ChatPlusAI User Manual
🤖️What is ChatPlusAI
💡 ChatPlusAI is an artificial intelligence (AI) driven customer service workbench specially designed for global e-commerce. It aggregates reception work from mainstream global e-commerce marketplaces through their official APIs. At this moment, 5 marketplaces Shopee, Lazada, Tiktok, Tokopedia, WhatsApp and 11 countries are well supported.
💡 ChatPlusAI redefines customer service team’s work from respond to buyer’s question to respond to all kinds of buyer behavior . With industry leading AI technology, ChatPlusAI could understand most of buyer’s intent precisely and give appropriate actions instantly. With ChatPlusAI’s strong support, inquiry based sales conversion gets boosted, order cancellation/return/refund loss is reduced,positive review rate goes higher, general customer satisfaction gets improved. Shop owner could put more strength on core business
ChatPlusAI connects marketplaces through their official API, no user data breach guaranteed, merchant could use this safely. Our system supports 8 languages: Indonesia, Philippines, Thai, Vietnamese, English, Spanish, Portuguese and Chinese. Besides Windows PC and Mac, ChatPlusAI supports iOS and Android as well.
🔜 Official website: https://www.chatplus.ai/
✅ 1. Certified ISVs for all supported marketplaces, implementation is based on official APIs, manage all reception work from multiple countries, multiple marketplaces in one place, no local IPs required, no worries on traffic punishment or shop ban.
📈 2. Full-cycle data analysis on whole reception period from pre-sales to post-sales, address the existing problems, understand the competitors service level, locate the potential growth point.
🤖️ 3. 7x24 AI response with 95% end to end precision, chatbot respond all in seconds. Answer quality beats native human customer service team in south east countries in statistics way hugely. The chatbot served per-sales conversion rate is double as native human team.
🤖️ 4. Intelligent customer care automation provides e-commerce reception best practice with order reminder, payment reminder, over-sale follow-up, logistics care, cancelation/return/refund follow-up, review booster and etc. Increase sales conversion, boost positive review rating, reduce order cancelation/return/refund loss.
🤝 5. Chatbot – human seamless collaboration: Machine saves human receptionist from lots of repeatable labor task to those judgement required task which is not suitable to machine. Machine can detect over 80+ high value scenarios, auto-reminder human to follow up immediately. Auto-reminder can be either high-lighted and topped inside the ChatPlusAI application or message through popular social communication software outside of ChatPlusAI.
💁 6. Modern reception job dispatch mechanism: Apply reception job dispatch algorithm from China mainstream e-commerce marketplaces. Resolve the unbalance problem from shop granularity reception assignment, clear the low efficiency and confliction issue result from one customer is assigned to multiple receptionists simultaneously.
🧰 7. Comprehensive Reception Toolbox: auto-translation, message shortcuts, time-out reply, on-duty mode, buyer blacklist etc.
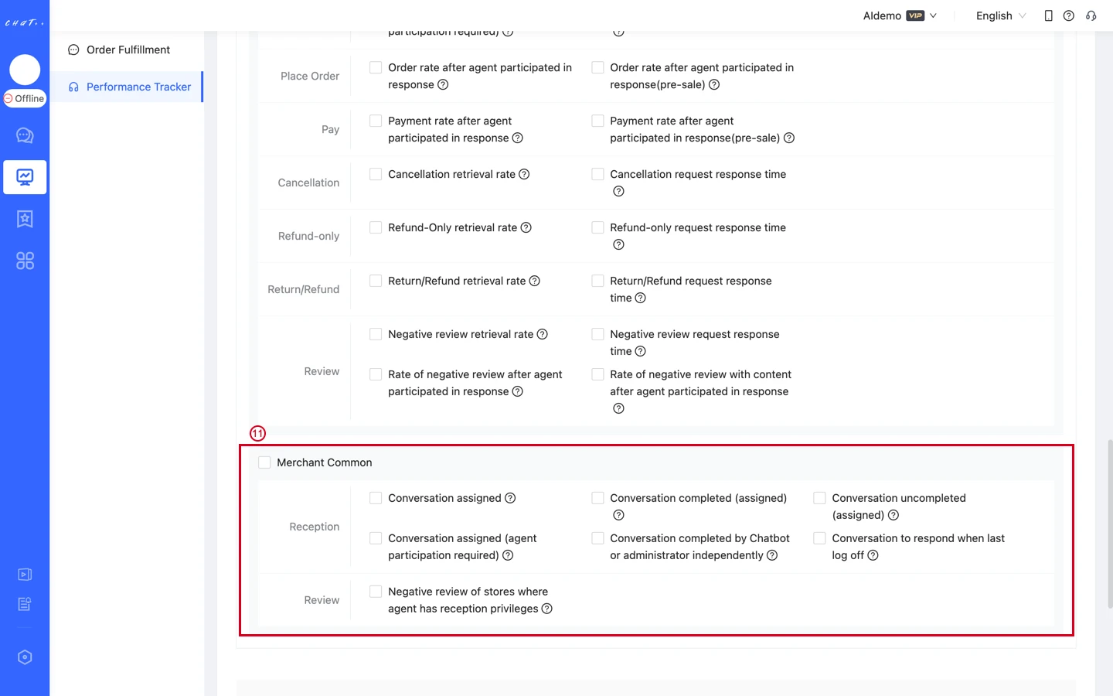
💰 8. ChatPlusAI is not only an efficiency tool to improve business goal, but also a management tool to boost the team growth: Over 80+ receptionist performance indexes are well prepared, reach the win-win between the employee and management. Real-time supervision help administrator track shop performance and individual status.
🏅️Product Strengths
Industry leading natural language recognition technology, reach 95% end to end precision on minority languages understanding and response. In over 200 field tests between AI chatbot and native receptionist, chatbot win all the comparison test no exception, on answer quality and respond speed. With over 7 years industry experience, we understand the value of customer service to the merchants and know the challenge in e-commerce reception.
✔️ We give merchant a clear data analysis on full-cycle reception, address the issue and potential.
✔️ We release a series of automatic or semi-automatic tool to help merchant boost the business goal as well as improve human efficiency significantly.
✔️ We offer management tool like performance sheet and supervision tool to combine human resource in a right way. With our service online and on-site support, eventually our merchants can see significant gain both on business and organization.
🤝 Show Cases
| Merchant | Service | Business Gain |
|---|---|---|
| Top Cosmetic Brand in Indonesia(Monthly Promotions ChatPlusAI not applied vs. applied ) | ChatPlusAI Enterprise | Average customer service response time: From 3hour18min to 5min33second; |
| Inquiry based conversion (collected from Shopee seller center, include both pre-sales and post-sales stages) From 3.7% to 9.12%. | ||
| Multiple-categories top seller, business in Philippines and Thailand (Monthly promotion post-sales stages ChatPlusAI not applied vs. ChatPlusAI applied) | ChatPlusAI Enterprise | Request for order cancelation, return, refund rate drop from 27.1% to 23.6% |
| Recover rate for cancelation, return, refund **increase from 8.4% to 12.4%**Recovery includes withdrawn and place another order |
📈 Field Data from one top cosmetics brand in Indonesia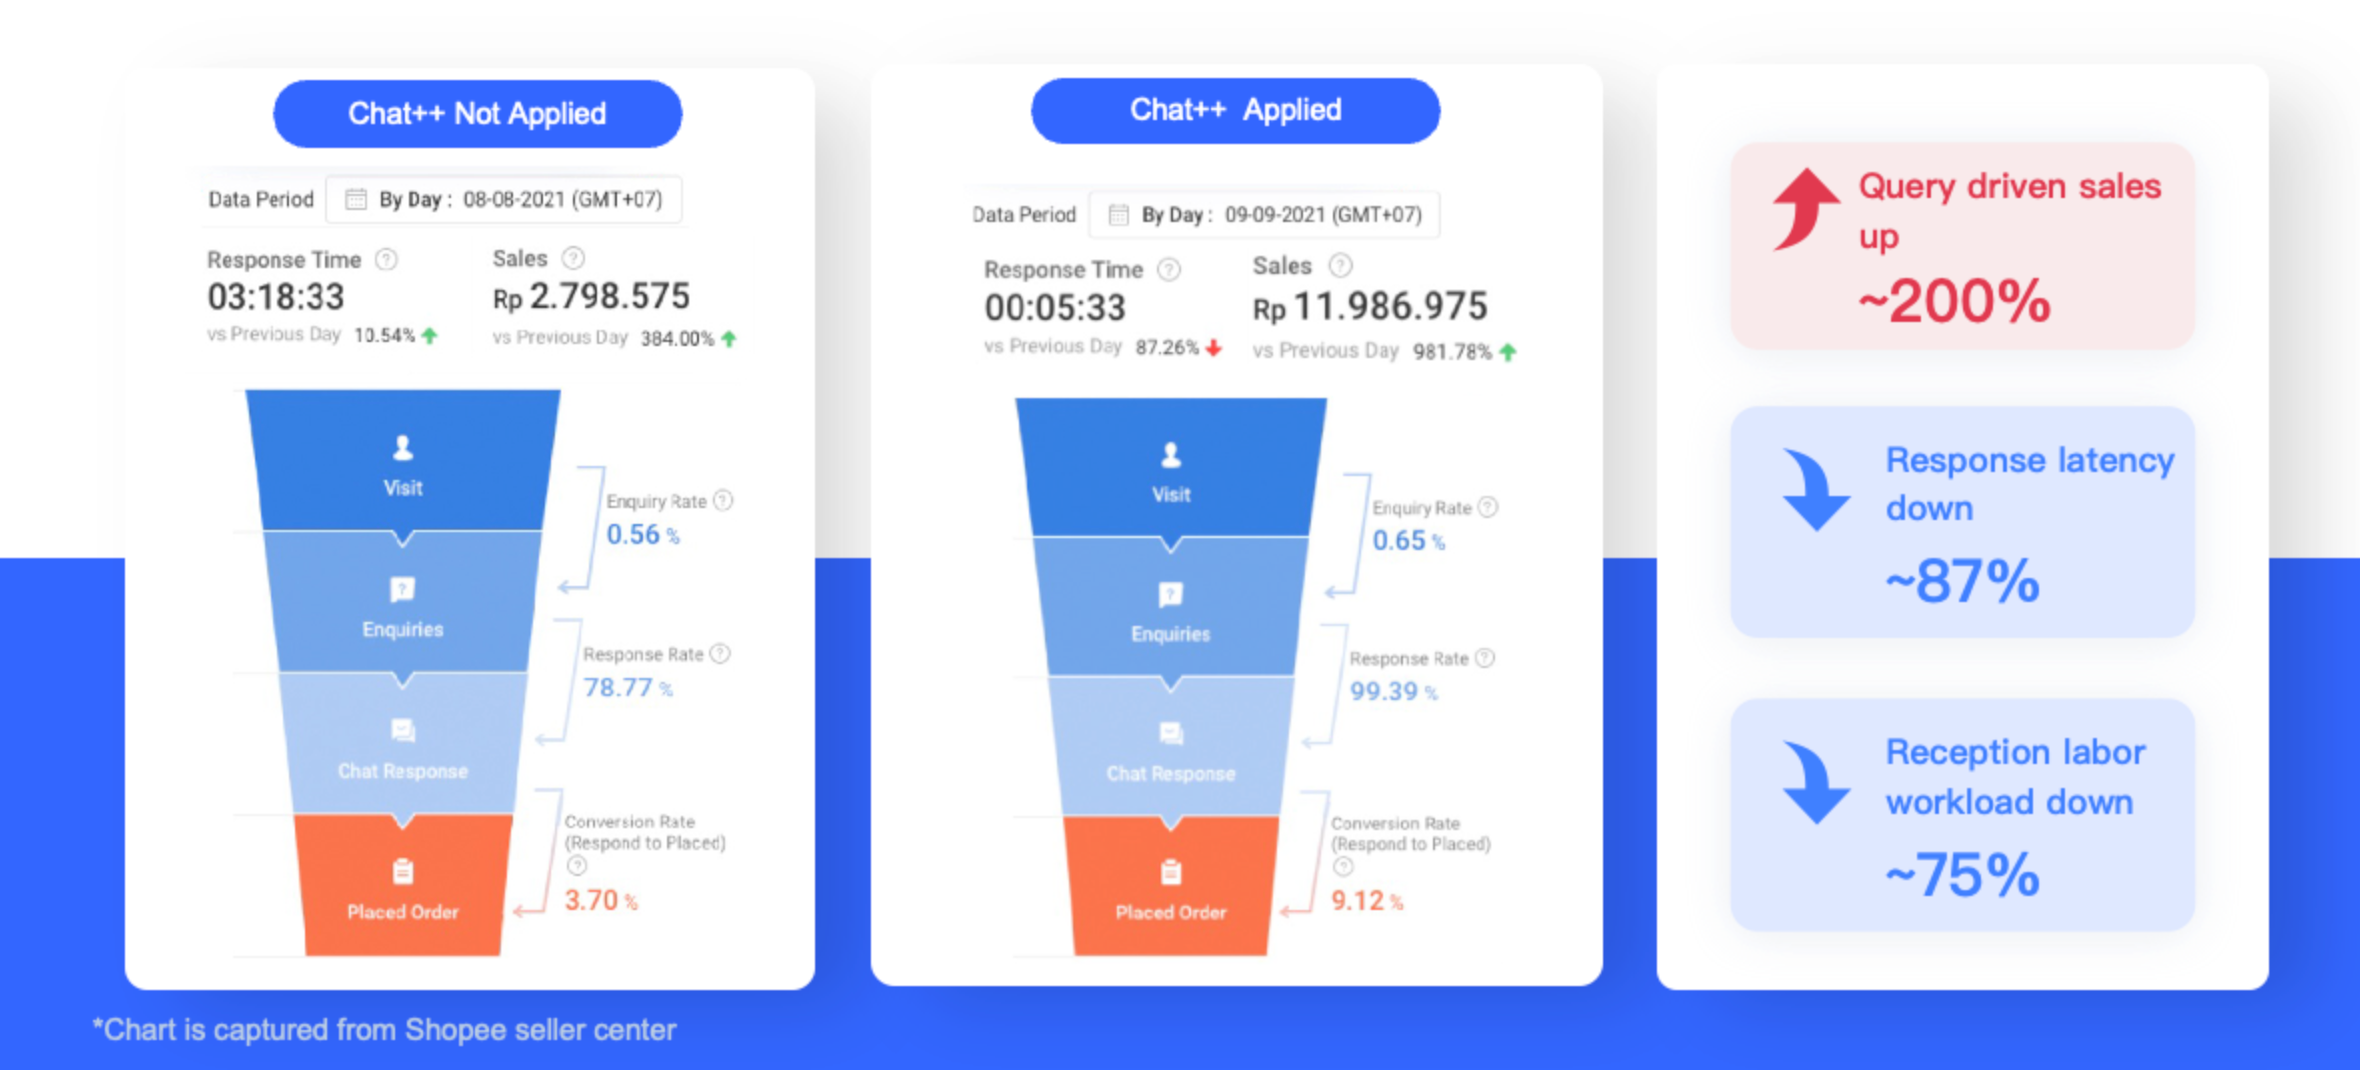
💰 Field Data from one top seller whose business is in Philippine and Thailand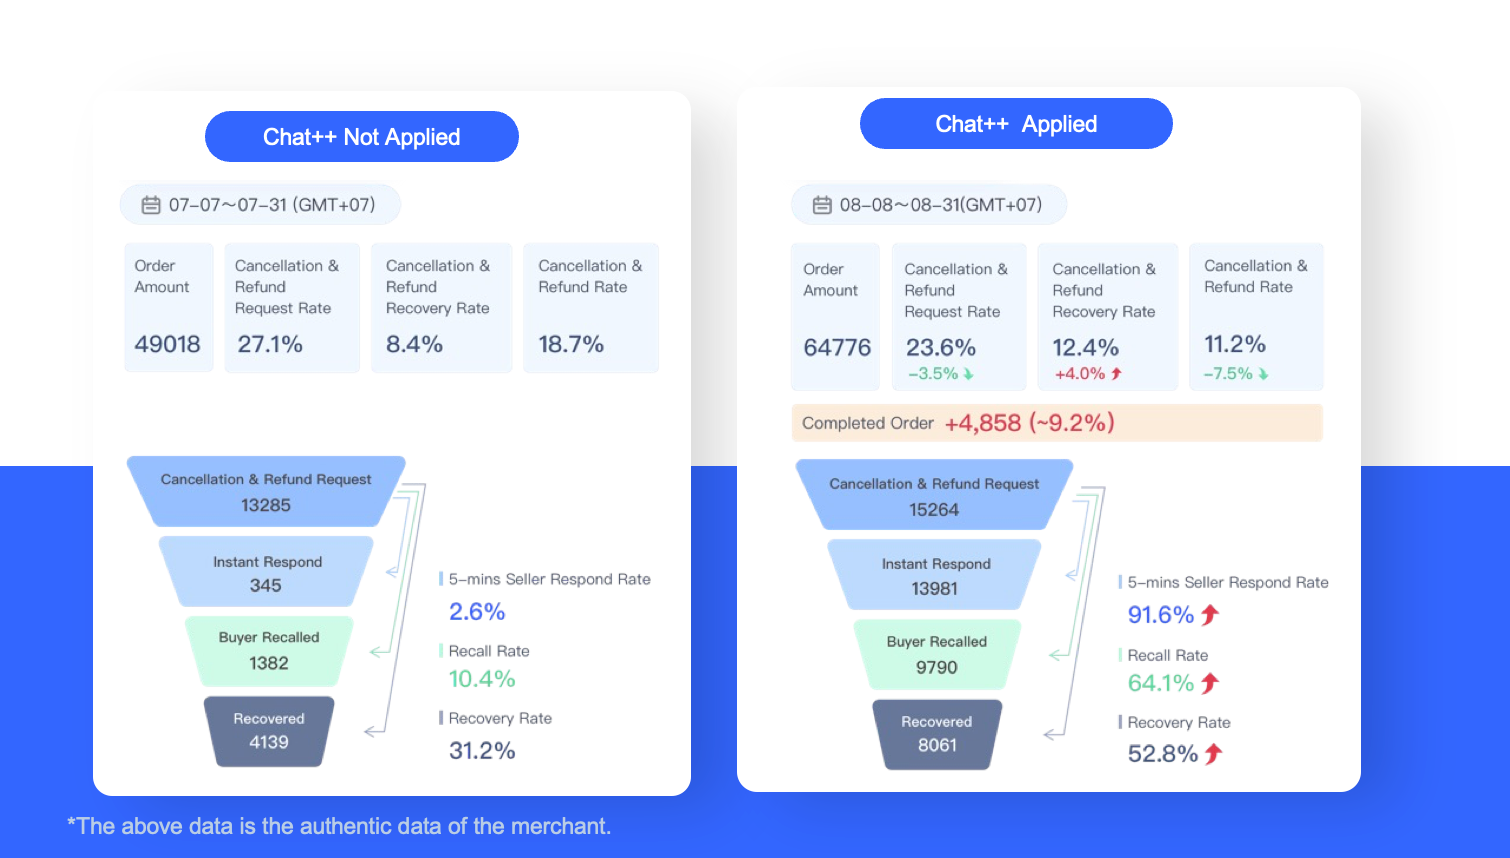
🔎 Get Started
ChatPlusAI provides Windows、Mac、Android、iOS support.
💻 Windows version
Download
💡Method1:Click following link to download
Windows:https://clients.zhisuitech.com/chatpp/official/win/chatplusplus_latest.exe
💡Method2:Download ChatPlusAI from Official site
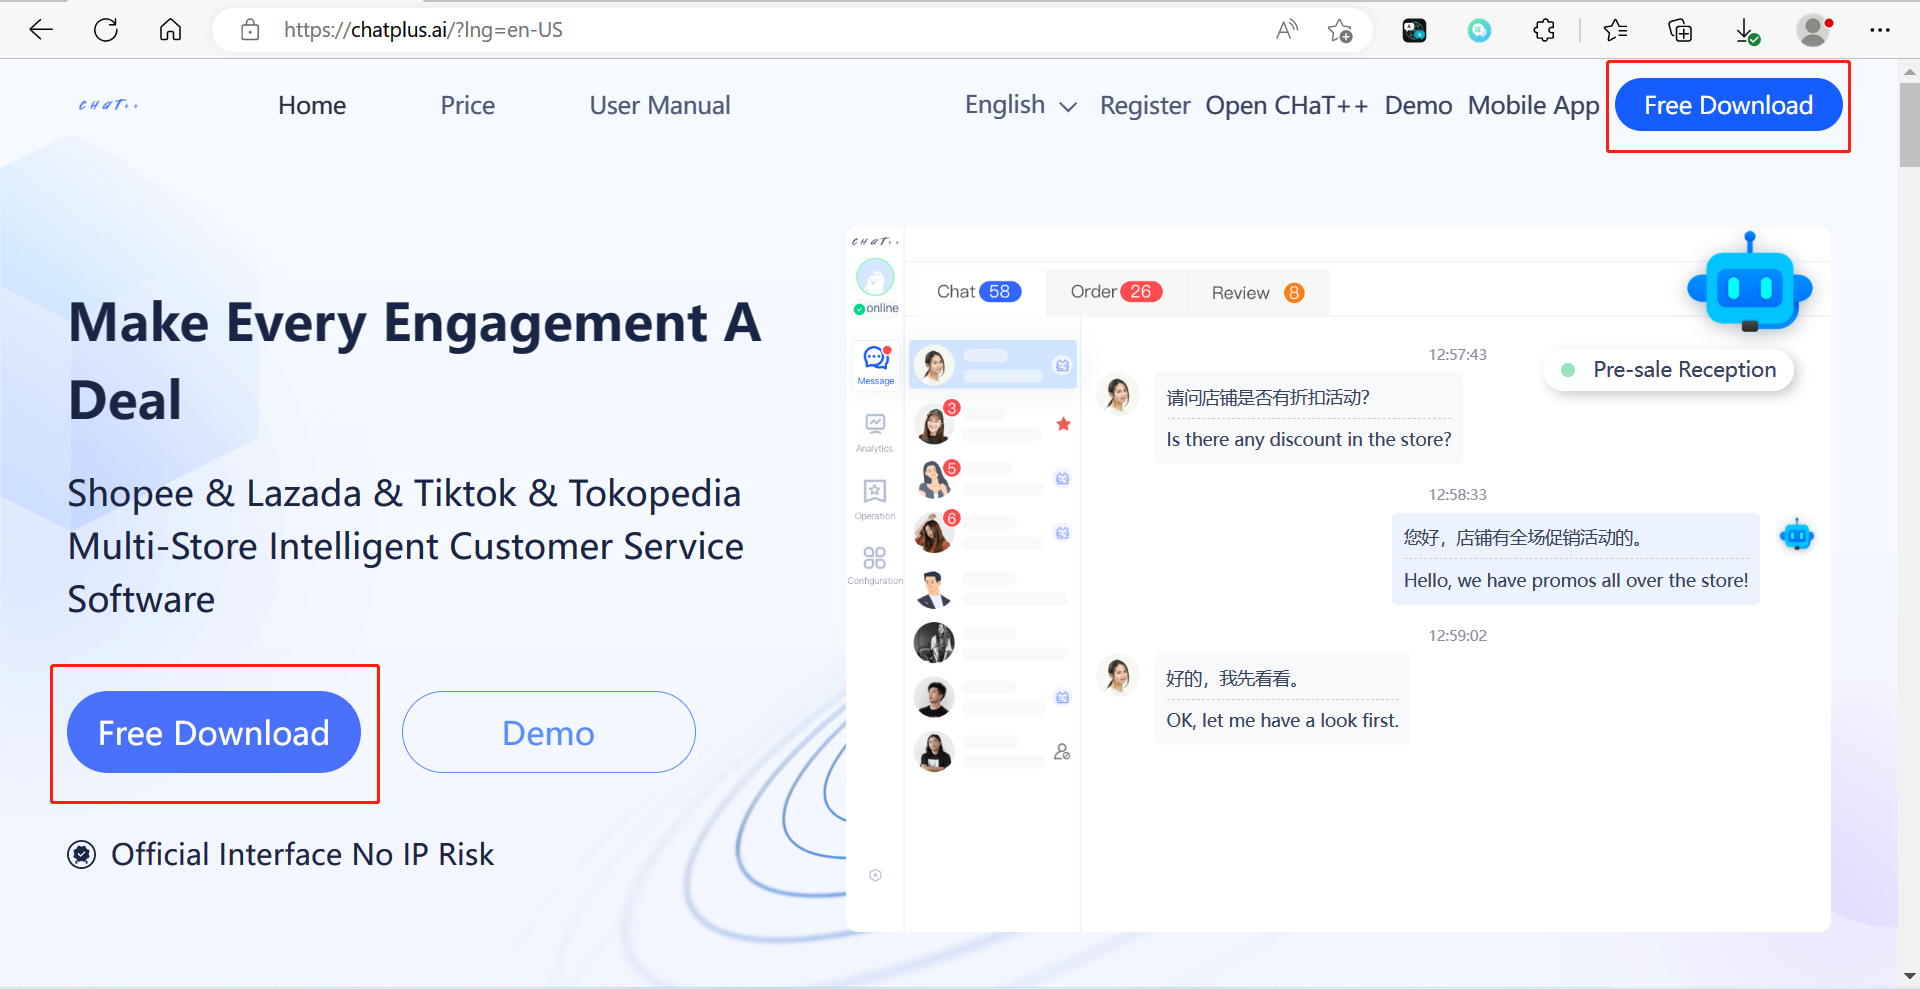
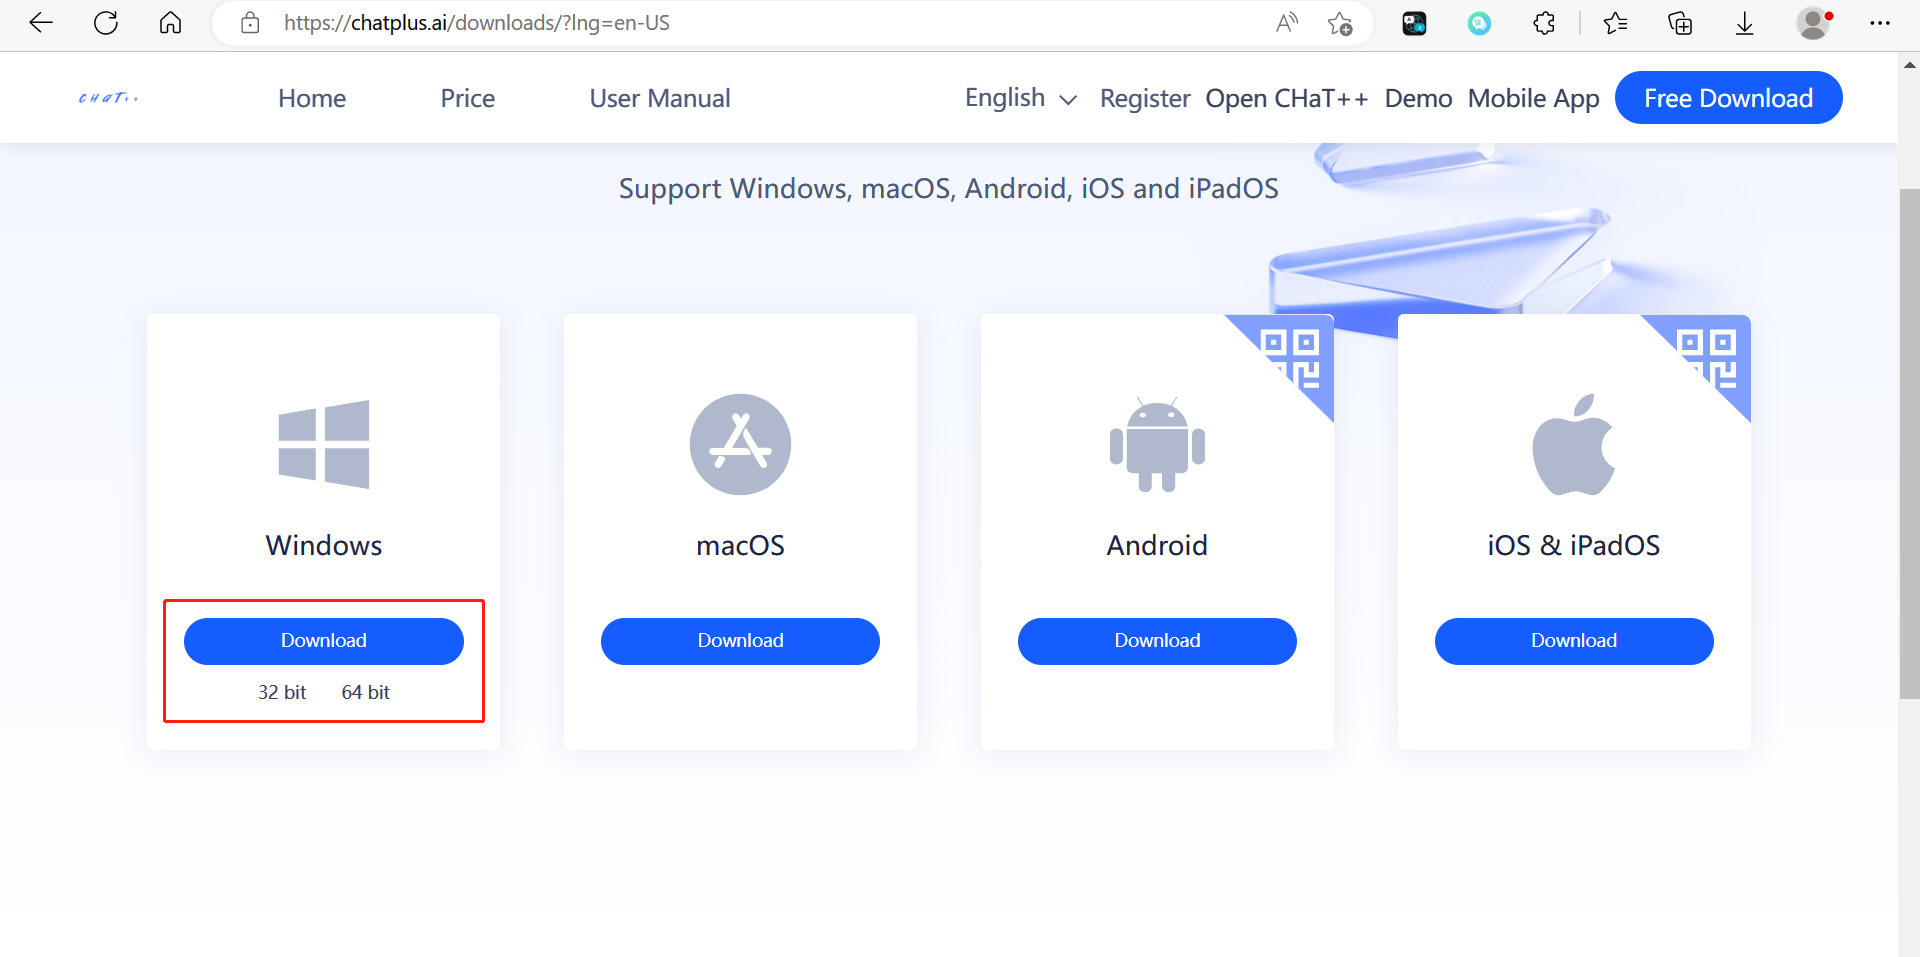
Click Official site, or open your Windows browser and input website https://chatplus.ai/?lng=en-US to open ChatPlusAI official site.
Click 「Free Download」button, click 「Download」button in Windows section, browser would match the right version to your system (32bit or 64bit operating system).
Installation
When the file is downloaded successfully, double click the installation file, Select "Install for current user" in the pop-up window, then select "Installation Path" and "Database File Storage Path". You can choose the installation and storage location for ChatPlusAI files by using the "View" button, or you can select the default options and proceed to the next step until installation is complete.
Registration
After ChatPlusAI application is installed successfully, Find the icon of "ChatPlusAI" on the desktop, and double-click to launch the client.
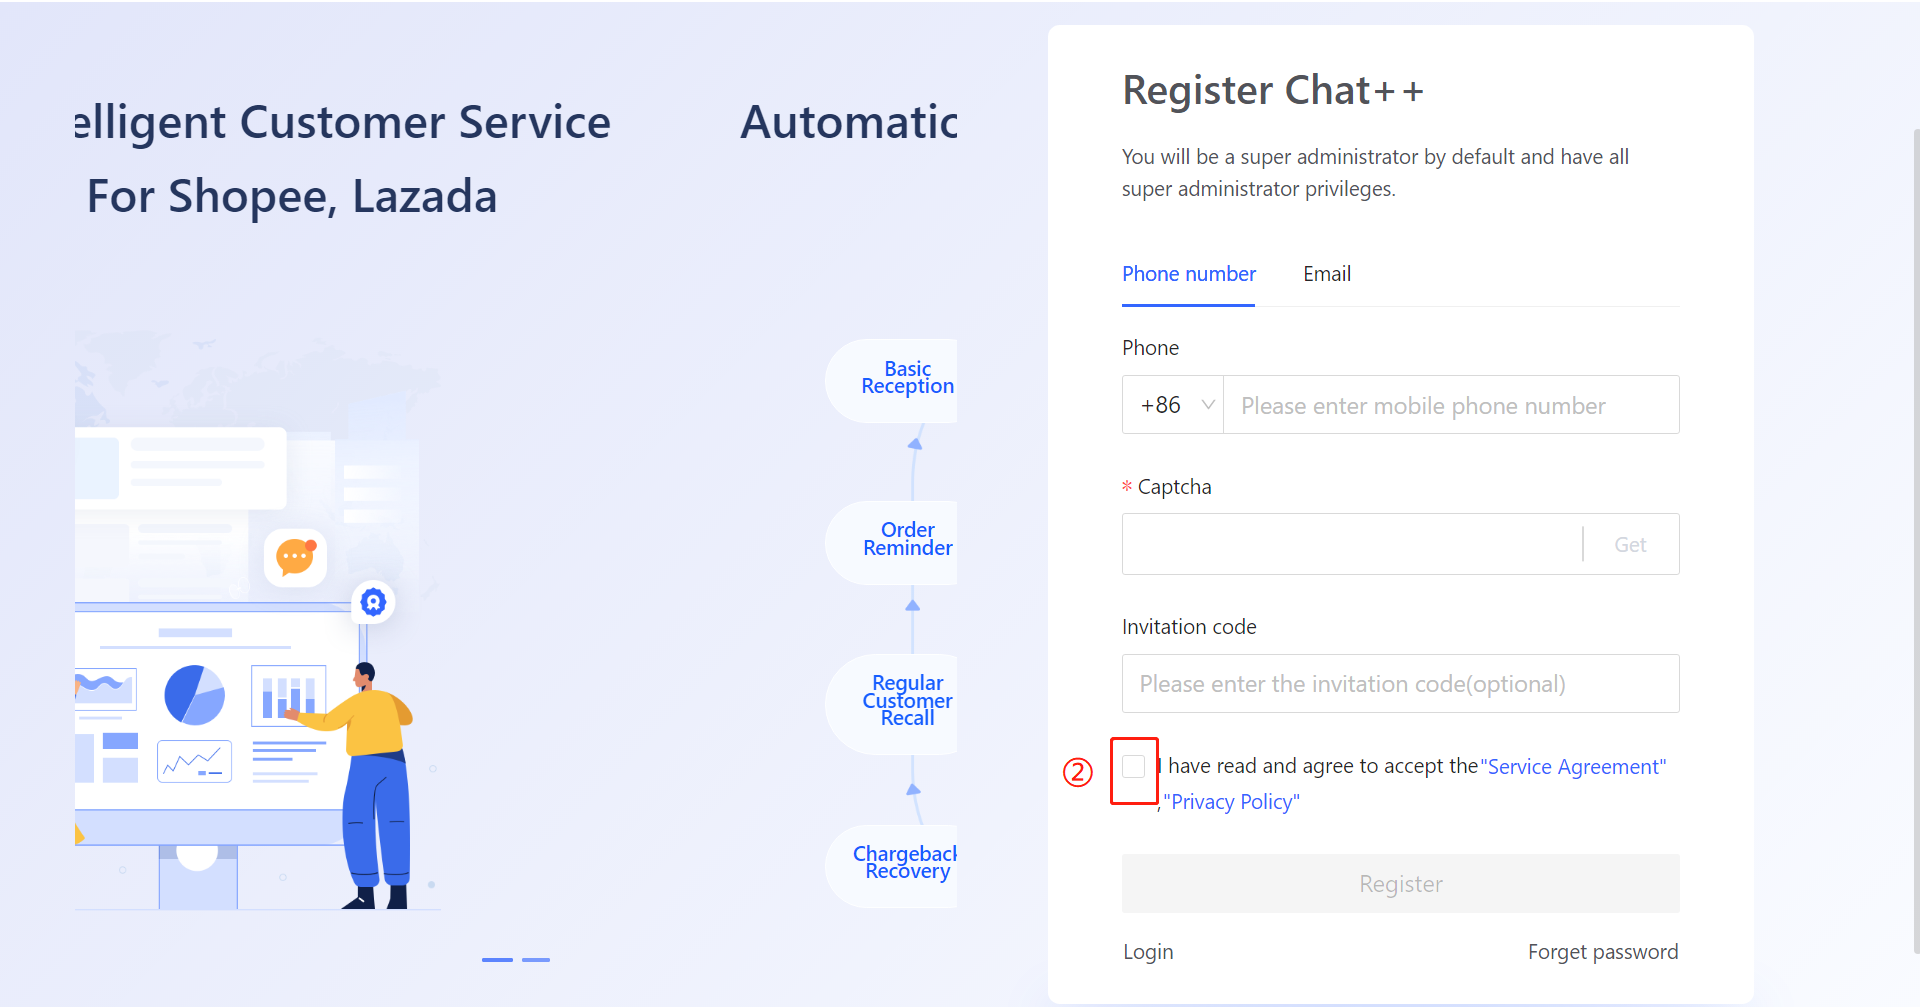
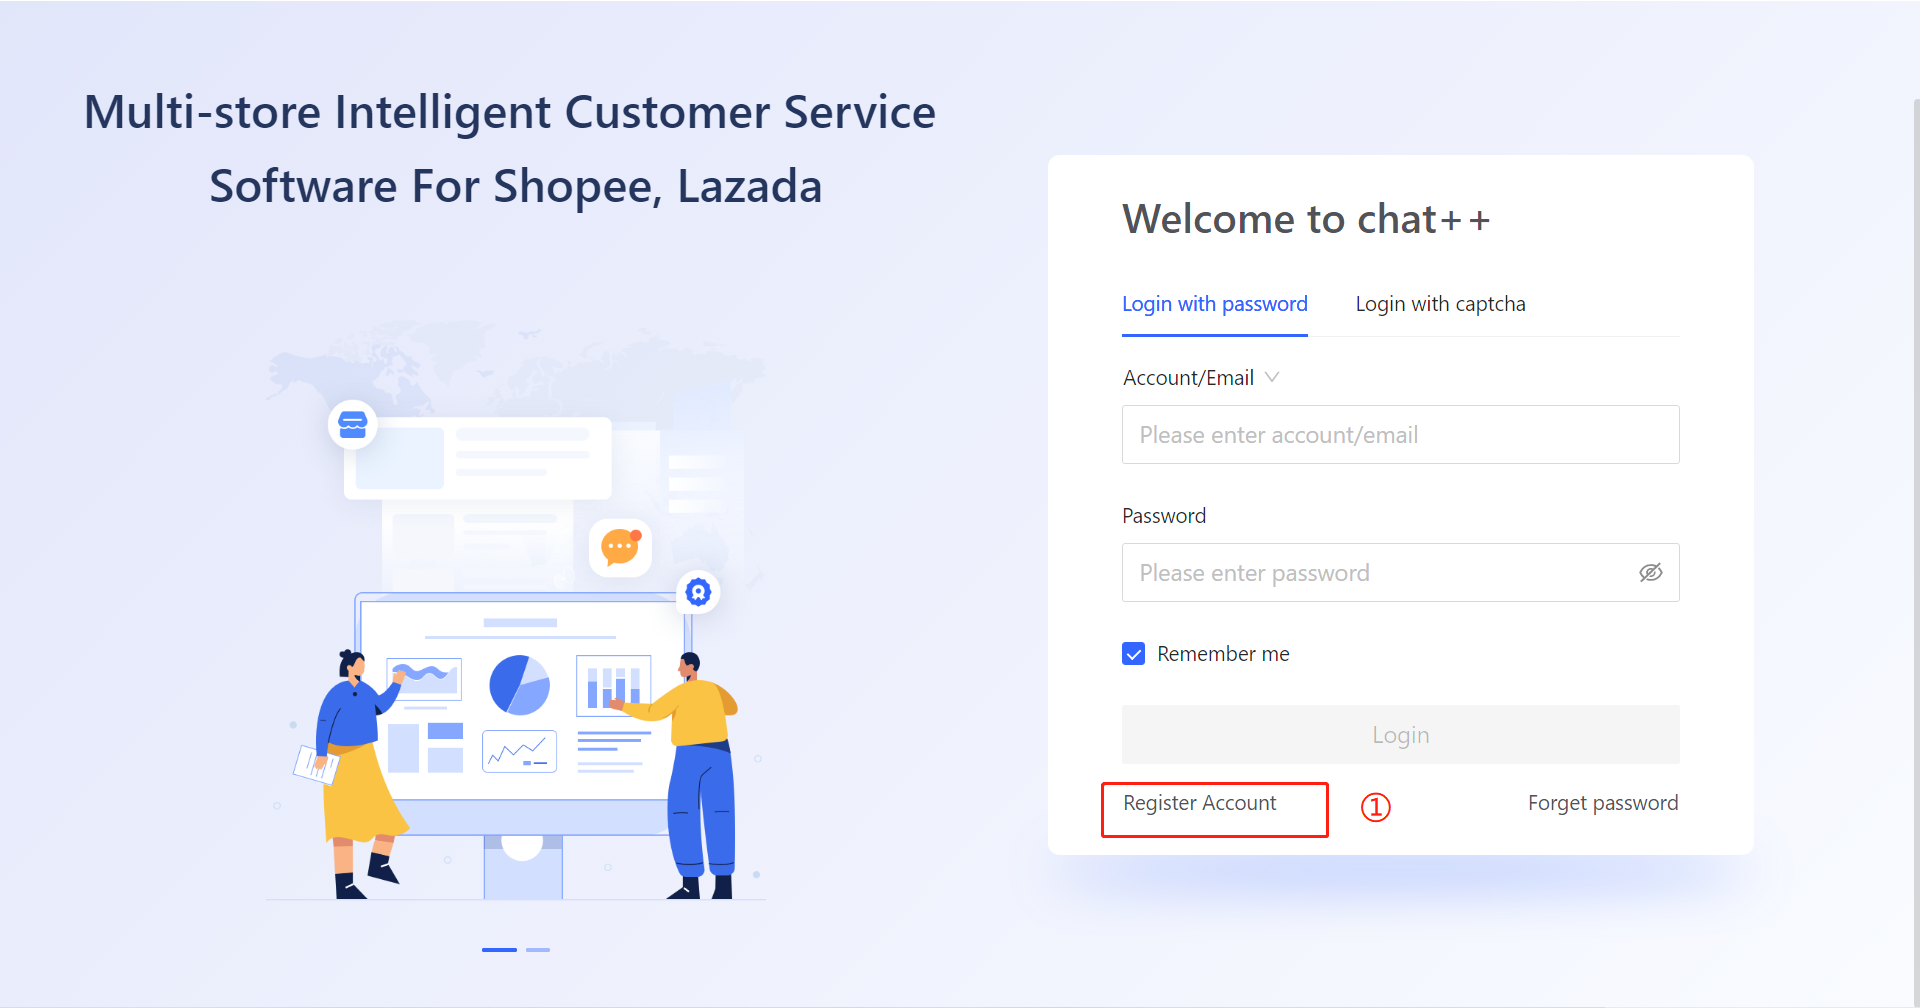
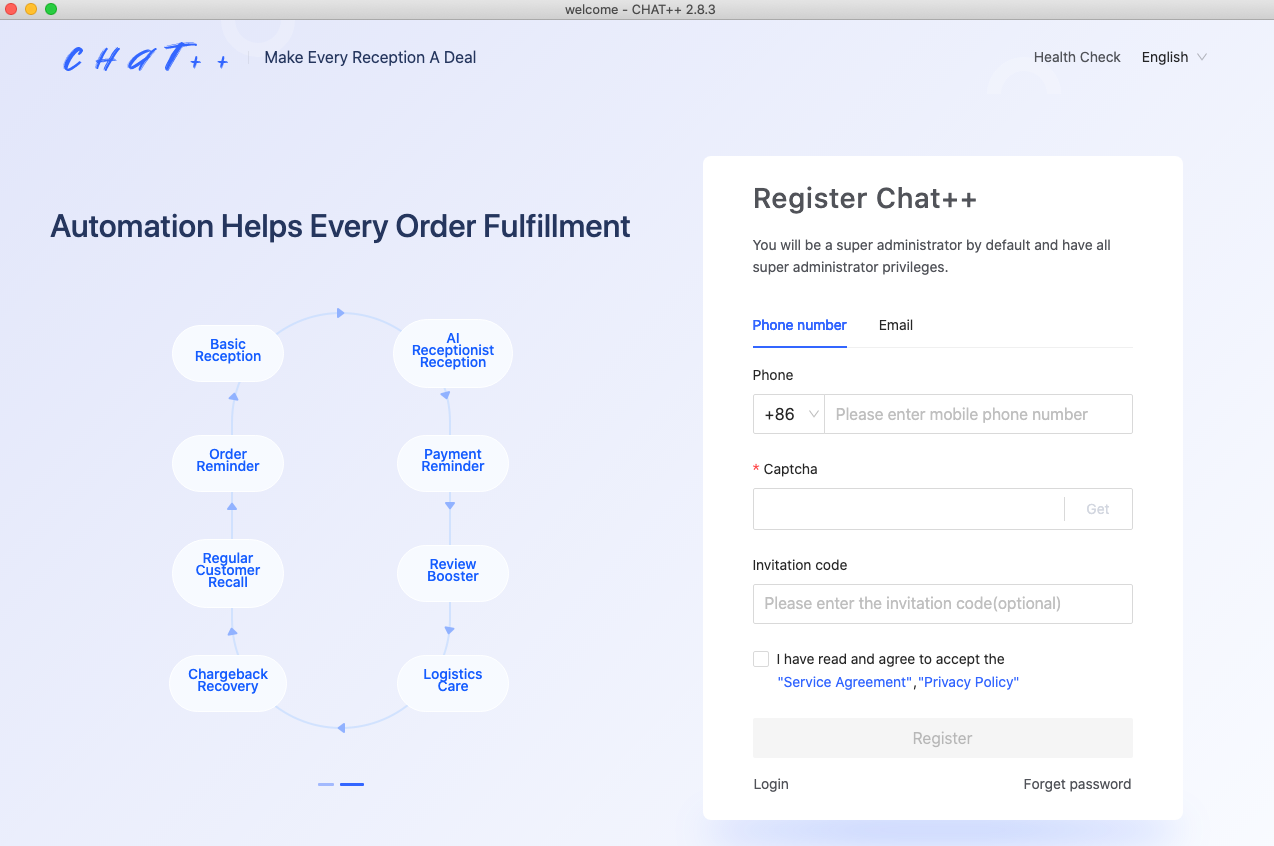
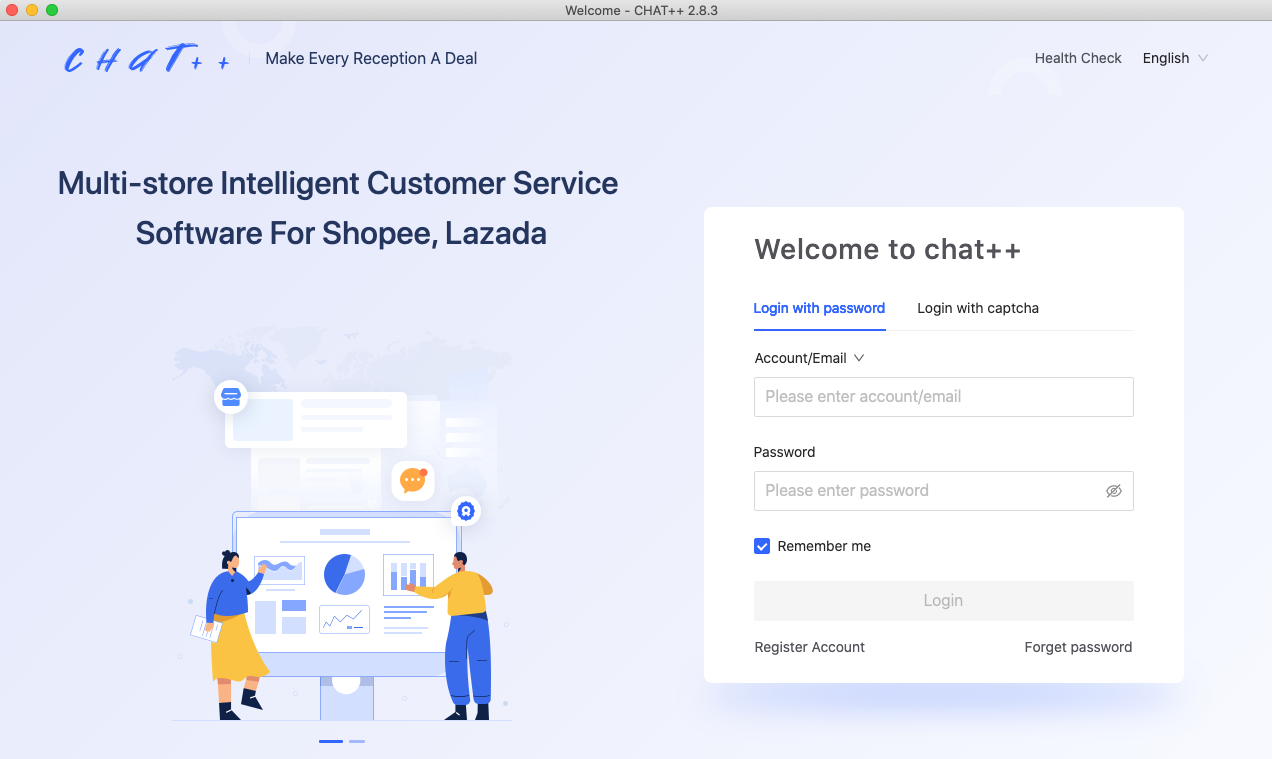
Please click on the "Register Account" button located at the bottom left of the login page to start the registration process. ChatPlusAI supports registration with both mobile phone numbers and email addresses.
Upon successful registration, you will become a super administrator by default.
Notes:
Invitation code is not a required field and can be skipped.
FAQ
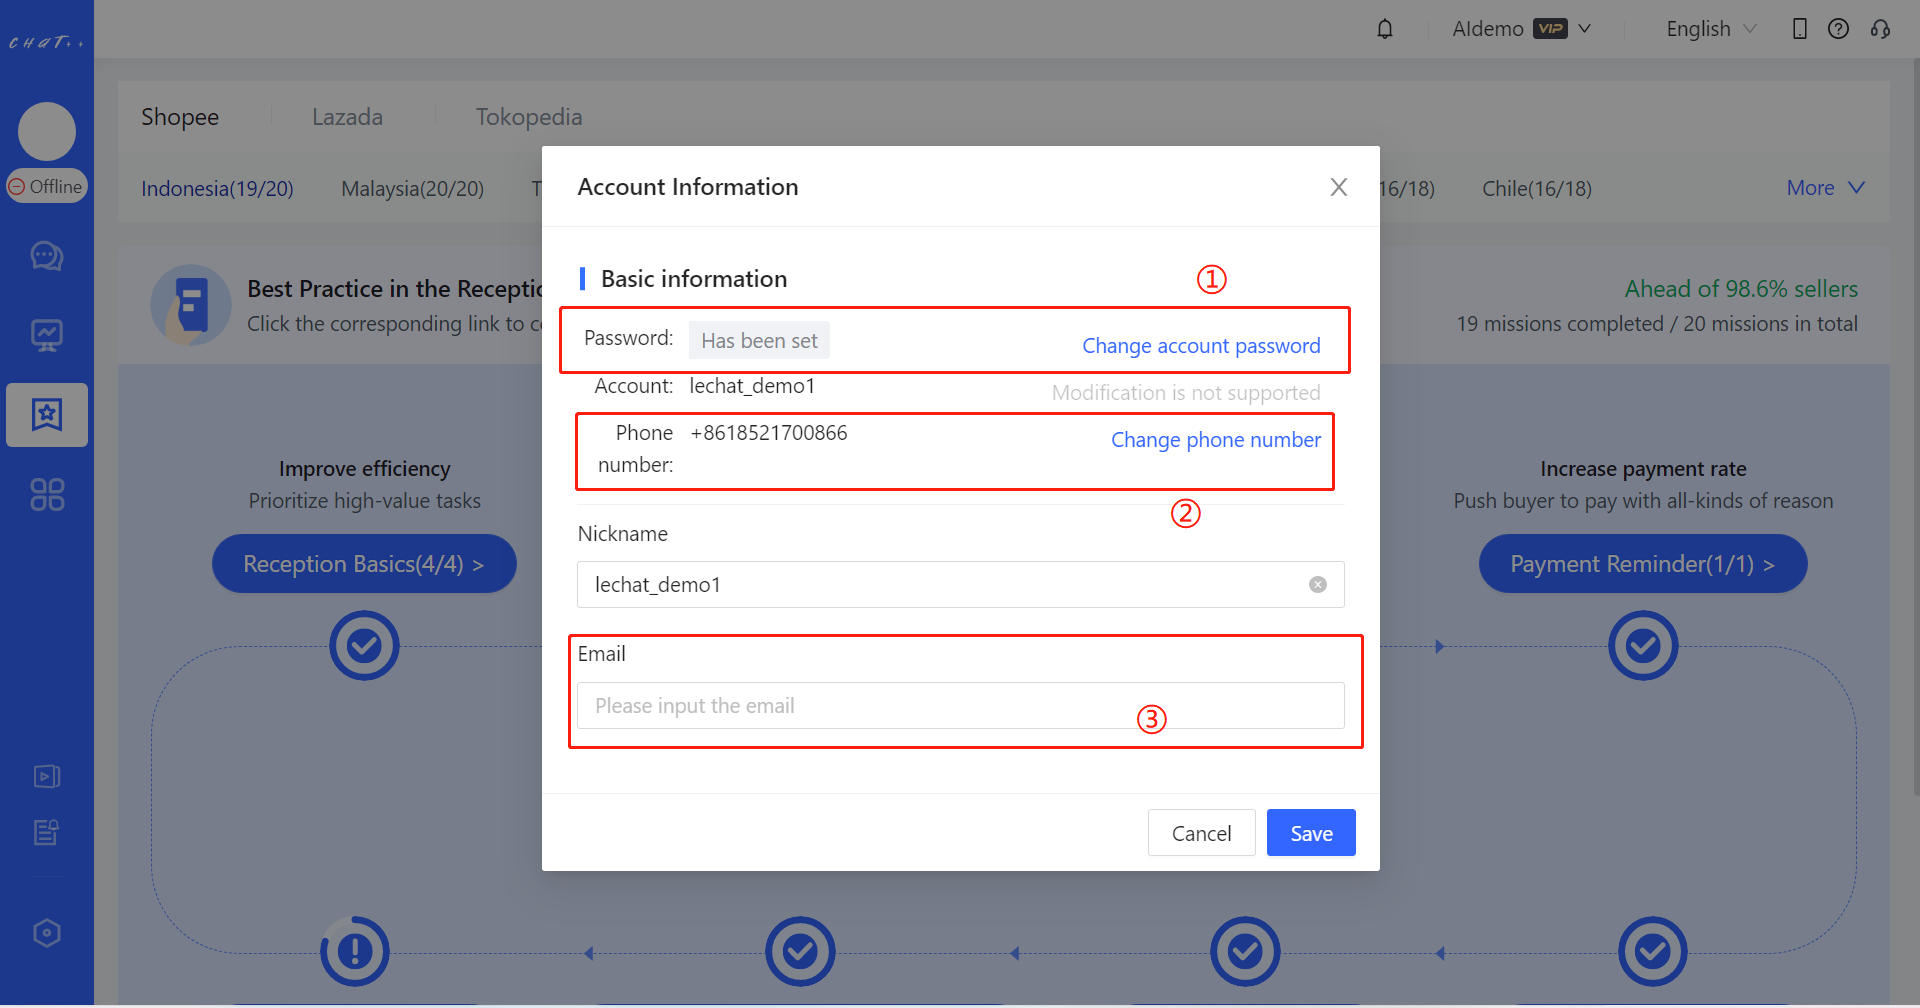
Q1: I selected phone number registration and no password set, where can I set password?
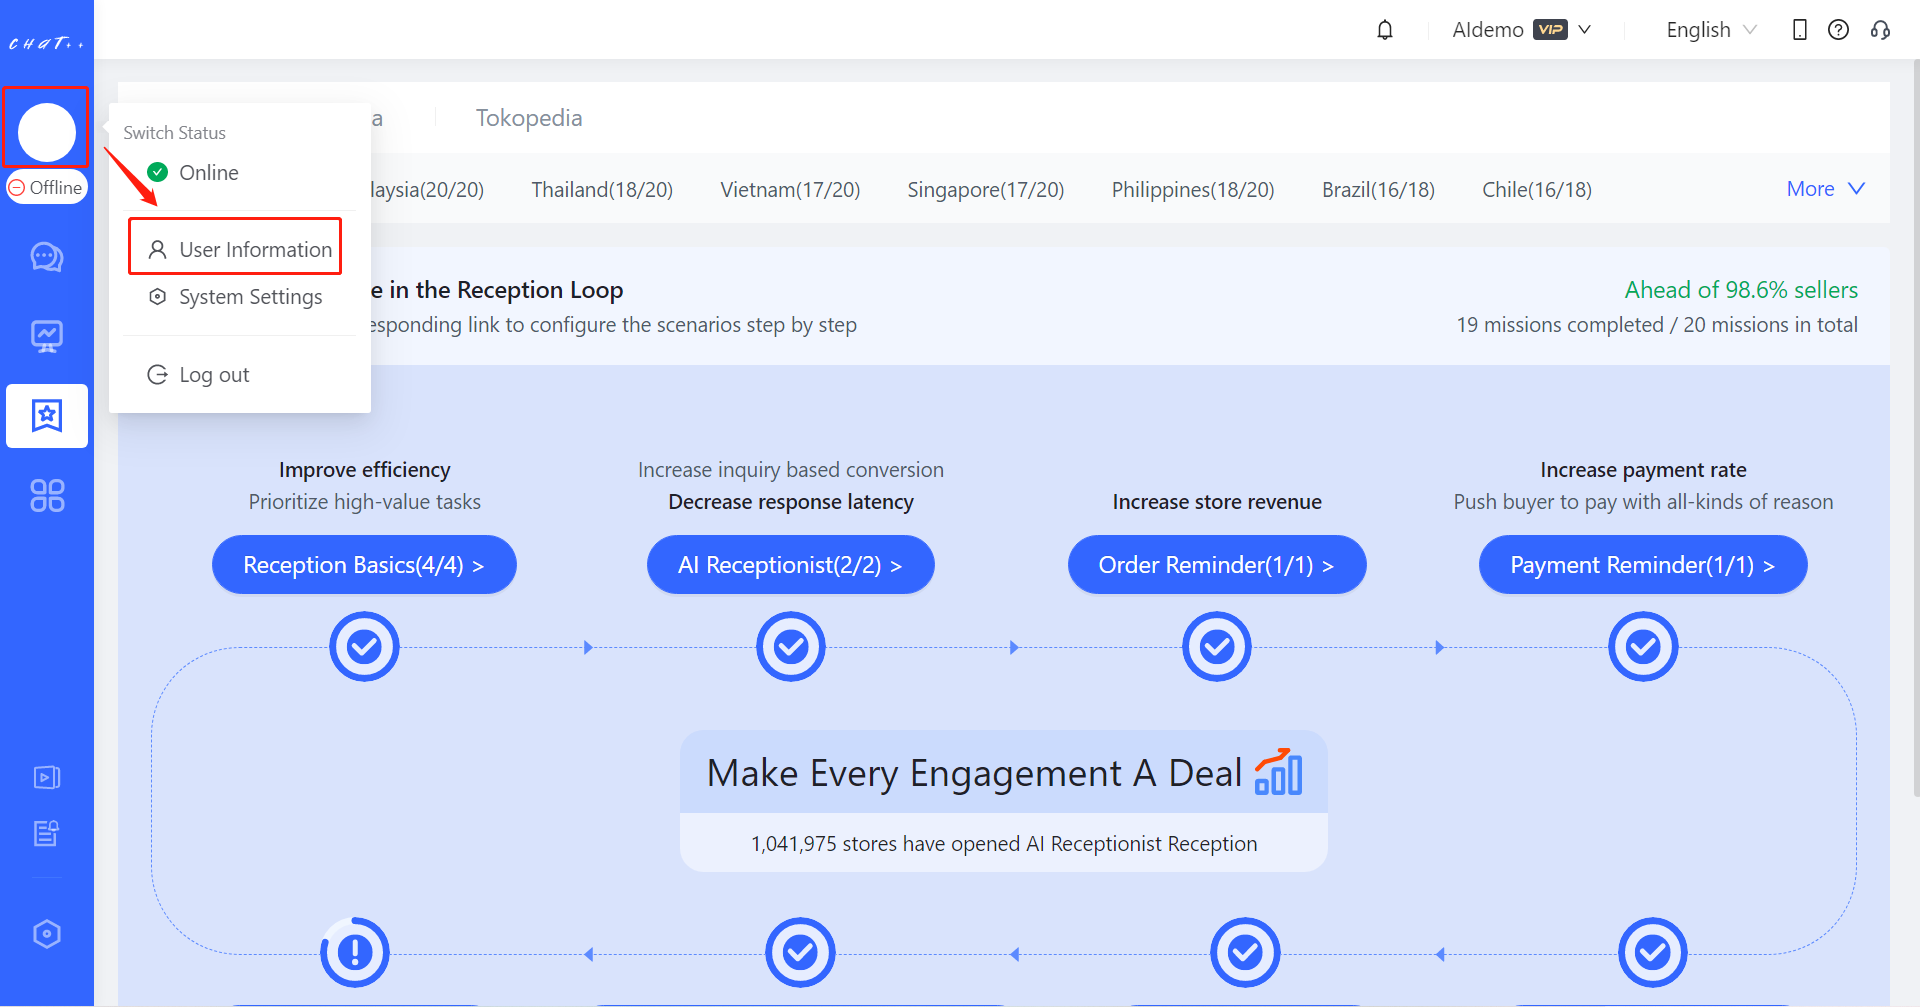
A1: Notice you are forced to add at least one shop in your first log-in ChatPlusAI after registration. After you add one shop in ChatPlusAI successfully, you can click the avatar in the top area of left column, then click user information, then set password.
Q2: what is the invitation code in registration page?
A2: Invitation code is not required for registration, if your friend gives you invitation code, you can fill out there. If you want to recommend ChatPlusAI to your friend, you can click ChatPlusAI reference program
Login
Run ChatPlusAI application, then login page appears, there are 2 login methods in ChatPlusAI, one method is to use contact phone number to get verification code, use this code to login the system, the other method is to use account and password to login in the system.
Notes
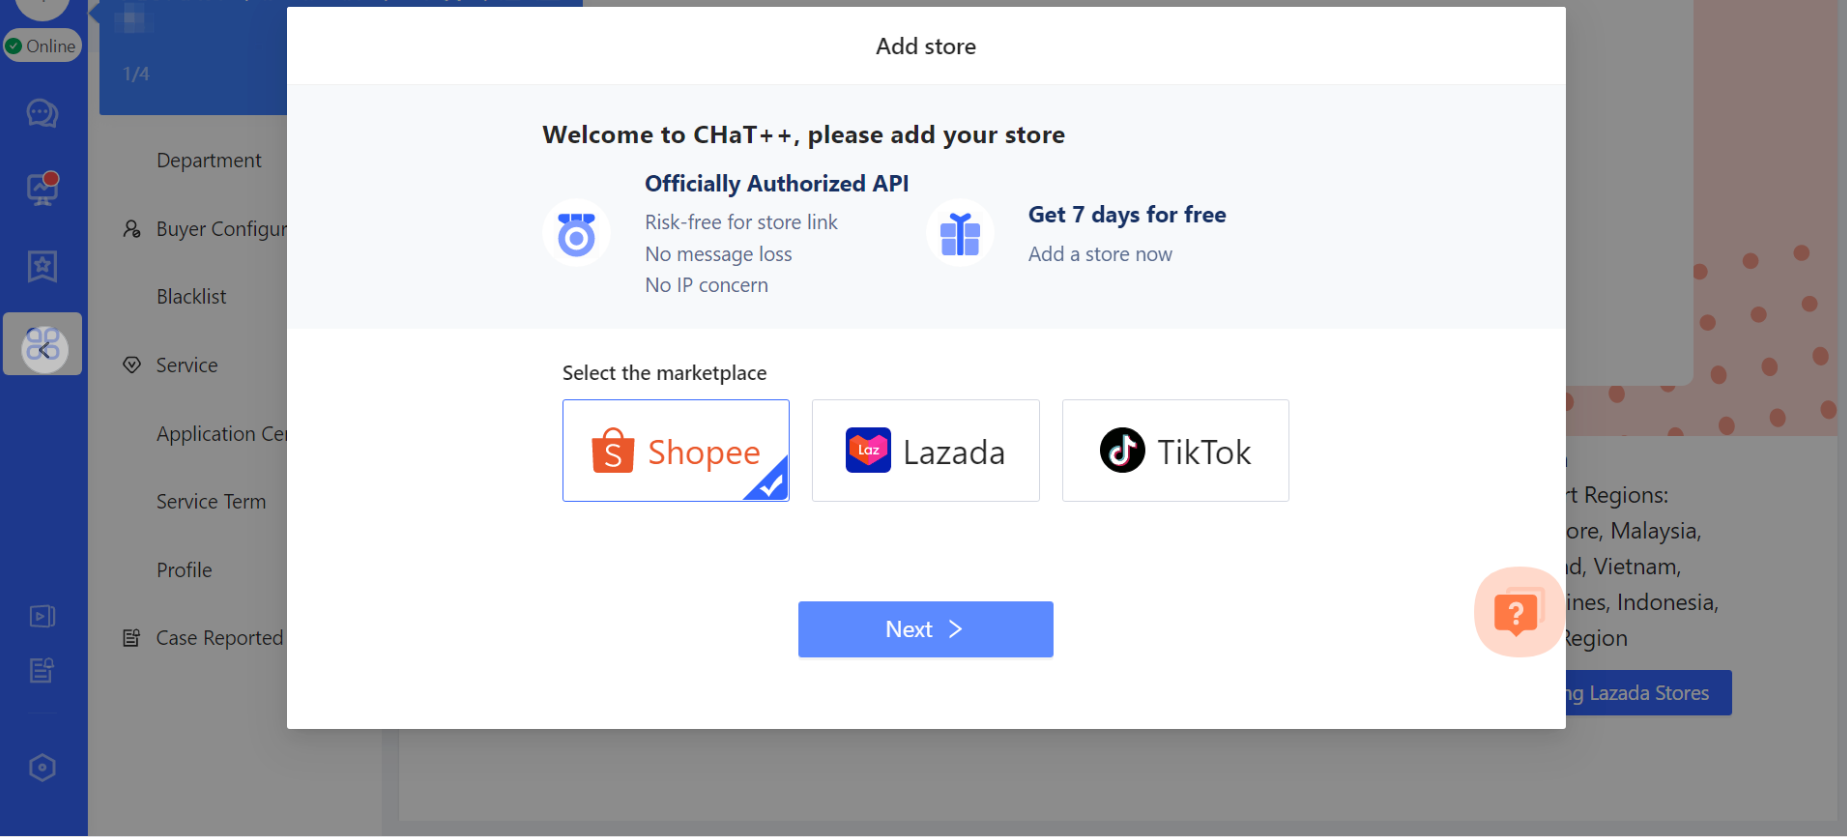
If there is no any shop added to ChatPlusAI yet, you would be taken to add shop page after login. As add shop to get access authorized data from marketplaces is a MUST step to use ChatPlusAI, so this step can’t be skipped.
💻 Mac version
Download
Supported macOS versions: macOS 10.11 and later.
💡Method1: Click the link to download directly.
Mac: https://clients.zhisuitech.com/chatpp/official/mac/chatplusplus_latest.dmg
💡Method2: Download by accessingour official website** through a computer browser.**
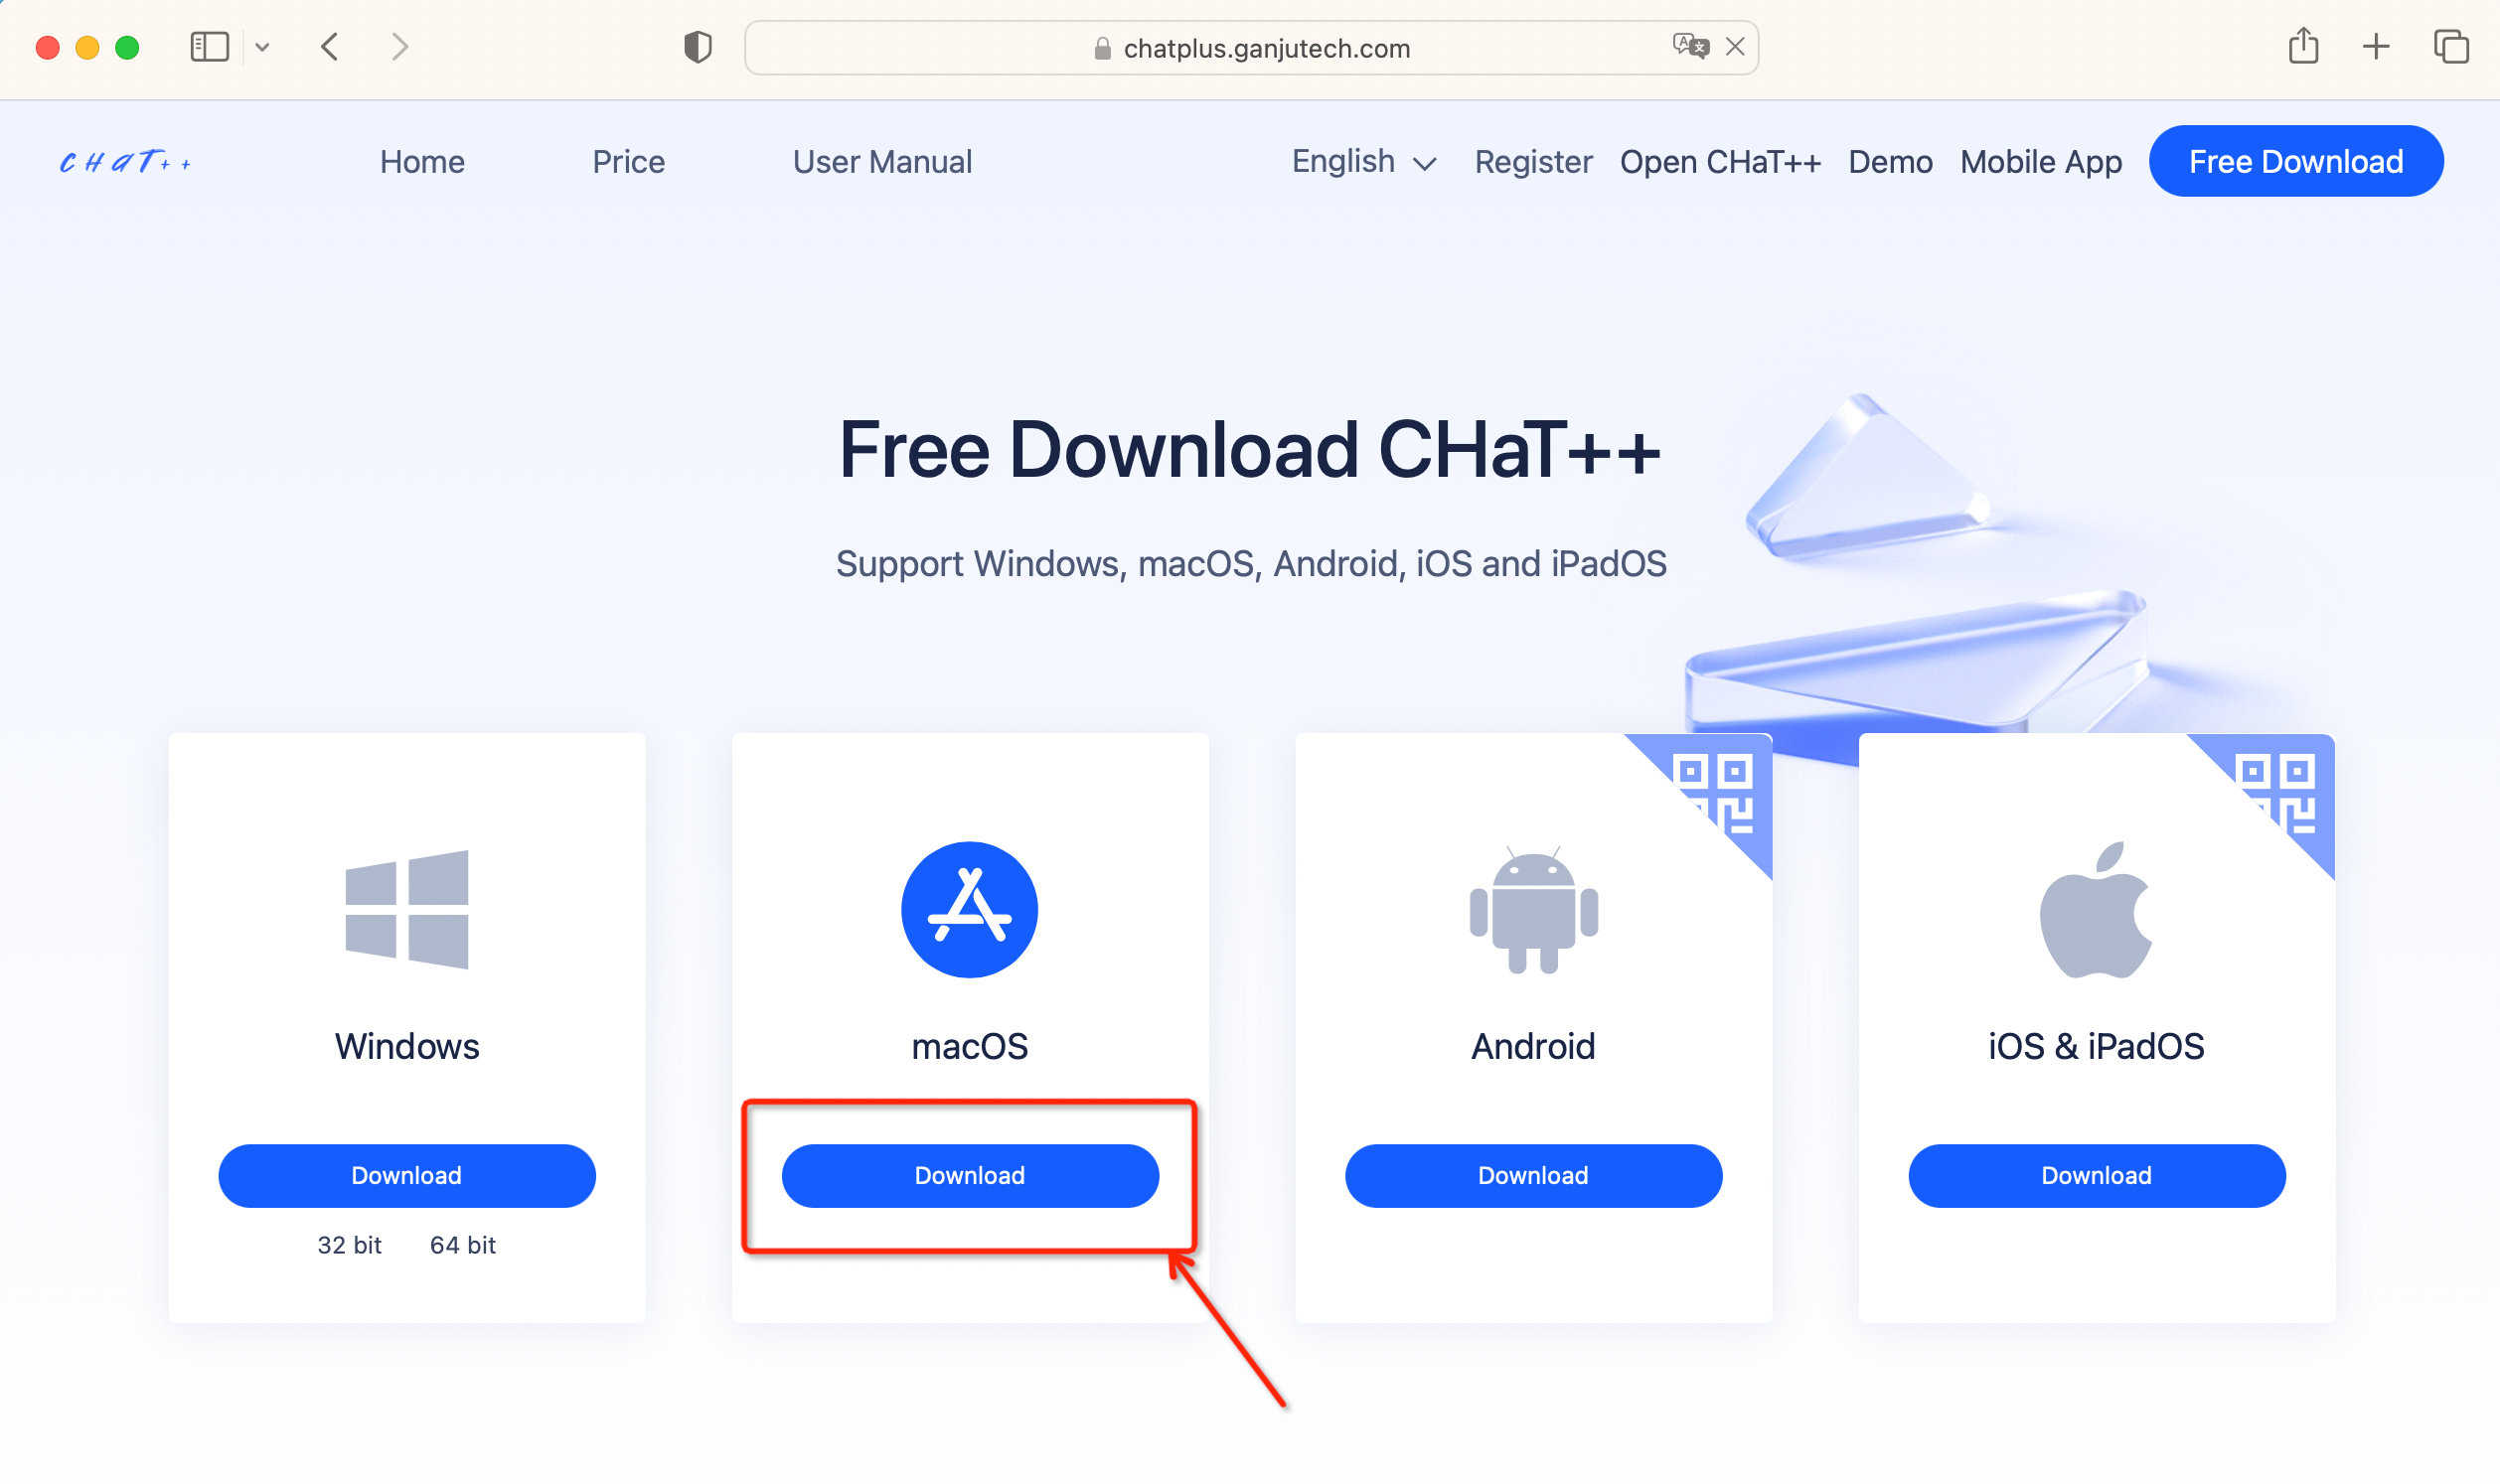
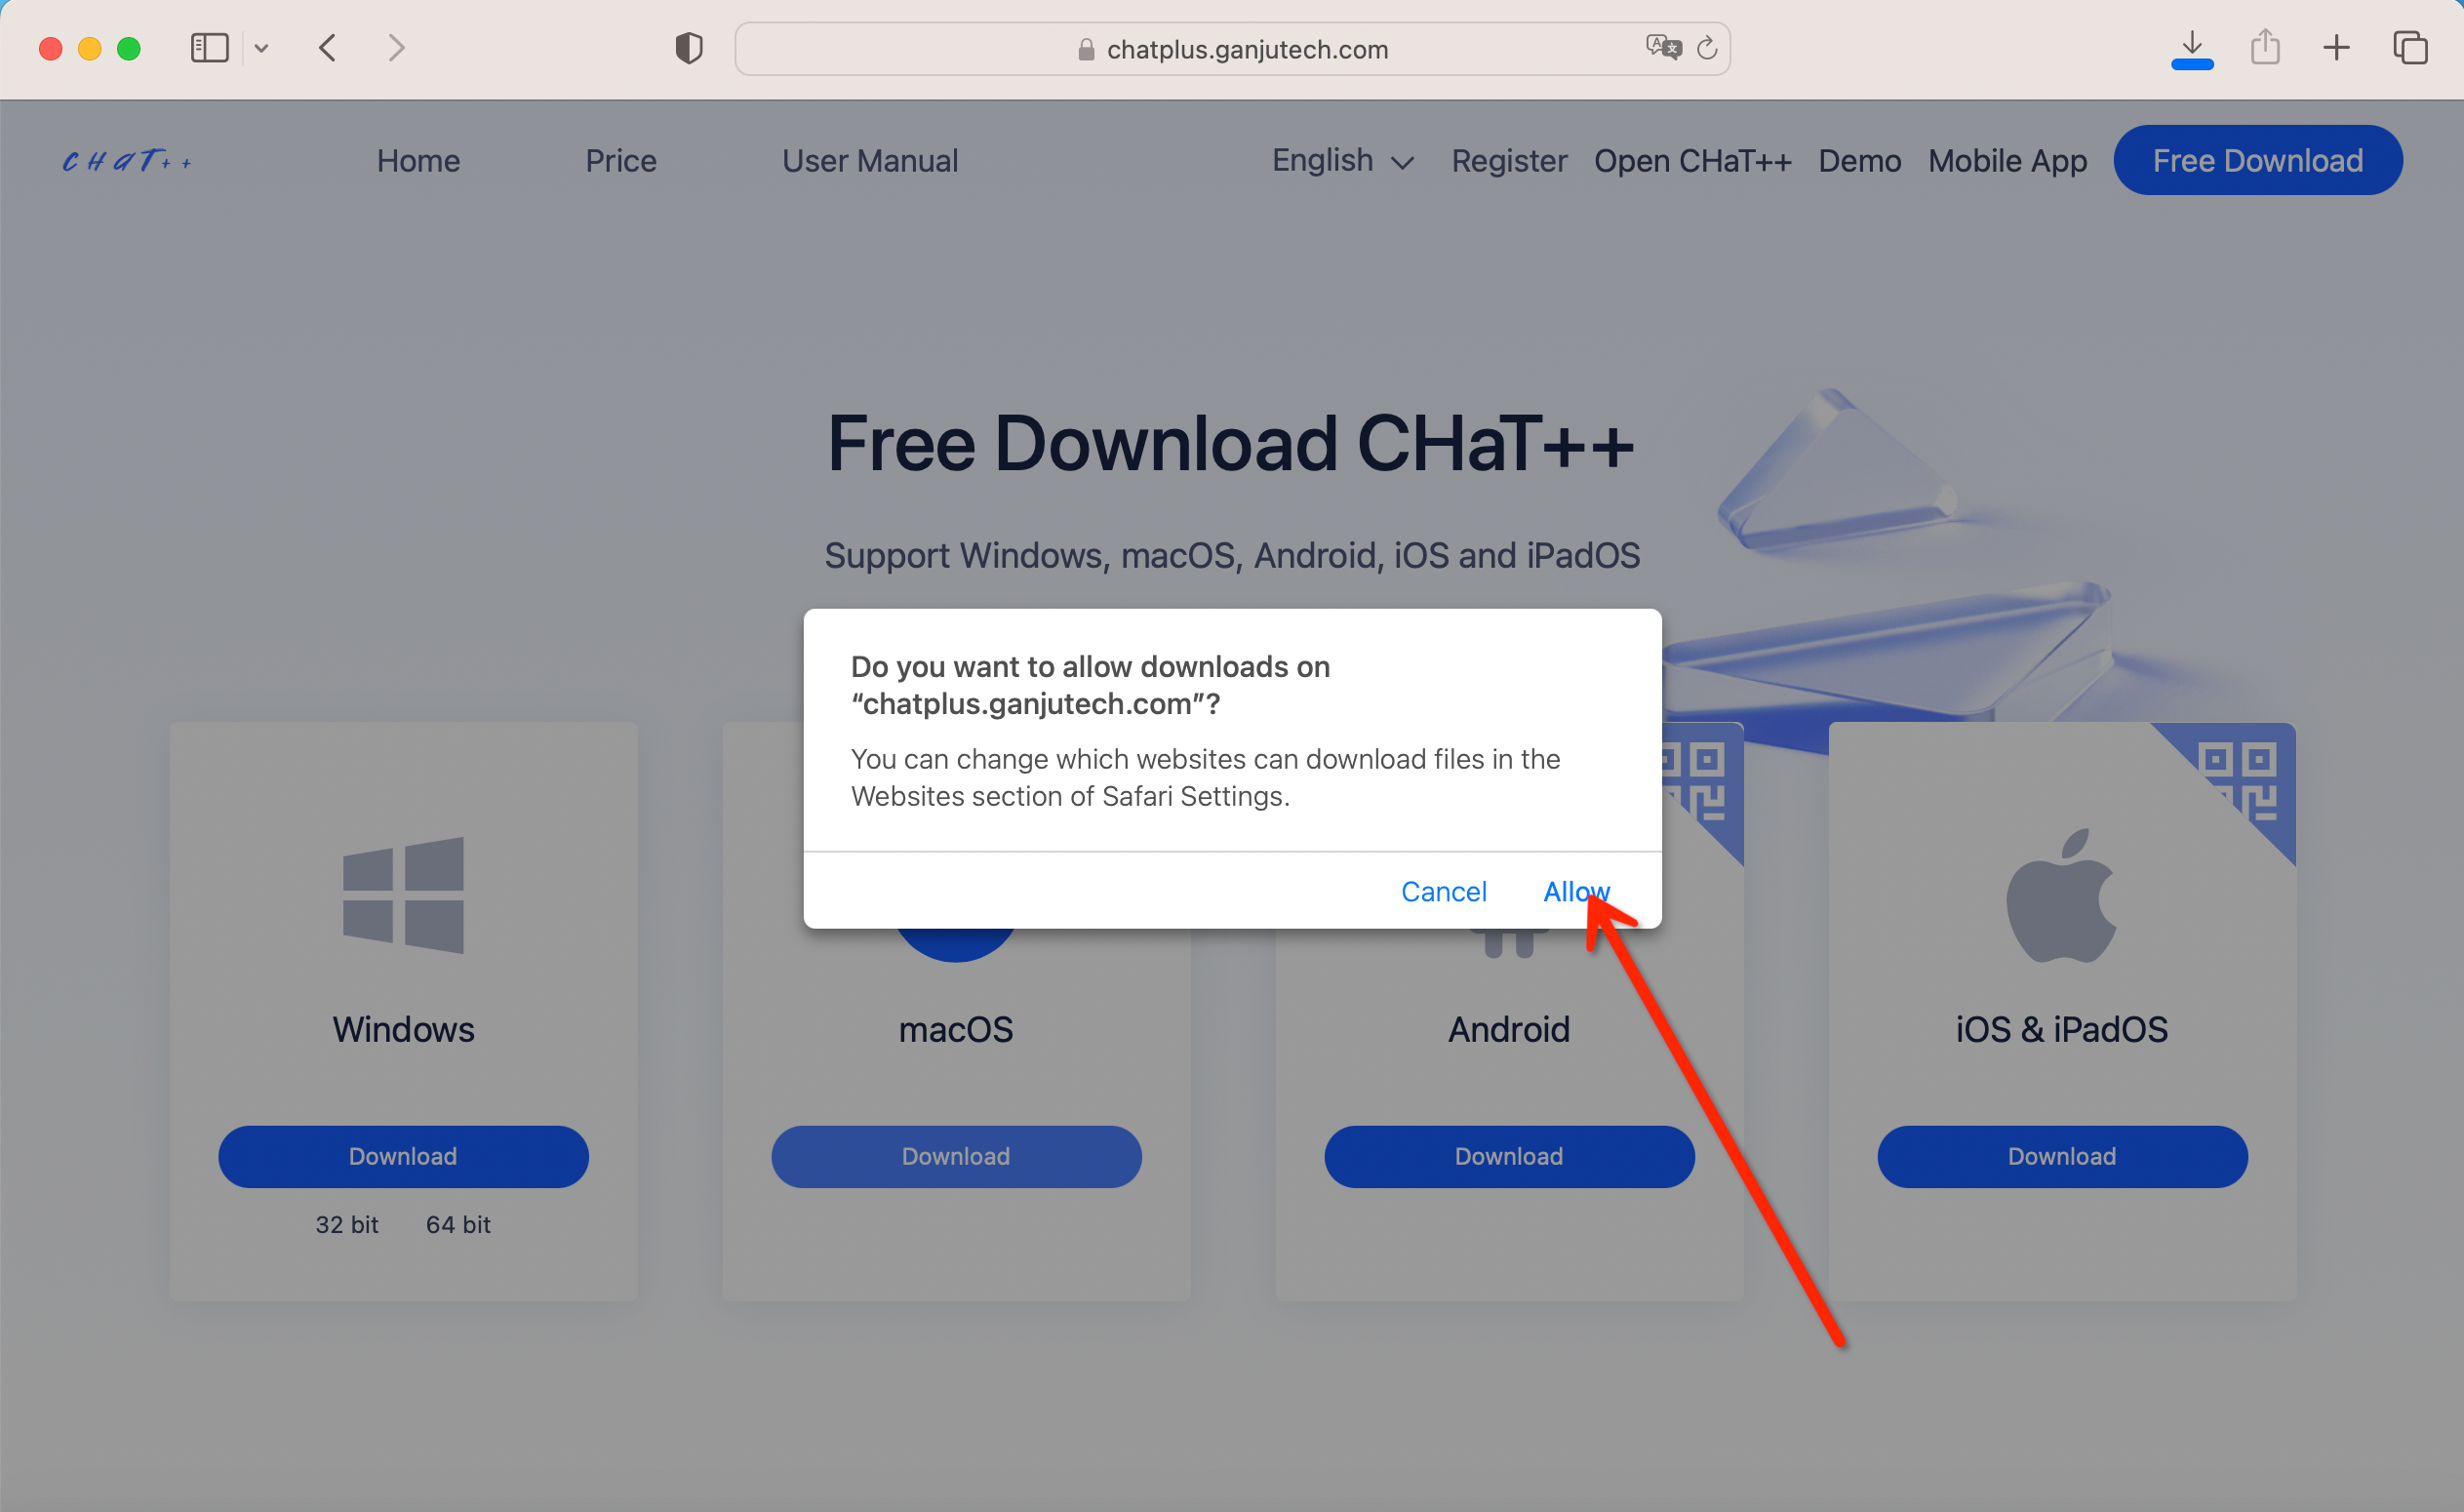
Open a browser on your computer and visit the official website of ChatPlusAI at www.chatplus.ai. Click the "Free Download" button located on the top right of the website. Select the Mac version and click "Allow" on the pop-up page.
Installation
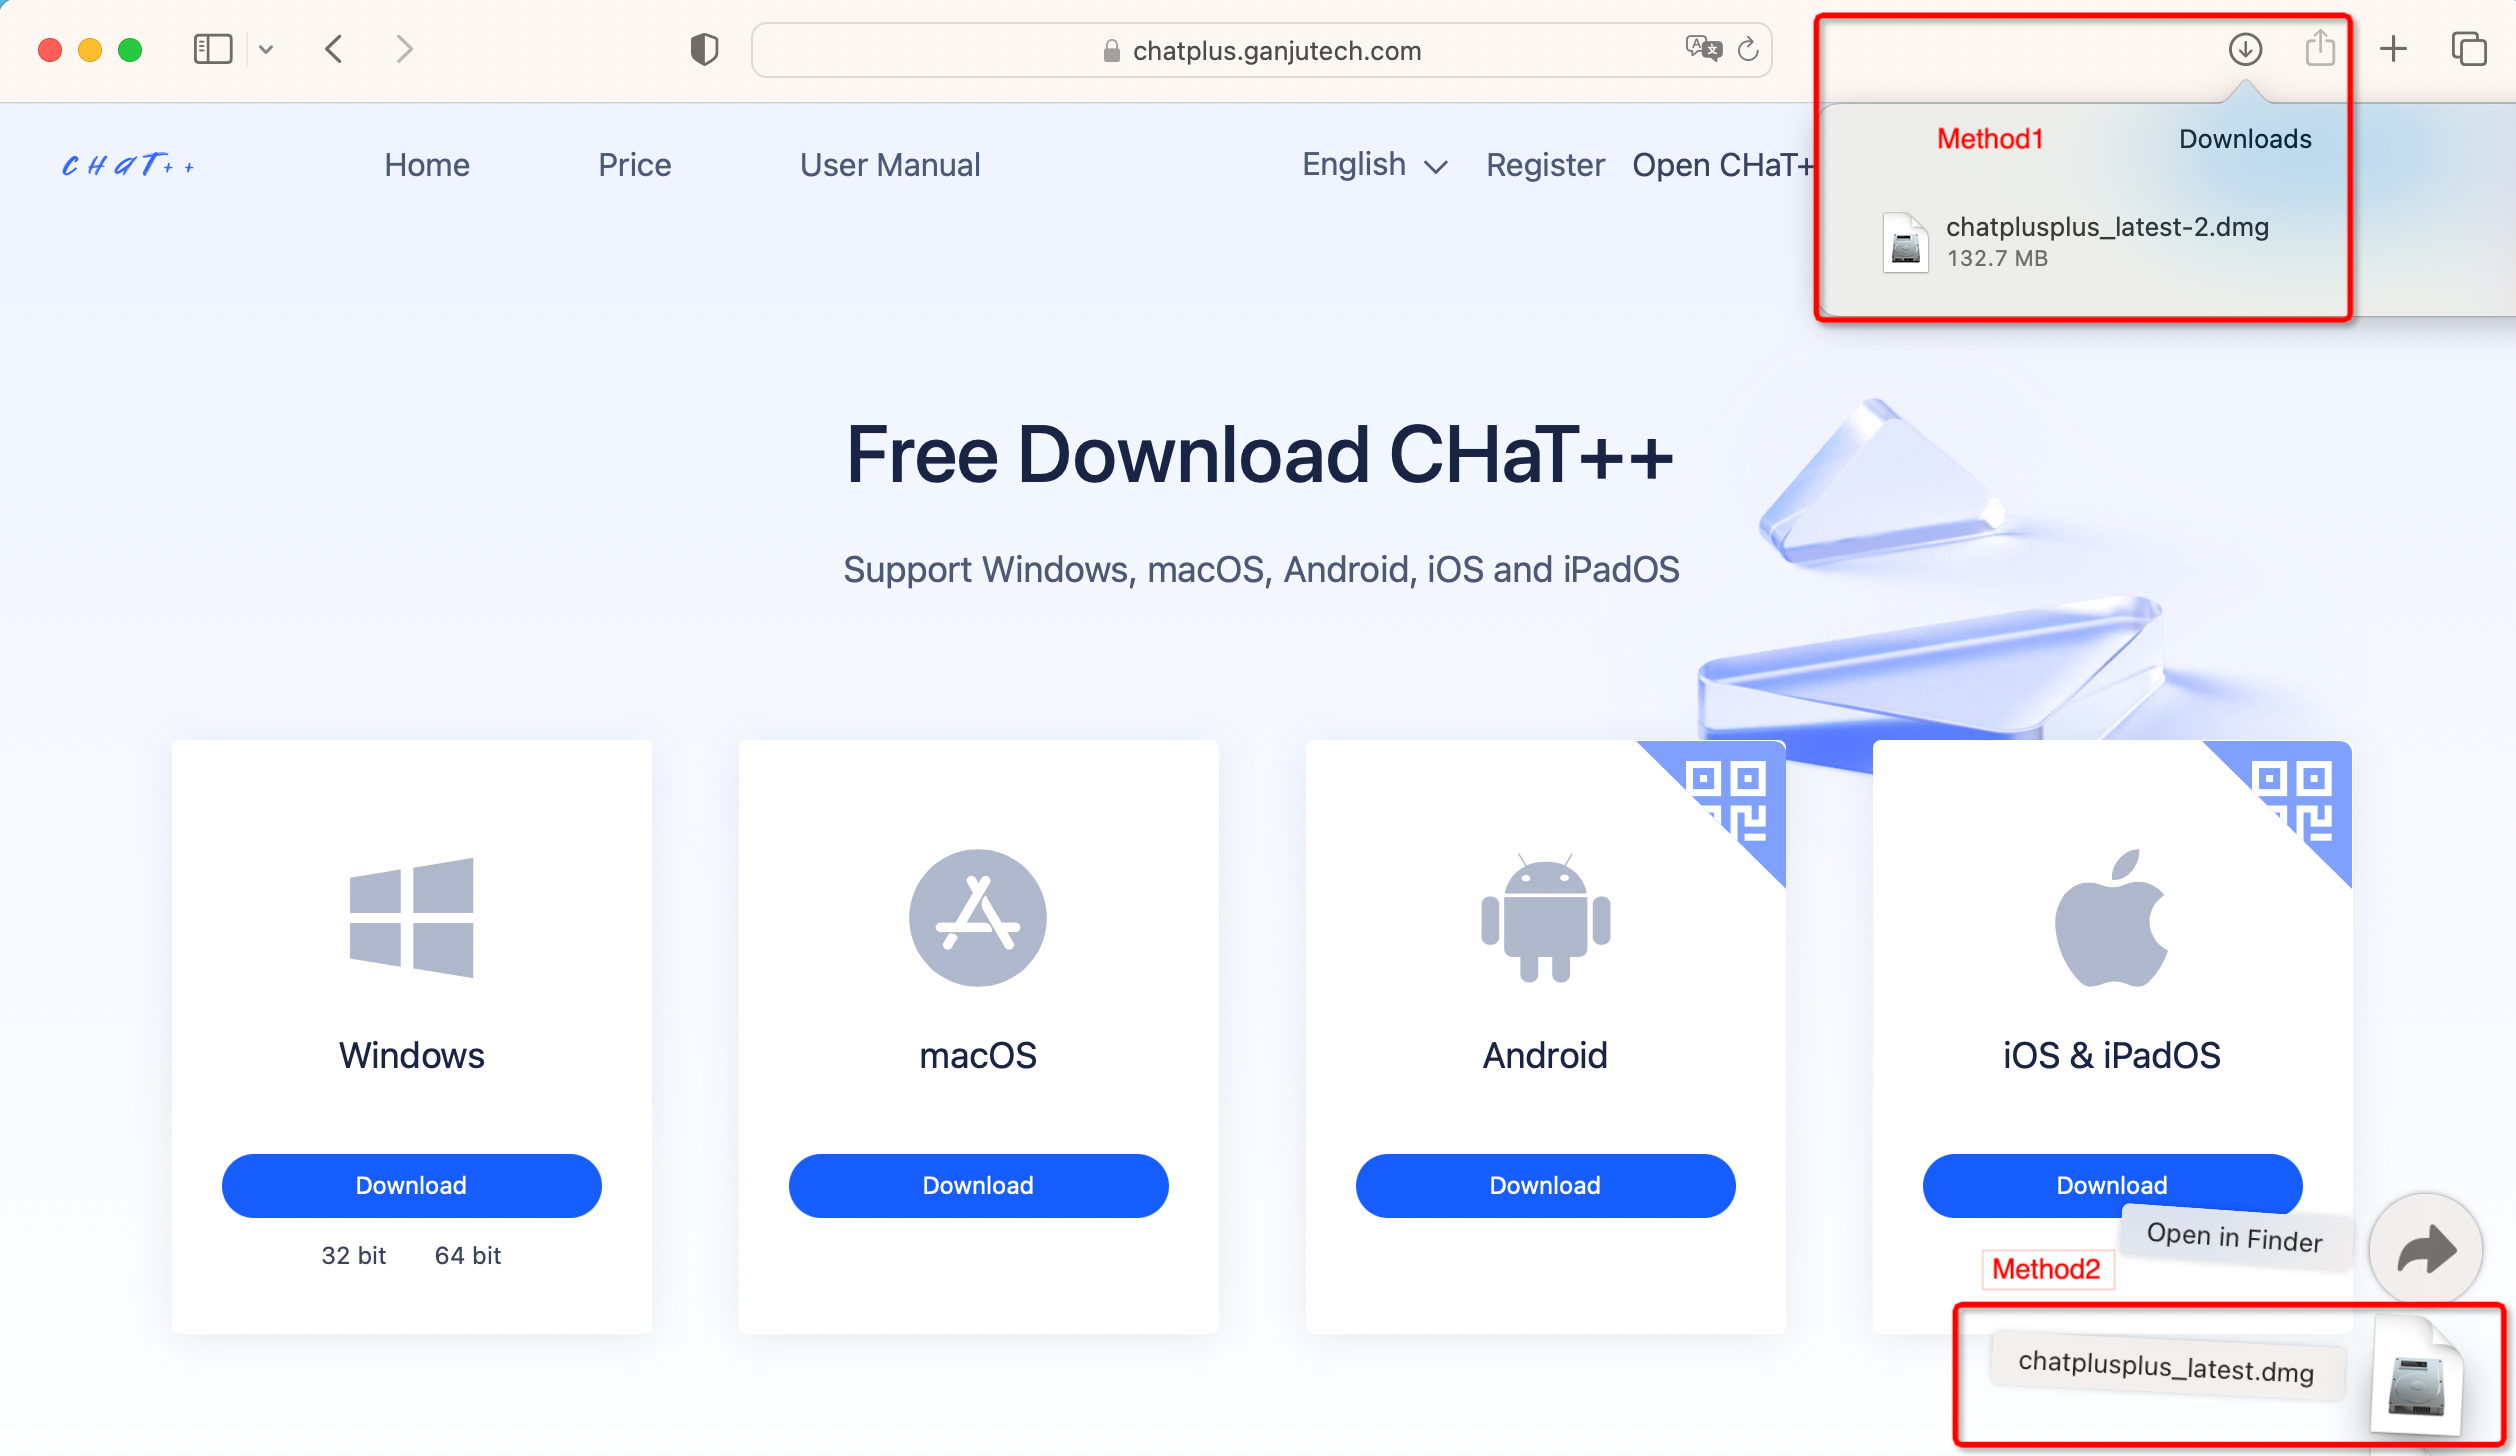
After the download is complete, locate "chatplusplus_latest.dmg" in the browser's "Downloads" folder or in the "Finder" on your computer, and double-click to open it.
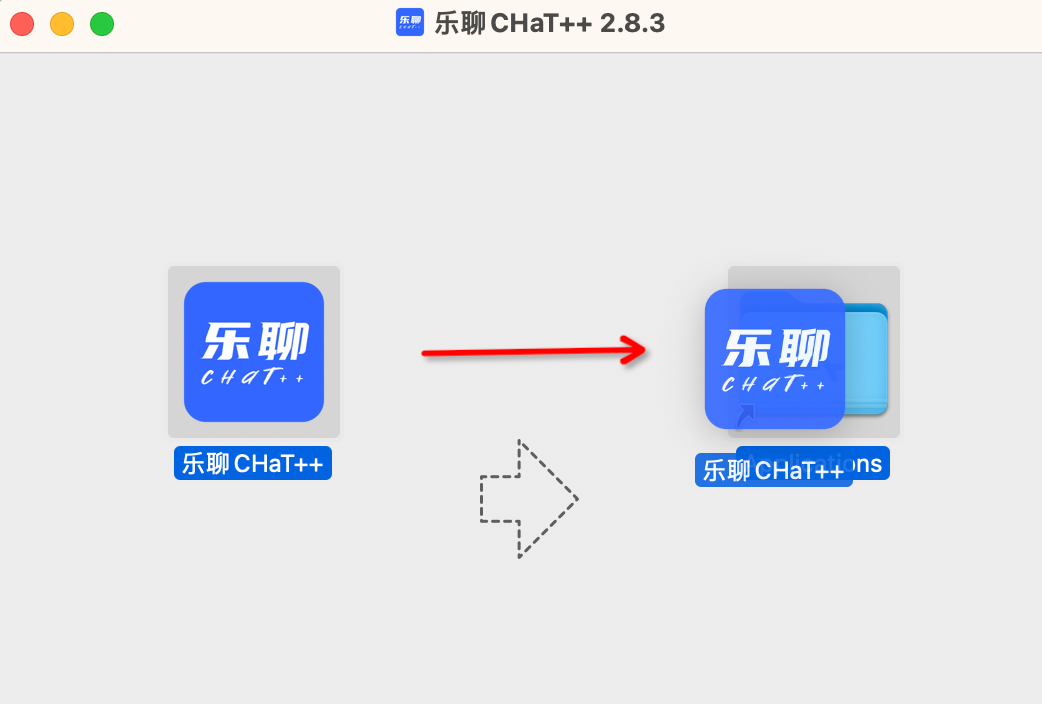
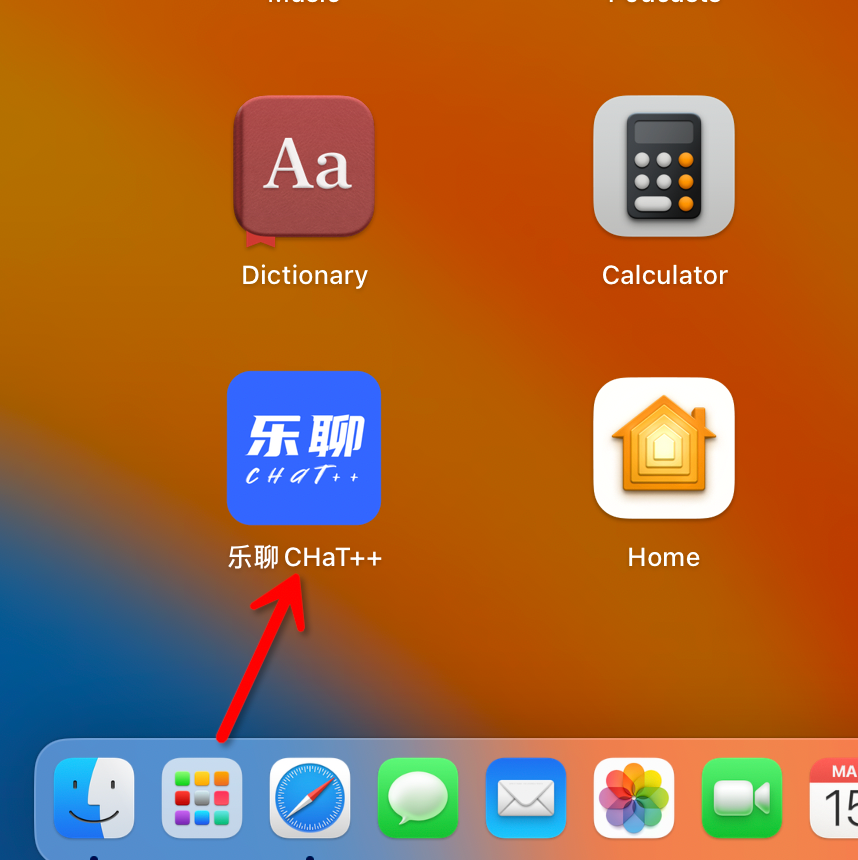
On the pop-up page, drag the ChatPlusAI icon to the Applications folder on the right to launch ChatPlusAI from the "Launchpad".
FAQ
Q: Failed to install the application
A: Please pull the ChatPlusAI into Applications folder, then you can start to use ChatPlusAI.
Registration
Please click on the "Register Account" button located at the bottom left of the login page to start the registration process. ChatPlusAI supports registration with both mobile phone numbers and email addresses. Upon successful registration, you will become a super administrator by default.
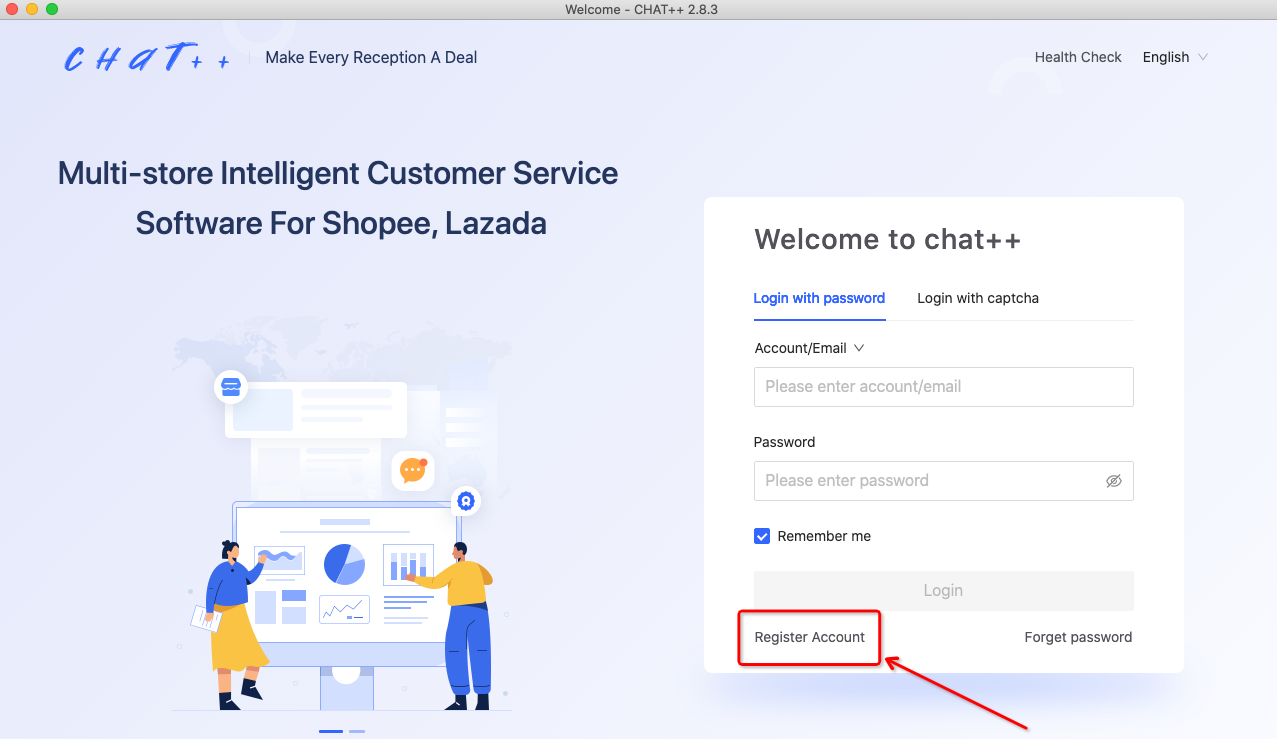
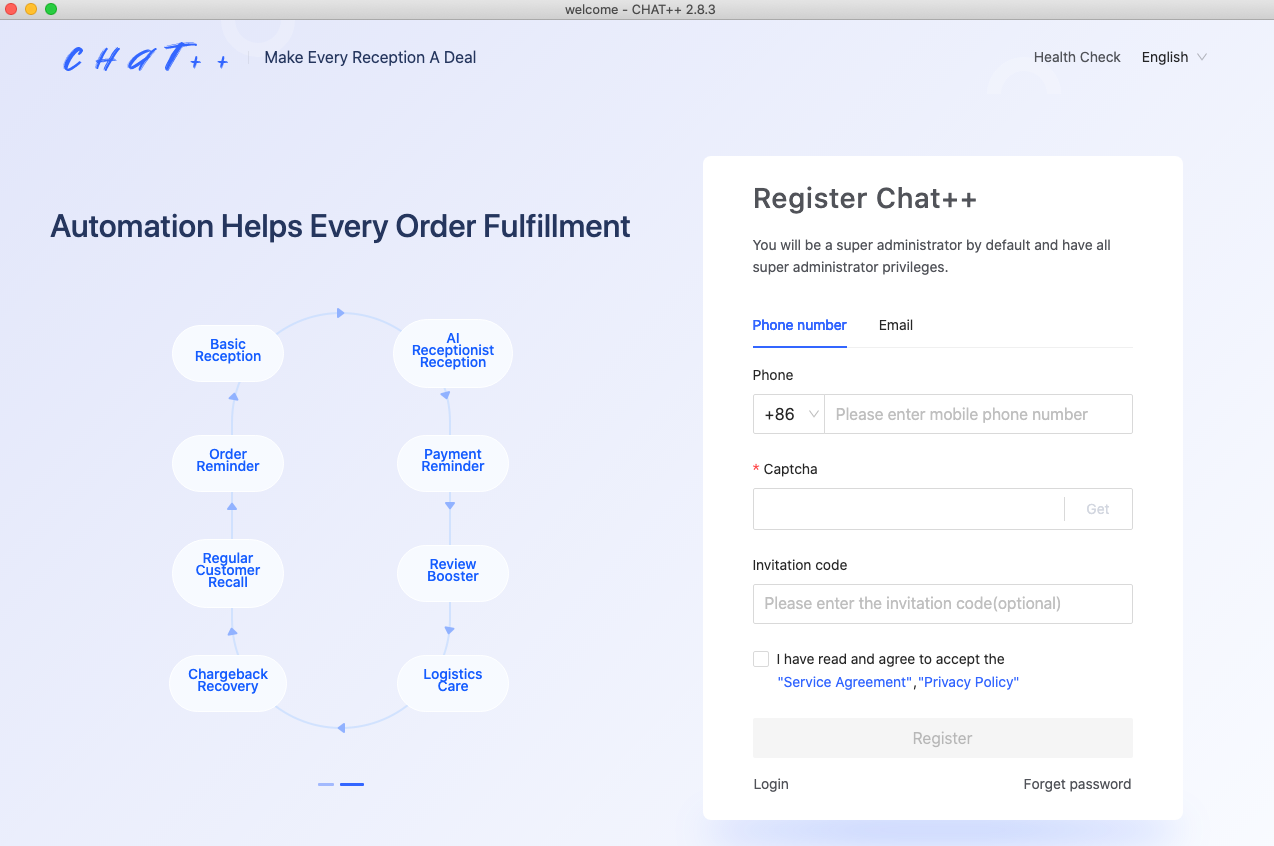
Note:
Invitation code is not a required field and can be skipped.
FAQ
Q1: I selected phone number registration and no password set, where can I set password?
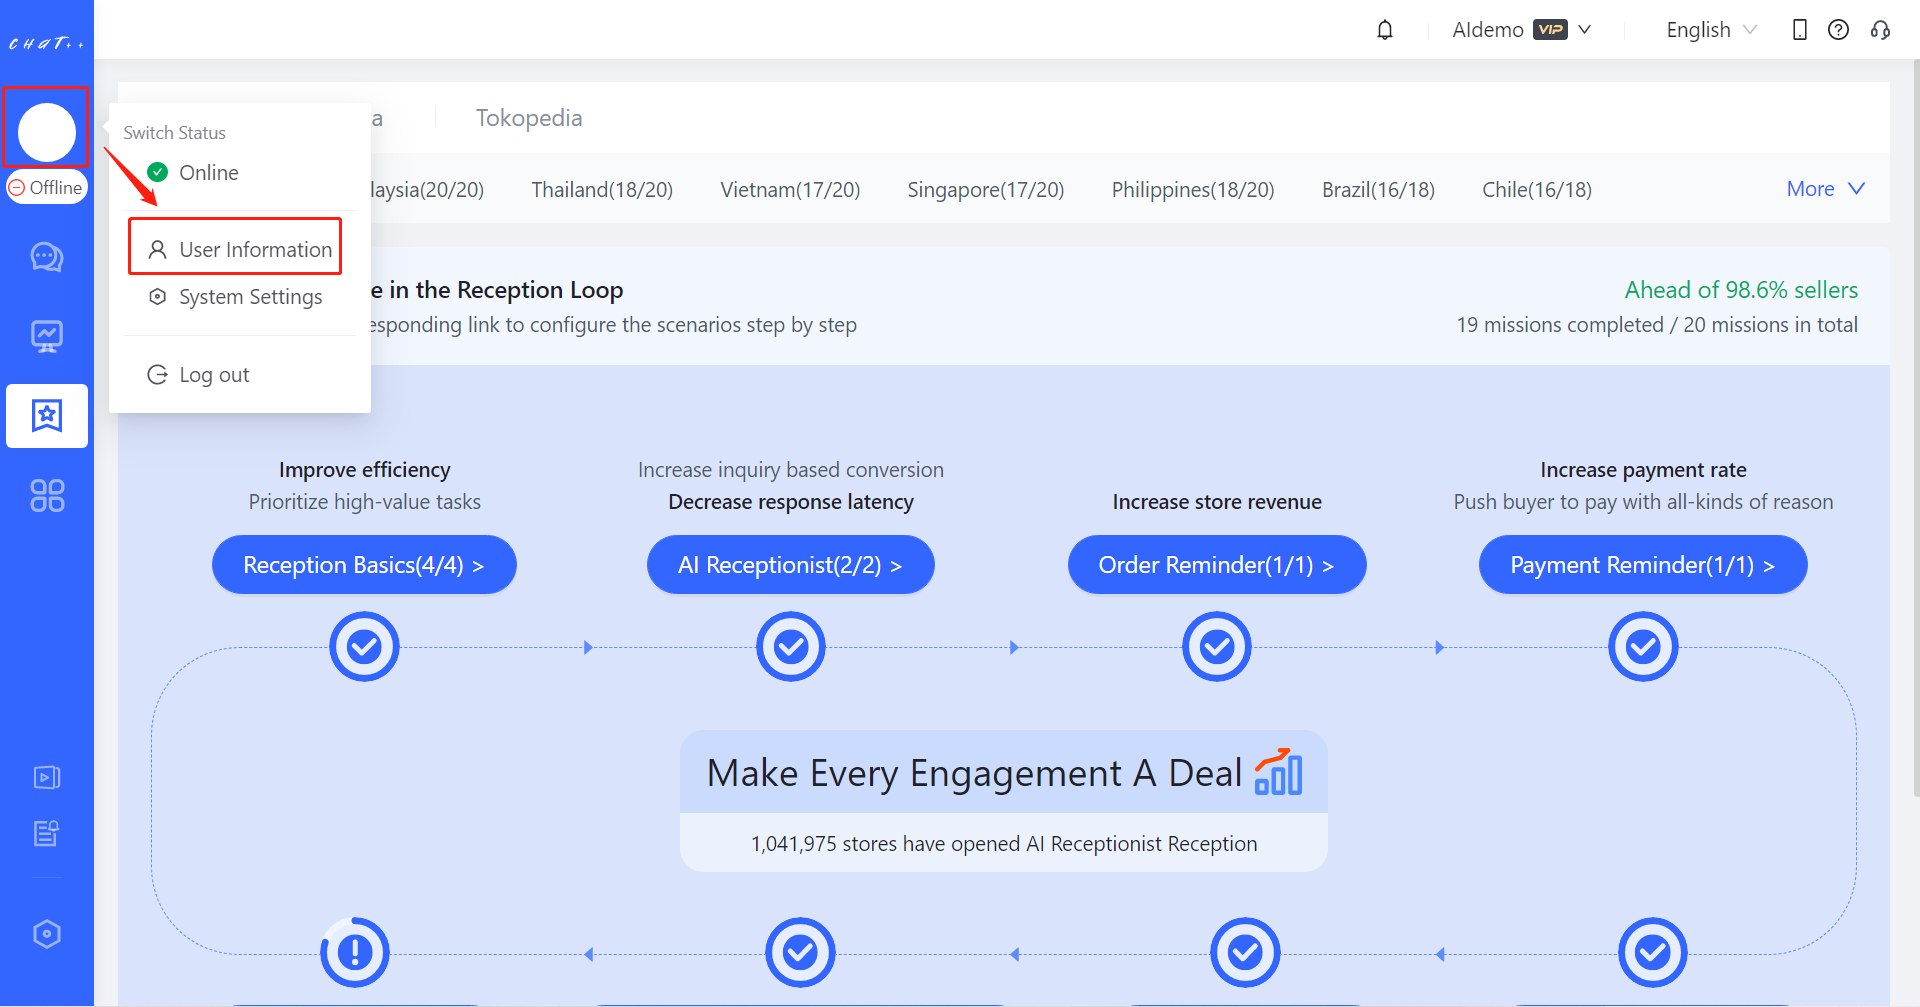
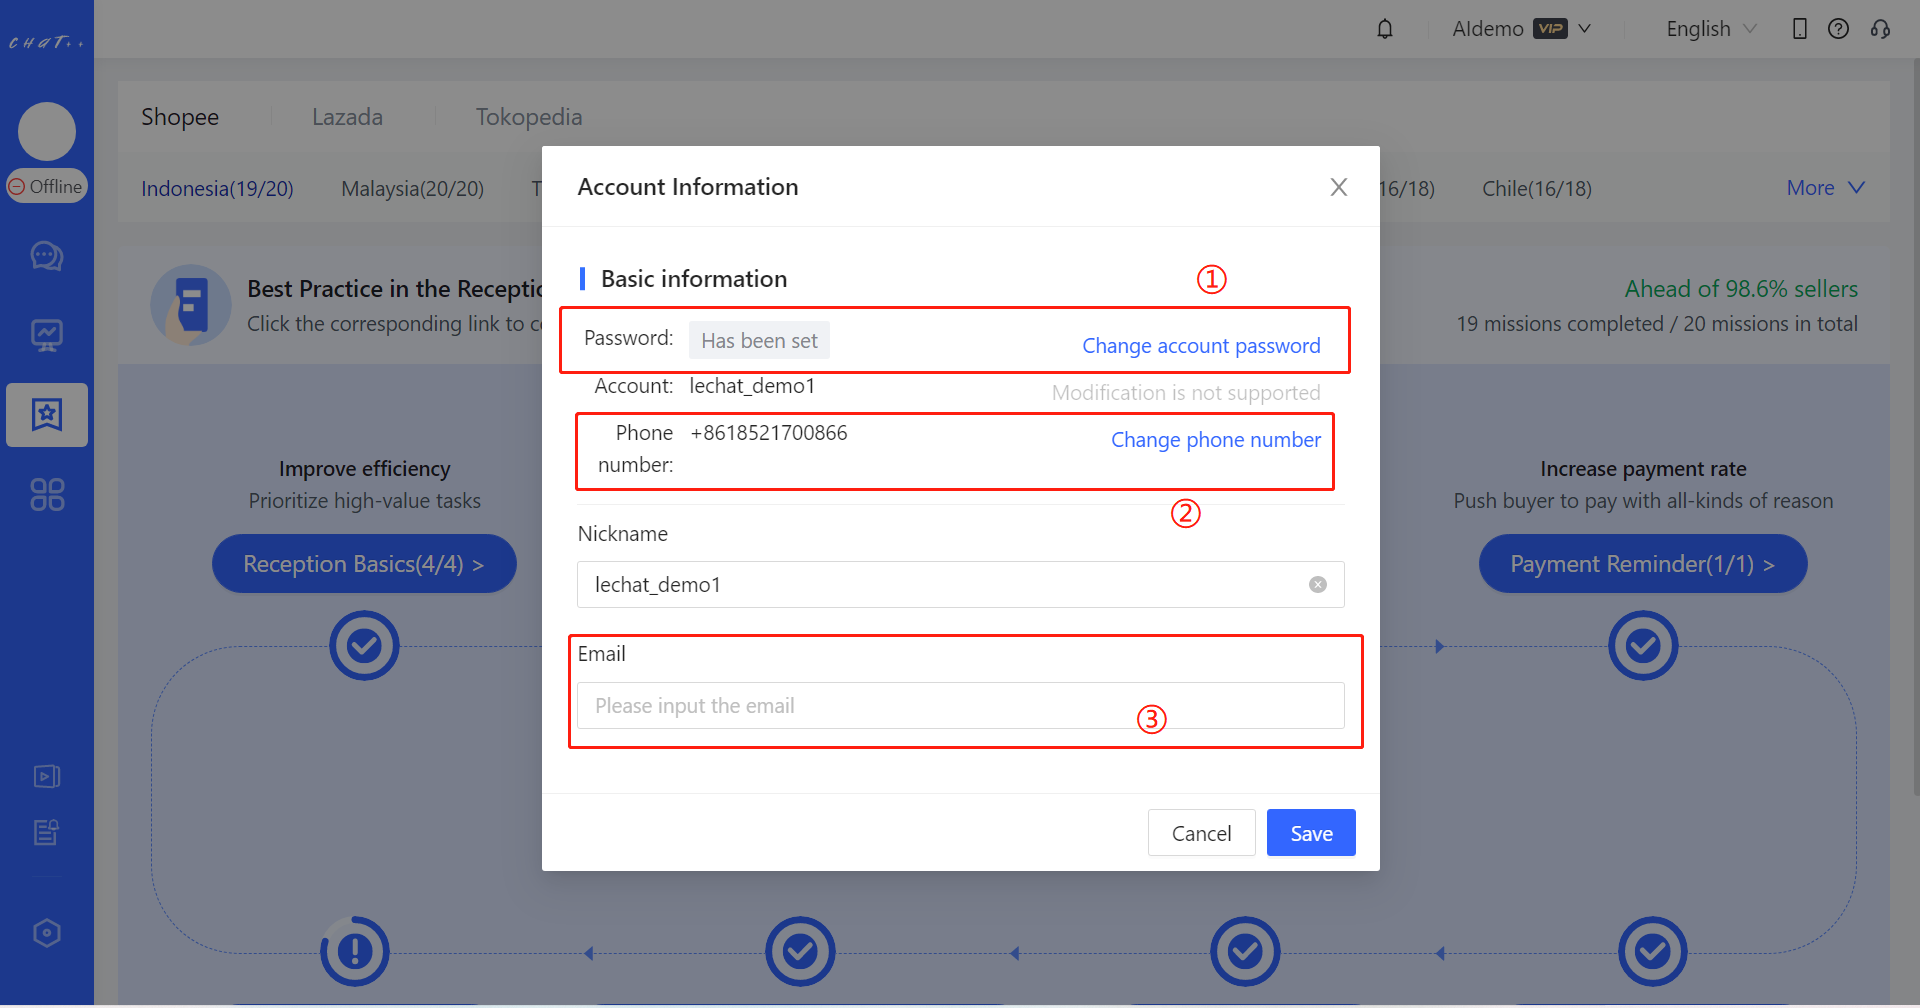
A1: Notice you are forced to add at least one shop in your first log-in ChatPlusAI after registration. After you add one shop in ChatPlusAI successfully, you can click the avatar in the top area of left column, then click user information, then set password.
Q2: what is the invitation code in registration page?
A2: Invitation code is not required for registration, if your friend gives you invitation code, you can fill out there. If you want to recommend ChatPlusAI to your friend, you can click ChatPlusAI reference program
Login
Run ChatPlusAI application, then login page appears, there are 2 login methods in ChatPlusAI, one method is to use contact phone number to get verification code, use this code to login the system , the other method is to use account and password to login in the system.
Notes:
If there is no any shop added to ChatPlusAI yet, you would be taken to add shop page after login. As add shop to get access authorized data from marketplaces is a MUST step to use ChatPlusAI, so this step can’t be skipped.
📱 ChatPlusAI Android version
Download
💡Method1: Download through a mobile browser
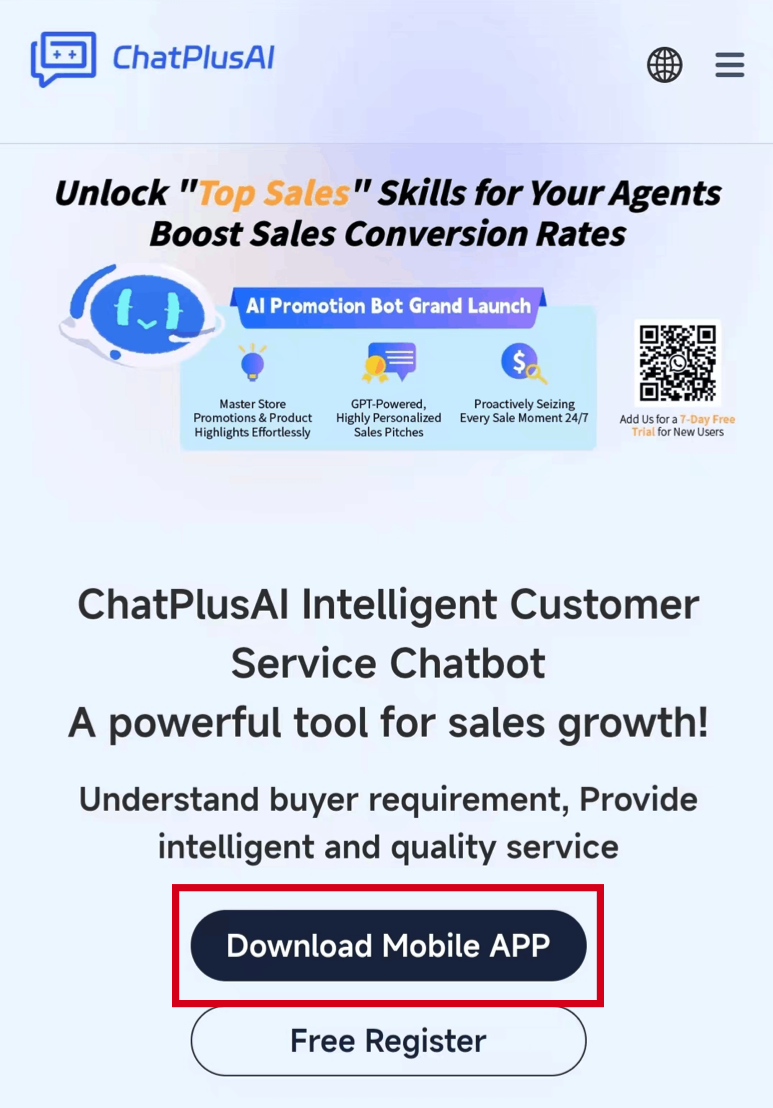
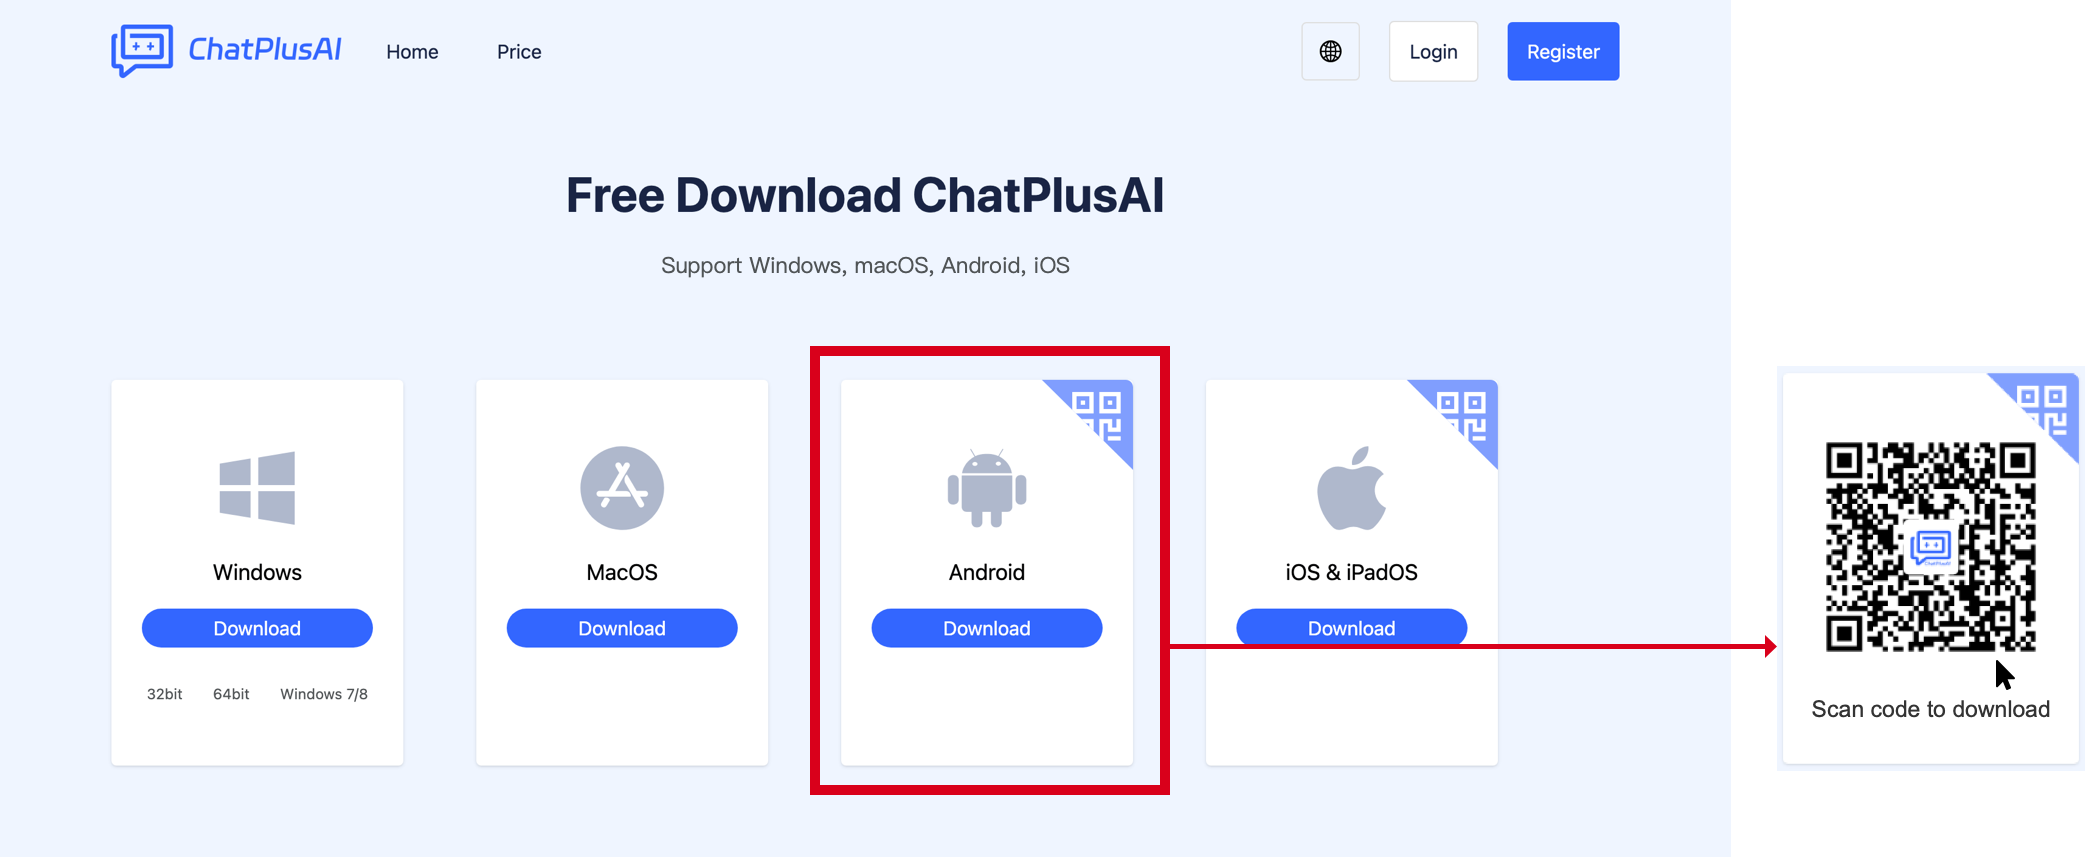
Open your mobile browser and enter the ChatPlusAI mobile website address www.chatplus.ai. Click on the "Download Mobile APP" button shown in the red box in the image below. You will be automatically directed to the appropriate installation page based on your mobile operating system.
💡Method 2: Direct download through QR code
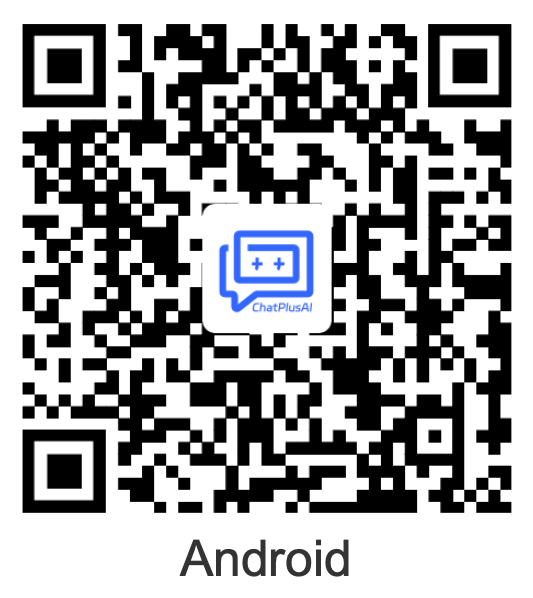
Android: https://www.chatplus.ai/mobile/download/android/
Click the link above on your mobile phone or use the "Scan" function on your phone to scan the QR code below. On the opened webpage, download and install the package.
💡Method 3: Download through PC browser
Open the ChatPlusAI download page on your Windows/Mac computer browser: https://chatplus.ai/en-US/pc/downloads.html. Hover your cursor over the "Android" card, and the corresponding Android download QR code will appear. Use the "Scan" function on your mobile phone to scan and download.
Installation
After the installation package is downloaded, open it and follow the prompts to complete the installation.
Login and Registration
Login
When you open ChatPlusAI, the login guide page will pop up first. ChatPlusAI provides two login methods. If you already have a ChatPlusAI account, please use the contact phone number associated with your account to receive a verification code or log in with your account password in area ① marked in the red box below.
Registration
If you have never registered for a ChatPlusAI account, please click "Register Now" at the bottom of the login page (area ② marked in the red box below). You will be automatically redirected to the registration page in your browser. ChatPlusAI supports registration via "phone number" or "email." Once registration is successful, you will be set as the super administrator by default.
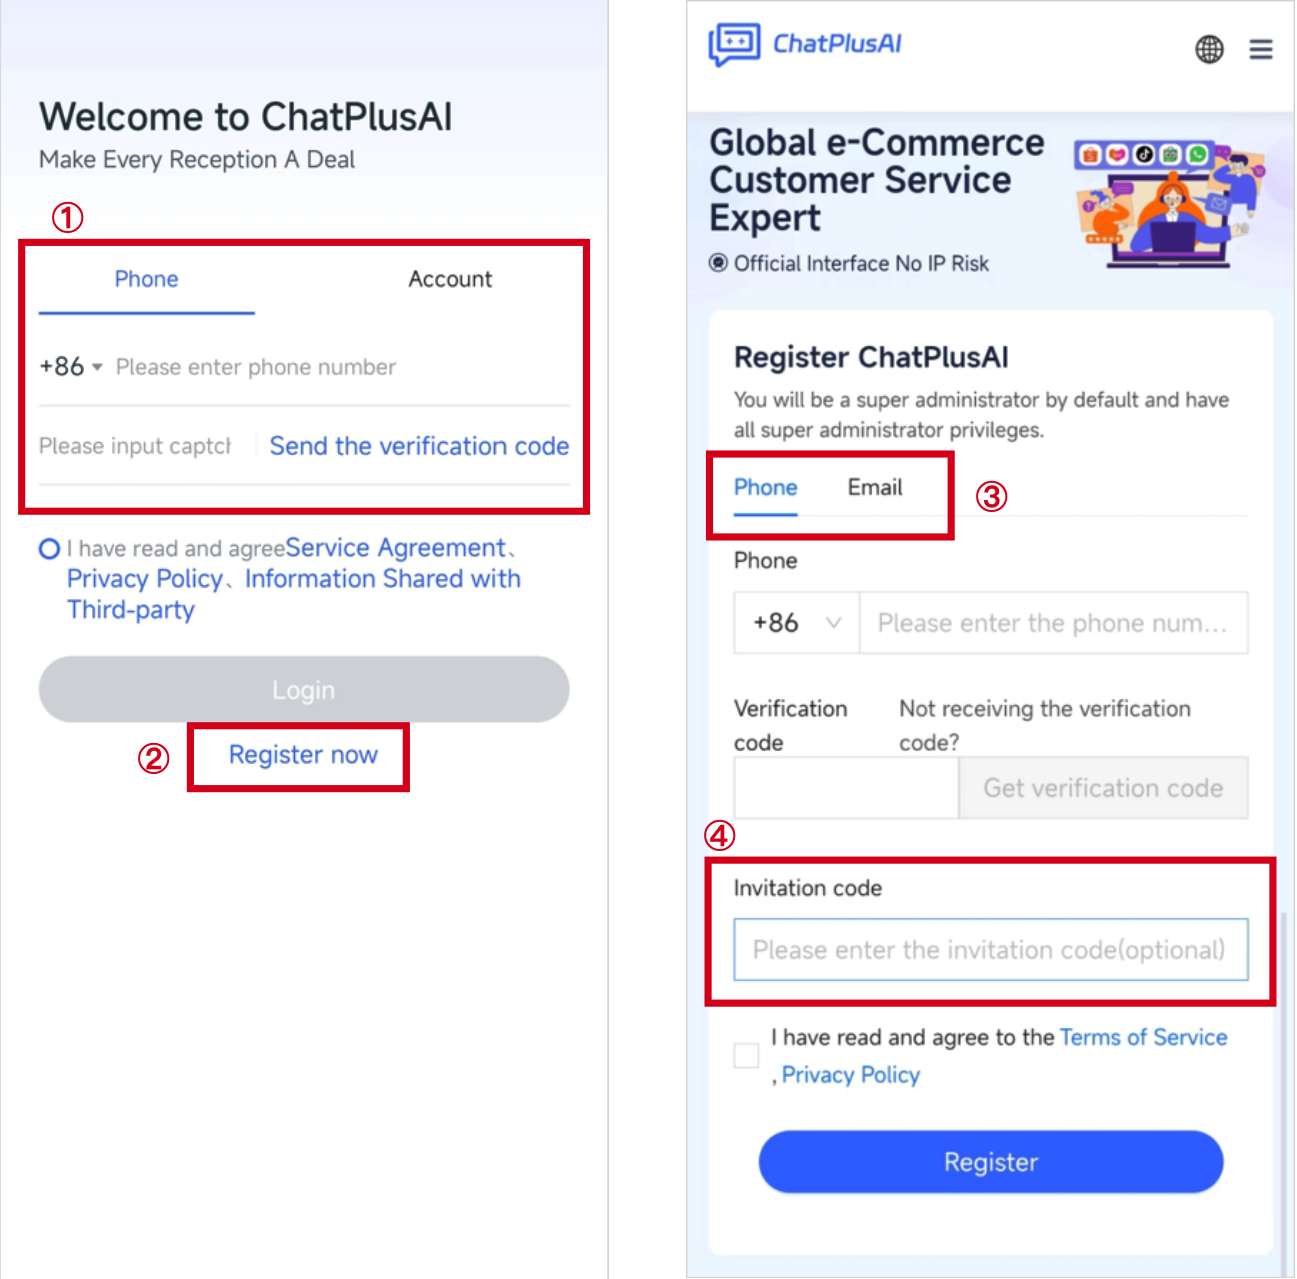
Note: Invitation code is not a required field( the red box ④ in the image above) and can be skipped.
📱ChatPlusAI iOS version
Download
💡Method 1: Download through a mobile browser
Enter the ChatPlusAI mobile website address www.chatplus.ai in your mobile browser, and click on the "Download Mobile APP" button shown in the red box ④ in the image below. You will be automatically directed to the appropriate installation page based on your mobile operating system.

💡Method 2: Download by searching "ChatPlusAI" in the App Store
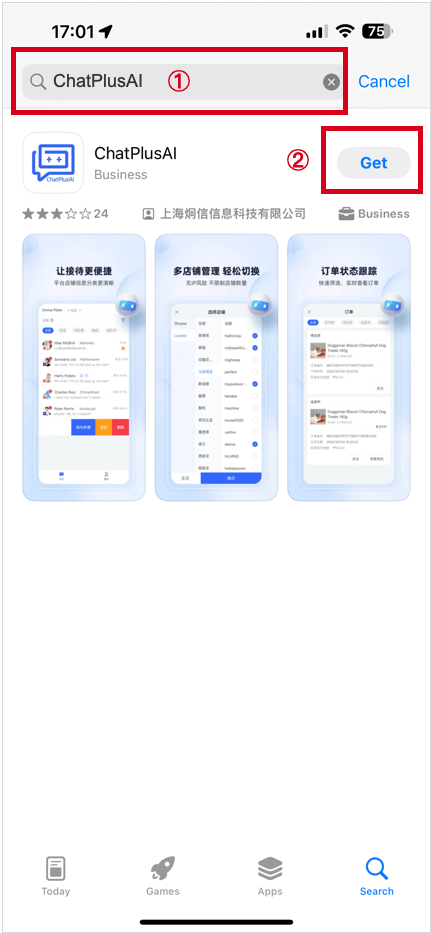
Search for "ChatPlusAI" in the App Store, and click "Get" (red box ② in the image below) to download "ChatPlusAI."
💡Method 3: Direct download
iOS: https://apps.apple.com/cn/app/chatplusai/id1635496522
Click the link above on your mobile phone or use the "Scan" function on your phone to scan the QR code below. You will be redirected to the App Store to complete the download as instructed.

💡Method 4: Download through PC browser
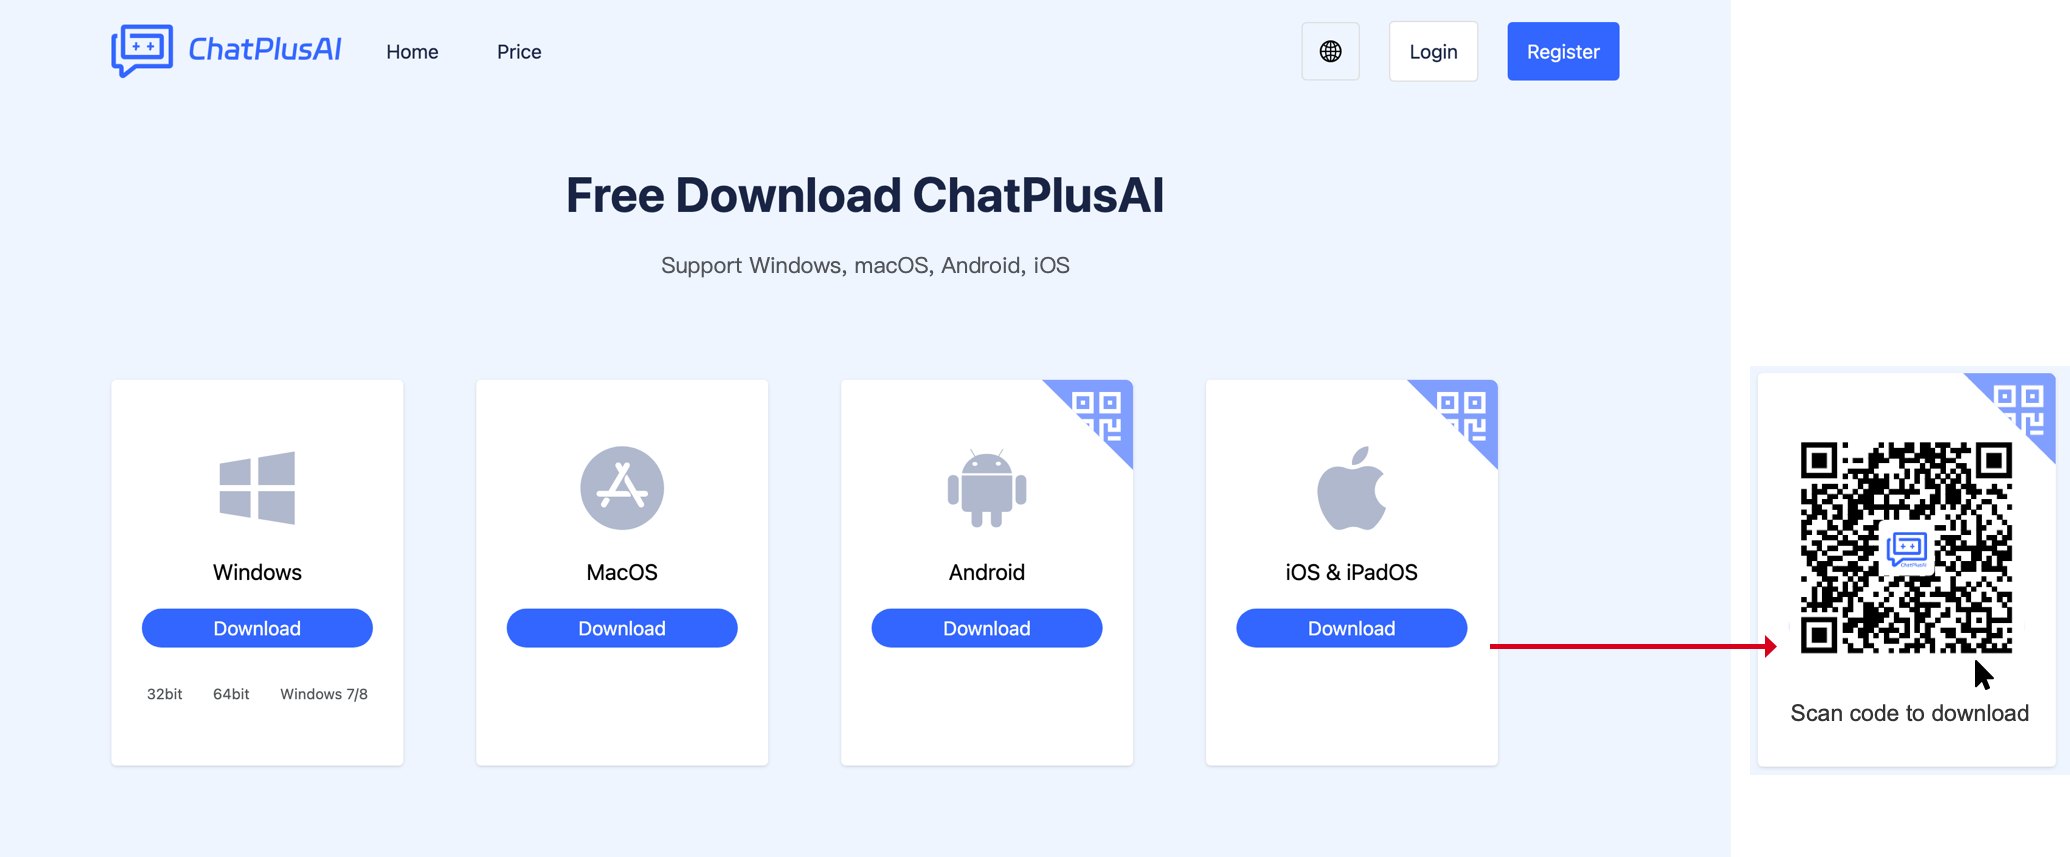
Open the ChatPlusAI download page on your Windows/Mac computer browser: https://chatplus.ai/en-US/pc/downloads.html. Hover your cursor over the "iOS" card, and the corresponding iOS download QR code will appear. Use the "Scan" function on your mobile phone to scan and download.
Installation
Once the download animation with the circular progress bar is complete, the installation will be finished.
Login and Registration
Once the installation is complete, click the ChatPlusAI icon to launch the application.
Login
When you open ChatPlusAI, a login guide page will appear first. ChatPlusAI offers two login methods. If you already have a ChatPlusAI account, use the contact phone number associated with your account to receive a verification code or log in with your account password in area ① marked in the red box below.
Registration
If you have never registered for a ChatPlusAI account, click "Register Now" at the bottom of the login page (area ② marked in the red box below). You will be automatically redirected to the registration page in your browser. ChatPlusAI supports registration via "phone number" or "email." Once registration is successful, you will be set as the super administrator by default. 
Note: Invitation code is not a required field(the red box ④ in the image above) and can be skipped.
Authorize Shop
As e-commerce customer service workbench, ChatPlusAI need merchant authorize order, item, logistics, promotion data in the daily work. All those data come from marketplaces (i.e. shopee, Lazada) through official APIs. Add Shop is merchant inform marketplaces to authorize those data to ChatPlusAI. As ChatPlusAI not only responds customer’s query, but also responds all kinds of customer’s behavior, like reviews, return-refund behavior, … besides chat authorization, ERP authorization is needed as well.
ChatPlusAI does not have any IP issue in reception time as all reception operations go with authorized official APIs, be cautions the authorization procedure is not in ChatPlusAI, it is on marketplace seller center, and all seller center operation has IP concern. Keep the exact same IP environment you visit seller center to add shop. After the authorization is completed, receptionist can use ChatPlusAI in any Internet connected environment.
Authorize Shopee Shop
Precautions
ChatPlusAI uses fully authorized official interfaces to obtain information such as orders, products, logistics, and customer conversations from merchants. This requires corresponding store authorization from the seller. Since ChatPlusAI not only needs to complete customer service and reception but also actively respond to customer behavior such as orders and evaluations during the working process, store authorization not only authorizes the customer service conversation part but also authorizes the ERP part.
During the authorization process, Shopee official will send a verification code. Please prepare your mobile phone if you use a mobile phone number to log in to Shopee. If you use an email to log in to Shopee, please log in to your email in advance to receive the verification code.
Methods of authorization
ChatPlusAI supports three methods to add a Shopee shop.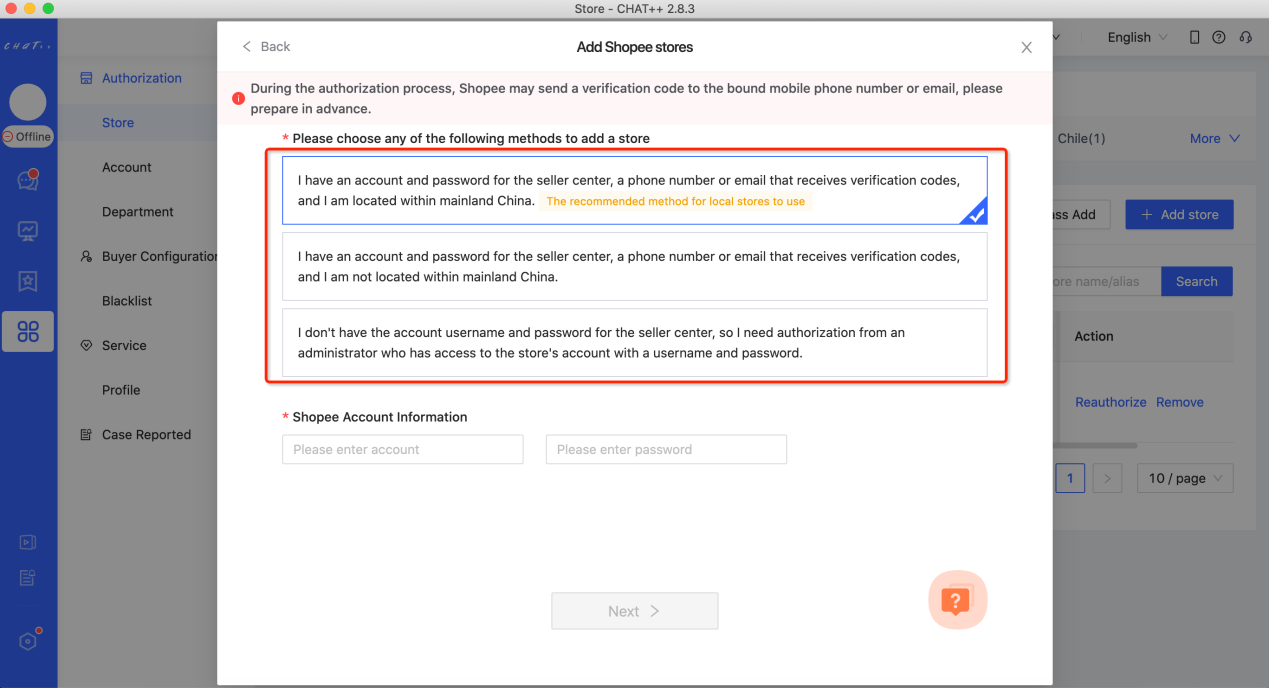
If you have a Shopee Seller Center account password and have a mobile phone or email to receive verification codes, and are worried about the risk of IP association before authorization, you can choose Method 1: authorize Shopee through ChatPlusAI. (Method 1 is easy to operate, but the waiting time for automatic authorization is longer, about 10 minutes.)
If you have a Shopee Seller Center account password and can receive verification codes, and there is no IP association risk in the current login environment, you can choose Method 2: you will be redirected to the Shopee Seller Center to complete the store addition. (Method 2 has more steps, but takes less time.)
If you do not have a Shopee account password, you can choose Method 3: follow the prompts to share the link with your administrator who has the account password, and ask them to click the link to log in to the Shopee Seller Center and complete the authorization.
If you have any questions during the shop authorization process, you can contact the customer service specialist for assistance to help you complete the authorization.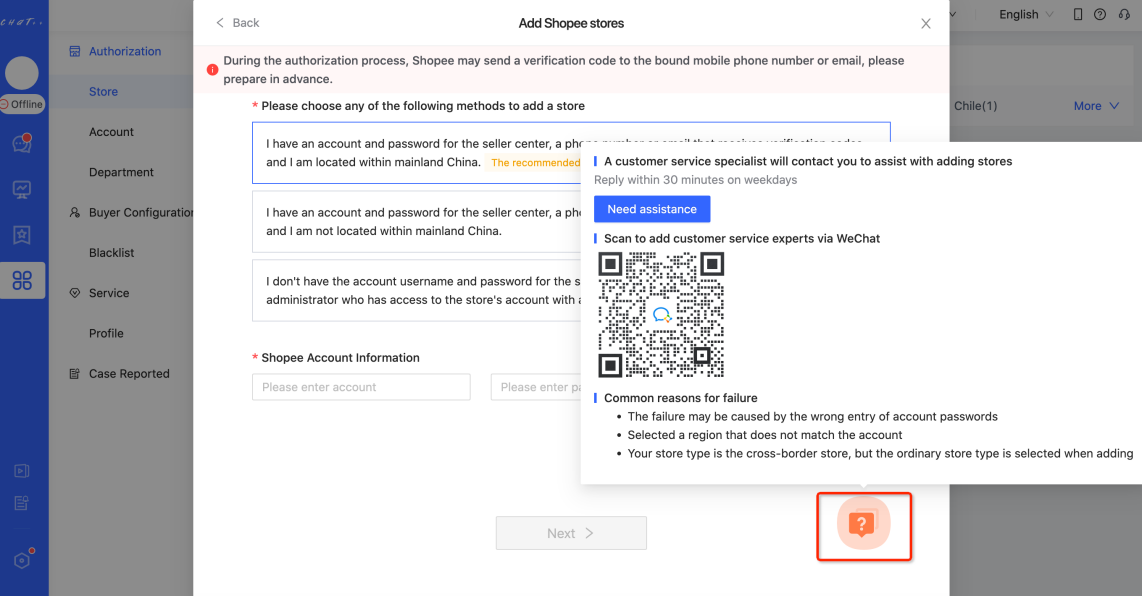
Method1:Authorize at ChatPlusAI (with account password)
Step
- Enter the store authorization page
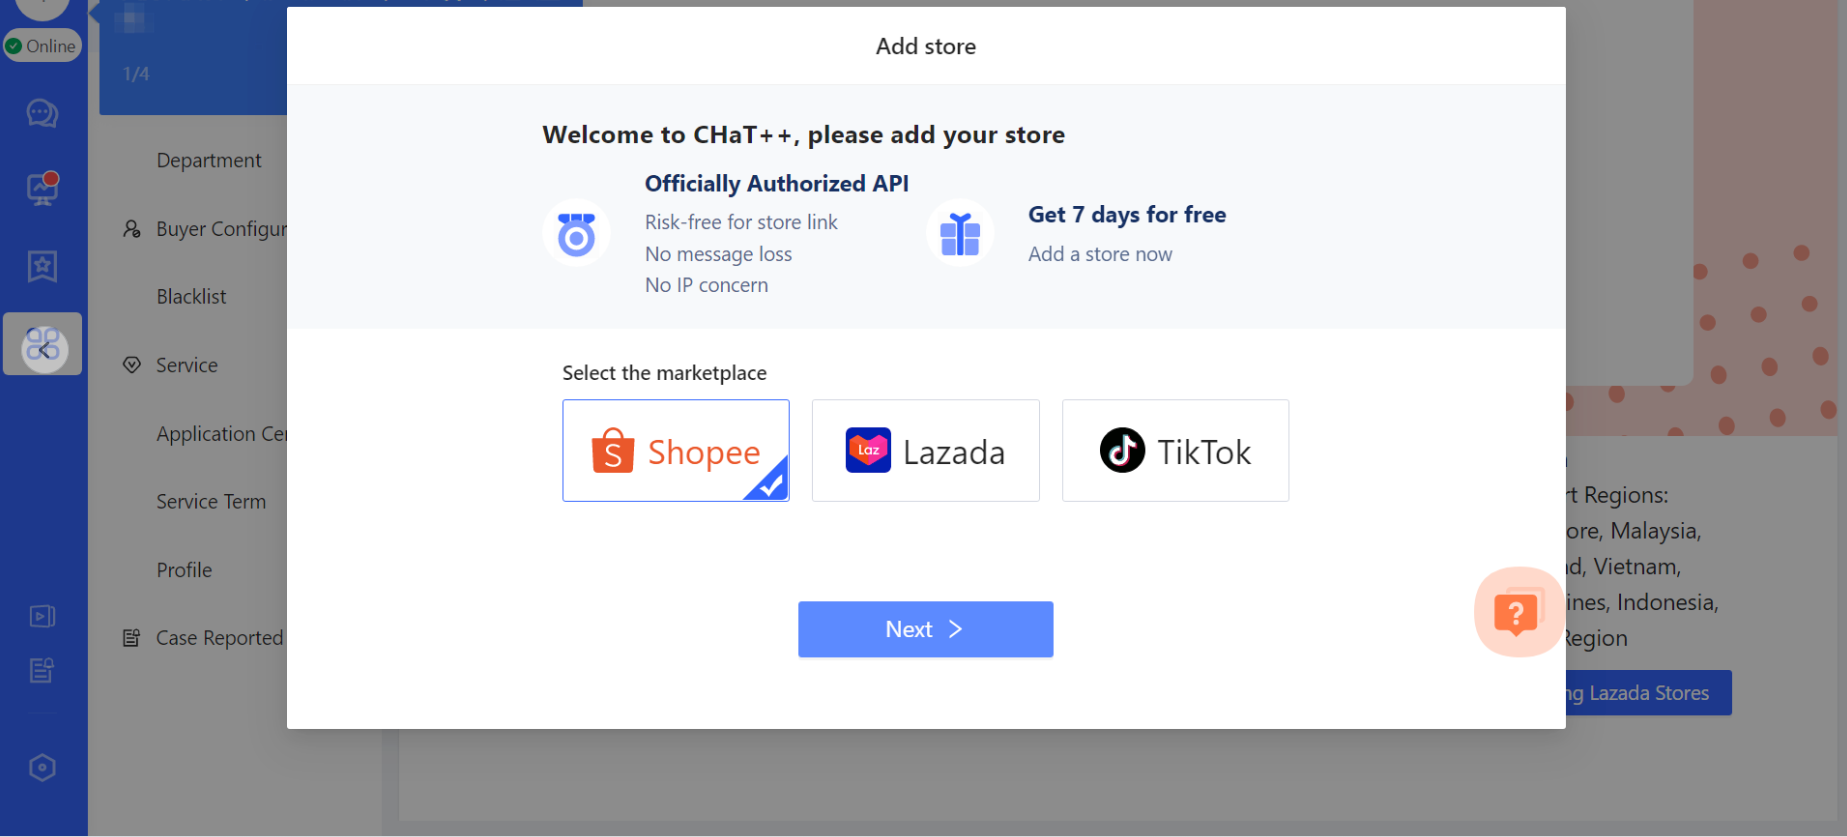
After the first login to ChatPlusAI, you will be directed to the guided page for adding a store.
Select “Shopee” --> Click “Next”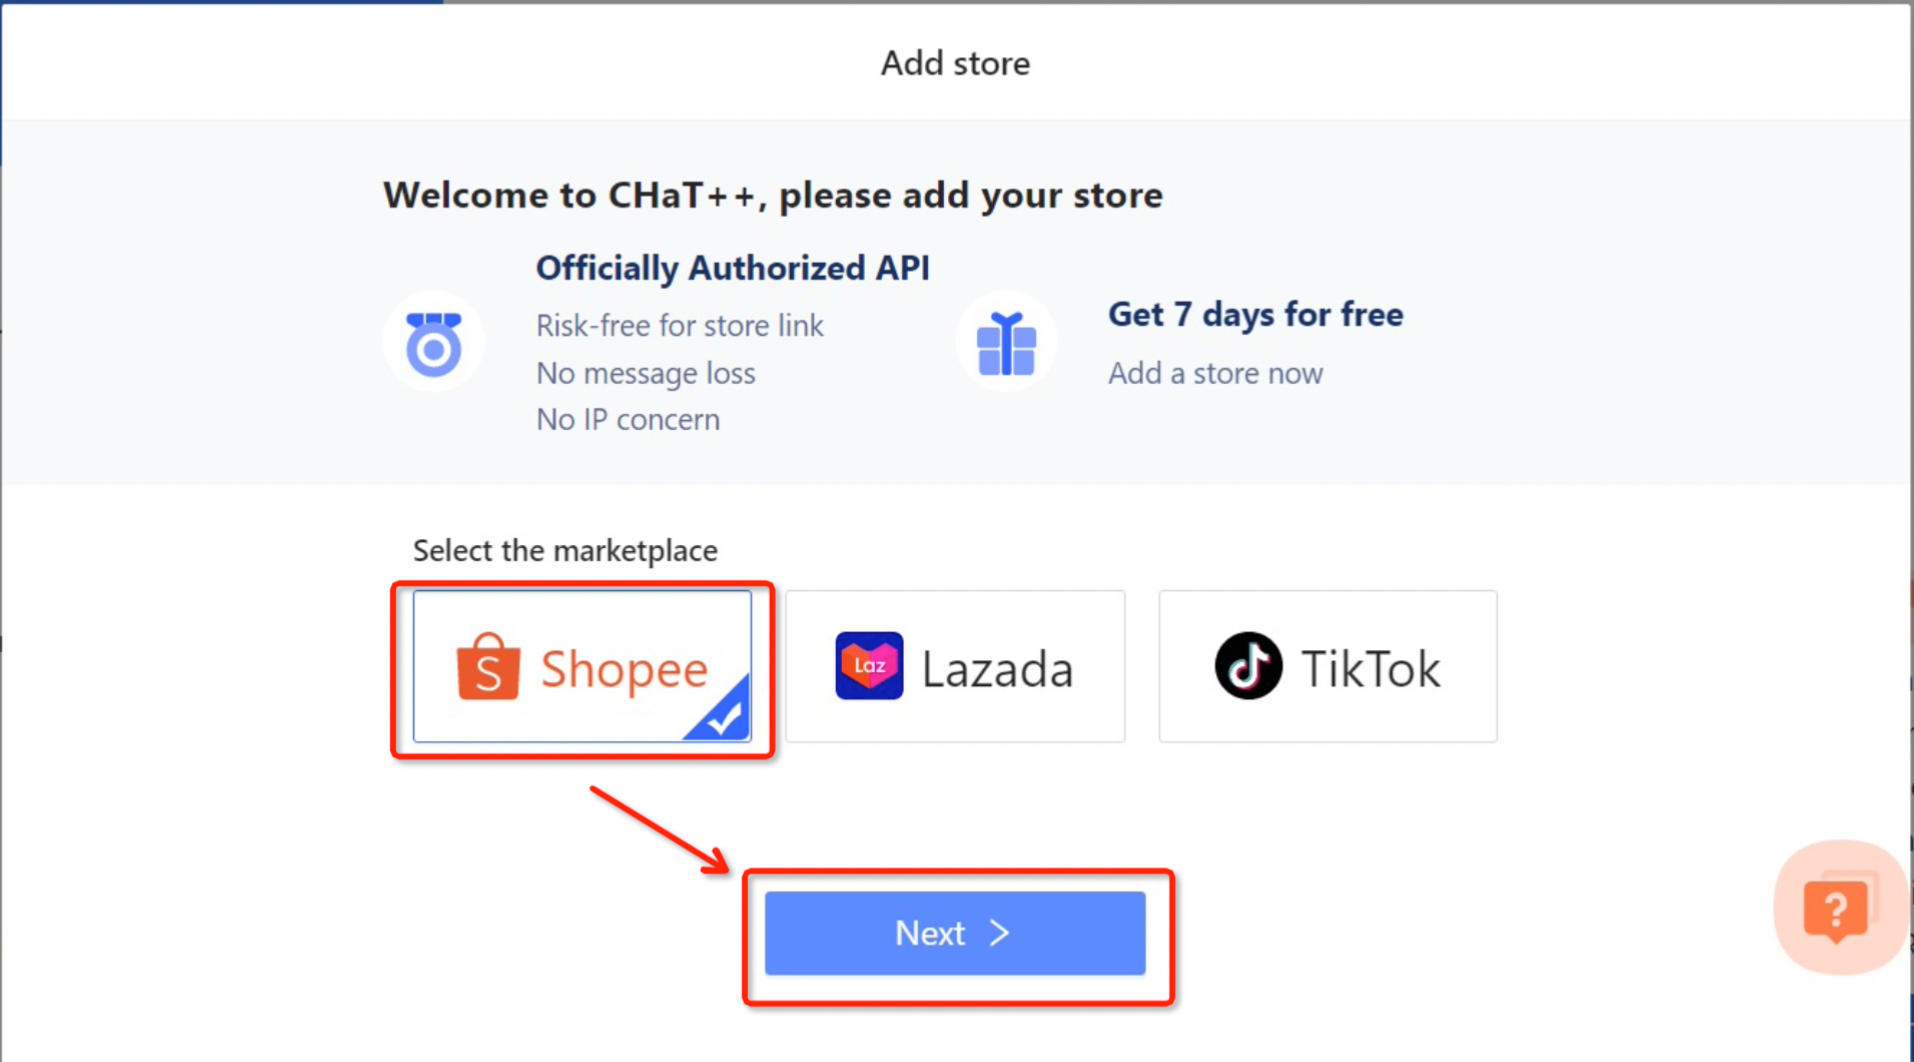
The steps to add a shop in daily operations:
Configuration-->Select Marketplace-->Add store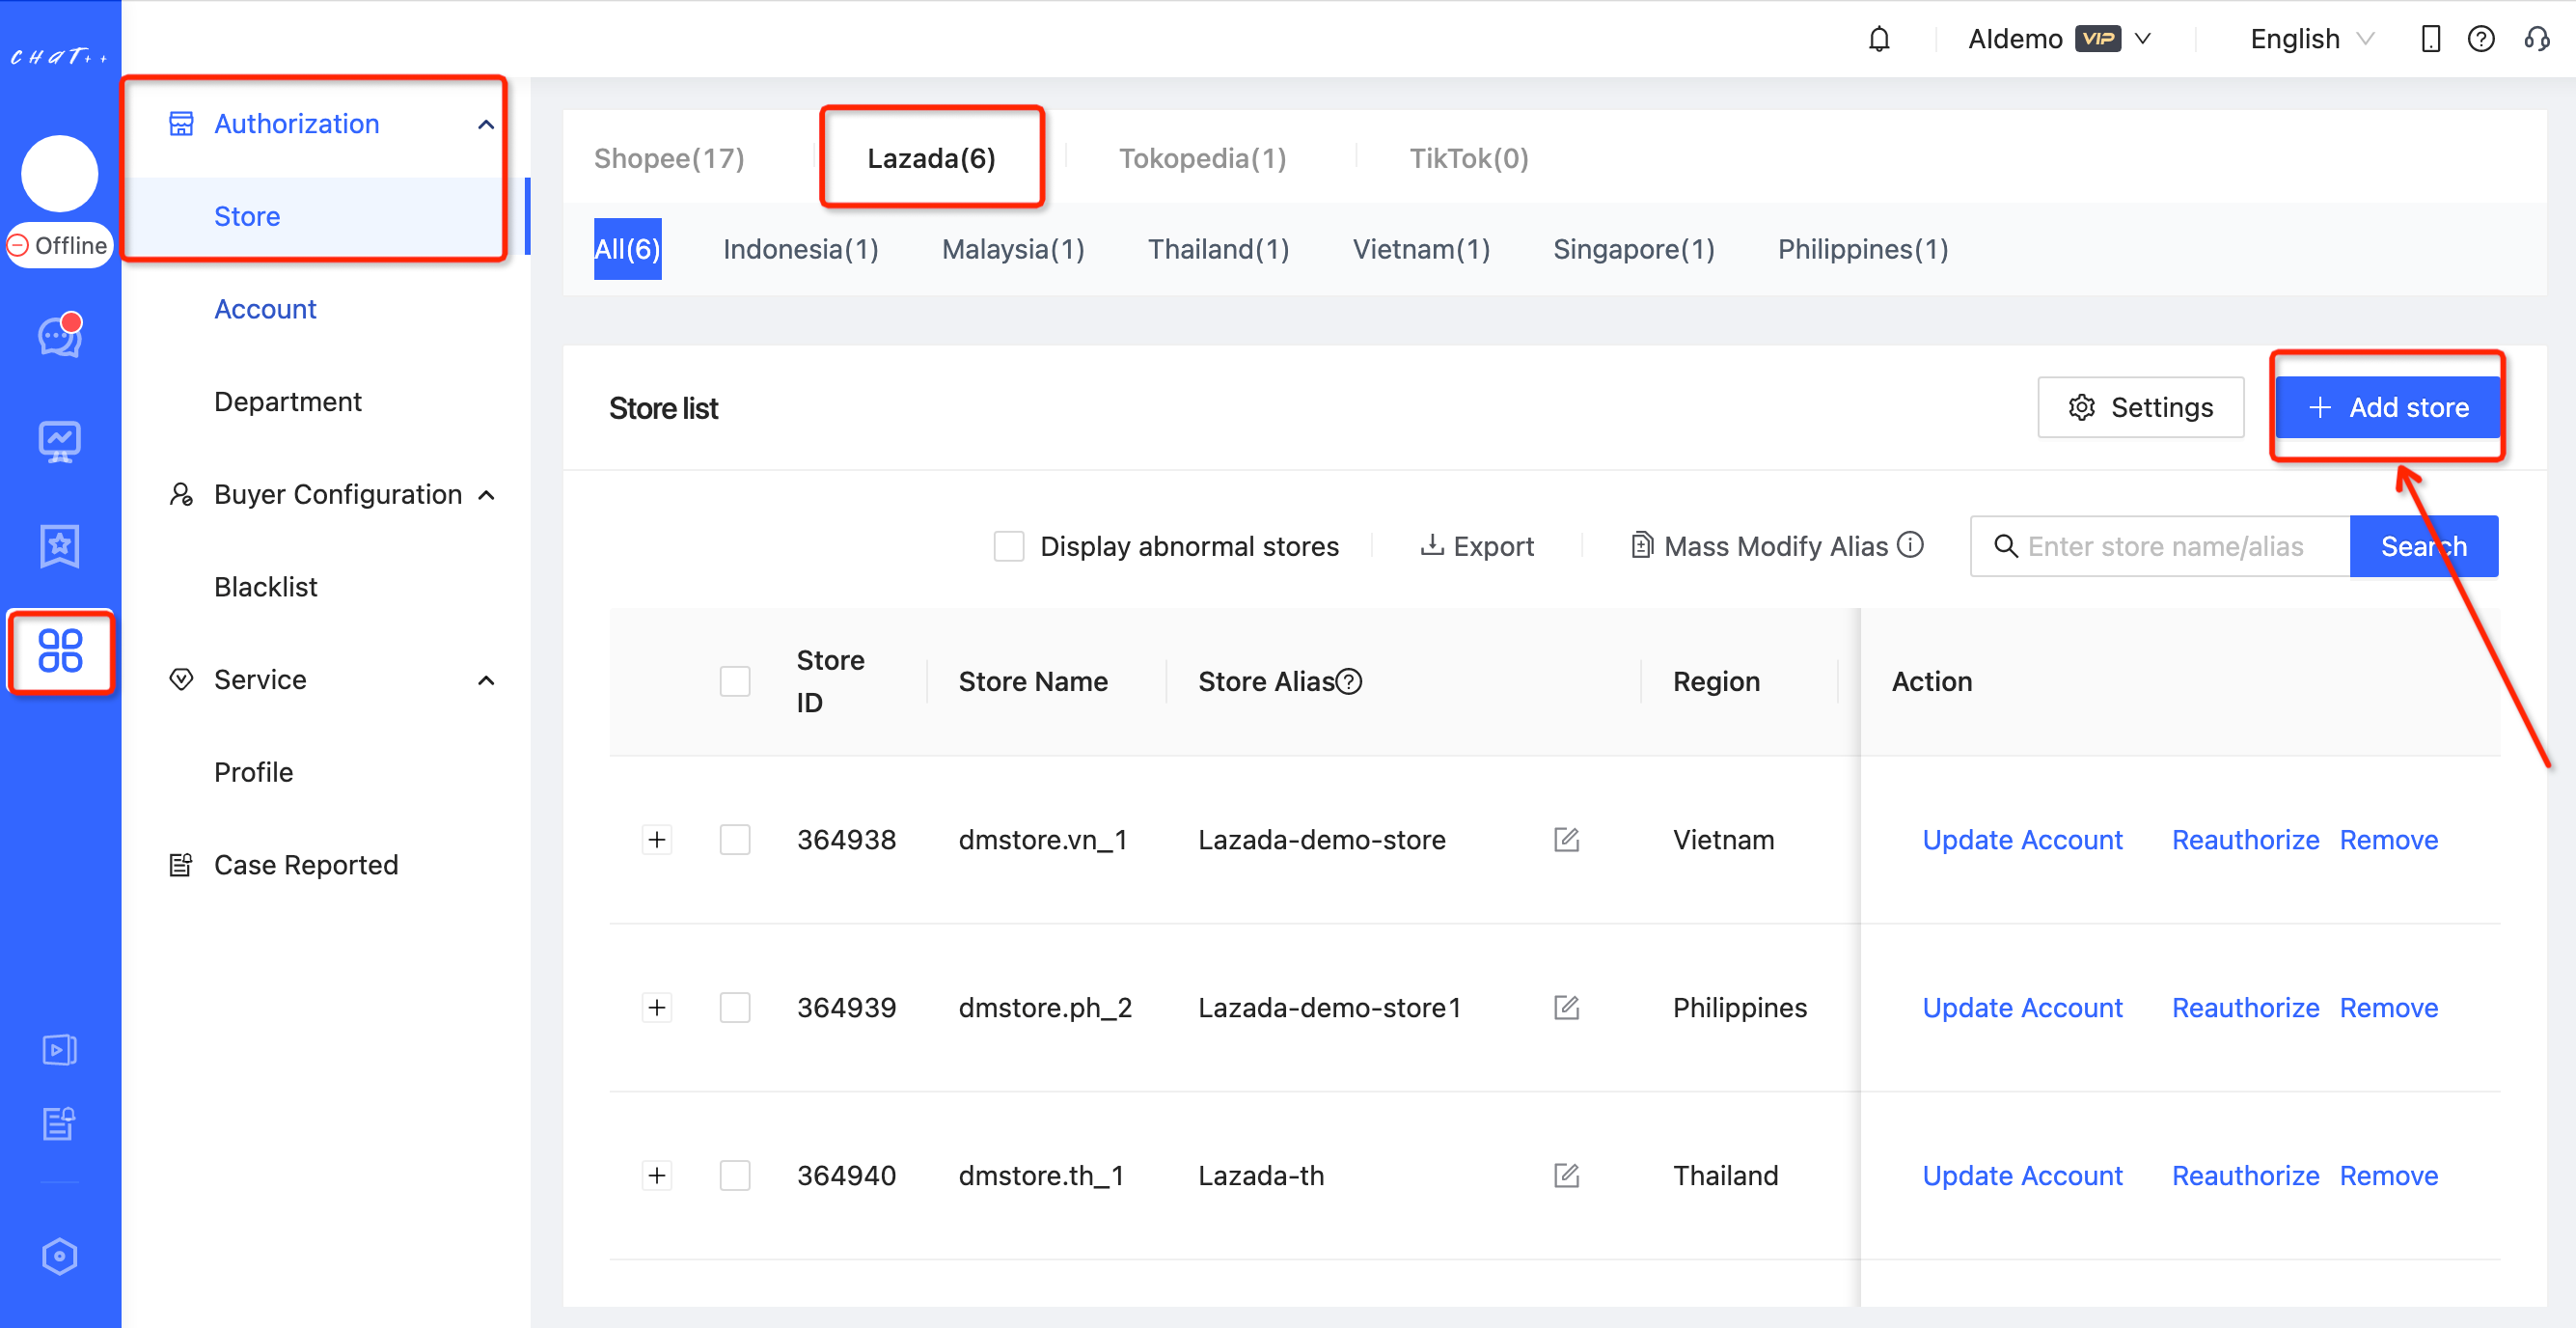
- Select store type
Select Local store--> select the store country site--> Click “Next”.
- Select adding method
Select Method1 --> Fill in Shopee account information--> Click “Next”.
Notes:
- Please verify that the selected store type, store country site, and account&password are correct.
- Authorization requires verification. Please open your mobile phone or login to your email account to prepare for receiving the verification code.
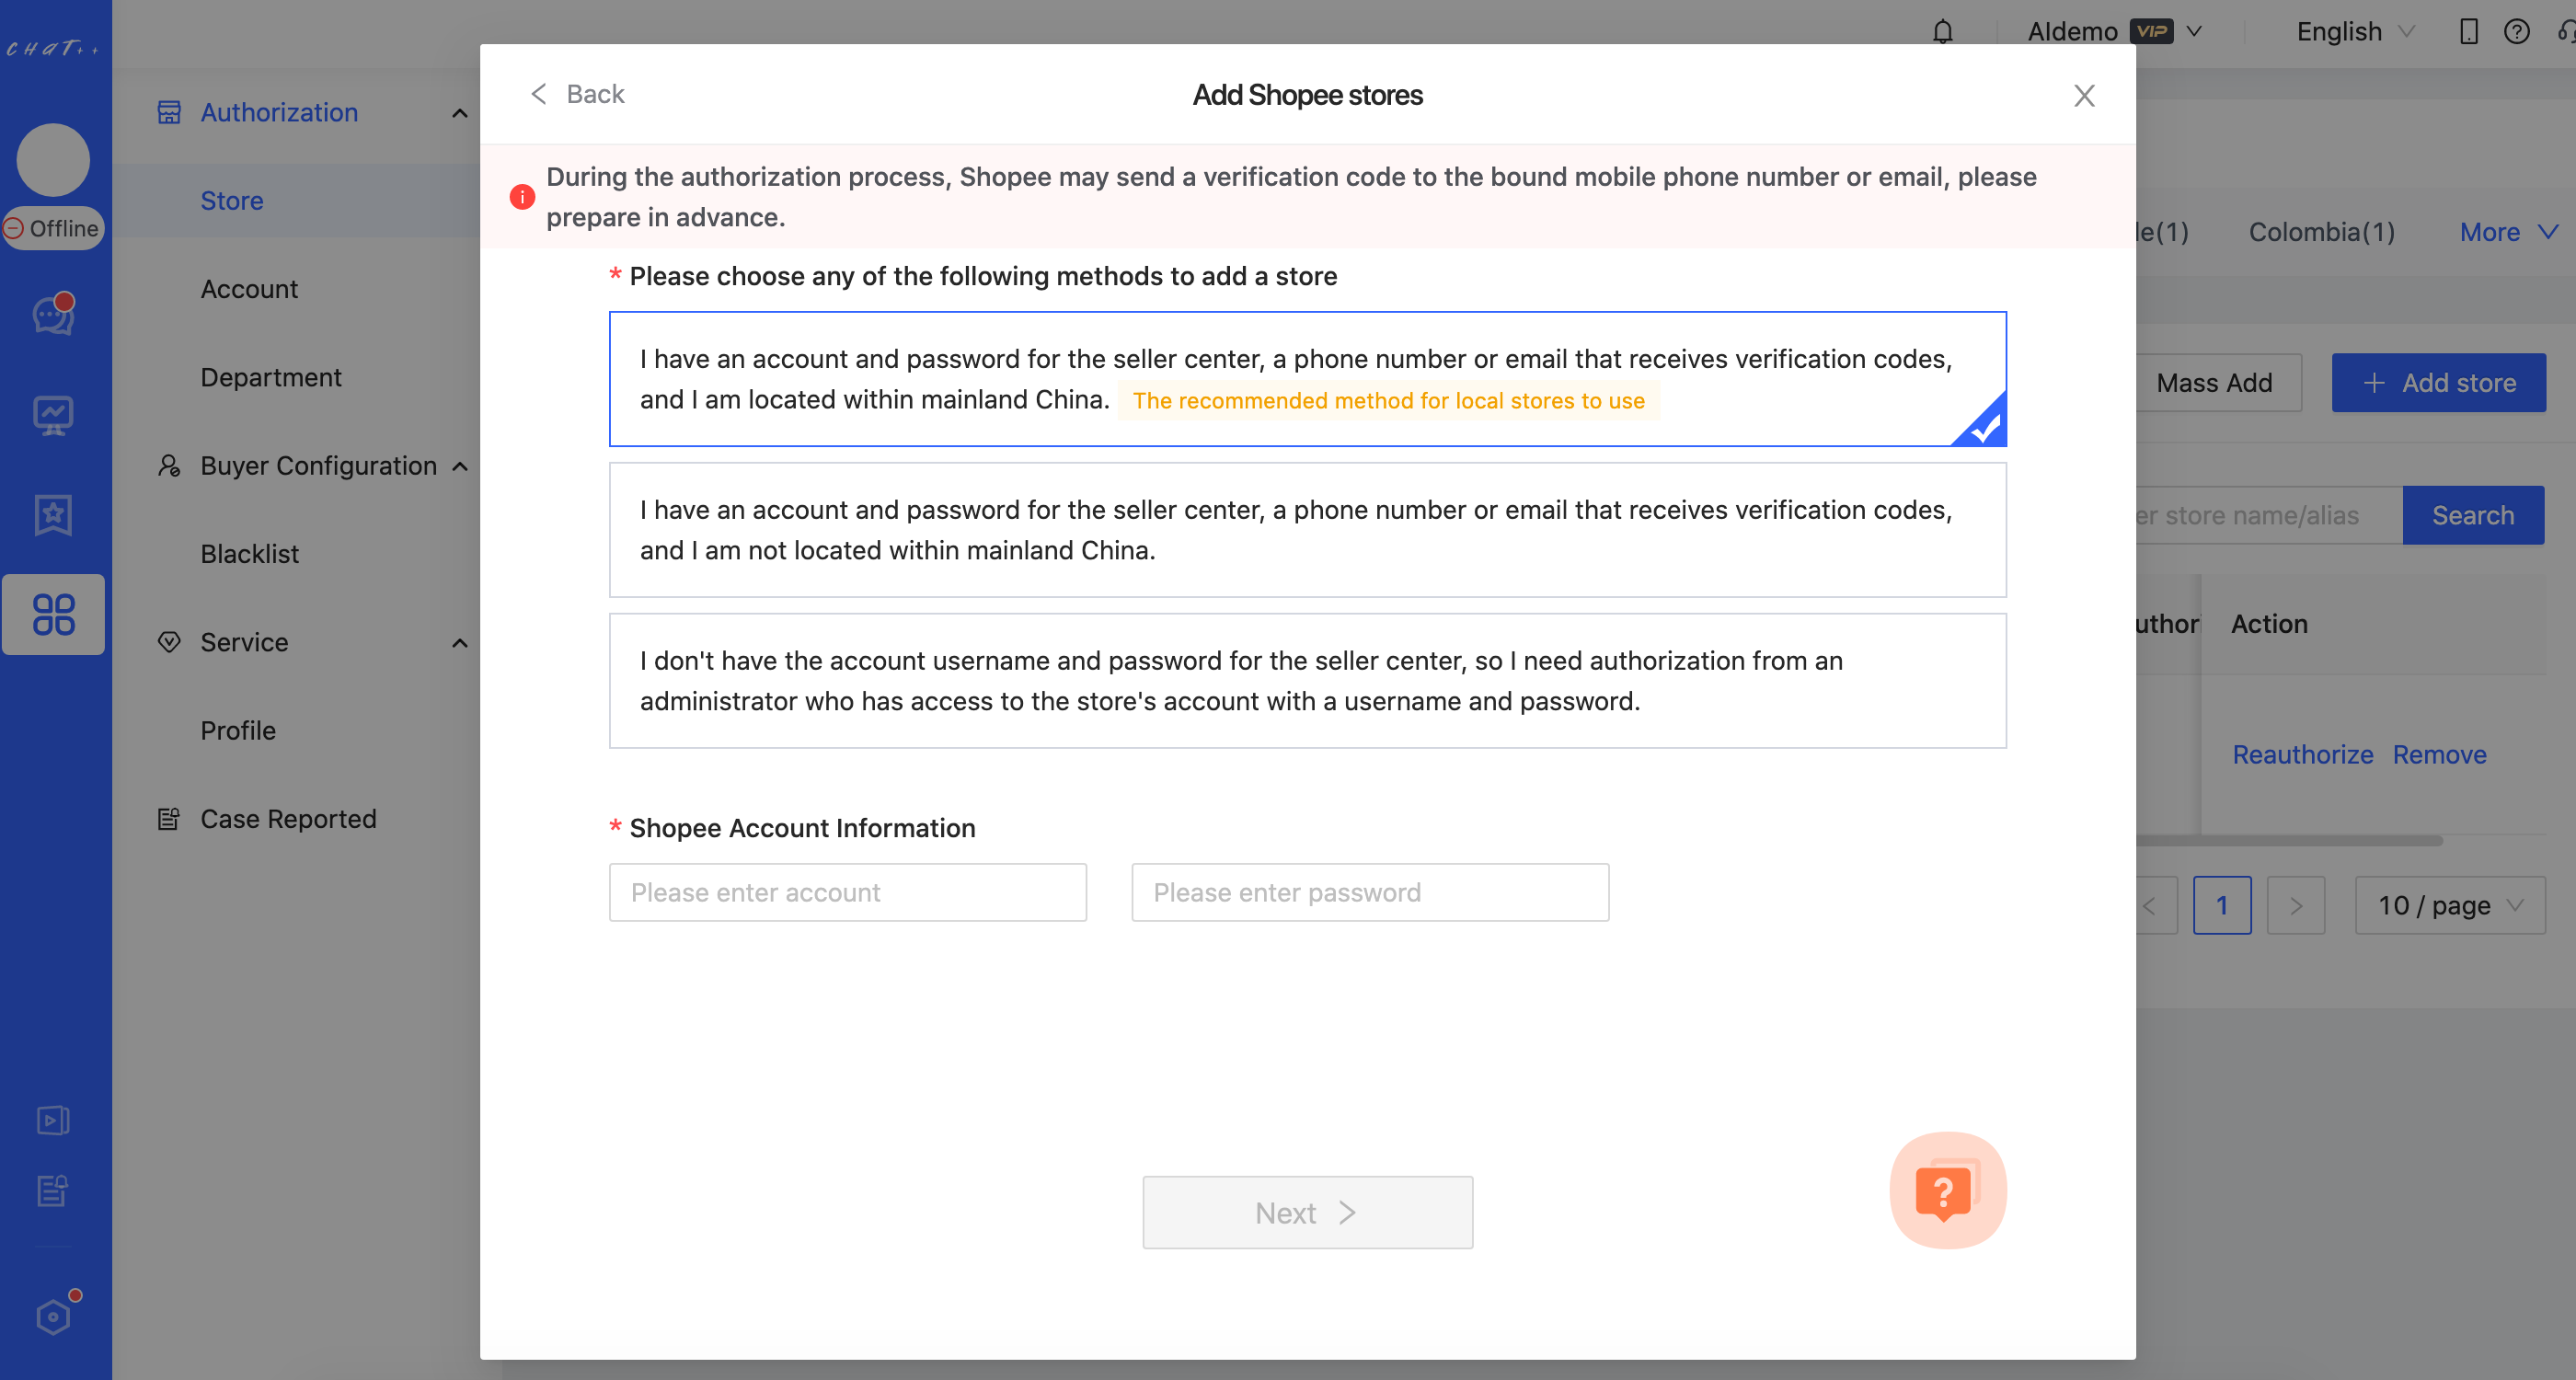
- Waiting for authorization success
Please wait for 10-15 minutes on the page shown in the following picture. If the waiting time is too long, you can click on 'Add Store Again' to try adding again.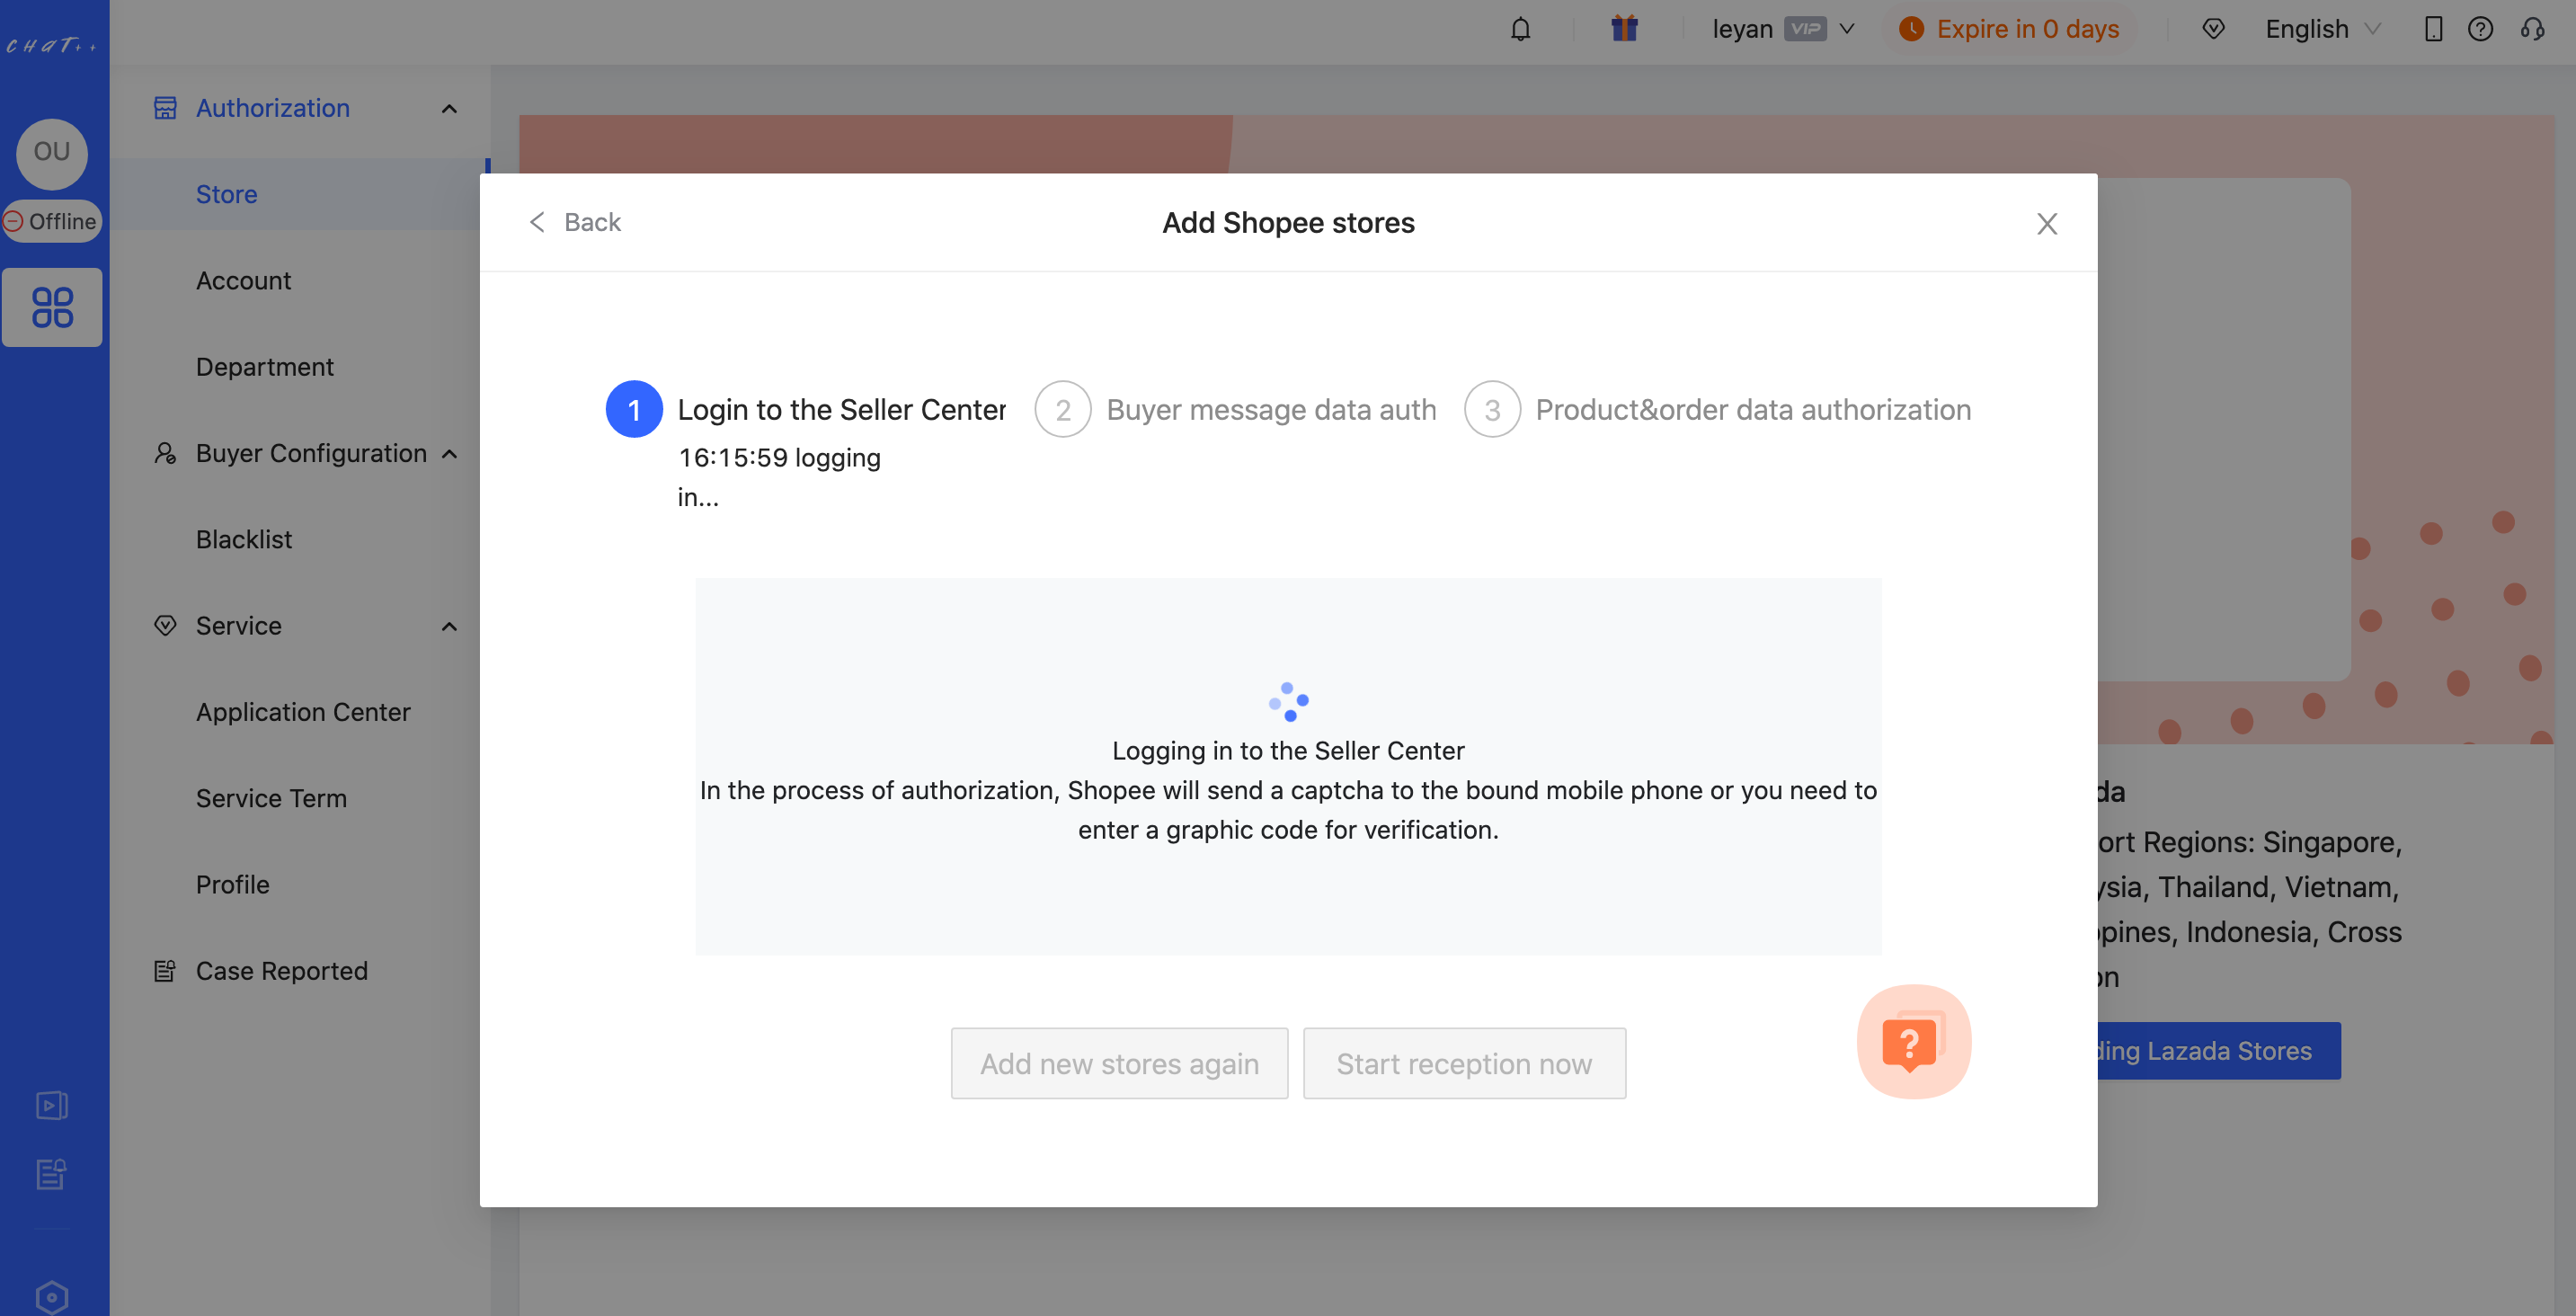
- Authorization success
If you receive a 'login failed' prompt, you don't need to take any action. ChatPlusAI will automatically retry until the authorization is complete.
After successfully adding the store, you can start receiving customers.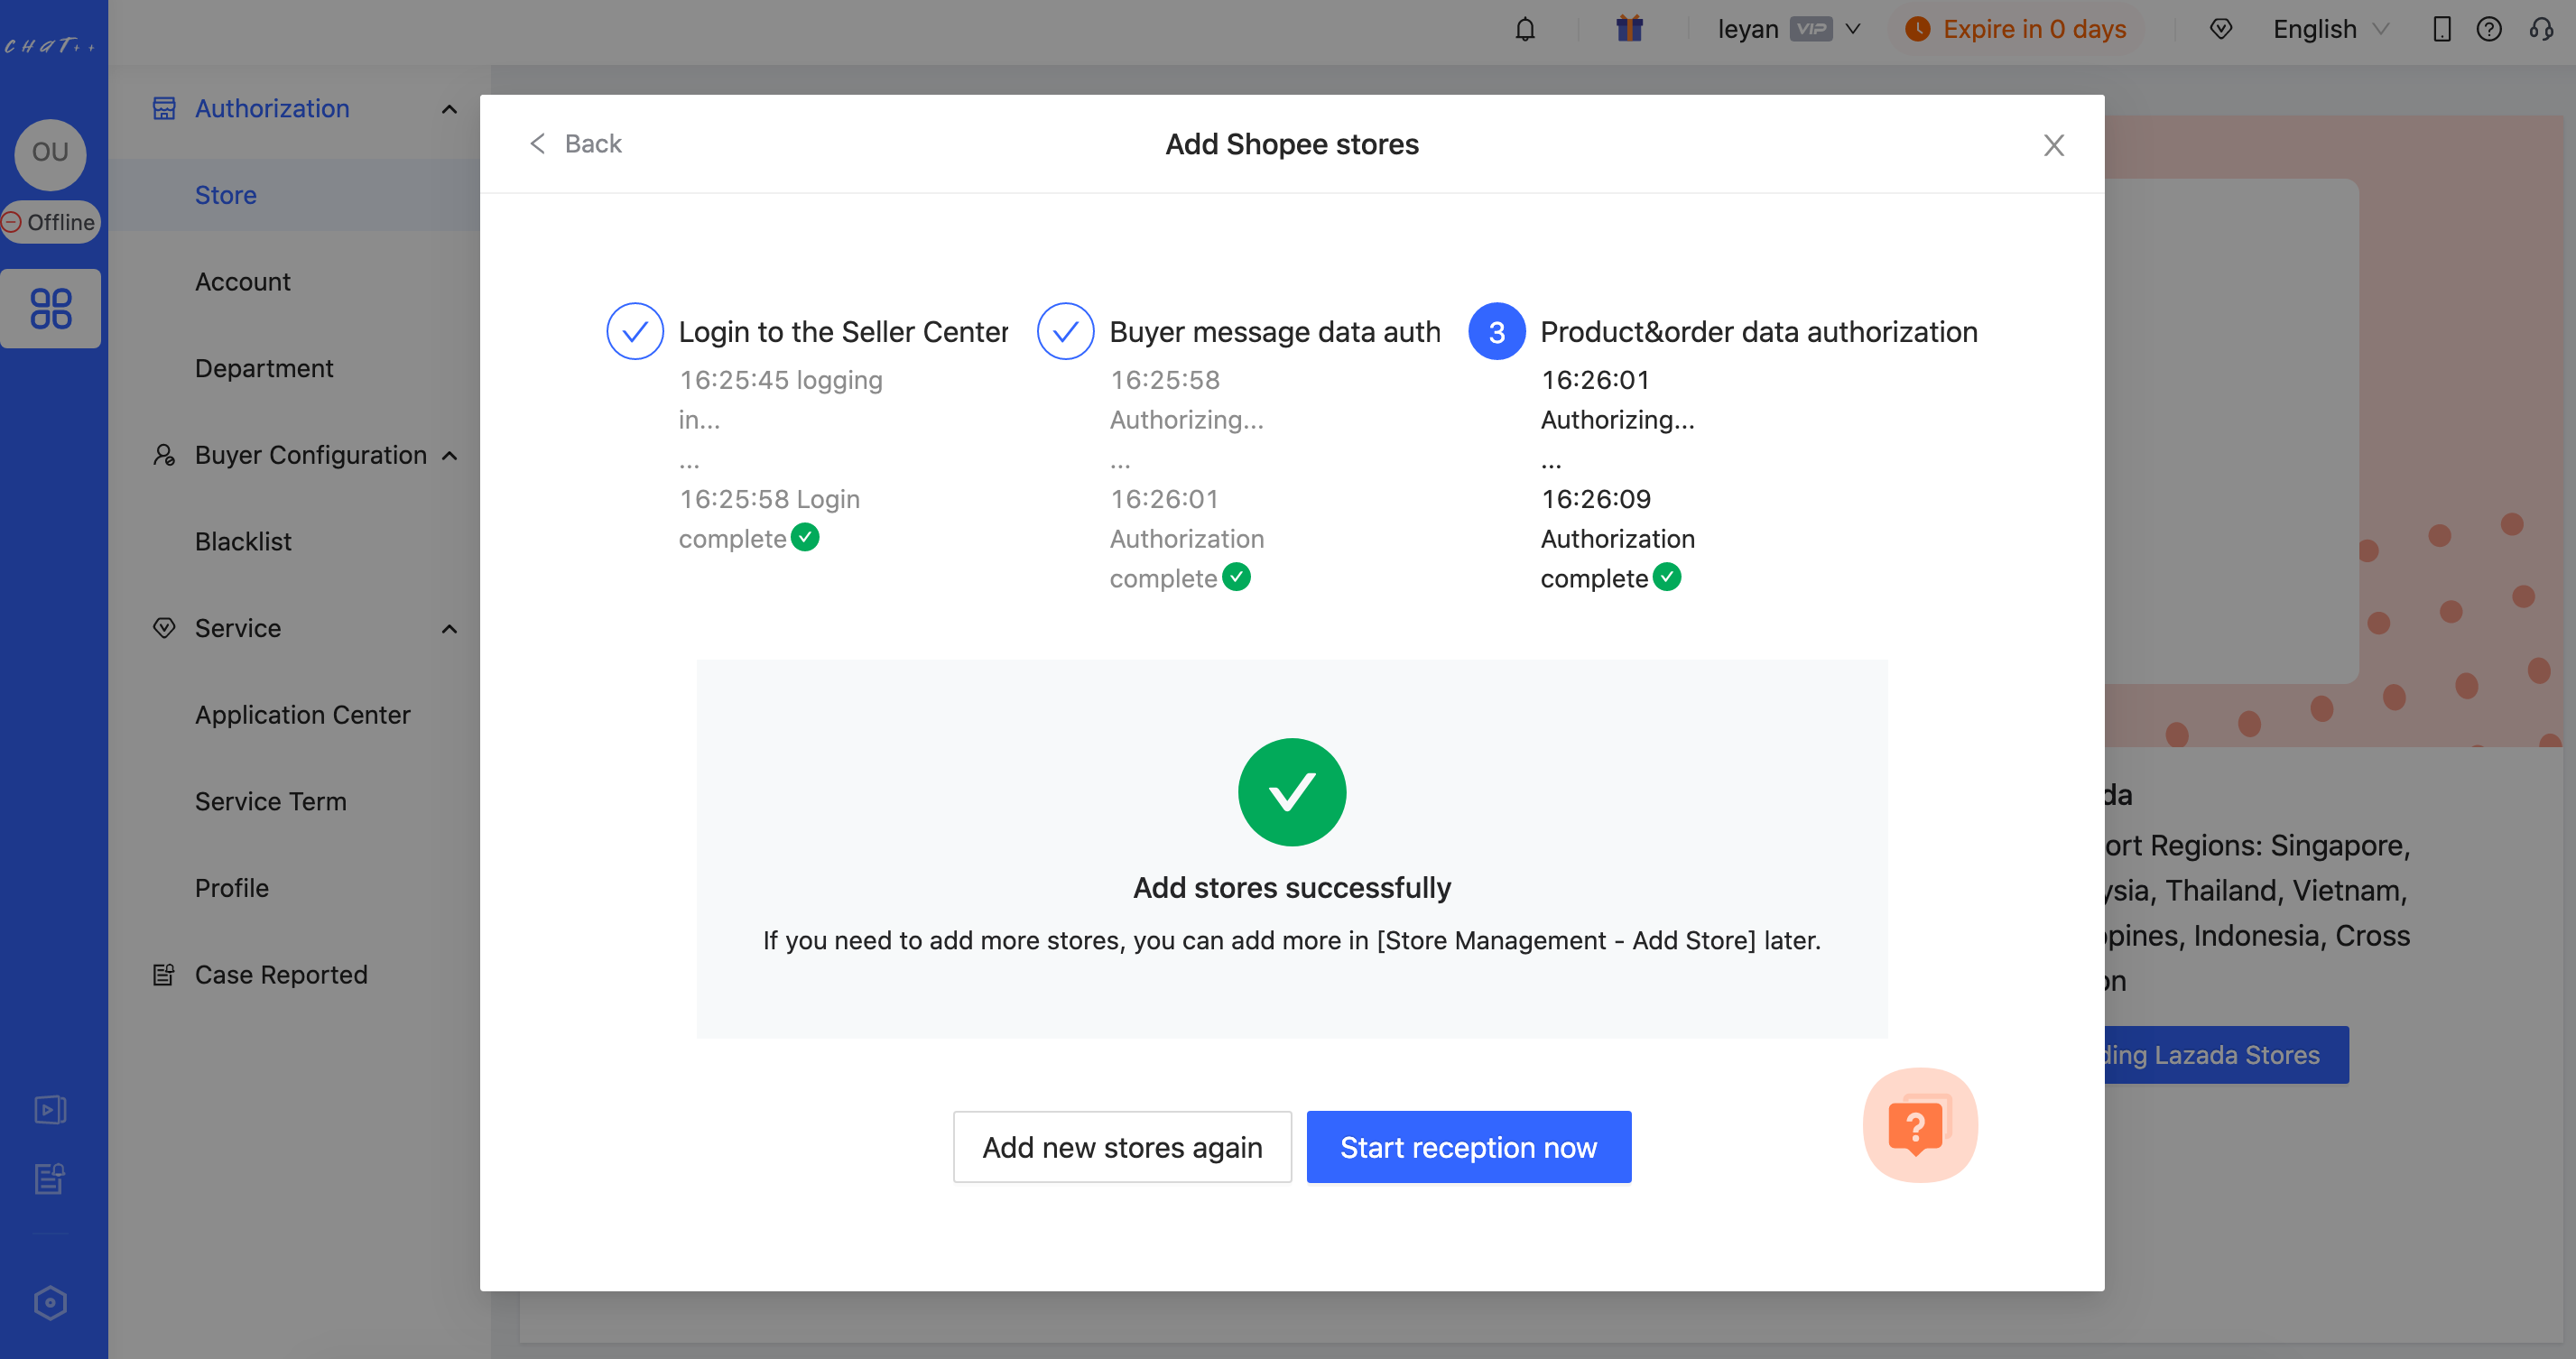
After adding the store for the first time, please be patient and wait for 15 minutes. The system is automatically synchronizing the message content of the past 30 days and the order information of the past 90 days.
Method2:Go to the seller center to authorize with your account and password.
Precautions:
During the authorization process, Shopee official will send a verification code. Please prepare your mobile phone if you use a mobile phone number to log in to Shopee. If you use an email to log in to Shopee, please log in to your email in advance to receive the verification code.
Step
- Enter the store authorization page
After the first login to ChatPlusAI, you will be directed to the guided page for adding a store.
Select Shopee --> Click “Next”.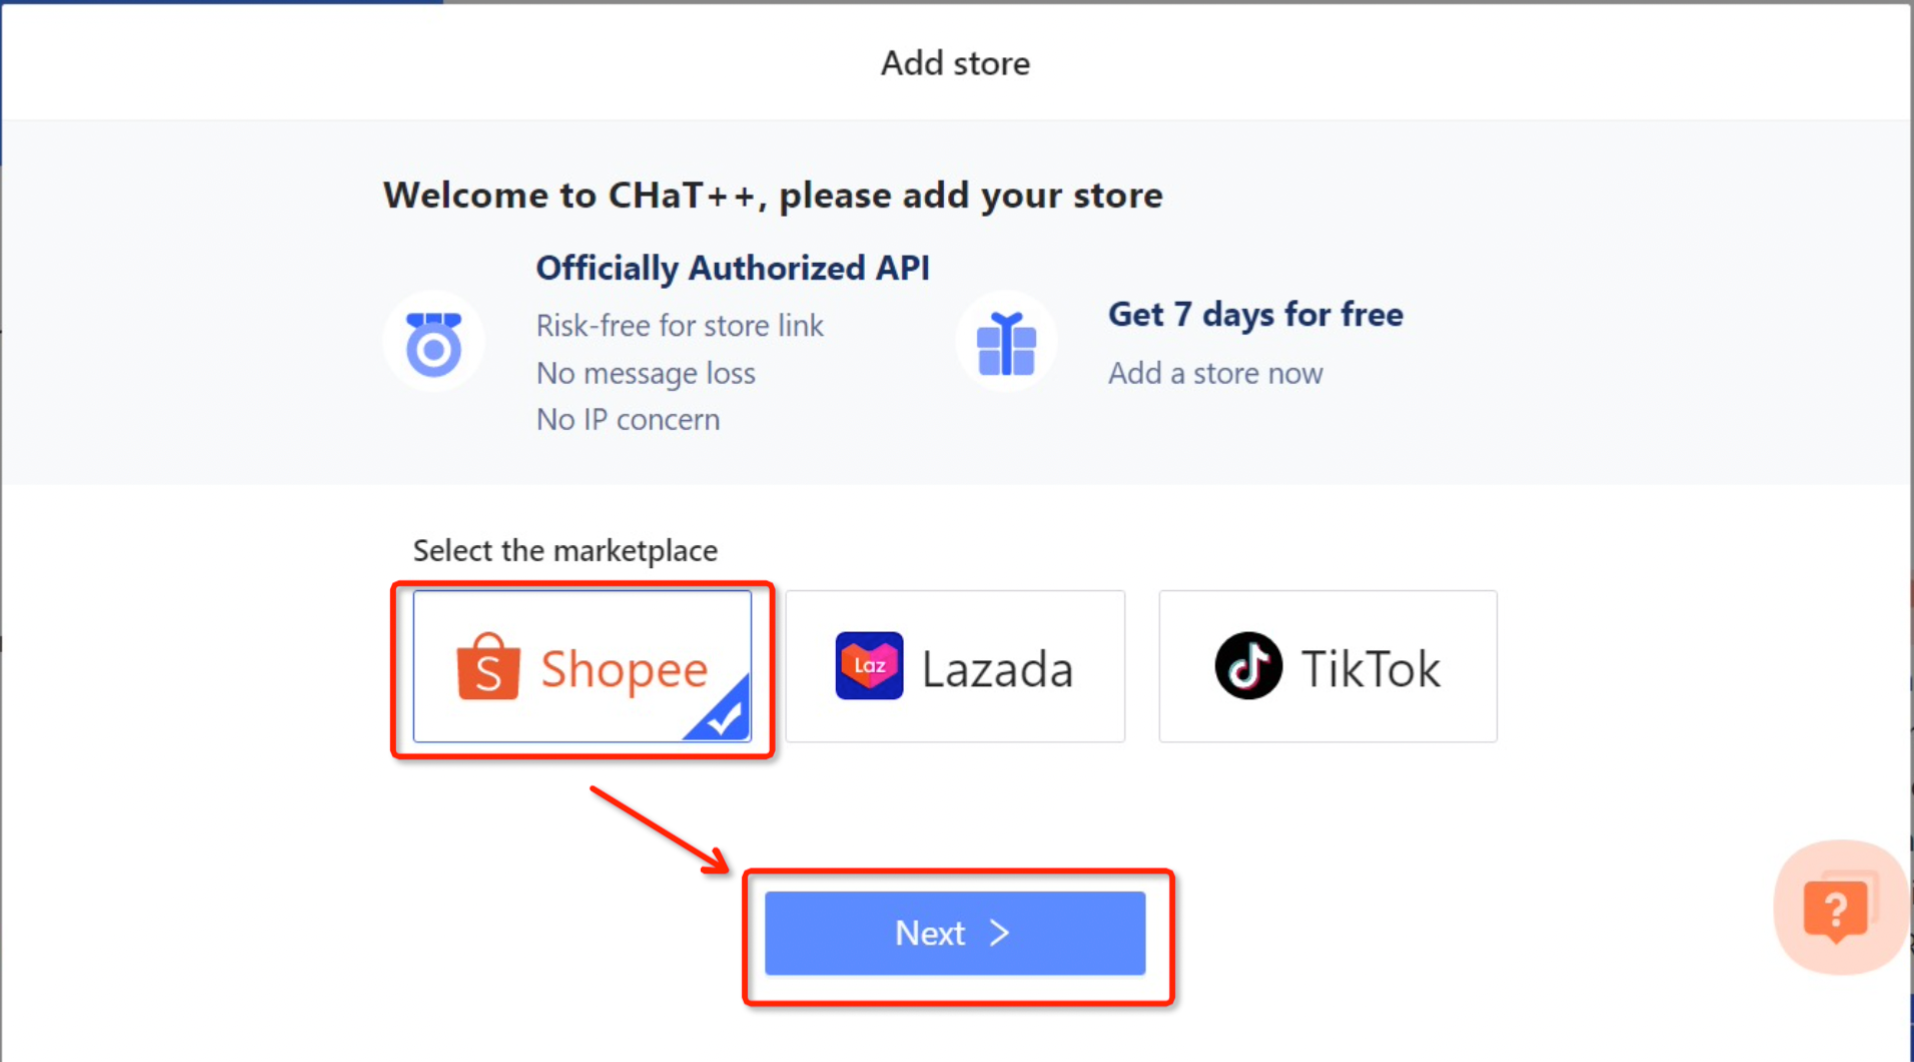
The steps to add a shop in daily operations:
Configuration-->Select Marketplace-->Add store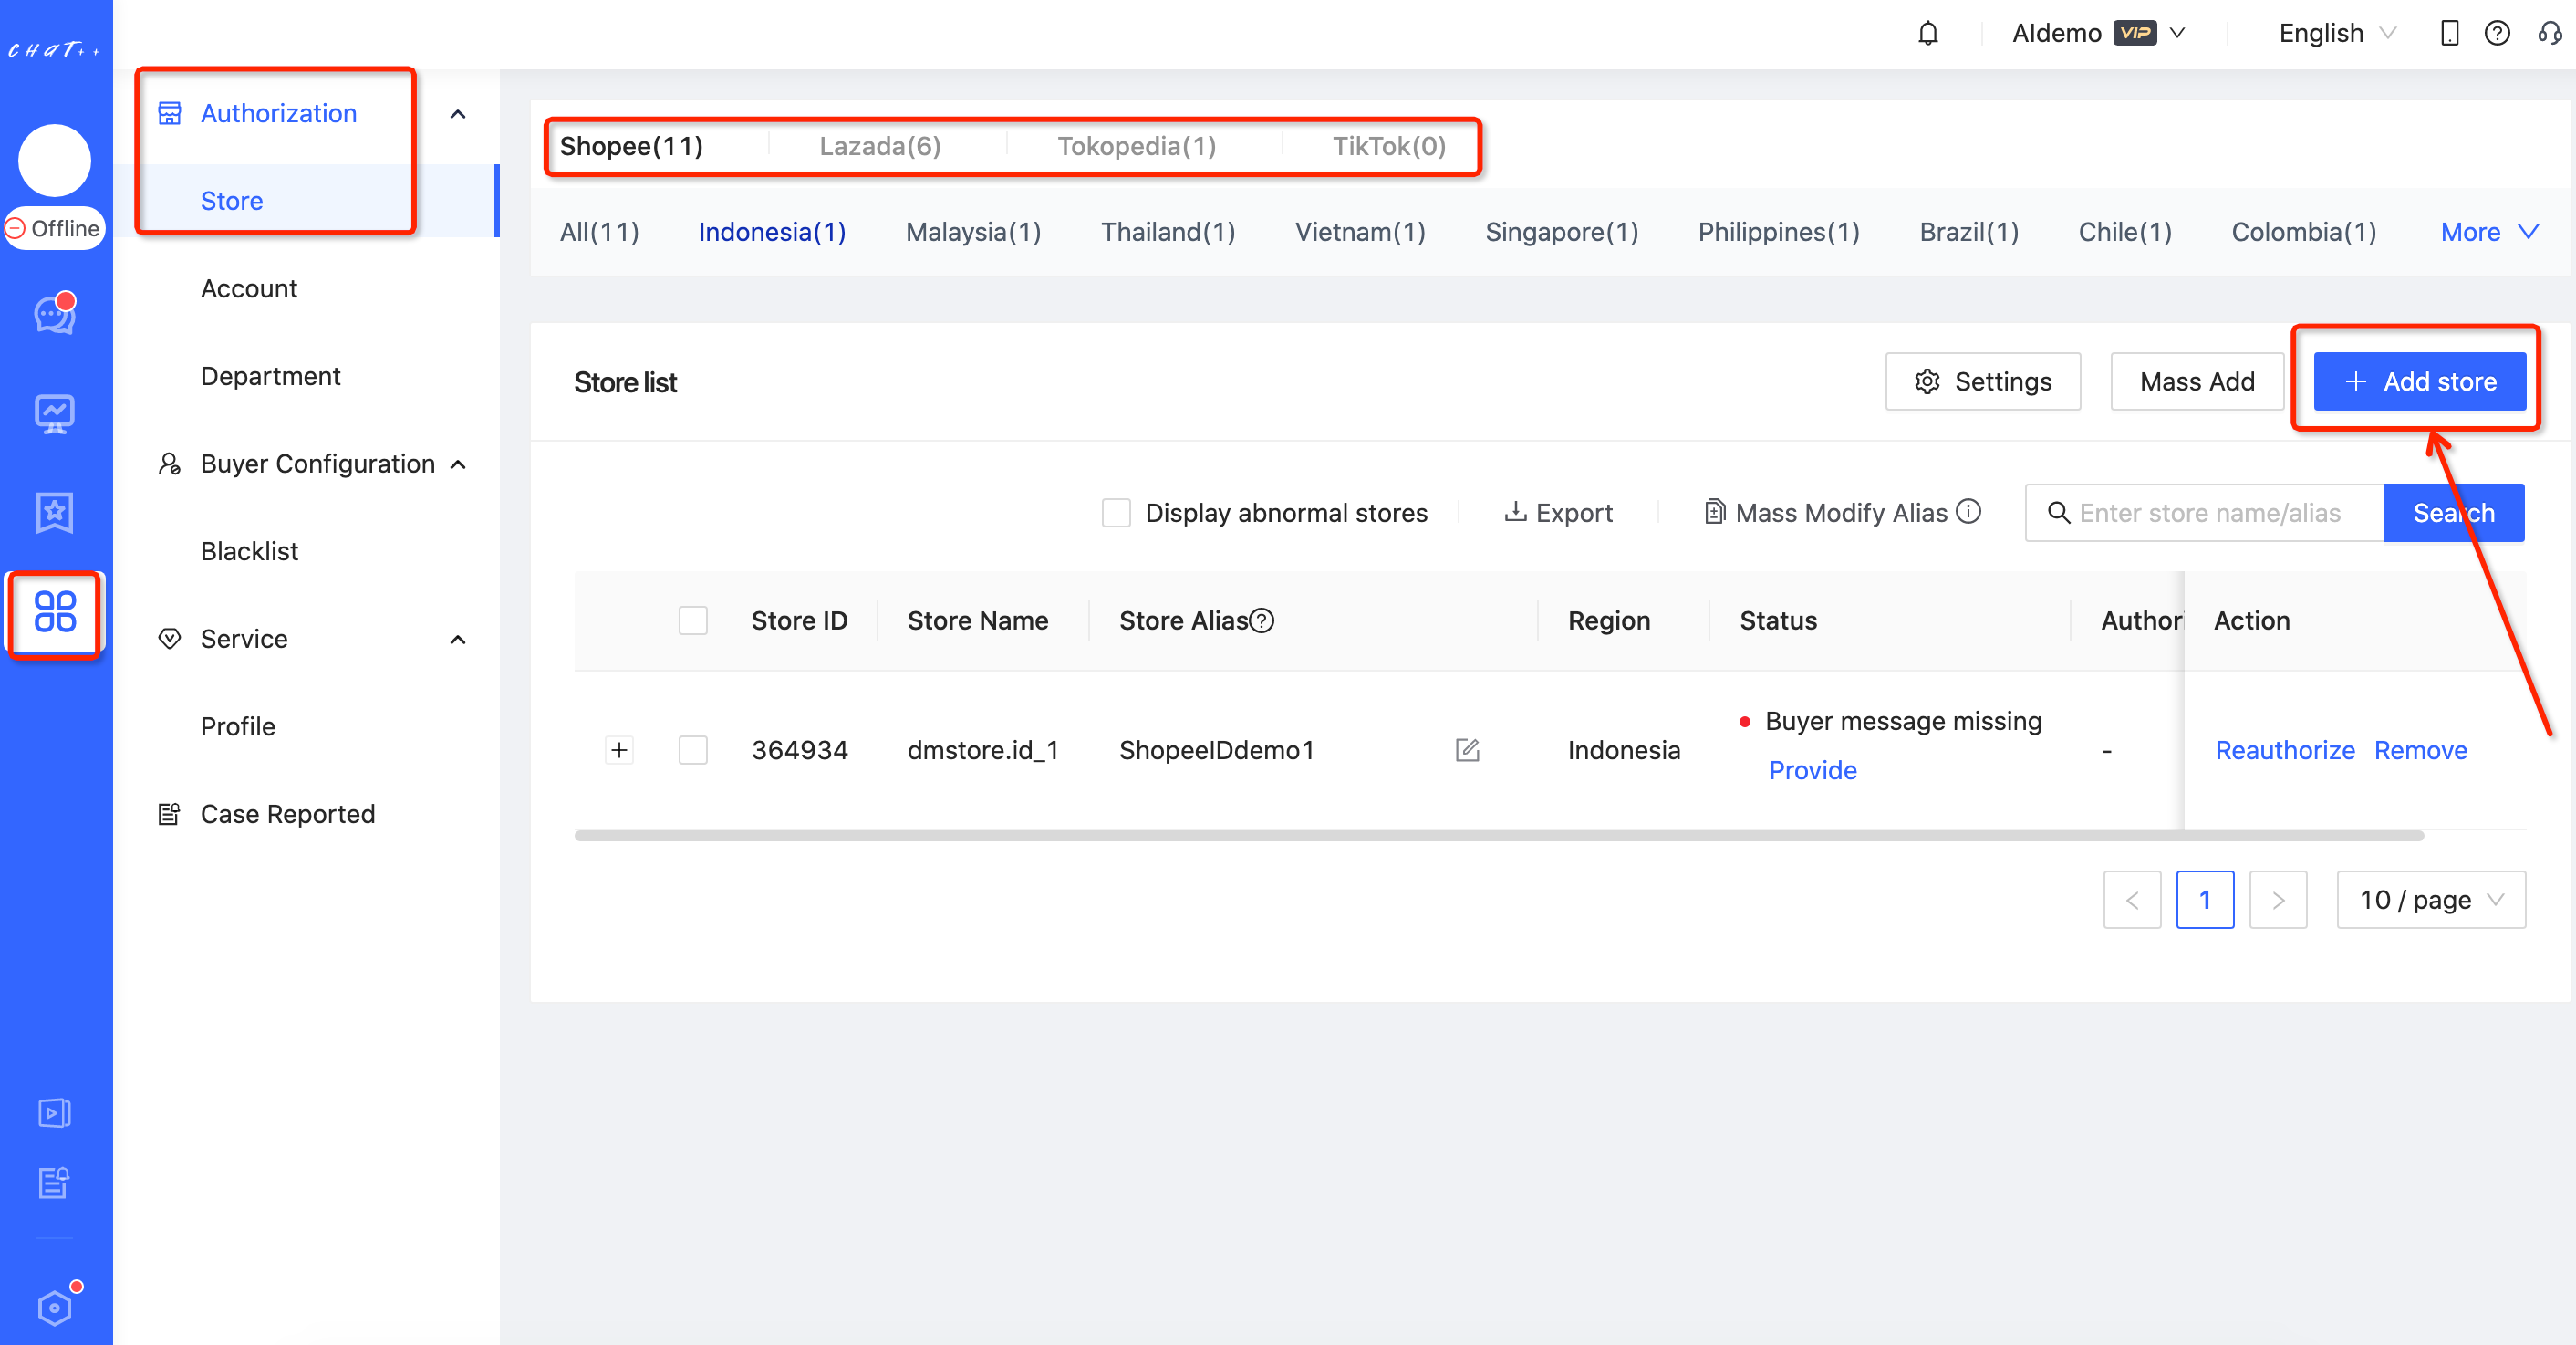
- Select store type&country
Select Local store--> select the store country site--> Click “Next”.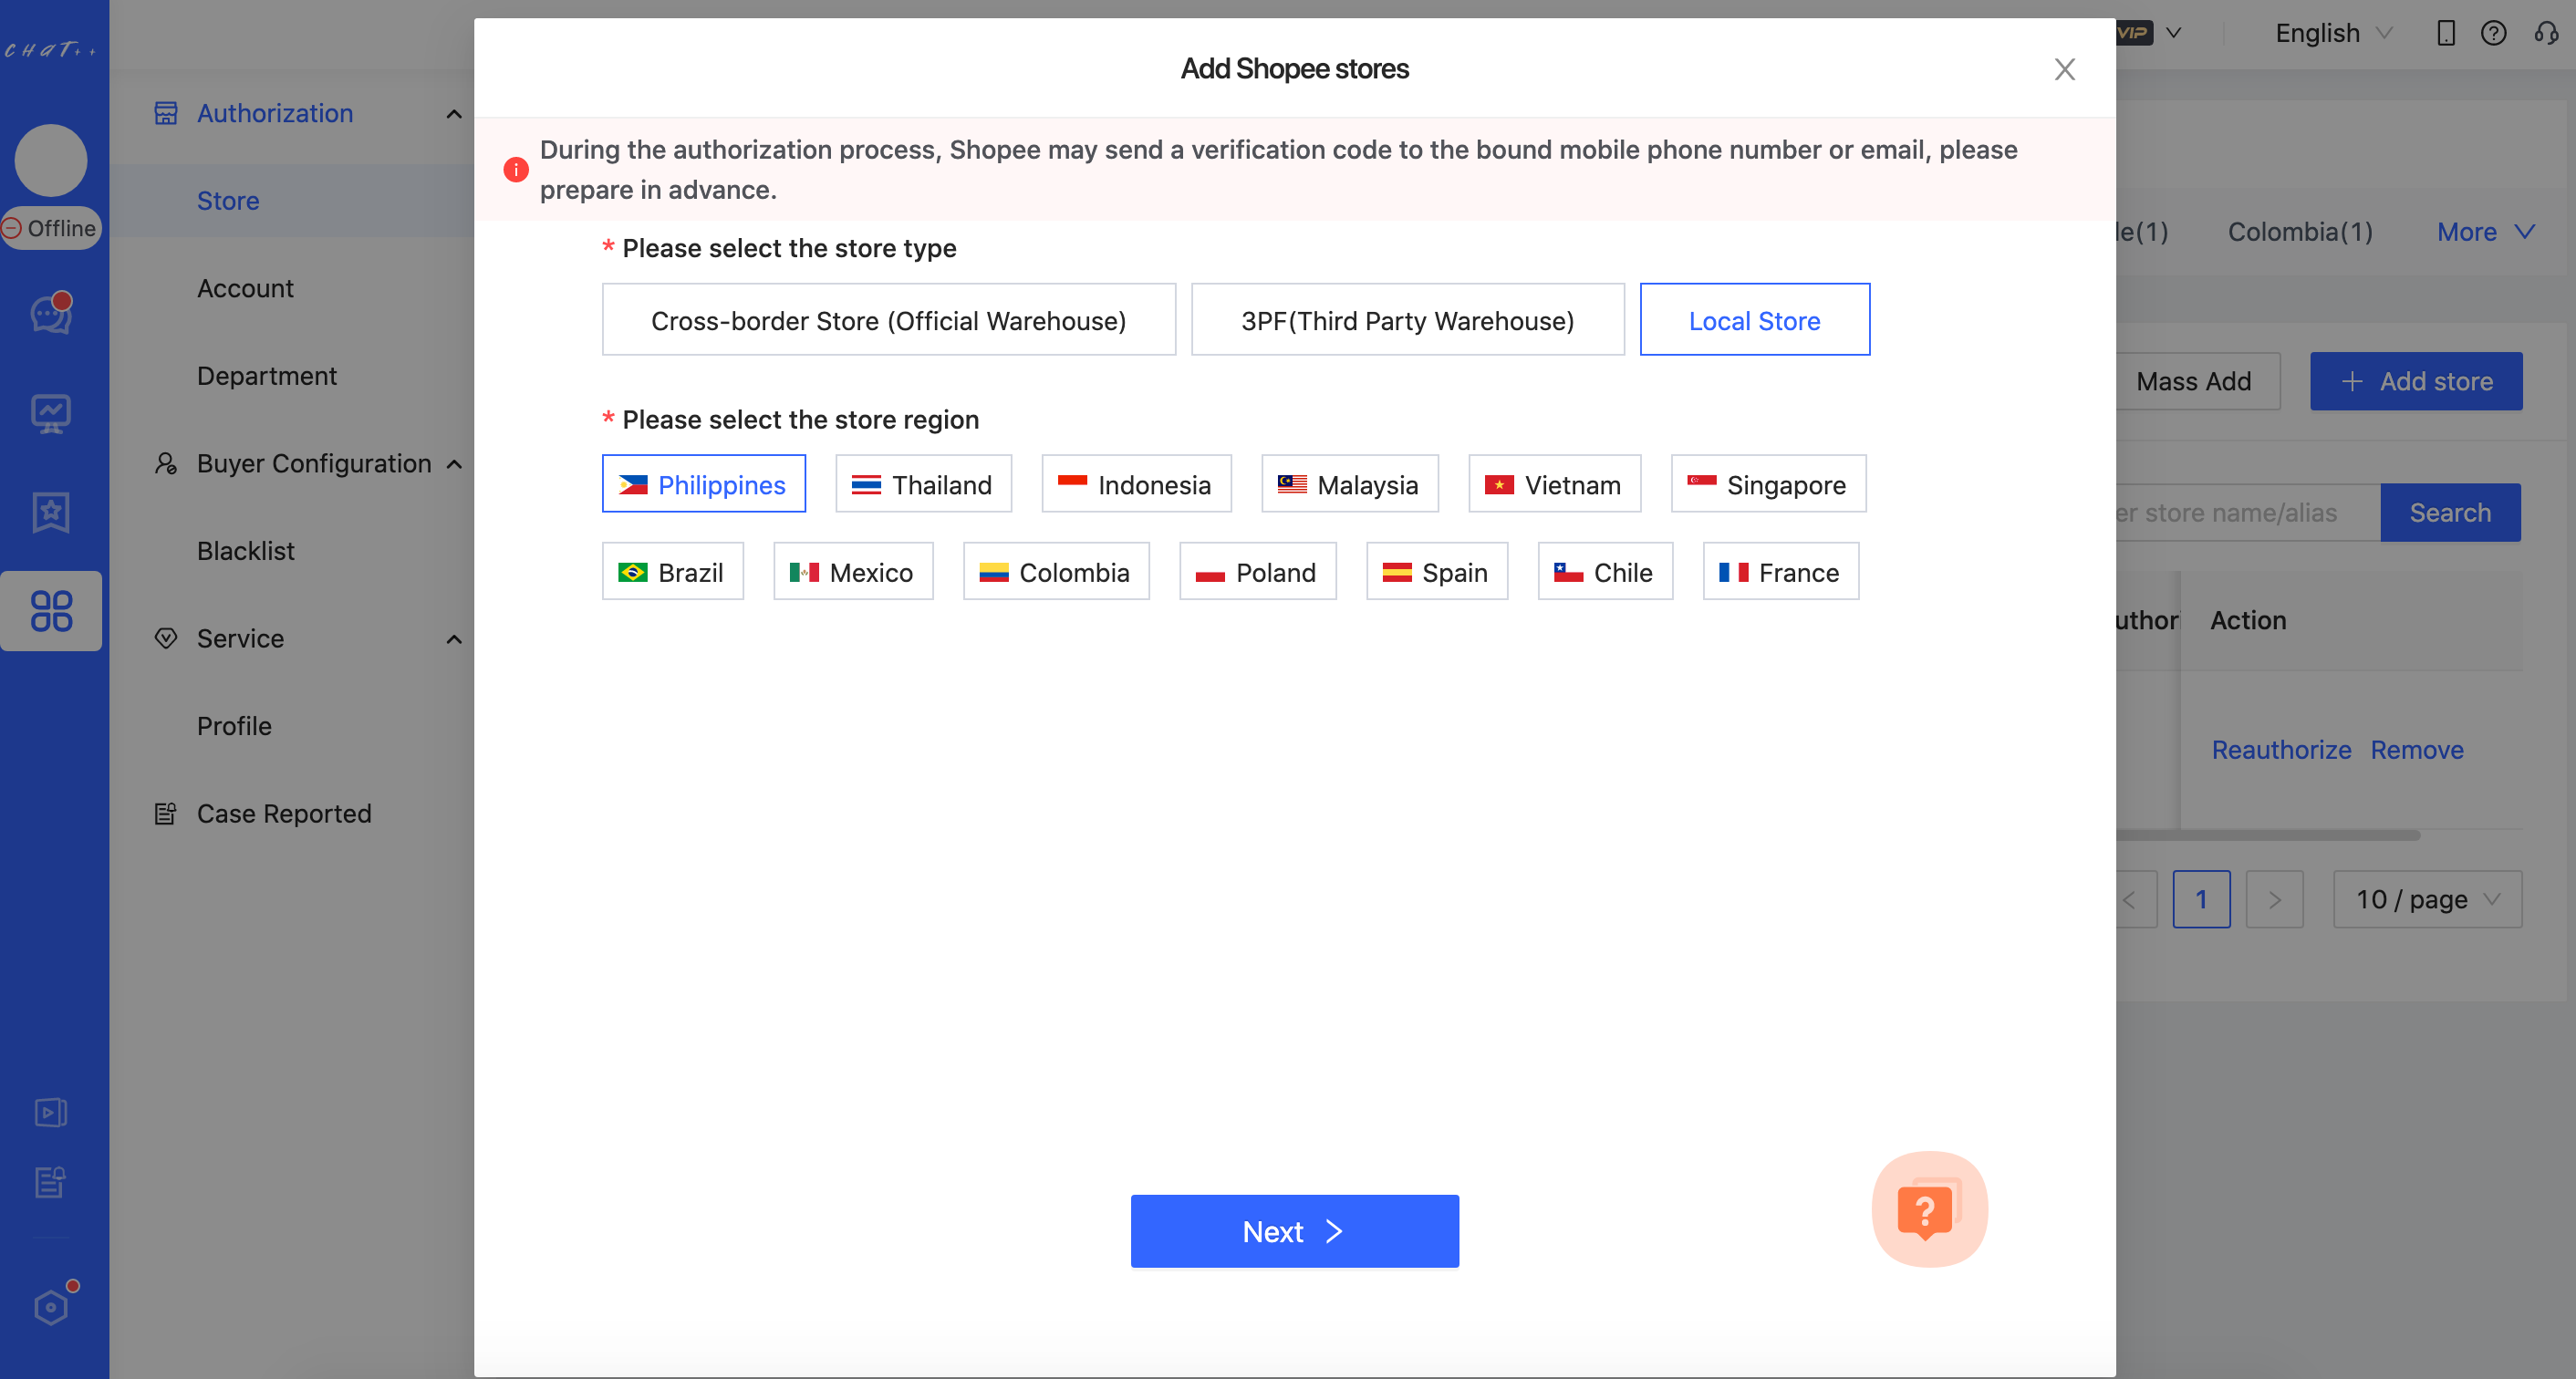
- Select adding method
Select Method2 --> Click “Next”.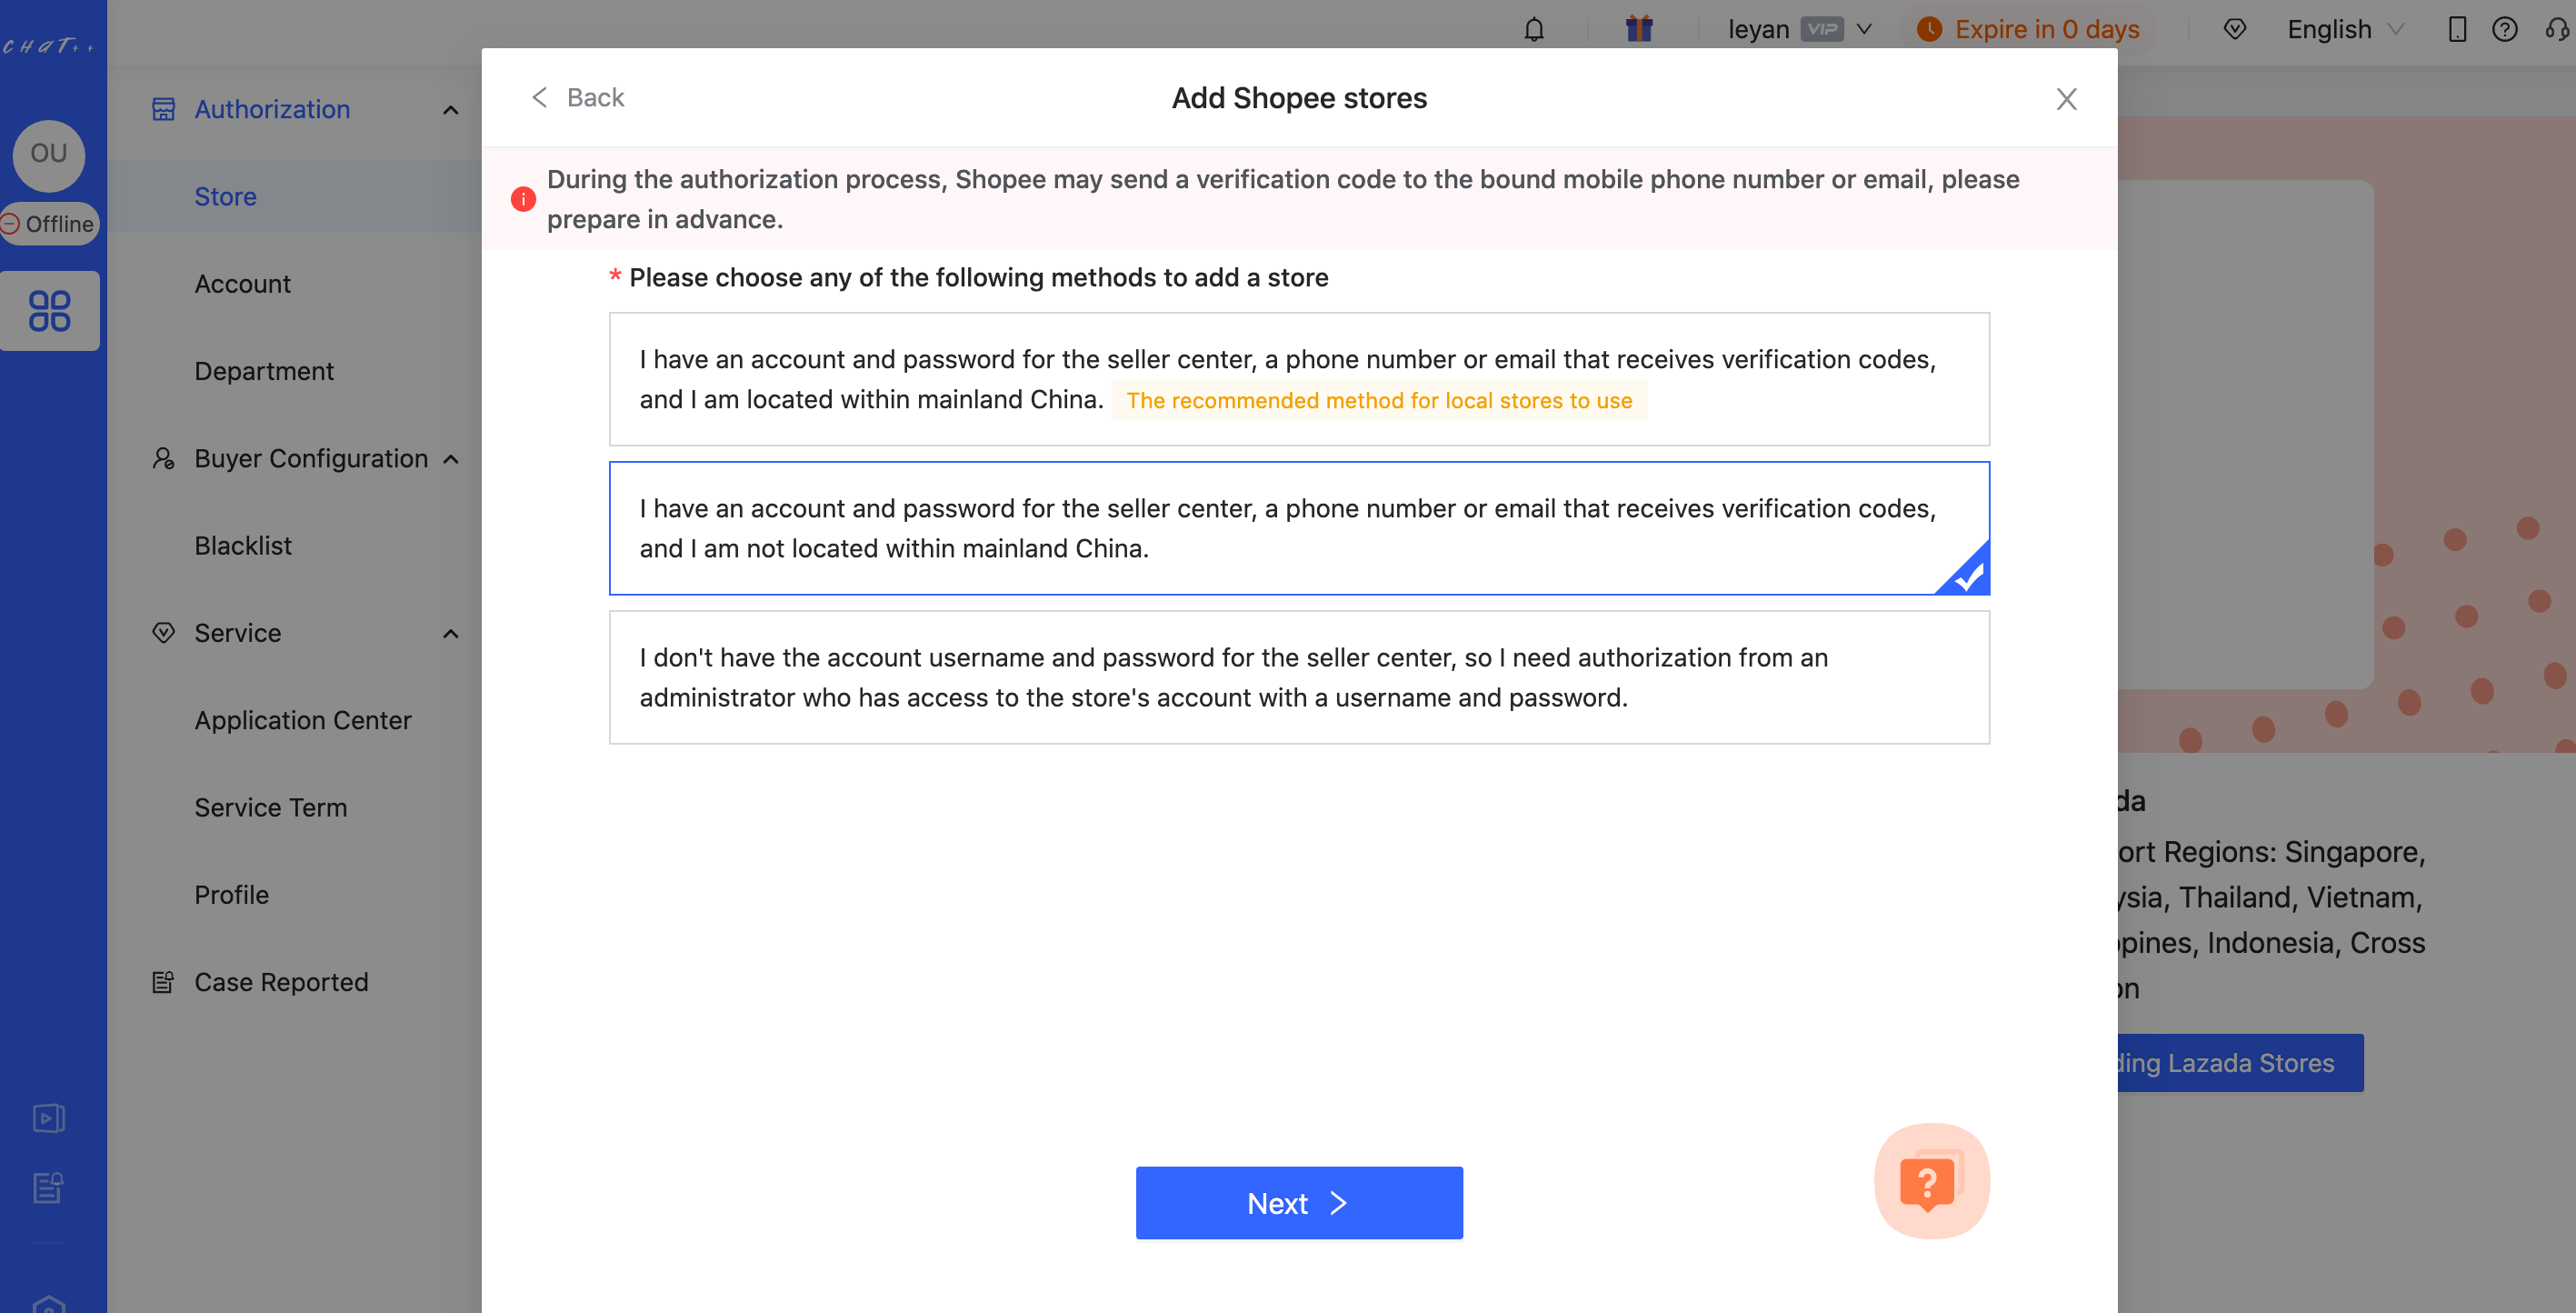
4. Authorize on Shopee
(1) Redirect to Shopee seller center for authorization.
Buyer message data authorization:
Click “Go to Seller Center” , will redirect to Shopee seller center for authorization.
Product&order data authorization:
The steps are the same as the buyer message data authorization. Simply repeat the process.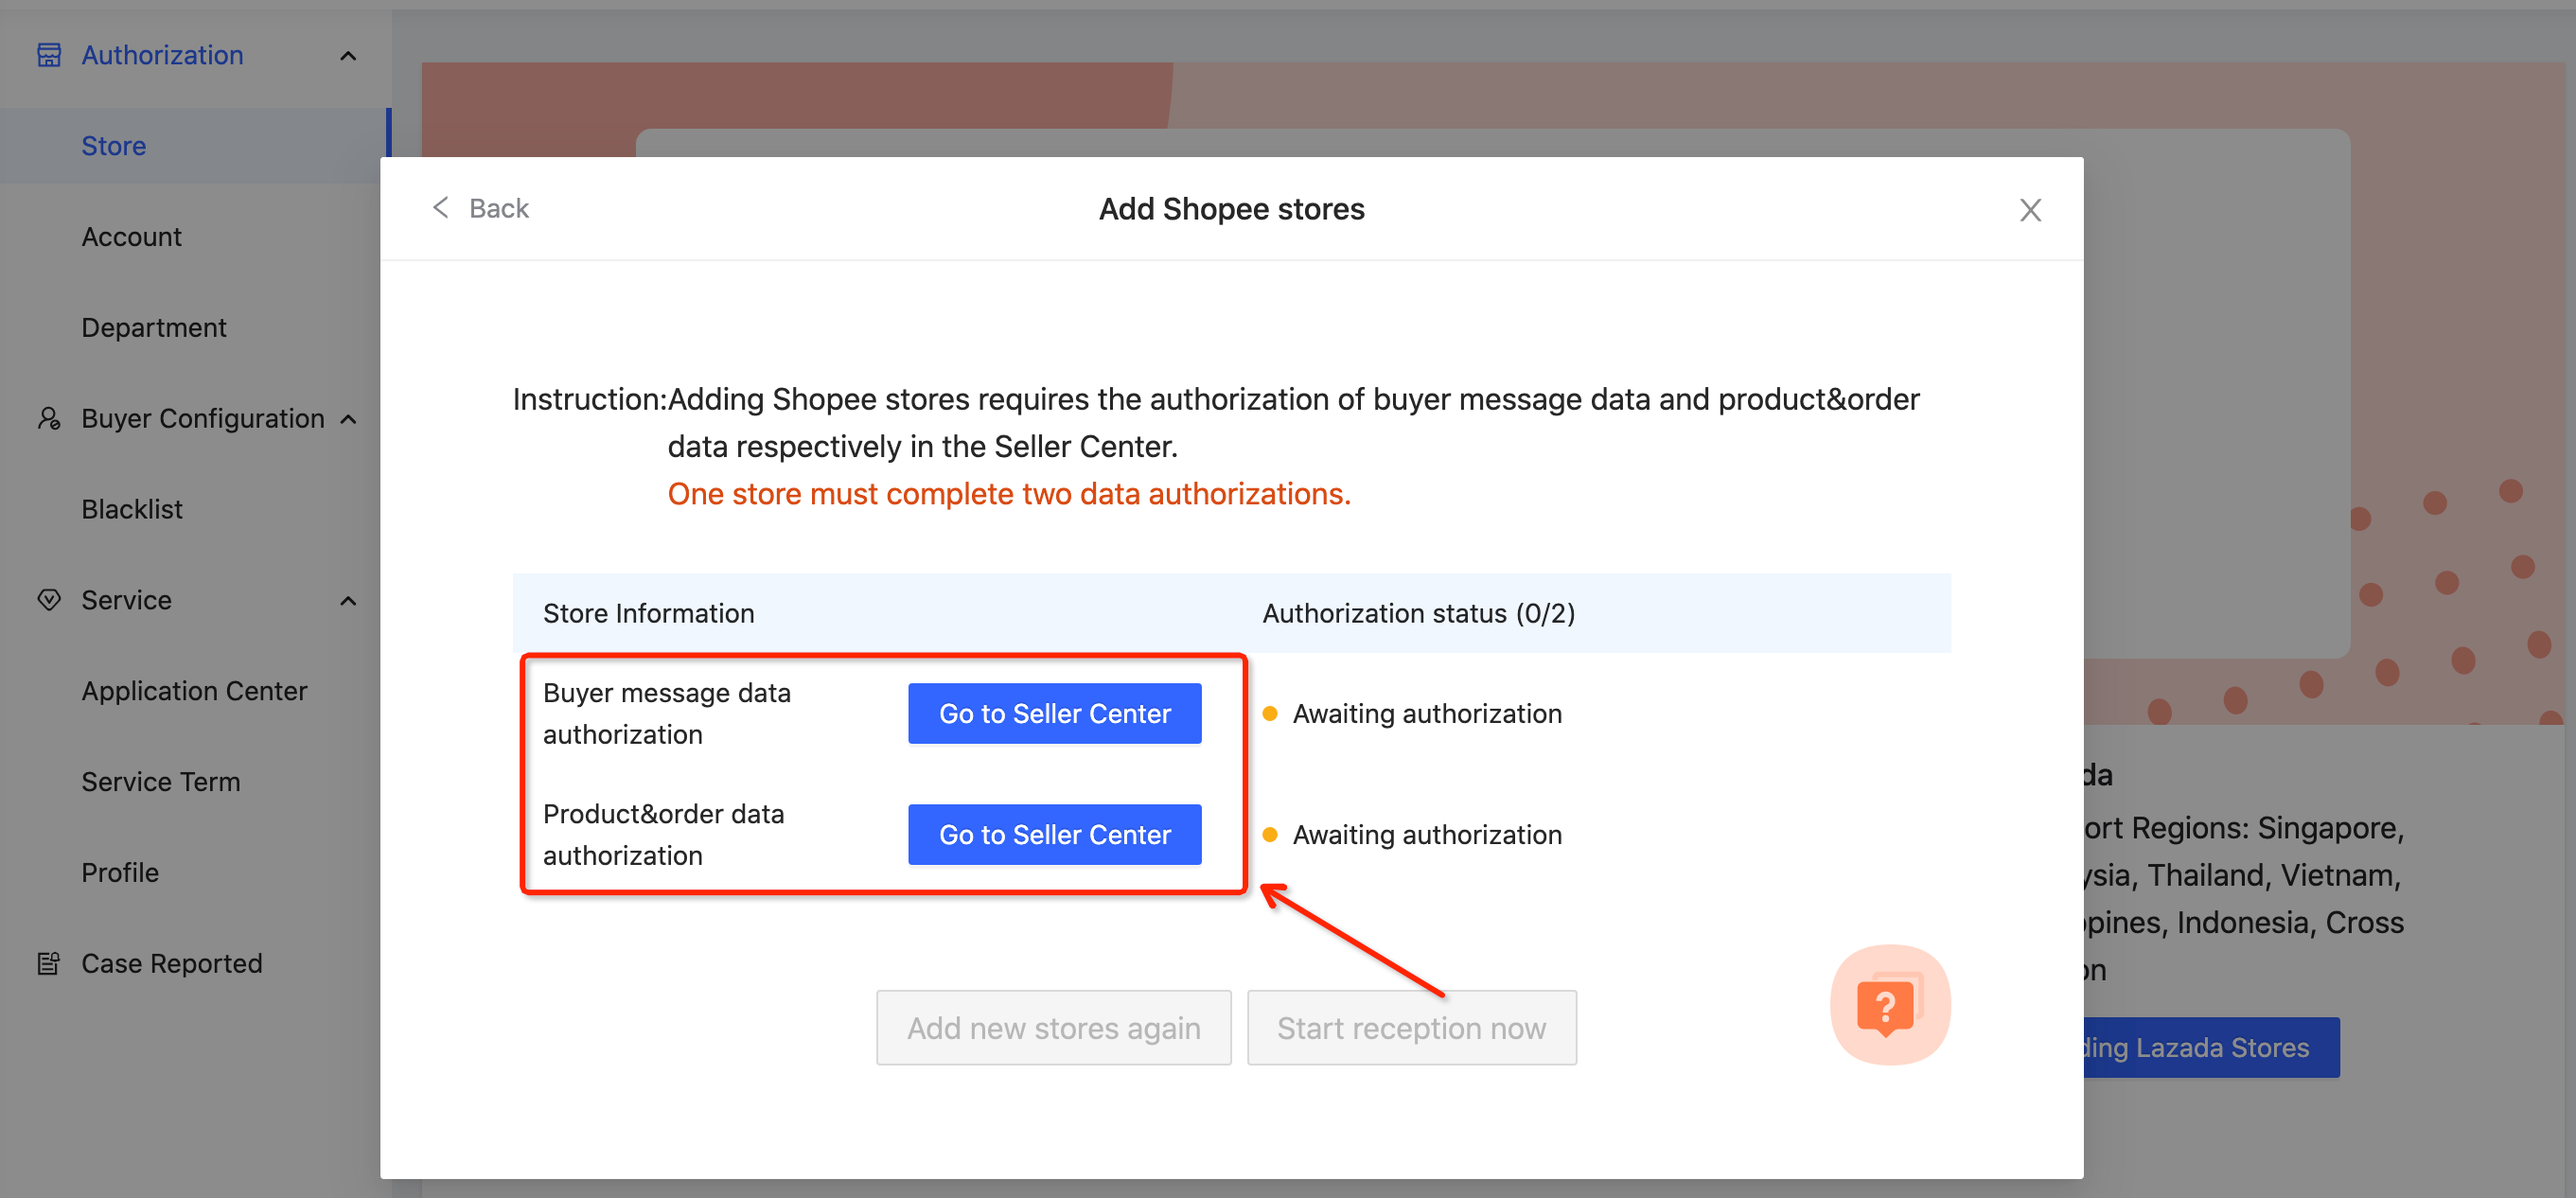
(2) Log in to Shopee seller center
Select country site --> Input account --> Input password -->Click “Log in”.
Please verify that the selected store type, store country site, and account&password are correct.
Authorization requires verification. Please open your mobile phone or login to your email account to prepare for receiving the verification code.
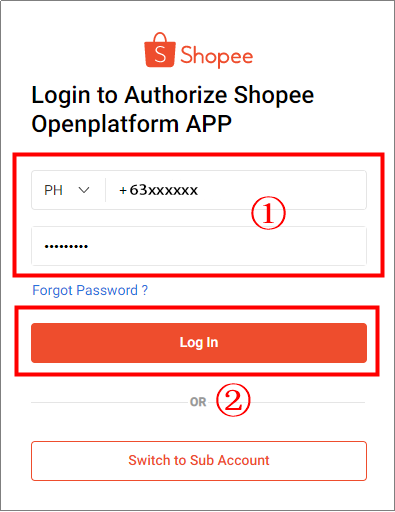
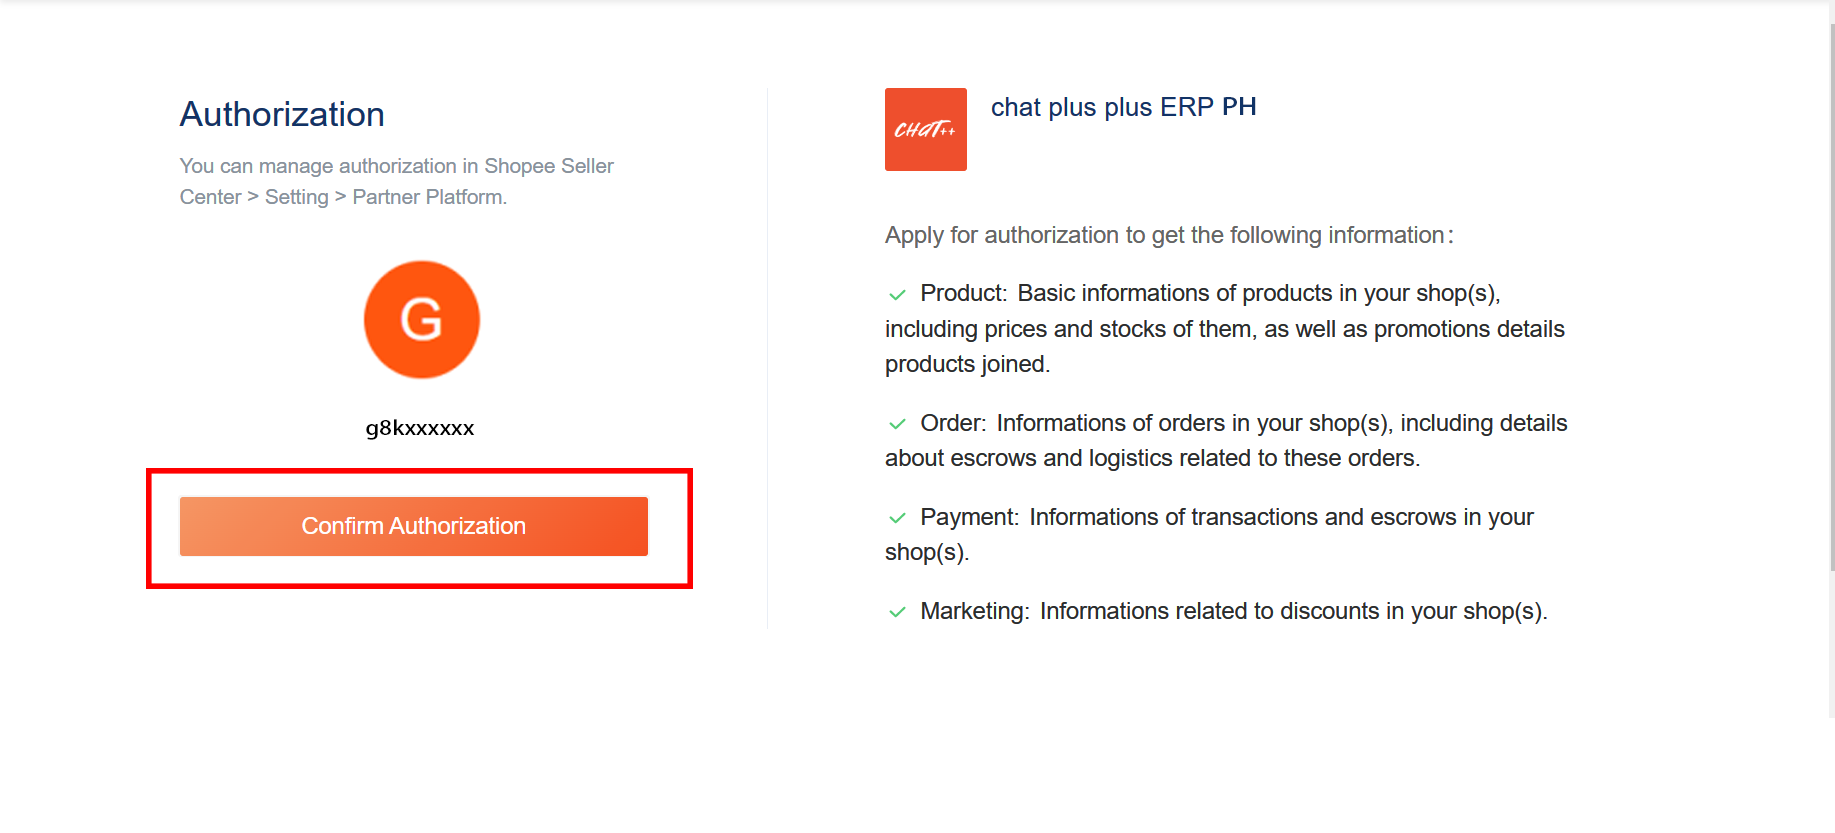
(3) Confirm Authorization
Click “Confirm Authorization”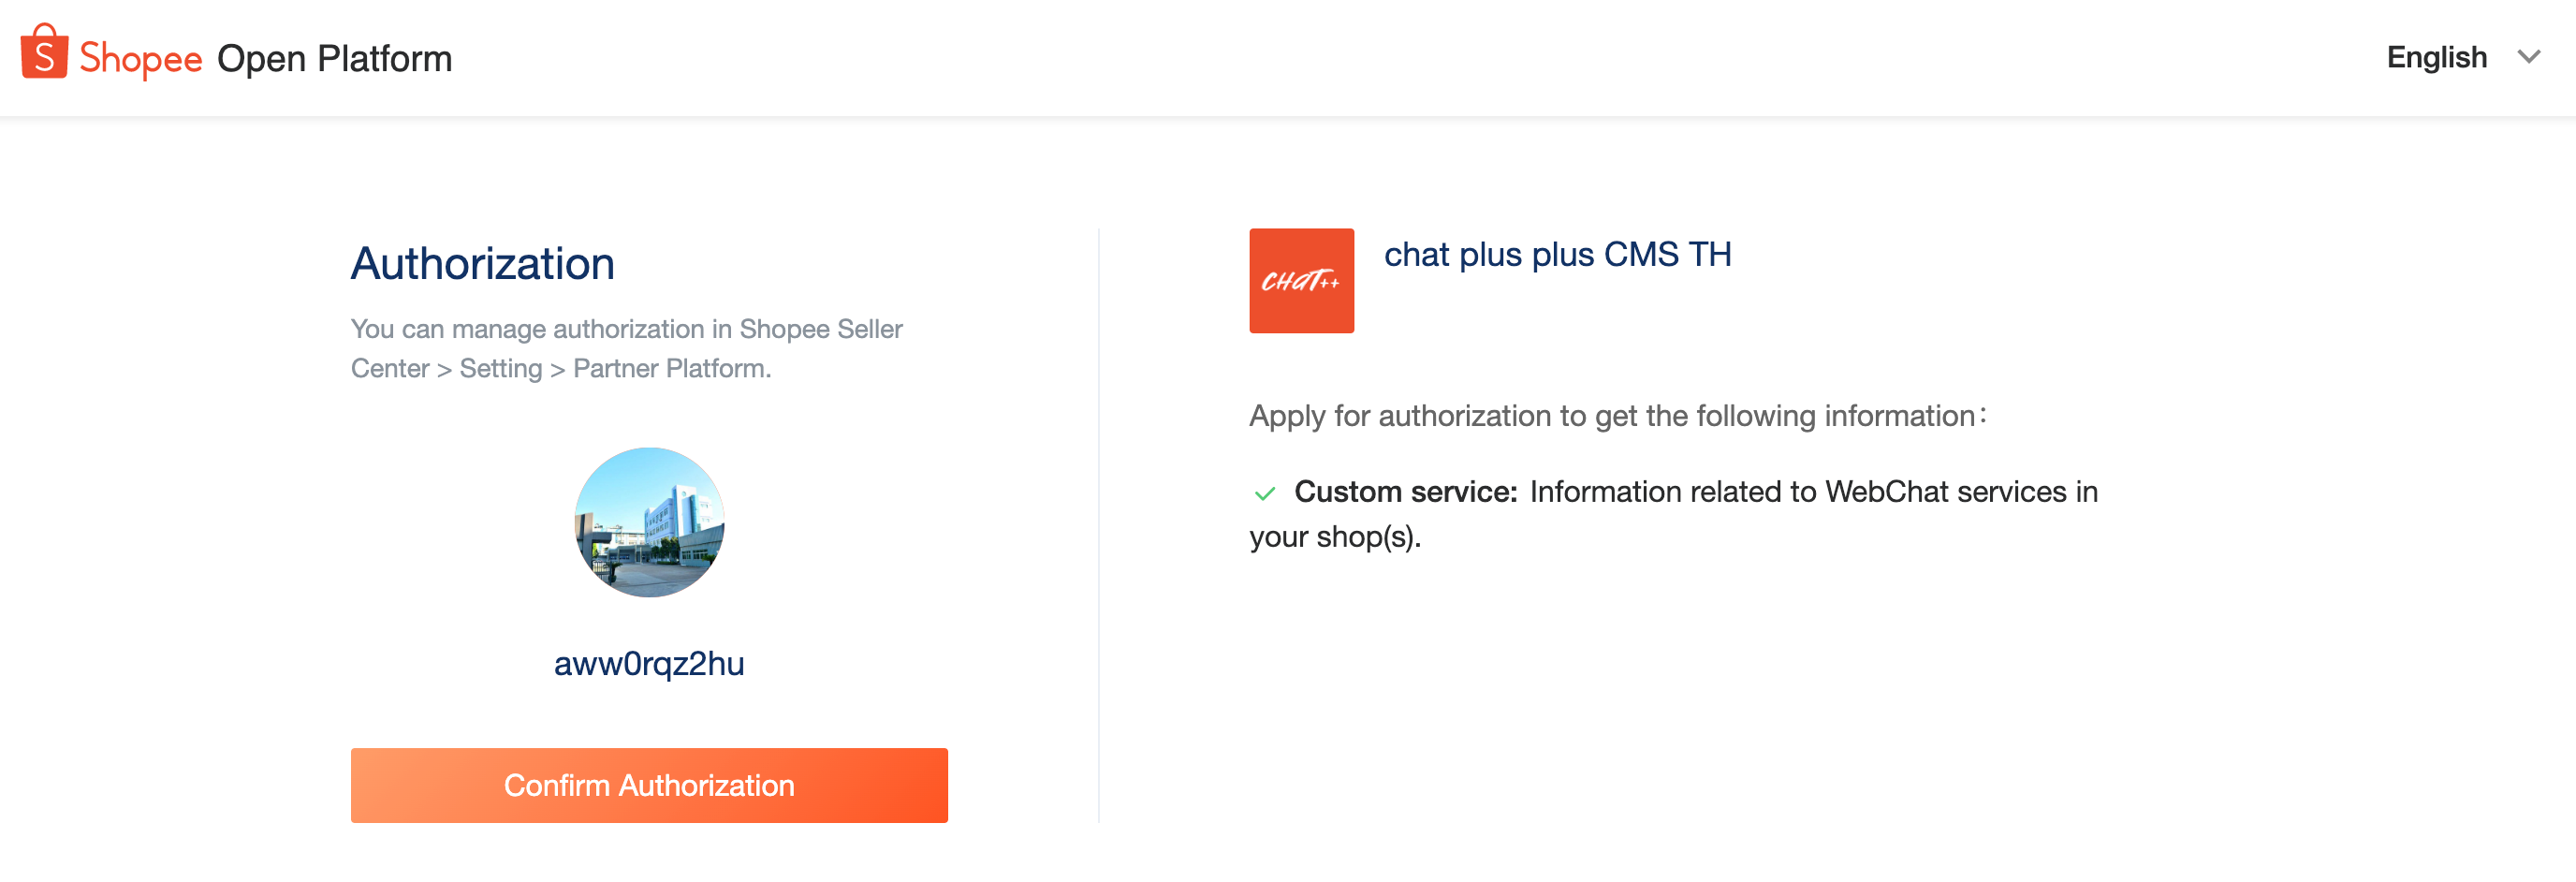
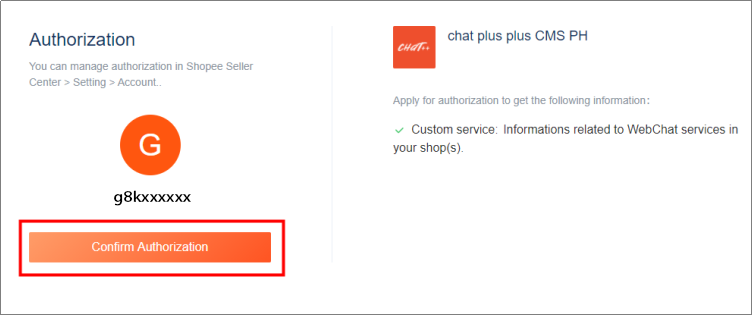
(4) Confirm authorization results.
After confirming the authorization information, the page shown below will appear.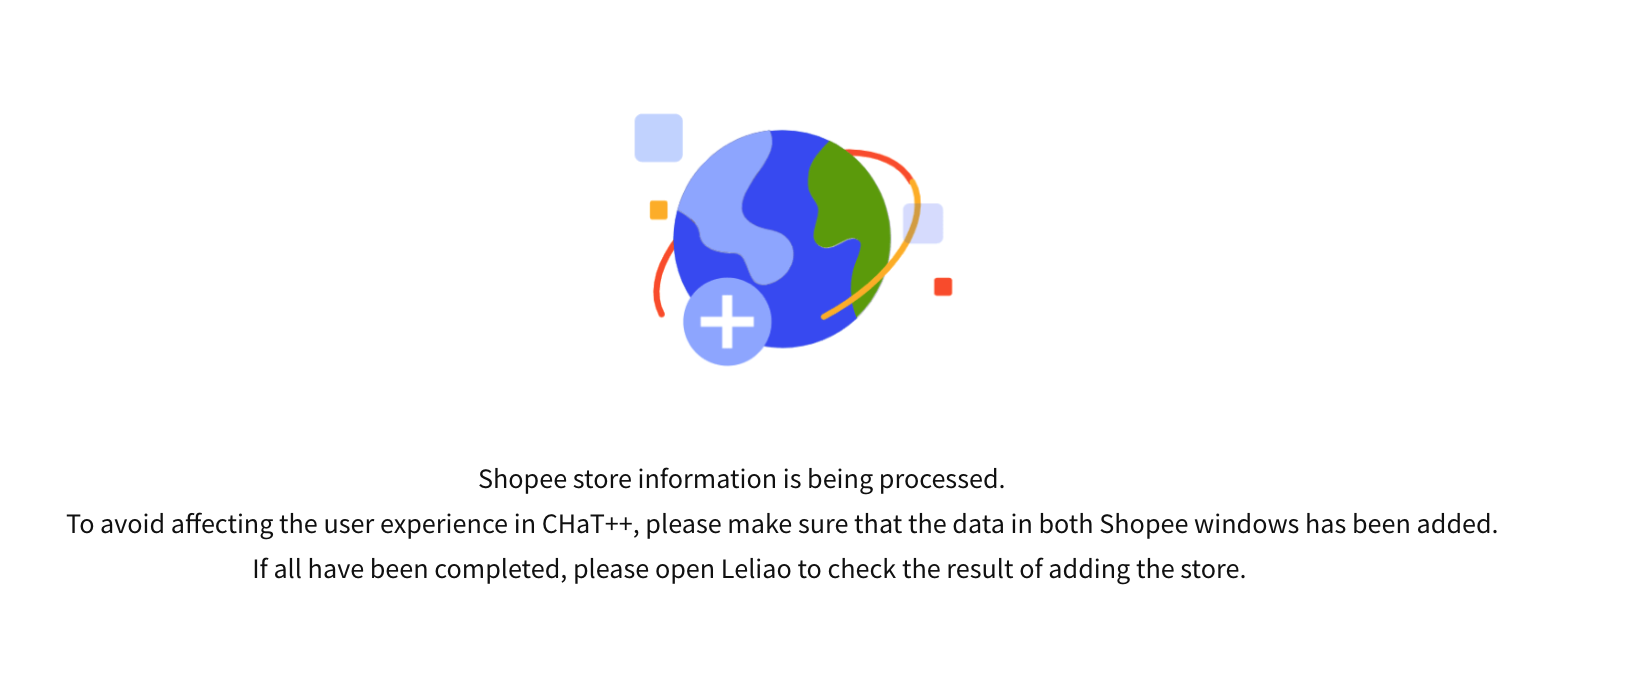
(5) Proceed with the second authorization.
Switch to ChatPlusAI from the browser to authorize product&order data. Both Shopee authorizations for the same store must be successful before the store can be added.
Click “Go to Seller Center”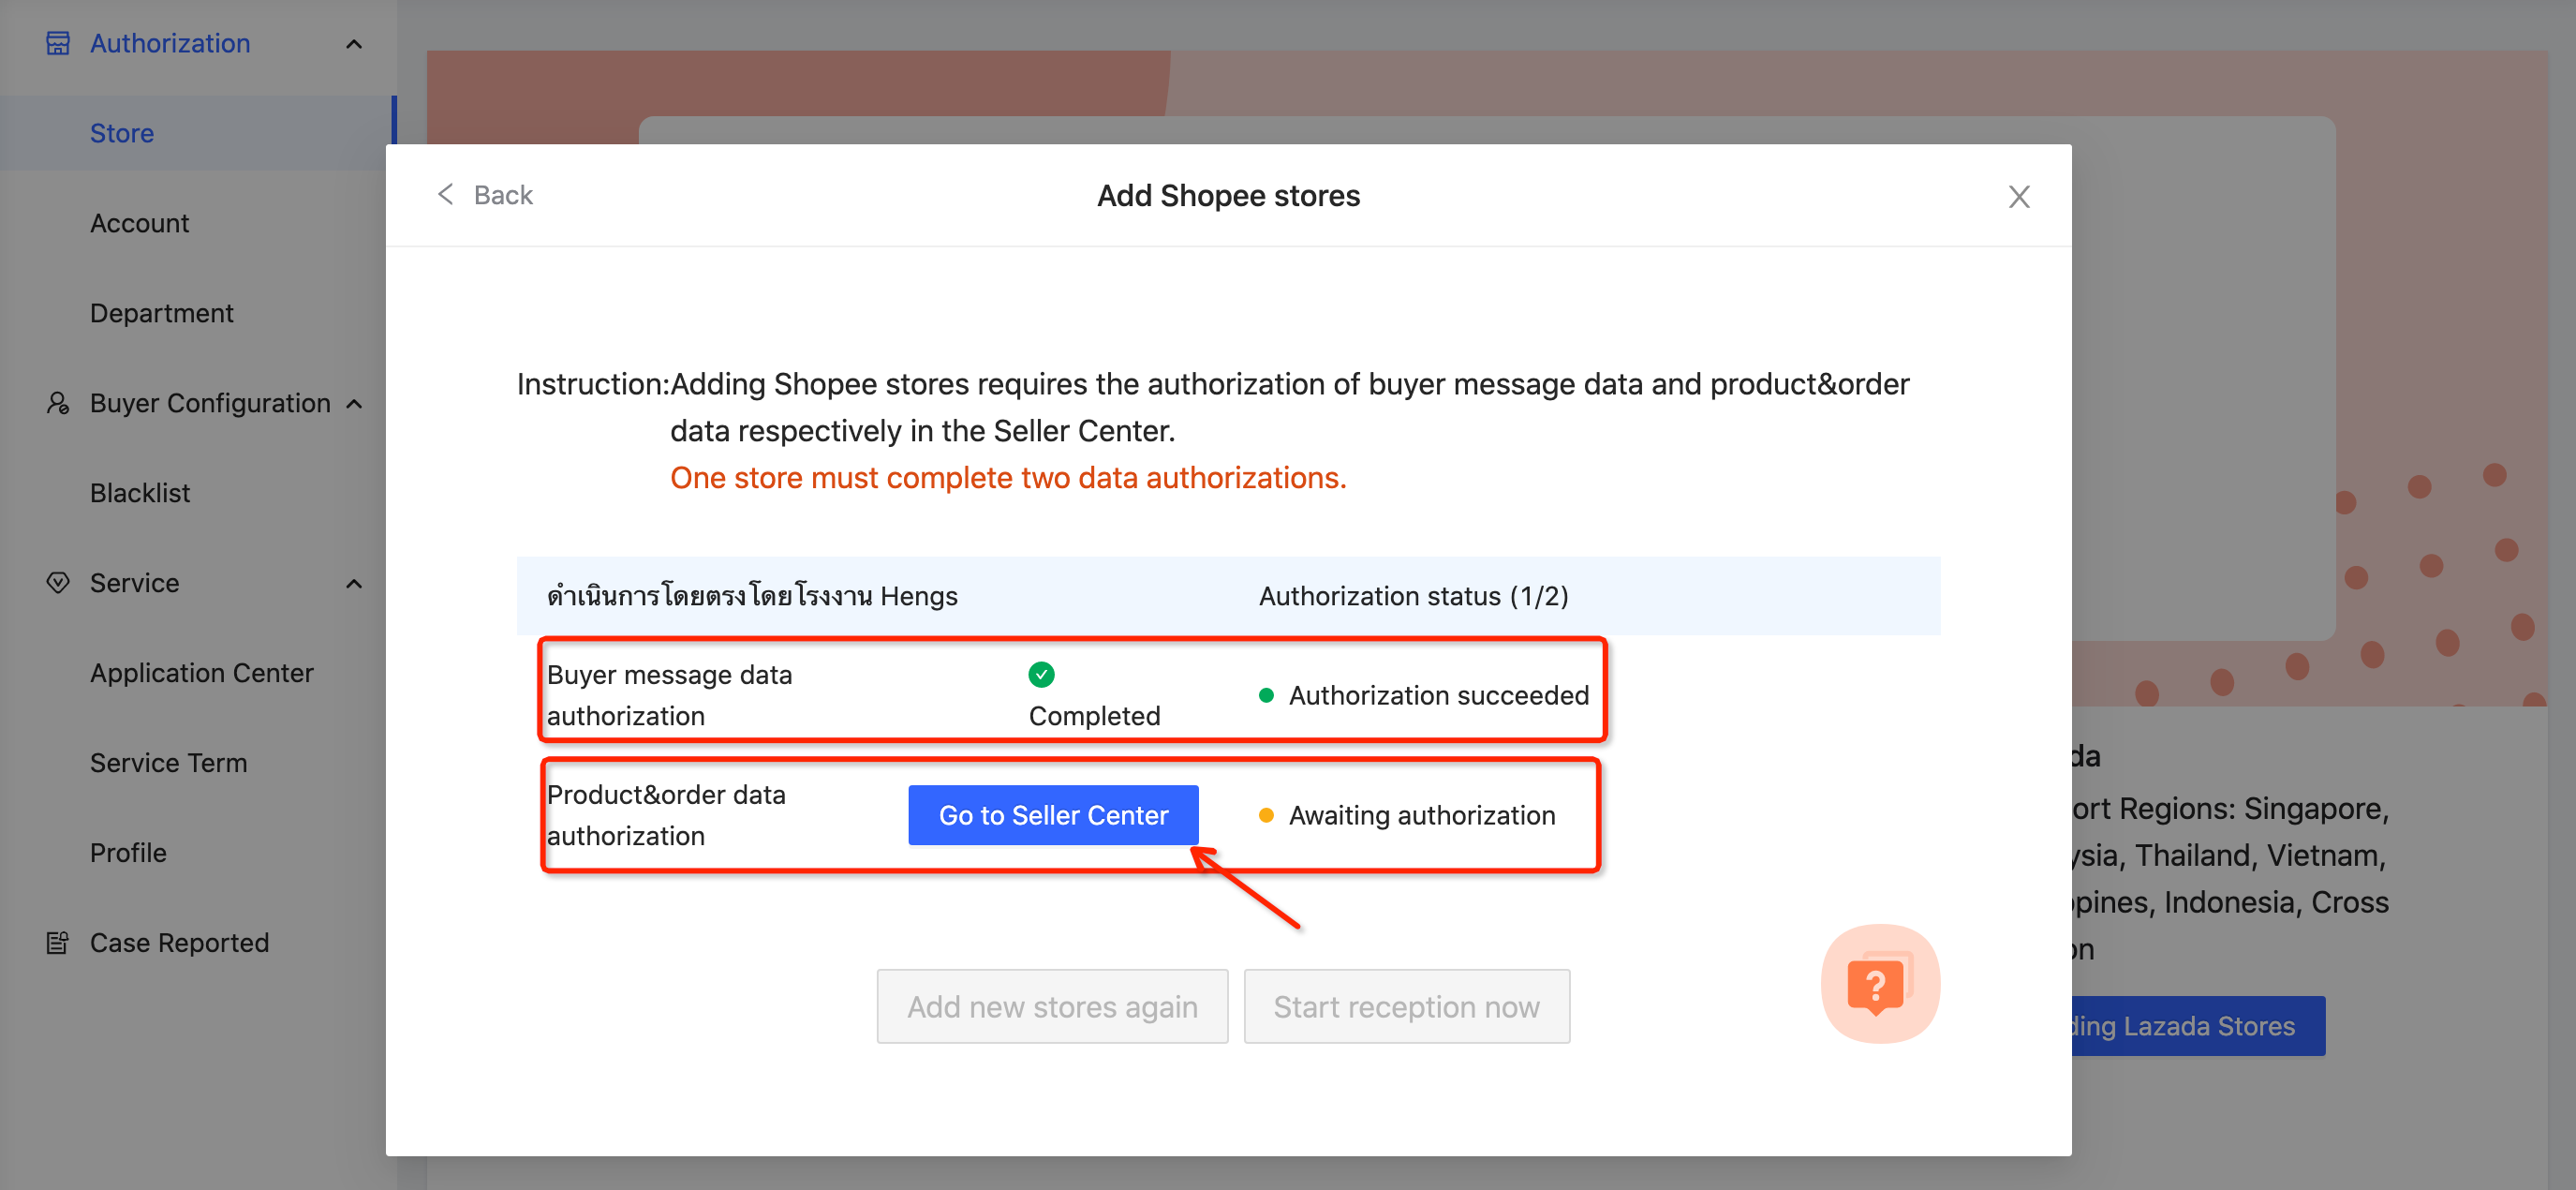
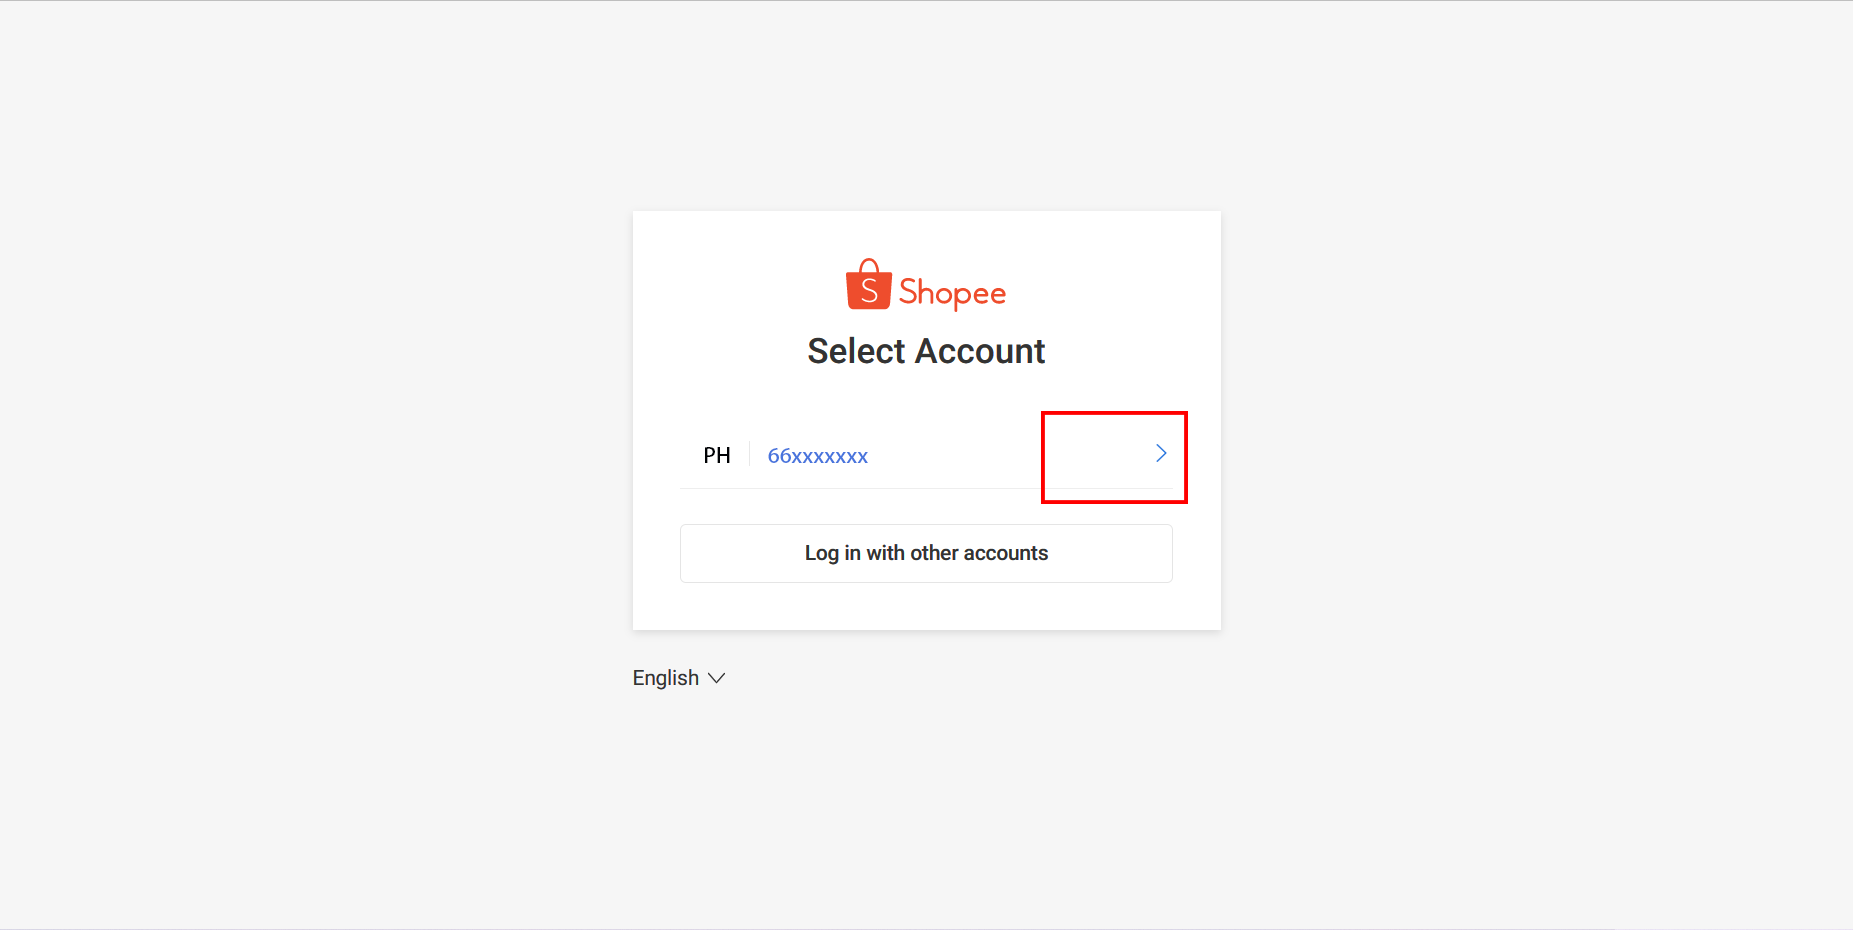
- If the account and password were not automatically saved, please re-enter them. After successfully logging in, click 'Confirm Authorization' to complete the authorization.
- If the account and password were automatically saved, hover the cursor over the location shown in the following picture and click to jump. Click 'Confirm Authorization' to complete the authorization.
- Authorization success
After switching to the ChatPlusAI, if both data items show 'authorization success', the store has been successfully added and you can start receiving customers.
If the authorization status is not updated due to poor network conditions, please log in to ChatPlusAI again and check if there is a new store under 'Configuration →Authorization→ Store'.
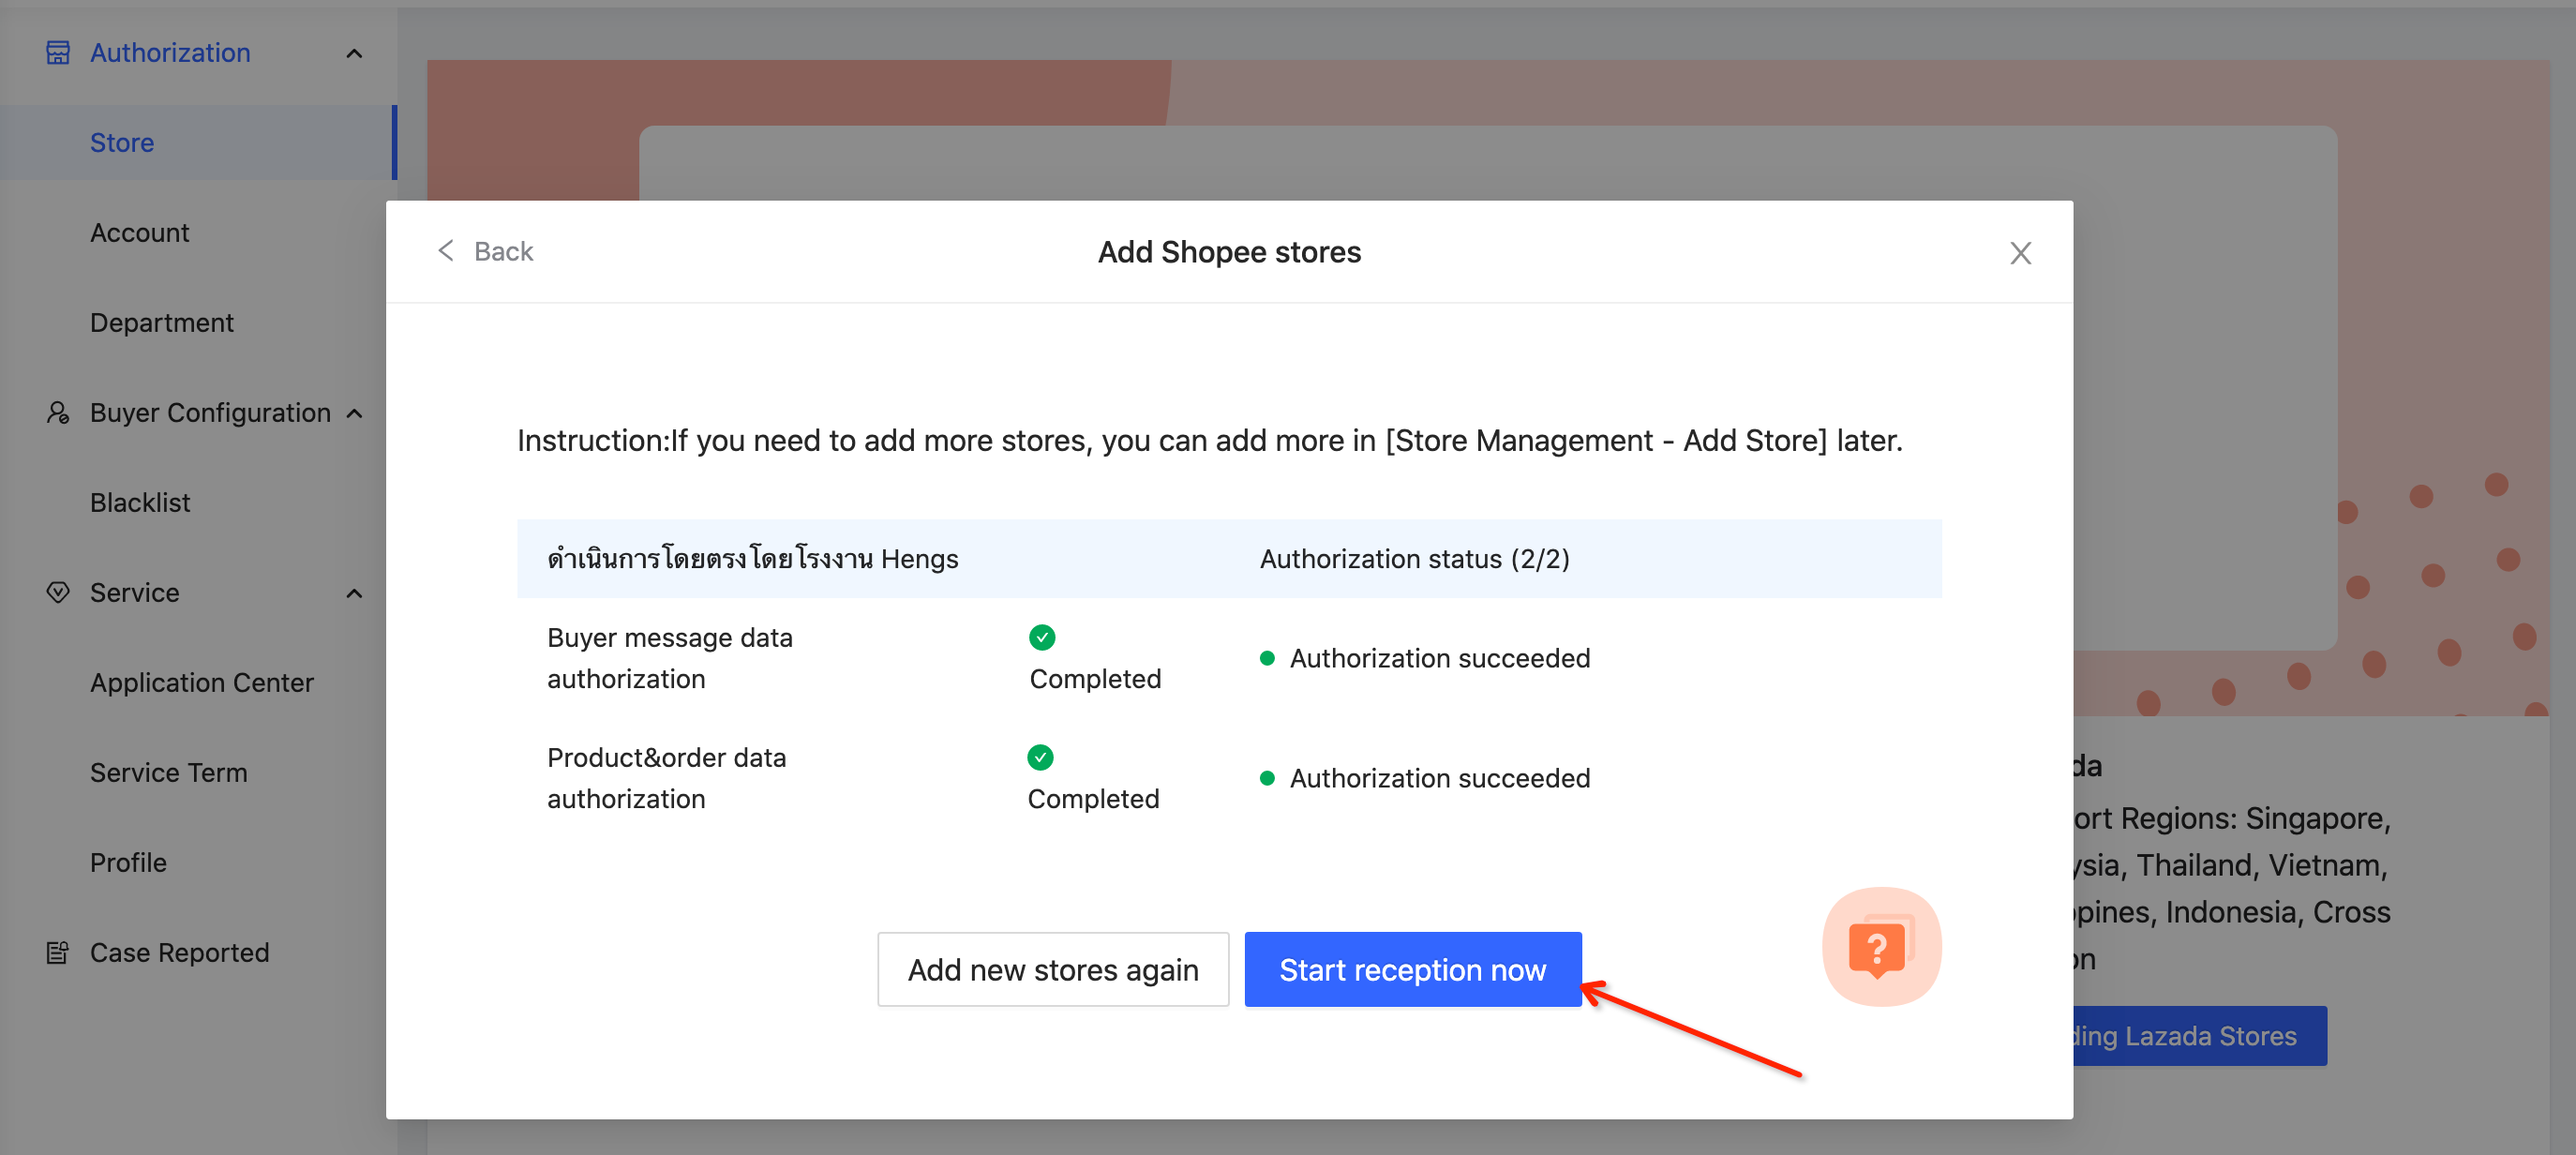
After adding the store for the first time, please be patient and wait for 15 minutes. The system is automatically synchronizing the message content of the past 30 days and the order information of the past 90 days.
FAQ
Q1:Why did the store authorization fail?
A1:Please check the below information carefully and try again.
- Entering incorrect account and password during authorization resulted in failure.
- Selecting a country site that does not match the account.
- Selecting the wrong store type, for example selecting cross-border store type instead of local store type.
Method3: Share with your administrator who has the account and password to authorize.
Precautions:
During the authorization process, Shopee official will send a verification code. Please prepare your mobile phone if you use a mobile phone number to log in to Shopee. If you use an email to log in to Shopee, please log in to your email in advance to receive the verification code.
Step
- Enter the store authorization page
After the first login to ChatPlusAI, you will be directed to the guided page for adding a store.
Select Shopee --> Click “Next”
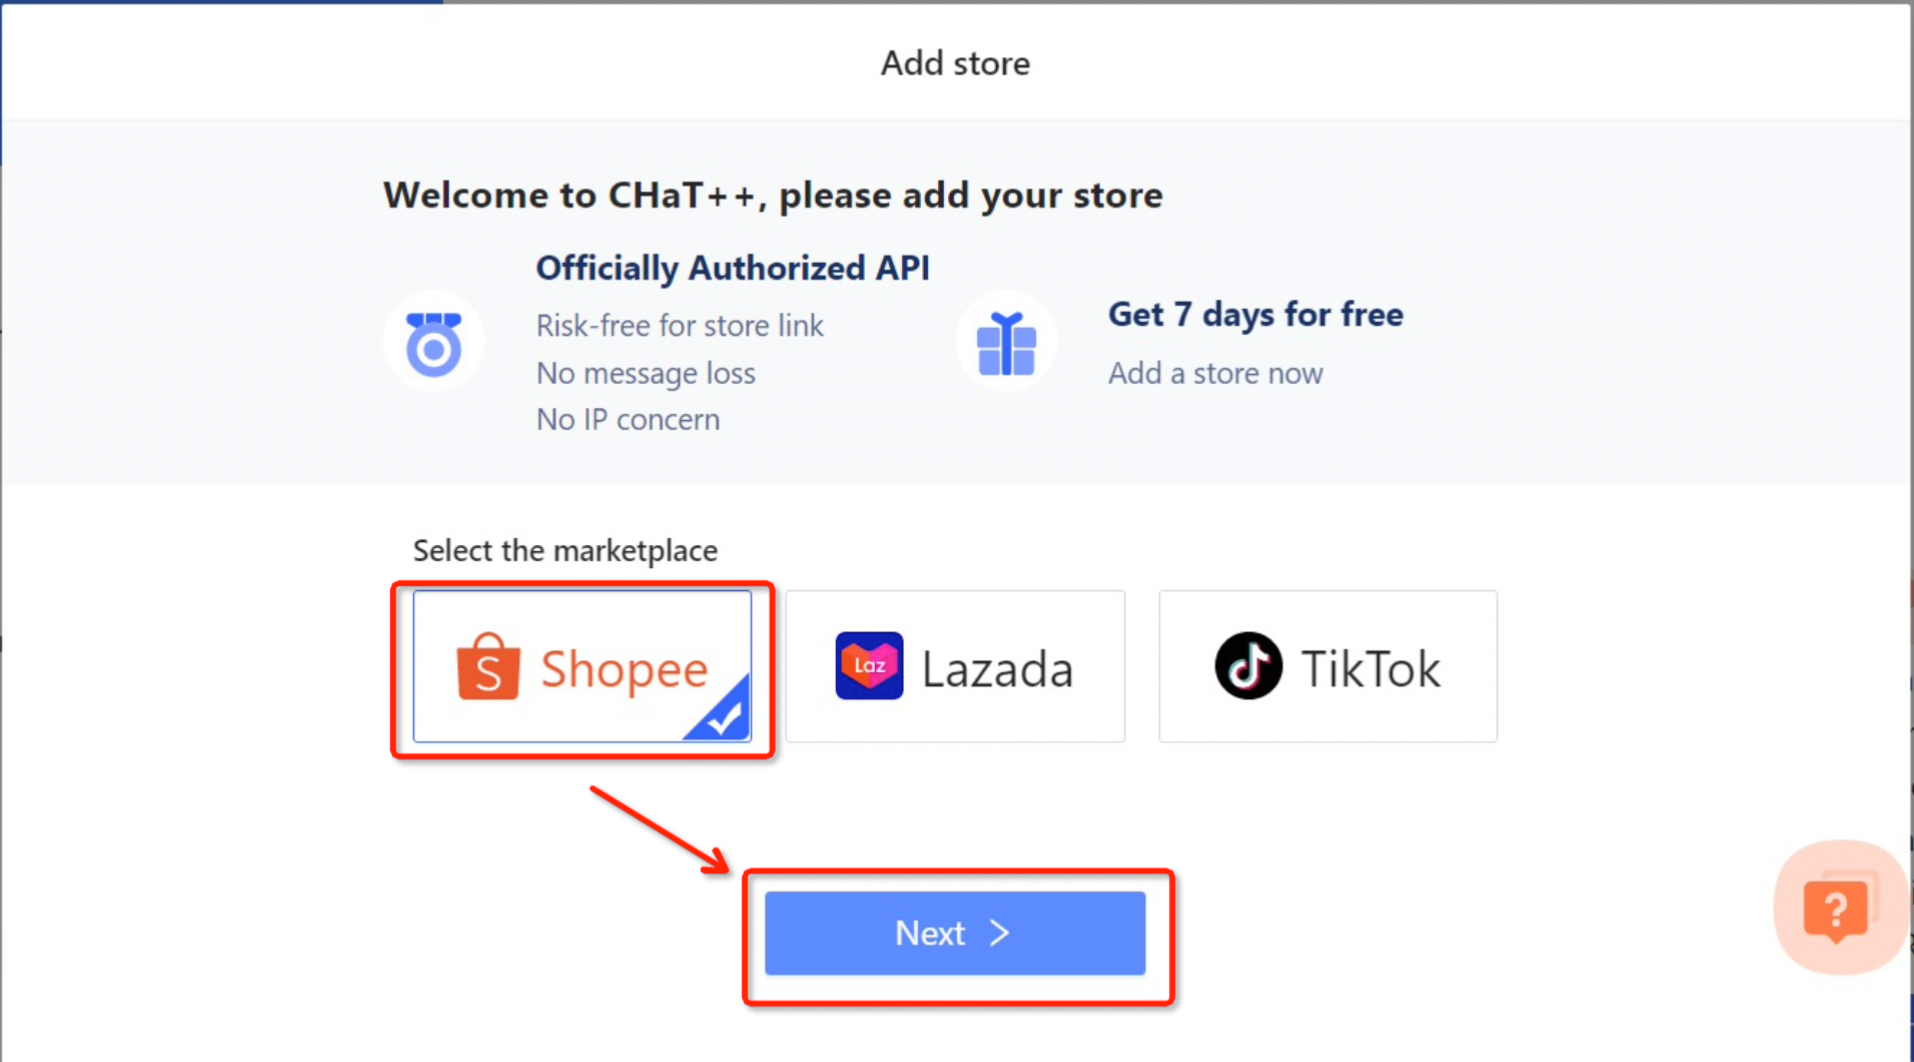
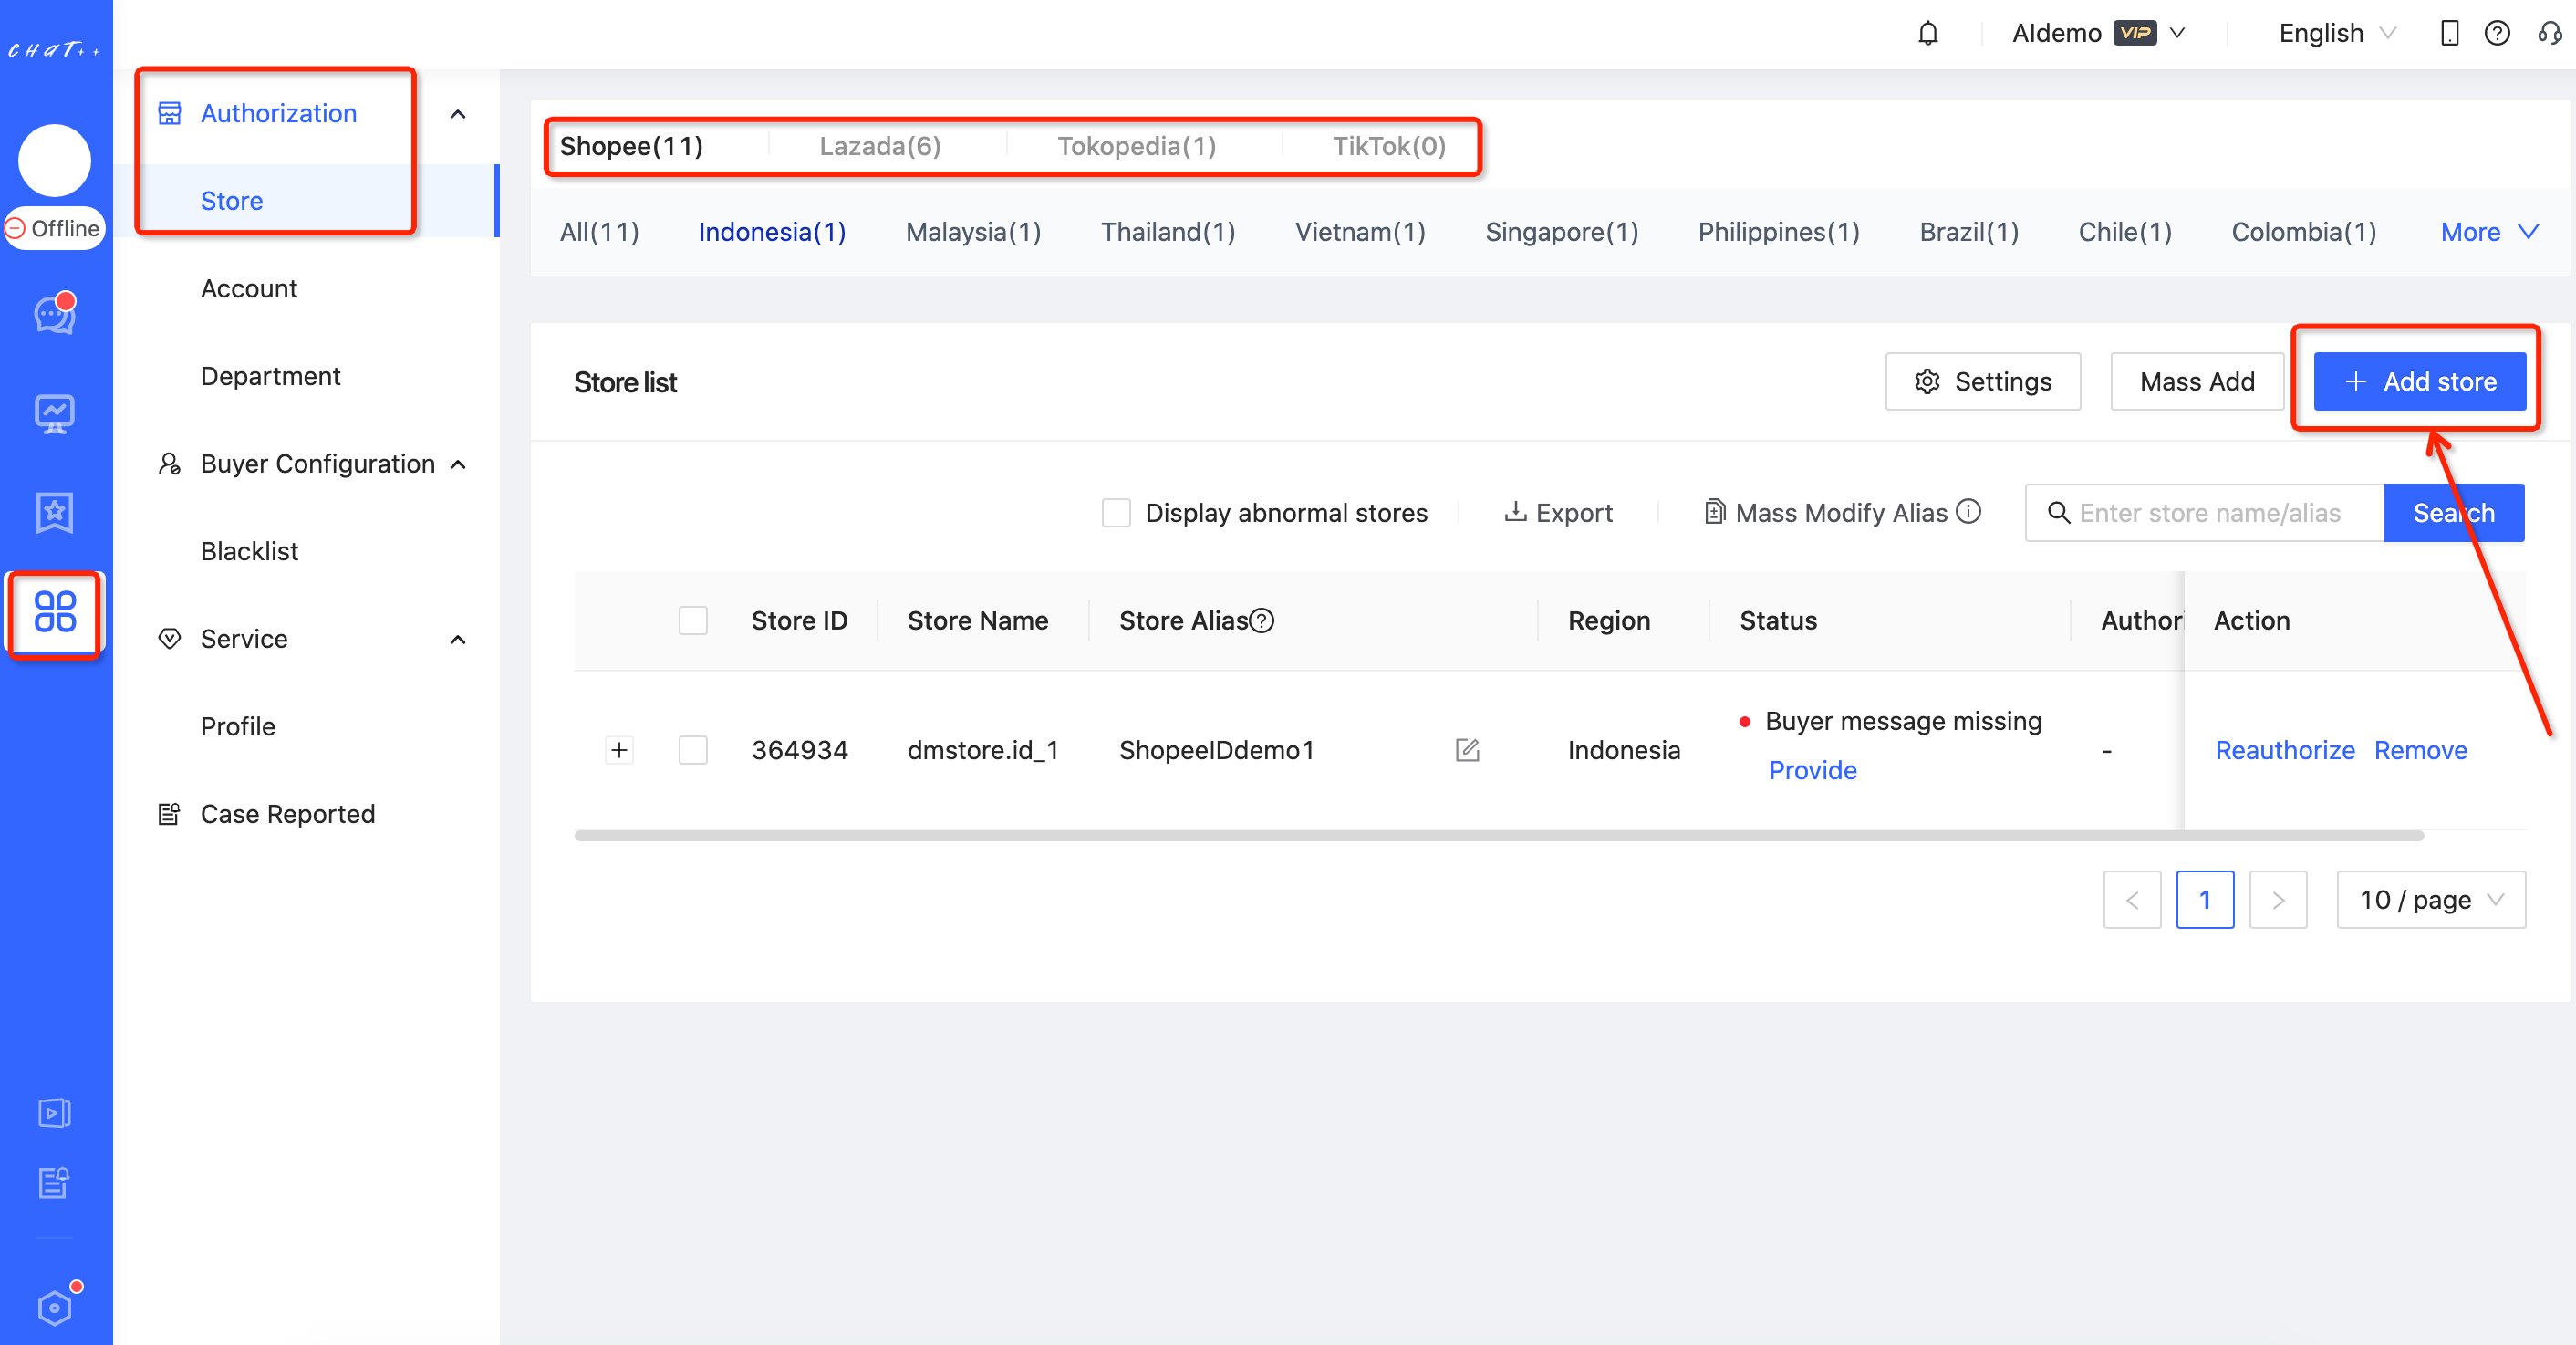
The steps to add a shop in daily operations:
Configuration-->Select Marketplace-->Store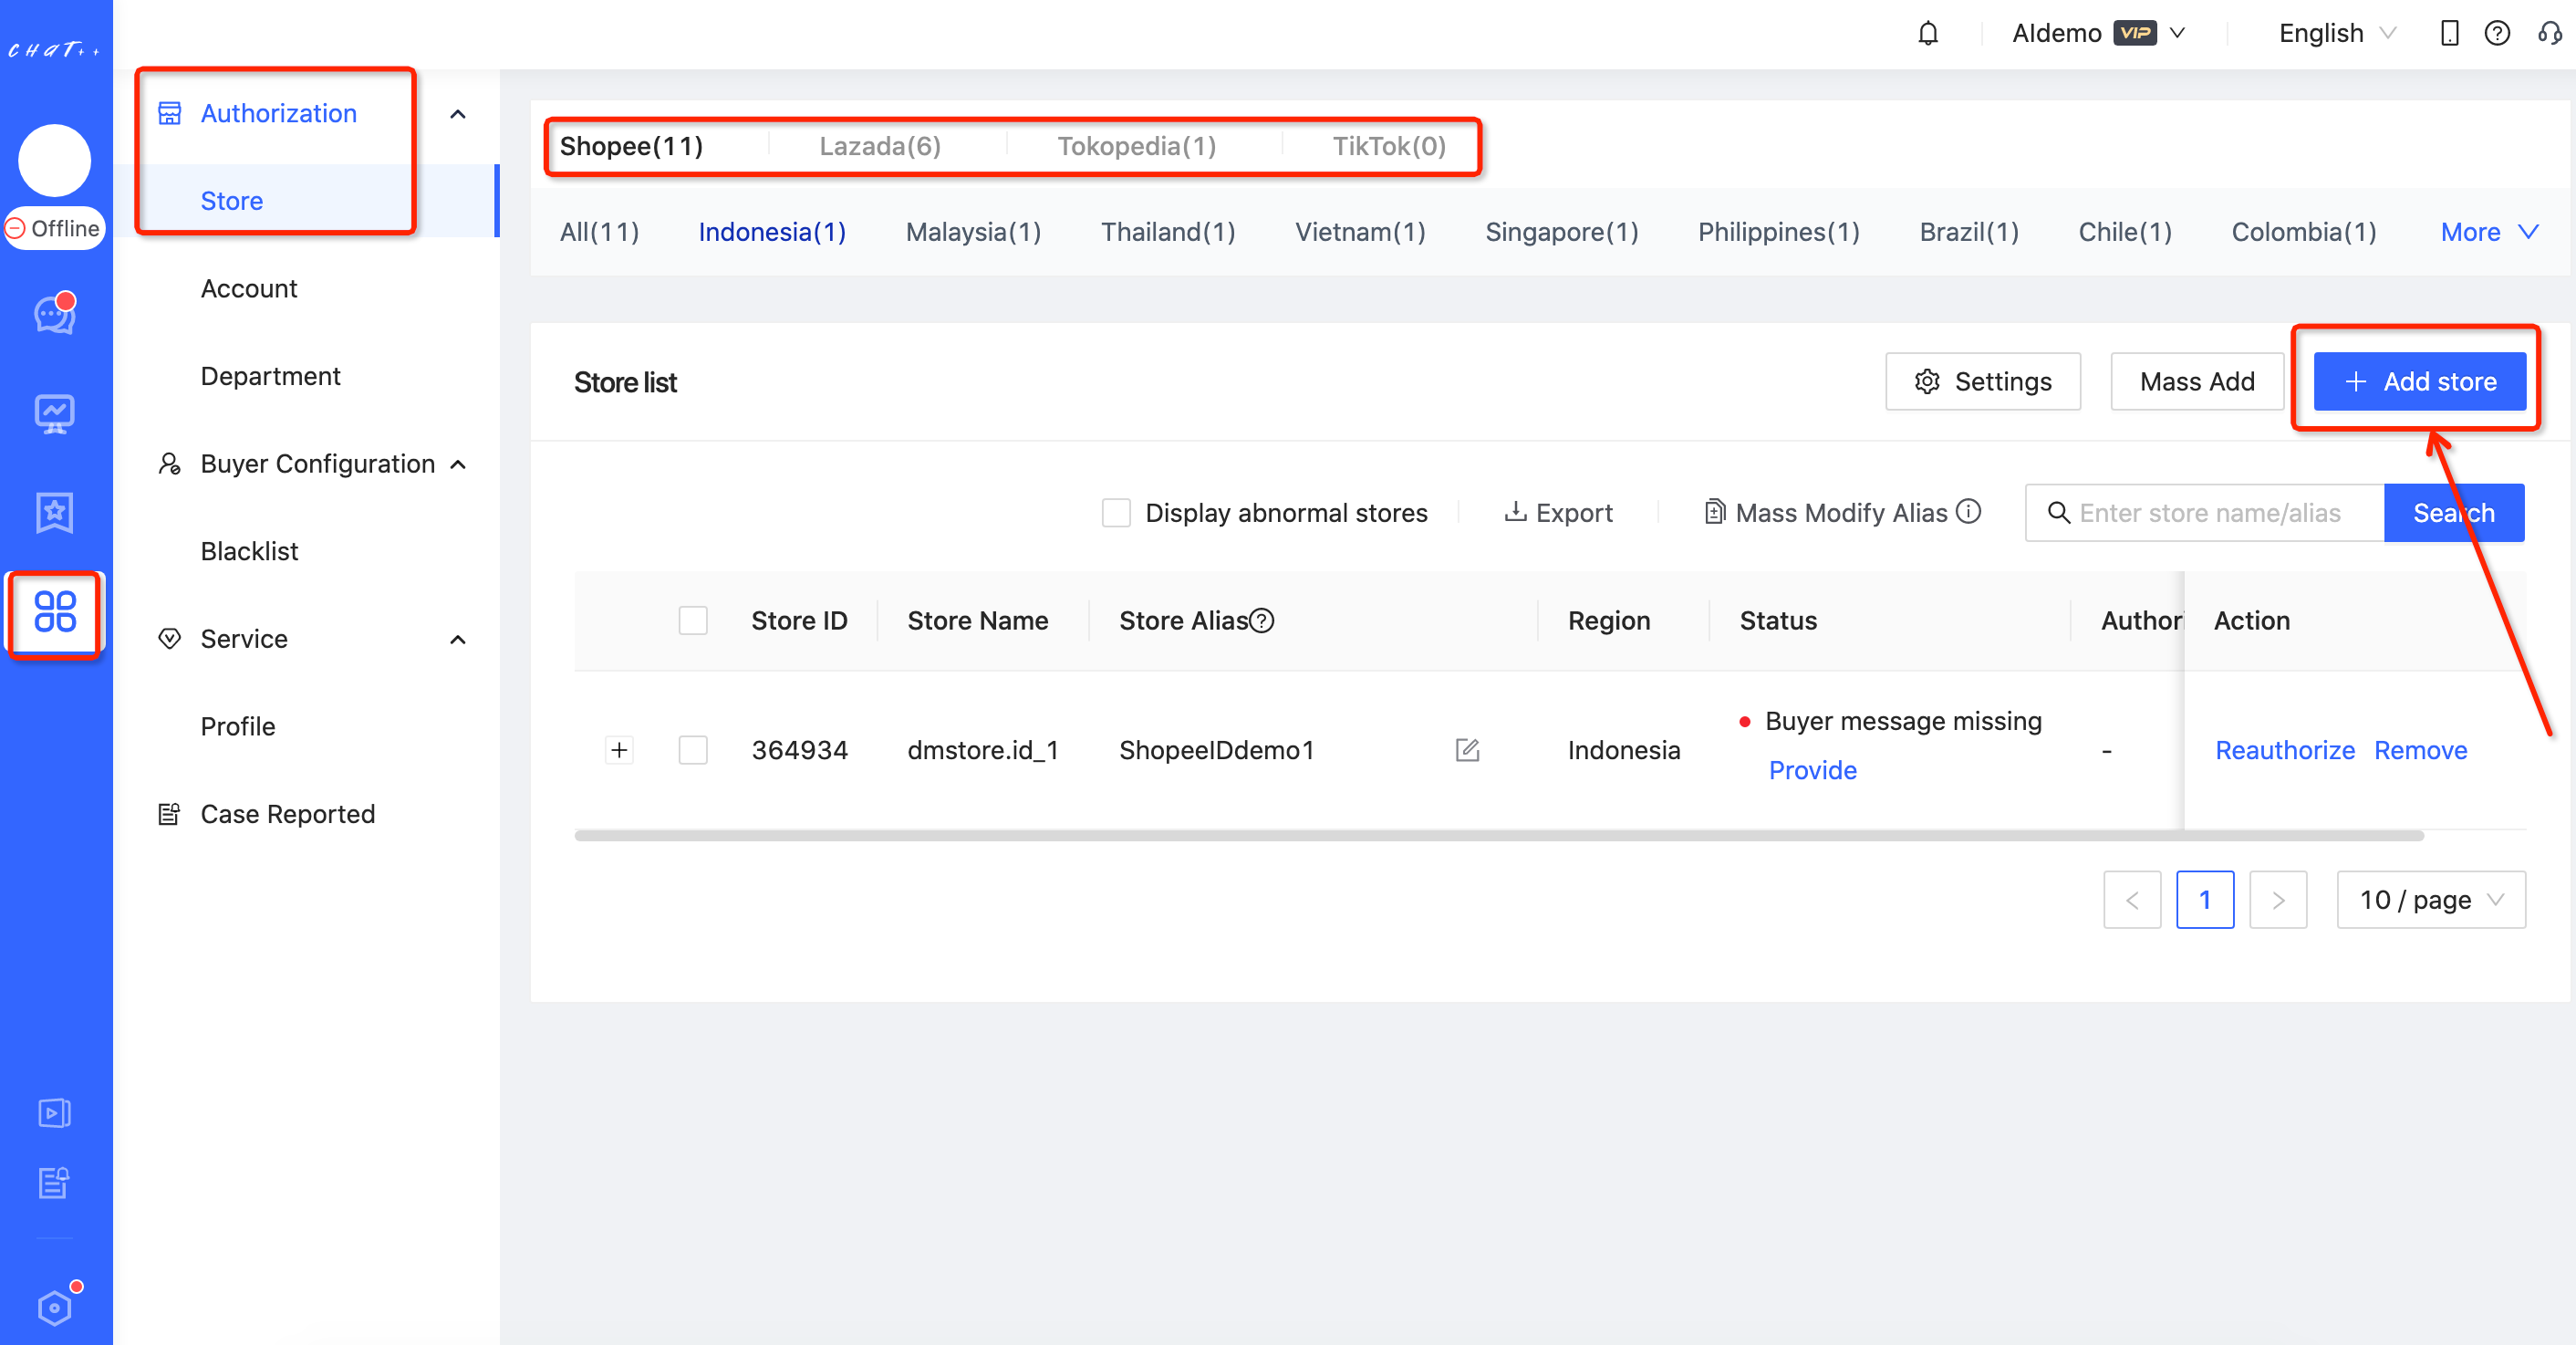
- Select store type&country
Select Local store--> select the store country site--> Click “Next”.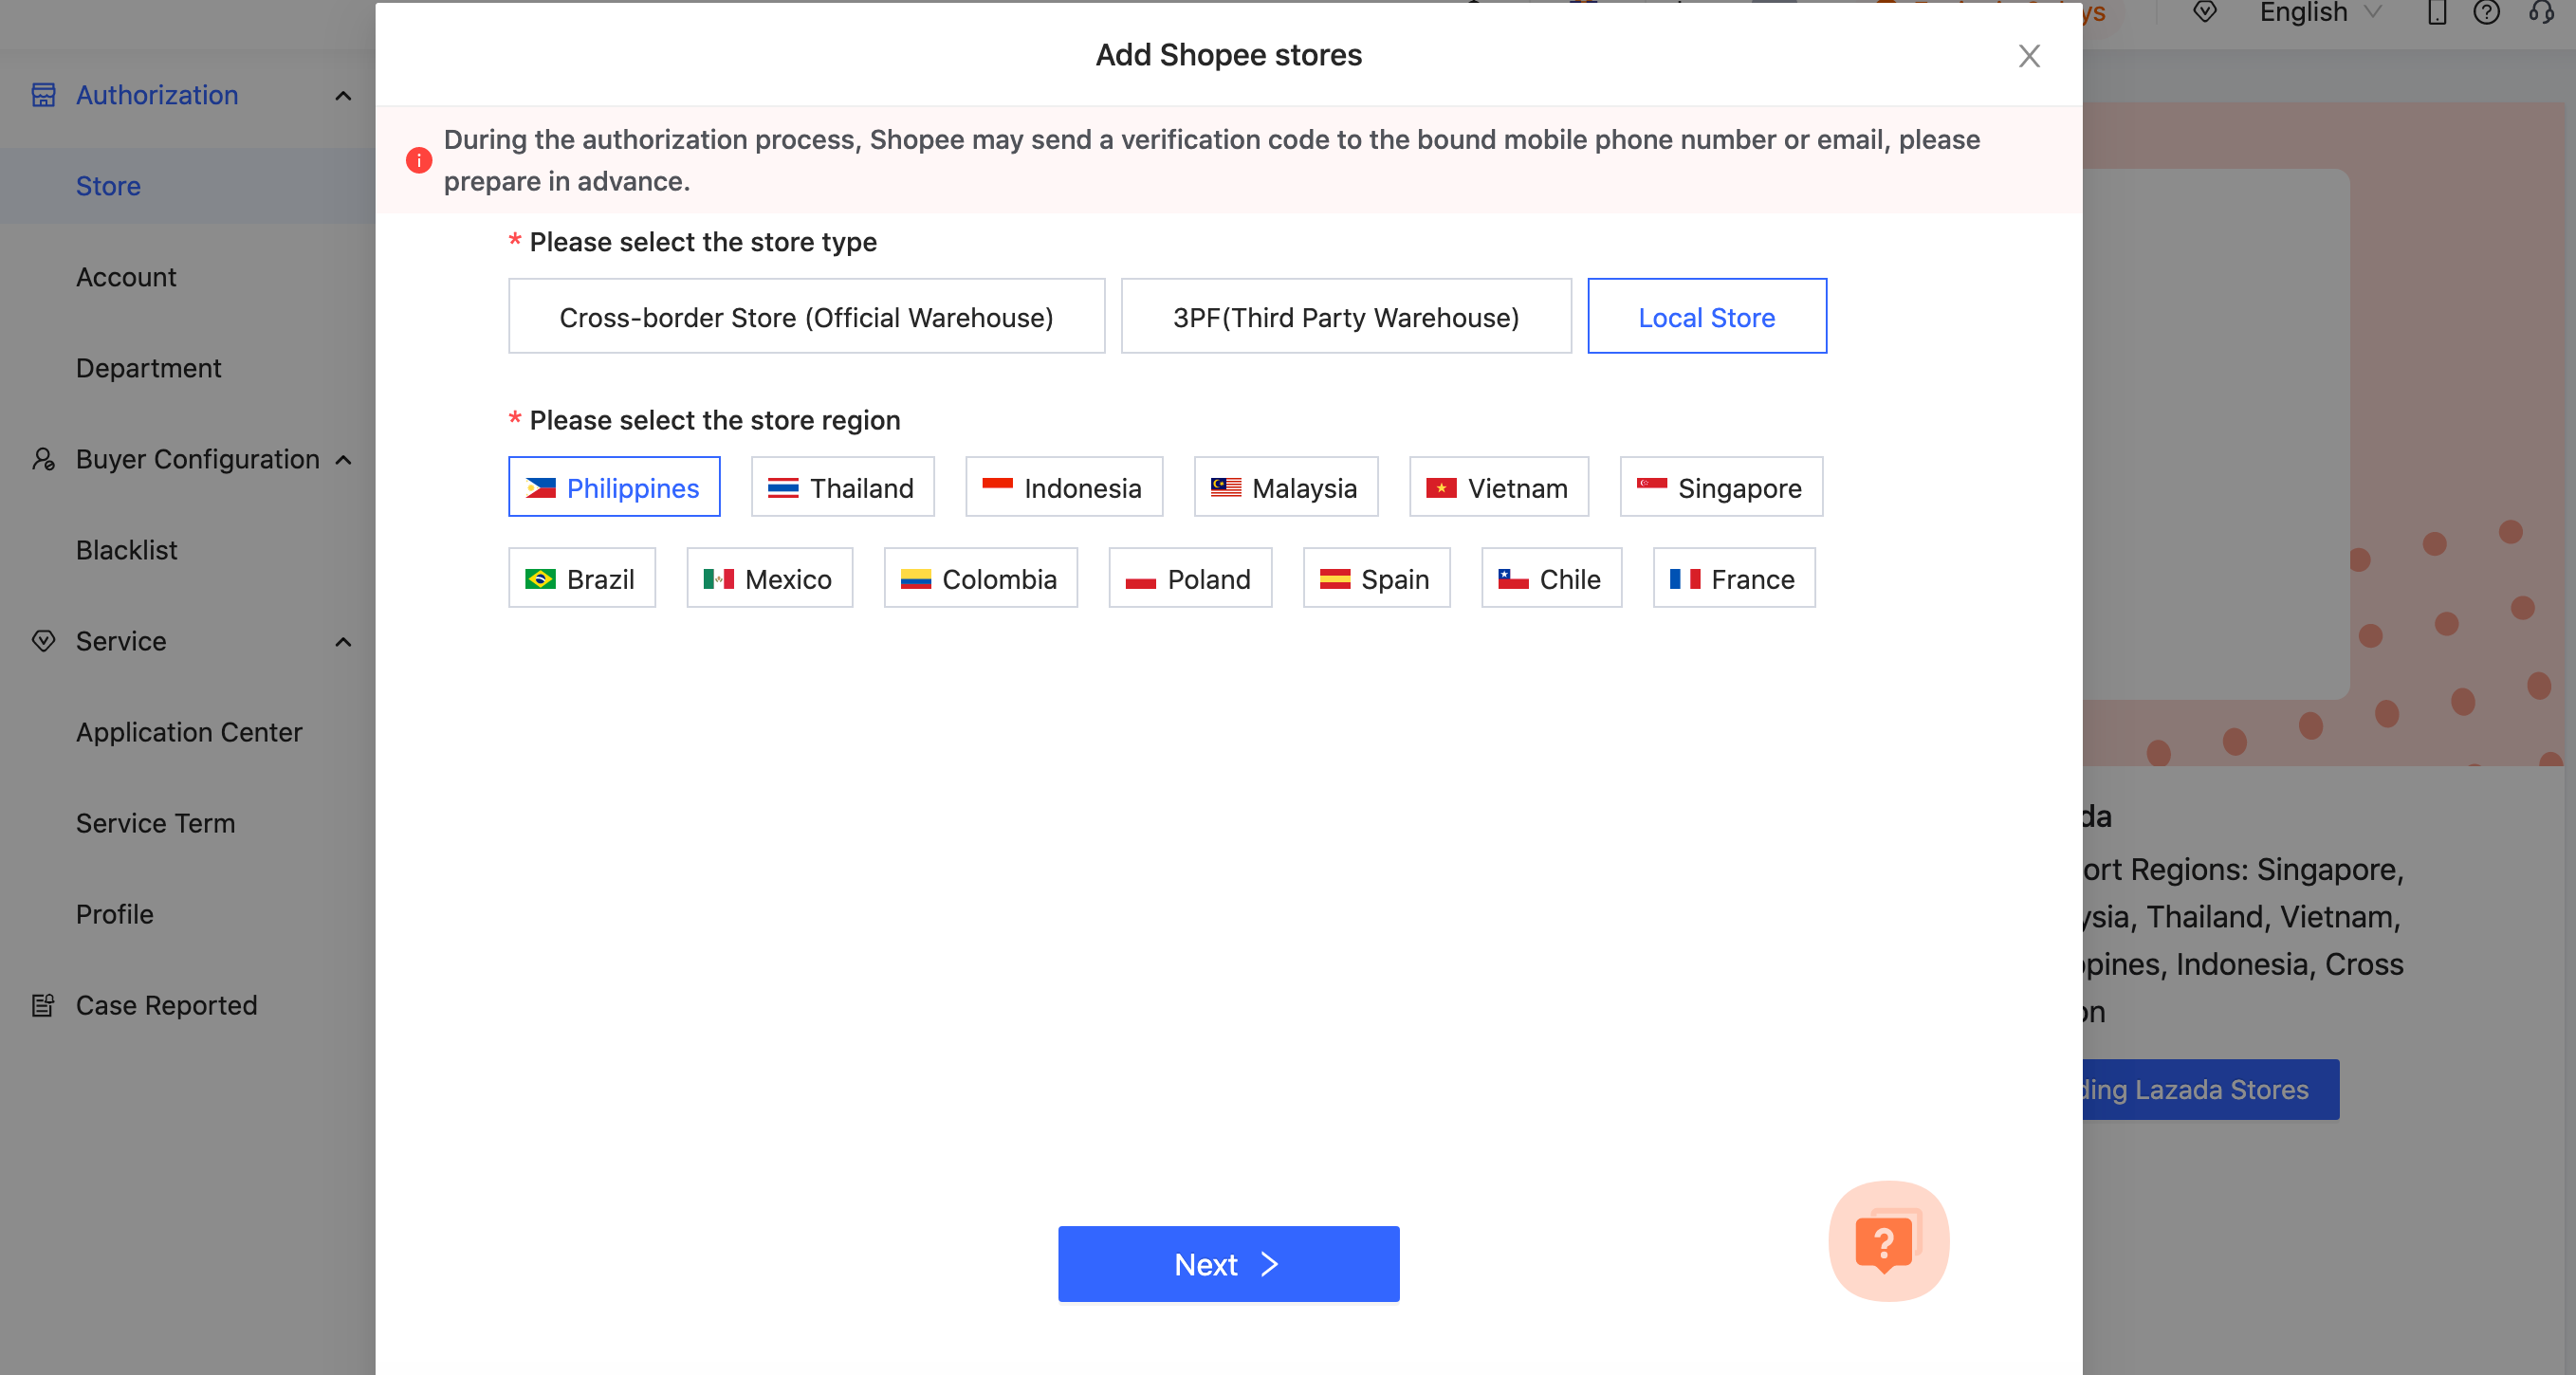
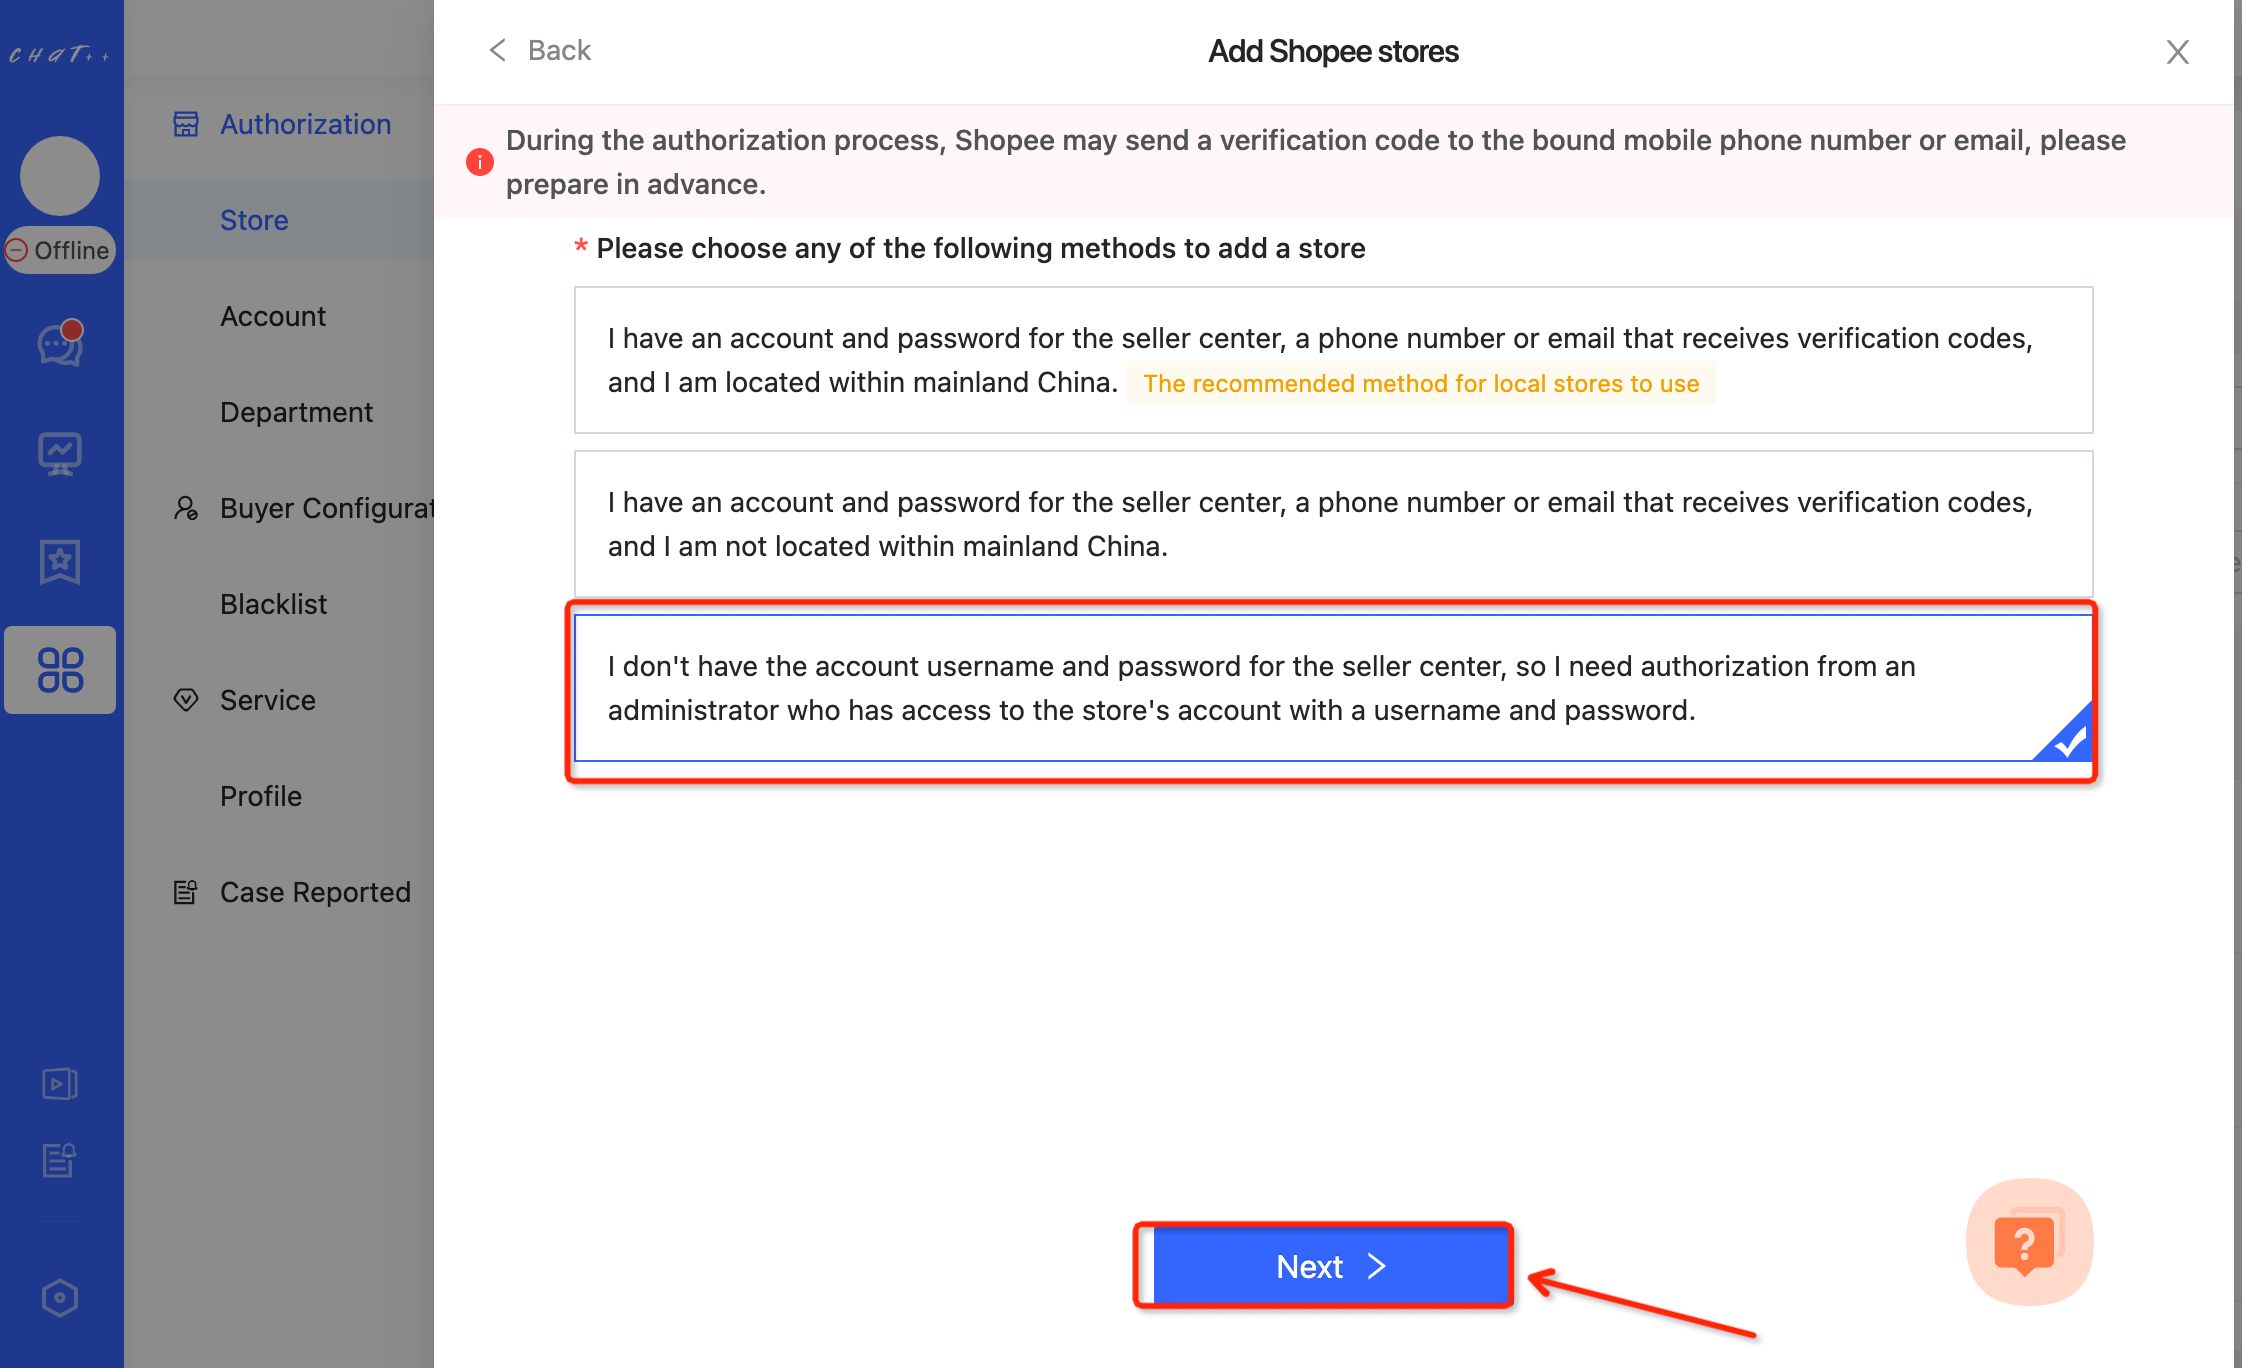
- Select adding method
Select Method3 --> Click “Next”.
(1) Click the 'Buyer message data authorization' copy link -> send to your administrator.
(2) Click the 'Product&order data authorization' copy link -> send to your administrator.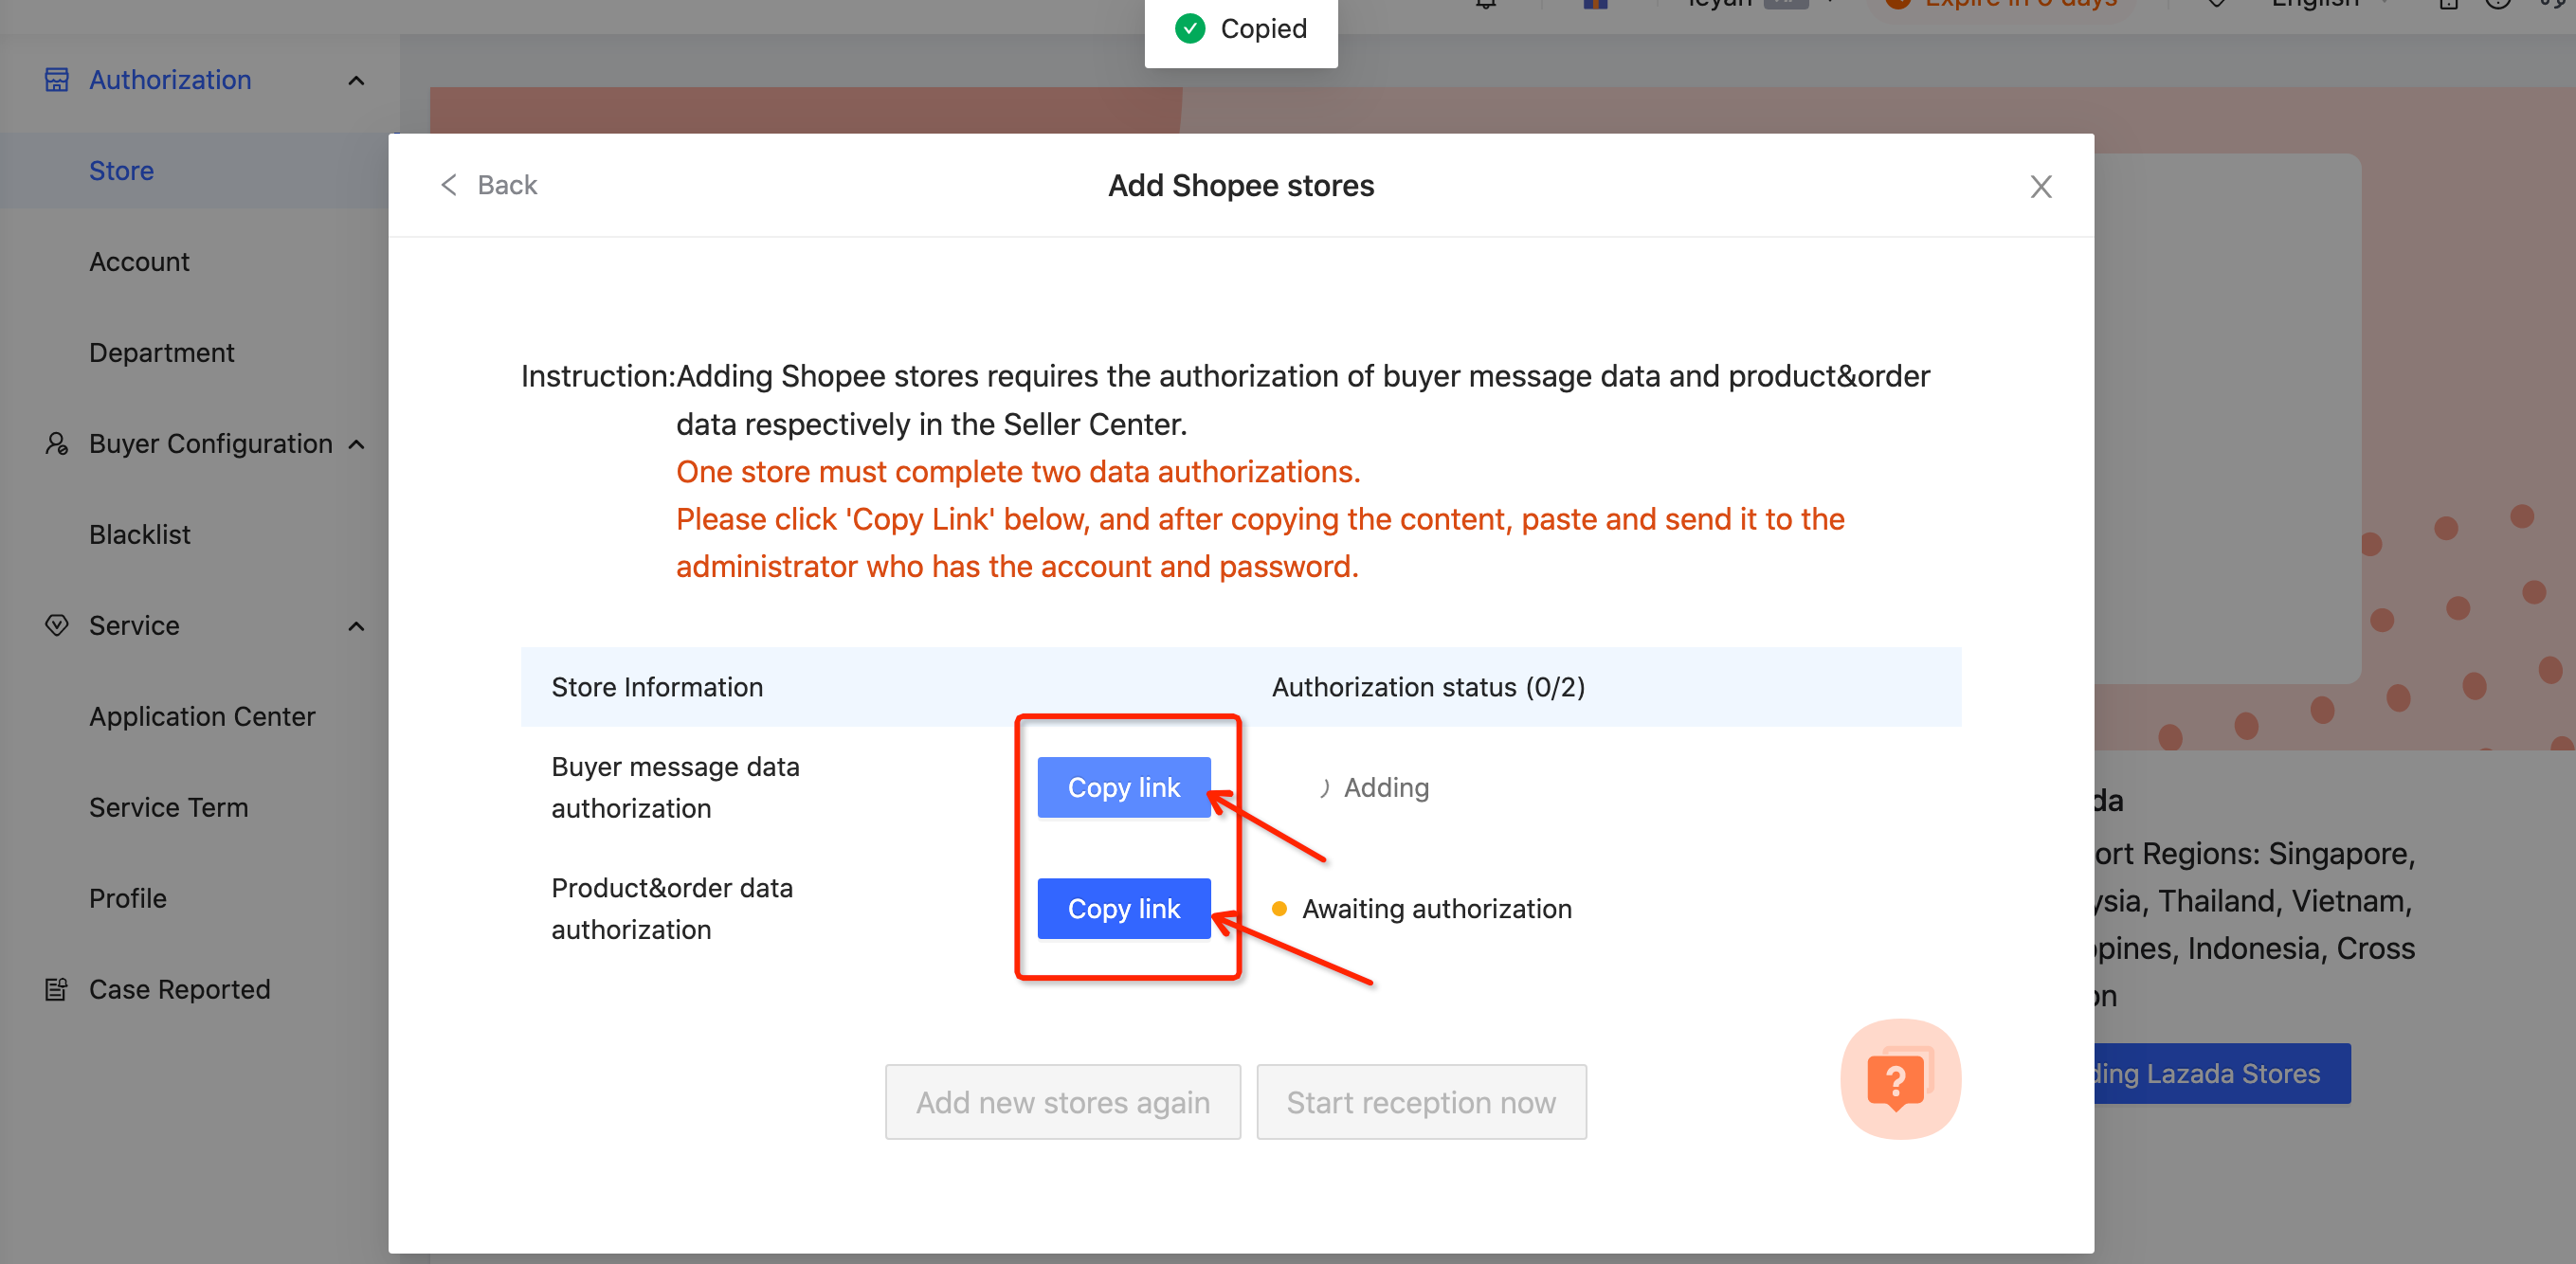
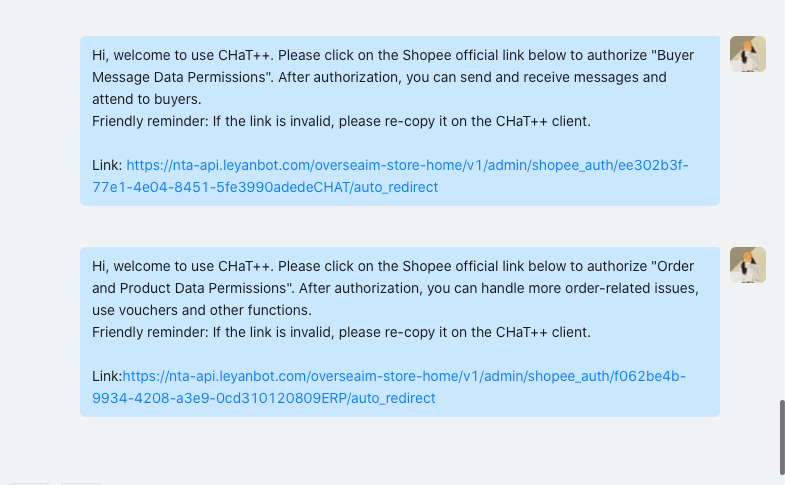
- Administrator operation
The administrator only needs to view this step.
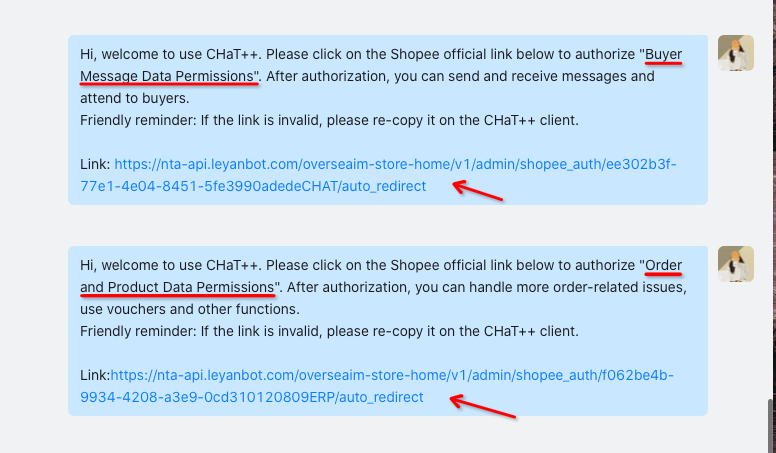
(1) Click the 'Buyer message data authorization' blue link.
When you received the staff message, please click on the two blue links to authorize 'Buyer message data' and 'Product&order data' separately. After clicking the link, you will be automatically redirected to the Shopee seller center login page.
(2) Log in to Shopee seller center.
Select country site --> Input account --> Input password -->Click “Log in”.
Notes:
- Please verify that the selected store type, store country site, and account&password are correct.
- Authorization requires verification. Please open your mobile phone or login to your email account to prepare for receiving the verification code.
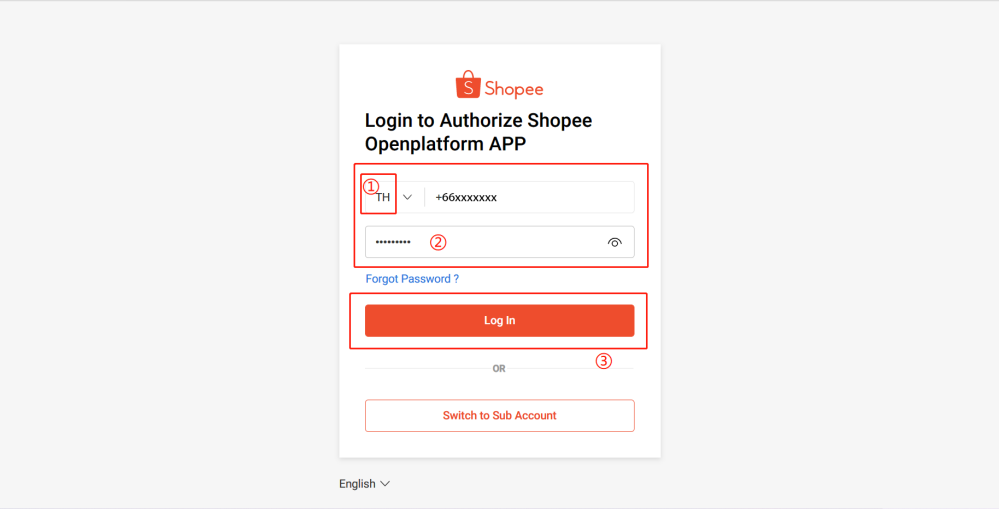
(3) Confirm Authorization
Click “Confirm Authorization”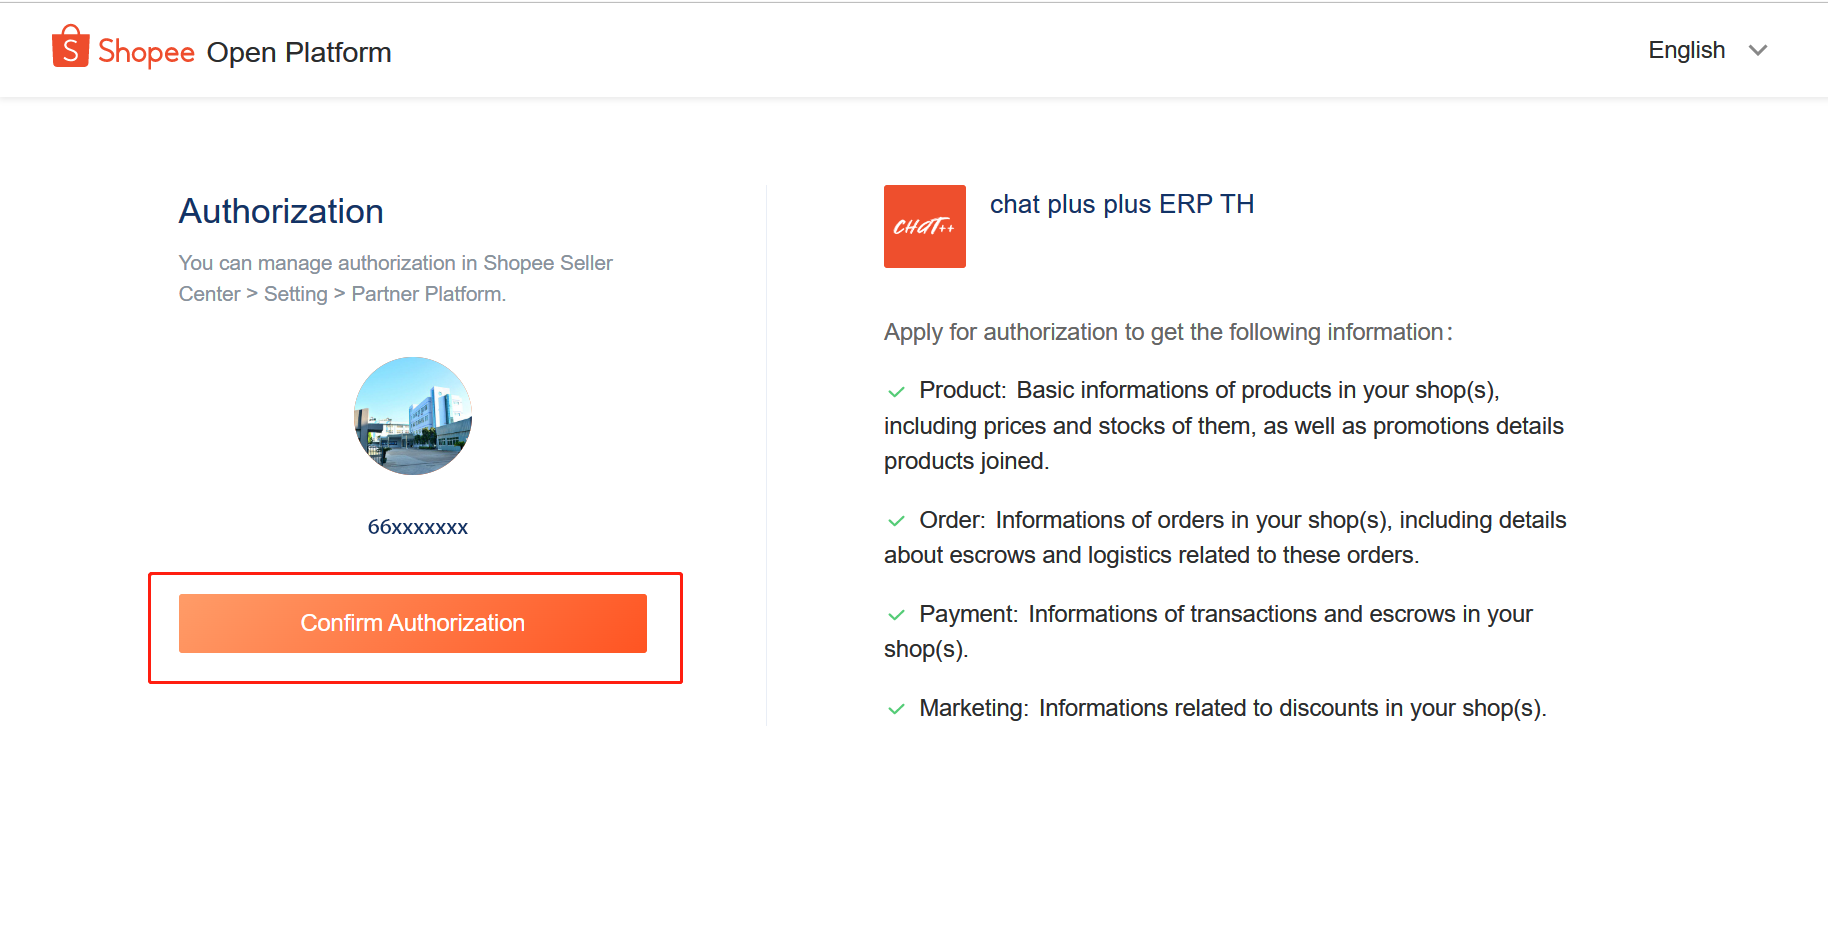
(4) Check authorization results
After confirming the authorization information, the page shown below will appear.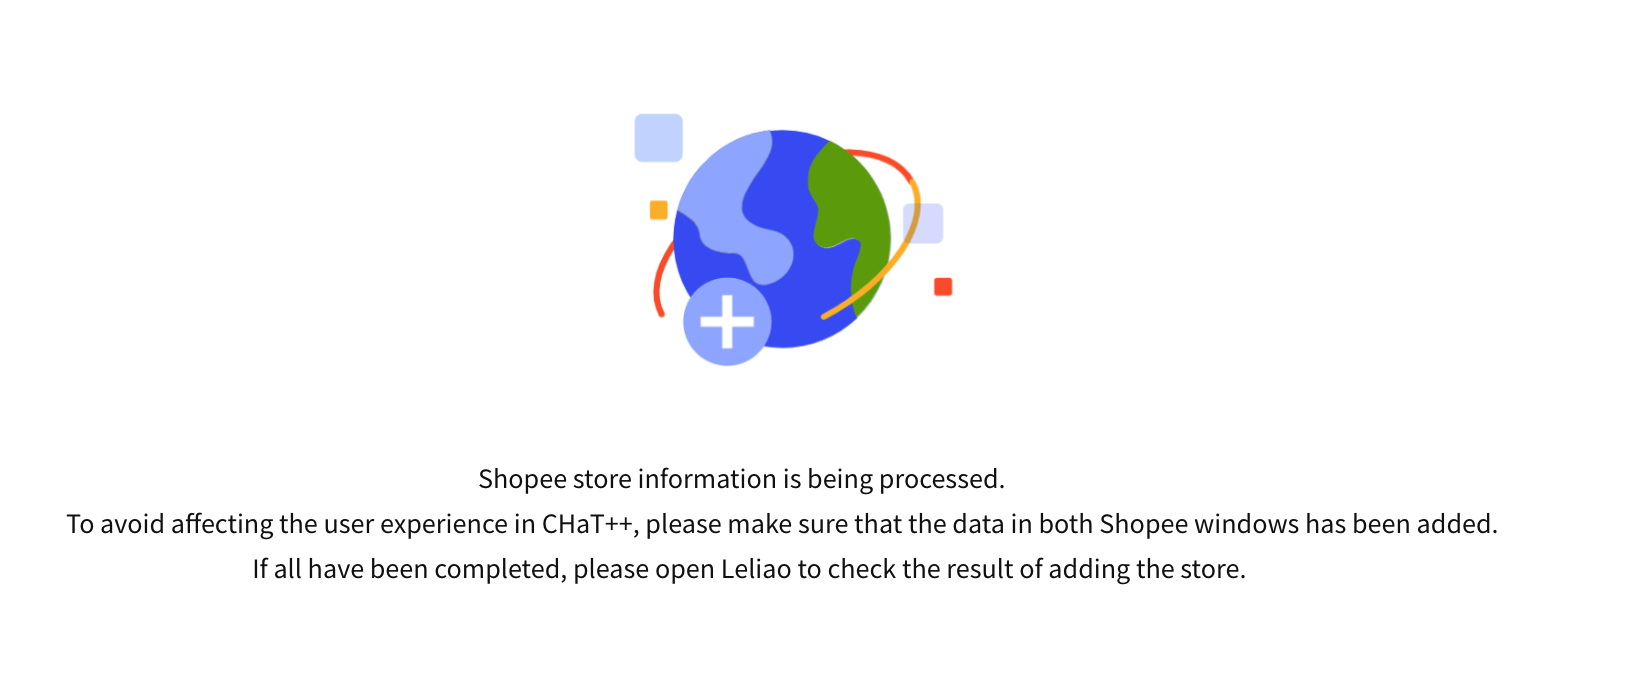
(5) Proceed with the second authorization.
Both sets of data authorization for the same store on Shopee must be completed successfully before adding the store.
- At this point, switch to the page where you received the link, click the blue "Product&order Data Authorization" link, and continue to be redirected to the login page of Shopee Seller Center.
- If the account and password were not automatically saved, please re-enter them. After successfully logging in, click 'Confirm Authorization' to complete the authorization.
- If the account and password were automatically saved, hover the cursor over the location shown in the following picture and click to jump. Click 'Confirm Authorization' to complete the authorization.
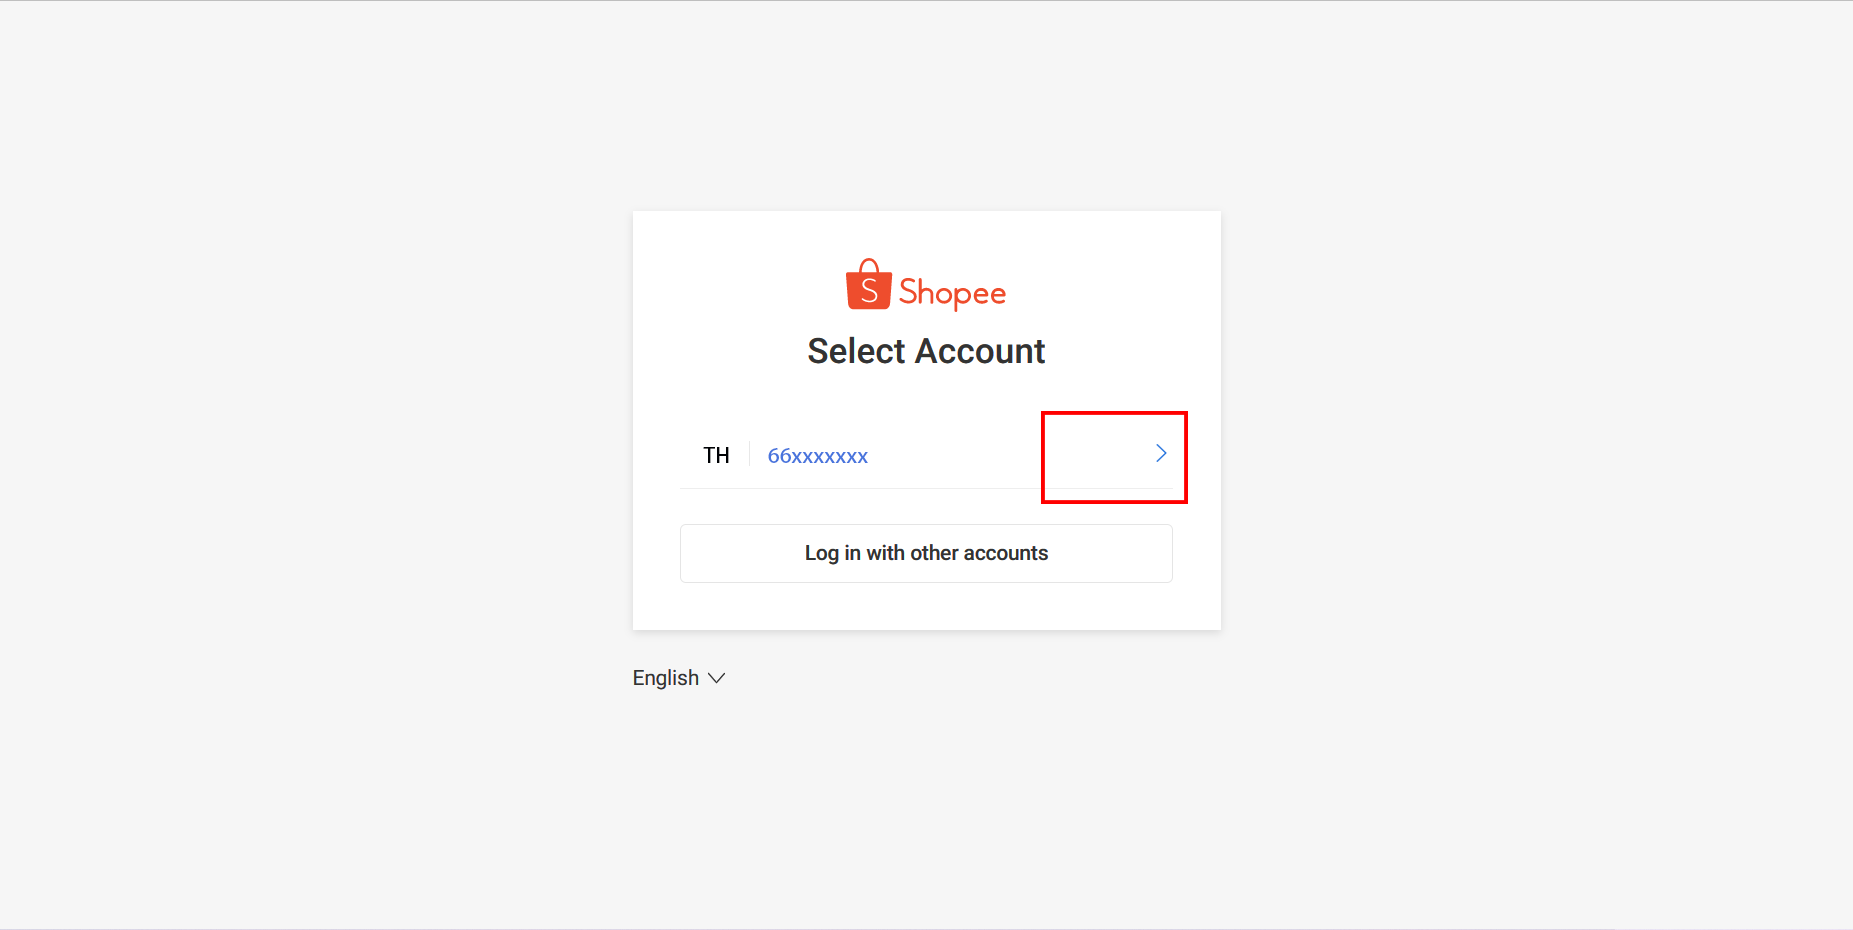
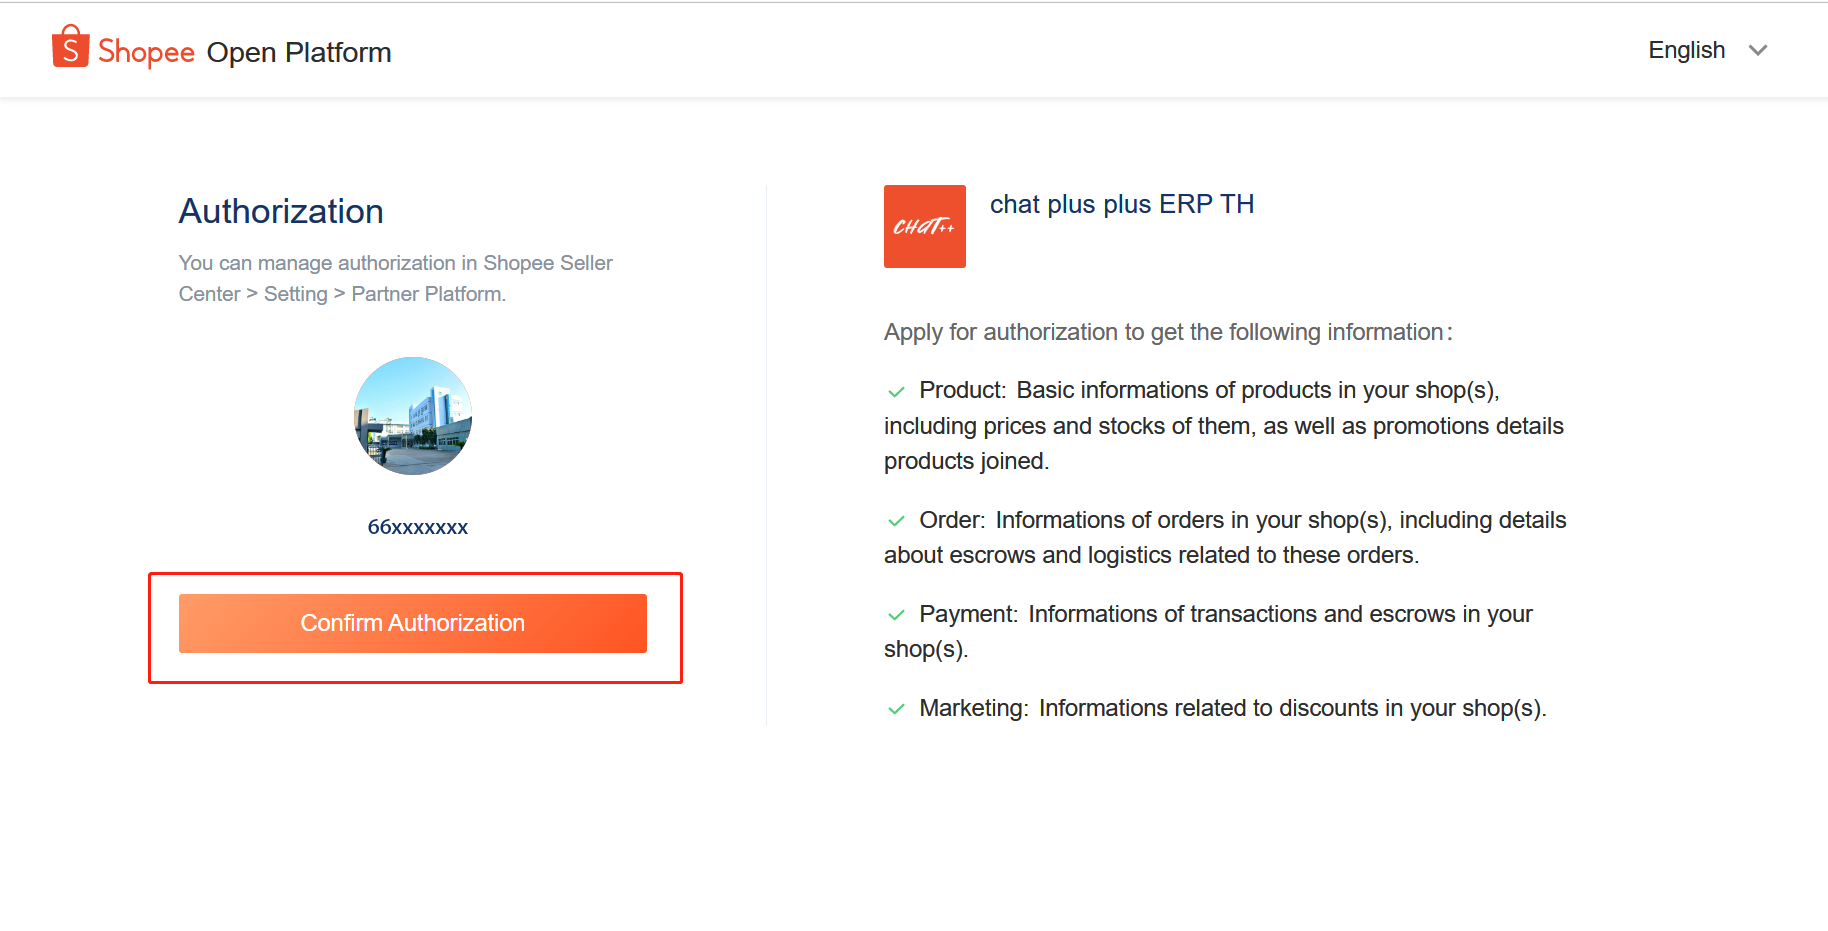
(6) After completing the authorization for the two data mentioned above, please confirm the authorization results with the employee who sent the link.
(The administrator's operation is complete at this point.)
- Authorization success
After switching to the ChatPlusAI, if both data items show 'authorization success', the store has been successfully added and you can start receiving customers.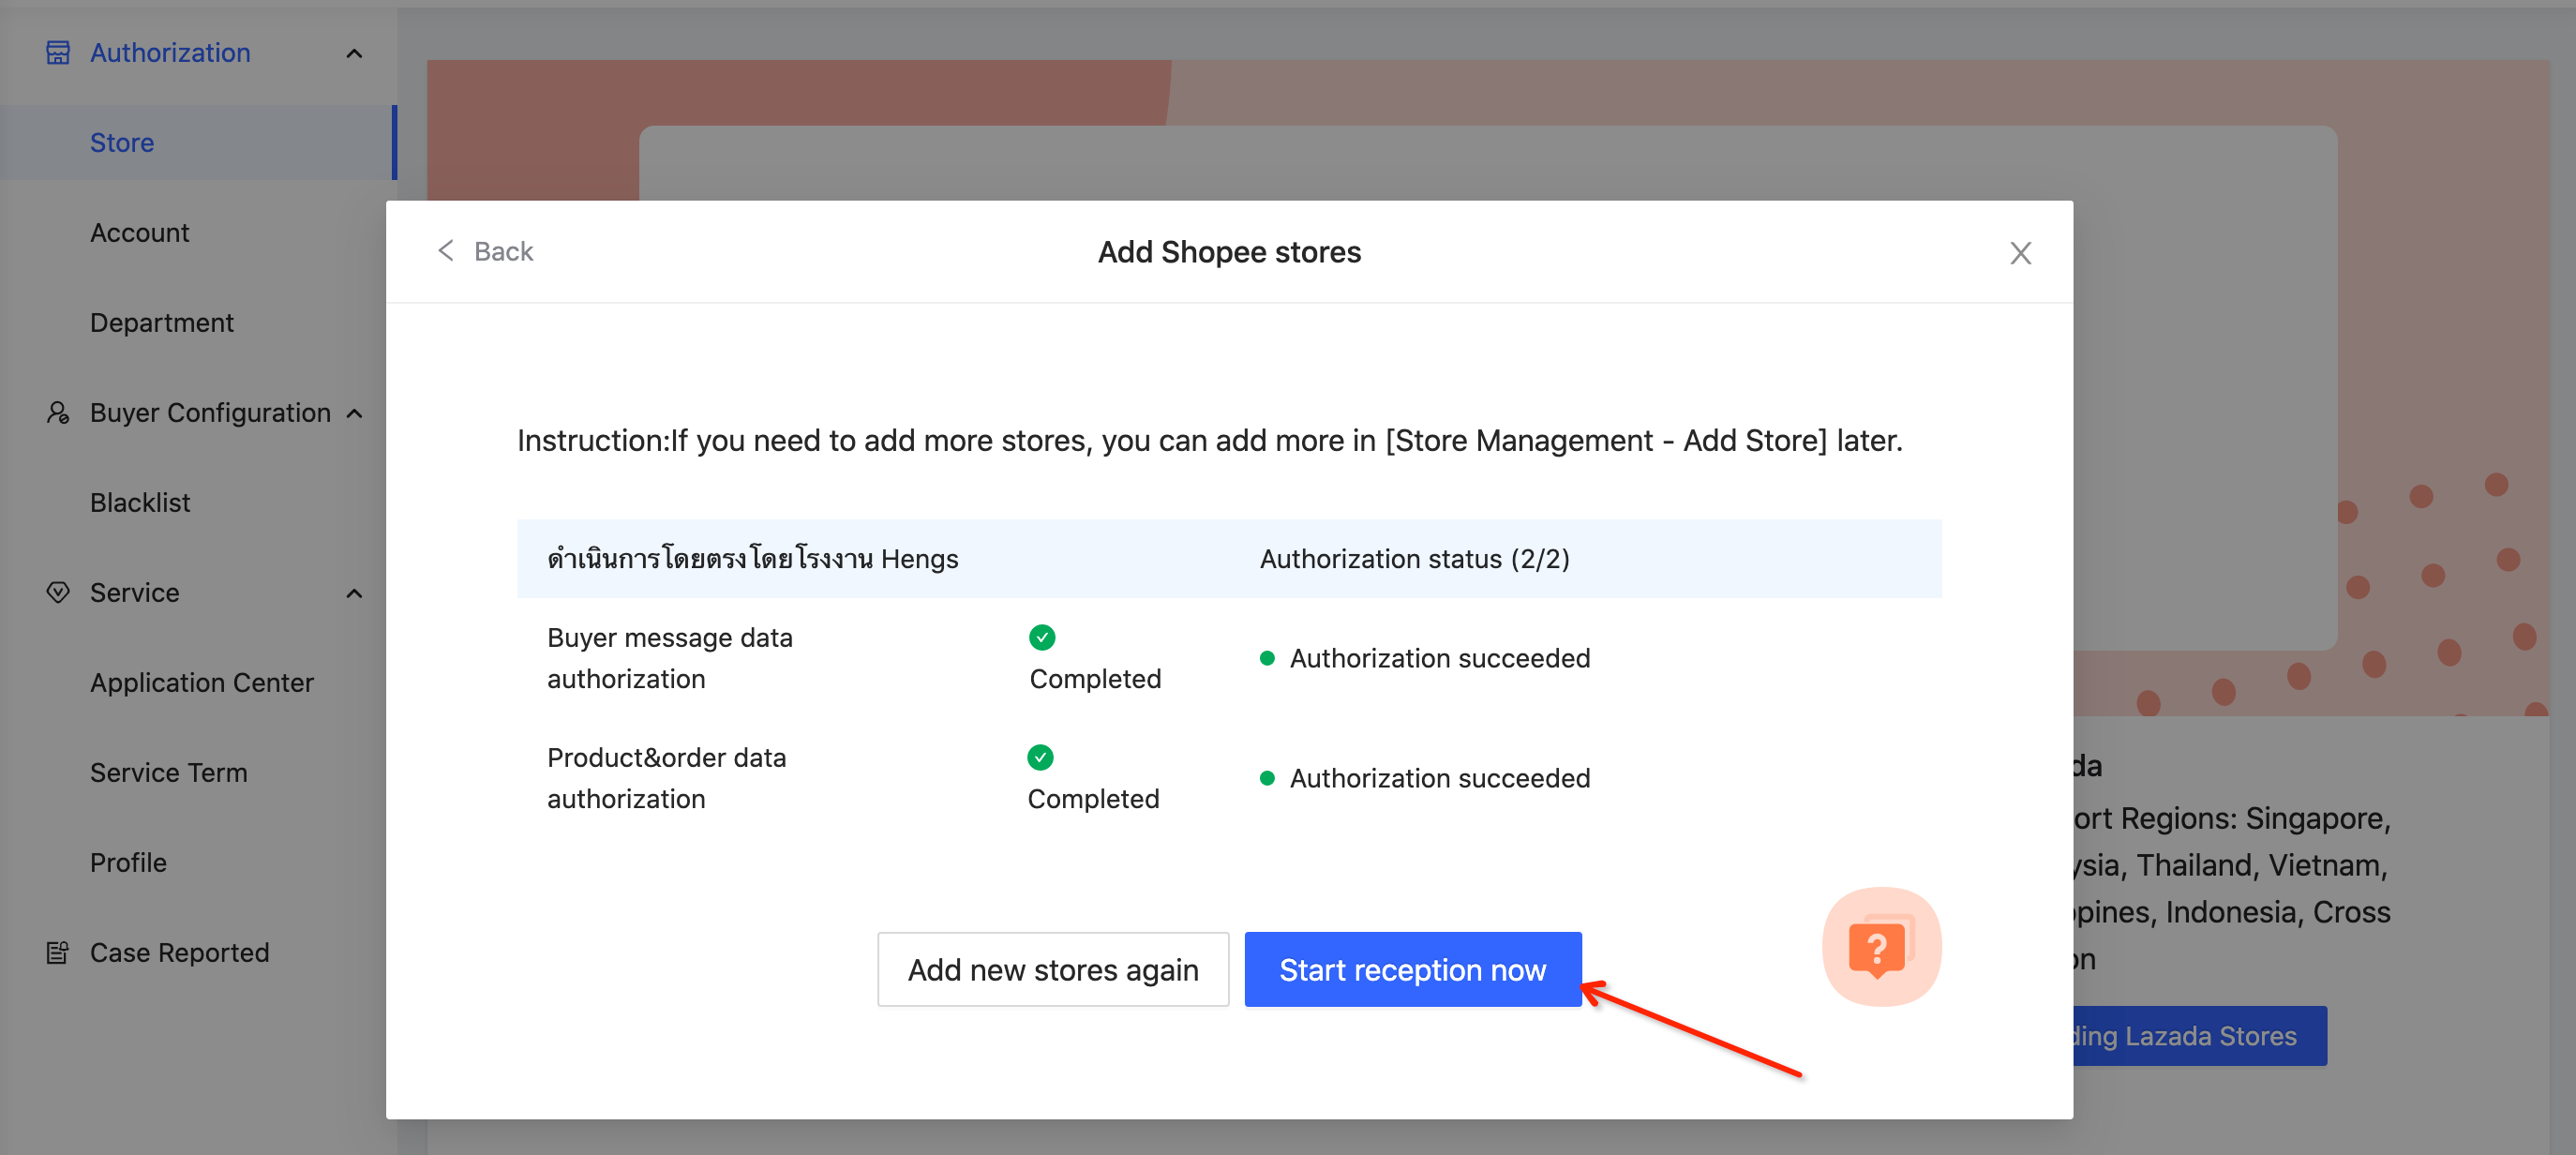
If the authorization status is not updated due to poor network conditions, please log in to ChatPlusAI again and check if there is a new store under 'Configuration →Authorization→ Store'.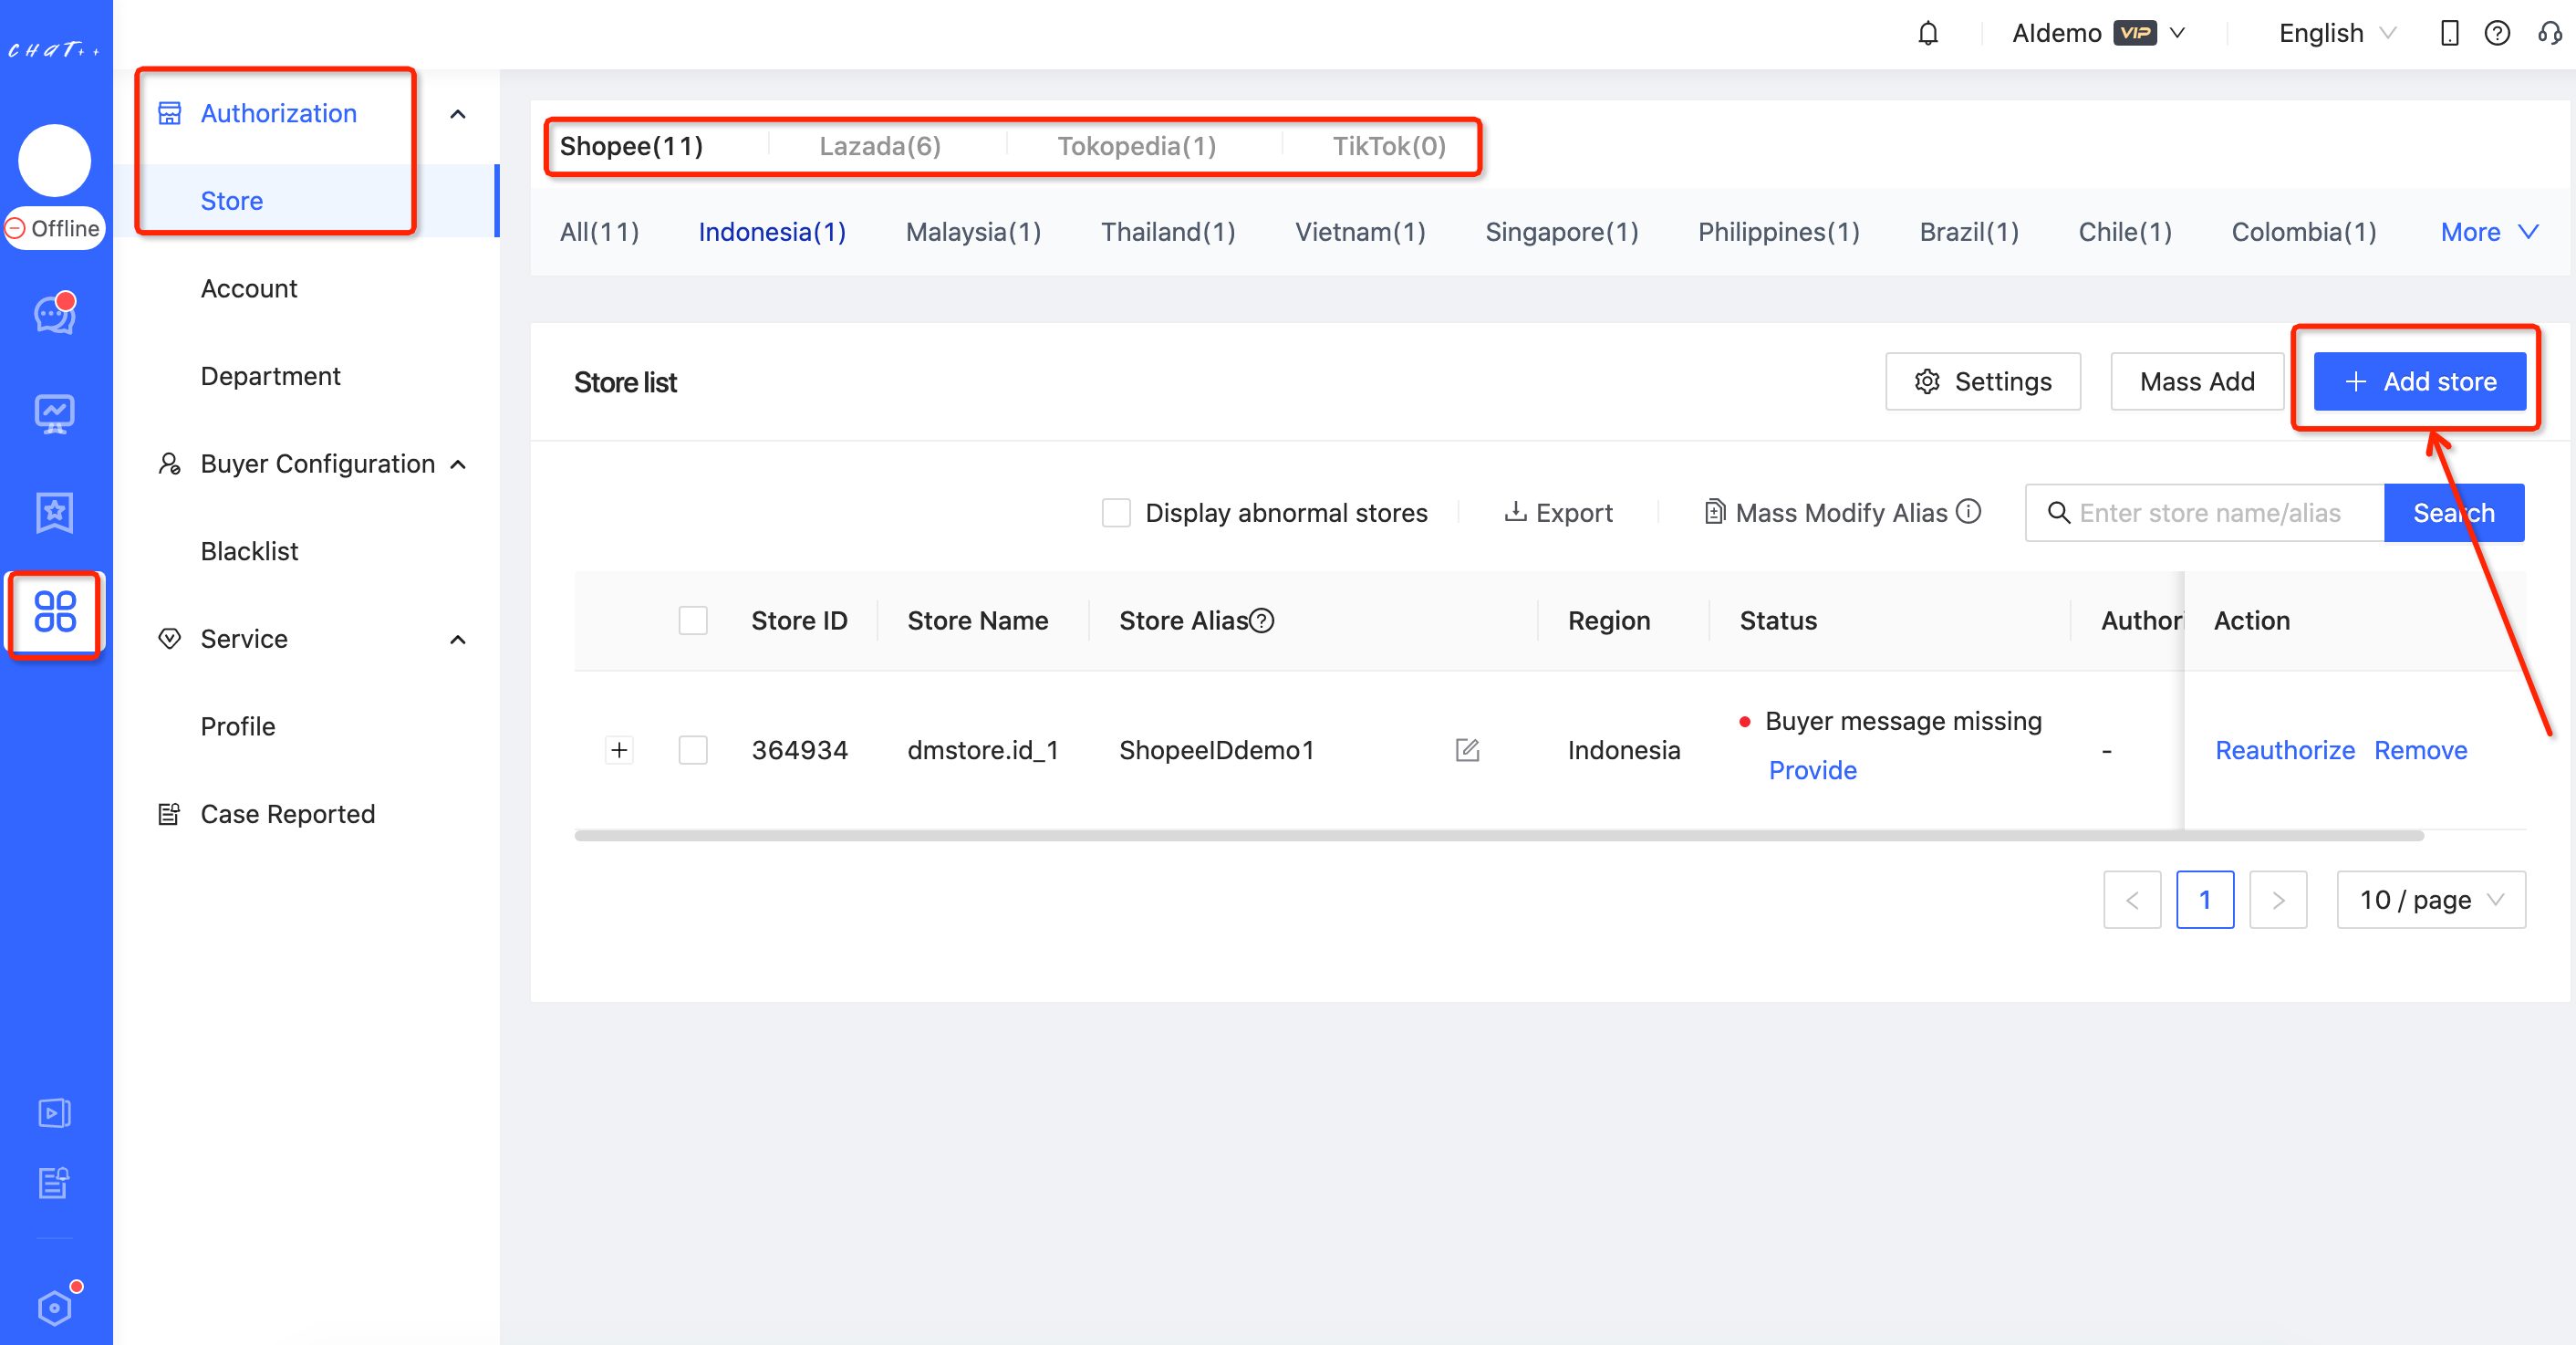
After adding the store for the first time, please be patient and wait for 15 minutes. The system is automatically synchronizing the message content of the past 30 days and the order information of the past 90 days.
FAQ
Q1:Why did the store authorization fail?
A1:Please check the below information carefully and try again.
- Entering incorrect account and password during authorization resulted in failure.
- Selecting a country site that does not match the account.
- Selecting the wrong store type, for example selecting cross-border store type instead of local store type.
Bulk adding Shopee stores
Before bulk adding Shopee stores, please make sure you have completed the authorization for one of the stores, otherwise logging into Lelink will automatically take you to the "Add Store" page.
Precautions
During the authorization process, Shopee official will send a verification code. Please prepare your mobile phone if you use a mobile phone number to log in to Shopee. If you use an email to log in to Shopee, please log in to your email in advance to receive the verification code.
Step
- Enter the page of "Bulk Add Store"
Configuration→Authorization→Shopee →Click “Mass Add”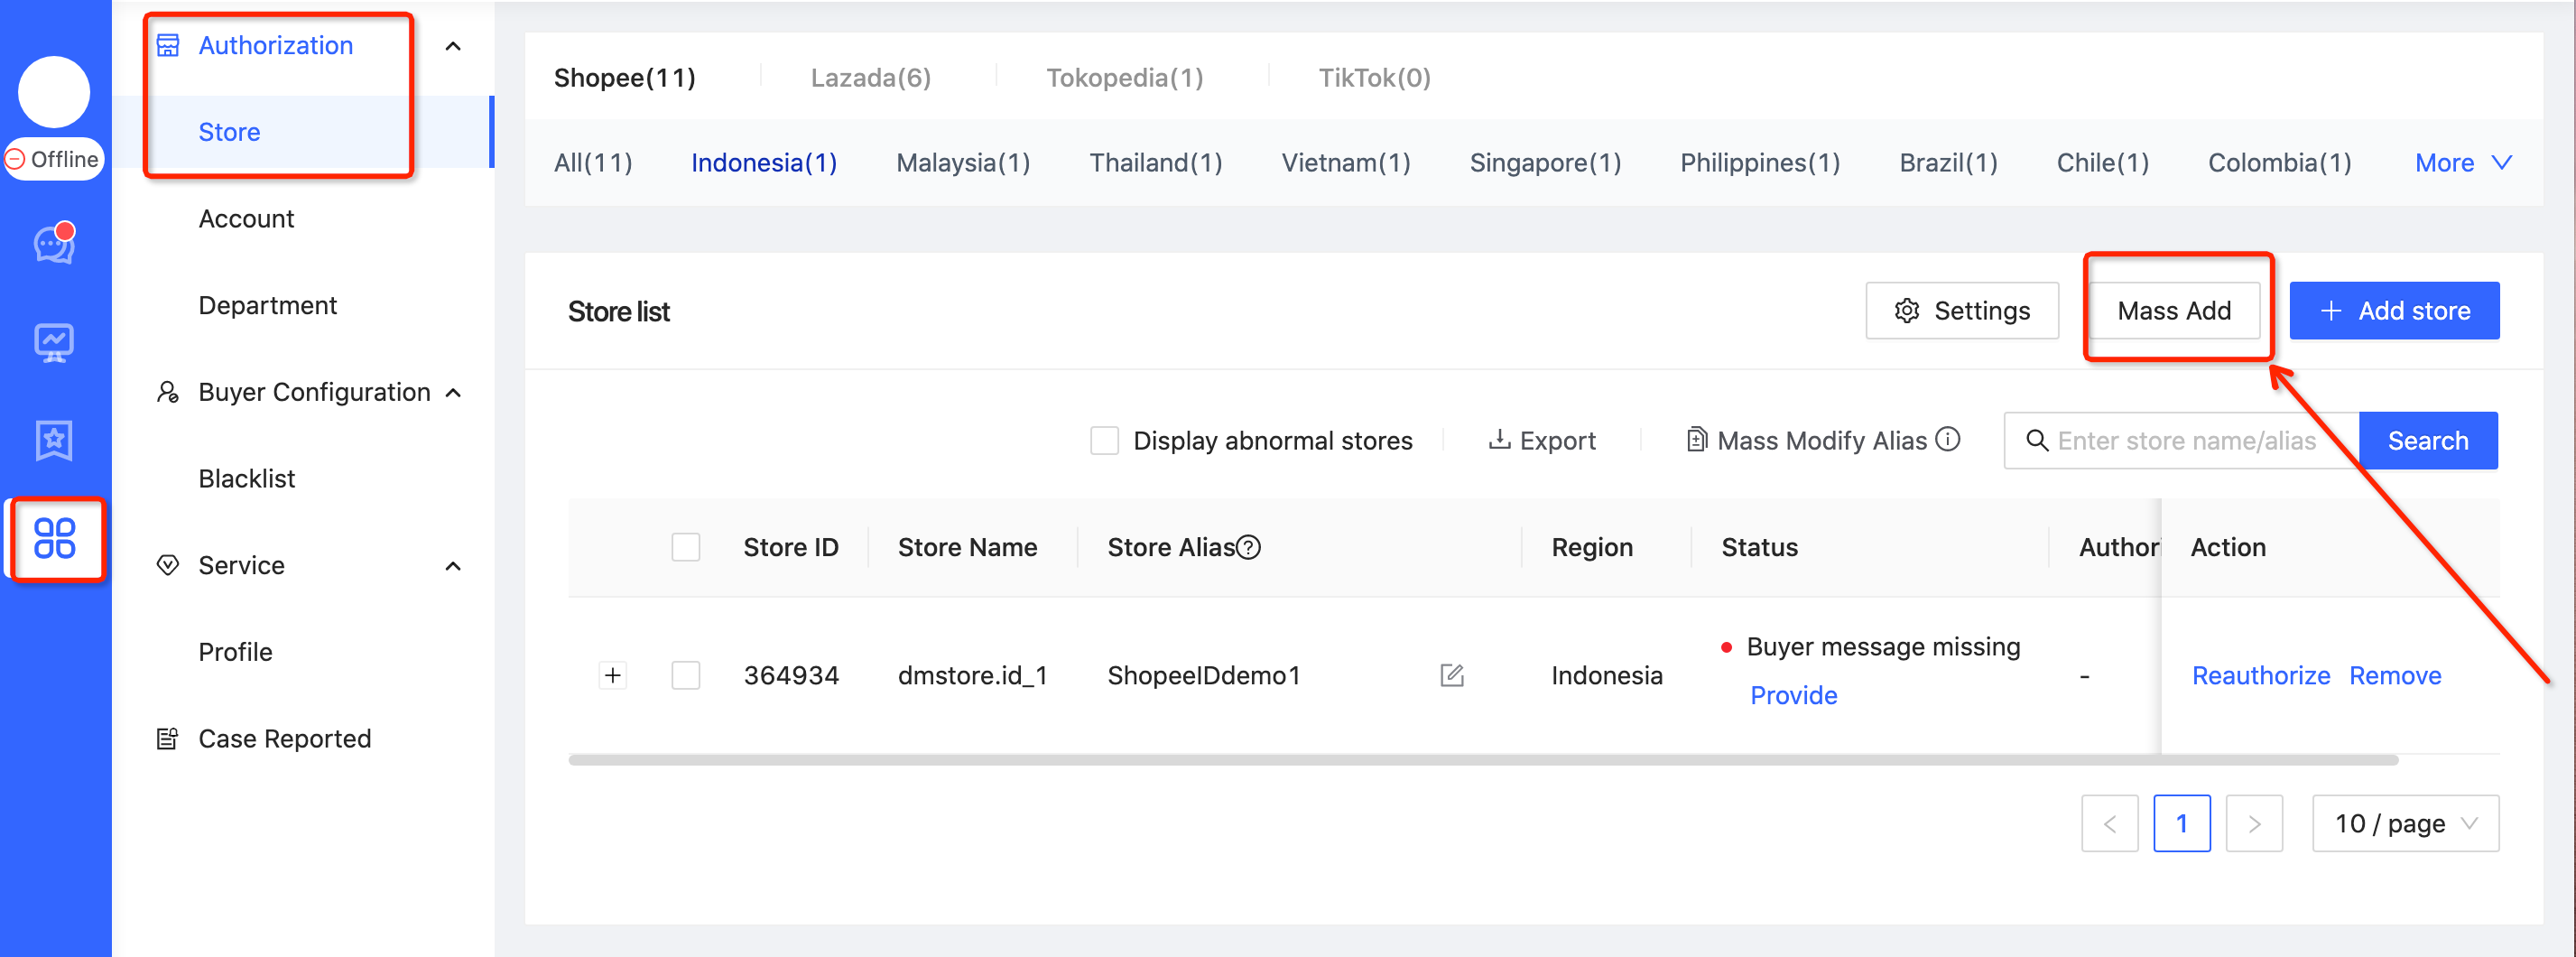
- Select store type
Select store type:Local store→ Download template
Please select store type, and then download the template.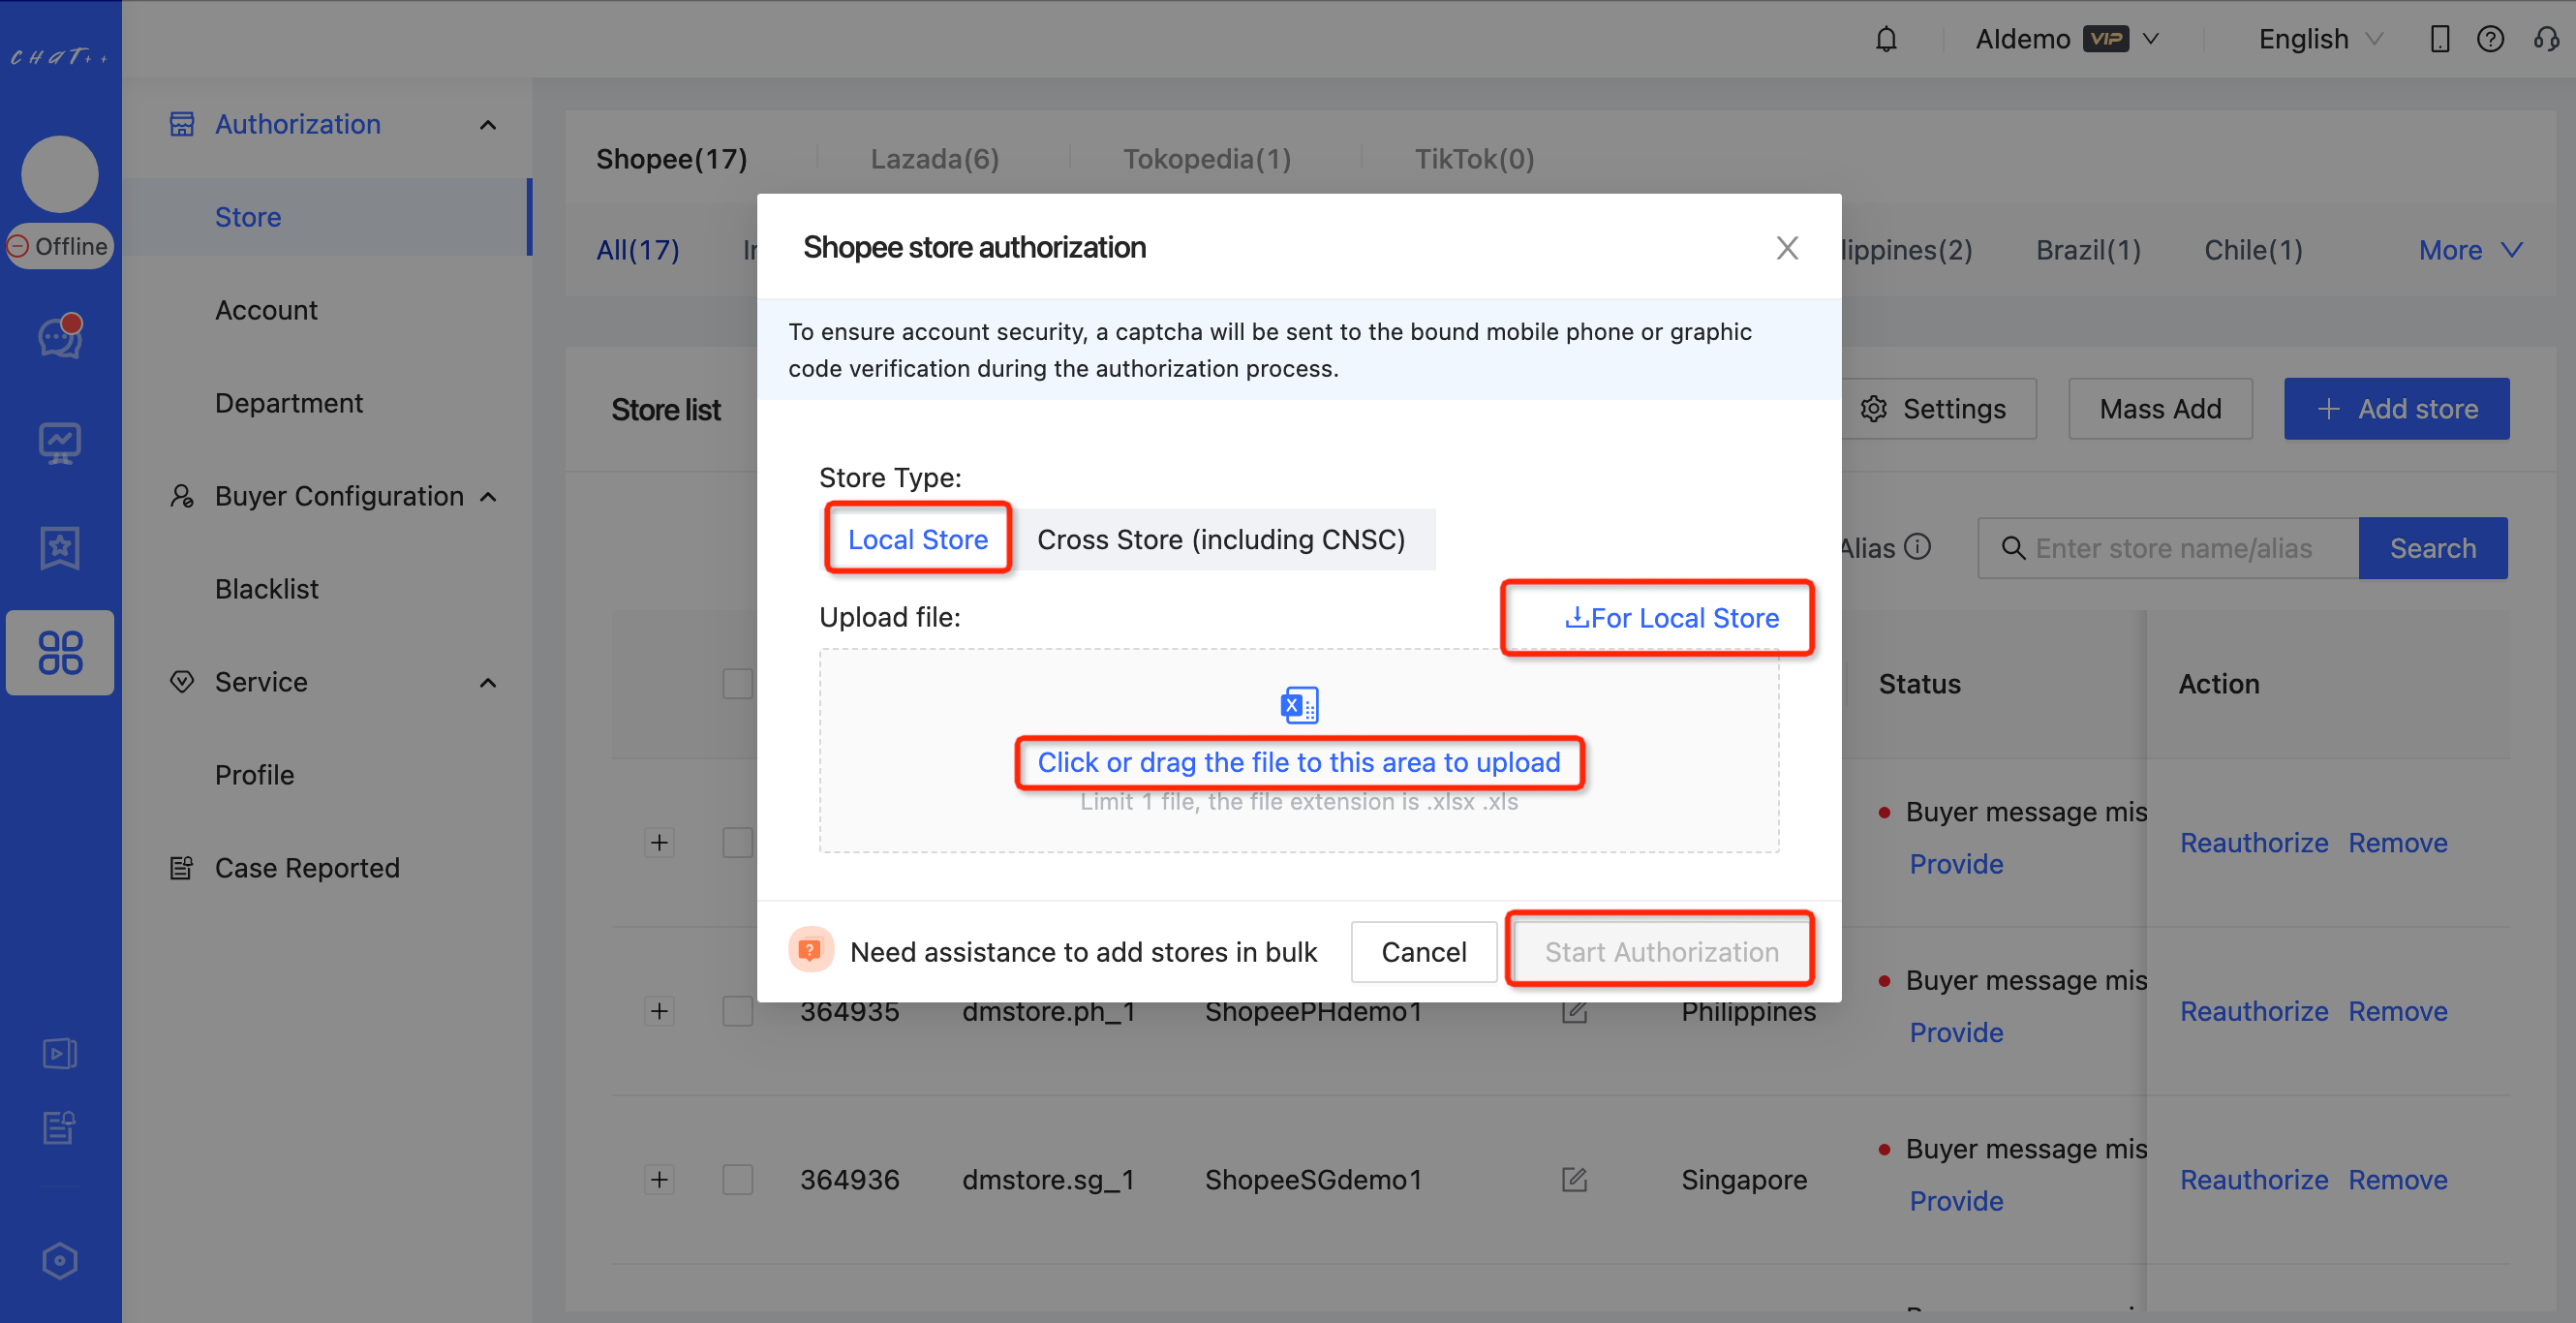
- Edit File
The country site does not need to be manually entered. Click on the triangle icon shown in the red box below and expand the list to make your selection.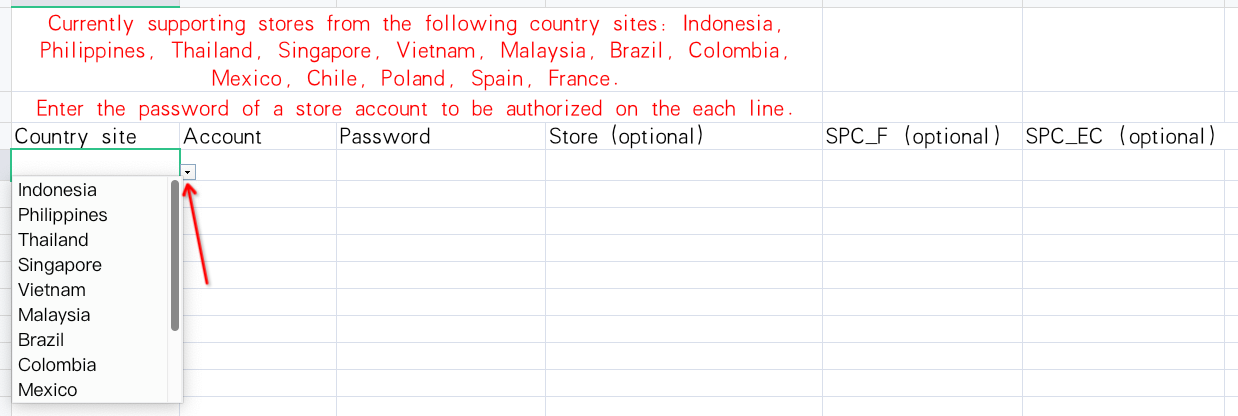
- Upload File
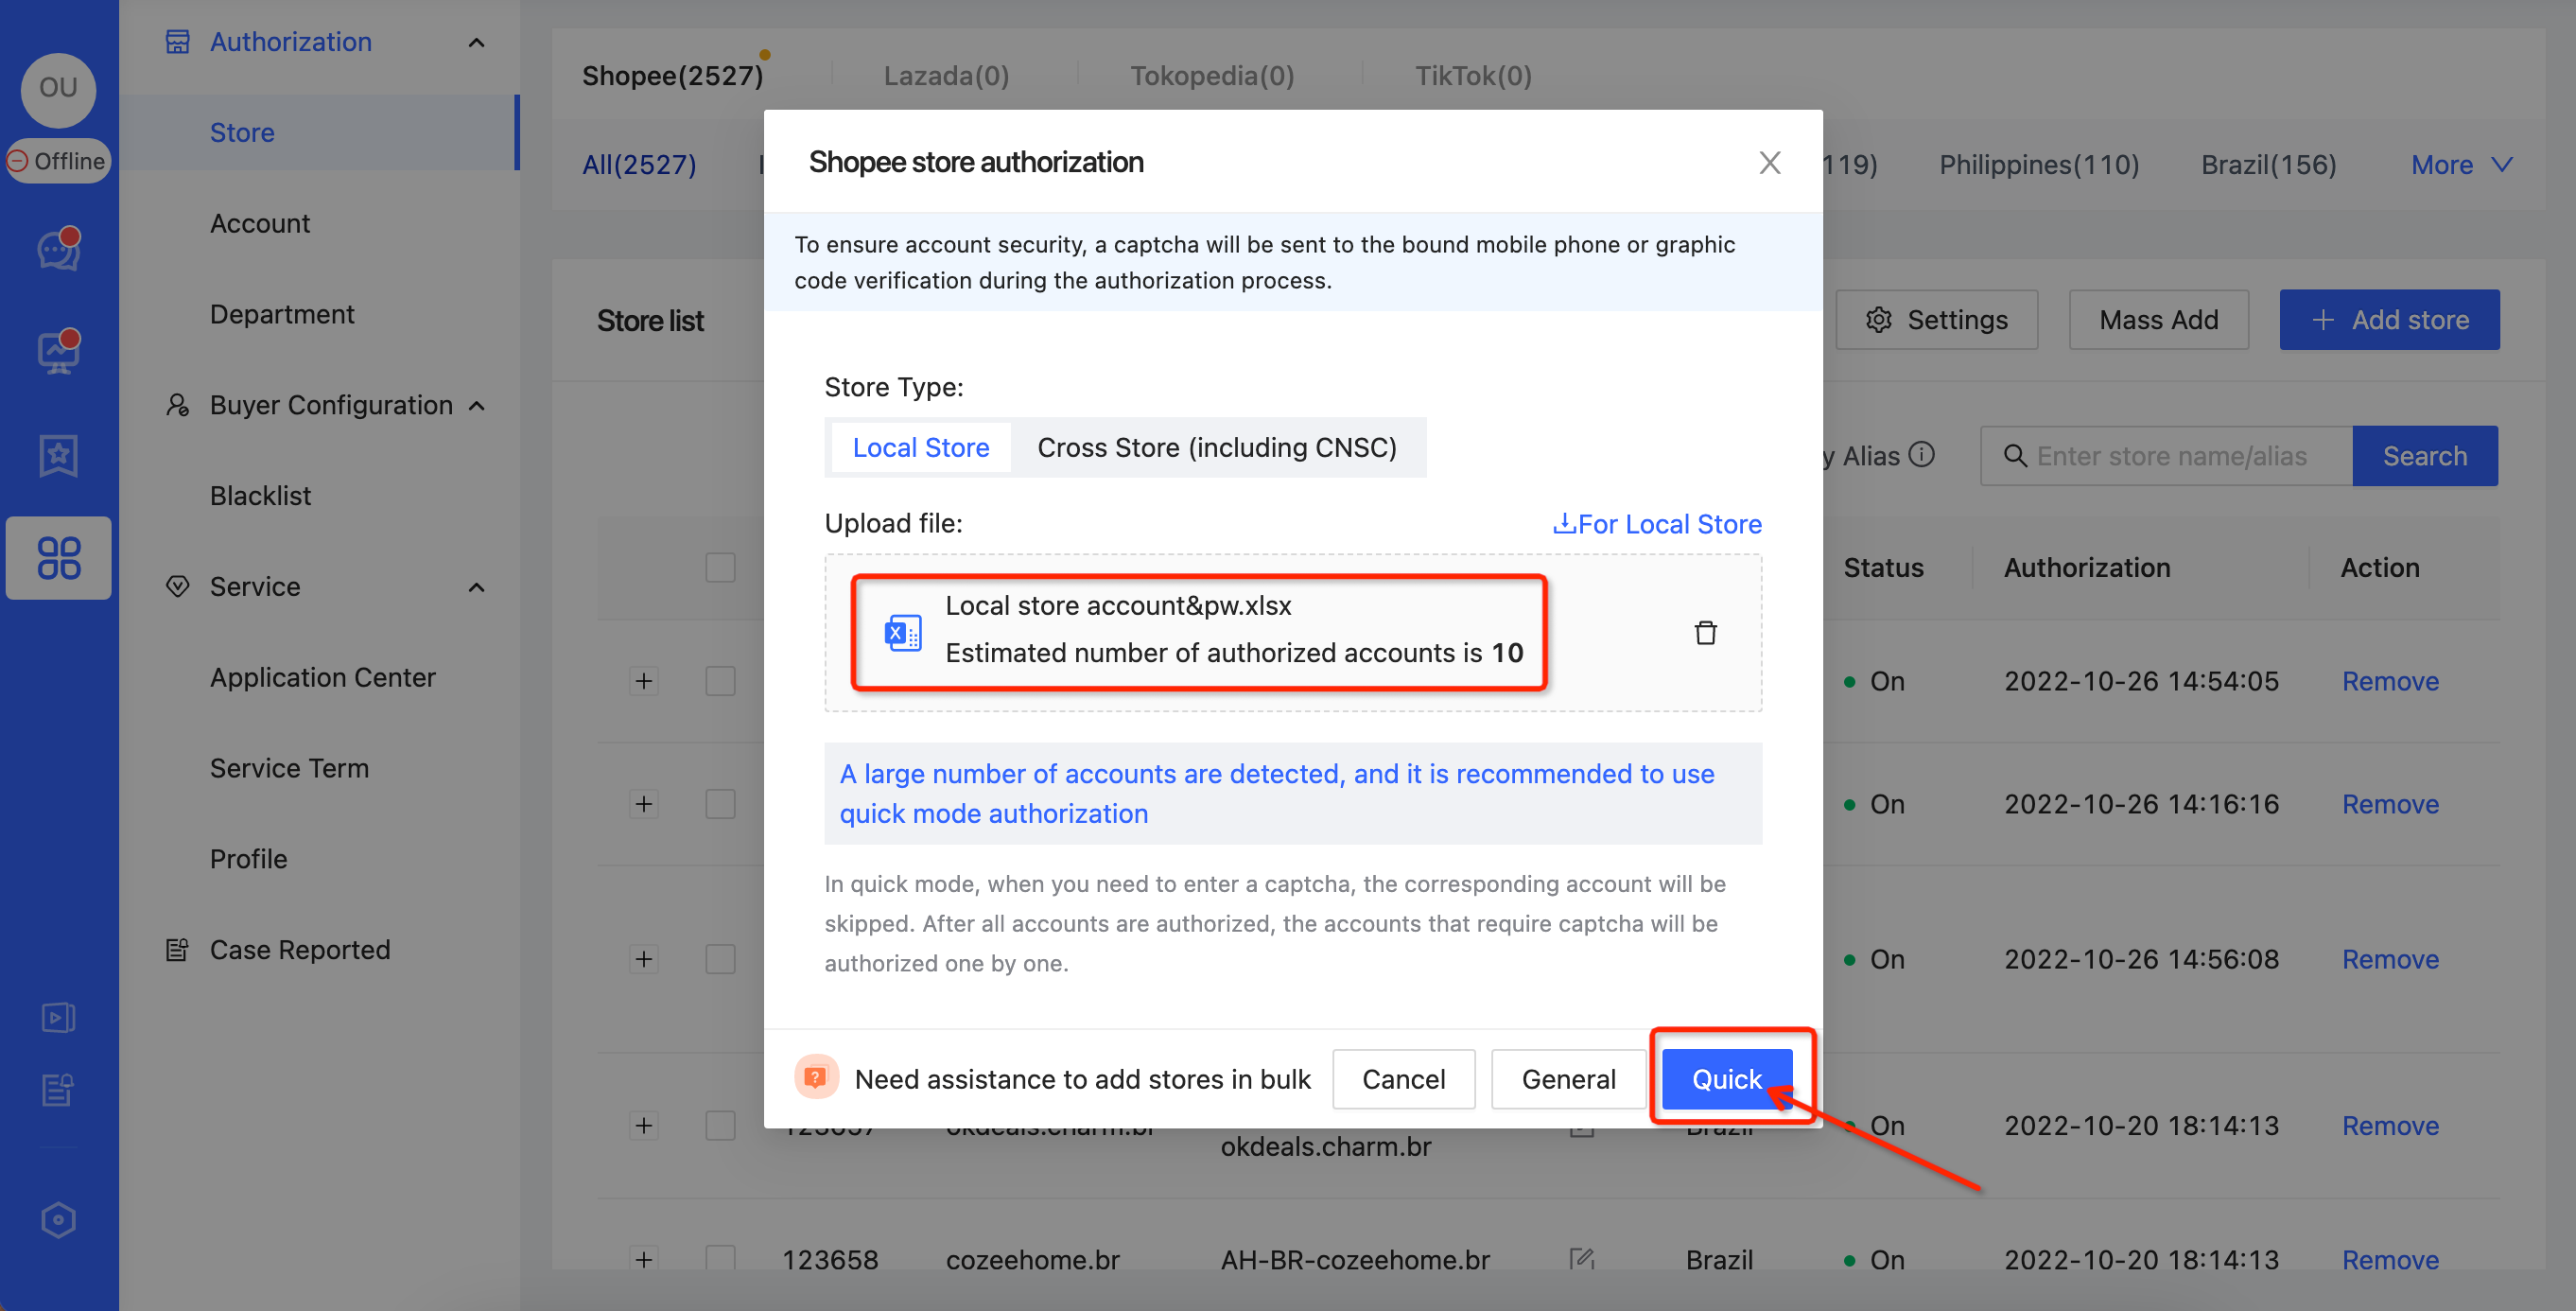
When the number of accounts is less than 10, the regular authorization mode will be automatically selected. For 10 or more accounts, it is recommended to use the fast authorization mode.
- Select authorization mode
Authorization requires verification. Please open your phone or log in to your email to prepare for receiving the verification code.
(1) General authorization (number of accounts<10)
General authorization mode: During the adding process, Shopee will send a verification code or captcha. For accounts that require verification, you need to enter the verification code on the page or manually click "skip" before proceeding to the next account authorization.
(2) Quick authorization (number of accounts≥10)
Quick authorization mode: When encountering an account that requires inputting a verification code, the corresponding account will be automatically skipped. After all the account authorizations are completed, the accounts that require verification codes will be authorized one by one.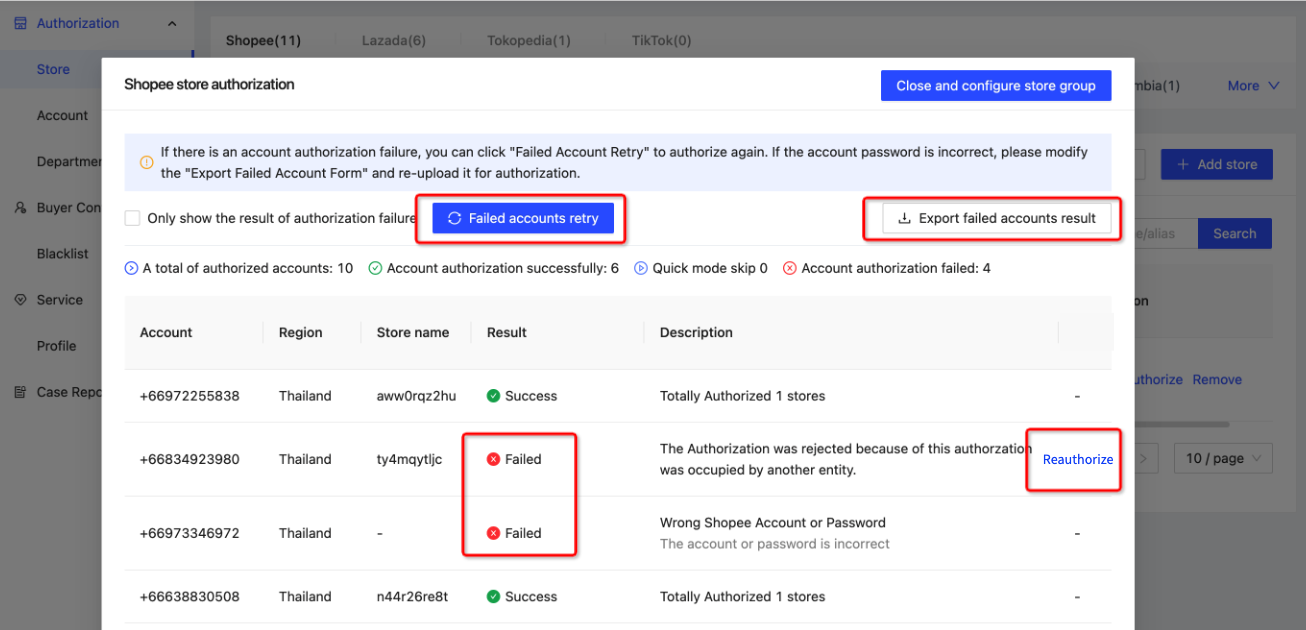
If there is a failed account authorization, click "Retry Failed Accounts" to authorize automatically again. If the authorization failed due to an incorrect account password, please click "Export failed account result", modify it, and re-upload it for authorization.
For accounts that require verification codes, please click "Send Verification Code", enter the verification code on the page to complete the authorization.
Authorize Lazada store
Authorize Lazada Local Store
Precaution
- Before authorization, to avoid IP association, please confirm that the current computer and network are the ones that are frequently used to log in to the Lazada marketplace's seller center. After authorization, you can use any computer or network environment to log in to ChatPlusAI for reception, without the risk of IP association.
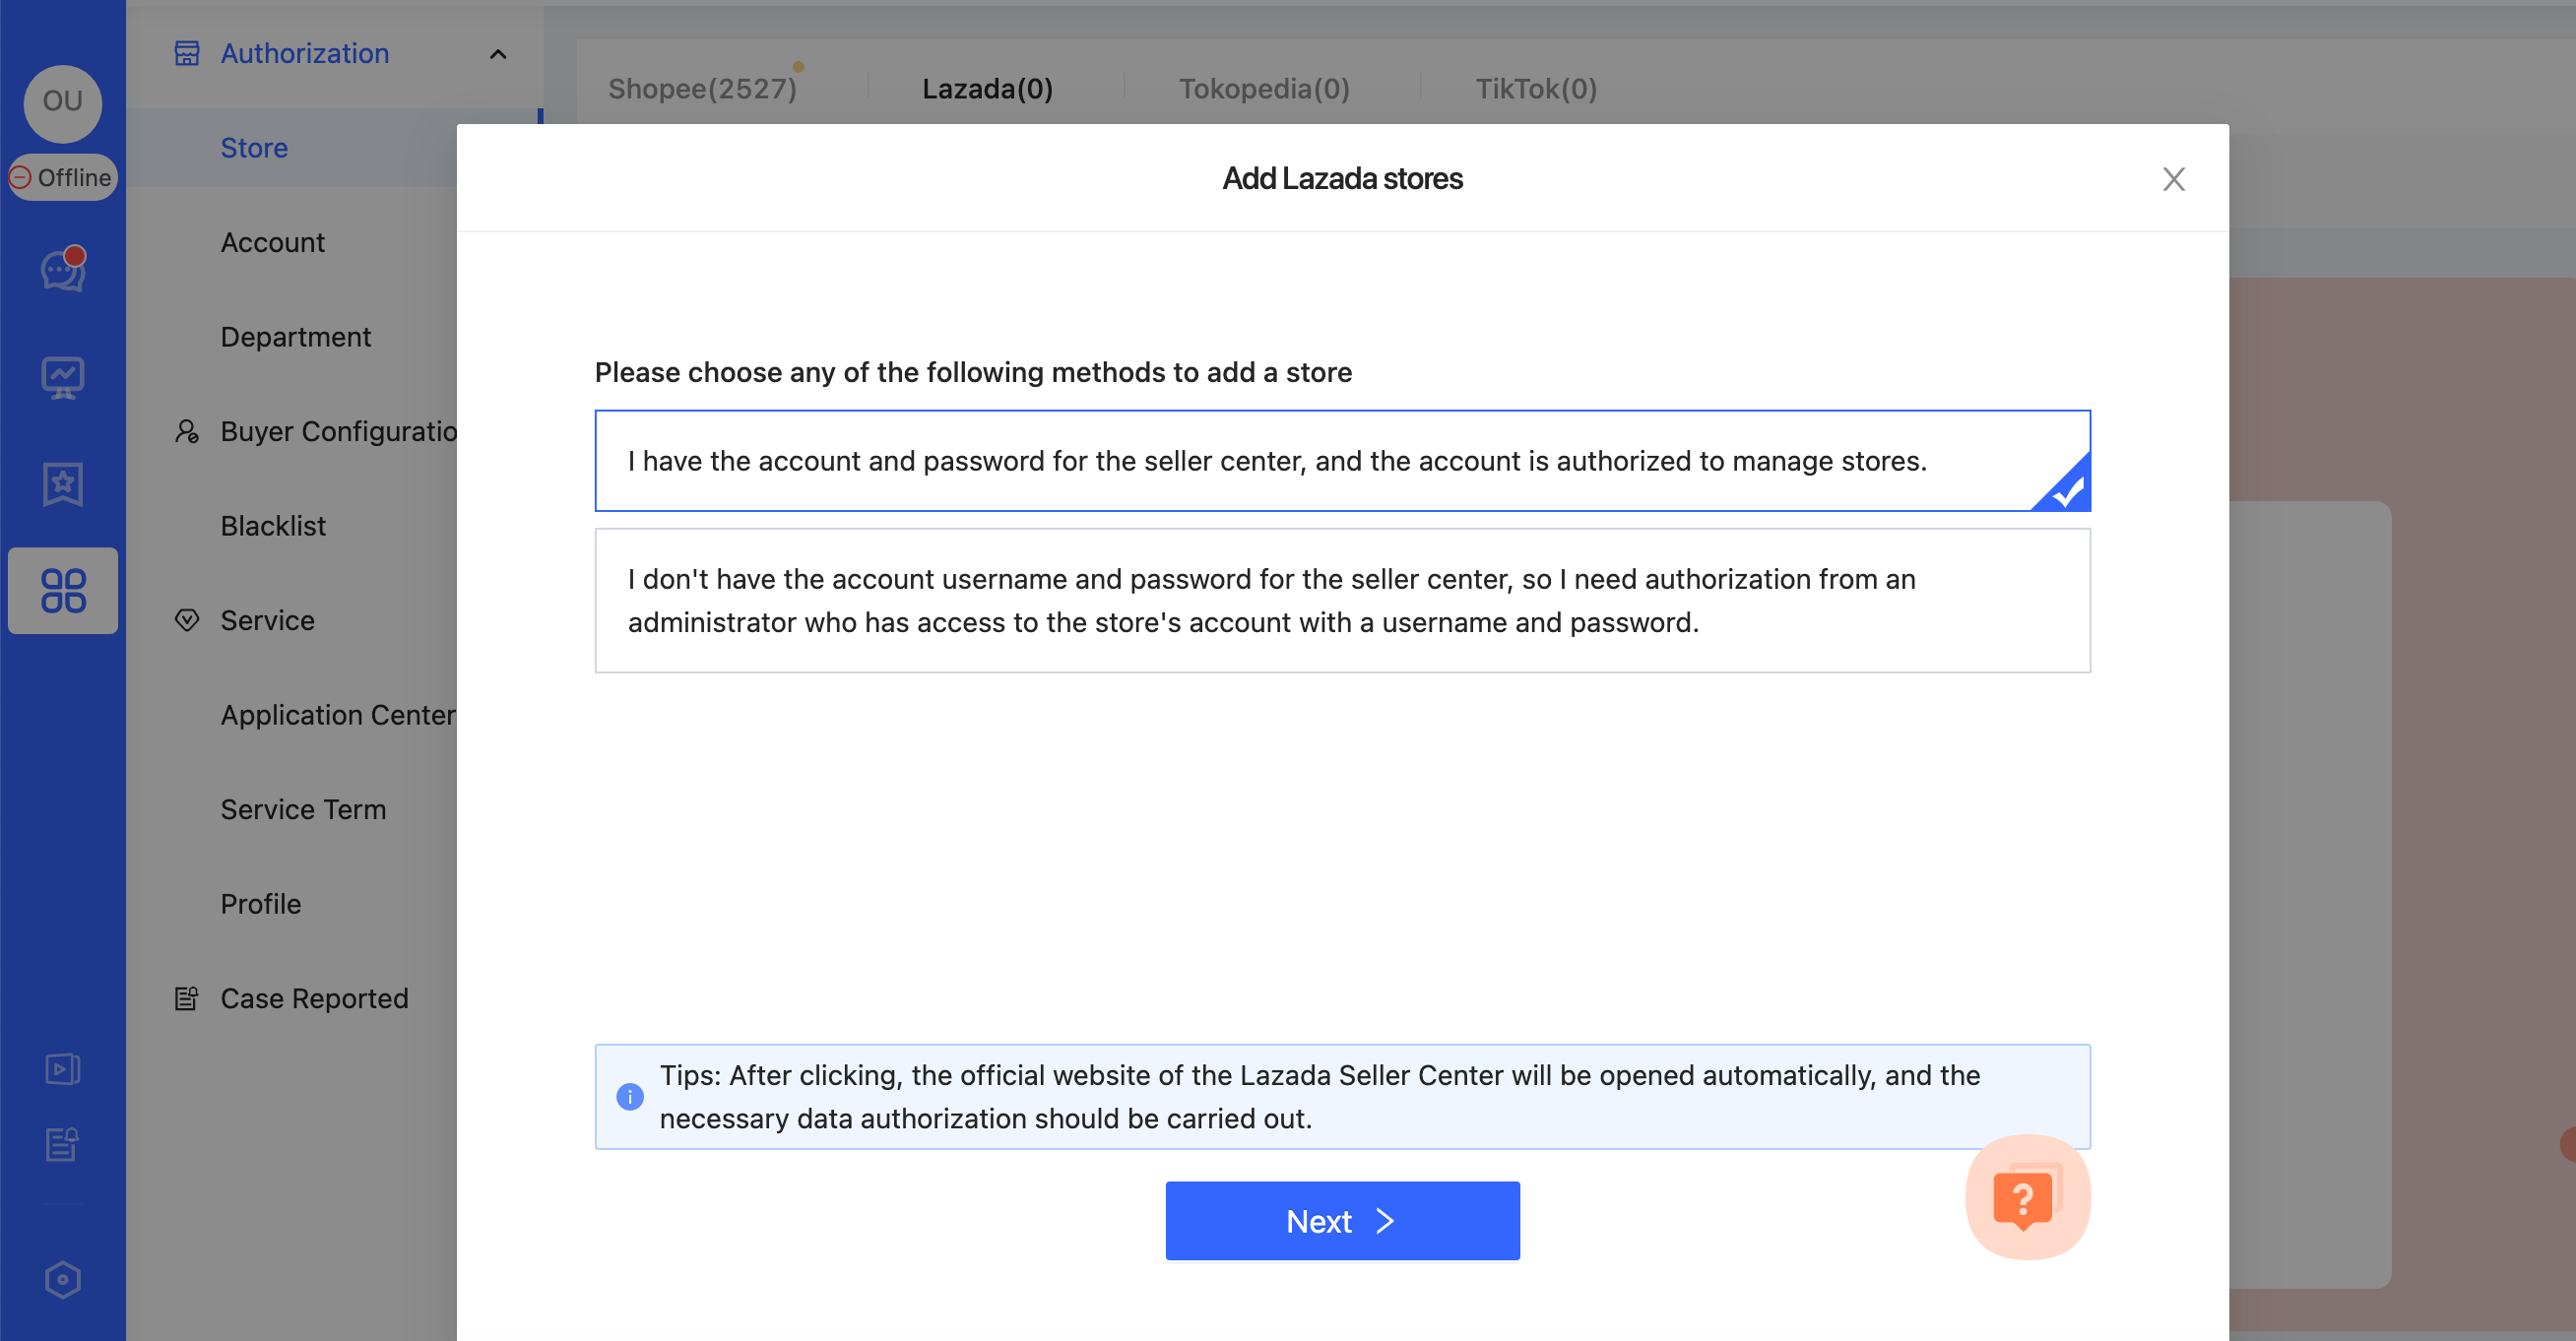
- If you have the account password for Lazada Seller Center and that account is authorized to manage shops, you can choose Method 1: you will be redirected to the Lazada Seller Center to complete the authorization.
- If you do not have the account password for Lazada Seller Center, when you reach the step of selecting the adding method, you can choose Method 2: Follow the prompts to share the link with an administrator who has the account password, and ask your administrator to click the link to log in to the seller center to complete the authorization.
The video tutorial is as follows:
Before local store authorization, it is recommended to log in to the Lazada seller account in advance in the browser that you log in to daily, so as to avoid the "0 price authorization for half a year" option becoming invalid during the authorization process.
Method 1: Go to the seller center to authorize with your account and password.
Step
1.Enter the store authorization page
After the first login to ChatPlusAI, you will be directed to the guided page for adding a store.
Select Lazada --> Click Next
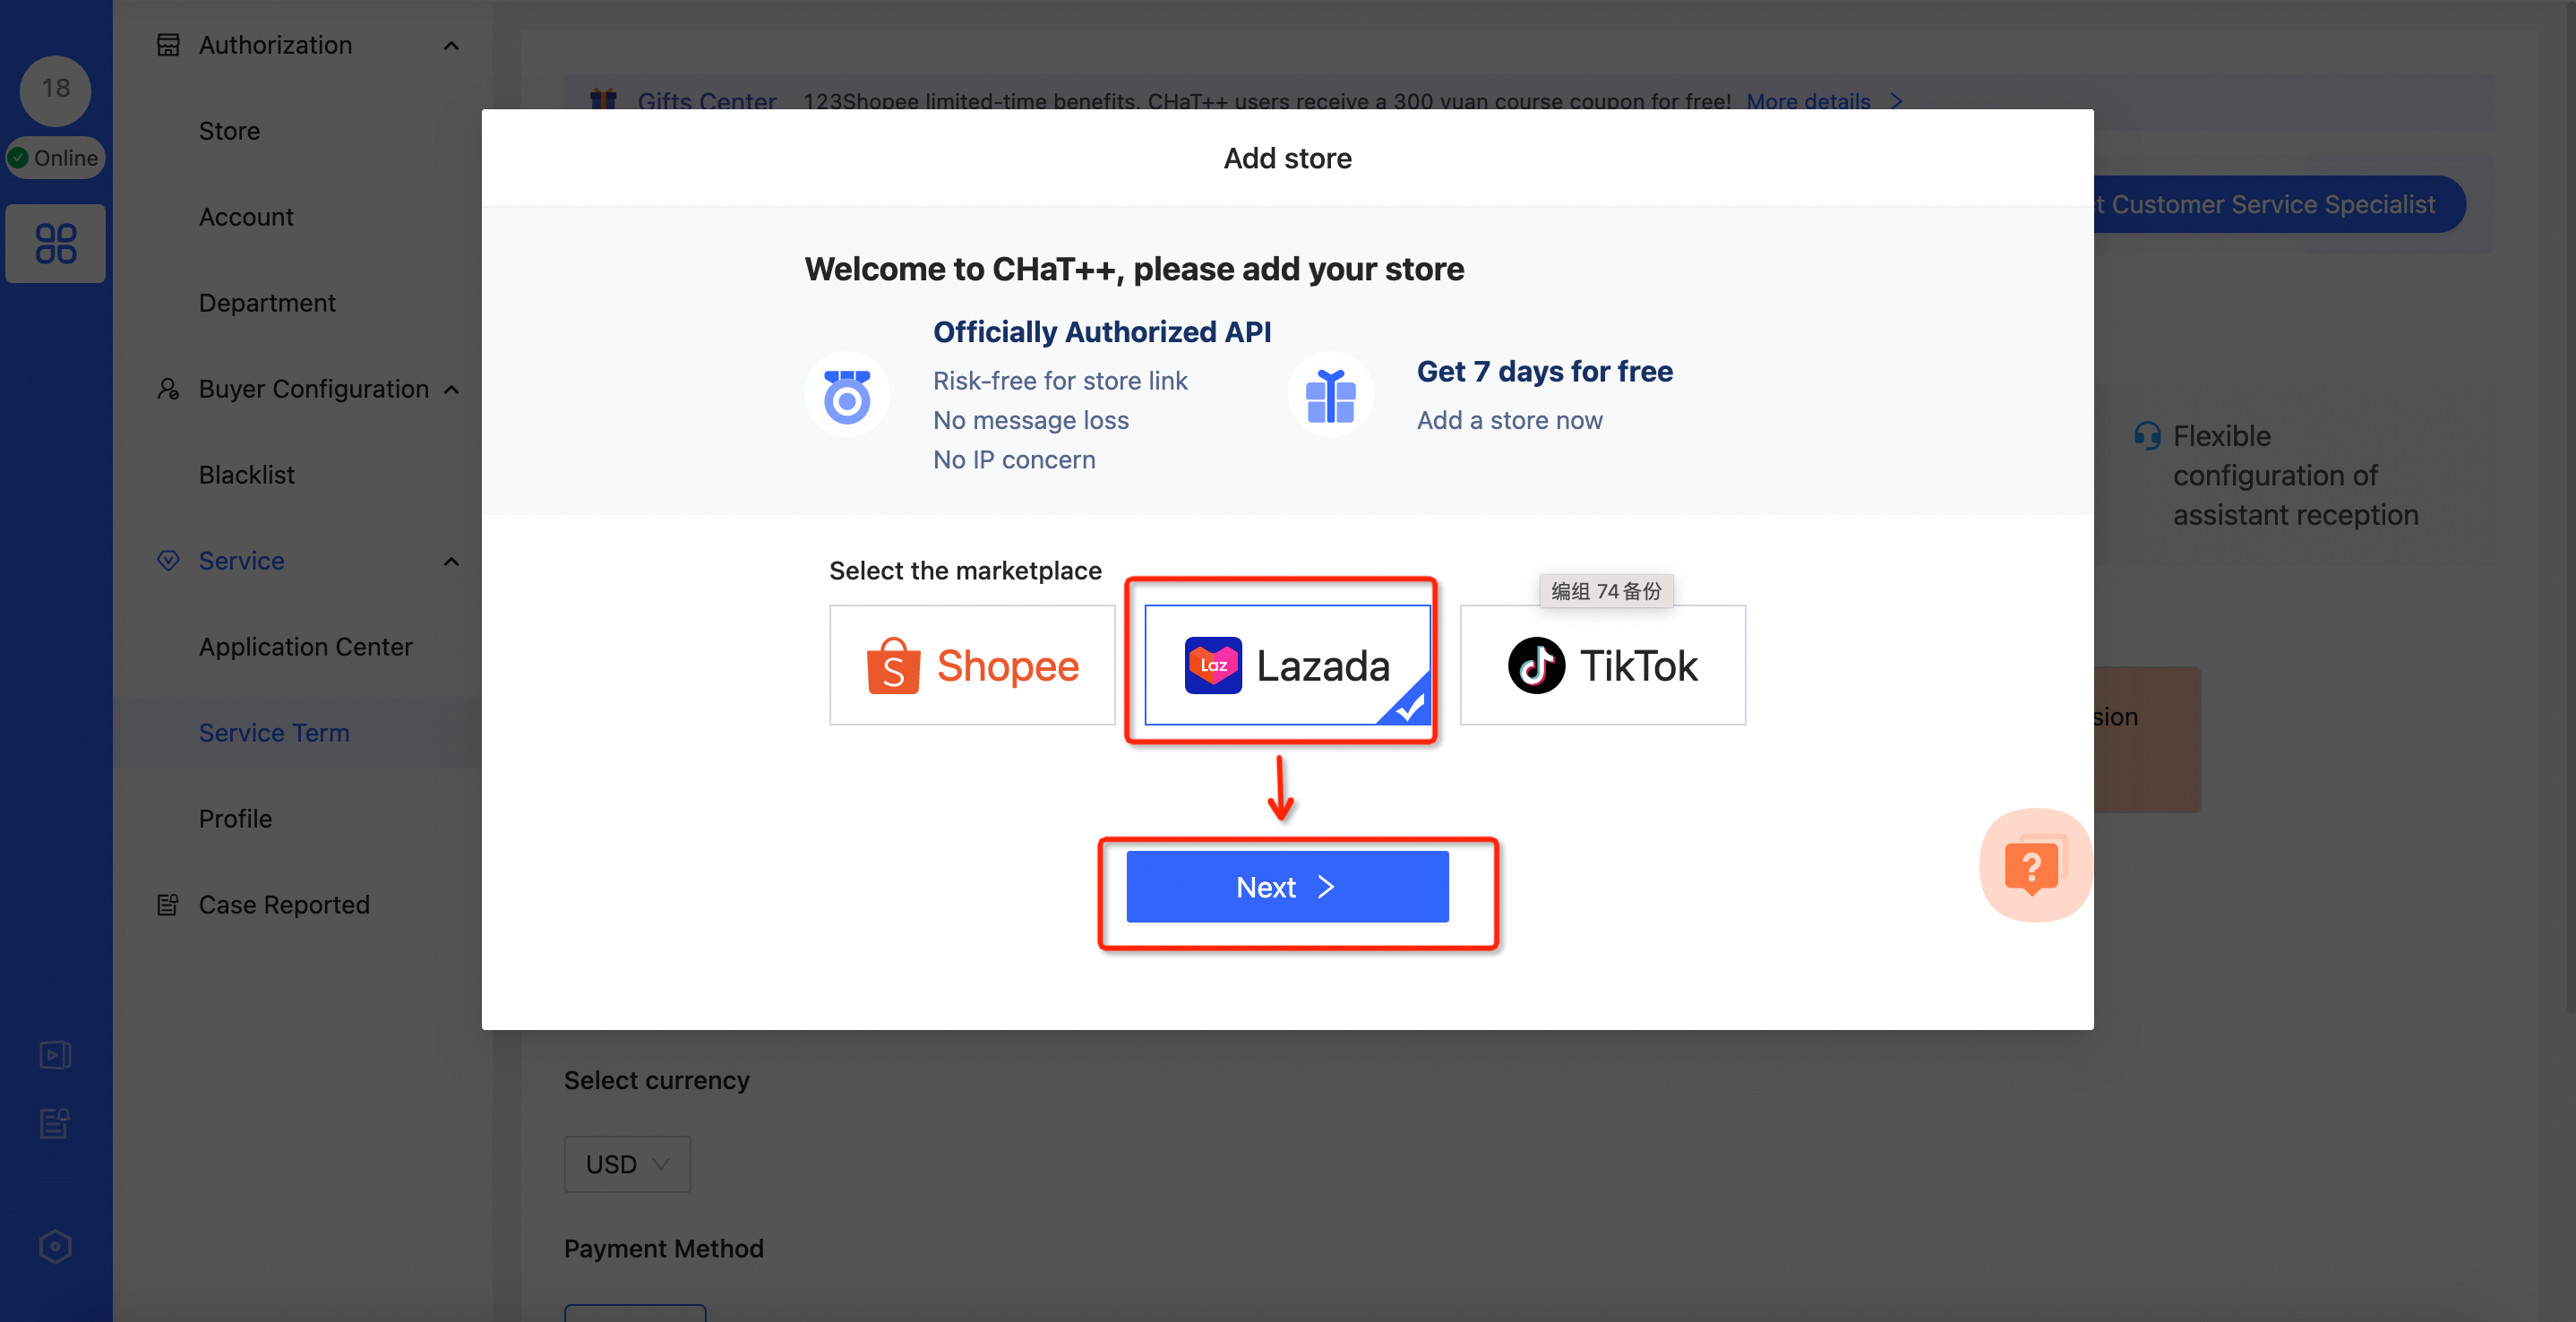
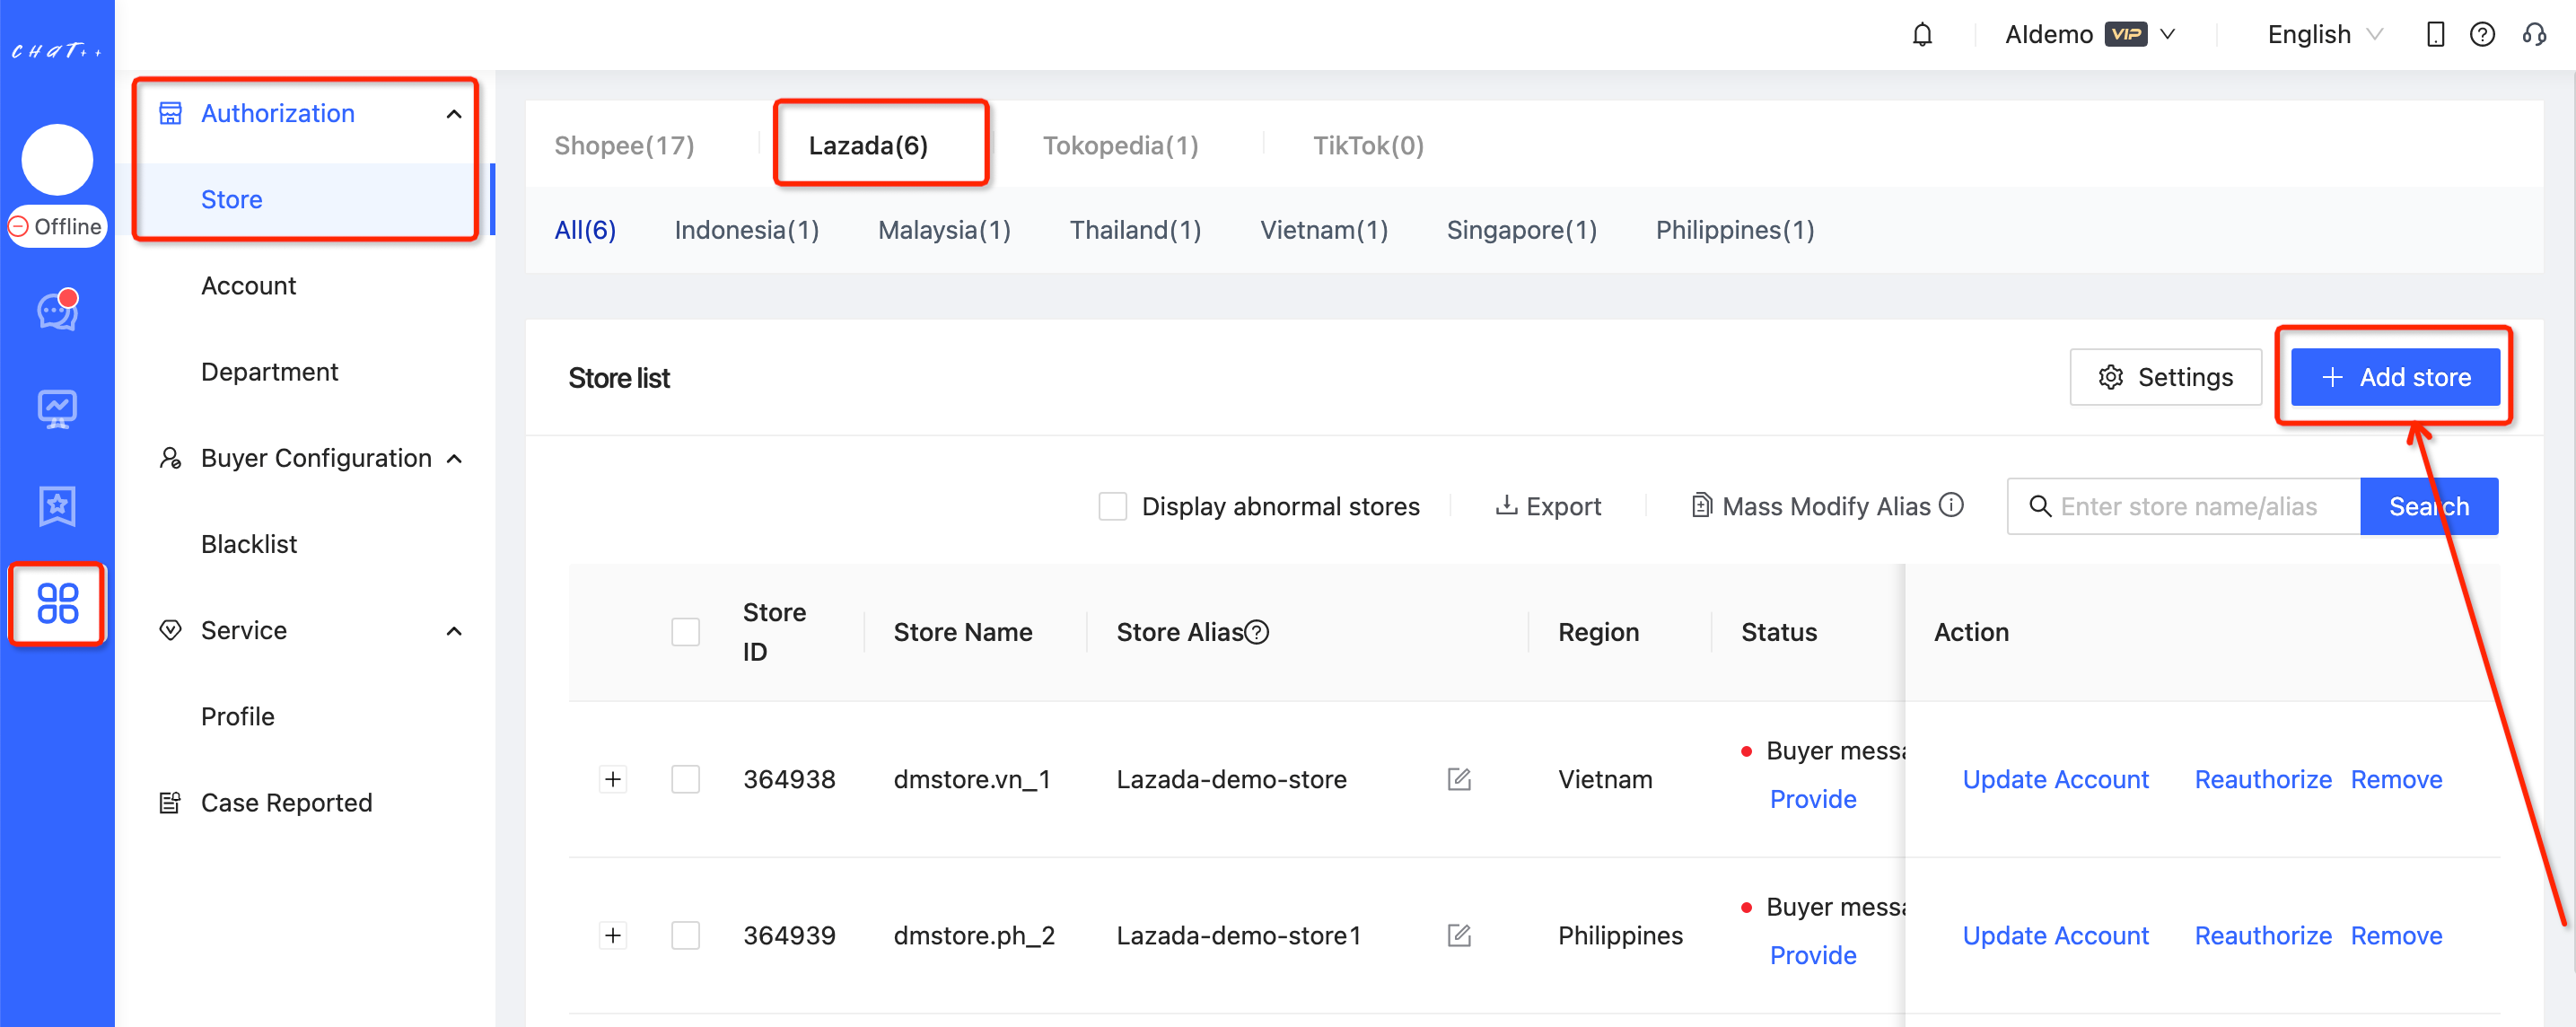
The steps to add a store in daily operations:
Configuration-->Select Marketplace-->Add store
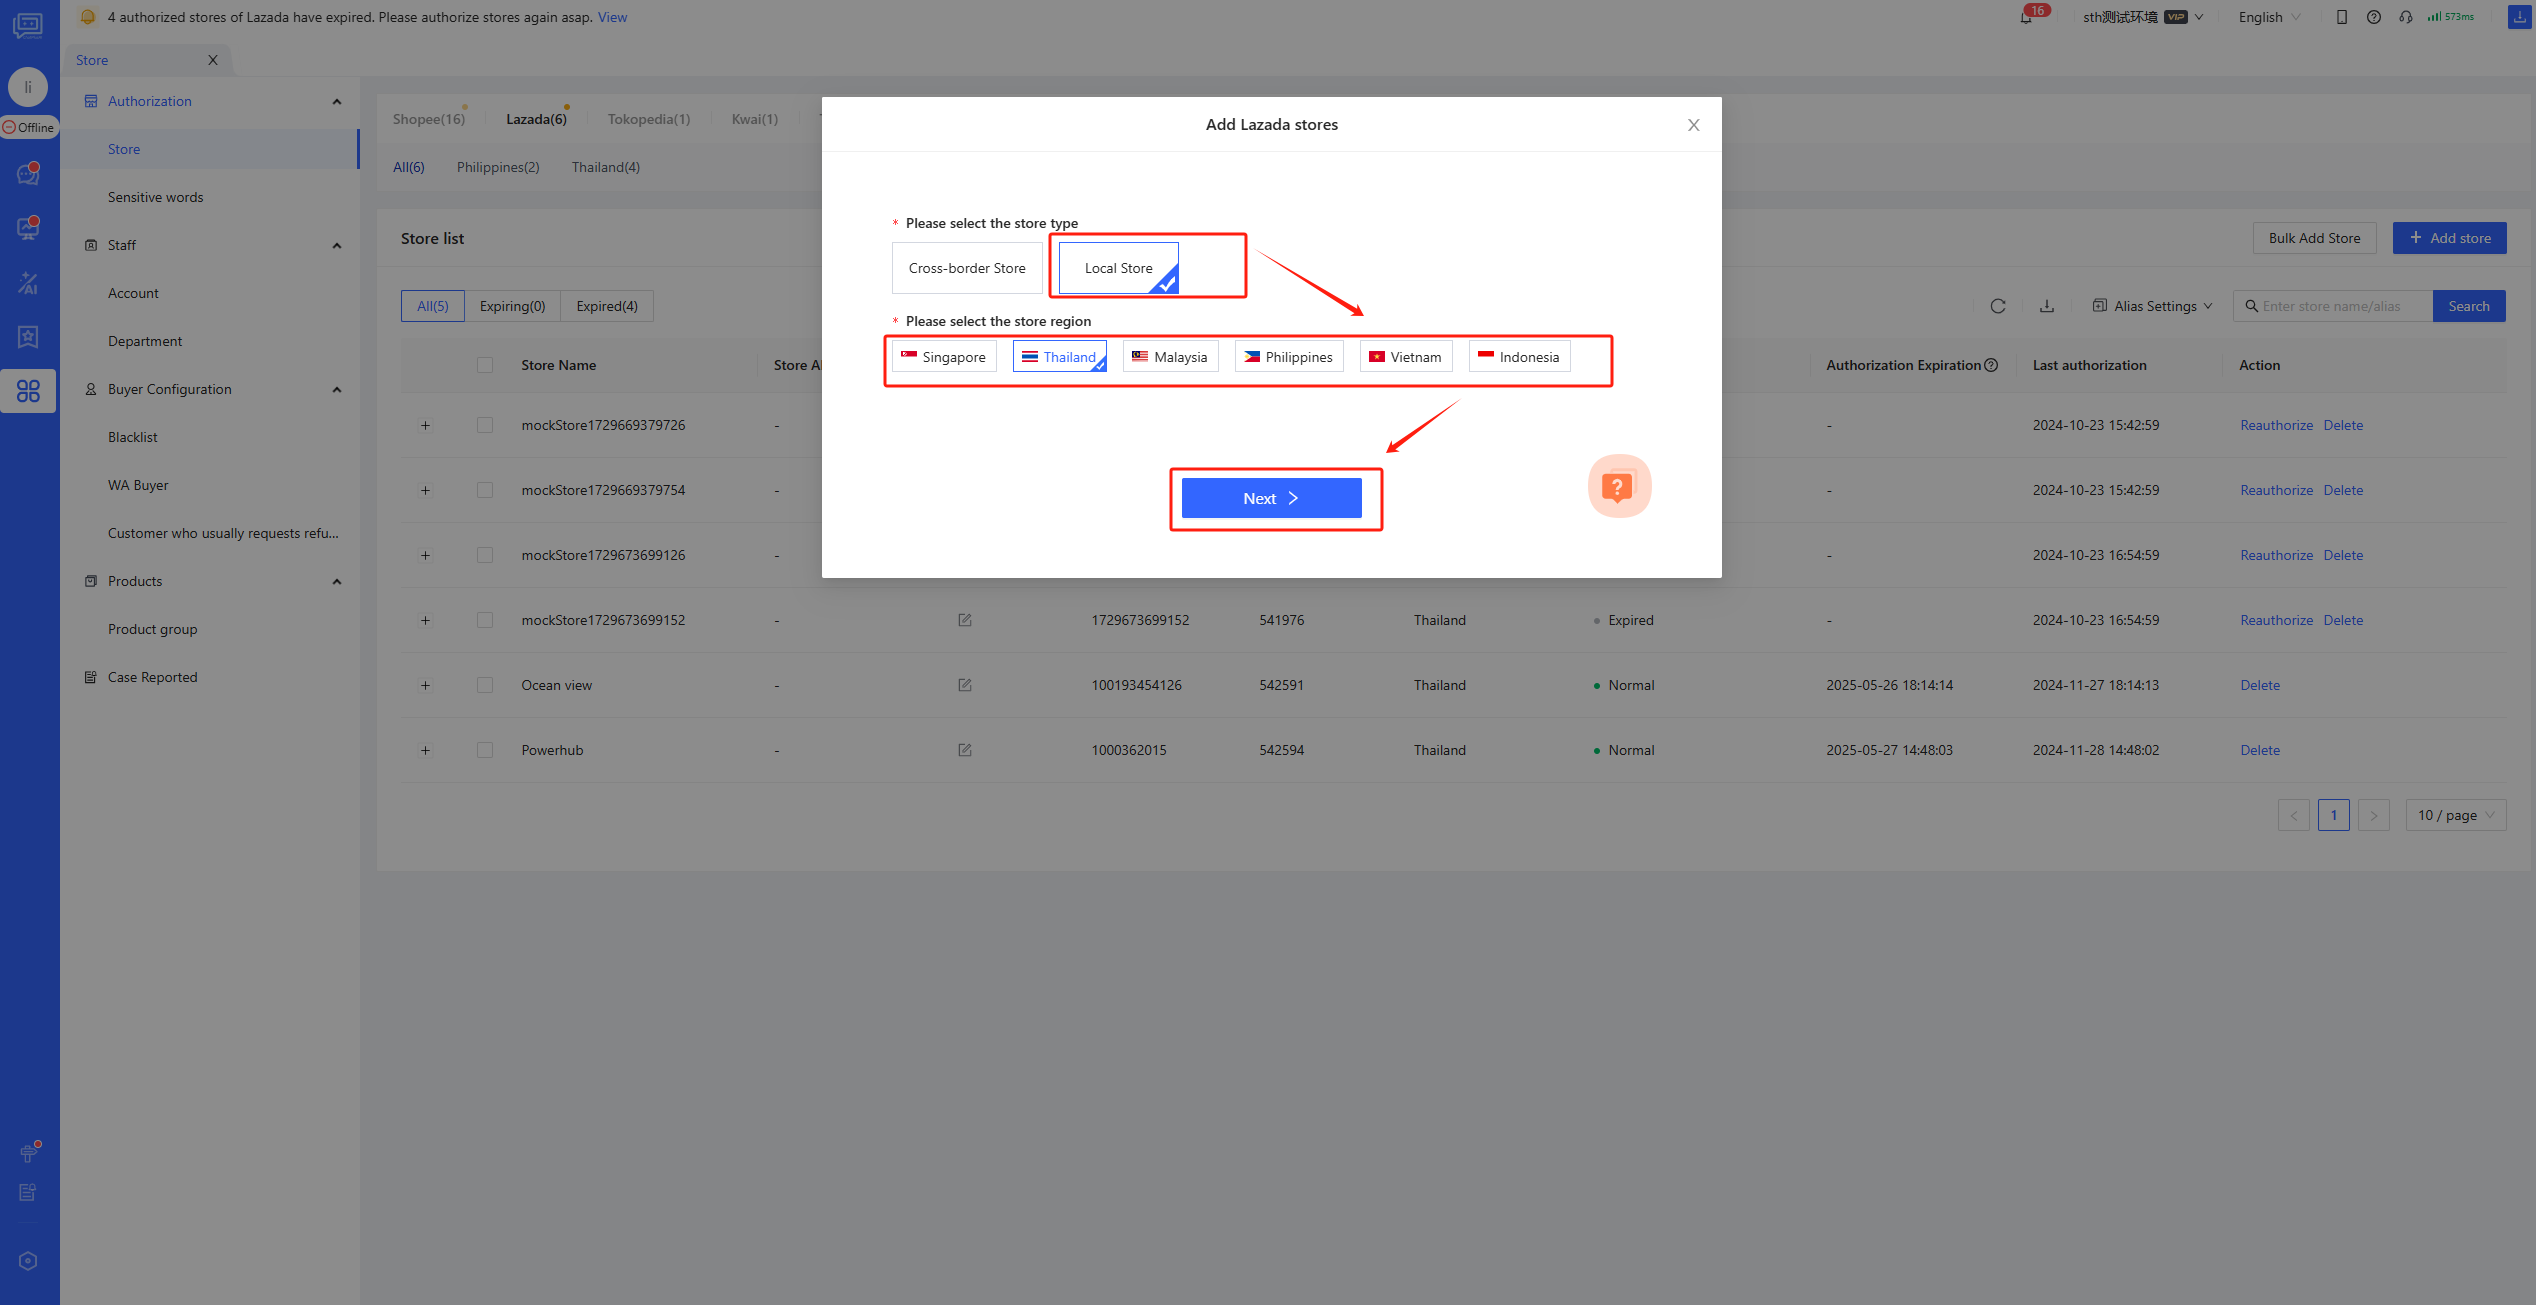
2.Select Local Store--> Select store region --> Click Next
3.Select add method
- Please make sure that the default browser is the browser you use to log in to the store backend daily. If the default browser is not the browser you use to log in to the store backend daily, please click "Copy Link" and go to the browser used for daily login to open it.
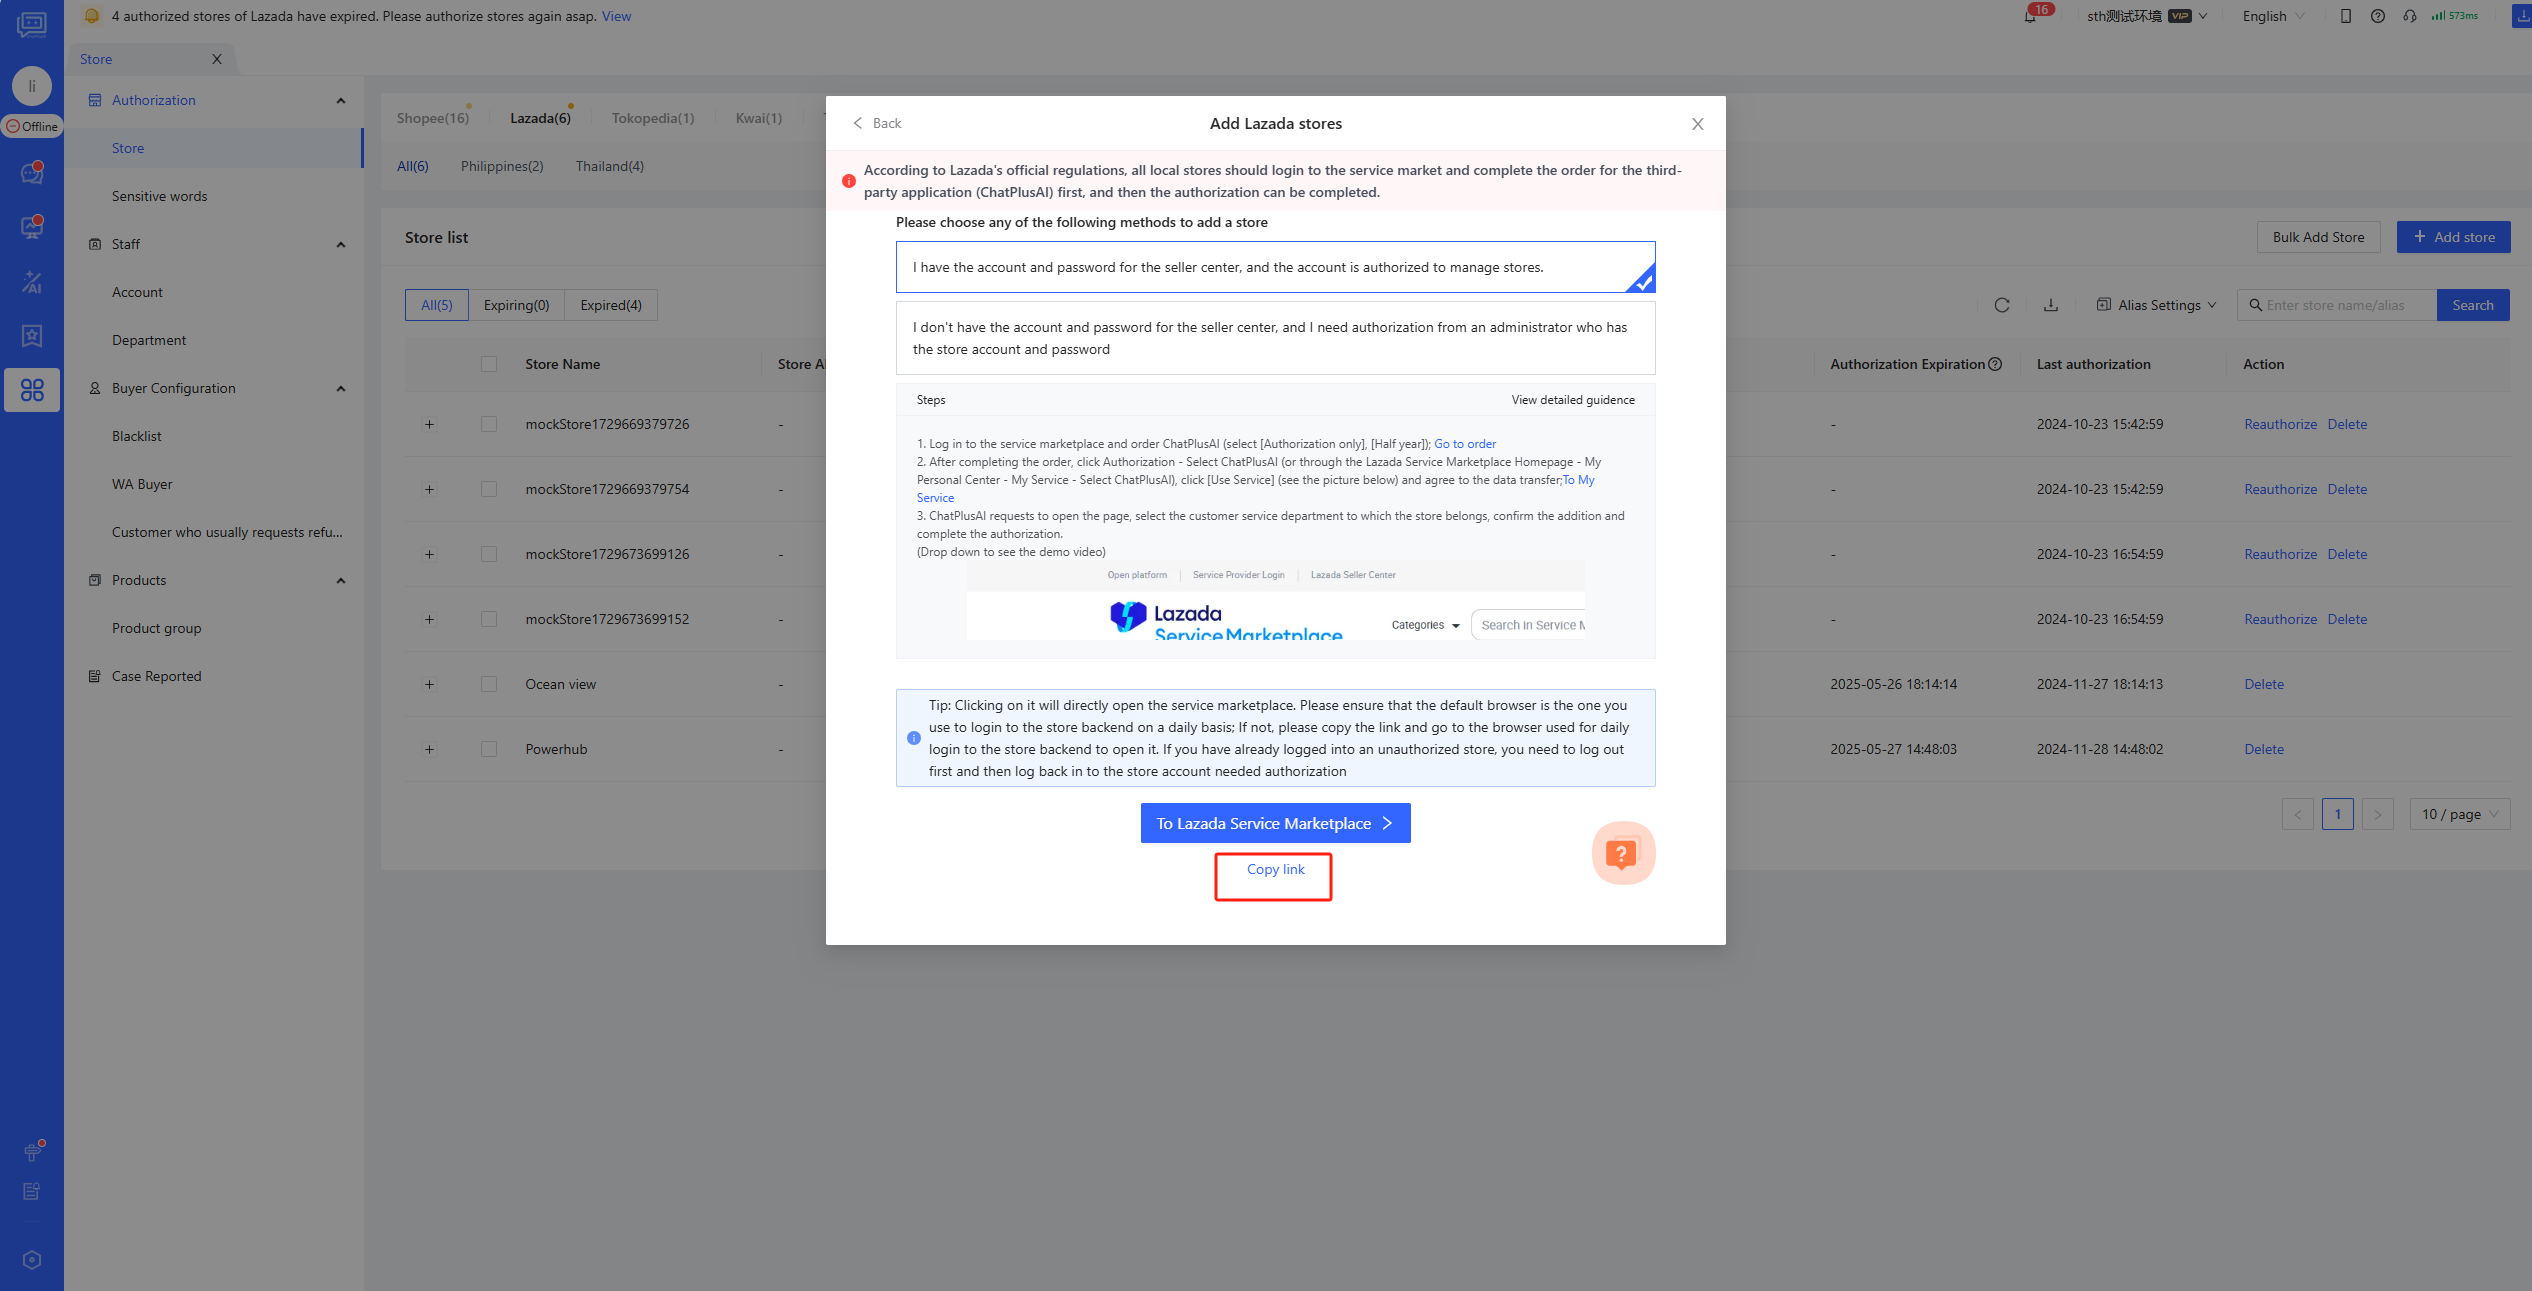
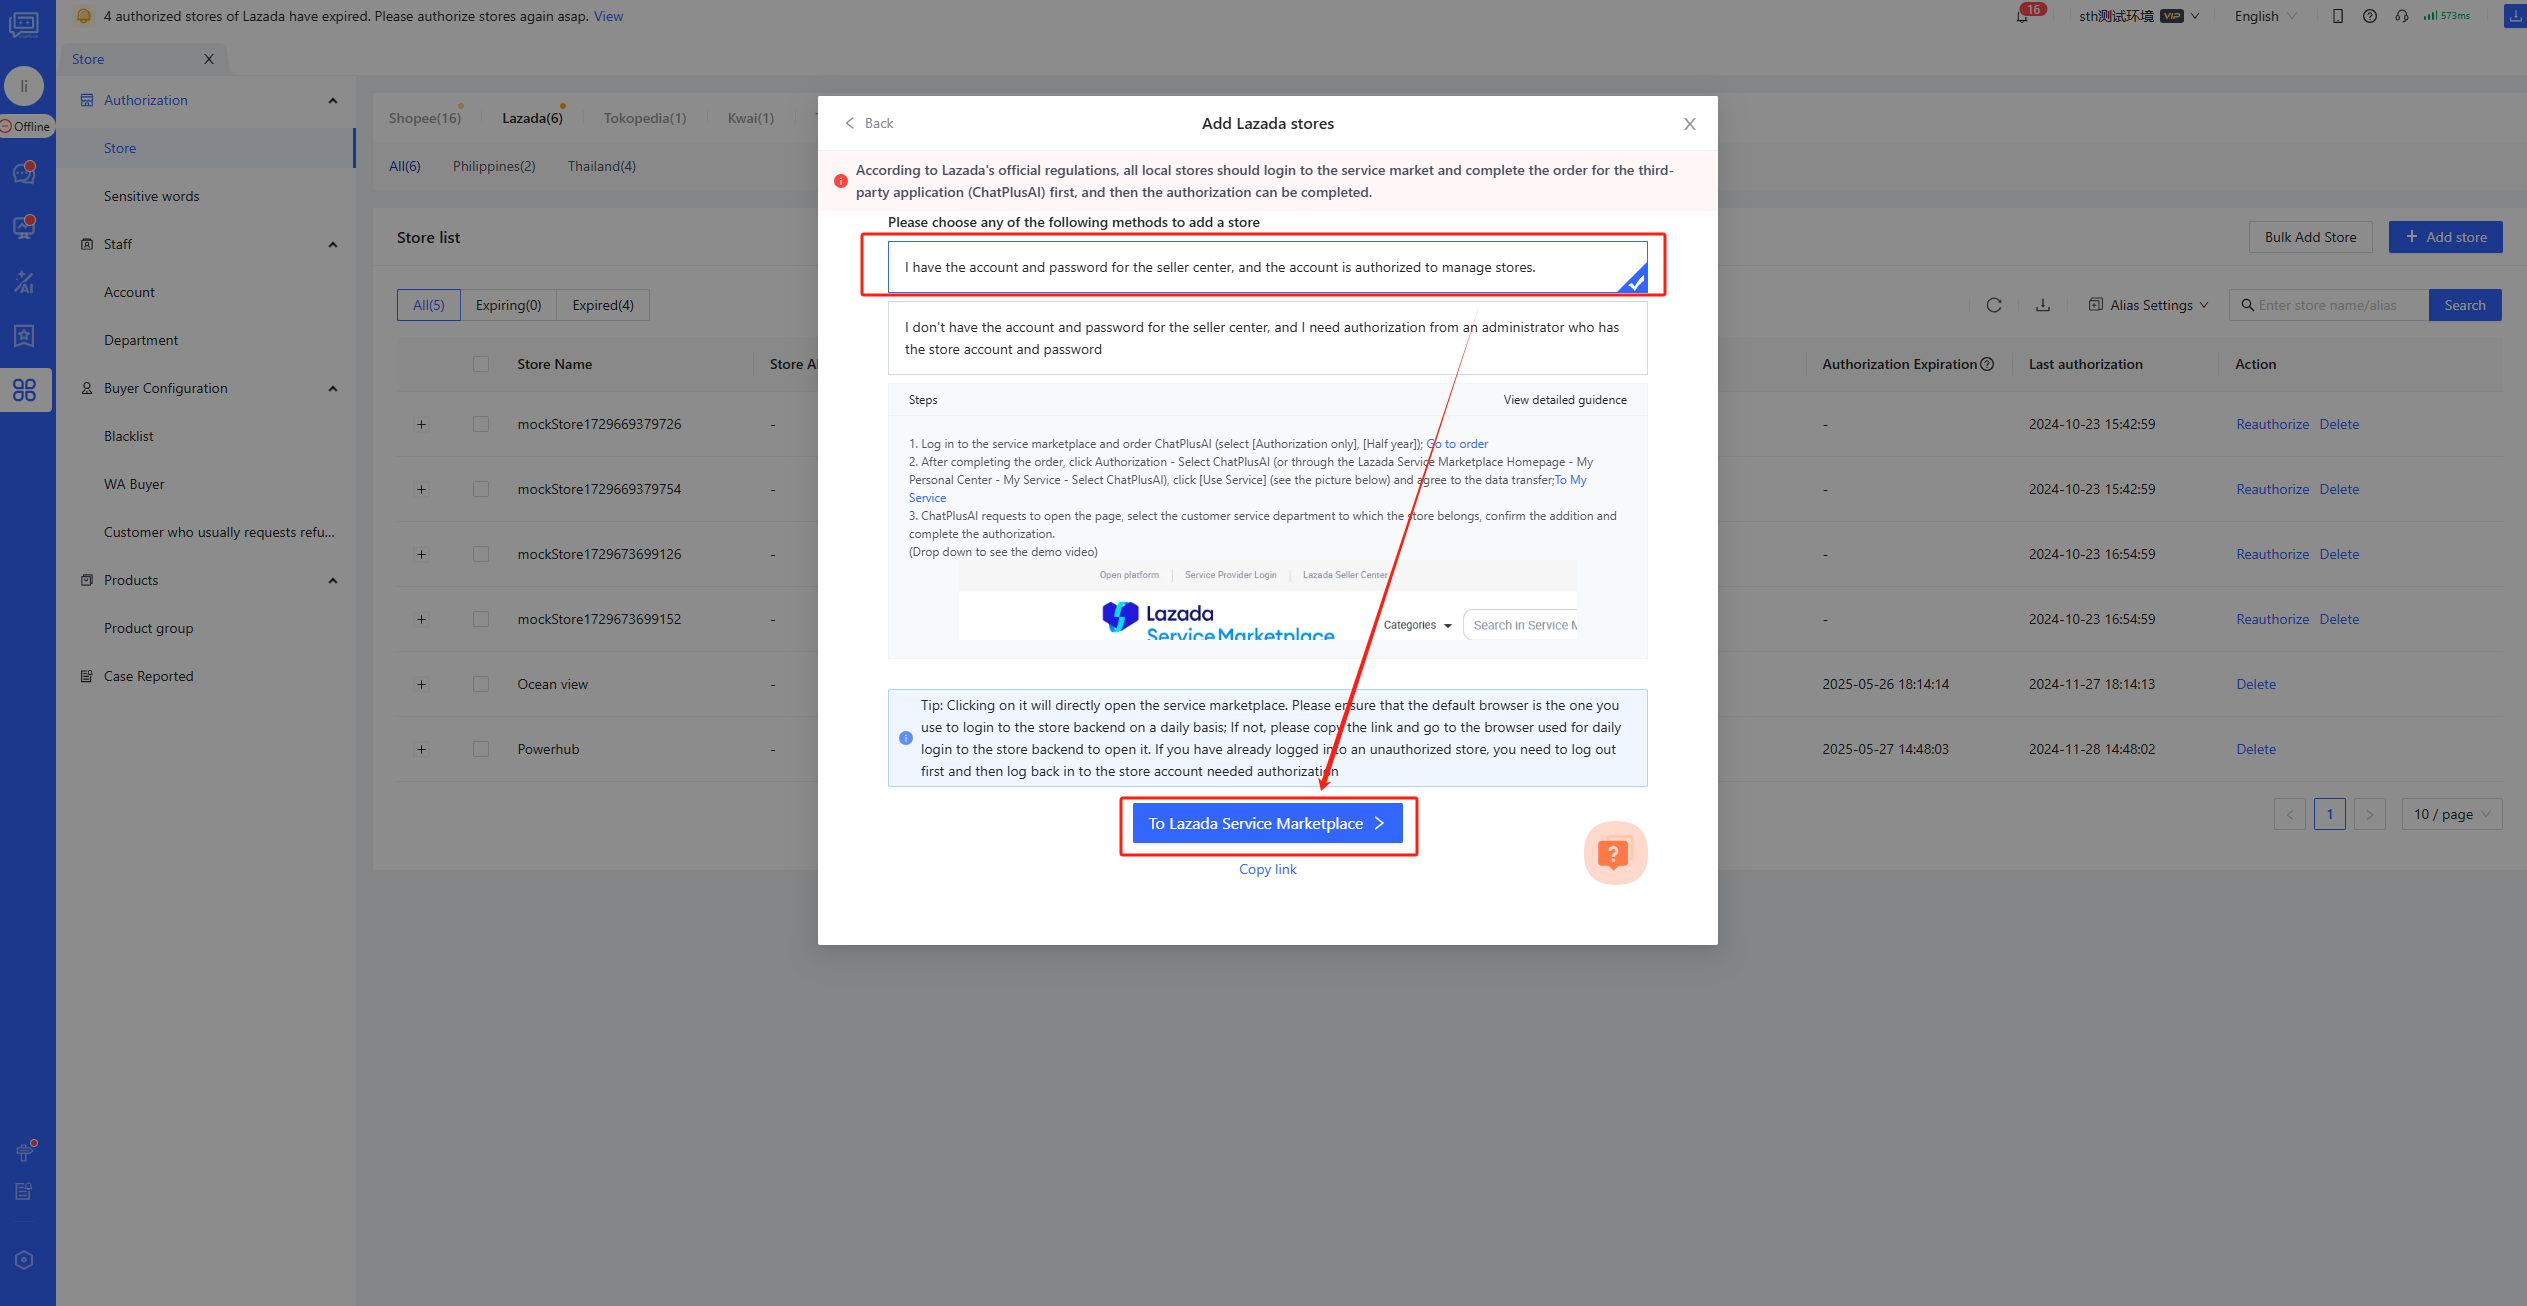
To avoid the authorization link from becoming invalid, it is recommended that you log in to the Lazada Seller Center in your browser first. If the browser has logged in to an unauthorized store, you need to log out first and then log in again to the store account that needs authorization.
【Select the method 1 --> Click "To Lazada Service Marketplace"】
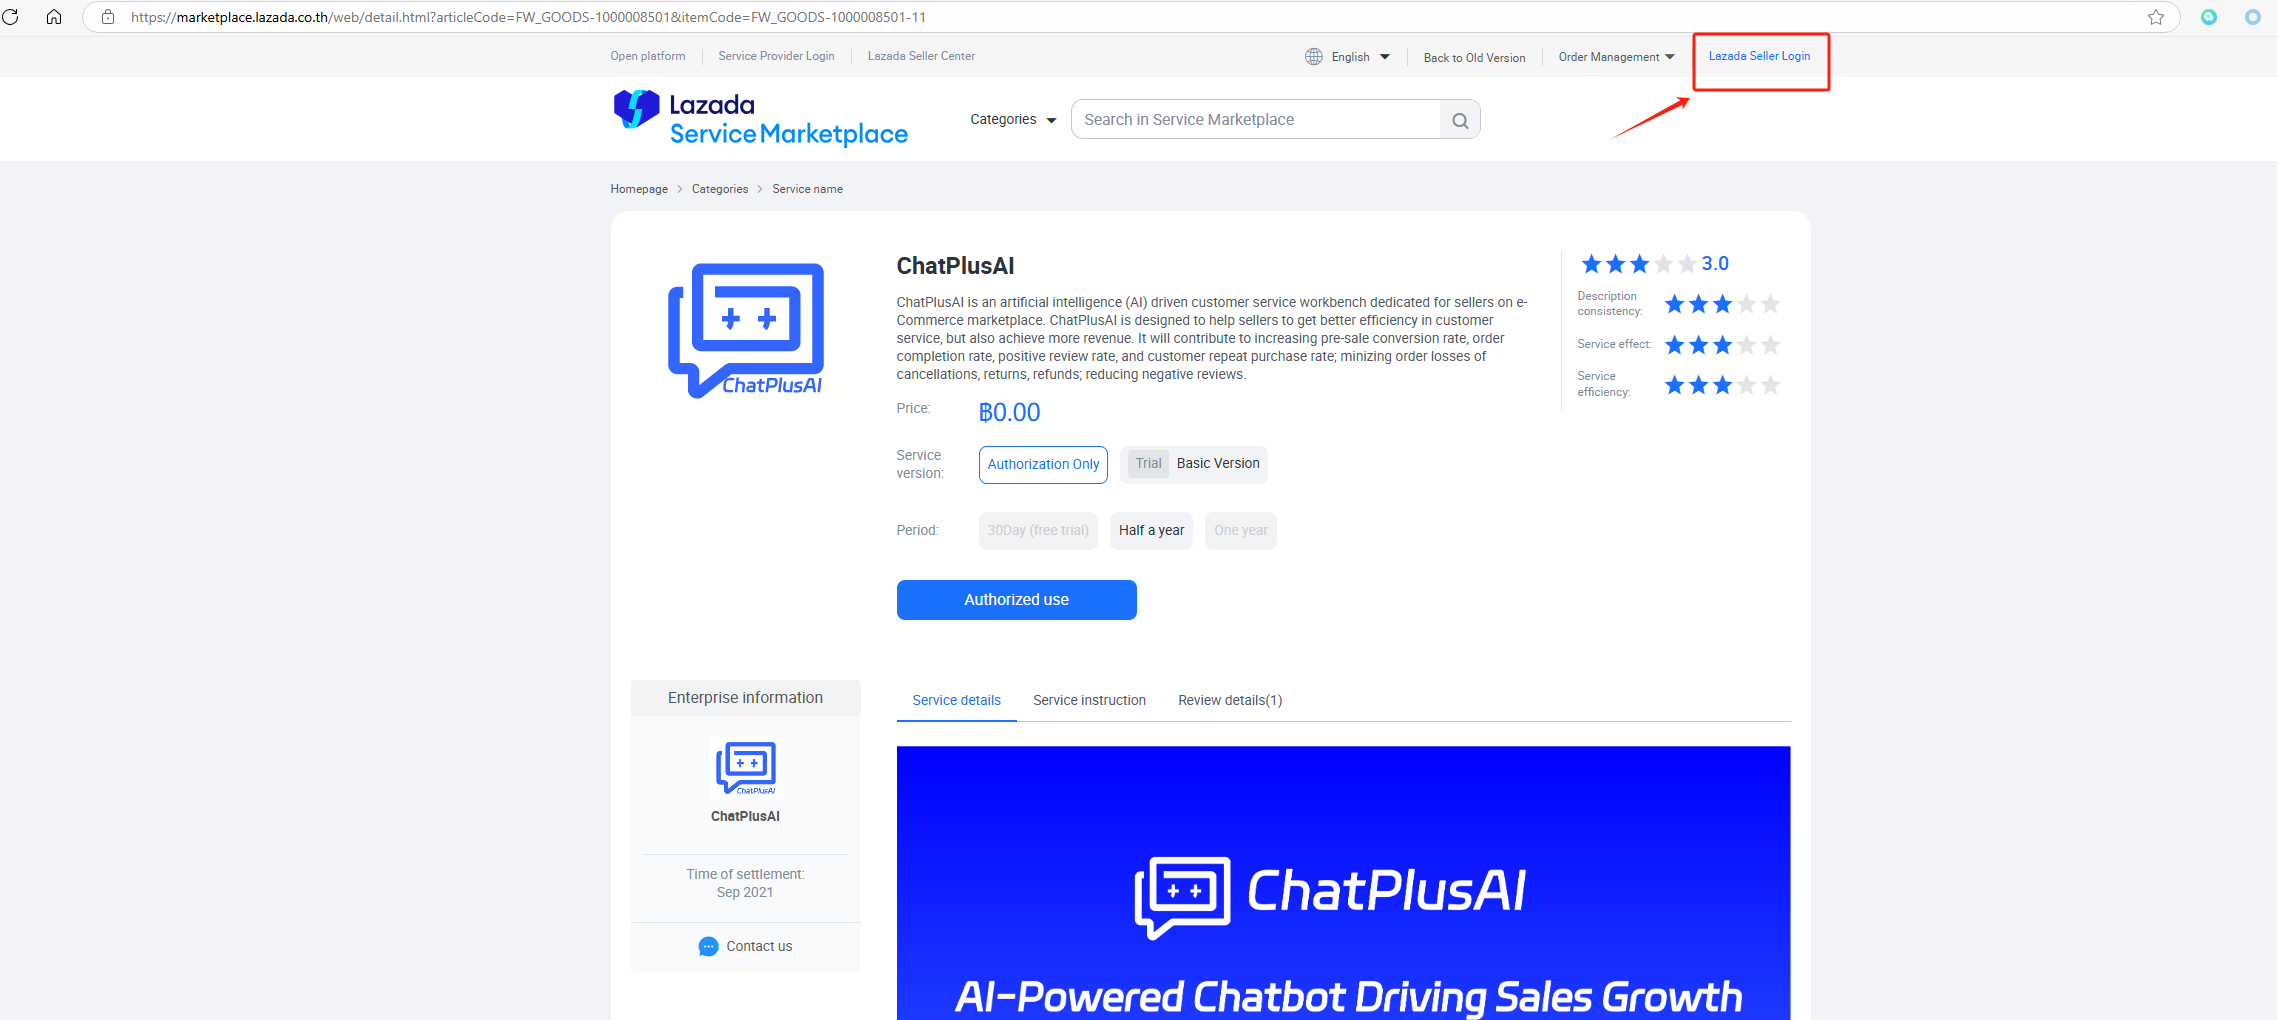
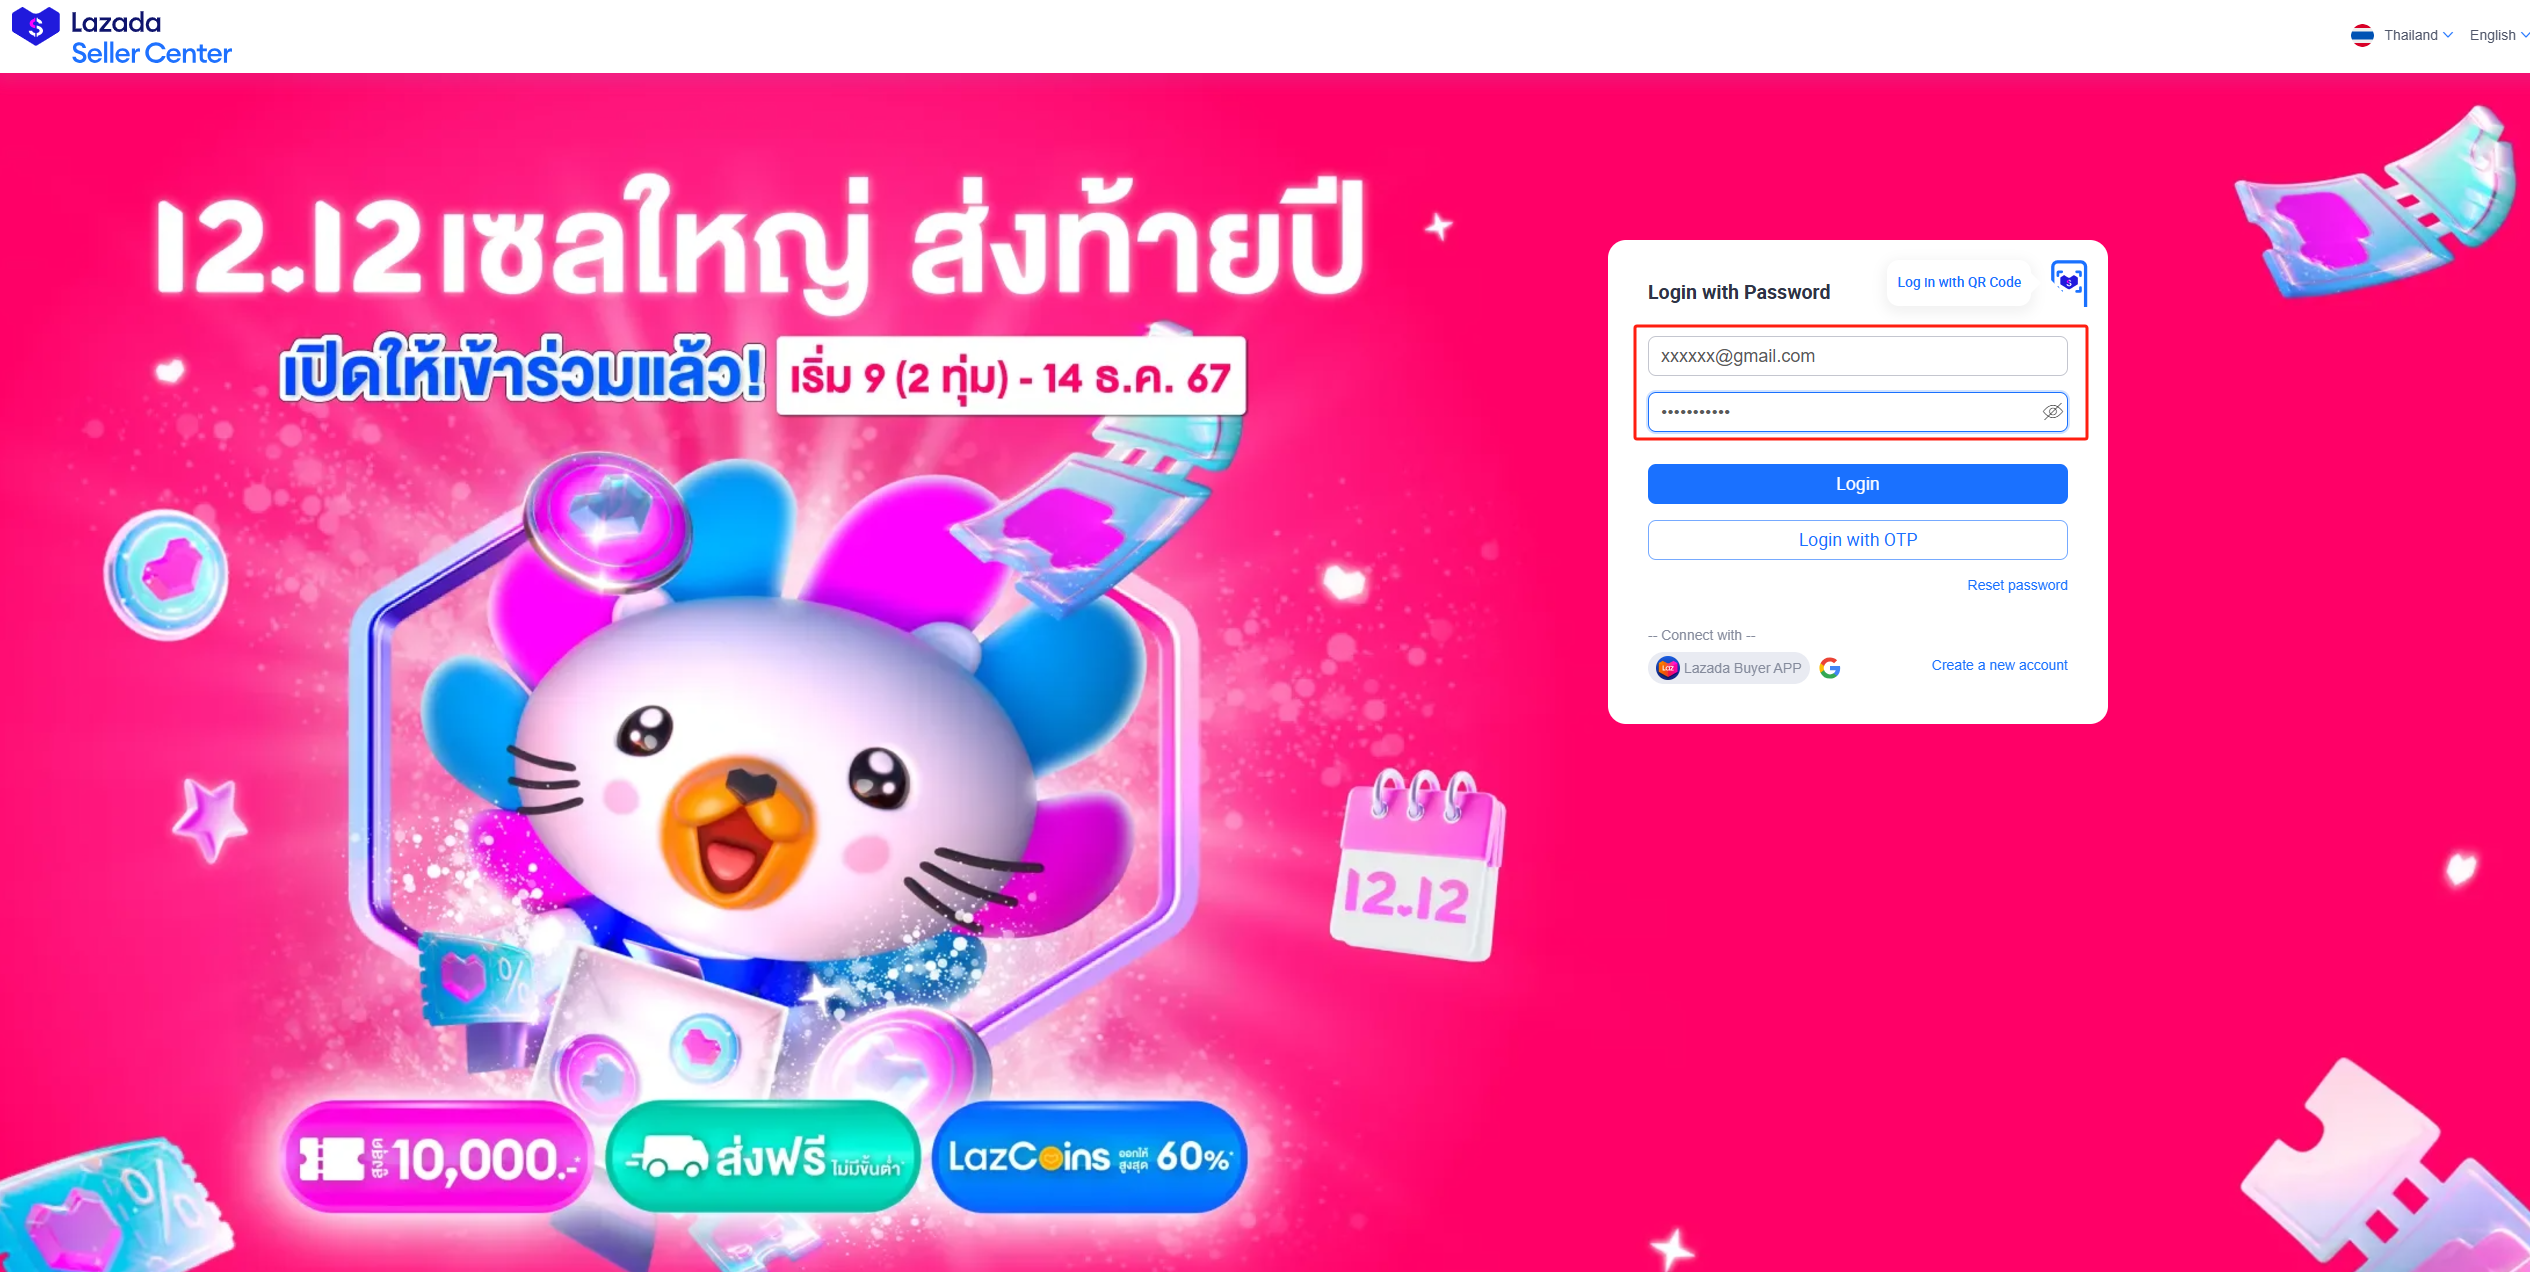
4.Log in to Seller Center
【Click "Lazada Seller Login" --> Enter Lazada account & password】
5.Authorization
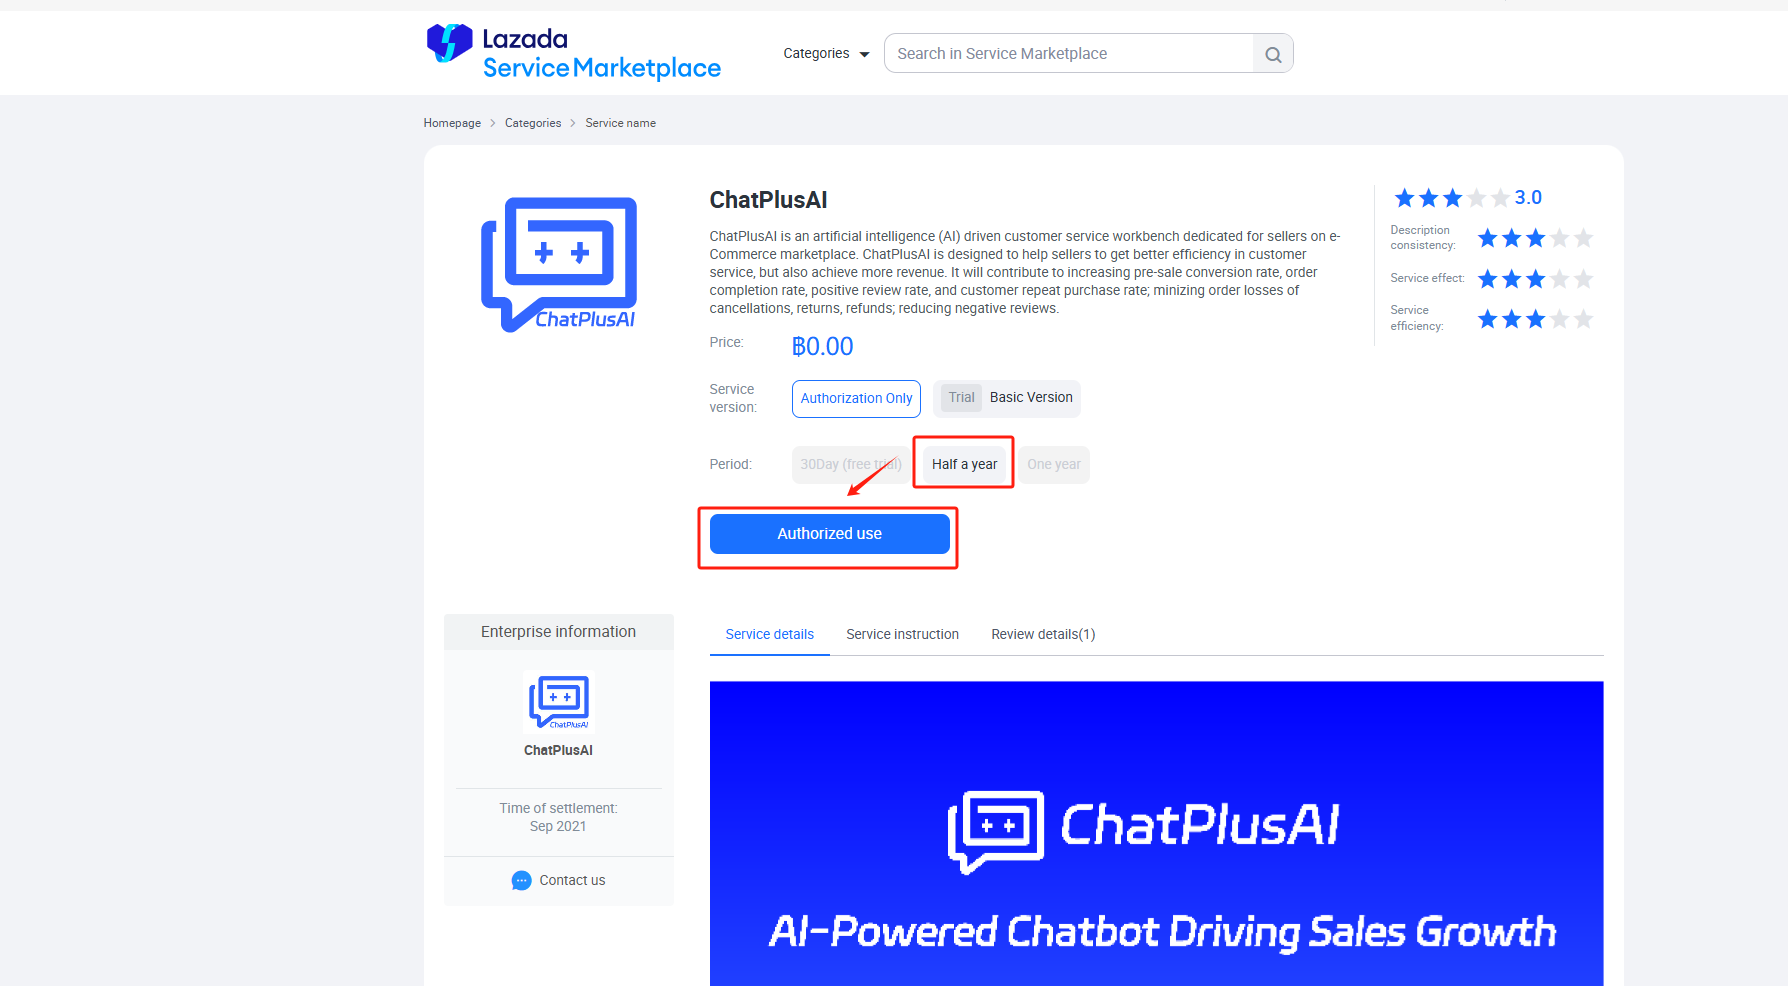
【Select autorization period --> Authorized use】
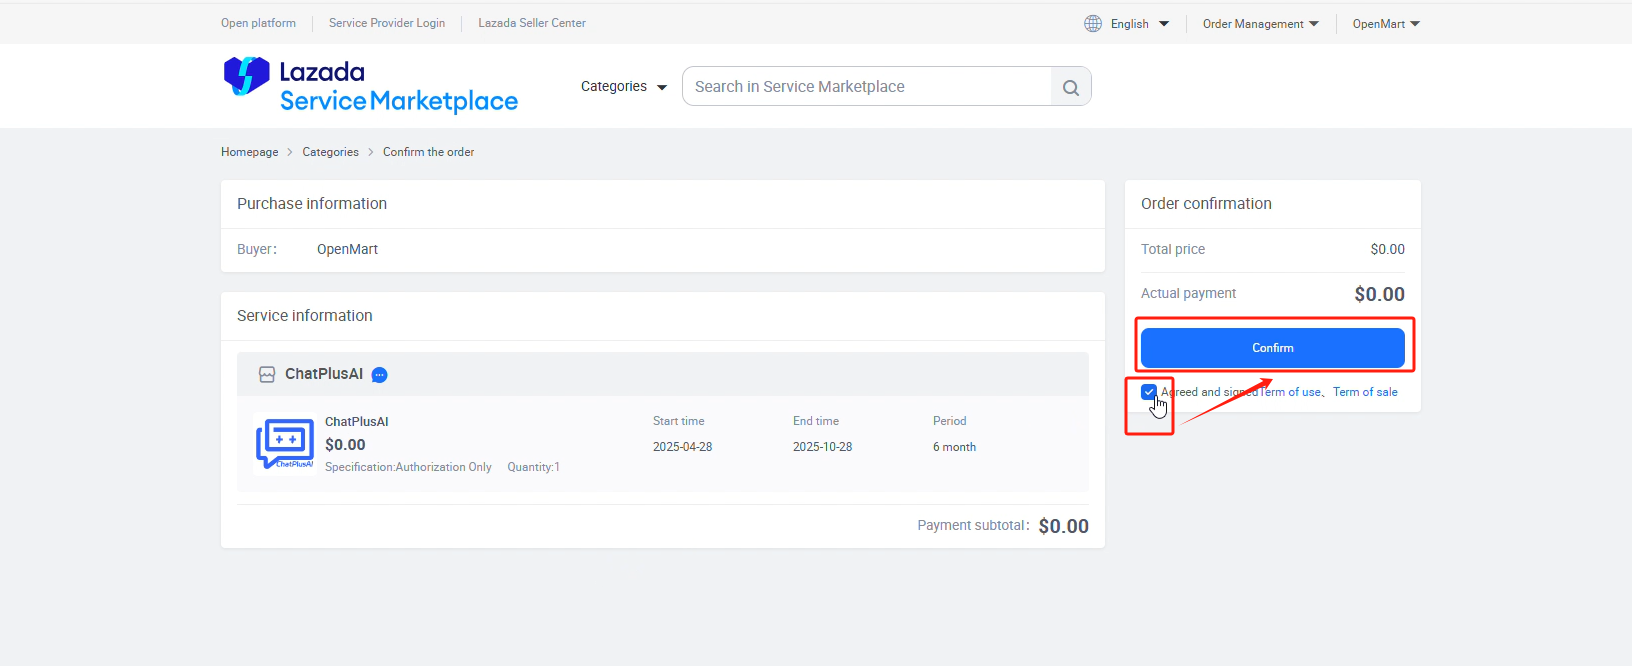
【Click to agree on Term of use --> confirm】
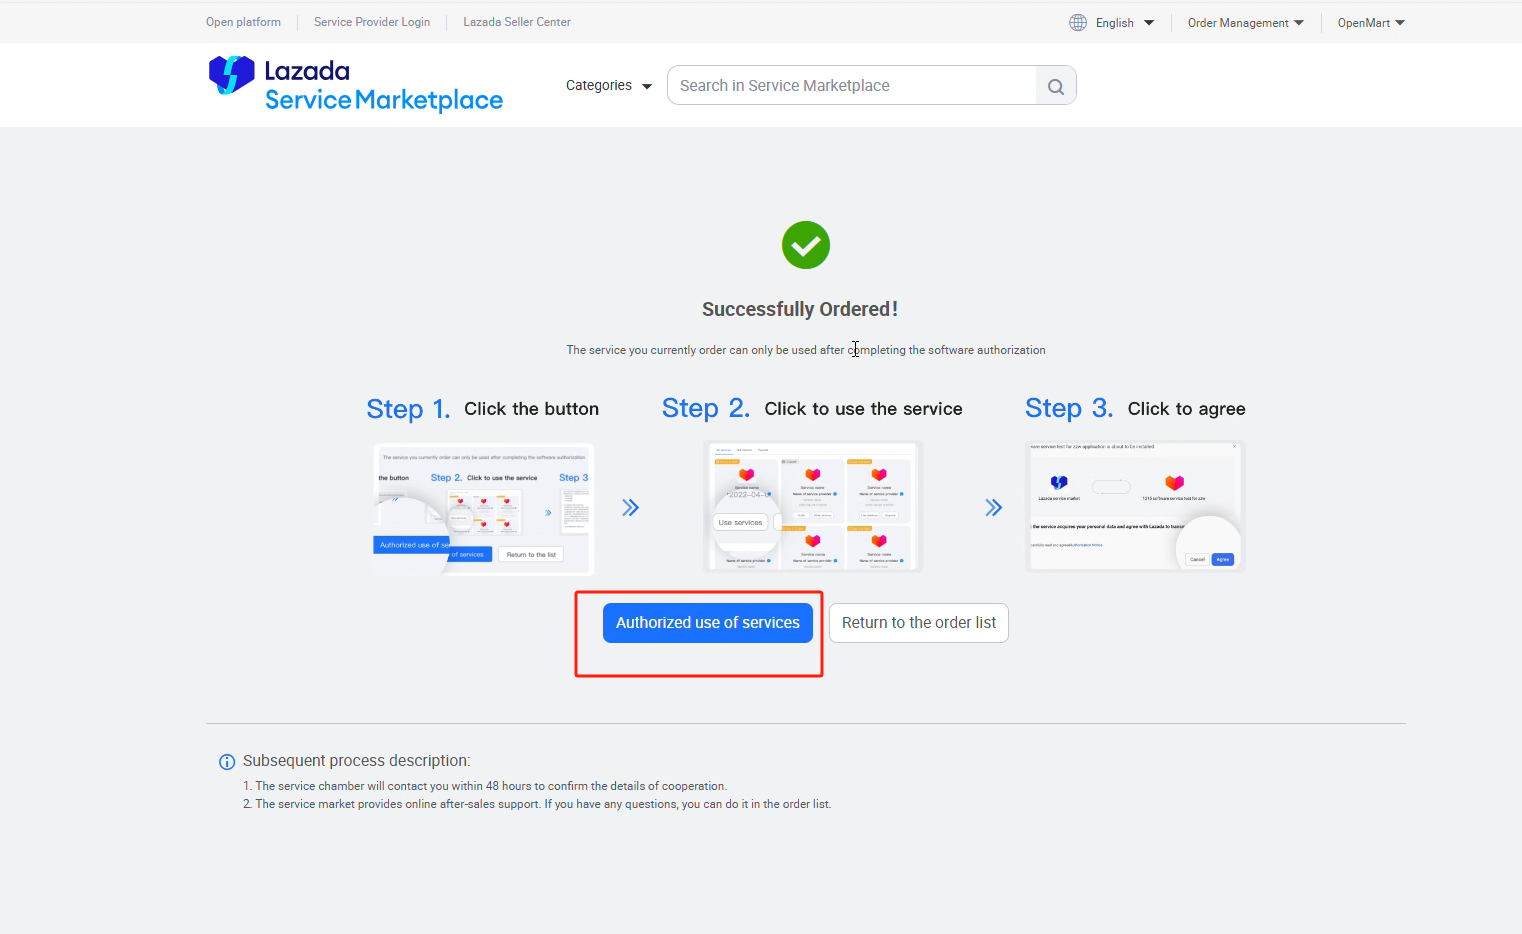
【Click "Athorized use of services"】
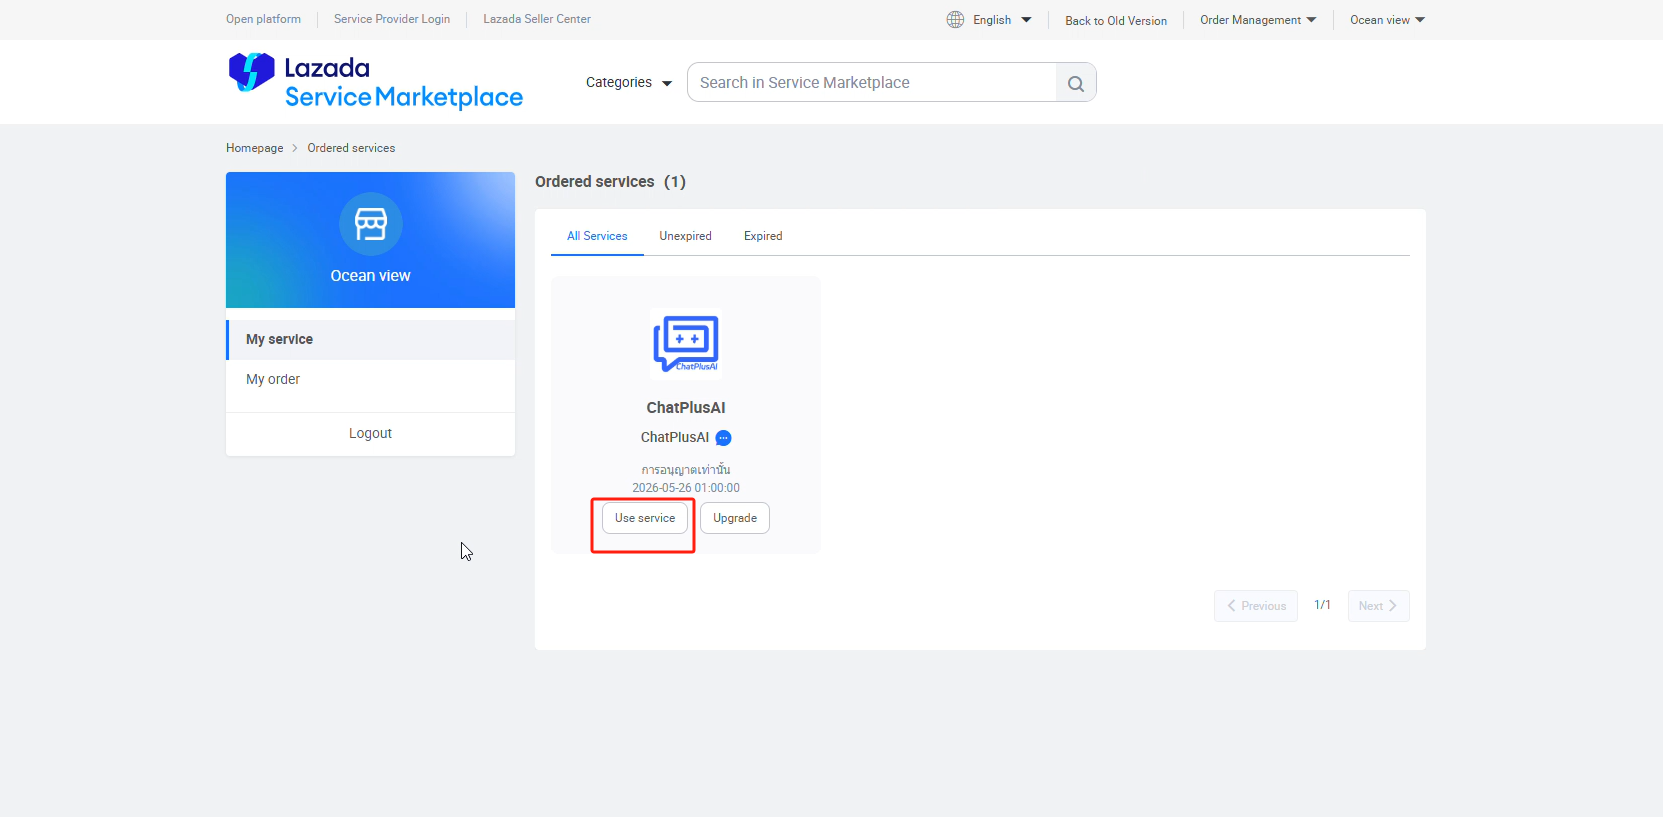
【Click "Use services"】
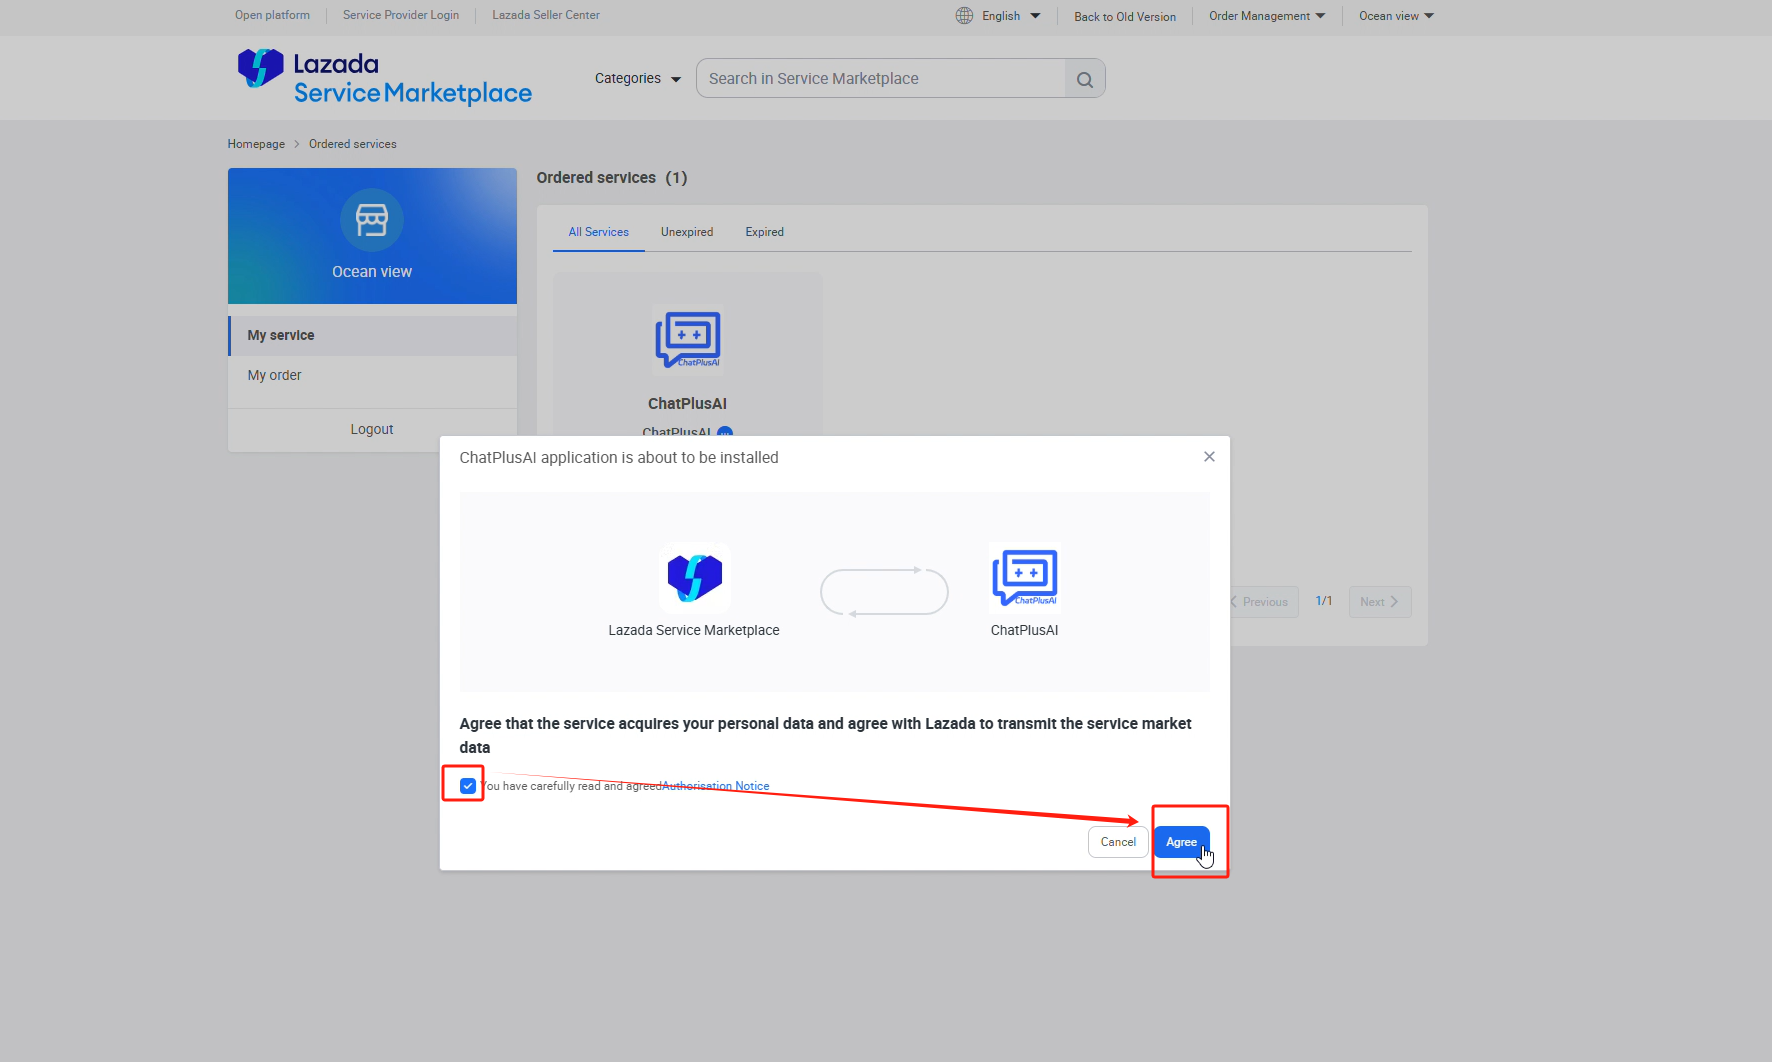
【Click to agree on "Athorization Notice" --> Agree】
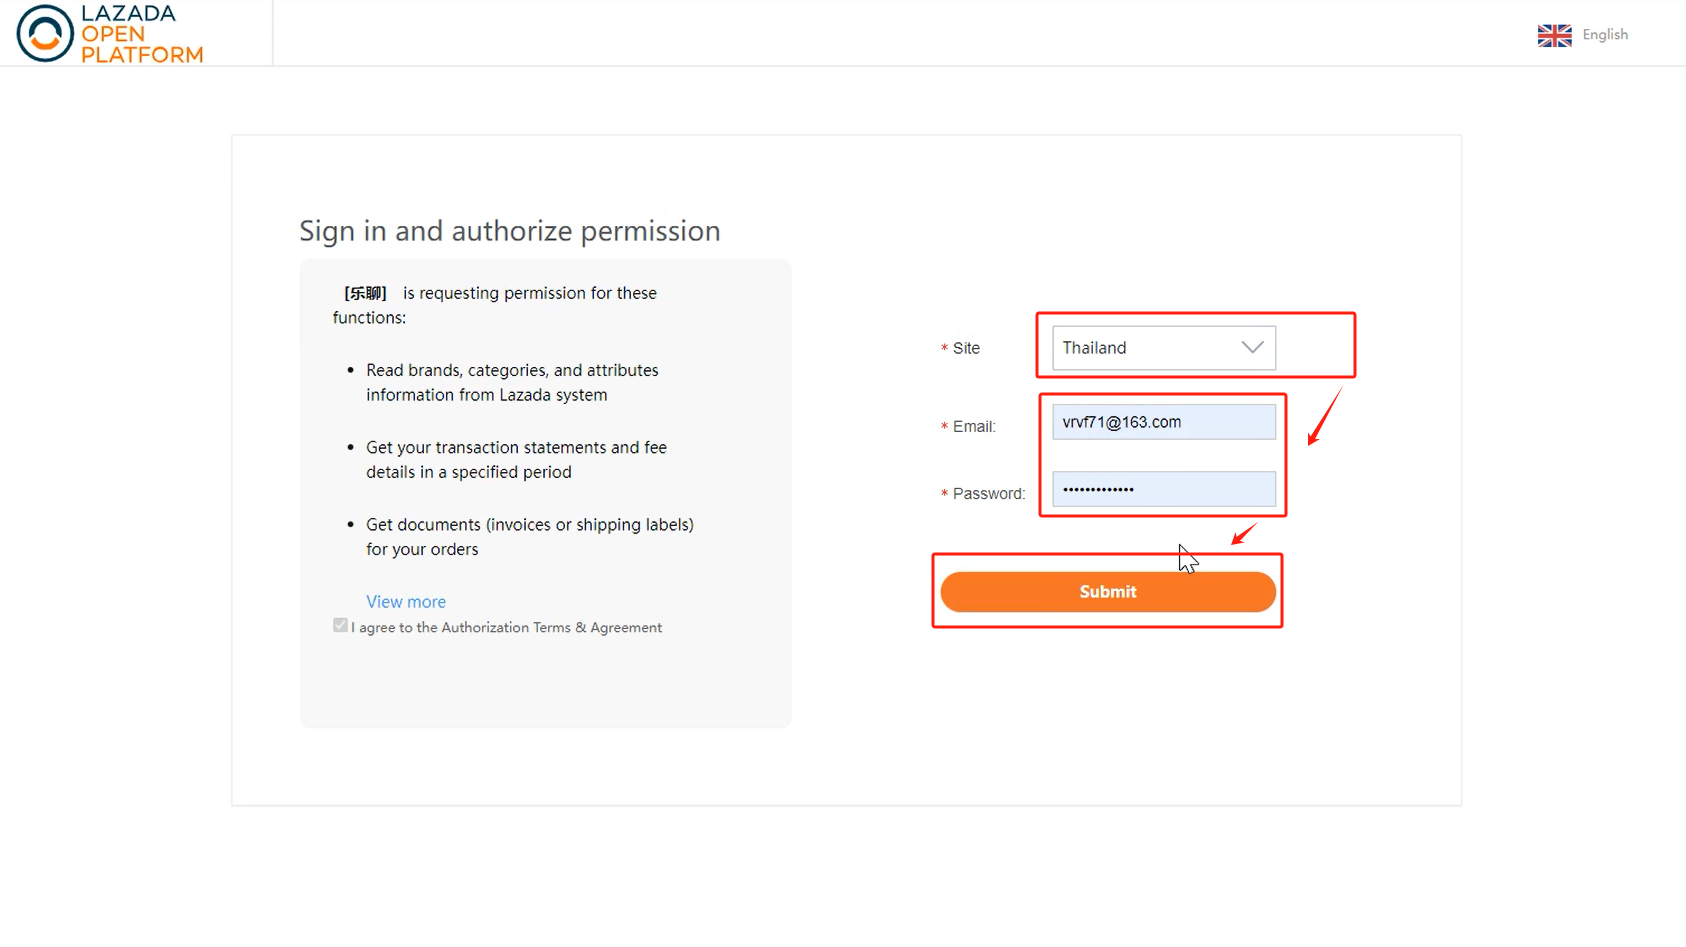
【Select Site --> Enter Lazada account & password --> Submit】
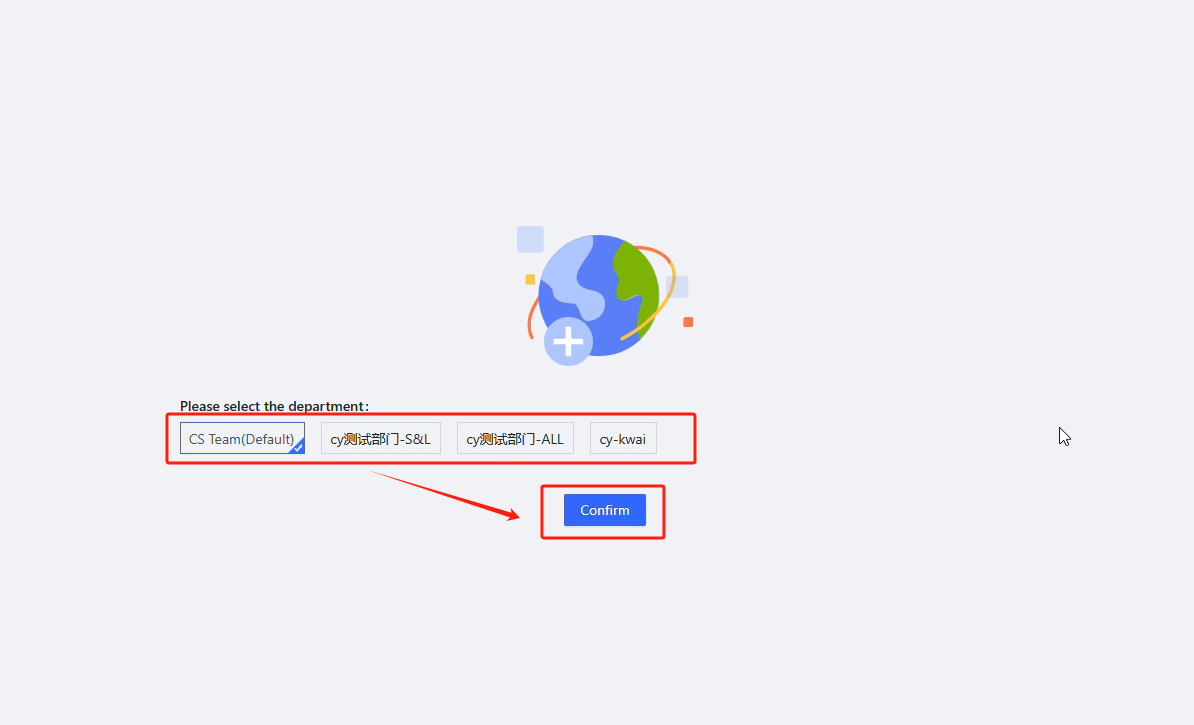
Log in to ChatPlusAI through the browser page that pops up automatically.

【Select CS Team that the store belongs to --> Confirm 】, then the authorization successful
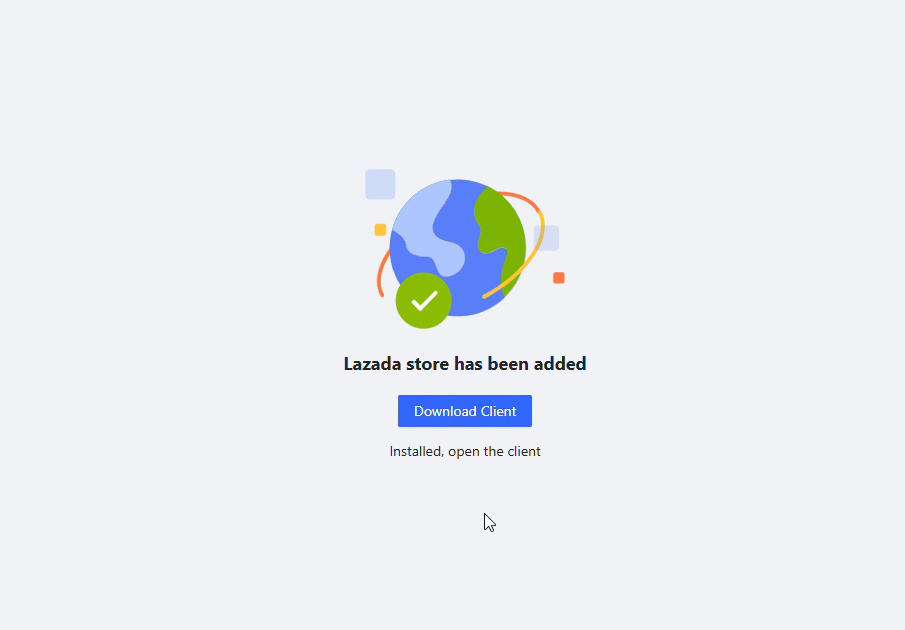
Q: Why did I directly enter the reception page after logging into the web version of ChatPlusAI instead of jumping to the department selection page in the tutorial?
A: If you encounter this situation during the authorization process, please return to the page shown below in the Lazada service marketplace and click "Agree" again to the department selection page.

FAQ
Q1: After logging in, why did the option to authorize for half a year for free on the Lazada service marketplace page disappear?
A1:
(1)If you do not authorize a store from the ChatPlusAI backend, but find ChatPlusAI directly from the Lazada service marketplace, the option of "half a year" on the ordering service page will not be displayed by default.
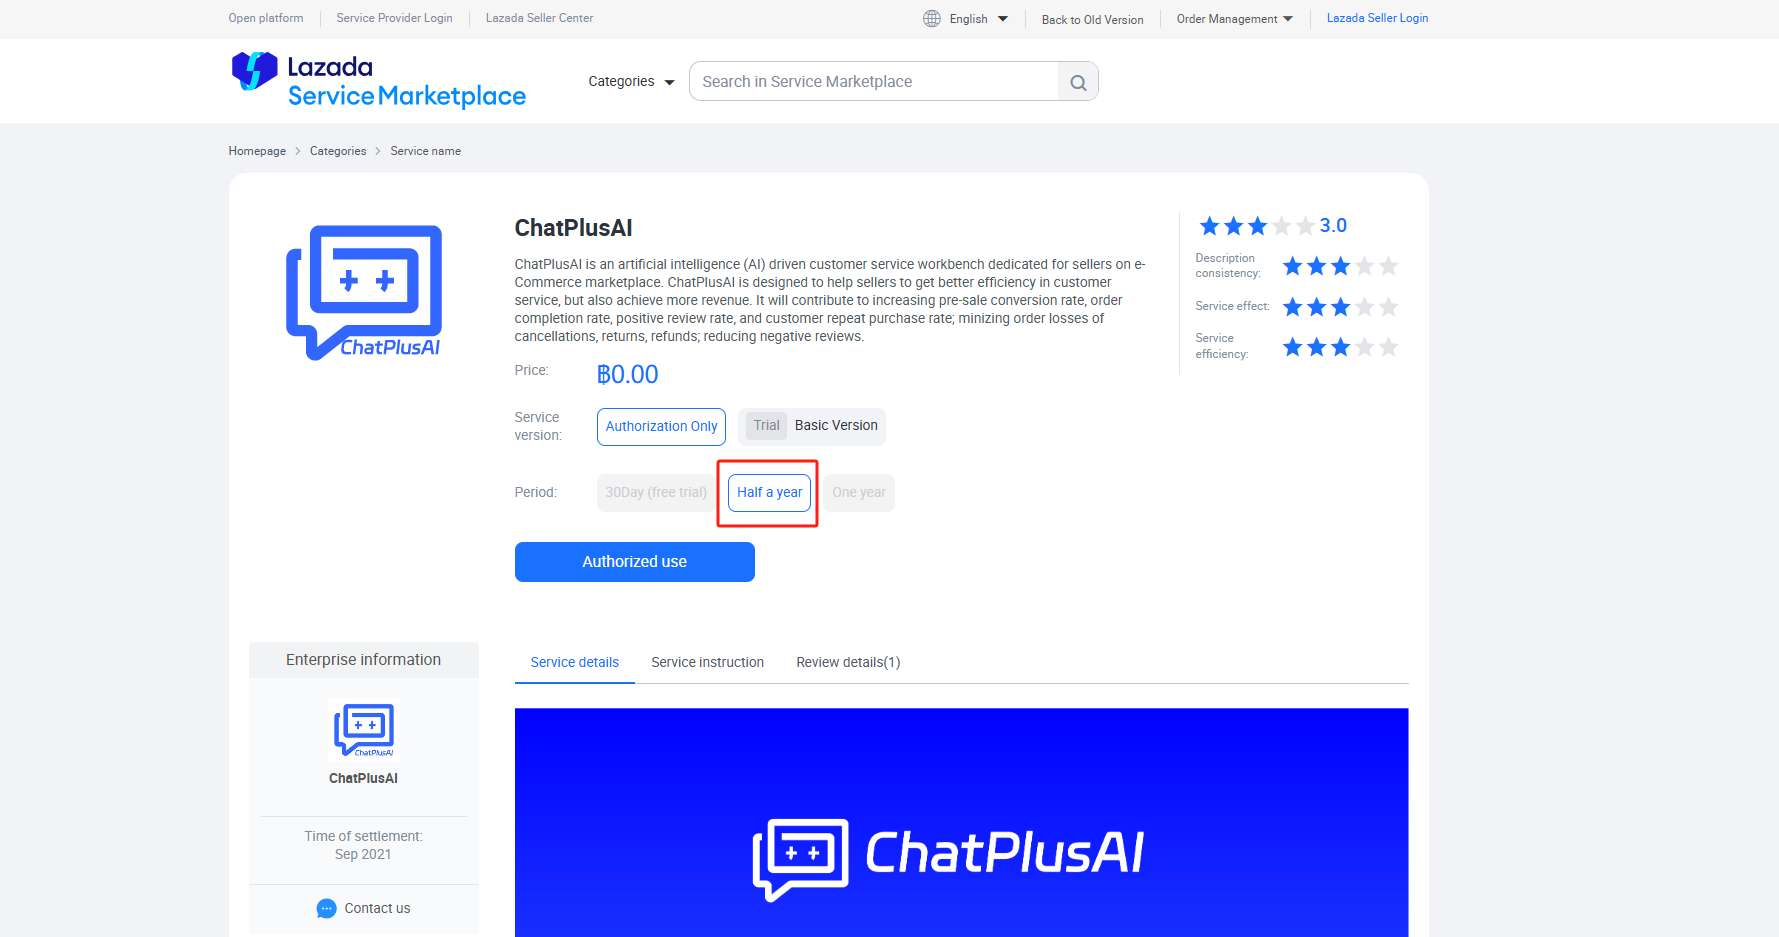
(2)Authorize the Lazada local store from the ChatPlusAI backend. If the option of "half a year" disappears after logging into Lazada, please return to ChatPlusAI, copy the link and paste it into the browser to open it.

Q2: After ordering the ChatPlusAI service, why cannot find how to use the service in the Lazada Seller Center?
A2: On the Lazada service marketplace page, click "Order Management → All Orders → My Service → Find ChatPlusAI → Click "Use Service".
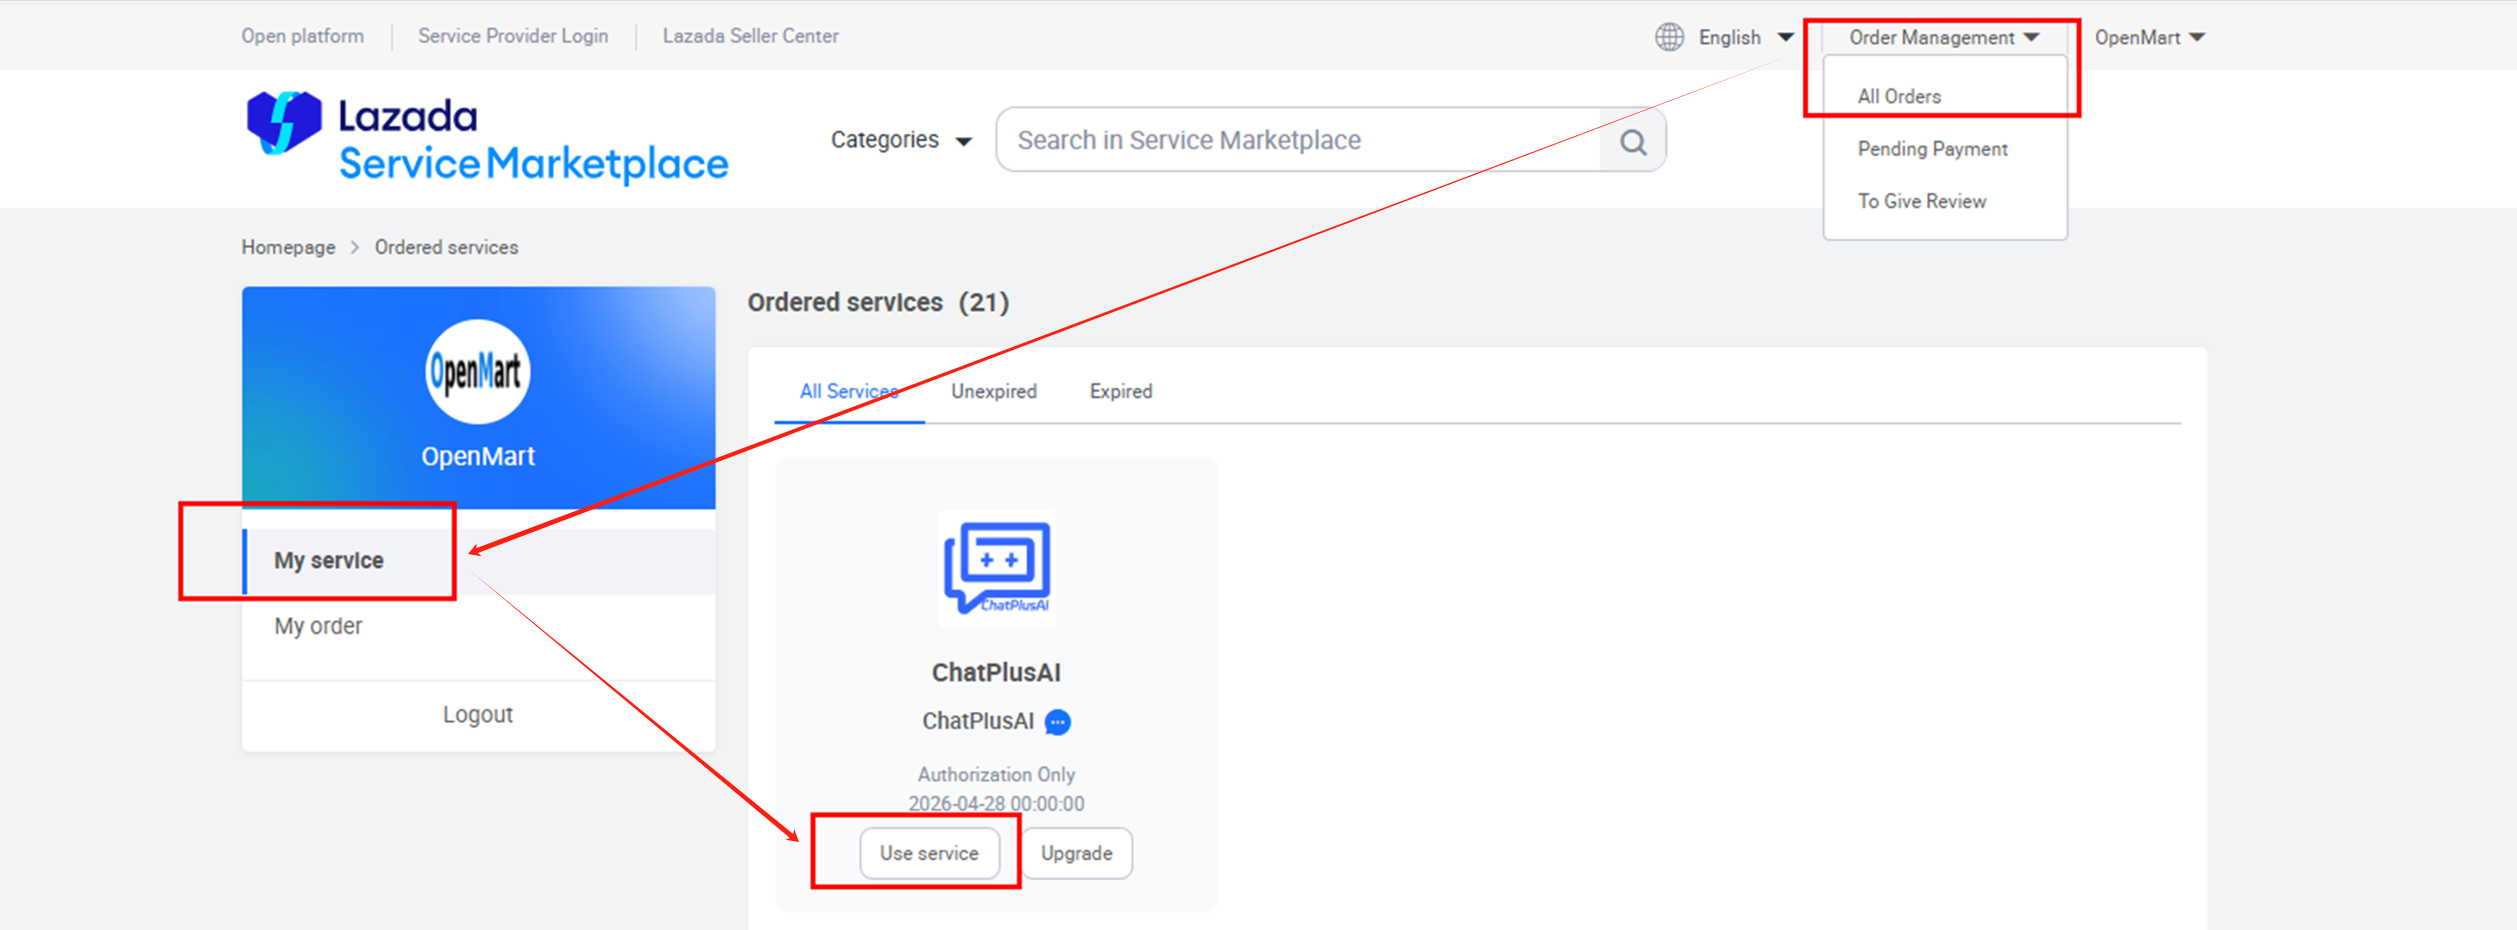
Q3: Error message when authorizing Lazada store: There is one order you are using now in the current service. If you need to buy other versions, please firstly cancel the underway order and contact the service provider to process it.

A3: When ordering ChatPlusAI service in the Lazada service marketplace, you can only choose one way to order different versions. For example, if you have already ordered the 0 price half-year version, the above error will occur if you order the paid version again within the authorization validity period.
At this time, just click on the top "Order Management → All Orders → My Services → Find ChatPlusAI" and click "Use Service".

Q4:Error message when authorizing Lazada store: The cumulative order period cannot exceed 18 months.

A4: When ordering ChatPlusAI services in the Lazada service marketplace, the 0 price half-year version supports up to 3 orders for a total of 18 months. If you order the service more than 3 times, the above error will be sent.
At this time, just click on the top "Order Management → All Orders → My Services → Find ChatPlusAI" and click "Use Service".

Method 2: Share with your administrator who has the account and password to authorize.
Step
1.Enter the store authorization page
After the first login to ChatPlusAI, you will be directed to the guided page for adding a store.
Select Lazada --> Click Next

The steps to add a store in daily operations:
Configuration-->Select Marketplace-->Add store

2.Select local store--> Select store region--> Click Next

3.Select the add method
【Select method 2 -> Click "Copy link"】, the authorization link with the introductory statement will be automatically copied.
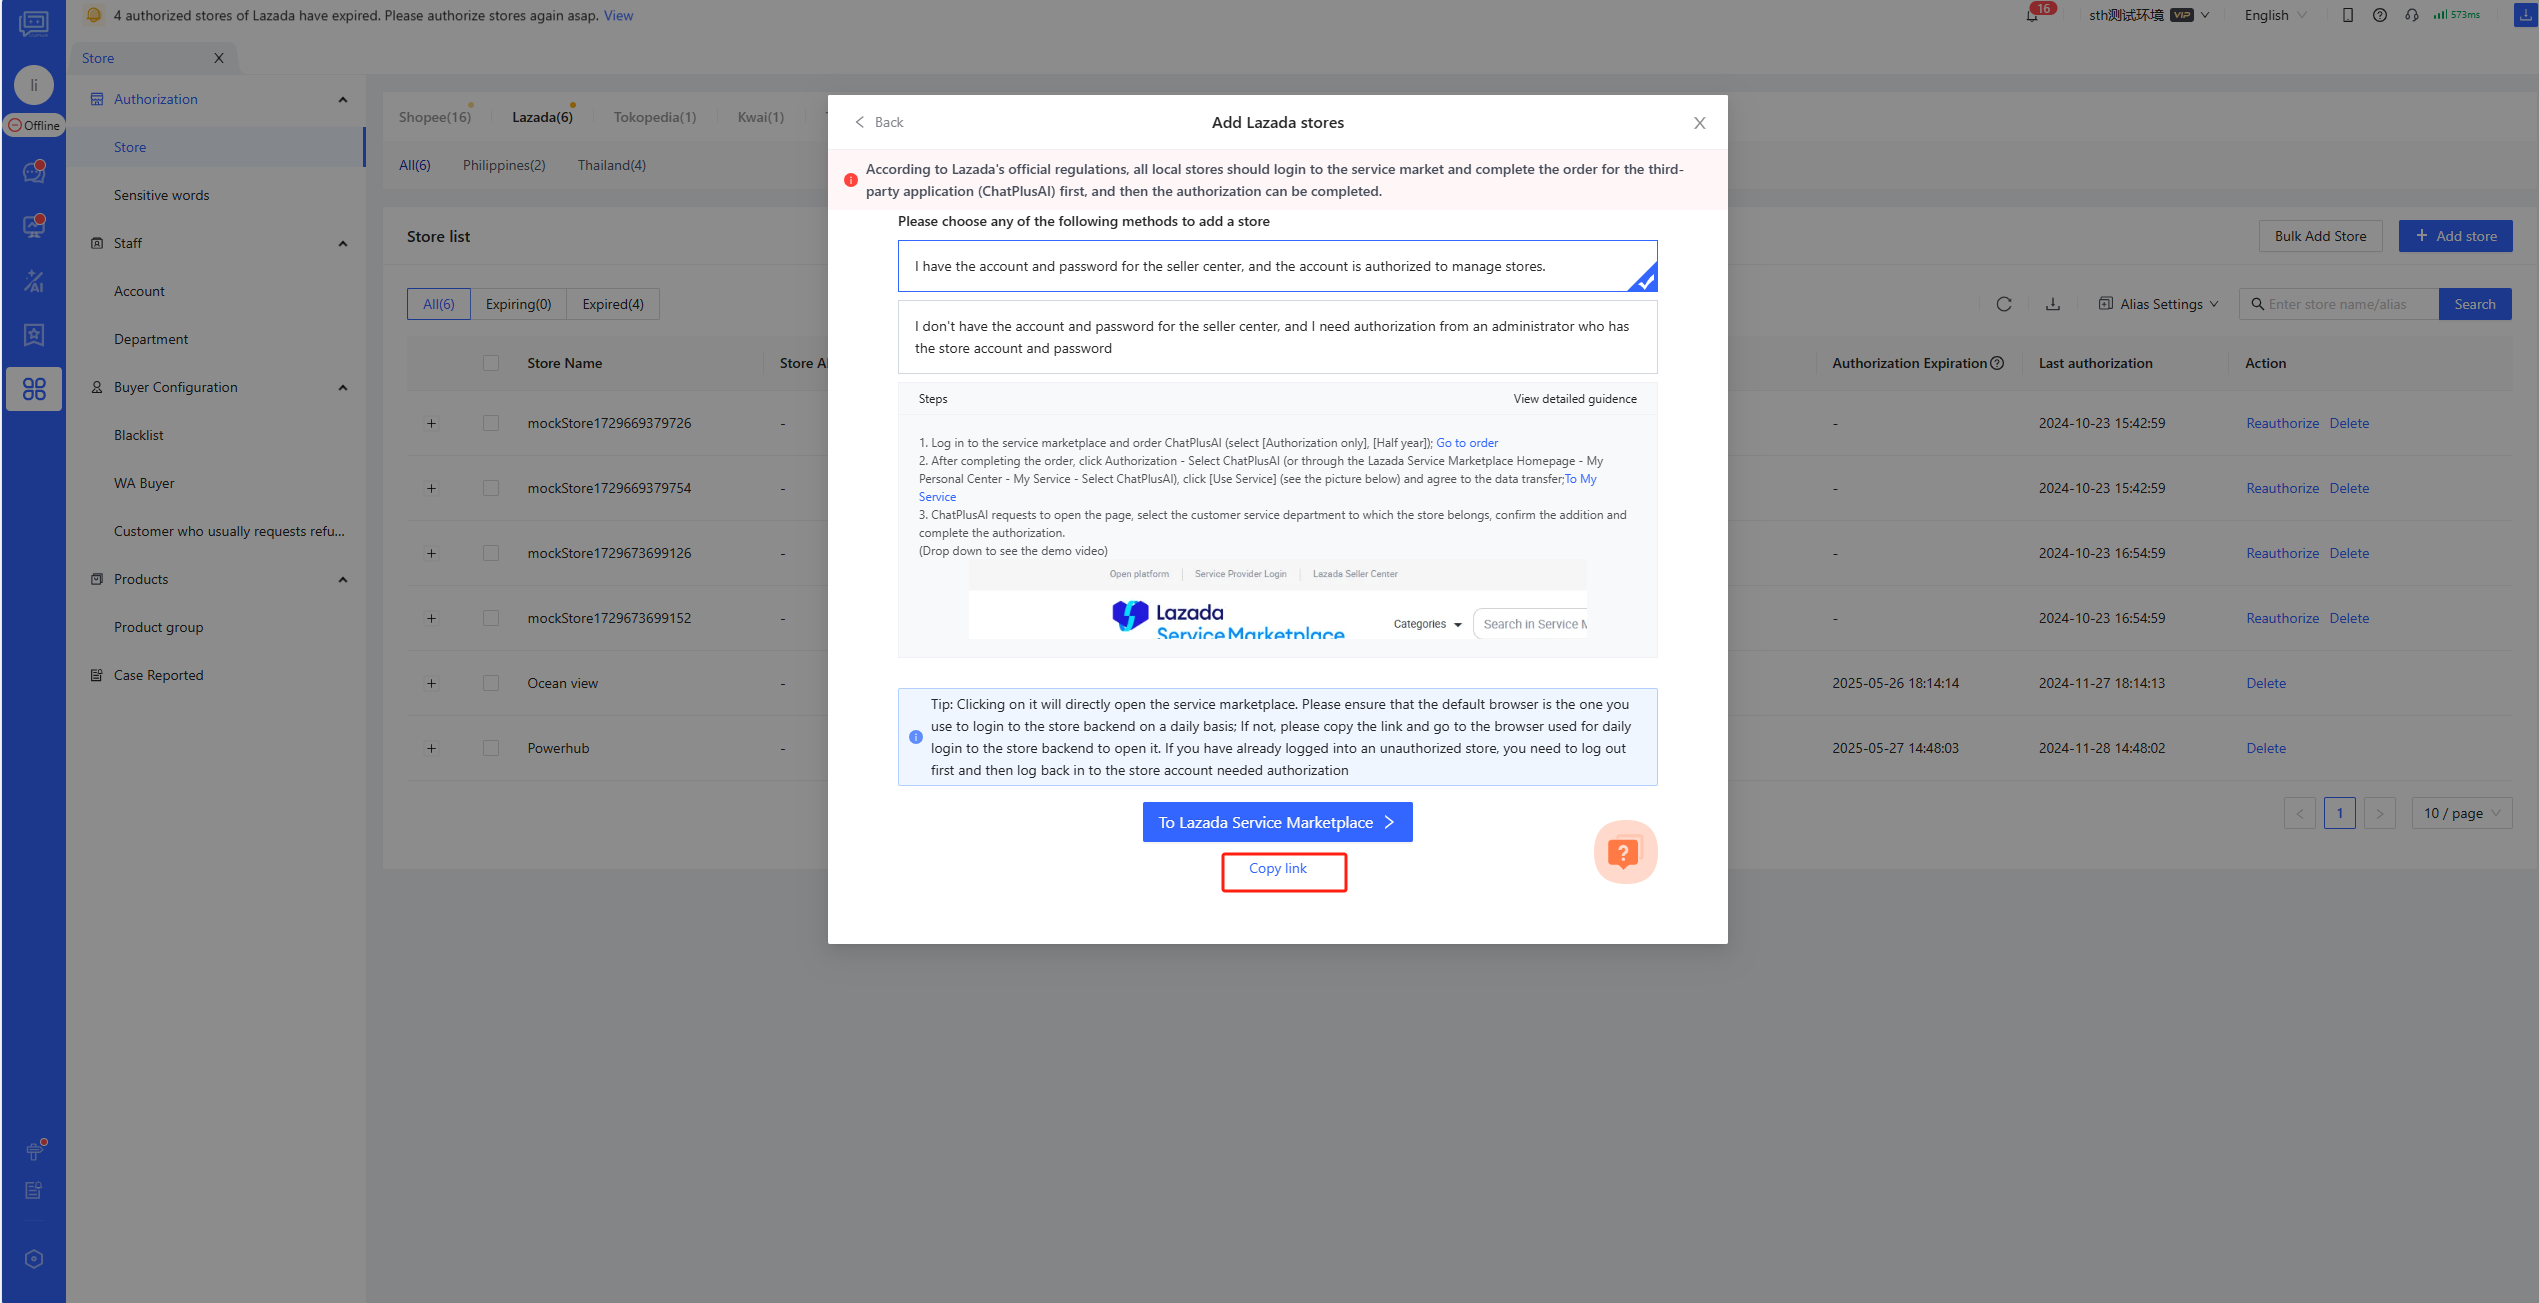
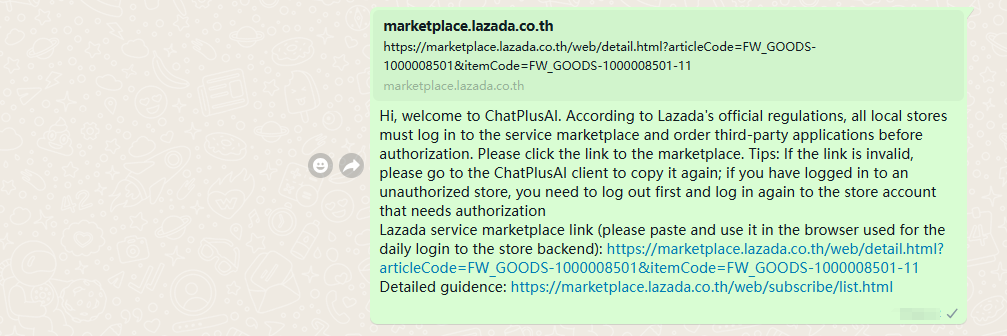
4.Send Link to the Administrator
Send the link to the administrator who has the Seller Center account & password. Please note that different sites correspond to different authorization links. Please inform the administrator of the store you want to authorize and the corresponding site.
5.(For Adiministrator)Login to Seller Center
(1) In the browser used to log in to the store backend, the administrator logs in to the Lazada store backend to be authorized;
(2) In the browser used to log in to the store backend, the administrator clicks the Lazada authorization link received;
6.(For Adiministrator)Authorized use
【Select authorization period --> Authorized use】

【Click to agree on Term of use --> Confirm】

【Click "Authorized use of services"】

【Click "Athorized use of services"】

【Click to agree on "Athorization Notice" --> Agree】

【Select site --> Enter Lazada account & password --> Submit】

【 Log in to ChatPlusAI through the browser page that pops up automatically. 】

【Select CS Team that the store belongs to --> Confirm 】, then the authorization successful


Q: Why did I directly enter the reception page after logging into the web version of ChatPlusAI instead of jumping to the department selection page in the tutorial?
A: If you encounter this situation during the authorization process, please return to the page shown below in the Lazada service marketplace and click "Agree" again to the department selection page.

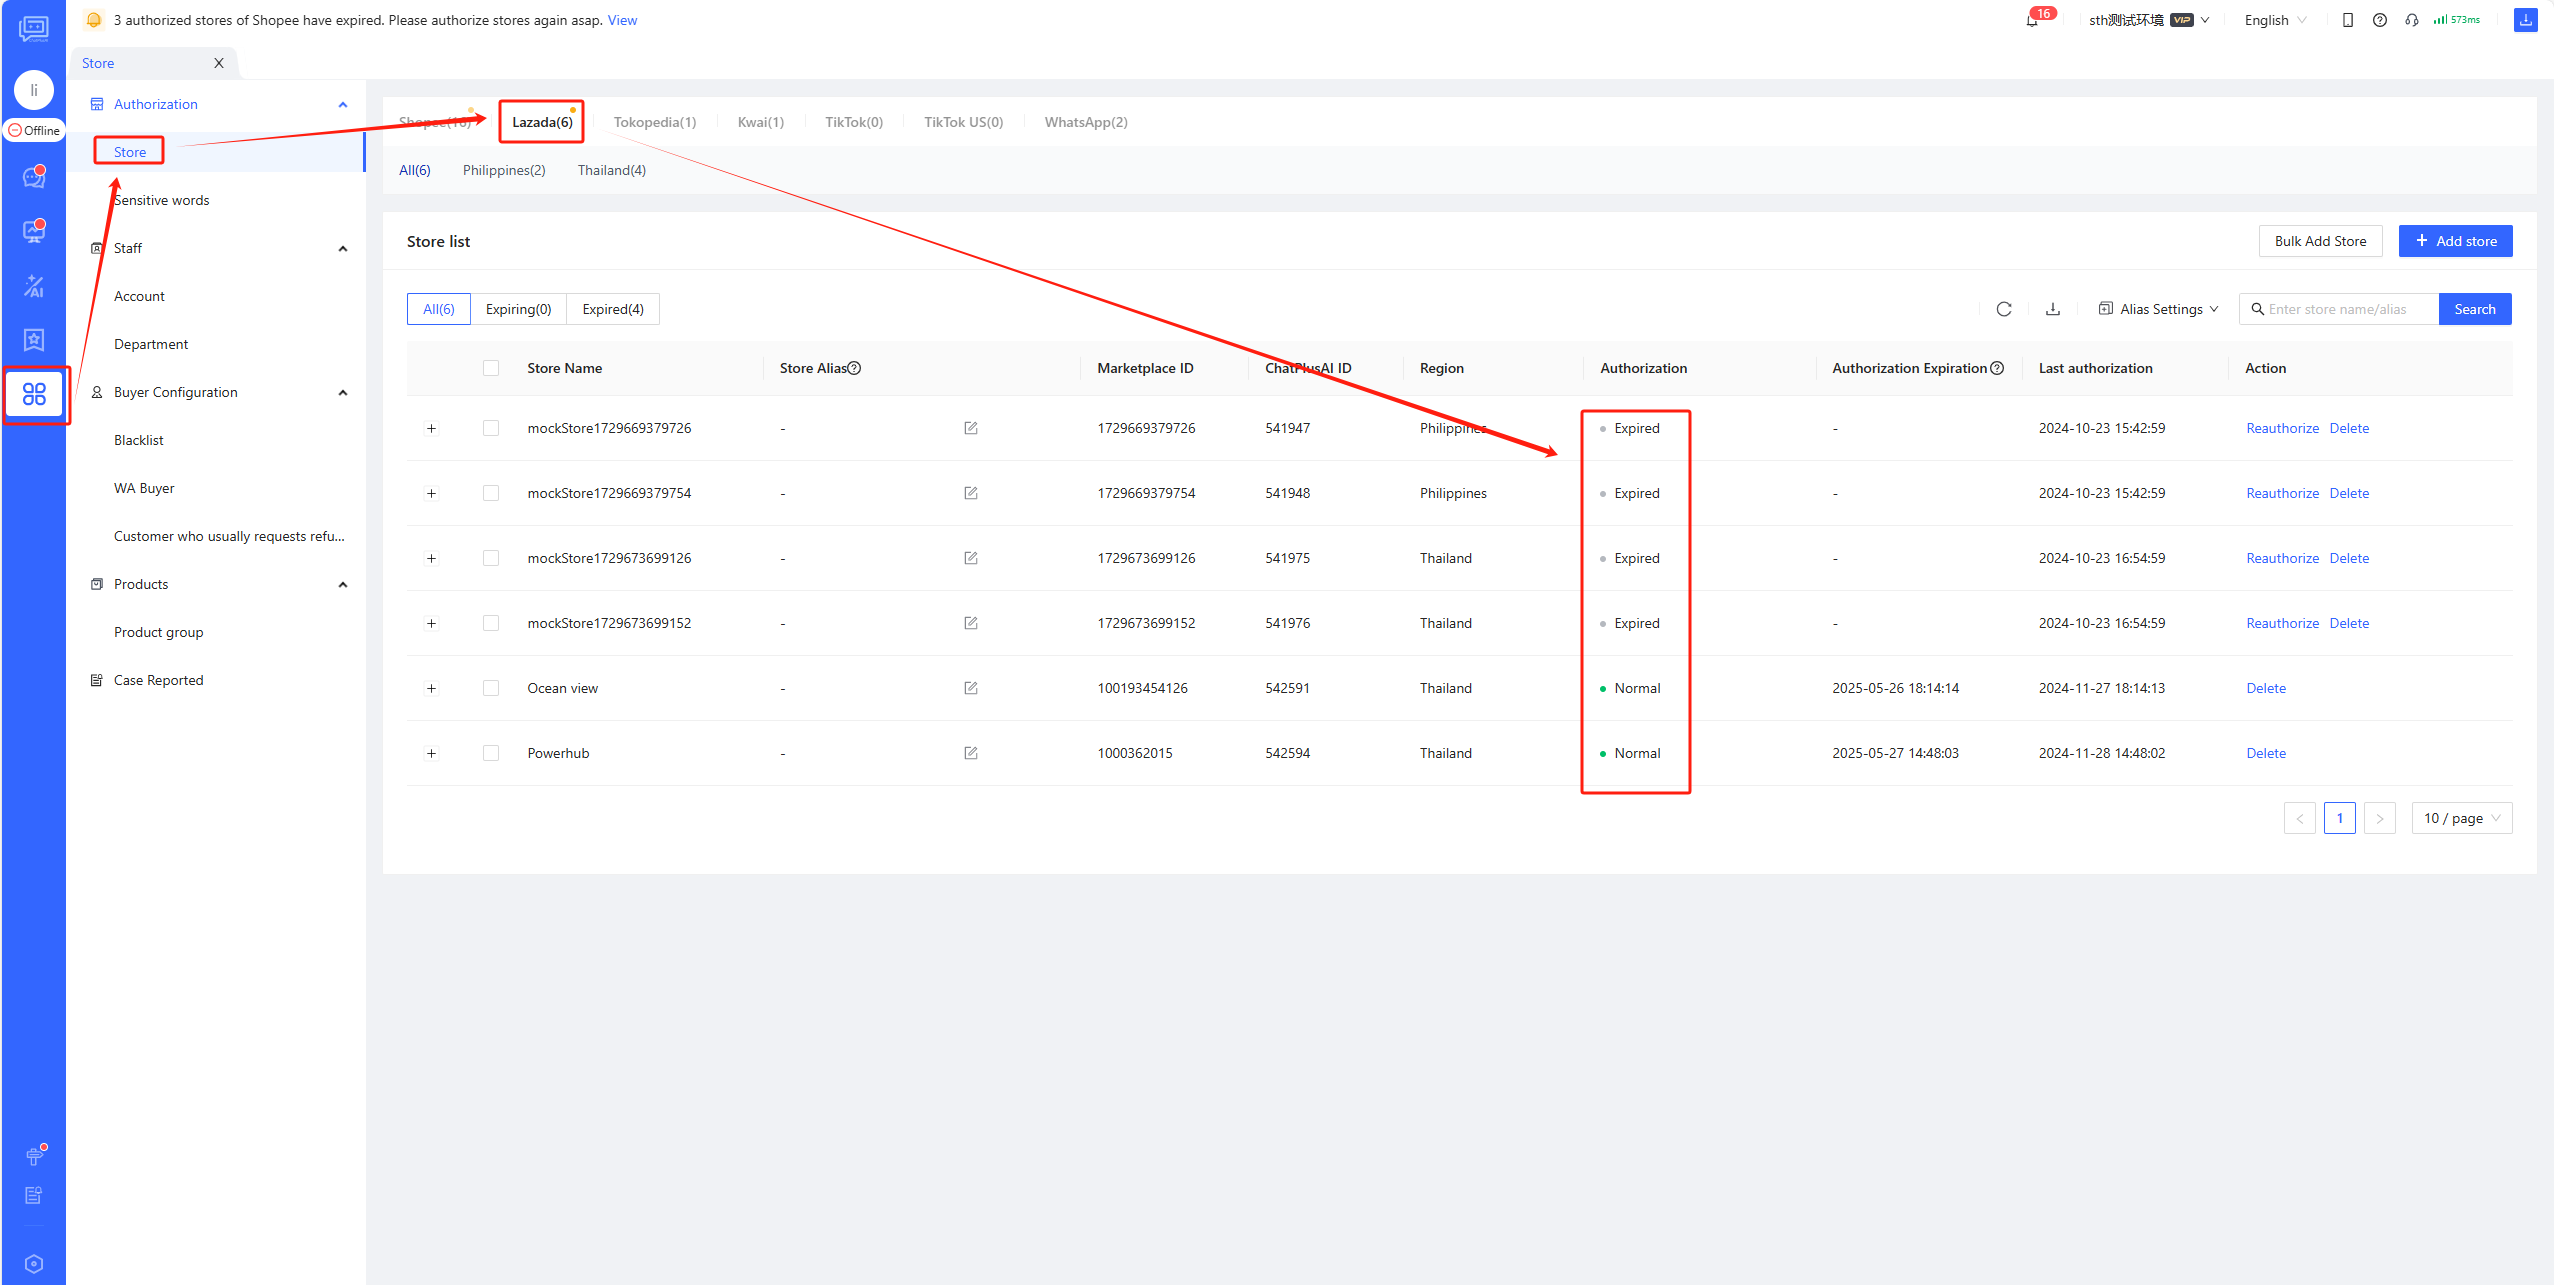
7. How to identify if the authorization is successful or not
After the administrator completes the authorization, you can click "Configuration --> Store --> Lazada --> Store List" in ChatPlusAI to check whether there is a new store.
FAQ
Q1: After logging in, why did the option of half a year for free on the Lazada service marketplace page disappear?
A1: After successfully logging in to Lazada, re-copy the Lazada authorization link you received; and paste it to open.

Q2: After ordering the ChatPlusAI service, why cannot find use service in the Lazada Seller Center?
A2: On the Lazada service marketplace page, click "Order Management → All Orders → My Service → Find ChatPlusAI → Click "Use Service".

Q3: Error message when authorizing Lazada store: There is one order you are using now in the current service. If you need to buy other versions, please firstly cancel the underway order and contact the service provider to process it.

A3: When ordering ChatPlusAI service in the Lazada service marketplace, you can only choose one way to order different versions. For example, if you have already ordered the 0 price half-year version, the above error will occur if you order the paid version again within the authorization validity period.
At this time, just click on the top "Order Management → All Orders → My Services → Find ChatPlusAI" and click "Use Service".

Q4:Error message when authorizing Lazada store: The cumulative order period cannot exceed 18 months.

A4: When ordering ChatPlusAI services in the Lazada service marketplace, the 0 price half-year version supports up to 3 orders for a total of 18 months. If you order the service more than 3 times, the above error will be sent.
At this time, just click on the top "Order Management → All Orders → My Services → Find ChatPlusAI" and click "Use Service".

Authorize Lazada Cross-border Store
Precaution
- Before authorization, to avoid IP association, please confirm that the current computer and network are the ones that are frequently used to log in to the Lazada marketplace's seller center. After authorization, you can use any computer or network environment to log in to ChatPlusAI for reception, without the risk of IP association.
- If you have the account password for Lazada Seller Center and that account is authorized to manage shops, you can choose Method 1: you will be redirected to the Lazada Seller Center to complete the authorization.
- If you do not have the account password for Lazada Seller Center, when you reach the step of selecting the adding method, you can choose Method 2: Follow the prompts to share the link with an administrator who has the account password, and ask your administrator to click the link to log in to the seller center to complete the authorization.

Method 1: Go to the seller center to authorize with your account and password.
Step
- Enter the store authorization page
After the first login to ChatPlusAI, you will be directed to the guided page for adding a store.
Select Lazada --> Click Next
The steps to add a store in daily operations:
Configuration-->Select Marketplace-->Add store
- Select the store type: Crossborder --> Click Next
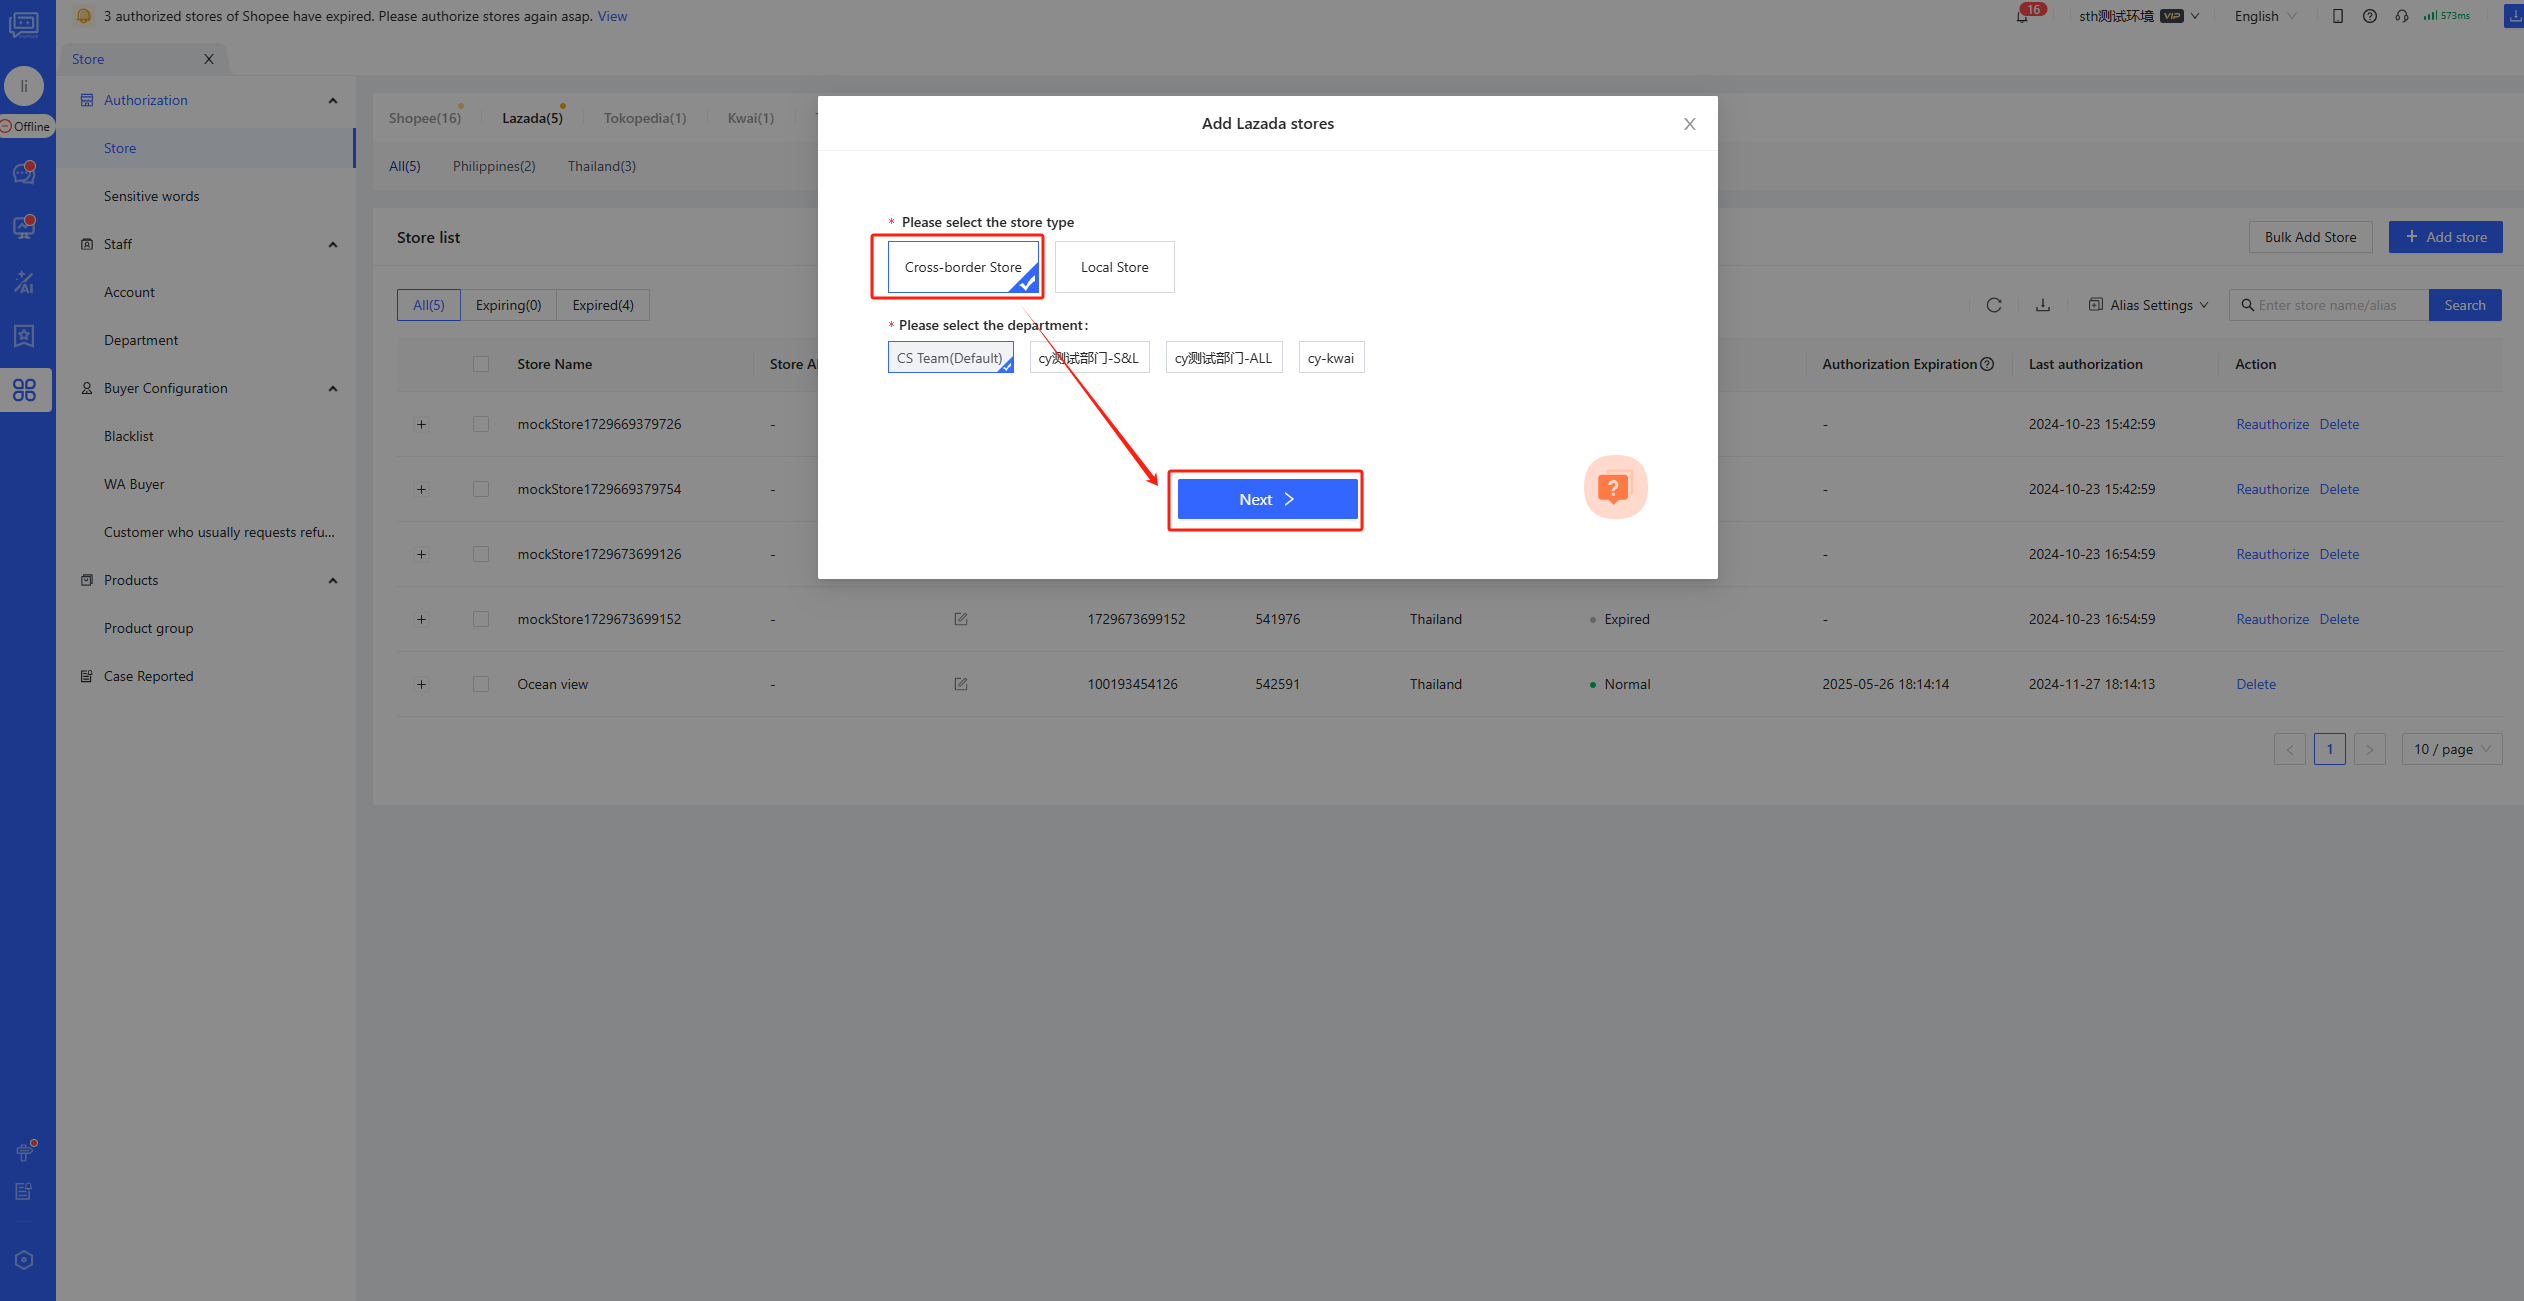
- Select adding method
Select Method 1 --> Click “Next”, you will be automatically redirected to the Lazada Seller Center login page.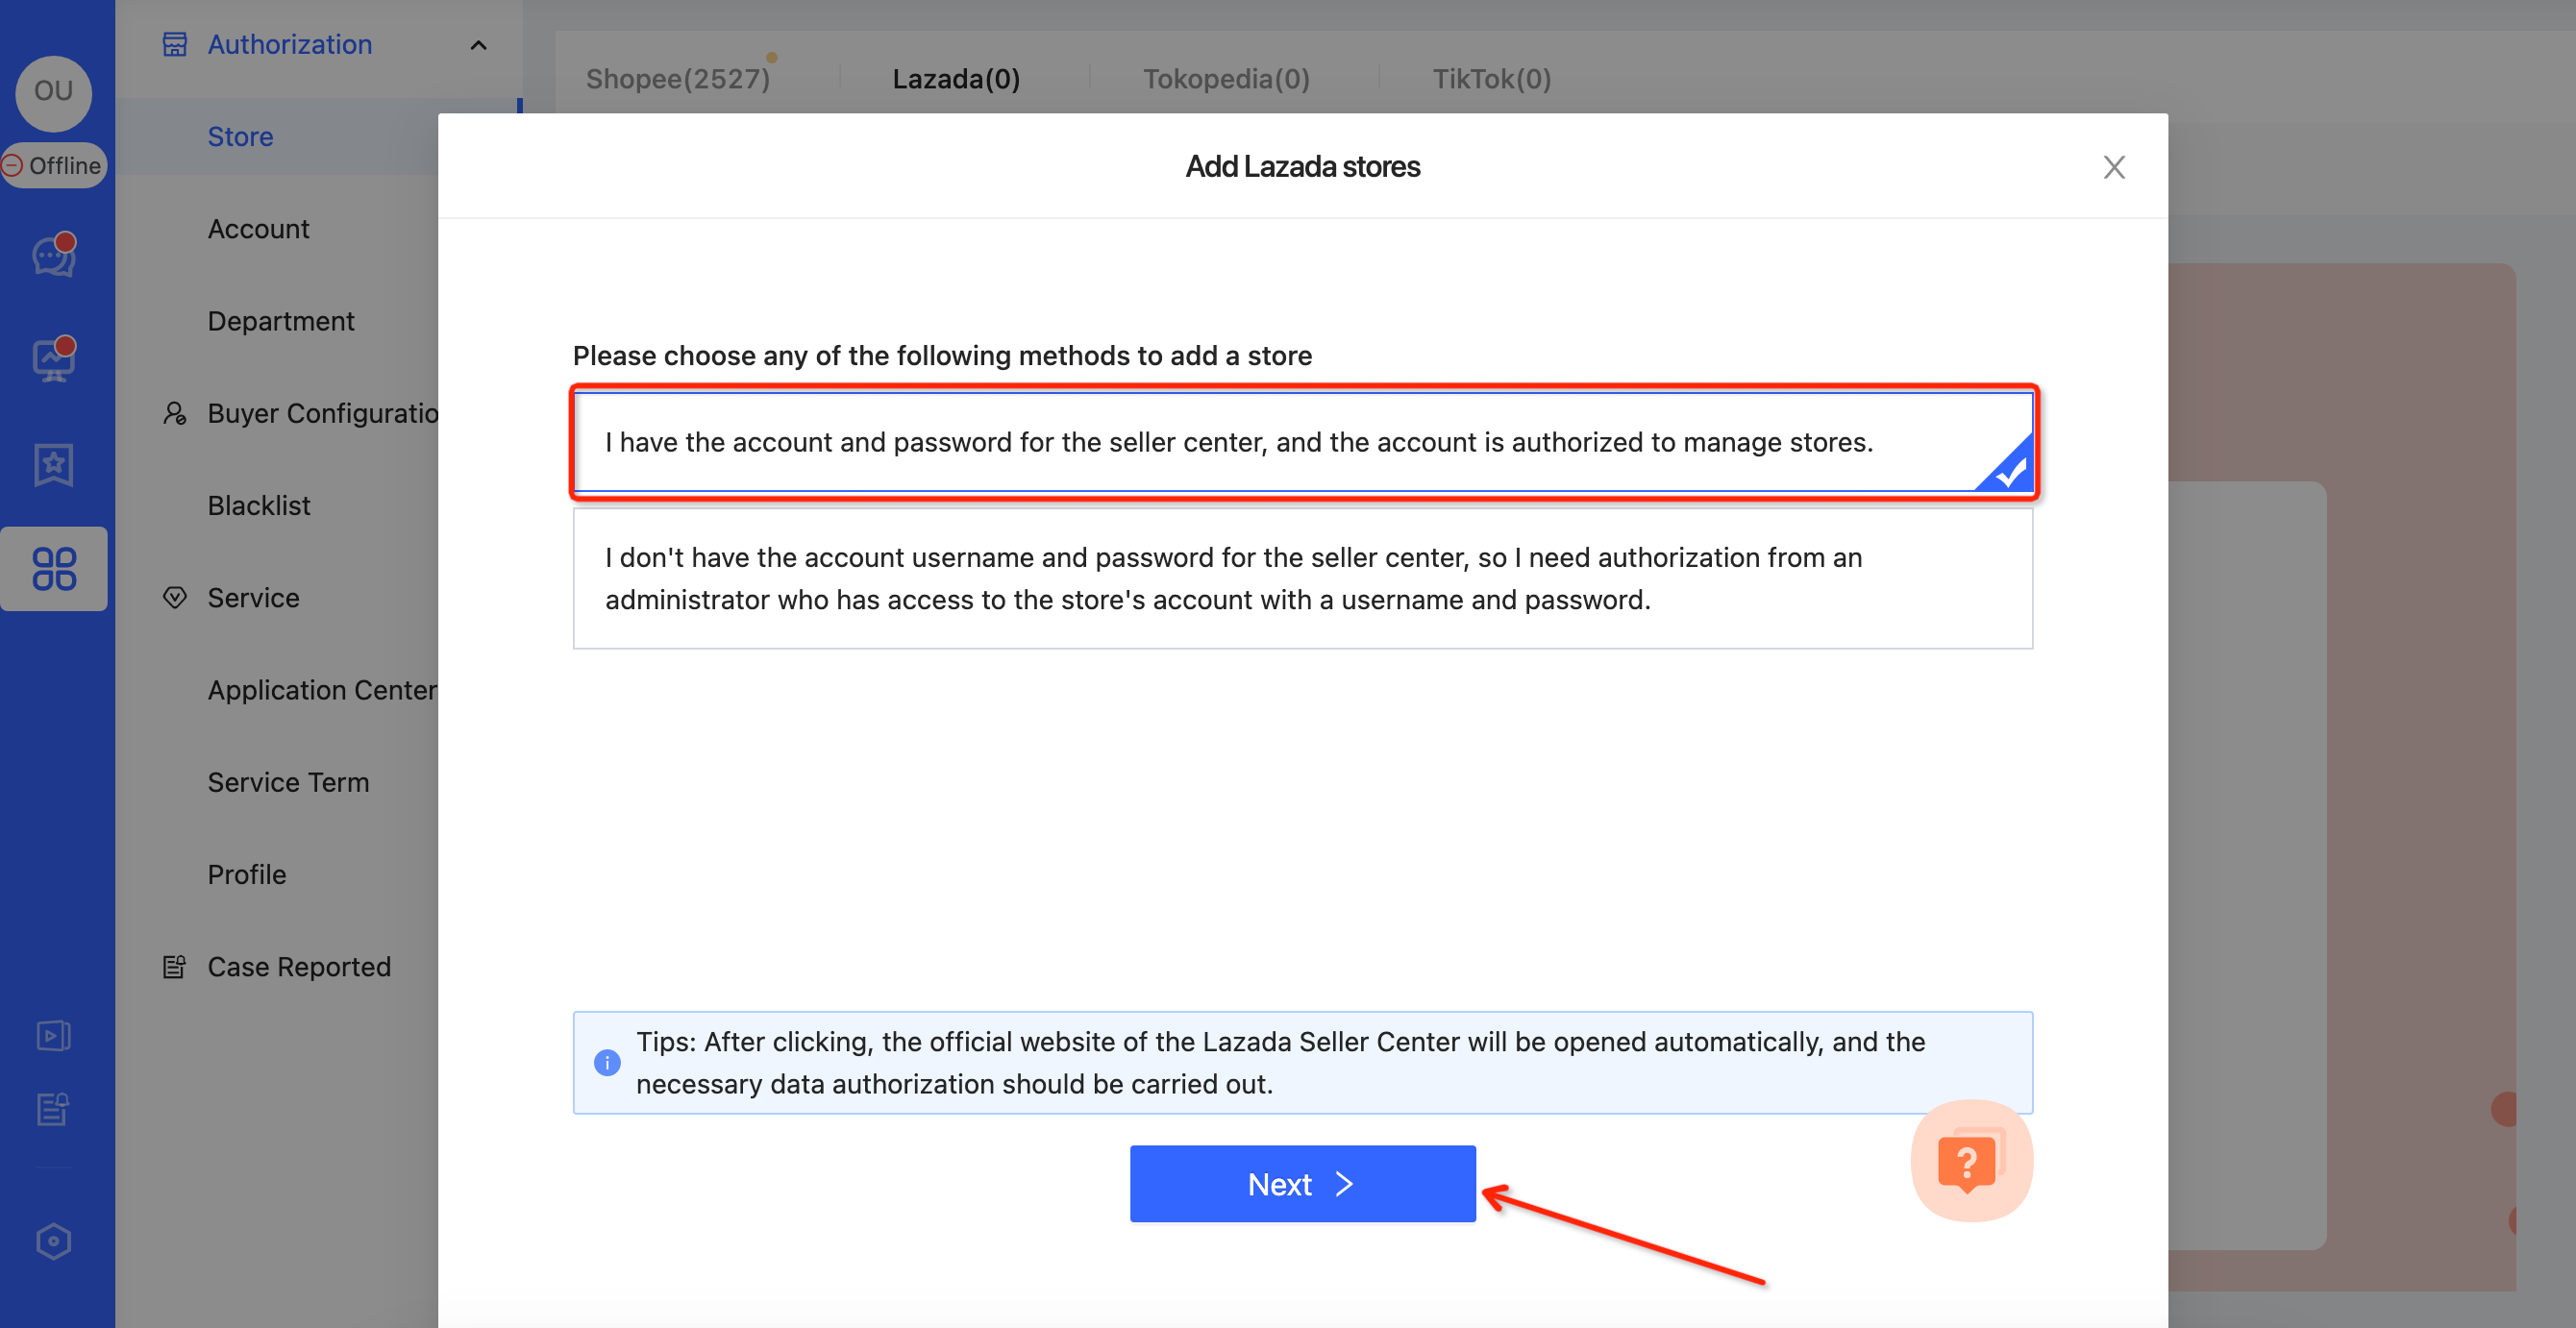
- Authorize on Lazada
Select site: Crossborder→Enter account & password →Click “Submit”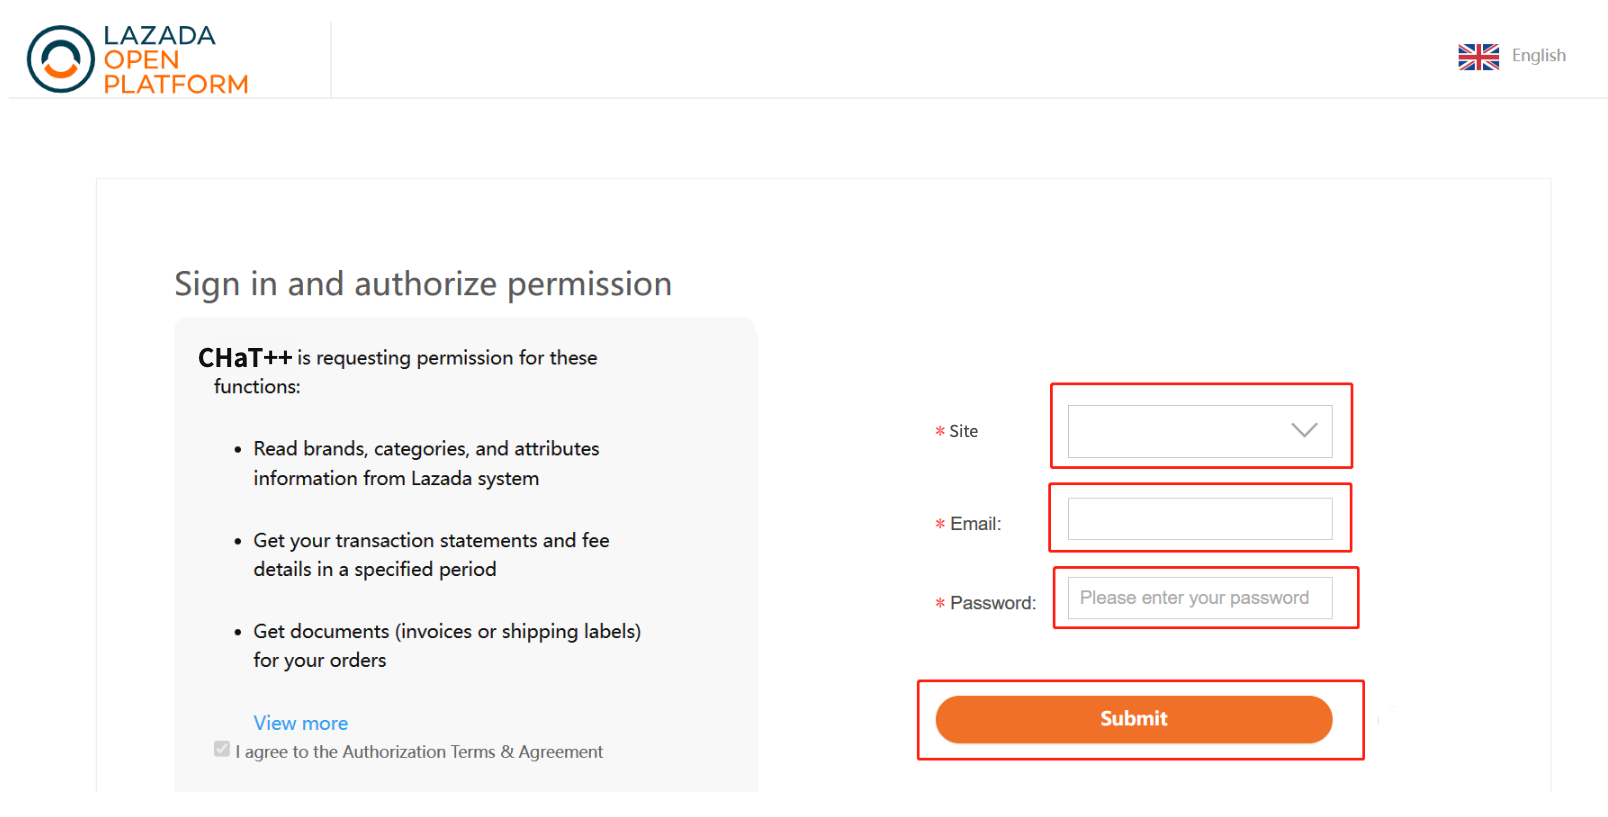
- Authorization Success
After entering account information and clicking "Submit," the page will automatically redirect to the authorization result page. When the page shown in the figure below appears, the authorization is complete, and you can switch to the ChatPlusAI background to begin customer service.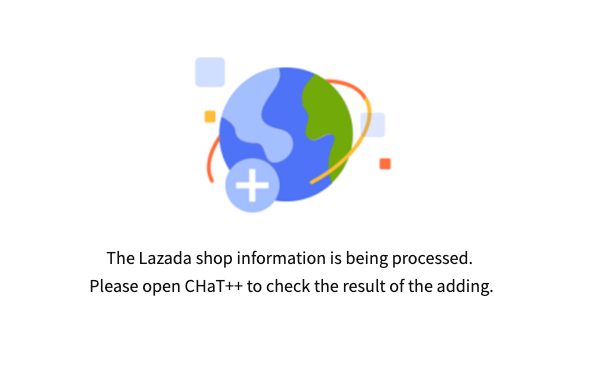
After adding the store for the first time, please be patient and wait for 15 minutes. The system is automatically synchronizing the message content of the past 30 days and the order information of the past 90 days.
FAQ
Q1:Why did the authorization of the Lazada shop fail?
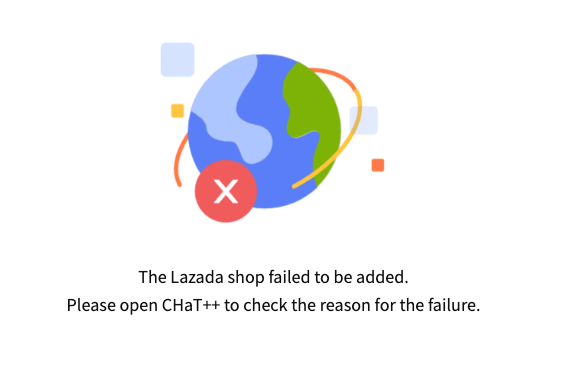
A1: When the "Adding Failed" page appears, please open ChatPlusAI to check the reason for the failure.
- The common reason for the failure is incorrect account password, which needs to be checked again.
- If the failure is caused by repeated authorization, it means that the shop has already been authorized to this ChatPlusAI account or another ChatPlusAI account.
Q2: How to authorize more Lazada stores?
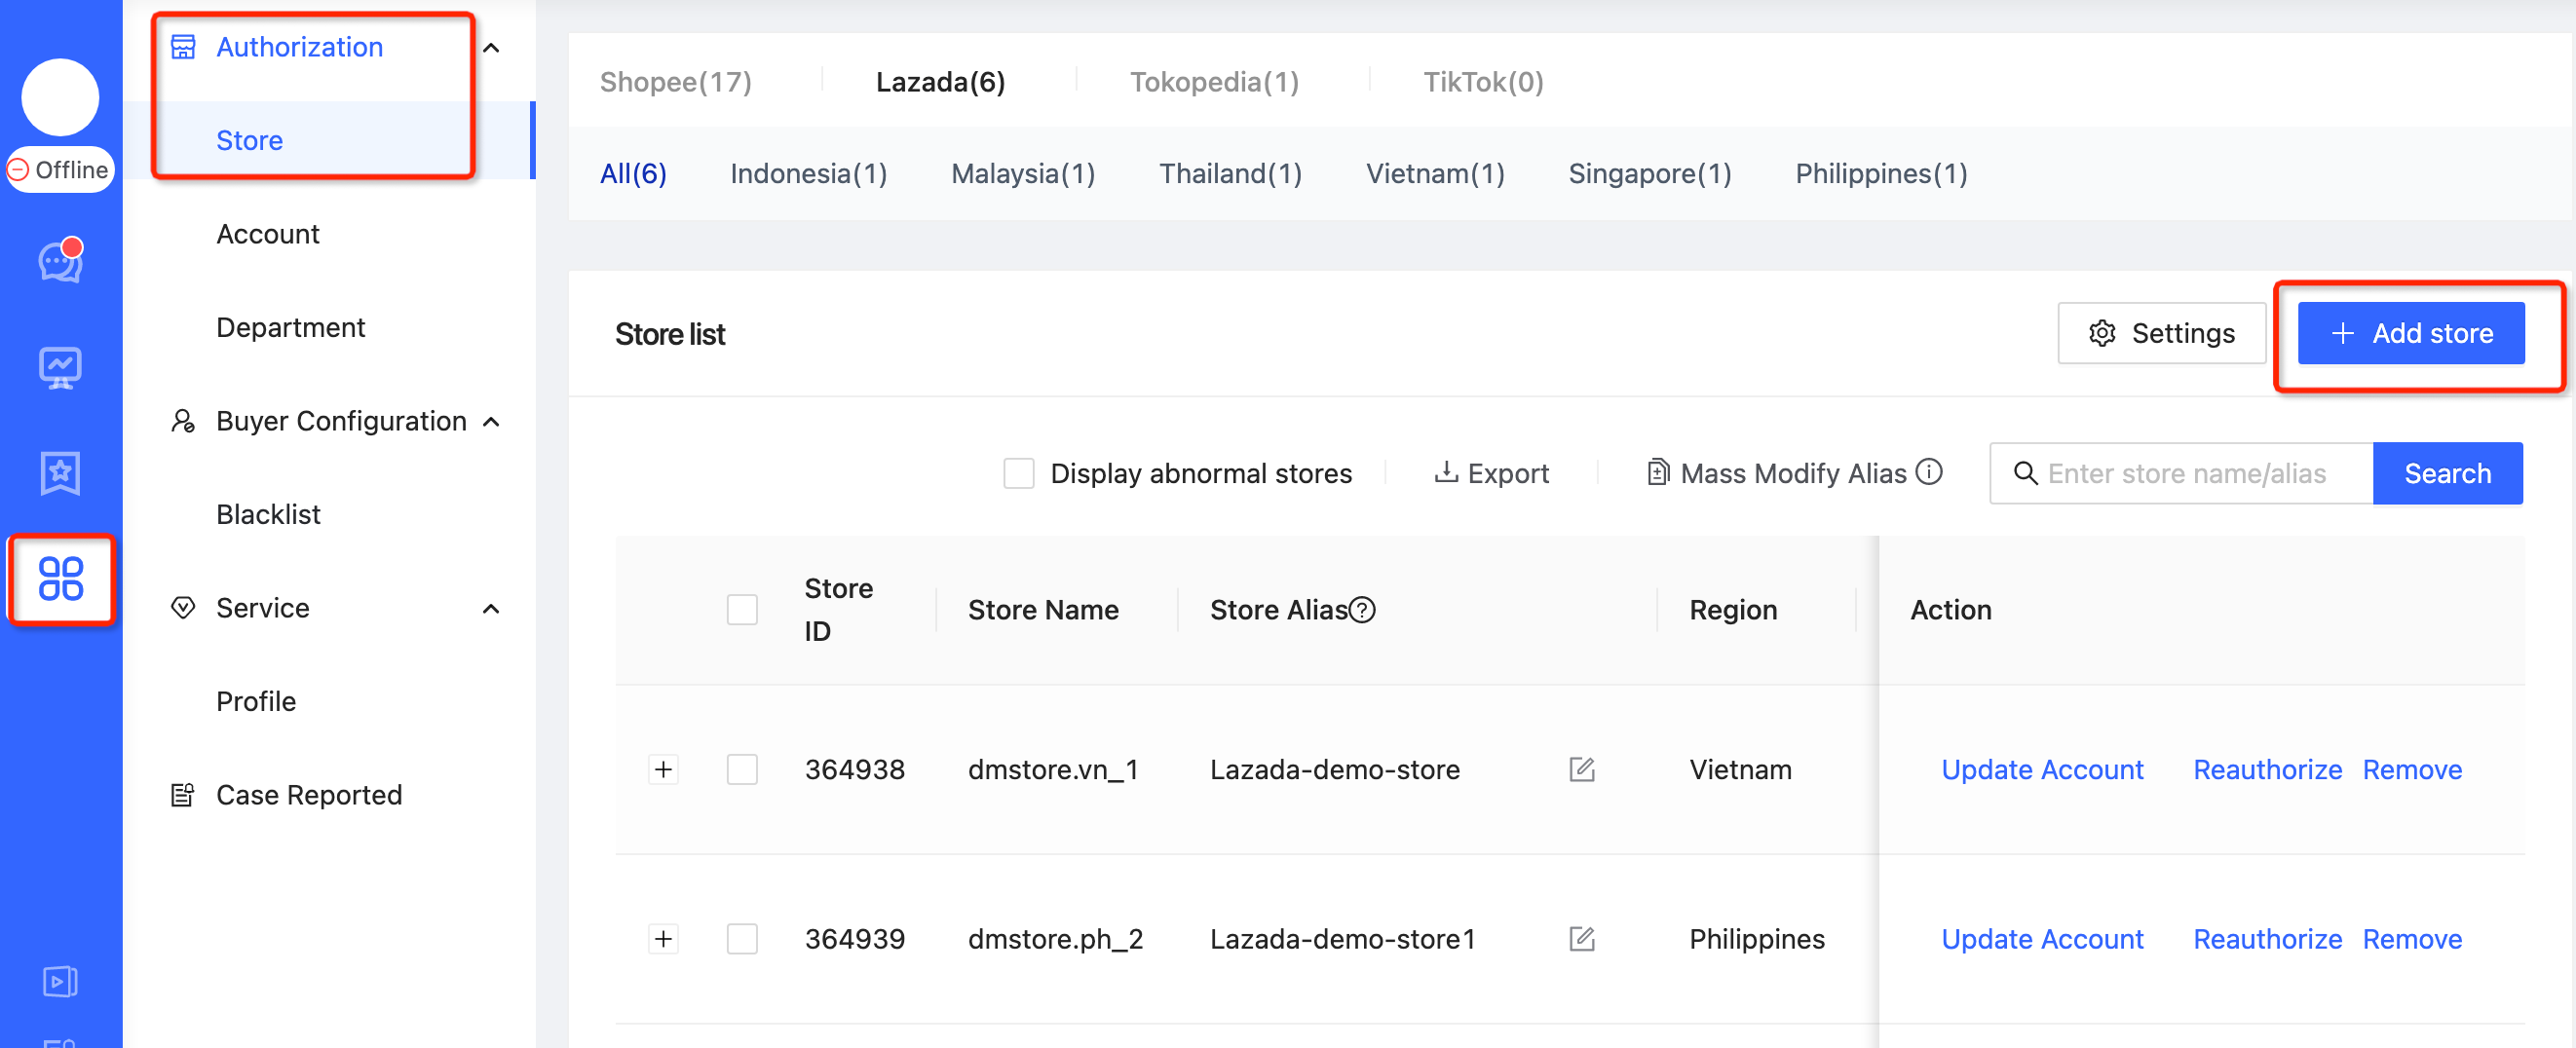
A2: Authorize more on ChatPlusAI: Configuration-->Authorization-->Store--> Add store.
Method 2: Share with your administrator who has the account and password to authorize.
Step
- Enter the store authorization page
After the first login to ChatPlusAI, you will be directed to the guided page for adding a store.
Select Lazada → Click "Next".
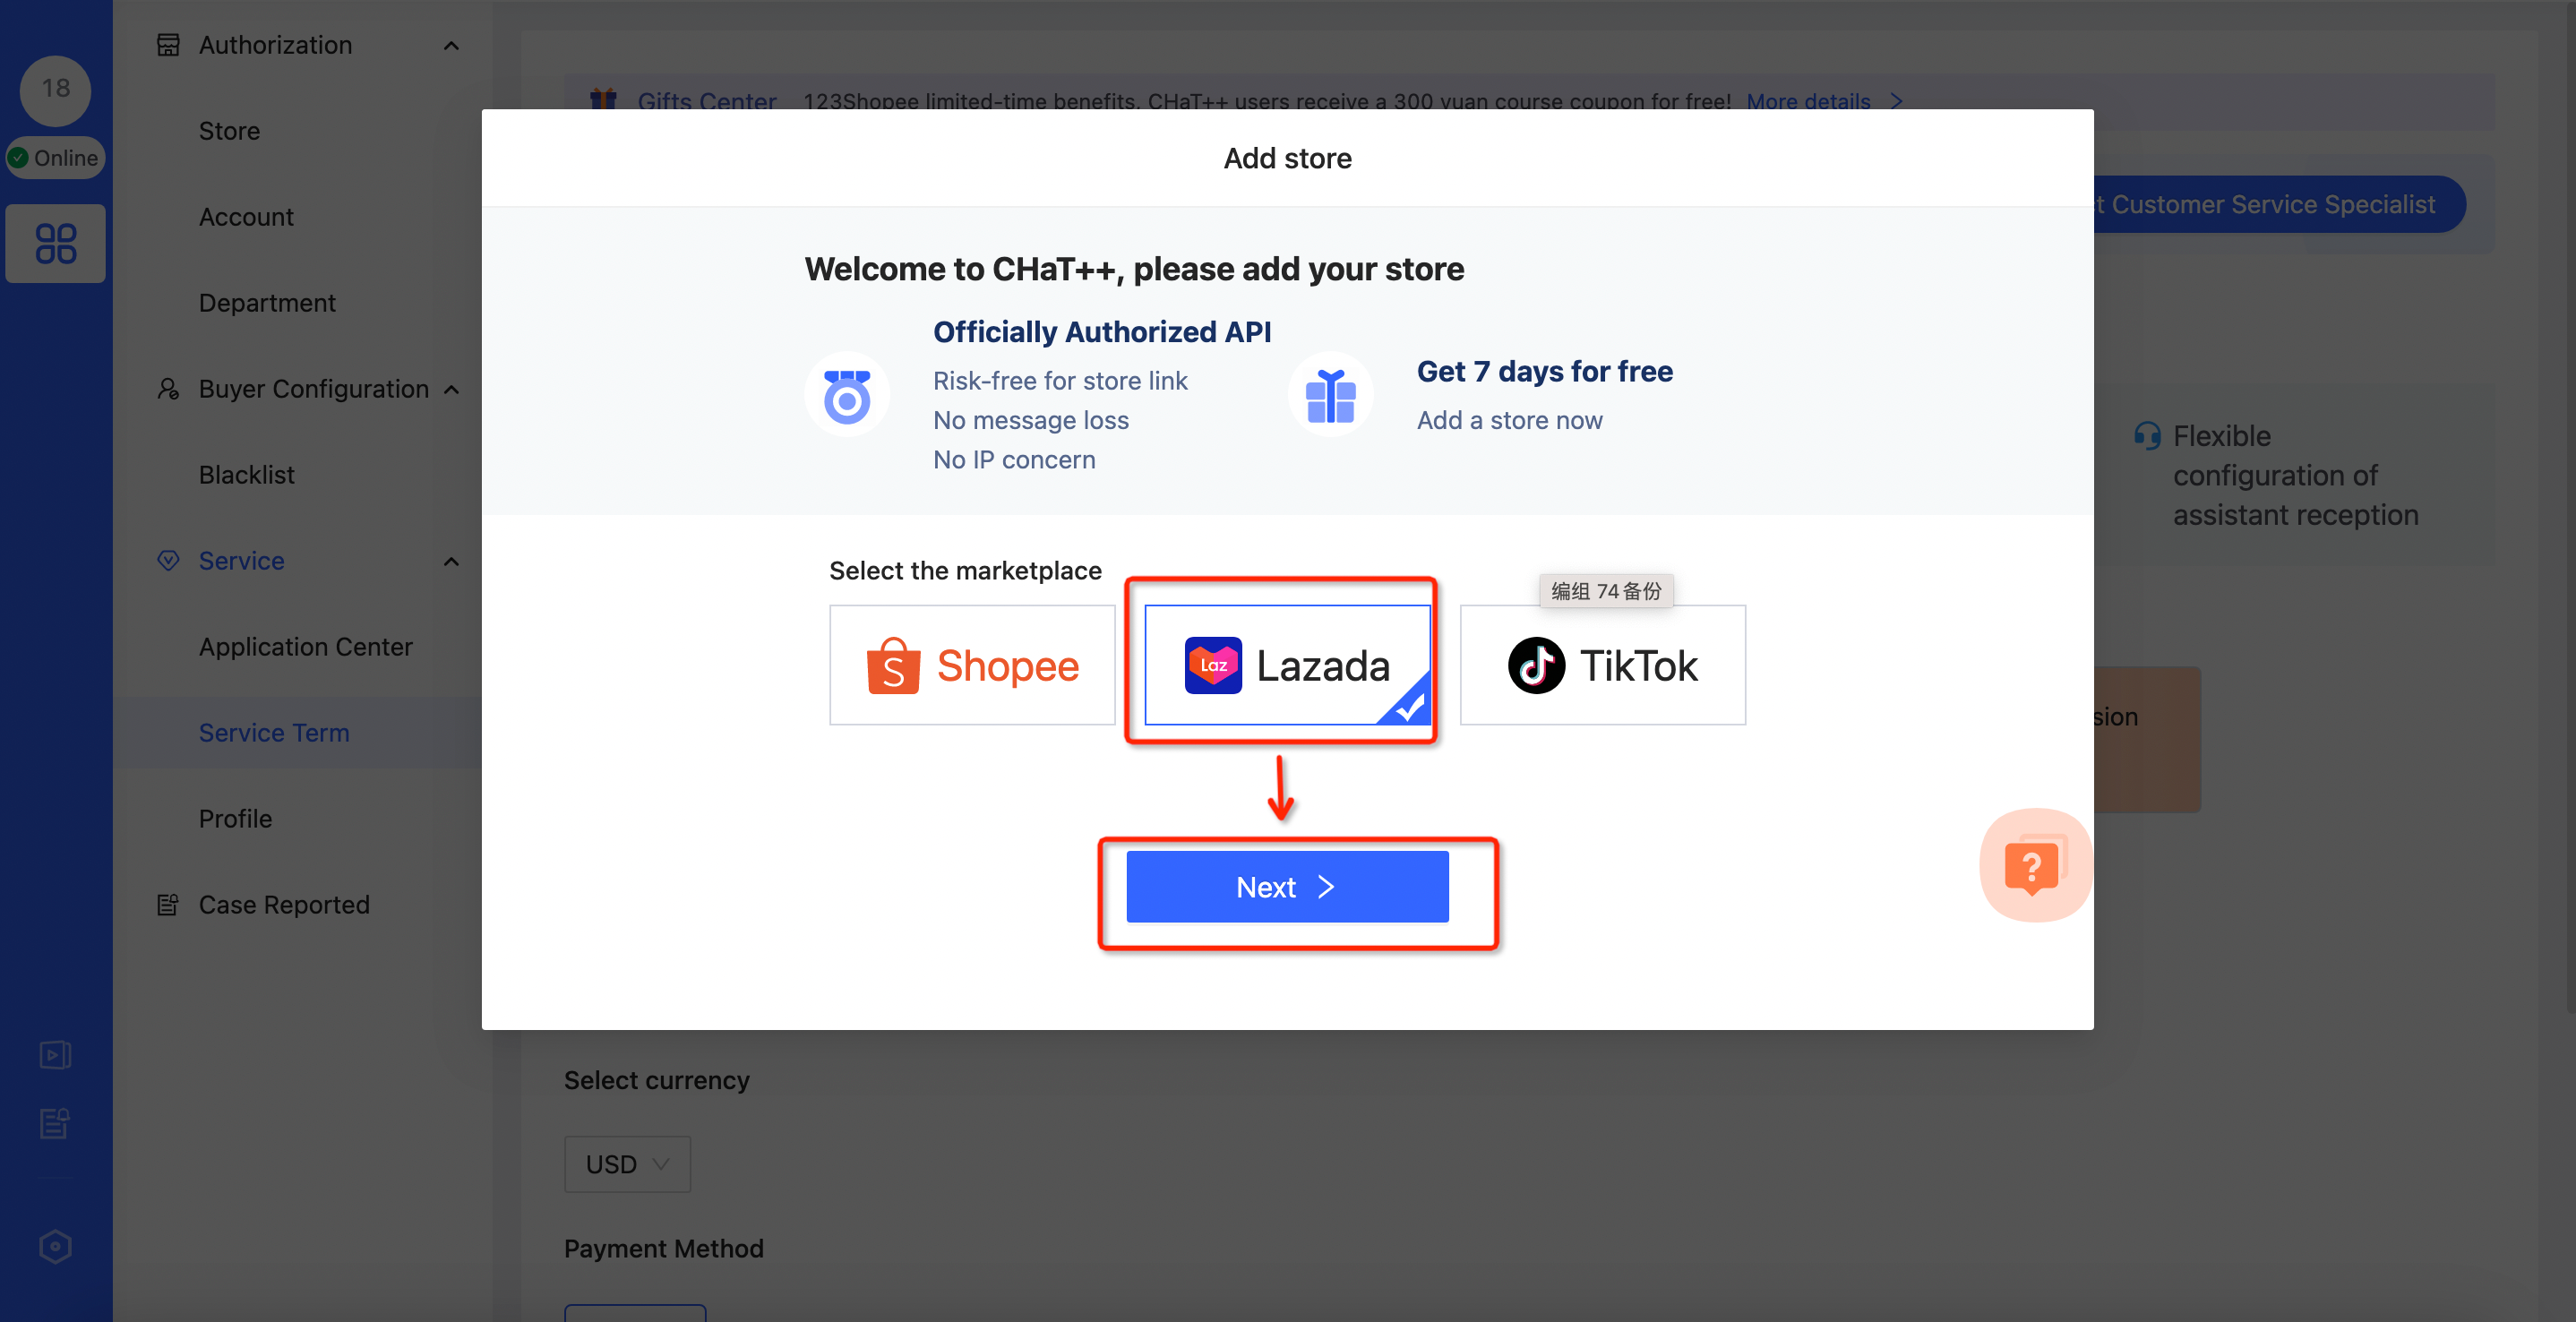
The steps to add a shop in daily operations:
Configuration-->Select Marketplace-->Store
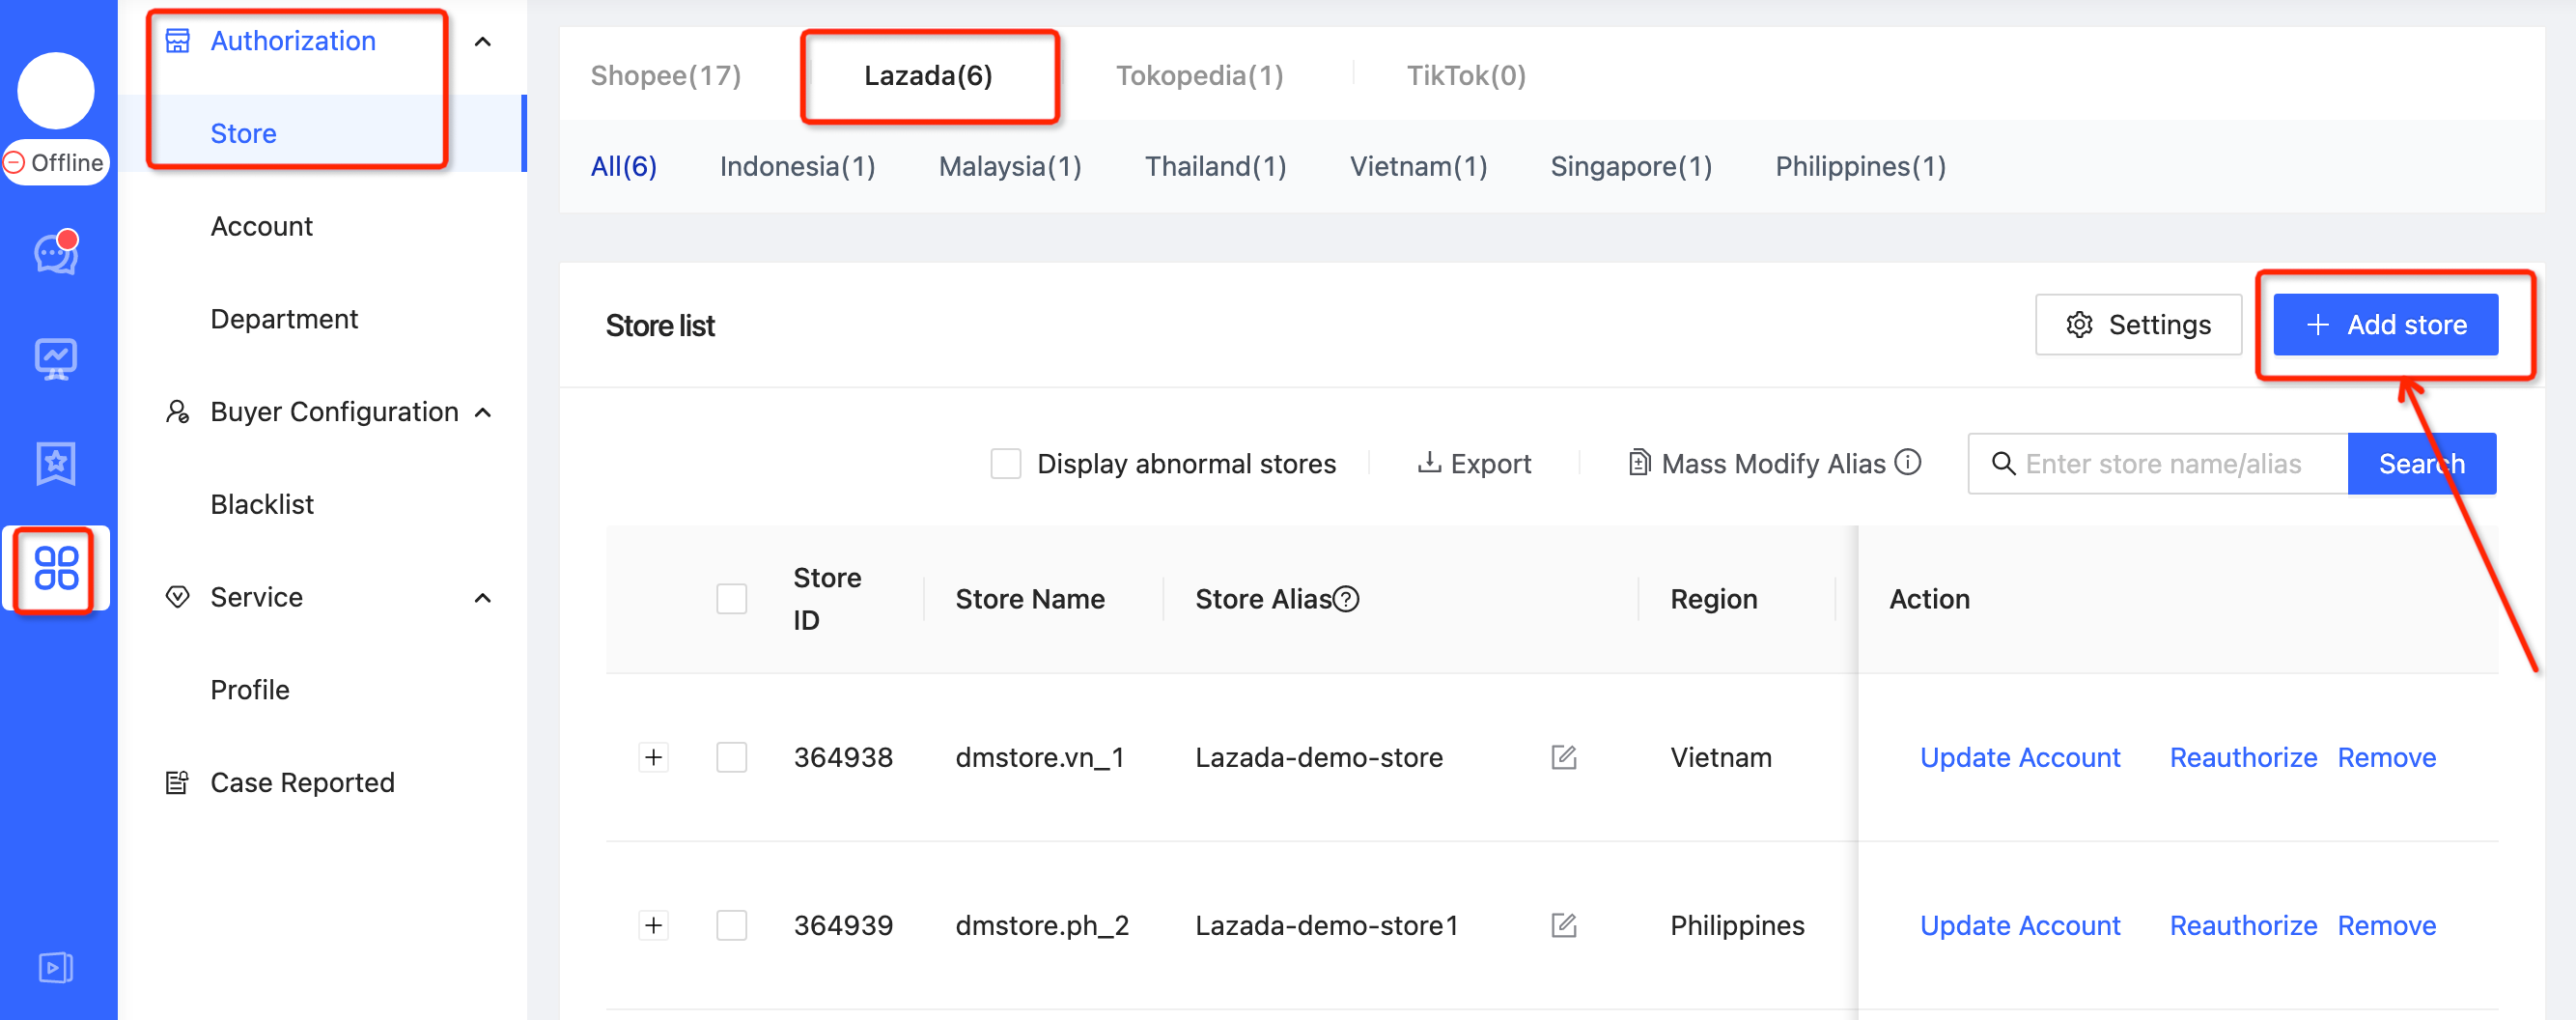
- Select the store type: Crossborder --> Click Next

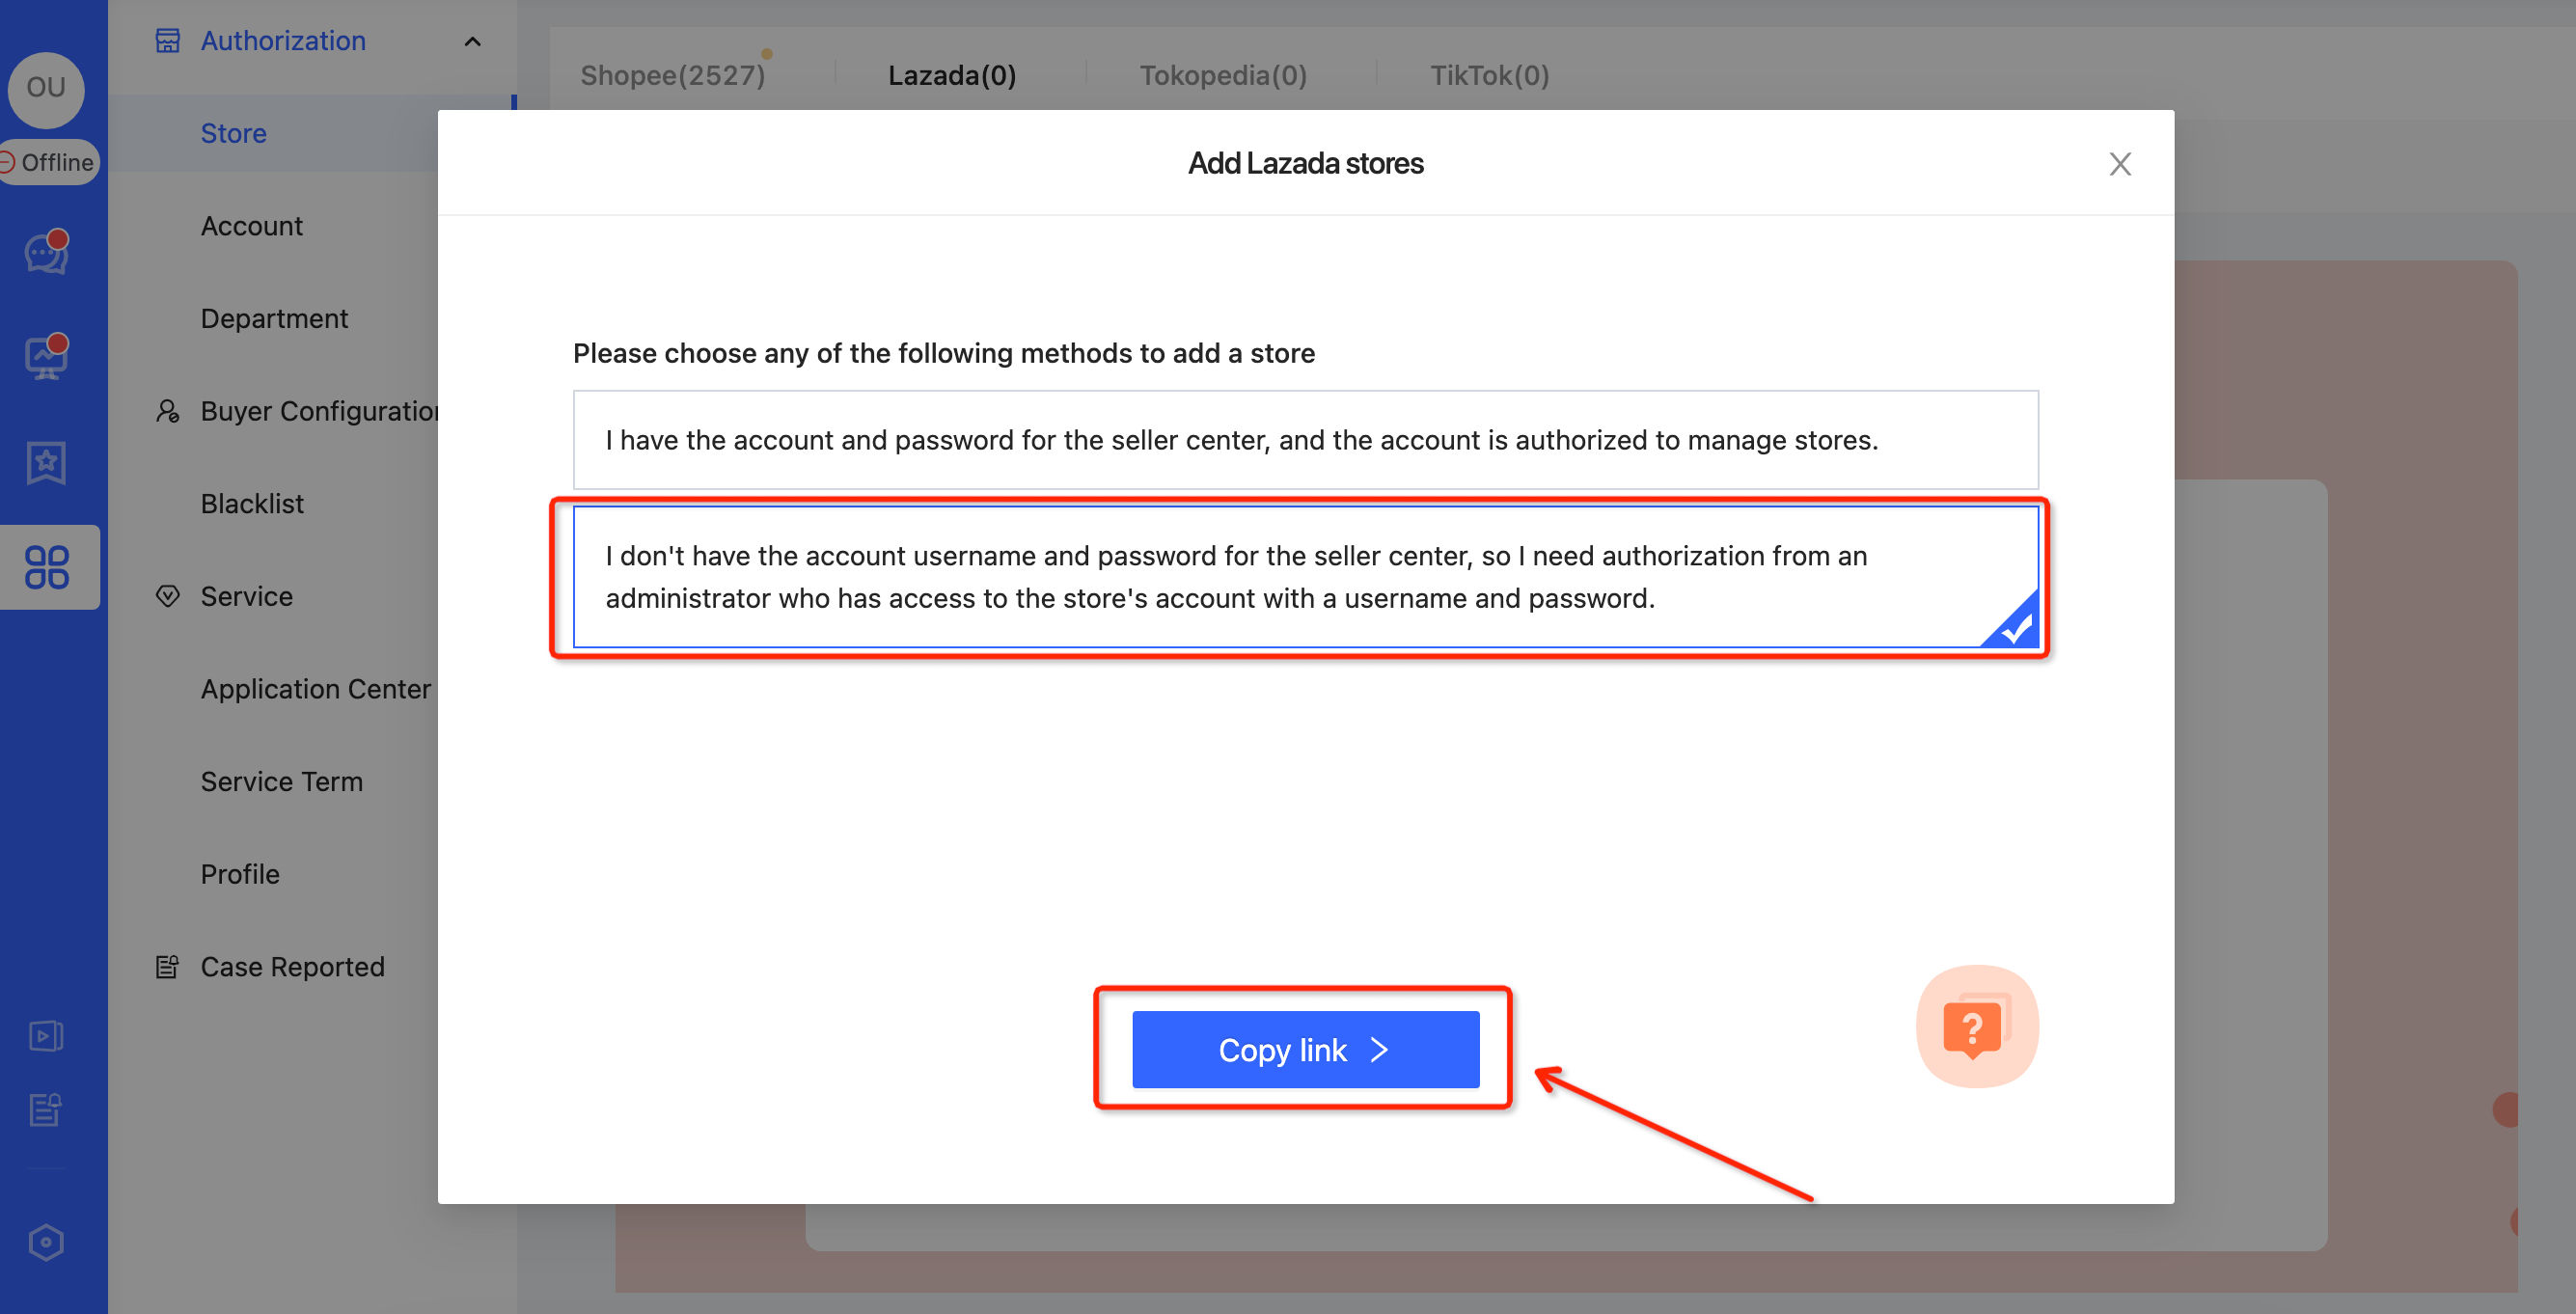
- Select adding method
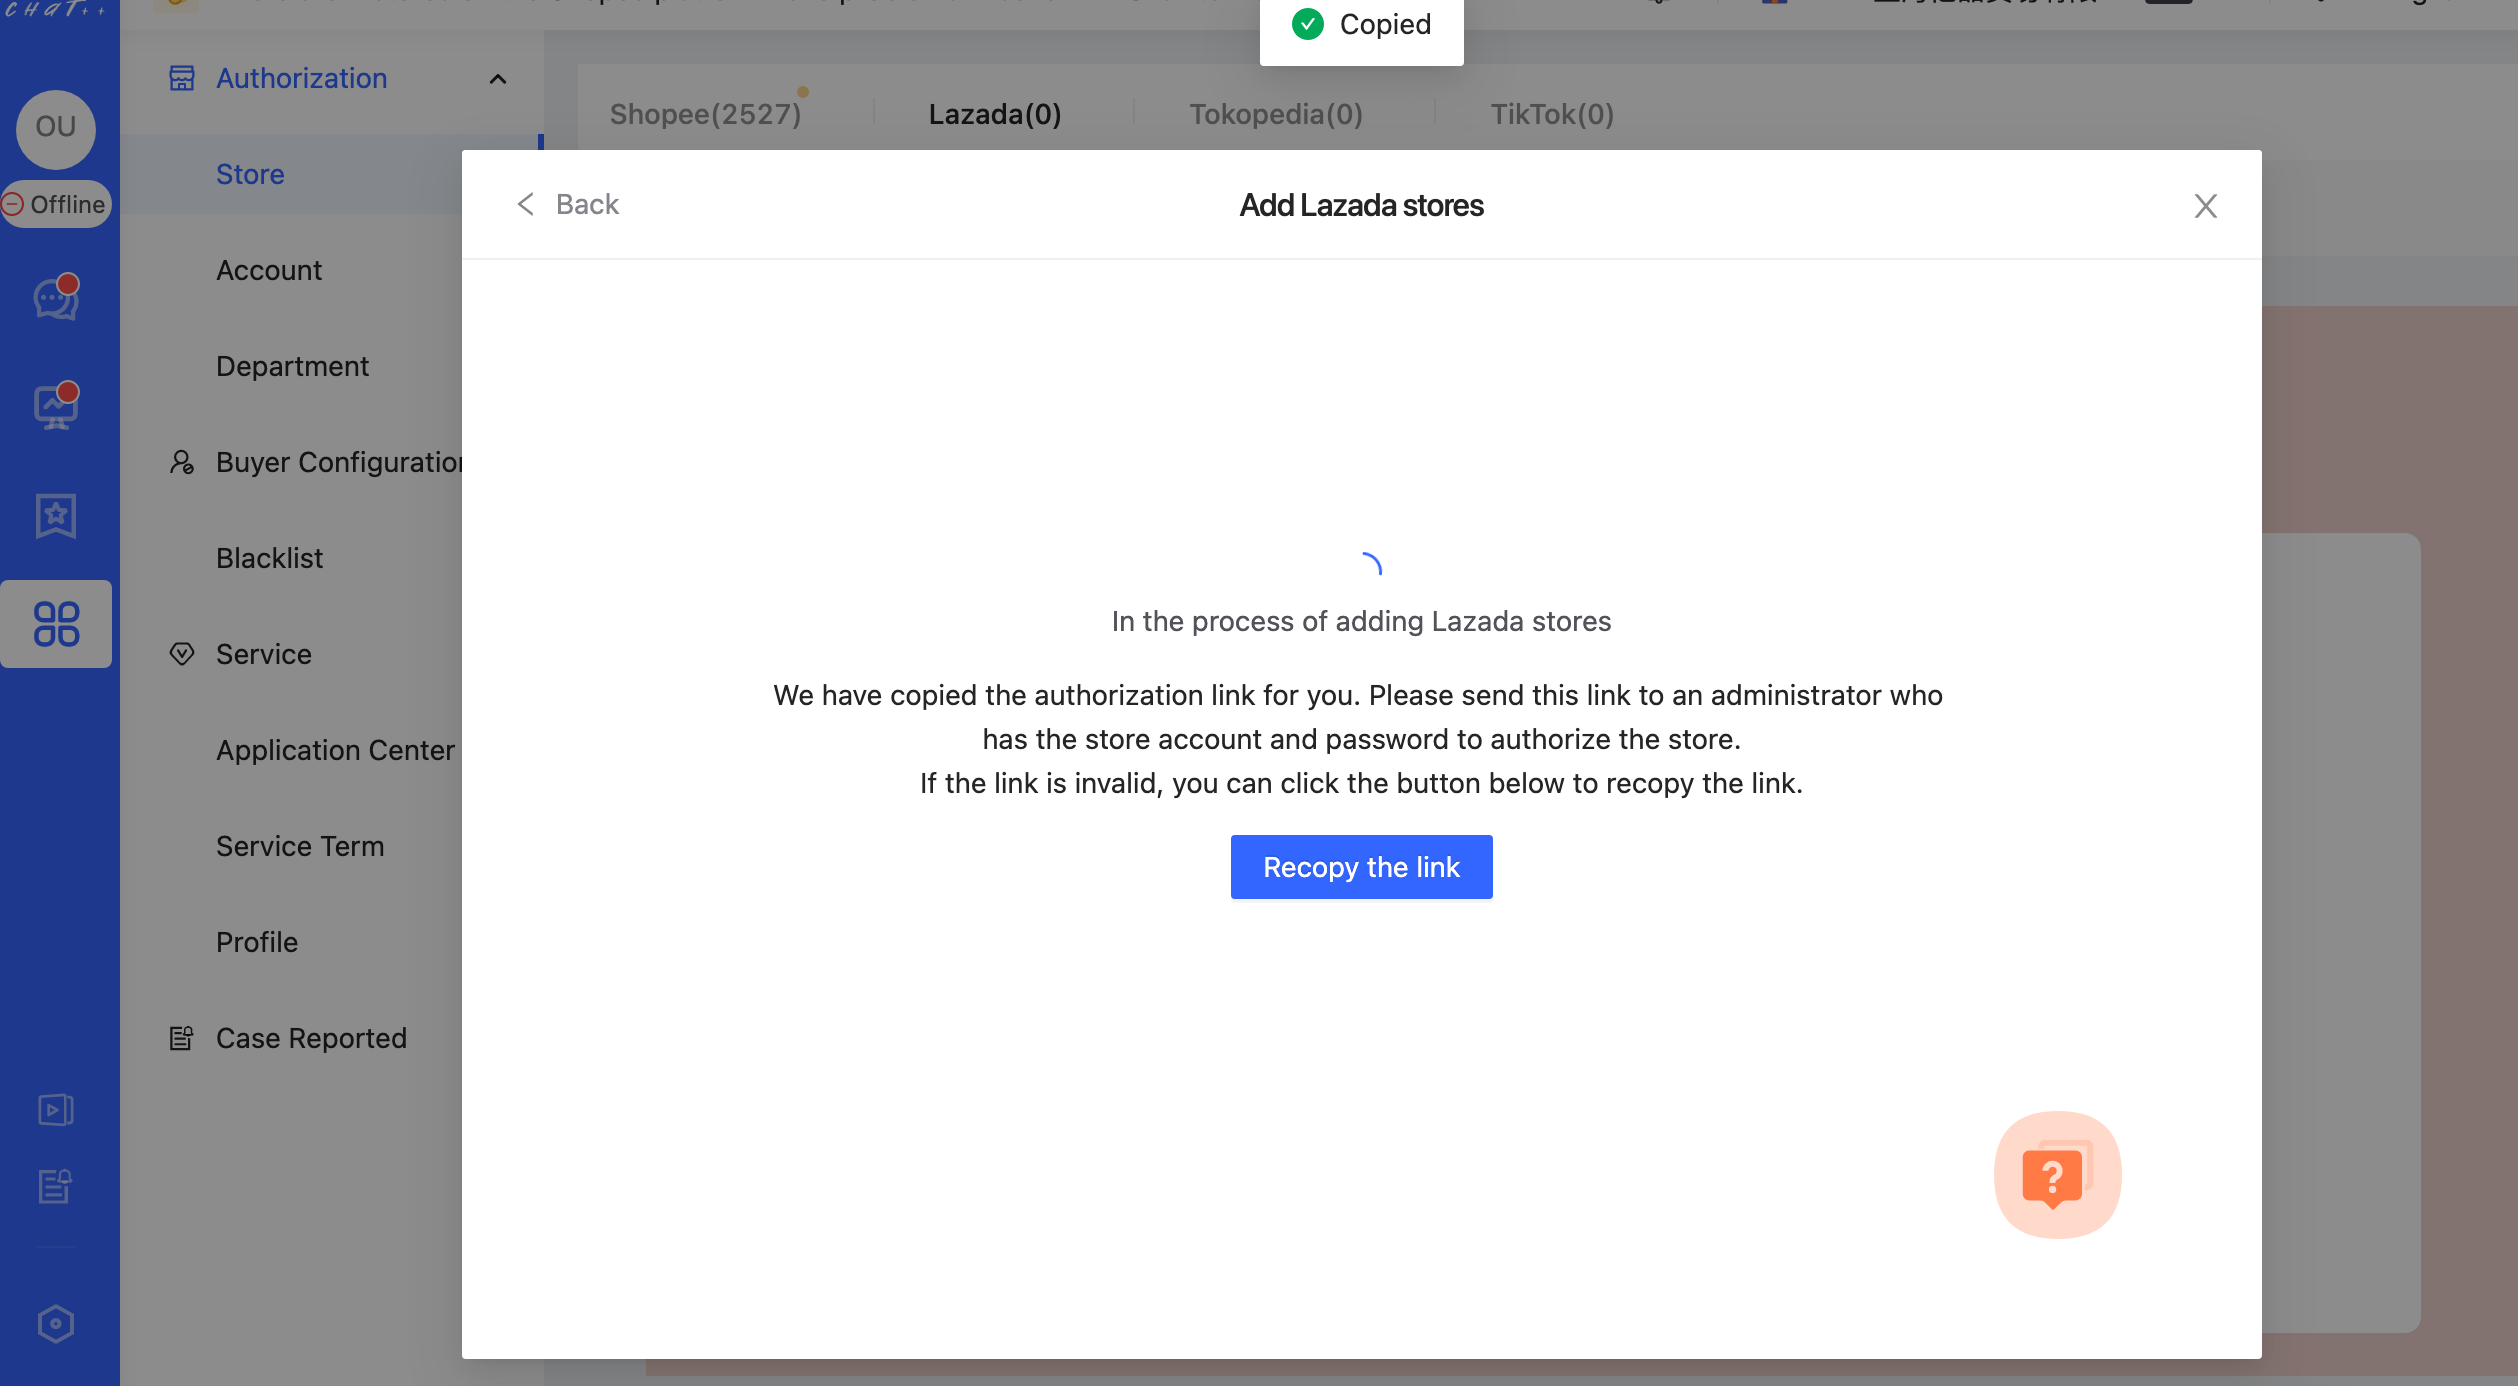
Select Method 2 → Copy Link, automatically copy the authorized link with the introductory statement.
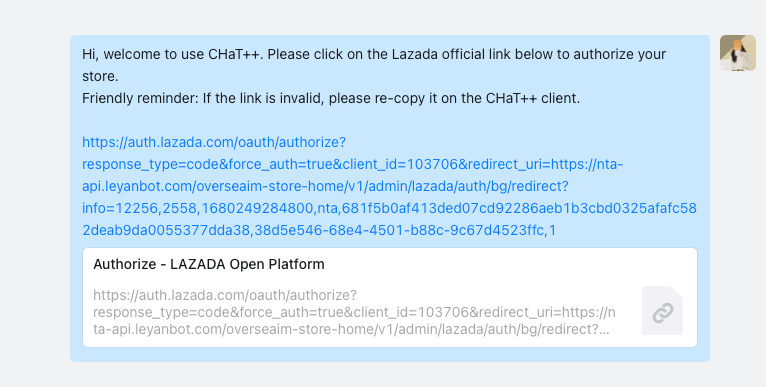
- Send link to your administrator
Send the link to the administrator with the seller center account password.
- Administrator operation
After clicking the link, the administrator will be automatically redirected to the Lazada Seller Center login page.
(1) Login Lazada
Select site: Crossborder→Enter account & password →Click "Submit”
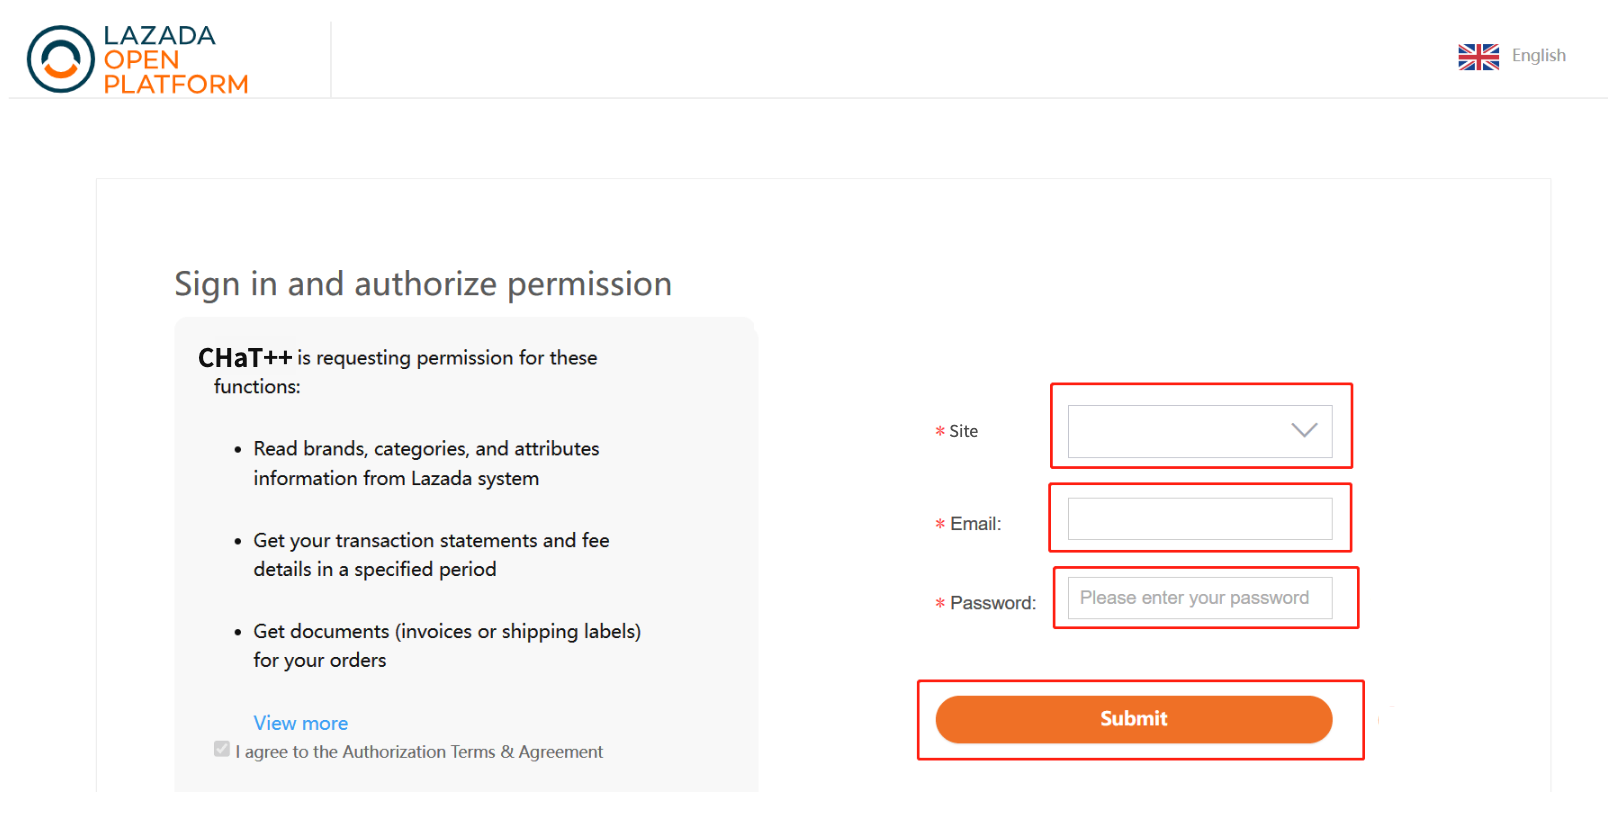
(2) Confirm authorization results
After entering the account information and clicking "Submit," you will be automatically redirected to the authorization result page. When the page appears as shown below, the authorization is completed. Please confirm the authorization result with the employee who sent the link. (Administrator operation ends here)
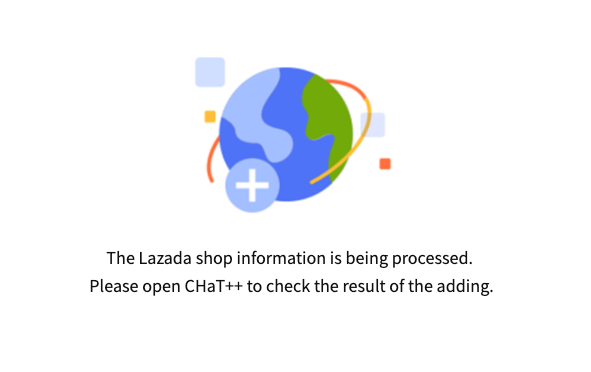
- Authorization Success
After the administrator has completed the authorization, you can check the new store in the "Configuration →Authorization→ Store → Lazada → Store List" section of the chat and begin to serve it.
If you are still on the "Add Store" page after logging in to the chat, please try adding it again and verify the selected and inputted information with the administrator.
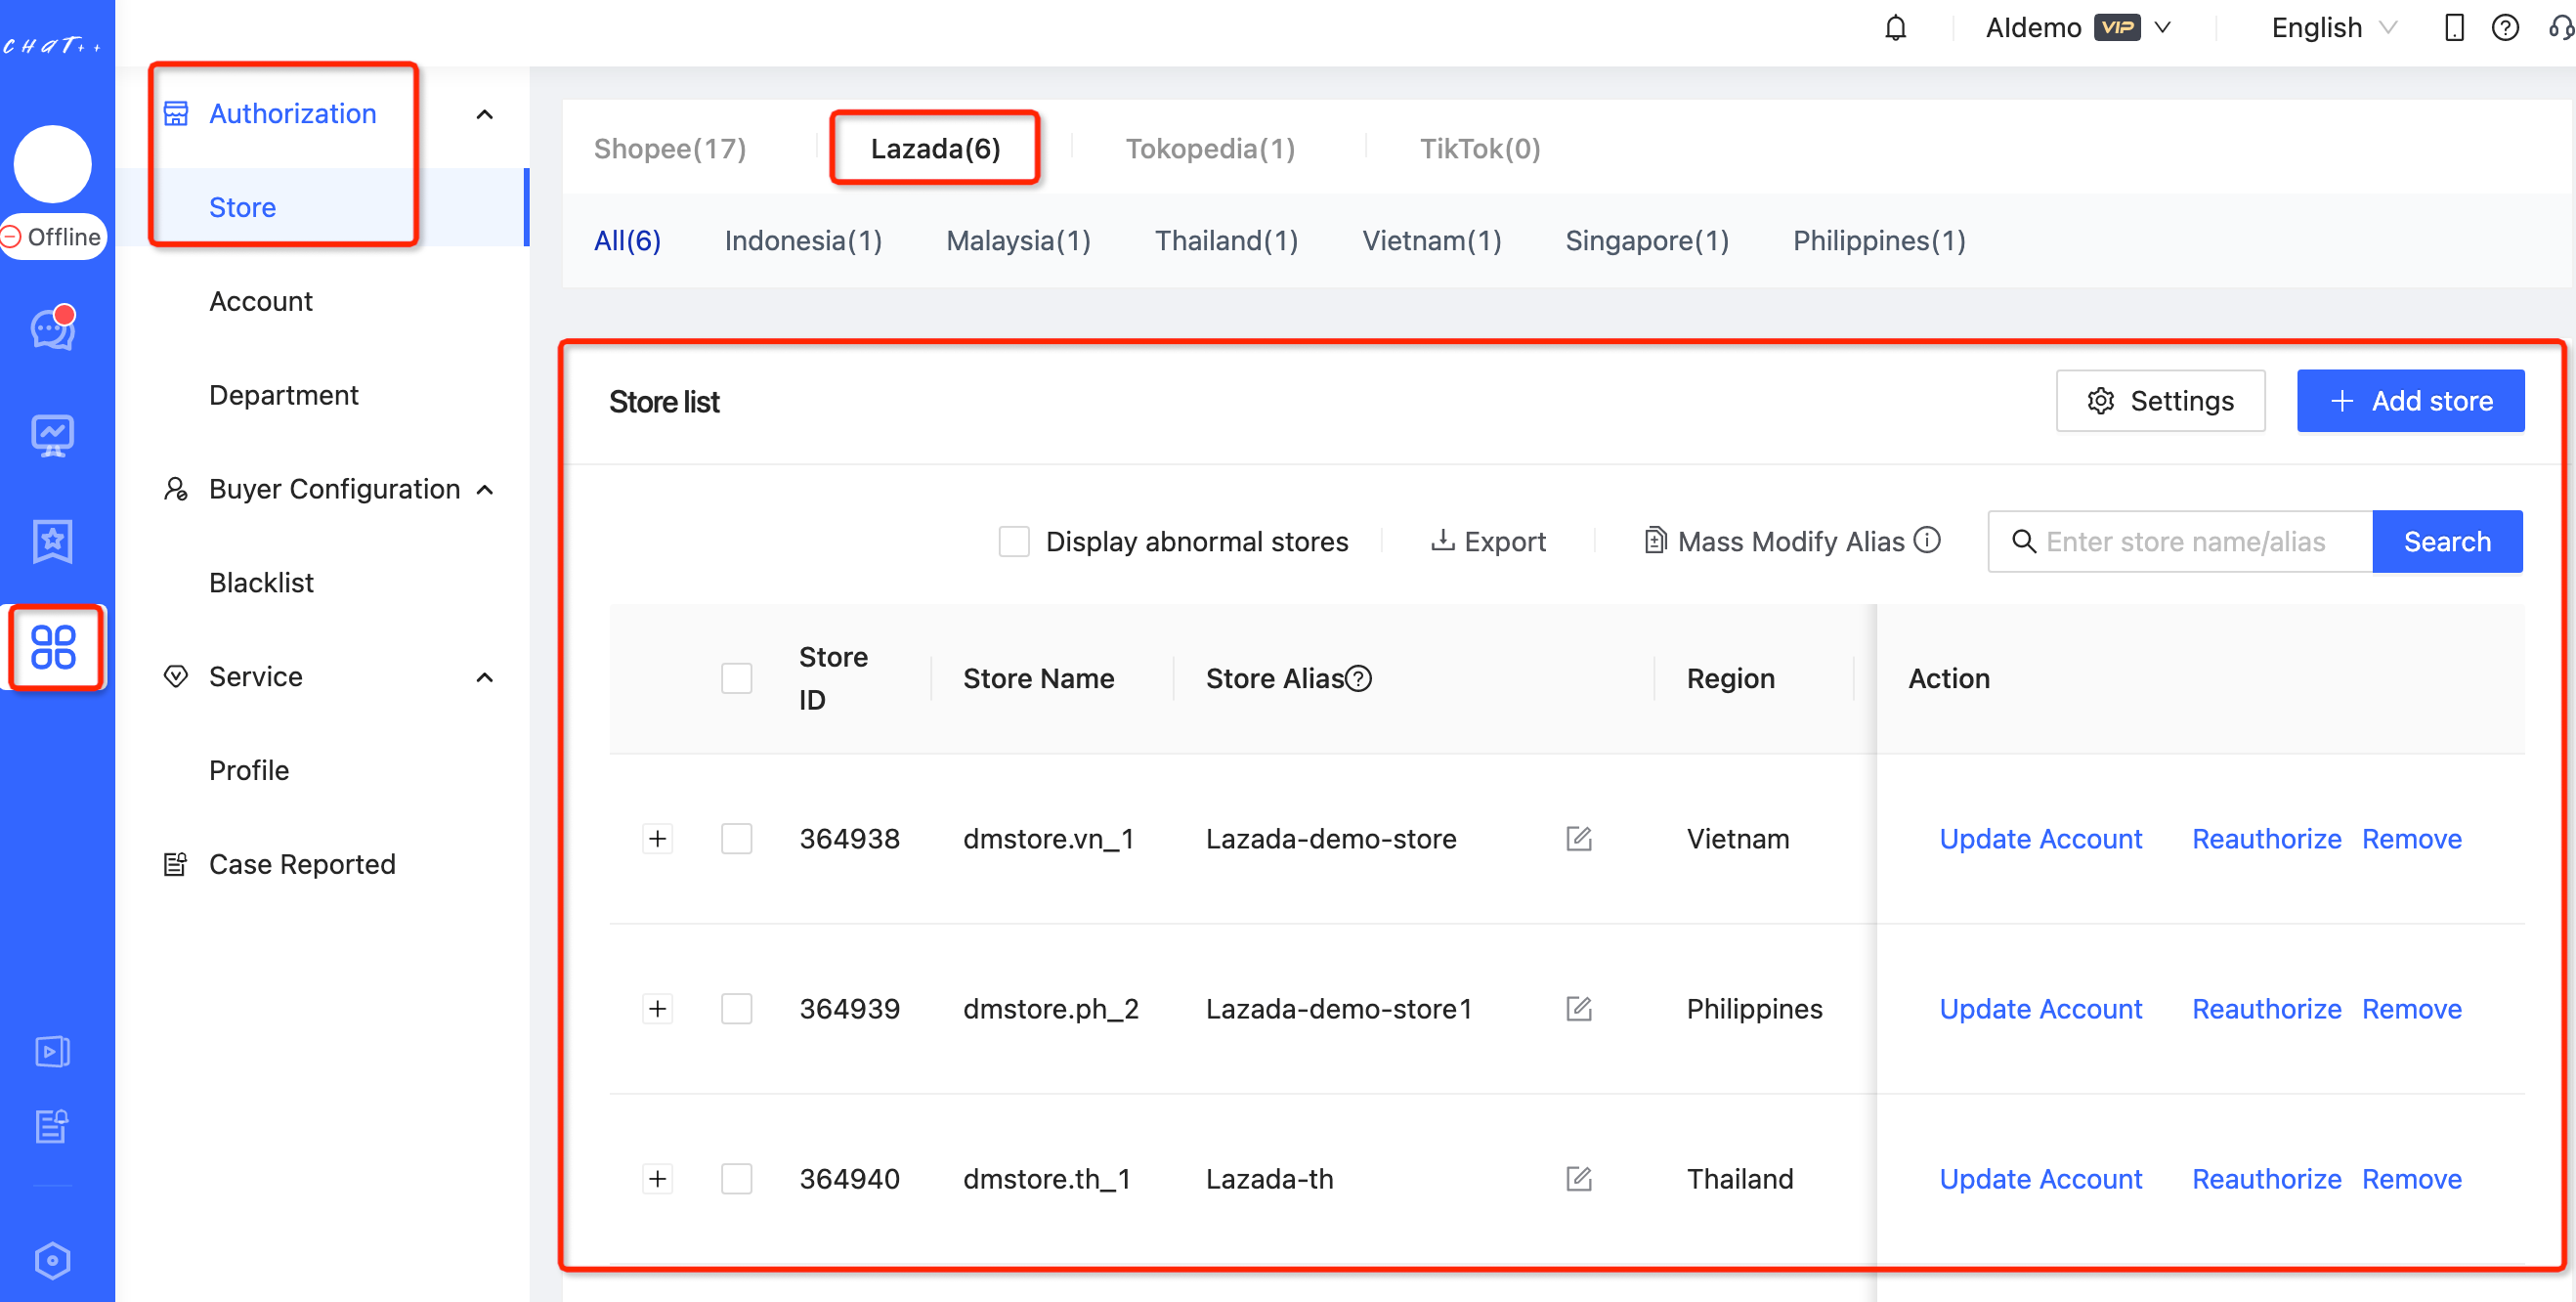
After adding the store for the first time, please be patient and wait for 15 minutes. The system is automatically synchronizing the message content of the past 30 days and the order information of the past 90 days.
FAQ
Q1:Why did the authorization of the Lazada shop fail?
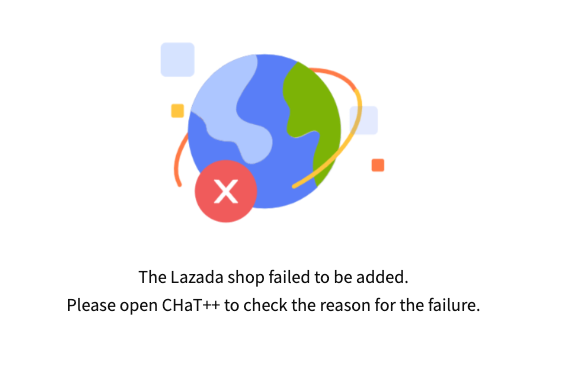
A1: When the "Adding Failed" page appears, please open ChatPlusAI to check the reason for the failure.
- The common reason for the failure is incorrect account password, which needs to be checked again.
- If the failure is caused by repeated authorization, it means that the shop has already been authorized to this ChatPlusAI account or another ChatPlusAI account.
Q2: How to authorize more Lazada stores?
A2: Authorize more on ChatPlusAI: Configuration-->Authorization-->Store--> Add store.
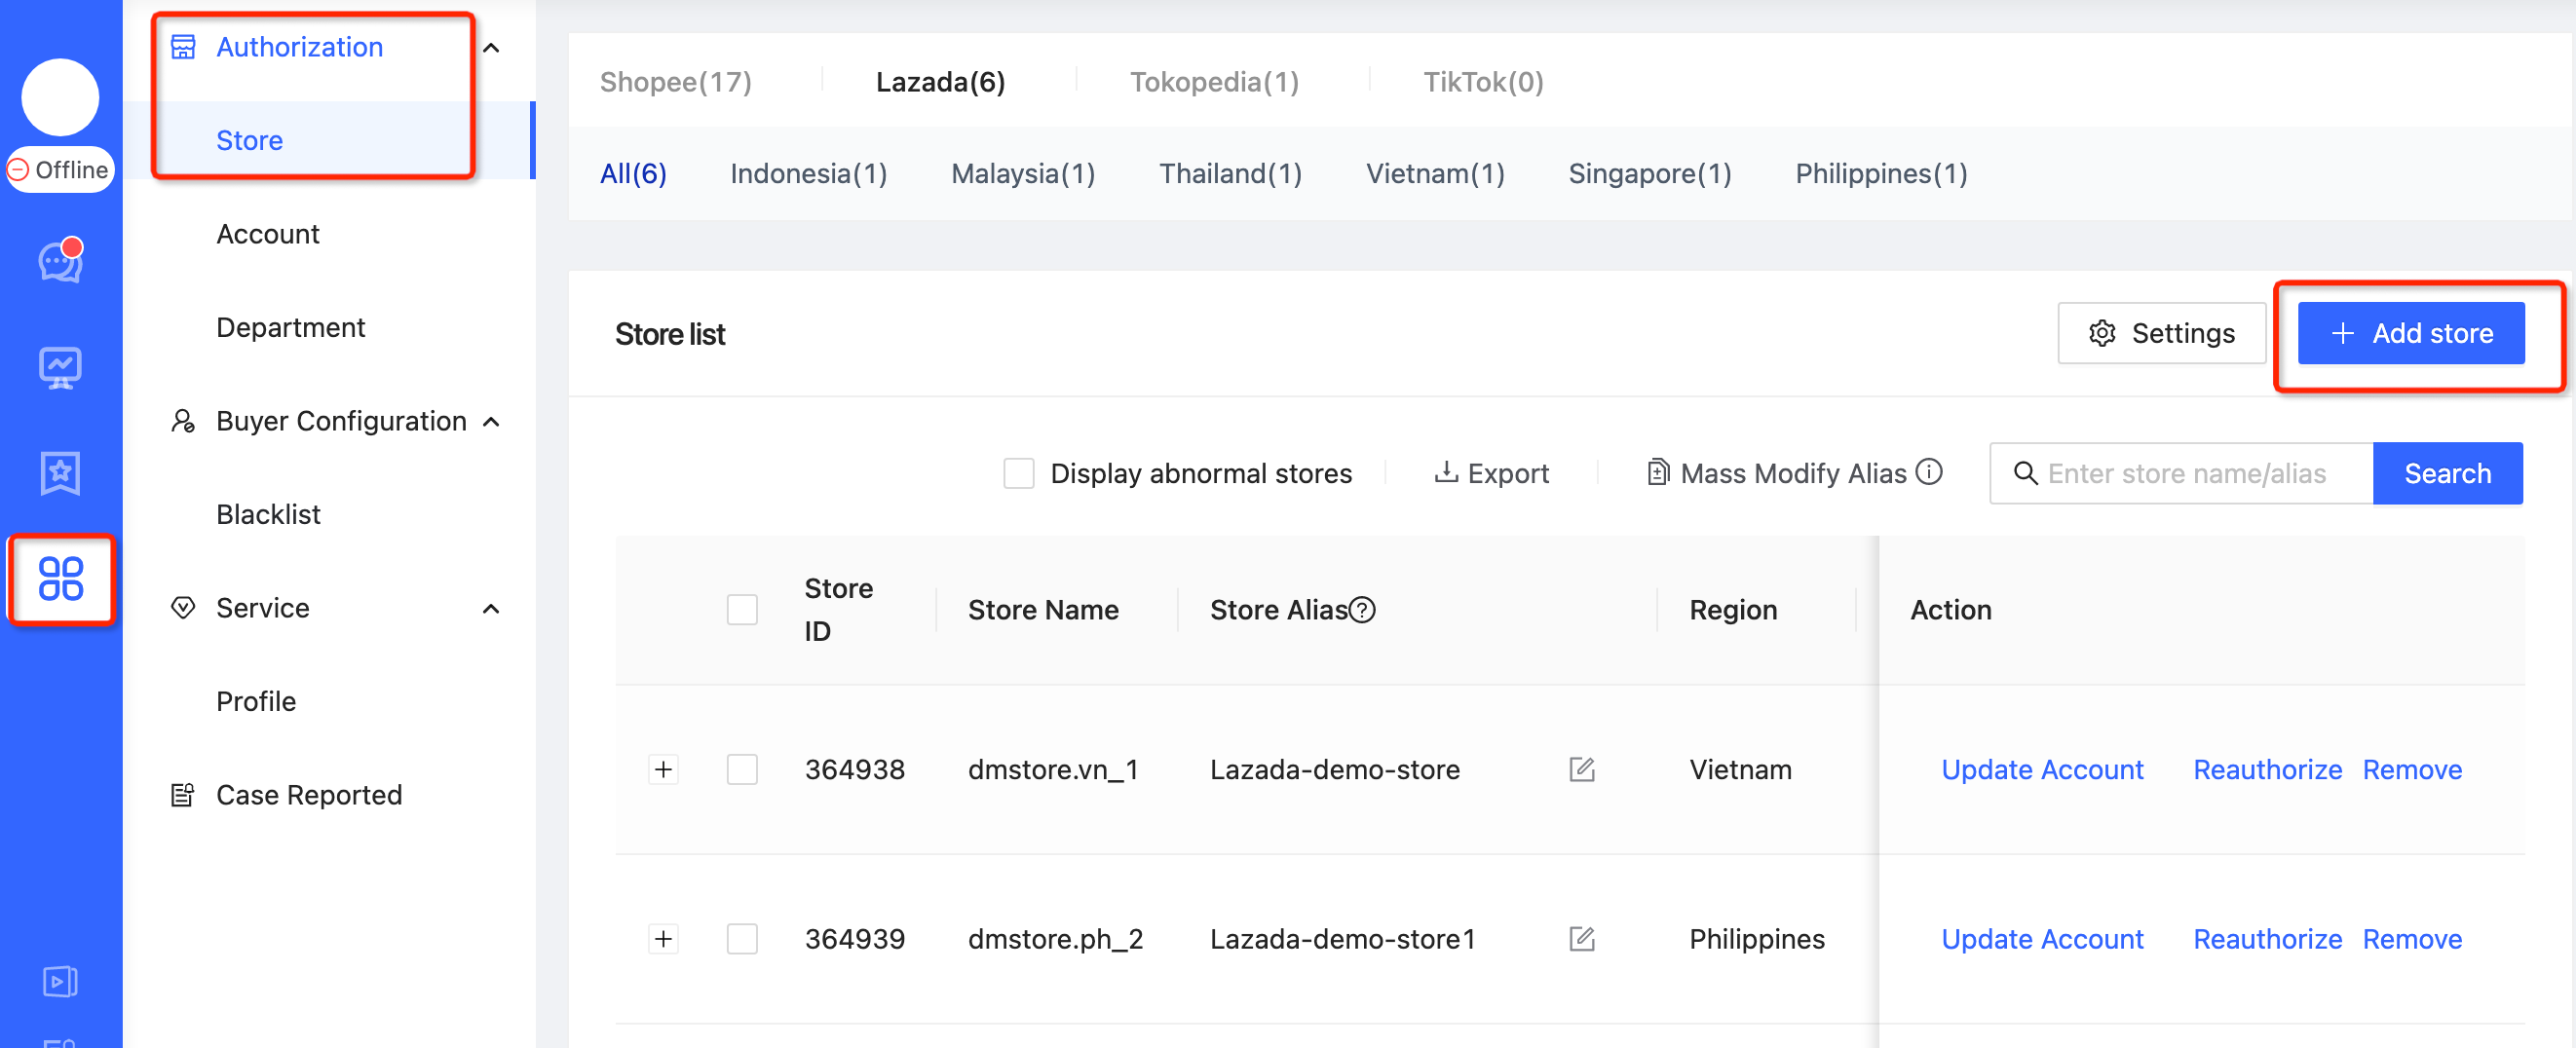
Authorize TikTok Shop
- ▶ Precaution
- Before authorization, to avoid IP association, please confirm that the current computer and network are the ones that are frequently used to log in to the TikTok marketplace's seller center. After authorization, you can use any computer or network environment to log in to ChatPlusAI for reception, without the risk of IP association.
- Please log out of your current TikTok account before authorizing a new store.
Methods of authorization
●▼ ChatPlusAI supports two ways to add TikTok stores.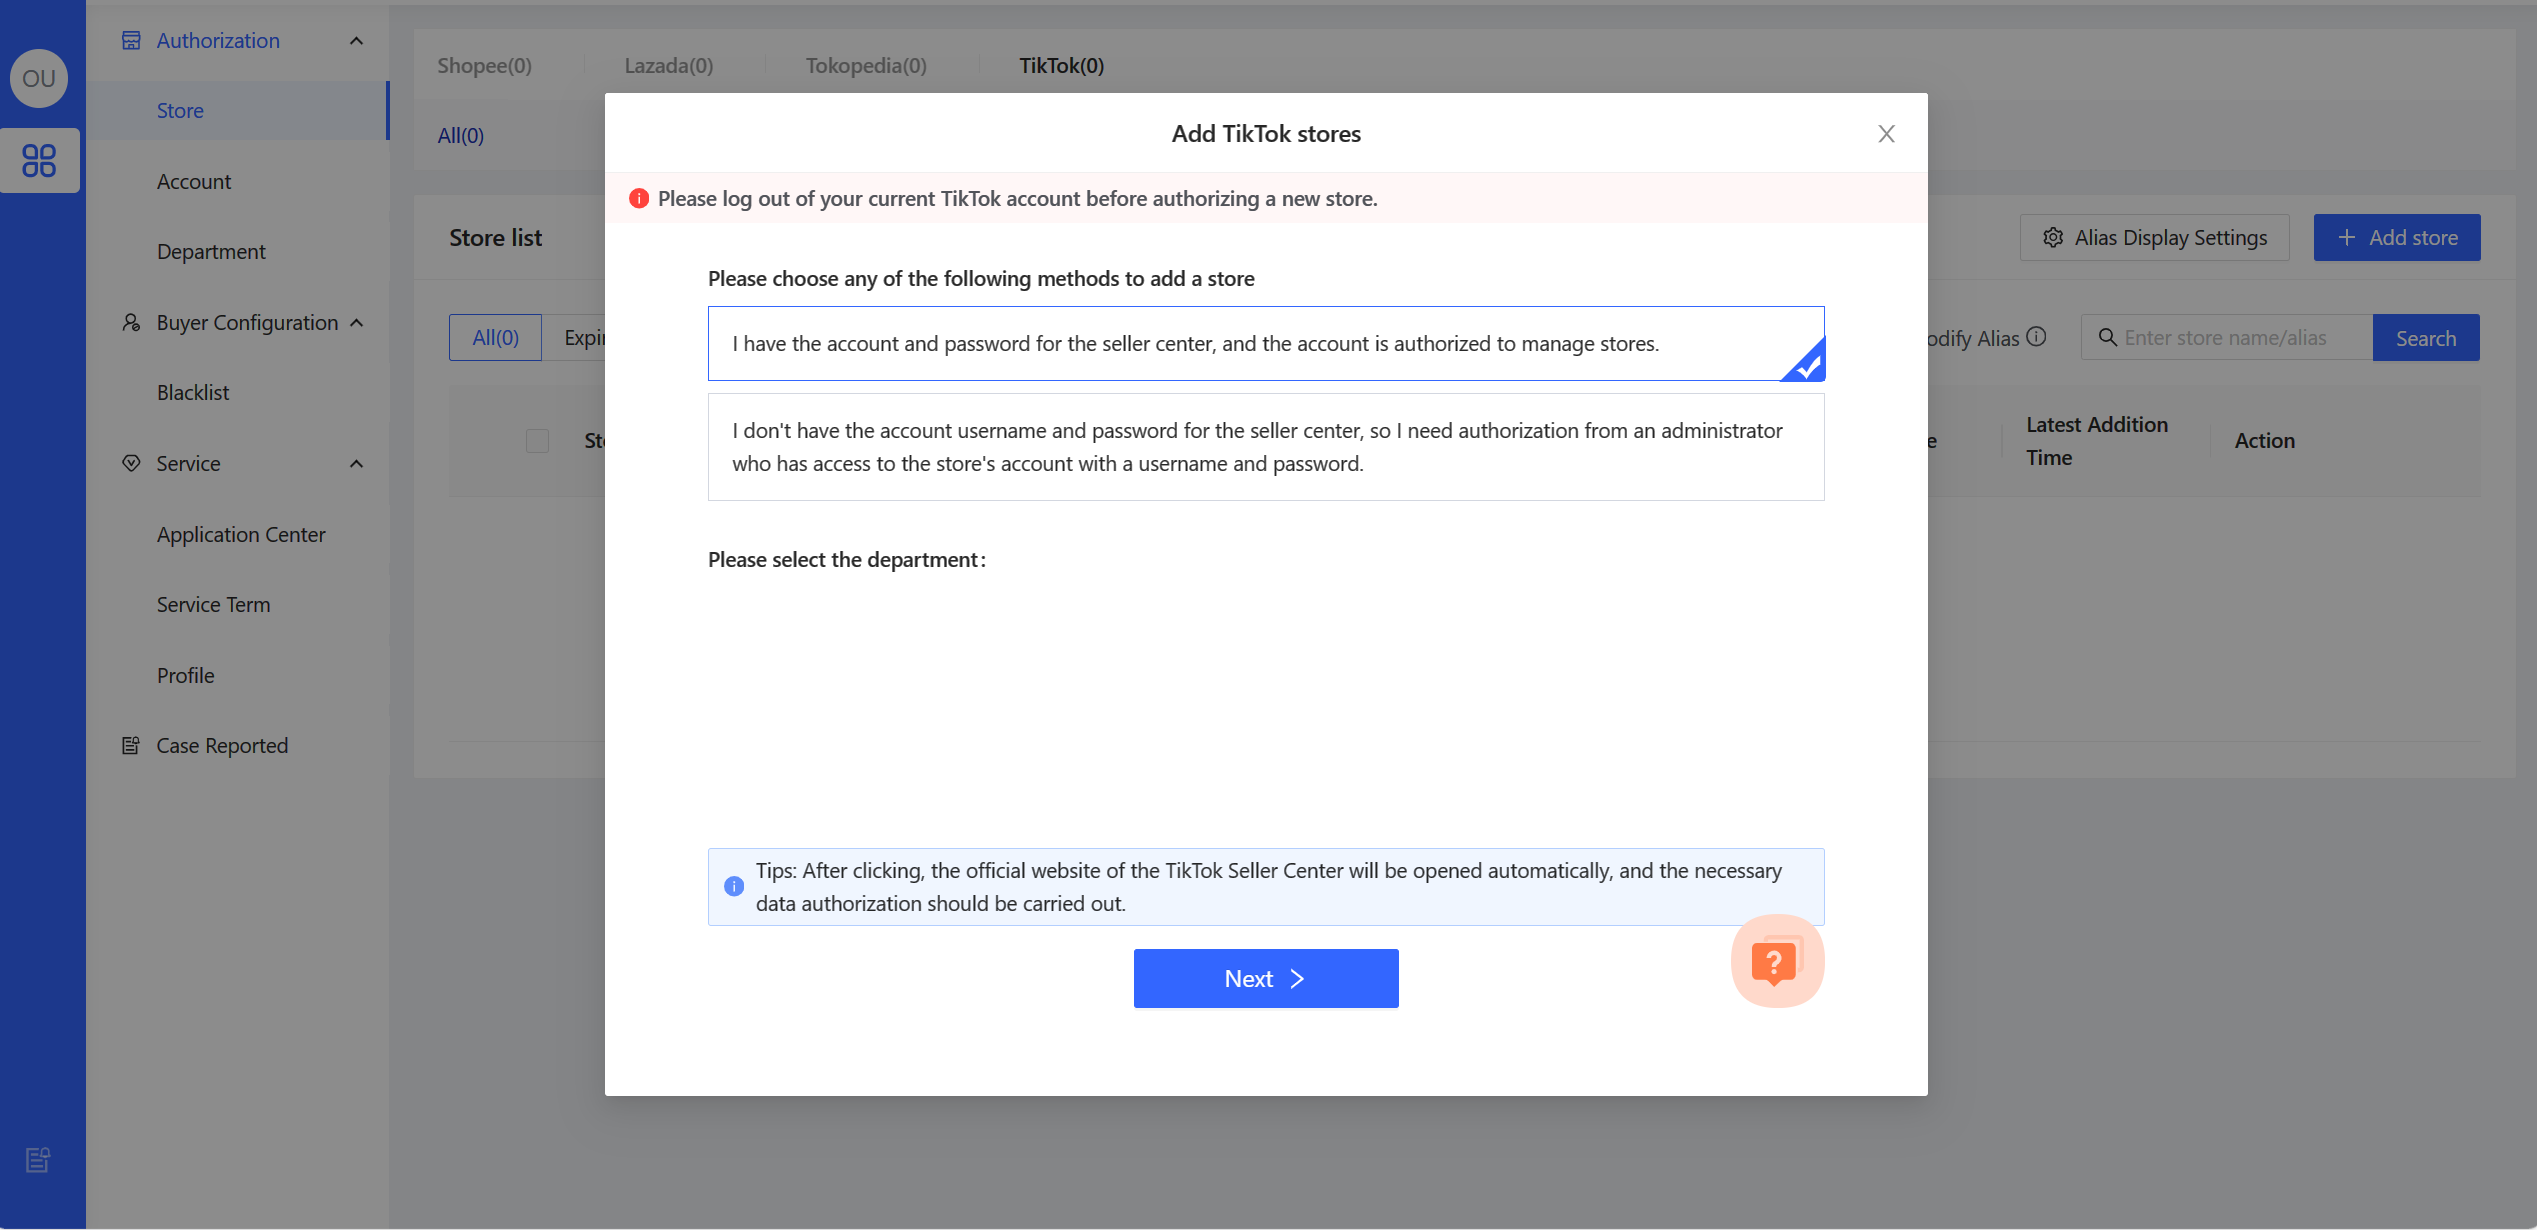
If you have the account password for TikTok Seller Center and that account is authorized to manage shops, you can choose Method 1: you will be redirected to the TikTok Seller Center to complete the authorization.
If you do not have the account password for TikTok Seller Center, when you reach the step of selecting the adding method, you can choose Method 2: Follow the prompts to share the link with an administrator who has the account password, and ask your administrator to click the link to log in to the seller center to complete the authorization.
- If you have the account password for TikTok Seller Center and that account is authorized to manage shops, you can chooseMethod 1: you will be redirected to the TikTok Seller Center to complete the authorization.
- If you do not have the account password for TikTok Seller Center, when you reach the step of selecting the adding method, you can choose Method 2: Follow the prompts to share the link with an administrator who has the account password, and ask your administrator to click the link to log in to the seller center to complete the authorization.
Method1: Go to the seller center to authorize with your account and password.
Step
Enter the store authorization page
After the first login to ChatPlusAI, you will be directed to the guided page for adding a store. Select TikTok US--> Click Next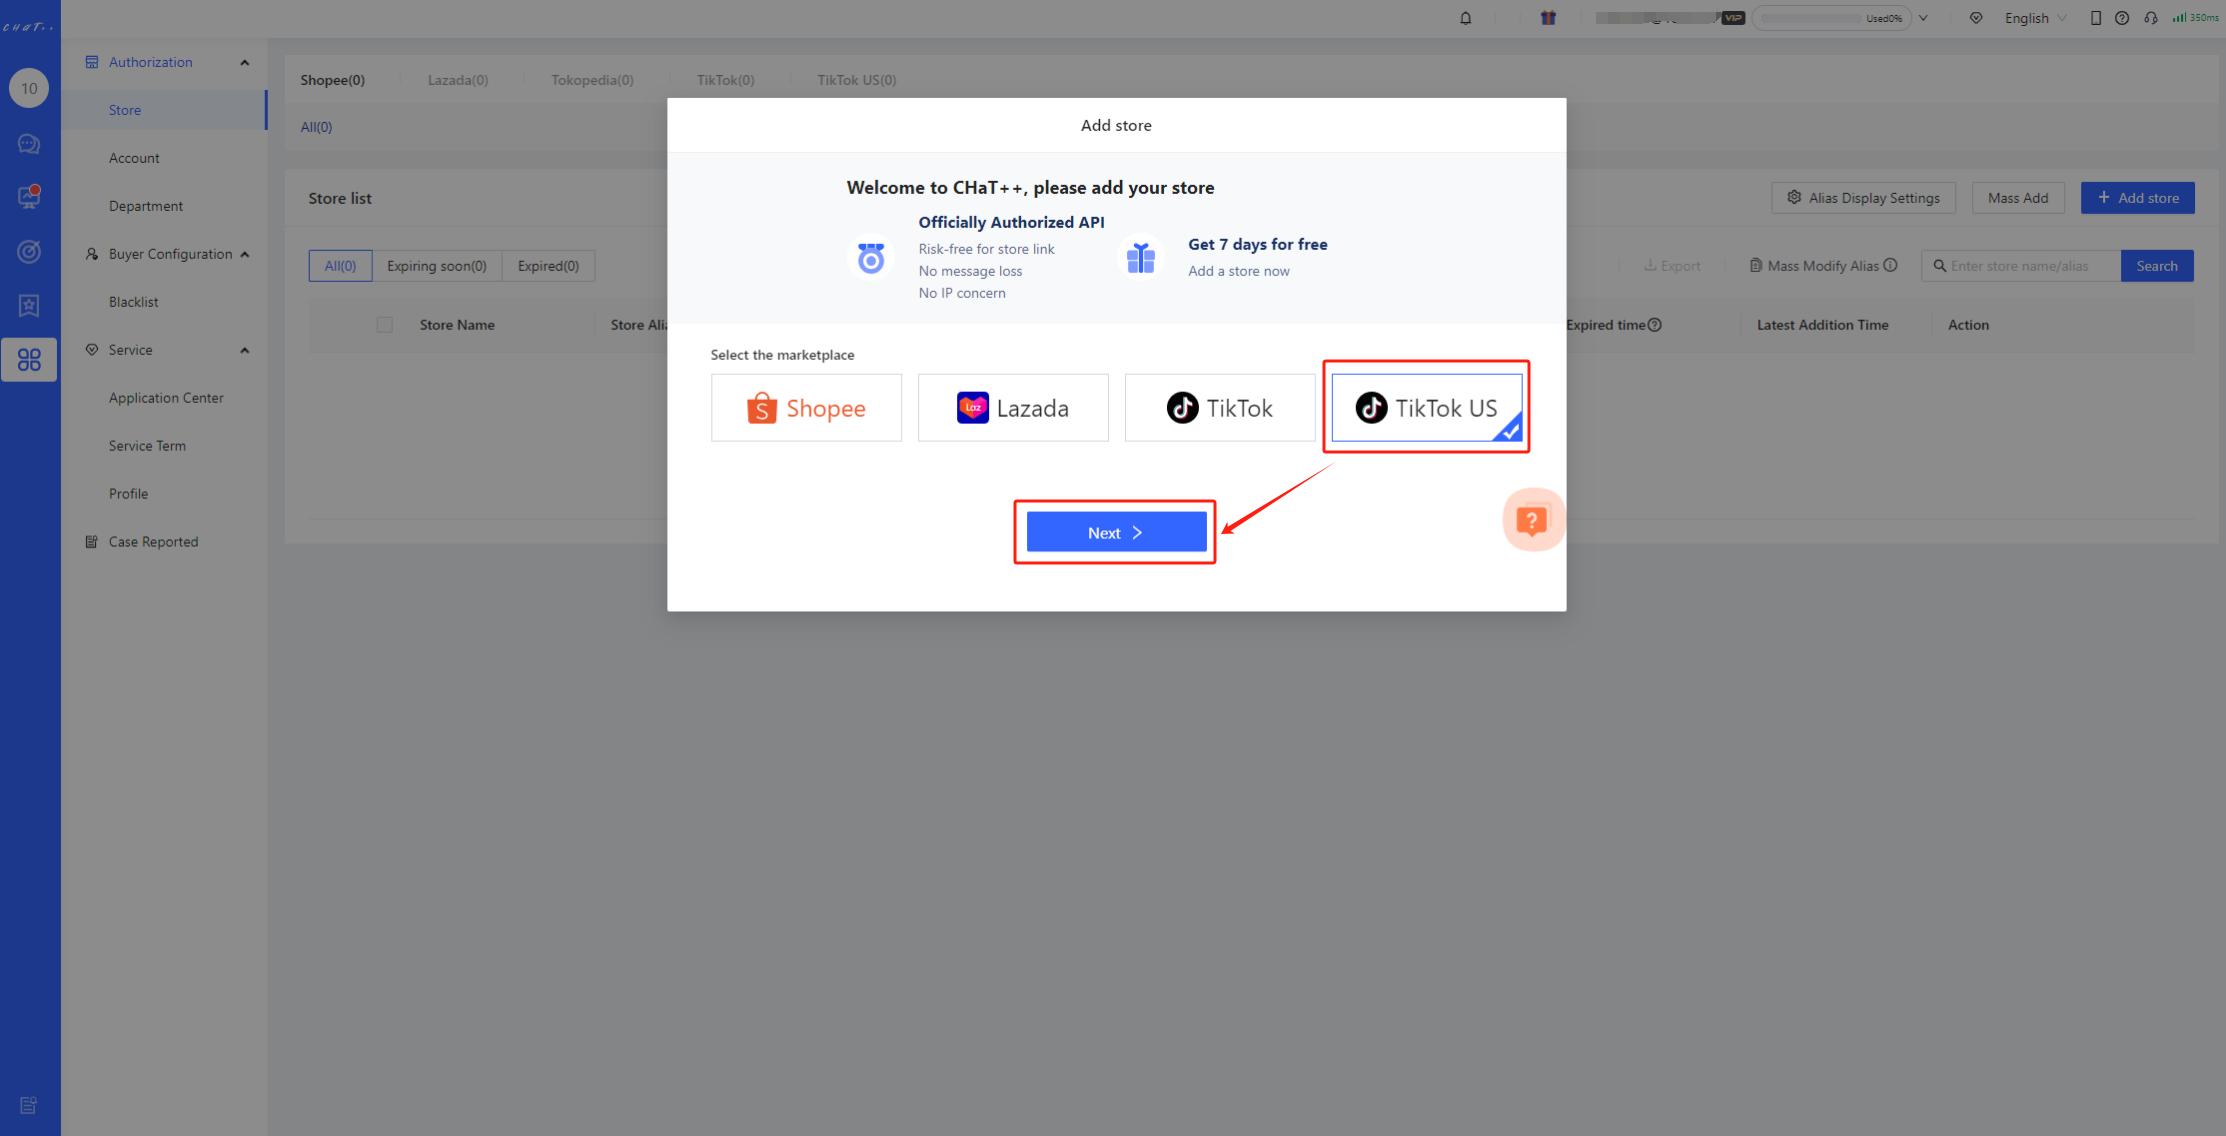
The steps to add a store in daily operations: Configuration-->Select Marketplace-->Add store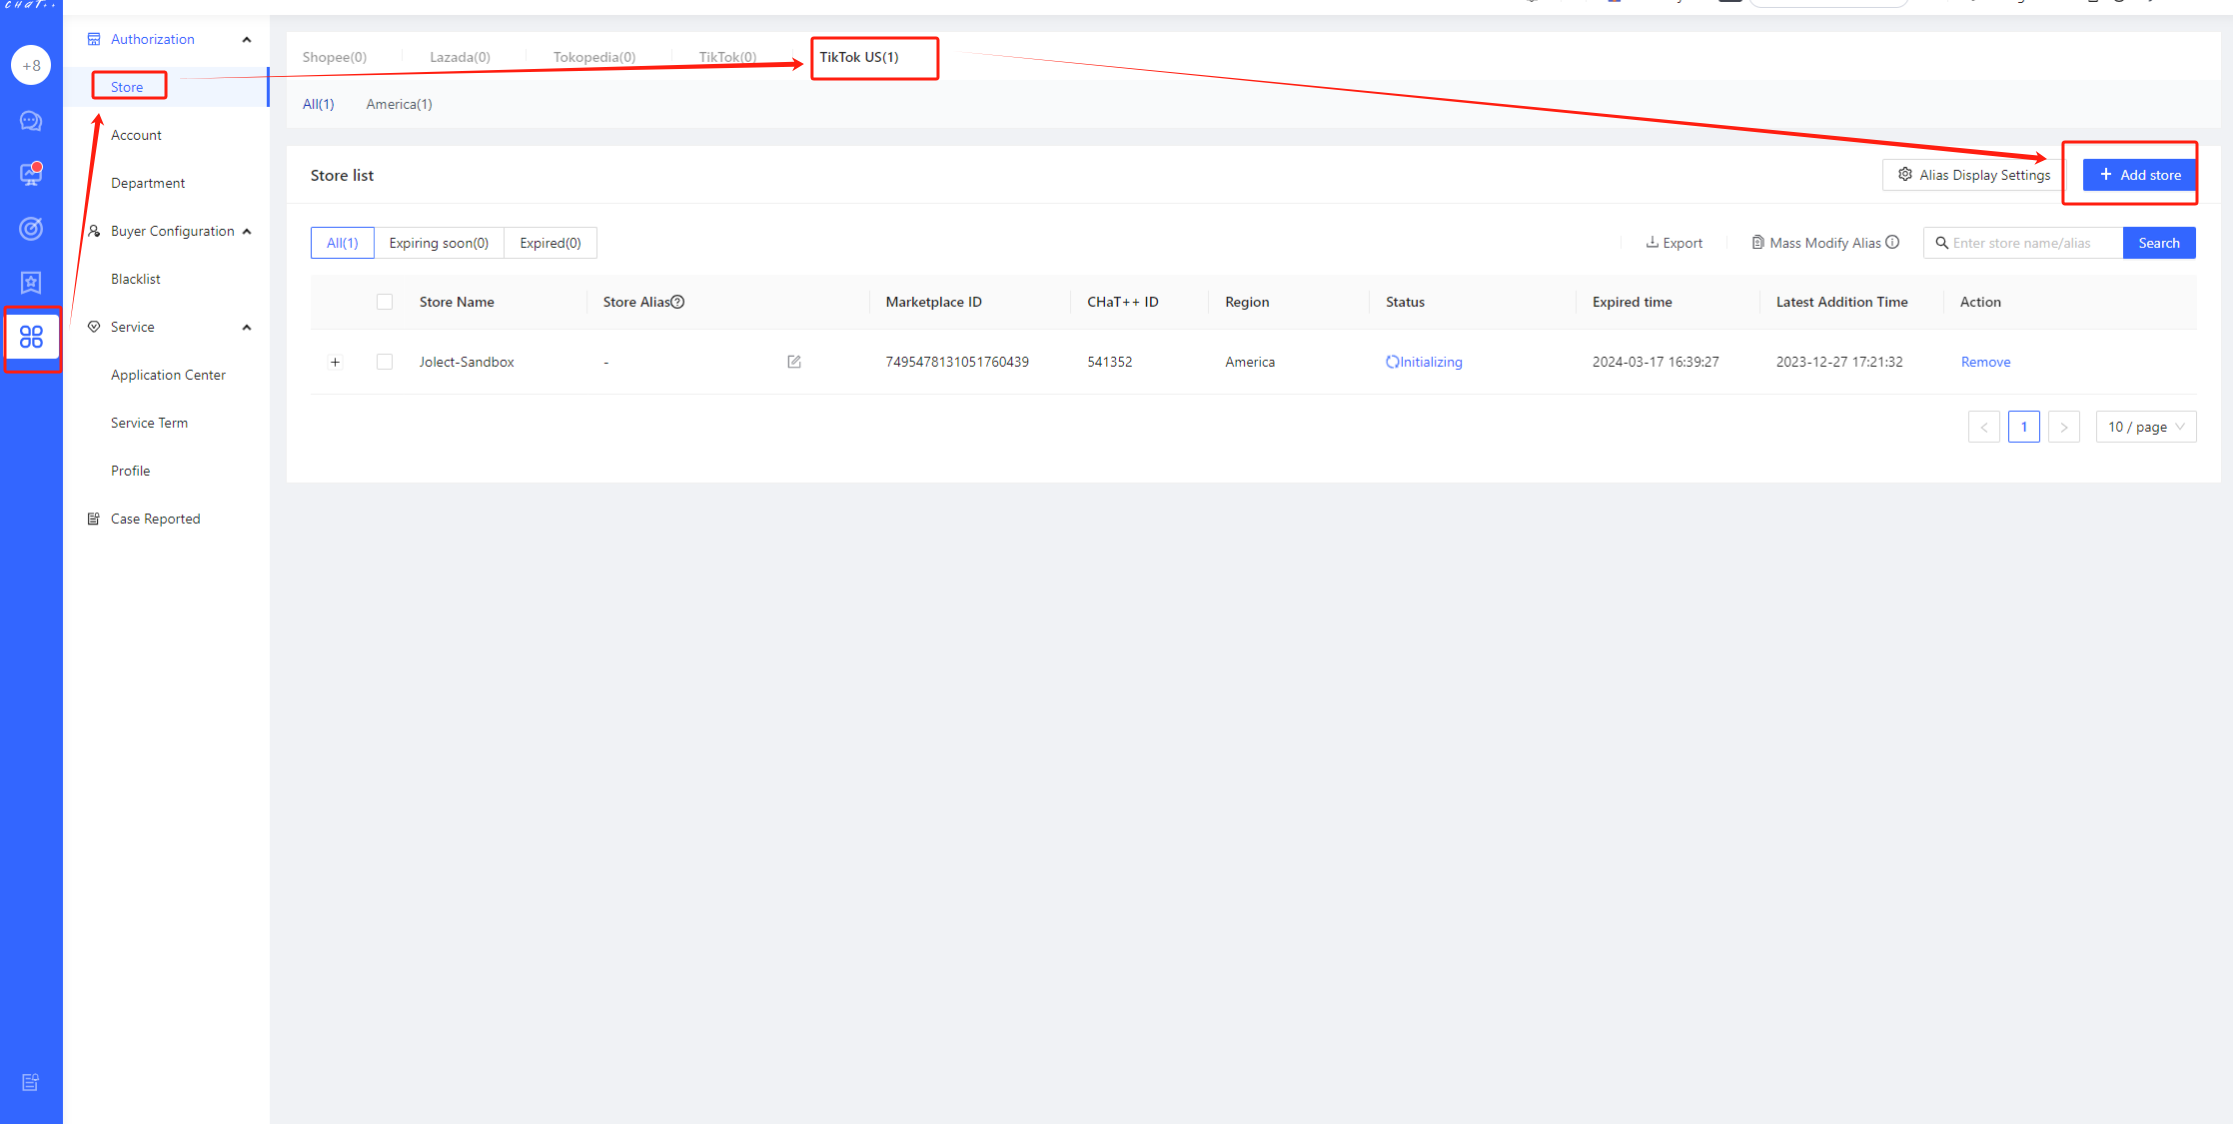
Select adding method
Select Method1 --> Click “Next”, you will be automatically redirected to the TikTok Seller Center login page.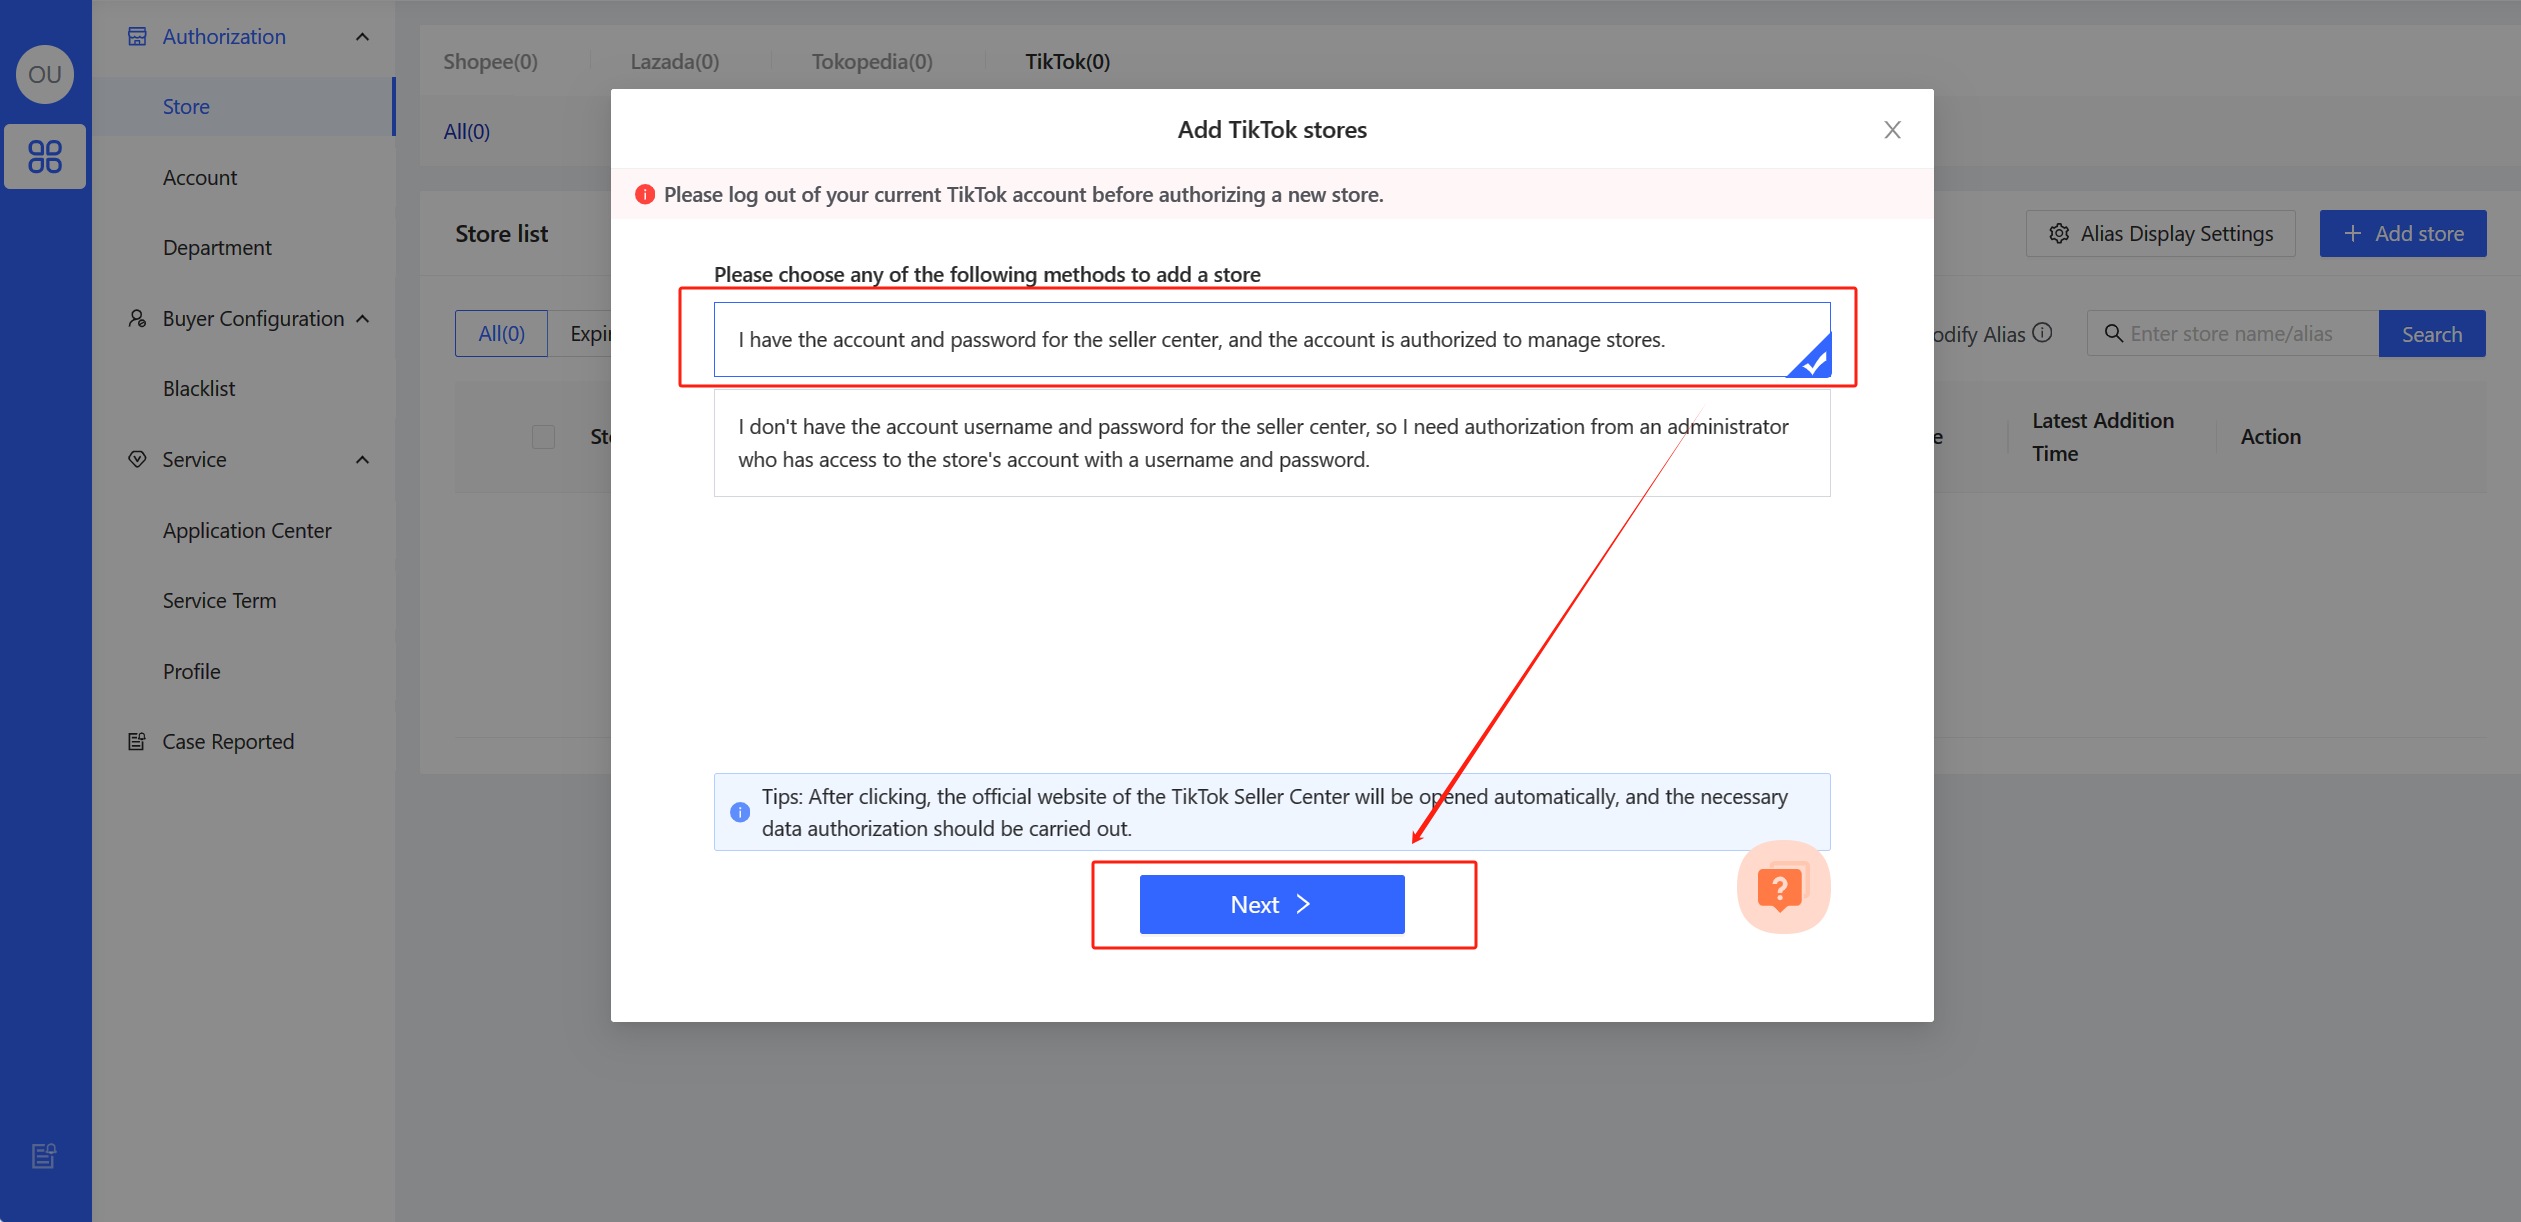
Authorize on TikTok Shop
Select site--> Click “Next”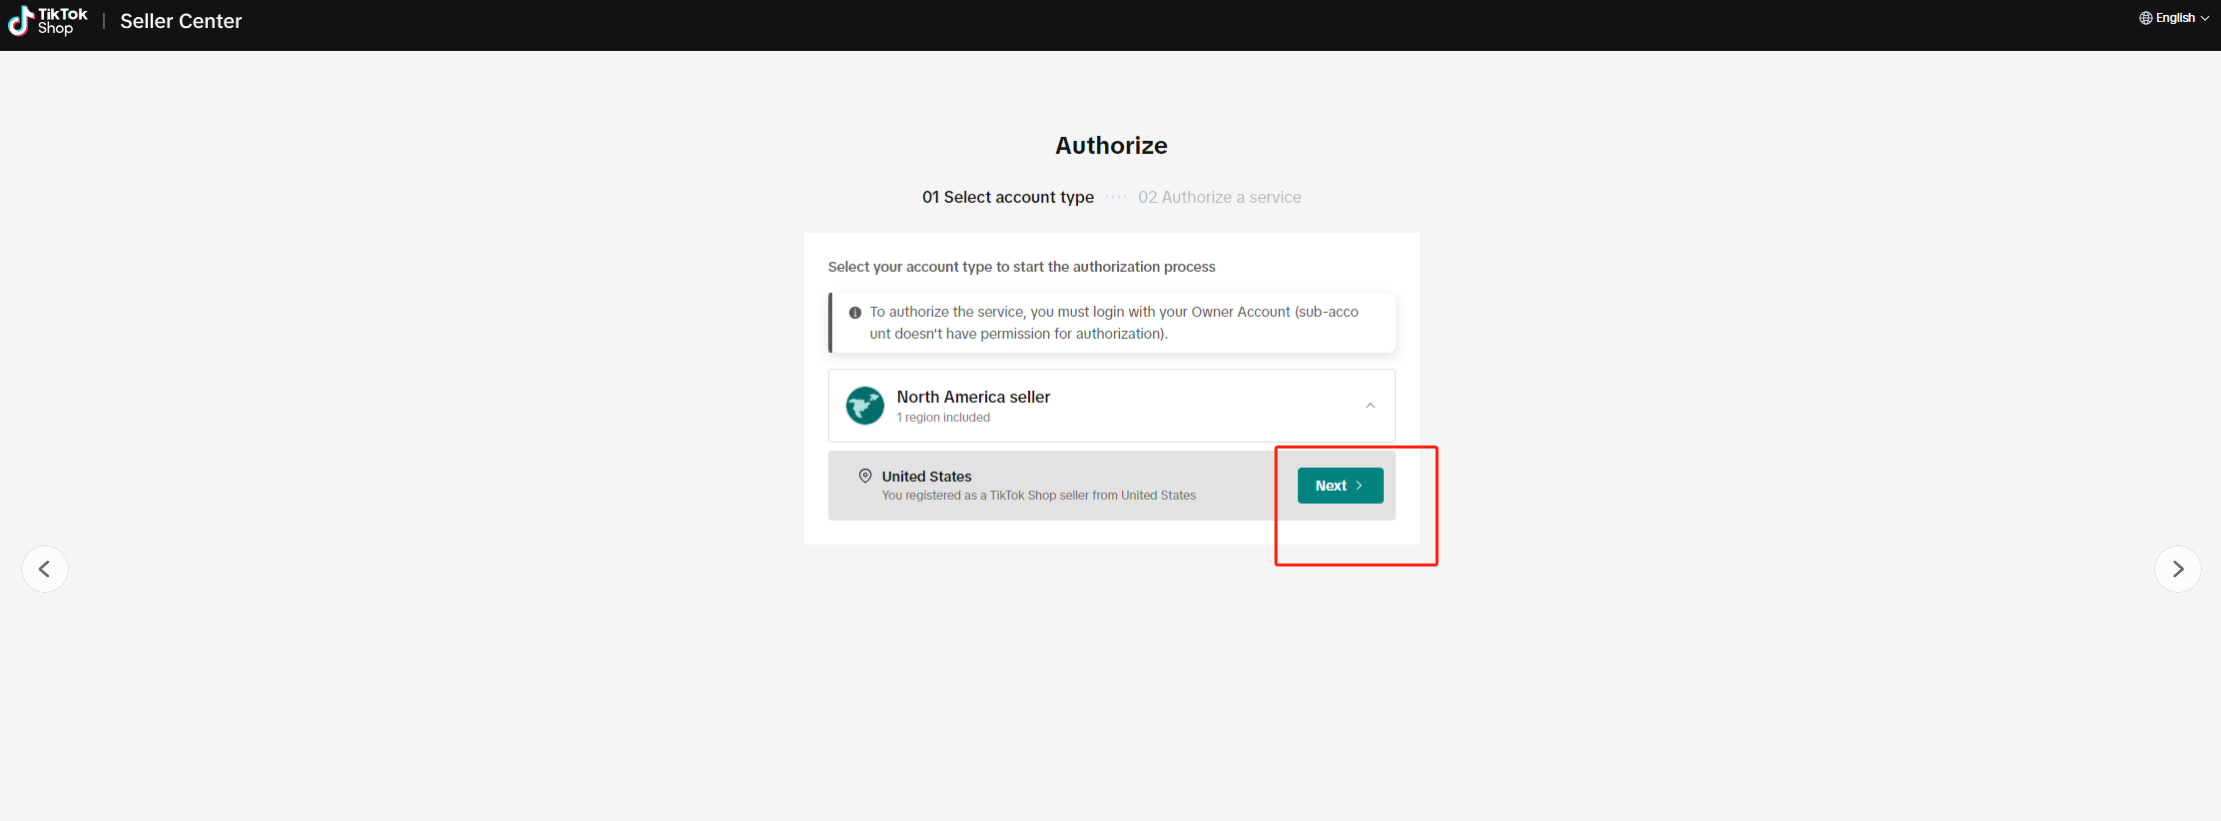
- When authorizing, please log in using the main TikTok account.
- Authorization requires verification. Please open your mobile phone or login to your email account to prepare for receiving the verification code.
⚠️ When multiple TikTok store authorizations are required, the previously authorized TikTok account remains logged in within the browser. Consequently, when attempting to authorize in the seller center, it automatically redirects to the 'logged-in TikTok account,' displaying authorization success, while the new store has not actually been authorized. Therefore, before authorizing a new store each time, it is necessary to ensure that there are no logged-in accounts in the web backend.
- Method 1: Open the seller center (https://seller.tiktok.com/) in a new browser tab and log out of the account.
- Method 2: Copy the authorization link and open the seller center in an incognito (private) web page to complete the authorization.
【Click “Log in”--> Input account--> Input password】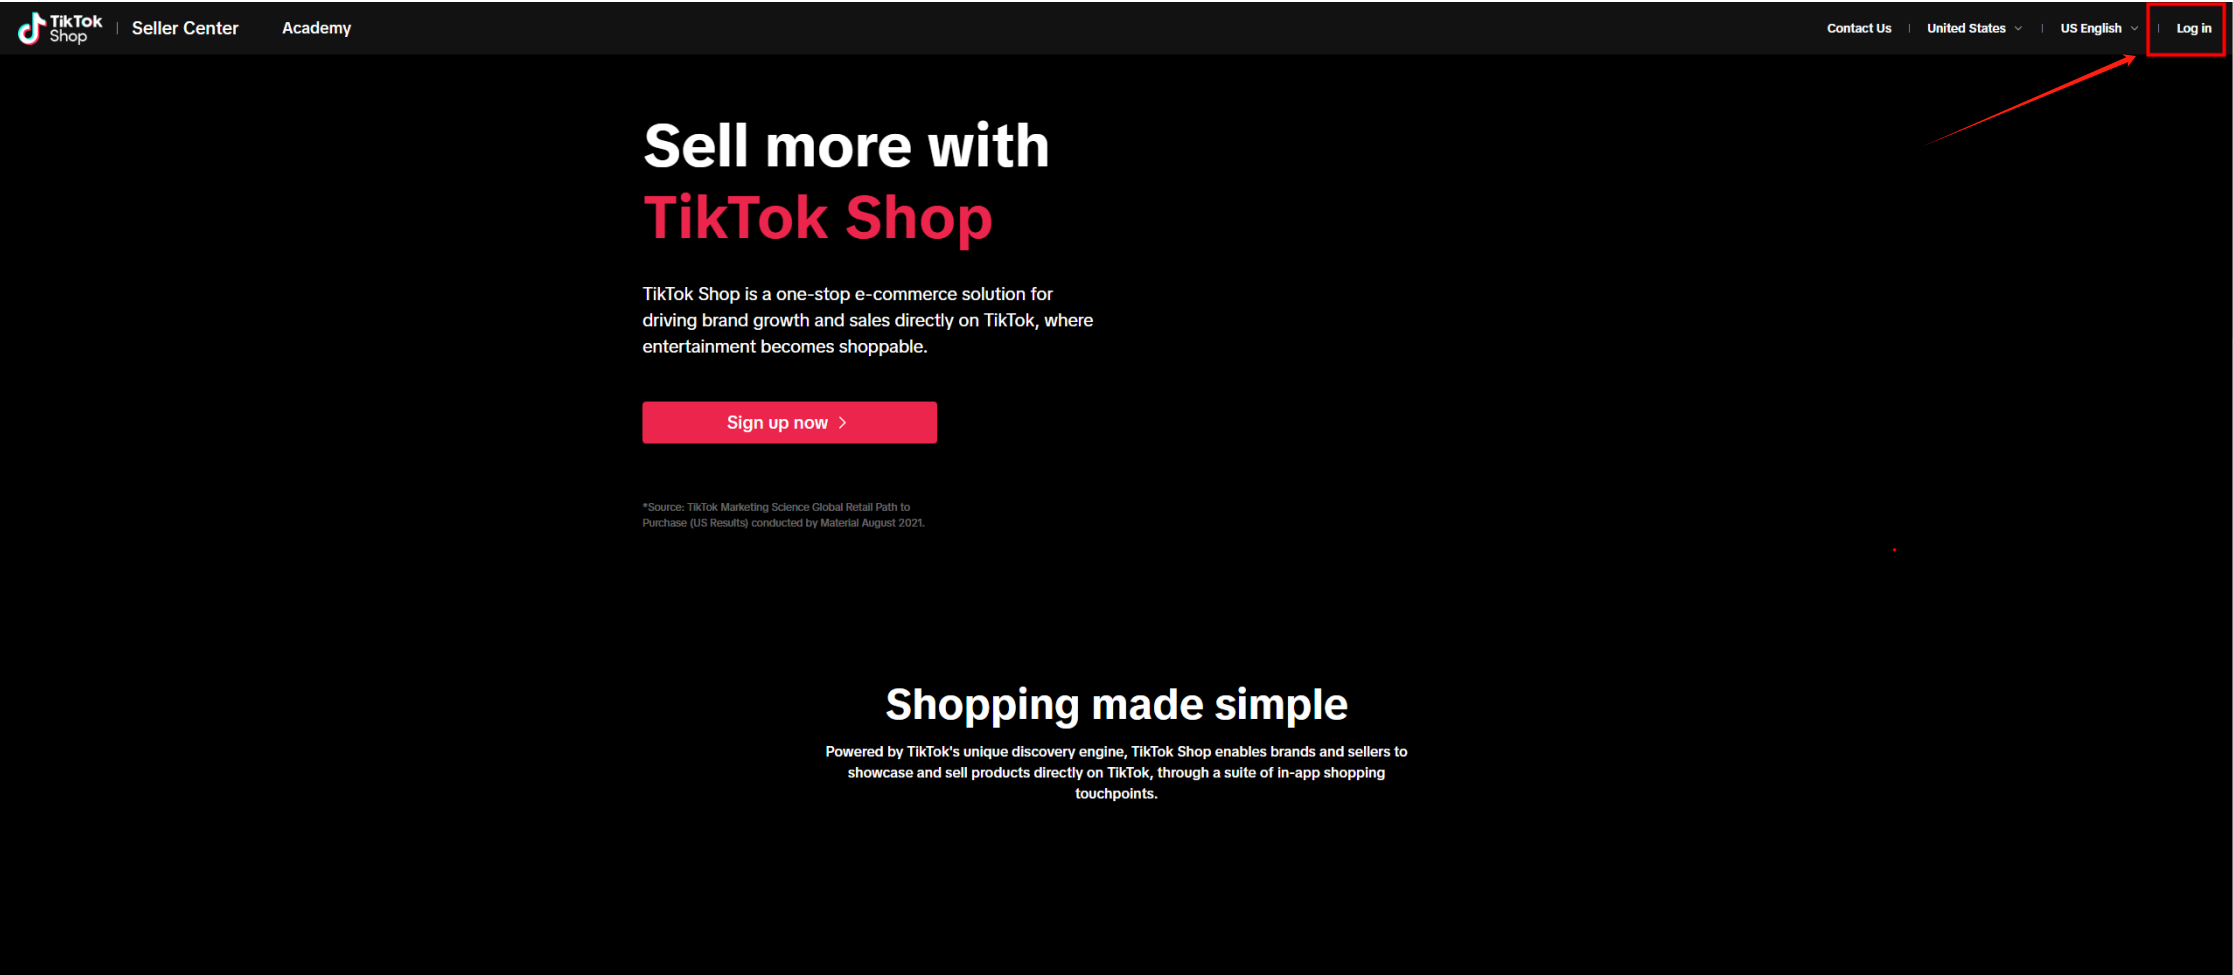
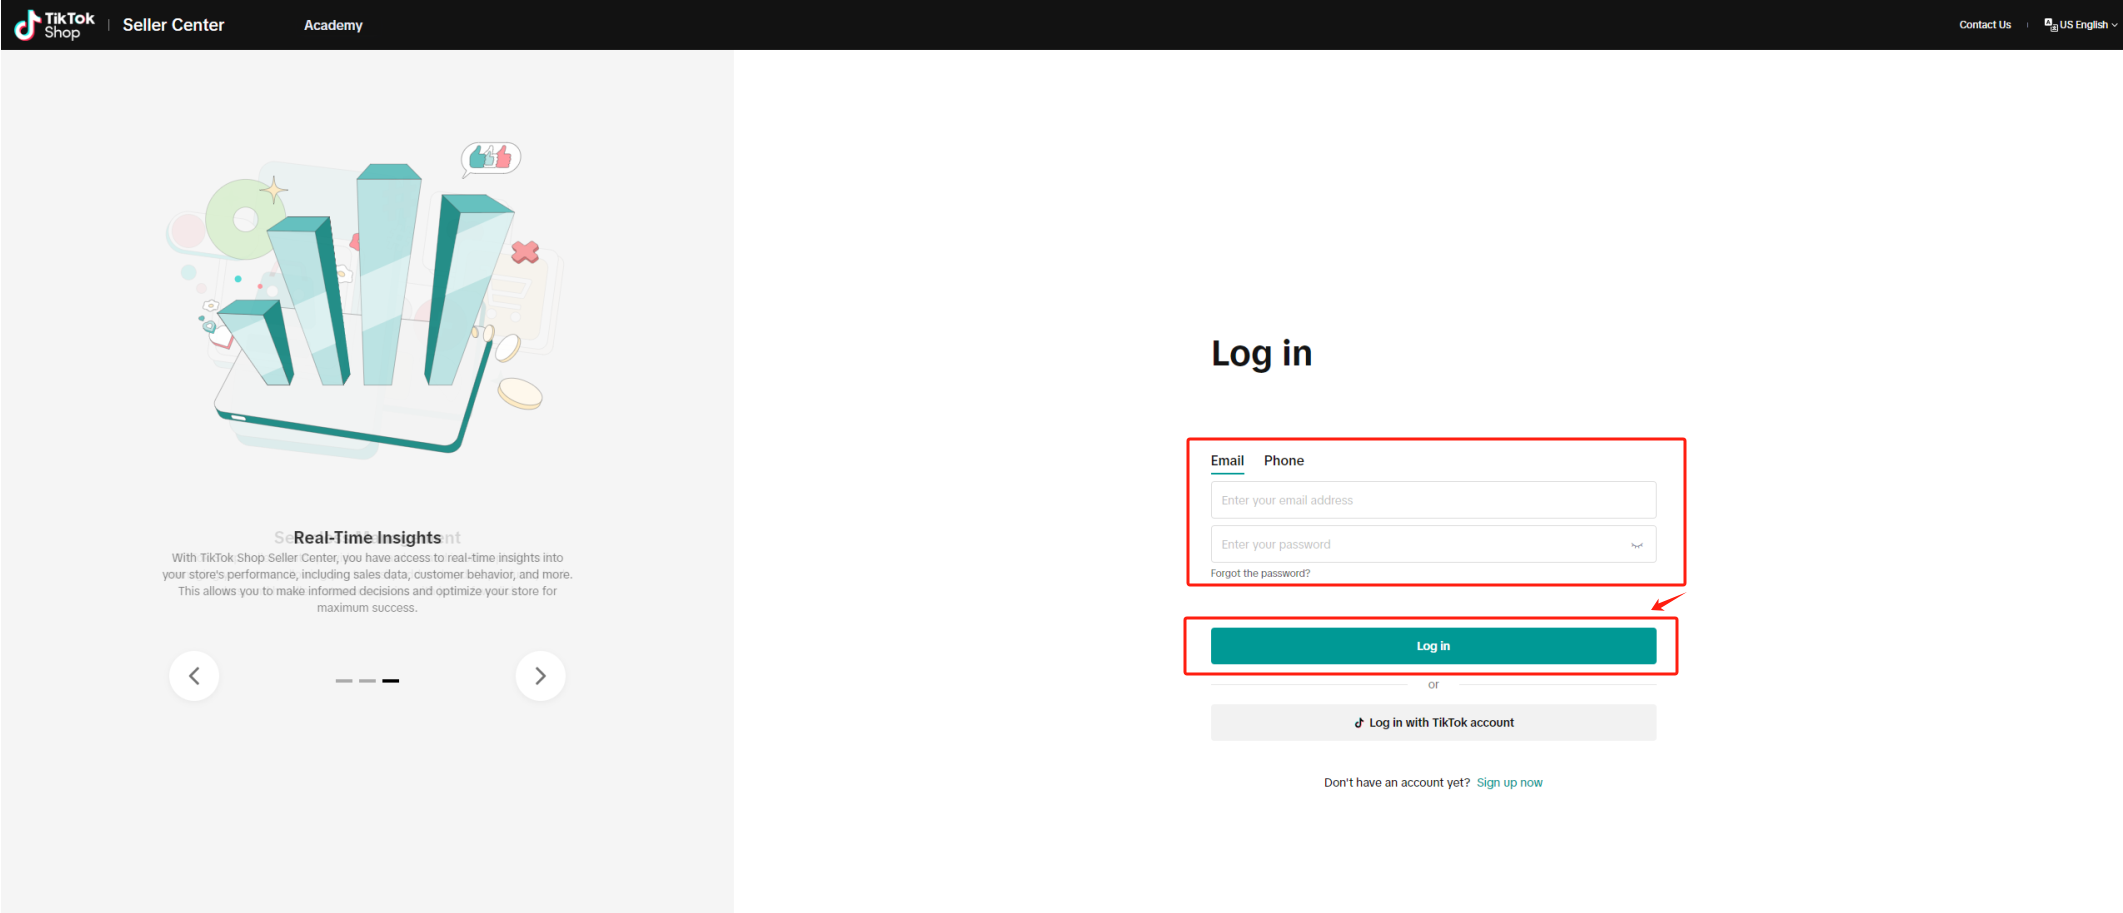
【After successful login, you will be automatically redirected to the authorization confirmation page. Click 'Confirm to install' and 'Authorize' to proceed.】
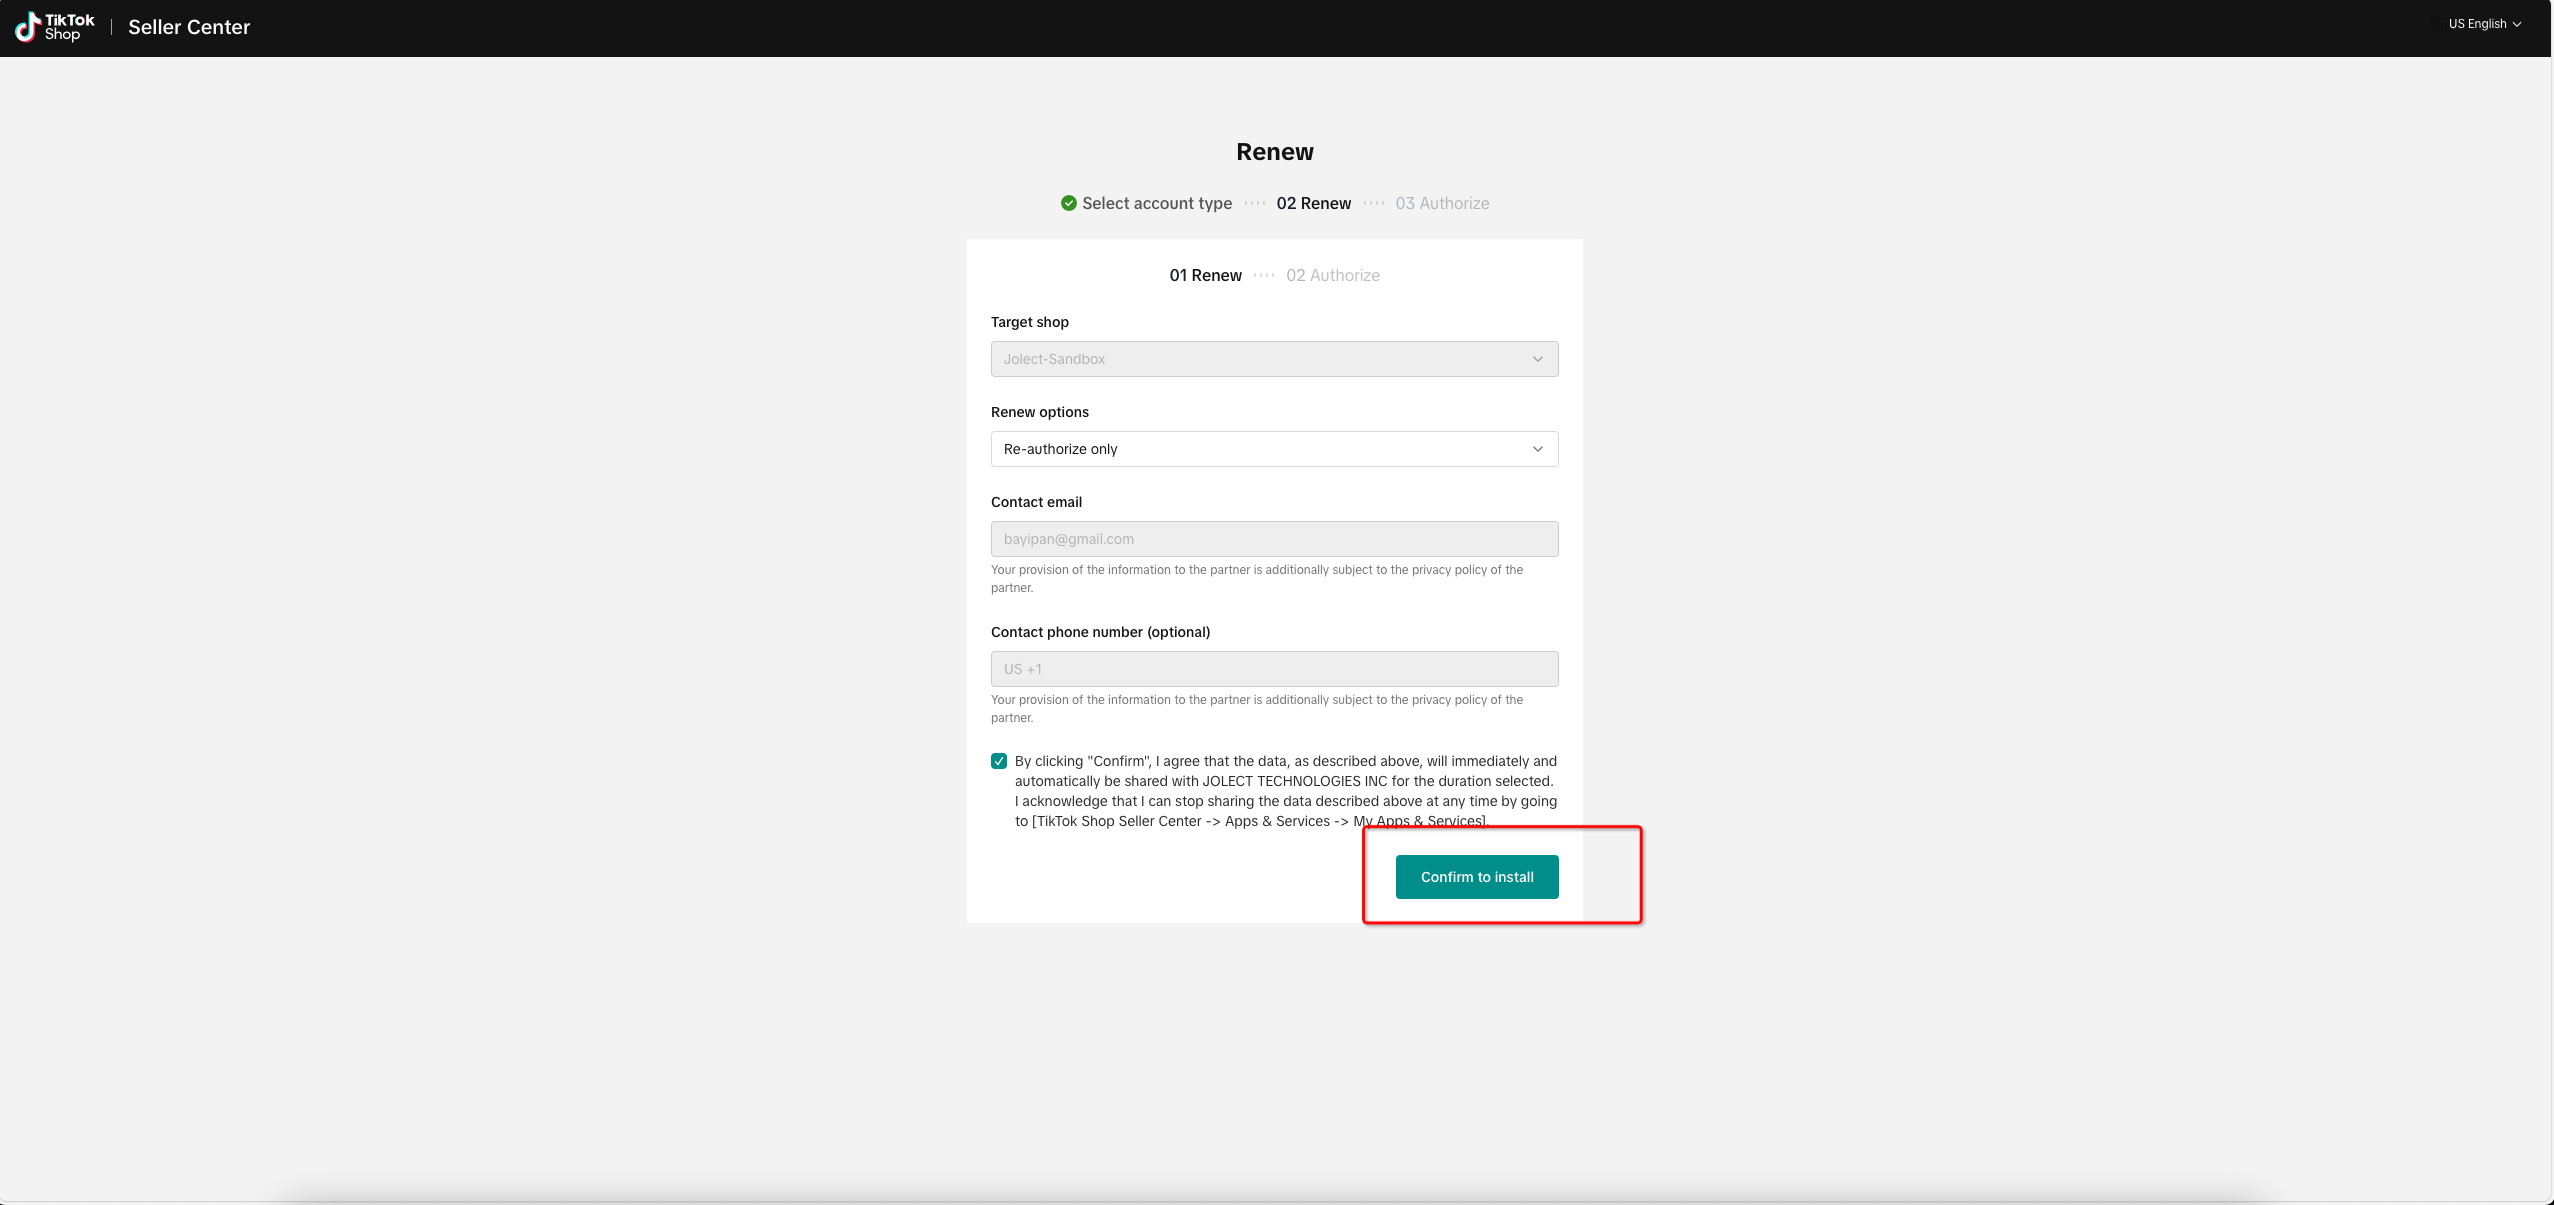
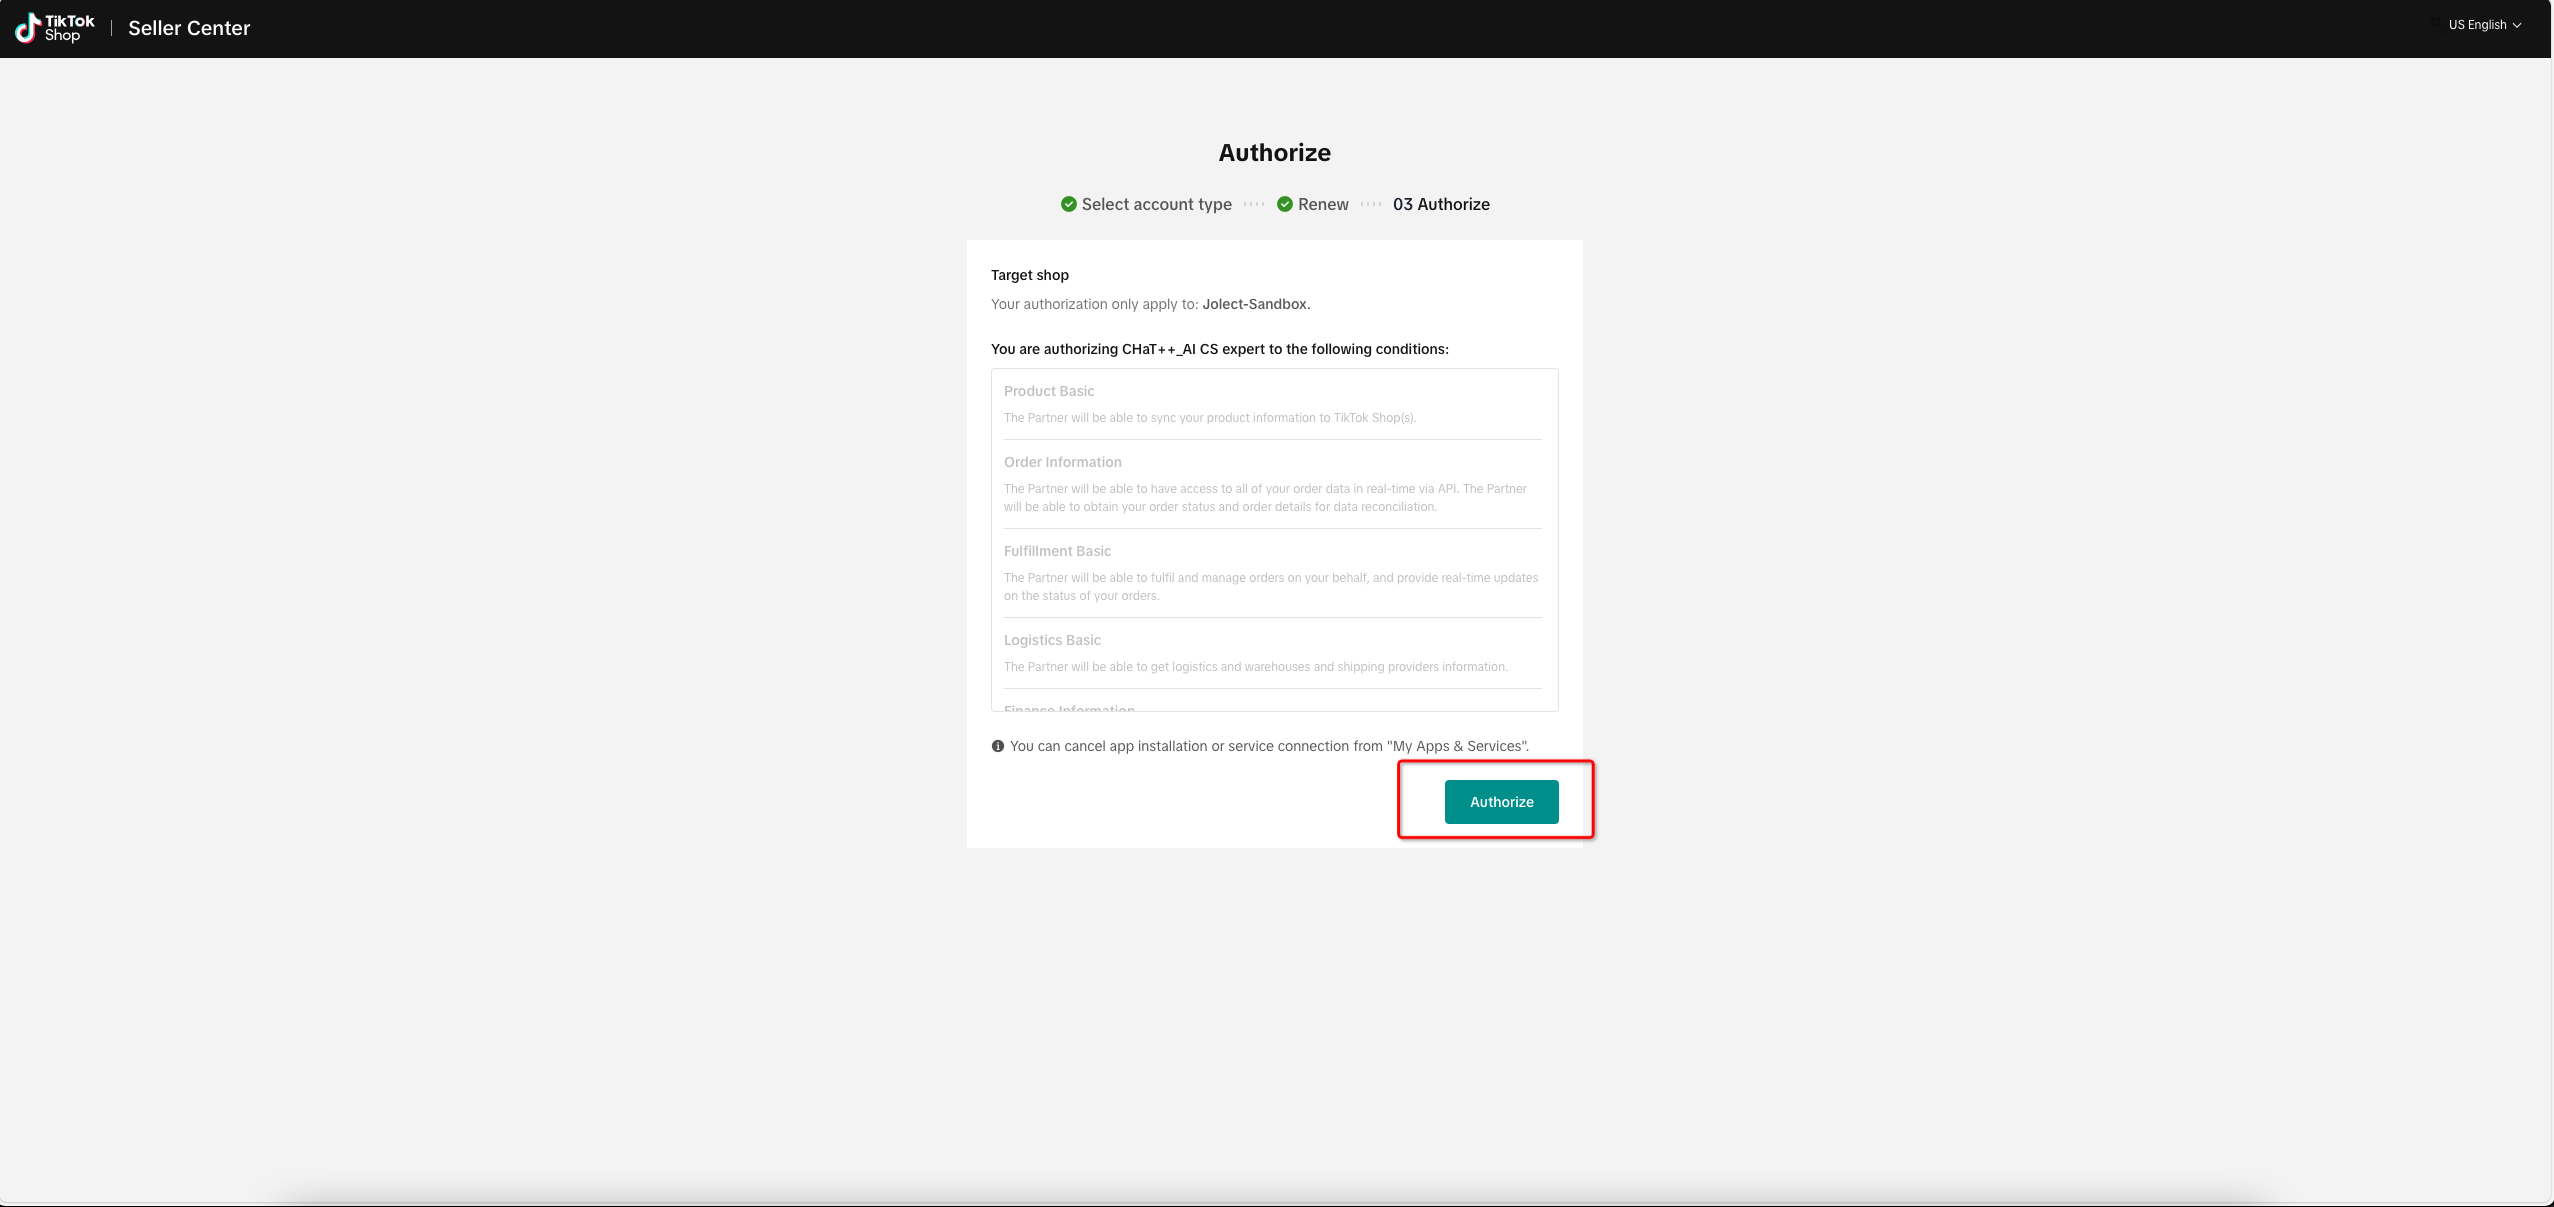
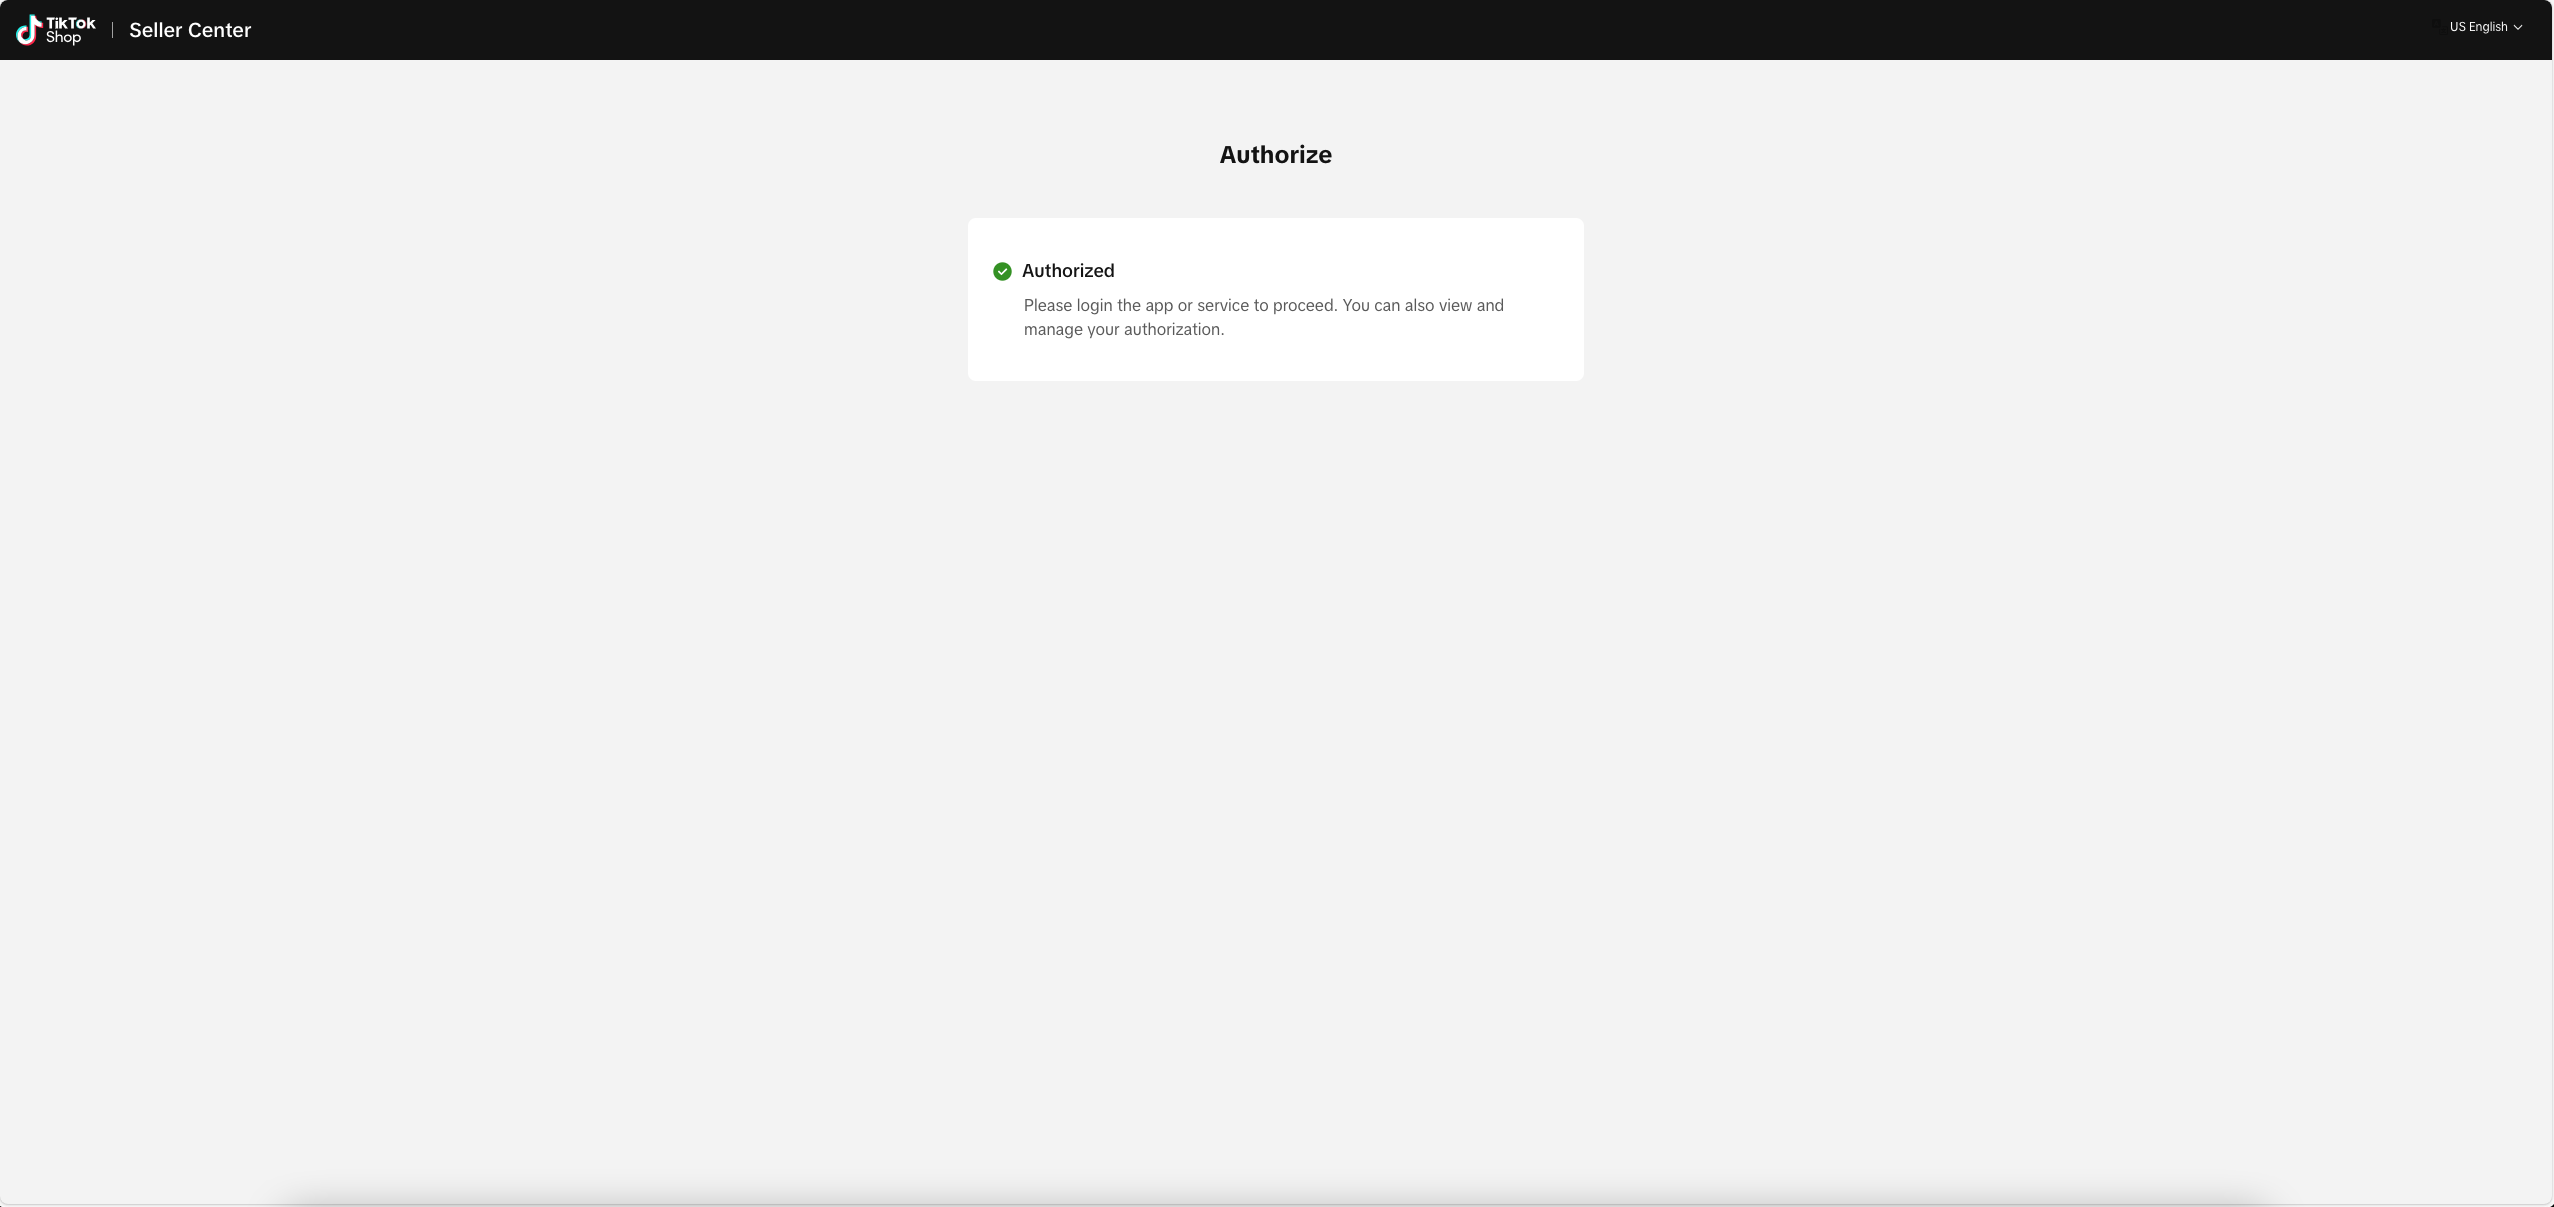
Authorization success
When ChatPlusAI appears as shown in the figure below, the authorization is completed. 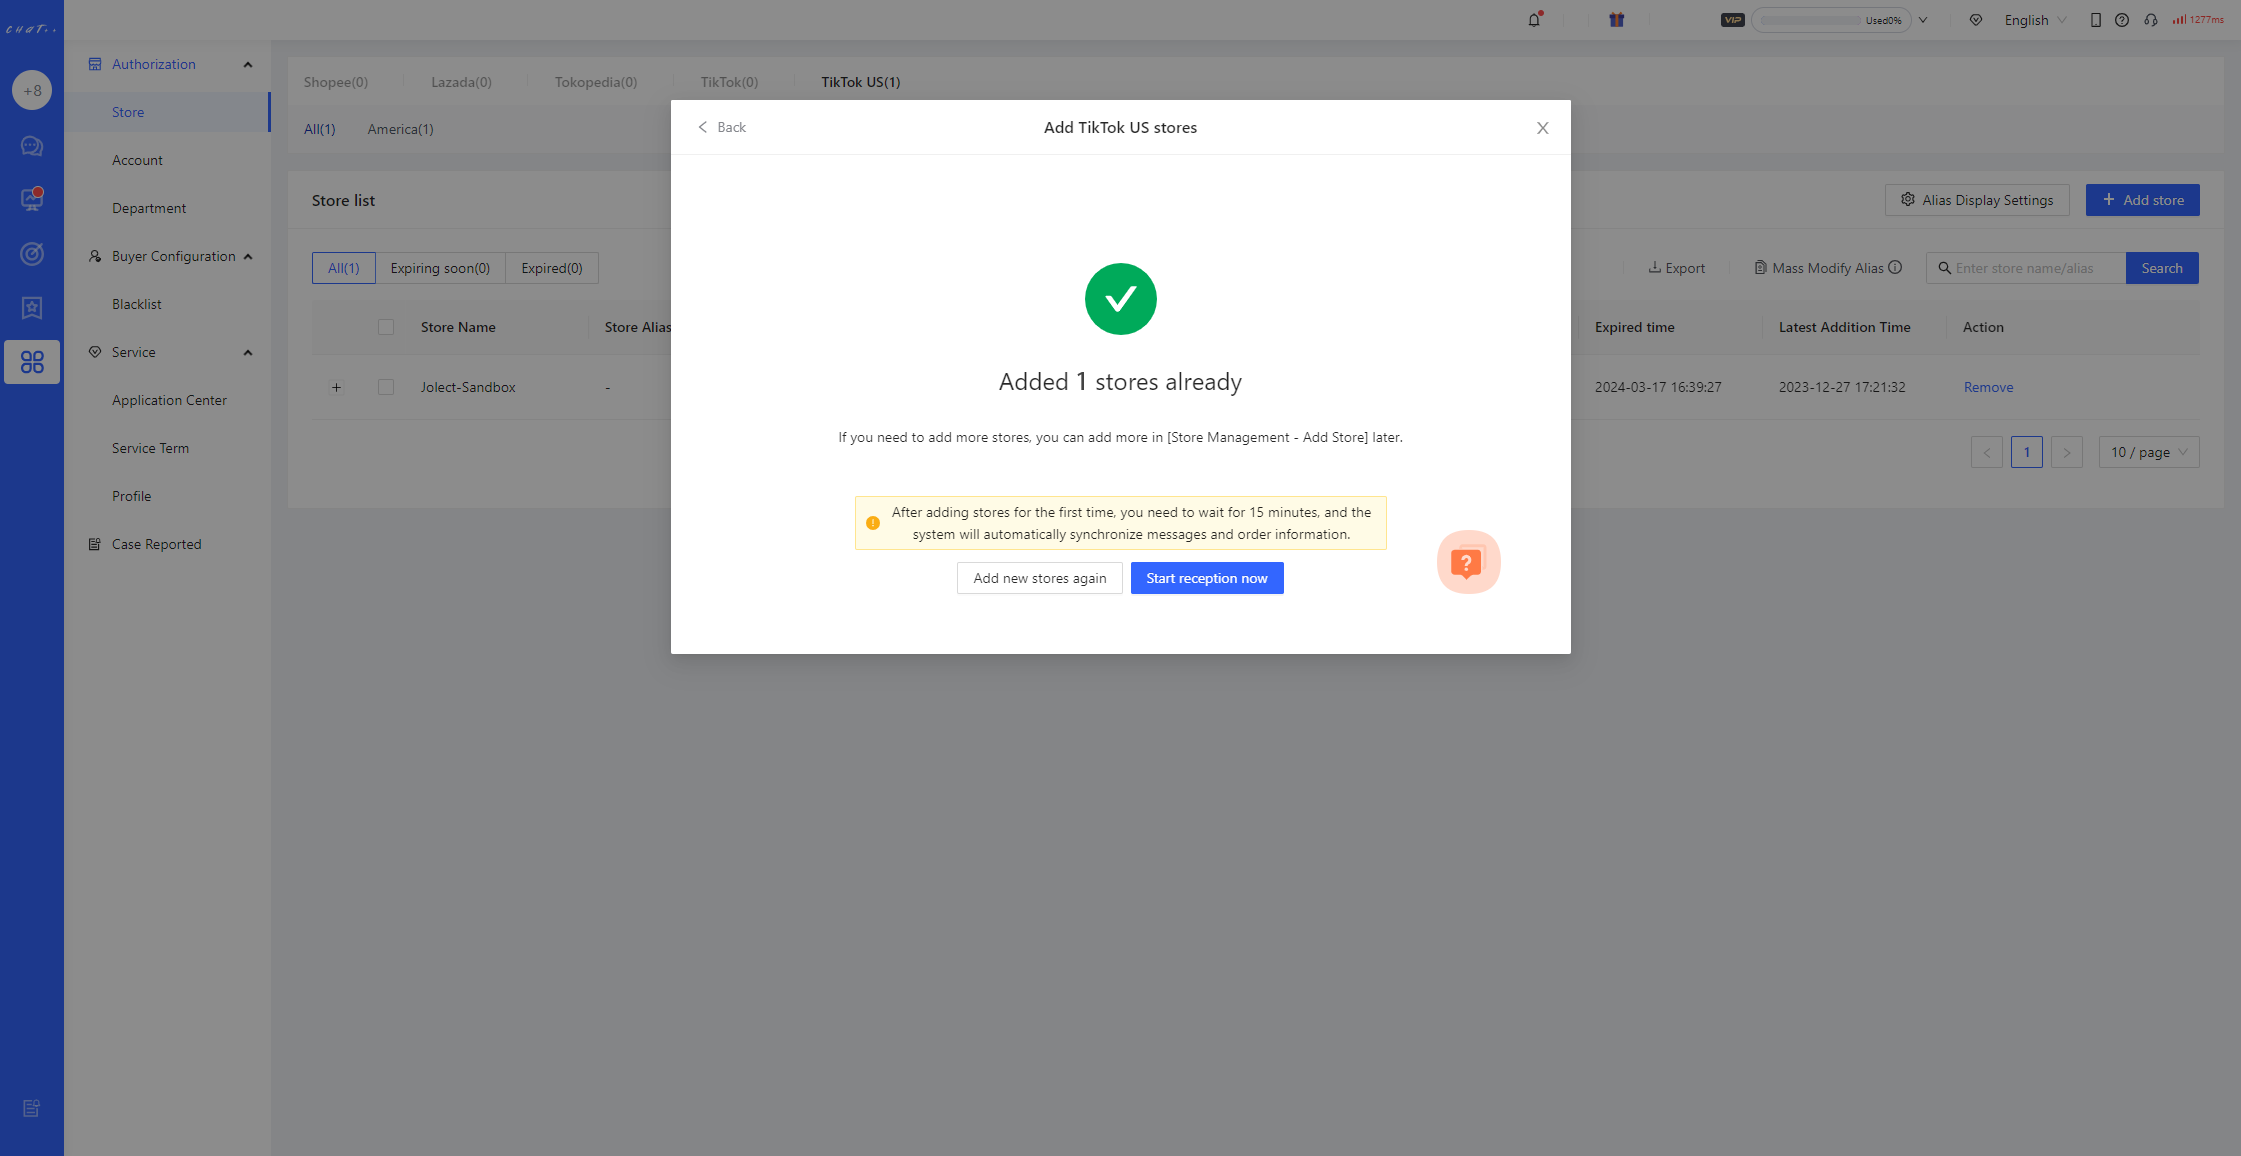
- After adding the store for the first time, please be patient and wait for 15 minutes. The system is automatically synchronizing the message content of the past 30 days and the order information of the past 90 days.
FAQ
Q1: Why does the authorization fail when authorizing the second TikTok store?
A1: The previously authorized TikTok account remains logged in within the browser. Consequently, when attempting to authorize in the seller center, it automatically redirects to the 'logged-in TikTok account,' displaying authorization success, while the new store has not actually been authorized. Therefore, before authorizing a new store each time, it is necessary to ensure that there are no logged-in accounts in the web backend. Hence, each authorization requires logging in first.
- Method 1: Open the seller center (https://seller.tiktok.com/) in a new browser tab and log out of the account.
- Method 2: Copy the authorization link and open the seller center in an incognito (private) web page to complete the authorization.
⚠️ During the authorization process, you may be required to enter a verification code. Please ensure that the registered mobile number or login email is ready to receive the verification code.
Method2:Share with your administrator who has the account and password to authorize.
Step
Enter the store authorization page
After the first login to ChatPlusAI, you will be directed to the guided page for adding a store. Select TikTok US --> Click Next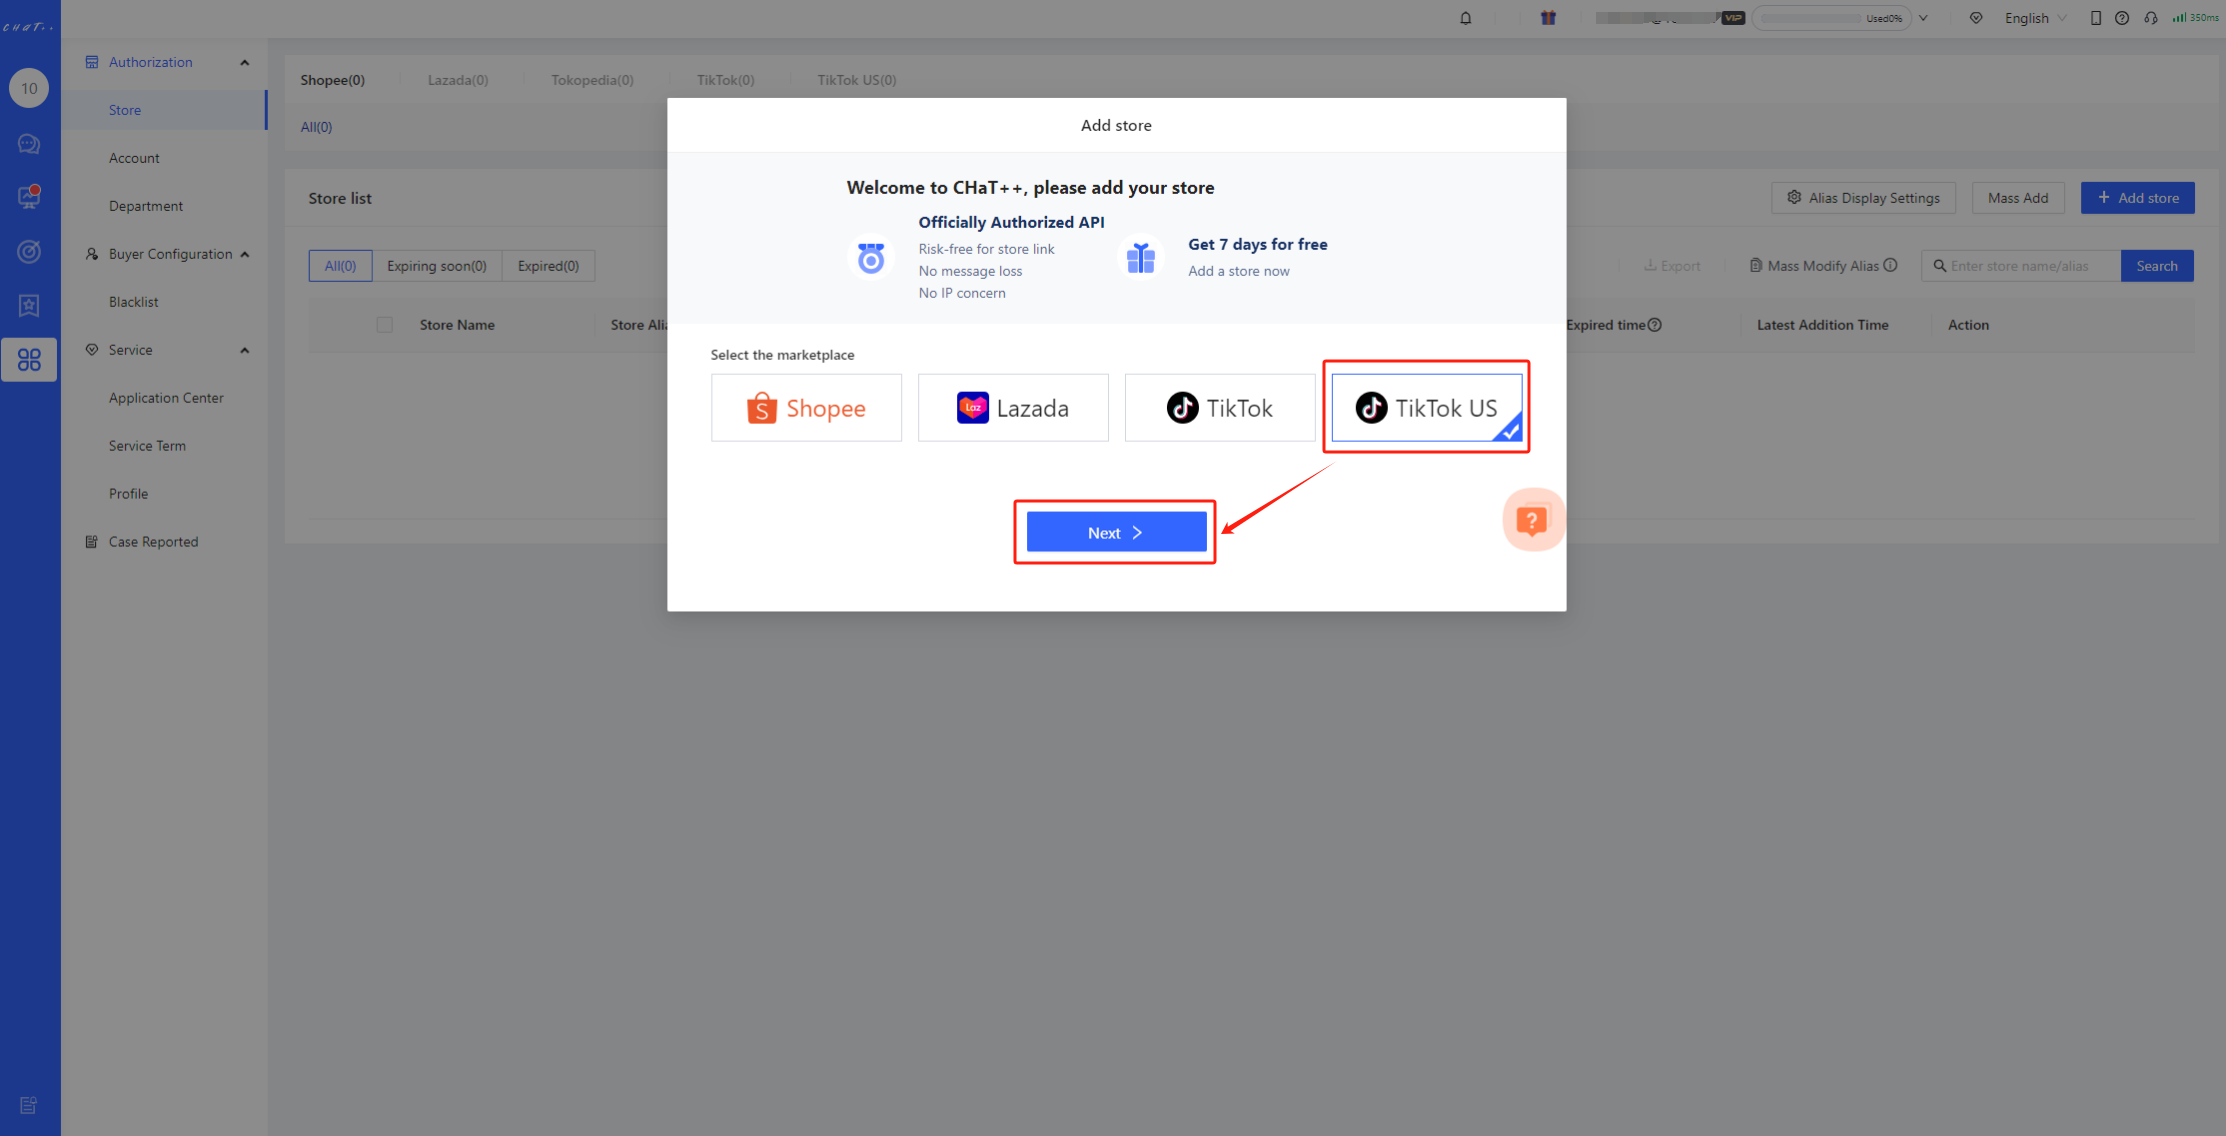
The steps to add a store in daily operations: Configuration-->Select Marketplace-->Add store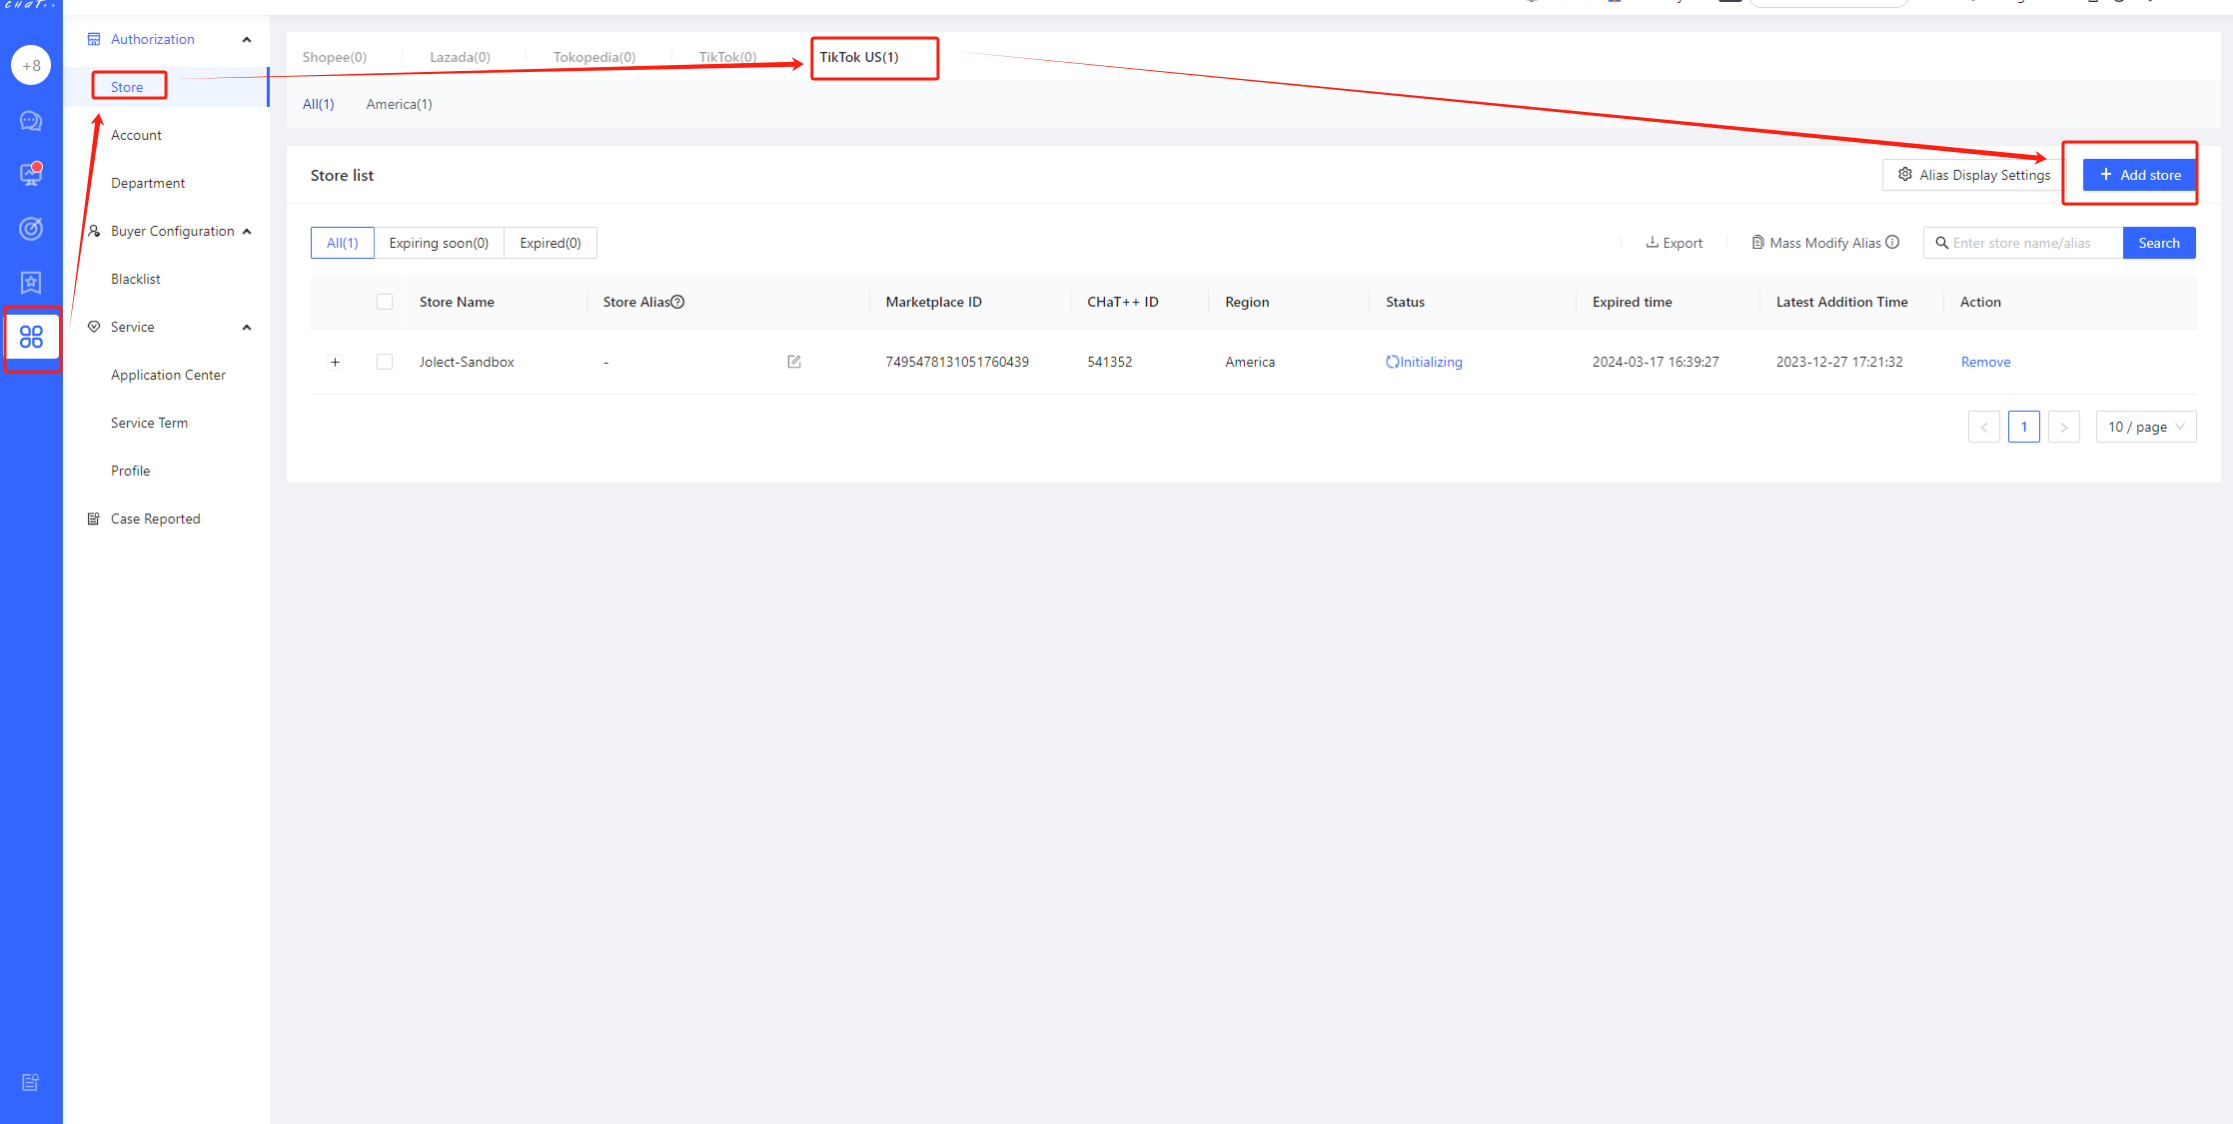
Select adding method
Select Method 2 → Copy Link, automatically copy the authorized link with the introductory statement.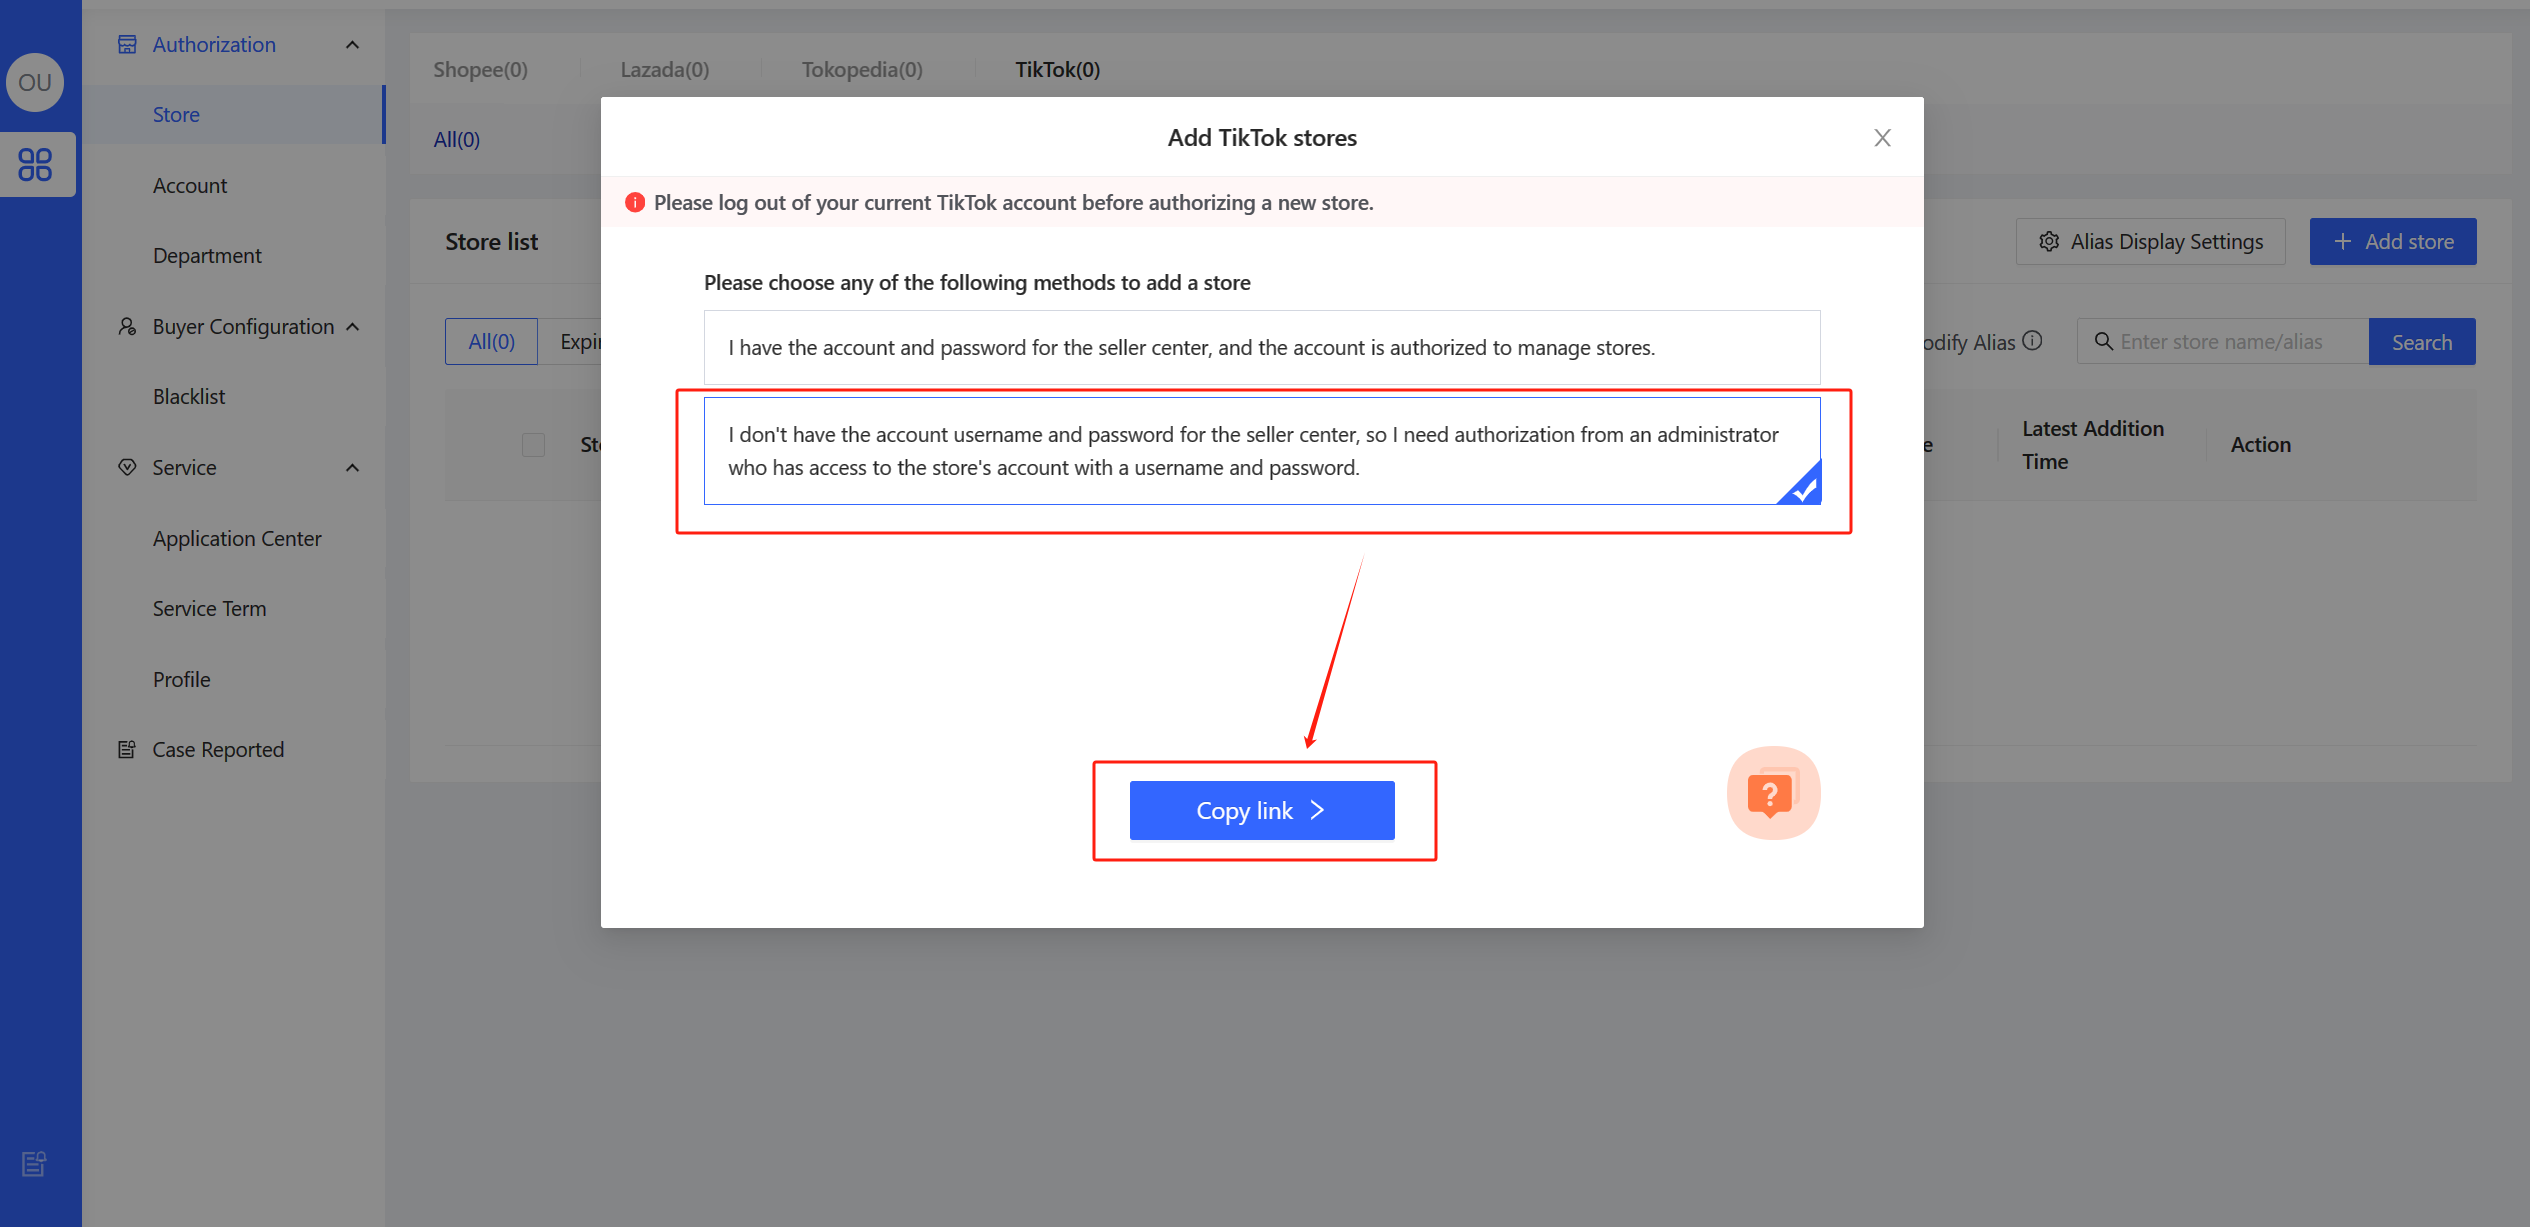
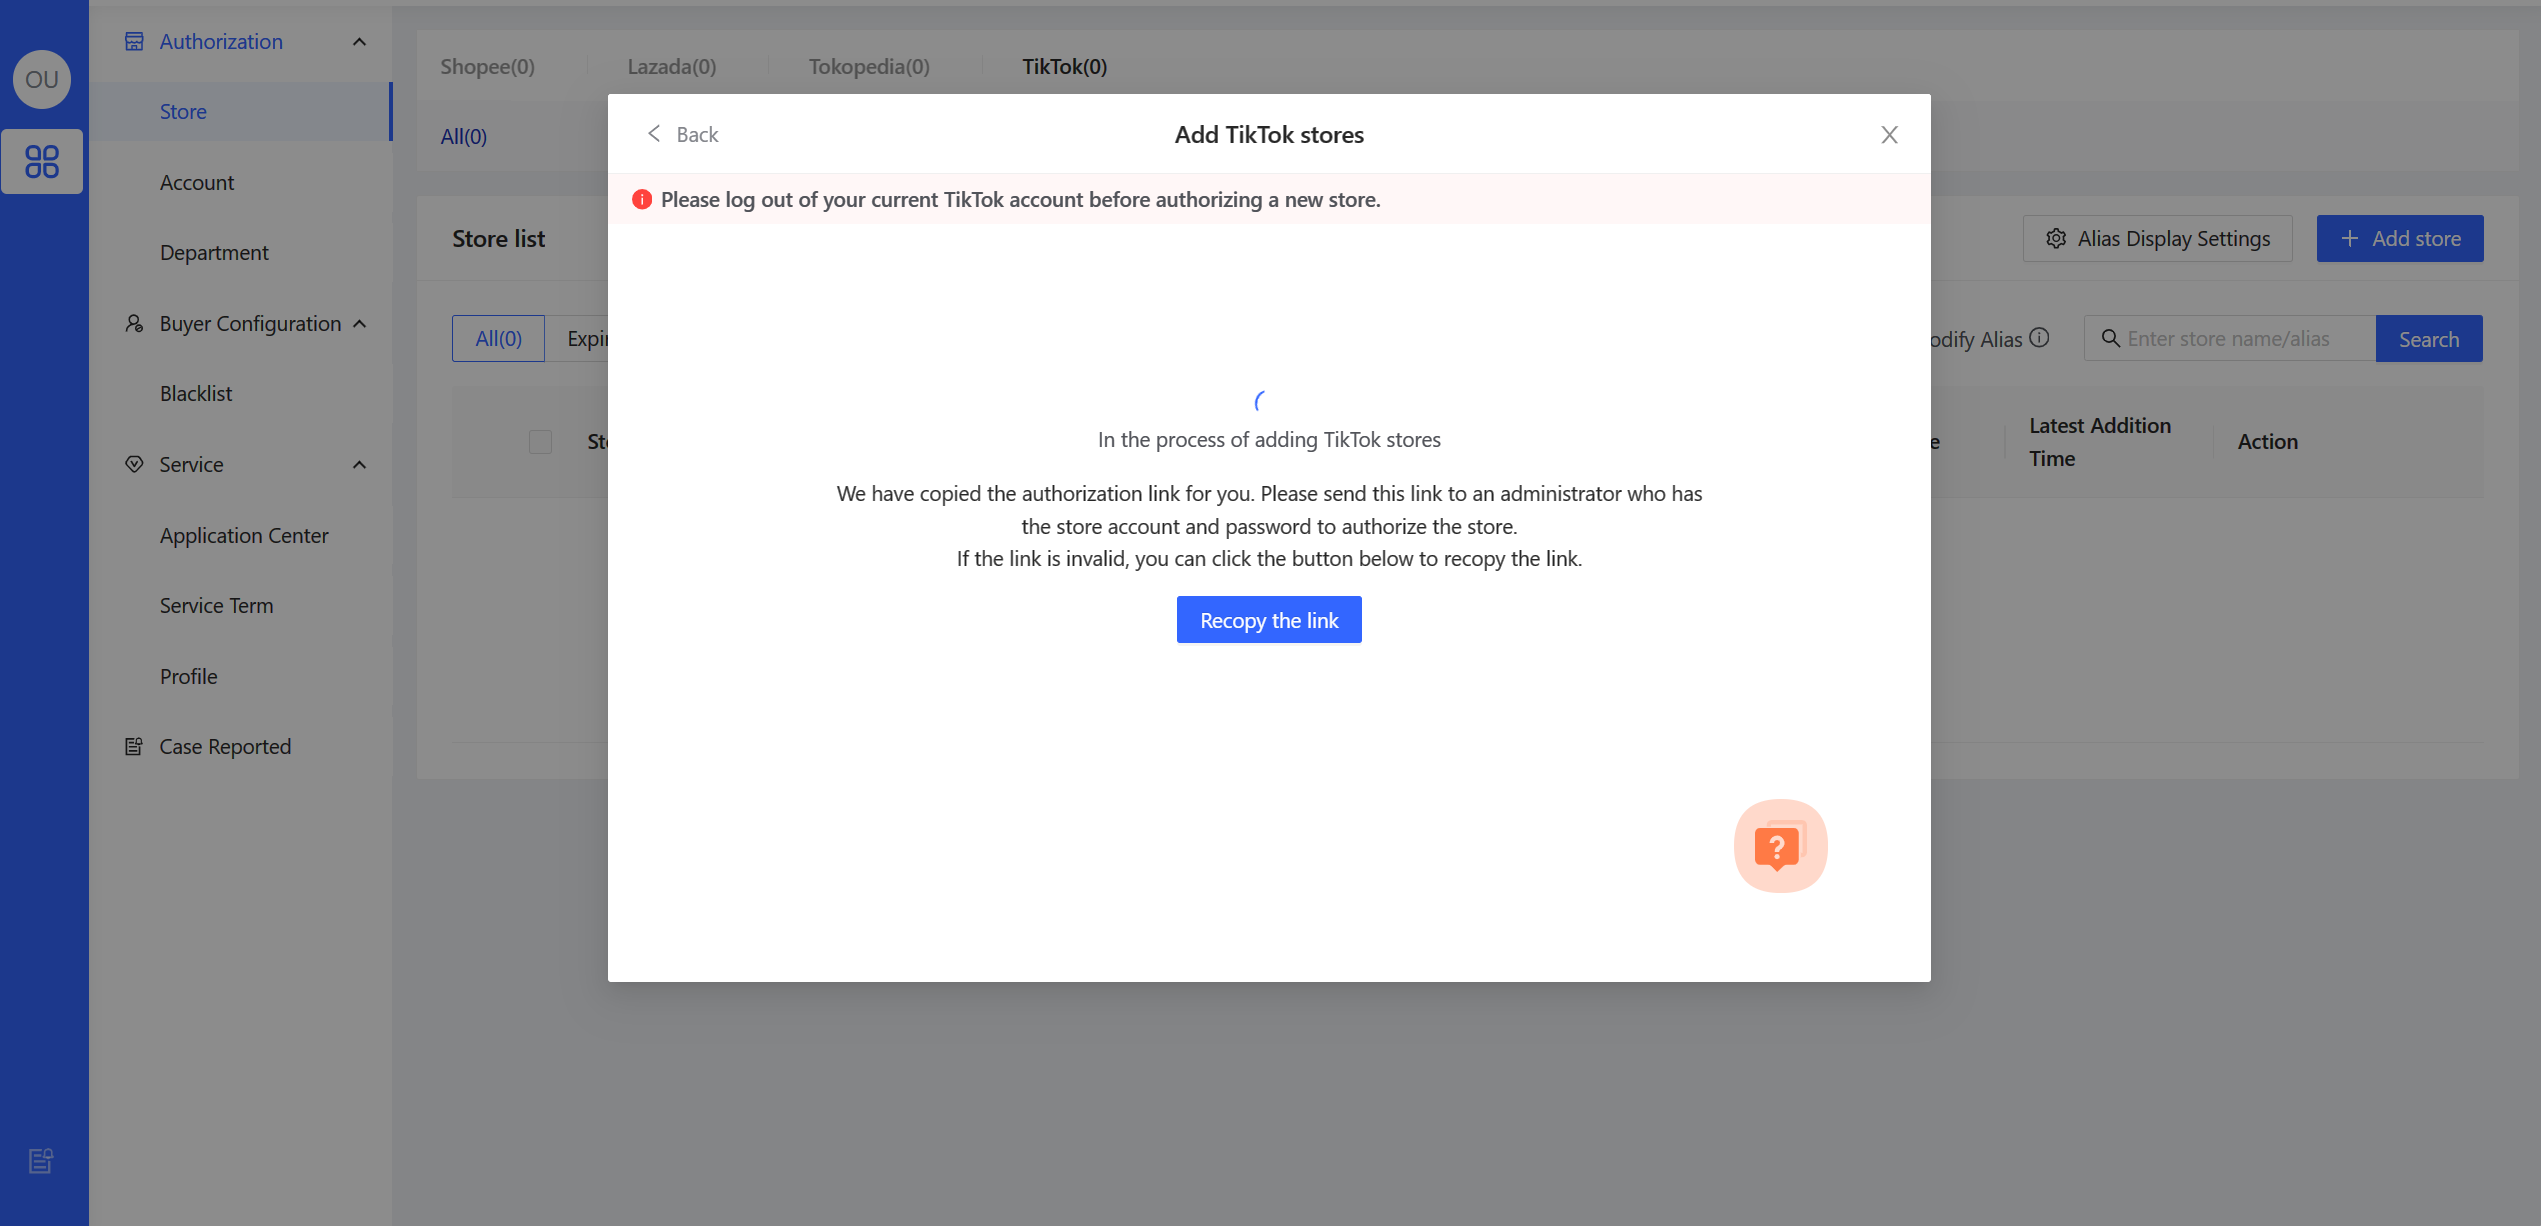
- Send link to your administrator

- (Administrator operation)Authorize TikTok Shop
After clicking the link, the administrator will be automatically redirected to the TikTok Seller Center login page.
【Select site--> Click “Next”】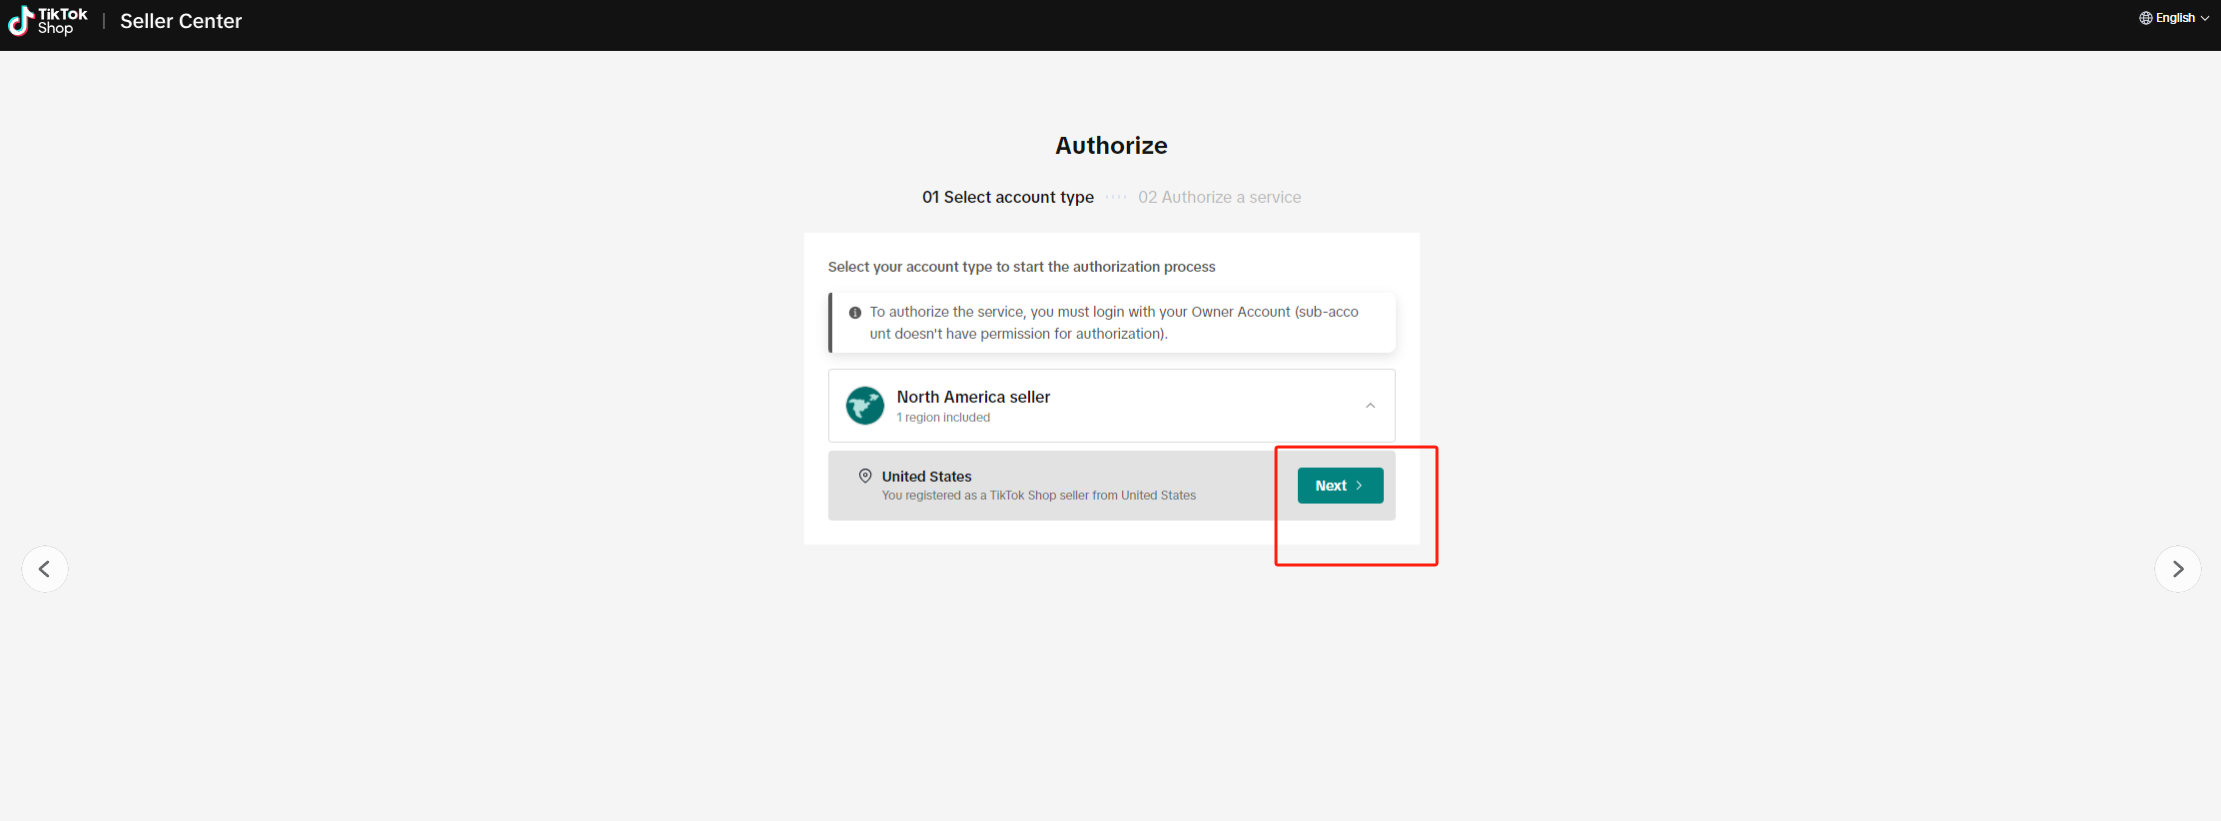
【Click “Log in”--> Input account--> Input password】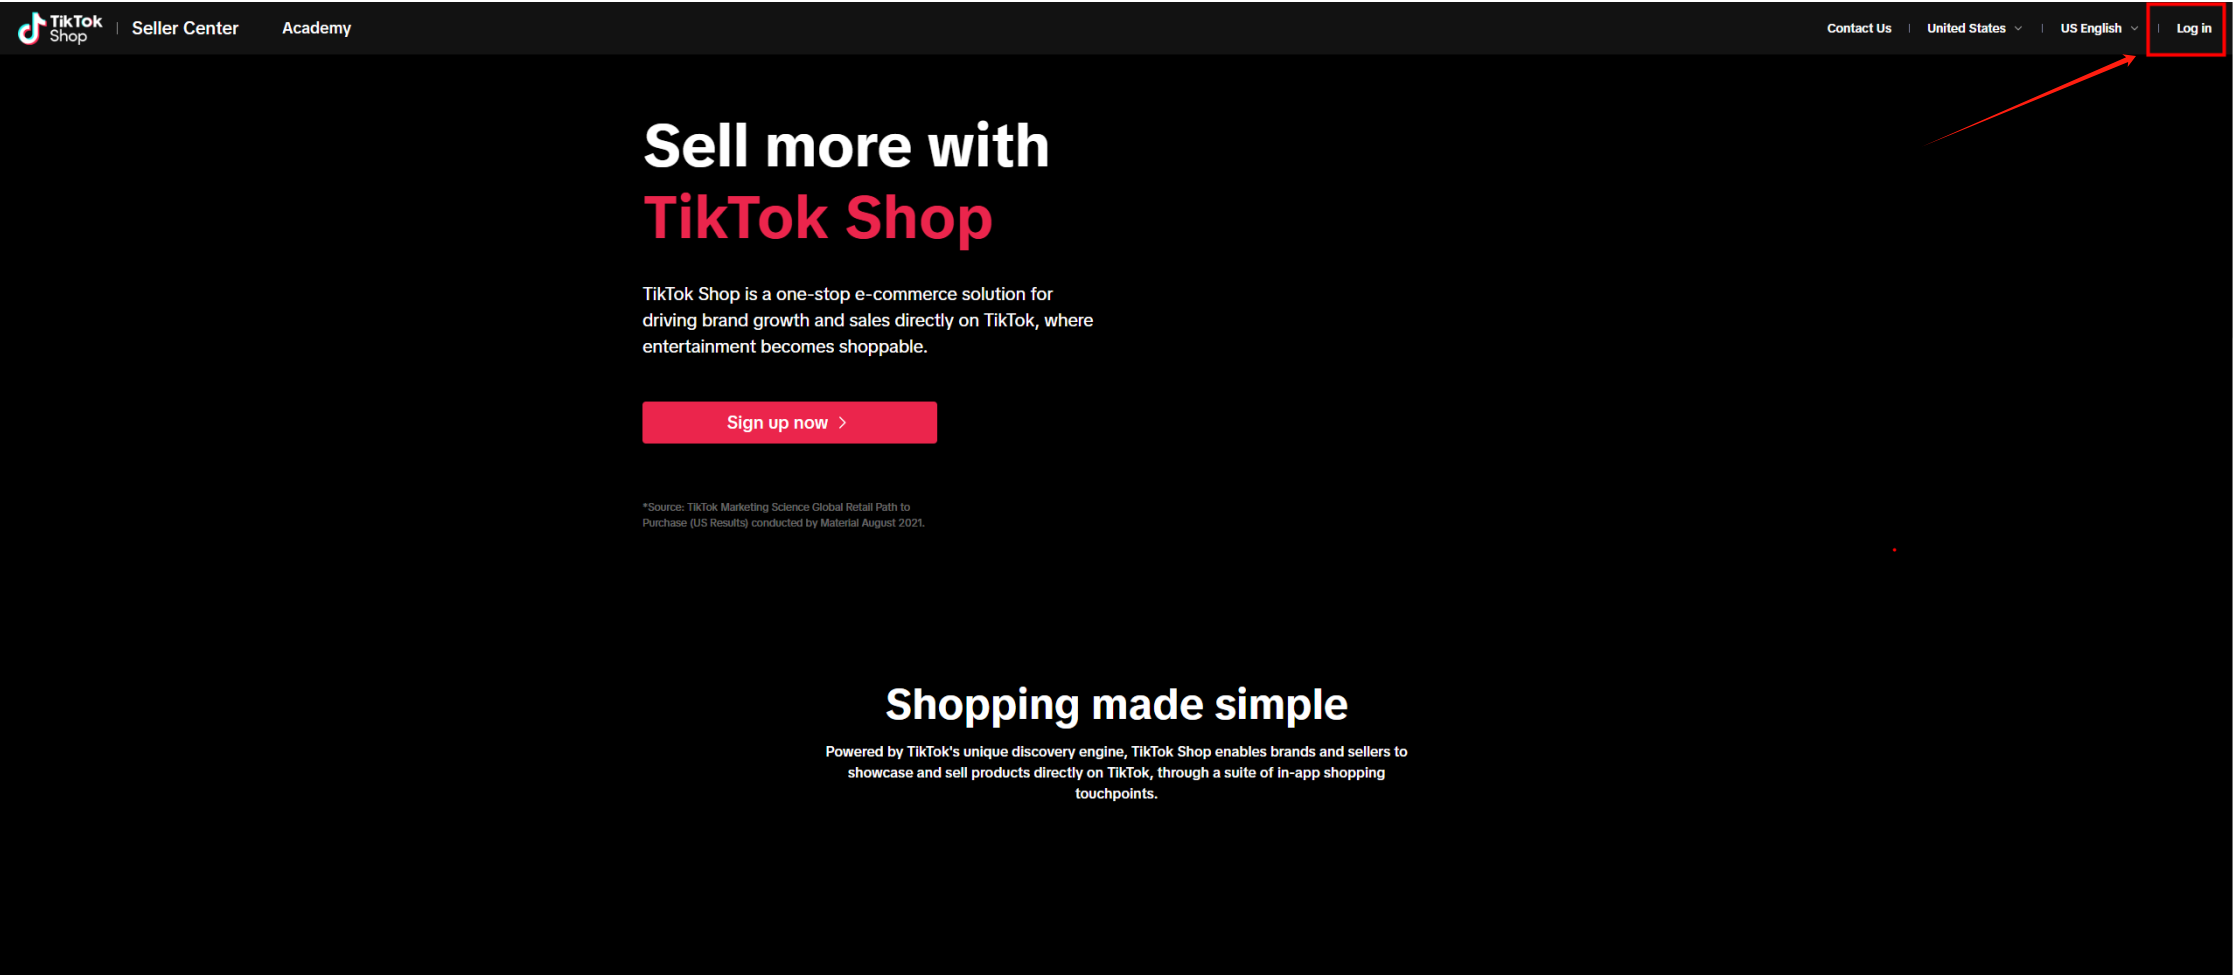
[x] When authorizing, please log in using the main TikTok account.
[x] Authorization requires verification. Please open your mobile phone or login to your email account to prepare for receiving the verification code.
⚠️ When multiple TikTok store authorizations are required, the previously authorized TikTok account remains logged in within the browser. Consequently, when attempting to authorize in the seller center, it automatically redirects to the 'logged-in TikTok account,' displaying authorization success, while the new store has not actually been authorized. Therefore, before authorizing a new store each time, it is necessary to ensure that there are no logged-in accounts in the web backend.
- Method 1: Open the seller center (https://seller.tiktok.com/) in a new browser tab and log out of the account.
- Method 2: Copy the authorization link and open the seller center in an incognito (private) web page to complete the authorization.
[x]
【After successful login, you will be automatically redirected to the authorization confirmation page. Click 'Confirm to install' and 'Authorize' to proceed.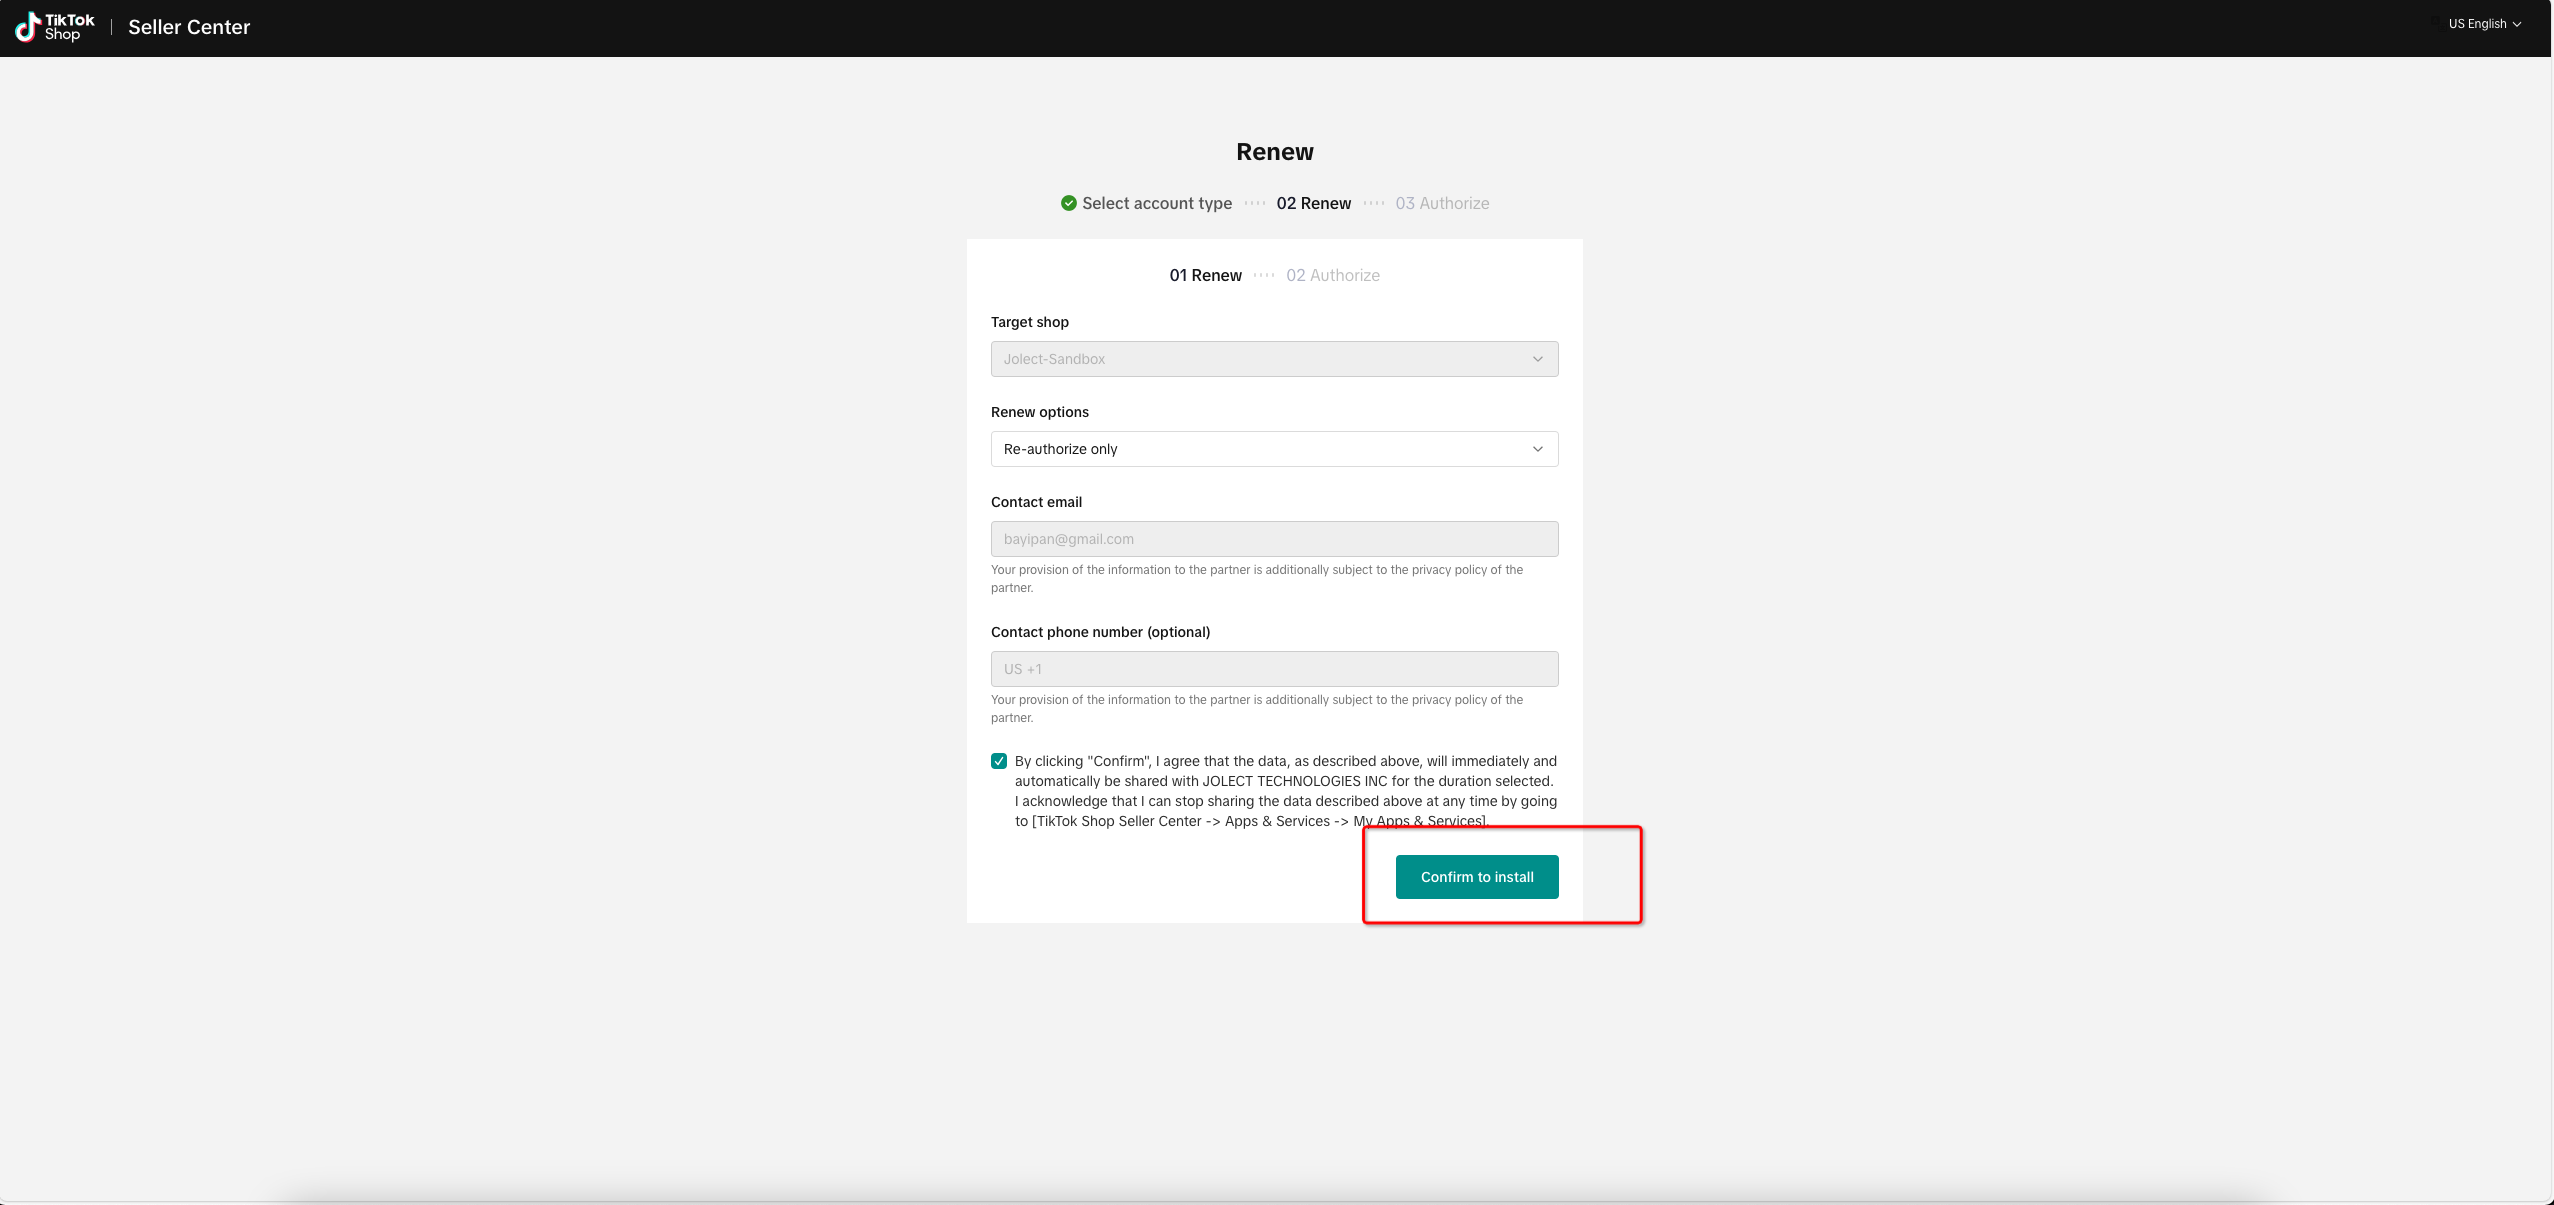
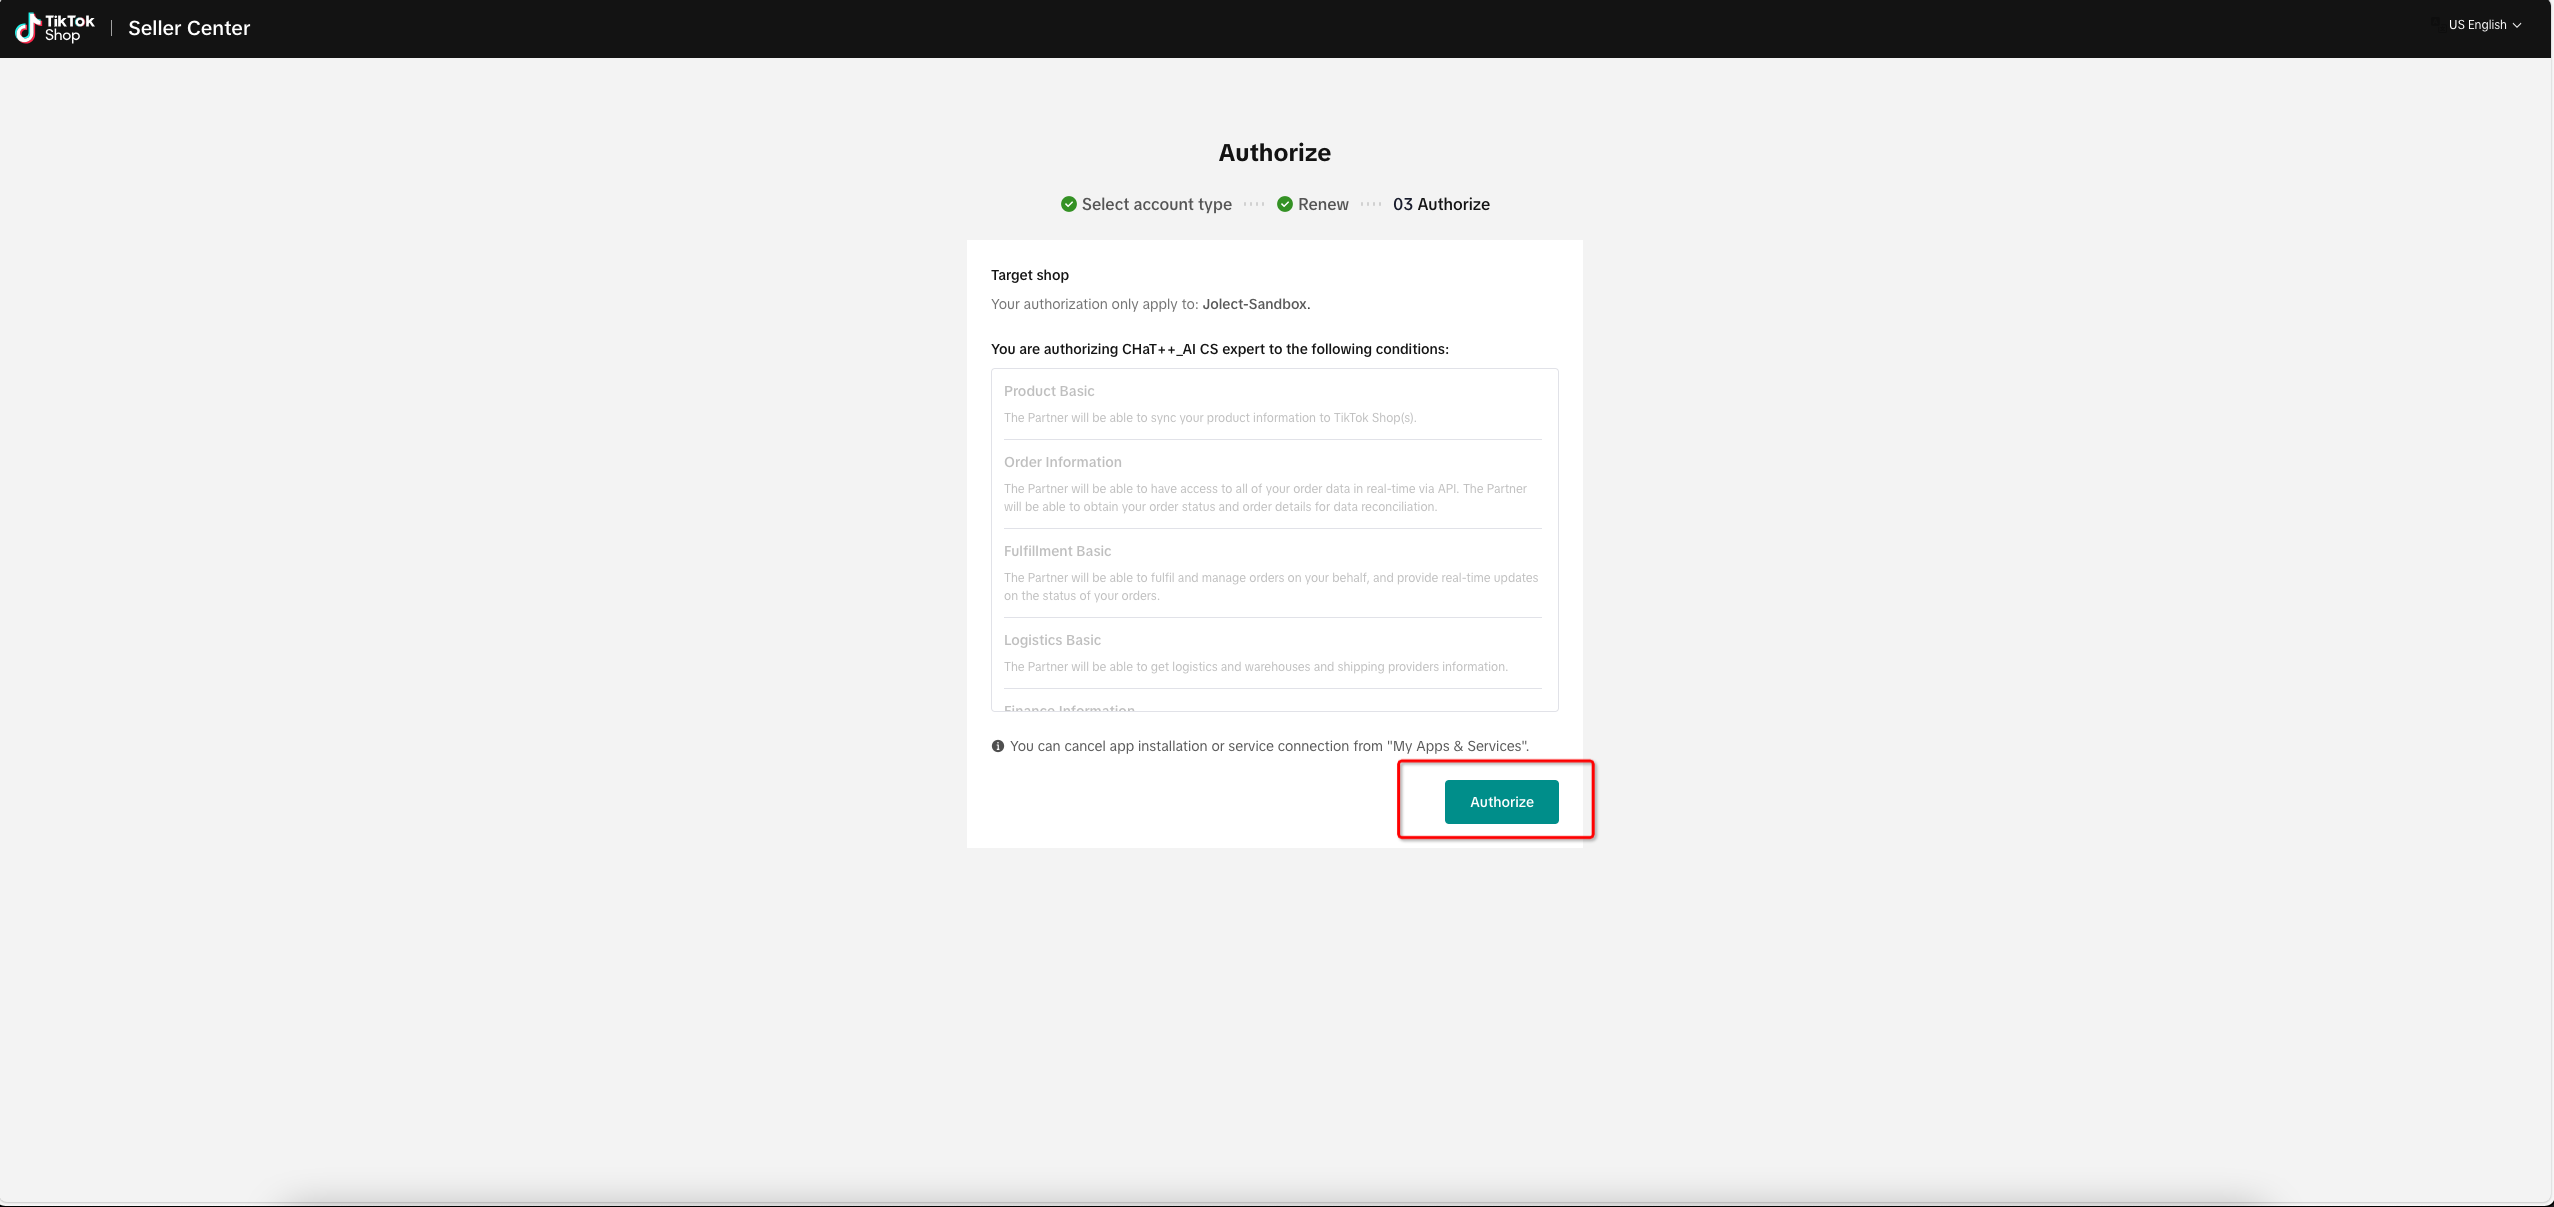
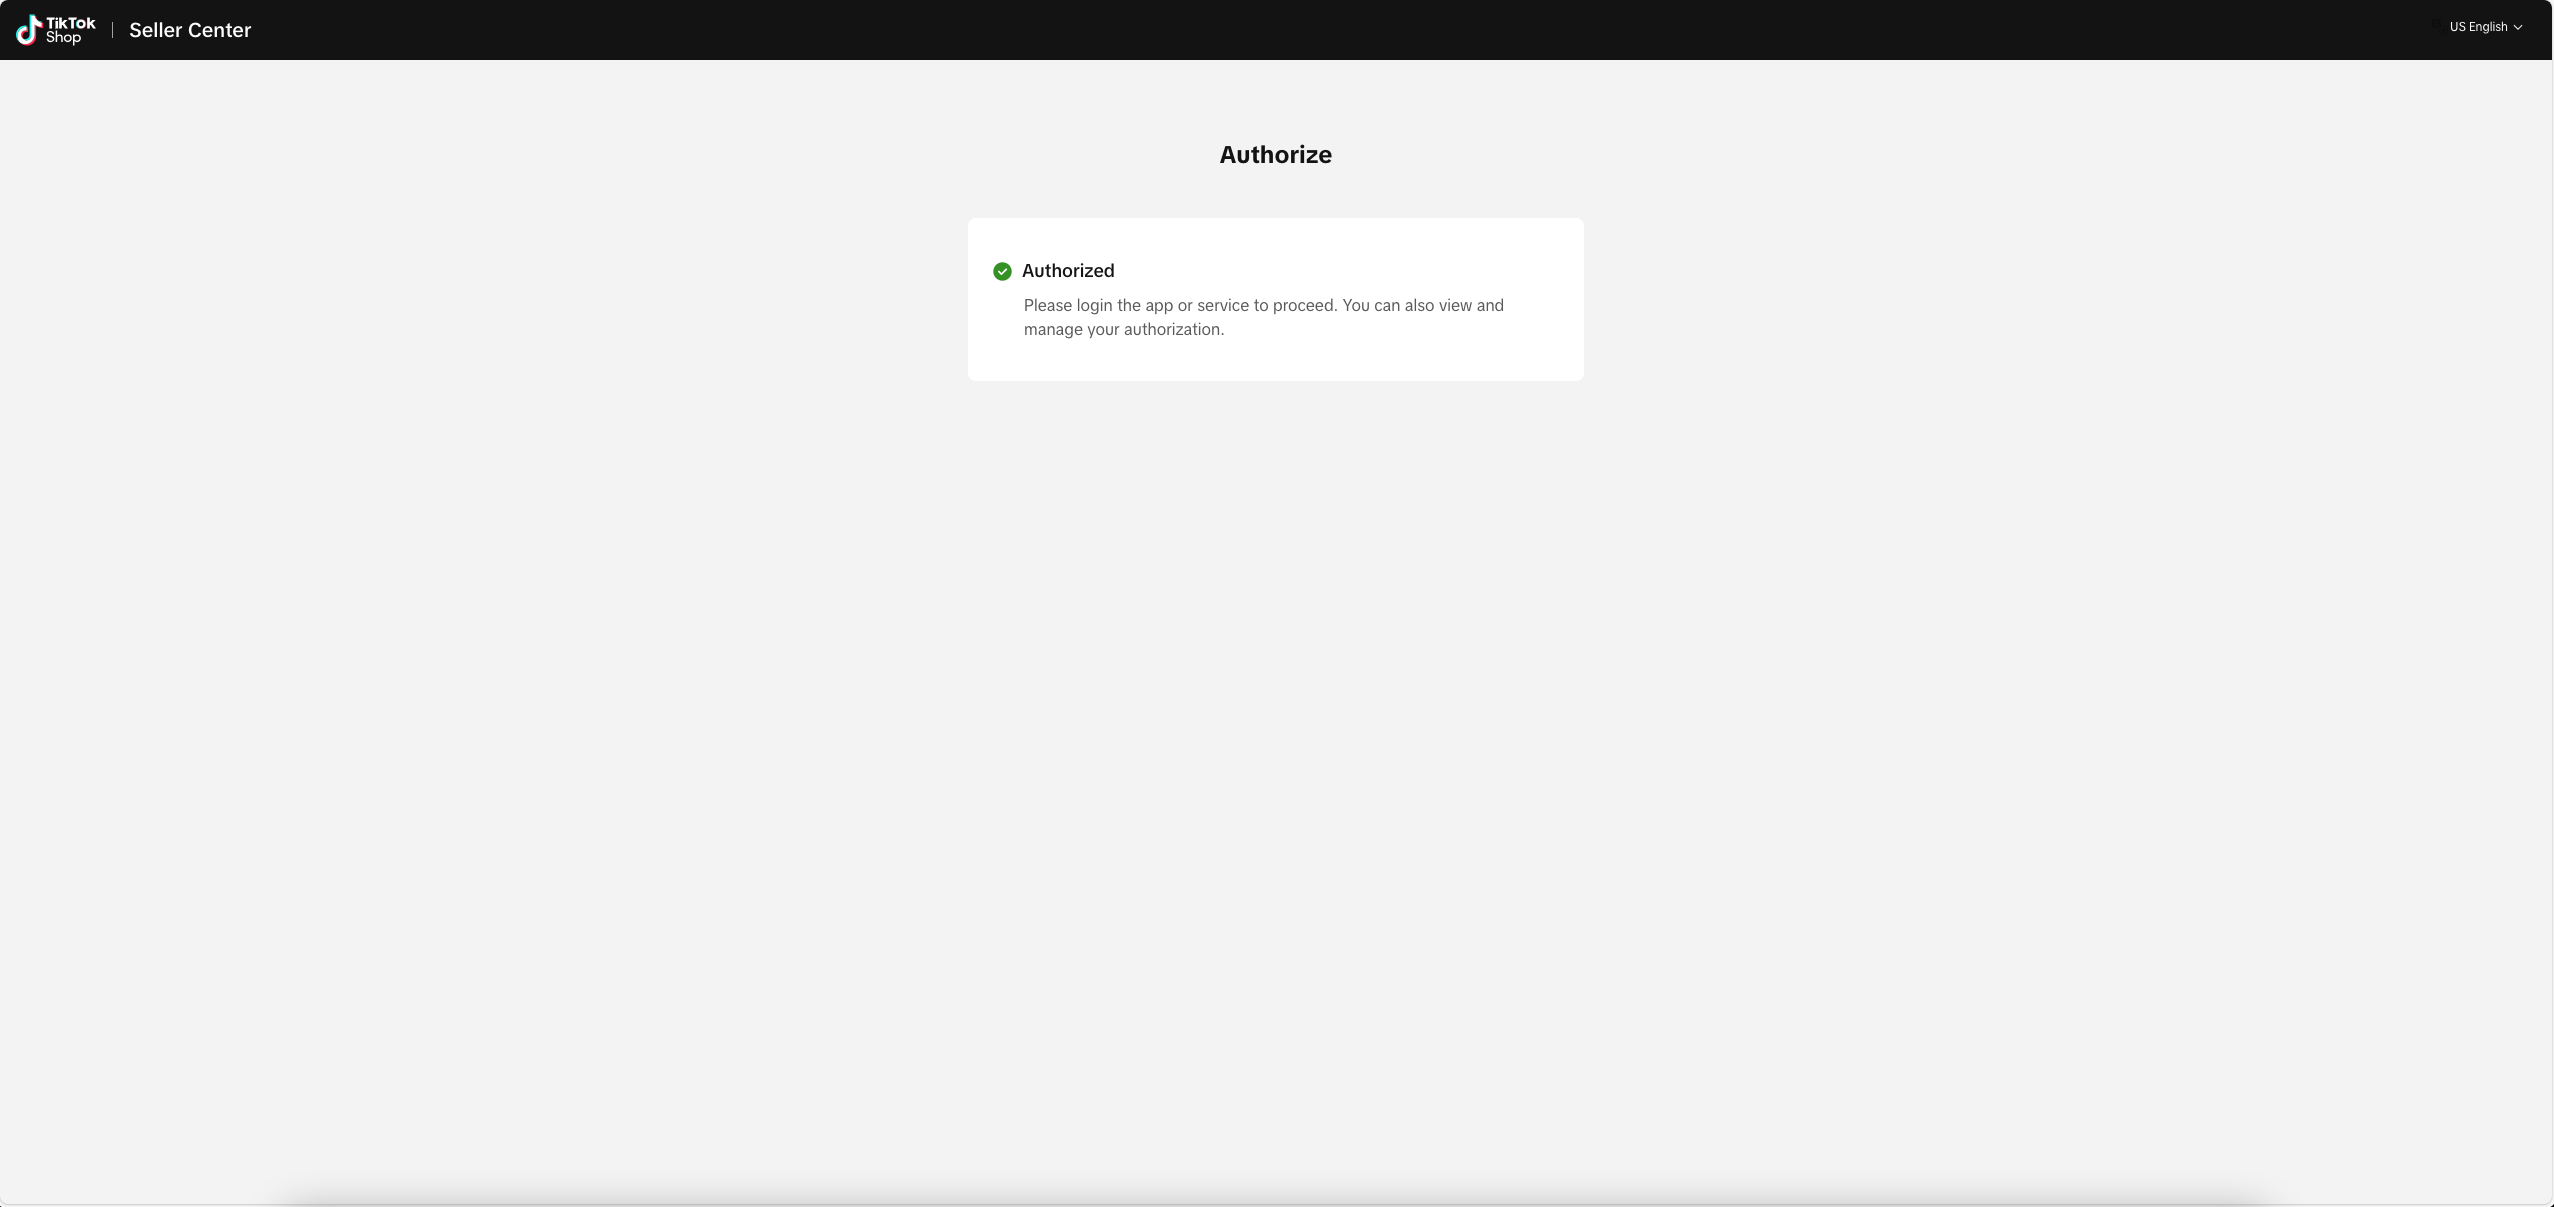
(Administrator operation ends here)
- Authorization success
When ChatPlusAI appears as shown in the figure below, the authorization is completed. 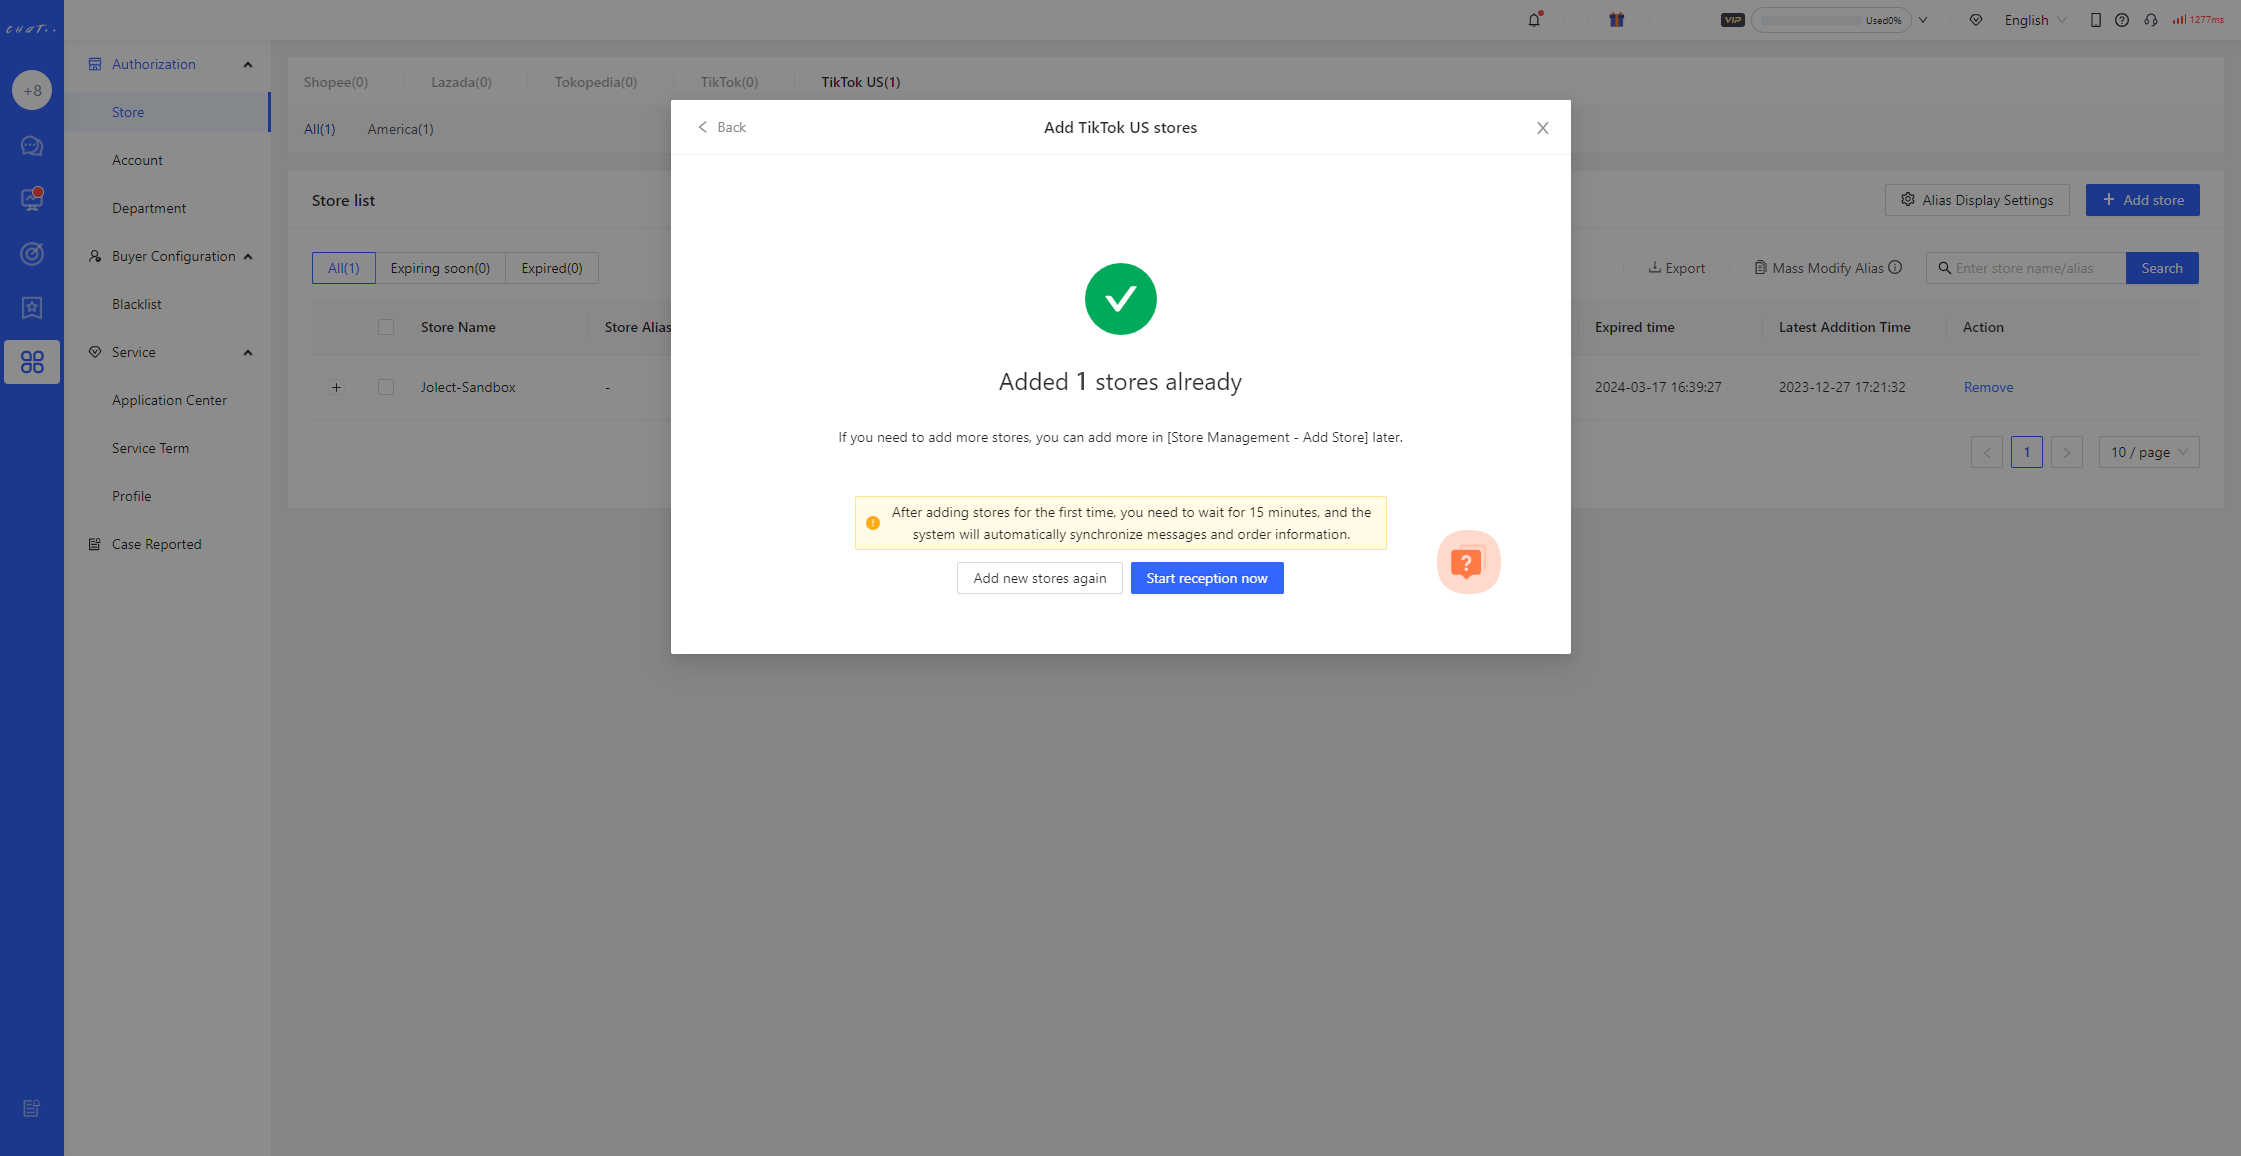
- After adding the store for the first time, please be patient and wait for 15 minutes. The system is automatically synchronizing the message content of the past 30 days and the order information of the past 90 days.
FAQ
Q1: Why does the authorization fail when authorizing the second TikTok store?
A1: The previously authorized TikTok account remains logged in within the browser. Consequently, when attempting to authorize in the seller center, it automatically redirects to the 'logged-in TikTok account,' displaying authorization success, while the new store has not actually been authorized. Therefore, before authorizing a new store each time, it is necessary to ensure that there are no logged-in accounts in the web backend. Hence, each authorization requires logging in first.
- Method 1: Open the seller center (https://seller.tiktok.com/) in a new browser tab and log out of the account.
- Method 2: Copy the authorization link and open the seller center in an incognito (private) web page to complete the authorization.
⚠️ During the authorization process, you may be required to enter a verification code. Please ensure that the registered mobile number or login email is ready to receive the verification code.
Authorize Mercado Store
Cross-border store
- ▶ Precaution
- Mercado currently supports only the Brazil, Mexico, and Argentina sites. Other sites will be added gradually.
- Before authorizing, to avoid IP association issues, please ensure that the current computer and network are the ones you usually use to log in to the Mercado backend. After authorization is completed, you can log in to ChatPlusAI from any computer or network environment without the risk of IP association.
- Before authorizing a new store, if there is an existing Mercado account logged in, please log out first to avoid being automatically redirected to an already bound store during authorization.
Methods of authorization
●▼ ChatPlusAI supports two ways to add Mercado stores. 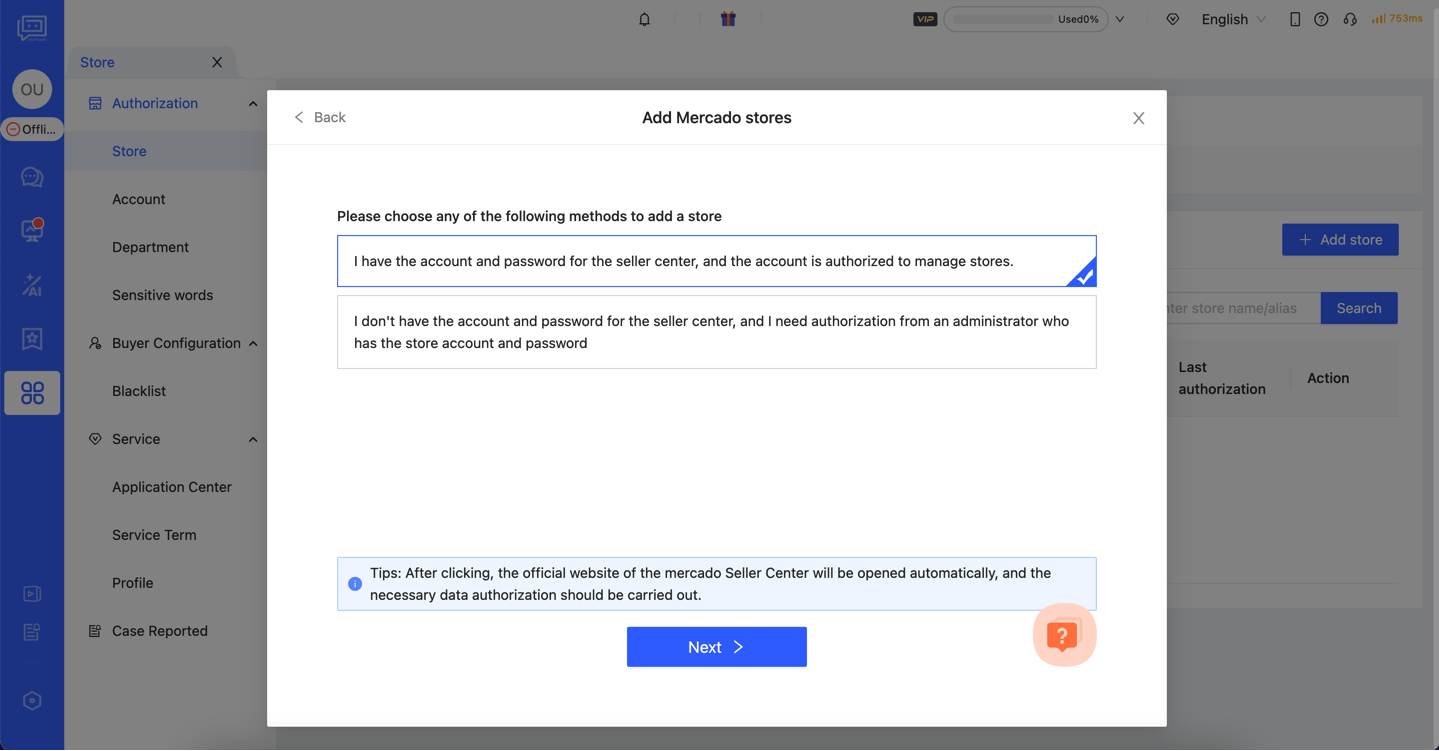 If you have the Mercado account password and are authorized to perform the authorization operation, you can choose Method 1: You will be redirected to the Mercado Seller Center to complete the authorization.
If you do not have the Mercado account password, at the step where you choose the adding method, you can select Method 2: Follow the instructions to share the link with the administrator who has the account password. Please ask the administrator to click the link and log in to the Seller Center to complete the authorization.
If you have any questions during the process of adding a store, you can contact a customer service specialist (as indicated by the red box in the image) to assist you in completing the store addition.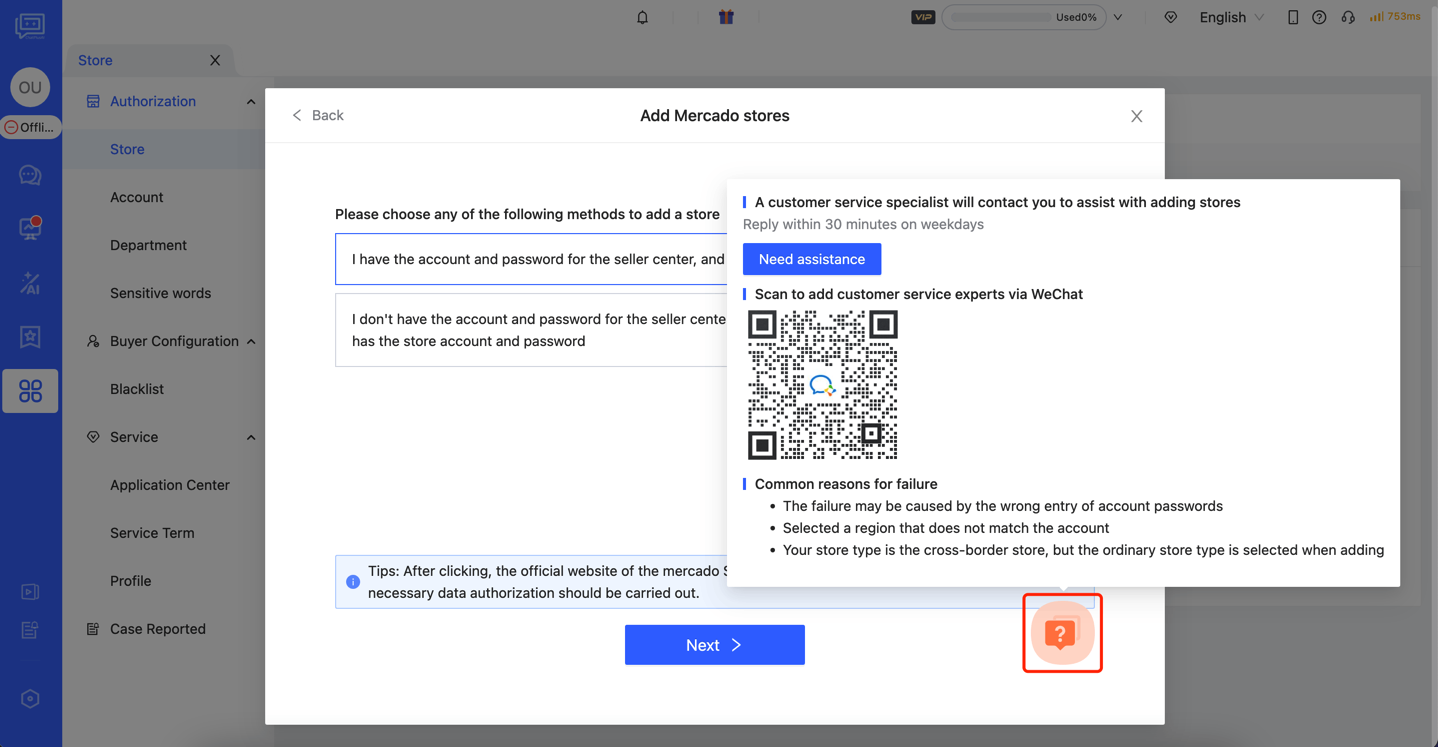
Method1: Go to the seller center to authorize with your account and password.
Step
Enter the store authorization page
After the first login to ChatPlusAI, you will be directed to the guided page for adding a store. Select Mercado--> Click Next 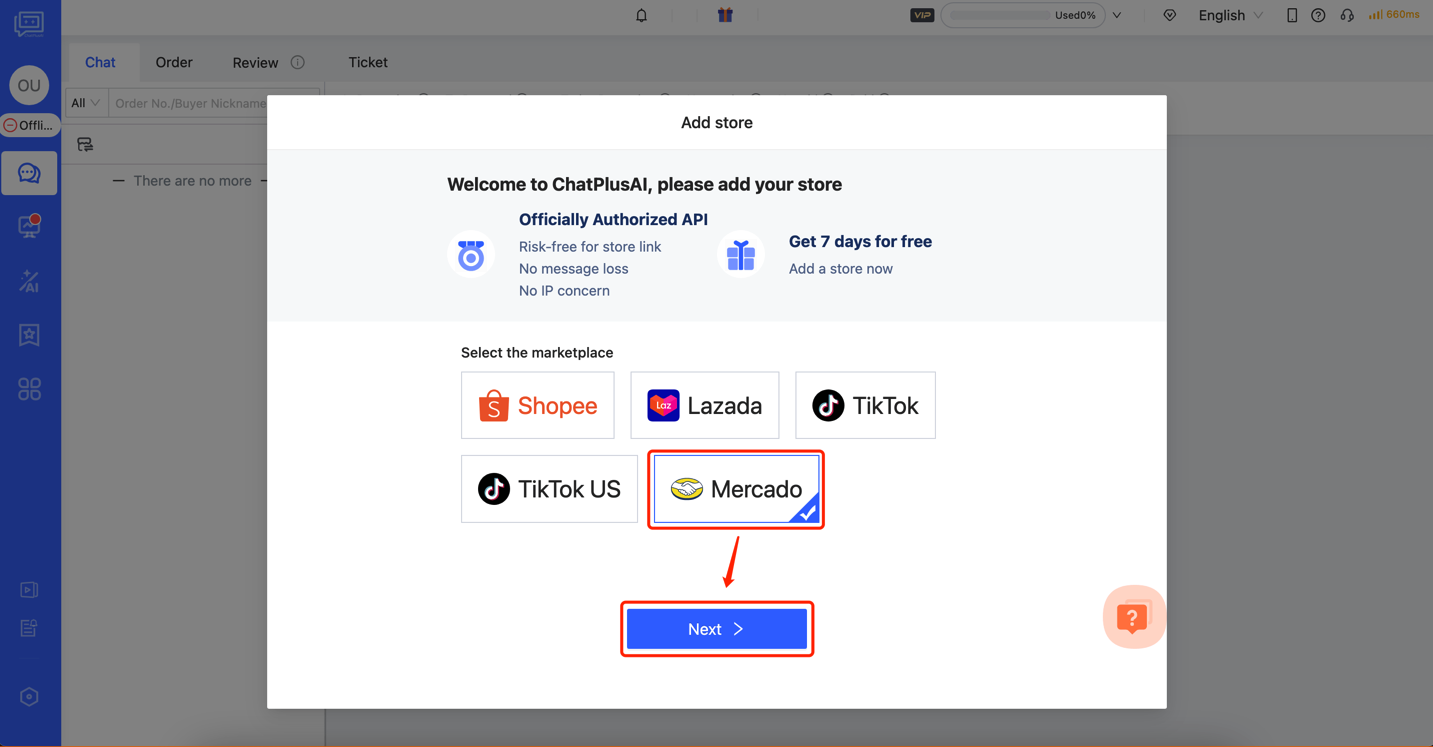 The steps to add a store in daily operations: Configuration-->Store-->Select Marketplace-->Add store
Select adding method
Select Method1 --> Click “Next”, you will be automatically redirected to the Mercado Seller Center login page. 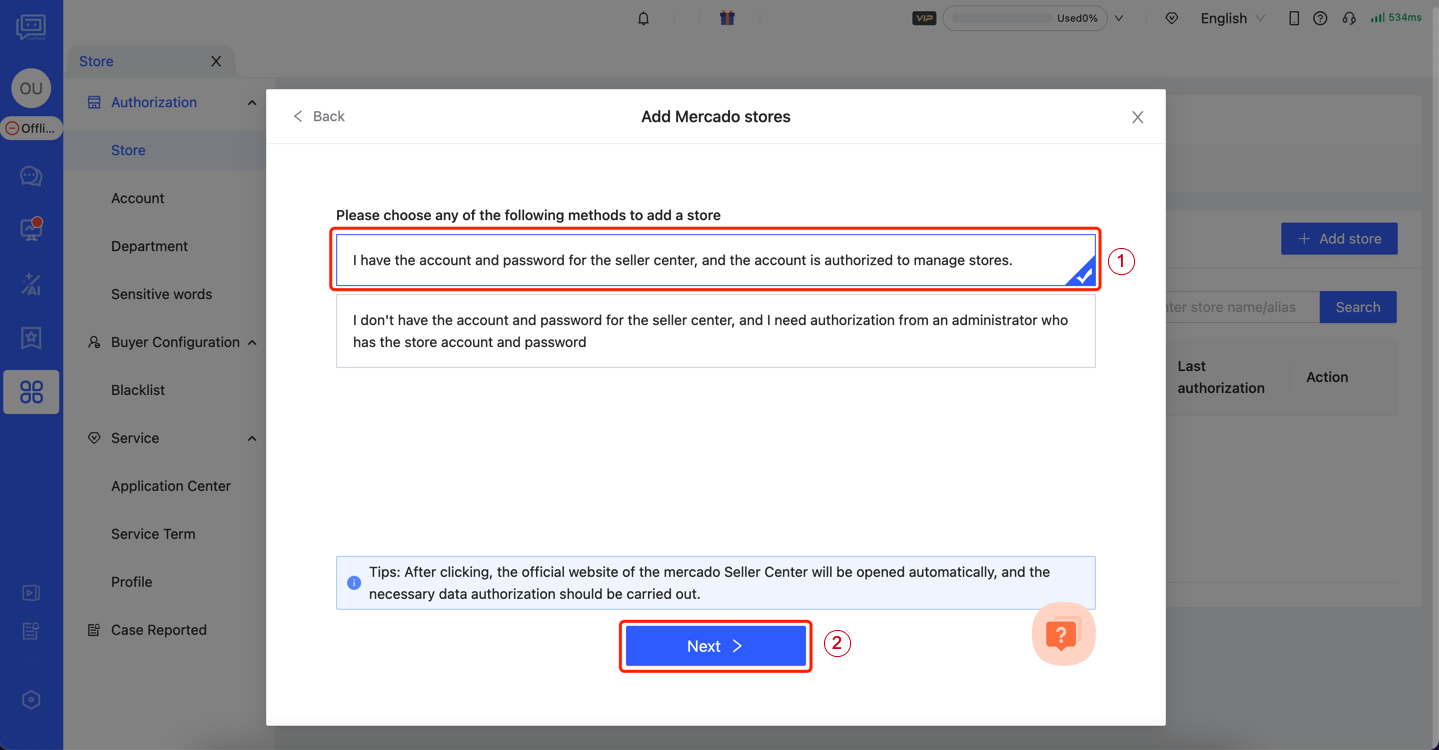
Authorize on Mercado
Enter your email or account--> Click "Continue"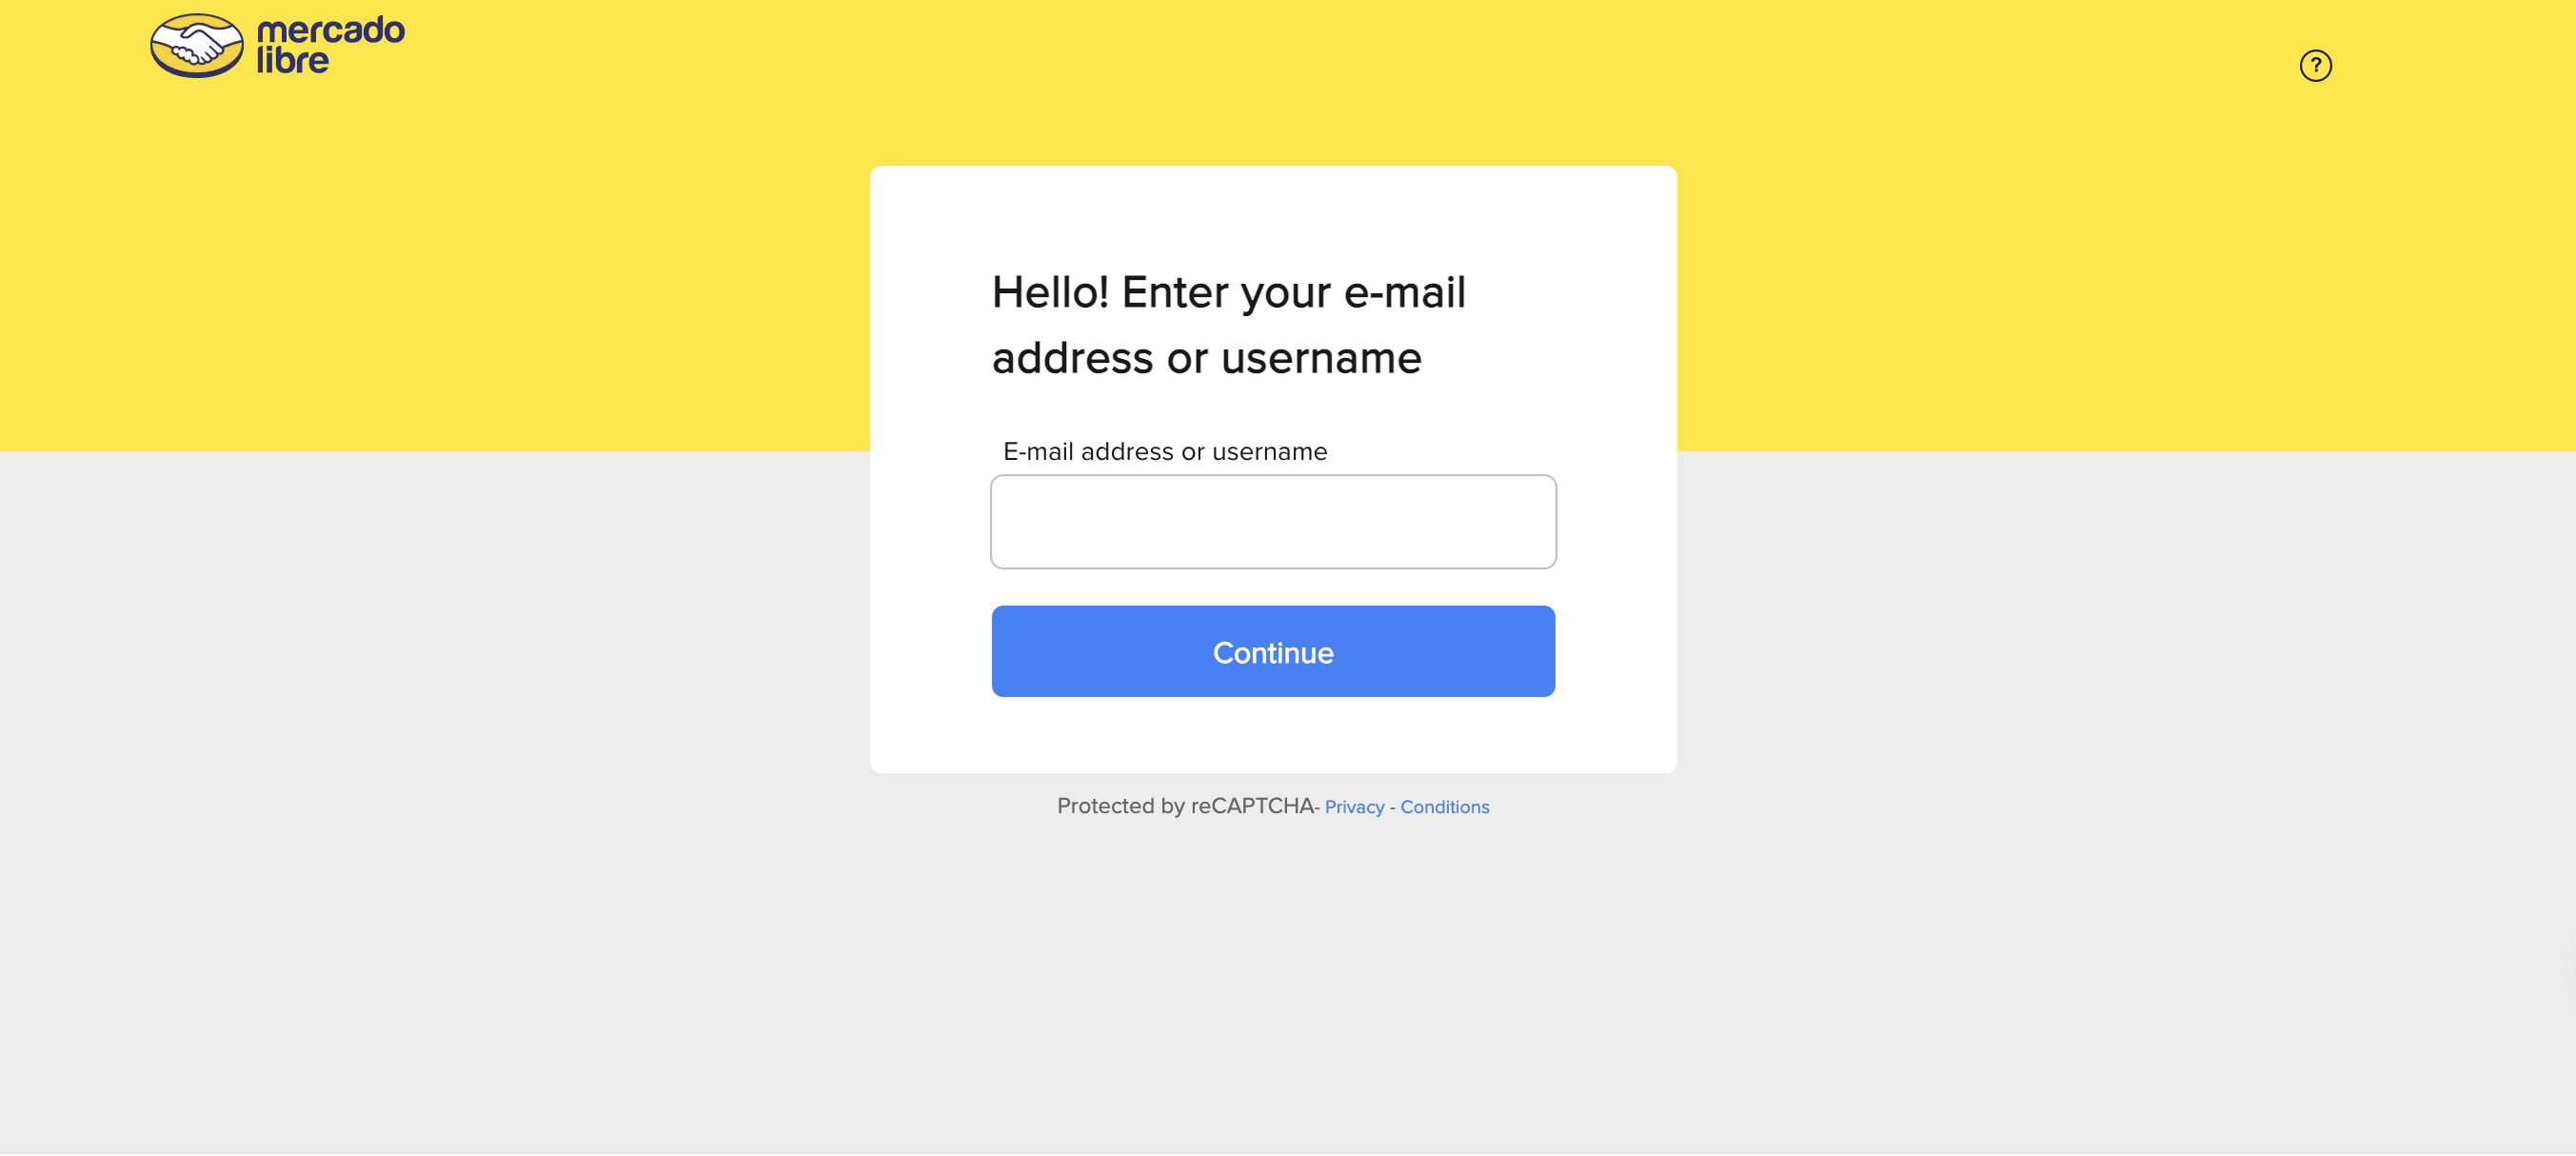
- When authorizing, please log in using the main Mercado account.
- Authorization requires verification. Please open your mobile phone or login to your email account to prepare for receiving the verification code.
【After successfully logging in, you will be automatically redirected to the authorization confirmation page. Check the box and confirm to proceed.】
Authorization success
When ChatPlusAI appears as shown in the figure below, the authorization is completed. 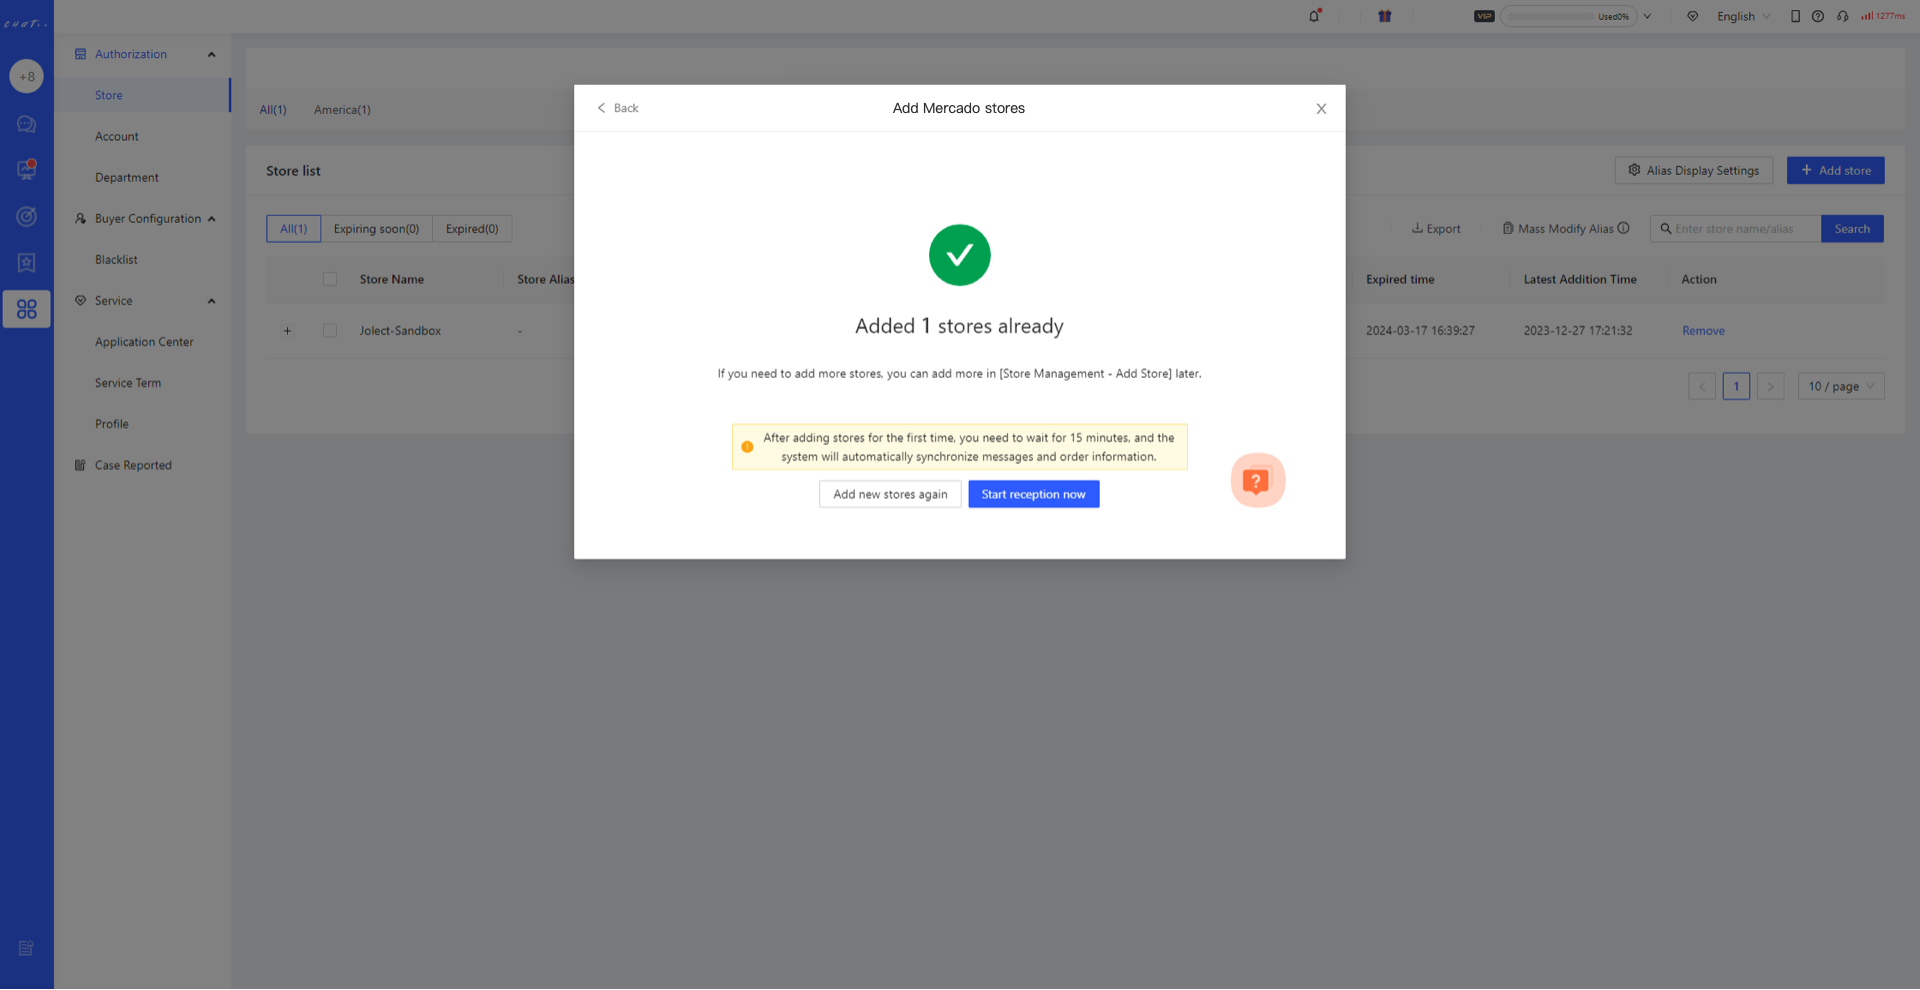
- After adding the store for the first time, please be patient and wait for 15 minutes. The system is automatically synchronizing the message content of the past 30 days and the order information of the past 90 days. If you need to synchronize data for a longer period, please contact a customer service specialist for assistance.
FAQ
Q1: How do I add more Mercado stores? A1: Configuration--> Store--> Select Mercado--> Add Store 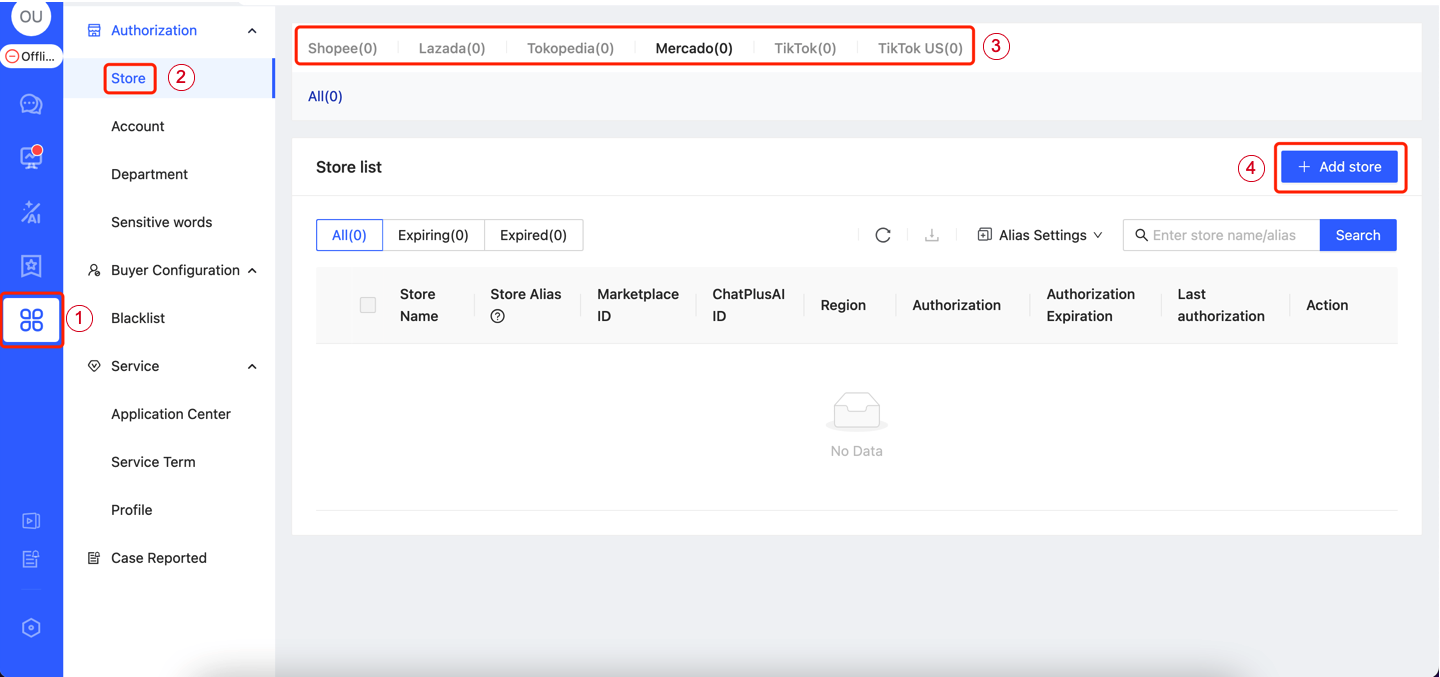
Method2:Share with your administrator who has the account and password to authorize.
Step
Enter the store authorization page
After the first login to ChatPlusAI, you will be directed to the guided page for adding a store. Select Mercado --> Click Next 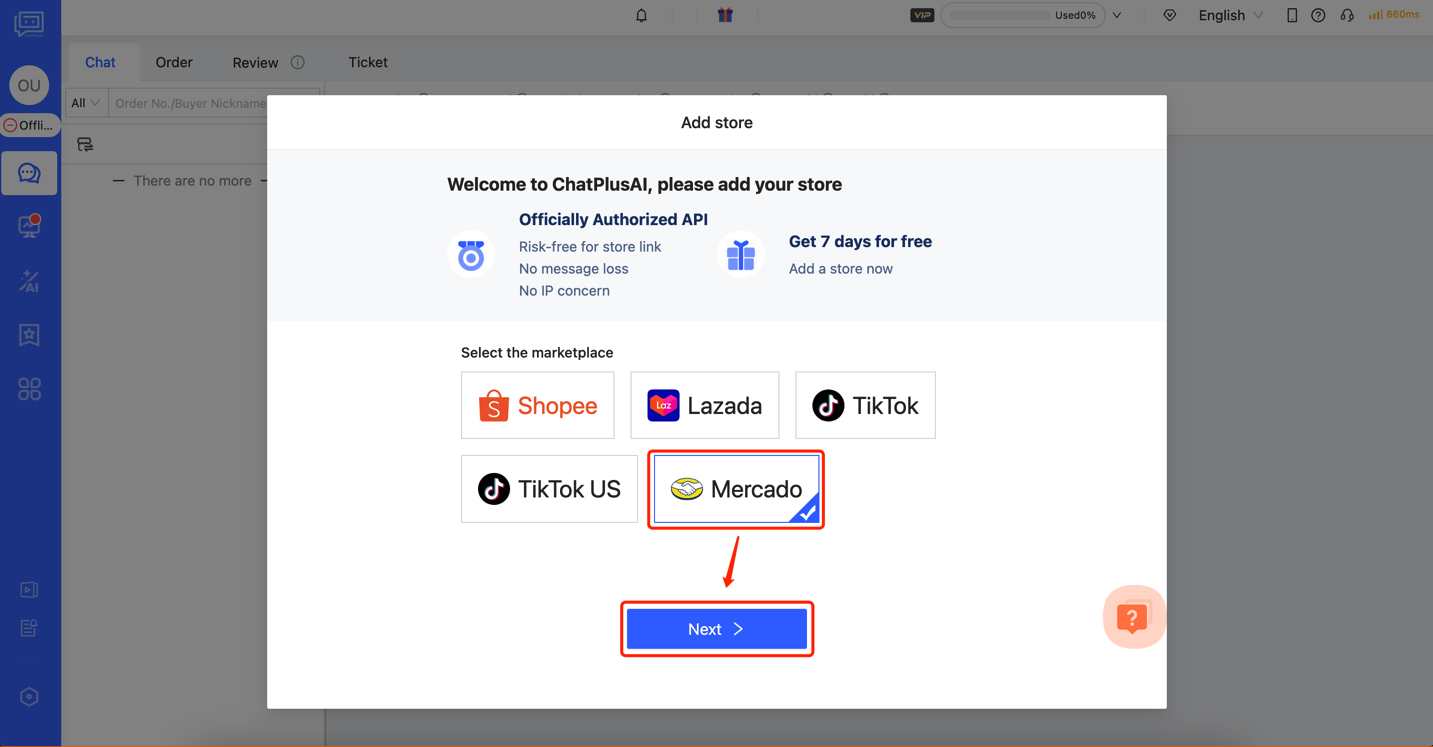 The steps to add a store in daily operations: Configuration-->Store-->Select Marketplace-->Add store
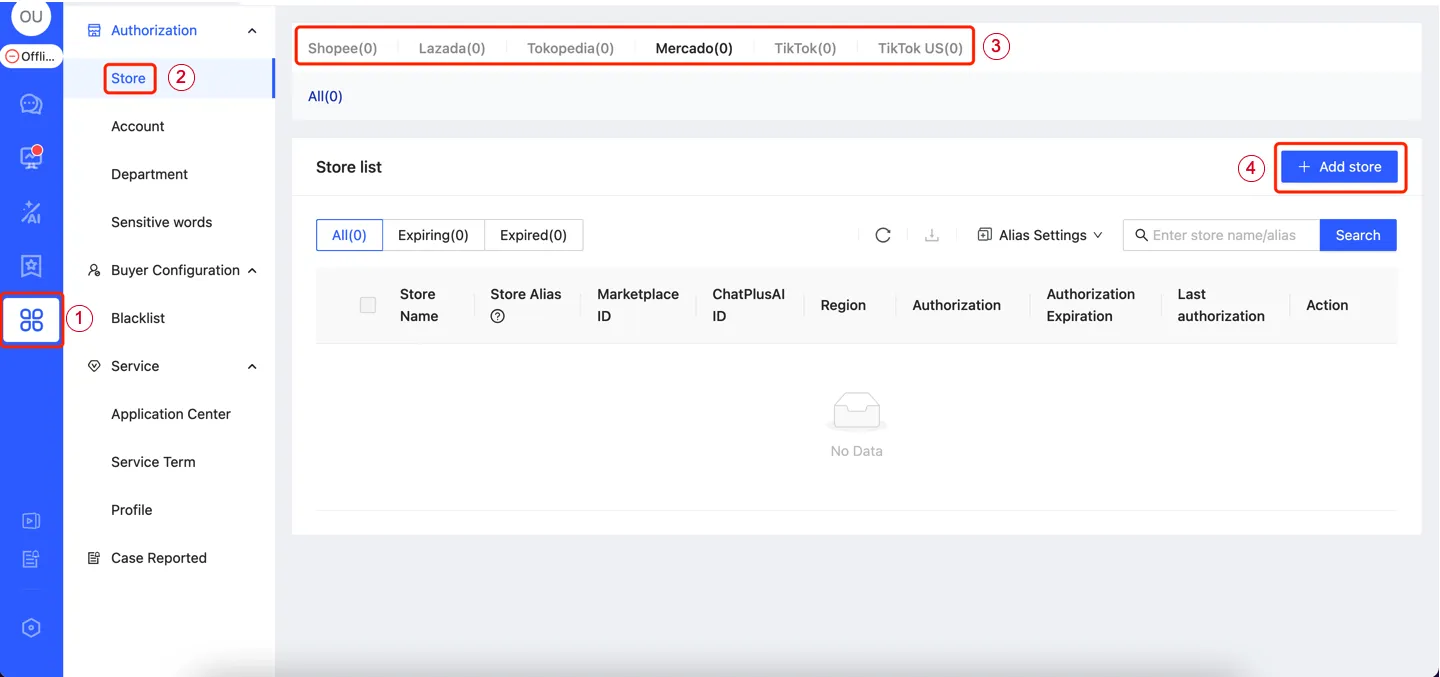
Select adding method
Select Method 2 → Copy Link, automatically copy the authorized link with the introductory statement. 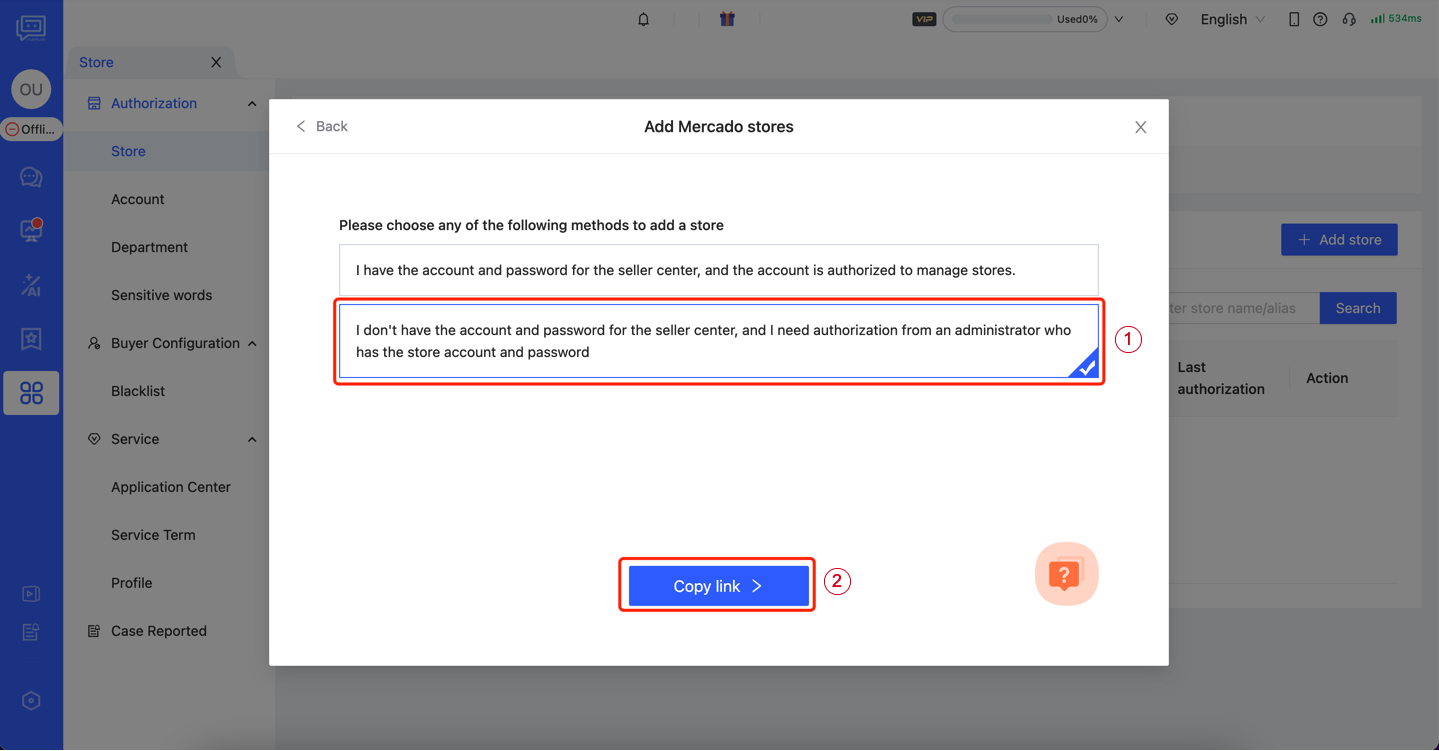
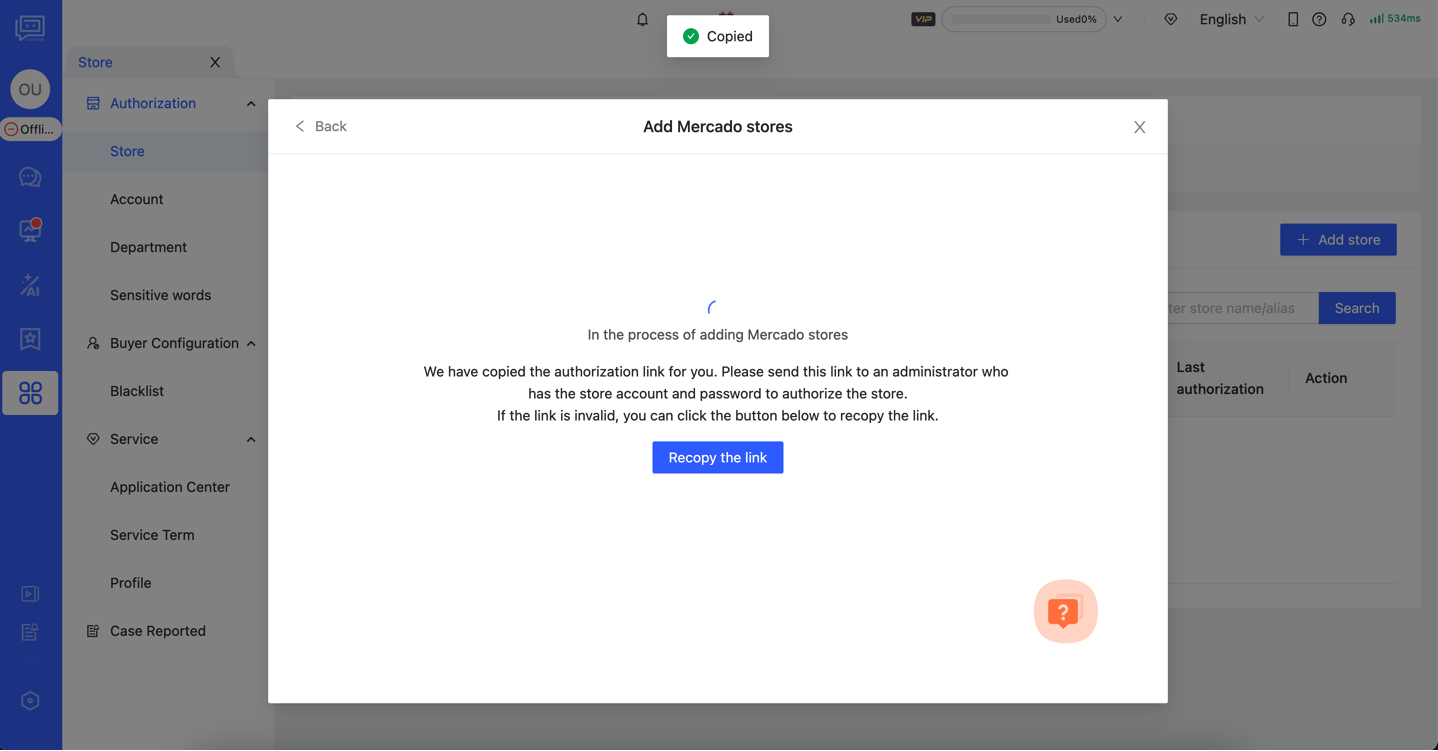
Send link to your administrator
Send the link to the administrator who has the Seller Center account password. 
4.(Administrator operation)Authorize Mercado
After clicking the link, the administrator will be automatically redirected to the Mercado Seller Center login page. 【 Enter your email or account --> Click “Continue”】 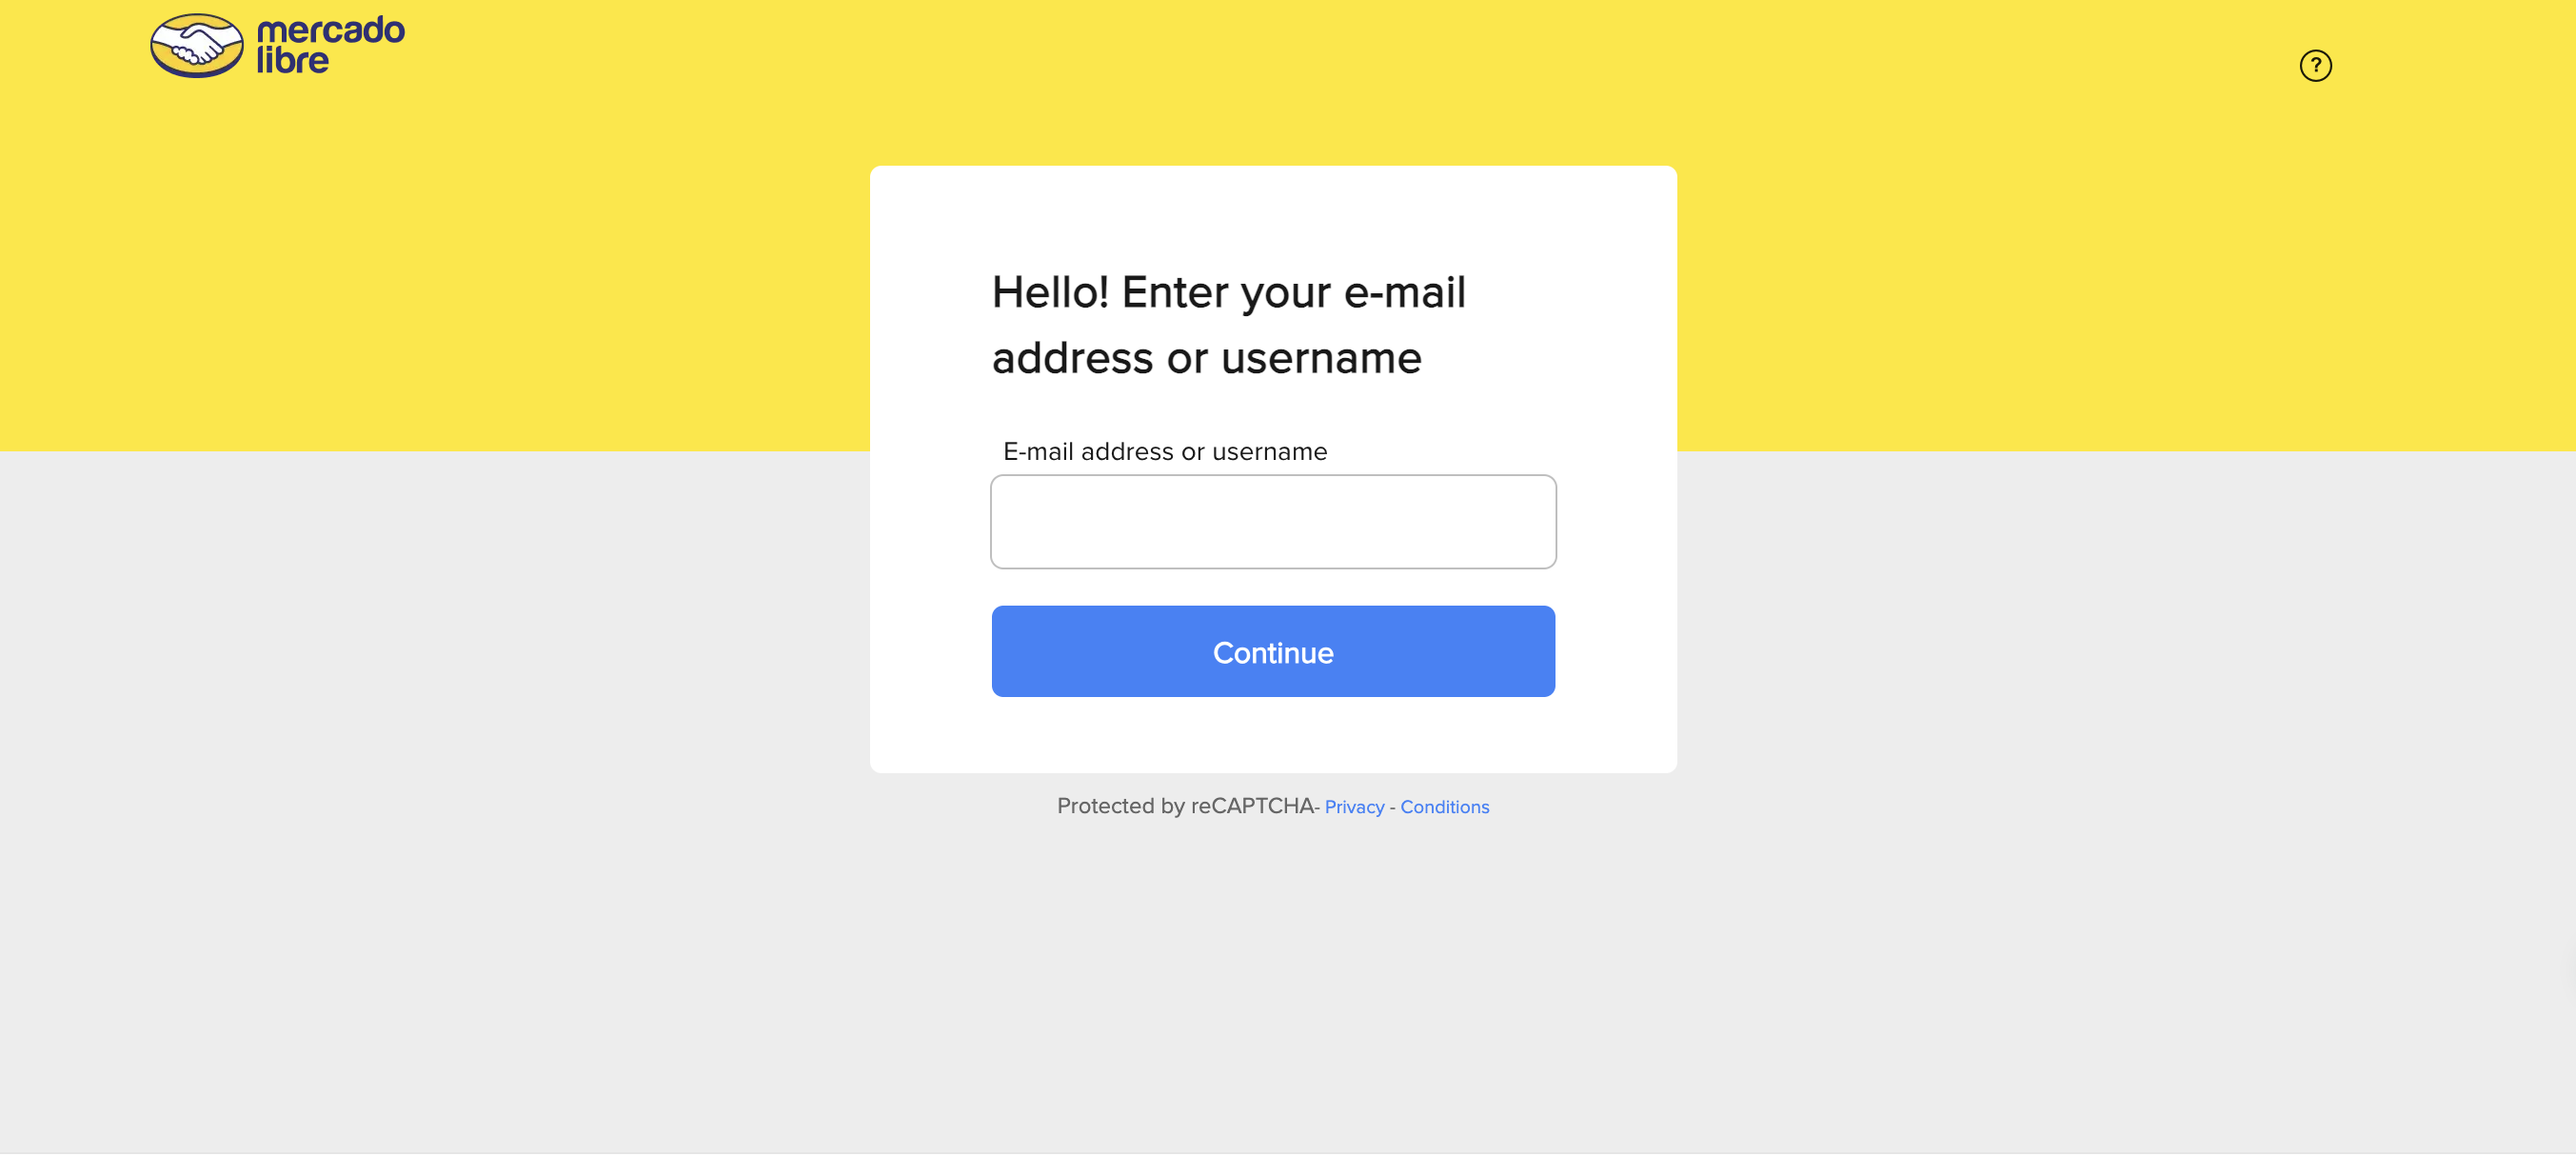
- When authorizing, please log in using the main Mercado account.
- Authorization requires verification. Please open your mobile phone or login to your email account to prepare for receiving the verification code.
【 After successfully logging in, you will be automatically redirected to the authorization confirmation page. Check the box and confirm to proceed. 】
5.Authorization success
When ChatPlusAI appears as shown in the figure below, the authorization is completed. 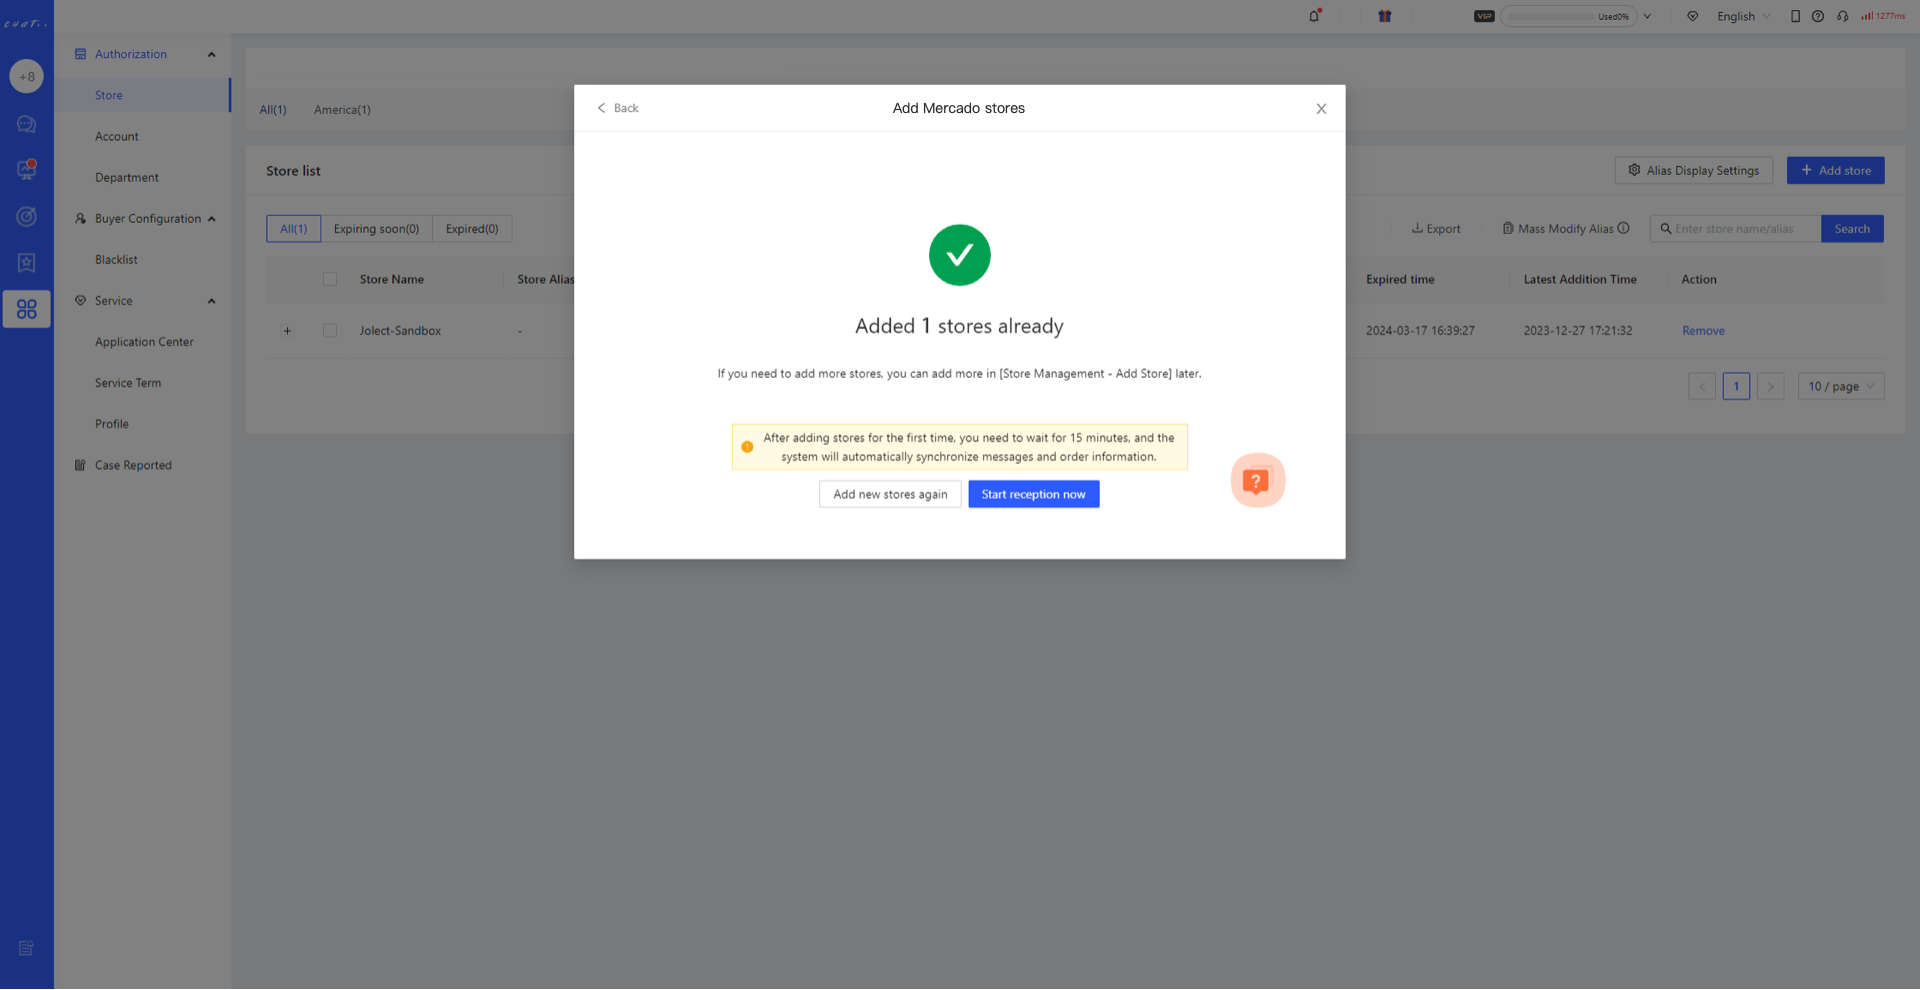
- After adding the store for the first time, please be patient and wait for 15 minutes. The system is automatically synchronizing the message content of the past 30 days and the order information of the past 90 days. If you need to synchronize data for a longer period, please contact a customer service expert for assistance.
FAQ
Q1: How do I add more Mercado stores? A1: Configuration--> Store--> Select Mercado--> Add Store 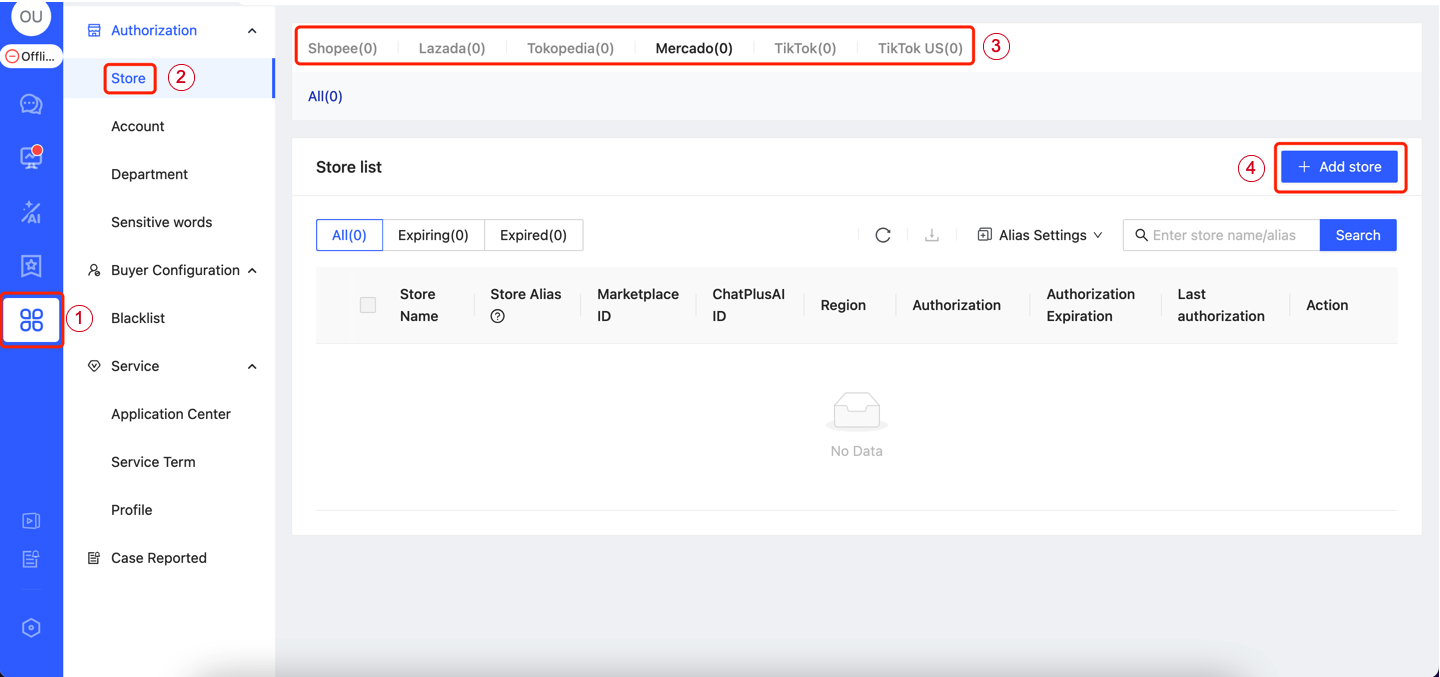
Local store
- ▶ Precaution
- Mercado currently supports only the Brazil, Mexico, and Argentina sites. Other sites will be added gradually.
- Before authorizing, to avoid IP association issues, please ensure that the current computer and network are the ones you usually use to log in to the Mercado backend. After authorization is completed, you can log in to ChatPlusAI from any computer or network environment without the risk of IP association.
- Before authorizing a new store, if there is an existing Mercado account logged in, please log out first to avoid being automatically redirected to an already bound store during authorization.
Methods of authorization
●▼ ChatPlusAI supports two ways to add Mercado stores. 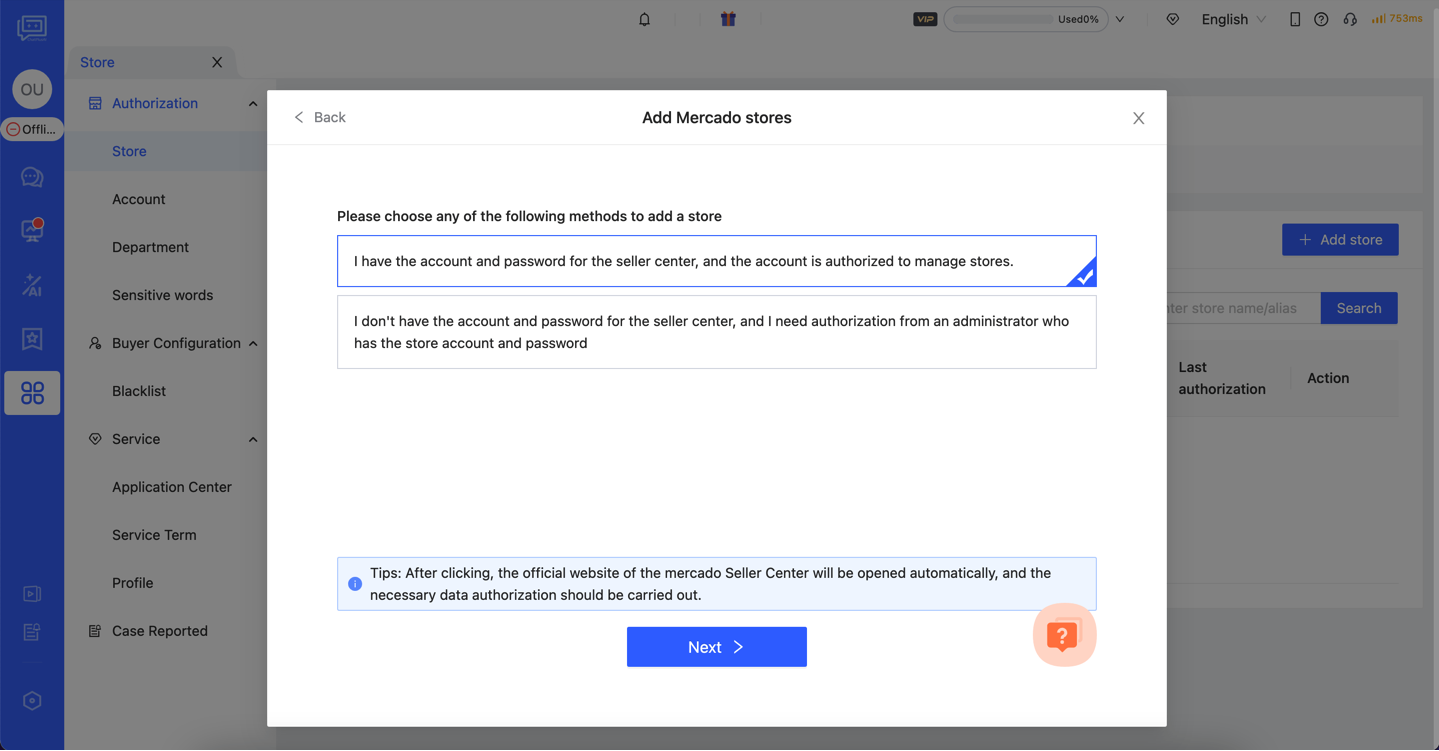 If you have the Mercado account password and are authorized to perform the authorization operation, you can choose Method 1: You will be redirected to the Mercado Seller Center to complete the authorization.
If you do not have the Mercado account password, at the step where you choose the adding method, you can select Method 2: Follow the instructions to share the link with the administrator who has the account password. Please ask the administrator to click the link and log in to the Seller Center to complete the authorization.
If you have any questions during the process of adding a store, you can contact a customer service specialist (as indicated by the red box in the image) to assist you in completing the store addition.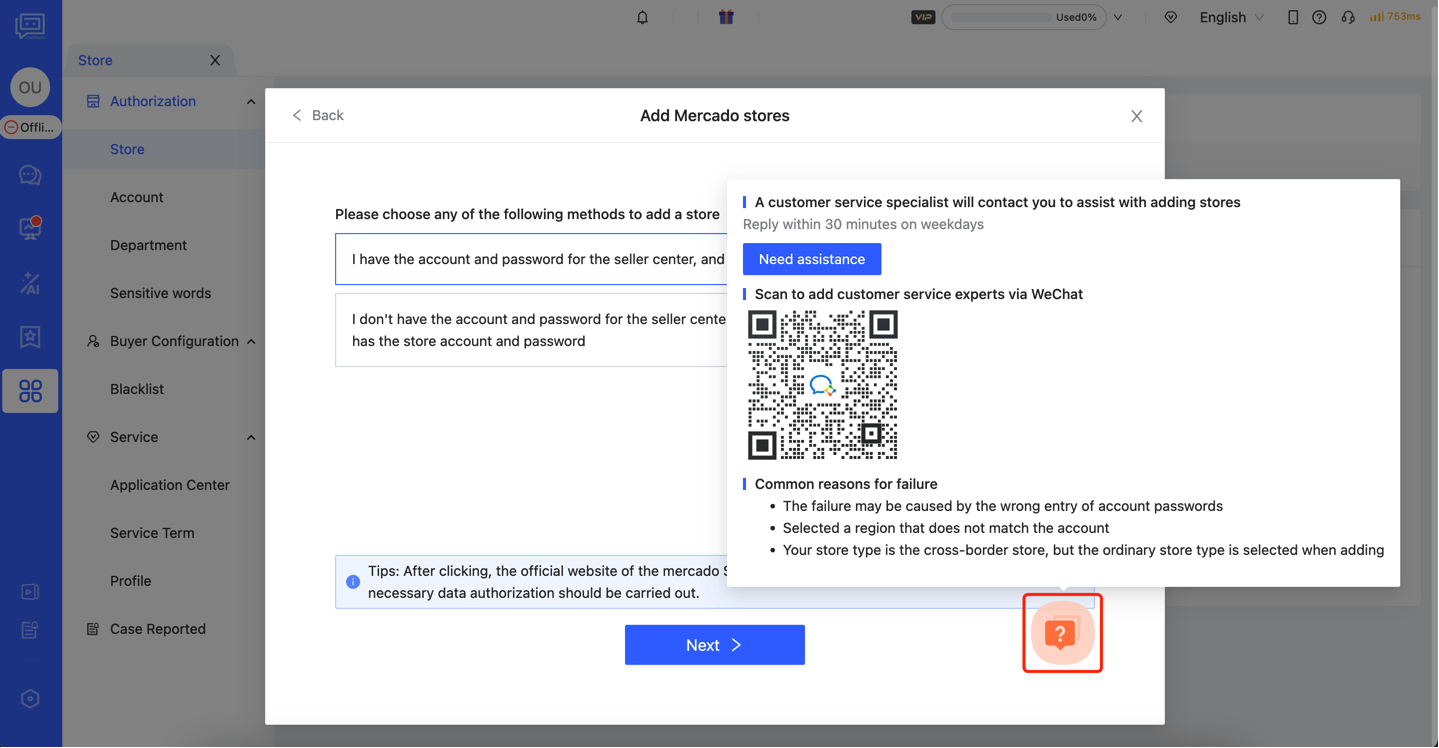
Method1: Go to the seller center to authorize with your account and password.
Step
Enter the store authorization page
After the first login to ChatPlusAI, you will be directed to the guided page for adding a store. Select Mercado--> Click Next 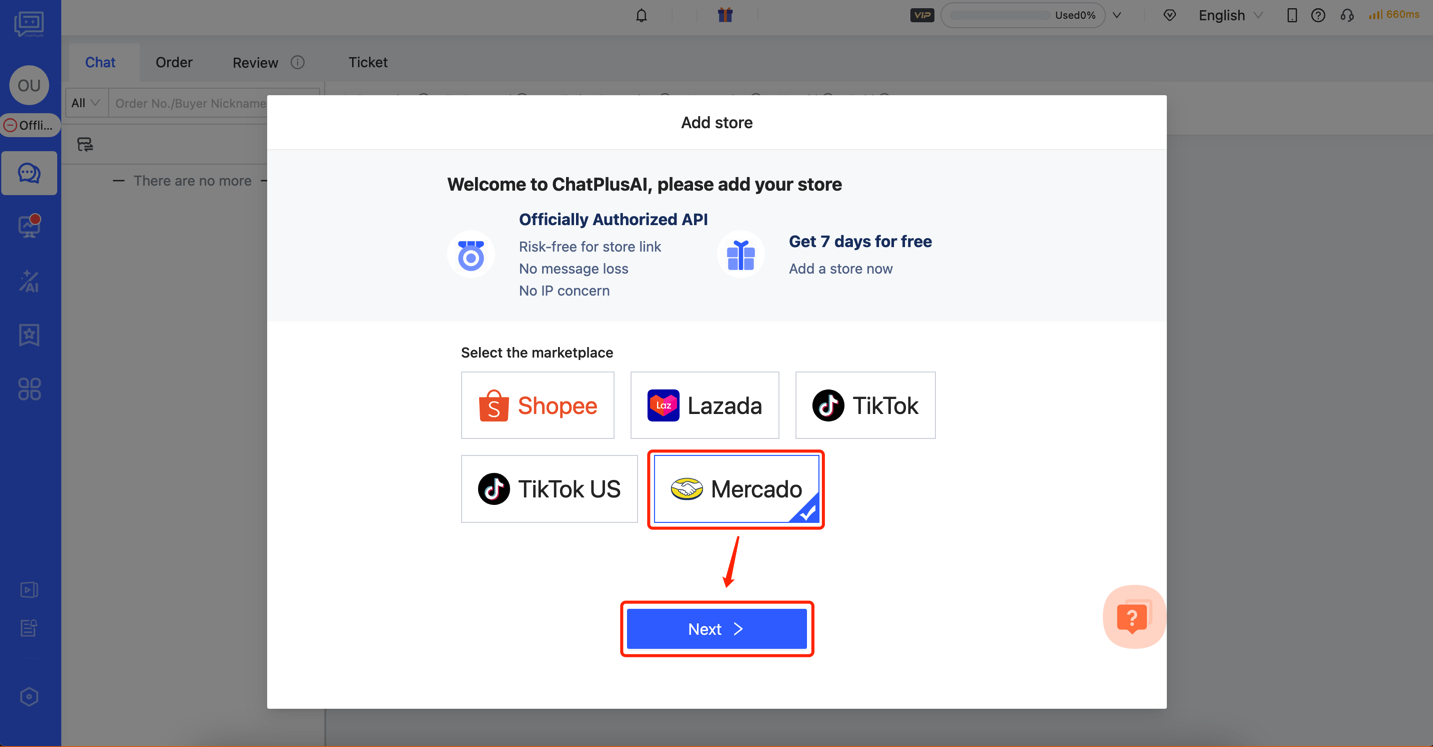 The steps to add a store in daily operations: Configuration-->Store-->Select Marketplace-->Add store
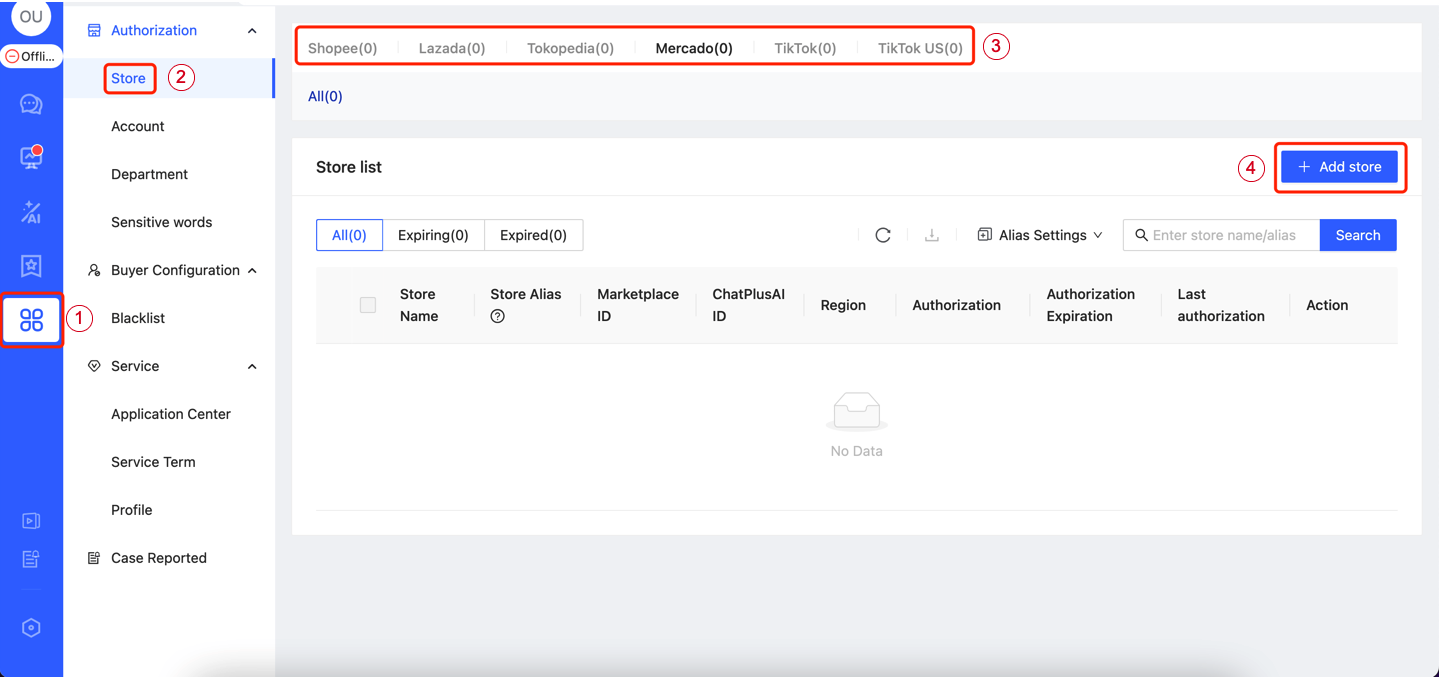
Select adding method
Select Method1 --> Click “Next”, you will be automatically redirected to the Mercado Seller Center login page. 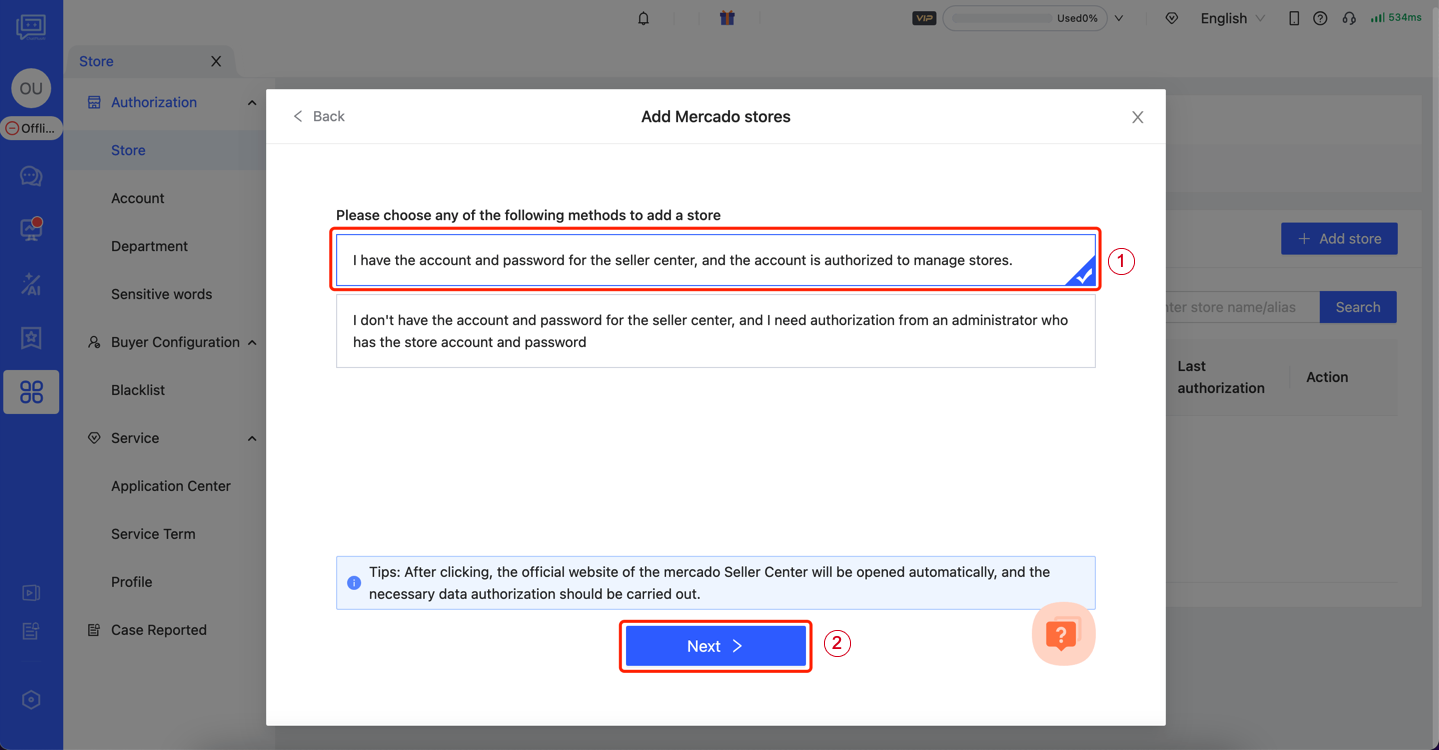
Authorize on Mercado
Enter your email or account--> Click "Continue"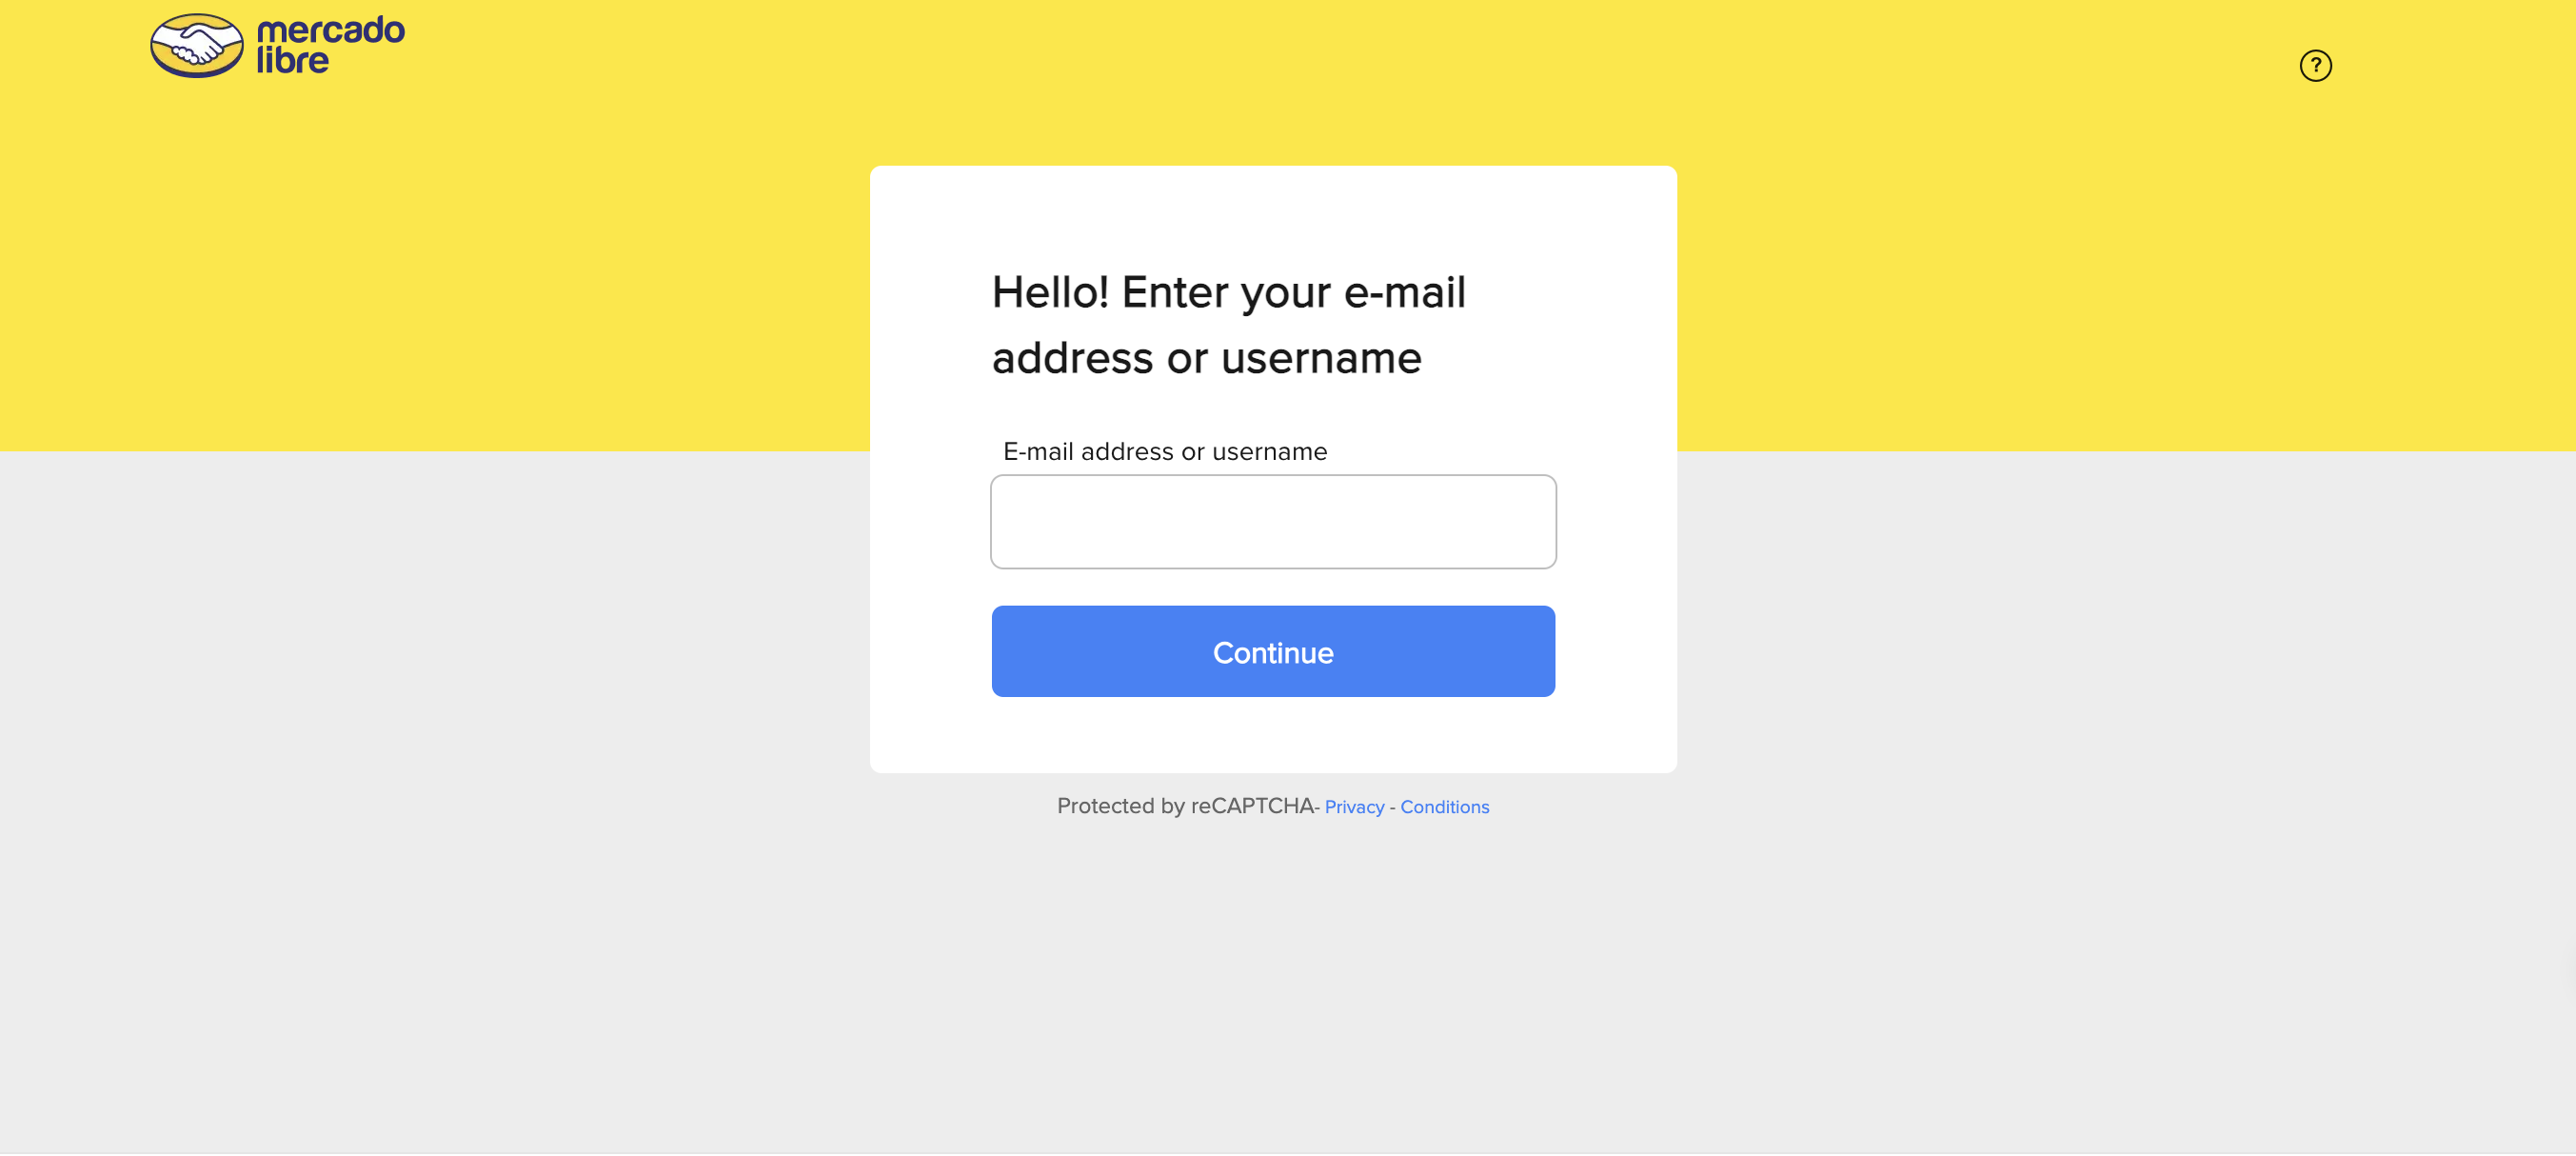
- When authorizing, please log in using the main Mercado account.
- Authorization requires verification. Please open your mobile phone or login to your email account to prepare for receiving the verification code.
【After successfully logging in, you will be automatically redirected to the authorization confirmation page. Check the box and confirm to proceed.】
Authorization success
When ChatPlusAI appears as shown in the figure below, the authorization is completed. 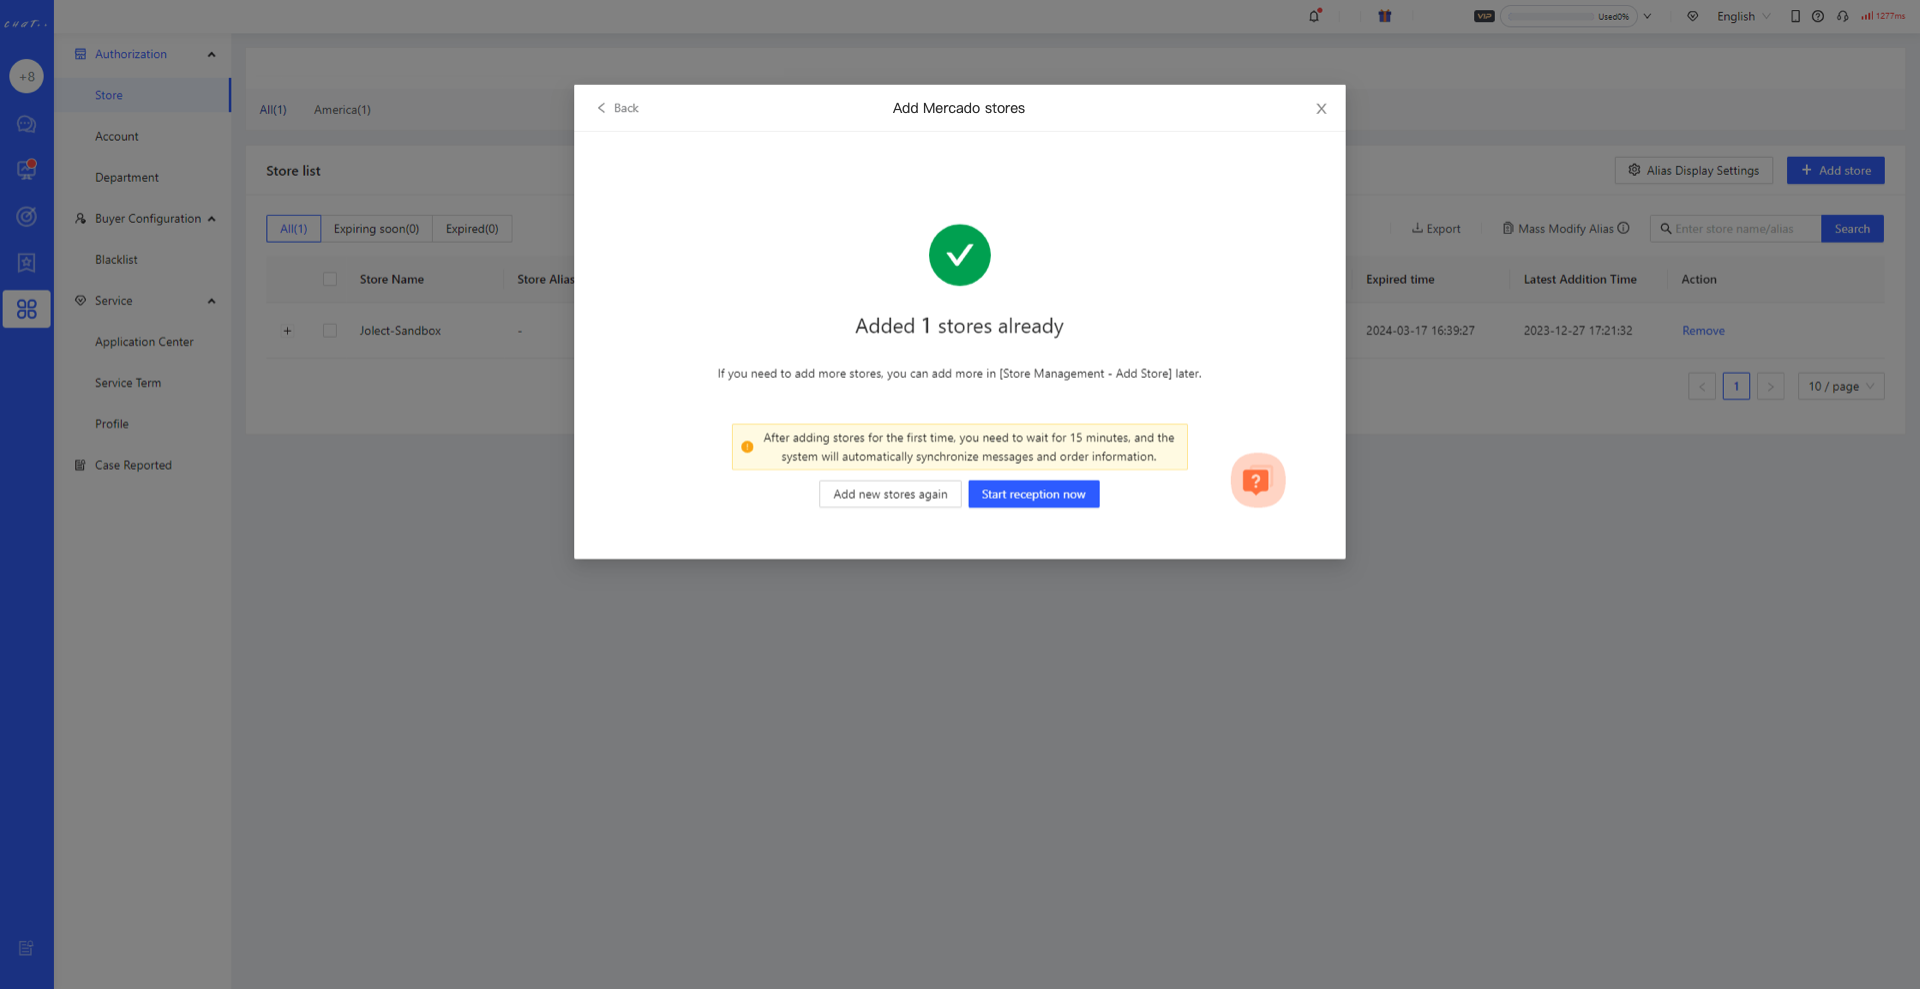
- After adding the store for the first time, please be patient and wait for 15 minutes. The system is automatically synchronizing the message content of the past 30 days and the order information of the past 90 days. If you need to synchronize data for a longer period, please contact a customer service expert for assistance.
FAQ
Q1: How do I add more Mercado stores? A1: Configuration--> Store--> Select Mercado--> Add Store 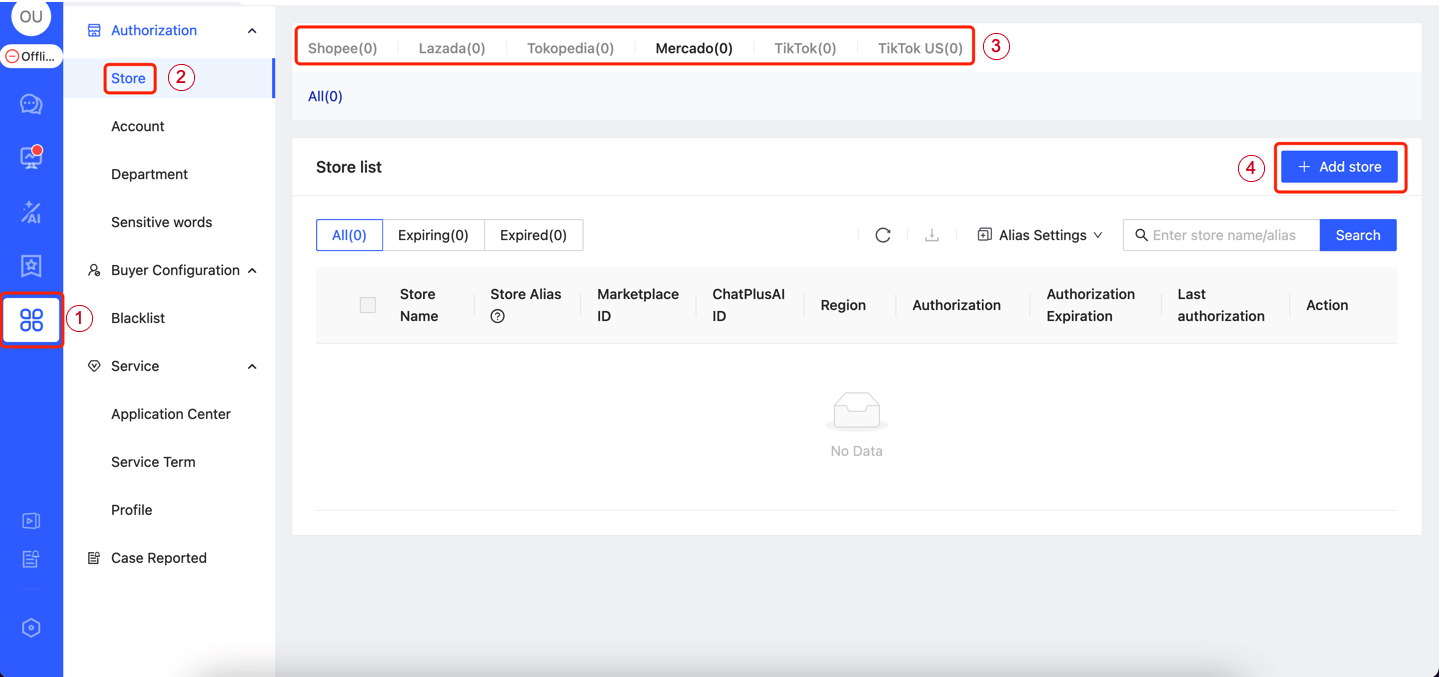
Method2:Share with your administrator who has the account and password to authorize.
Step
Enter the store authorization page
After the first login to ChatPlusAI, you will be directed to the guided page for adding a store. Select Mercado --> Click Next 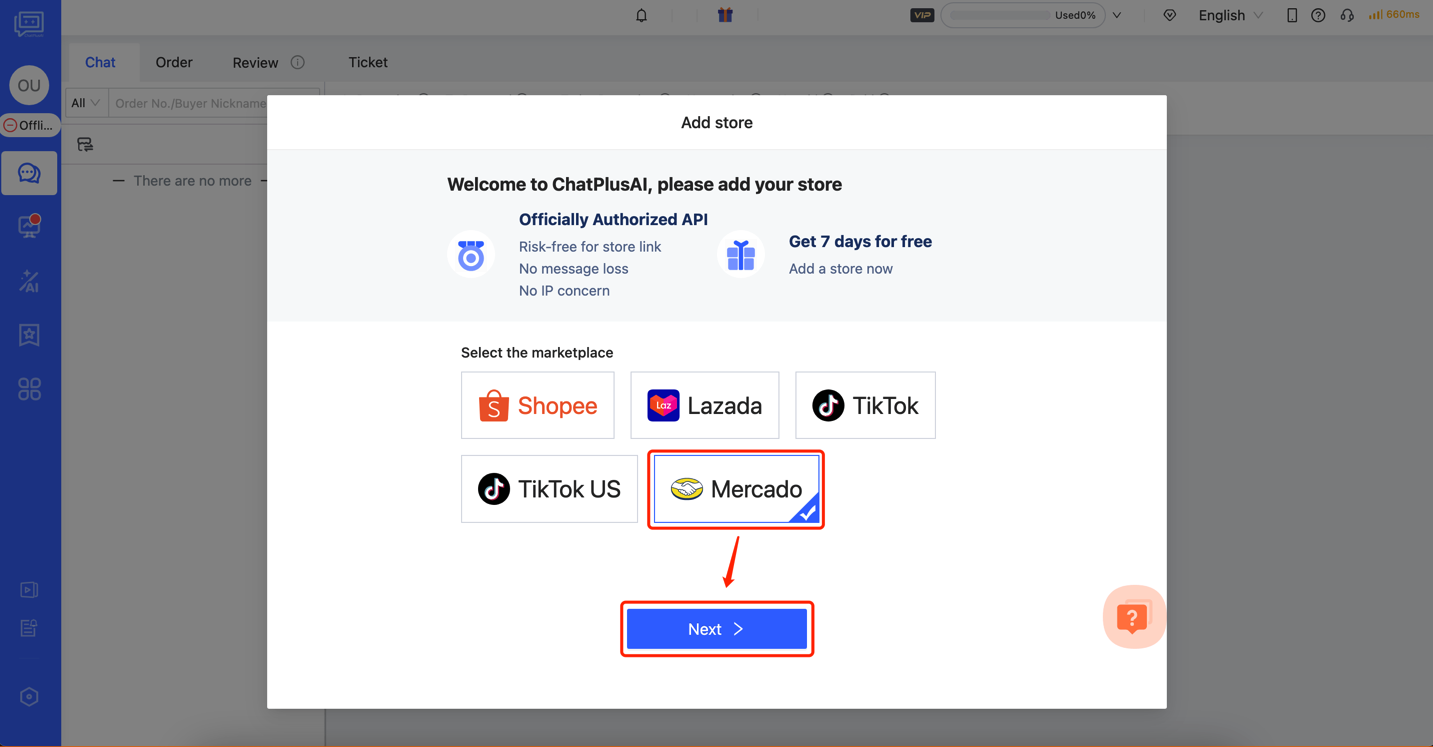 The steps to add a store in daily operations: Configuration-->Store-->Select Marketplace-->Add store
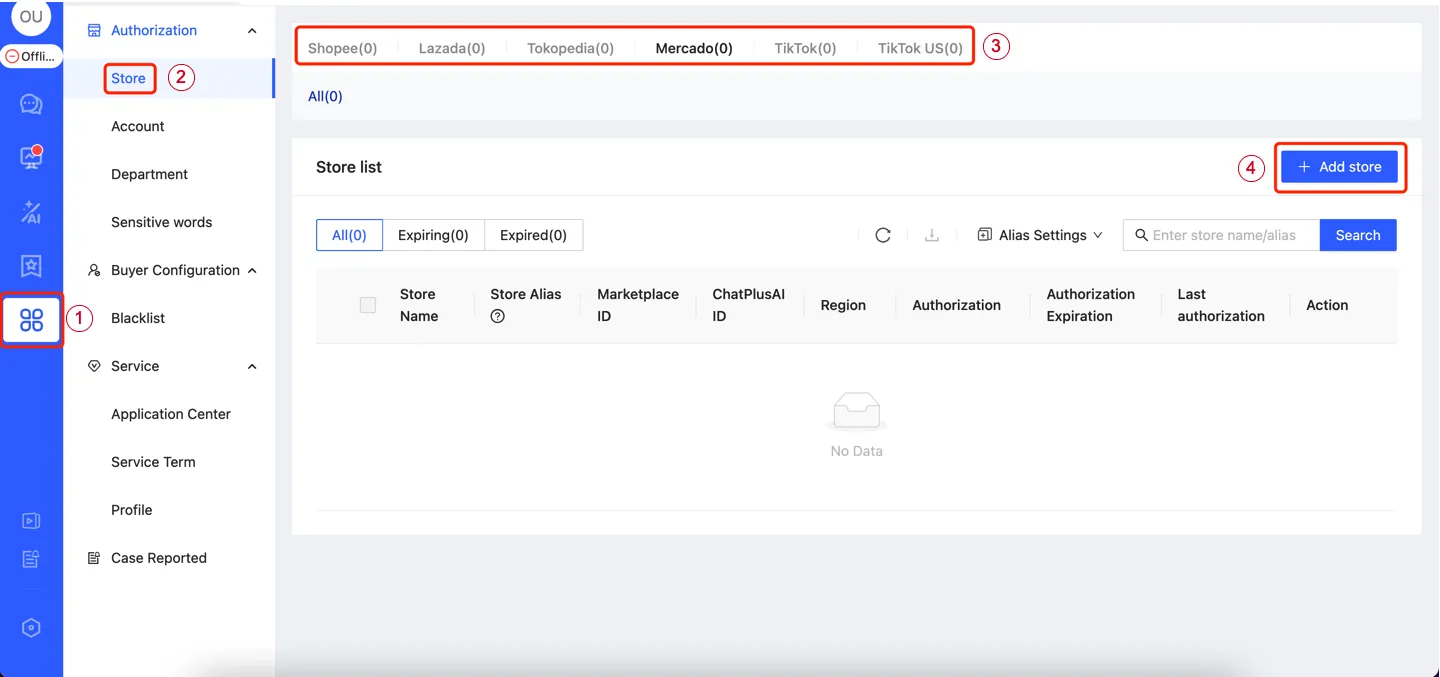
Select adding method
Select Method 2 → Copy Link, automatically copy the authorized link with the introductory statement. 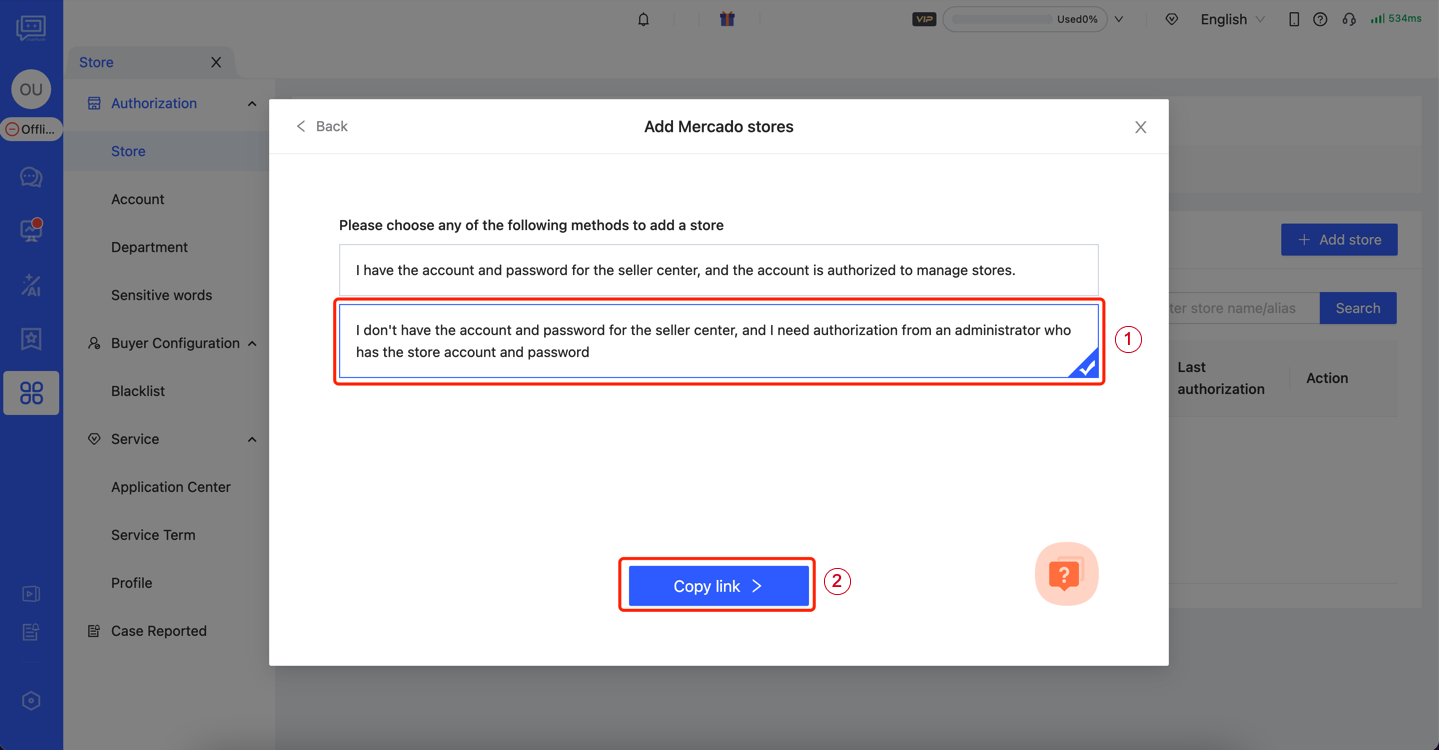
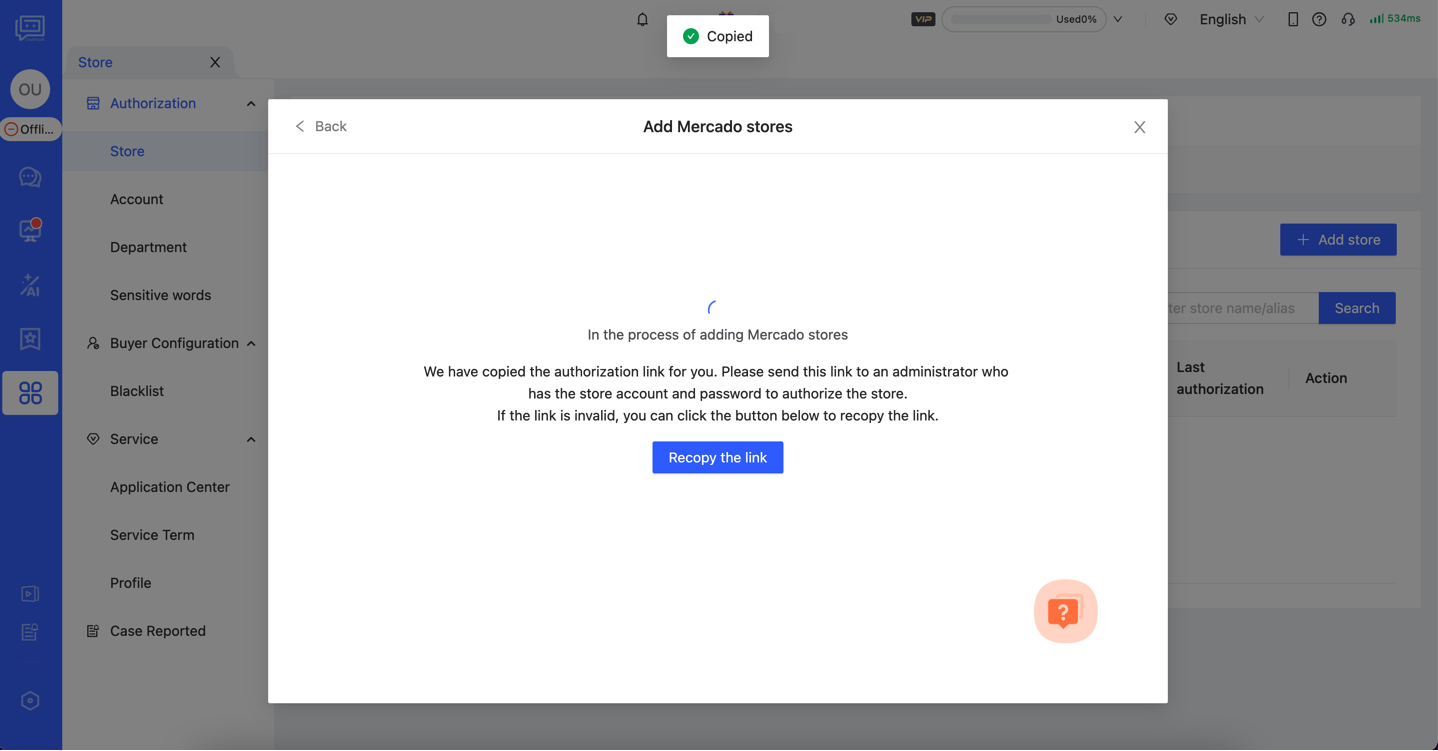
Send link to your administrator
Send the link to the administrator who has the Seller Center account password. 
4.(Administrator operation)Authorize Mercado
After clicking the link, the administrator will be automatically redirected to the Mercado Seller Center login page. 【 Enter your email or account --> Click “Continue”】 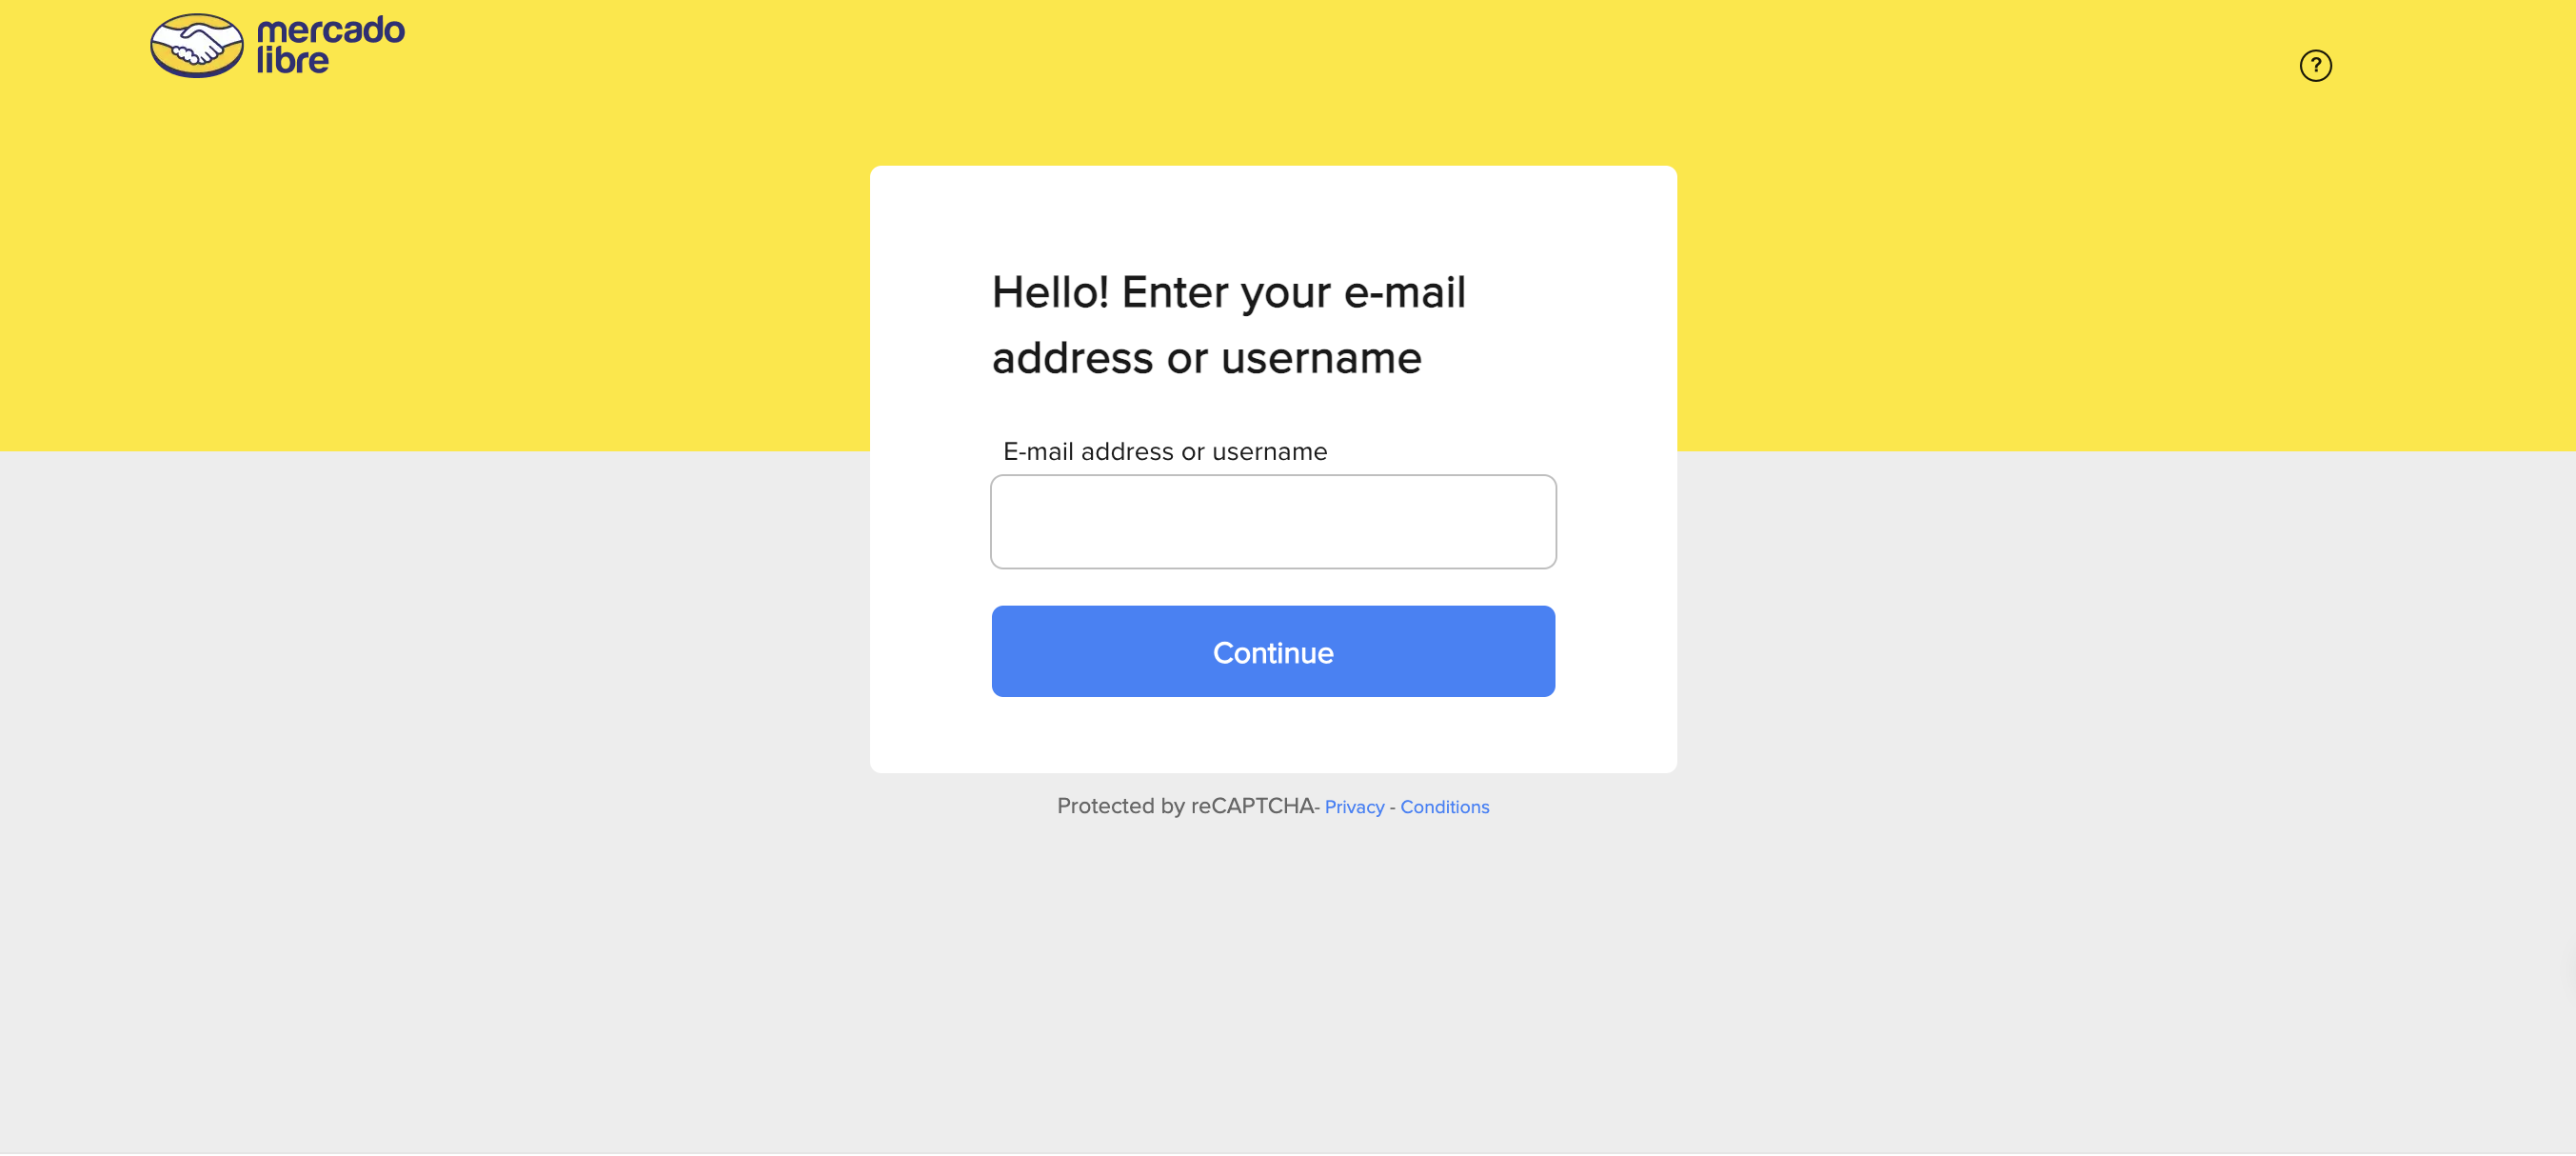
- When authorizing, please log in using the main Mercado account.
- Authorization requires verification. Please open your mobile phone or login to your email account to prepare for receiving the verification code.
【 After successfully logging in, you will be automatically redirected to the authorization confirmation page. Check the box and confirm to proceed. 】
5.Authorization success
When ChatPlusAI appears as shown in the figure below, the authorization is completed. 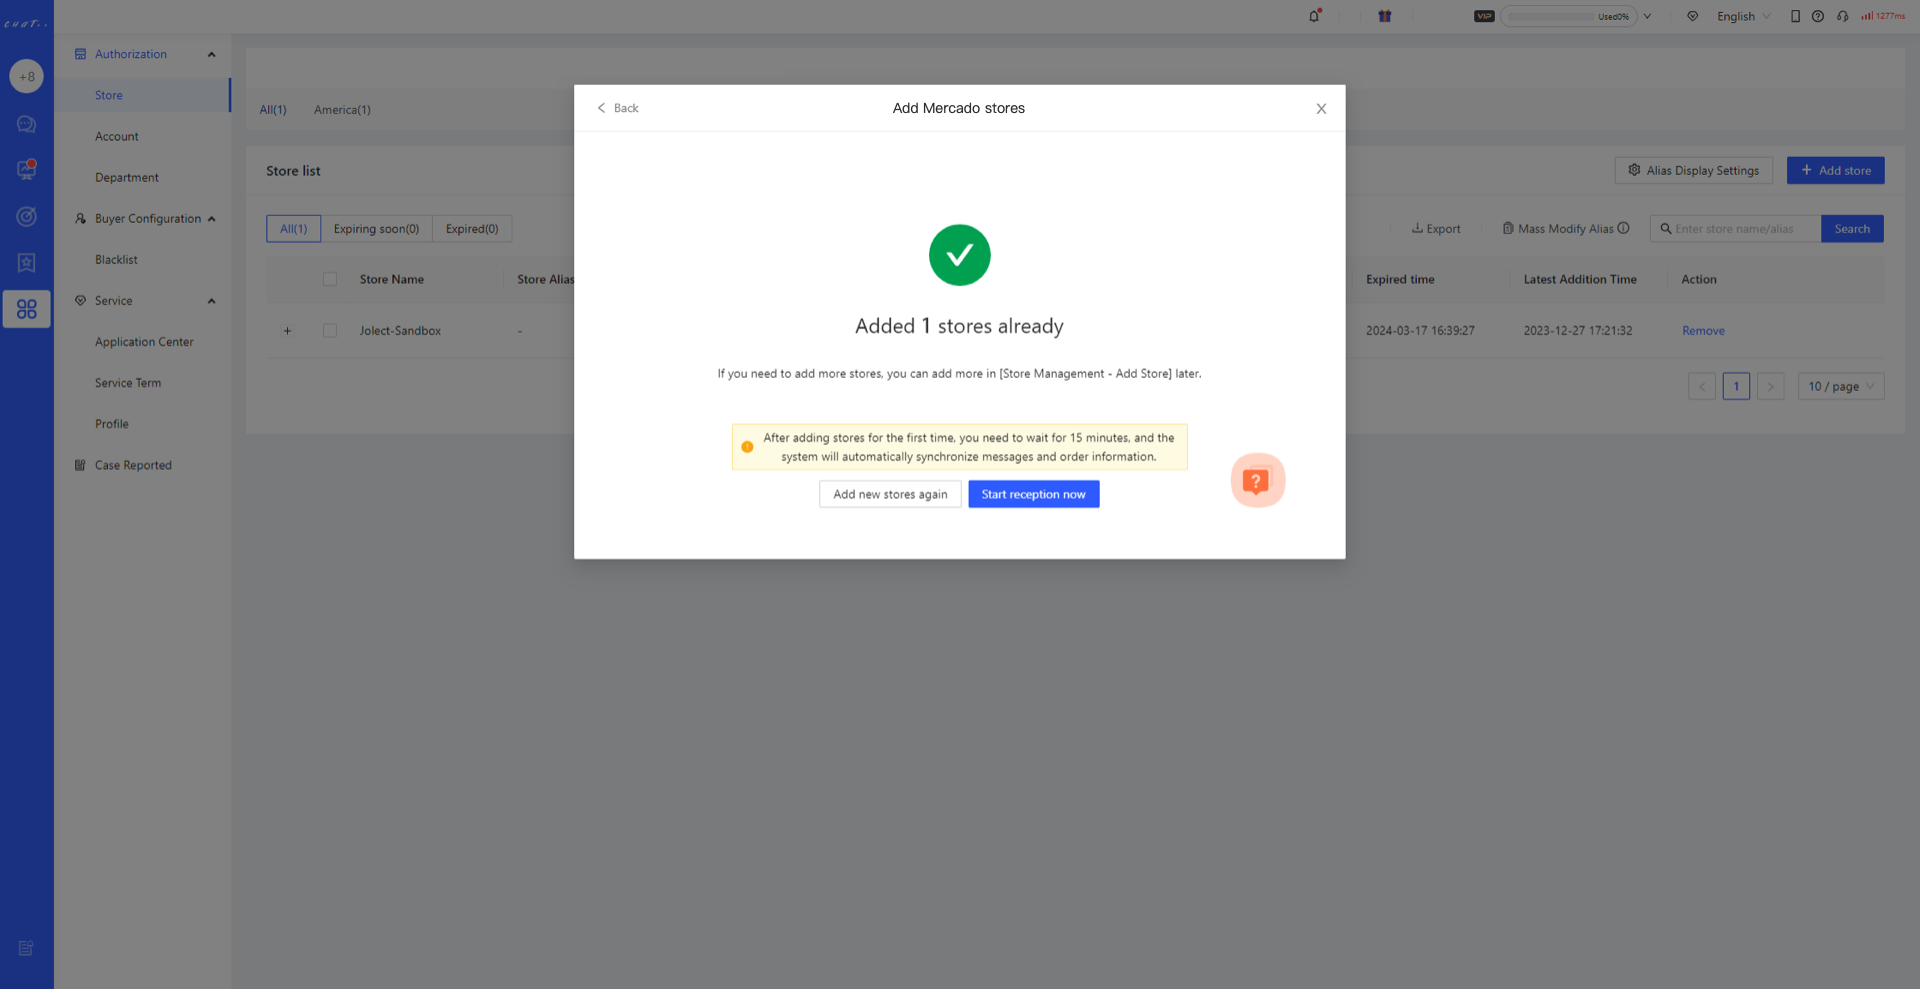
- After adding the store for the first time, please be patient and wait for 15 minutes. The system is automatically synchronizing the message content of the past 30 days and the order information of the past 90 days. If you need to synchronize data for a longer period, please contact a customer service specialist for assistance.
FAQ
Q1: How do I add more Mercado stores? A1: Configuration--> Store--> Select Mercado--> Add Store 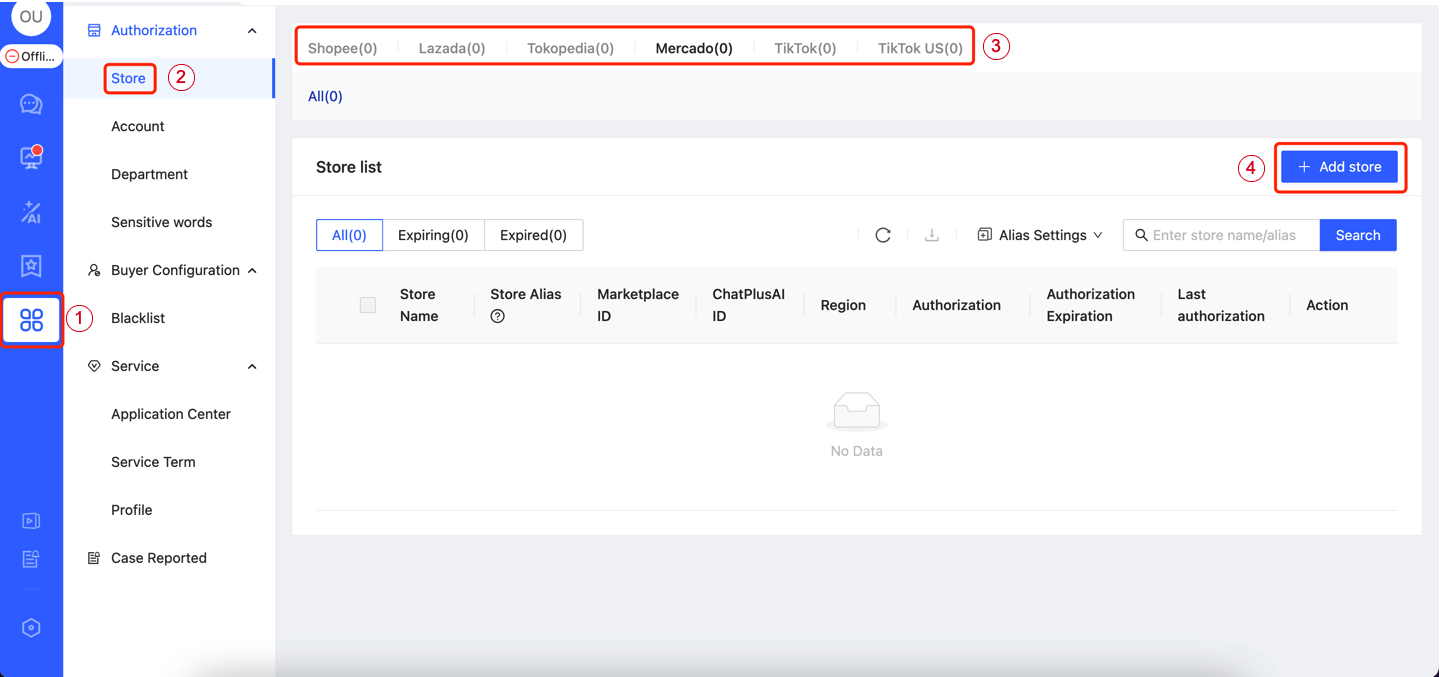
Version update
ChatPlusAI is continuously researching and developing better versions, upgrading functionality, fixing bugs, optimizing page layouts, and further enhancing the smooth and convenient user experience.
When there is a new version of ChatPlusAI, a small red dot will appear on the 'Settings' button in the lower left corner to prompt for an update.
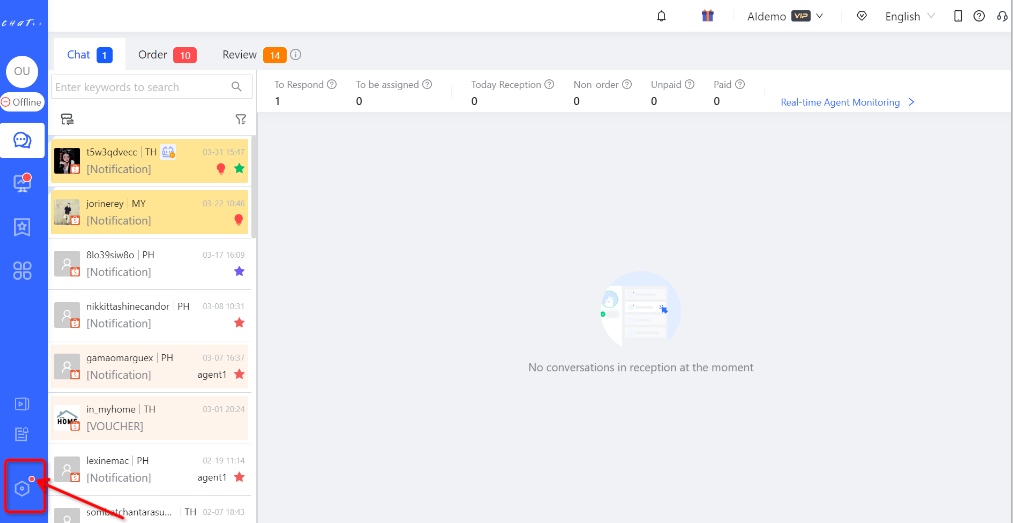
How to update version?
Click “Settings”, scroll down to the bottom to 'About ChatPlusAI' and click 'Update'.
FAQ
Q1:Is there no 'Update' button on the PC version?
A1: When there is an available update, the 'Update' button will be displayed. If there is no 'Update' button, it means that the current version is already up to date.
FAQ
Q1: How to rename store?
A1: To make it easier to manage your store, you can rename it within ChatPlusAI.
- Edit store alias, such as “Shopee 3C1”.
Click “Configuration” → “Authorization”→ “Store”→ Select marketplace → Edit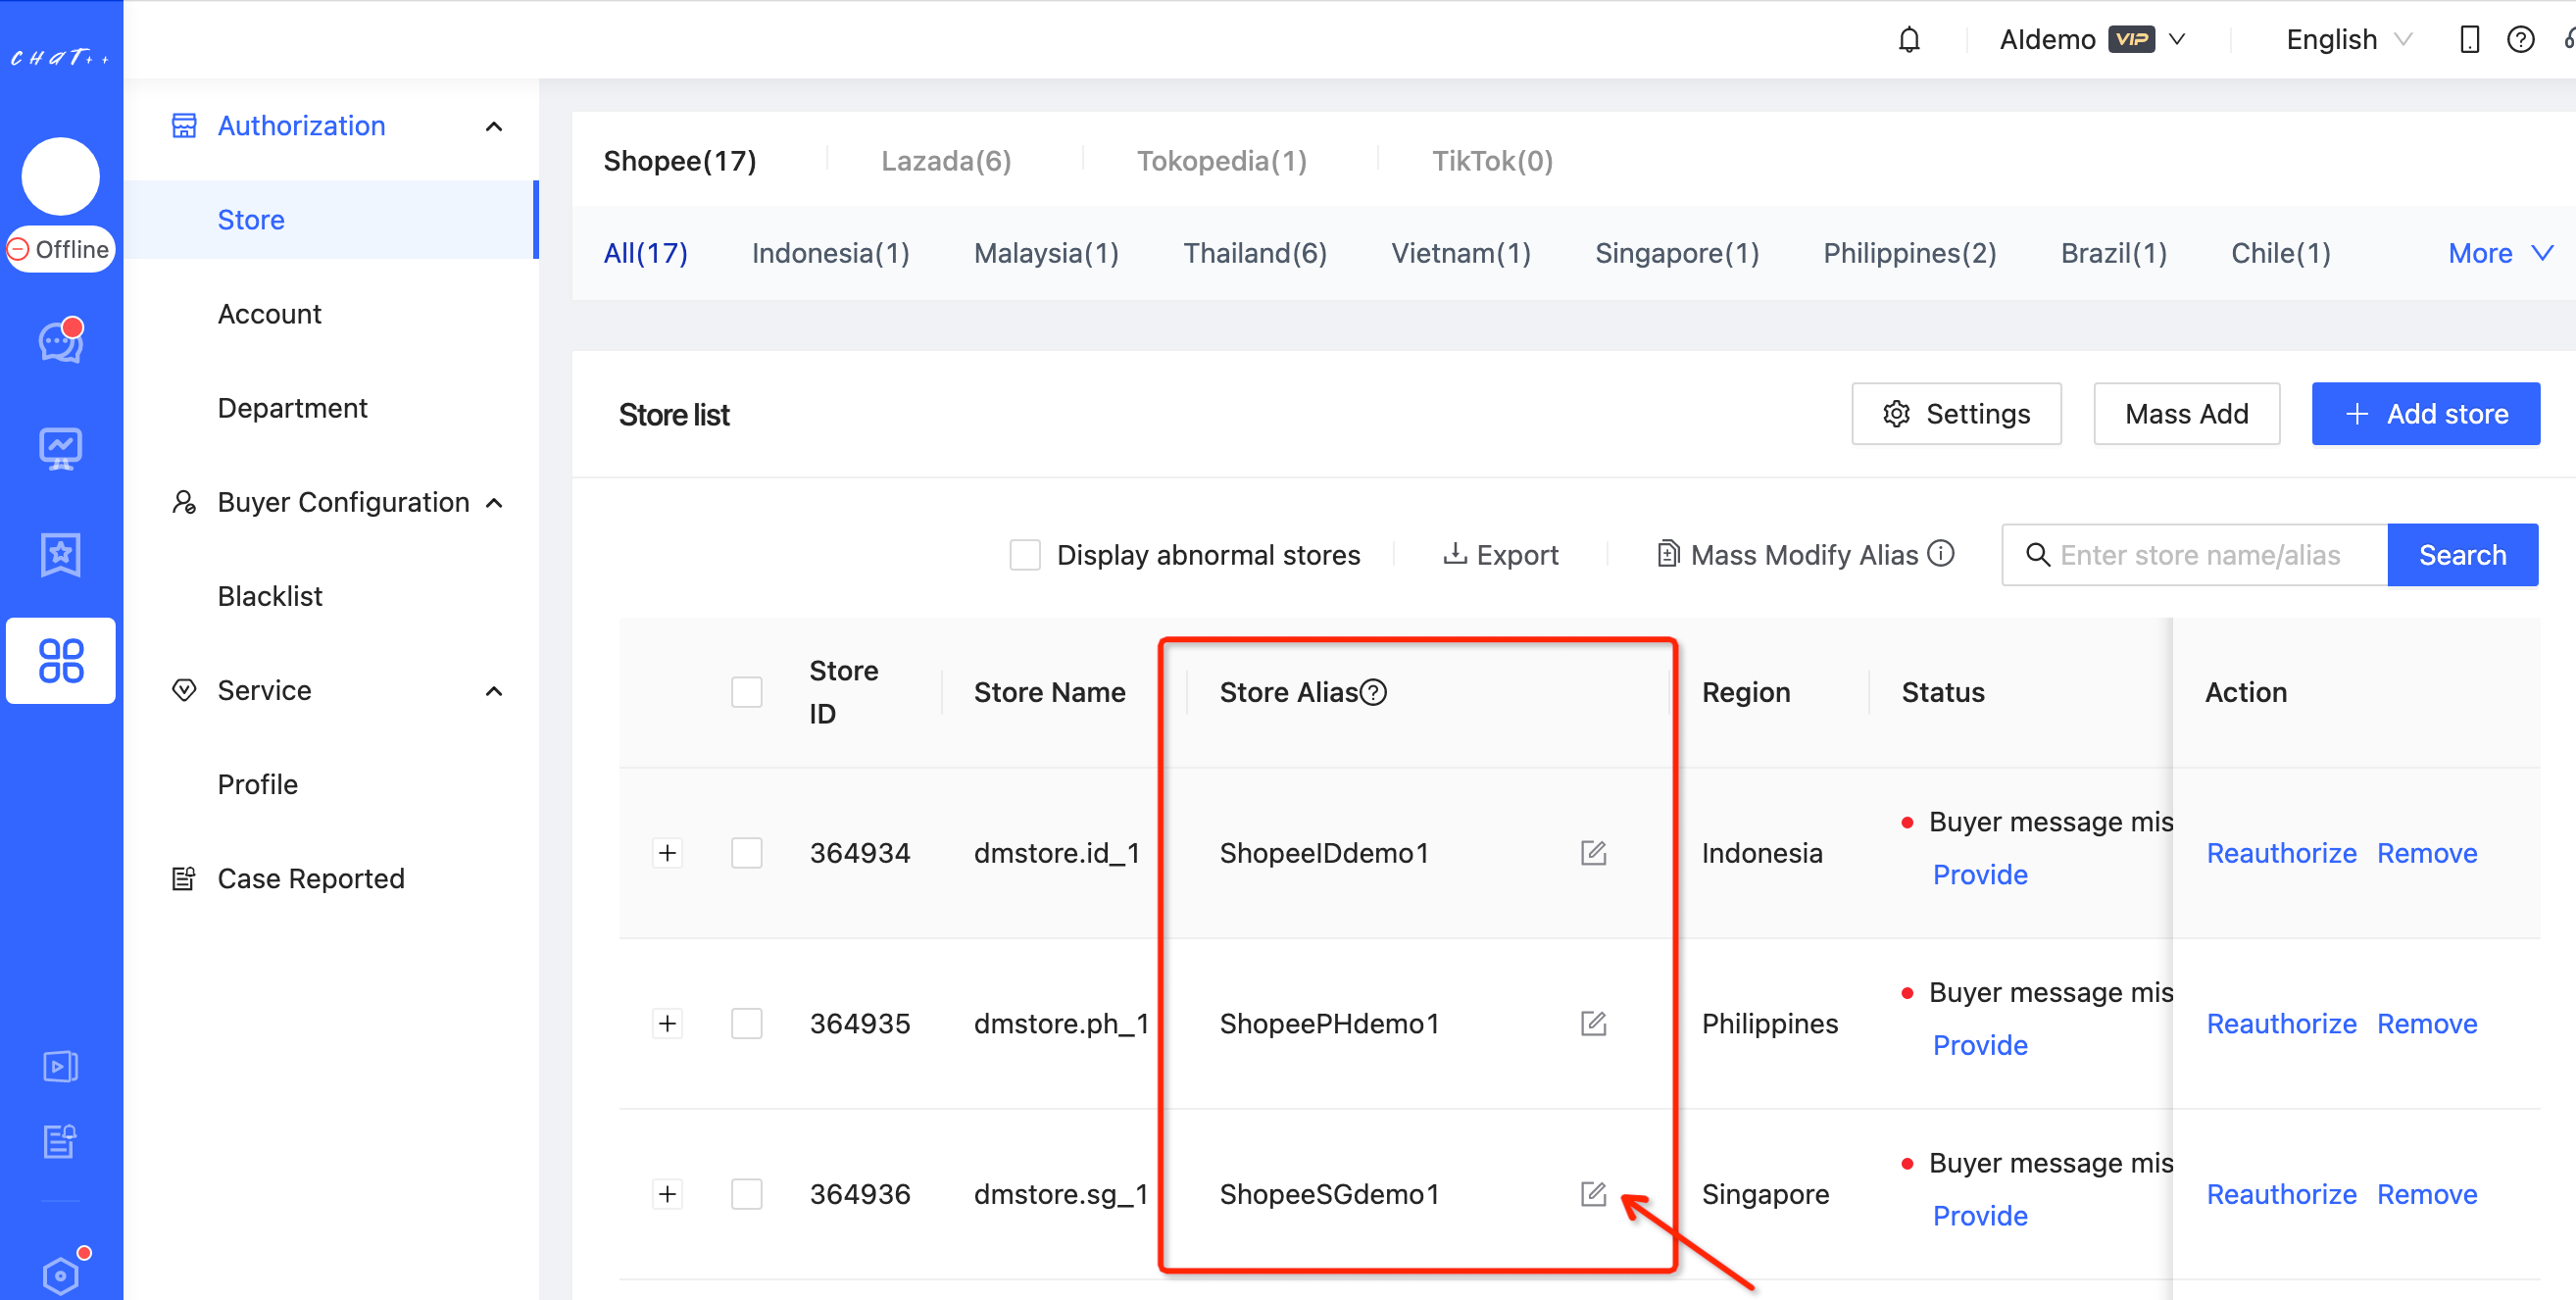
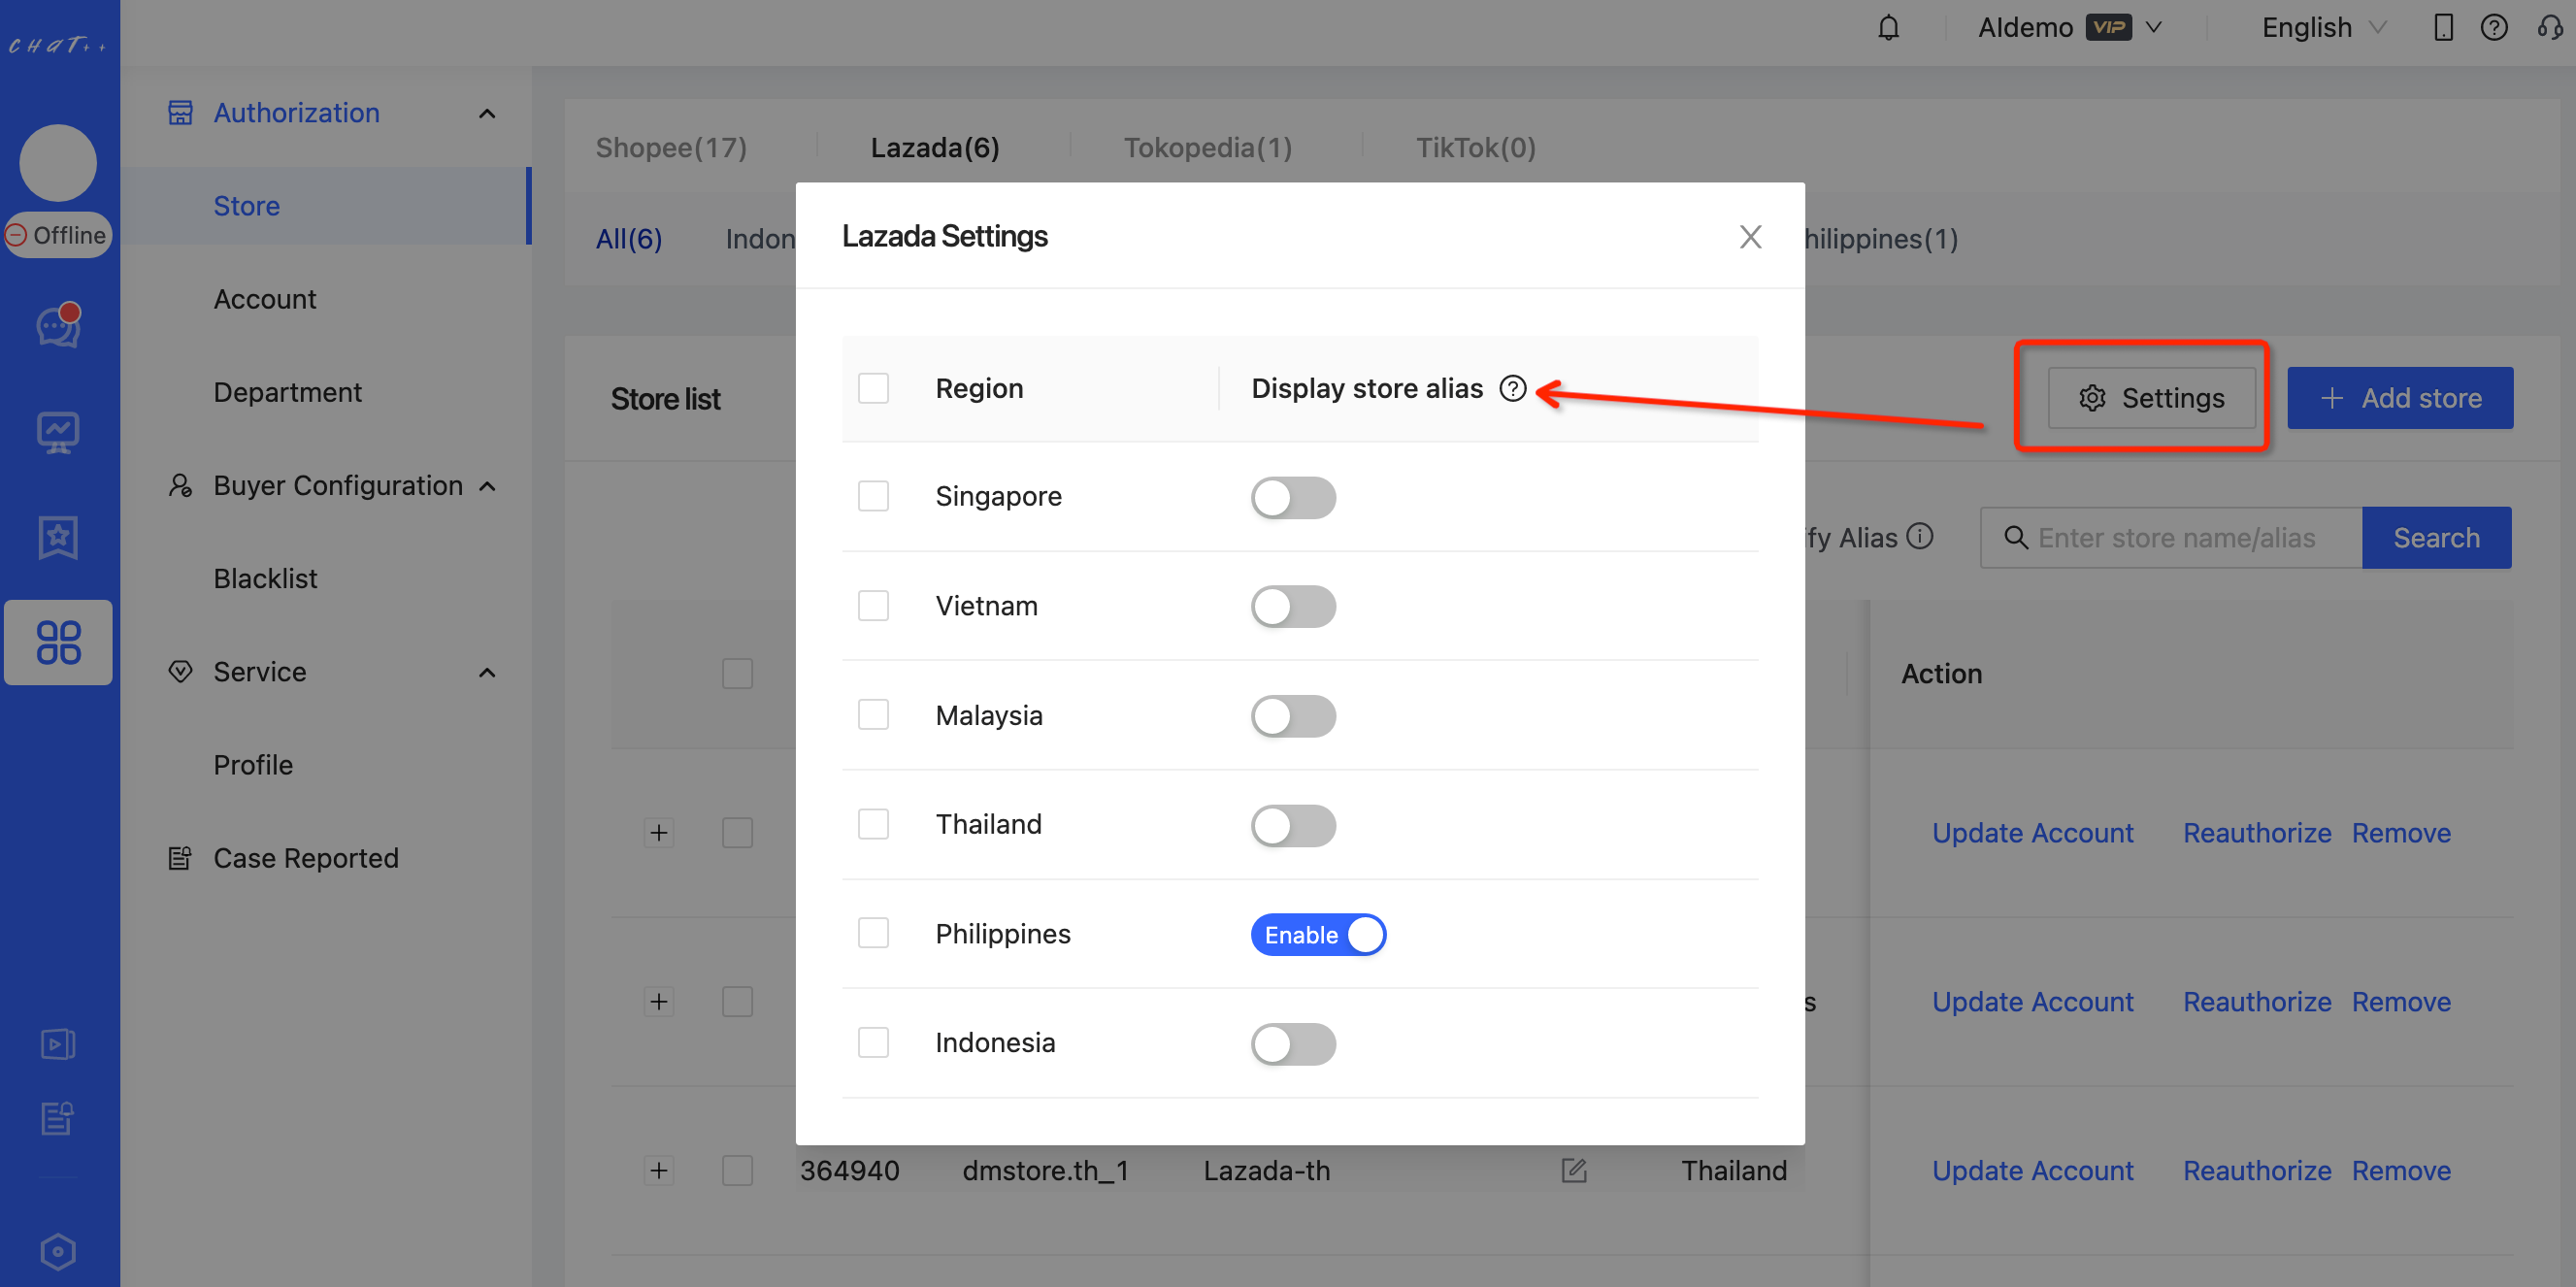
- After editing the store alias, enable priority display of the store alias. Click “Settings→Enable”. After enabling it, ChatPlusAI will prioritize displaying the store alias wherever the store name is displayed.
Q2:Where do I receive buyers?
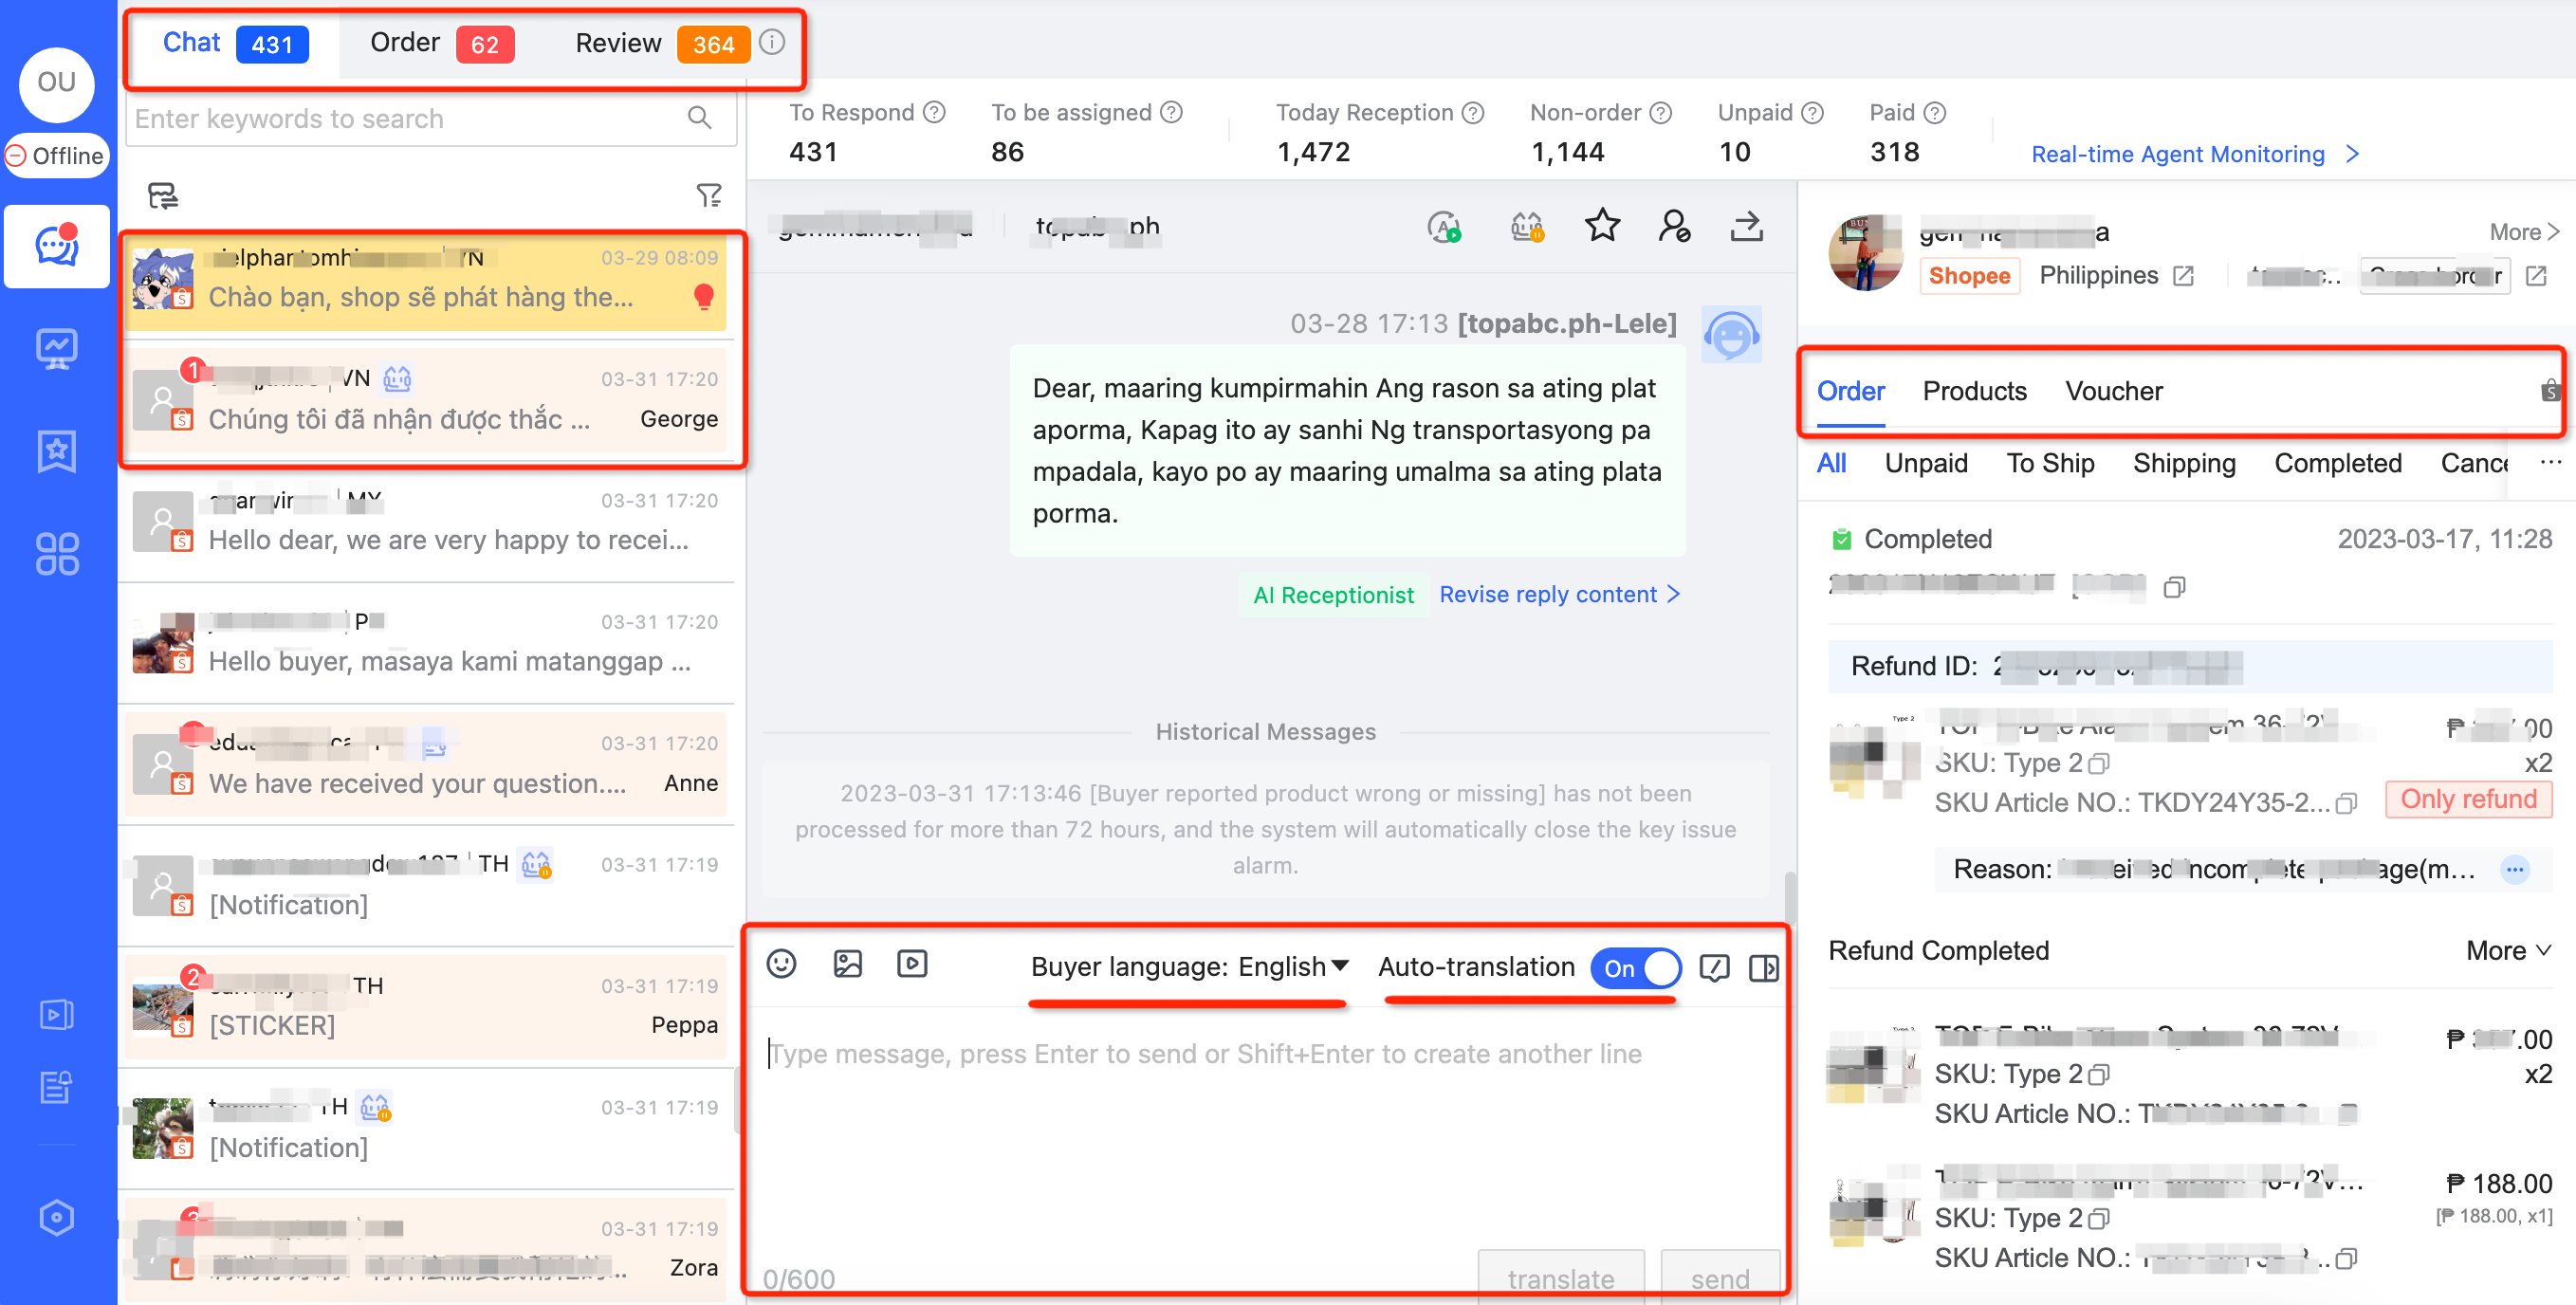
A2:Customer service can view the Conversations they have been assigned to in the 'Conversation List' on the left side. Clicking on a Conversation will display the specific content of the session in the 'Current Conversation Window', and you can enter a message in the editing box to reply to the buyer.
Automatic translation: If automatic translation (of customer service responses) is enabled, the translated content will be sent. The default target language for automatic translation is the language of the country where the serviced store is located. Customer service can also manually adjust the target translation language.
Support for multiple message types: Customer service can send text, emoji, image, and video messages to achieve better response effects."
Quick reply: In the sidebar, you can view the customer's order information and send product cards or vouchers. If you cannot view order information with your account, please contact the administrator to confirm whether the 'View customer’s sensitive info' permission has been authorized for your account.
Q3: Can I set up the order tracking scenario in 1 minute? Is the configuration process complicated?
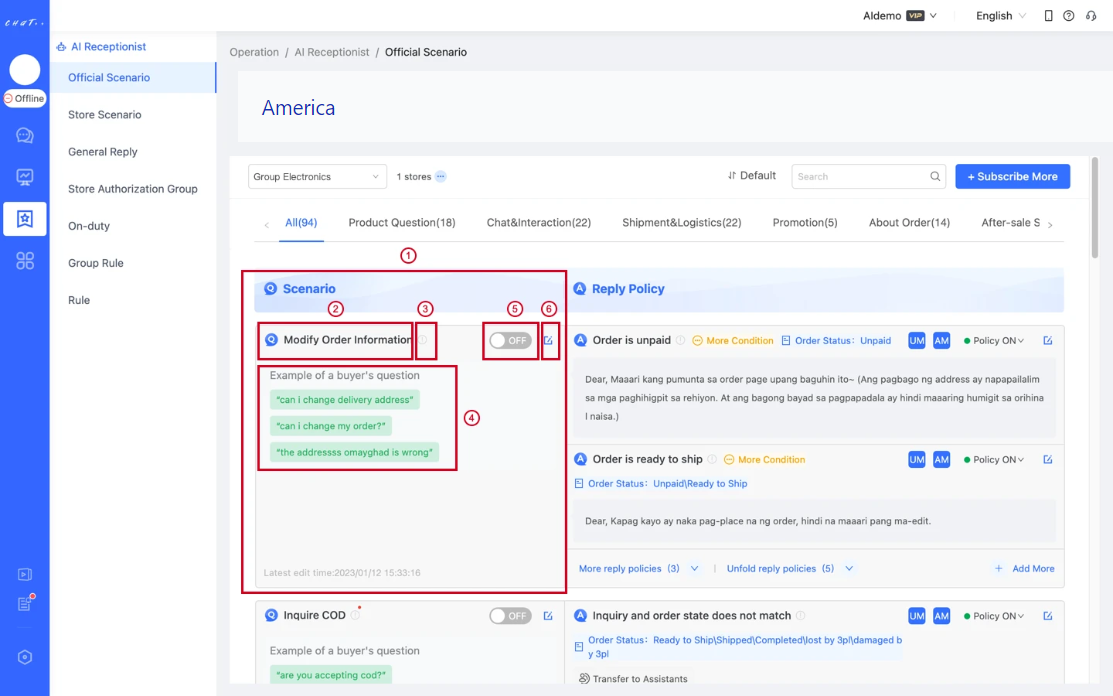
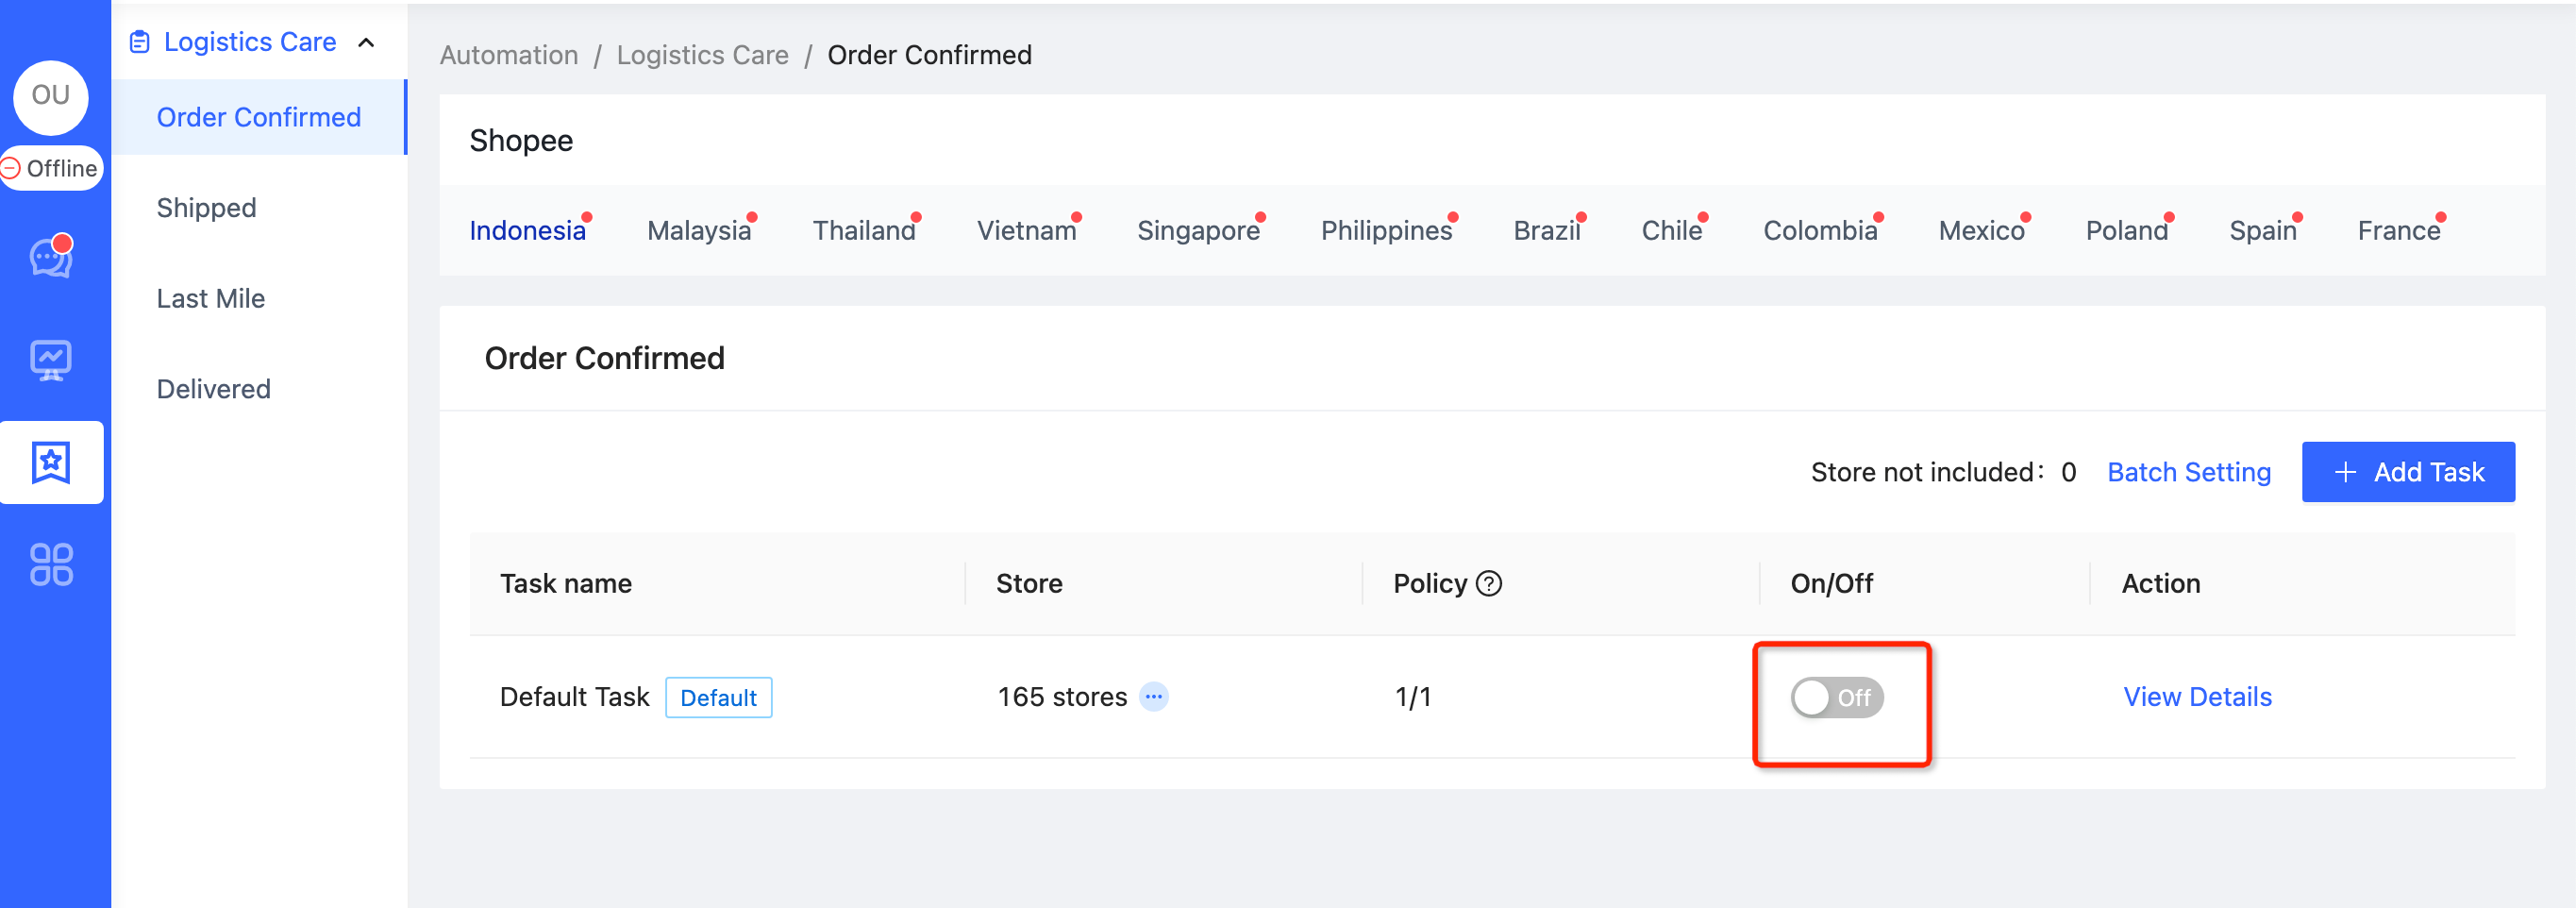
A3: ChatPlusAI is ready to use. In order to minimize configuration difficulties, ChatPlusAI has created a 'default task' for each order tracking scenario for each platform and each country site, which covers all stores under that country site by default. To avoid the robot automatically replying without your knowledge during the first use, the switch of the 'default task' is set to off by default. You can successfully configure it by manually turning it on with one click.
Q4:How to add customer service/administrator?
A4:Click “Configuration”→ Authorization → Account → Add account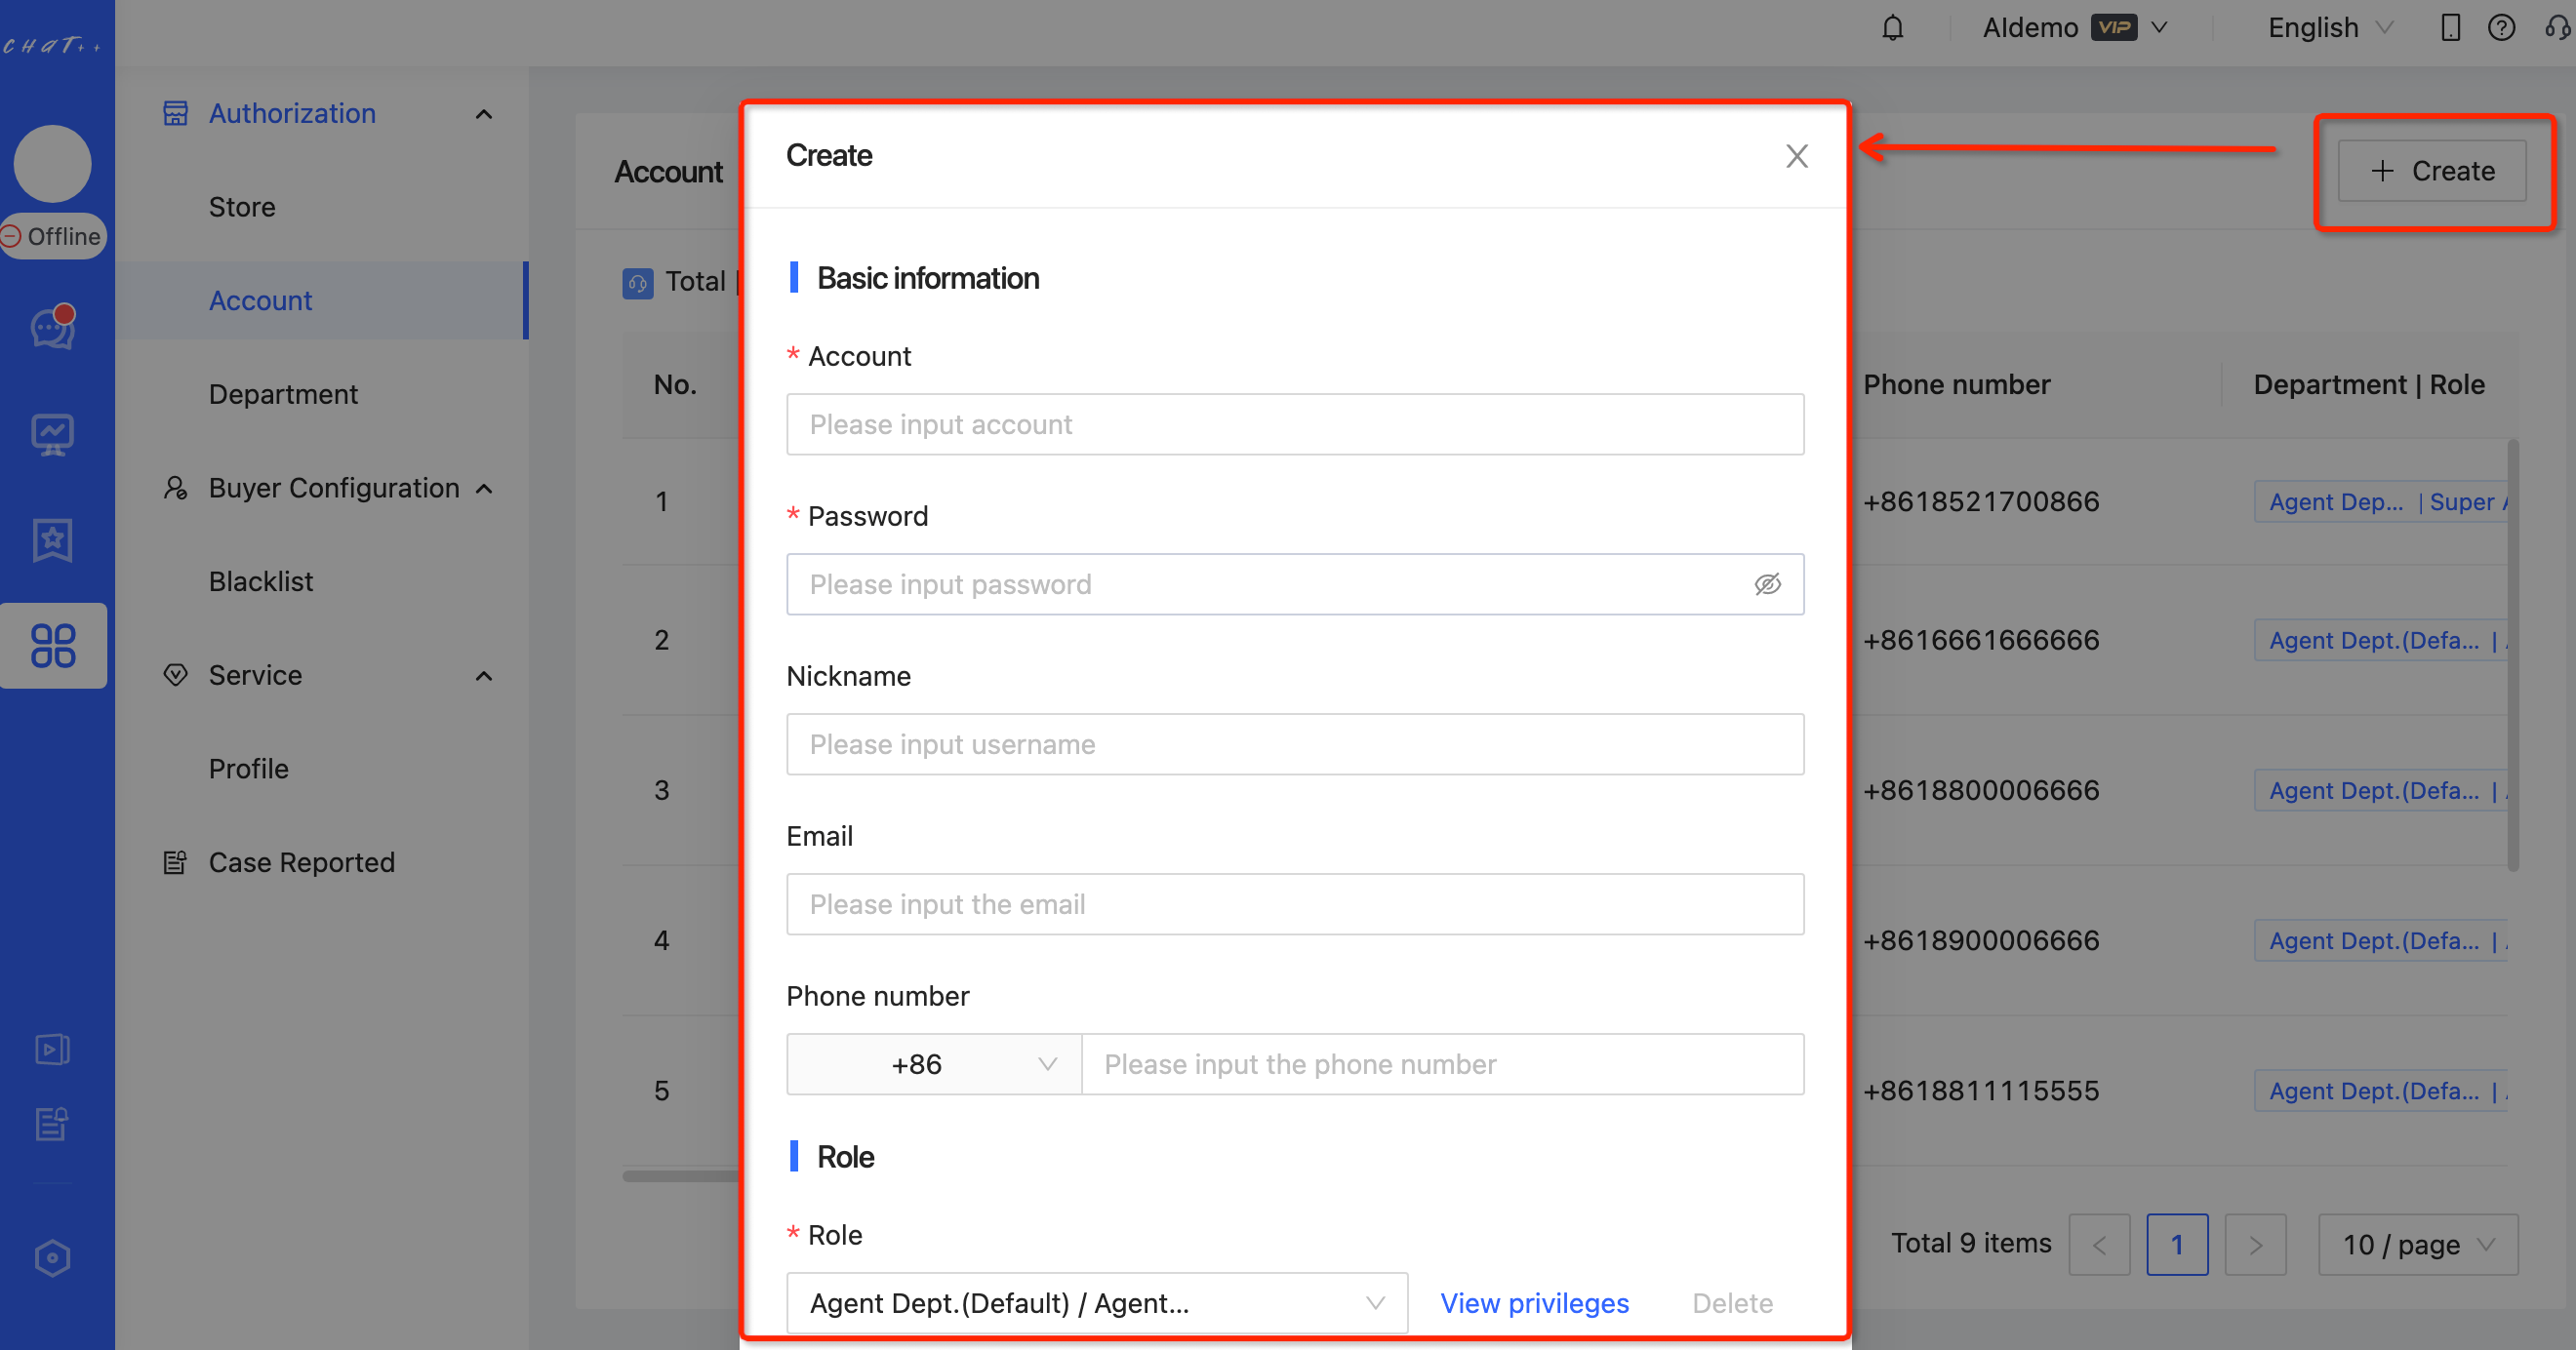
Q5: How to switch the system language?
A5:
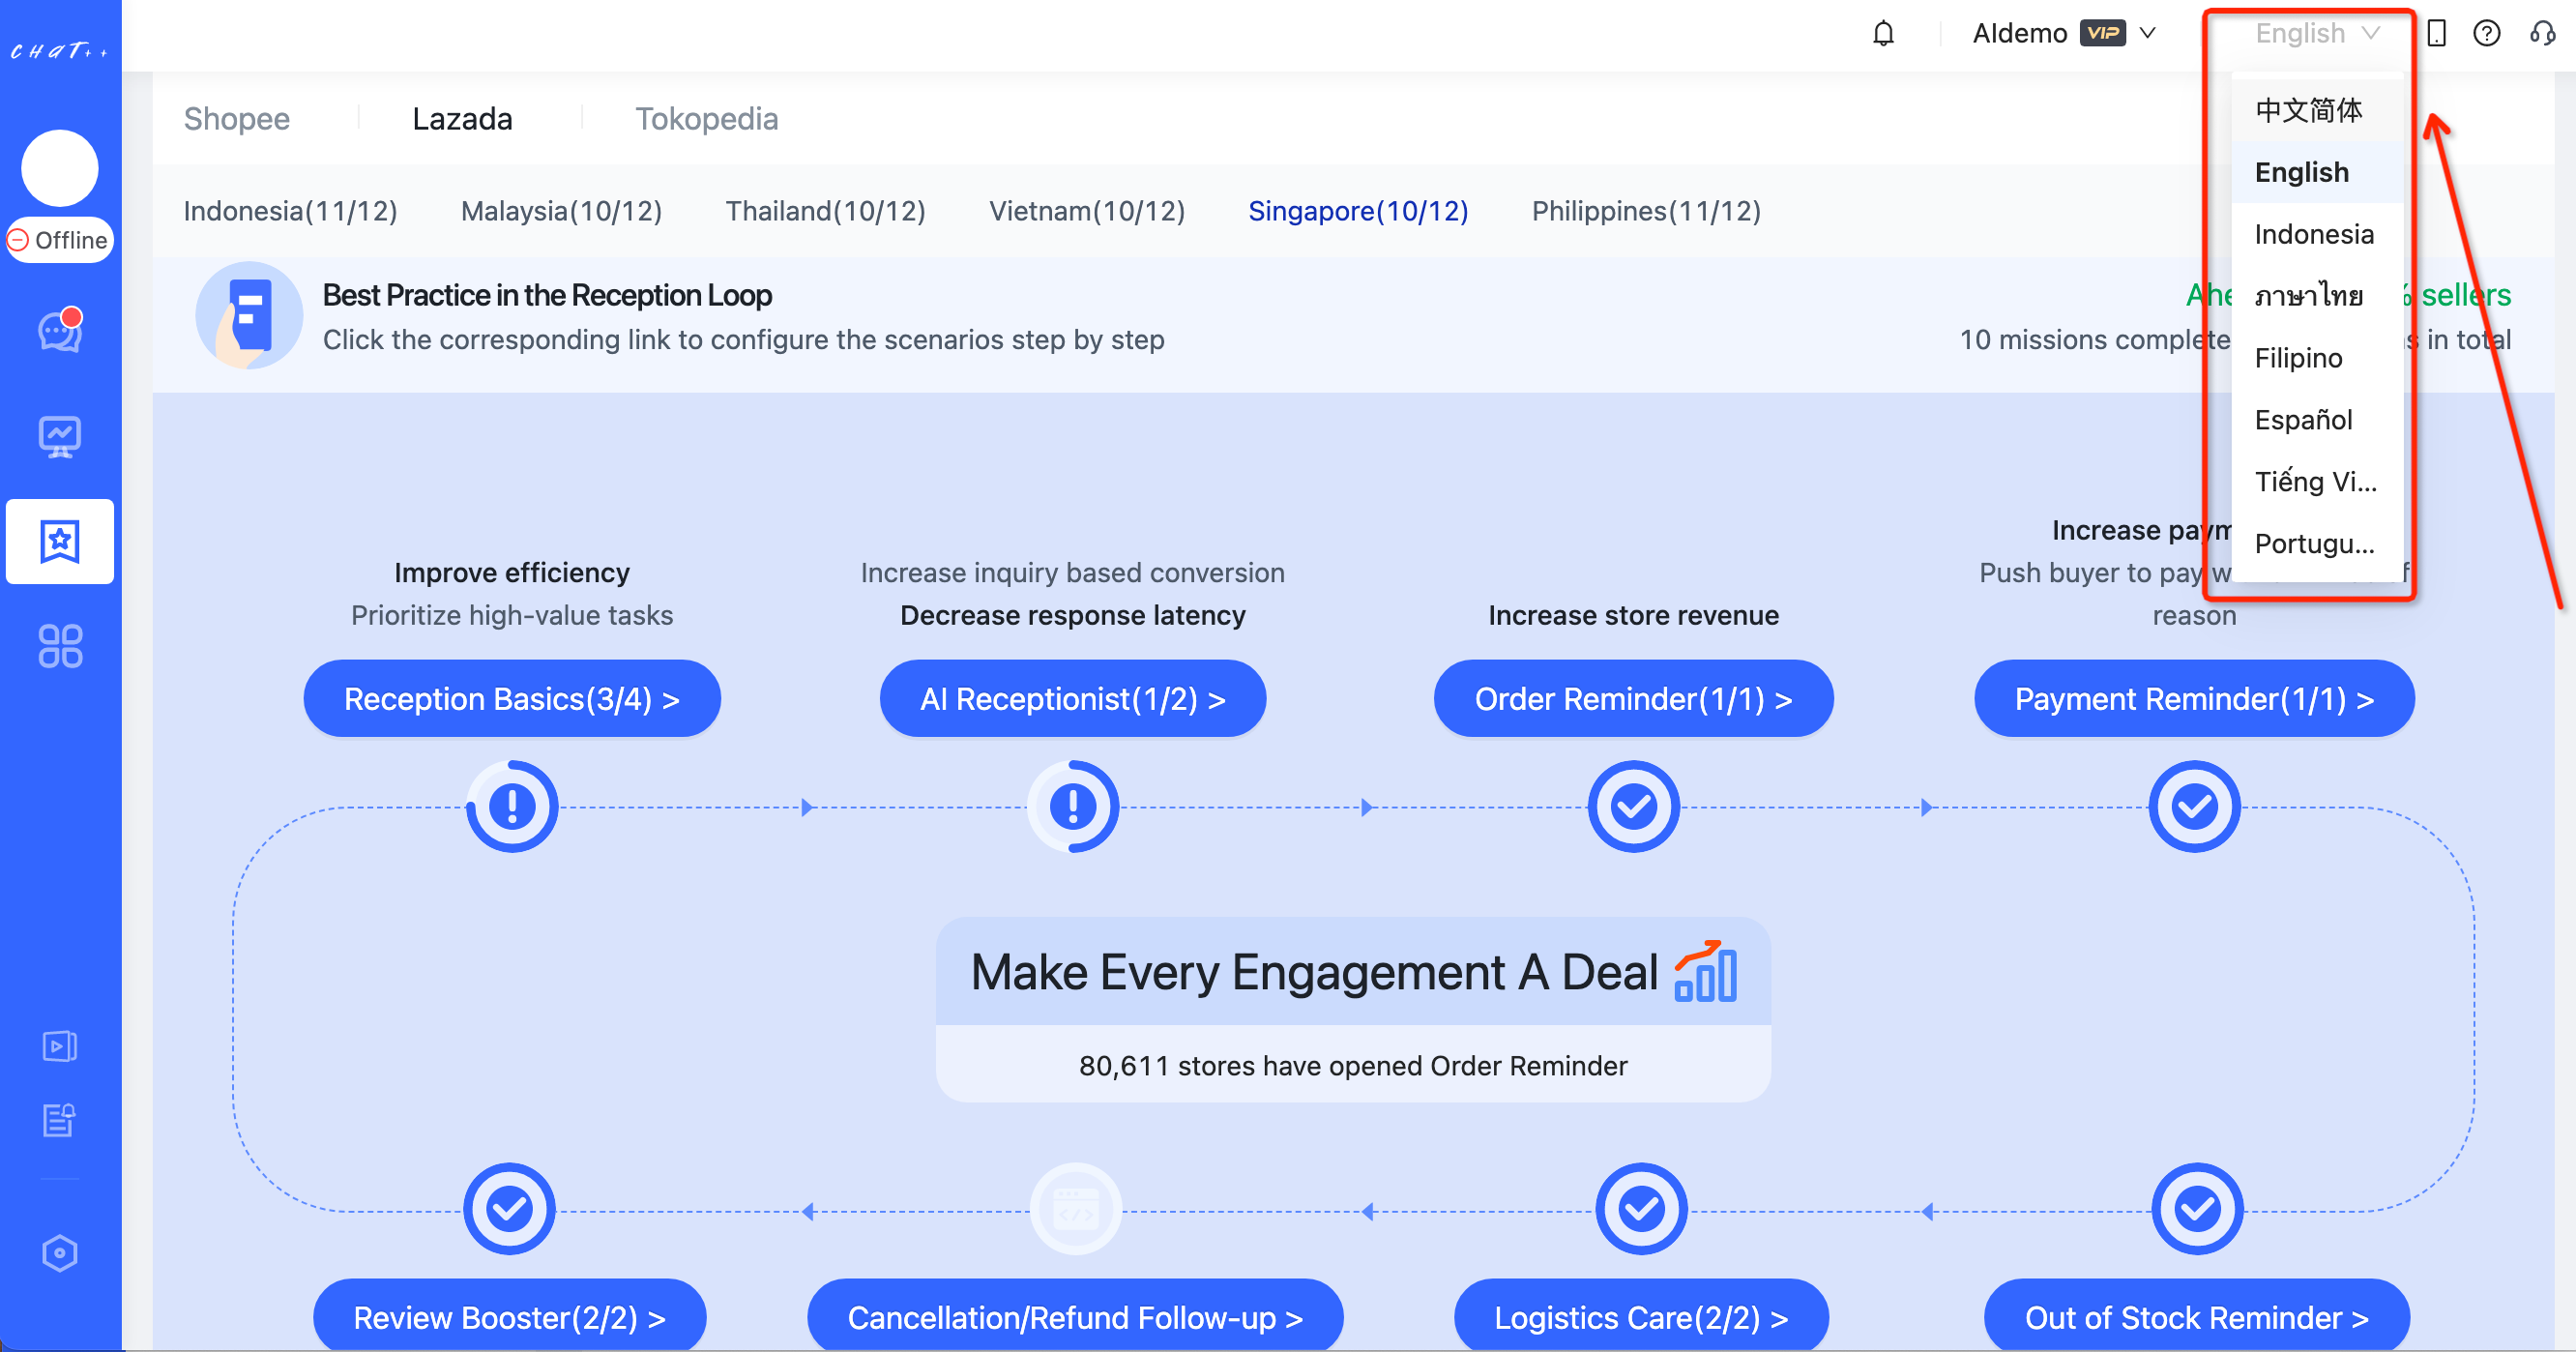
Method 1: Click on the 'System Language' button in the upper right corner to switch to one of the eight languages, including Chinese, English, Indonesian, Thai, Filipino, Spanish, Vietnamese, and Portuguese.
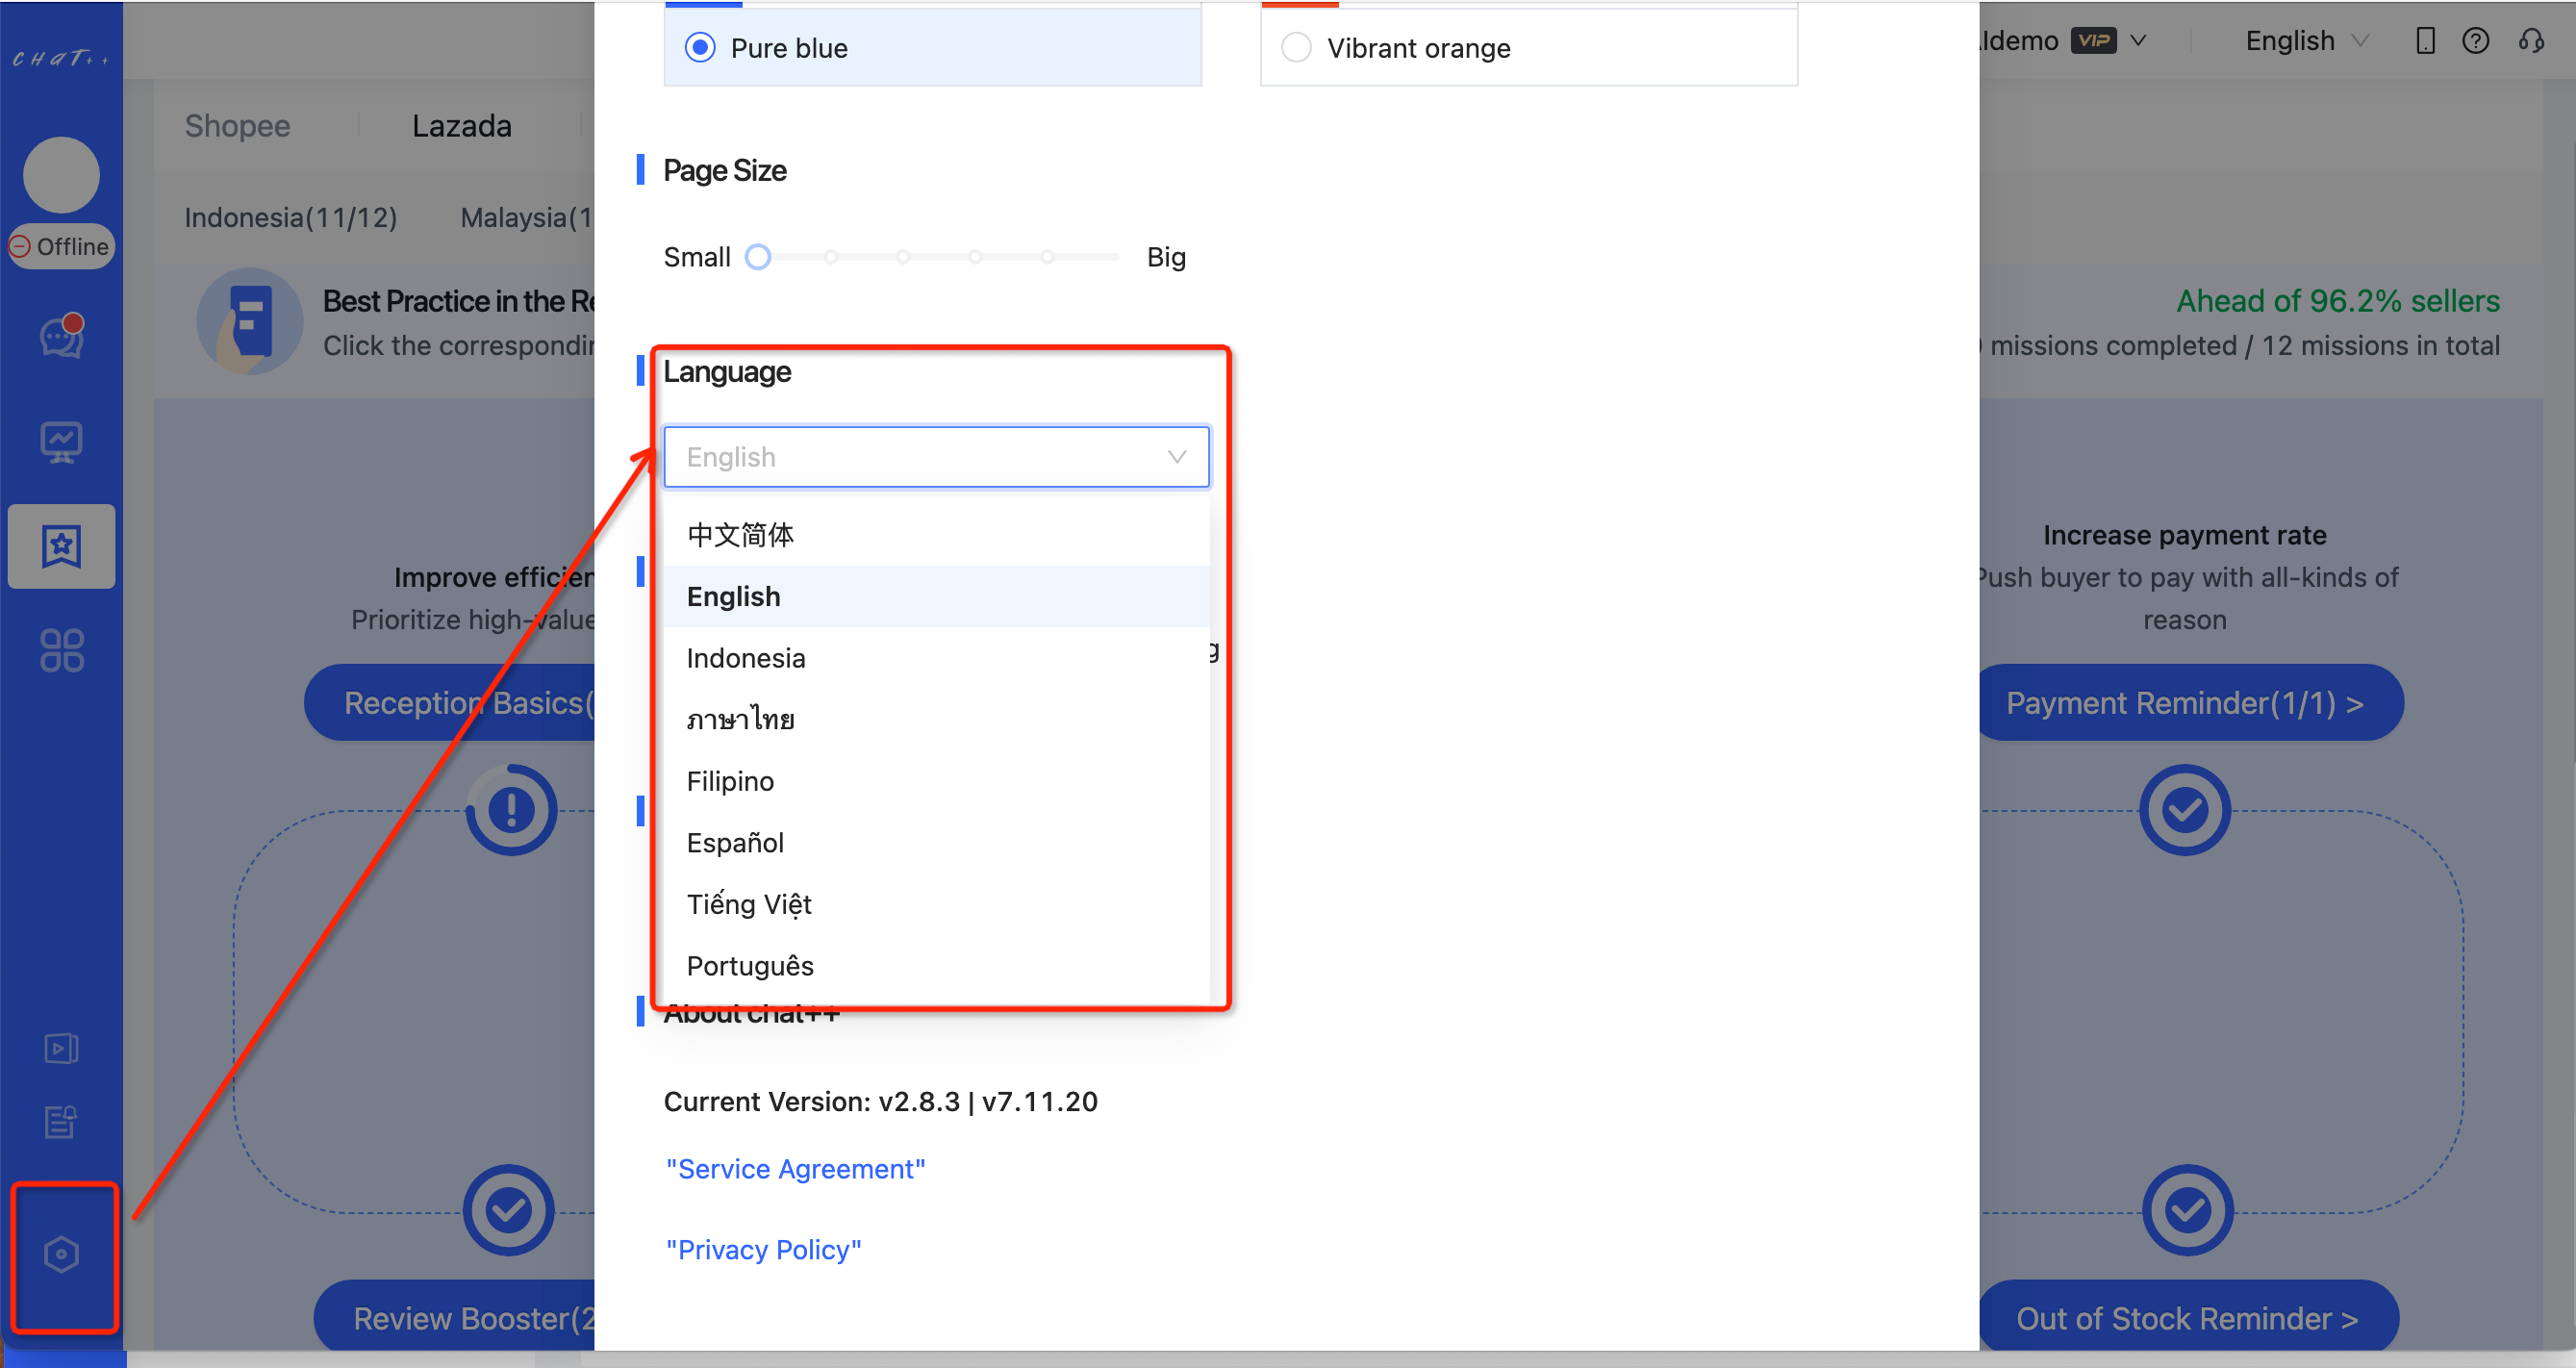
Method 2: Click on the 'Settings' button, scroll down to the bottom, and switch languages in the 'System Language' section.
Q6:How to log out of the account?
A6:
Method 1: Click on the 'Avatar' button in the upper left corner, and then click 'Log Out' in the expanded page to log out of the account.
Method 2: Click on the three-dot button next to the account in the upper right corner, and then click 'Log Out' in the expanded page to log out of the account.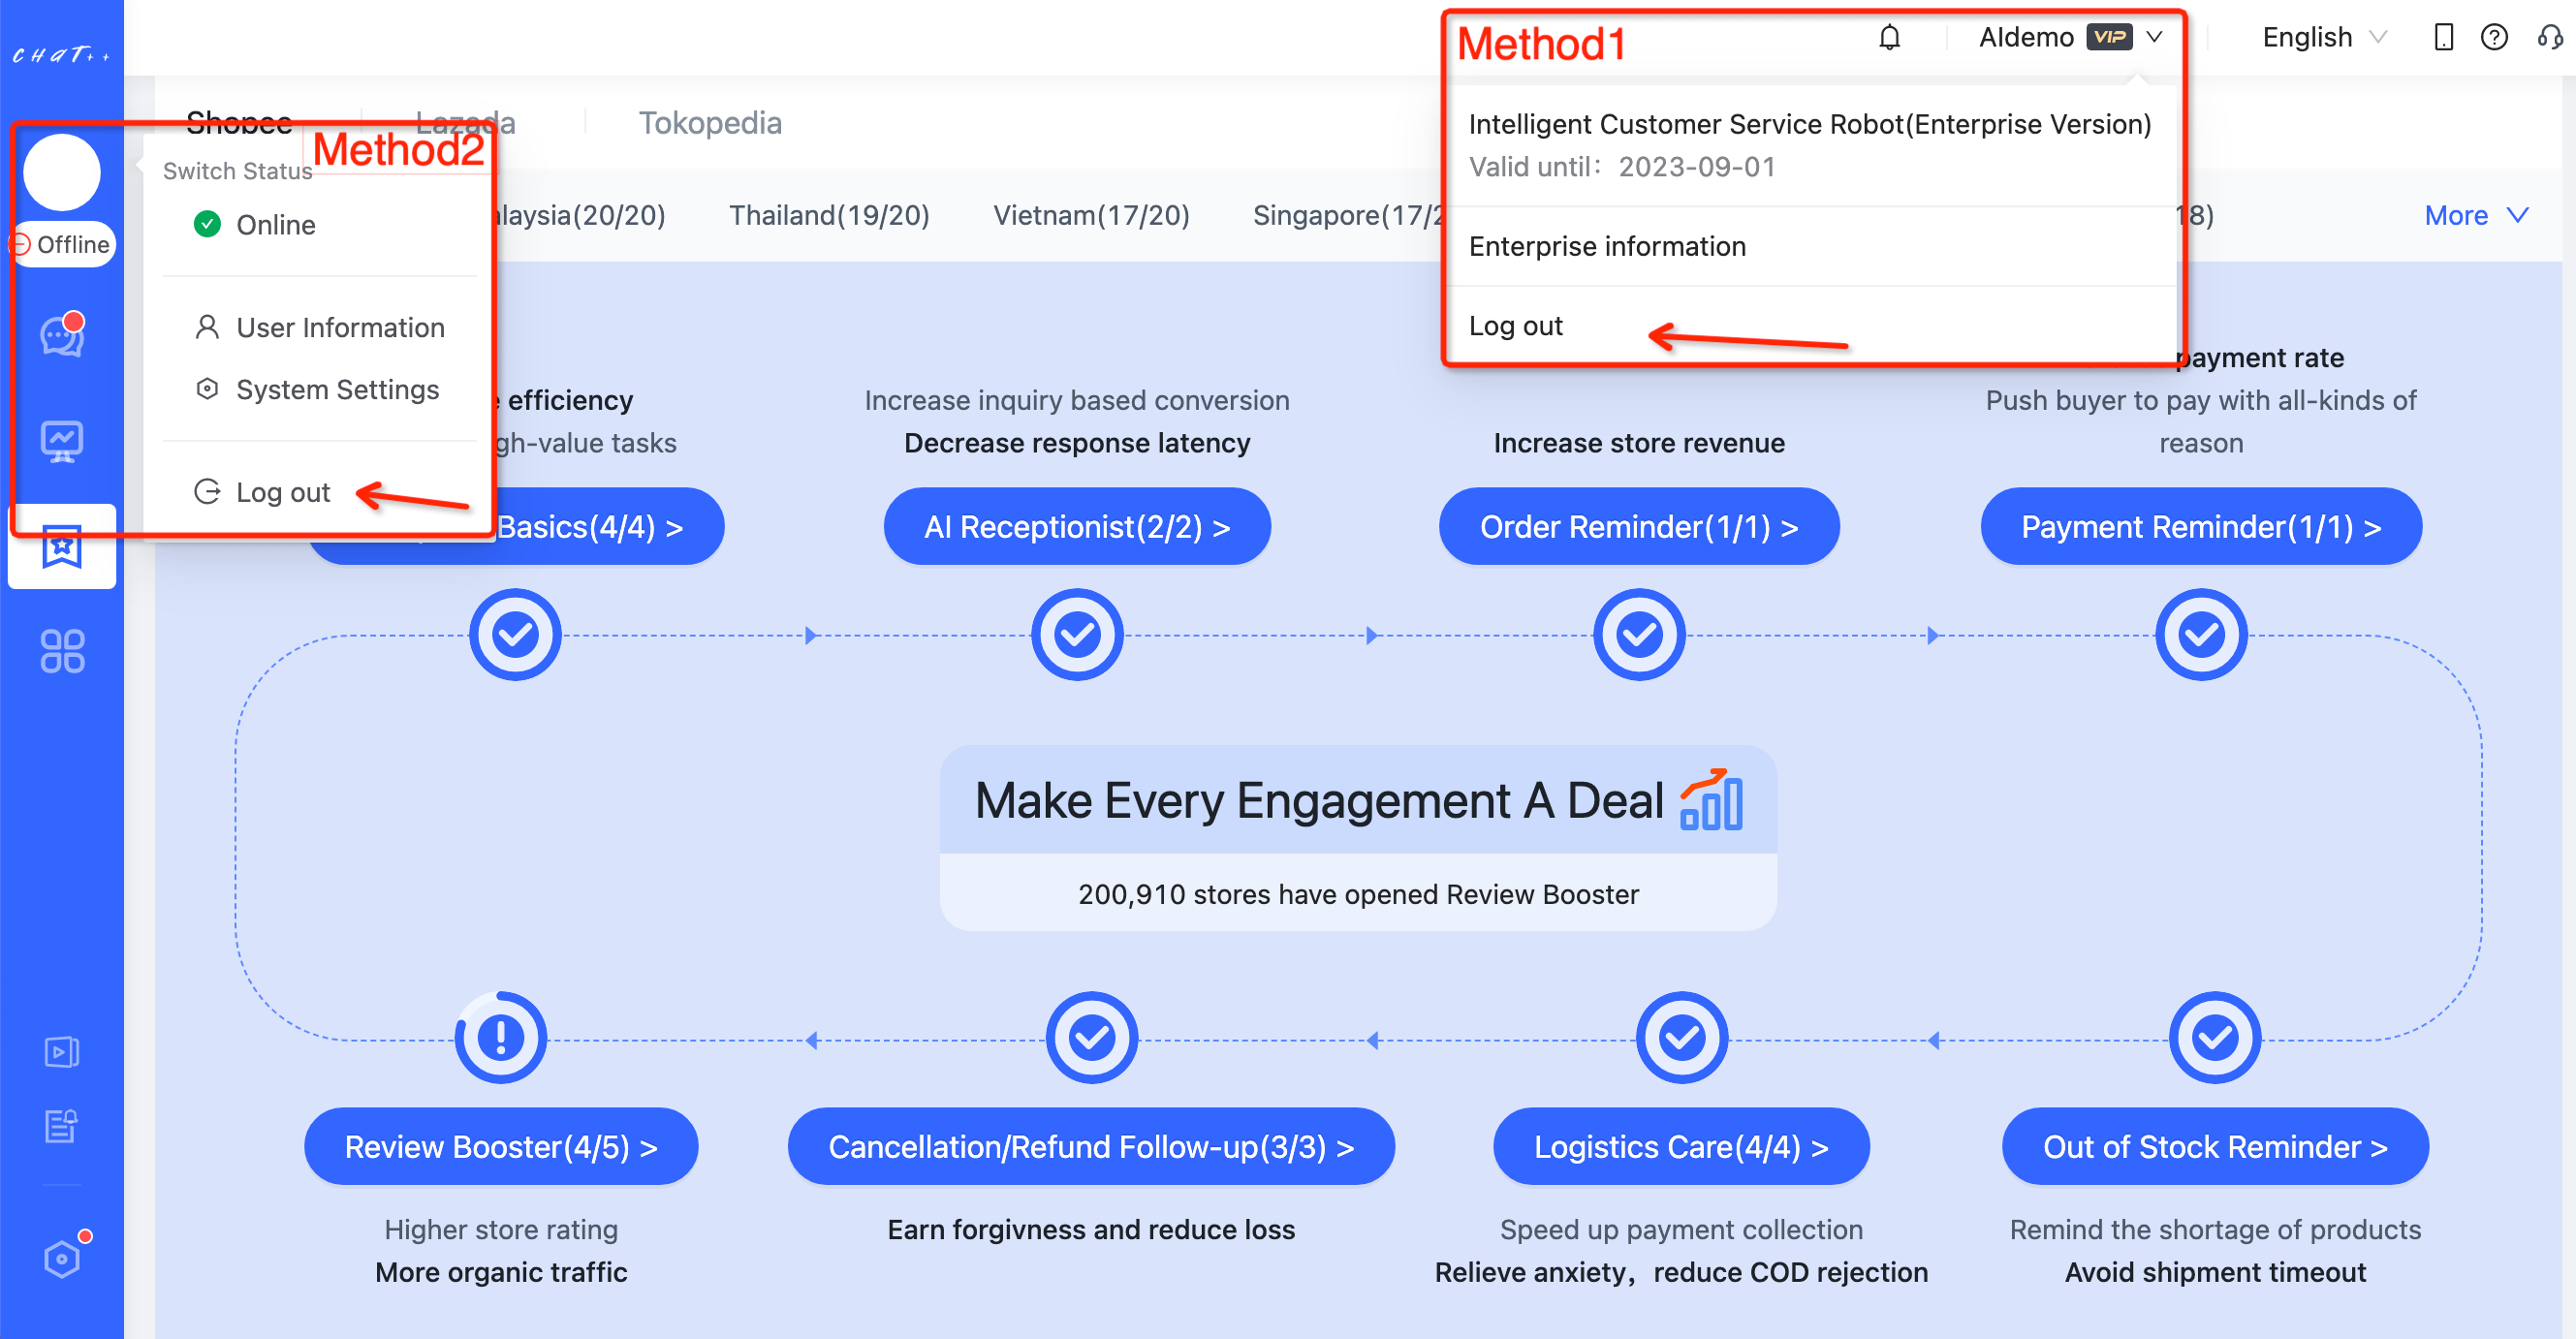
Q7:How to switch online status?
A7:Click on the 'Avatar' button in the upper left corner, and then click 'Switch Status' in the expanded page to switch between 'Online' and 'Offline'.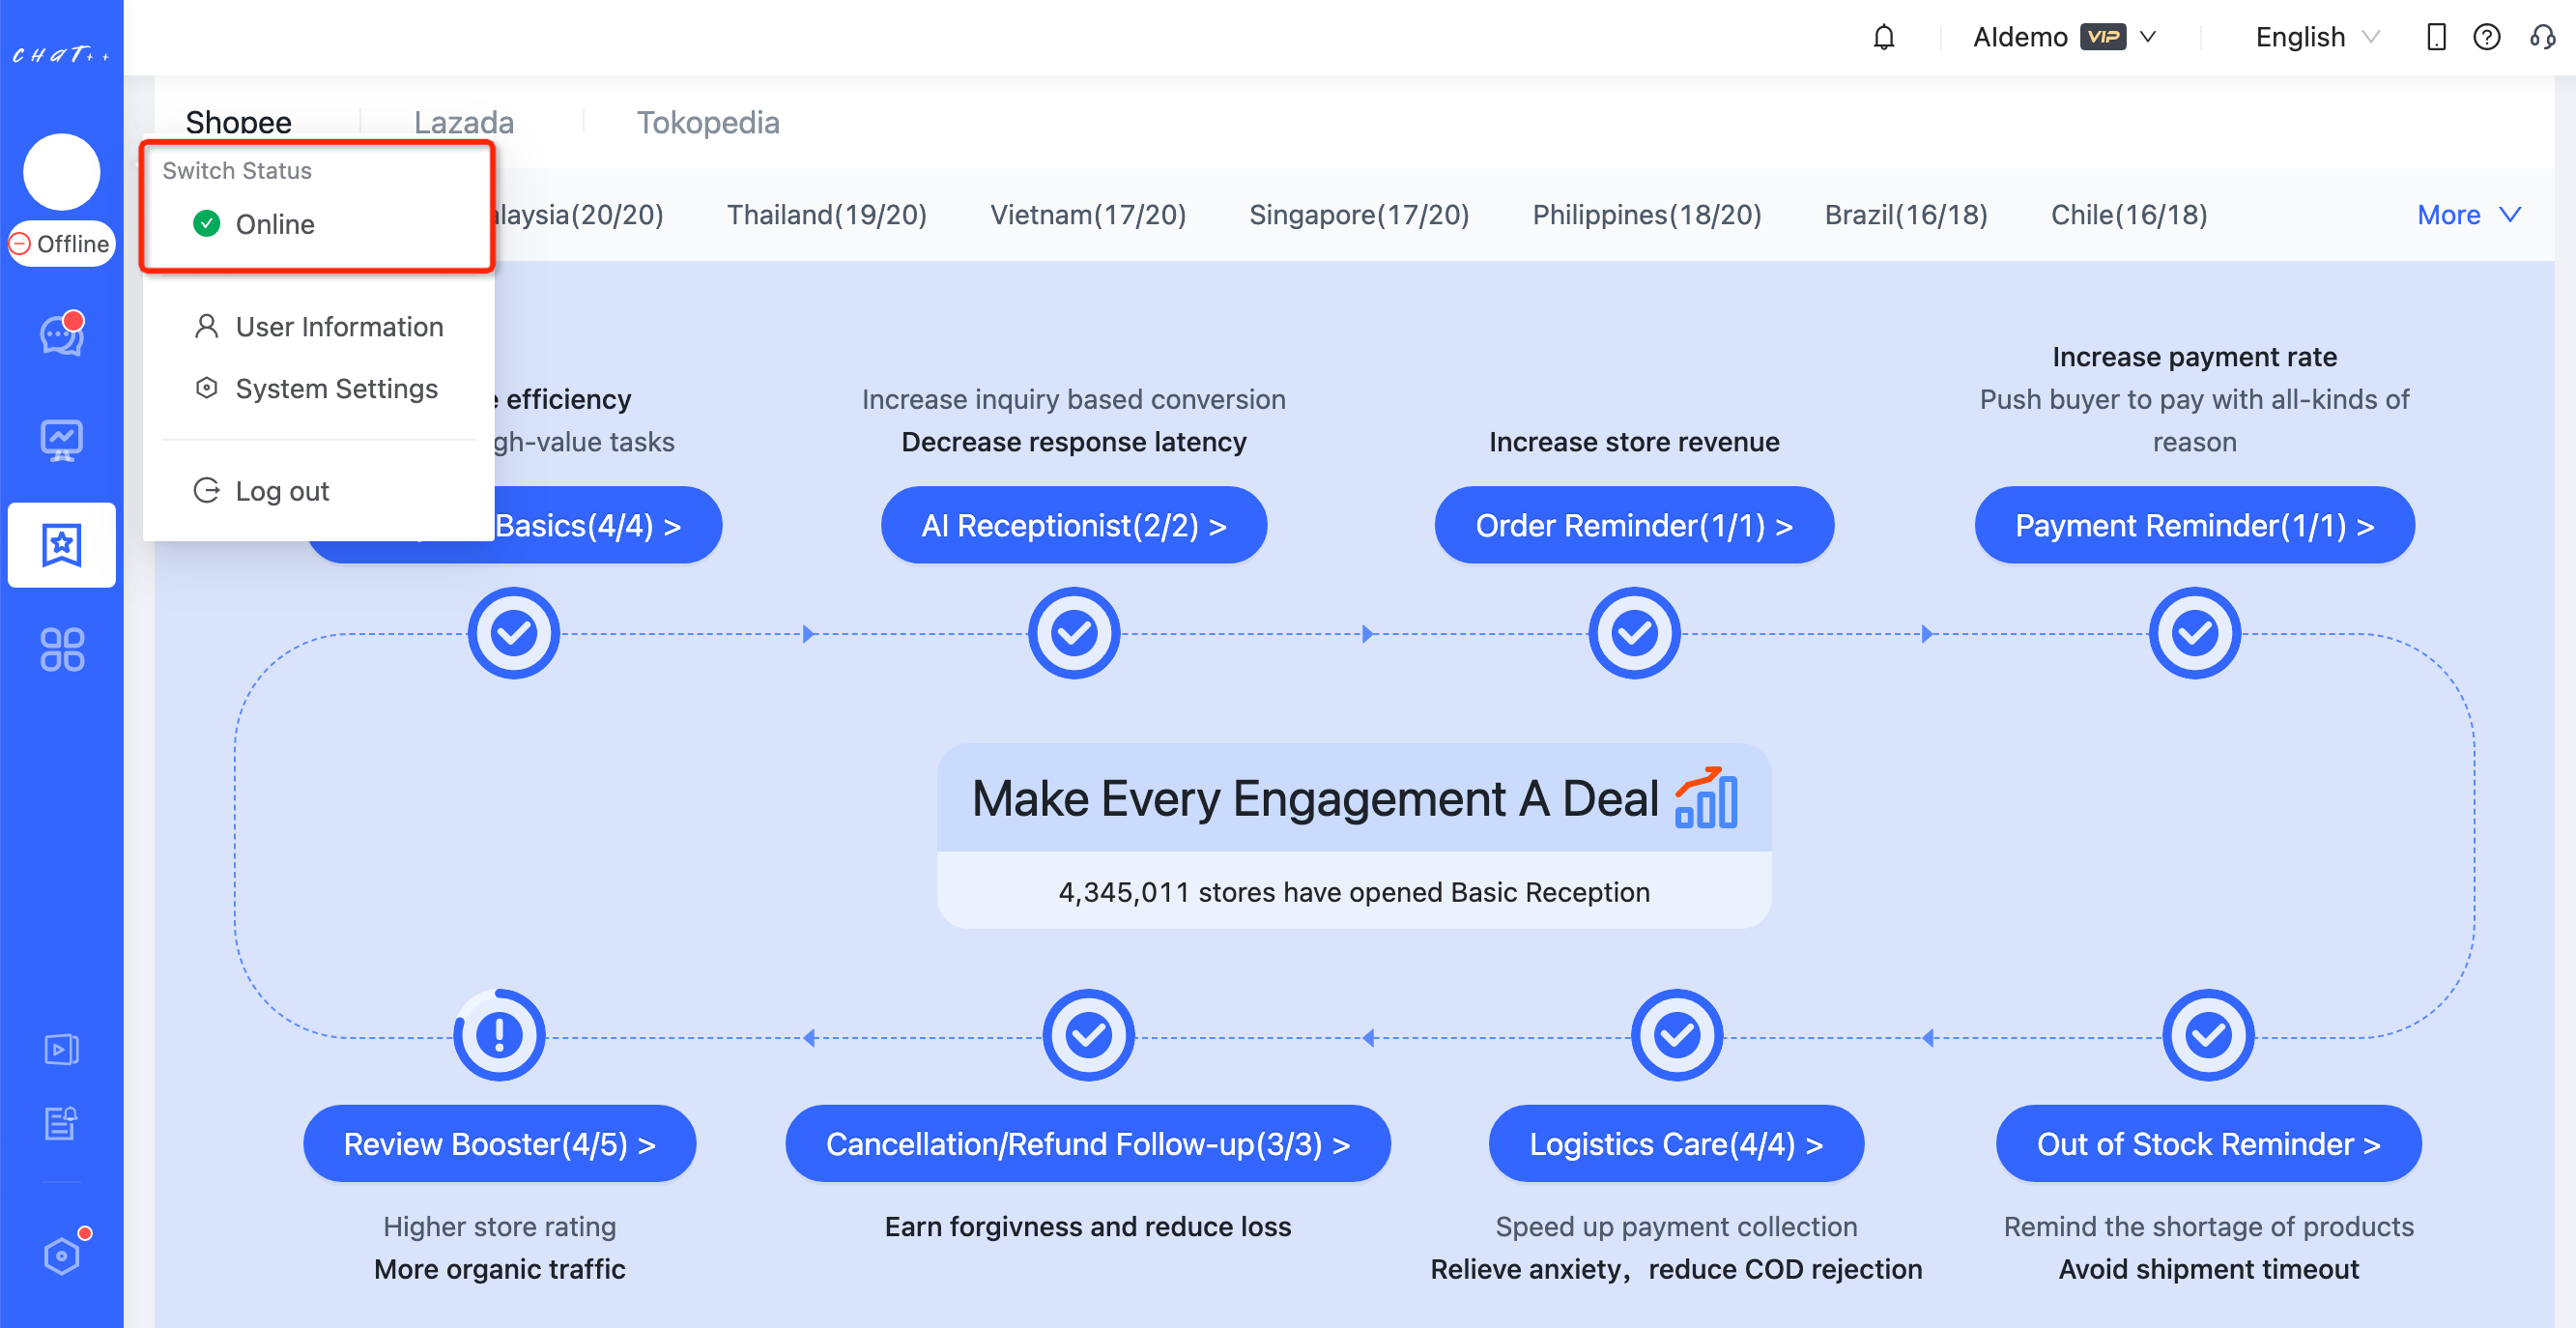
CS Manual
Inquiry/Answer Reception
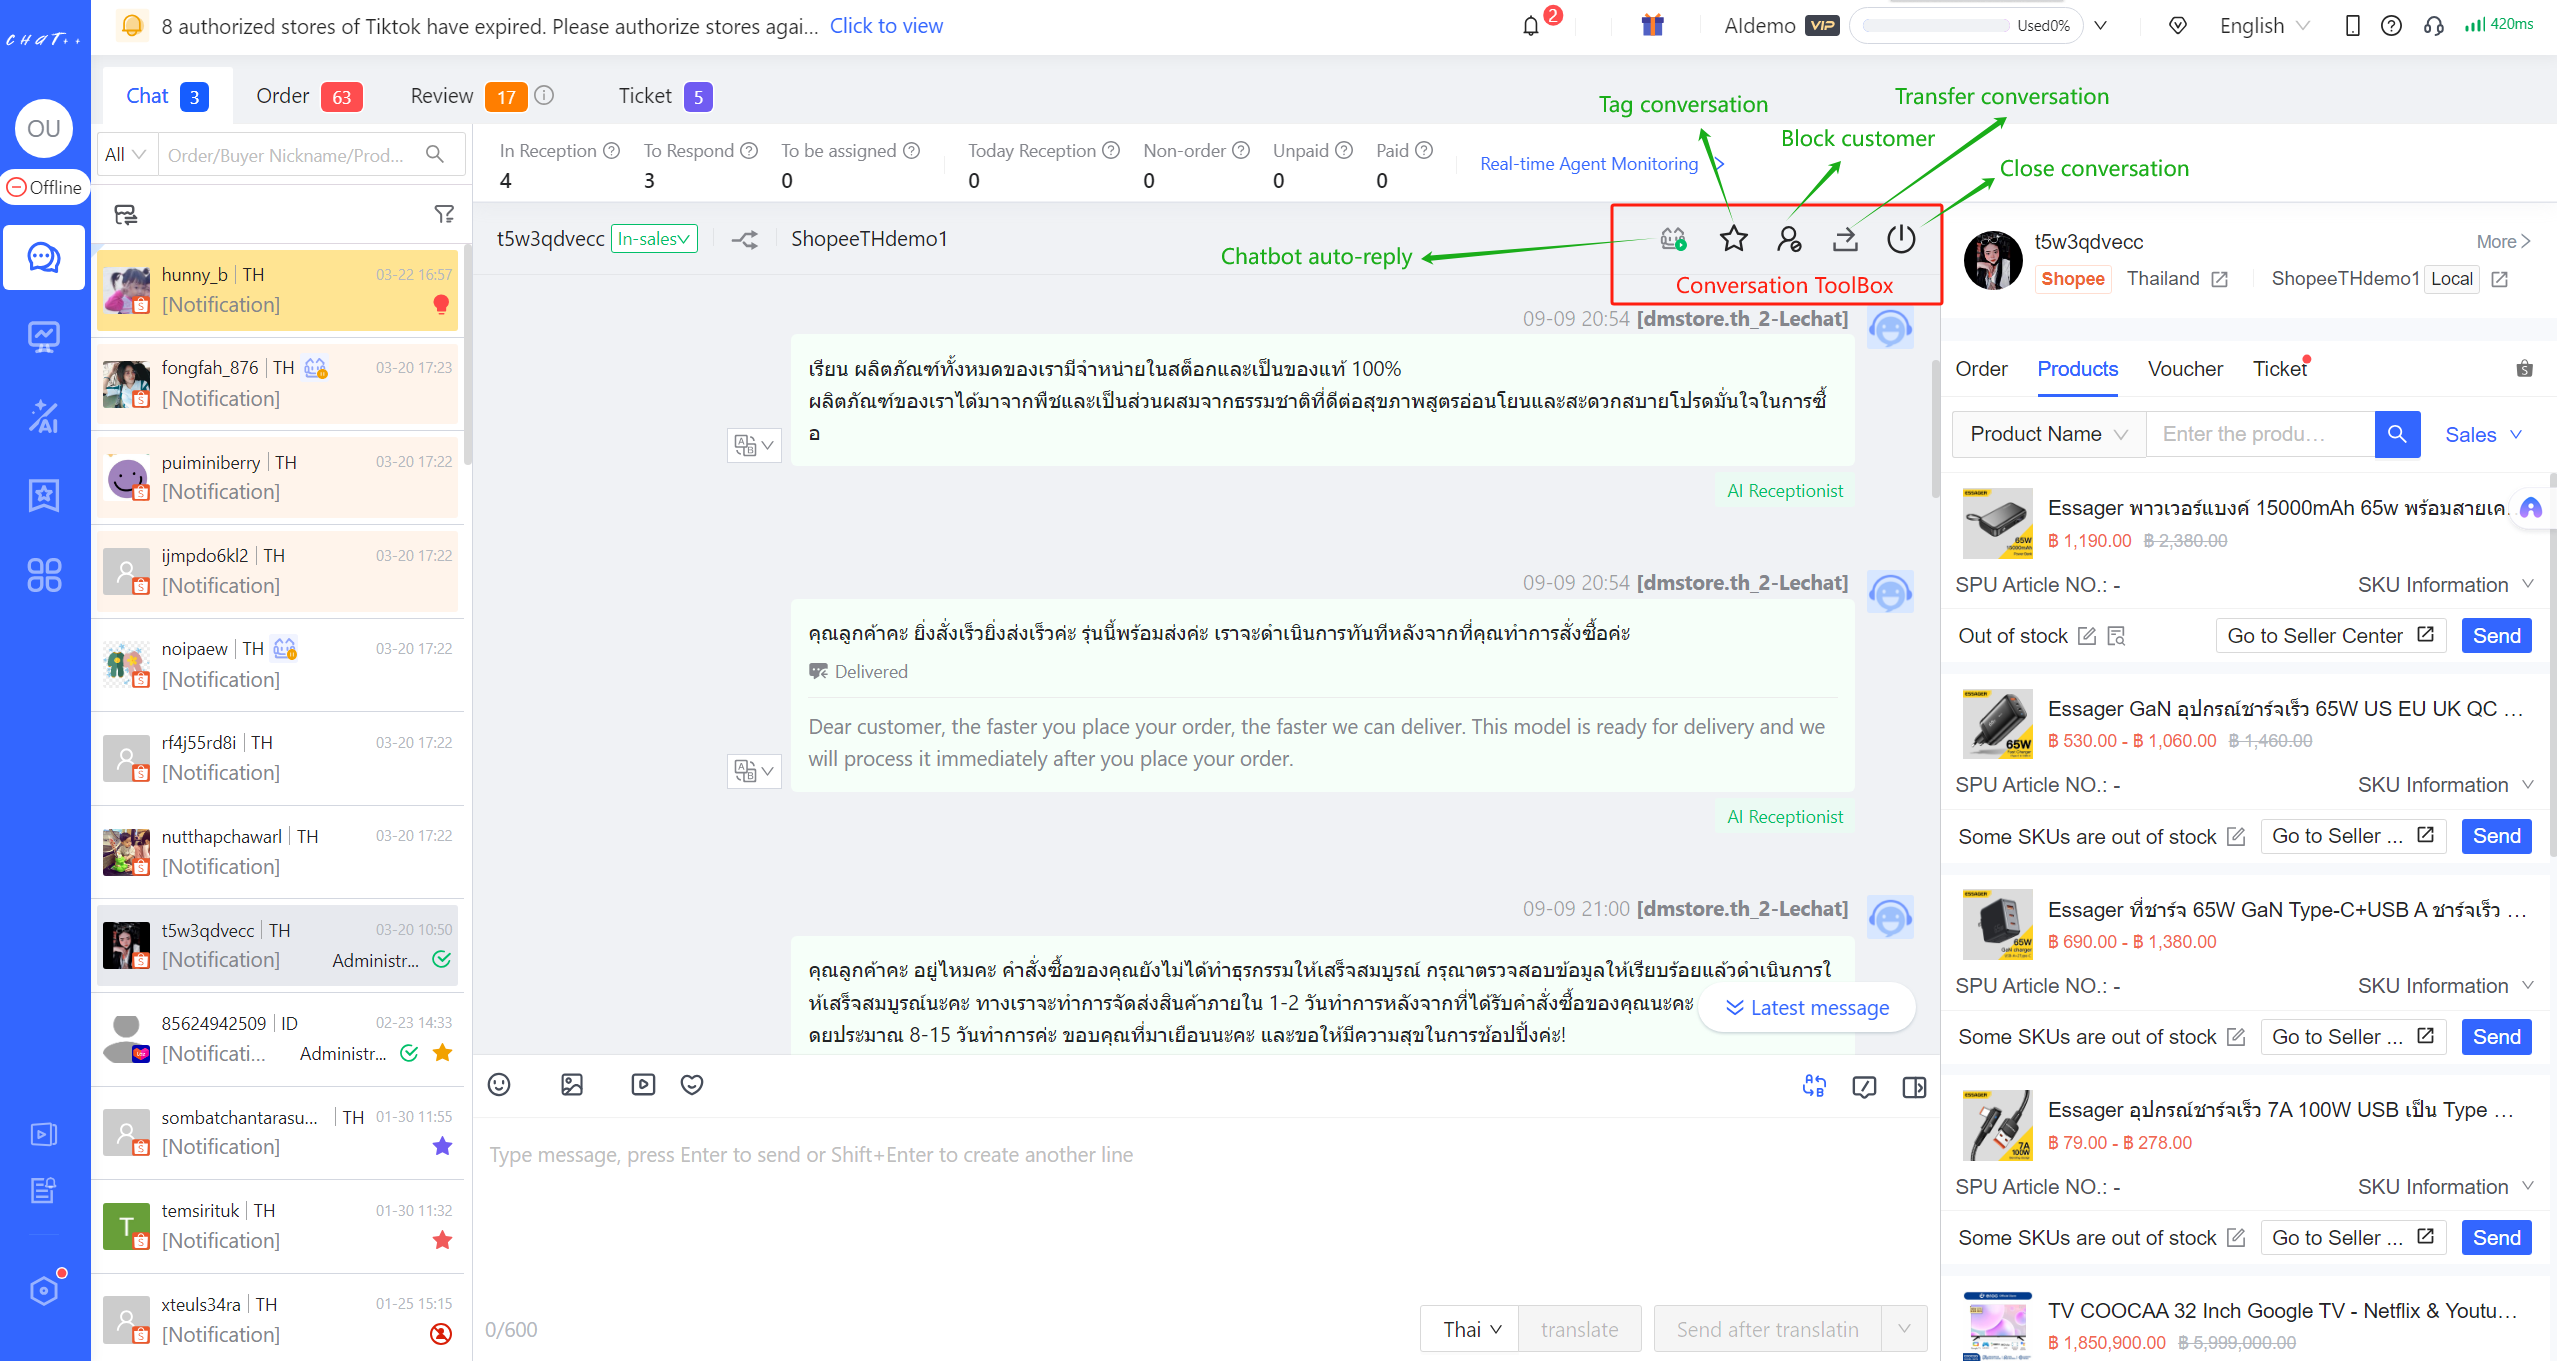
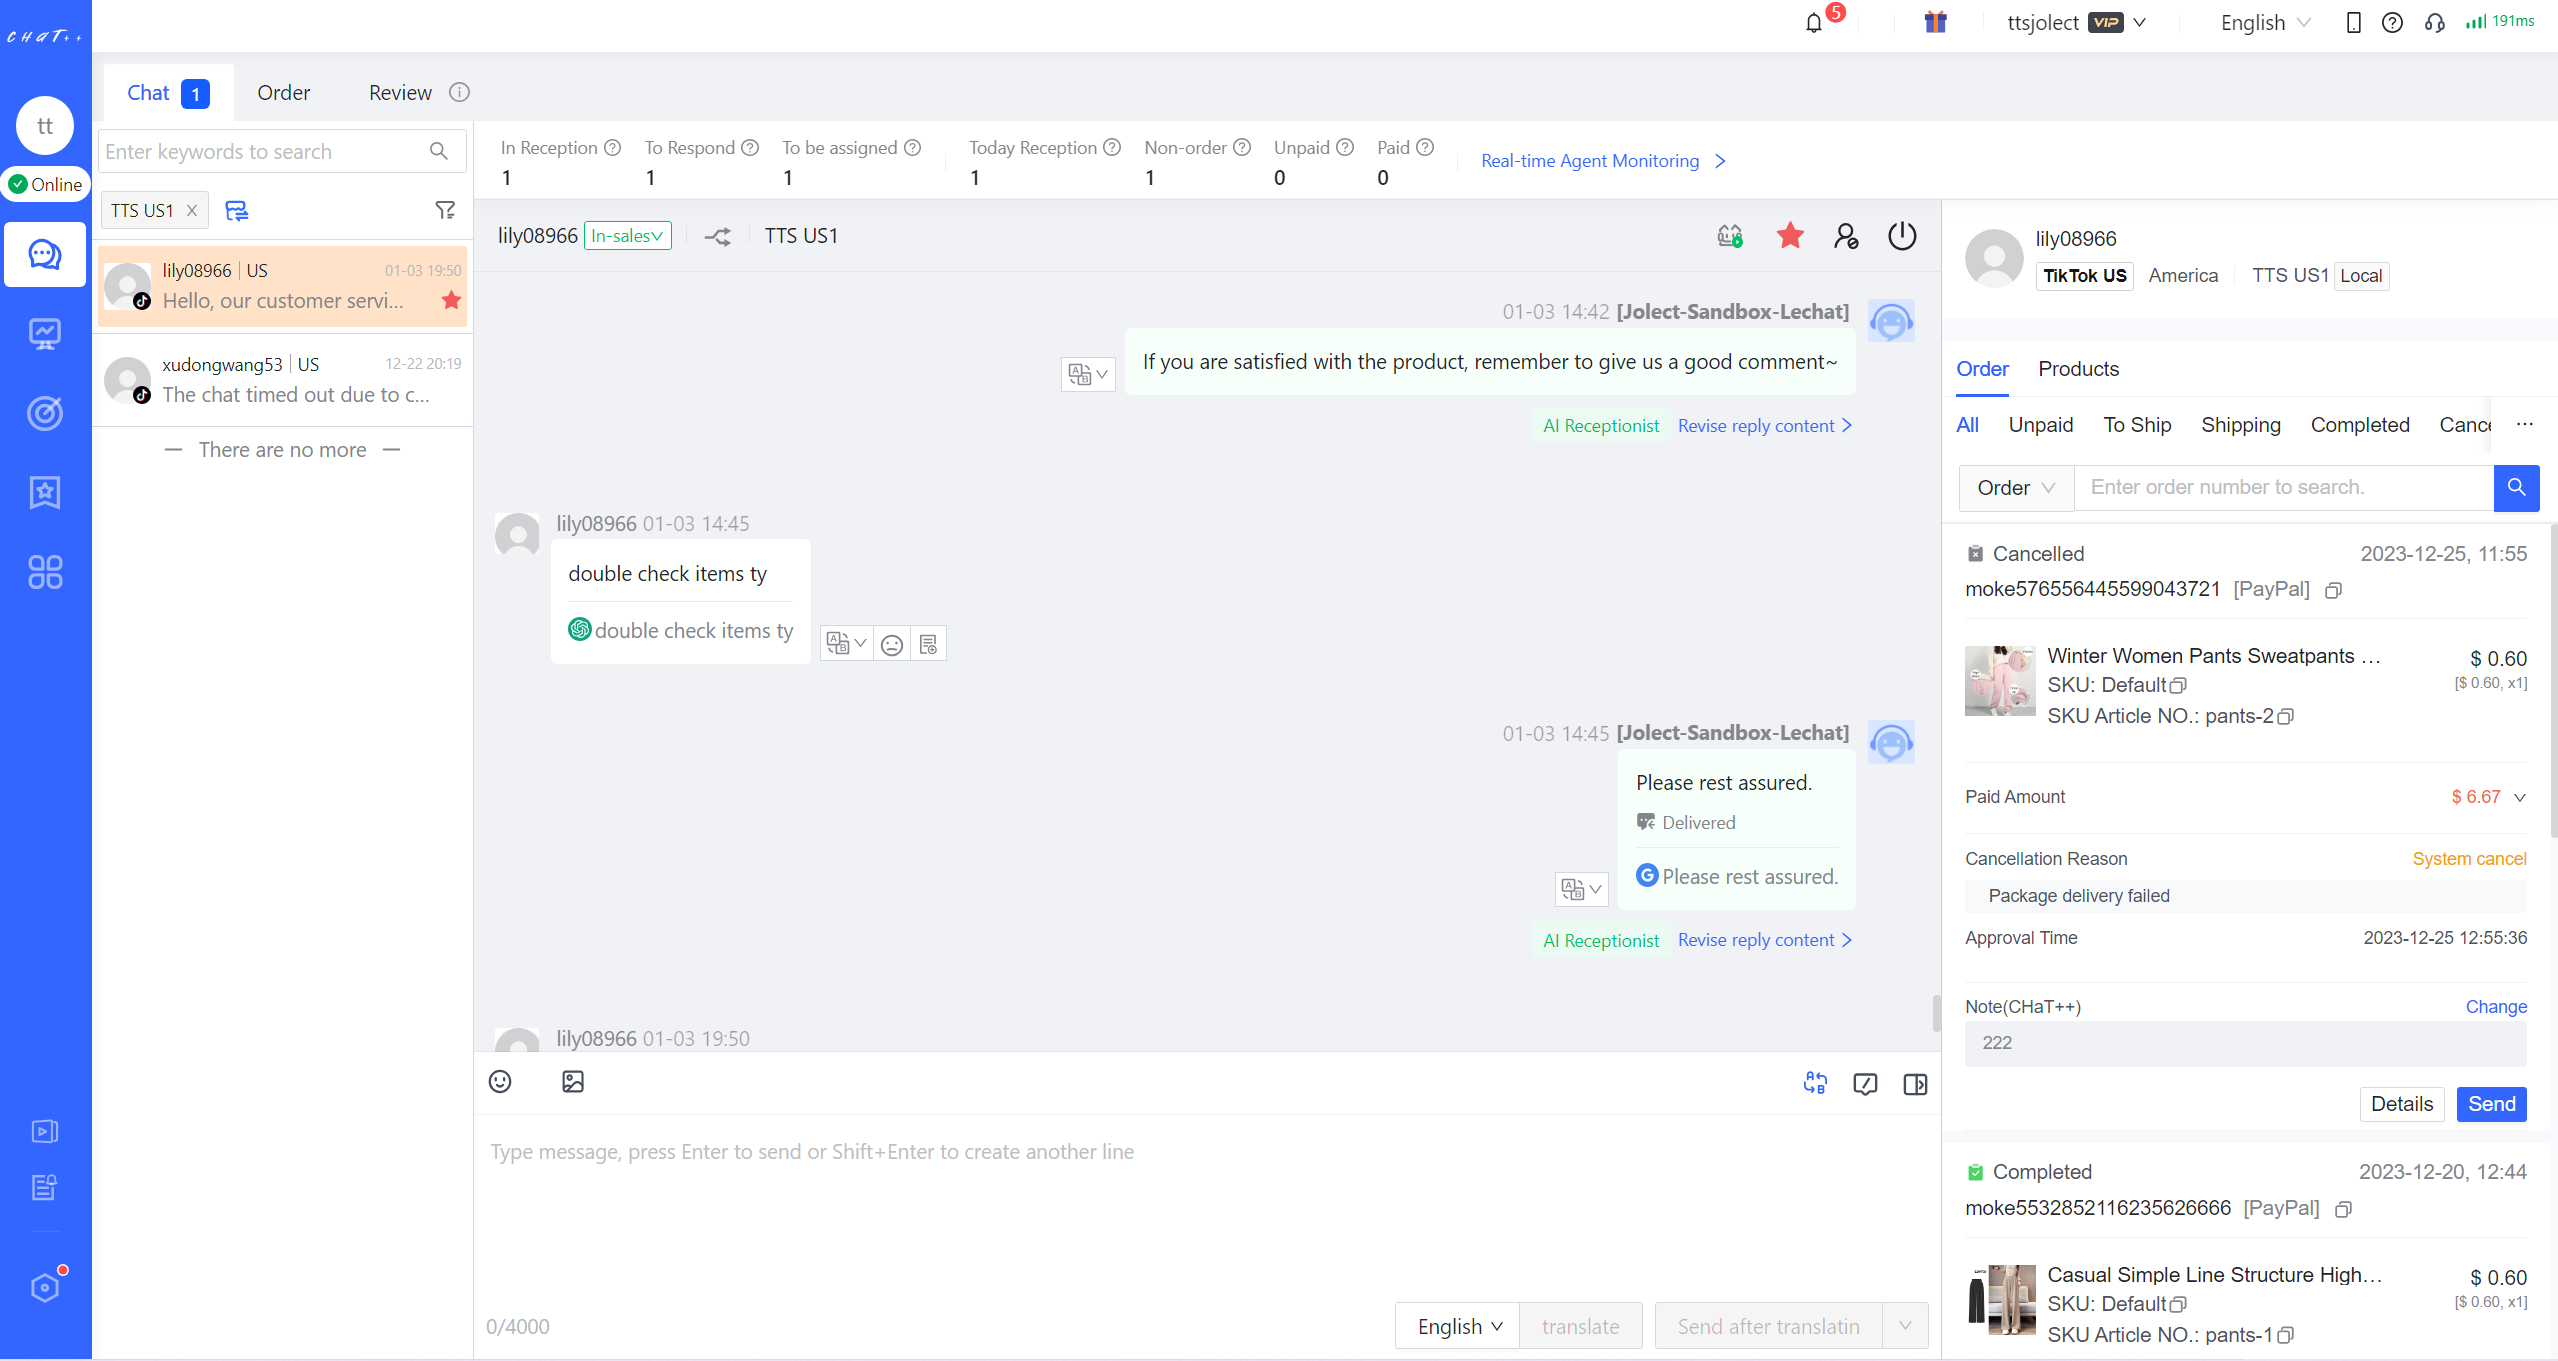
In ChatPlusAI customer service workbench, we aggregate the query message from major marketplaces (Shopee, Lazada, TikTok and Tokopedia) from different county sites all in one place, support multiple conversation filtering and search methods, strong reminder of the high value scenarios to human, collaborate bot and human work seamlessly. ChatPlusAI provides a perfect way to increase the agent team efficiency significantly.
Click「Message」in the left menu→「Chat」,enter Chat page.
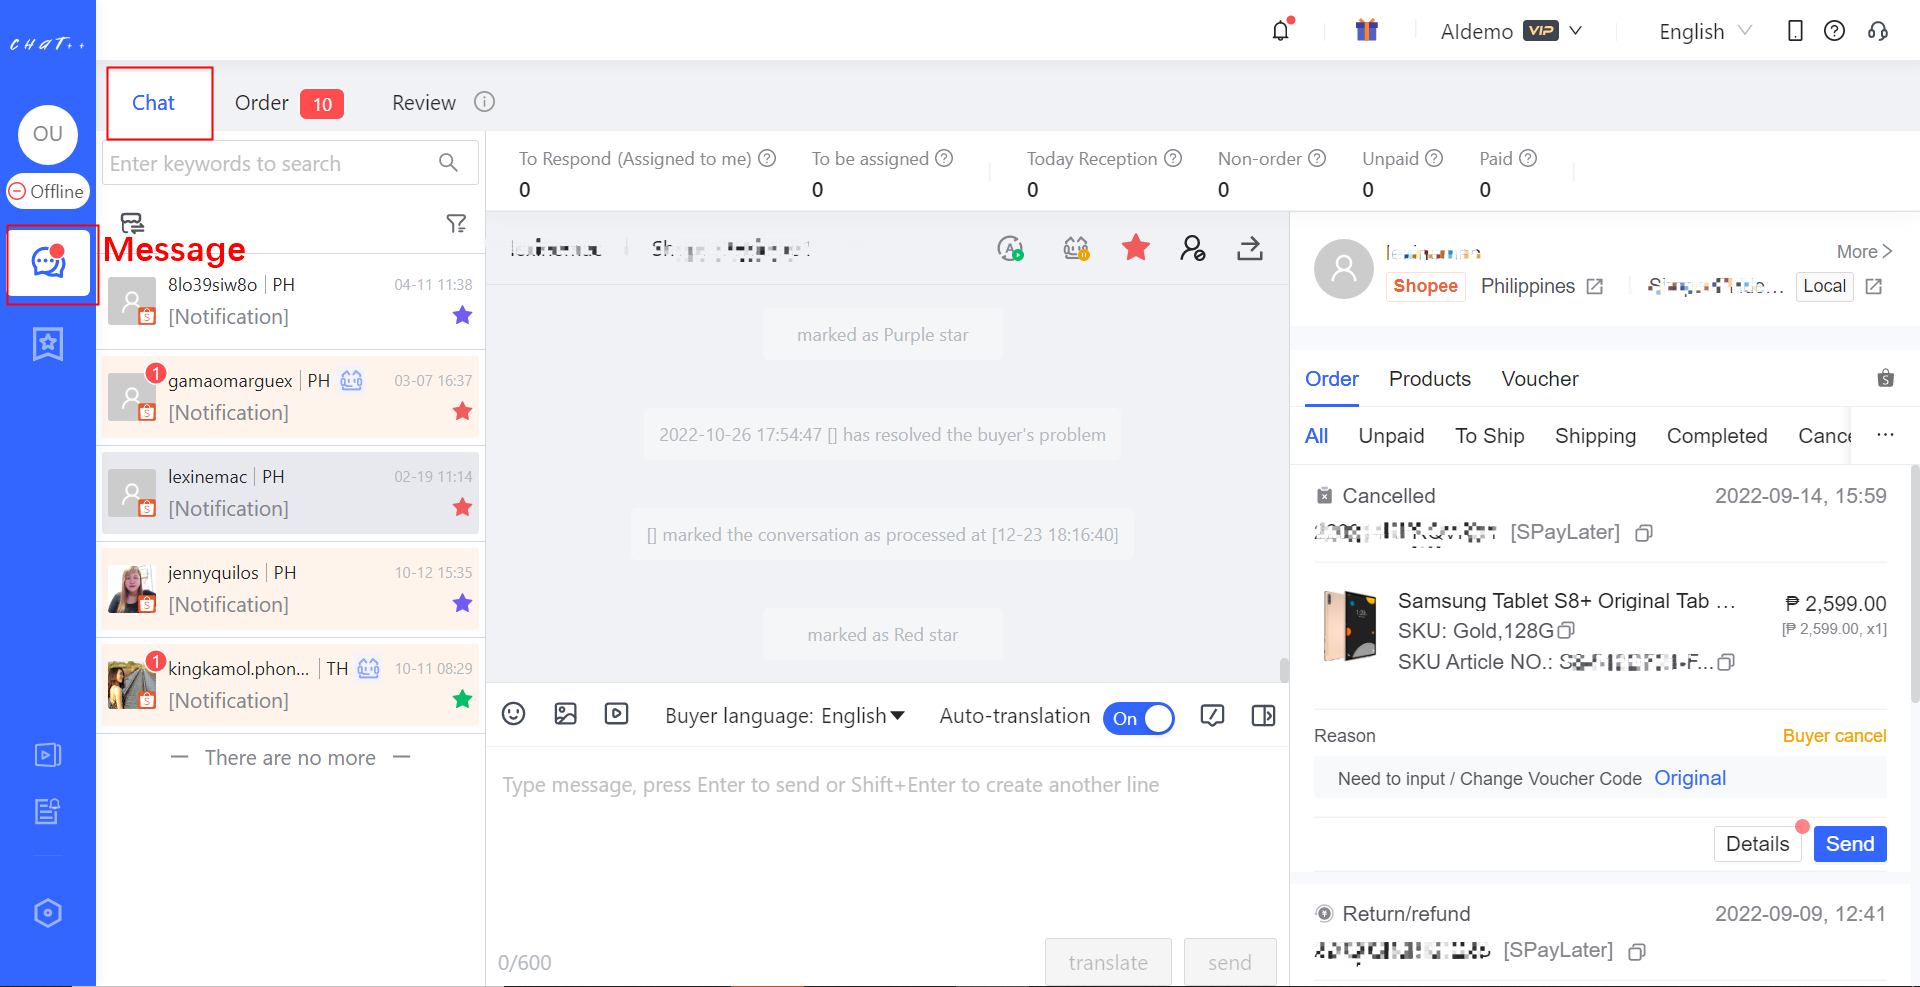
Chat Page
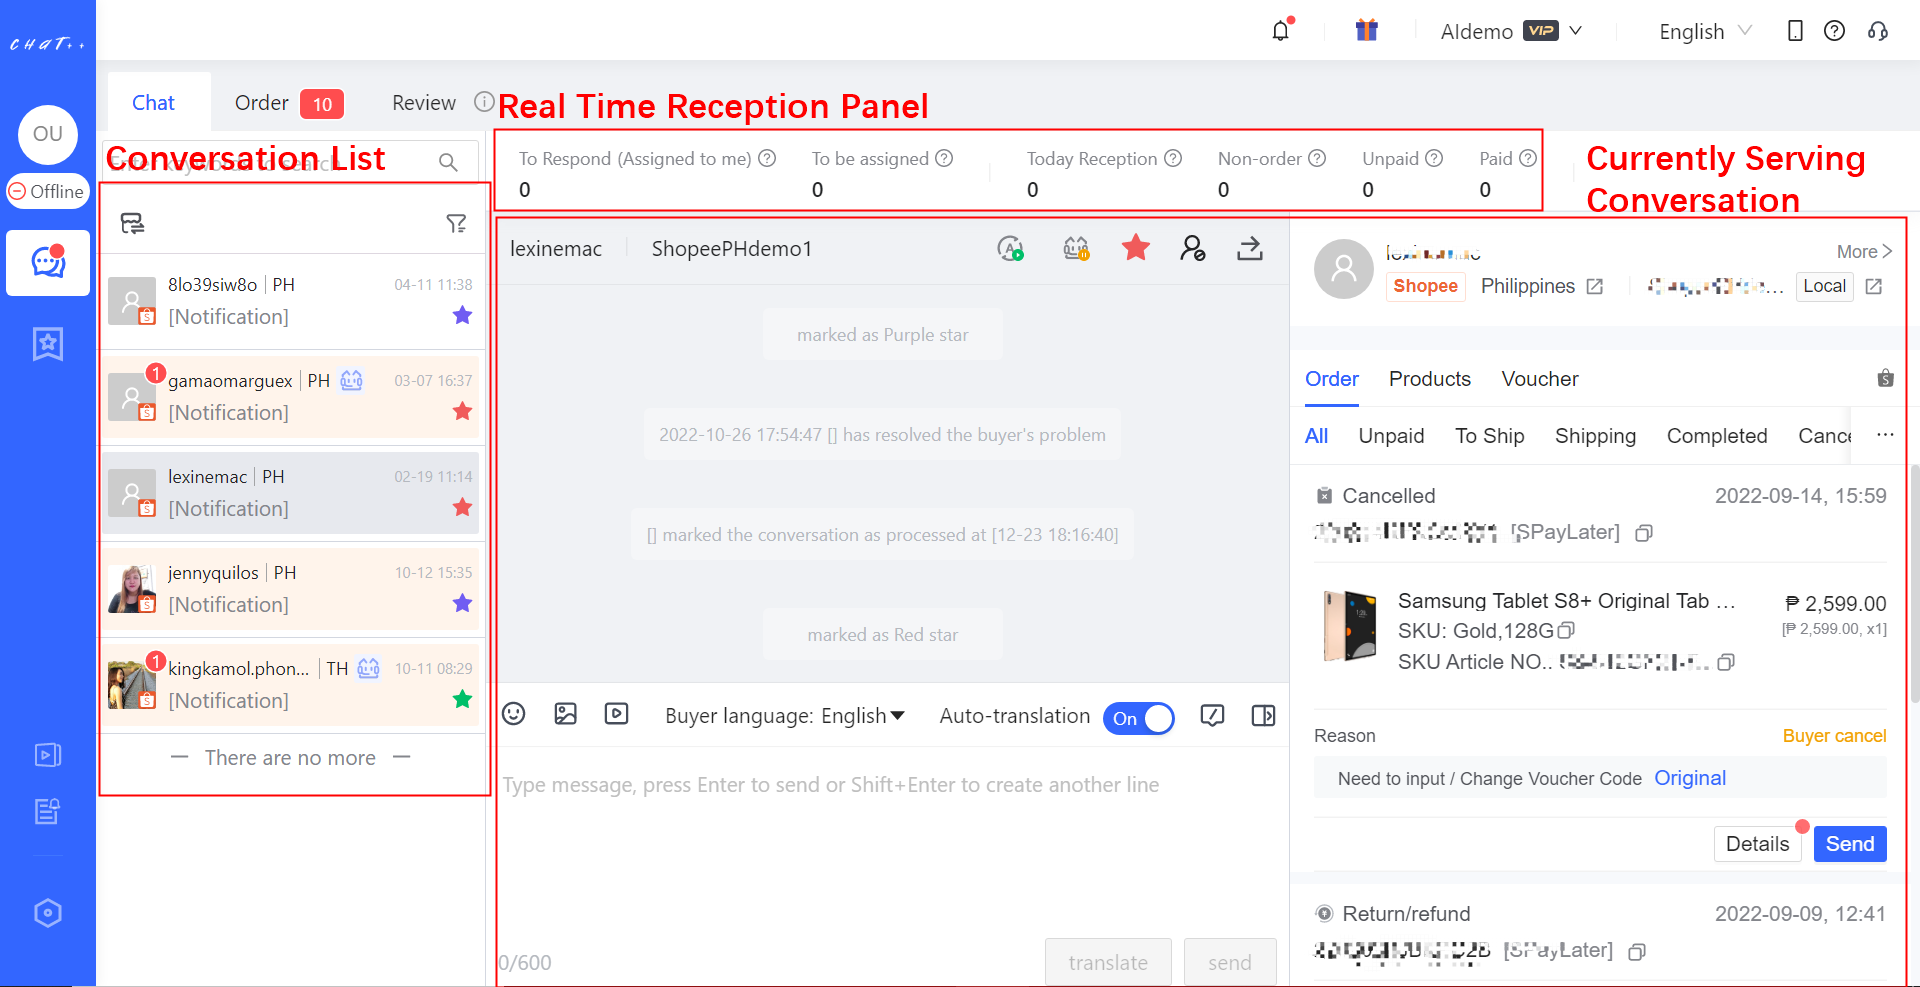
Conversation List
Basic functions
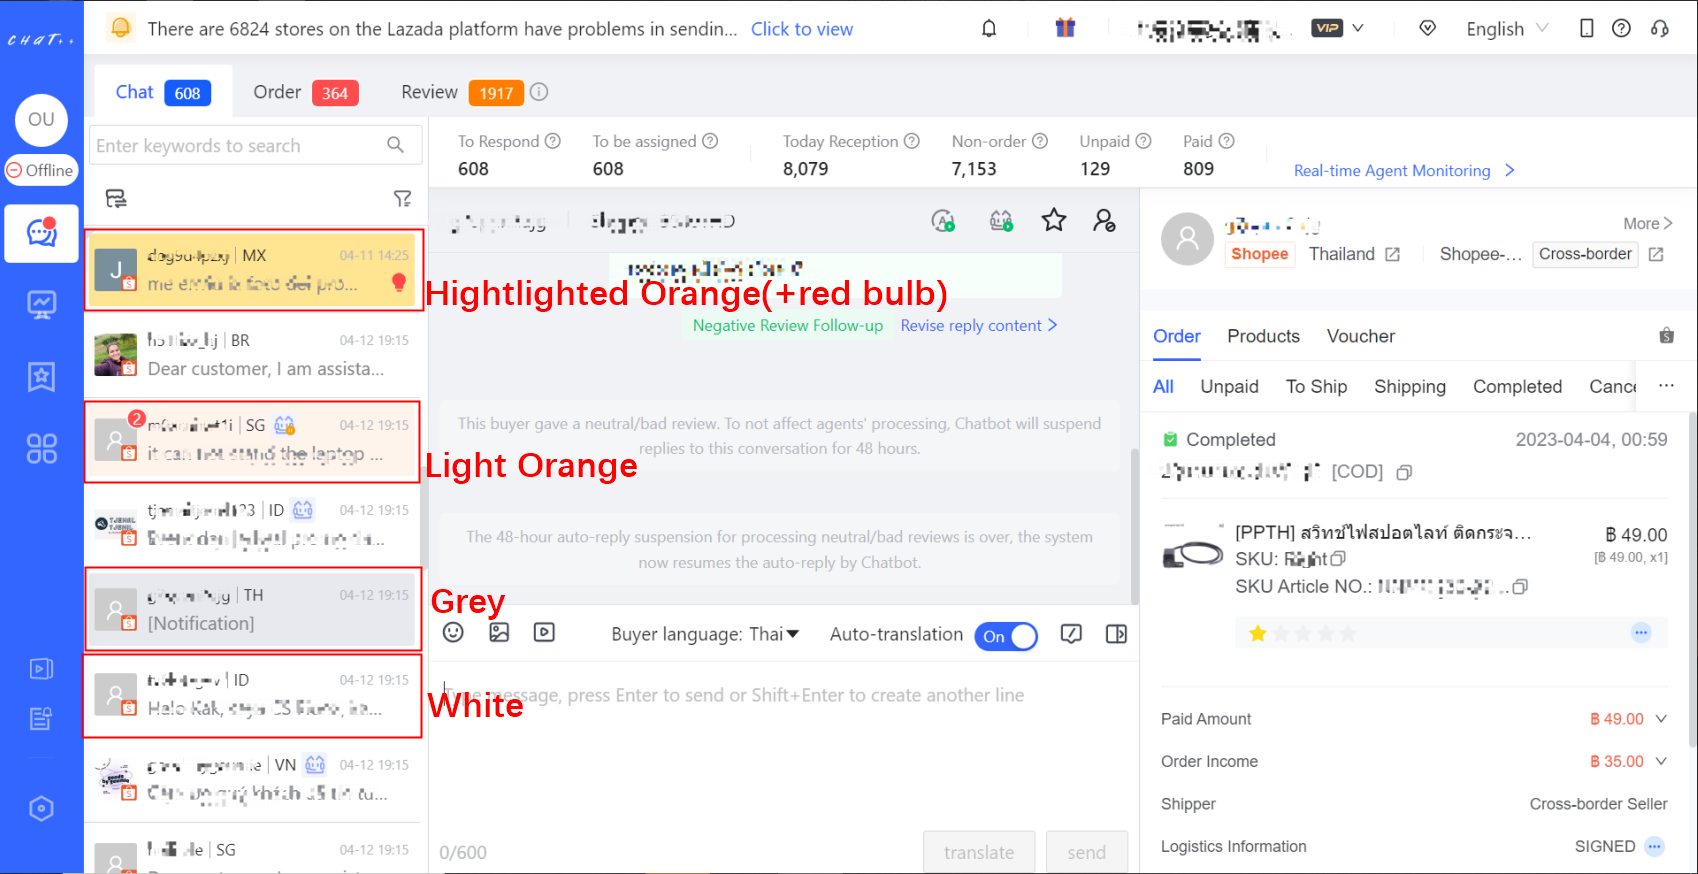
Background Color Description: 4 colors indicate different conversation status.
Grey: The conversation is currently serving, the agent is working on this conversation, and the right window shows the conversation context.
Light Orange: The conversation is waiting for response by agents.
Note: Either agents’ response or business meaningful auto-reply is counted as response. Auto-message like store welcome message, timeout reply, on-duty reply are not counted.
Highlighted Orange (+red bulb): This conversation is machine-detected as high value/high risk conversation, ChatPlusAI strongly reminds the agent to process this in priority.
White: This conversation is meaningfully responded by either agents or AI Chatbot.
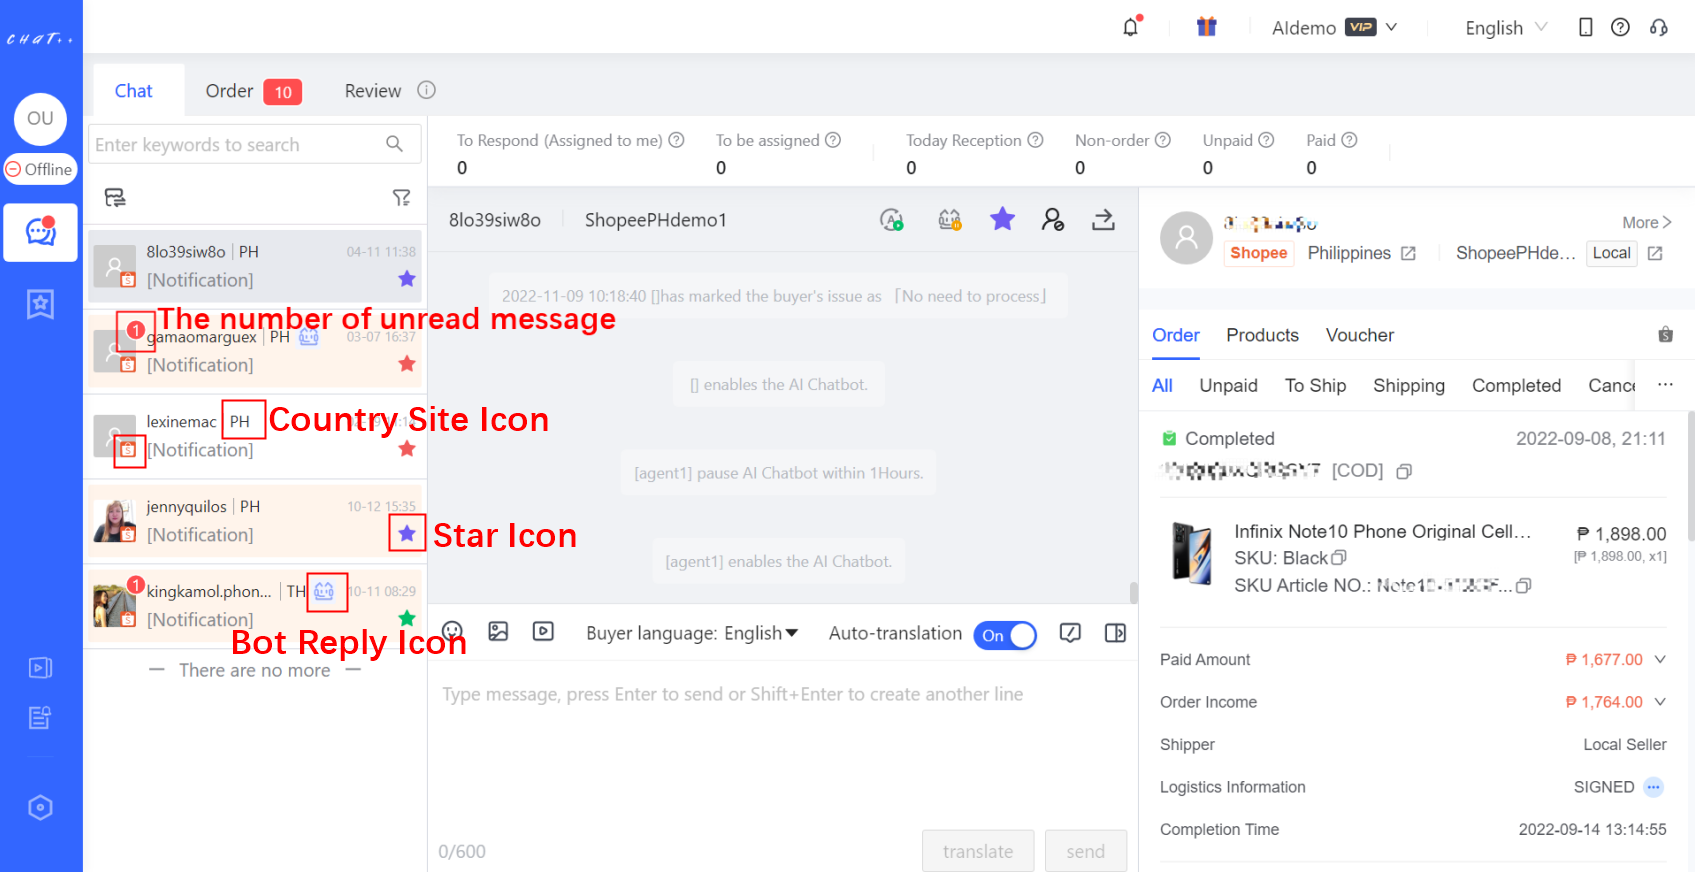
Icon Description
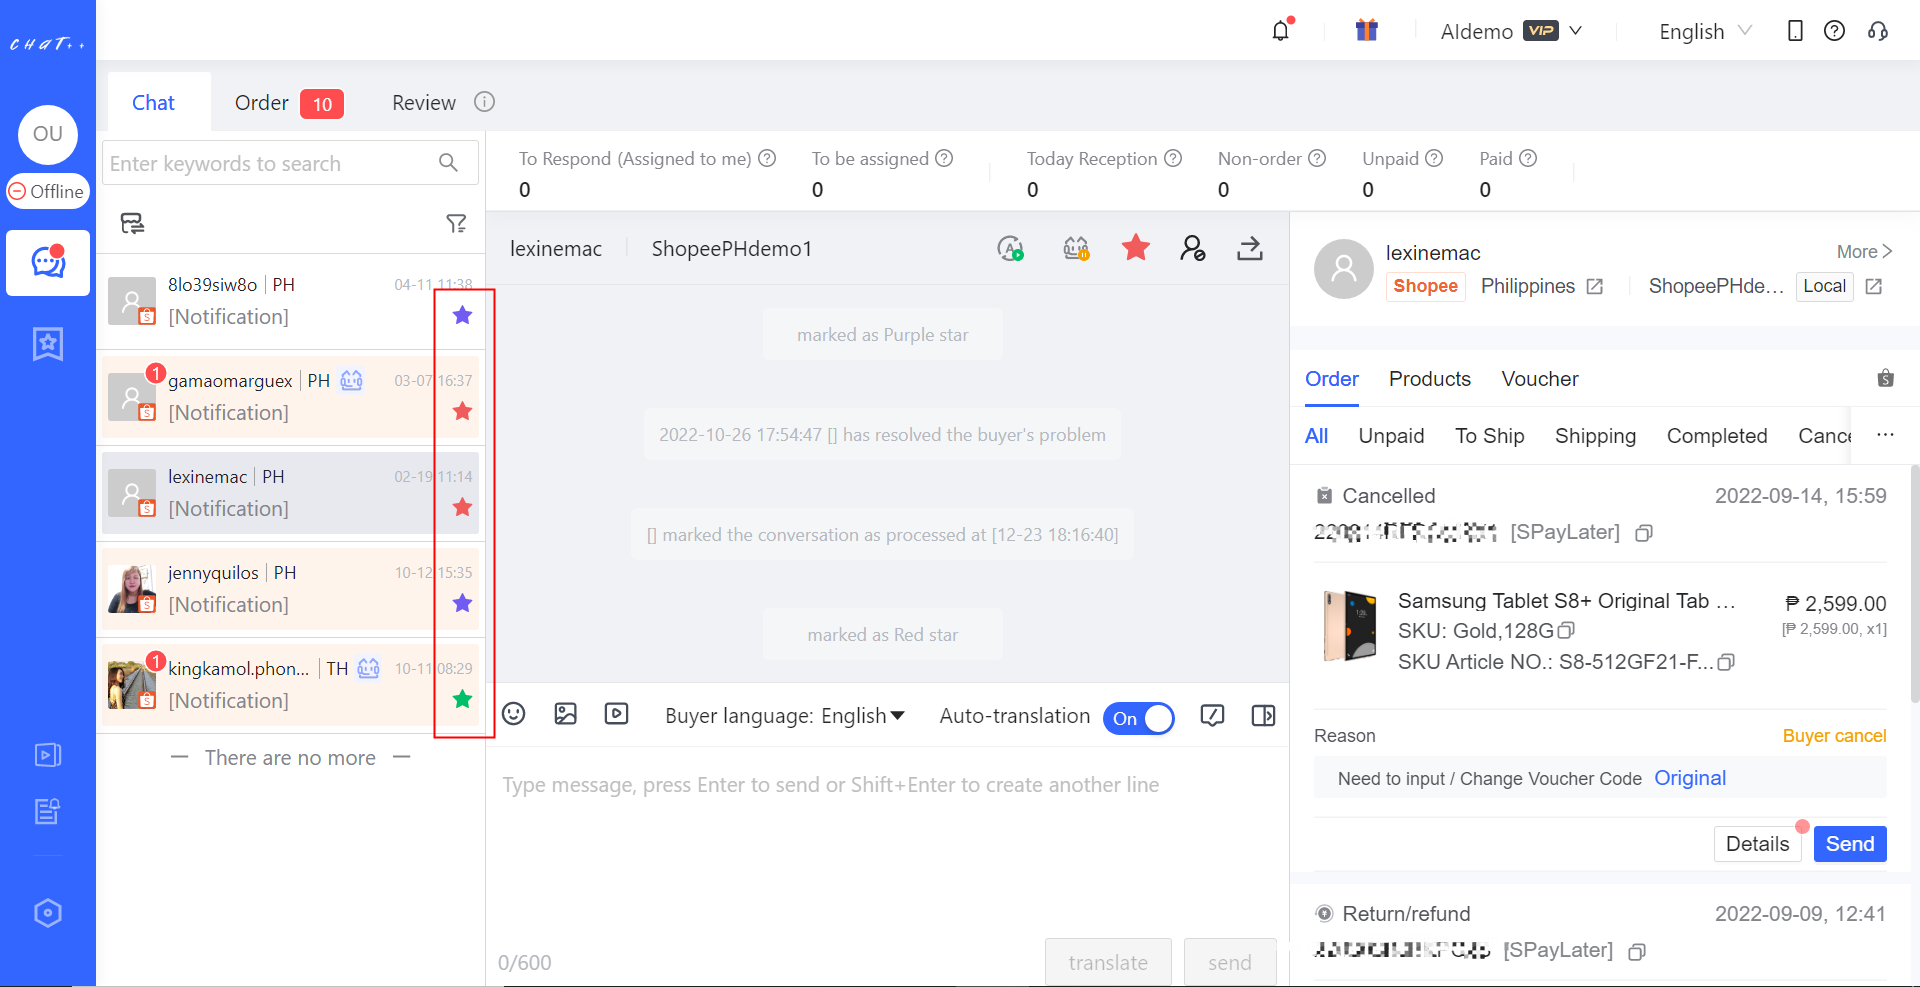
Star icon: It is tagged by the agent to indicate some important conversation for follow-up.
Bot reply icon: It indicates bot reply in this conversation, and the agent has not reviewed it yet. After reviewing the conversation (click this conversation and read the bot reply), the bot reply icon will disappear.
The number on the right corner of avatar: It shows the number of unread buyer messages by the assigned agent account. Note: If the latest buyer’s question in this conversation is meaningful responded by AI Chatbot, then the unread message number icon will disappear, the bot reply icon will be showed instead.
Country site icon: It shows the country site of the conversation.
ChatPlusAI adopts customer traffic dispatch mechanism which send store’s customer traffic to different agent accounts respectively, if one store has several agents, then one online agent gets part of customer traffic. One customer conversation is assigned to one of the online agent, is not assigned to multiple agents which might result in reception confliction. This methodology improves the agent team’s efficiency significantly.
In terms of the privilege of the role which the agent account belongs to, the right customer conversation traffic is sent to the agent’s conversation list.
In the conversation list, ChatPlusAI shows each conversation’s latest message and its timestamp. The latest message could be either buyer’s query, seller side’s response, or system info (i.e. conversation transfer, marked as star). The conversation is ordered by latest message time, more newer more upper. The strong reminded conversation is topped.
Conversation Search
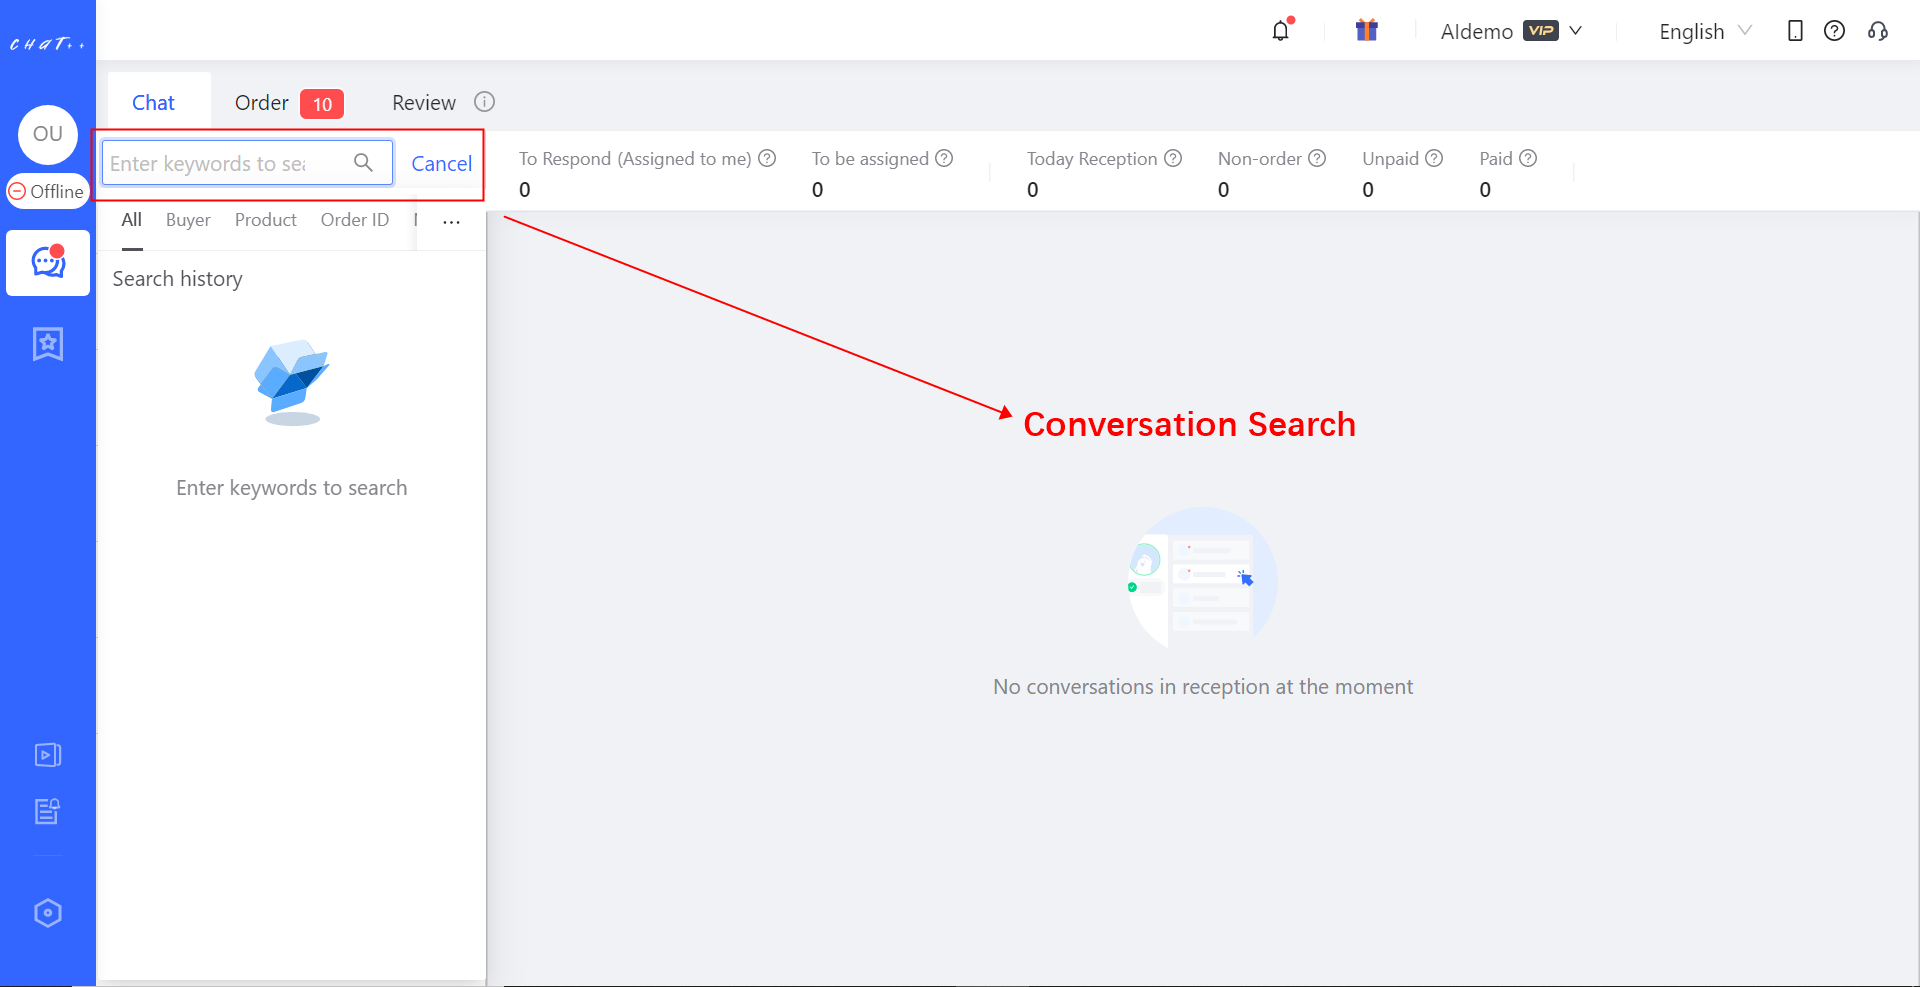
Click the search box above the conversation list, the agent can input buyer, product, order ID, message content to search the conversation.
Note: The agent can not only search the conversation which is assigned to his account, but also the conversation which is not assigned. The constraint is the latest message in the conversations which took place no more than 30 days.
Search by Buyer: Full buyer name is required as input. The result shows all the conversations with this buyer, which took place no more than 30 days.
Search by Product: Keyword or partial name of the product is okay as input to search the conversation. The result shows all the conversations include matched product card, which took place no more than 30 days.
Search by Order ID: Full Order ID is required as input to search the conversation. The search result shows all the conversations connected with the matched order, which took place no more than 30 days.
Search by Message Content: Keyword of the message is inputted to search the conversation. The search result shows all the conversations include matched message, which took place no more 30 days.
As to silent buyer who does not contact the agent, the agent can input order ID to locate the buyer and then trigger conversation on Shopee and Lazada. Lazada has 7 days window limits for silent buyer contract. The agent can only touch silent buyer who has placed an order no more than 7 days.
Note:Search scope is limited by account’s store access rights. Agents can’t search the conversation from the store which he does not have access right.
Conversation Filter
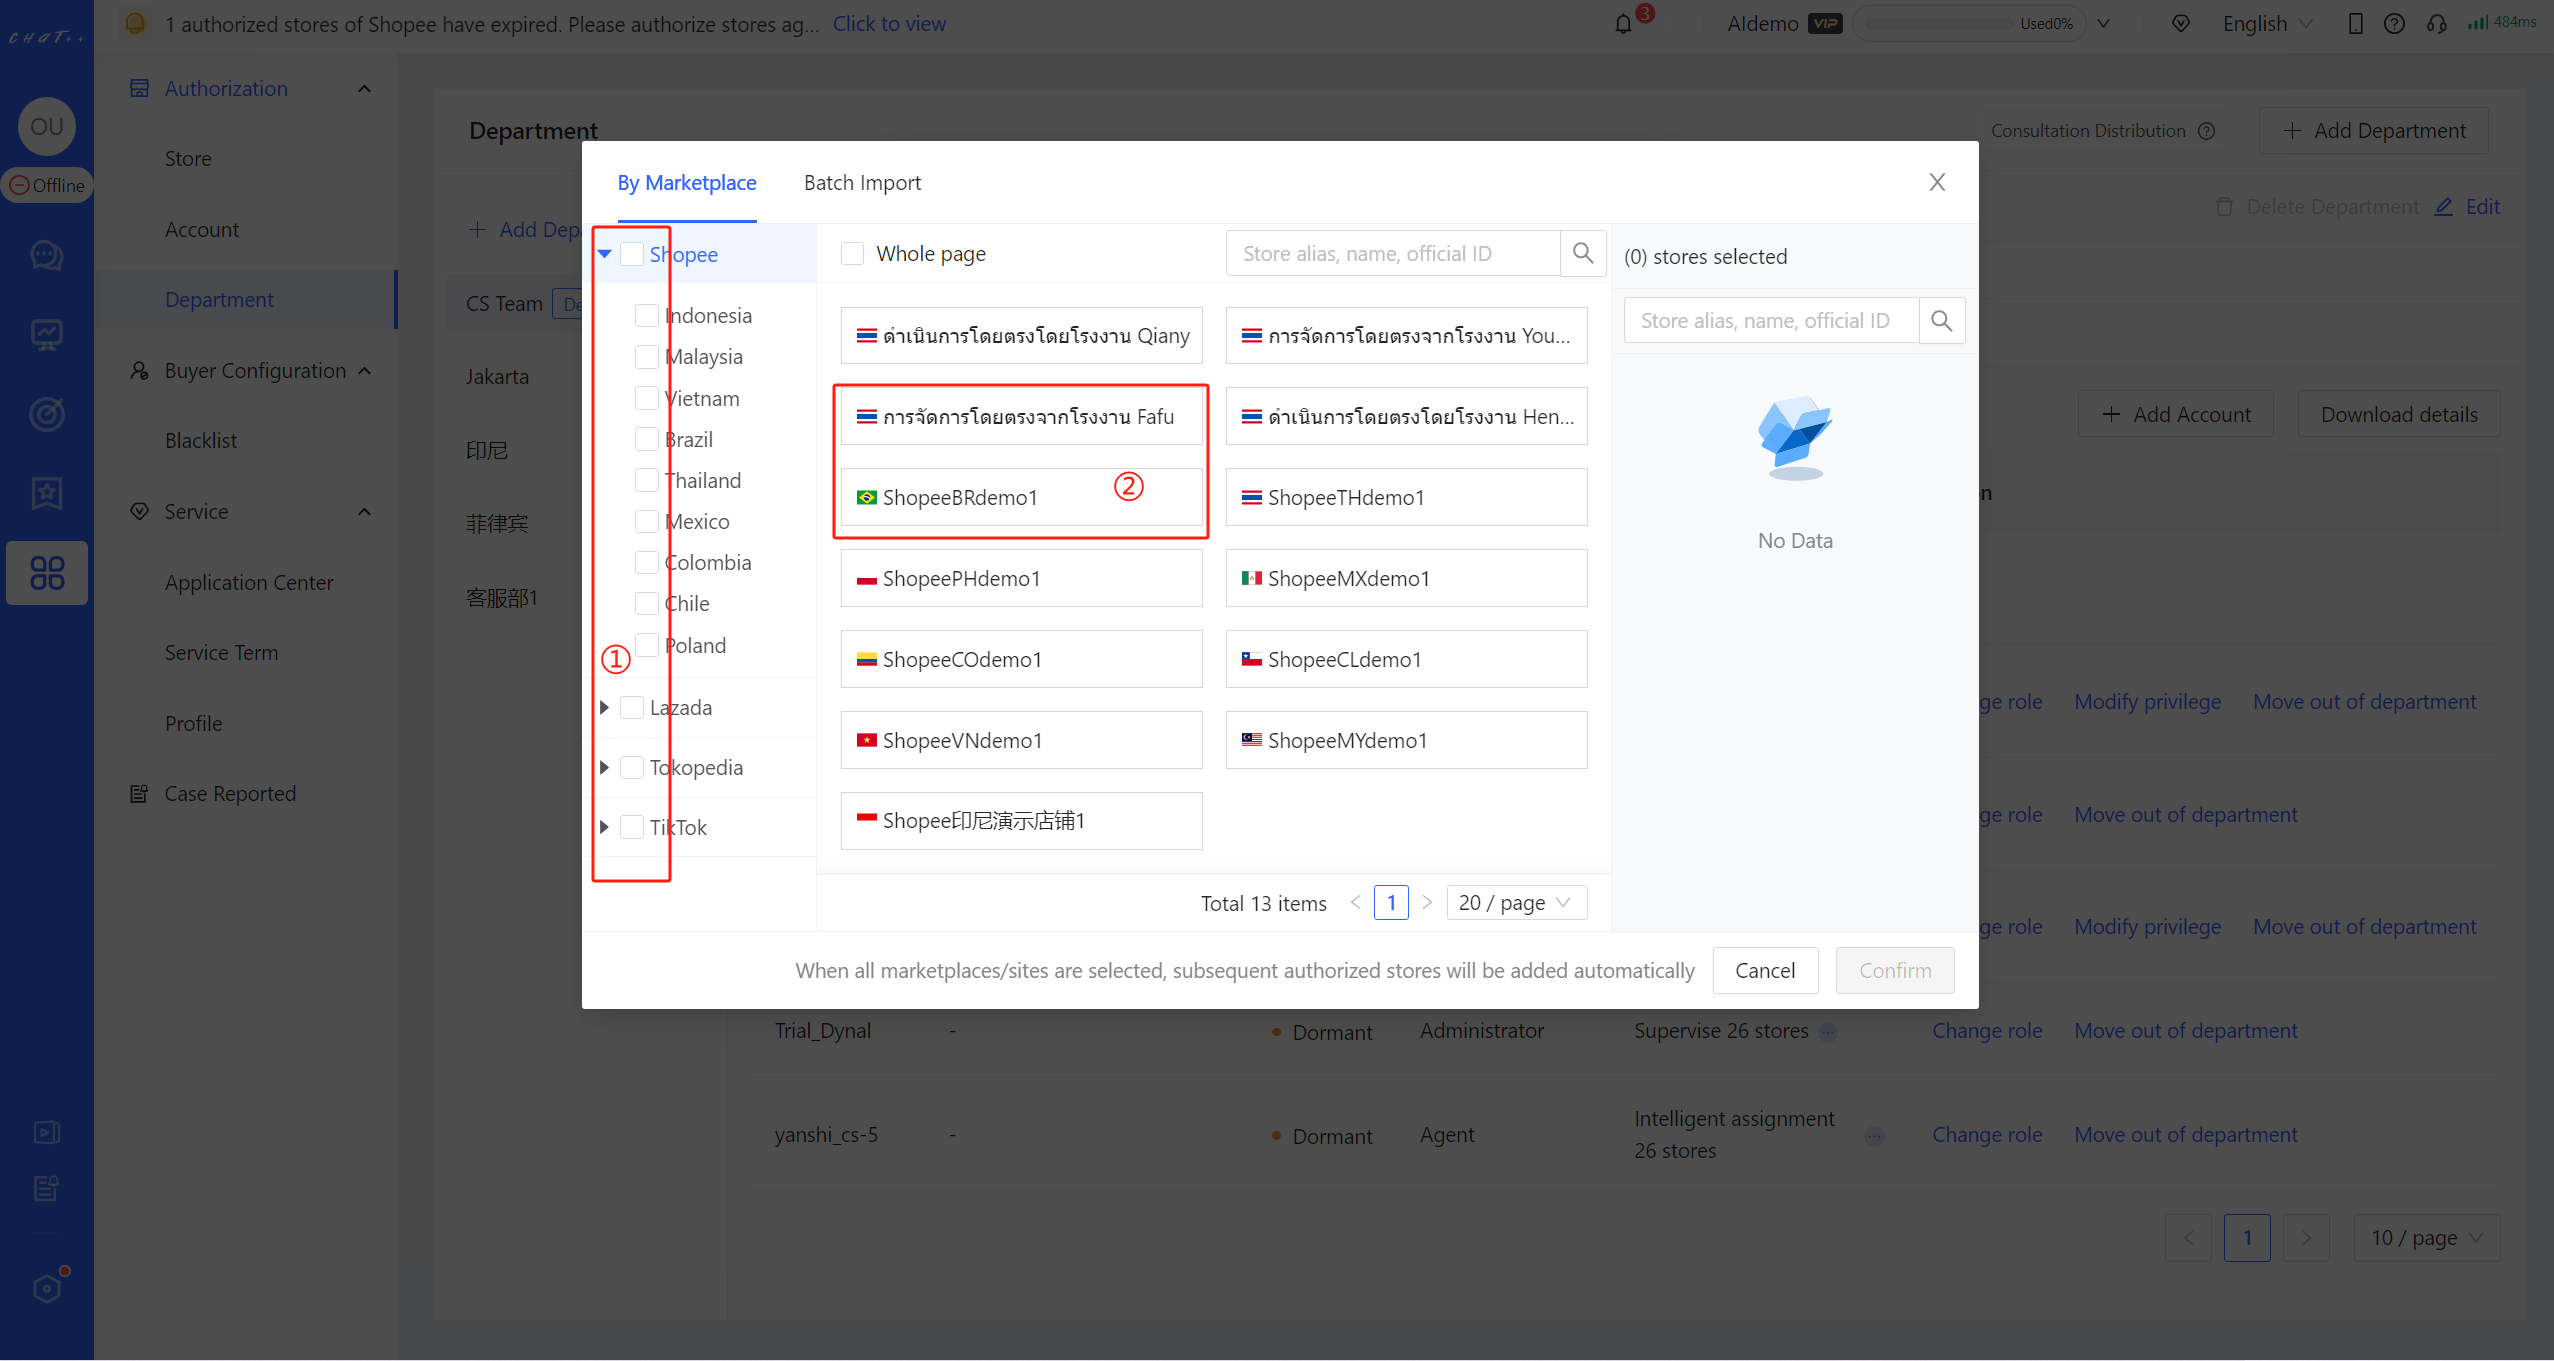
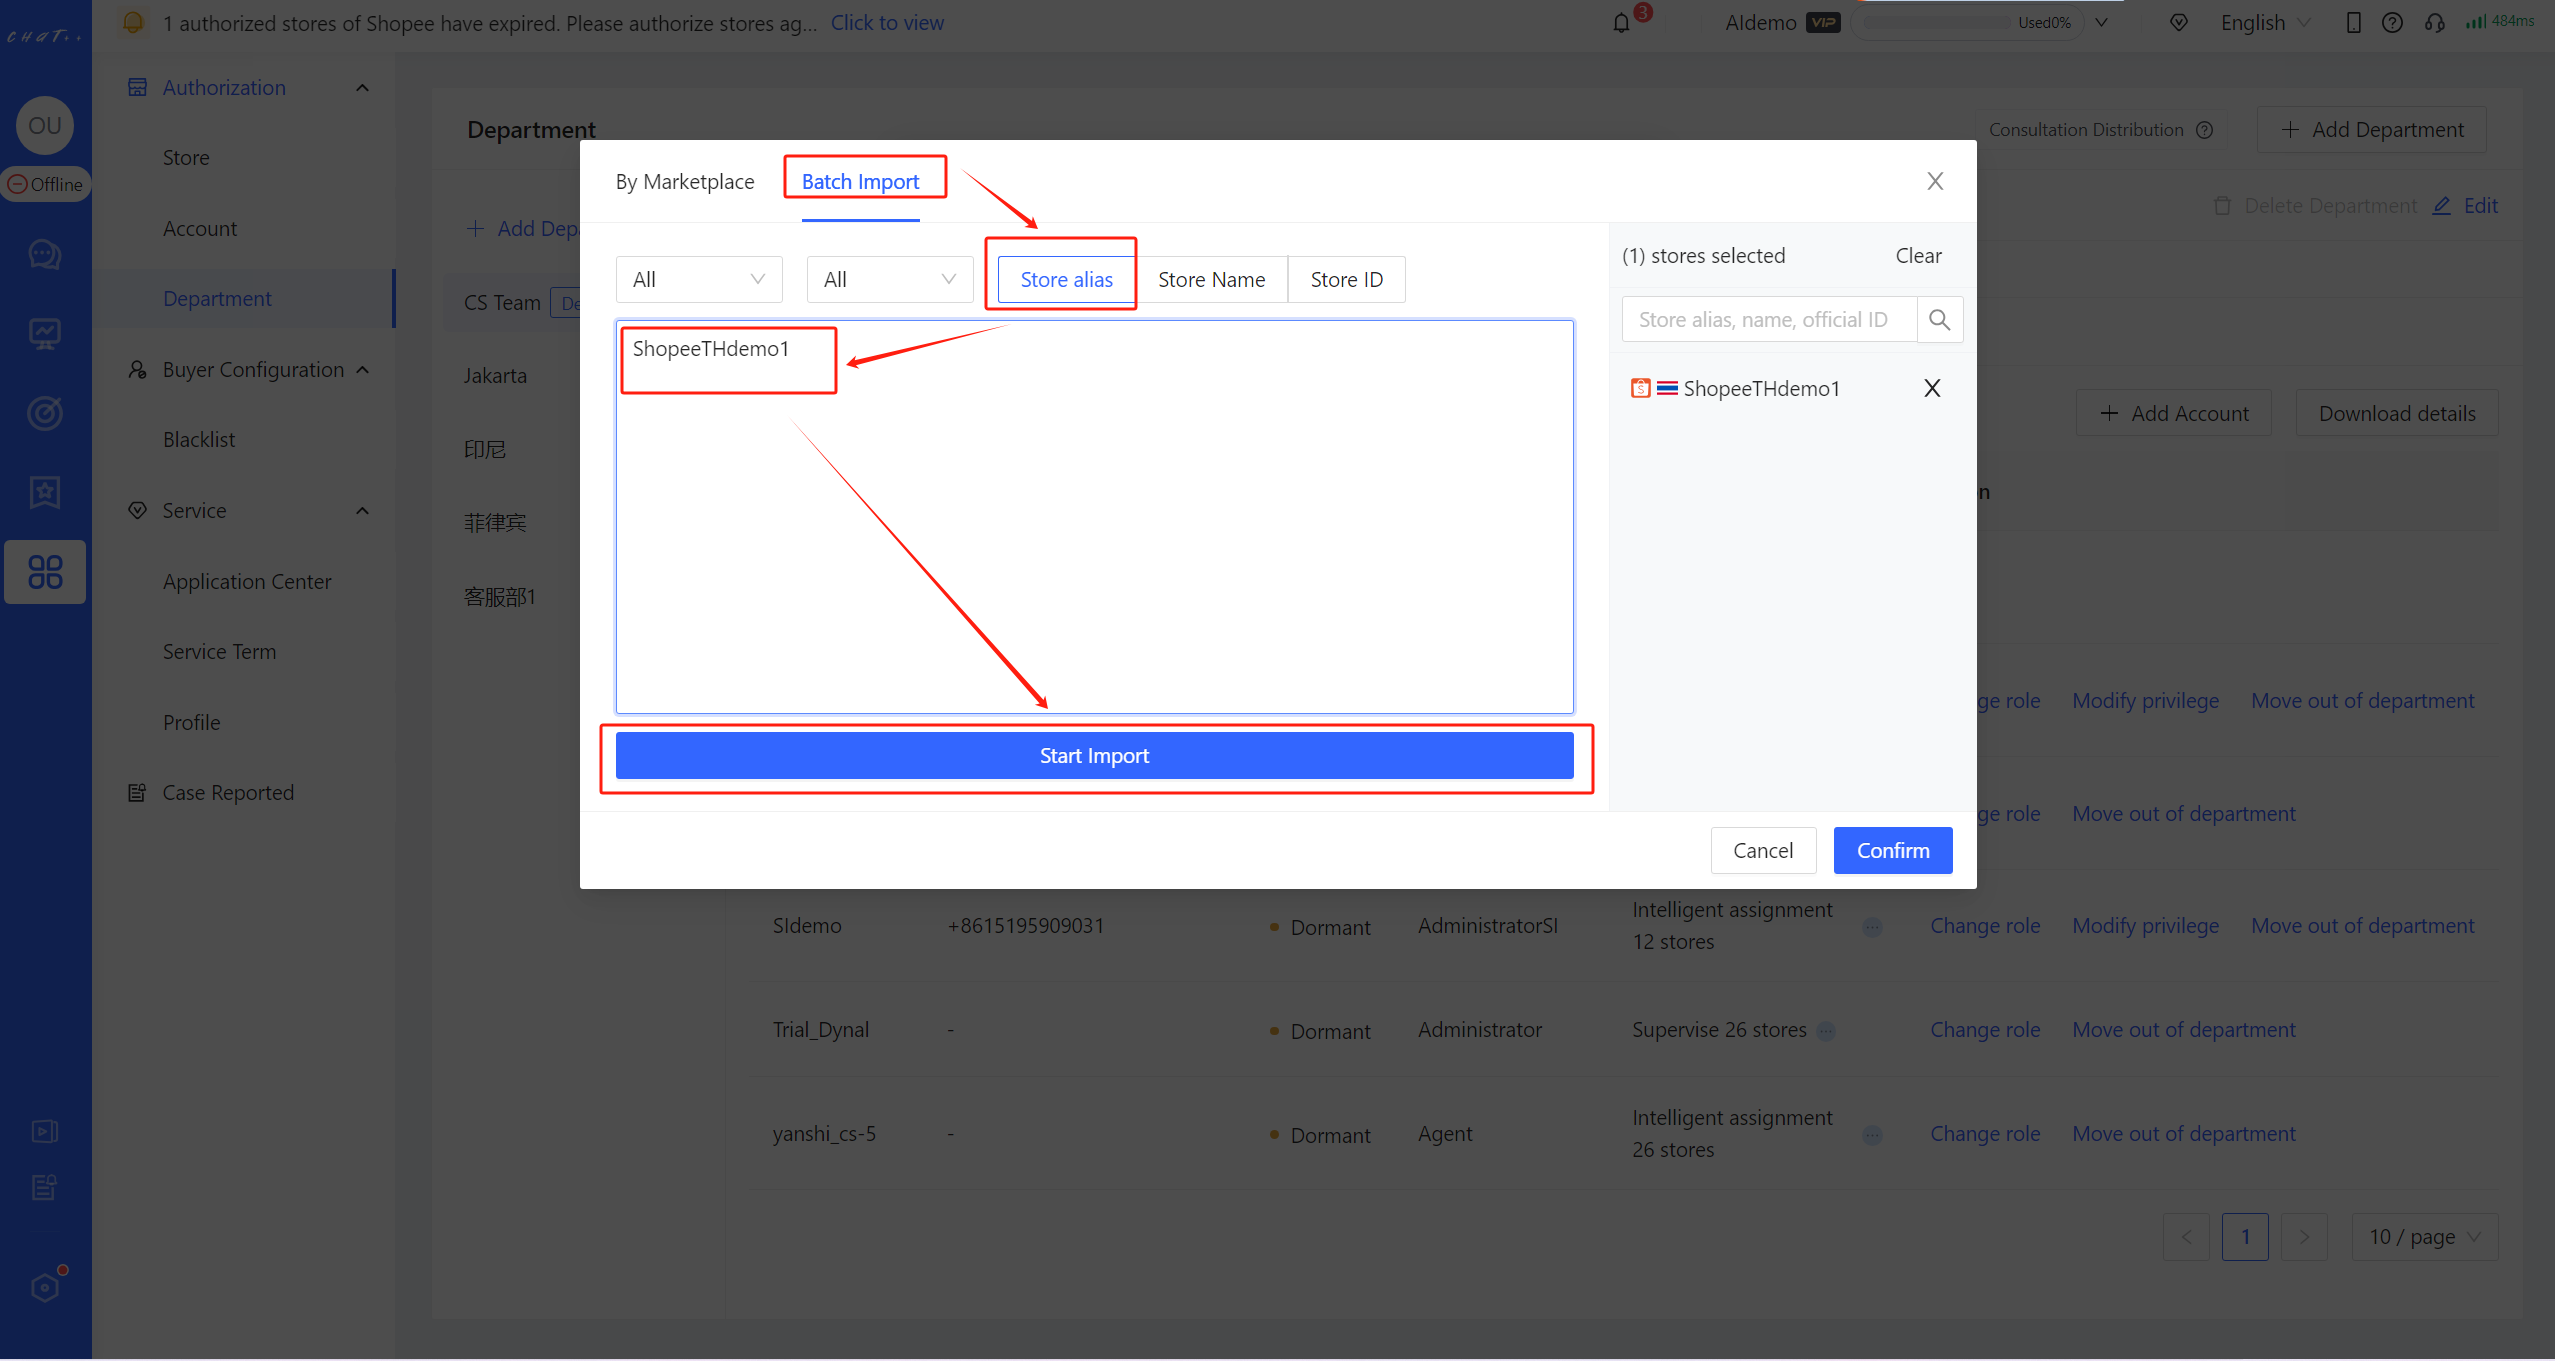
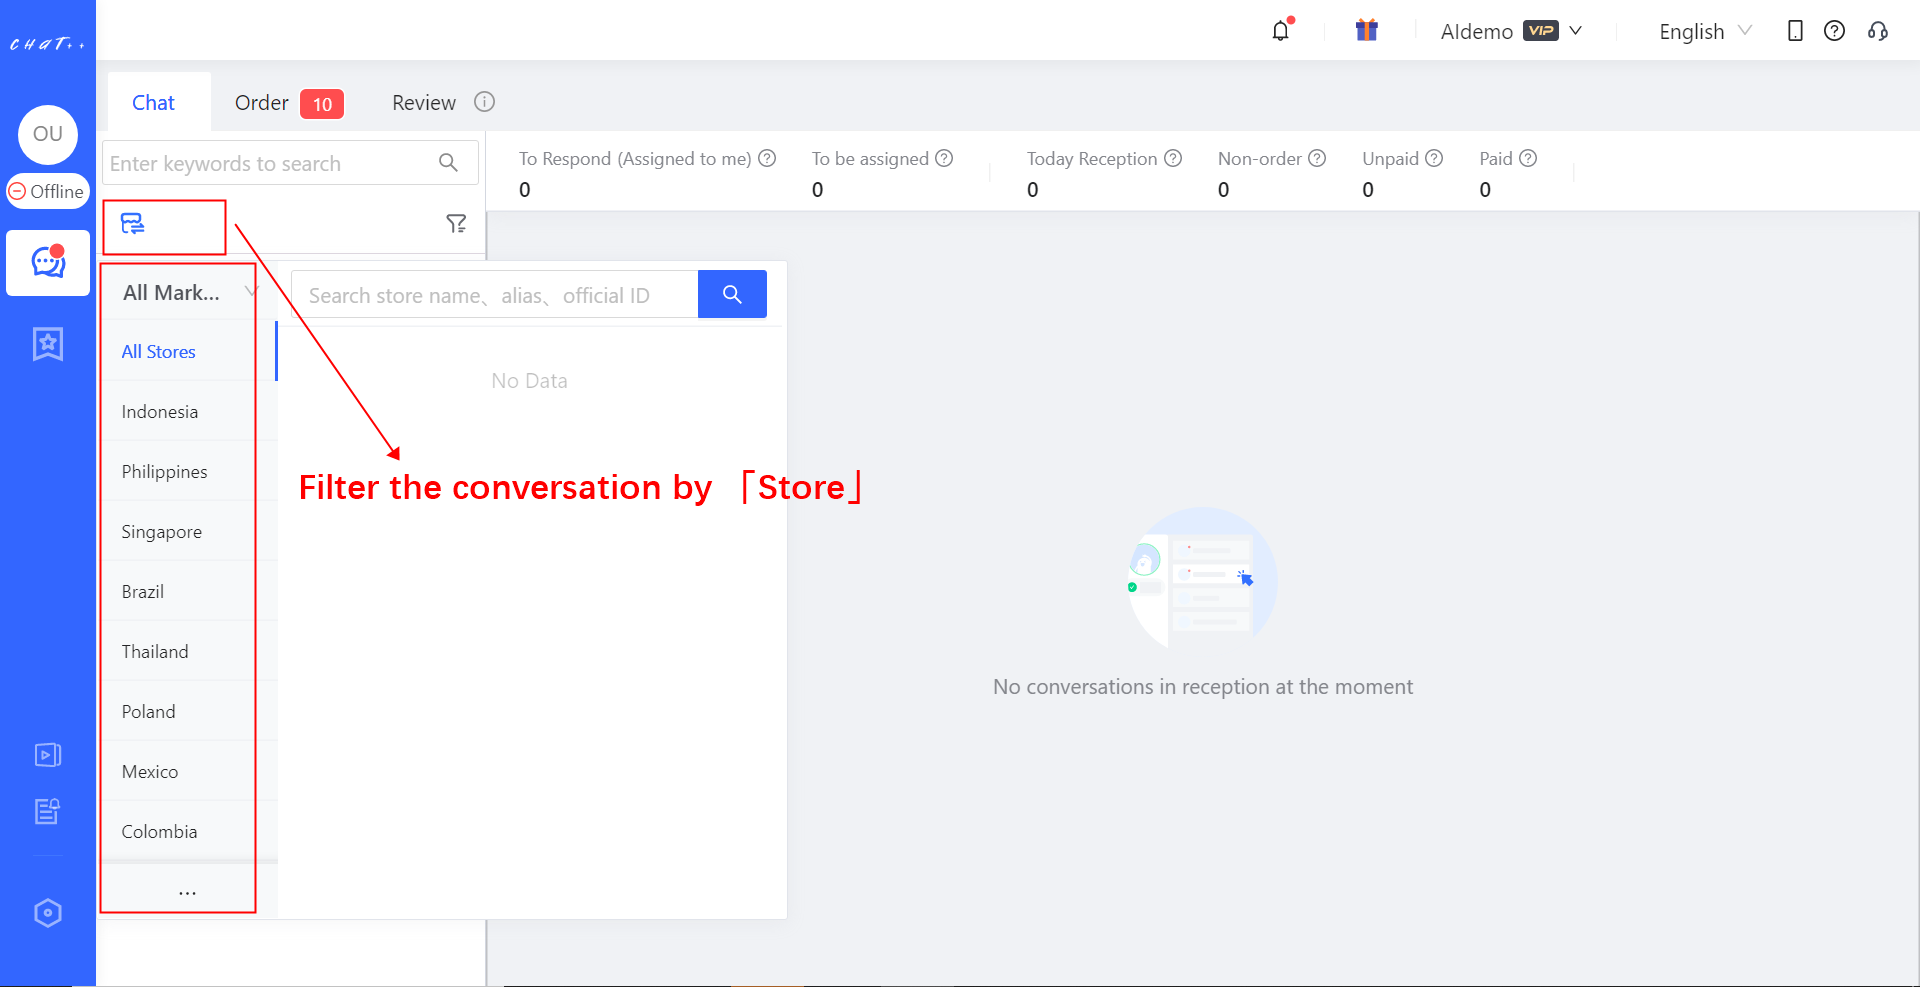
Filter the conversation by 「Store」: Click the store icon top left to the conversation list, agents can filter the conversation by store, by country or by marketplace.
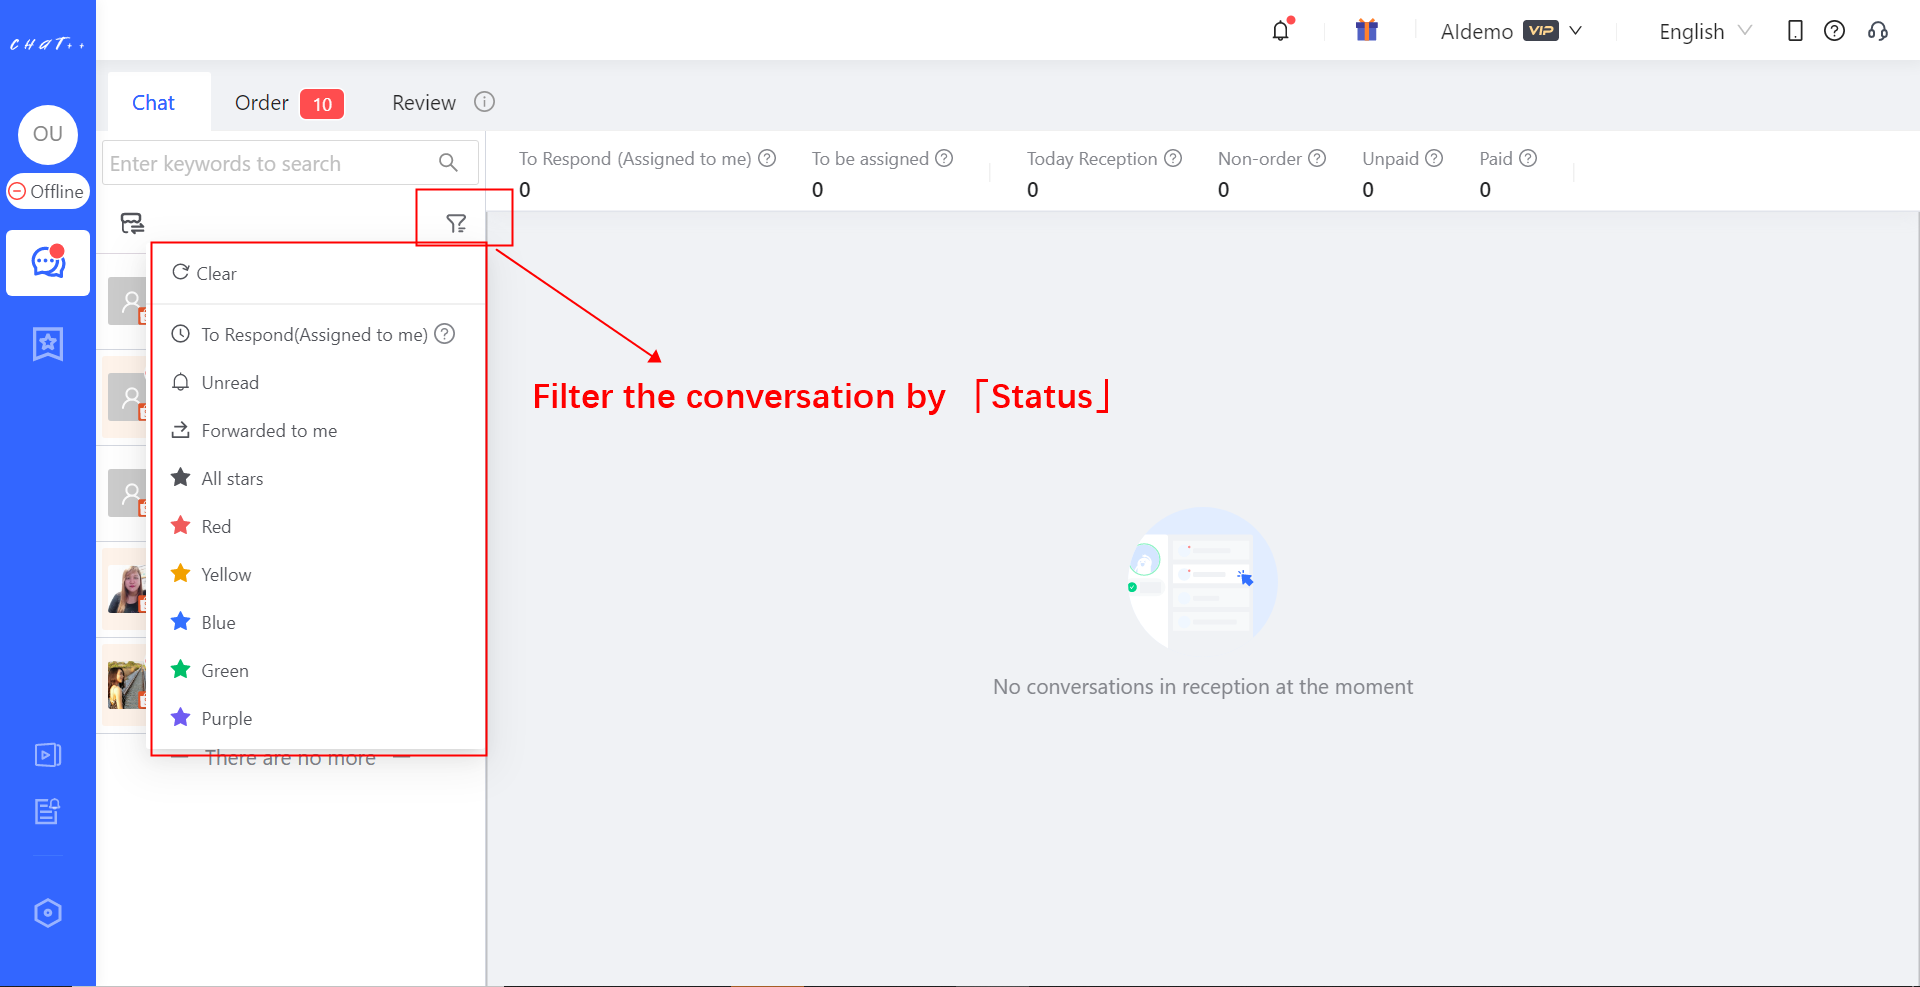
Filter the conversation by 「Status」: Click the filter icon top right to the conversation list, agents can filter the conversation by response, unread, or different color stars etc.
To be assigned: customer's conversations that have not been assigned to you are counted as "To be assigned". There are following situations:
(1)The number of conversations that can be responded by all agents in the current store has reached the upper limit.
(2)All agents of the current store are not online.
(3)No agents are configured in the current store.To respond: The conversation is waiting for your response. Neither the customer's latest message is responded by agent, nor is responded by Chatbot on business point. Timeout reply, store welcome message or on-duty reply are not counted in business meaningful reply, still in "To Respond" status.
In Reception: It includes both "To respond" conversations and conversations within a certain period after being responded. It is designed to help you quickly locate conversations that need a response.
✅ In the daily reception of agents, it is recommended to filter by "In Reception" status, which only displays conversations that currently require a response, to avoid missing replies due to too many conversations.
After replying, click on "Close the conversation(Esc)" to remove it from "In Reception" list.
If the conversation is not manually closed after replying, the system will automatically close it after a certain period, which can be adjusted in the system settings. :::
Unread: The agent doesn't read (click) those conversation yet. Unread status is linked with the agent account strongly. Note: When the conversation is replied by other agent or by Chatbot business-wise reply, the "Unread" status disappears.
Pre-sales/ In-sales/ After-sales status: The system automatically determines whether the customer is pre-sales or in-sales/after-sales based on order status of the conversation, making it convenient for agents to quickly obtain customer information. If a conversation is associated with multiple orders and the customer does not attach the order link when inquiring, the priority of determining the pre-sales, in-sales, and after-sales status by the system is as follows: in-sales > after-sales > pre-sales. The agent can manually adjust the pre-sales, mid-sales, and after-sales status in the conversation window.
Star: Agents could set different color star signals on the conversation, making it easy to recall the important conversations for varied purpose.
Responsible: This filter option is only available to the agent account, not available for administrator. The agent account has full control over those conversations and full responsibility with those conversations.
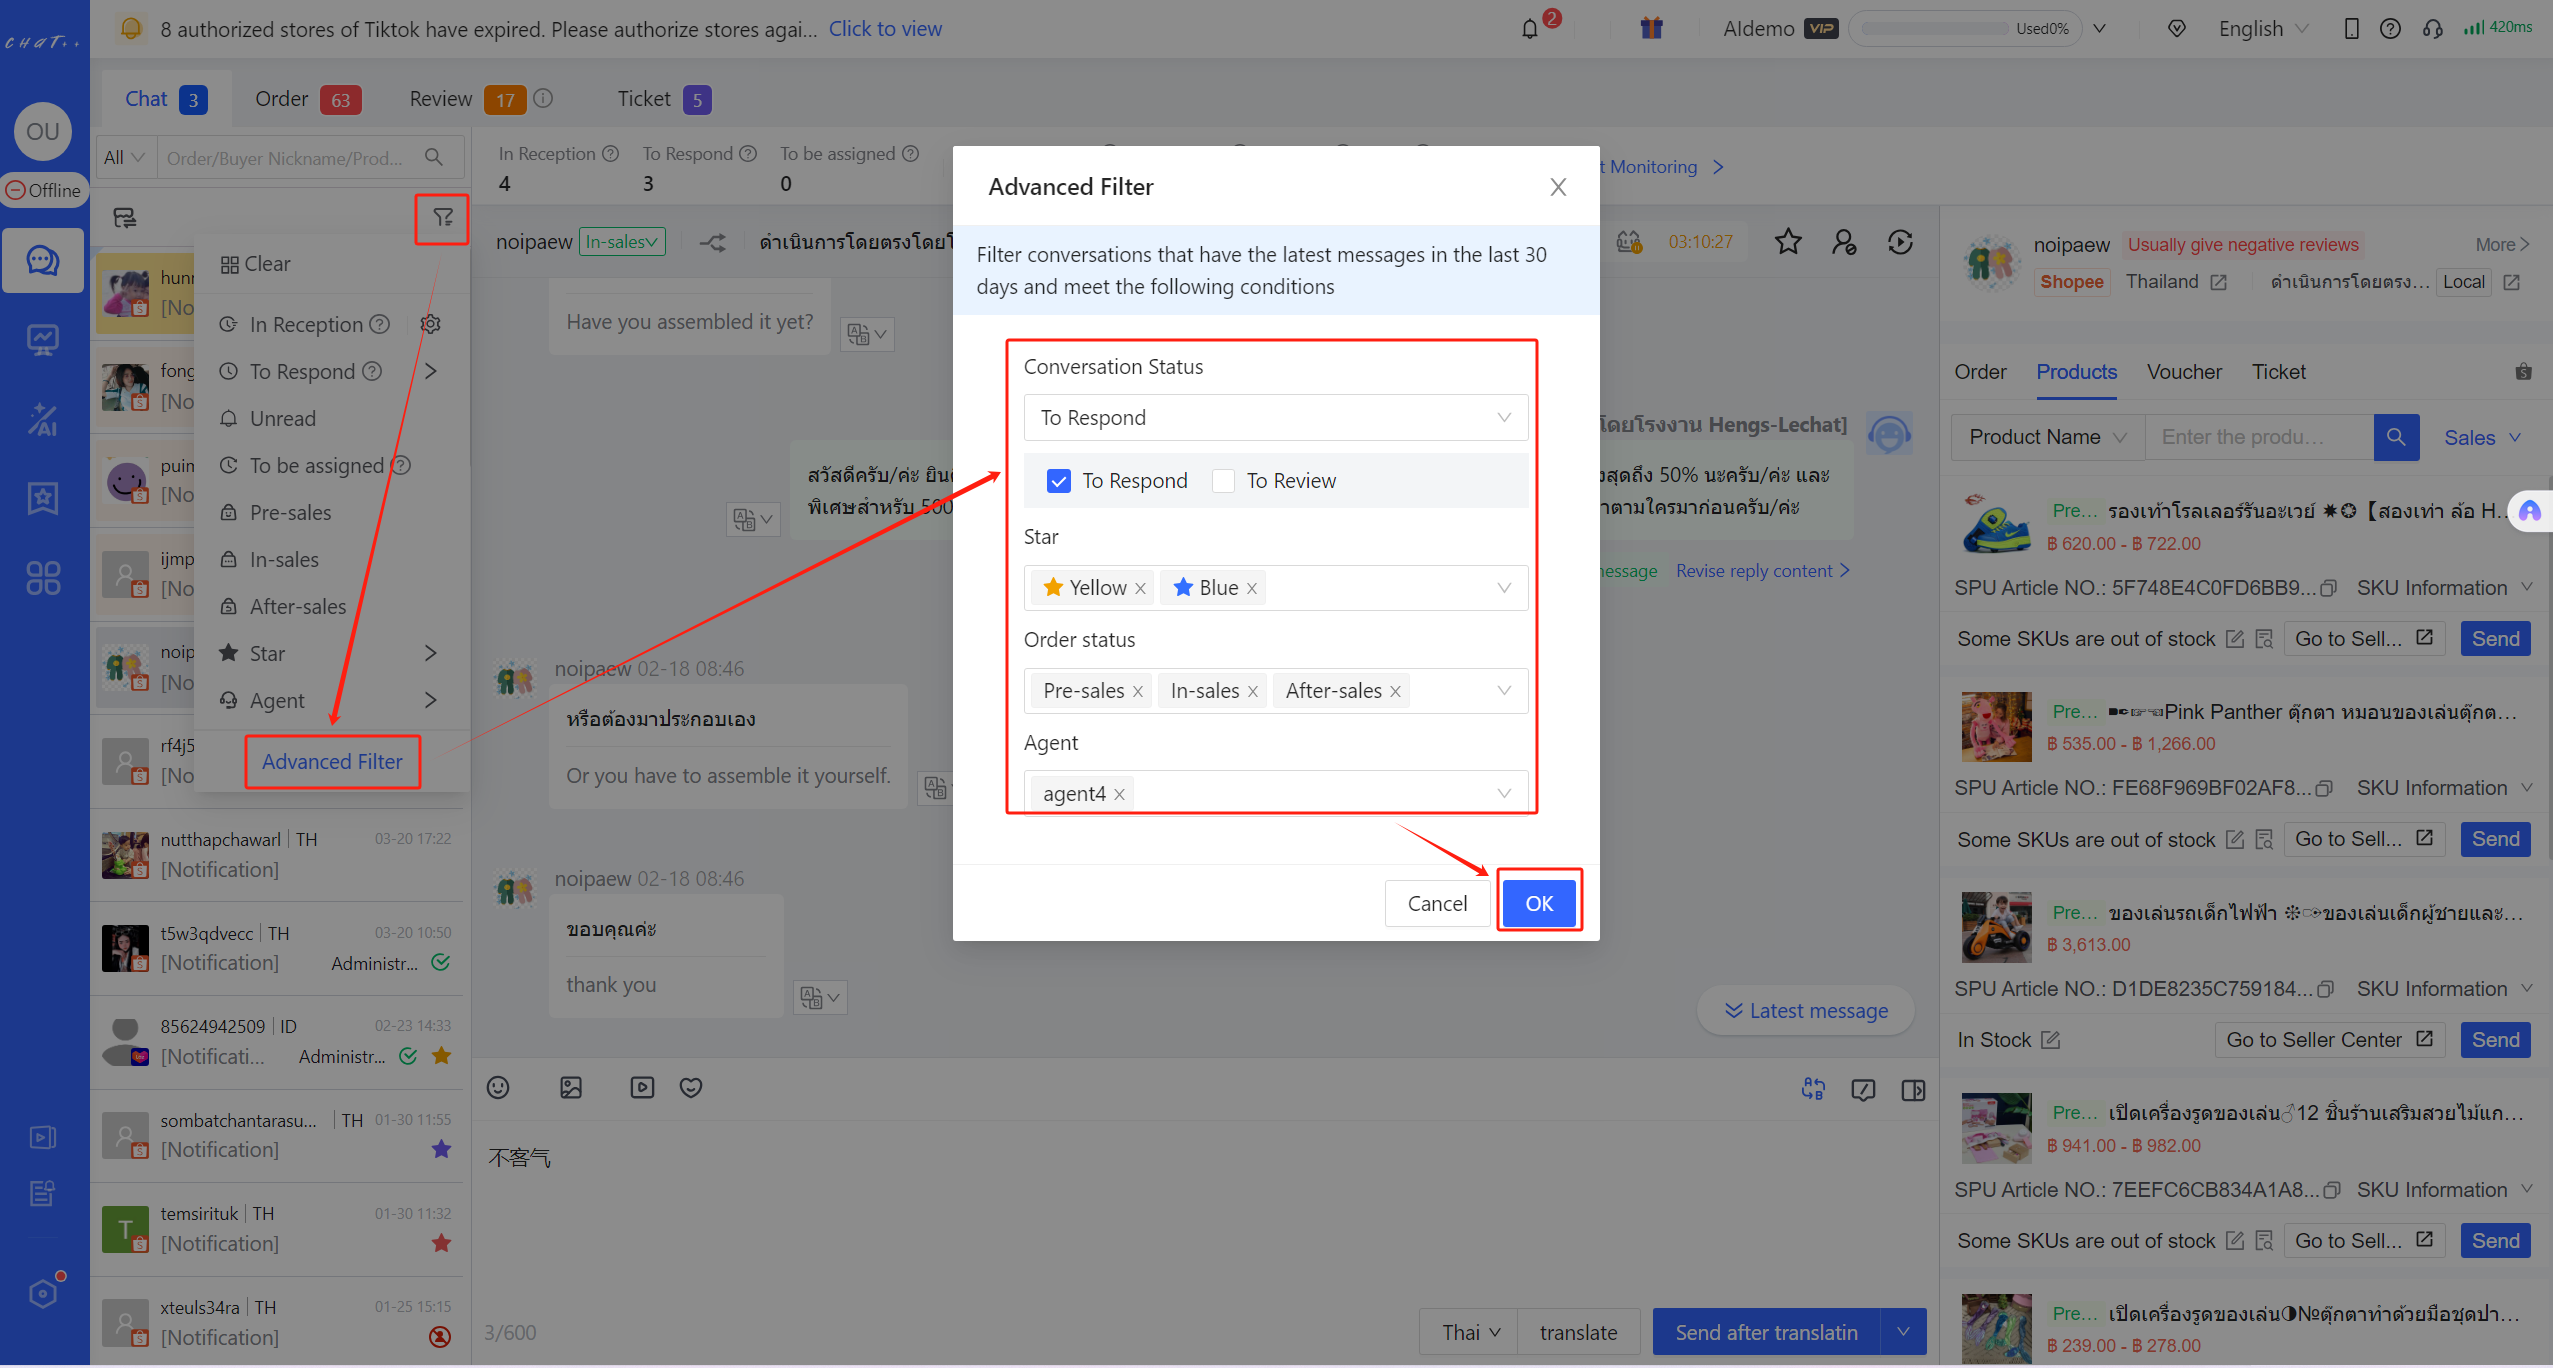
Advanced Filter: Supports selecting multiple filtering dimensions, including Conversation Status (single selection), Star (multiple selection), Order status (multiple selection), and Agent (multiple selection).
Tag and Trace Important Conversations
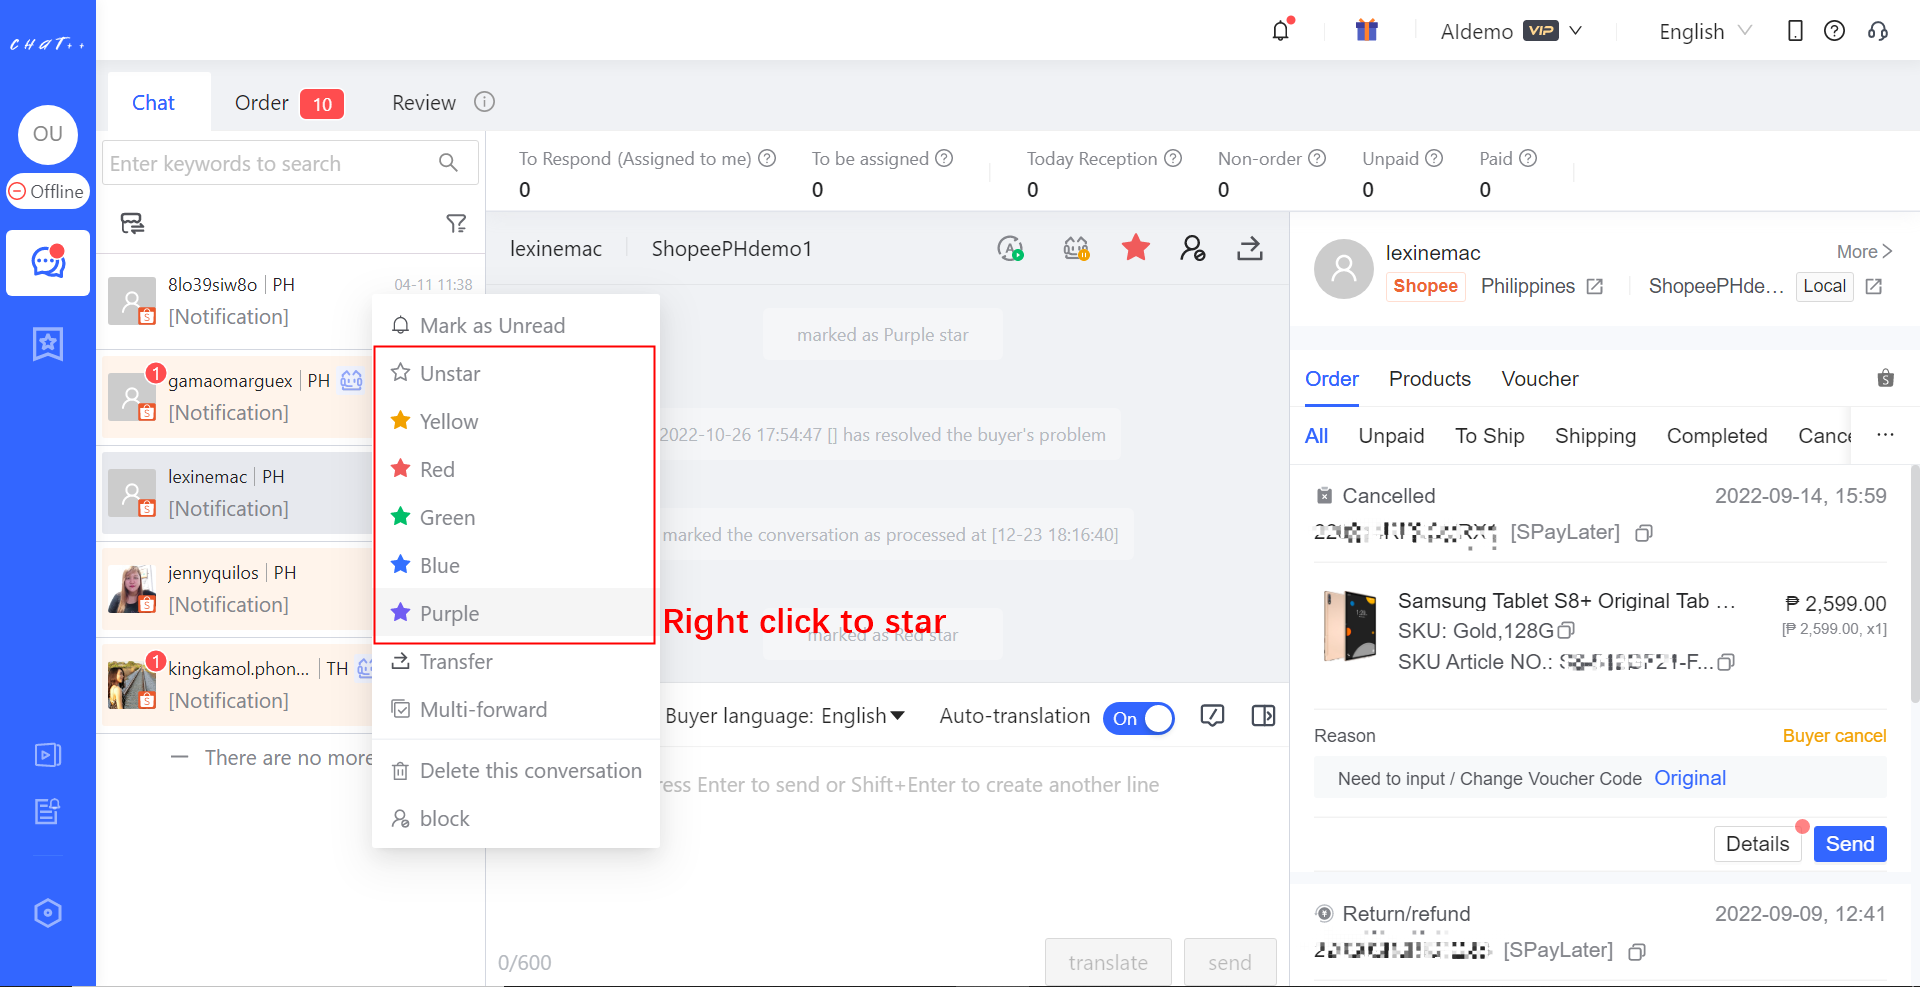
Sometimes reception work can’t be completed immediately, simple reply does not fix the problem and the conversation needs follow up later. The agent can use「tag important conversation」 function, right click the conversation, and pick the colorful star as a tag.
Five different colors are available to be picked, for different reception purpose. Any time, the agent can quickly trace those important conversations through filtering the related colorful star. After the mission completed, you can clear the star tag from the conversation.
Note: The color star tag is cross agent account visible, all other agent (include administrator) can see the star tag on this conversation. But this color star tag will not be sync to seller center’s chat.
Transfer/Close/Restart/Block Conversation
Transfer Conversation
Assigned conversation can be transferred from one online reception account A to another online reception account B. The previous owner A can trigger “Transfer”, the administrator whose customer traffic dispatch mode is configured as supervision can trigger “Transfer”. The receiver B shall be in allowed receptionist list for the store which the conversation belongs to.
As the administrator does supervision, who does not have responsibility on reception, conversation can’t be transferred to the administrator. The conversation which is not assigned to reception account can’t be transferred, even the administrator can’t transfer it.
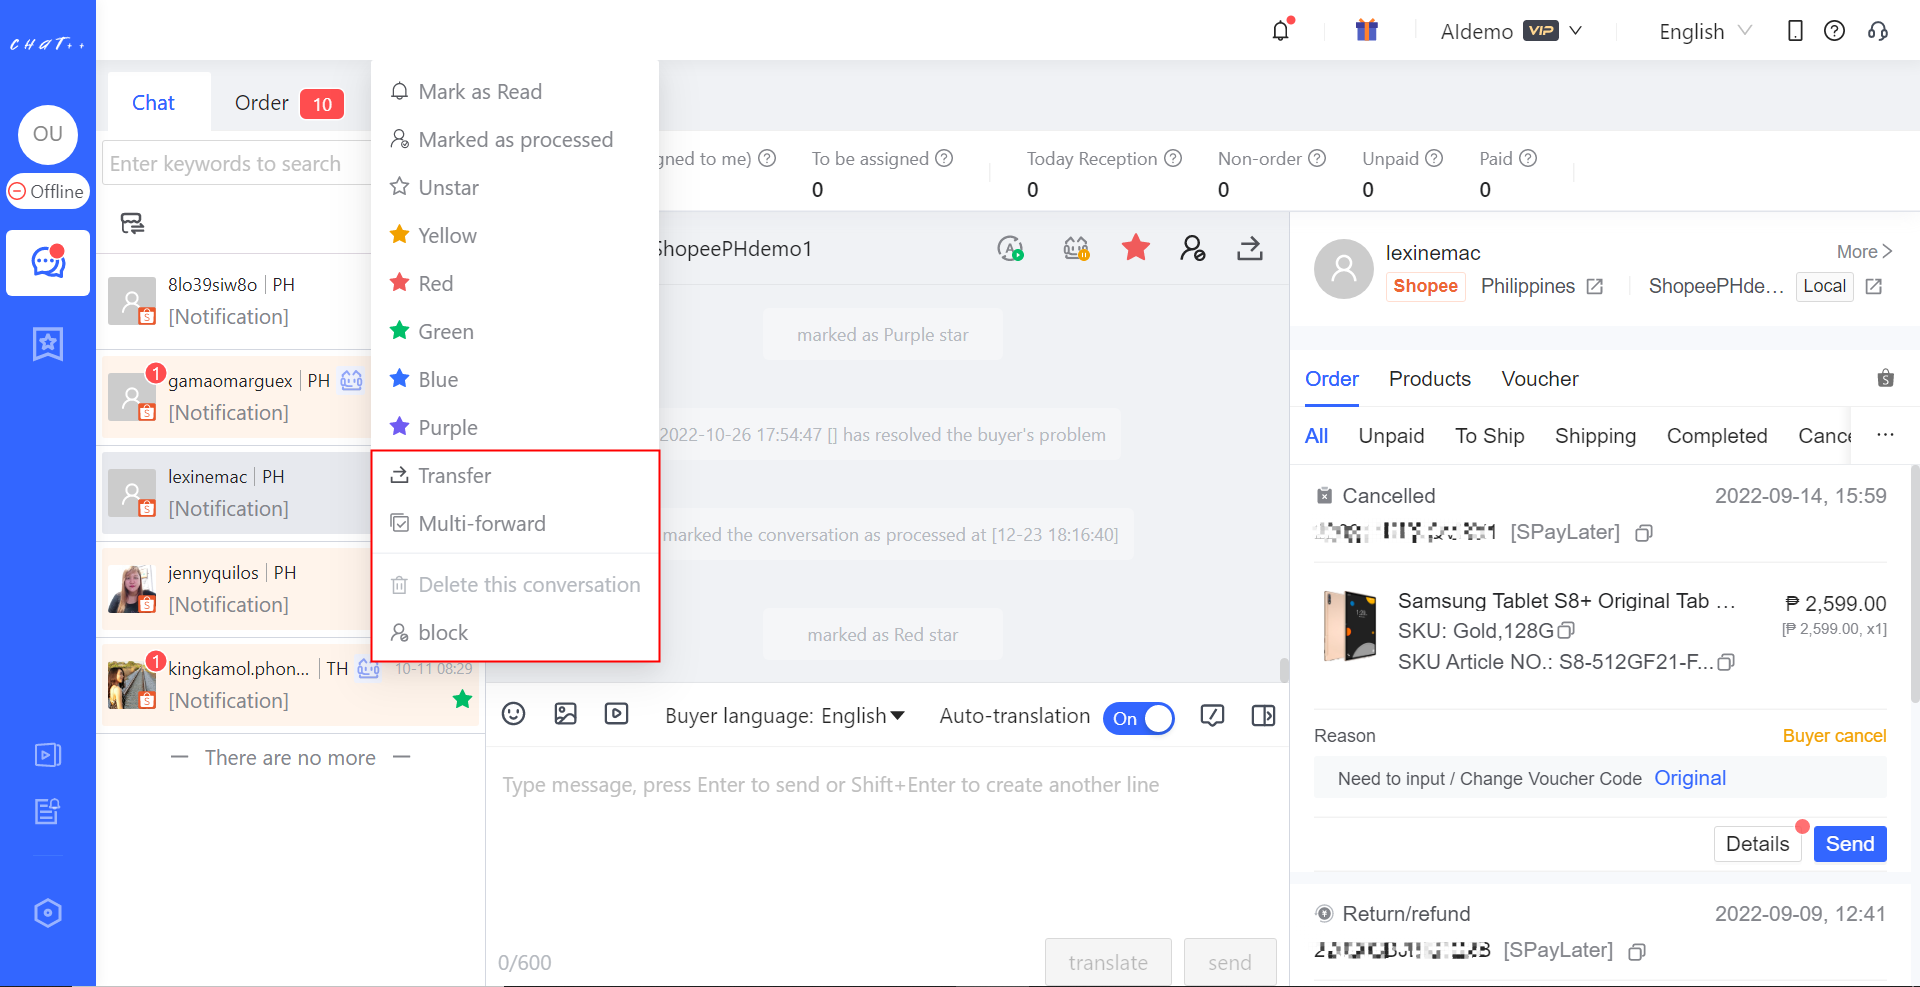
Right click the conversation to transfer, the agent will see a pop-up menu, click “Transfer” and then pick the reception account that needs to be transferred.
Close Conversation
For those conversation which the reception is completed, you can close the conversation.
Right click the conversation, and you can click "Close the conversation". The closed conversation will be removed from "In Reception" status, so that you can focus attention on new, urgent, or more important conversations.
Restart Conversation
For closed conversations, if you need to restart it to "In Reception" status, right-click on the conversation and then click "Restart the conversation". It will return to the "In Reception" status, making it easy to find it quickly next time by filtering "In Reception".
Delete Conversation
For the conversation where reception work is completed, you can also delete it to focus more on other conversations. Right-click on the conversation, then click "Delete the conversation". It will be removed from the conversation list. However, ChatPlusAI system does not delete the conversation record. Agents can use conversation search to find and reopen the it. If the buyer makes another inquiry after removal, the chat records will be resynchronized.
Block Conversation
For harassment advertiser or customer you does not want to do real reception for. You can put them into block list. Right click the conversation, you will see a pop-up menu, and click "block". After that, the coming messages from the blocked customer will be automatically replied by system to keep reply rate. The blocked conversation will not show in conversation list. You can use conversation search to open the blocked conversation.
Real-time Reception Panel
ChatPlusAI provides real-time panel to monitor the reception status. The panel is top to the currently serving window.
The administrator and agents can see varied indicators with different scopes. The administrator can see team performance, covering today buyers responded count, buyers to respond count, order placed or not after reception, etc. Agents can see individual indicator only. The data in the panel is synced every 15 seconds from data center.
Note: The administrator’s customer reception traffic dispatch mode is configured as Supervision.
Real-time Reception Panel for Agent
To be assigned: When the agent’s incoming line number (number of buyer’s conversation to respond) reaches up limit. Newly generated buyer’s conversation will not be assigned to the agent. If all agents who have privilege to receive this customer are in saturated status, the conversation will be in “to be assigned” status.
When any agent who has privilege to receive the buyer responds one assigned and conversation “To respond”, his incoming line number decrease by 1, system will assign another one conversation in “To be assigned”to him. Then the “To be assigned” count will decrease by 1.
Note: When a piece of new buyer message emerges in one assigned and responded buyer’s conversation, the conversation status will turn to “To respond”, the agent’s “To respond” conversation count will increase by 1. At this moment, the agent’s incoming line number ( conversation “To respond” number) can beyond the limit. And the agent still keep serving this new message emerged in the conversation. We call this last served agent preferred rule, this rule overwhelms the incoming line up limit rule.
Note: If only one agent (administrator excluded) has privilege to serve the buyer from the store, the buyer conversation from the store is assigned to the agent without incoming line limit. The incoming line limit rule is designed to avoid unbalanced traffic dispatch among multiple agents. This not applies to single agent case.
To Respond(Assigned to me): The conversation that has been assigned to the agent and the last message from the buyer has not yet been effectively replied.
Note: When the last message of the buyer in the conversation is answered automatically by timeout reply, and it’s the response of on-duty, we recognize that the buyer has not been effectively replied, and the conversation is still in the state of pending. Replies from agents and business meaningful replies from Chatbot will be considered as valid replies.
In Reception(Assigned to me): The conversations include "To Respond" conversations and conversations within a certain period after being responded.
⚠️ "To Respond" conversations: The conversation is waiting for agents' response. Neither the customer's latest message is responded by agent, nor is responded by Chatbot on business point. Timeout reply, store welcome message or on-duty reply are not counted in business meaningful reply, still in "To Respond" status.
⚠️ About "a certain period"
- The system defaults to maintaining the "In Reception" status for pre-sales and in-sales conversations for 24 hours; for after-sales conversations, "In Reception" status is maintained for 48 hours. The time duration can be modified in the left sidebar of the system- Settings- Chat Settings, or by clicking the filter above the conversation list- Settings button on the right of "In Reception".
- You can also close the conversation manually. After closing, it will be removed from the "In Reception" status
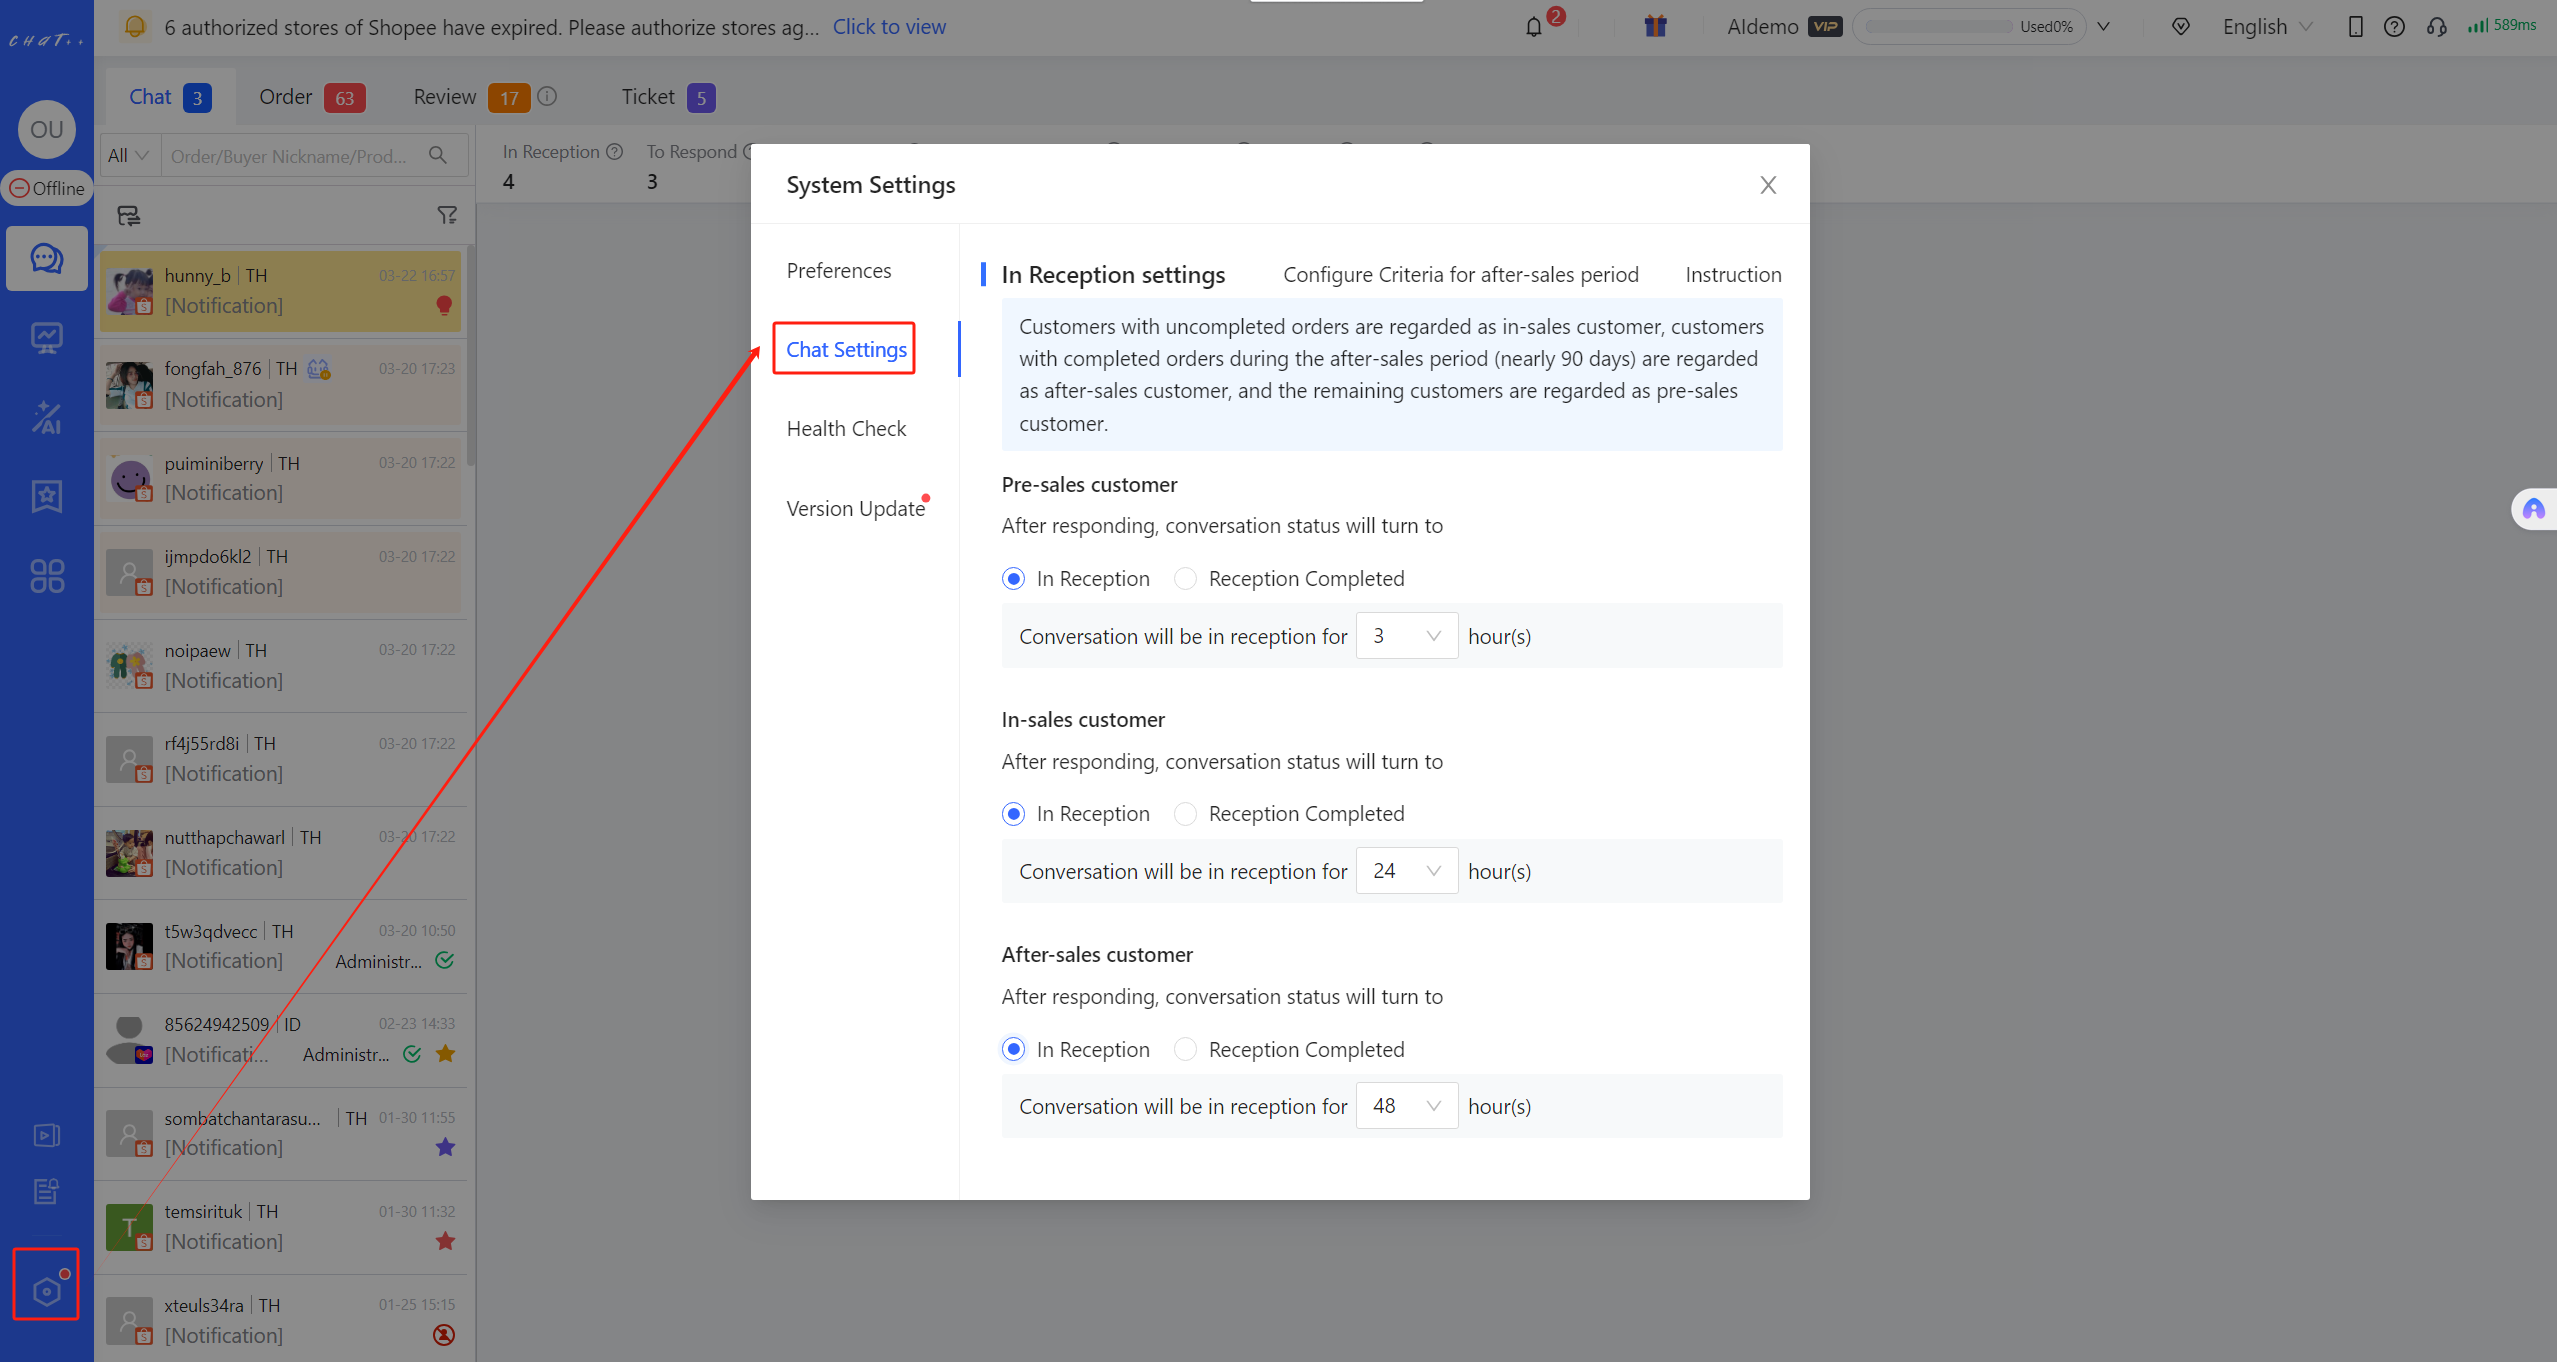
Today Reception: It indicates the number of buyers “To Respond” received today.
Non-order/Unpaid/Paid: In today’s reception, distinguish statistics according to buyers’ order/payment status.
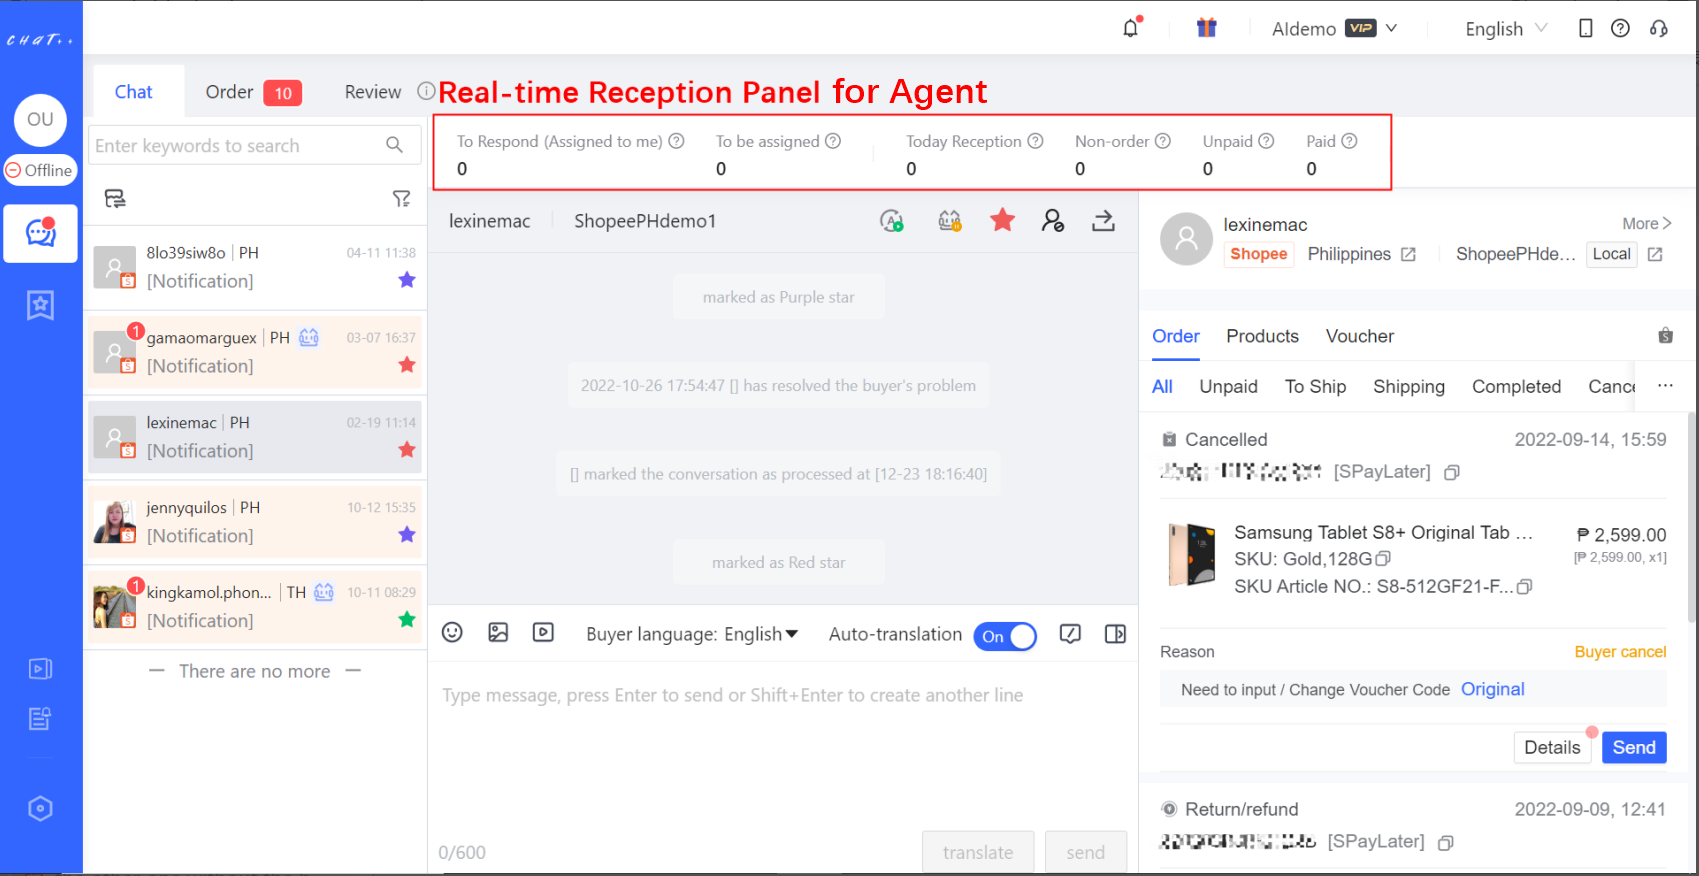
Real-time Reception Panel for Administrator
To Respond: The number of all the conversations need to be responded within 72 hours
In Reception: "To Respond" conversations assigned to agents and conversations within a certain period after being responded by agents are counted in "In Reception" count.
⚠️ "To Respond" conversations: The conversation is waiting for agents' response. Neither the customer's latest message is responded by agent, nor is responded by Chatbot on business point. Timeout reply, store welcome message or on-duty reply are not counted in business meaningful reply, still in "To Respond" status.
⚠️ About "a certain period"
- The system defaults to maintaining the "In Reception" status for pre-sales and in-sales conversations for 24 hours; for after-sales conversations, "In Reception" status is maintained for 48 hours.
- Agents can also close the conversation manually. After closing, it will be removed from the "In Reception" status
To be assigned: It refers to the conversations have not been assigned to the agents’ reception.
It includes the following situations:
- The maximum number of receptions for all agents in the store has reached the upper limit.
- All agents of the store are currently offline.
- The agent is not configured in the store which the current buyer conversation belongs to.
Today Reception: It indicates the number of buyers “To Respond” in supervision of stores in today’s reception.
Non-order/Unpaid/Paid: In today’s reception, distinguish statistics according to customers’ order/payment status.
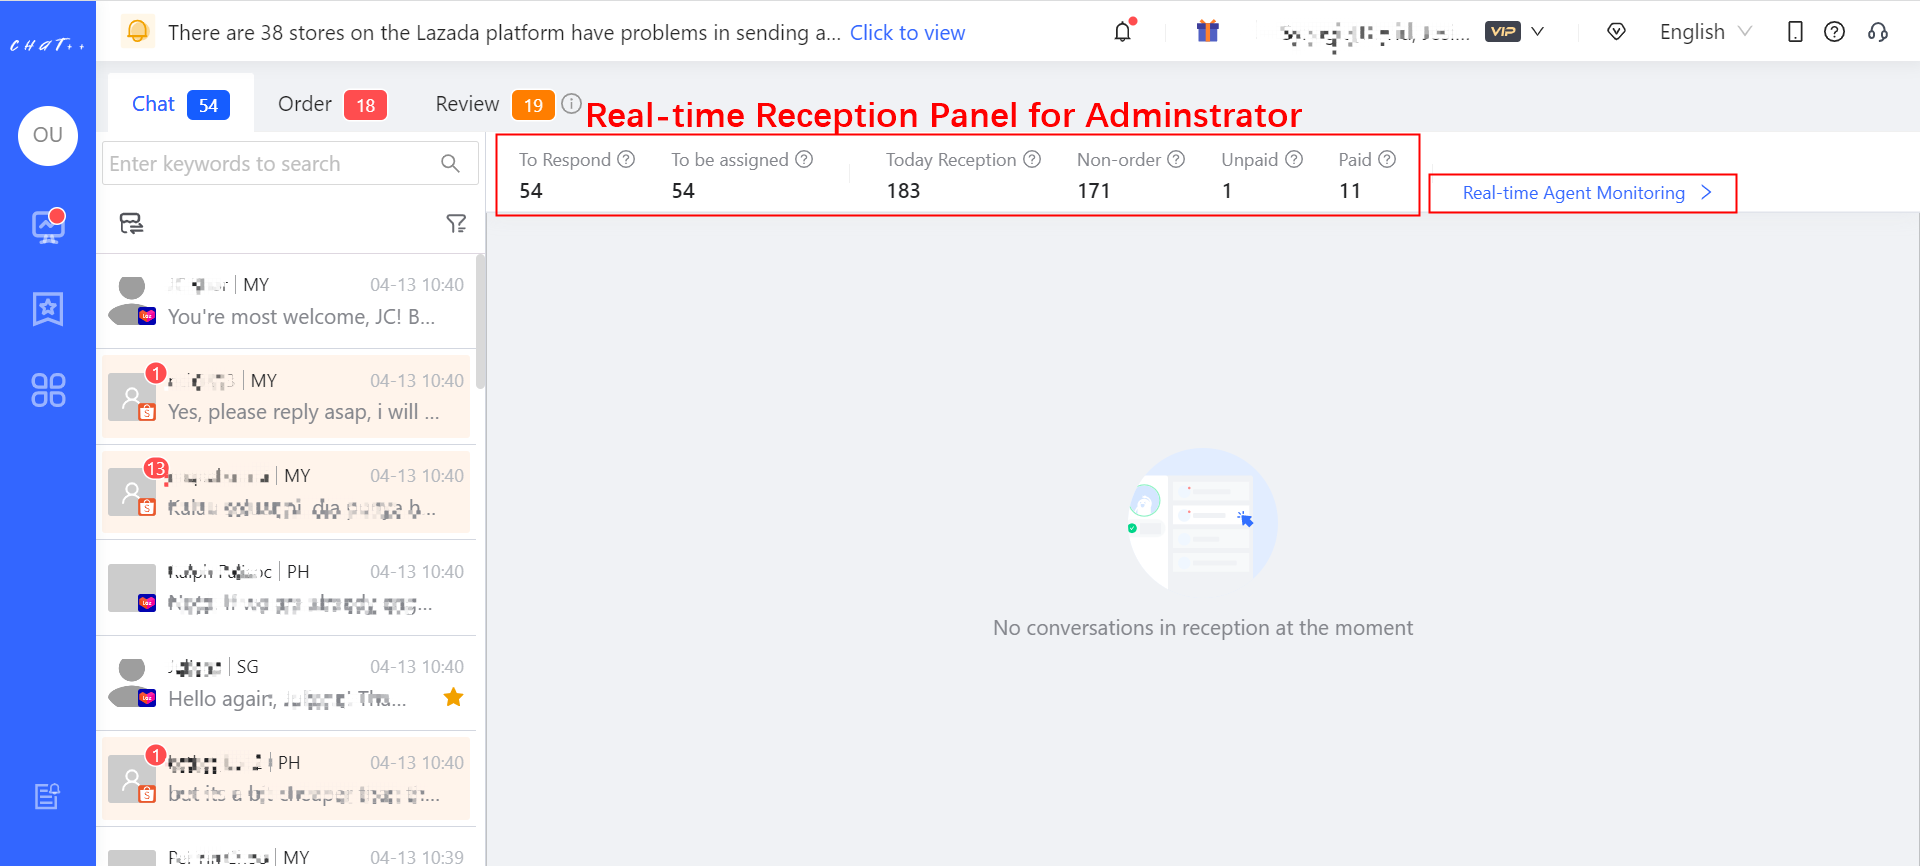
Conversation Window
When the agent select a conversation/buyer from conversation list, he can see chat content in the conversation window include all back and forth messages. System will auto-translate buyer’s message from its original language to the language of ChatPlusAI workbench if they are different. The language of ChatPlusAI workbench is configurable.
Basic functions
Conversation Record: All the latest message and historical messages between the buyer and store are shown here. It is convenient for agents to get the chat context from this window and avoid asking customer duplicated questions.
ChatPlusAI does auto-translate customer message if the original language is different from the language of ChatPlusAI workbench. As to seller side message, the agent can right click the message, and select “Translate”.
If the agent wants to quote buyer’s message in the reply, he can right click the buyer message and select “Reply”. The buyer message will be quoted in agent’s reply.
ChatPlusAI sync marketplace seller center chat on daily base, for special usage case, the sync frequency is increased to every 2 mins. All the chat history since 30 days ahead of store authorization date is synced to ChatPlusAI.
For better user experience, we highly recommend the agent do the reception work all in ChatPlusAI for single store. Using marketplace seller center and ChatPlusAI same time will result in seller message delay.
Strong Reminder Panel: When the conversation is in strong reminder procedure, the reason of strong reminder is present here. The termination of strong reminder is mostly automated when the case is resolved. i.e. When the buyer withdraws the cancellation, the seller will approve buyer’s refund request. For some cases, the agent can decide whether the case is resolved or no need to process. Click the button to do it.
Editing Window: Compose the message, enter “Return” key or click “Send” button, the message will be sent to the buyer and showed in the conversation record window. If auto translation (translate agent’s response) is on, the agent’s message will be translated to buyer’s language and sent. The buyer’s language is set as country language the store belongs to by default. The agent can manually switch target translation language.
Character count of the input message is shown in the bottom-left corner of the editing window. There is character limit count for each message sent to the buyer from the marketplace.
Note: If auto-translate is turned on, please keep more buffer for the translated language, as the up limit will be applied on translated language instead of original input language.
Varied message types support: To increase agent-buyer communication efficiency, ChatPlusAI provides multiple message types support besides text. Now emoji, image, video, follower invitation card are well supported.
✅ Shopee:The image file size shall be less than 10Mb, the video file size shall be less than 30Mb, video time length shall be between 10 seconds and 30 seconds. Follower invitation card is not supported in Shopee.
✅ Lazada:The image file size shall be less than 10Mb, the video file size shall be less than 100Mb, video time length shall be less than 180 seconds. Follower invitation card is supported in Lazada.
❎ Due to API limitations, Tokopedia currently does not support sending images and videos, and TikTok does not currently support sending videos.
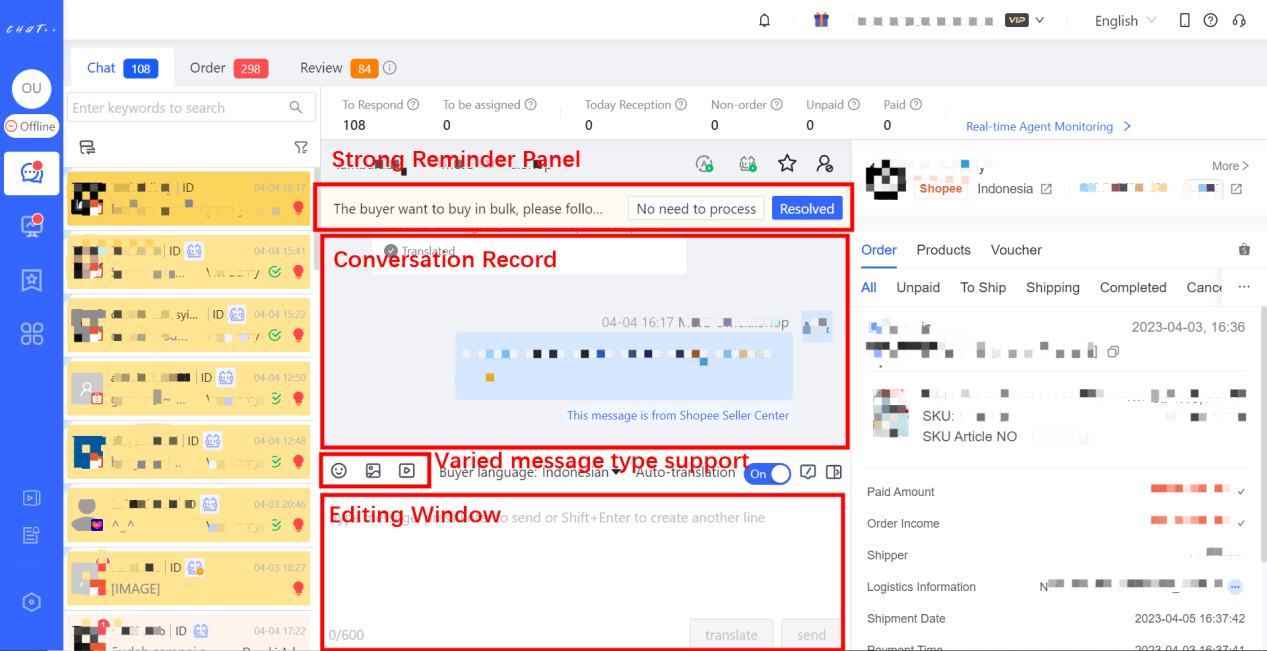
Identifying Pre/In/After-Sales Customers
Pre-sales/ In-sales/ After-sales status (as shown in figure below): The system automatically determines whether the customer is pre-sales or in-sales/after-sales based on order status of the conversation, making it convenient for agents to quickly obtain customer information. If a conversation is associated with multiple orders and the customer does not attach the order link when inquiring, the priority of determining the pre-sales, in-sales, and after-sales status by the system is as follows: in-sales > after-sales > pre-sales. The agent can manually adjust the pre-sales, mid-sales, and after-sales status in the conversation window.
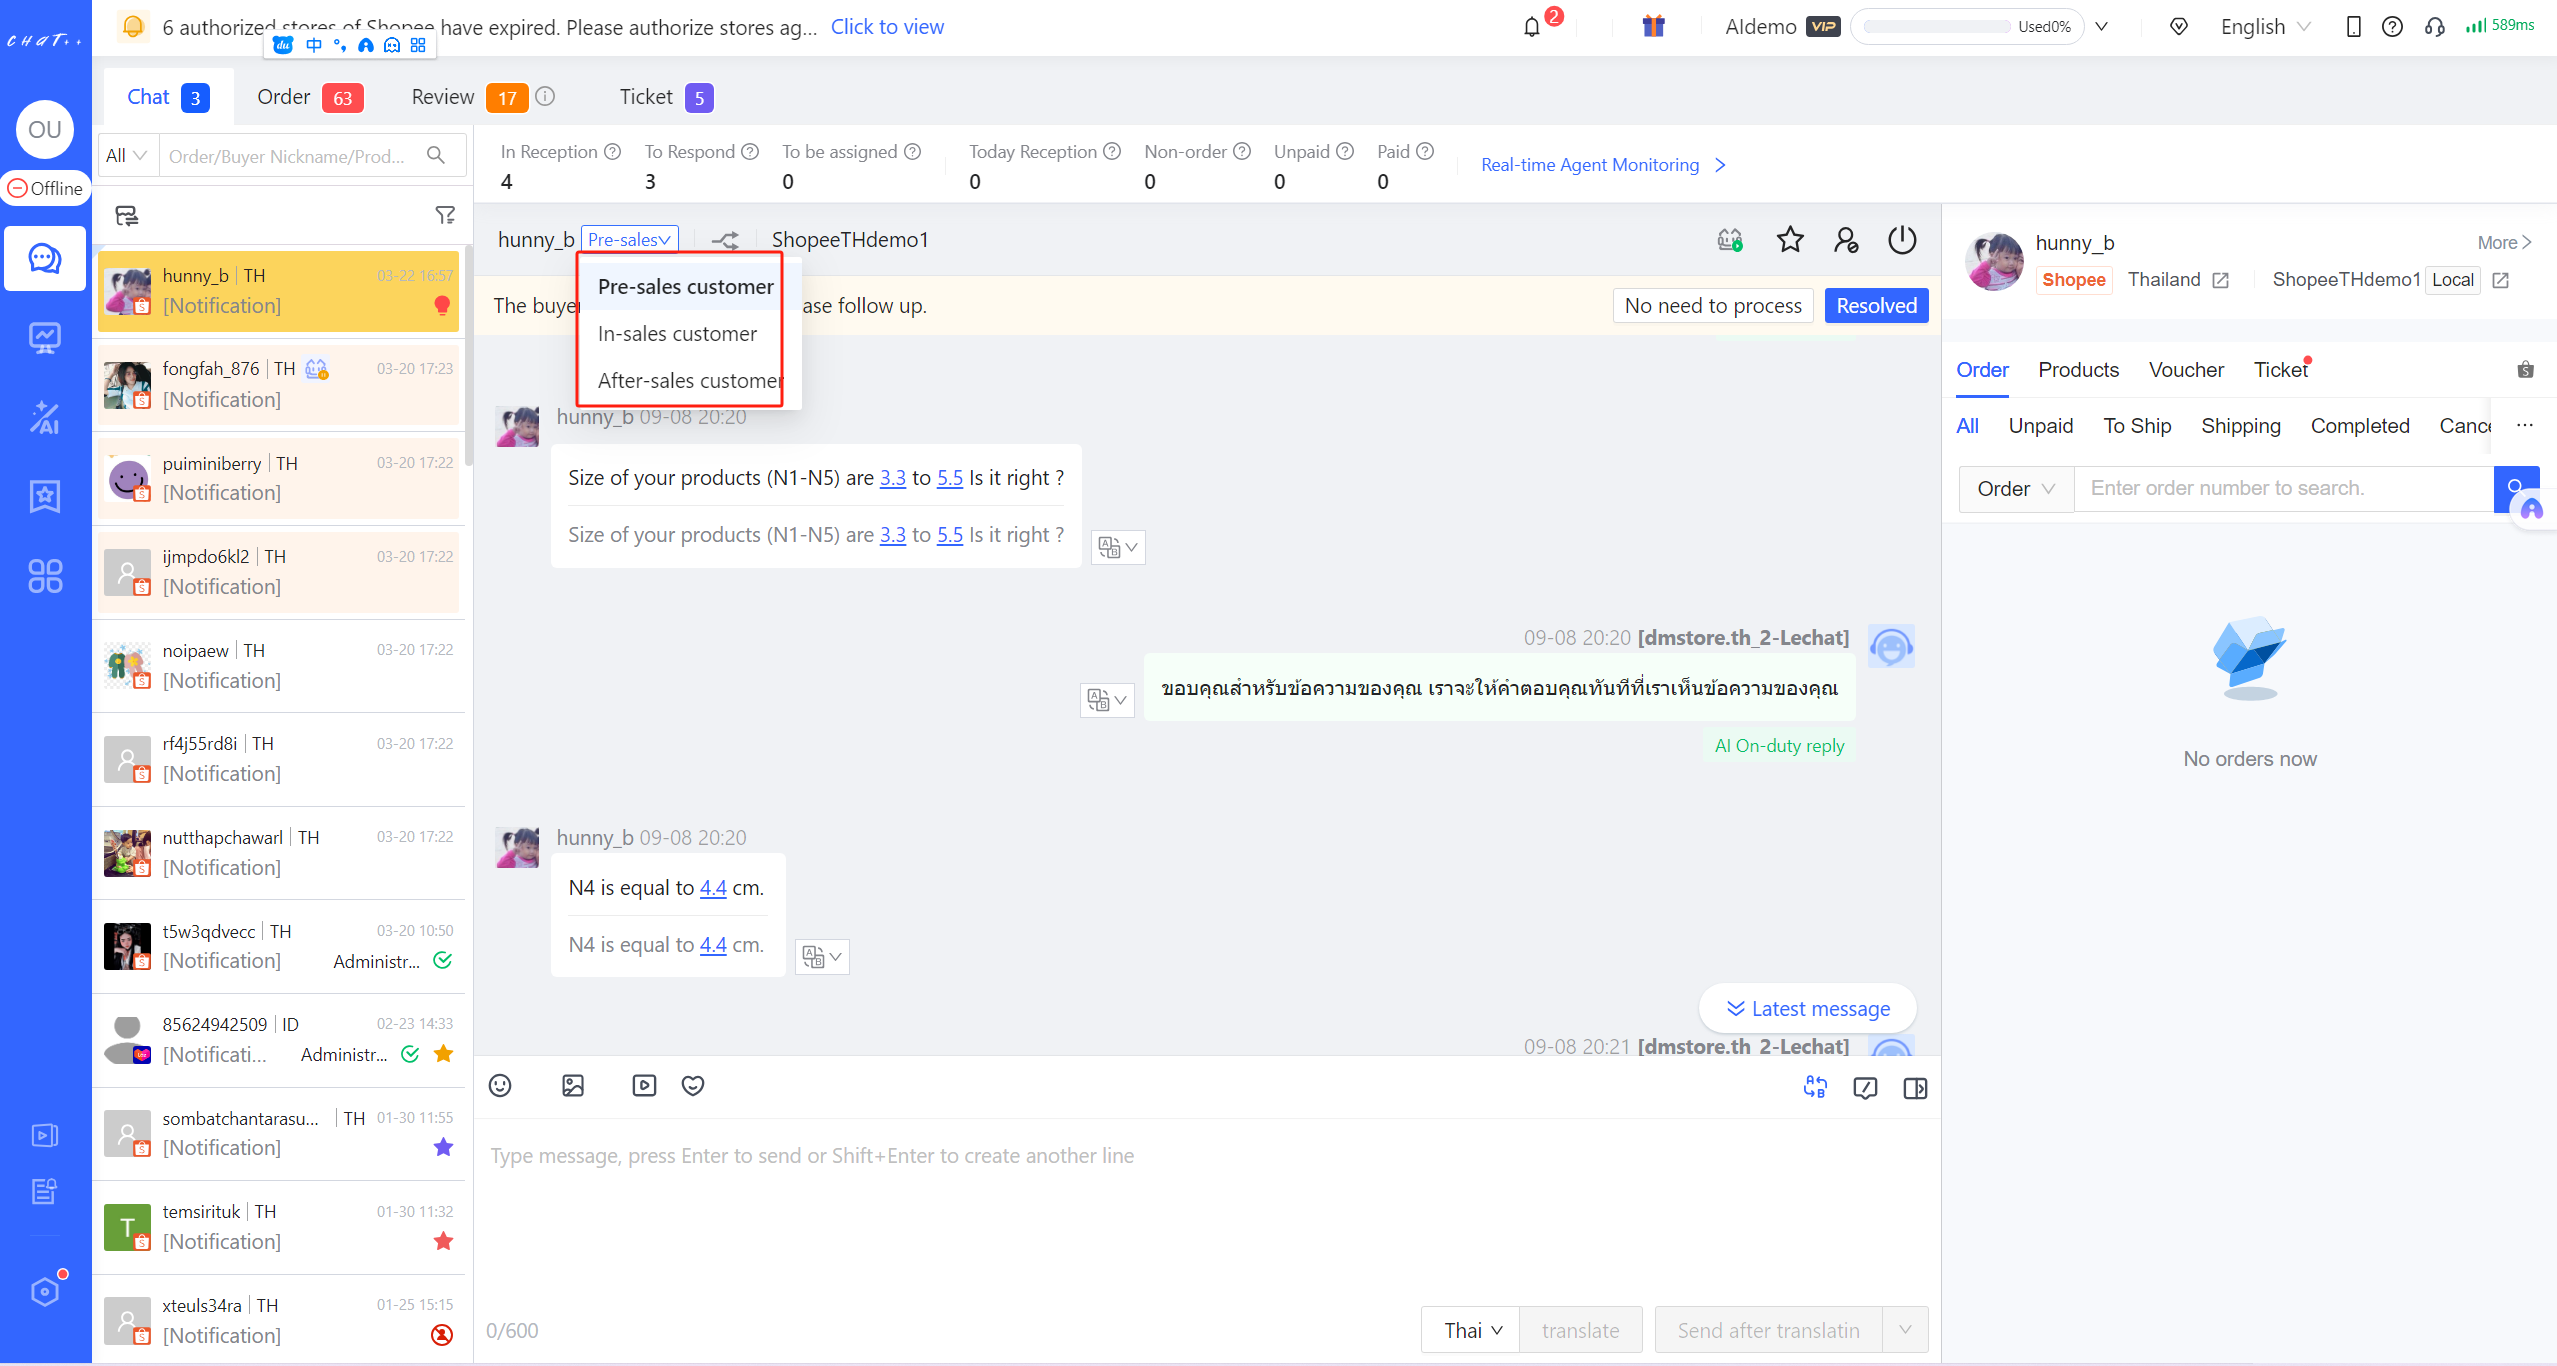
After-sales Period: Customers who have orders with the following conditions, they will be identified in the after-sales period. The order has been confirmed to be received/Refund has been requested for the order/The order has been canceled by the system within 90 days. Click on [Automation(in the left sidebar - AI Receptionist - Group Rule - After-sales Period], time of the after-sales period can be modified.
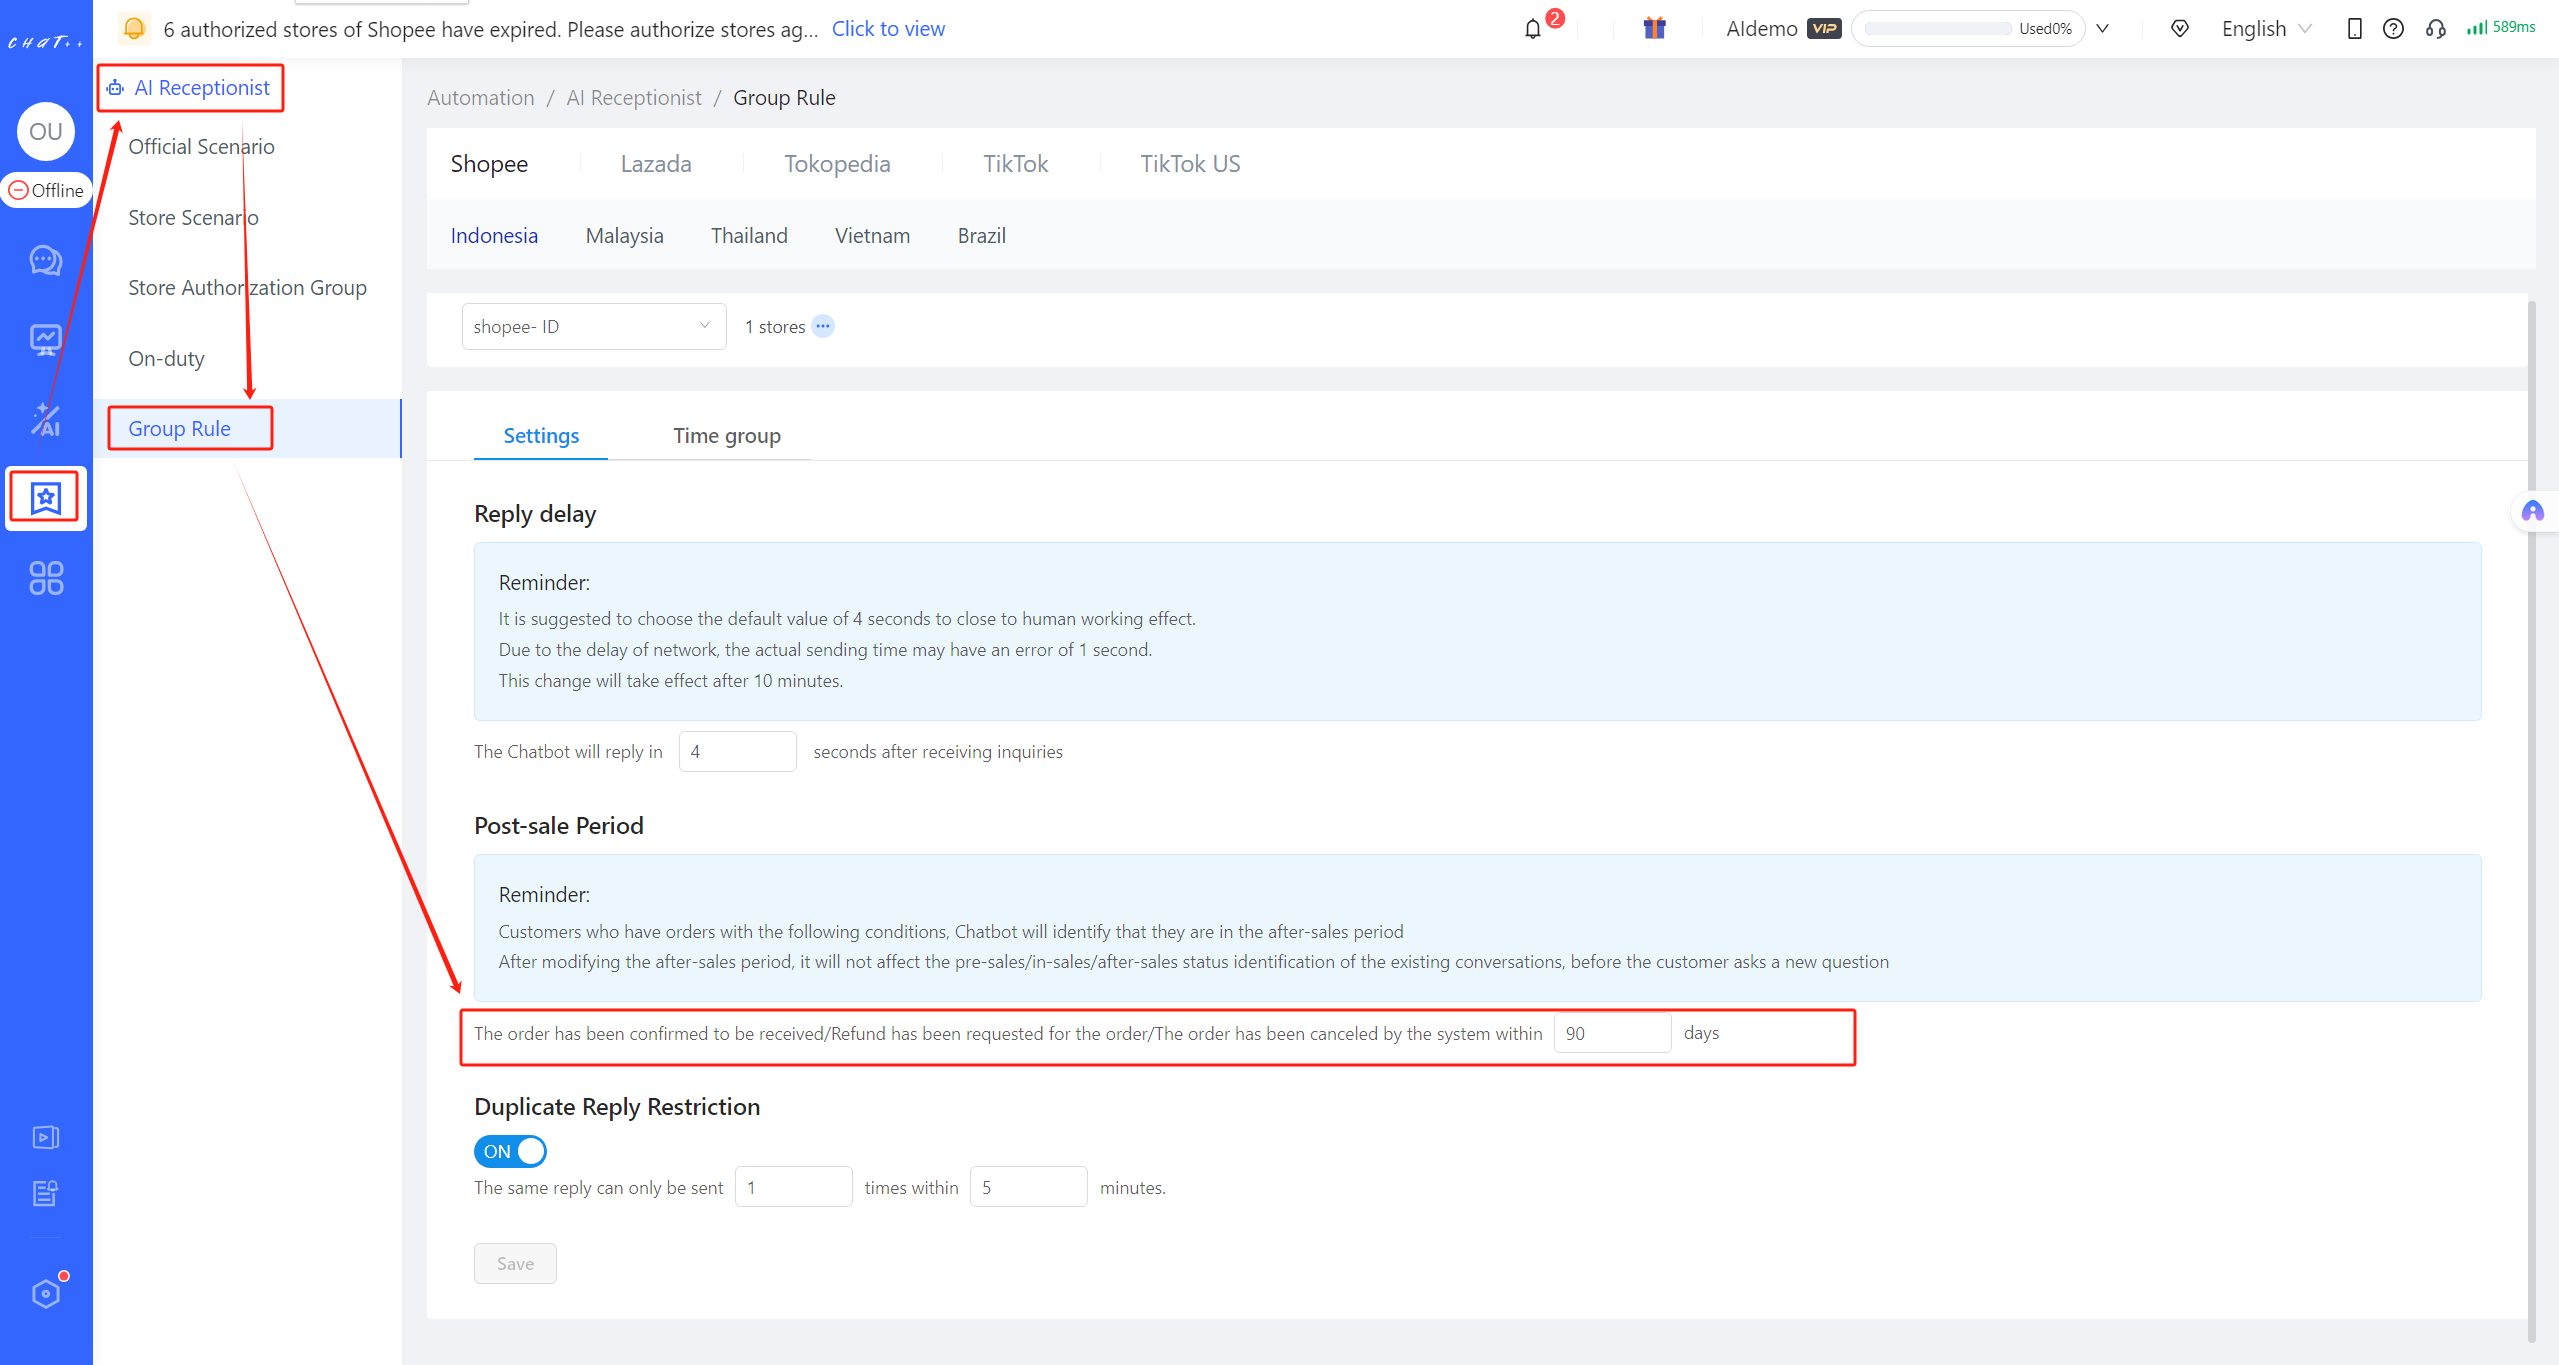
Quick conversation operations: Optional operations include 'Pause/Activate AI Chatbot auto-reply, Tag conversation, Block, Transfer conversation and Close conversation'.
Activate AI Chatbot auto-reply
There are two modes available for pausing auto-reply. You can choose to activate either mode according to your usage needs, or activate both modes simultaneously.
- Agent has priority over AI Chatbot auto-reply: If it is activated, when the agent enters the customer's conversation, AI Chatbot auto-reply will be paused, ensuring priority for agents to serve customers. When the agent leaves the customer's conversation, AI Chatbot auto-reply will be restarted.

- Figure 15
- Agent pauses AI Chatbot auto-reply manually: Upon activating this pause mode and setting the pause time, agents can manually pause AI Chatbot auto-reply while serving customers in the conversation interface. Once the pause time elapses, AI Chatbot auto-reply will restart.
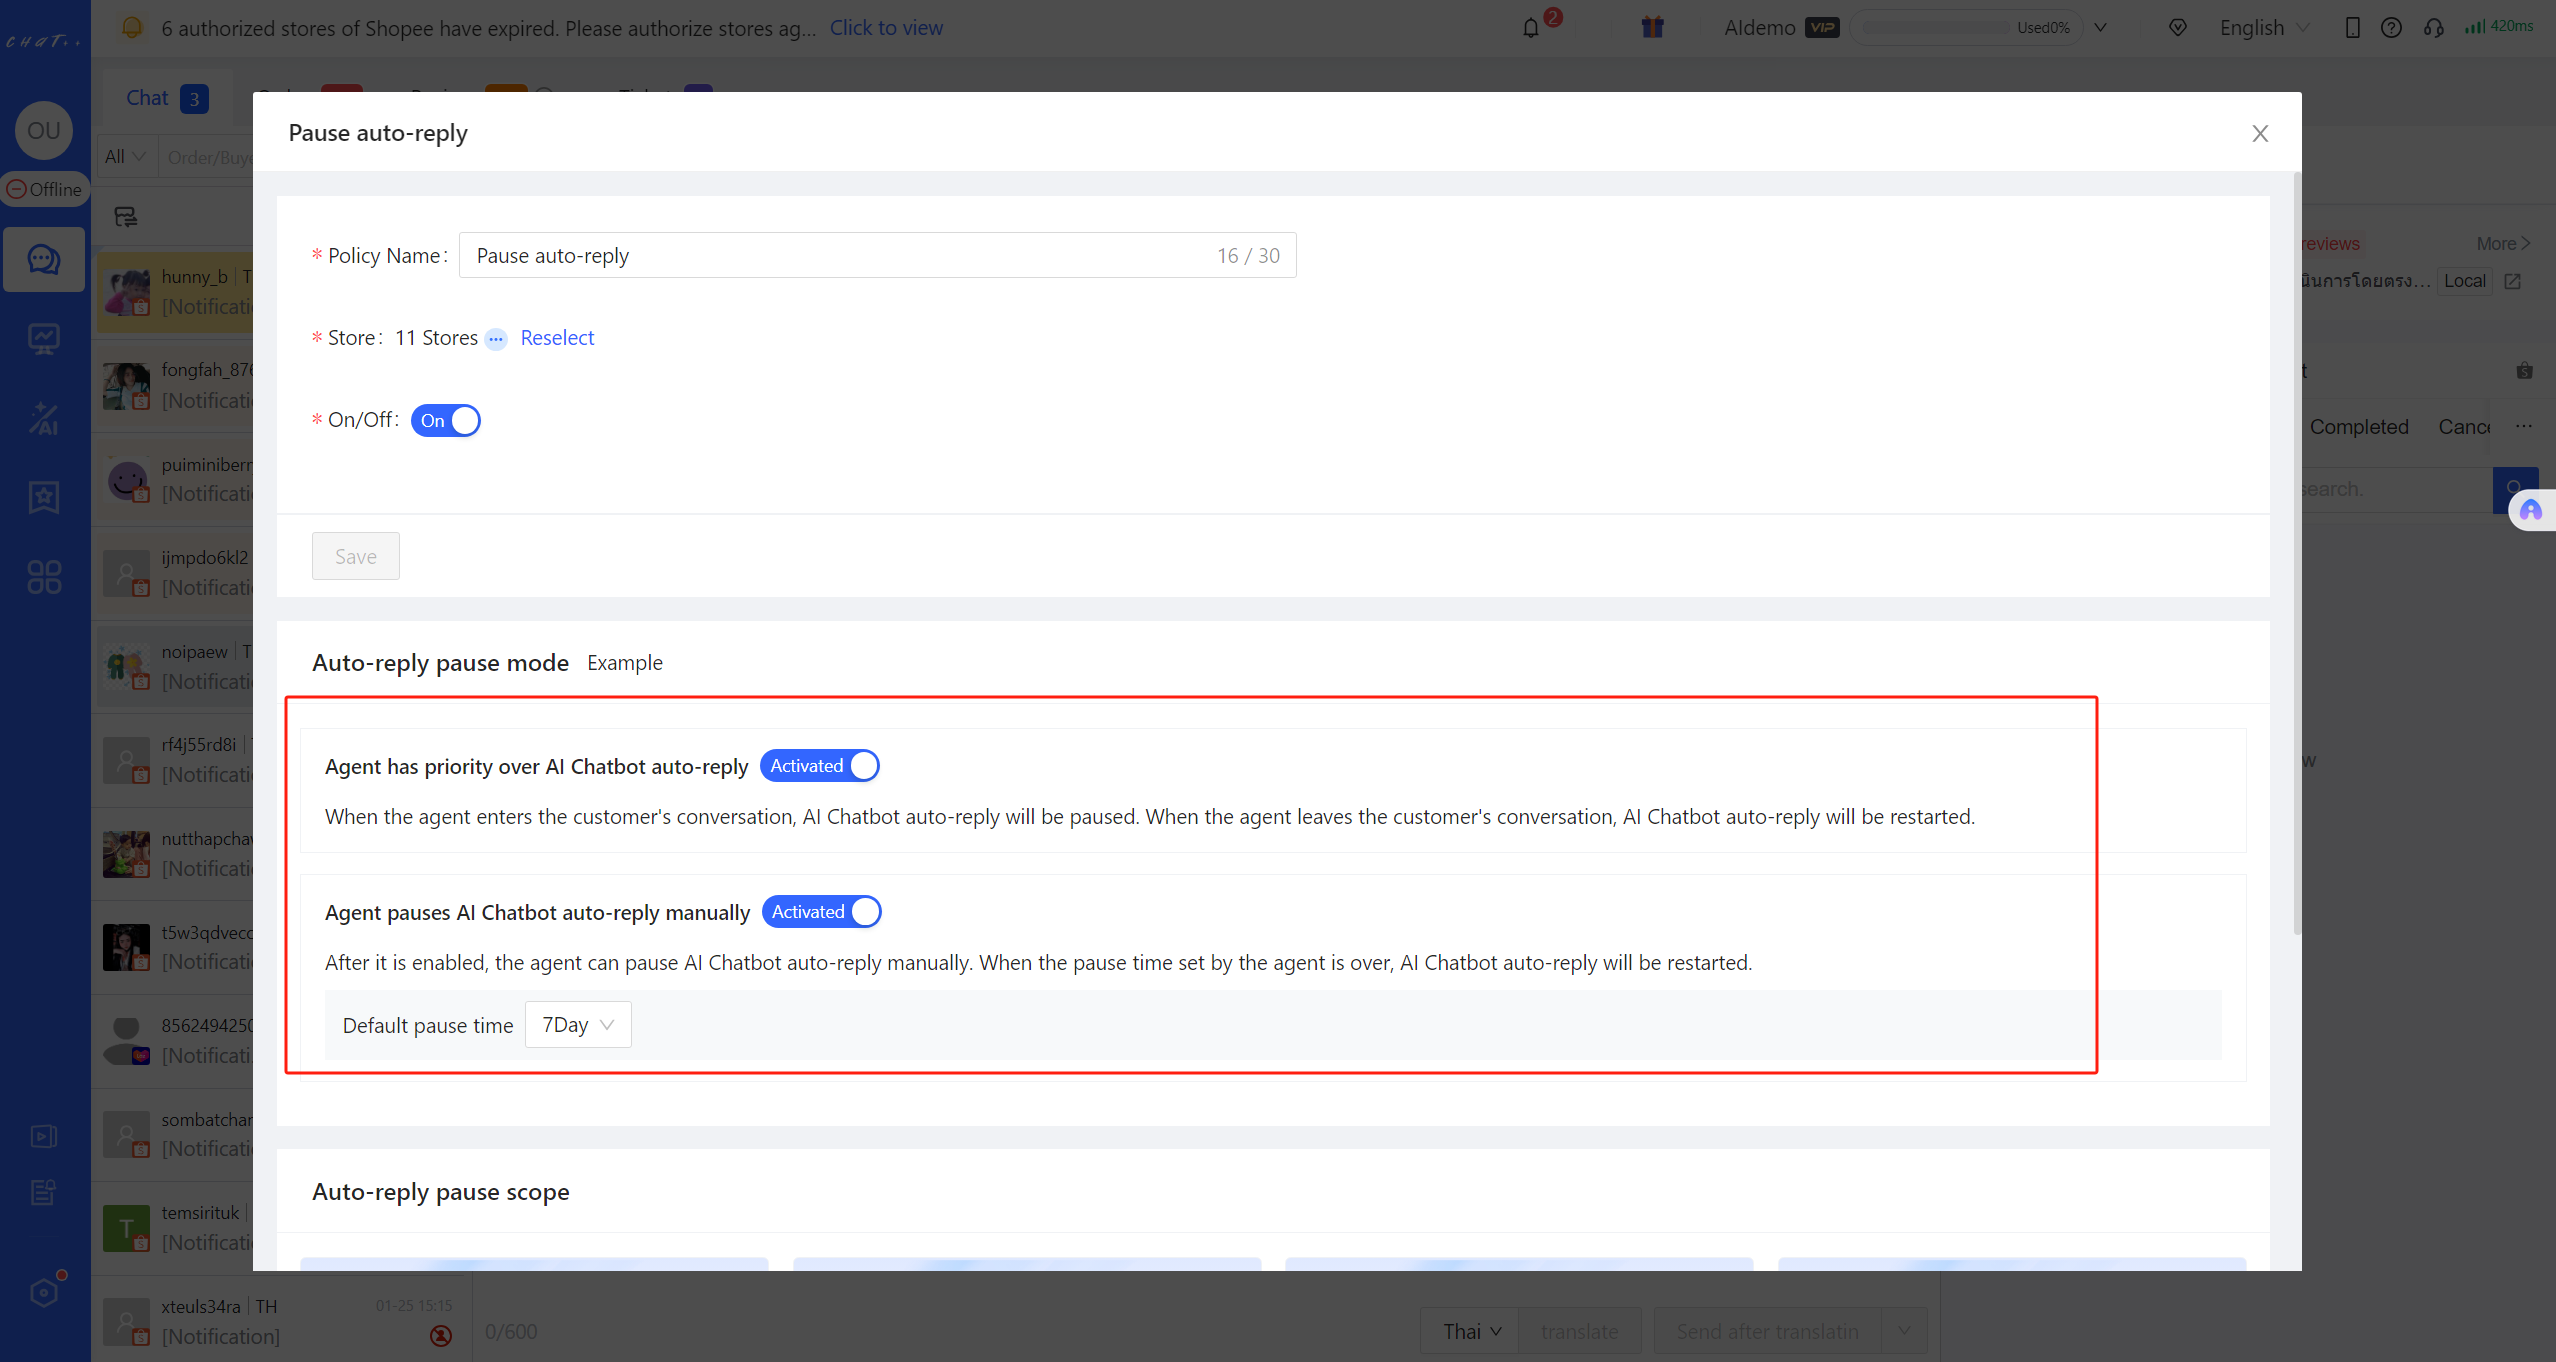
- Figure 16
- If both of the aforementioned pause modes are activated simultaneously, the scenario is illustrated as follows: When Agent A enters the customer conversation, AI Chatbot auto-reply will be paused. While the agent serves this customer, the agent simultaneously manually pause the auto-reply, and the pause time is set to 7 days. Therefore, within the 7-day period, AI Chatbot auto-reply will remain paused.
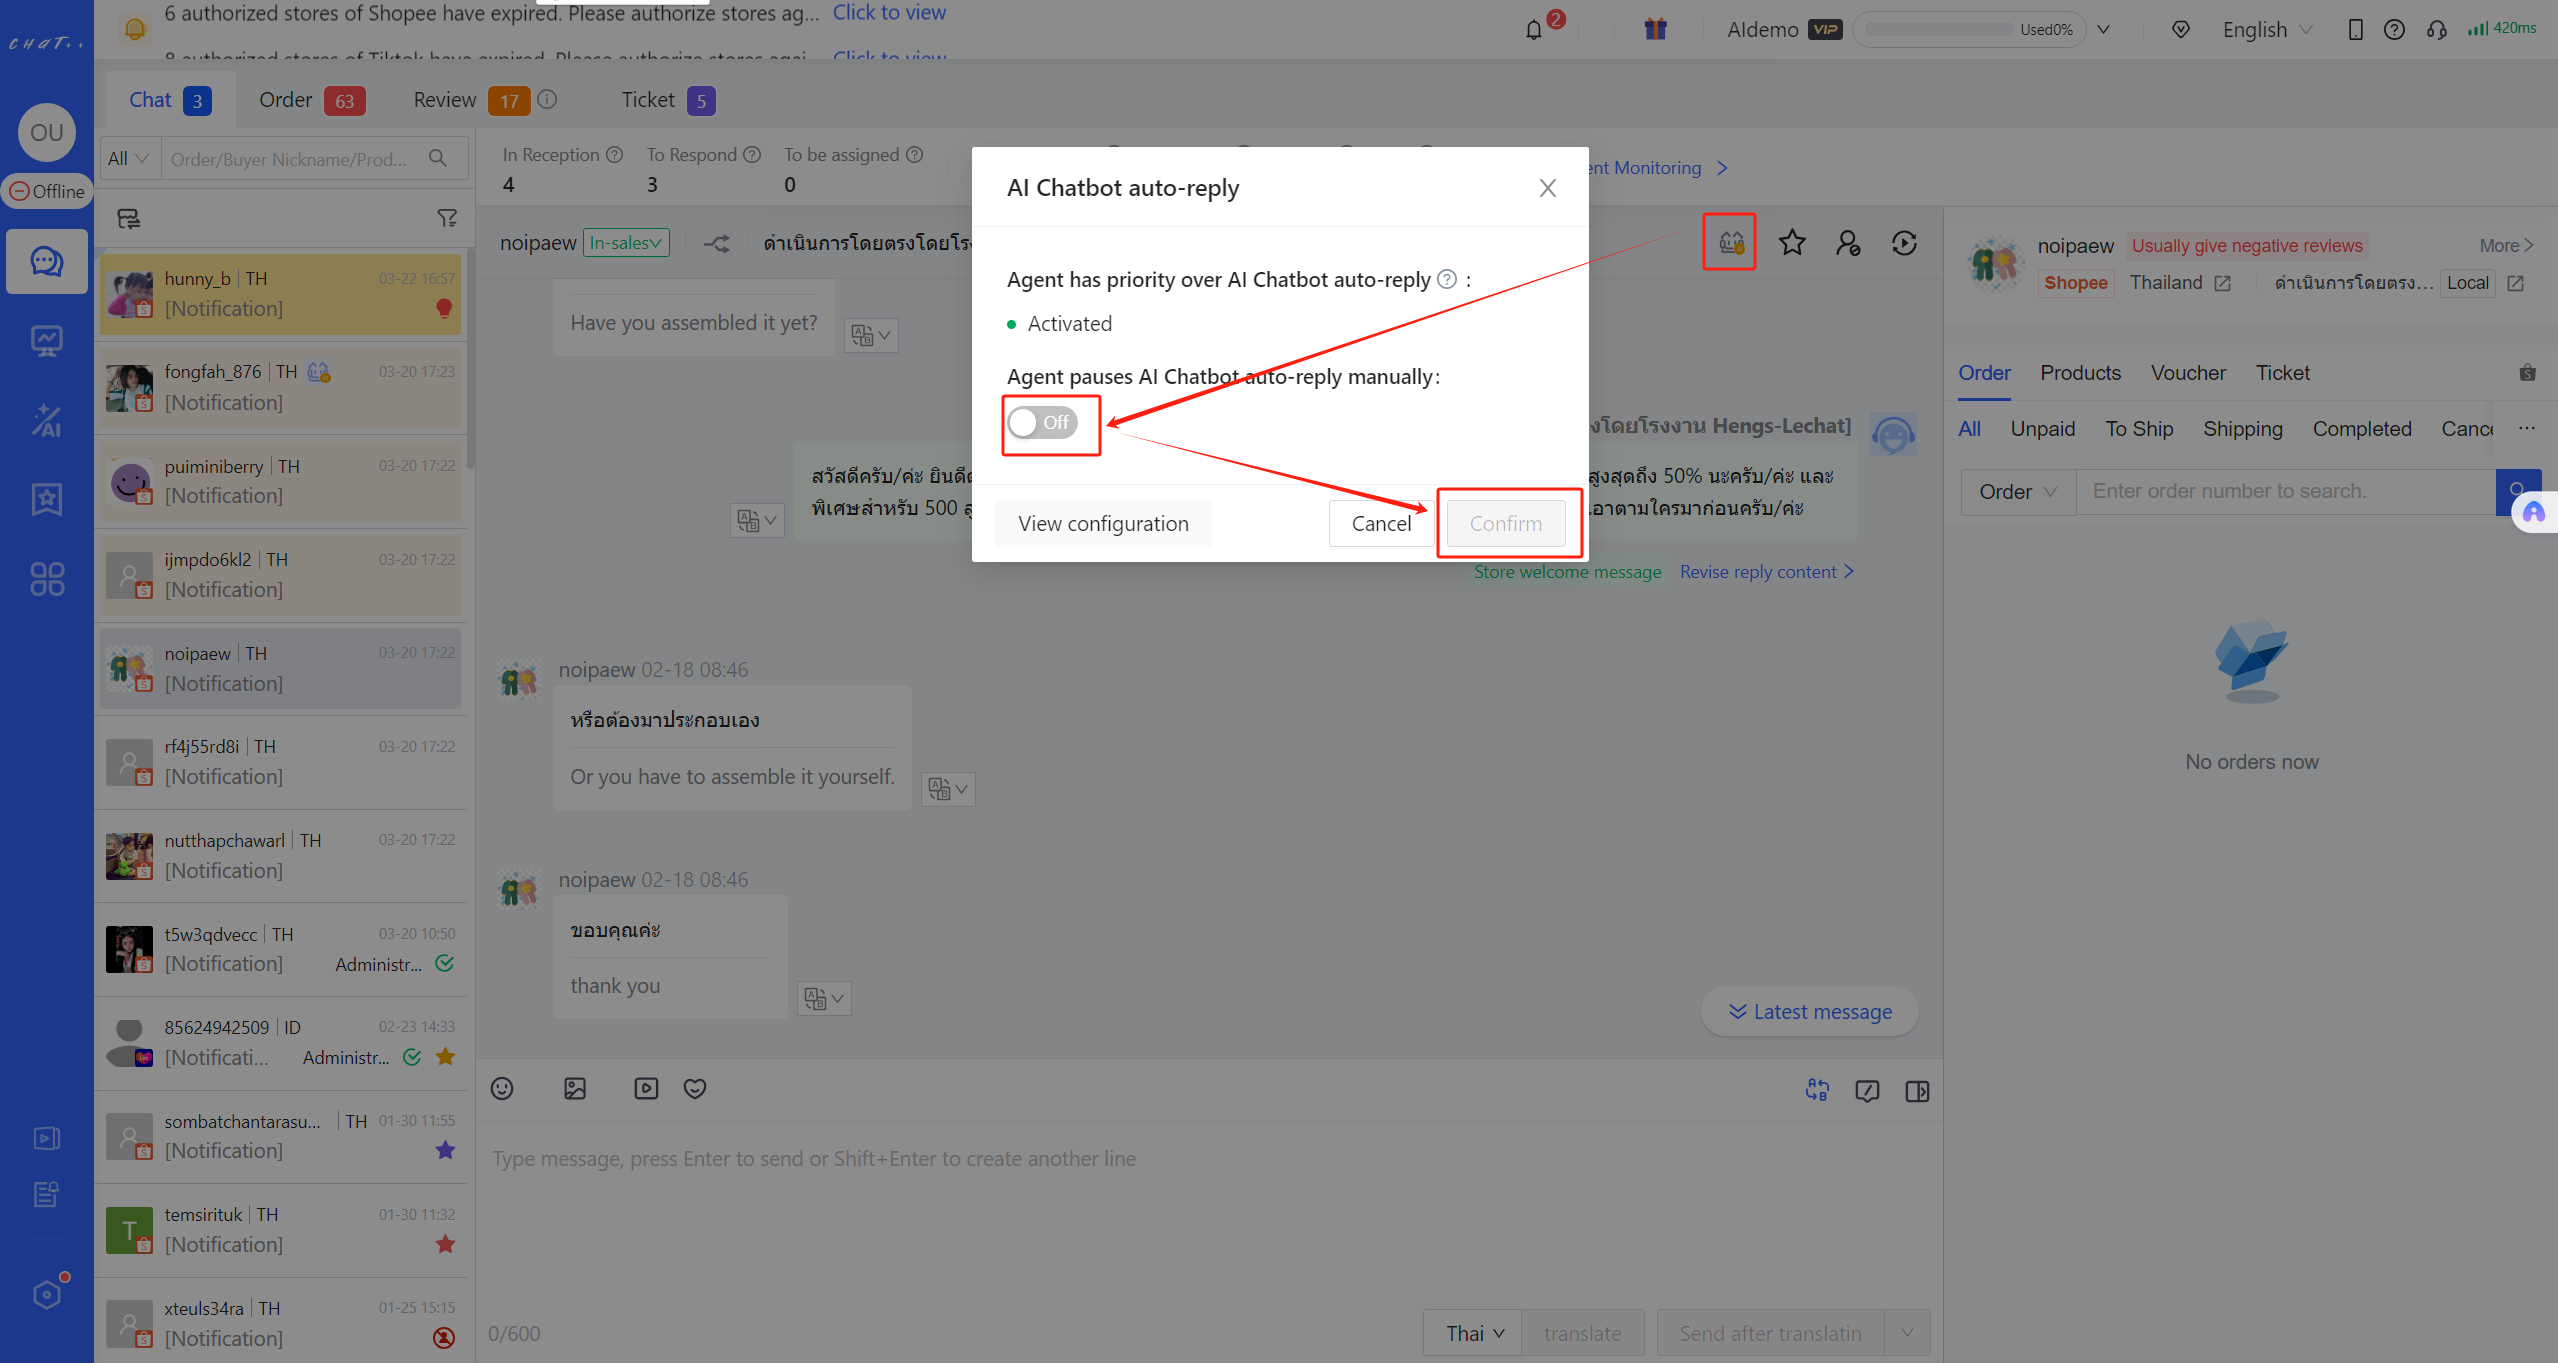
- Figure 17
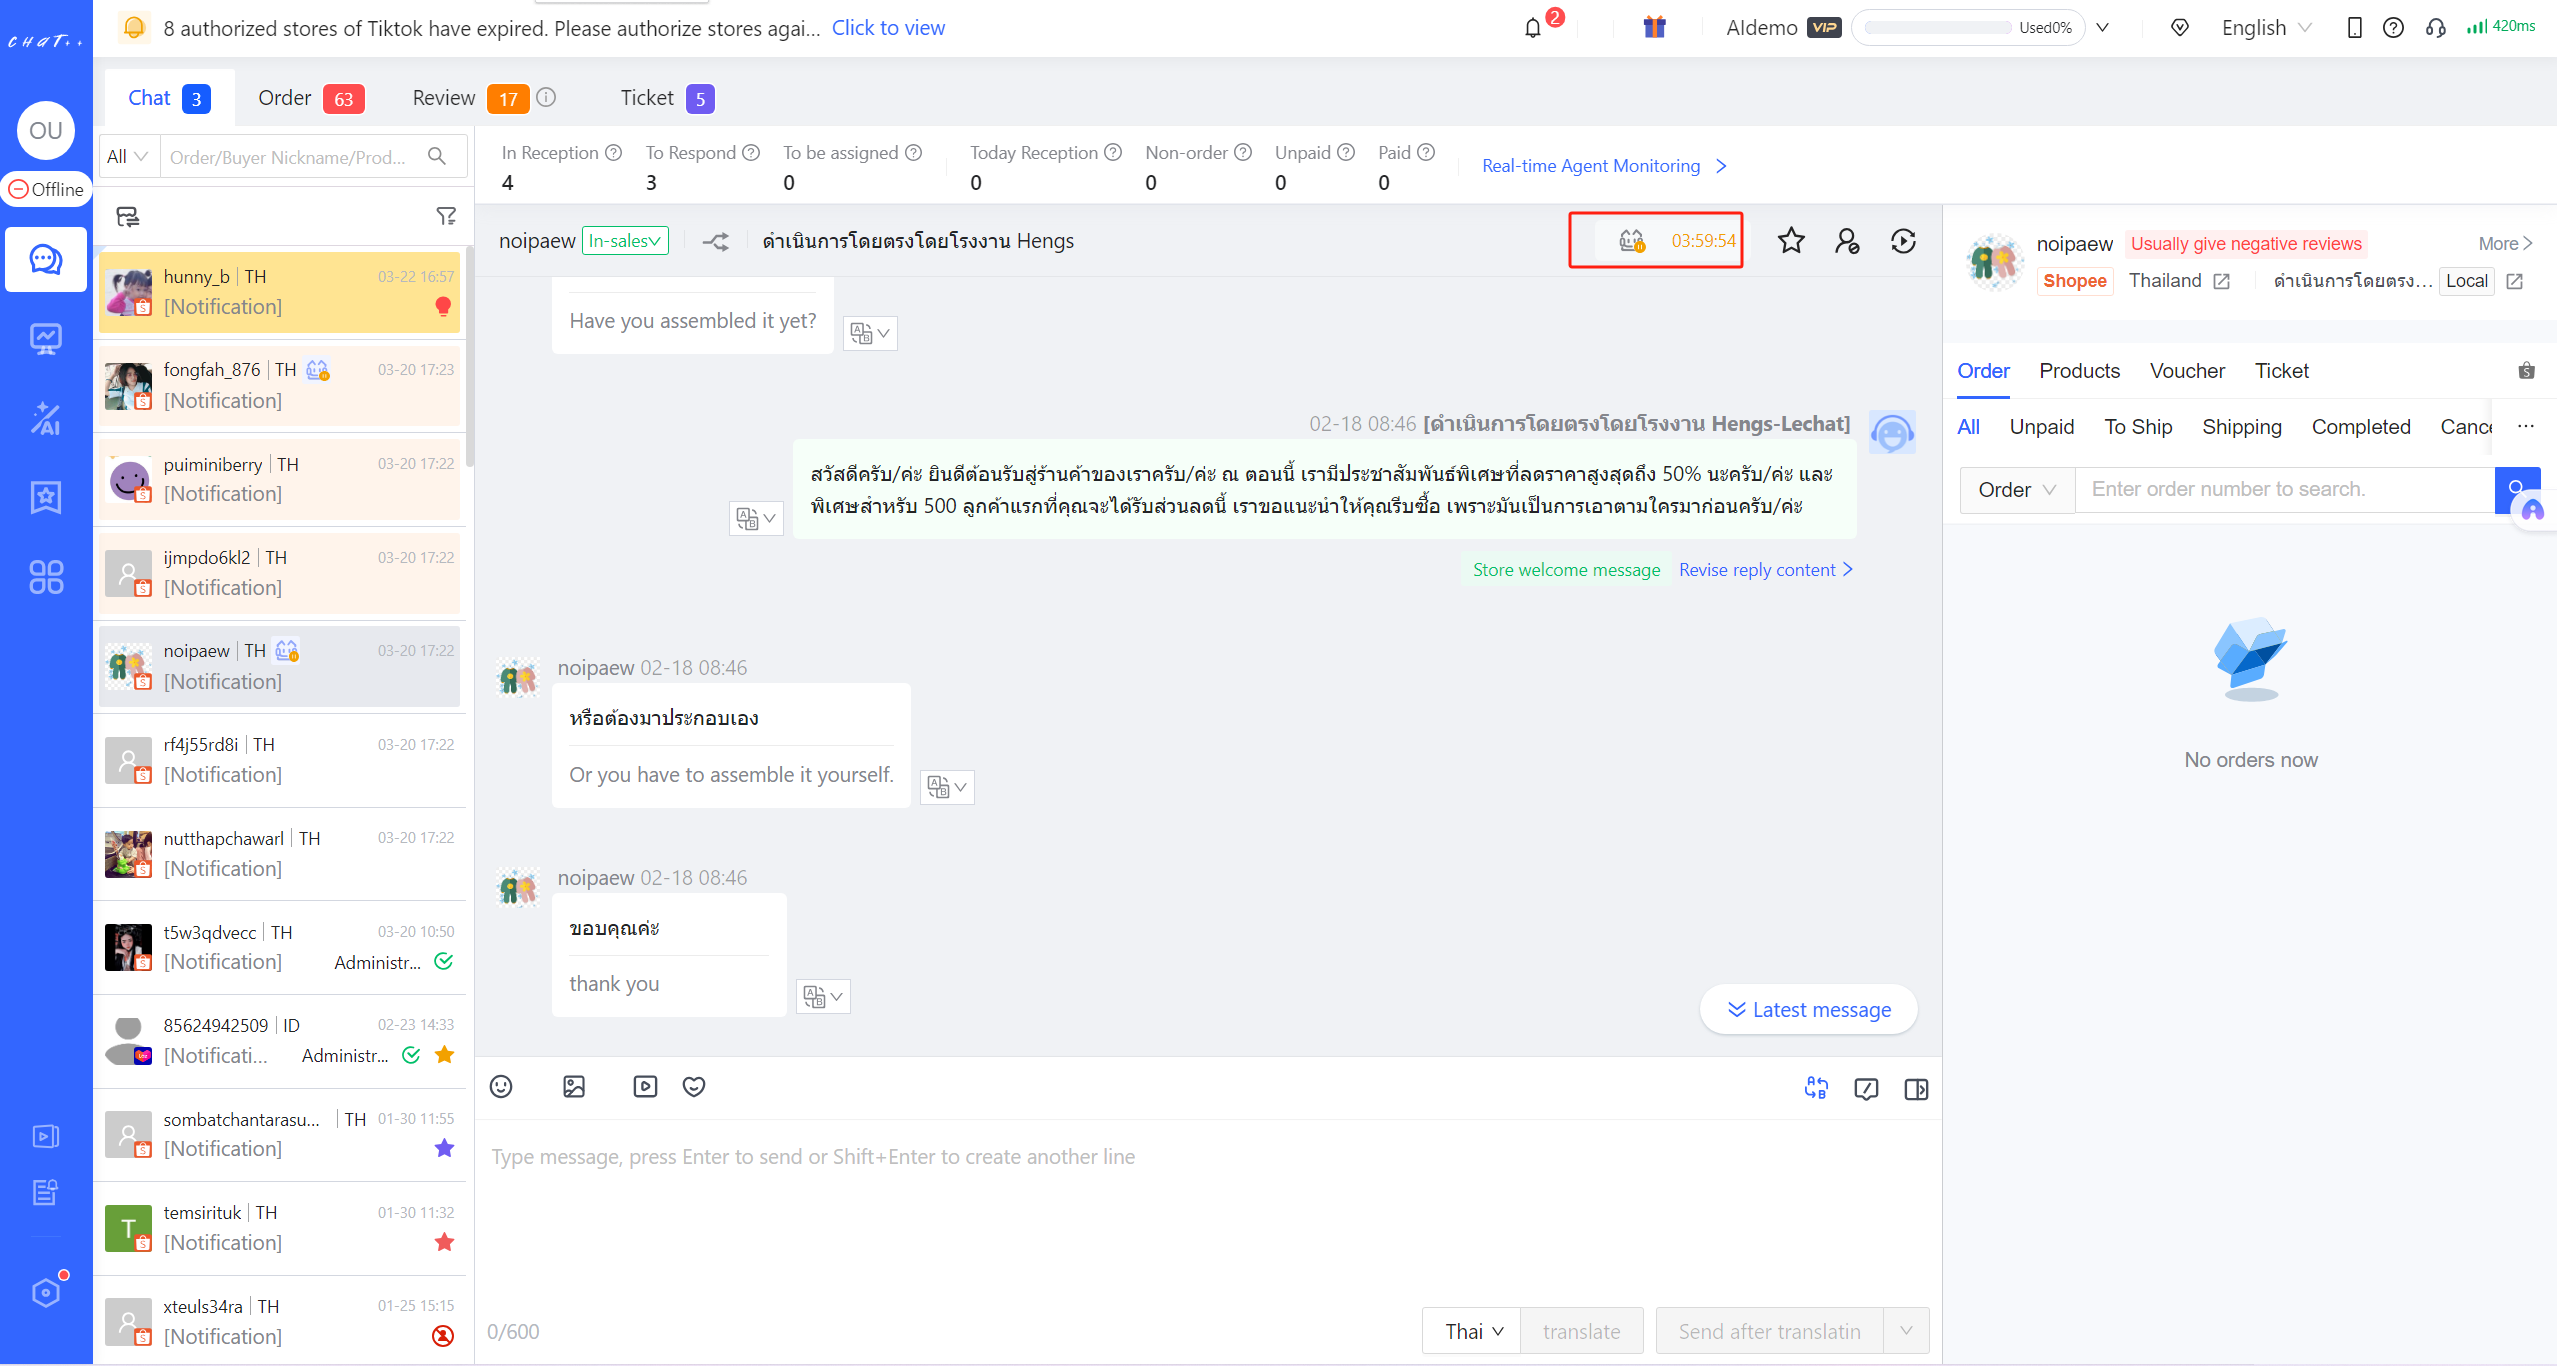
- Figure 18
The official roles "Administrator" and "Agent" in ChatPlusAI are granted default permissions to "configure pause AI Chatbot auto-reply." Official roles do not support modifying permissions. If adjustments to permissions are needed, administrators can create new roles. Therefore, if the agent cannot configure pause AI Chatbot auto-reply in the conversation interface, he should contact the administrator to confirm the permissions associated with his account's assigned role.
Pause AI Chatbot auto-reply
Pause AI Chatbot auto-reply: ChatPlusAI allows agents to temporarily disable Automation such as AI Receptionist and Order Reminder/Payment Reminder/Logistics Care at the customer's conversation level. Using scenarios such as pausing AI Receptionist, pausing Cancellation/Refund Follow-up, and pausing Logistics Care as examples:
Pause AI Receptionist: In certain after-sales scenarios or other complex situations, where an agent has already responded and does not wish for AI Chatbot to provide conflicting solutions in subsequent communication with the customer, the agent can manually pause AI Receptionist for the current conversation.
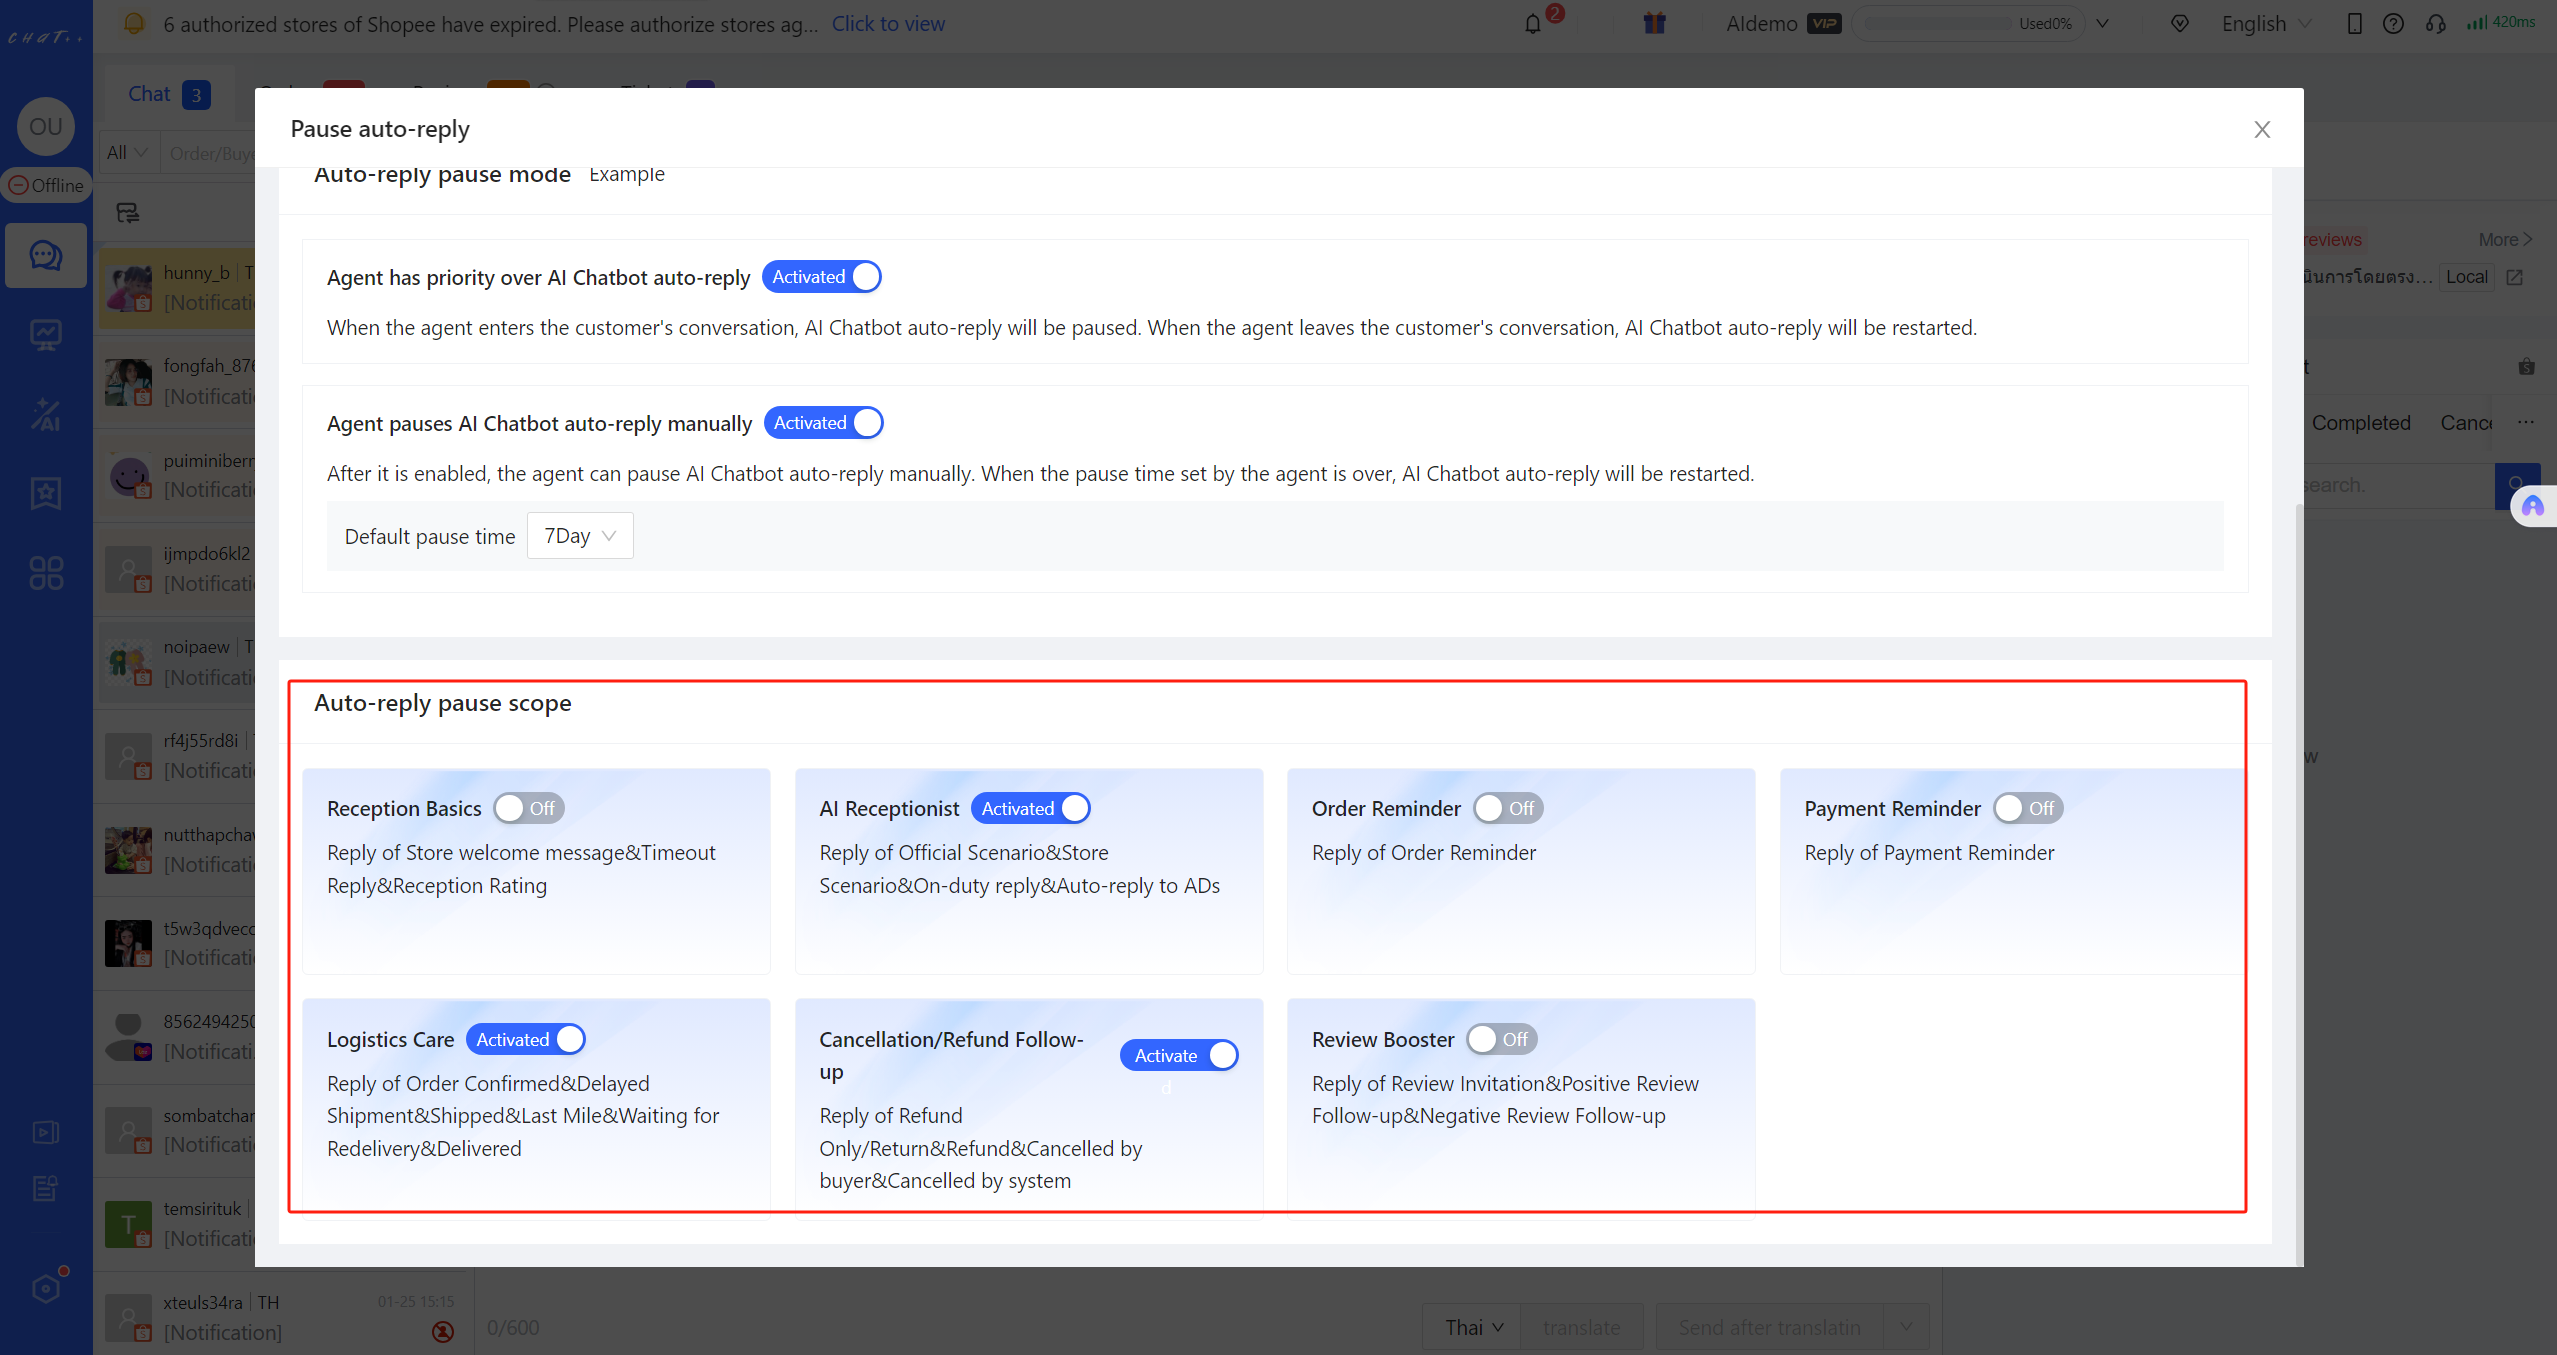
Figure 19
Pause Cancellation/Refund Follow-up: Some customers have already communicated with agents and reached an agreement on the Cancellation/Refund request before initiating a after-sales request. At this point, AI Chatbot should no longer follow up on the Cancellation/Refund order. Pausing Cancellation/Refund Follow-up for the current conversation is recommended.
- 💡 Note: ChatPlusAI offers order follow up automation to respond customer's cancellation/return/refund request immediately, collect the evidence and give the solution.
Pause Logistics Care: When the agent is serving a customer and feels that reception work is being affected by auto-reply from Logistics Care system, he can now temporarily pause it.
For more pausing options, please click "View configuration" and select the scope for pausing auto-reply.
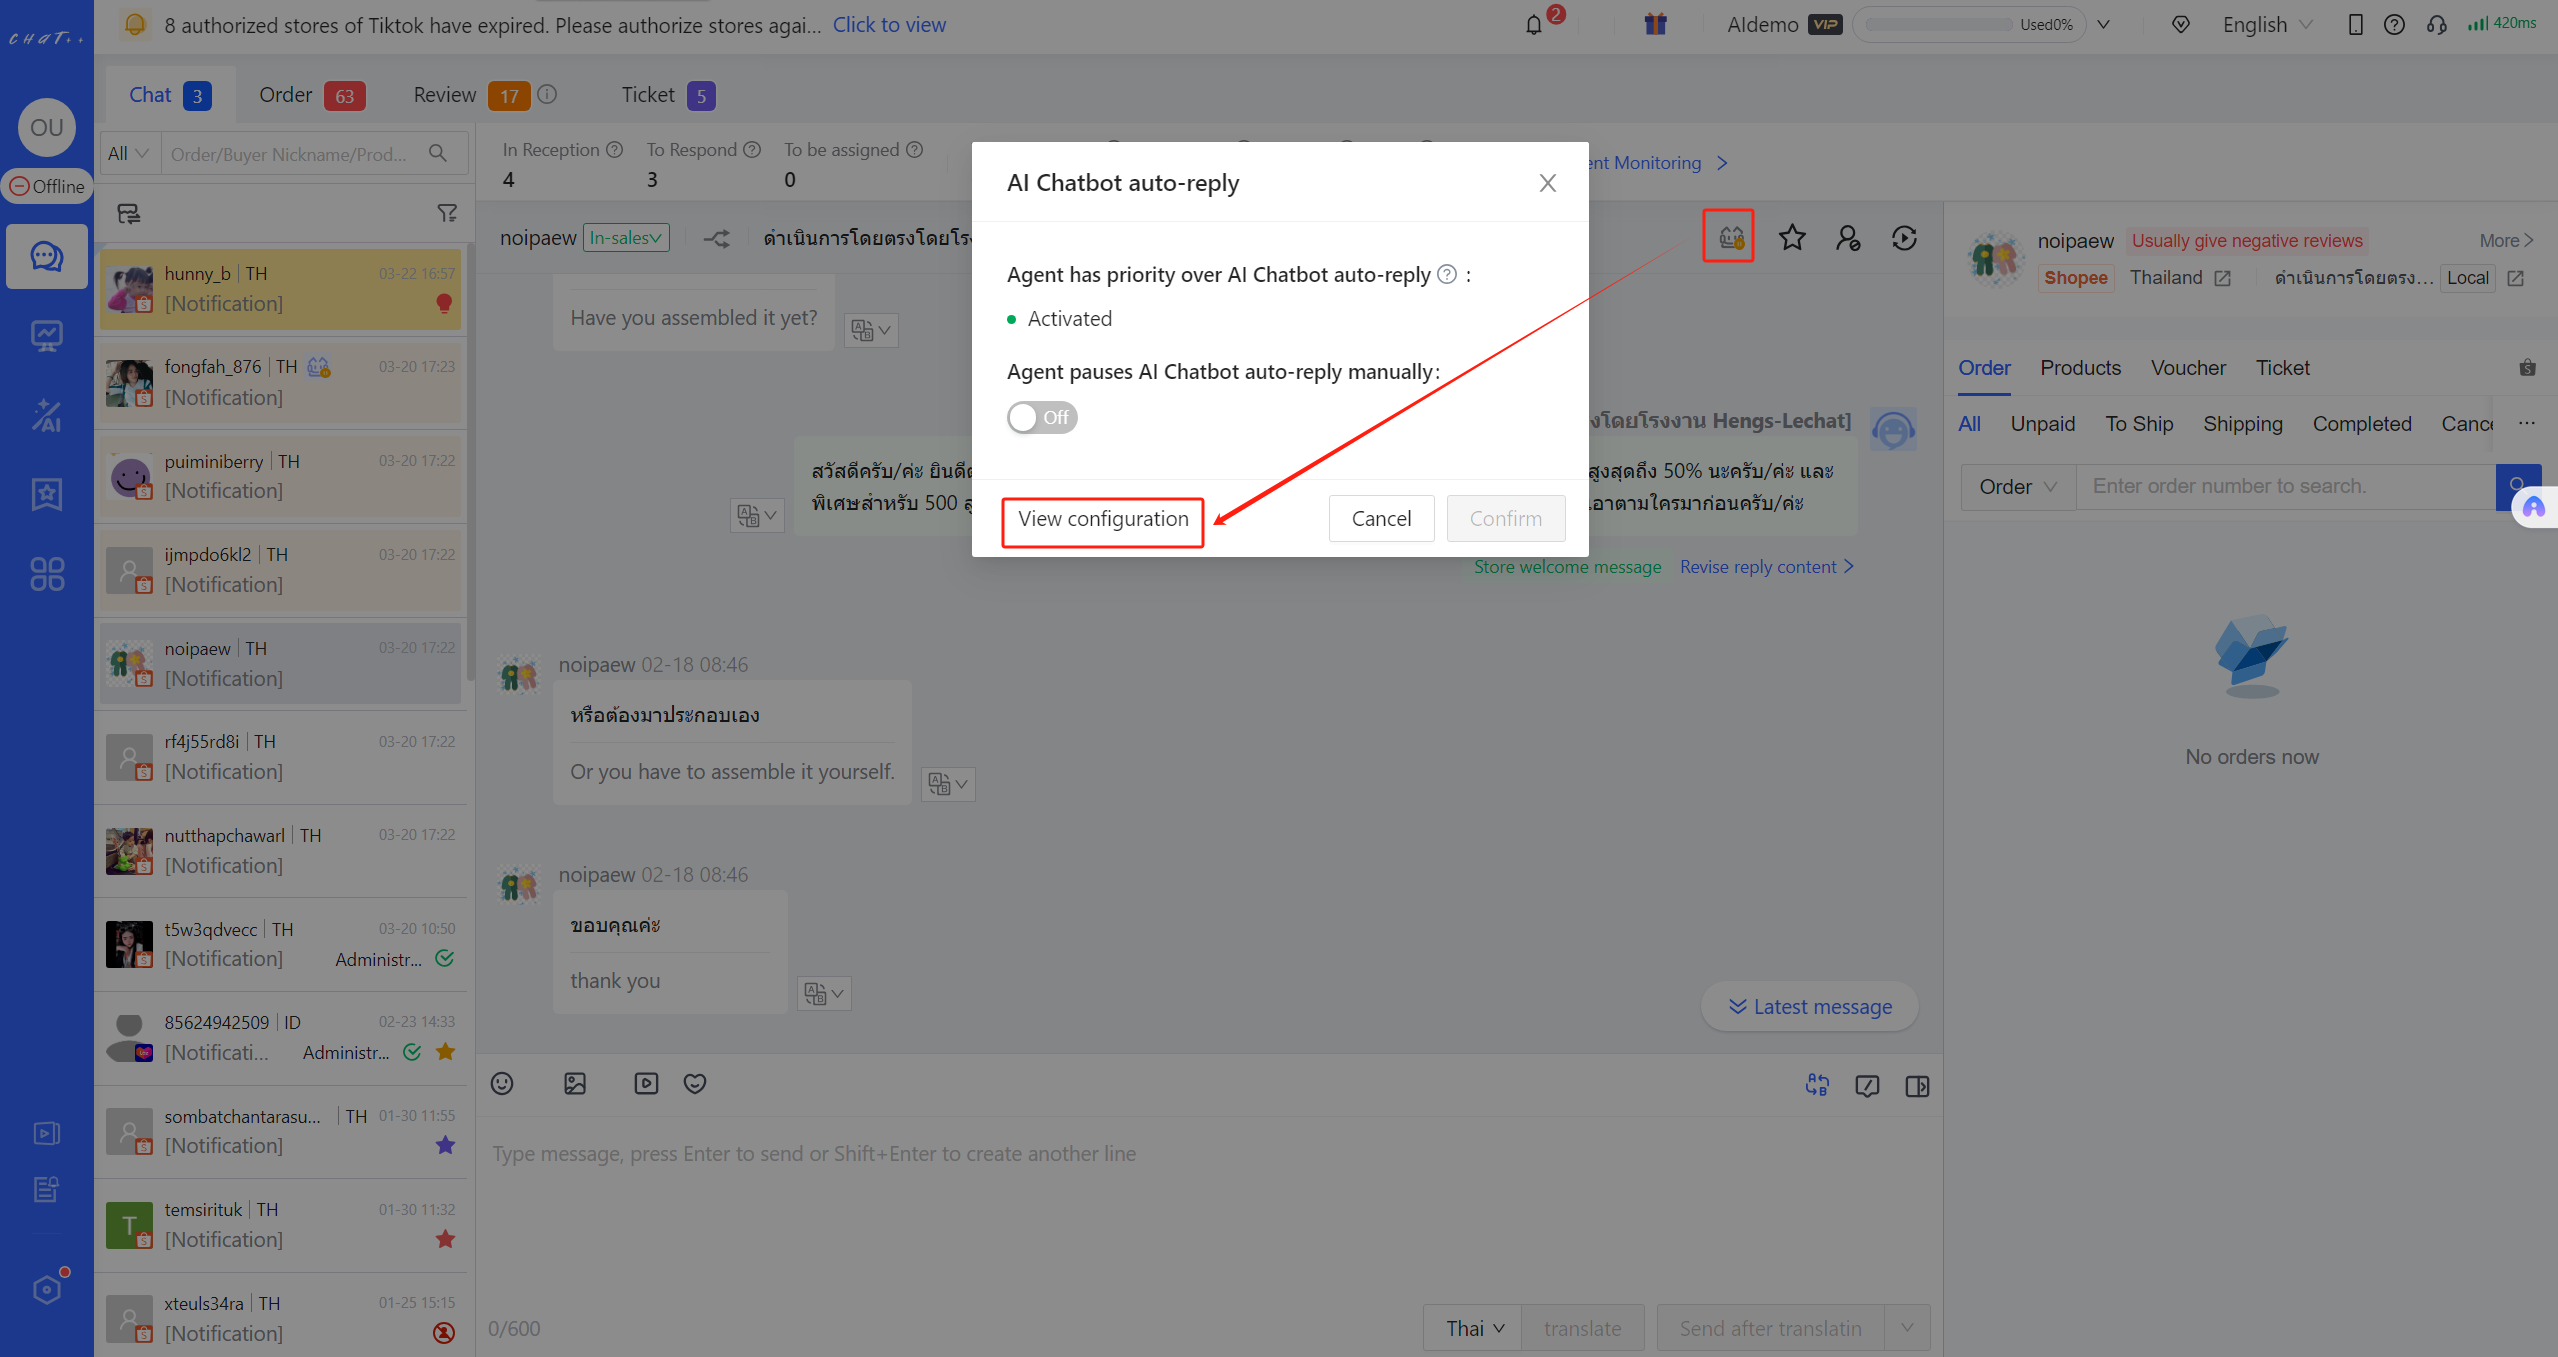
Tag conversation
>>>For details, please click to jump
Block customer
For harassment advertiser or customer you does not want to do real reception for. You can put them into block list. Right click the conversation, you will see a pop-up menu, and click "block". After that, the coming messages from the blocked customer will be automatically replied by system to keep reply rate. The blocked conversation will not show in conversation list. You can use conversation search to open the blocked conversation.
Transfer conversation
Assigned conversation can be transferred from one online reception account A to another online reception account B. The previous owner A can trigger “Transfer”, the administrator whose customer traffic dispatch mode is configured as supervision can trigger “Transfer”. The receiver B shall be in allowed receptionist list for the store which the conversation belongs to.
As the administrator does supe rvision, who does not have responsibility on reception, conversation can’t be transferred to the administrator. The conversation which is not assigned to reception account can’t be transferred, even the administrator can’t transfer it.
Right click the conversation to transfer, the agent will see a pop-up menu, click “Transfer” and then pick the reception account that needs to be transferred.
Close conversation
For those conversation which the reception is completed, you can close the conversation.
Right click the conversation, and you can click "Close the conversation". The closed conversation will be removed from "In Reception" status, so that you can focus attention on new, urgent, or more important conversations.
Translation Tool in editing window
Auto-translation of customer message ( as shown in red box①): When enabled, customer messages will be automatically translated into the system language. 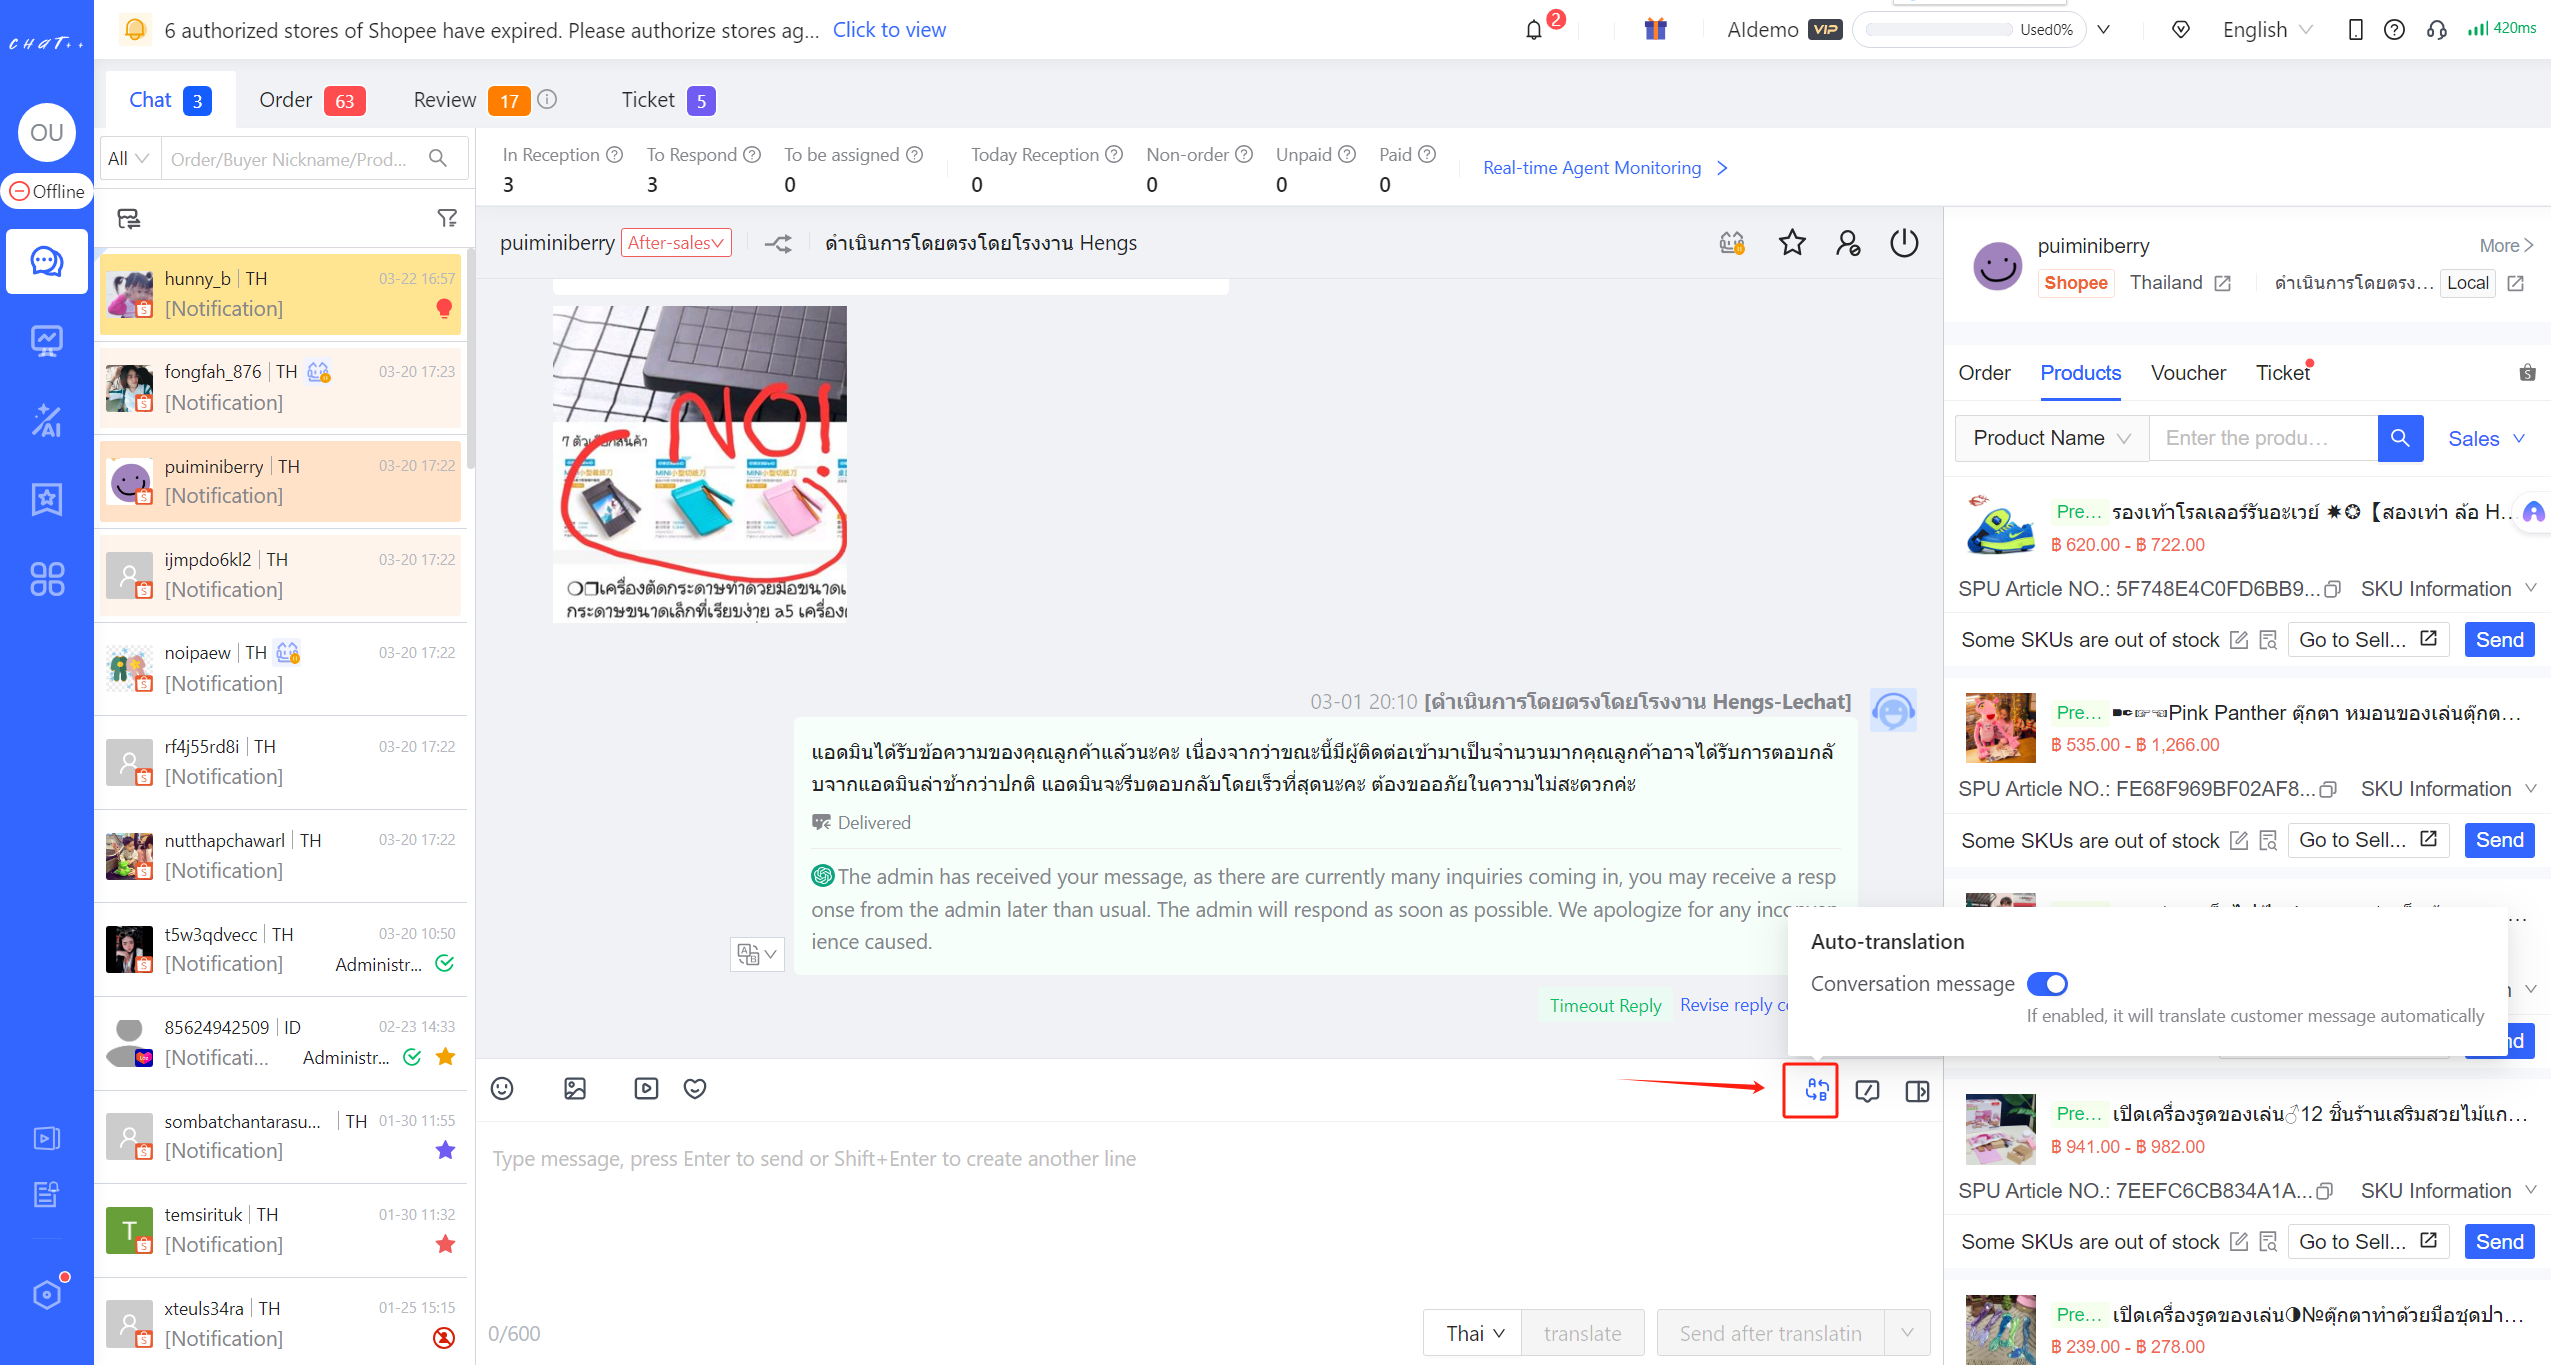 Auto-translation of seller message ( as shown in red box②): If the content of agent's reply needs to be translated and doesn't require checking after translation, click "Send after translating" to automatically translate agent's reply into the customer's language and send it to customer.
Direct sending of seller messages:If the content of agent's reply does not require translation, after editing the reply content in the conversation input box, click "Send ". 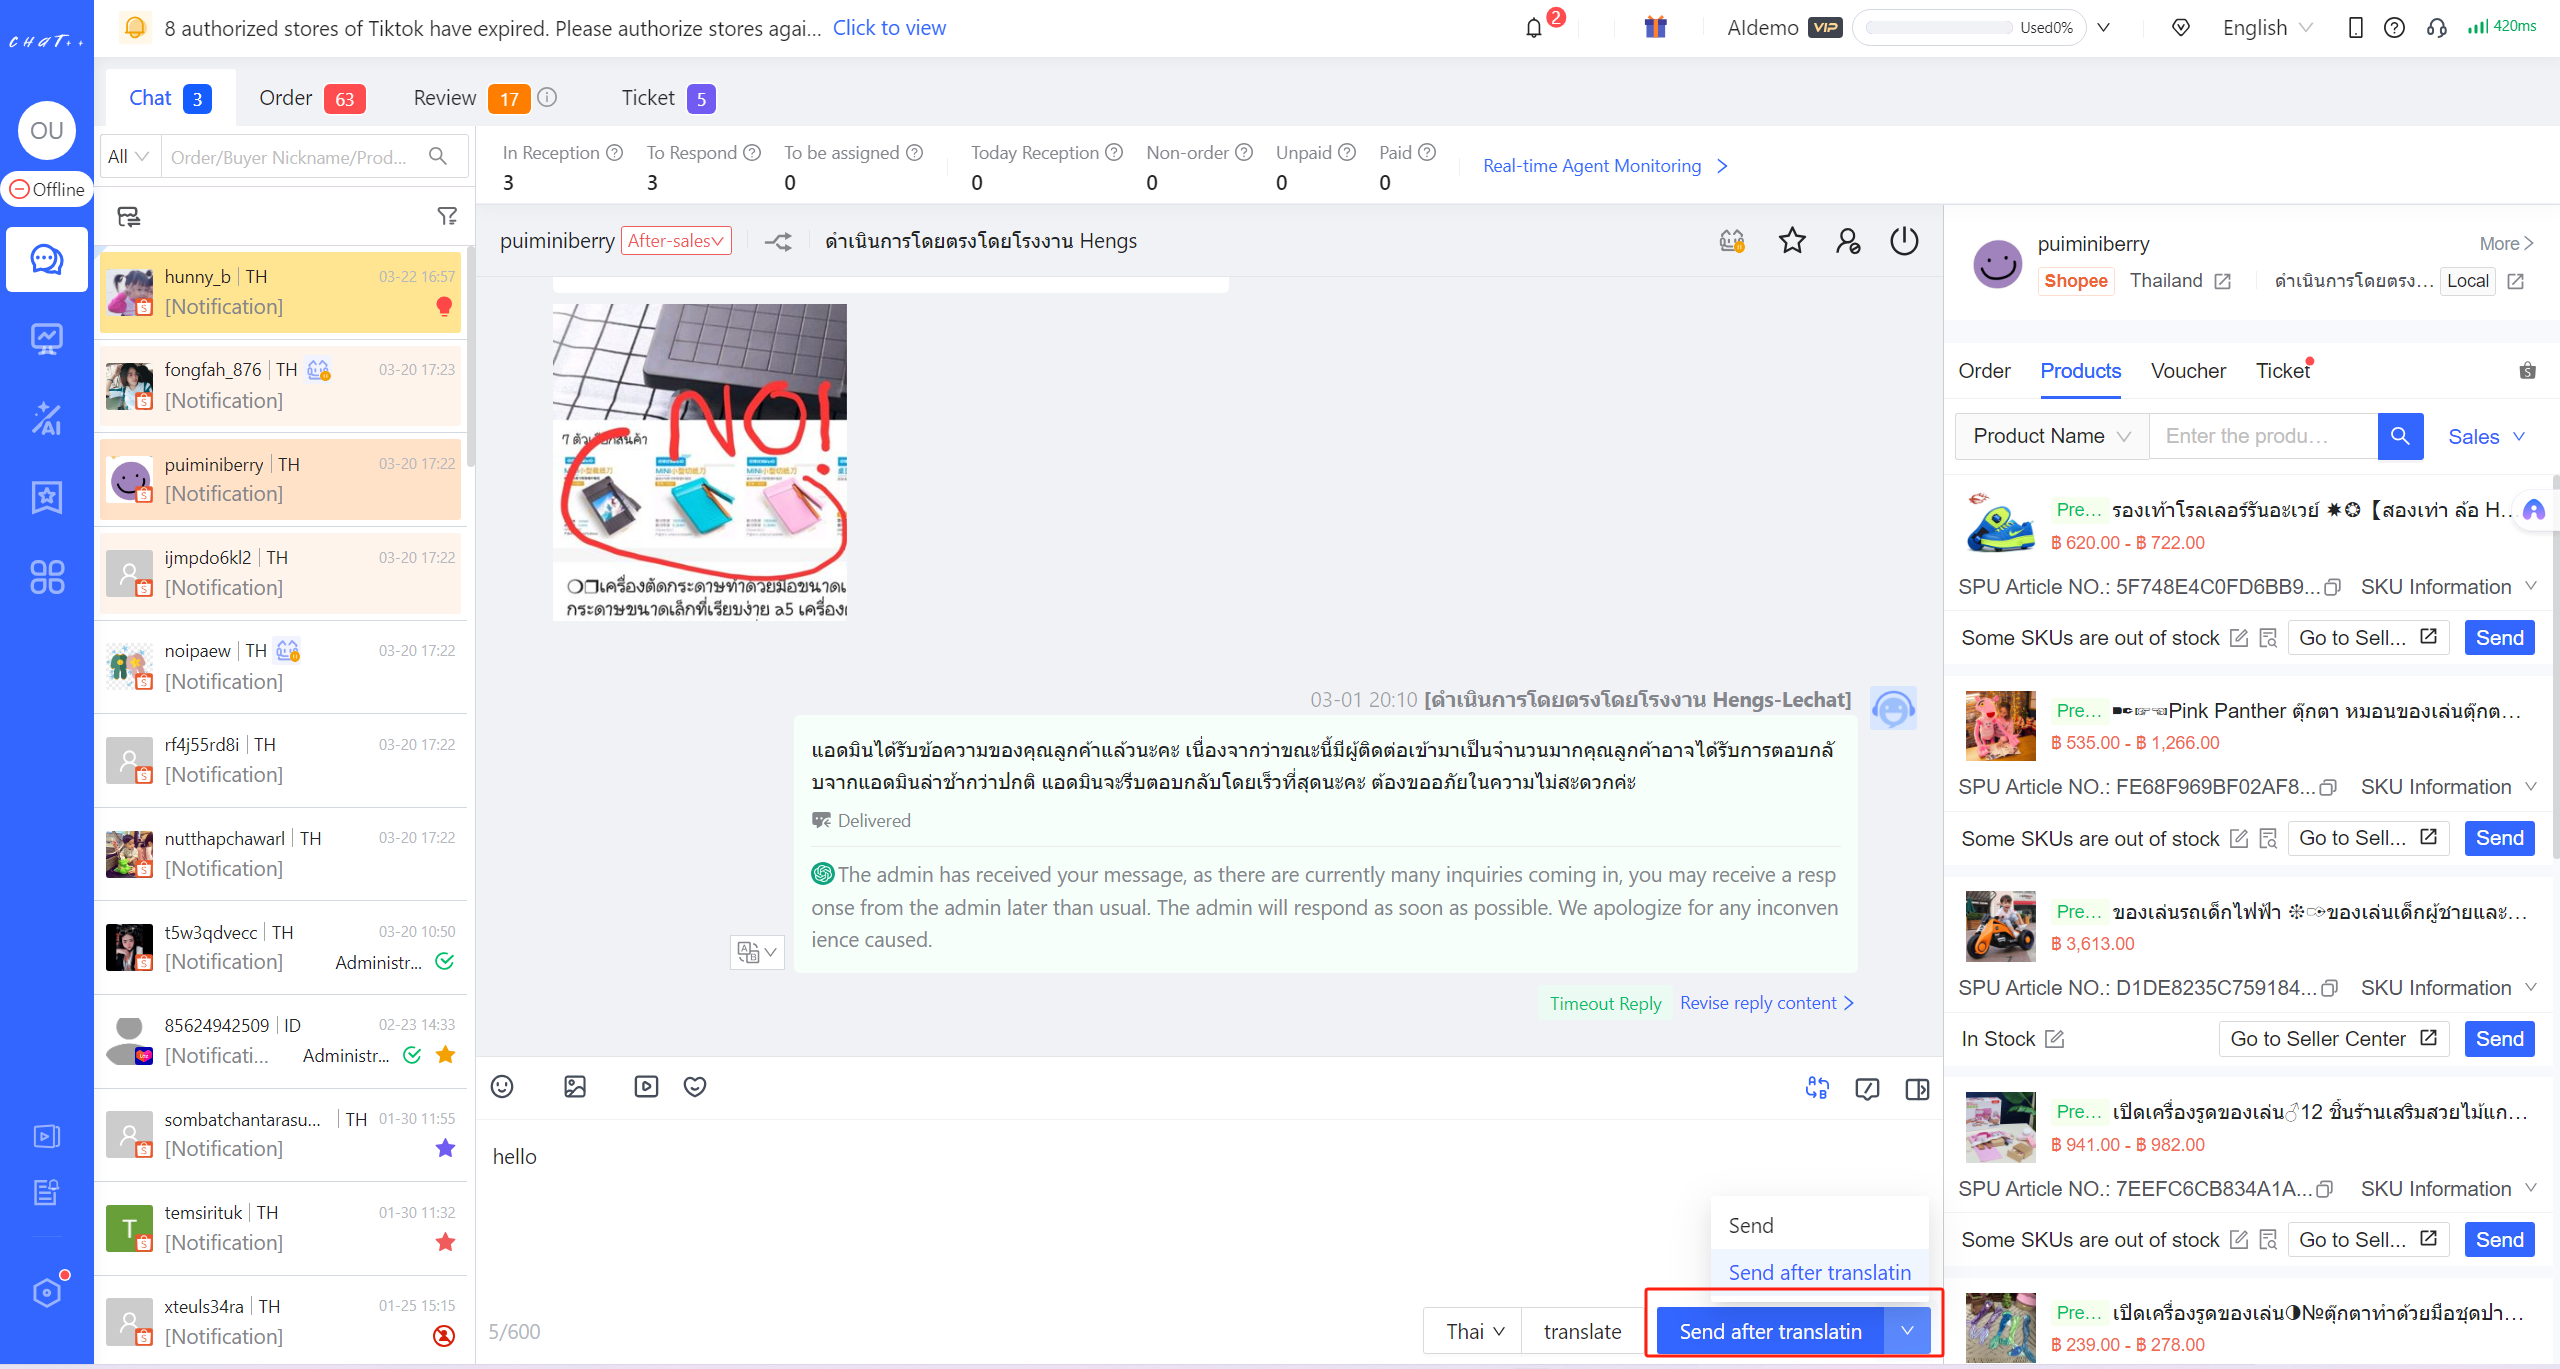 Manual translation and check: If the content of agent's reply needs to be translated and he wants to check the translated content, he can click "Translate". After checking, click "Send" again.
Buyer language: Agents can adjust buyer’s language, the default language comes from the country which the store belongs to.
The Display of Reply Source
| Reply Source | Explanation |
|---|---|
| Replied by Agent on ChatPlusAI | The message is replied by the agent on ChatPlusAI. |
| AI Receptionist | The message is a real-time and effective response from AI Receptionist to the buyer’s question. |
| Order Reminder | The message is that AI Receptionist will urge pre-sale buyers who have not placed an order within a certain period of time after the inquiry. |
| Payment Reminder | The message is that AI Receptionist will urge buyers who have not payed within a certain period of time after the inquiry. |
| Cancellation Follow-up | The message is that when the buyer initiates the cancellation, AI Chatbot will send a targeted retrieval message according to the buyer's reason, asking the buyer to withdraw the request, or to re-order after cancellation. |
| Return/Refund Follow-up | The message is that when the buyer initiates return/refund, AI Chatbot will send a targeted retrieval message according to the buyer's reason, asking the buyer to withdraw the request. |
| Refund Only Follow-up | The message is that when the buyer initiates refund only, AI Chatbot will send a targeted retrieval message according to the buyer's reason, asking the buyer to withdraw the request. |
| Negative Review Follow-up | The message is that when the buyer gives a negative review, AI Chatbot will send a targeted retrieval message according to the buyer's reason, asking the buyer to modify the review. |
| Positive Review Follow-up | The message is that when the buyer gives a positive review, AI Chatbot will express gratitude. |
| Logistics Care - Order Confirmed | The message is that AI Chabot will remind the buyer to confirm the order information after the COD order is placed, or after the non-COD order is fined |
| Logistics Care - Shipped | The message is that AI Chatbot will notify the buyer that the package has been shipped out. |
| Logistics Care - Last Mile | The message is that AI Chatbot will notify the buyer that the package is ready to be delivered. |
| Logistics Care - Delivered | The message is that AI Chatbot will notify the buyer of instructions and precautions after delivered. |
| Timeout Reply | The message is an appeasing reply given b AI Chatbot to the buyer who has not received a reply for a long time, which is not counted as a valid reply It still needs to be received by the agent after sending. |
| Store Welcome Message | The message is that AIChatbot will send the promotion, hot sale products and other information when the buyer inquires for the first time. The reply is not counted as a valid reply, and it will be transferred to the agent immediately after sending. |
| AI On-duty reply | The message is given by the AI Chatbot on duty (cannot be transferred to the agent), which cannot reply validly. The message is not counted as a valid reply, and the conversation will be transferred to the agent immediately when the agent is online. |
| This message is from Seller Center | The message is replied by the agent from Seller Center. |
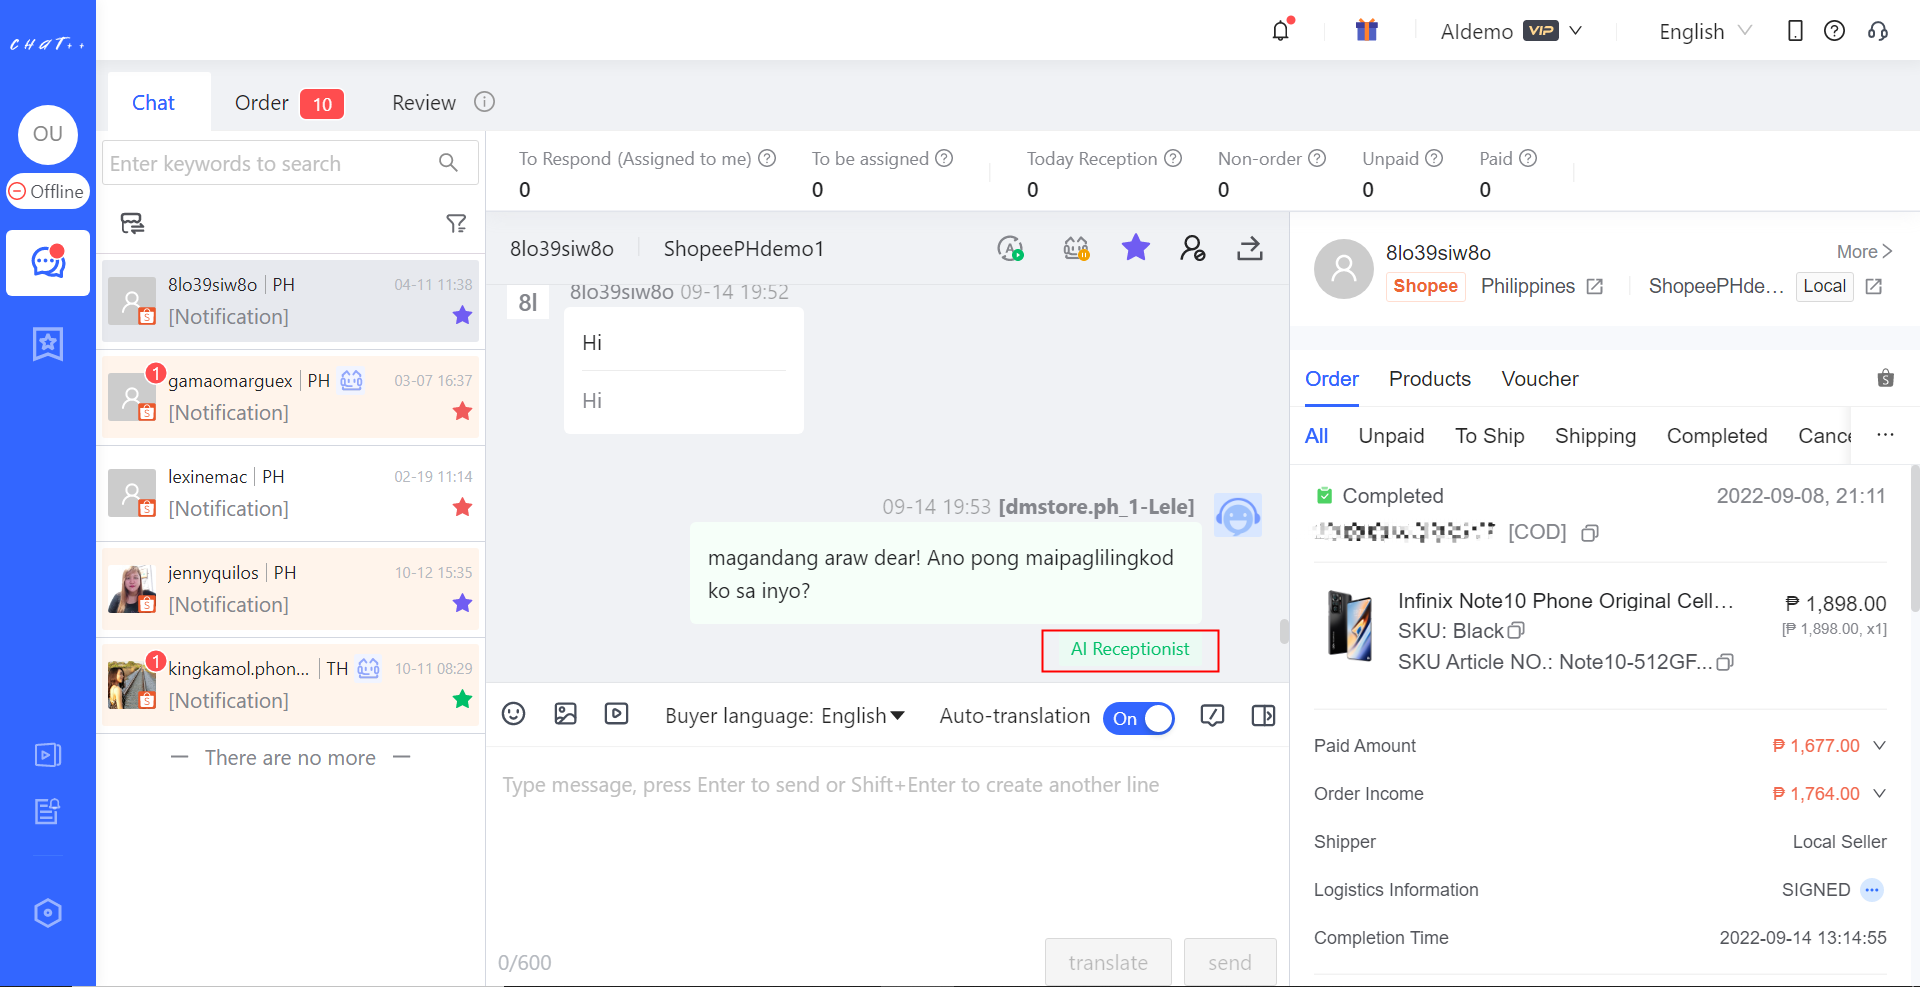
Process Shopee Buyers' OFFER Cards
In the conversation record, the agent can view/process the OFFER cards made by buyers from Shopee.
View OFFER Card: When the buyer makes a bid on the product, the “OFFER” icon will be displayed in the conversation list on the left.
After clicking the conversation, OFFER to be confirmed can be seen in the conversation record, which the agent can choose to reject or accept it.
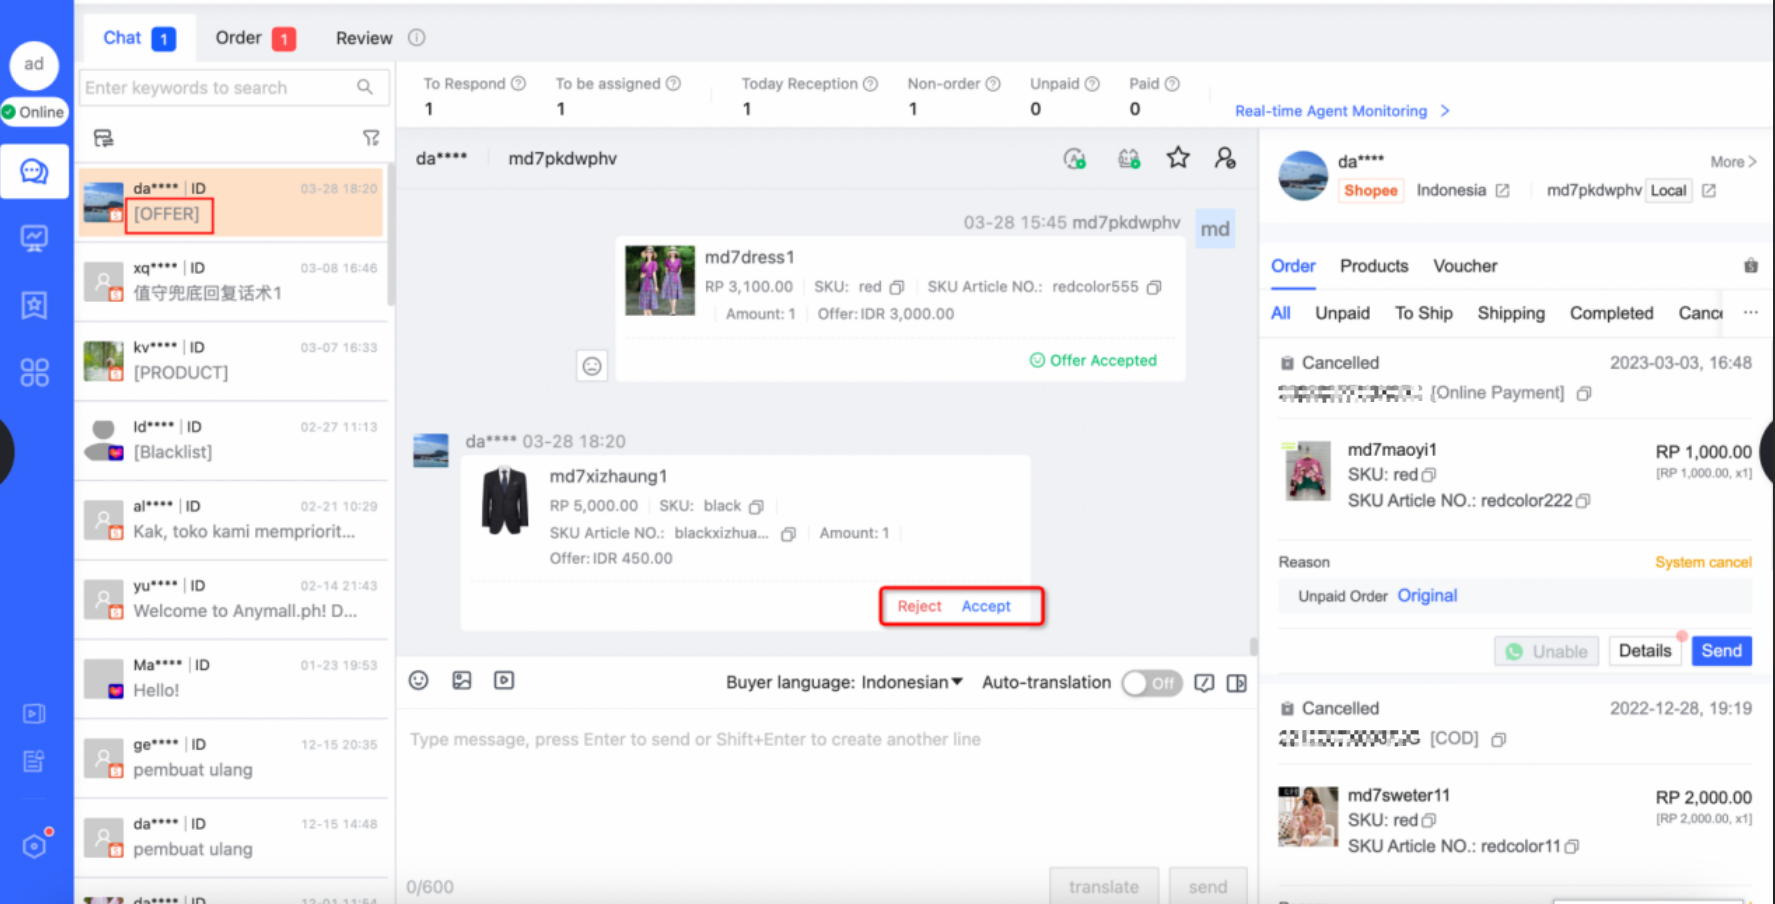
Reject or Accept OFFER: If the agent wants to reject/accept an OFFER from a buyer, click the “Reject/Accept” button at the bottom right of the card. The status of the buyer’s OFFER card will then change, and the system will automatically send the buyer a processed OFFER card to remind.
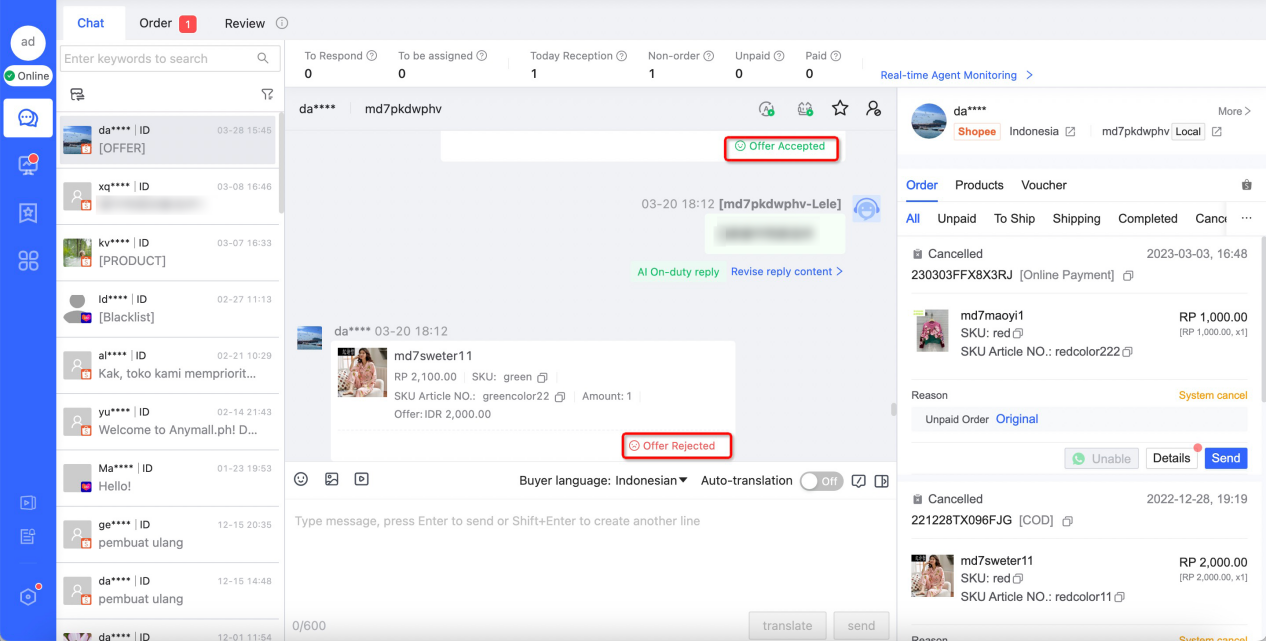
Guide the Buyer to Modify the OFFER Price
Sending OFFER card by sellers is not supported as the API interface limitation from marketplace. If price modification is needed, it is suggested that the agent do not click the "Reject/Accept" button first, he can negotiate with the buyer to find an acceptable price and guide the buyer to modify the OFFER card and then click “Accept”.
Shortcut to Adjust Script of Chatbot Response
In the conversation history window, there is a convenient way to modify the response content of Chatbot. Below Chatbot’s response message, the corresponding scenario for this Chatbot message will be highlighted in green font.
Clicking the “Revise reply content” button on the right side of scenario label allows the agent to view the specific scenario policy, script content and makes quick modification if needed.
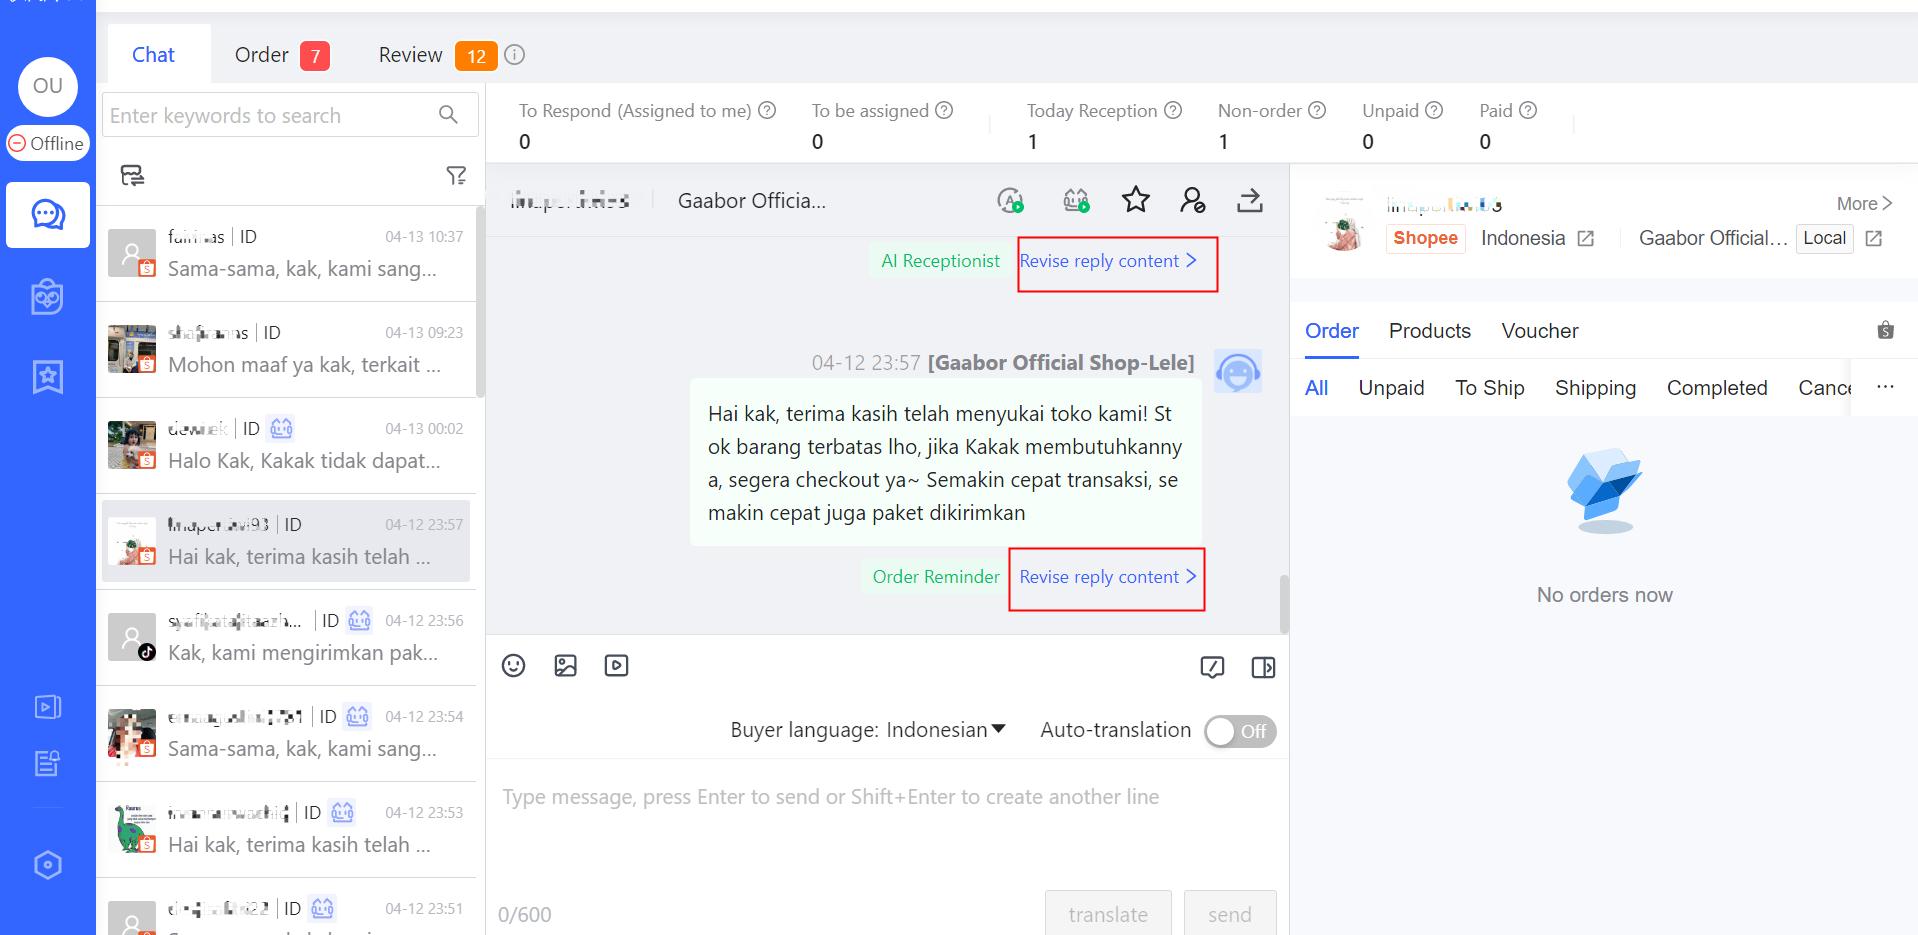
After clicking the “Revise reply content” button, the system will automatically navigate to the scenario corresponding to Chatbot message in the pop-up page, and highlight the subdivision policy branch in yellow to facilitate a quick view.
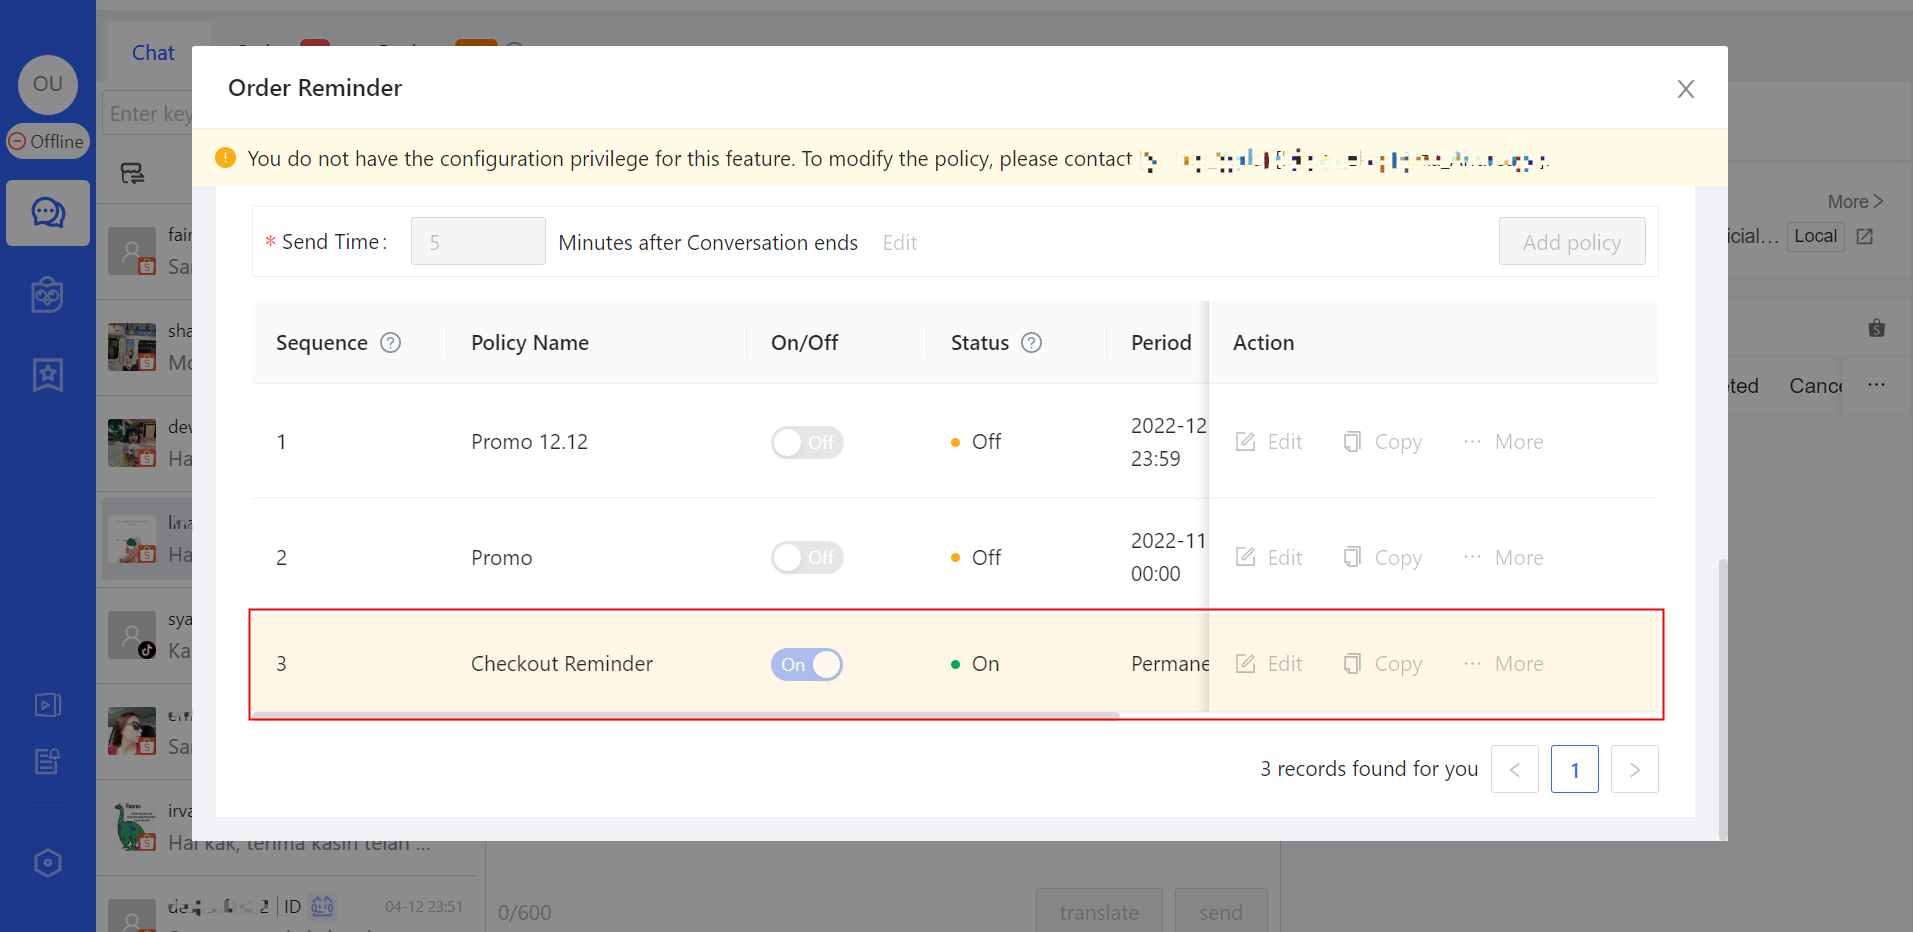
If more details need to be modified, the agent can click 「 Edit 」button, enter the detailed configuration page to modify the policy.
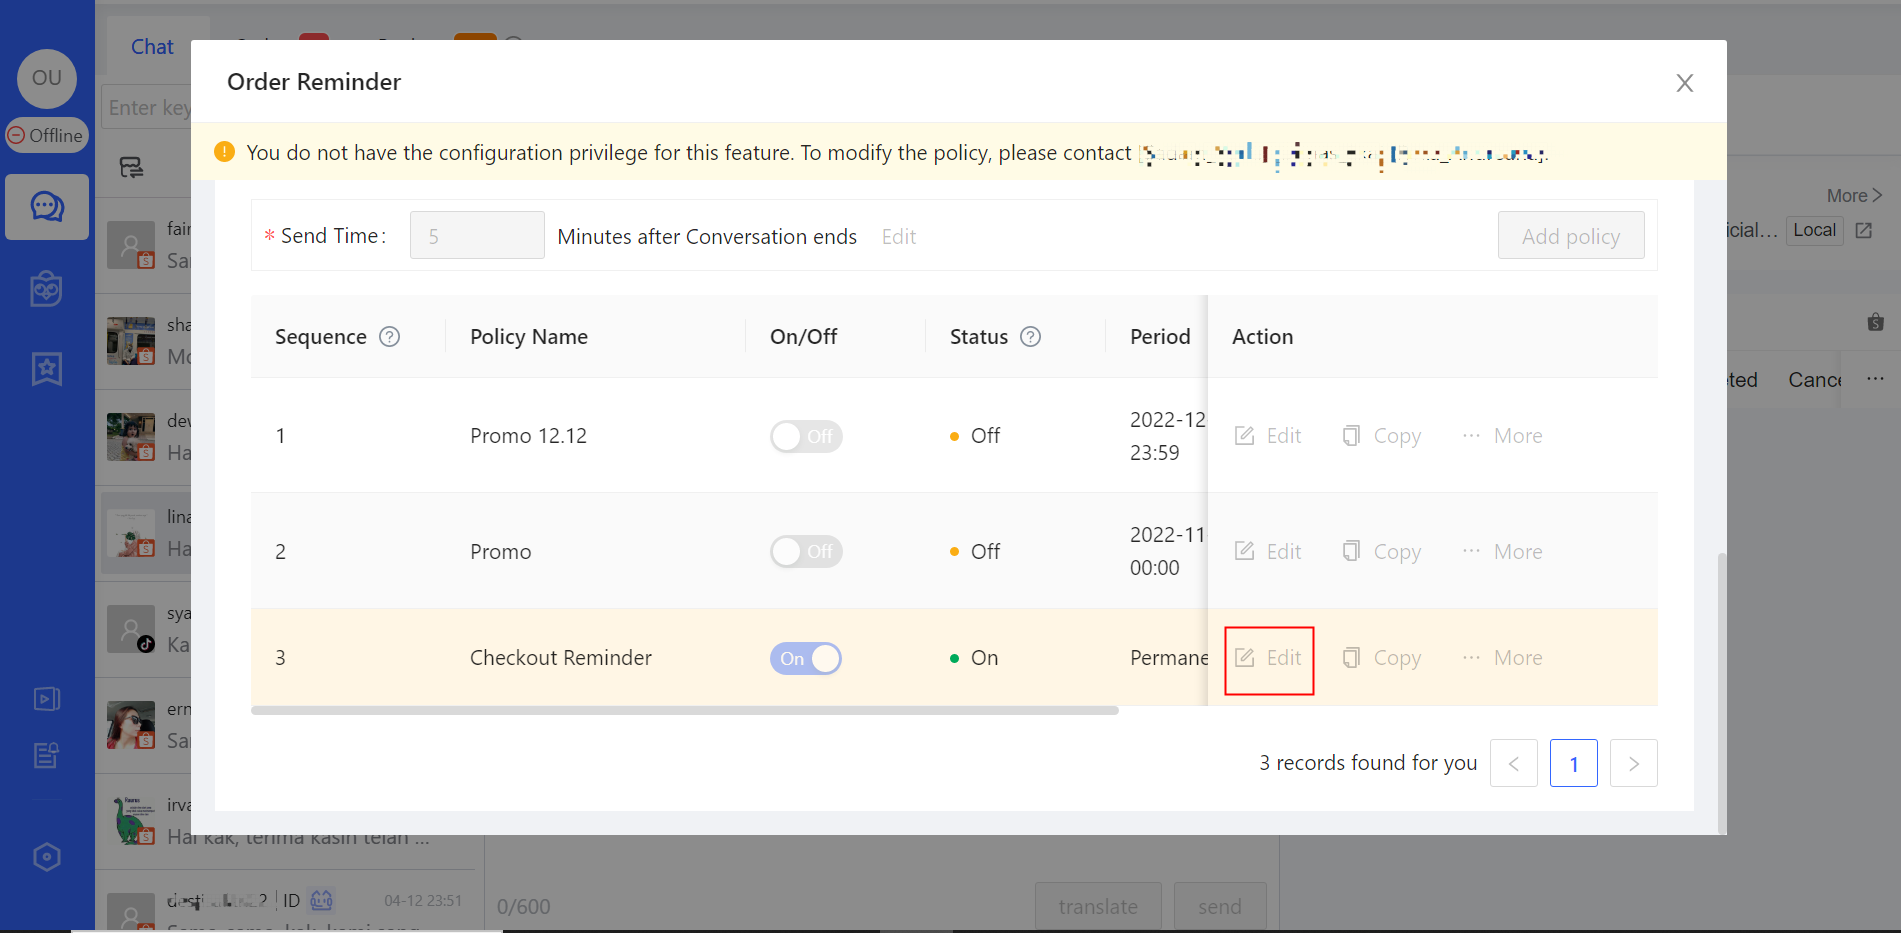
Context Side Window: All the conversation context information is present in this window, includes order, products, voucher. More valuable context will be added in coming future. Agents can grab most required information here to better serve the buyer, improving the reception efficiency significantly.
Conversation Basic: Buyer information and store information are present in this panel. And some useful external link is prepared too. Click「more」to open buyer info page. Click the jump link next to country site, the agent can jump to store page on marketplace. Click the jump link next to store name, the agent can jump to seller center.
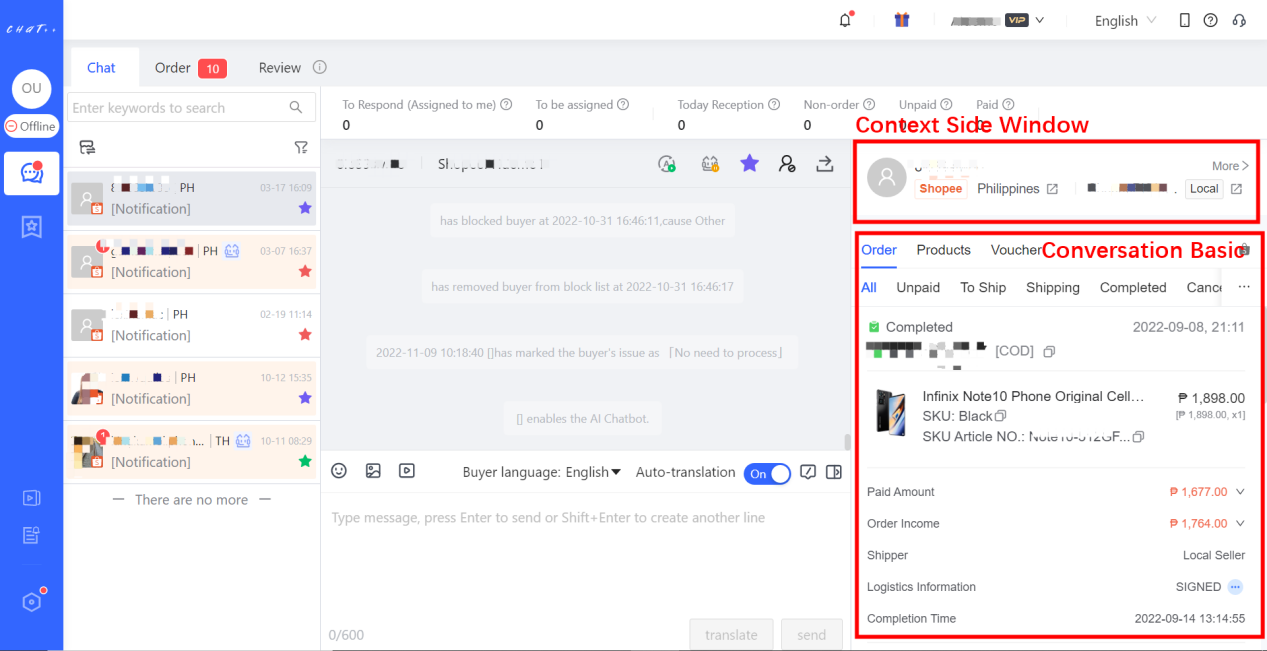
📜 Context Side Window - Order
In 「Context Side Window – Order」, the agent can get the buyer's current and history order in the store, including each order's latest status, paid amount, order income, logistics information etc. Creating/revising notes for the order is supported.
🔎Search Order
In the 「Context Side Window – Order」 search box, you can search by "Order Number, Product Name, Product ID, SKU, SKU Article No." to quickly locate a specific order for this customer. 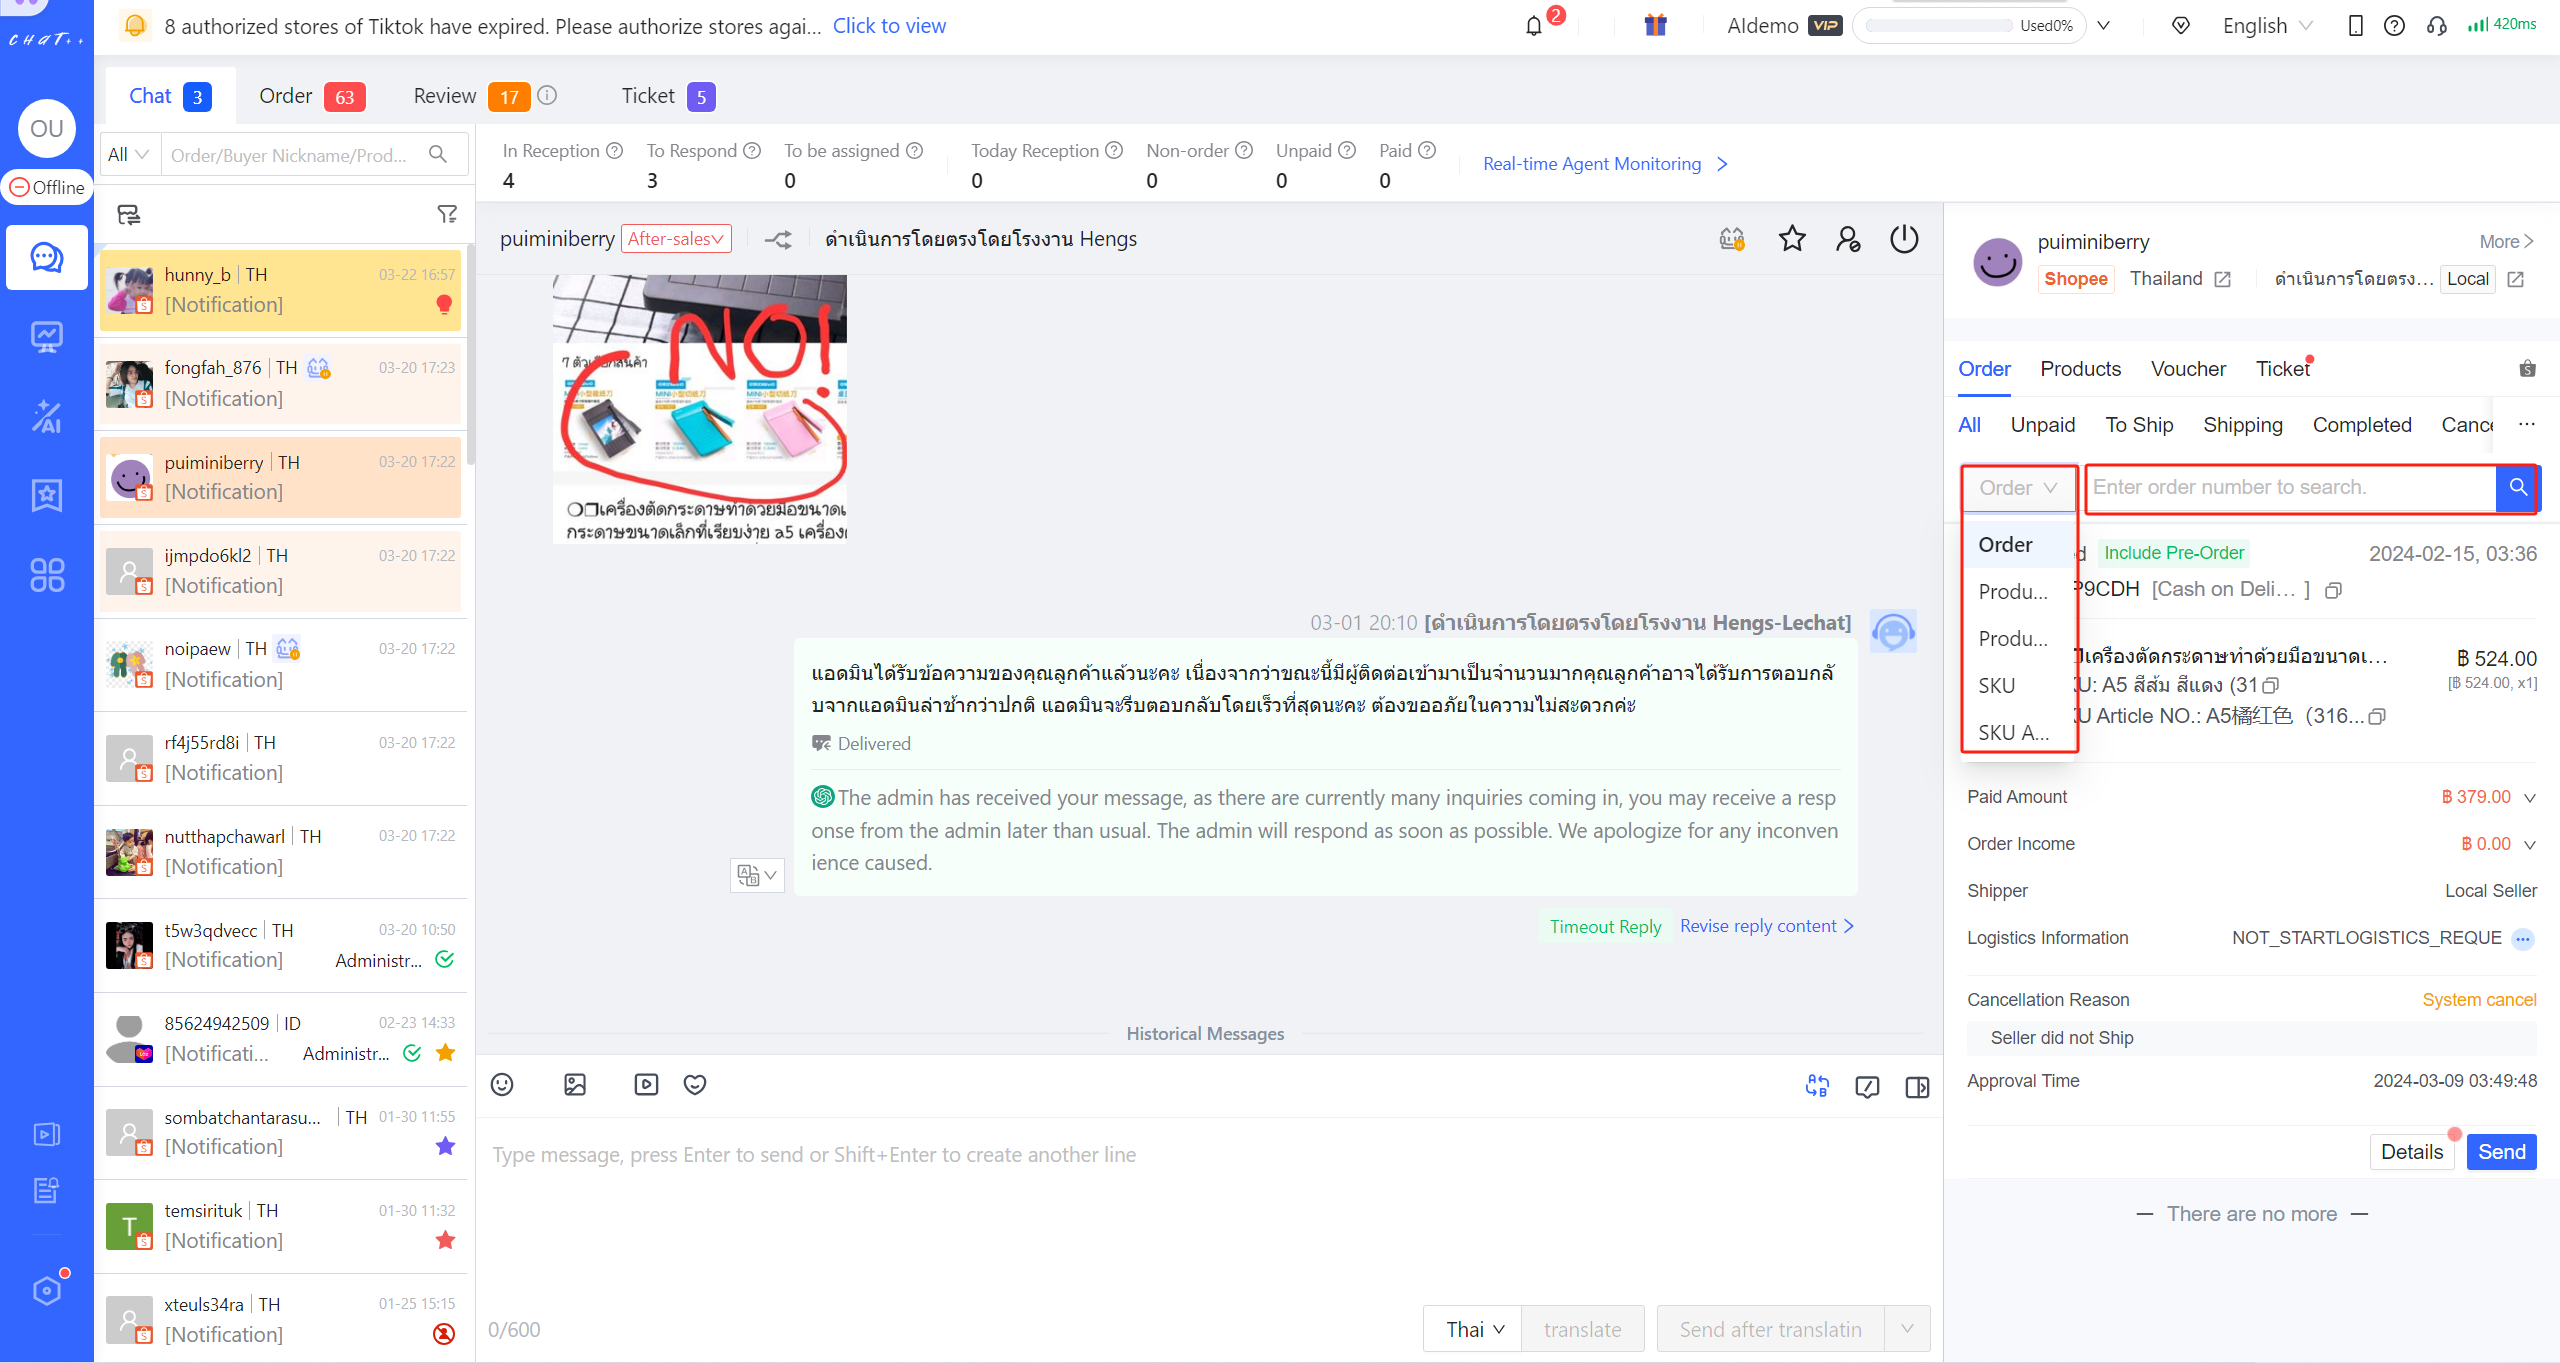
Figure 28
View Order Details / Send Electronic Invoice
Click「 Details」button, you can see all data details, including the delivery address. Then click on "Invoice" (Figure 26) to preview the invoice information such as store name and shipping address. Finally, click on "Send" (Figure 27) for the customer to receive the electronic invoice. 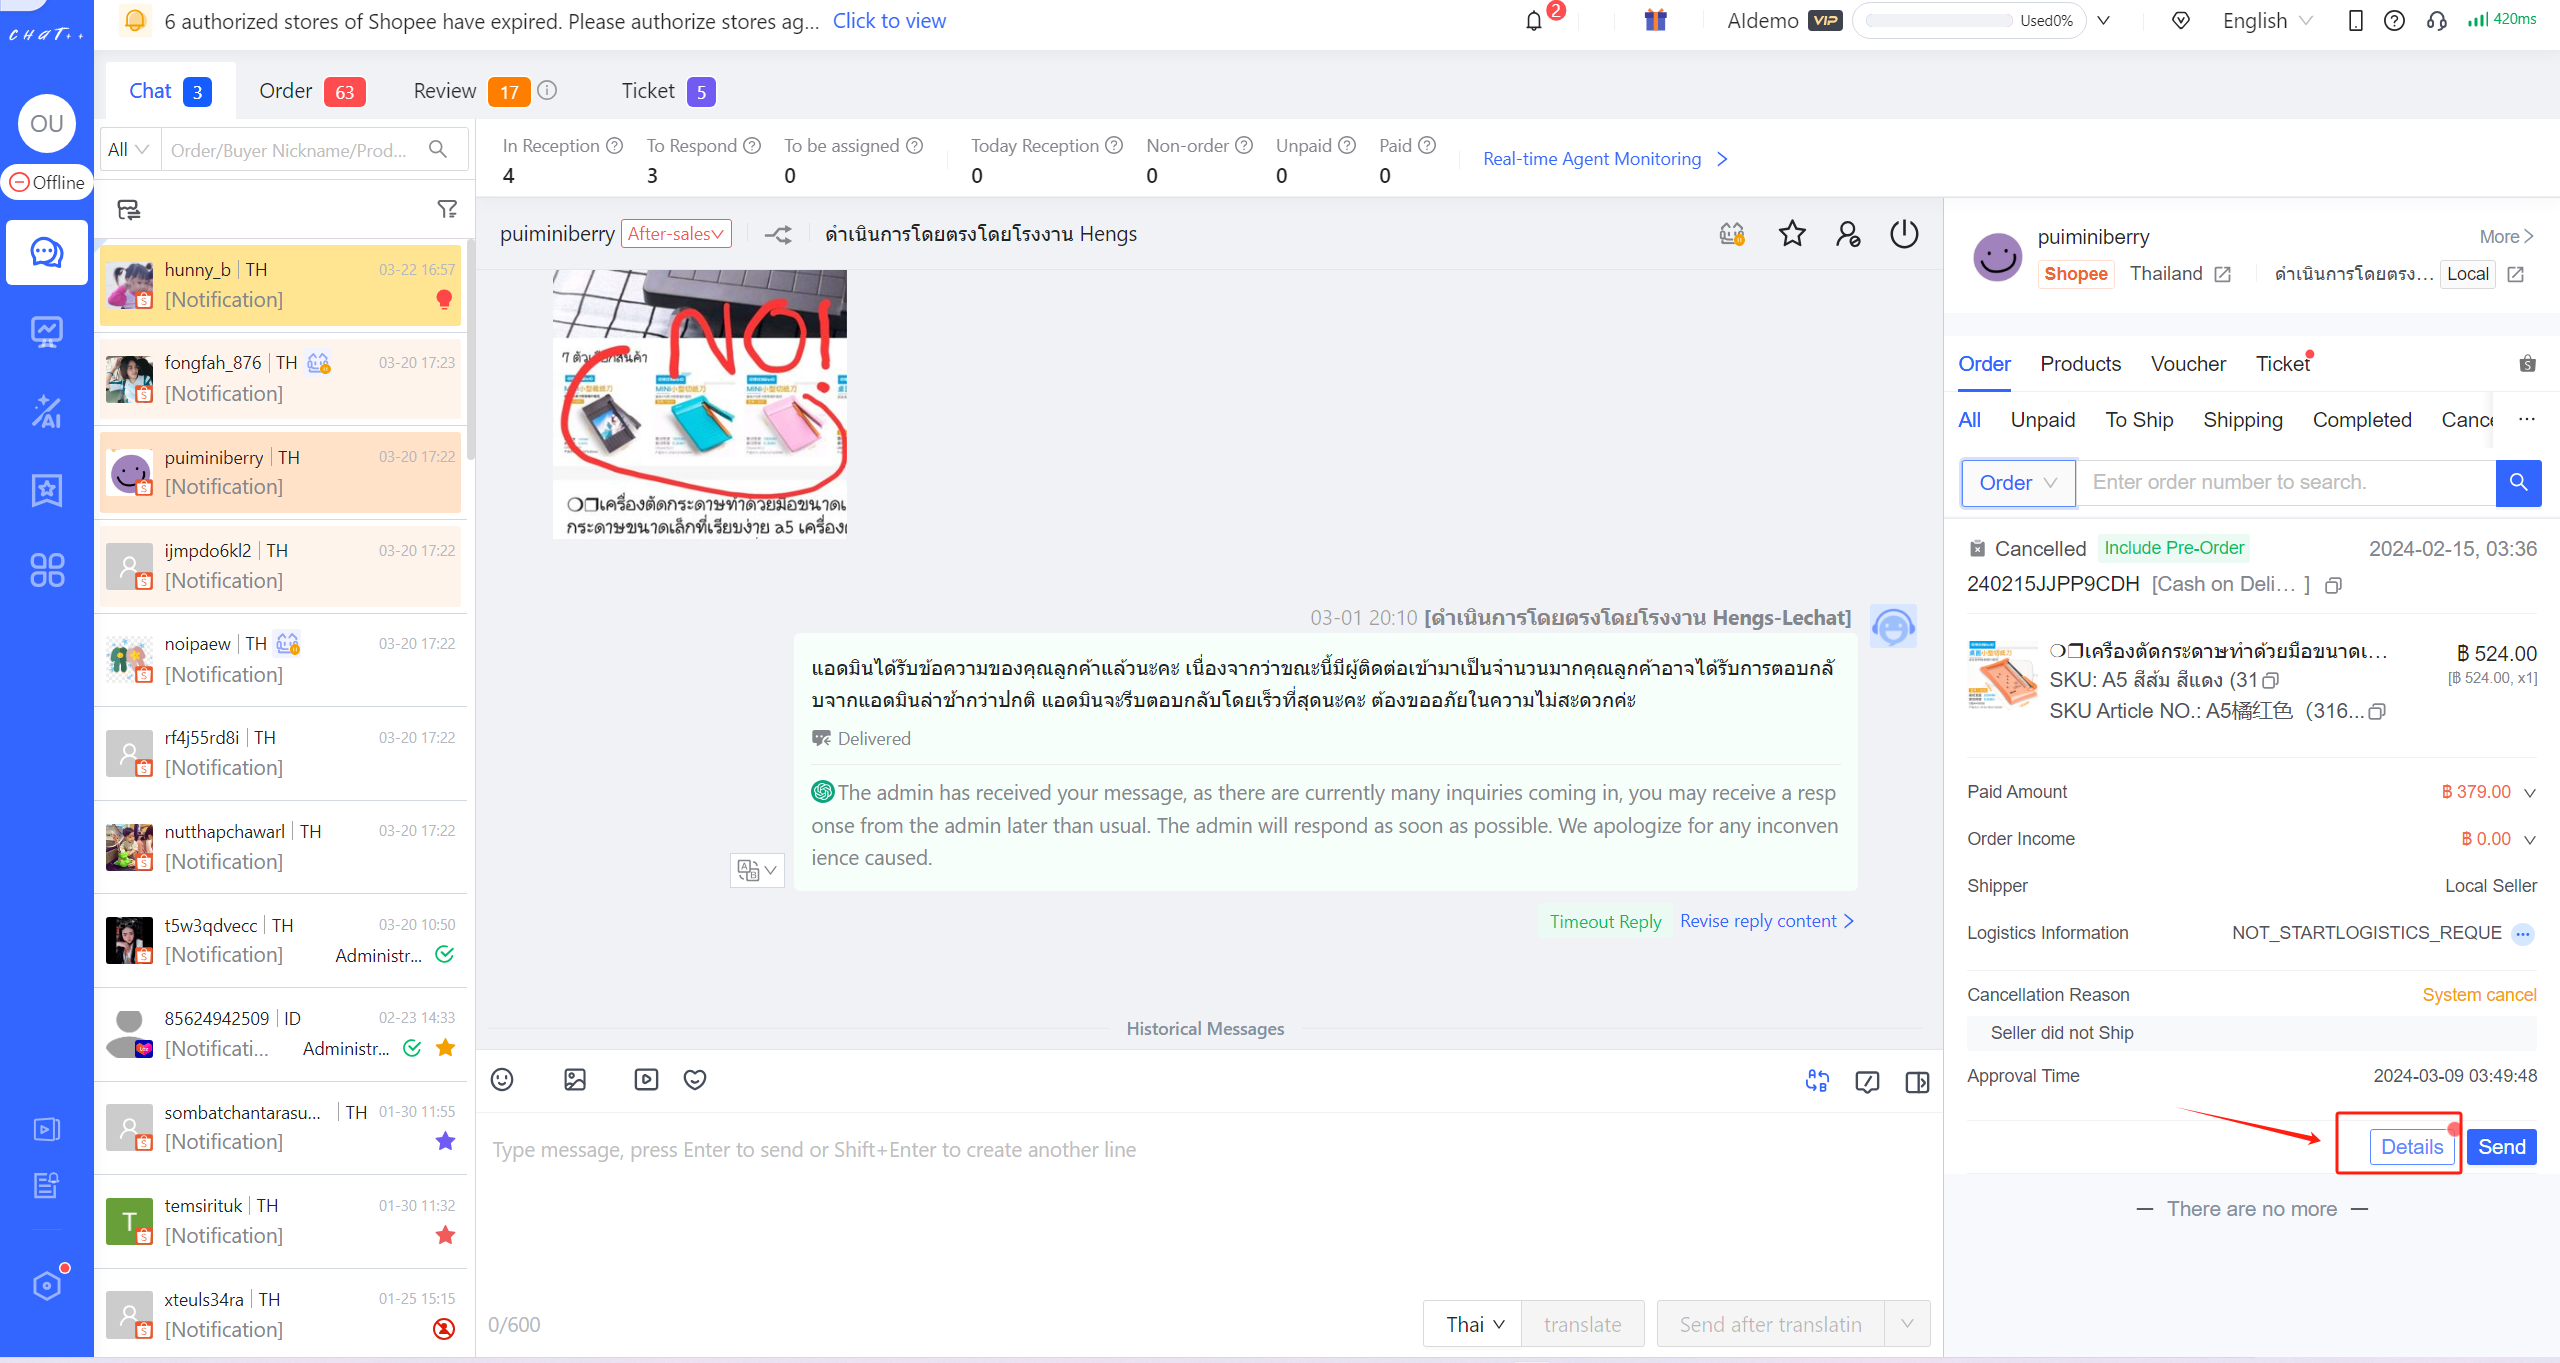
Figure 29
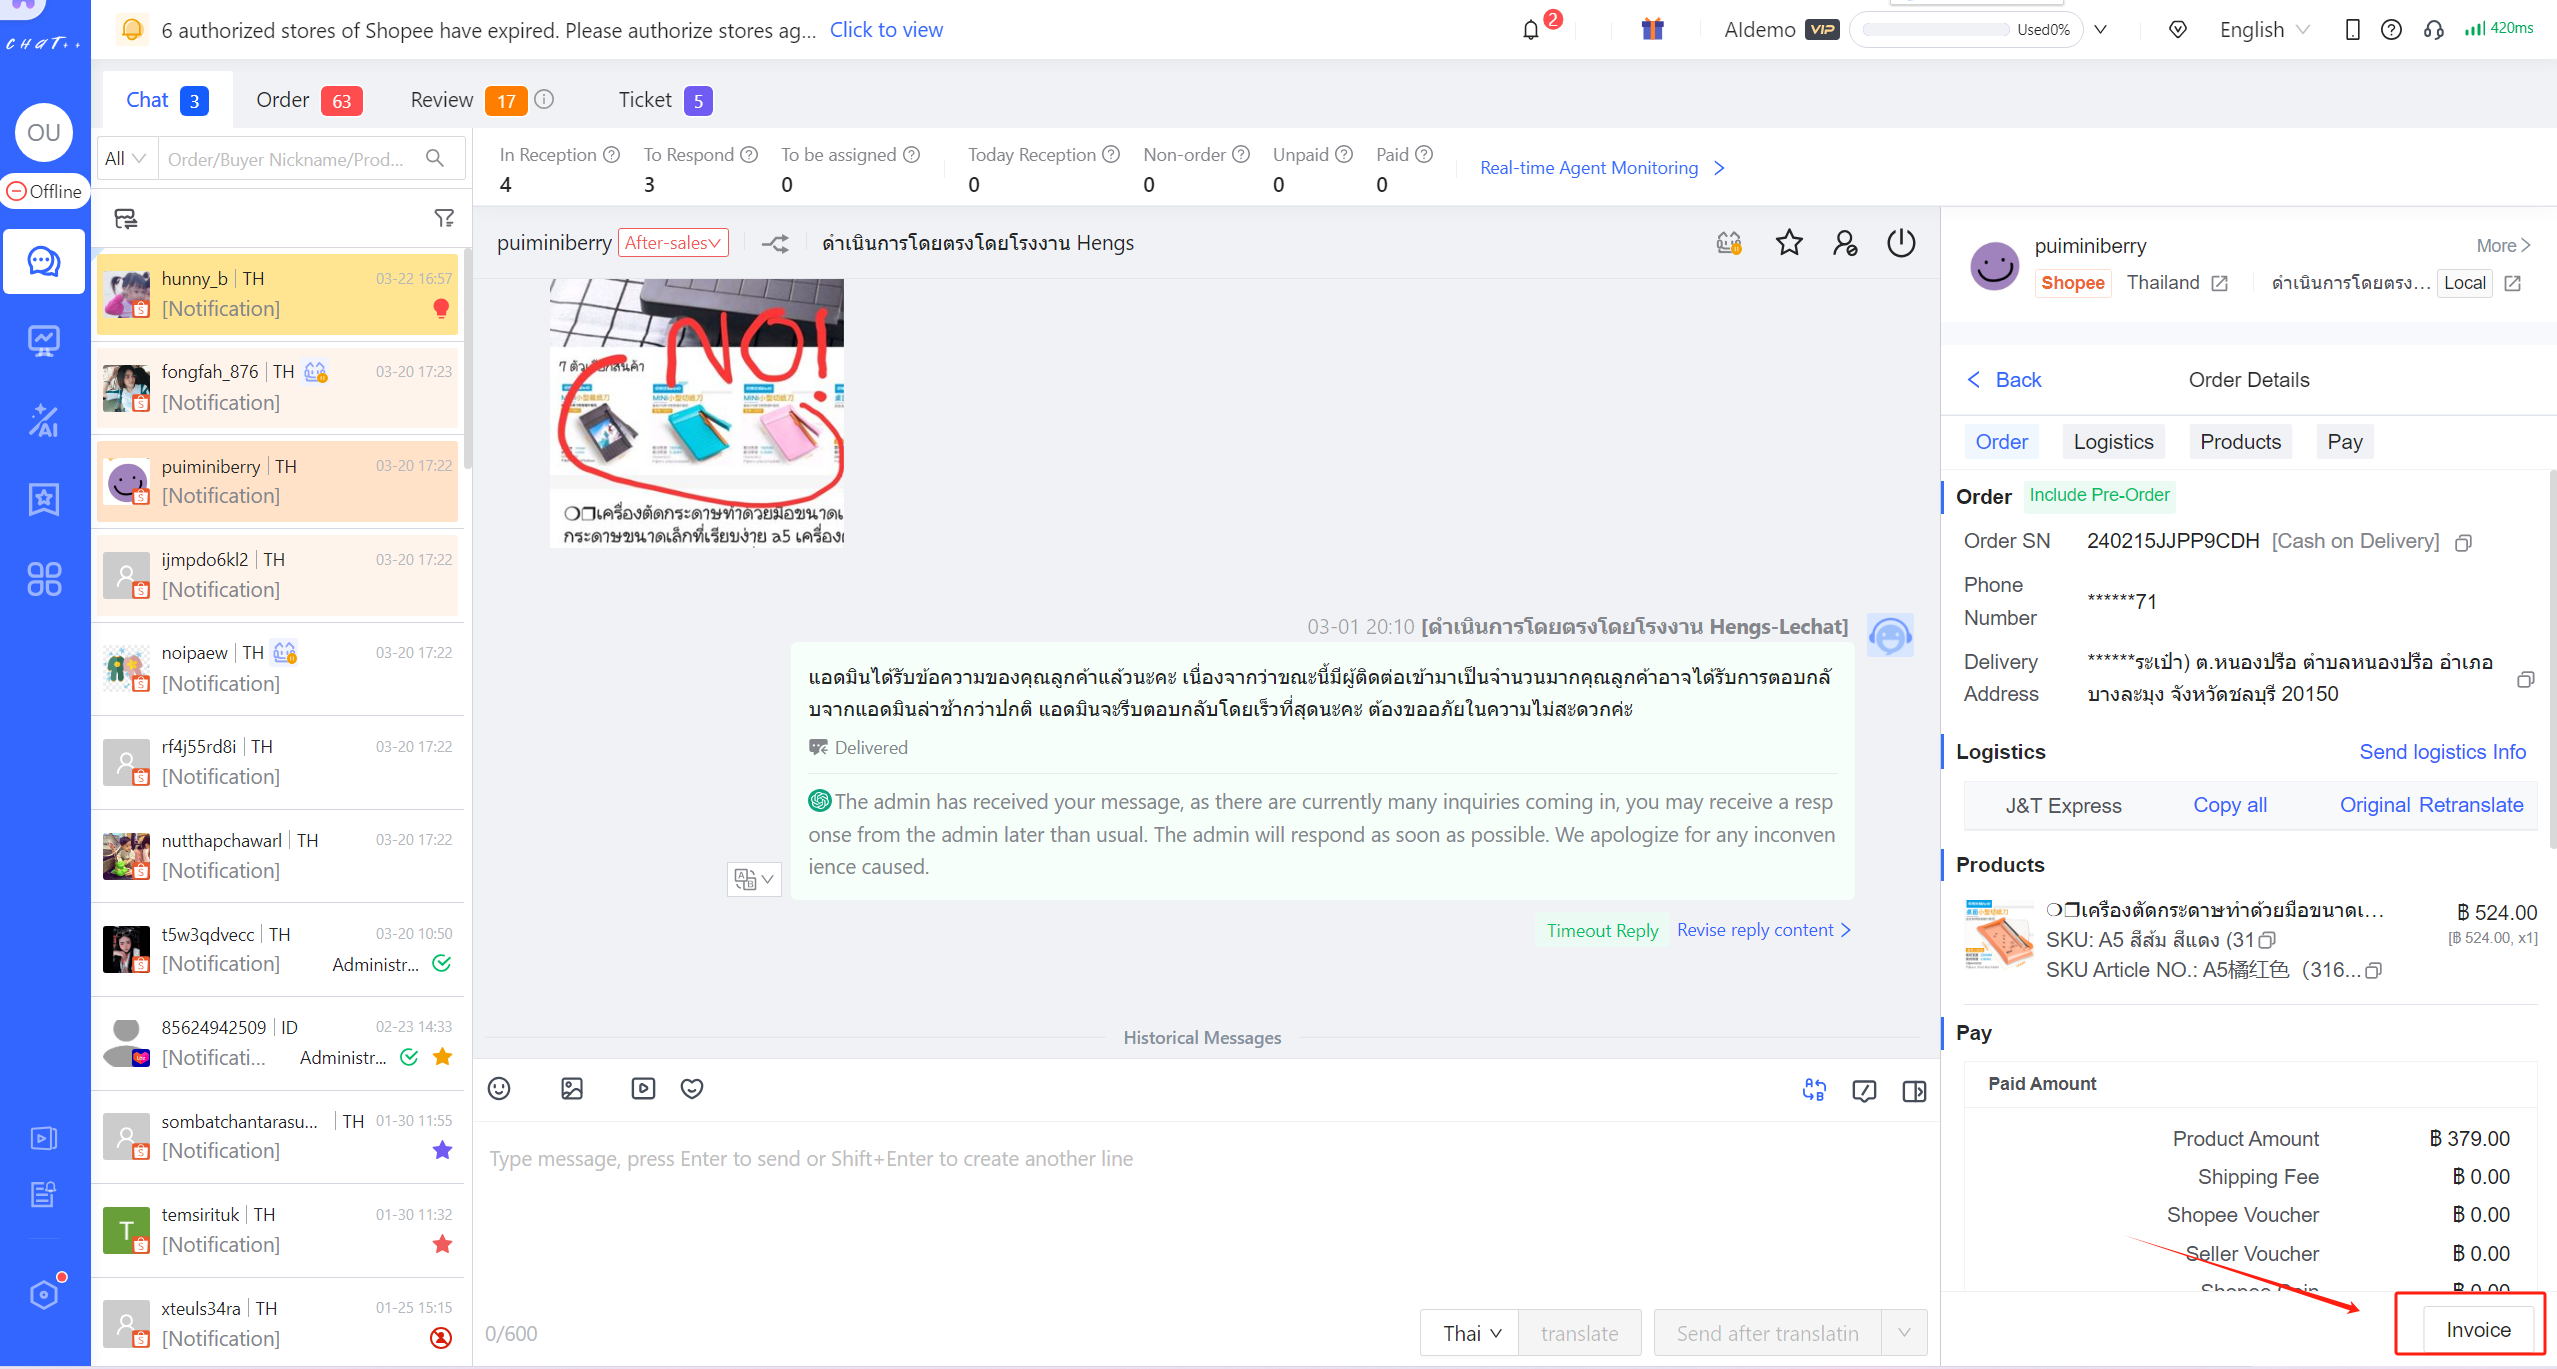
Figure 30
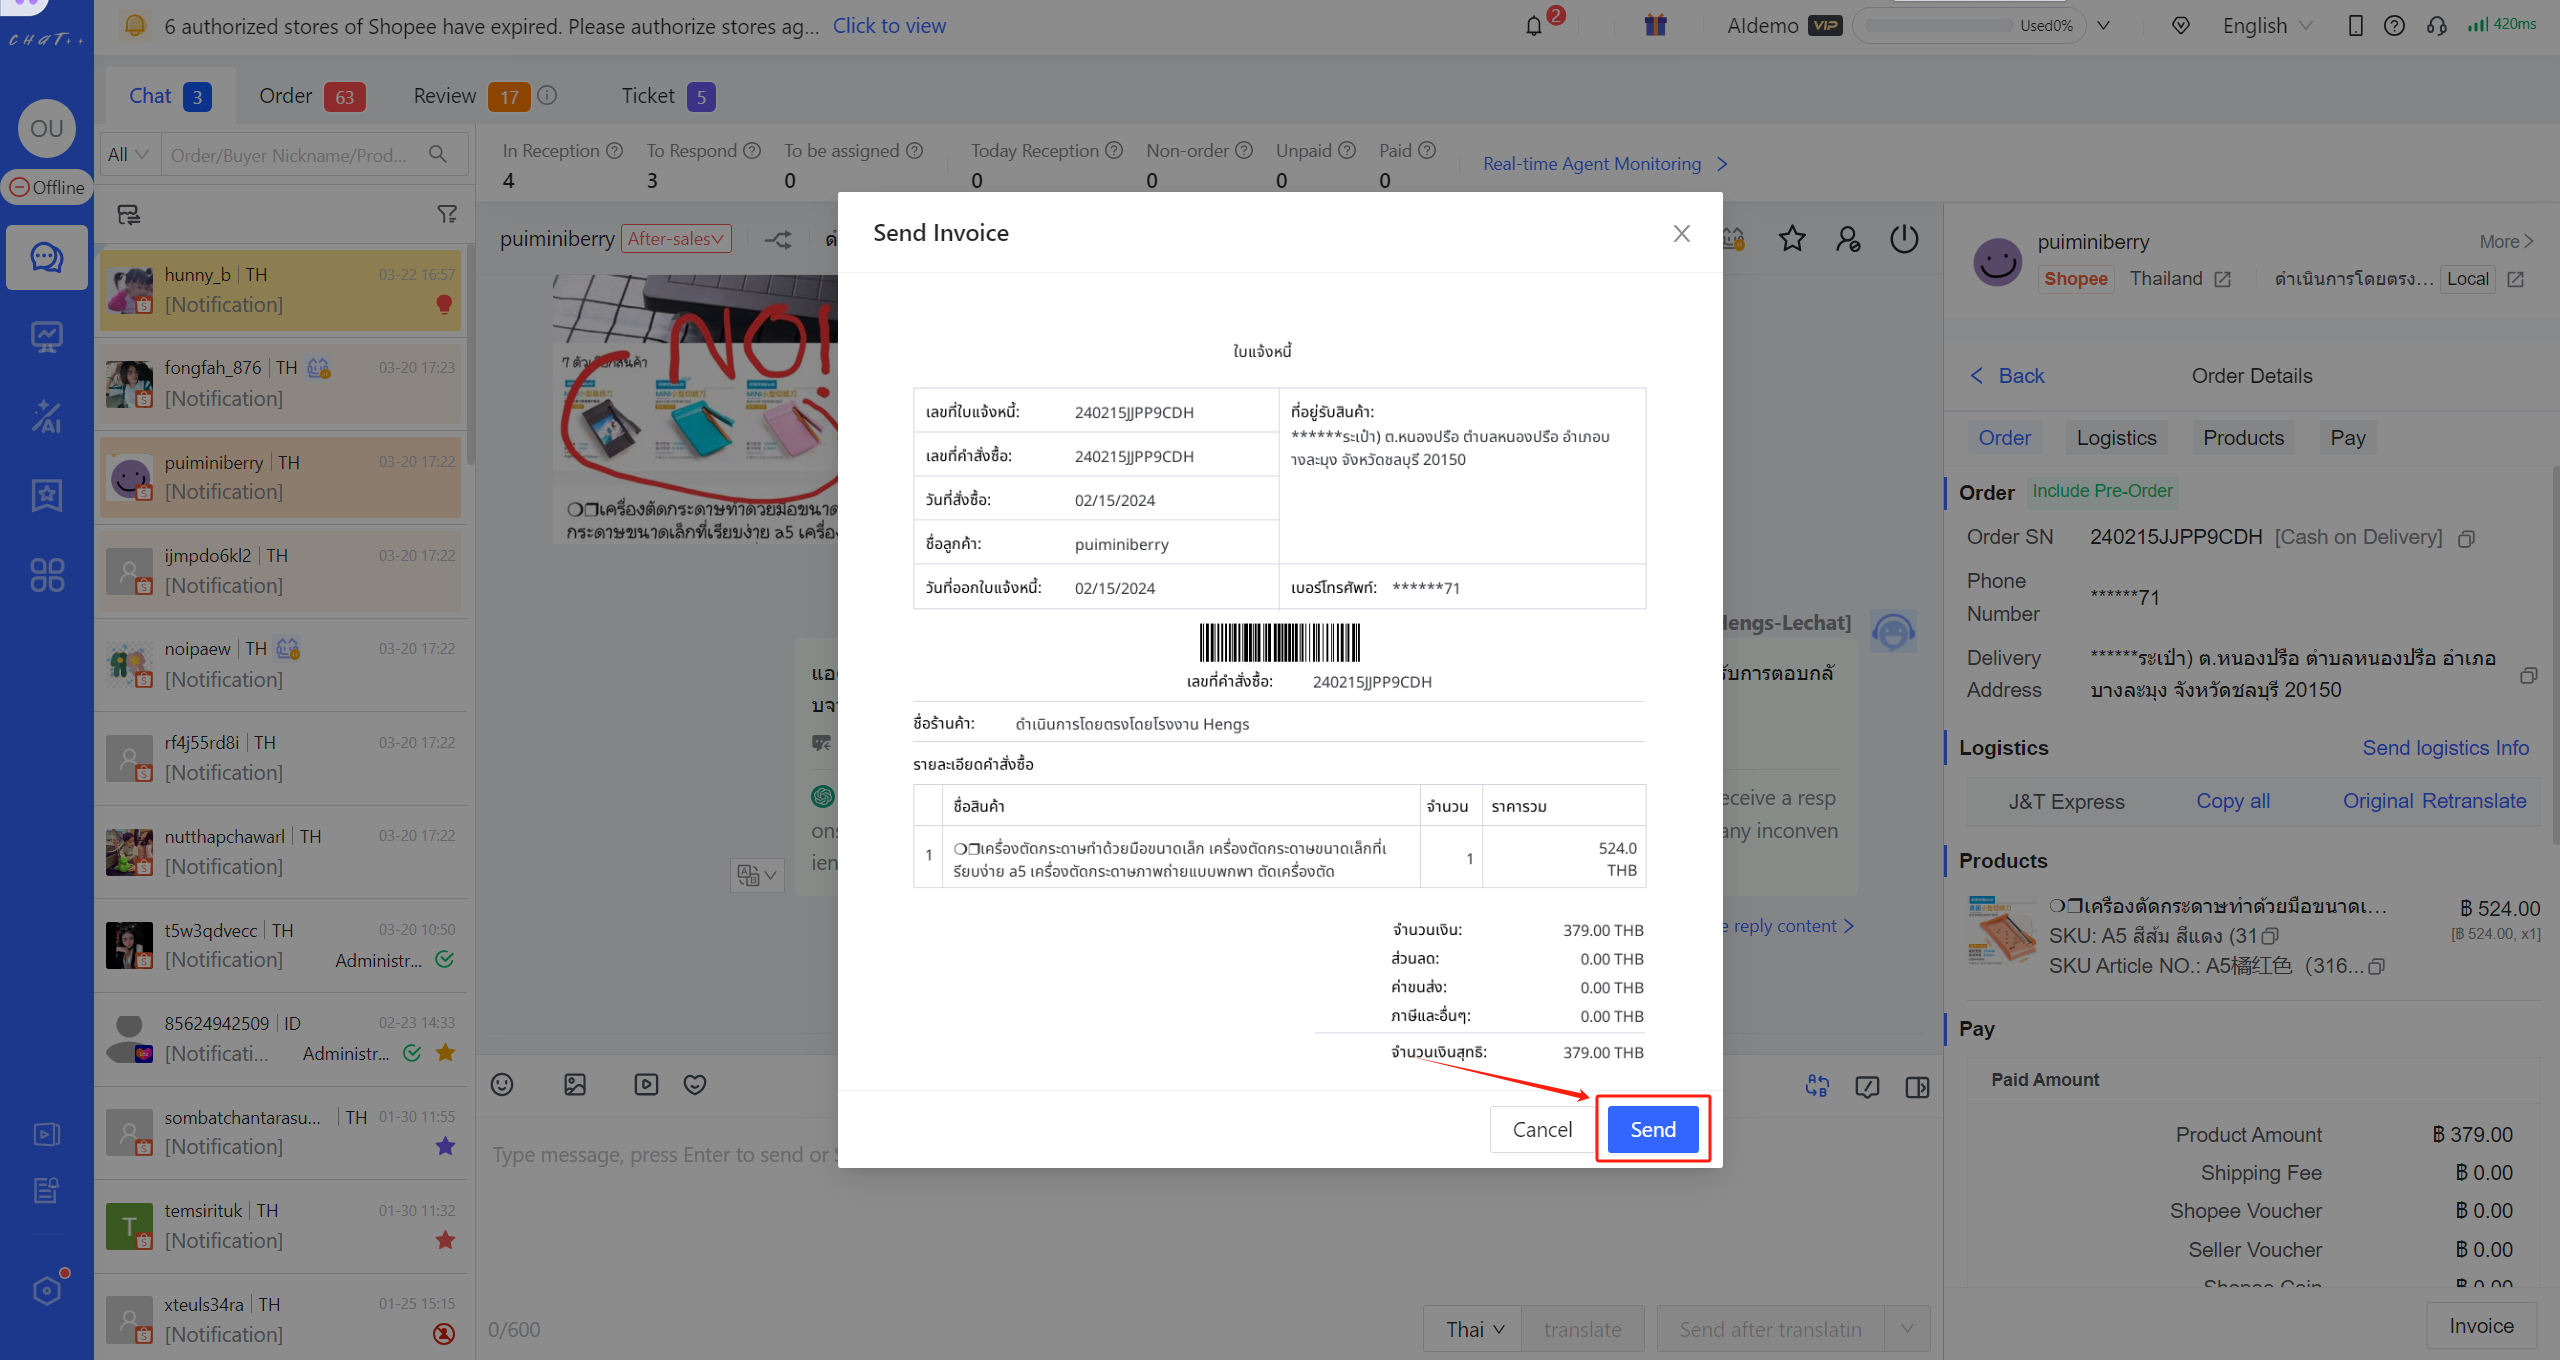
Figure 31
If you can't see those detail info such as Phone Number, Delivery Address, Order Income, please contact the administrator to check agent account permission. >>>For details, please click to jump
Send Order Link
Click 「 Send」button, the order link (include basic info) will be sent to the customer through conversation.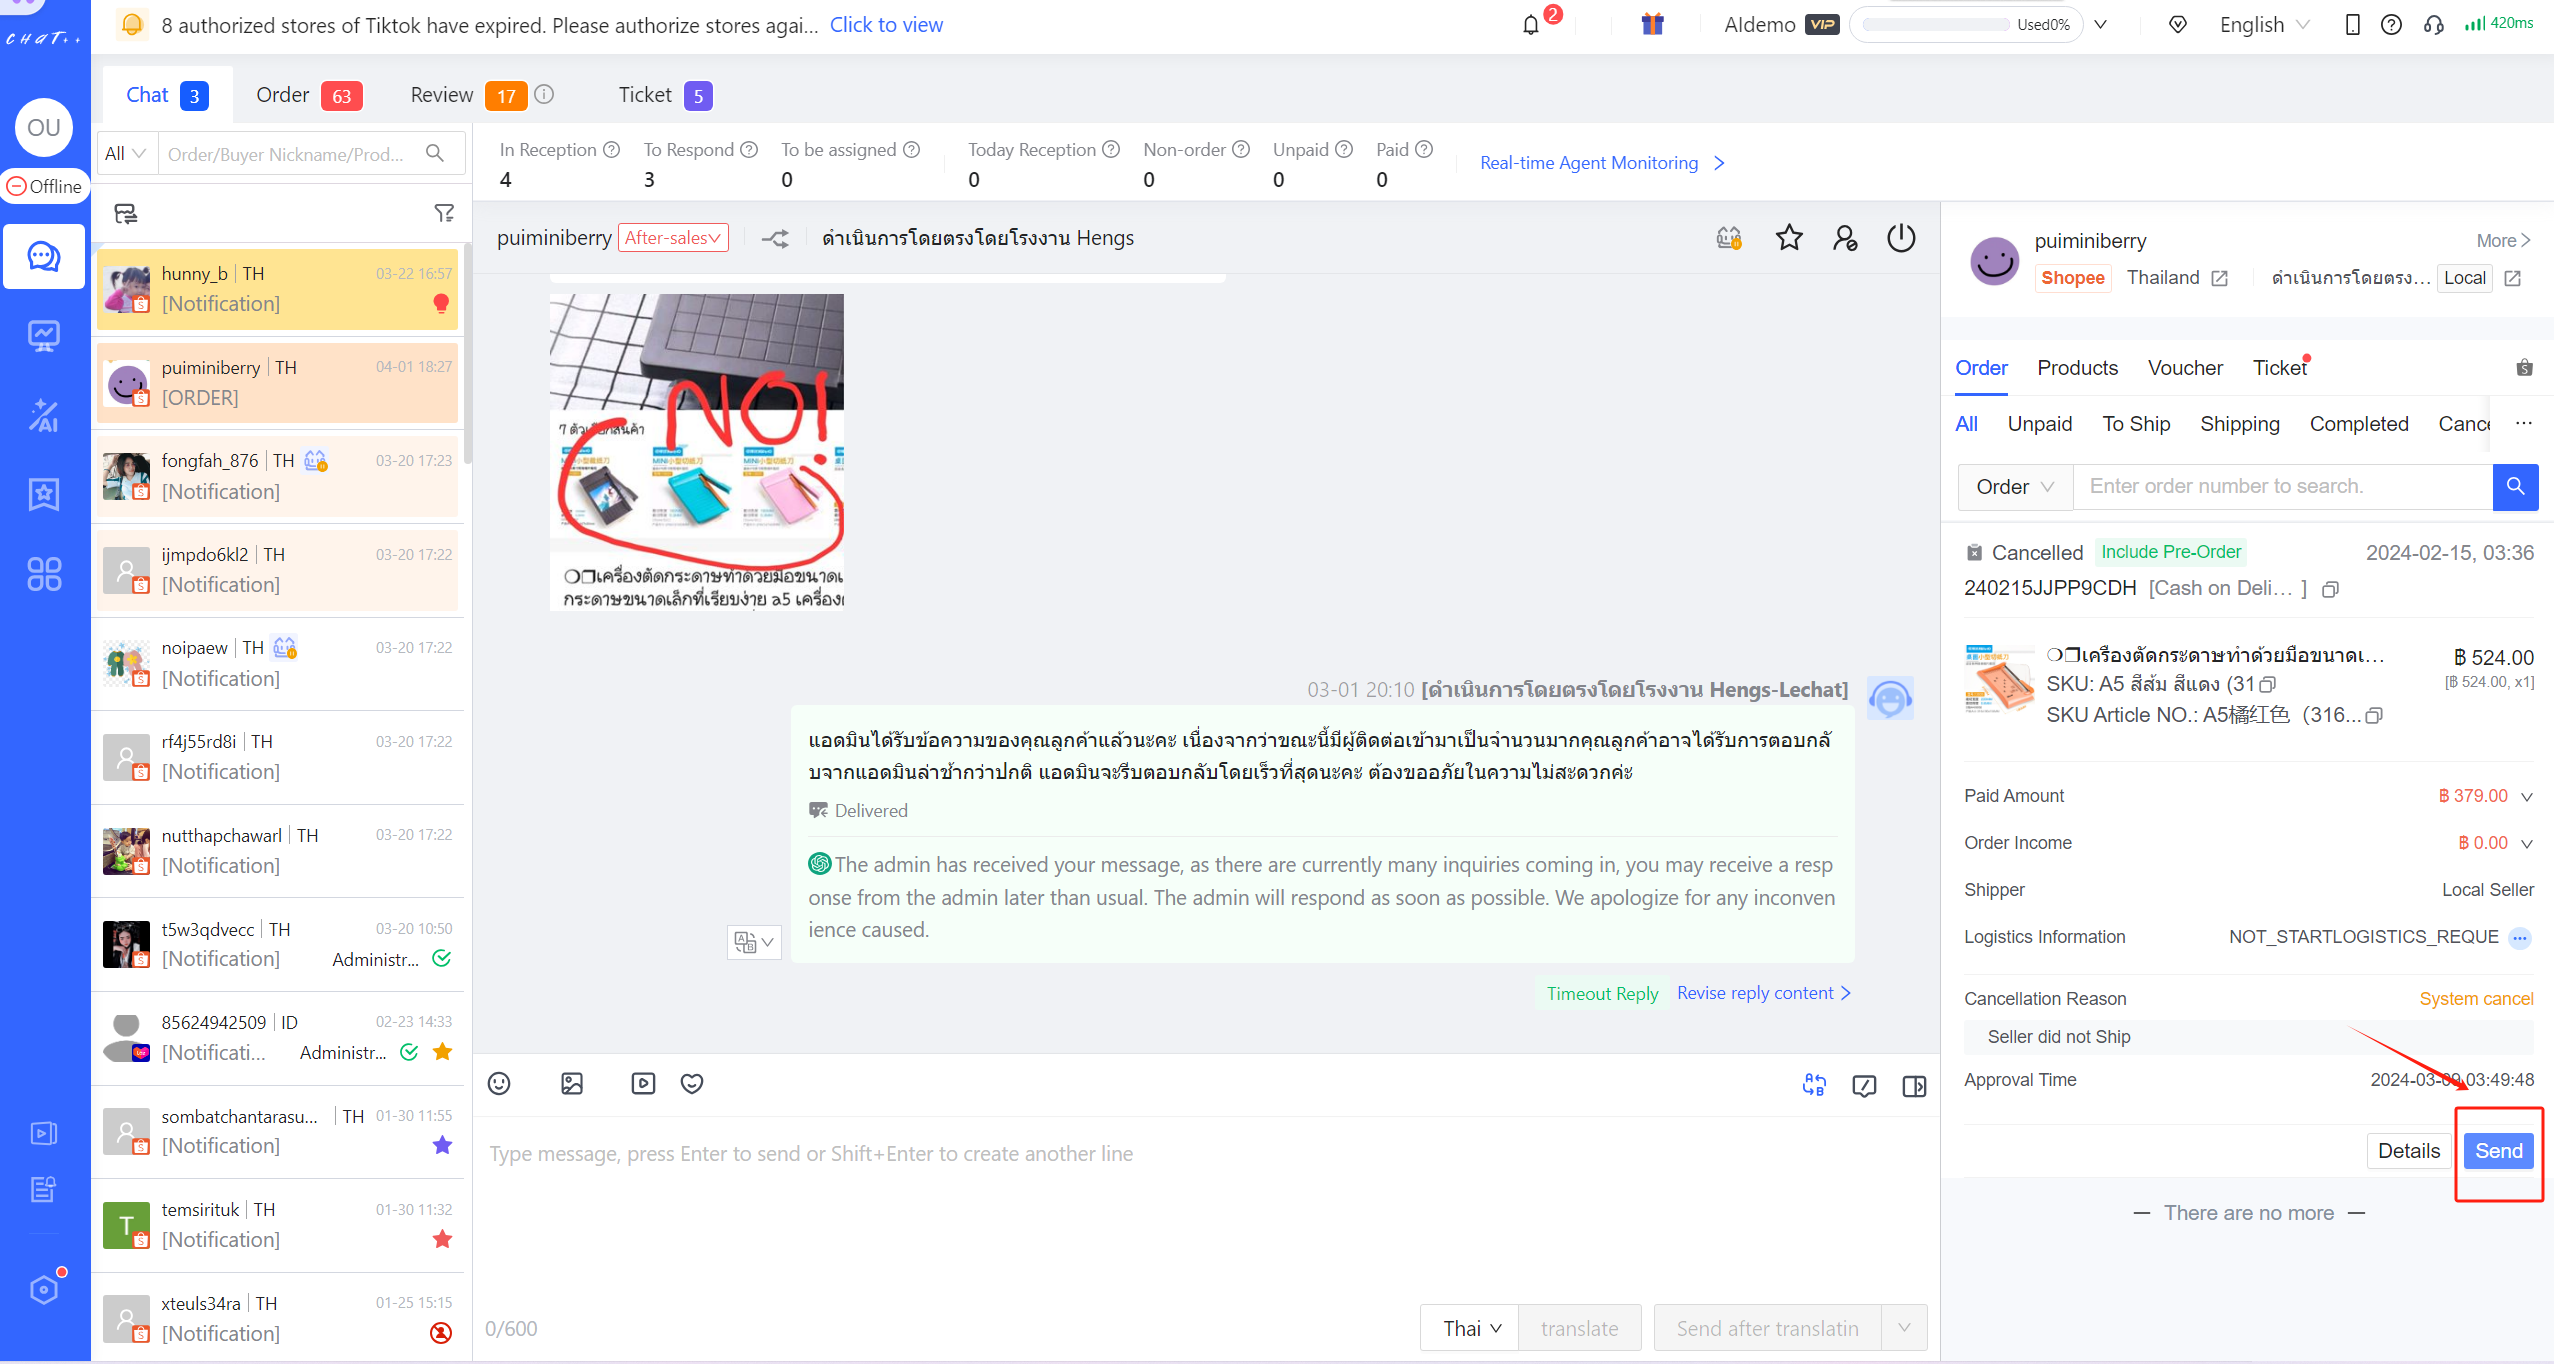
Figure 32
⚠️ Note: Last 3 month customer orders are present in Context Window. If you want to get more historical orders considering long warranty period in the store. Please click "Contact Us" in the upper right corner of ChatPlusAI, then scan QR code to talk with our representatives.
🛒Context Side Window – Product
In the "Product" section of context side window, you can view all products information for the store, including the product name, price, whether it is a pre-order item, the main product number, the number of SKUs, and the corresponding SKU article number for each SKU. Clicking on the product image or name will open the product page on the marketplace, from the customer's perspective. Clicking "Go to Seller Center" will open the seller management page for that product, requiring login to the Seller Center.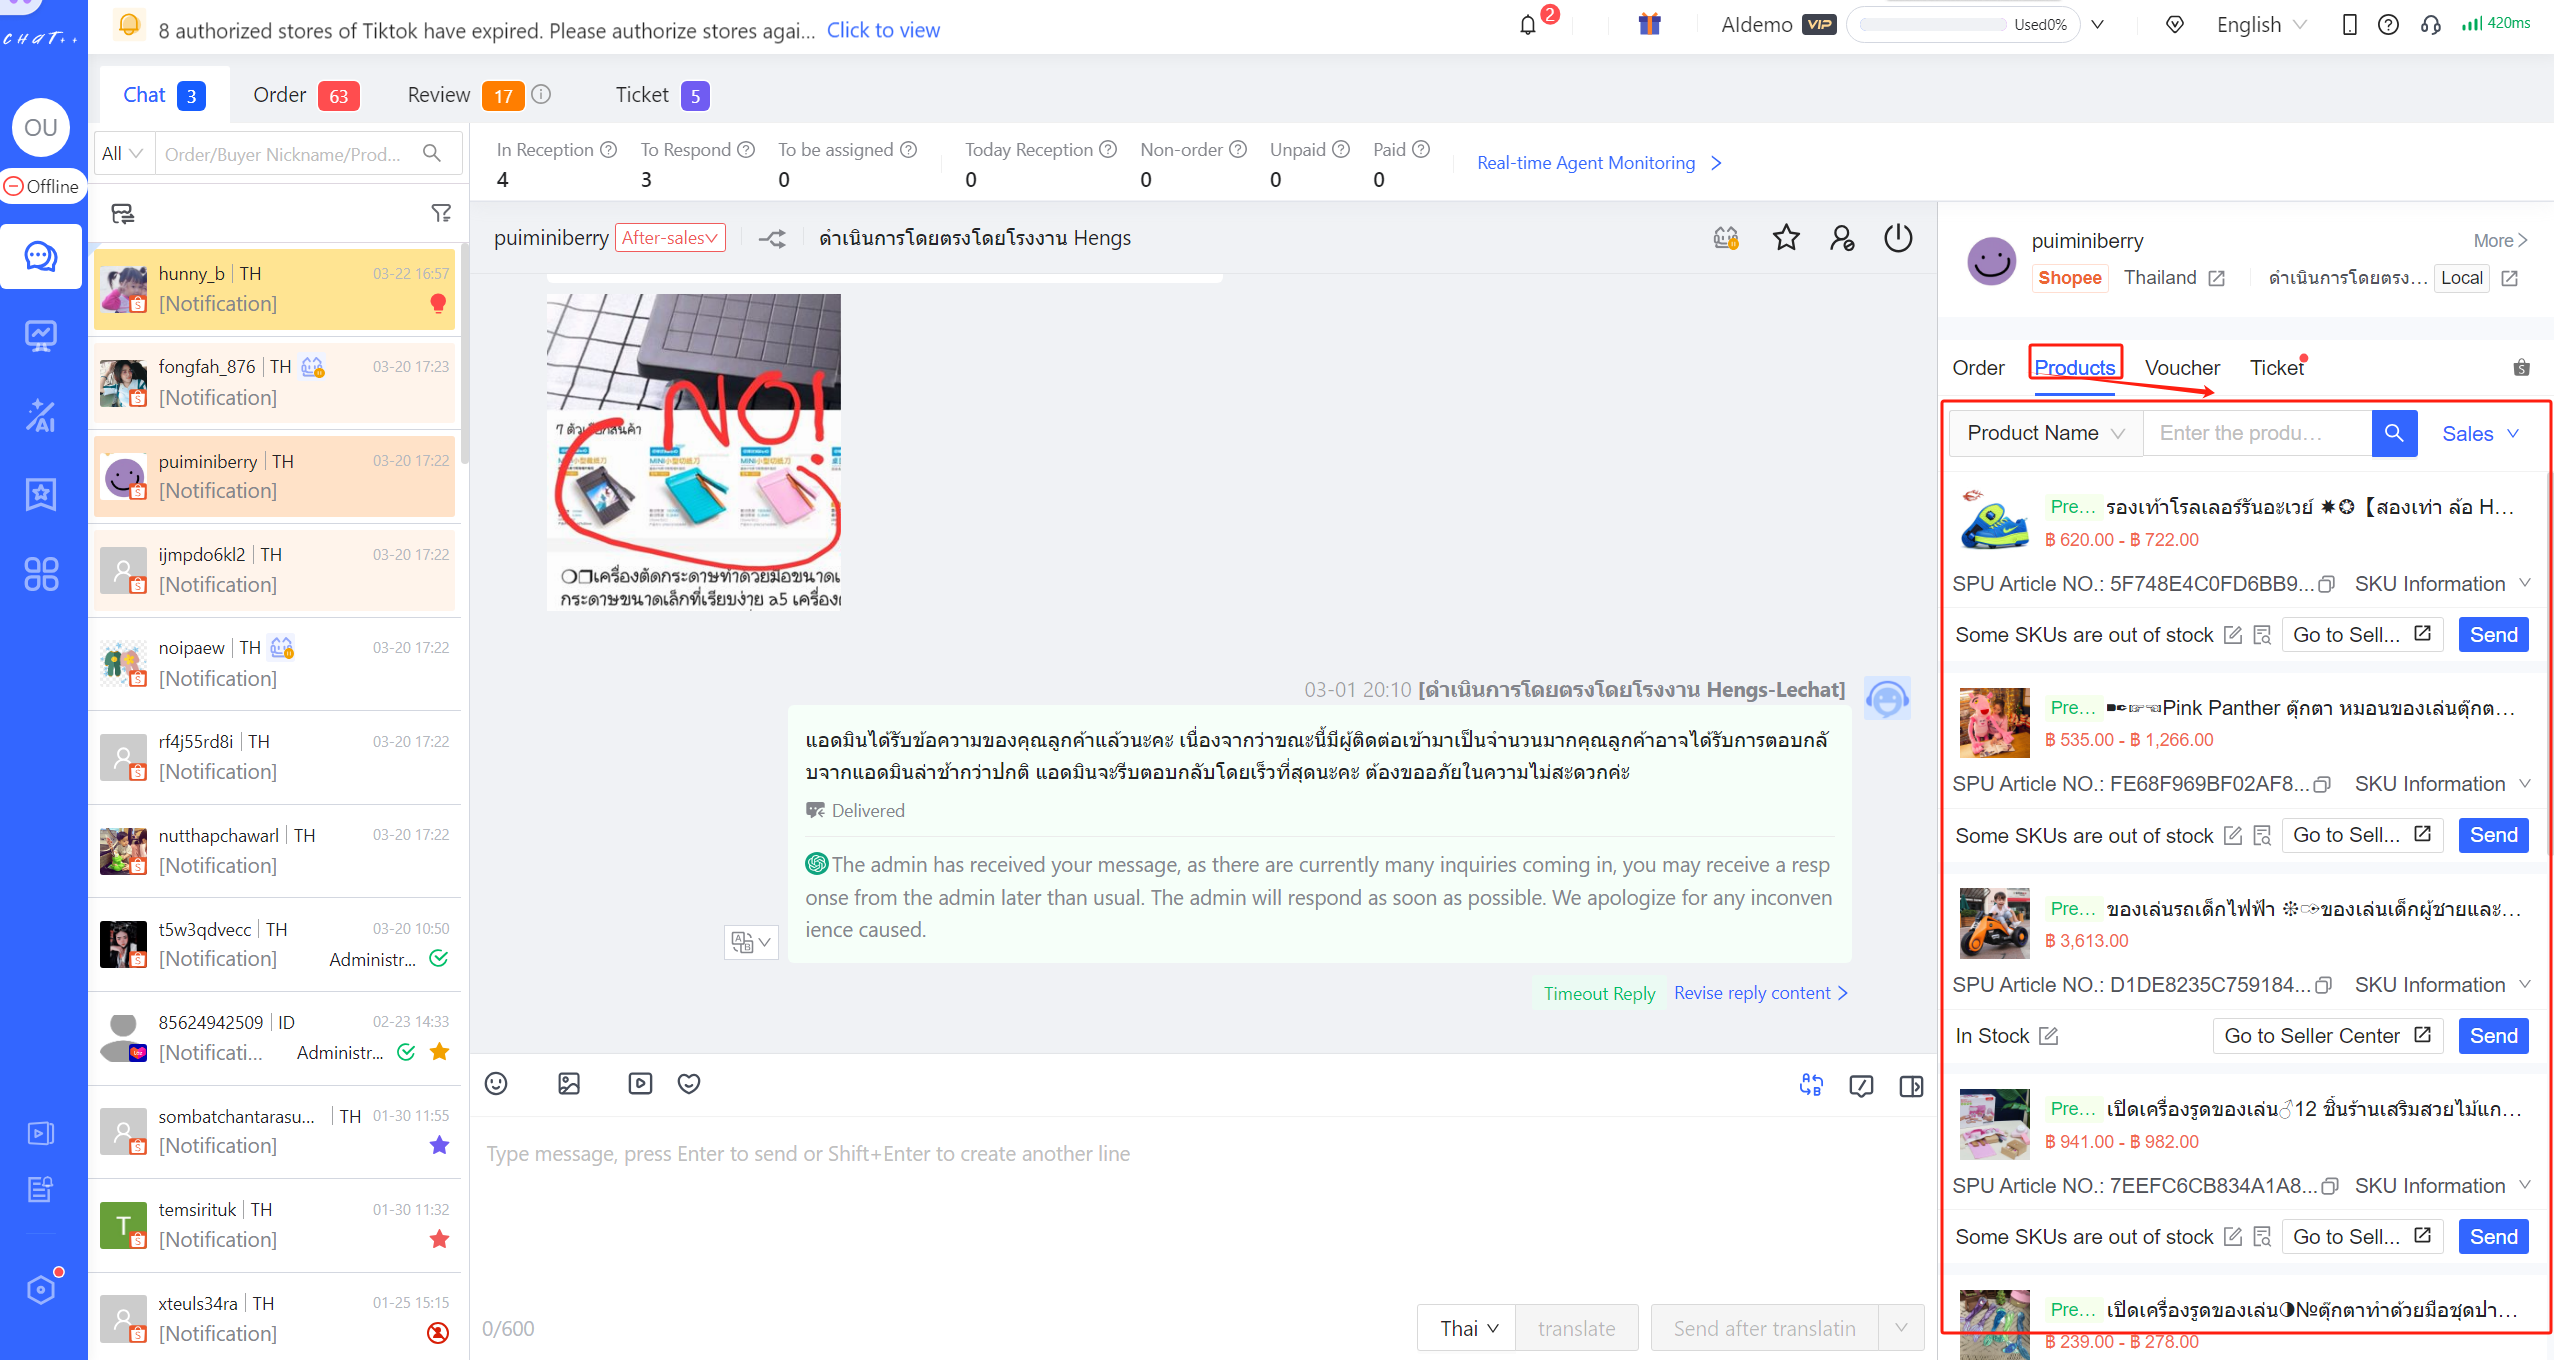
Figure 33
Search Product
Currently, you can search for products using several dimensions, including product name, product ID, SKU, and article number (including main product article number and SKU article number provided from seller system). This helps you quickly find the desired product to send to the customer. The product name dimension supports keyword match, while the other dimensions require complete input to display searched results. Clicking "Send" will send the product link to the customer.
⚠️ Note: Newly listed products can't be viewed or searched on ChatPlusAI until a buyer makes an inquiry or places an order for the first time. (The limitation is imposed by marketplace APIs)
Mark Out of Stock Products
>>>For details, please click to jump
Click ["Messages" in the left menu → "Products" in the context side window], find the main product link where the out-of-stock SKU is located, and click "Mark as Out of Stock" (Red Box ② below).
At the bottom left corner of the link displays the inventory status of all SKUs under this main product:
- In Stock: Indicates that all SKUs under this main product are in stock on the e-commerce marketplace.
- Some SKUs are Out of Stock: Indicates that some SKUs under this main product are out of stock on the e-commerce marketplace; or for some SKUs, the agent has marked them as out of stock in ChatPlusAI system, and they are still within the out-of-stock time period set by the agent.
- Out of Stock: Indicates that all SKUs under this main product are either out of stock on the e-commerce marketplace or have been marked as out of stock by the agent in ChatPlusAI system, and they are still within the out-of-stock time period set by the agent.
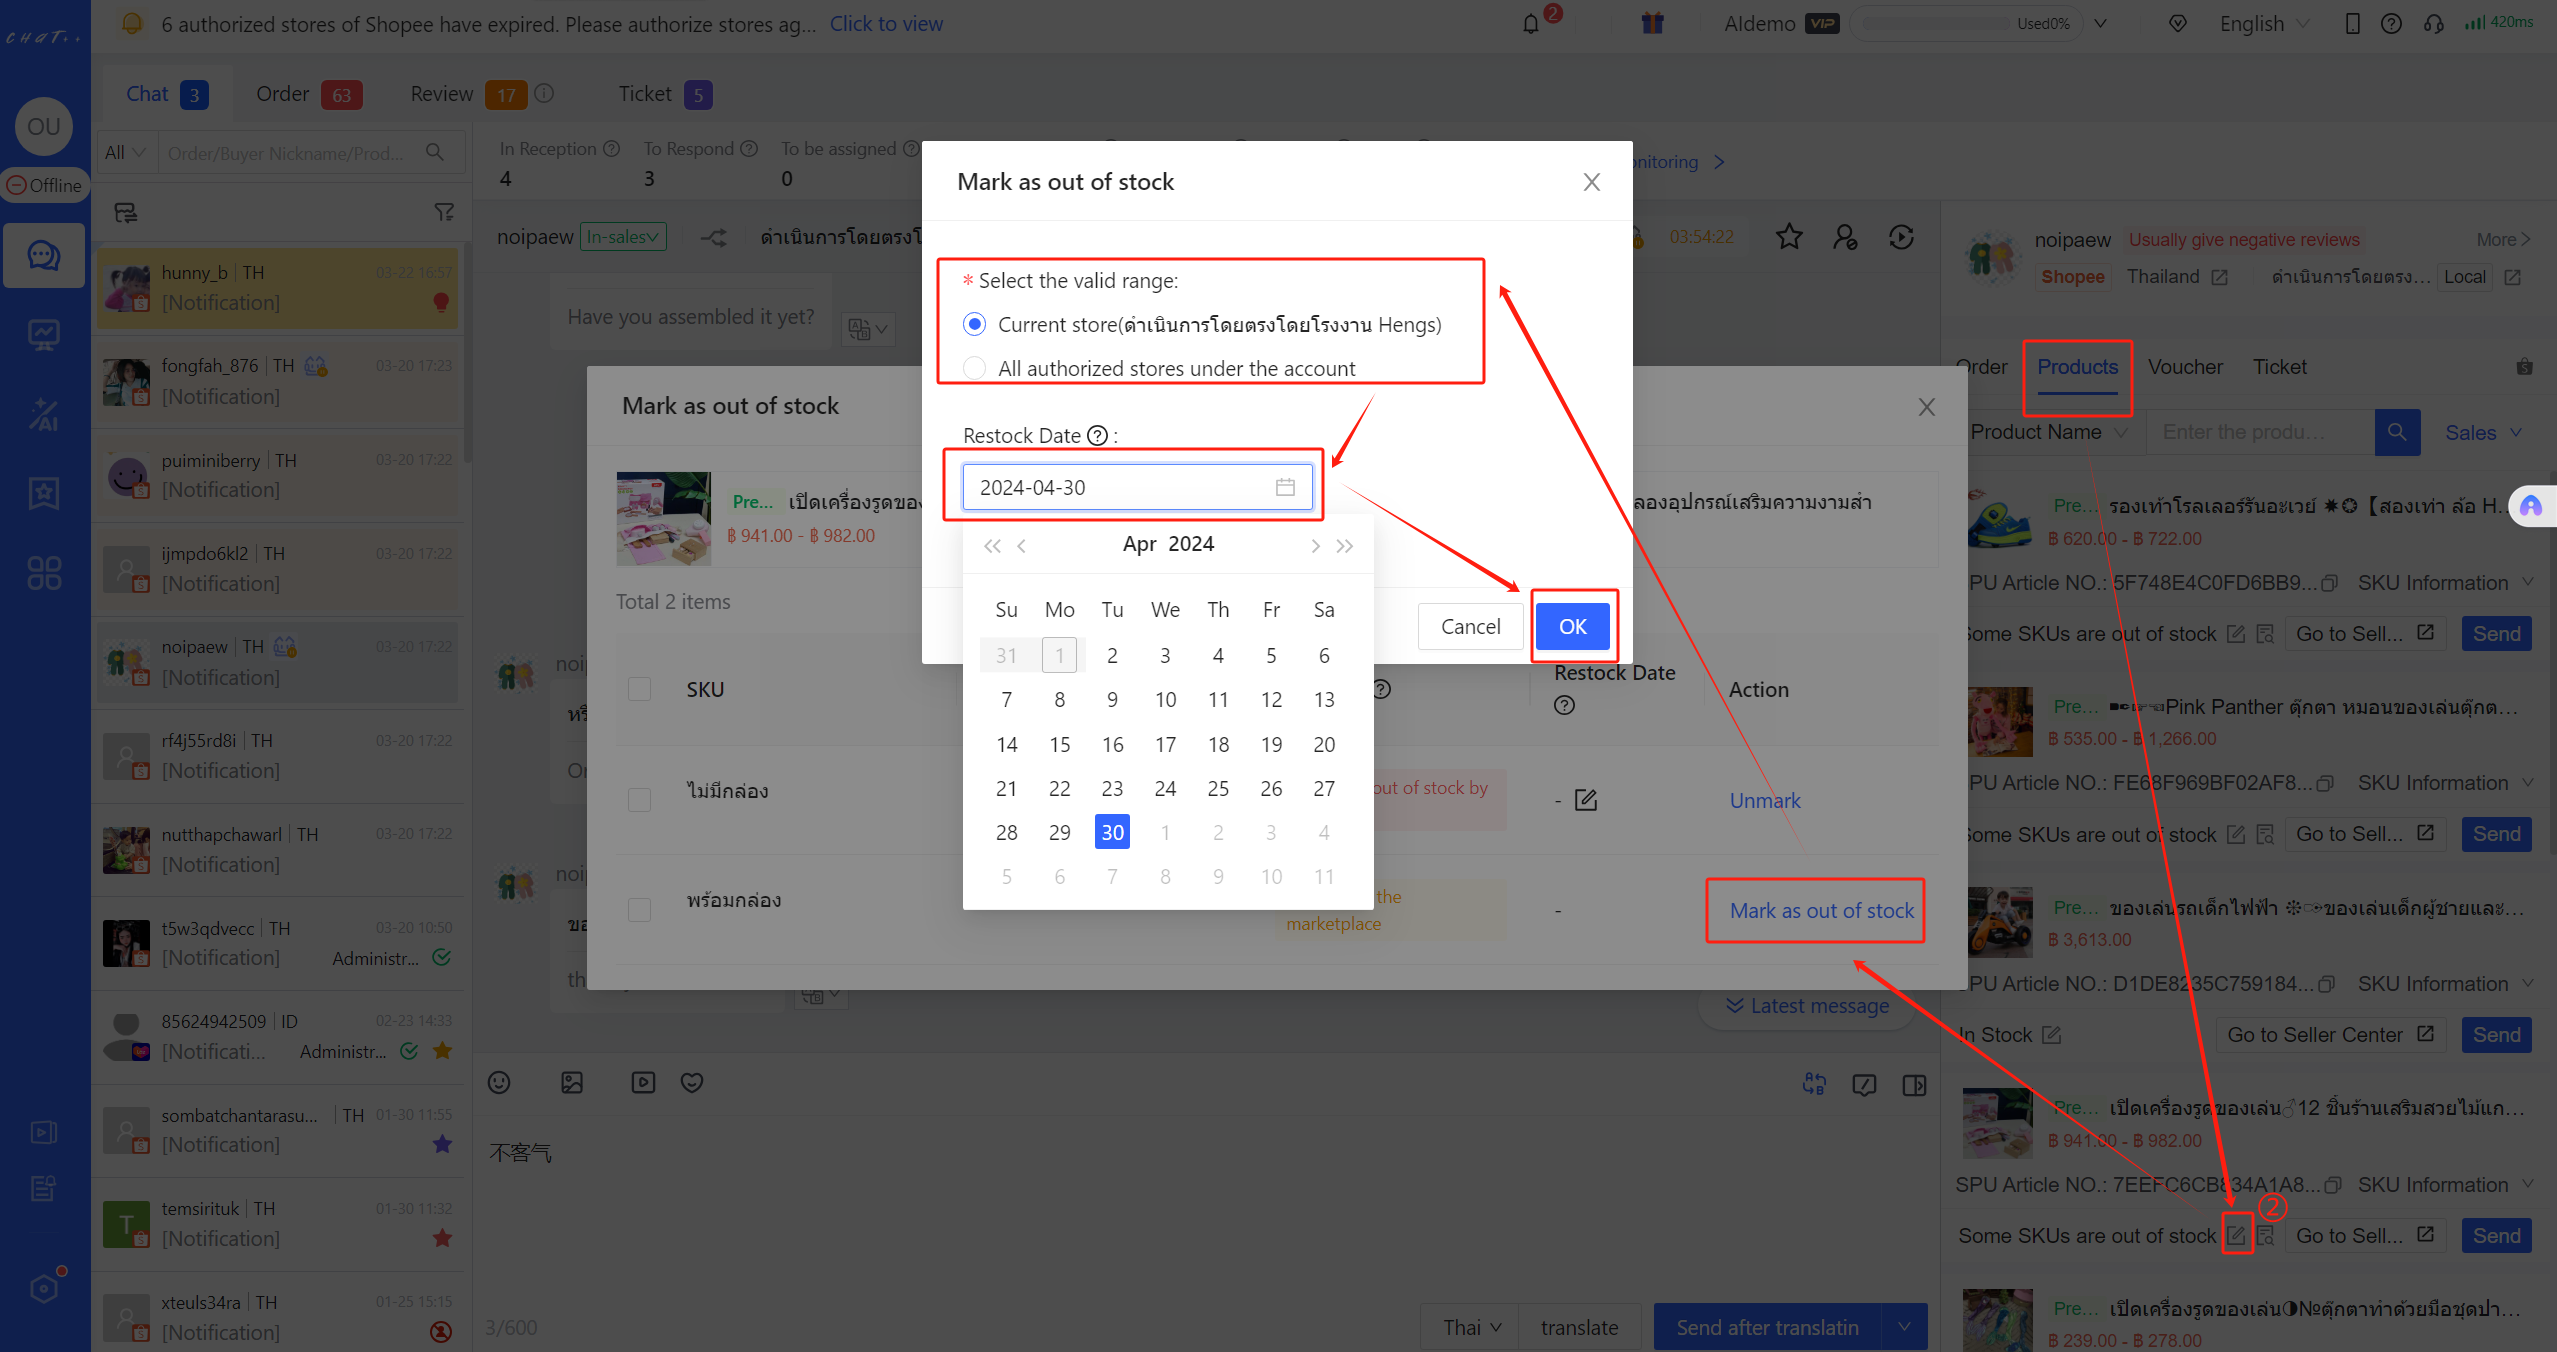
Figure 34
In the popped-up "Mark Out of Stock" page, locate the out-of-stock SKU and mark it as out of stock (see Figure above).
Select the valid range:
- Current store: The out of stock mark for this SKU will only apply to the current store.
- All authorized stores under the account: The out of stock mark for this SKU will apply to all stores authorized under the account in ChatPlusAI
Restock Date:
- On the specified restock date, out of stock mark for this product will automatically be cleared by the ChatPlusAI system.
- If no "Restock Date" is provided, the product will remain marked as "Out of Stock" in ChatPlusAI system indefinitely.
If there are multiple out of stock SKUs under the main product link, you can select them simultaneously and click "Bulk Mark" (see Figure below). 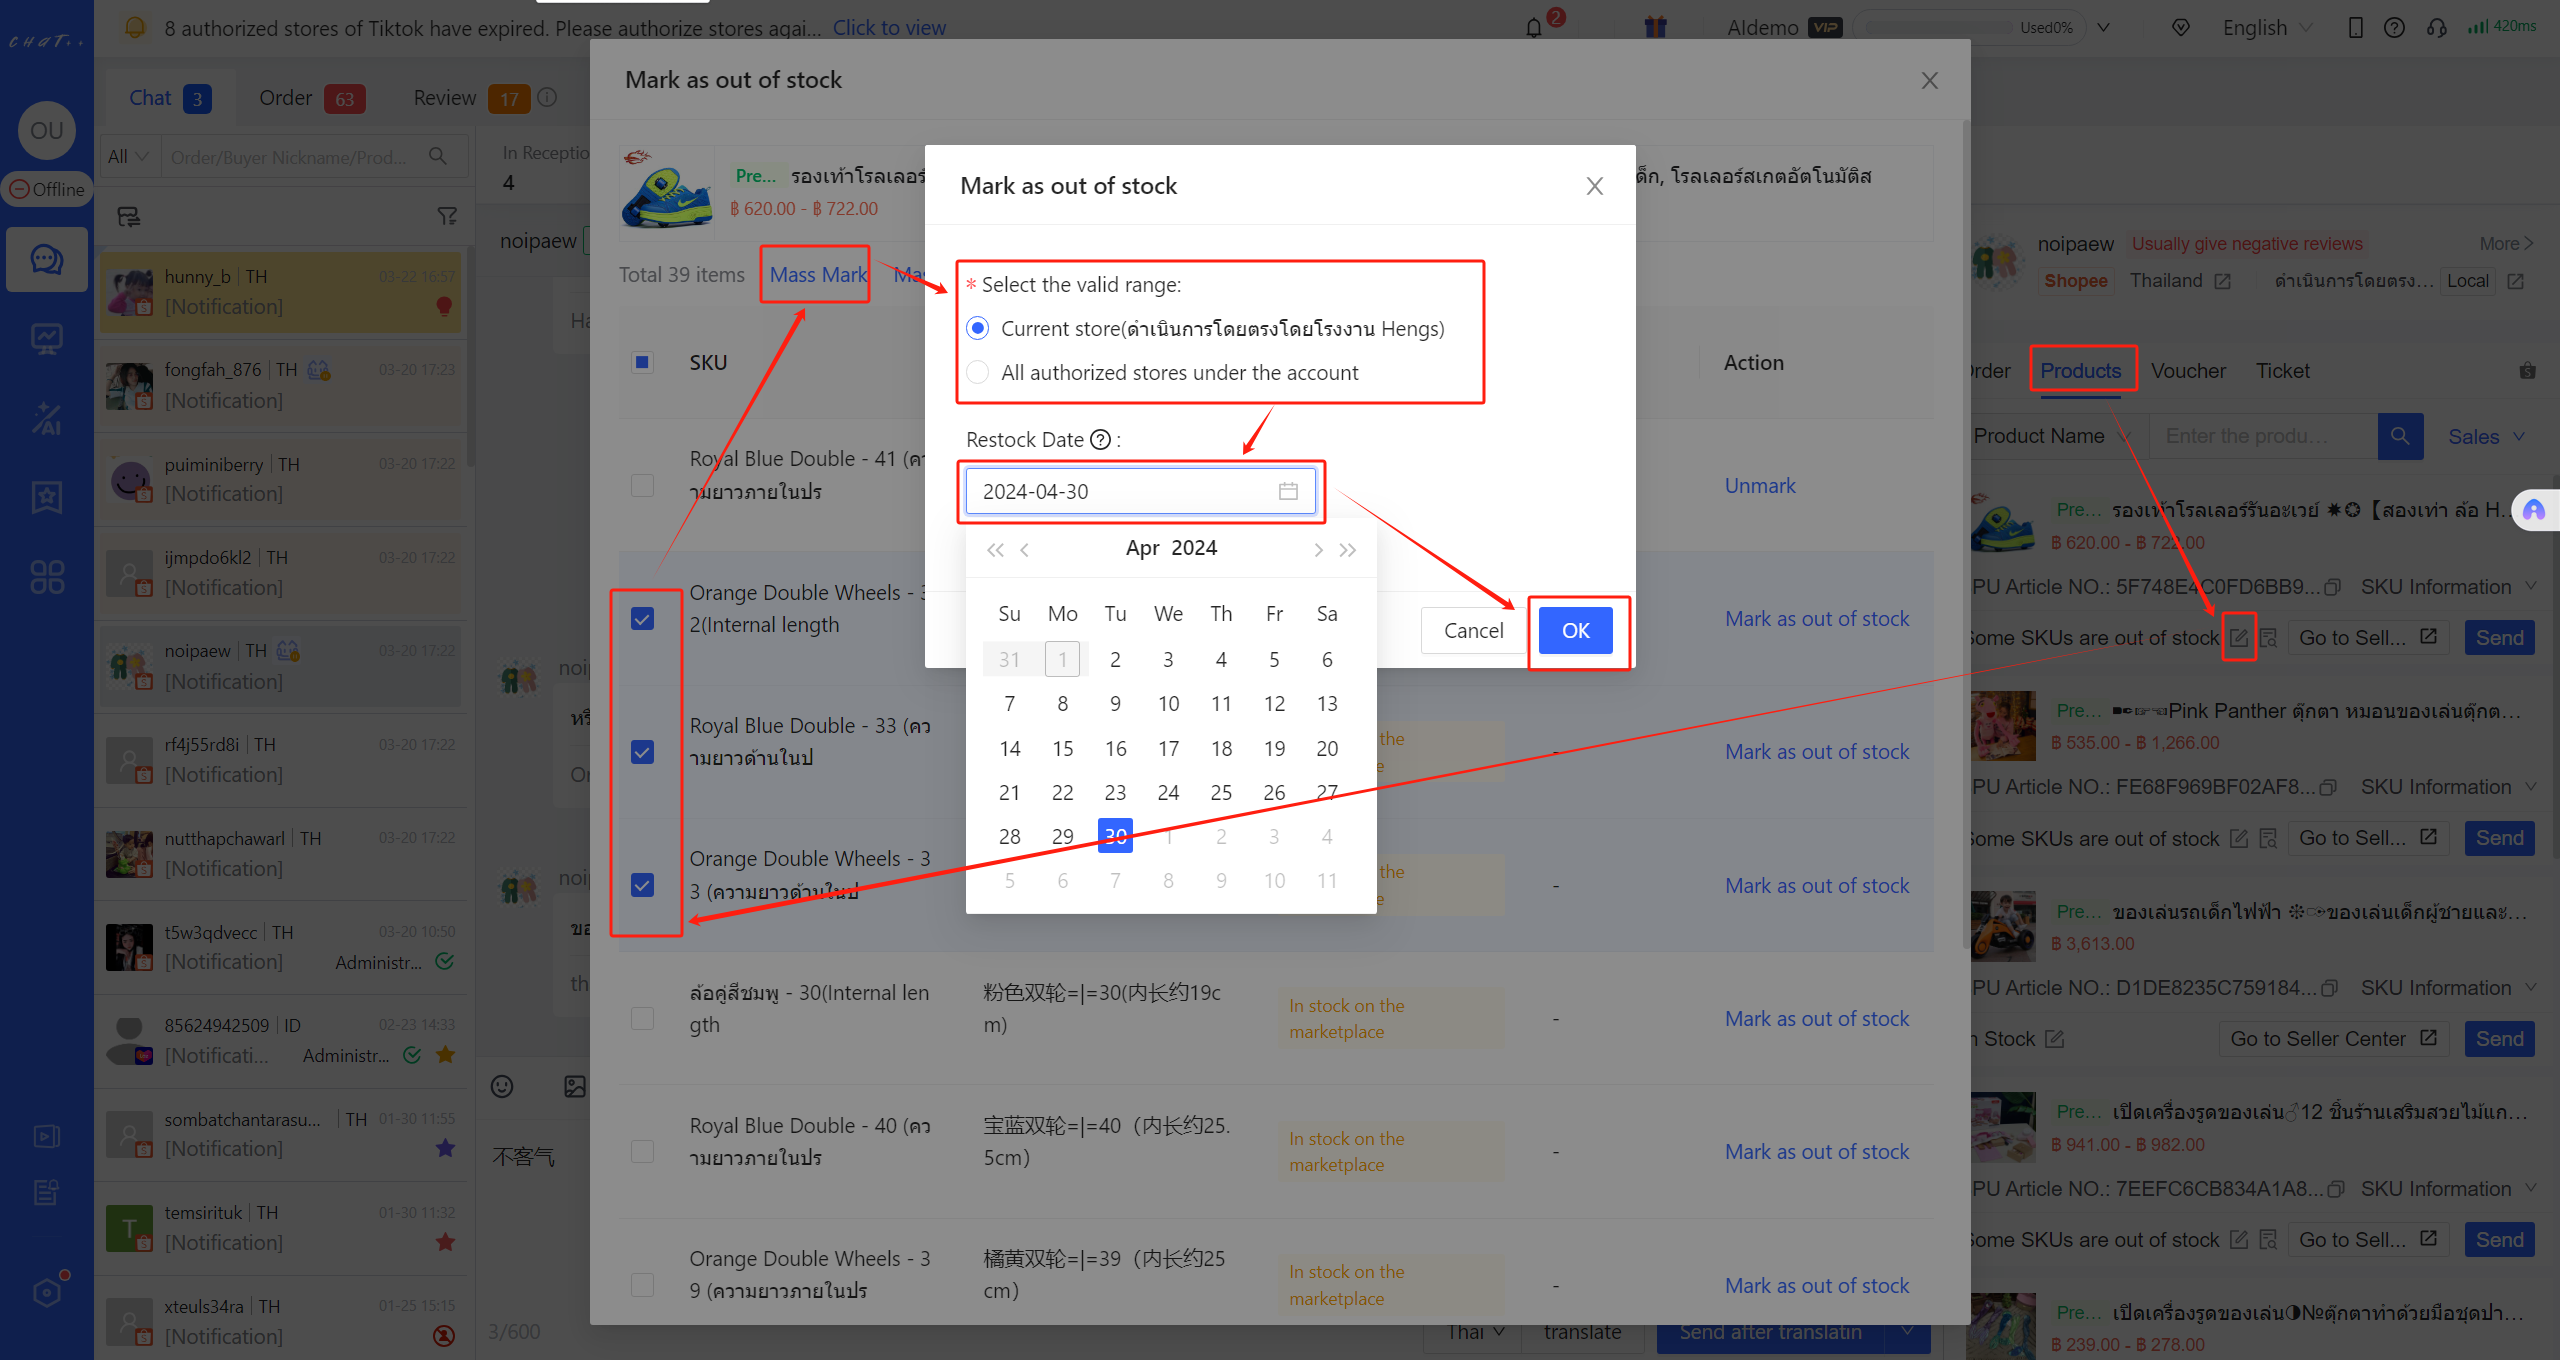 Figure 35
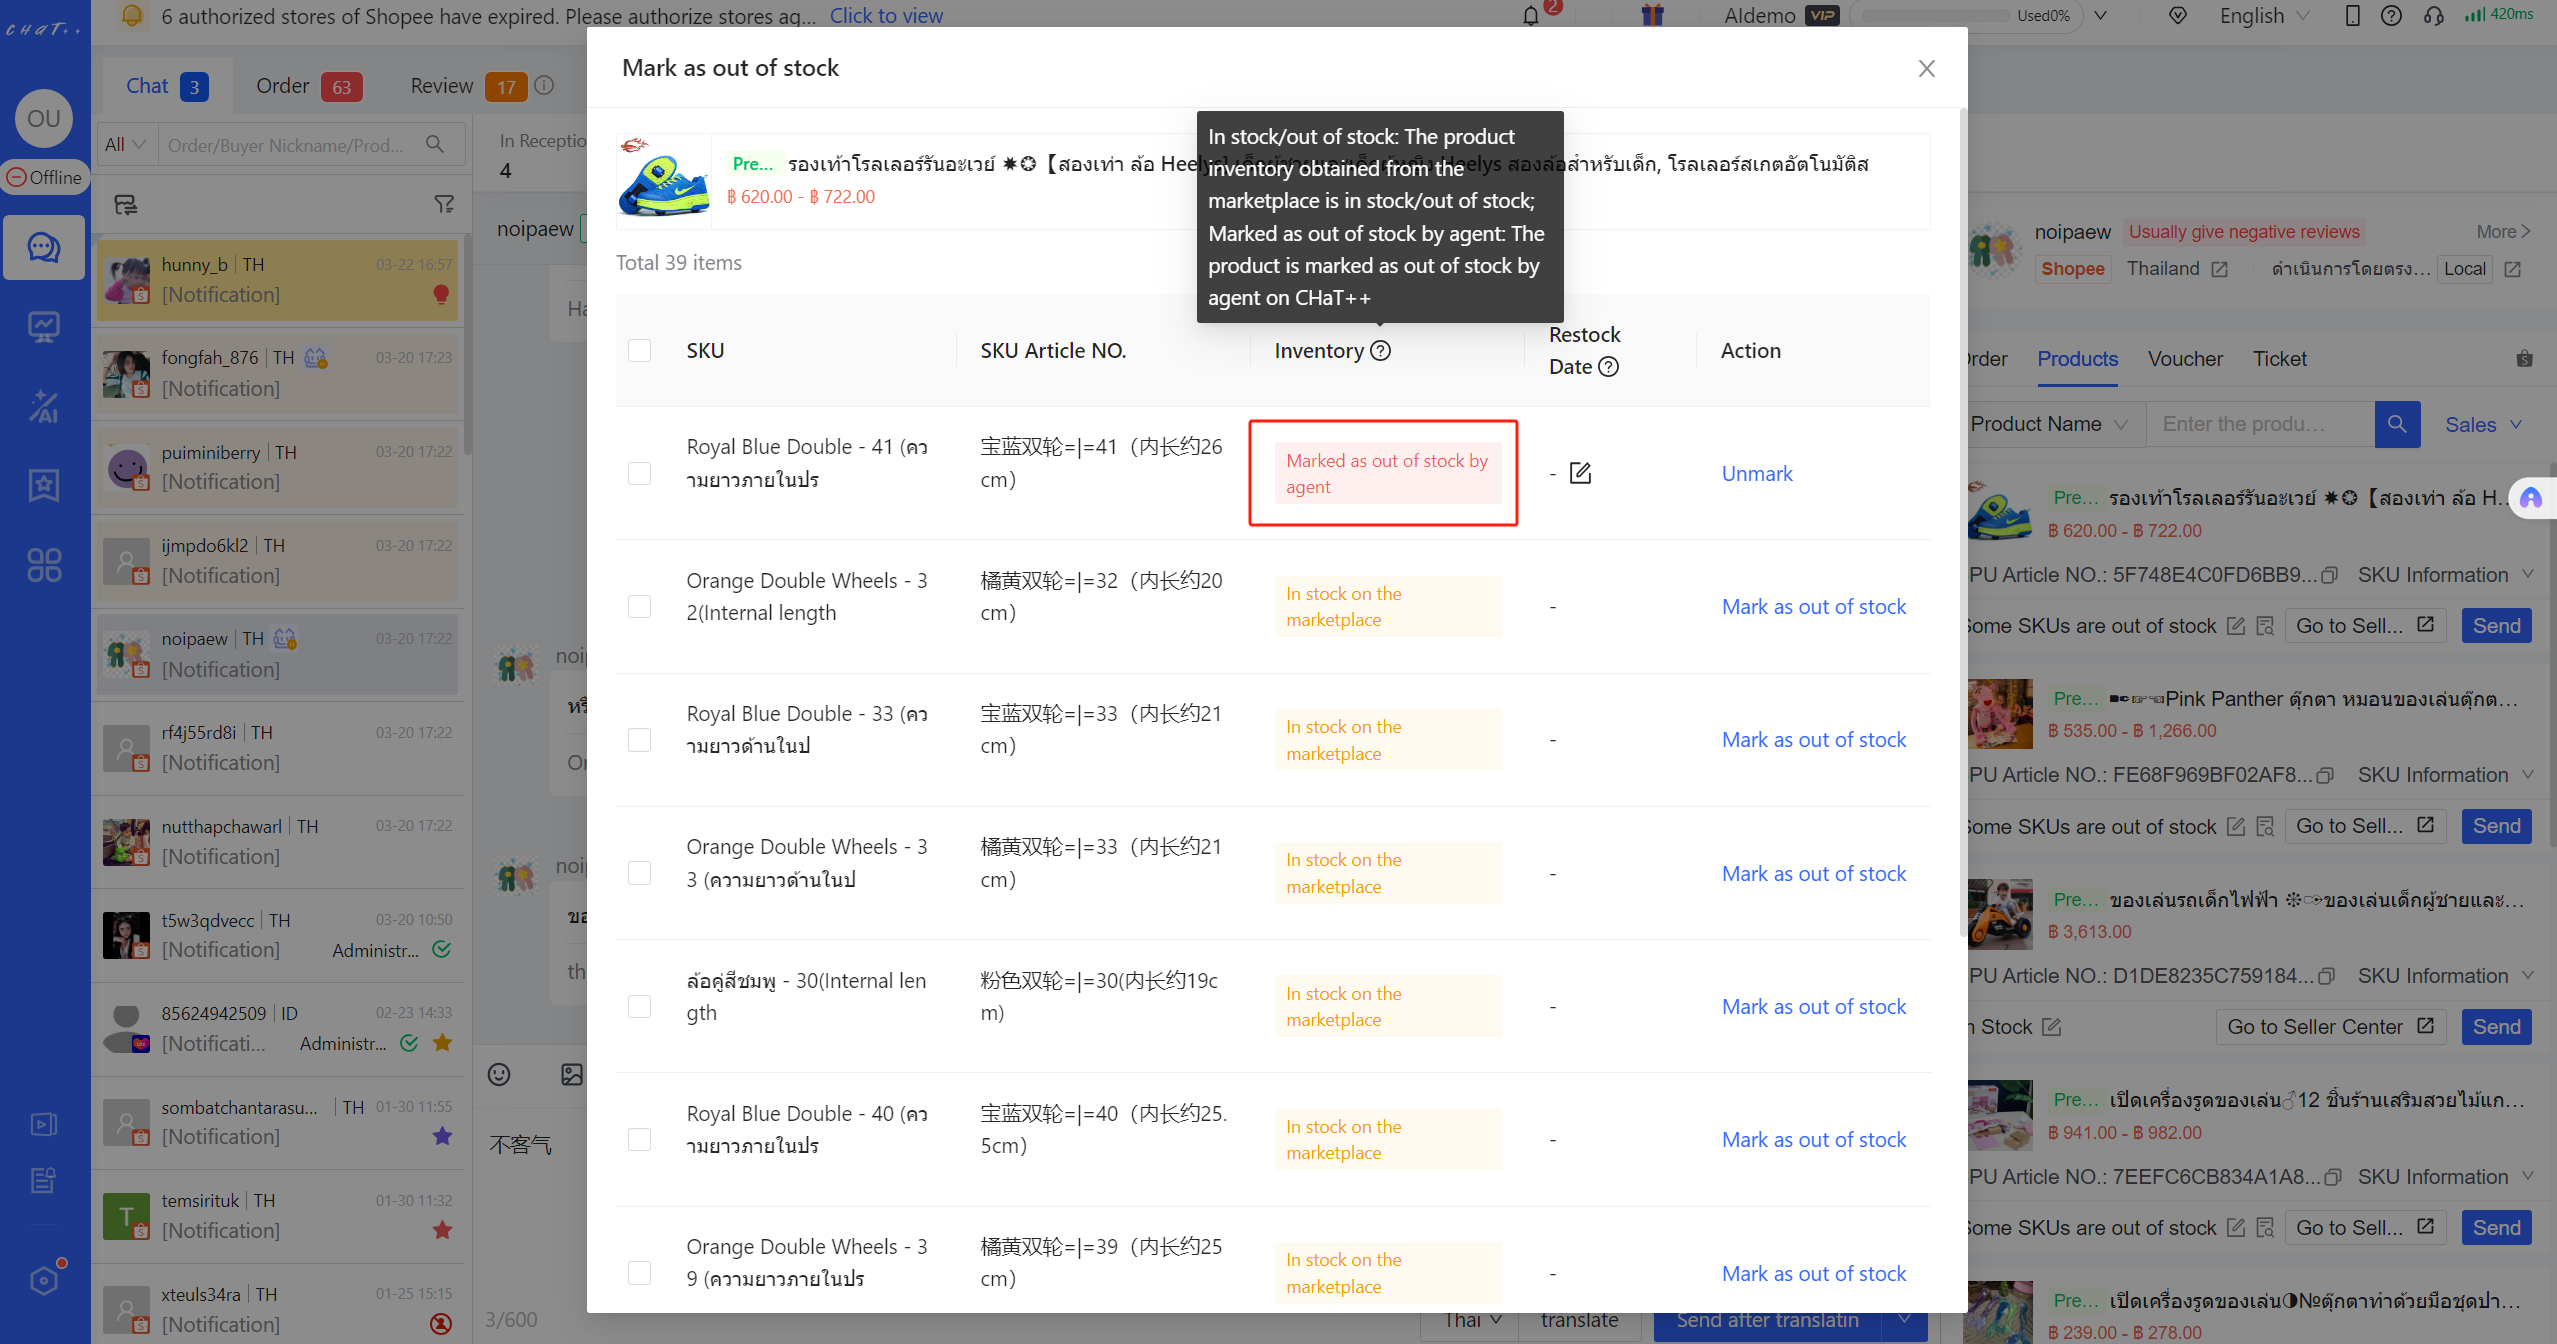
Figure 36
Manually Clear Out of Stock Mark
Click [ "Messages" in the left menu→ "Products" in the context side window], locate the main product link containing the SKU for which you want to cancel the out of stock mark, click the "Mark as out of stock" button (Red Box ② below), and select "Unmark". After unmarking, the SKU will display inventory information based on the marketplace's inventory in ChatPlusAI.
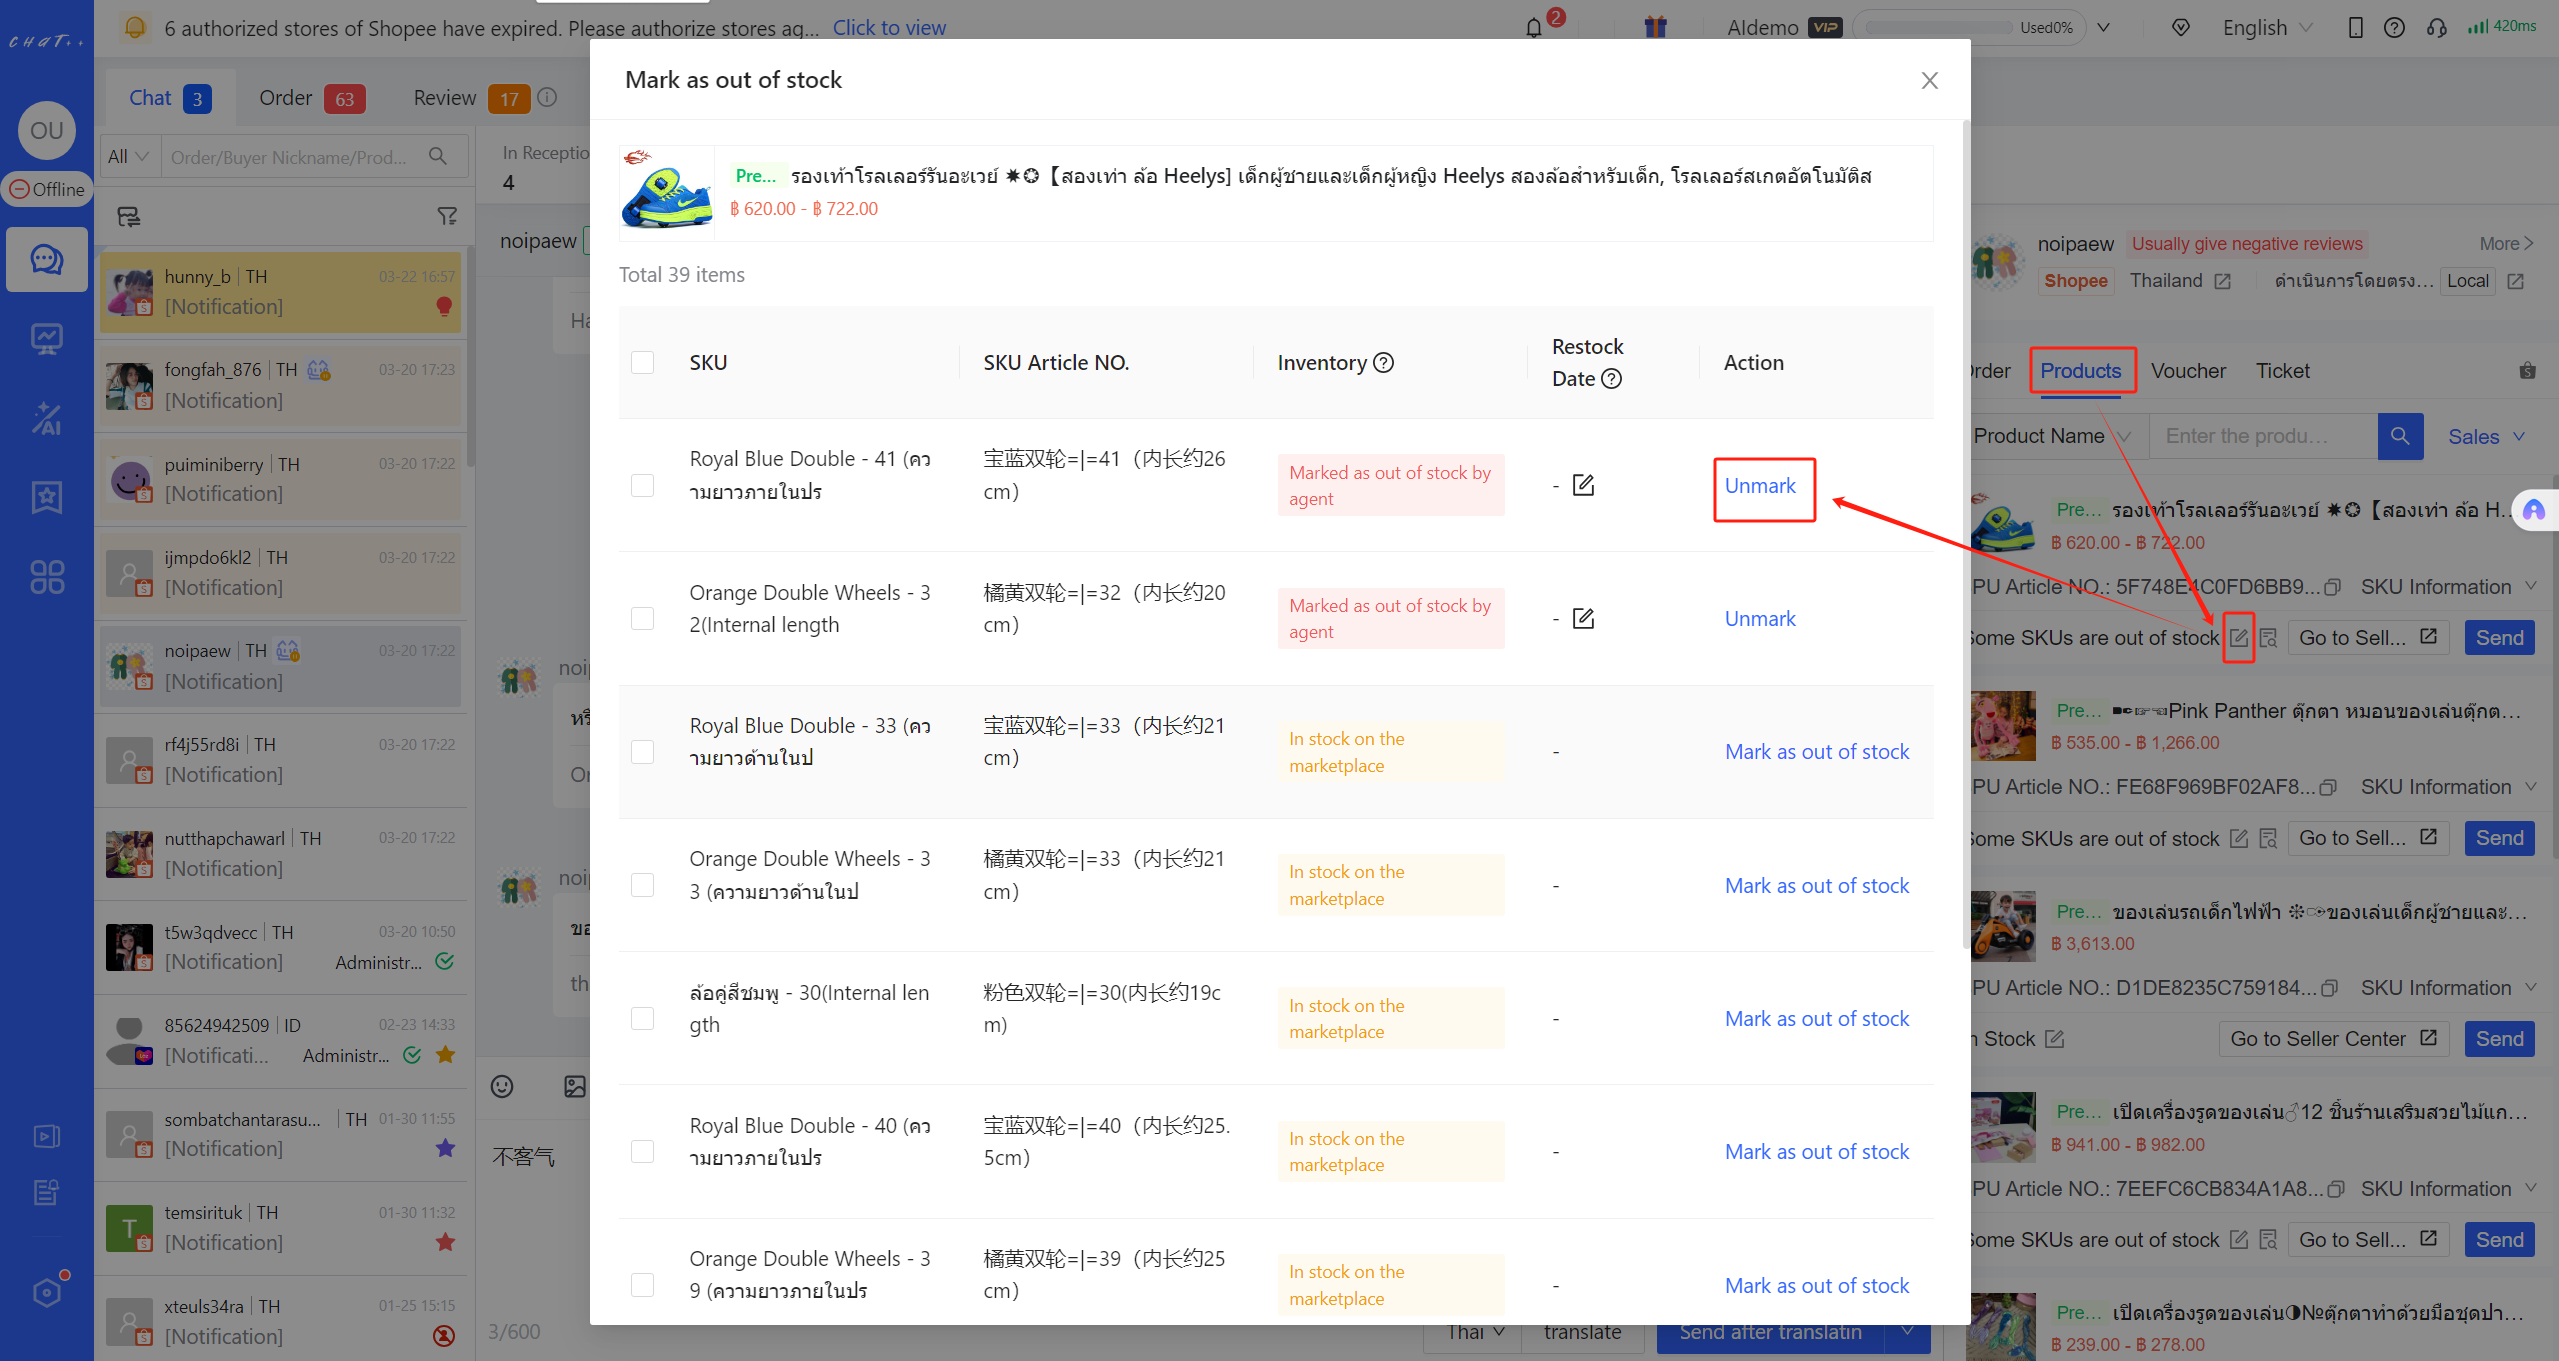
Figure 37
If there are multiple out of stock SKUs under the main product link that need to be unmarked, you can select them simultaneously and click "Bulk Unmark" (see Figure below).
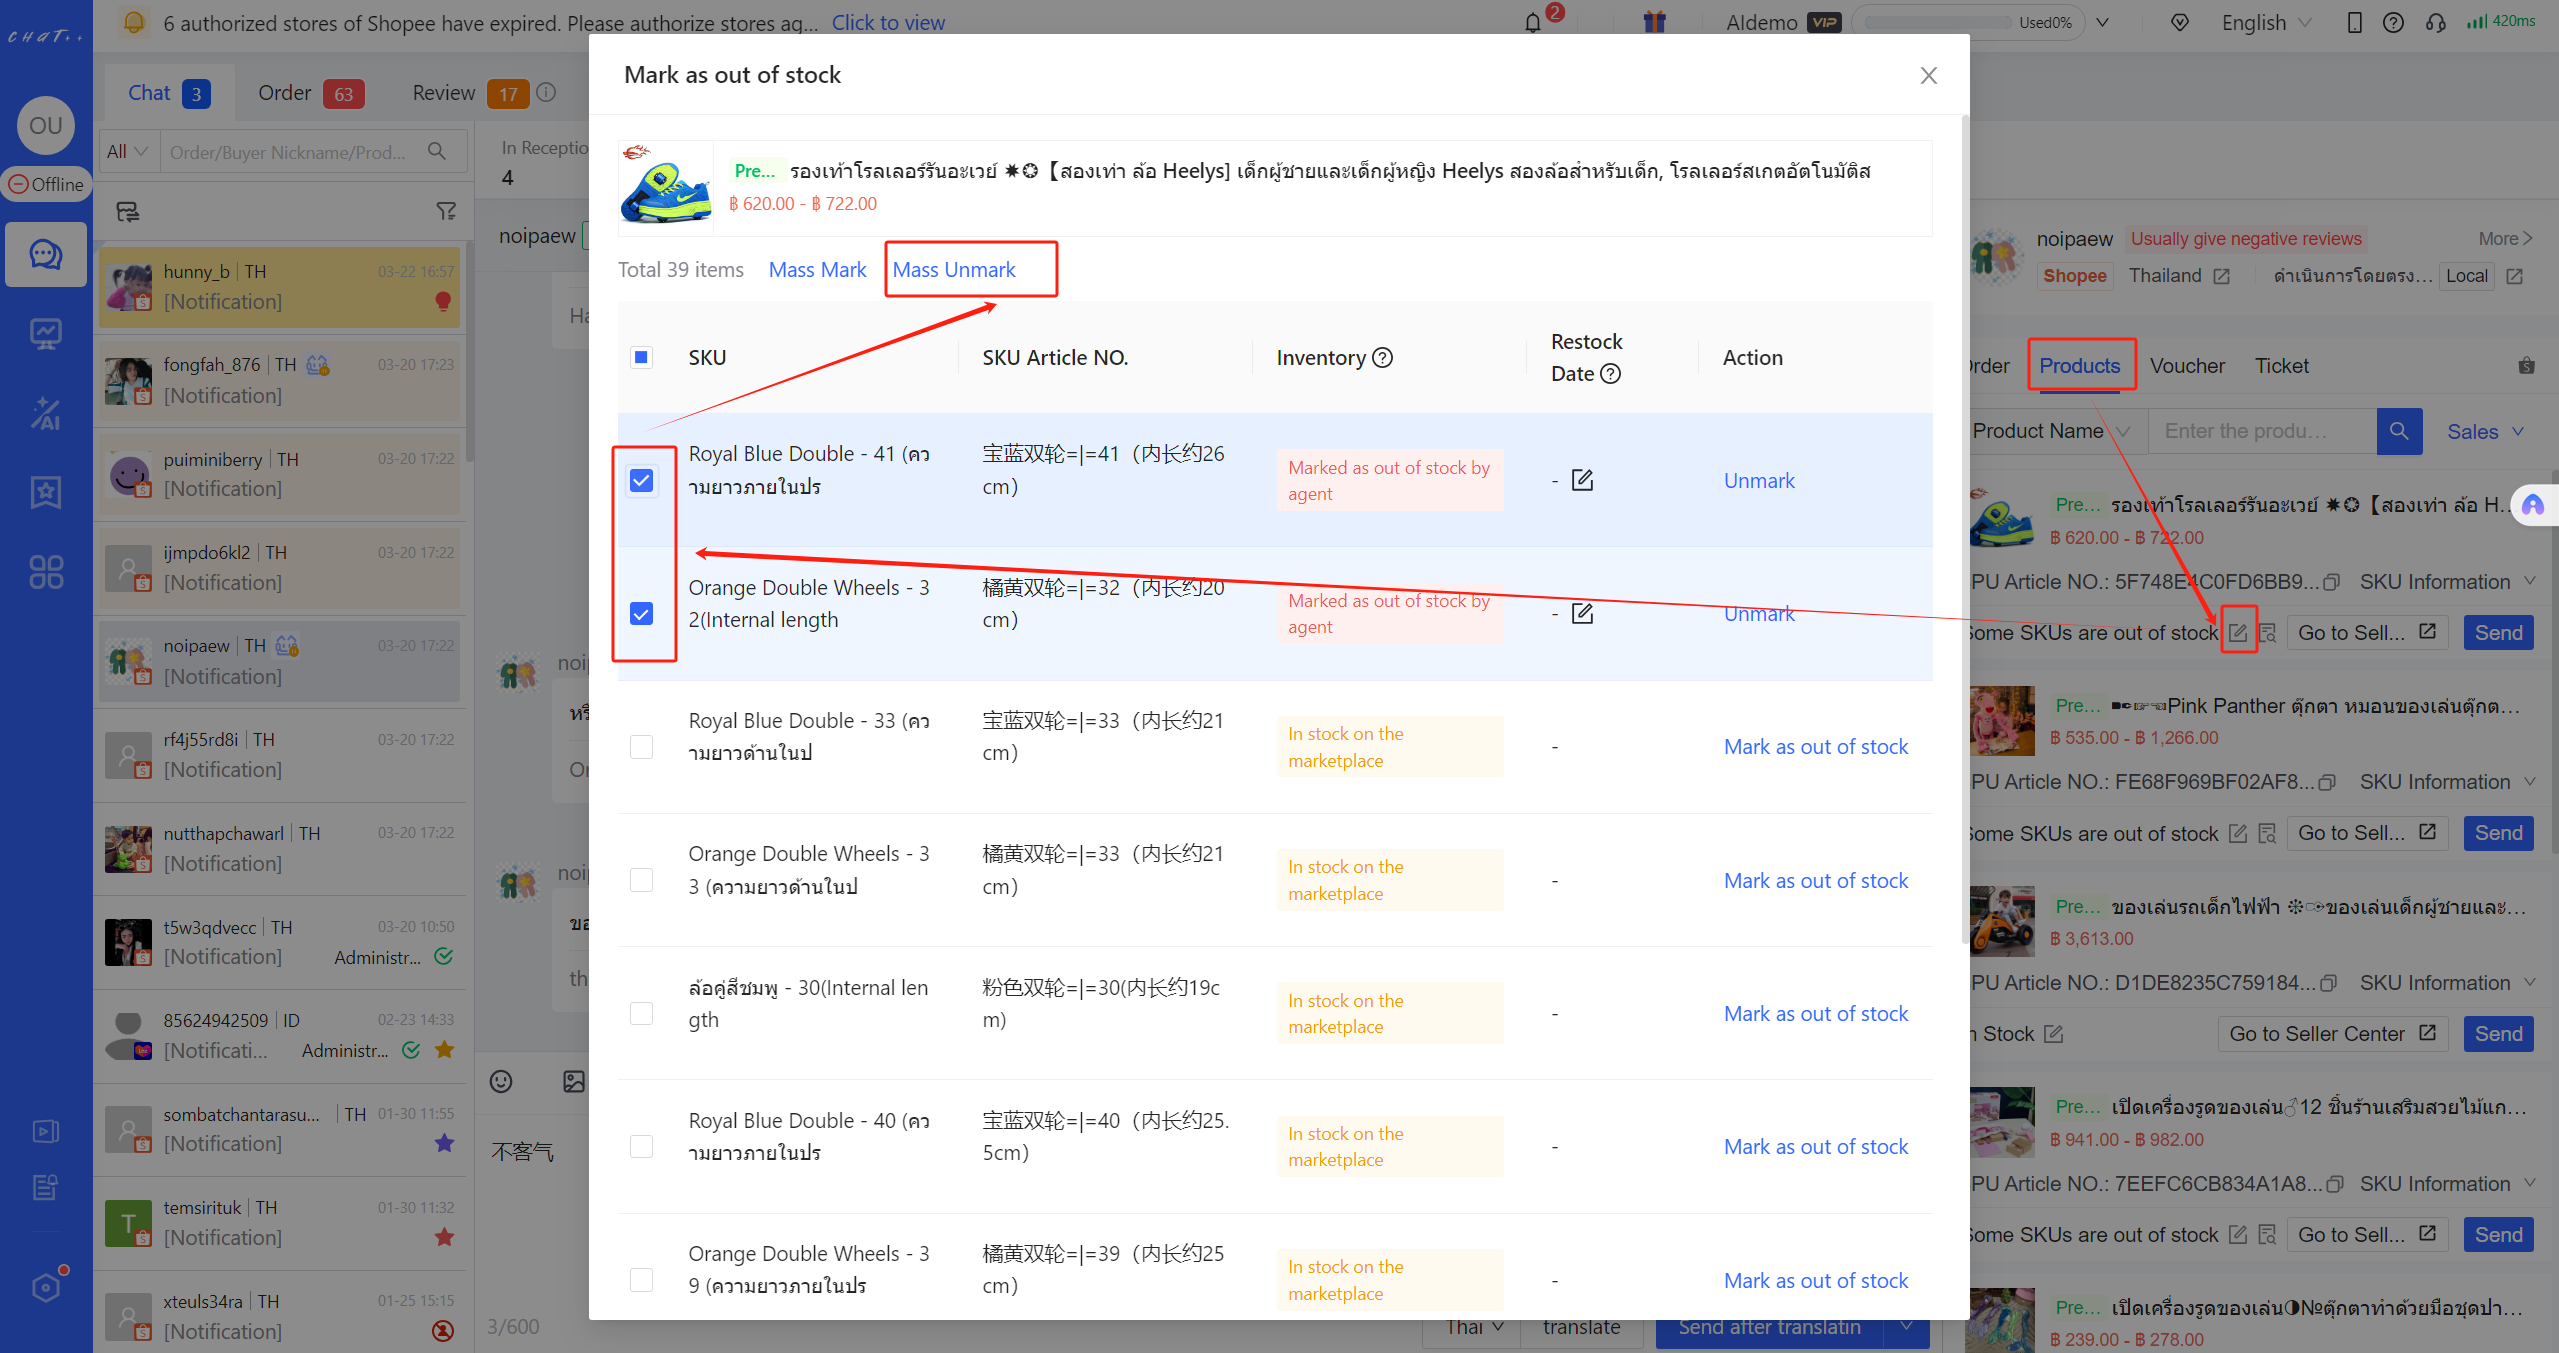
Figure 38
Context Side Window - Voucher
In the “Voucher” section of the conversation context window, the agent can view the voucher information for the store that the conversation belongs to. It includes name, discount details, whether it is a product specific voucher, expiration date, and redemption progress for each voucher.
Agents can search vouchers using several dimensions, including voucher name, discount amount, and discount percentage, which helps agents quickly find the desired voucher to send it to the buyer.
If an agent’s account can not view or create/edit vouchers, he should contact his administrator to confirm whether the account has been granted permissions for creating/editing/invalidating vouchers.
Clicking “Send” will allow the agent to send the voucher to the buyer.
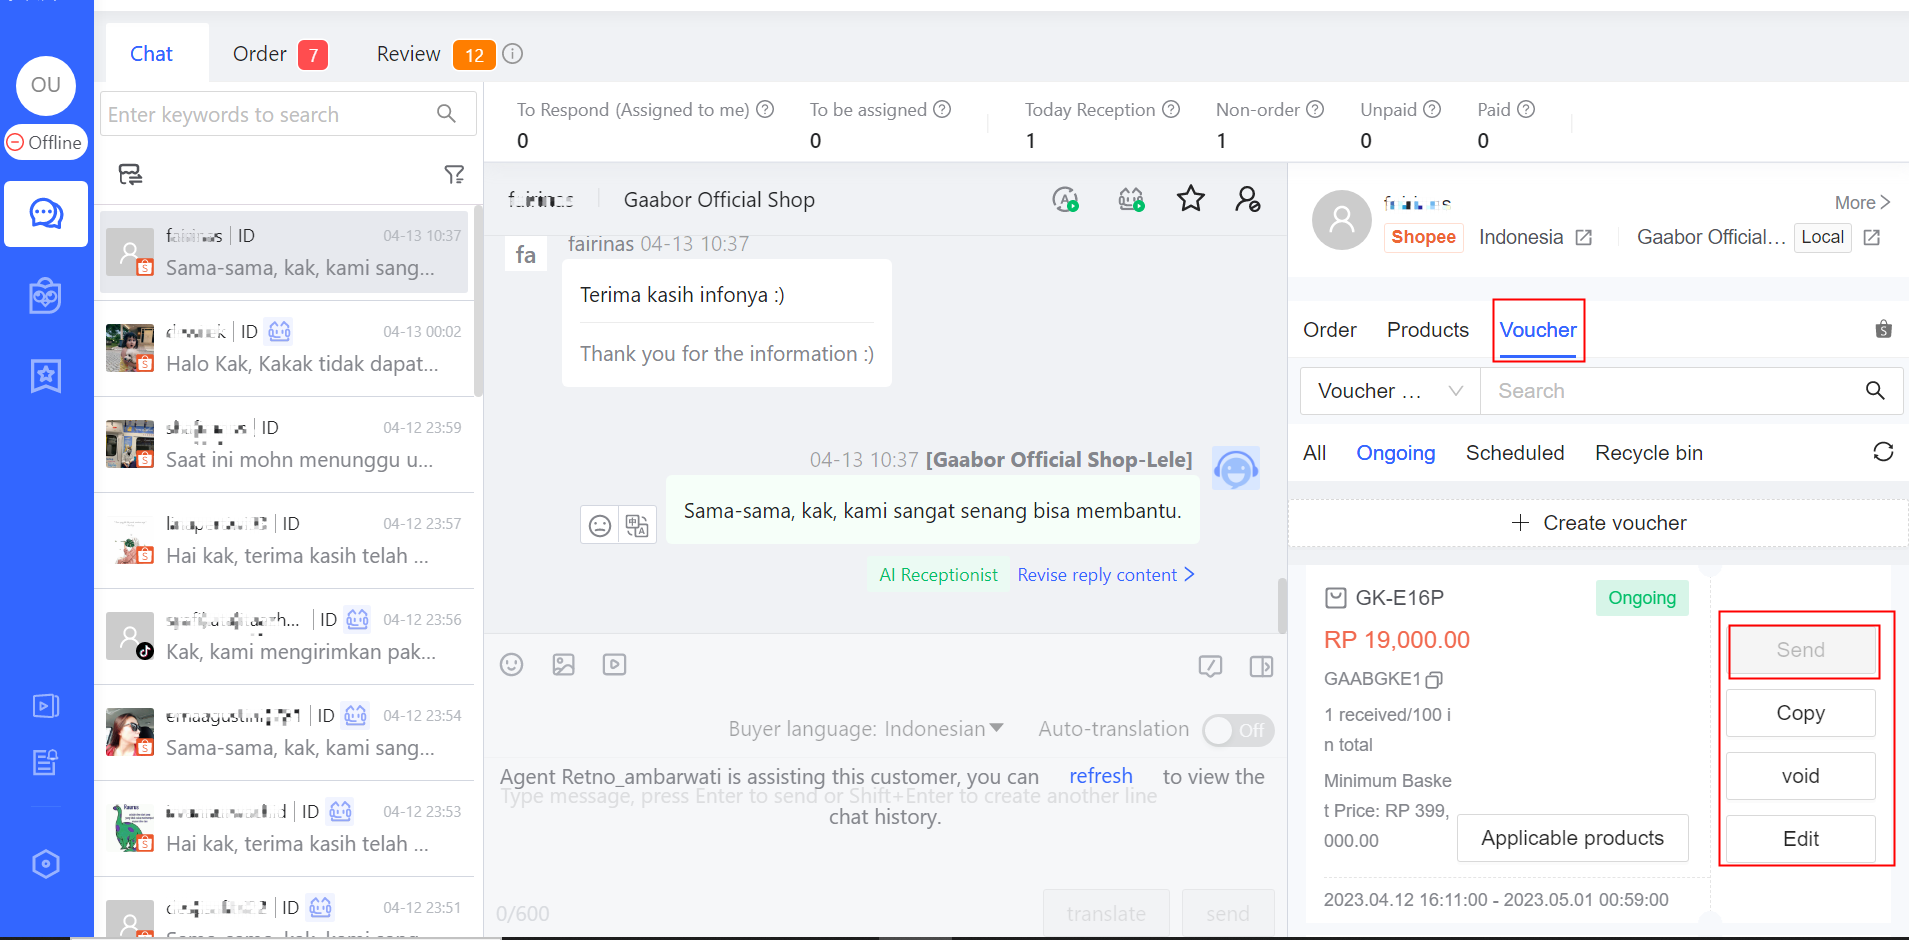
📌 Context Side Window - Ticket
In this section, you can view and manage all historical tickets for this customer in the current store, including the current status and progress of all tickets.
>>>For details, please click to jump
FAQ
Q1:Can message sent through ChatPlusAI be viewed in the seller center?
A1:Yes, the messages sent through the ChatPlusAI are synchronized with the seller center.
Q2:When the buyer send OFFER, how to configure the Strong Reminder?
A2:Automation-Reception Basics-Key Issue Alarm-AI Receptionist-Check off “Buyer made an offer” and save.
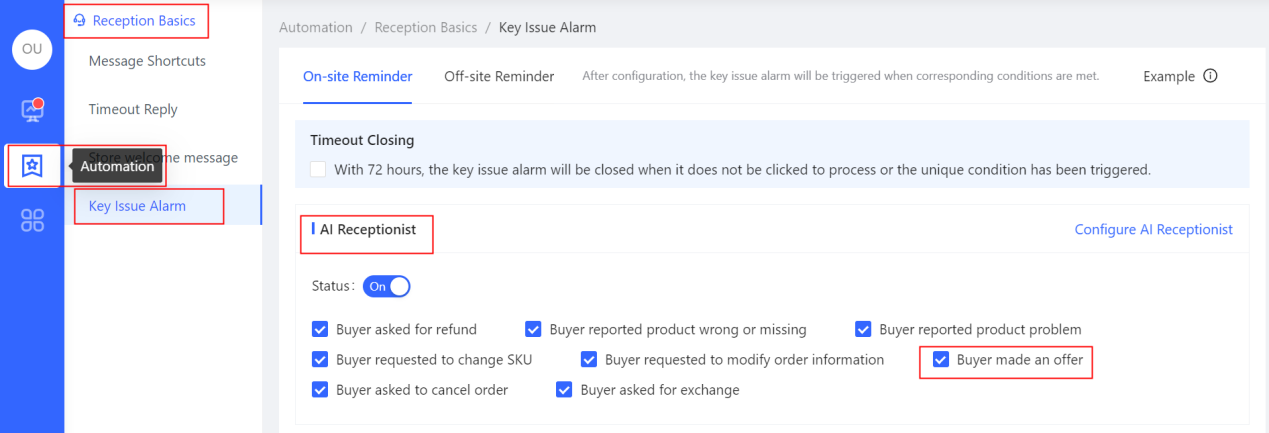
Cancellation Follow-up
ChatPlusAI aggregates all authorized stores cancellation orders in real time from various marketplaces such as Shopee, Lazada, and Tiktok in one place for easy viewing and processing, greatly improving the efficiency of agents. Moreover, it puts order with high risk into a strong reminder mode, reminding agents to respond as soon as possible, thus increasing the cancellation retrieval rate.
Permission to Handle Cancellation
To process “Cancellation”, it is important to ensure that the agent’s account role has access to “Visit the Order page” and “Post Sales disposal” permissions. These two permissions are enabled by default for the agent’s account role.
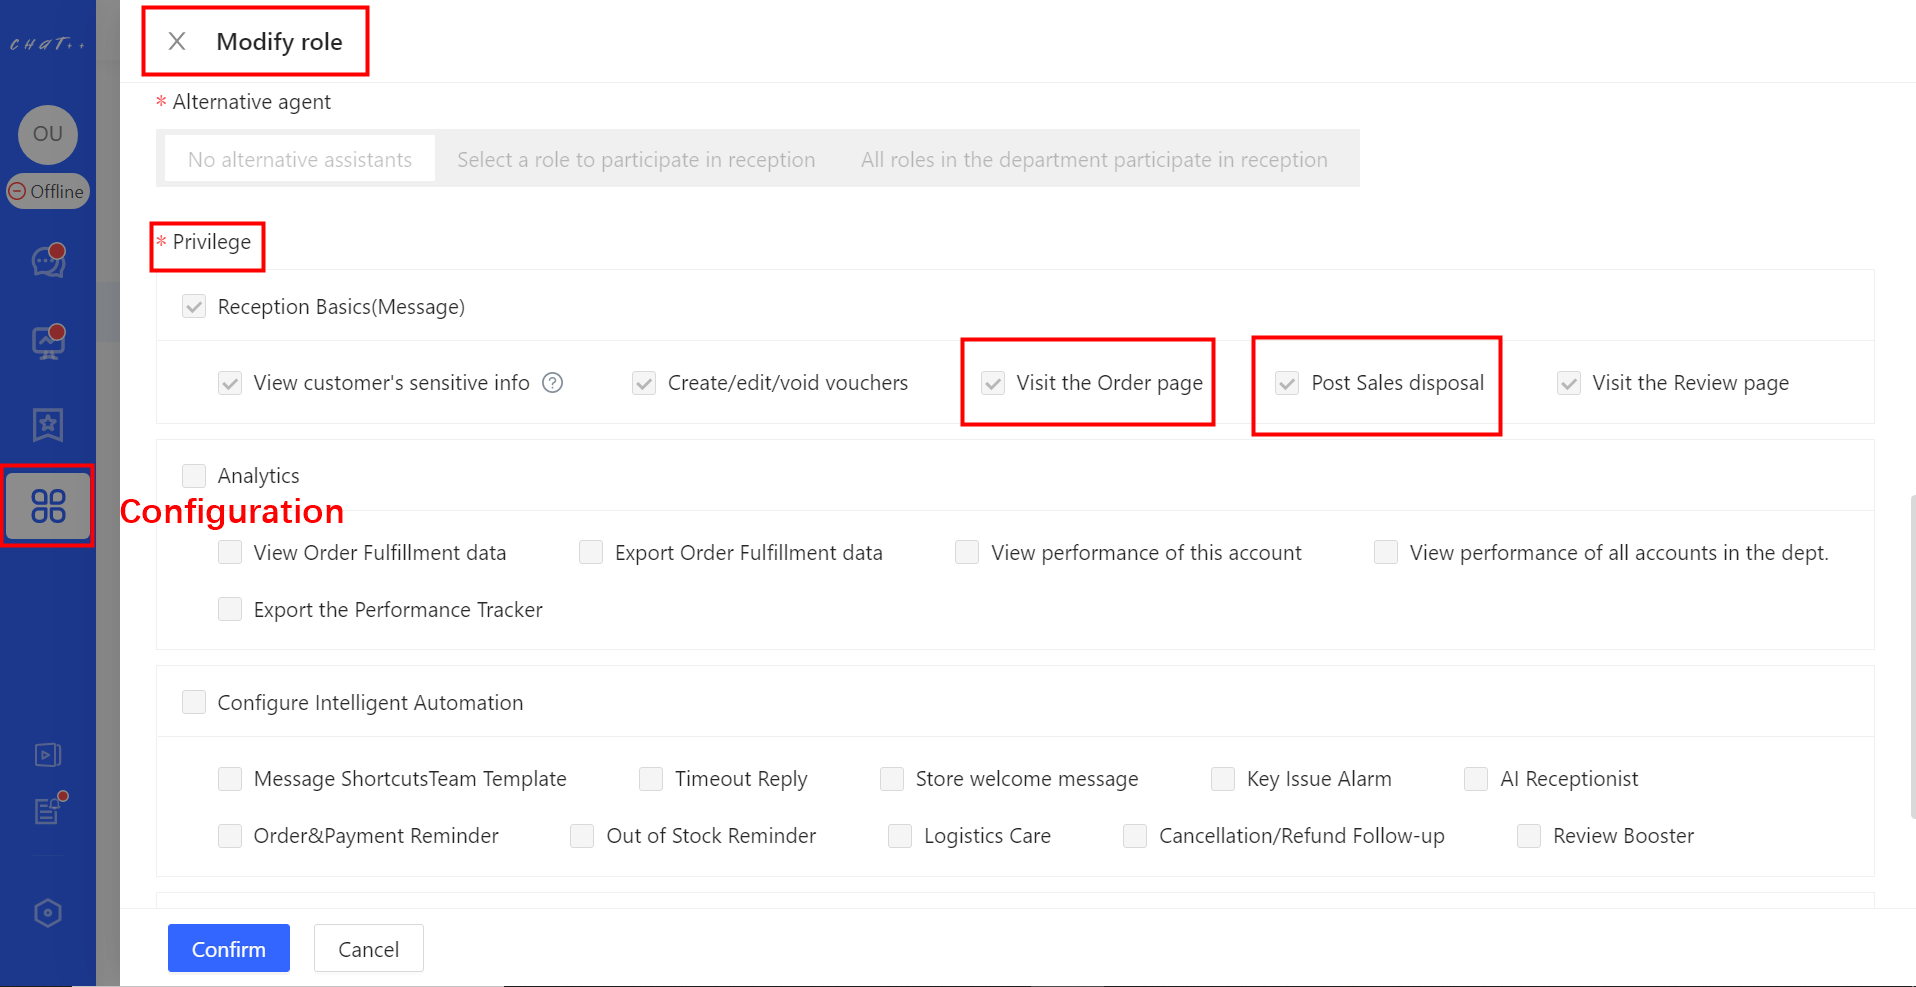
View Cancellation
Click on the “Message” option from the left-hand menu→ Select “Order” → Select marketplace → Select “Cancellation”
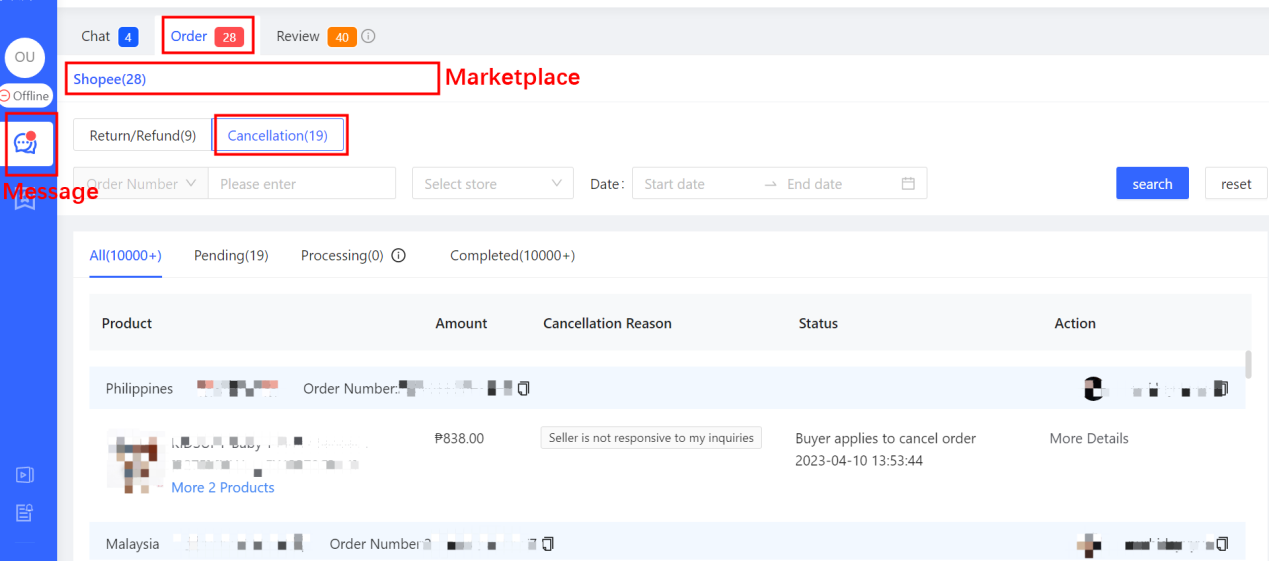
Features in Cancellation follow-up
The number besides “Order” icon represents the total number of “Return/Refund” and “Cancellation” that requires attention from the agent team for all stores under their responsibility. This statistics is updated in real-time, and it is recommended that the agent team promptly intervene and contact the buyers to negotiate order cancellation upon seeing the notification, as the buyers are more likely to be online shopping at this time, which greatly increases the success of order recovery.
Search Cancellation Orders: ChatPlusAI supports searching based on order number, store, and order created date, which satisfies the different processing needs of agents.
Paginate Orders by Processing Status: To improve the efficiency of cancellation processing, orders are classified into different processing statuses: Pending, Processing, Completed and All orders.
Compared to the seller center in marketplace, ChatPlusAI has an additional “Processing” status for cancellation. After a buyer initiates a cancellation request, if the agent contacts with the buyer through ChatPlusAI and sends a message to give a solution and persuades the buyer to withdraw the cancellation request, the order status will change to “Processing”. After the buyer withdraws the request or the agent agrees the cancellation, the order status will change to “Completed”.
Below the Processing Status shows the list of cancellation and related operations agents might make. Due to differences in the cancellation process or API capabilities of various marketplace, the following paragraph will explain how to handle cancellation requests for each marketplace respectively.
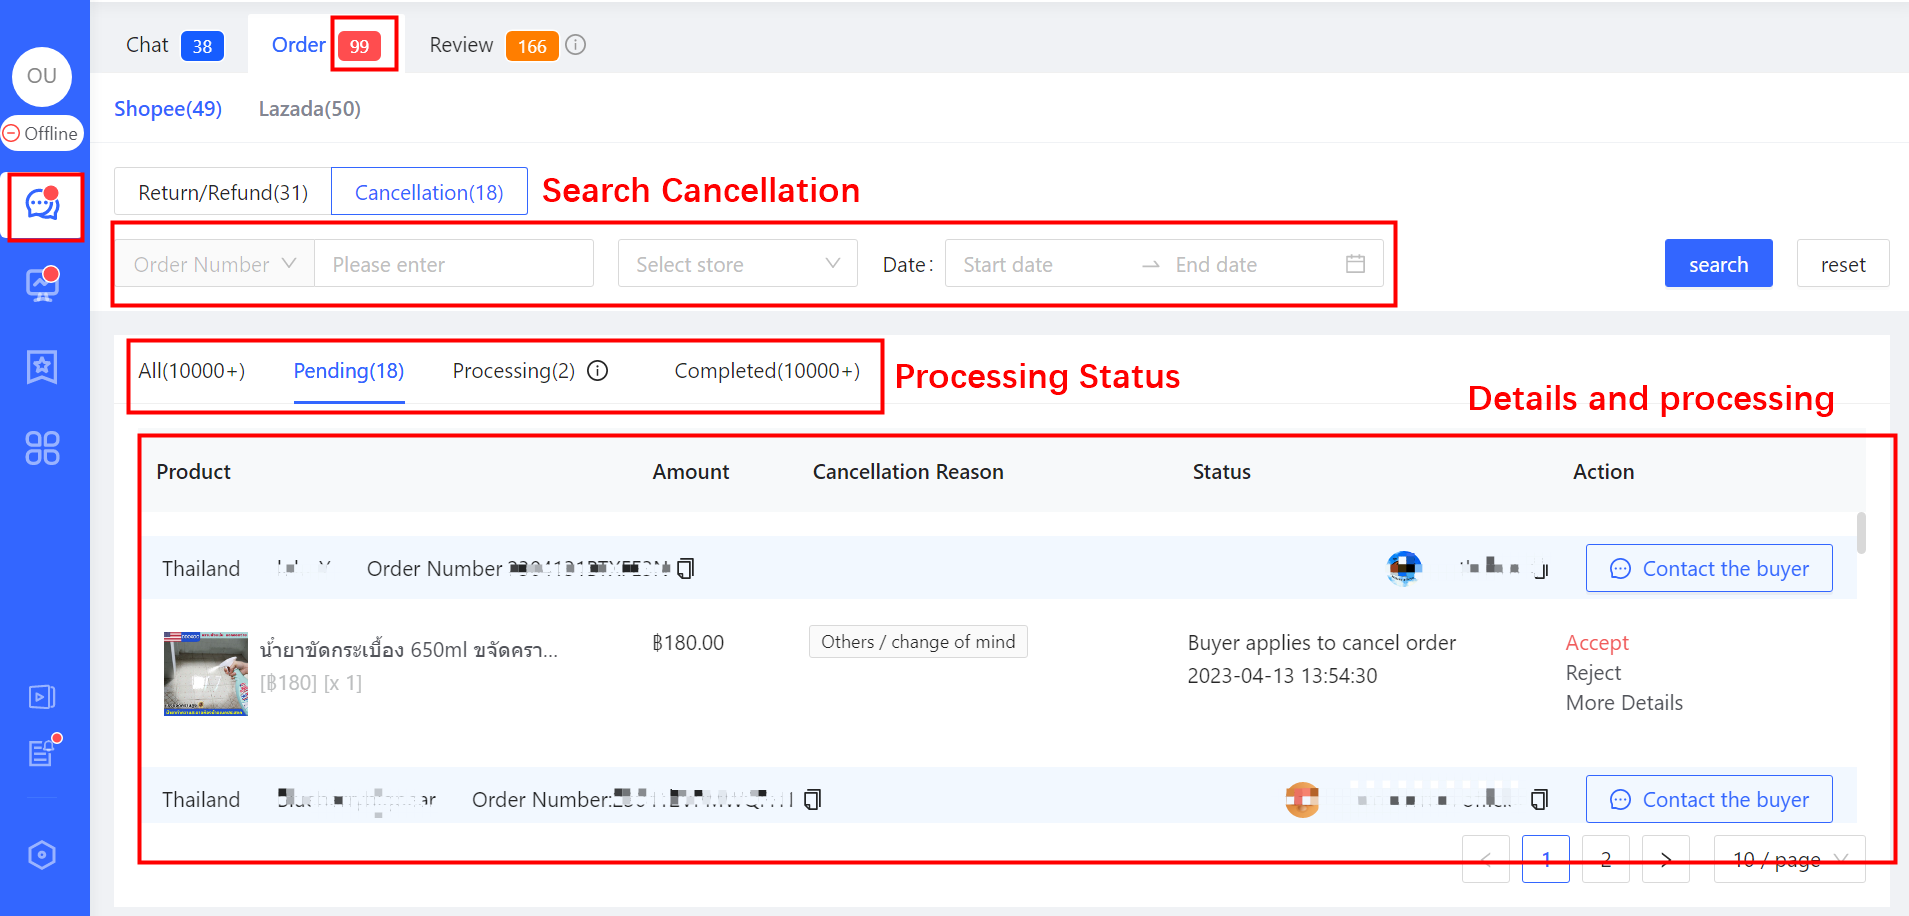
How to handle “Cancellation”
The definitions of several key numbers
The sum of “Return/Refund” and “Cancellation” pending processing across all marketplaces is displayed as the value in white font on a red background to the right of the “Order” button.
The number besides each marketplace indicates the total number of pending “return/refund” and “cancellation” on the marketplace. (In the example below, there are 49 pending abandoned orders on Shopee stores.)
The numbers besides “Return/Refund” and “Cancellation” indicate the number of pending “Return/Refund” and “Cancellation” on one marketplace. (In the example below, there are 18 pending cancellation orders on Shopee store.)
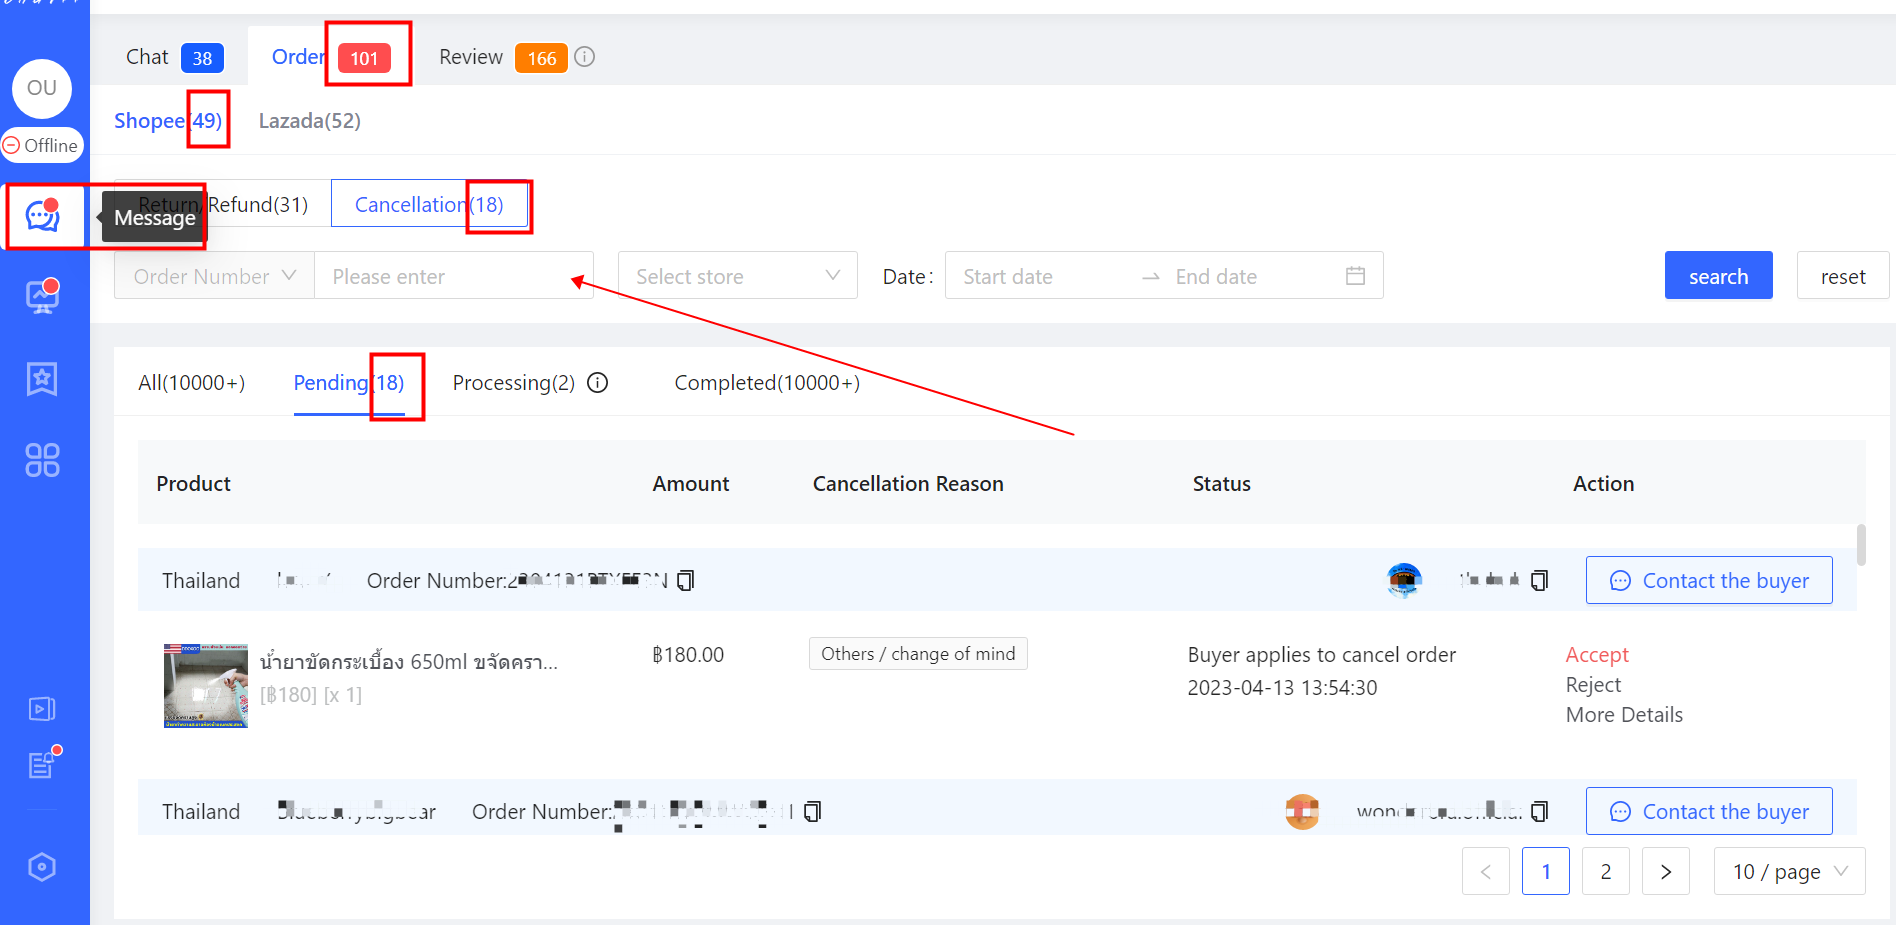
The aforementioned numbers indicate agents that these are high-priority after-sales orders that require processing. Agents should focus more of their energy on this part of the work because it generates high value.
Clicking the “Pending” button will display a list of “Cancellation” requests that require timely handling by agents. Agents can also handle “Cancellation” requests for a selected store by using “Select store” option, or by searching and handling “Cancellation” requests for a specified time period using the date function.
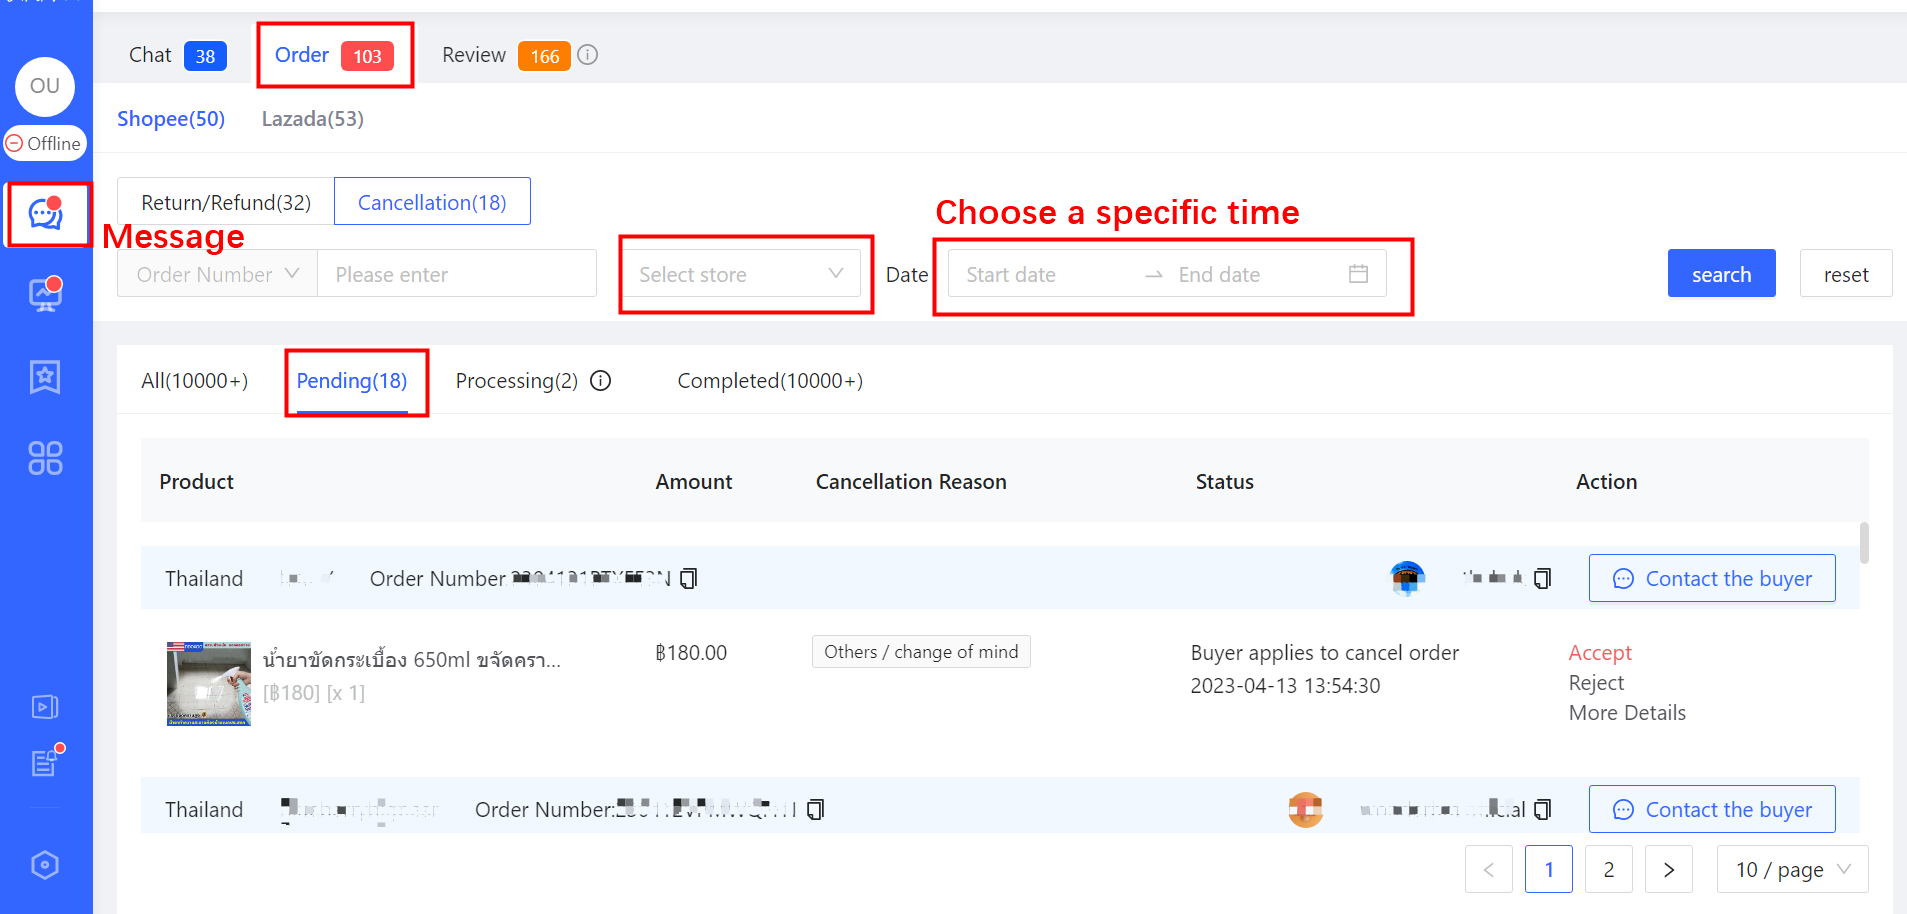
Shopee
The agent can click the “Contact the buyer” button to establish contact with the buyer and understand detailed reason for the cancellation. Then the agent can give a solution and guide the buyer to either withdraw the “Cancellation” or place a new order after previous cancellation. Eventually follow up the order timely.
If the goods have not been shipped: If the buyer insists on canceling the order or wants to place a new order with different size/color/voucher code etc, the agent can click “Accept” to agree to cancel the order.
If the goods have actually been shipped: The agent can choose to “Accept” or “Reject” the cancellation request based on the status of the shipment (whether it can still be intercepted).
Overall, it is recommended to first guide the buyer to withdraw the request or place a new order through communication, in order to retain the order as much as possible.
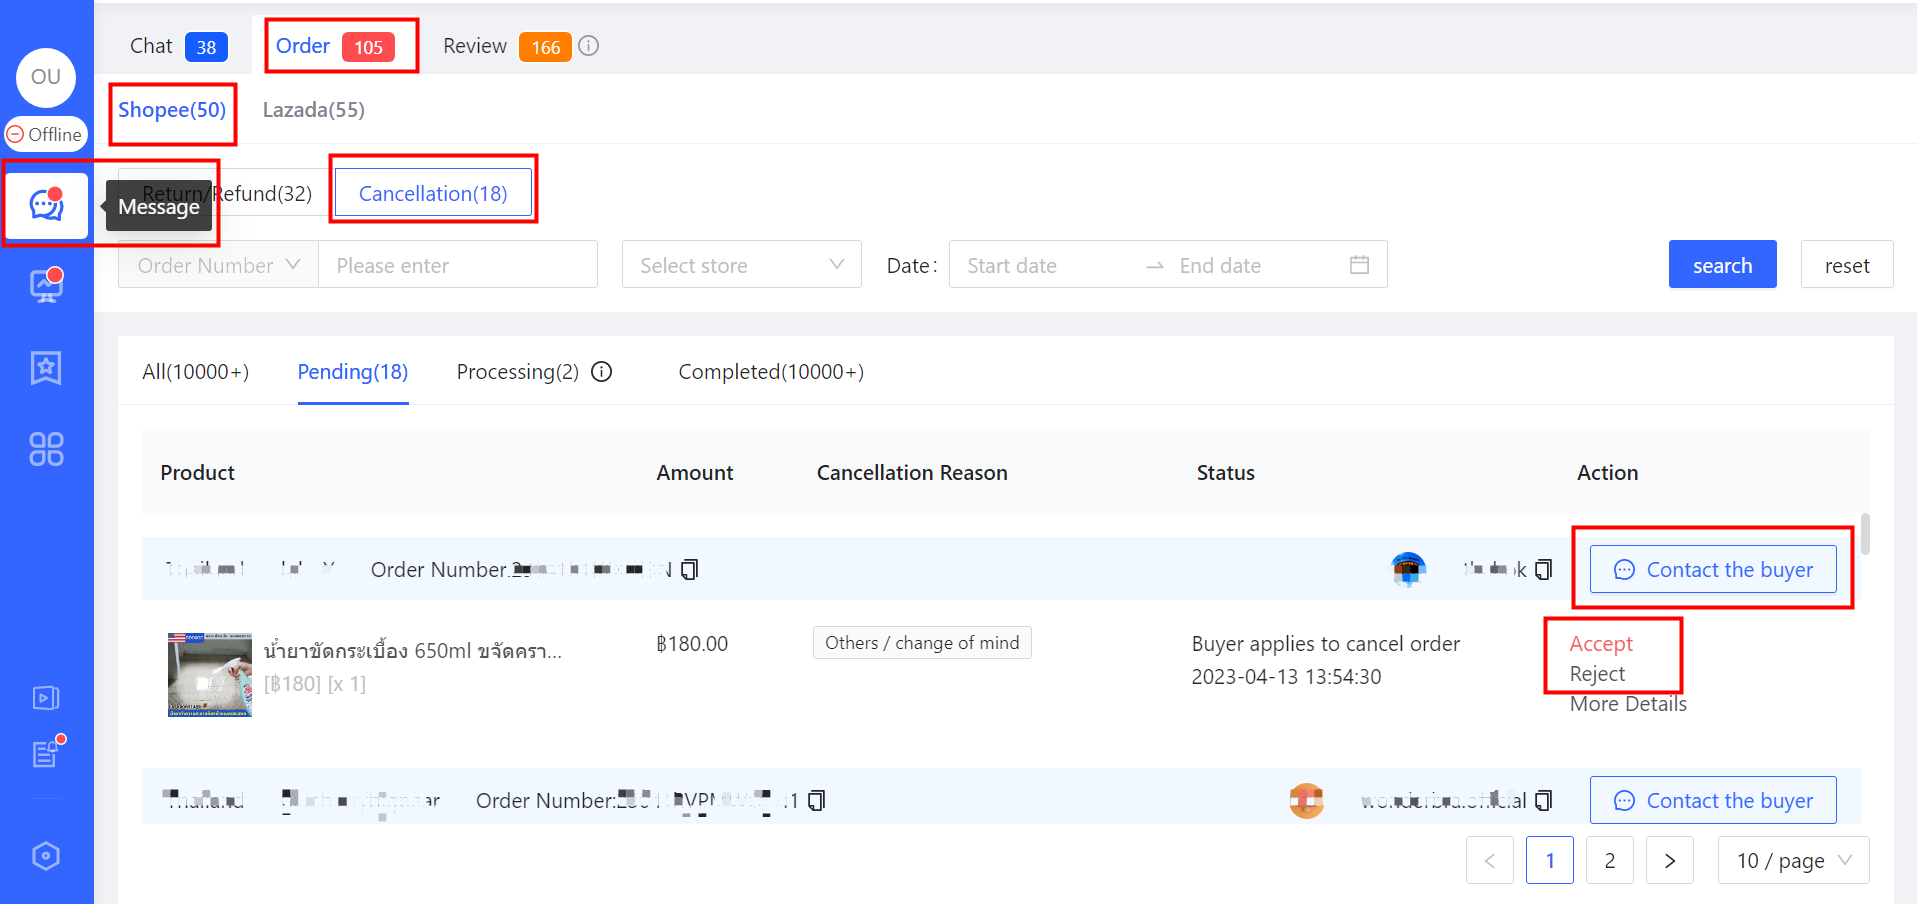
Notes:
(1)Not all “Cancellation” requests require the seller to take action to “Accept/Reject”. If the order is an “Unpaid Order” or a “Recently Placed Order that the seller has not yet clicked to ship”, and the buyer requests for cancellation, the marketplace will automatically approve the request.
(2)The seller needs to handle “Cancellation” requests timely. If the seller does not “Accept/Reject” the request within the designated time after the request is initiated (the time varies for each country site, usually around 1 ~ 2 natural days), marketplace will automatically approve the request. Therefore, please pay attention to handling “Cancellation” requests timely.
Lazada
Due to restrictions from Lazada official API, further operation on “Cancellation” is not supported on ChatPlusAI (such as “Accept/Reject” buyer’s “Cancellation” request)
However, it is still recommended to refer to the processing method of Shopee by first clicking “Contact the buyer” to establish contact with the buyer, understand the detailed reason for the buyer’s cancellation, and guide the buyer to withdraw the “Cancellation” request or place a new order after cancellation to follow up the order timely.
Currently, ChatPlusAI is actively communicating with Lazada team to lift the interface restrictions, in order to ensure that all relevant operations are supported on ChatPlusAI.
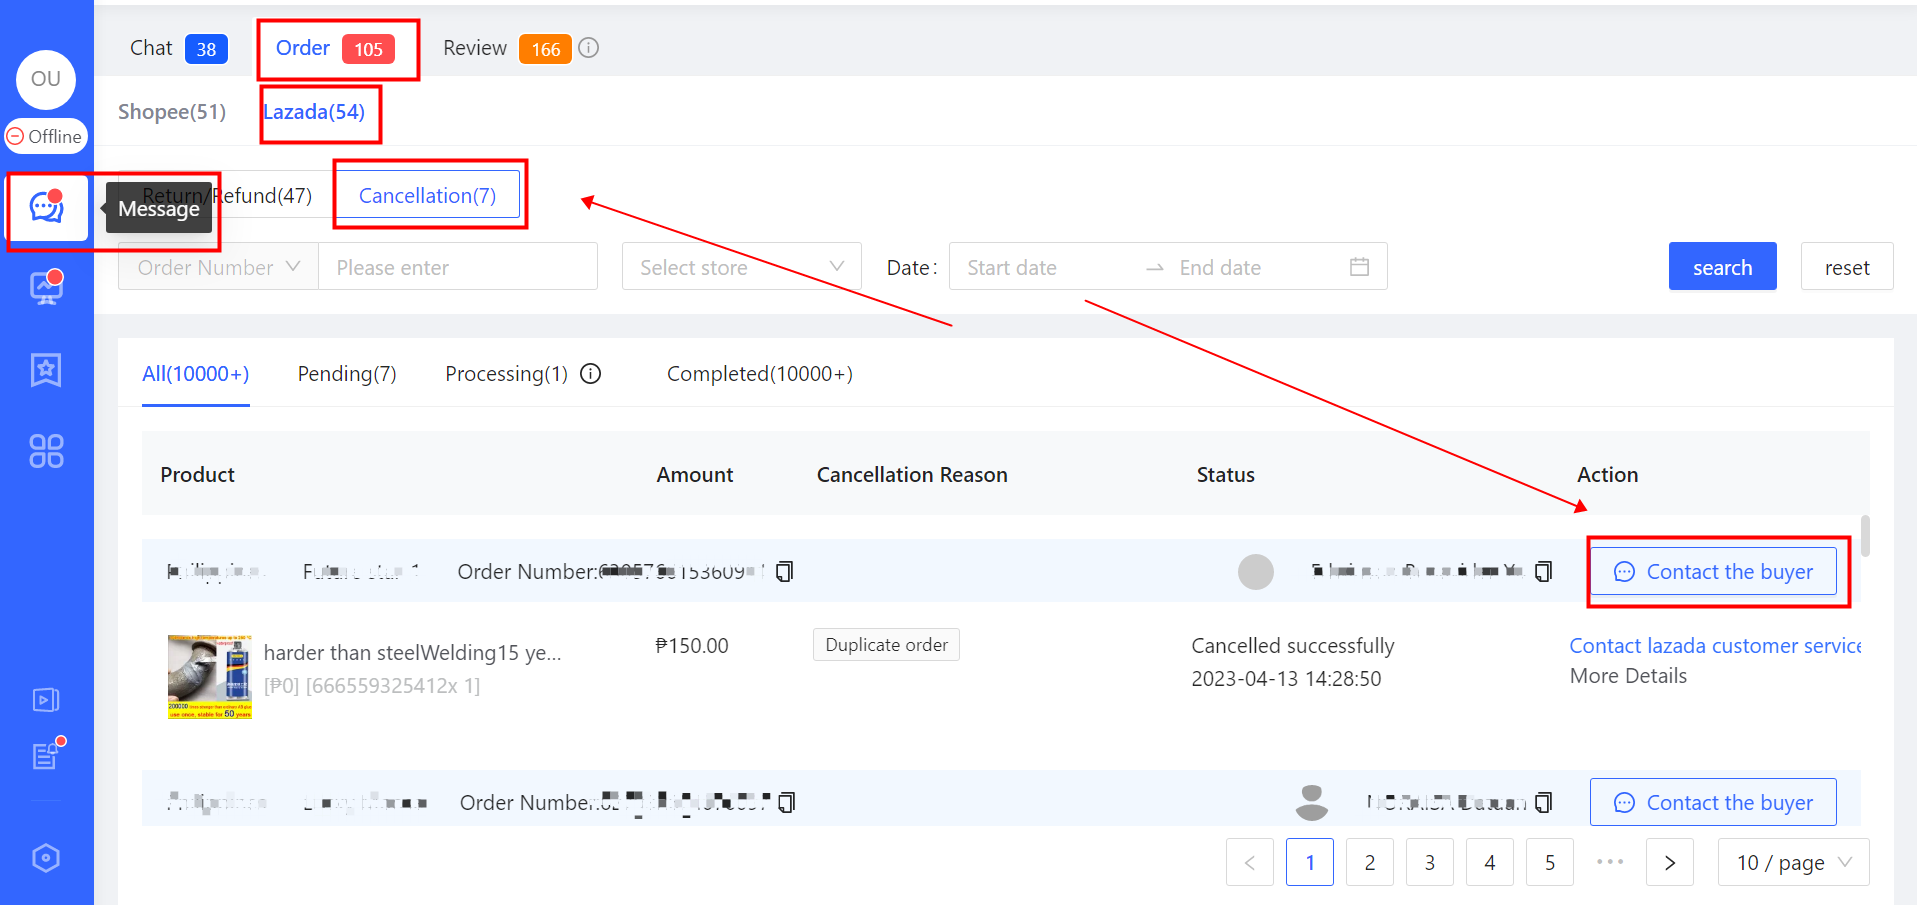
TikTok
Due to restrictions from Tiktok official API, ChatPlusAI currently only supports partial “Cancellation” related operations for Tiktok.
“Accept” buyer’s “Cancellation” request is currently supported, whereas “Reject” buyer’s “Cancellation” request is currently not supported on ChatPlusAI.
Due to TikTok’s official restrictions on “sellers cannot proactively send messages to silent order buyers”, the feature of “Contact the buyer” is currently not supported.
Note: Silent order buyers refer to buyers who have not inquired the seller before or after placing an order.
ChatPlusAI is actively communicating with Tiktok official team to lift the interface restrictions, in order to ensure that all relevant operations and reasonable buyer touch are supported on ChatPlusAI. Tiktok will soon open up the capability to proactively send messages to silent order buyers.
Note: Due to the different cancellation processing and API restrictions across marketplaces such as Shopee, Lazada, and TikTok, ChatPlusAI handles “Cancellation” separately for each marketplace.
Return/Refund Follow up
ChatPlusAI aggregates all authorized stores return/refund orders in real time from various marketplaces such as Shopee, Lazada, and Tiktok in one place for easy viewing and processing, greatly improving the efficiency of agents.
Moreover, it puts orders with high risk into a strong reminder mode, reminding agents to respond as soon as possible, thus increasing the return/refund retrieval rate.
Permission to Handle Return/Refund
To process “Return/Refund”, it is important to ensure that the agent’s account role has access to the “Visit the Order page” and “Post Sales disposal” permissions. These two permissions are enabled by default for the agent’s account role.
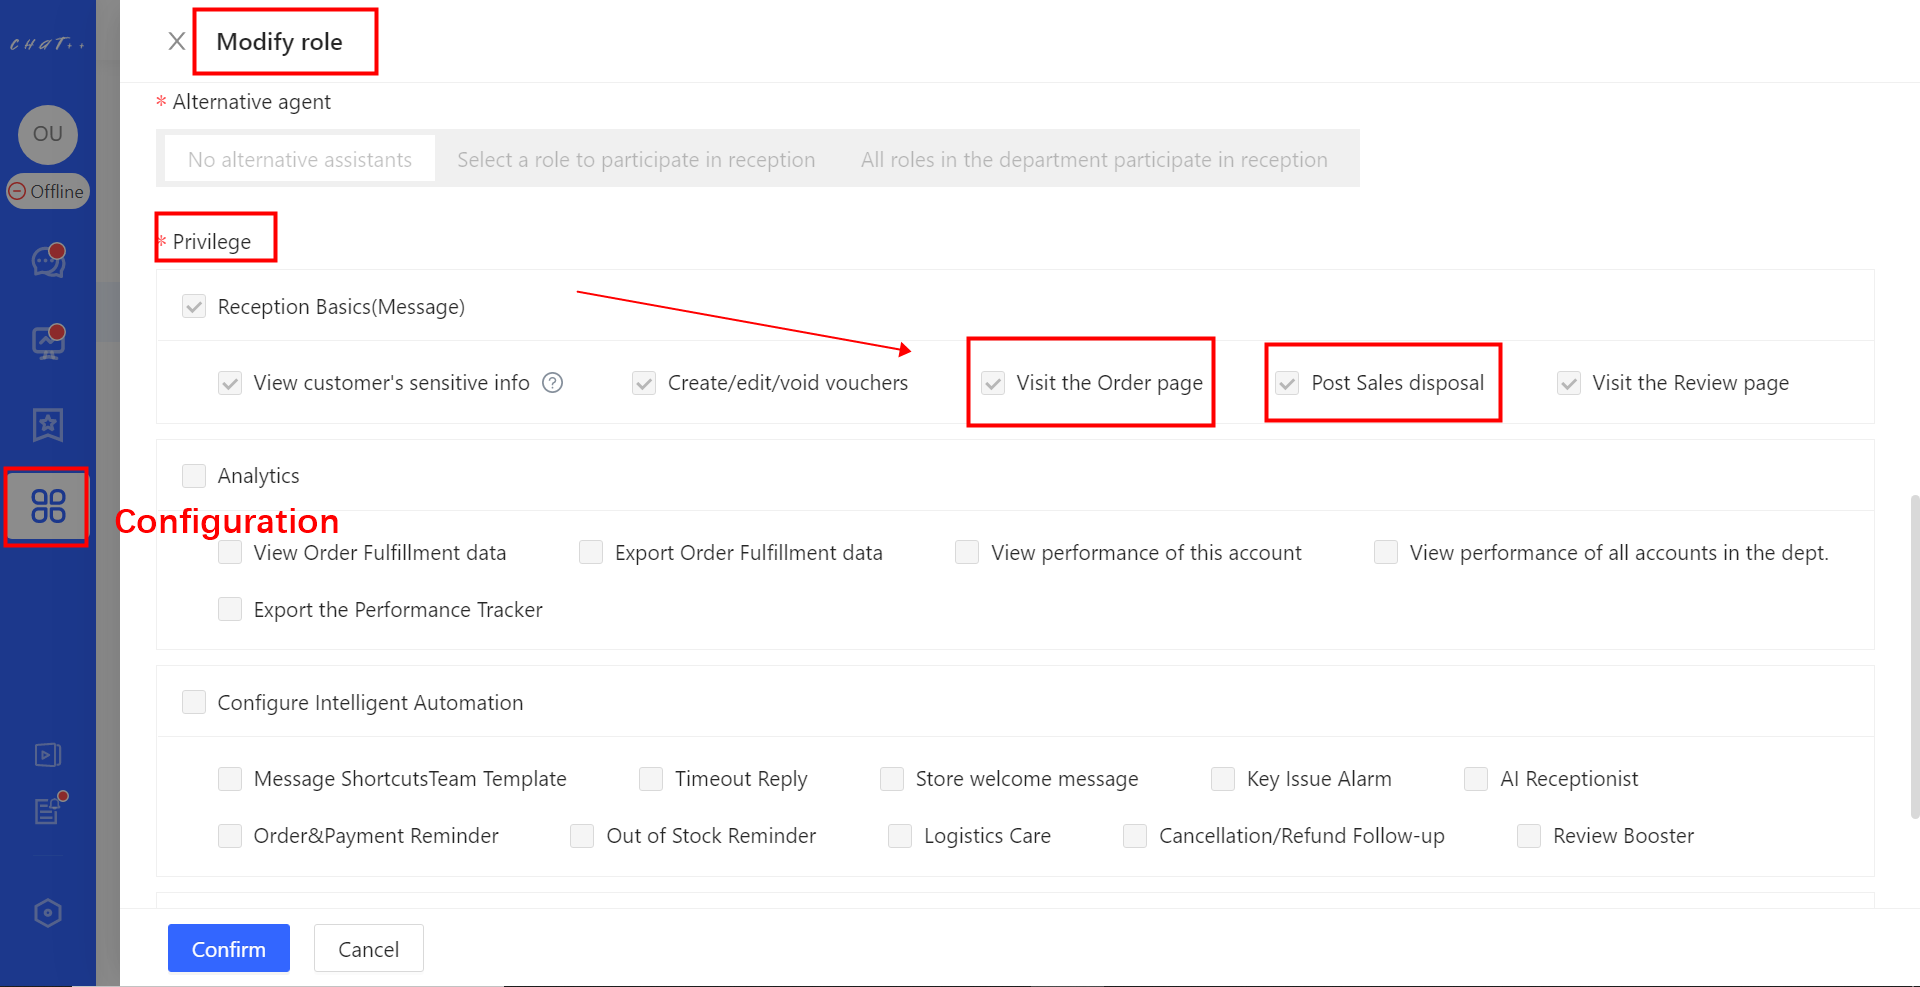
View Return/Refund
Click the “Message” option from the left menu→ Select “Order” → Select marketplace → Select “Return/Refund”
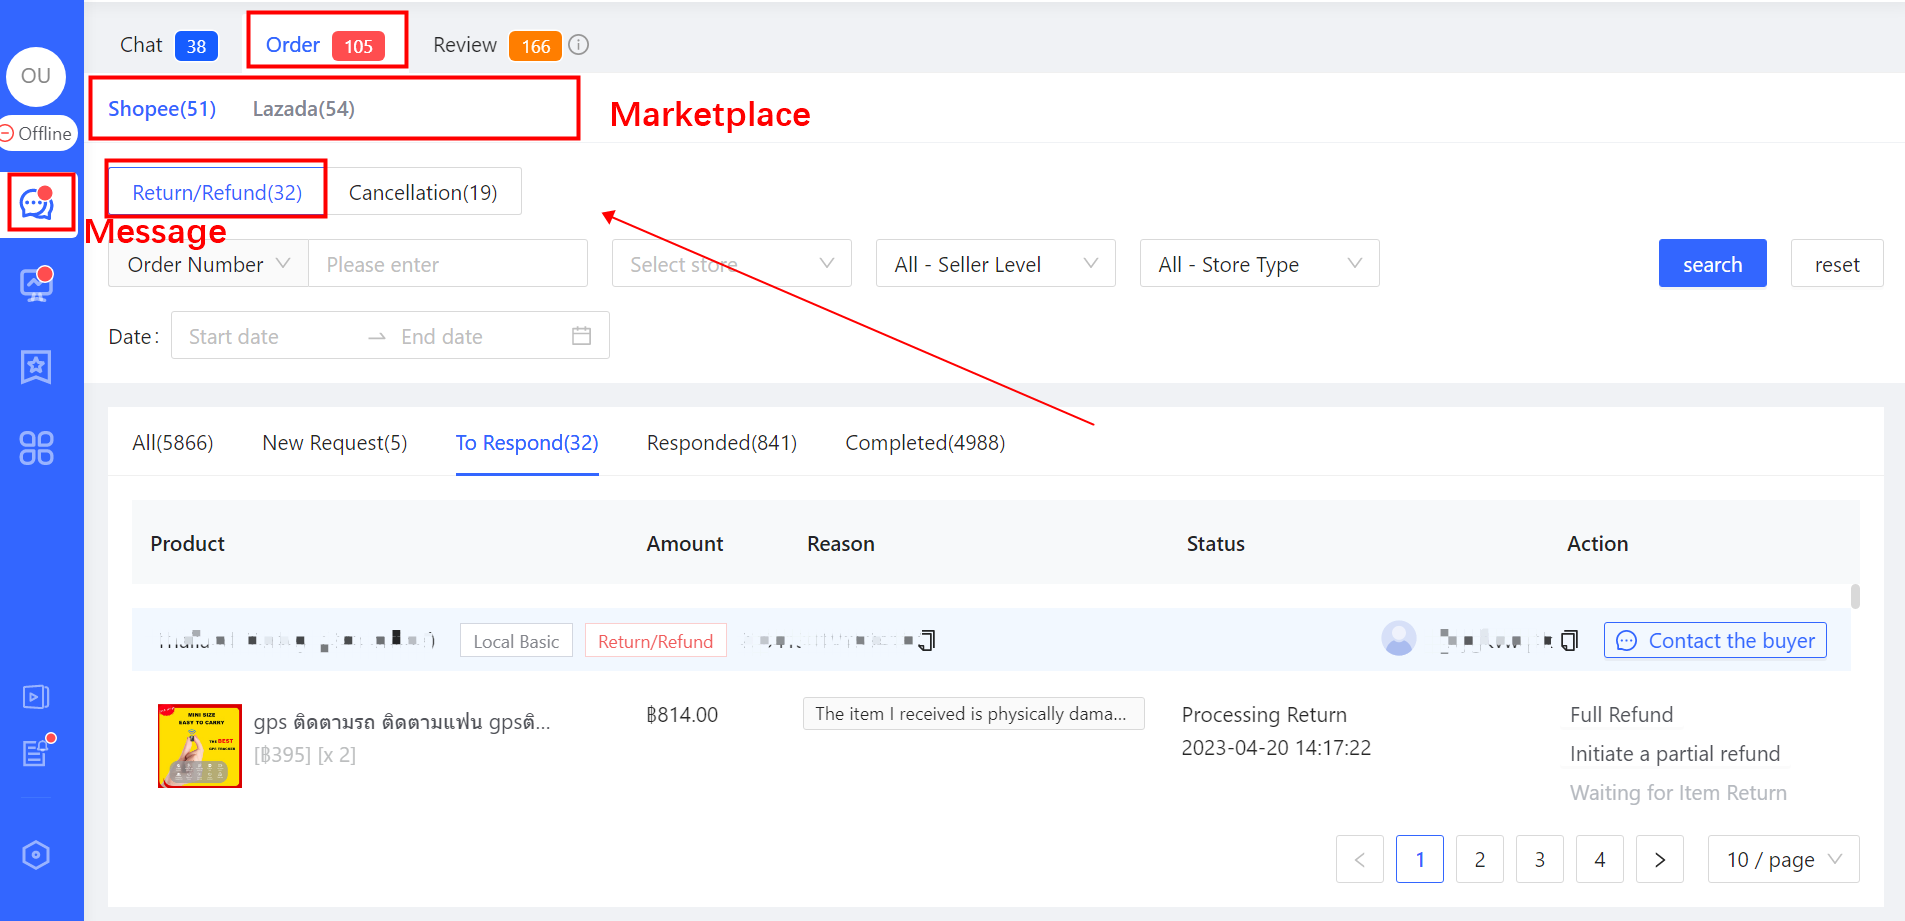
Features in Return/Refund follow-up
The number besides “Order” icon represents the total number of “Return/Refund” and “Cancellation” that require attention from the agent team for all stores under their responsibility. This statistics is updated in real-time, and it is recommended that the agent team promptly intervene and contact the buyers to negotiate order cancellation upon seeing the notification, as the buyers are more likely to be online shopping at this time, which greatly increase the success of order recovery.
Search Return/Refund Orders: ChatPlusAI supports searching based on order number, return/refund number, seller level, store type, and request time, which satisfies the different processing needs of agents.
Paginate Orders by Processing Status: To improve the efficiency of return/refund processing, orders are classified into different processing statuses: New Request, To Respond, Responded, Completed and All orders. Due to the varies from different marketplace, the processing statuses are different. (Example showed is from Shopee.)
Below the Processing Status shows the list of return/refund and related operations agents might make.
Due to differences in the return/refund process or API capabilities of various marketplace, the following paragraph will explain how to handle return/refund requests for each marketplace respectively.
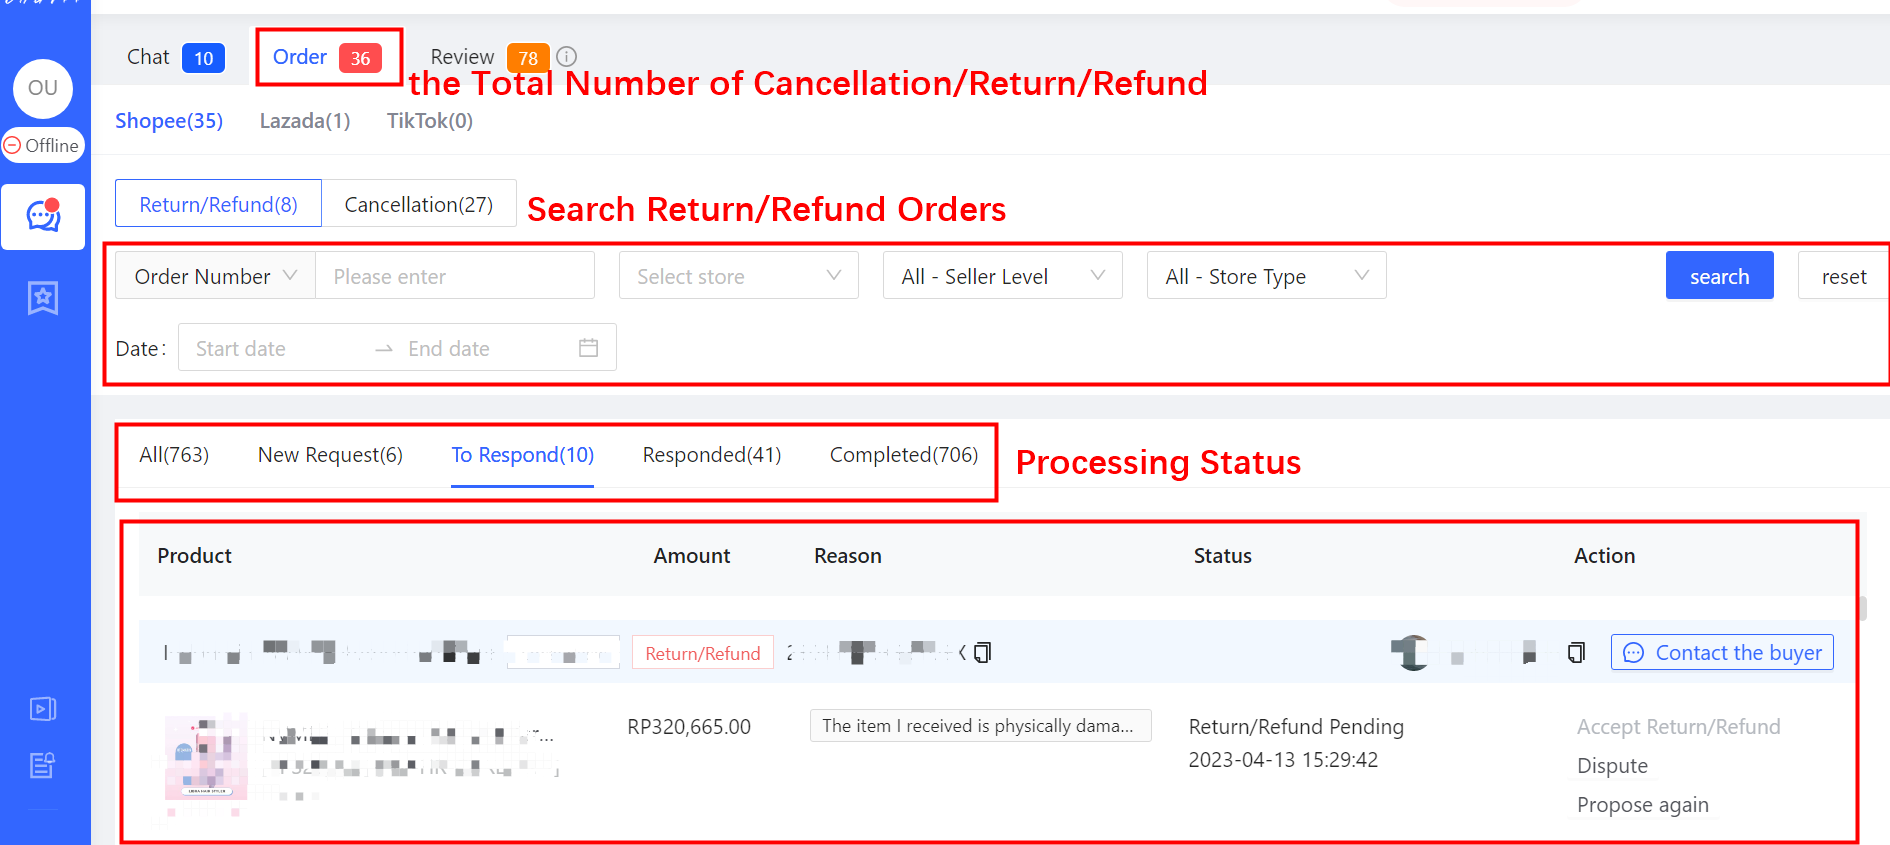
How to handle “Return/Refund”
The definitions of several key numbers
The sum of “Return/Refund” and “Cancellation” pending processing across all marketplaces is displayed as the value in while font on a red background to the right of the “Order” button.
The number besides each marketplace indicates the total number of pending “return/refund” and “cancellation” on the marketplace. (In the example below, there are 50 pending abandoned orders on Shopee store.)
The numbers besides “Return/Refund” and “Cancellation” indicate the number of pending “Return/Refund” and “Cancellation” on one marketplace. (In the example below, there are 31 return/refund orders to be responded on Shopee.)
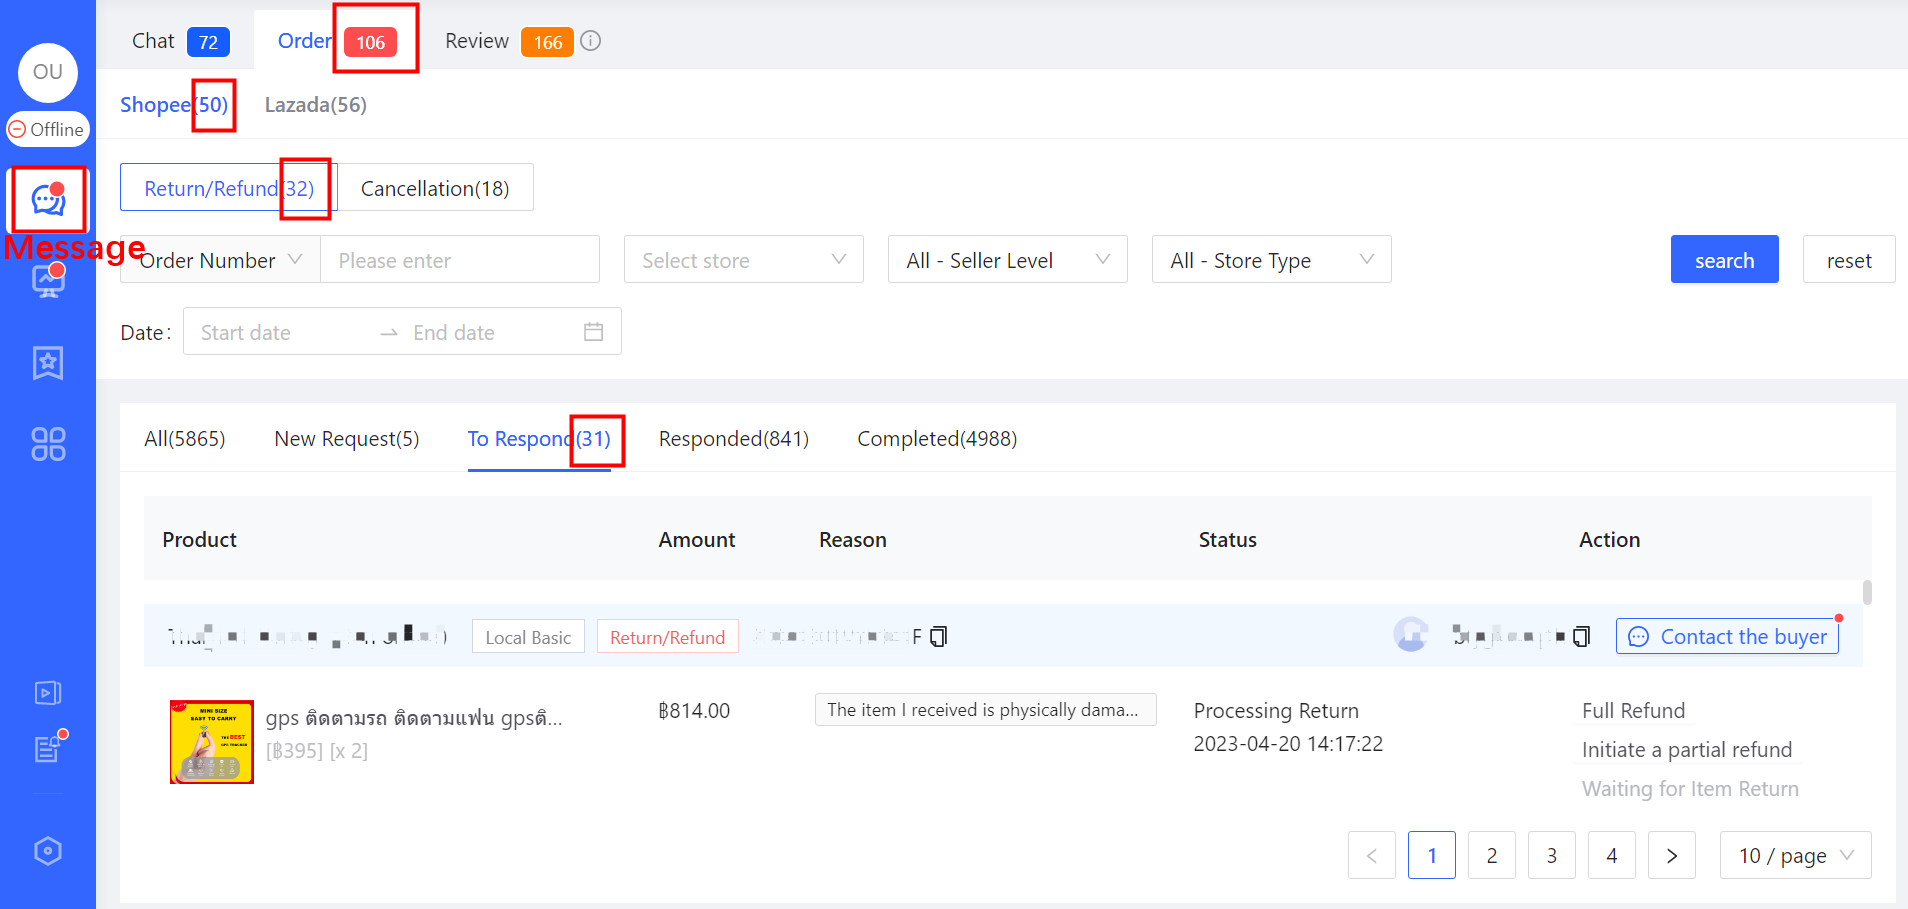
The aforementioned numbers indicate to agents that these are high-priority after-sales orders that require processing. Agents should focus more of their energy on this part of the work because it generates high value.
Shopee
To Respond: The “return/refund” orders in the list need to be handled by the agent timely.
Responded: The agent can see the current progress of handling Return/refund orders such as “Return In Progress”, “Under Shopee Review”, “Refund Approved” and so on.
New Request: The requests in this list are still under “Shopee review”, so there is no need for the agent to intervene temporarily.
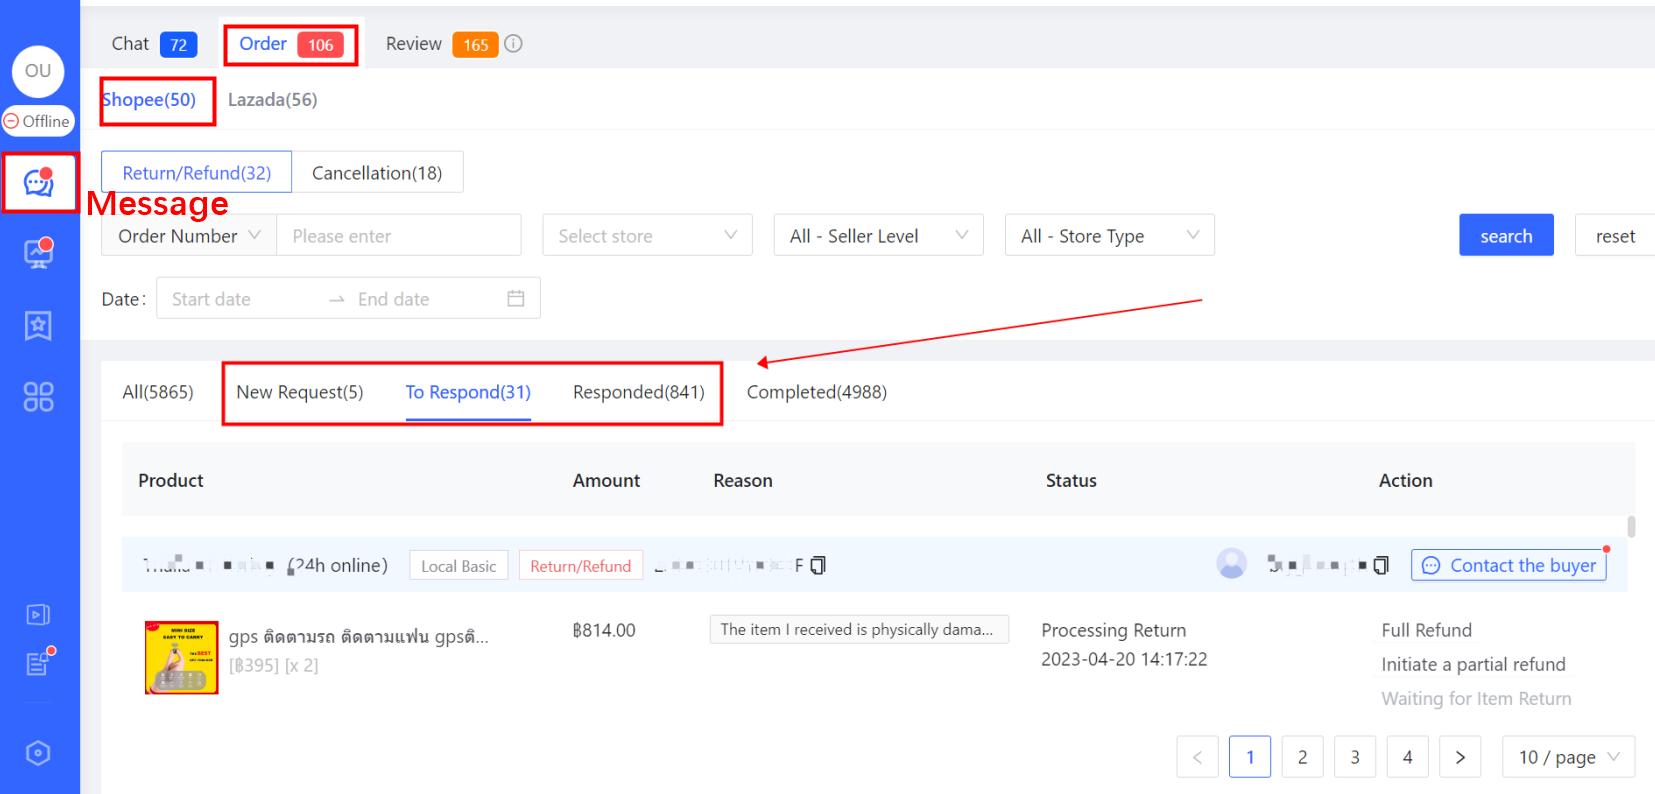
When processing “Return/Refund” orders, the agent can click “ Contact the buyer” , establish contact with the buyer, further understand the buyer’s detailed reasons for return/refund and guide the buyer to cancel the return/refund request, timely following up the order.
For example, if the buyer reports that the package has not been received, the agent can tell the buyer that it has been shipped, guide the buyer to contact the express company and appease him that it will be delivered soon, and then ask the buyer to cancel the request first.
According to the result of communication with the buyer, the agent can make corresponding operation such as Accept or Dispute. Due to the restriction of official interface, some operations are not supported temporarily. ChatPlusAI is actively communicating with Shopee team to lift the interface restrictions.
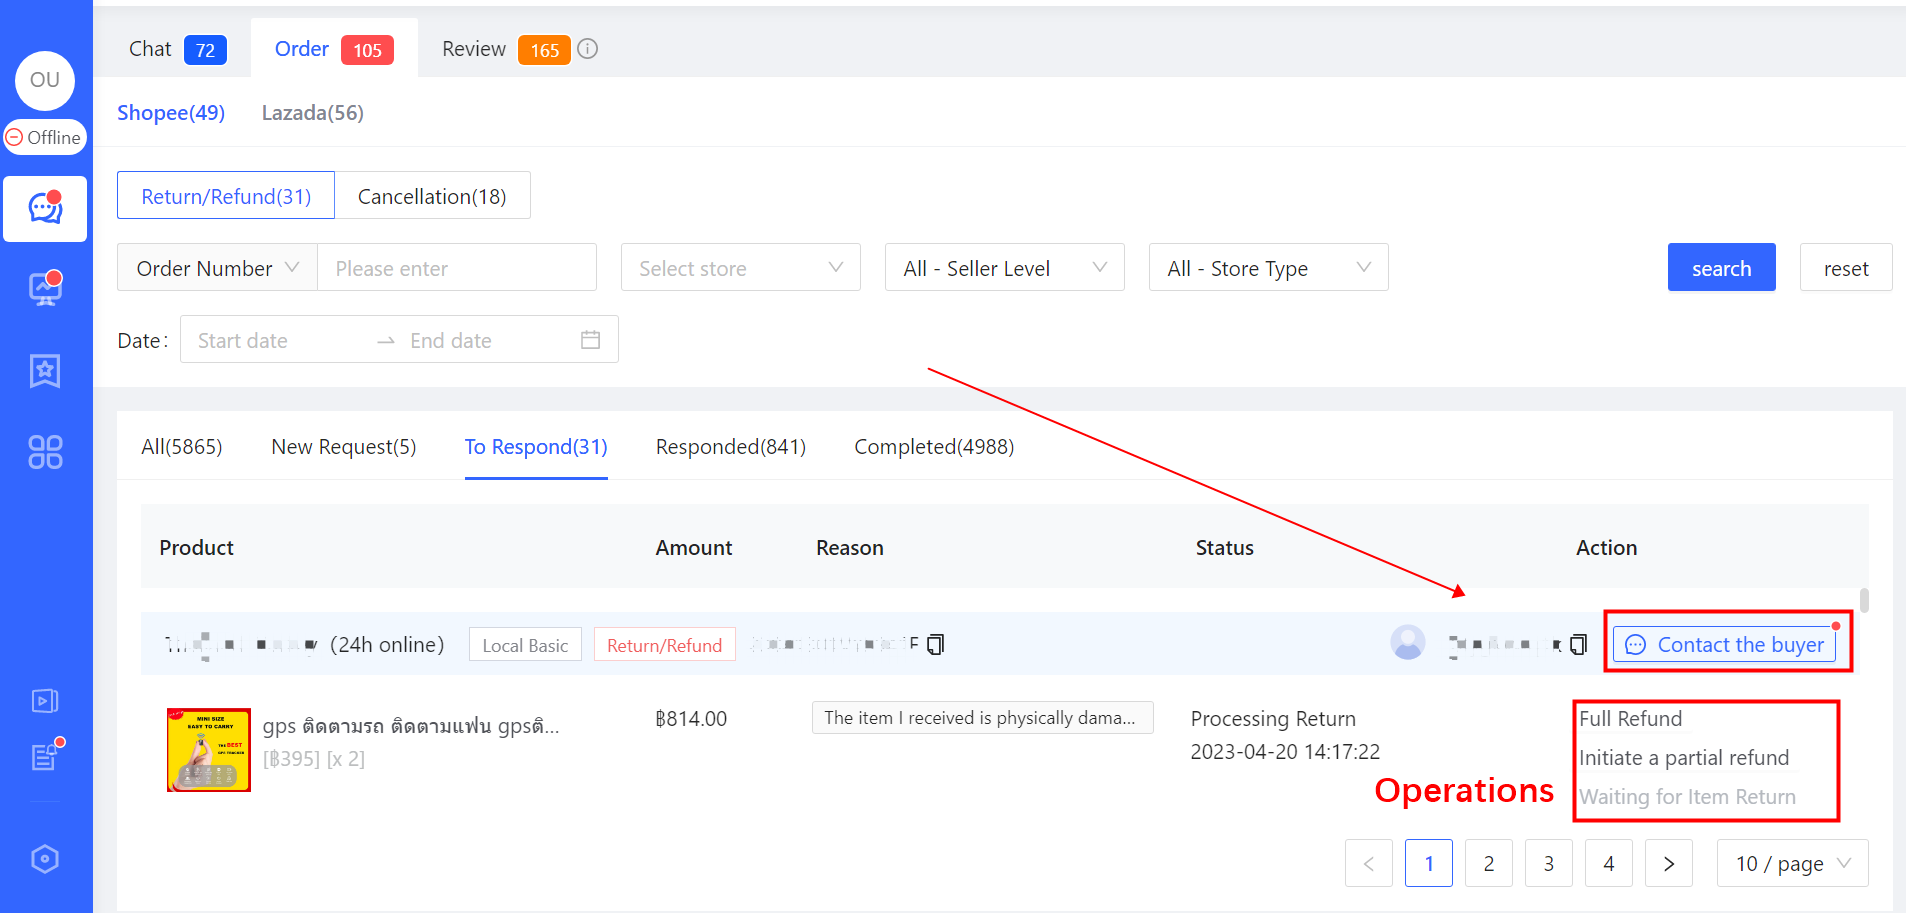
Lazada
Click “New Request”, the “Return/Refund”orders in the list need to be handled by the agent timely.
When processing the “Return/Refund”orders, the agent can refer to the processing method of Shopee by first clicking “Contact the buyer” to establish contact with the buyer, understand the detailed reason for the return/refund, and guide the buyer to withdraw the request to follow up the order timely.
Currently, ChatPlusAI is actively communicating with Lazada team to lift the interface restrictions, in order to ensure that all relevant operations are supported on ChatPlusAI.
According to the result of communication with the buyer, the agent can make corresponding operation such as Accept or Dispute. Due to the restriction of official interface, some operations are not supported temporarily. ChatPlusAI is actively communicating with Lazada team to lift the interface restrictions.
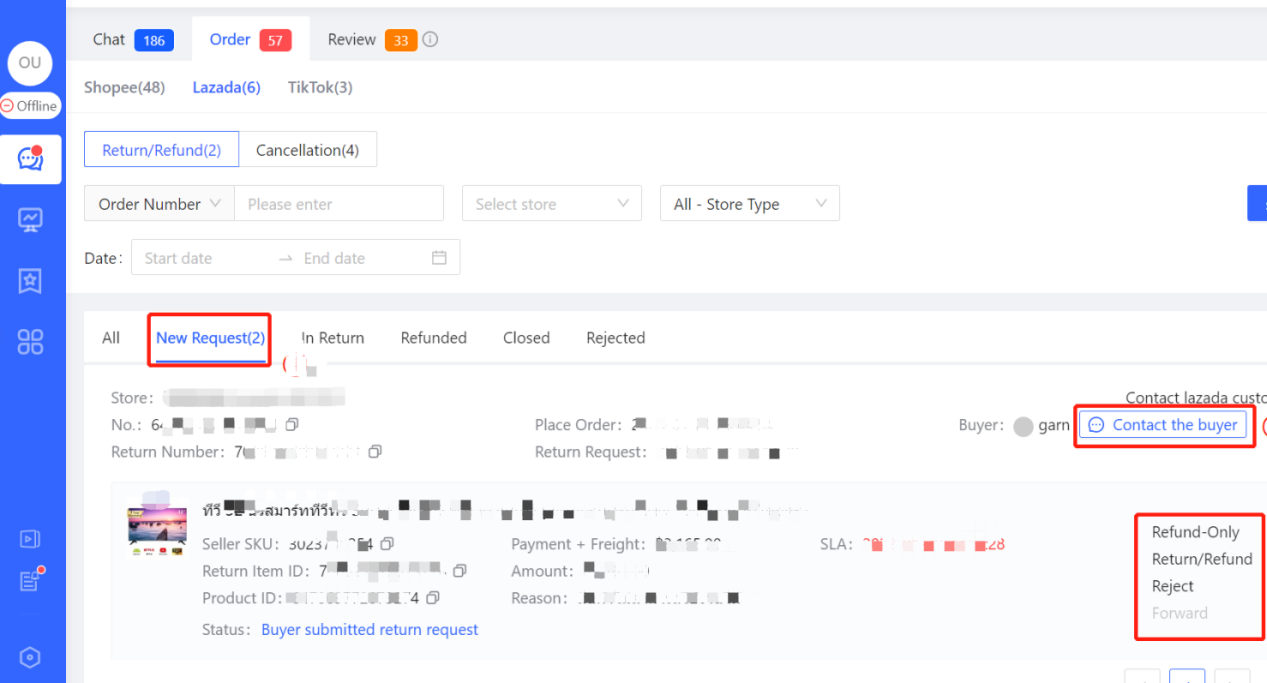
TikTok
Click “Pending”, the “Return/Refund” orders in the list need to be handled by the agent timely.
Processing: The agent can see the current progress of processed Return/refund orders such as wait for buyer’s return, reject and so on.
Due to restrictions from Tiktok official API, ChatPlusAI currently only supports partial “Return/Refund” related operations for Tiktok.
“Accept” buyer’s “Return/Refund” request is currently supported, whereas “Reject” buyer’s “Return/Refund” request is currently not supported.
Due to TikTok's official restrictions on “sellers cannot proactively send messages to silent order buyers”, the feature of “Contact the buyer” is currently not supported.
Note: Silent order buyers refer to buyers who have not inquired the seller before or after placing an order.
ChatPlusAI is actively communicating with Tiktok official team to lift the interface restrictions, in order to ensure that all relevant operations and reasonable buyer touch are supported in ChatPlusAI. Tiktok will soon open up the capability to proactively send messages to silent order buyers.
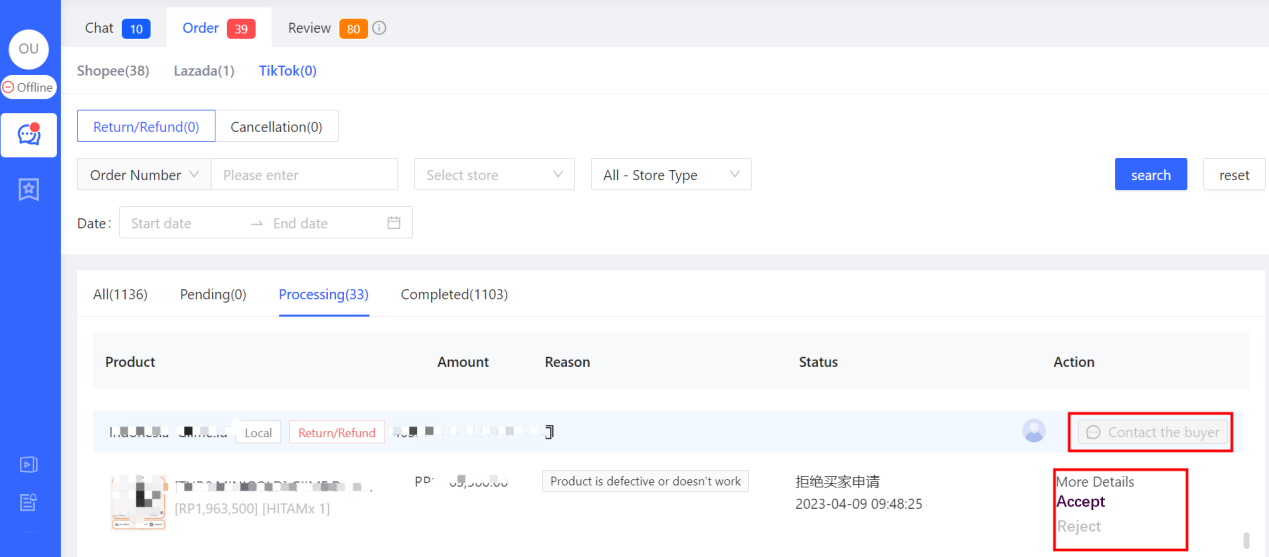
Note: Due to the different “Return/Refund” processing and API restrictions across marketplaces such as Shopee, Lazada, and TikTok, ChatPlusAI handles "Cancellation" separately for each marketplace.
Processing Reviews
It is supported to view/reply to buyer reviews of all Shopee and Lazada stores. ChatPlusAI aggregates all authorized shop negative reviews from various marketplaces such as Shopee, Lazada, and Tiktok in one place and push notification in real time. It will strongly prompt agents to follow up, early intervention to improve the retrieval rate.
Click 「Message」in the left menu-「Review」, enter Review page
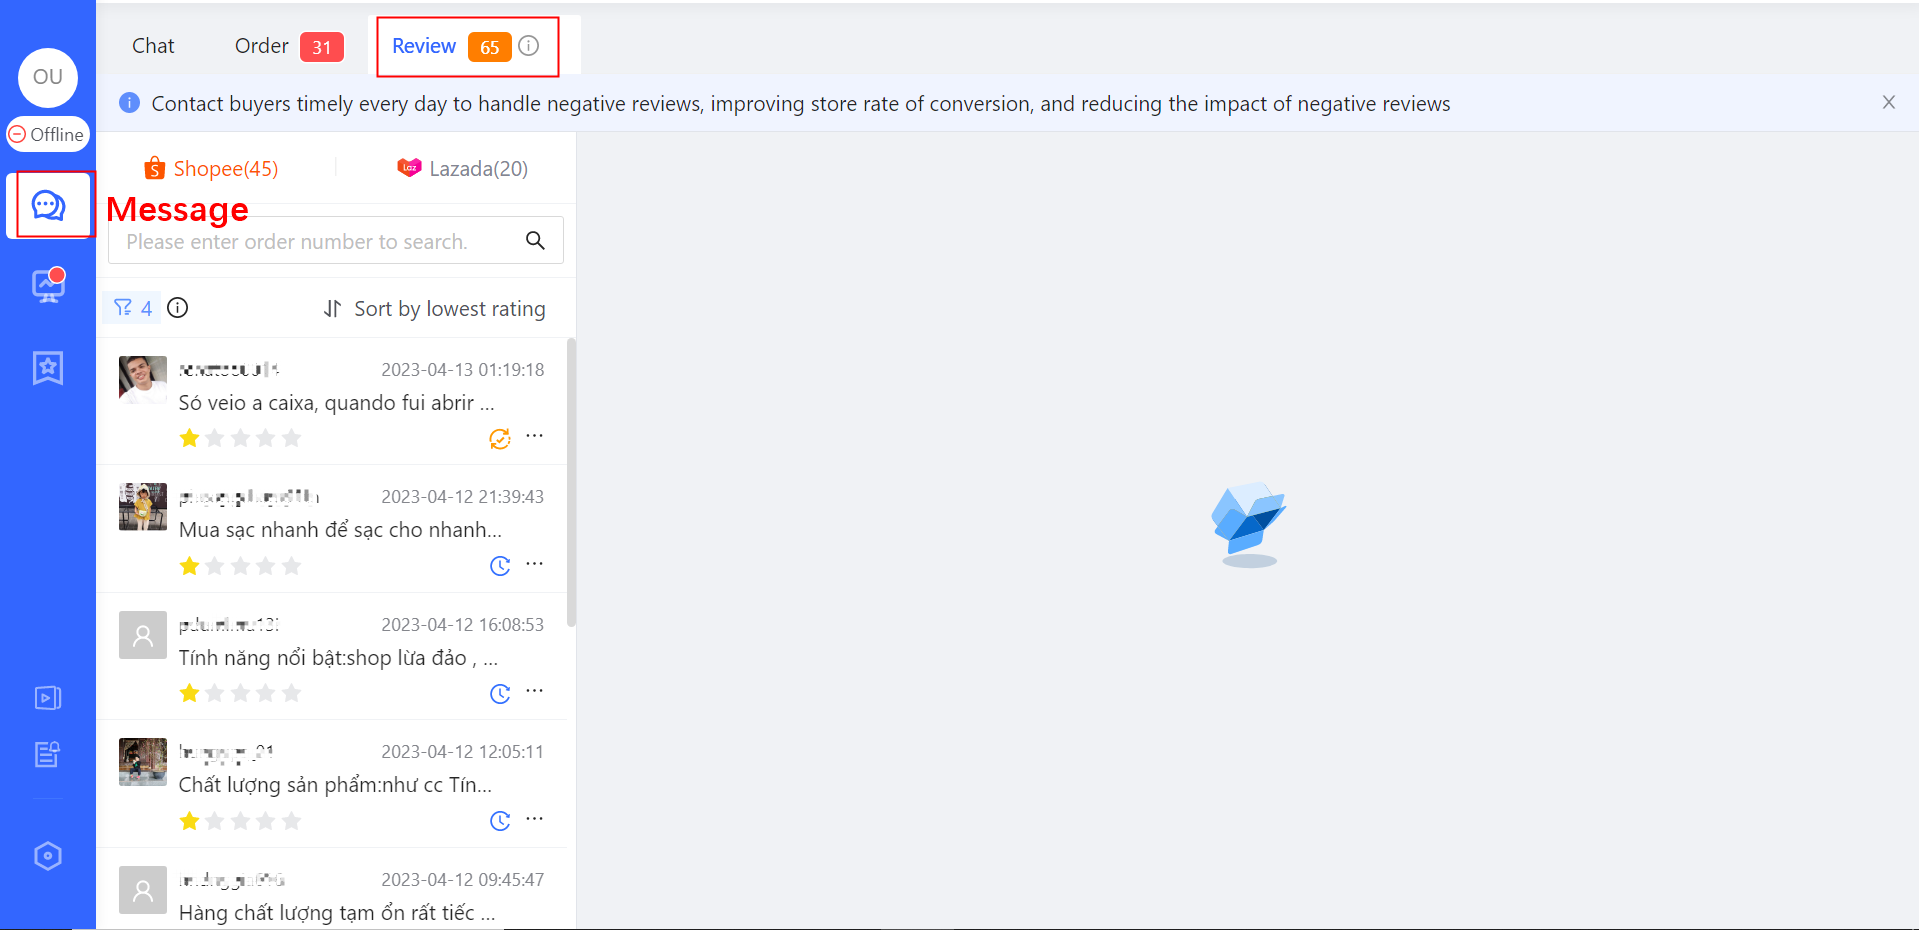
「Review」description
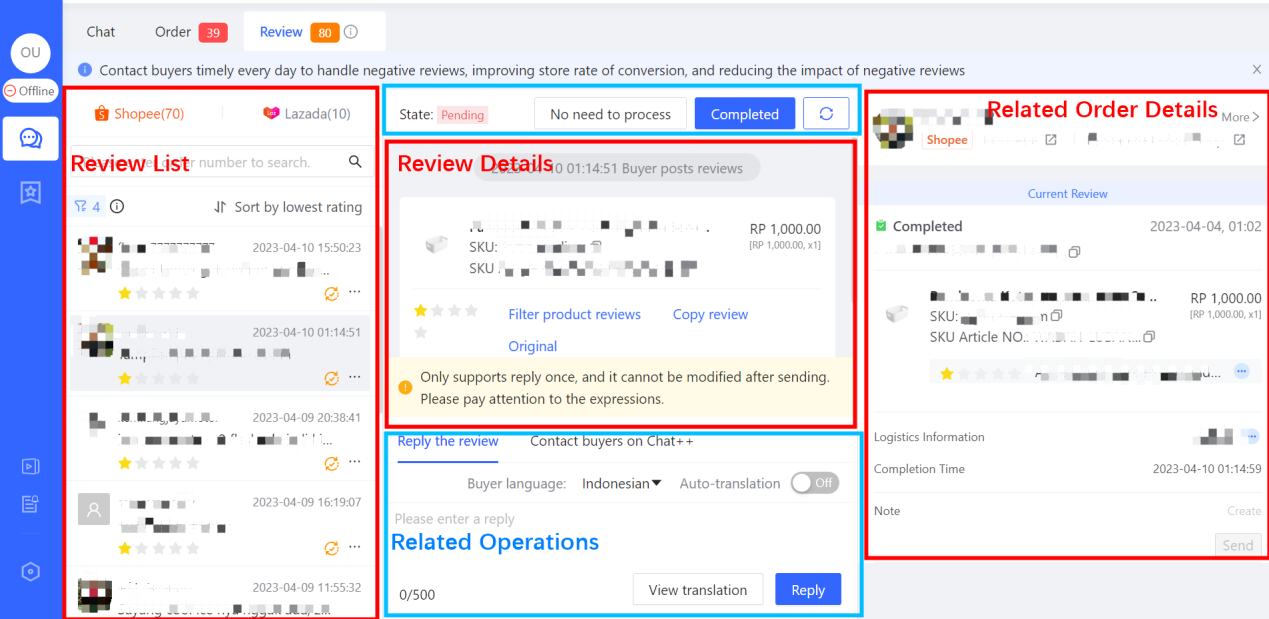
Strong Reminder of Negative Reviews for Follow-up
The definitions of several key numbers
- The number on the right of Shopee icon is the number of 1 ~ 3 star to be pended and processed within 2 days on Shopee.
- The number on the right of Lazada icon is the number of 1 ~ 3 star to be pended and processed within 2 days on Lazada.
- The number with white font on yellow background represents the total number of reviews that meet the conditions (1) and (2) in the stores responsible for the agent.
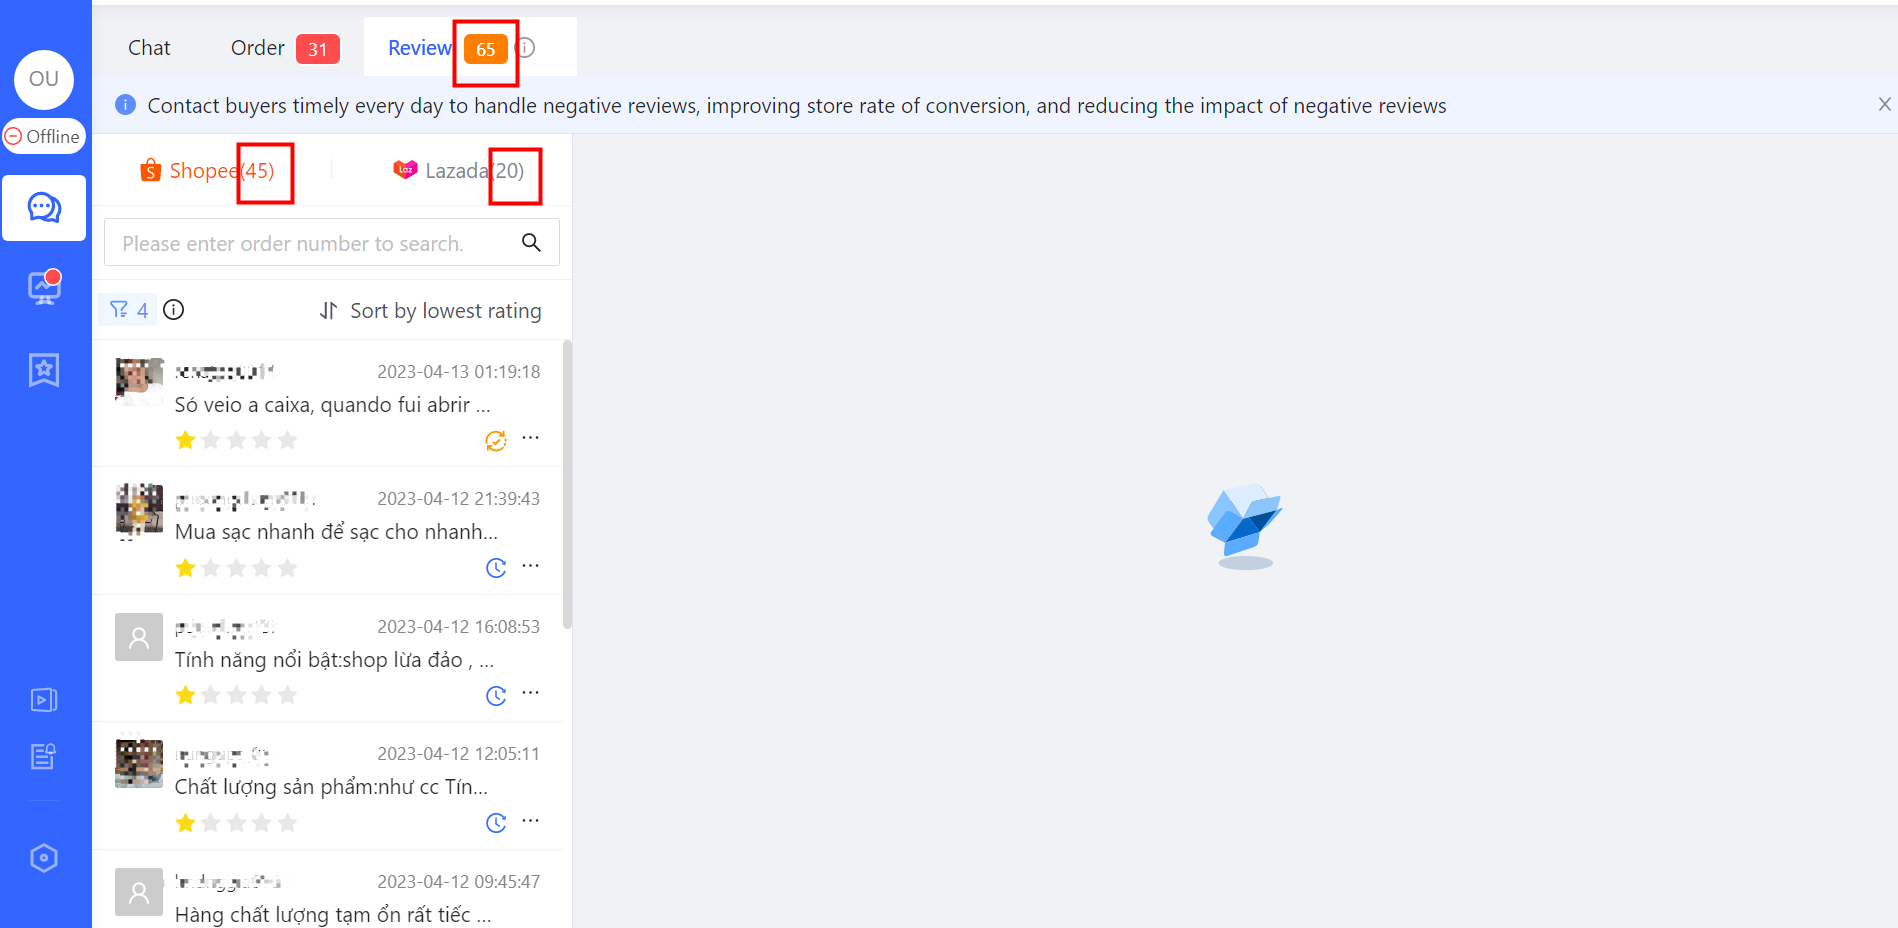
Contact Buyers on ChatPlusAI
After receiving the review push, the agent can click “Contact buyers on ChatPlusAI”. At this time, the buyer is likely to be online and the communication efficiency will be high.
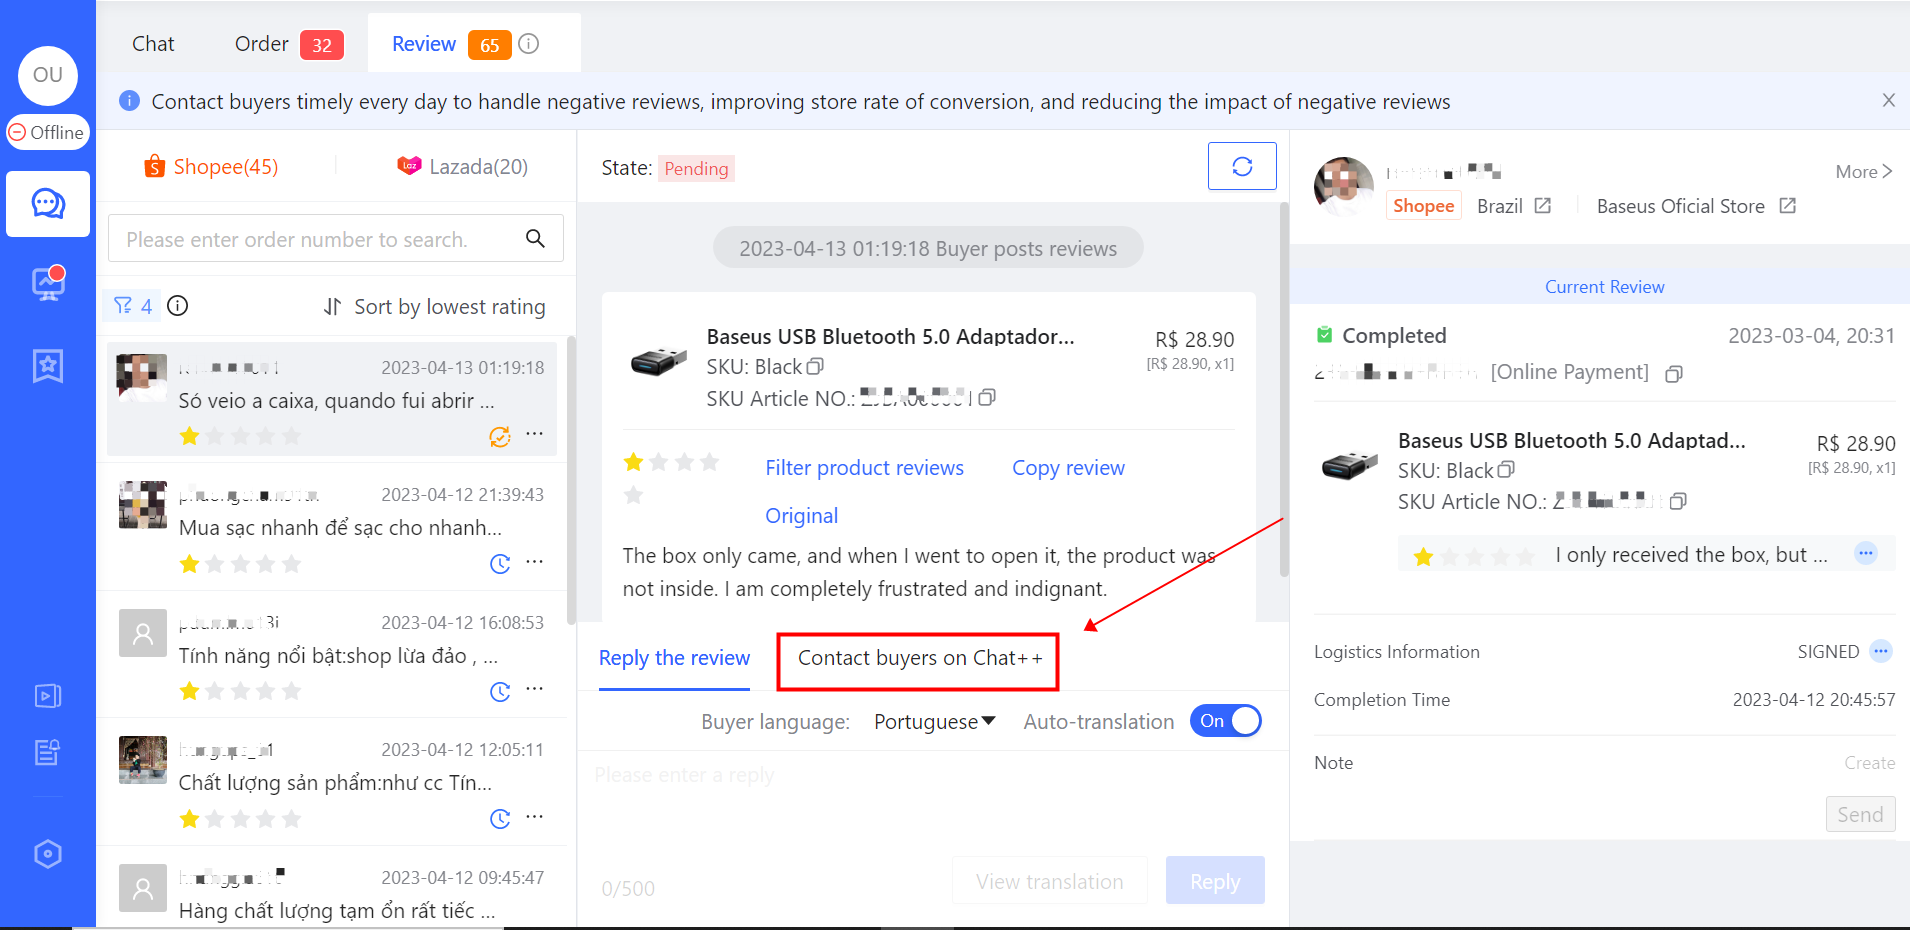
Application scenario Example 1: After receiving a positive review, the agent can contact the buyer to follow the store and become a fan or join the fan group to establish the private traffic of the store.
Application scenario Example 2: After receiving a negative review, the agent can contact the buyer to negotiate to modify the review and intervene early to improve the retrieval rate.
Reply the Review
After inputting message, the agent can enter or click “send” button to send a message to the buyer. If the auto-translation is on (for the agent’s reply translation), it will send the translated content. The default target language of auto-translation comes from the country which the store belongs to, the agent can also adjust it.
Editing Window: The agent can input reply content here, and then press enter or click “send” button to send a message.
Auto-translation: If the auto-translation is on (for the agent’s reply translation), it will send the translated content. The default target language of auto-translation comes from the country which the store belongs to, the agent can also adjust it.
Manual translation: It provides a reply content manual translation button, which is convenient for the agent to check and modify the translated content.
Reply translation check: After the agent inputs the reply content, click “View Translation”, and the system will translate the reply content into the buyer’s language. If there is no error, the agent can click “Reply” button to send the message.
Buyer language: The agent can adjust the buyer language. The default buyer language comes from the country which the store belongs to.
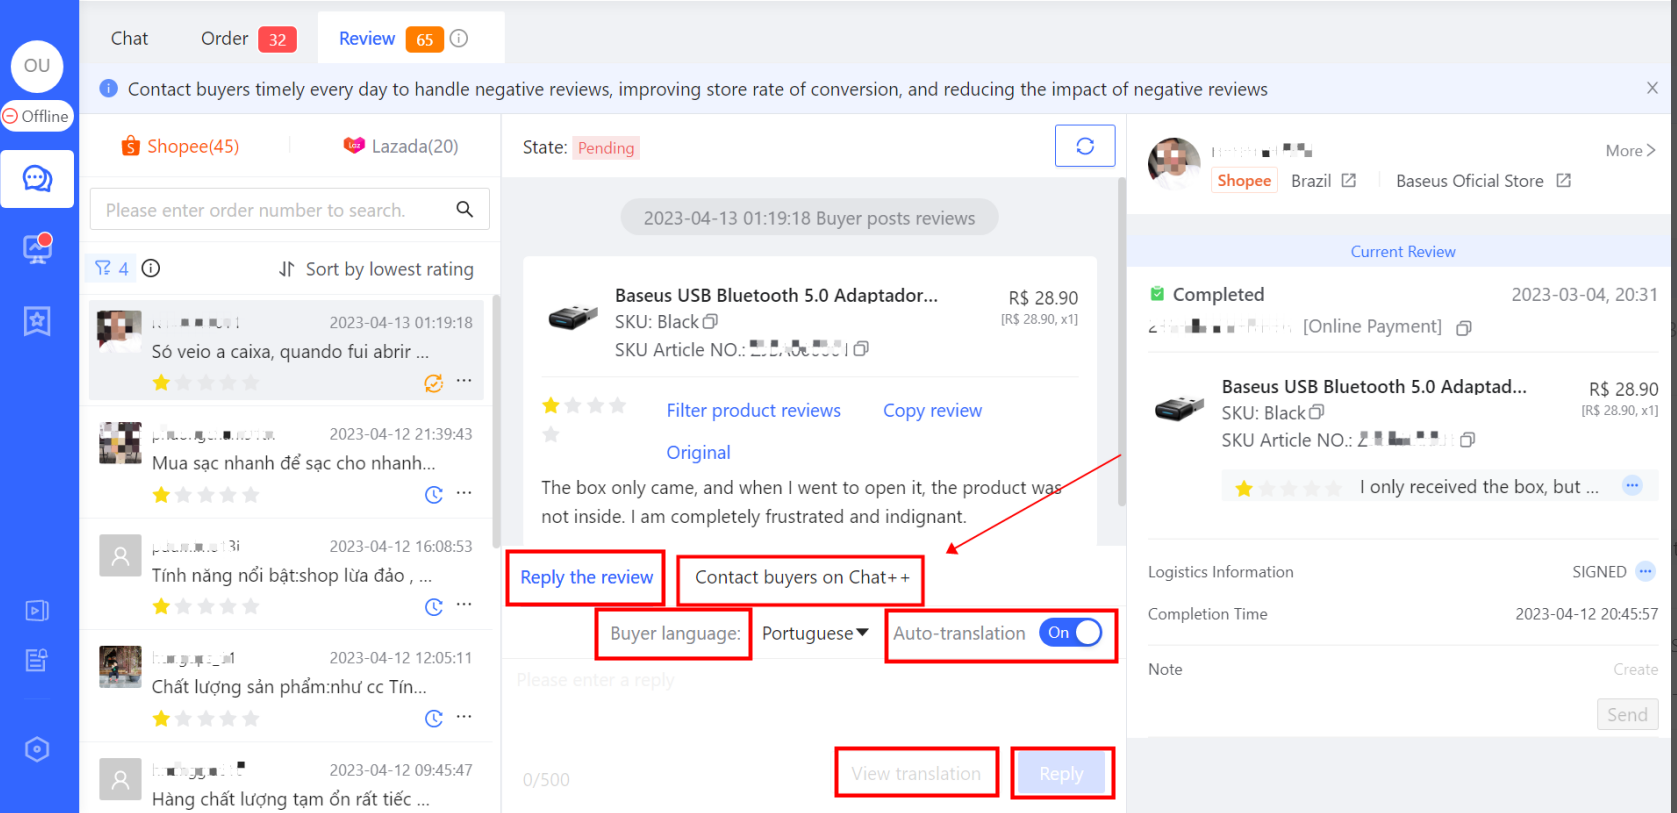
Note:
The official limit for replying the review after translation, whether automatic or manual, is no more than 500 characters.
The review reply can only be sent once (The system gives a warm reminder above the editing window). The content cannot be modified after the reply. Please pay attention to the words of the reply. (This restriction comes from marketplace rules)
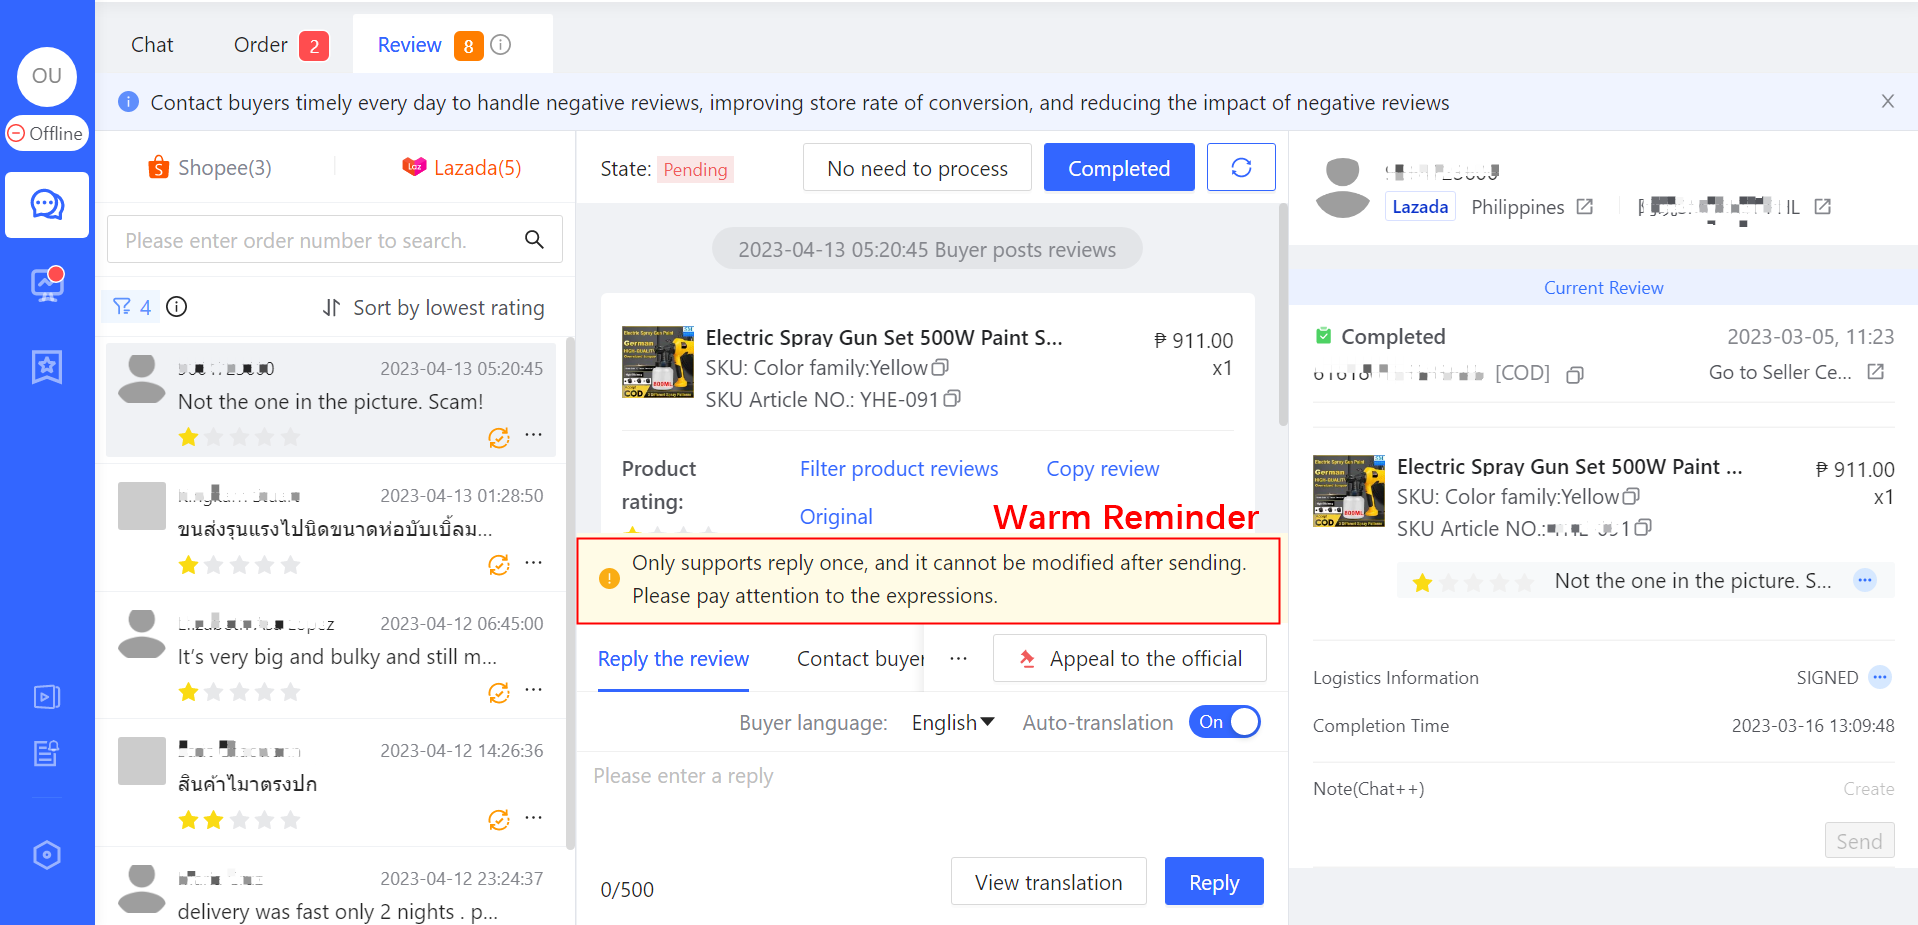
On Lazada, when there is no “text” content in the buyer’s review, it is not allowed to reply. (This restriction comes from the marketplace rules, and the system gives a warm reminder above the editing window.)
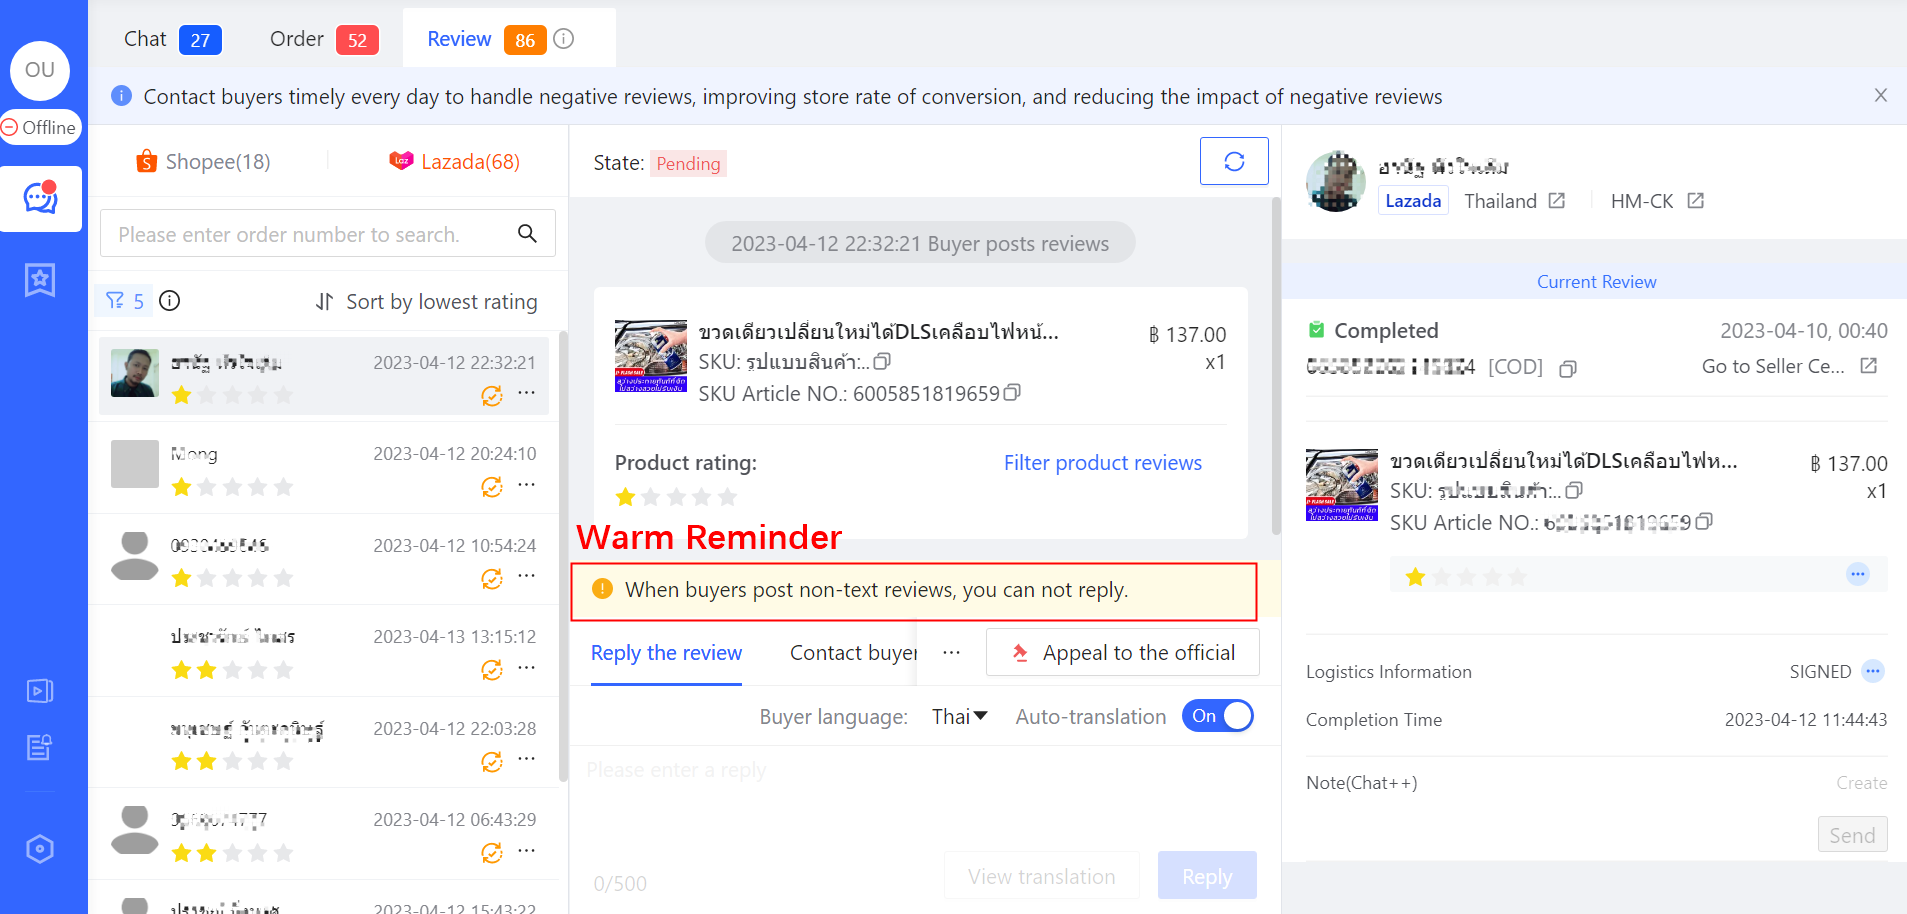
Multidimensional 「Filter Reviews」&「Export Reviews」
The agent can click “Filter” button to to conduct multidimensional filtering and exporting of reviews.
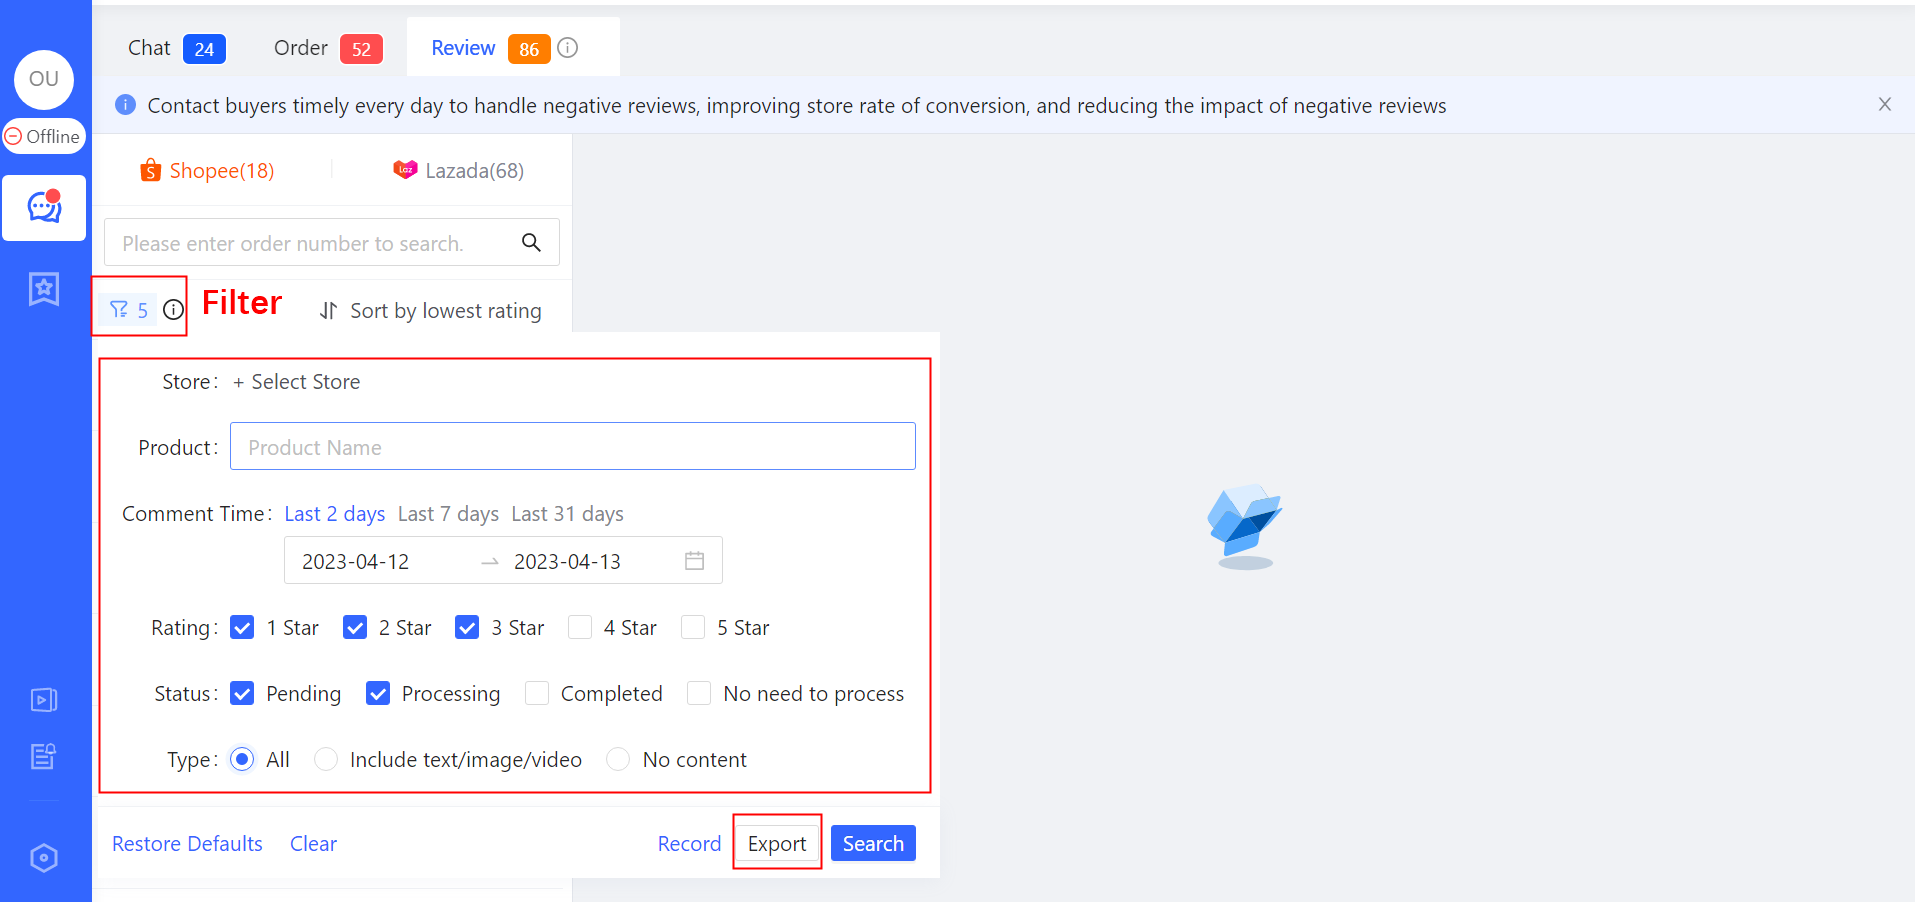
Multidimensional Filtering
- Filtered by stores: It can be selected one or more stores.
- Filtered by products: The reviews of a certain product can be quickly filtered by the product dimension.
- Filtered by the review time: It is supported to view the reviews within 31 days (The default filter is “within 2 days”.)
- Filtered by the rating: Single or multiple different ratings can be selected ○ Lazada supports filtering by four dimensions: "Overall, Quality, Logistics Rating, Seller Service ."
- Filtered by the review status: Single or multiple statuses can be selected (If not selected, “Pending” and “Processing” will be selected by default.).
- Filtered by the review content: The agent can check off the options of review content (include text/image/video), no content and all.
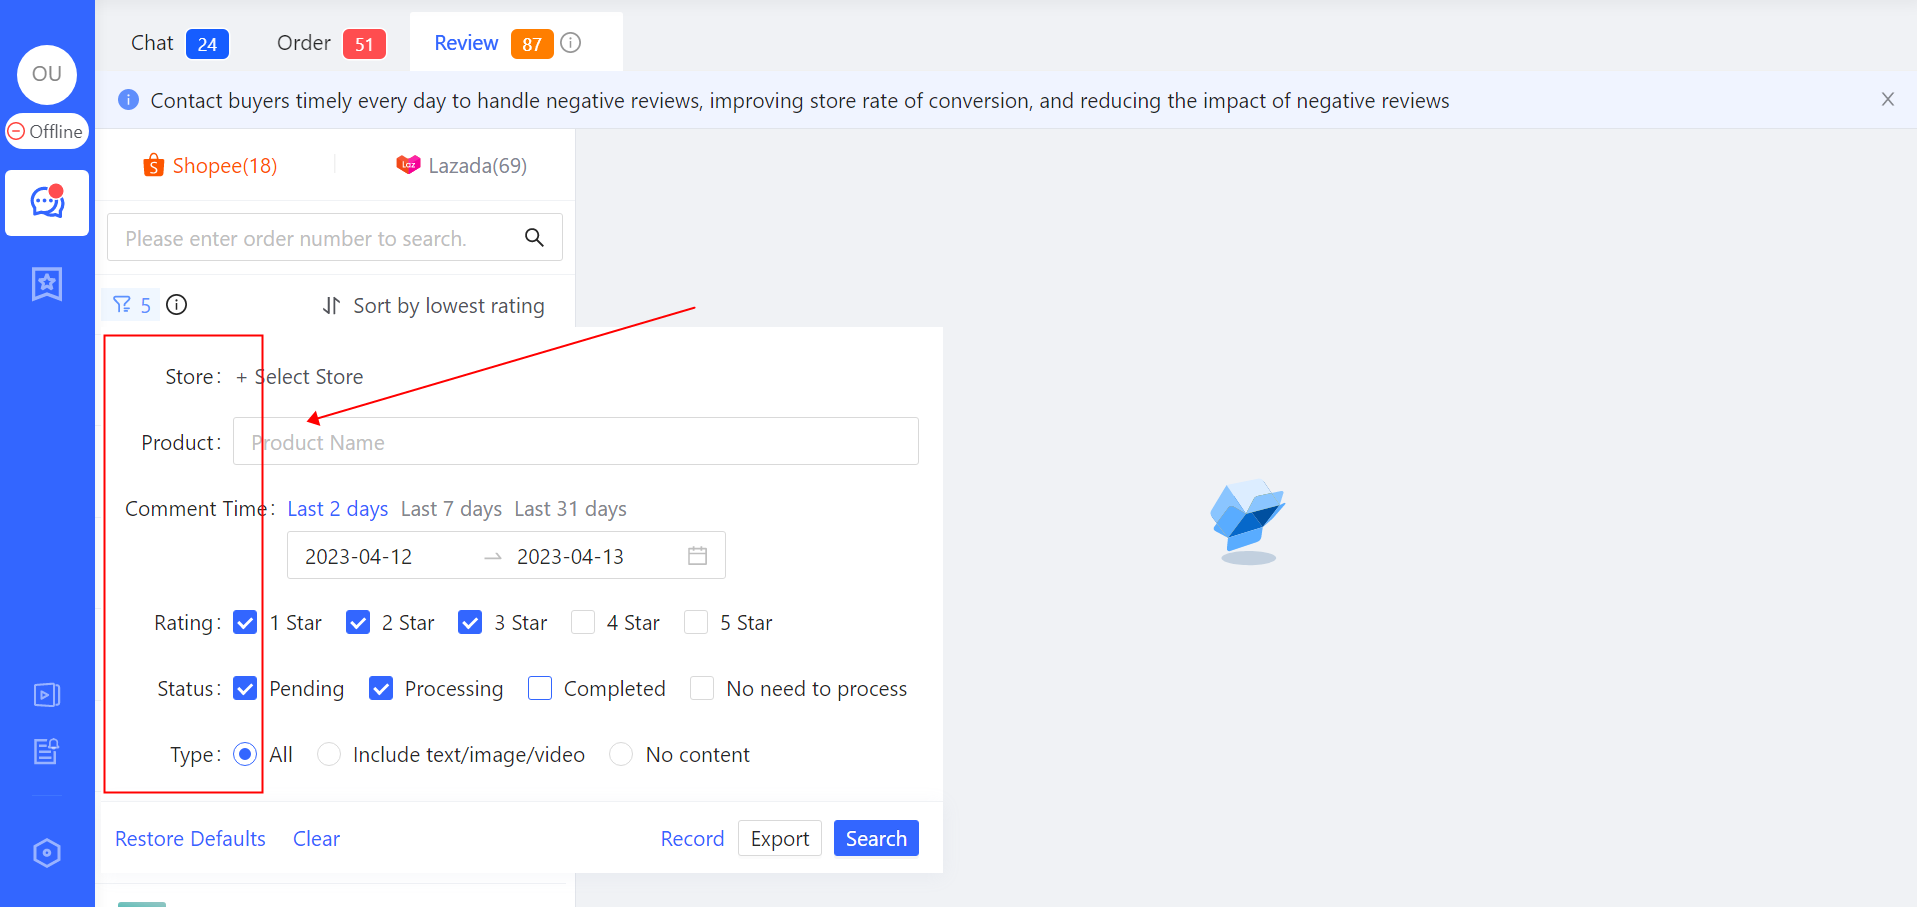
Exporting
After filtering, the agent can click “Export” button to export the reviews that match with the filtering conditions. Click “Record” button to view or download the historical export record.
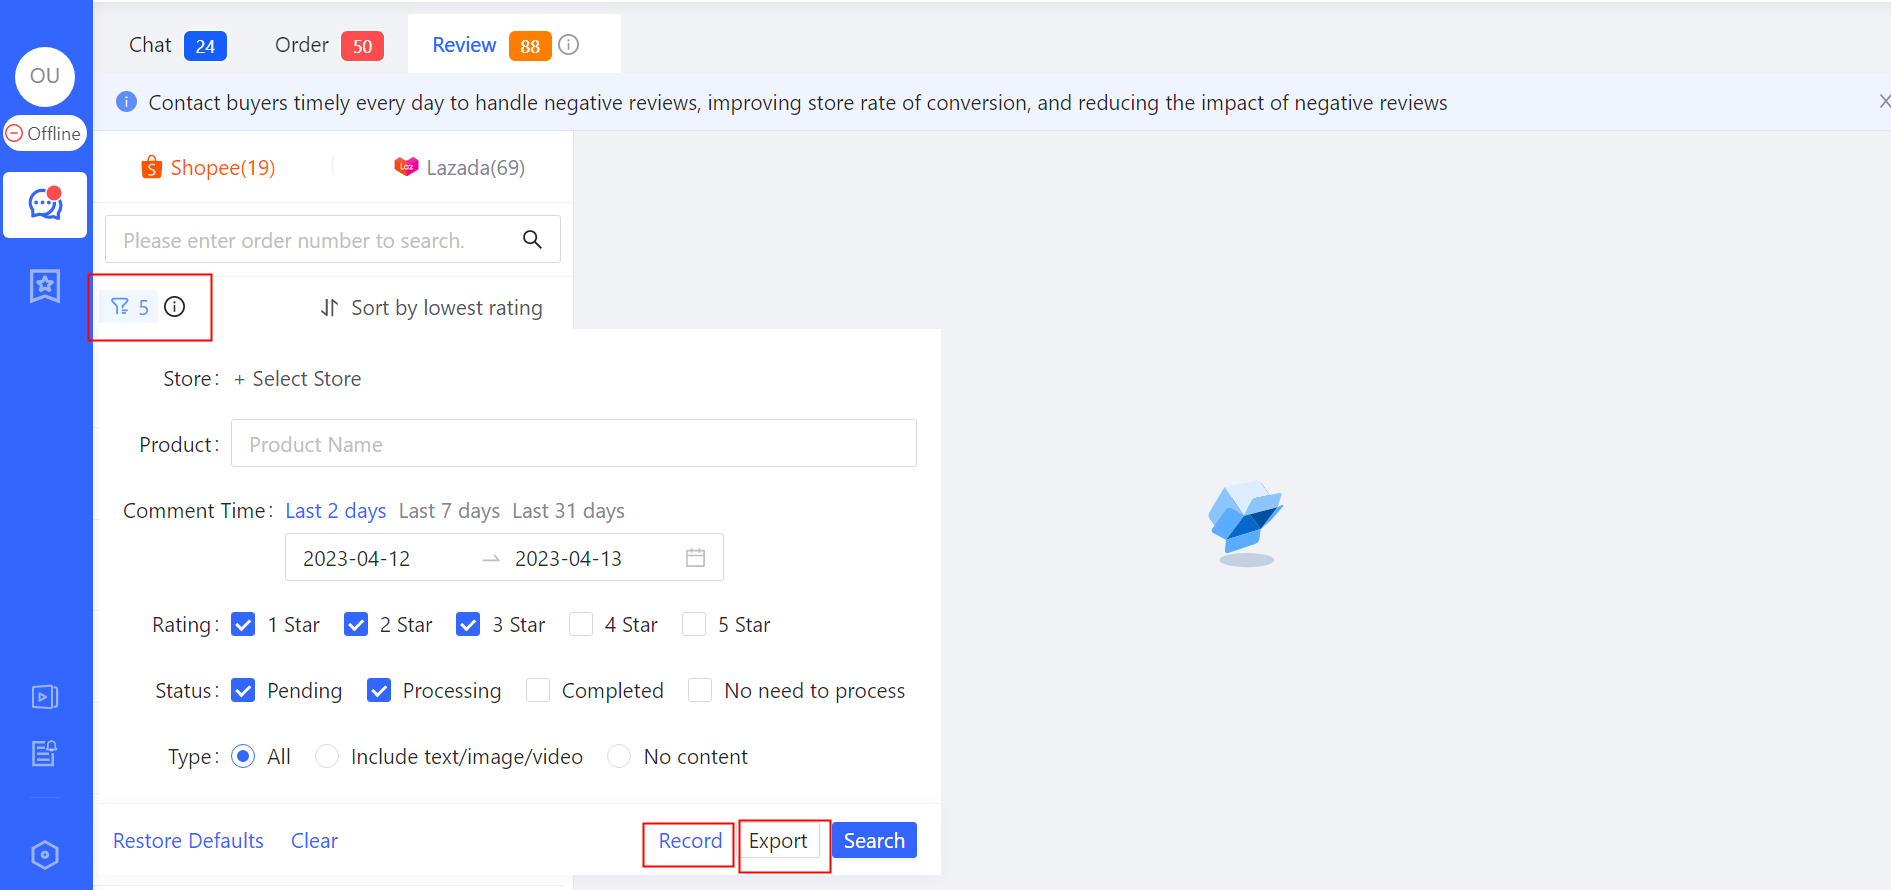
Multidimensional Reviews Ranking
By default, the reviews are sorted by rating from low to high. The agent can adjust the ranking according to the situation for better processing.
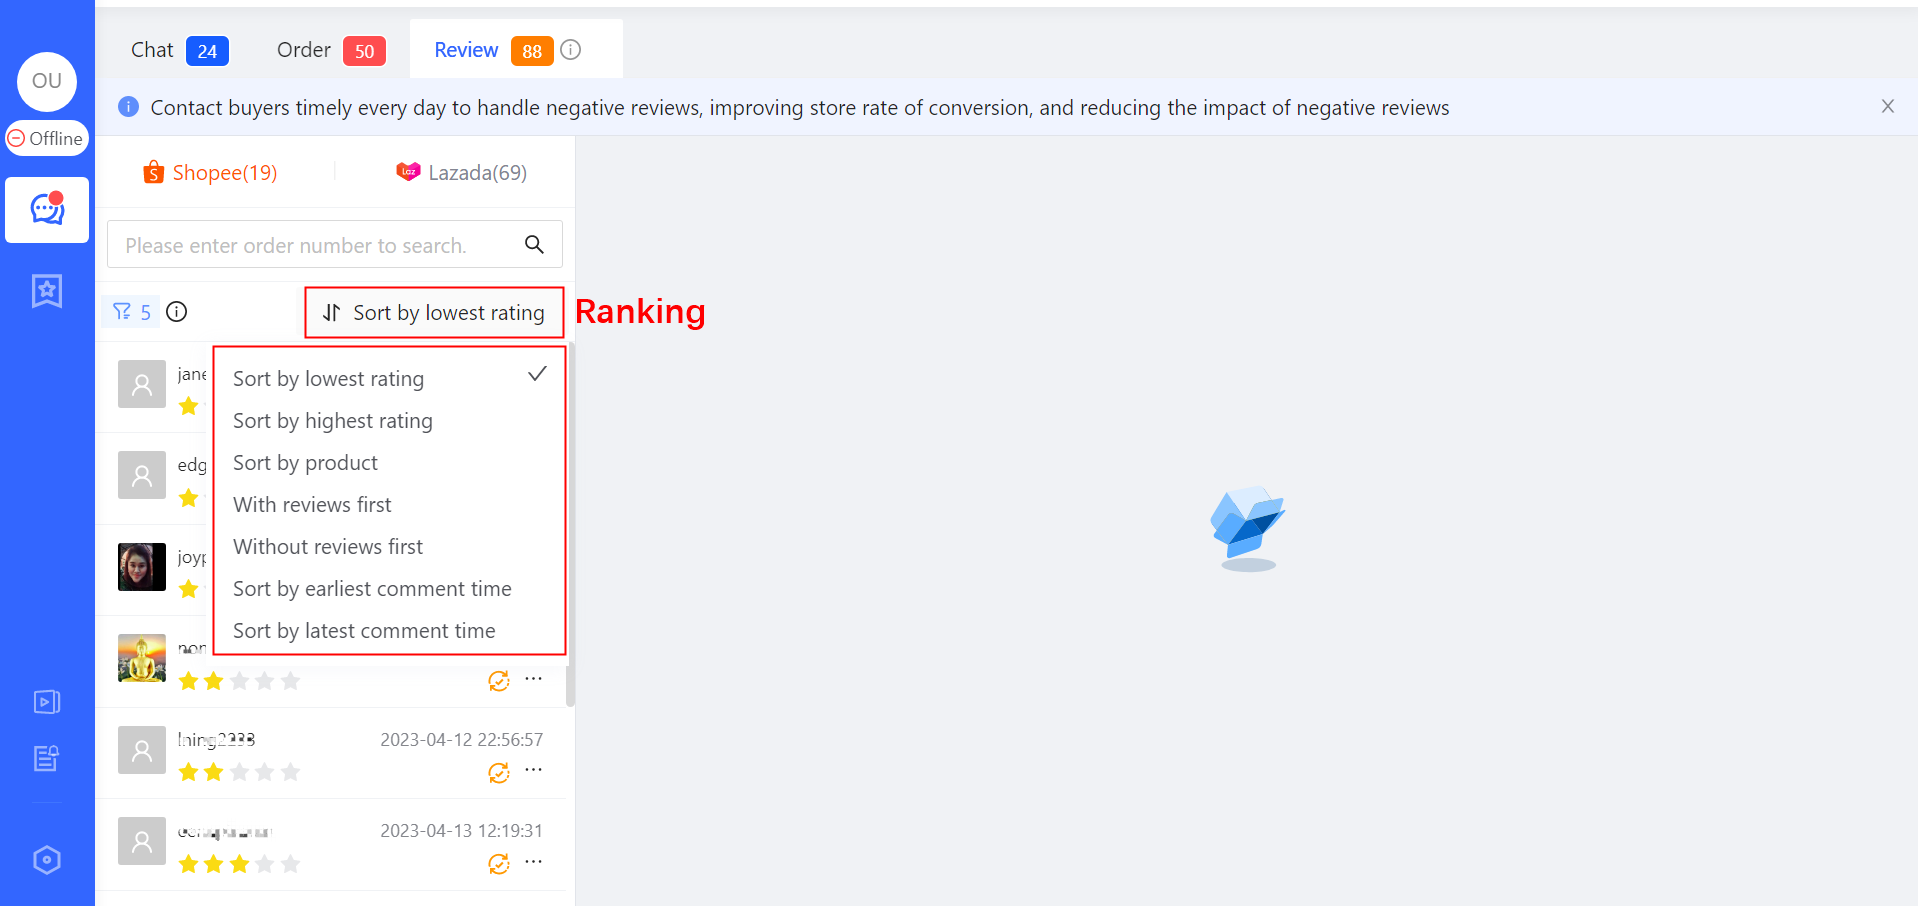
Processing the Review State
The agent can manually set the states of processing reviews. The processing state is defined by ChatPlusAI internally, which is convenient for reviews management.
Pending: The agent hasn’t contacted buyers on ChatPlusAI or replied to the review.
Processing: The agent is contacting buyers on ChatPlusAI.
Completed: The state of the reviews have been replied will automatically change into “Completed” state. The agent can also manually set the state of reviews to “Completed” state.
No need to process: The agent can manually set the state of reviews to “No need to process” state (such as the reviews cannot be replied on Lazada)
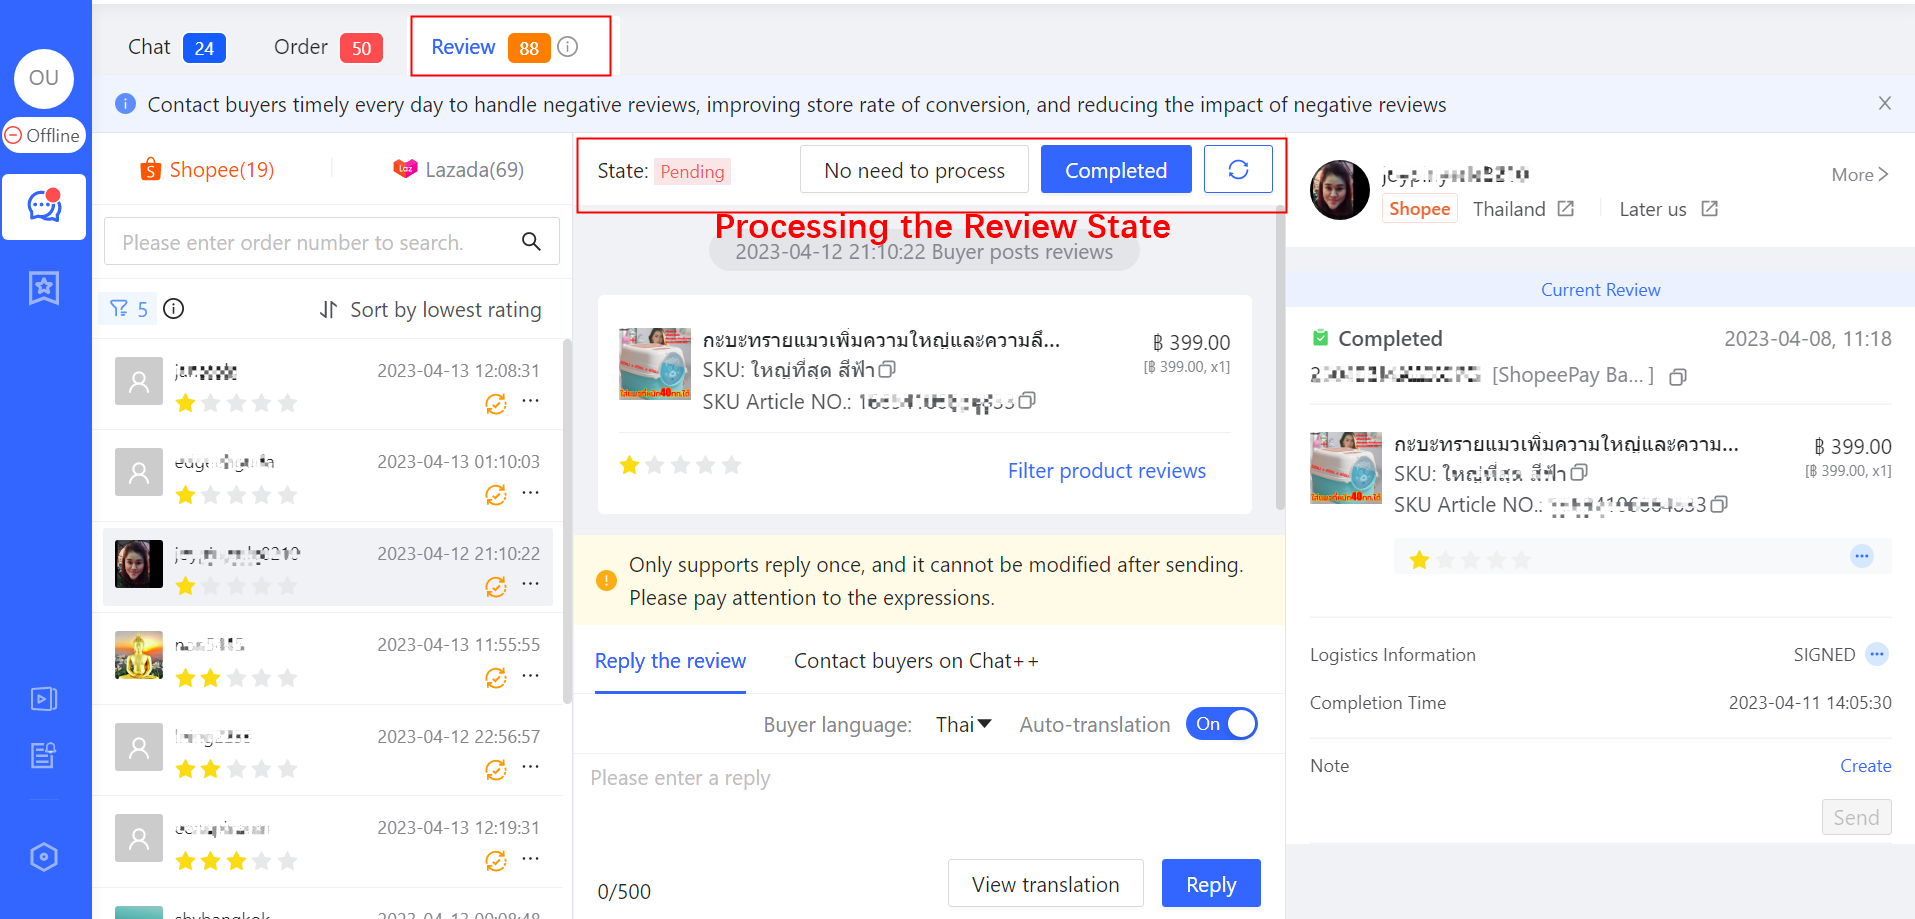
Update the Date of Reviews
The reviews on Lazada update and synchronize in “real-time”, and the reviews on Shopee update and synchronize in “quasi-real time” (minute level latency). ChatPlusAI provides a “Update data of reviews” button. When the buyer indicates that he has modified the review, but it may not be automatically updated at this time, the agent can manually update the review data to confirm whether the buyer has modified the review.
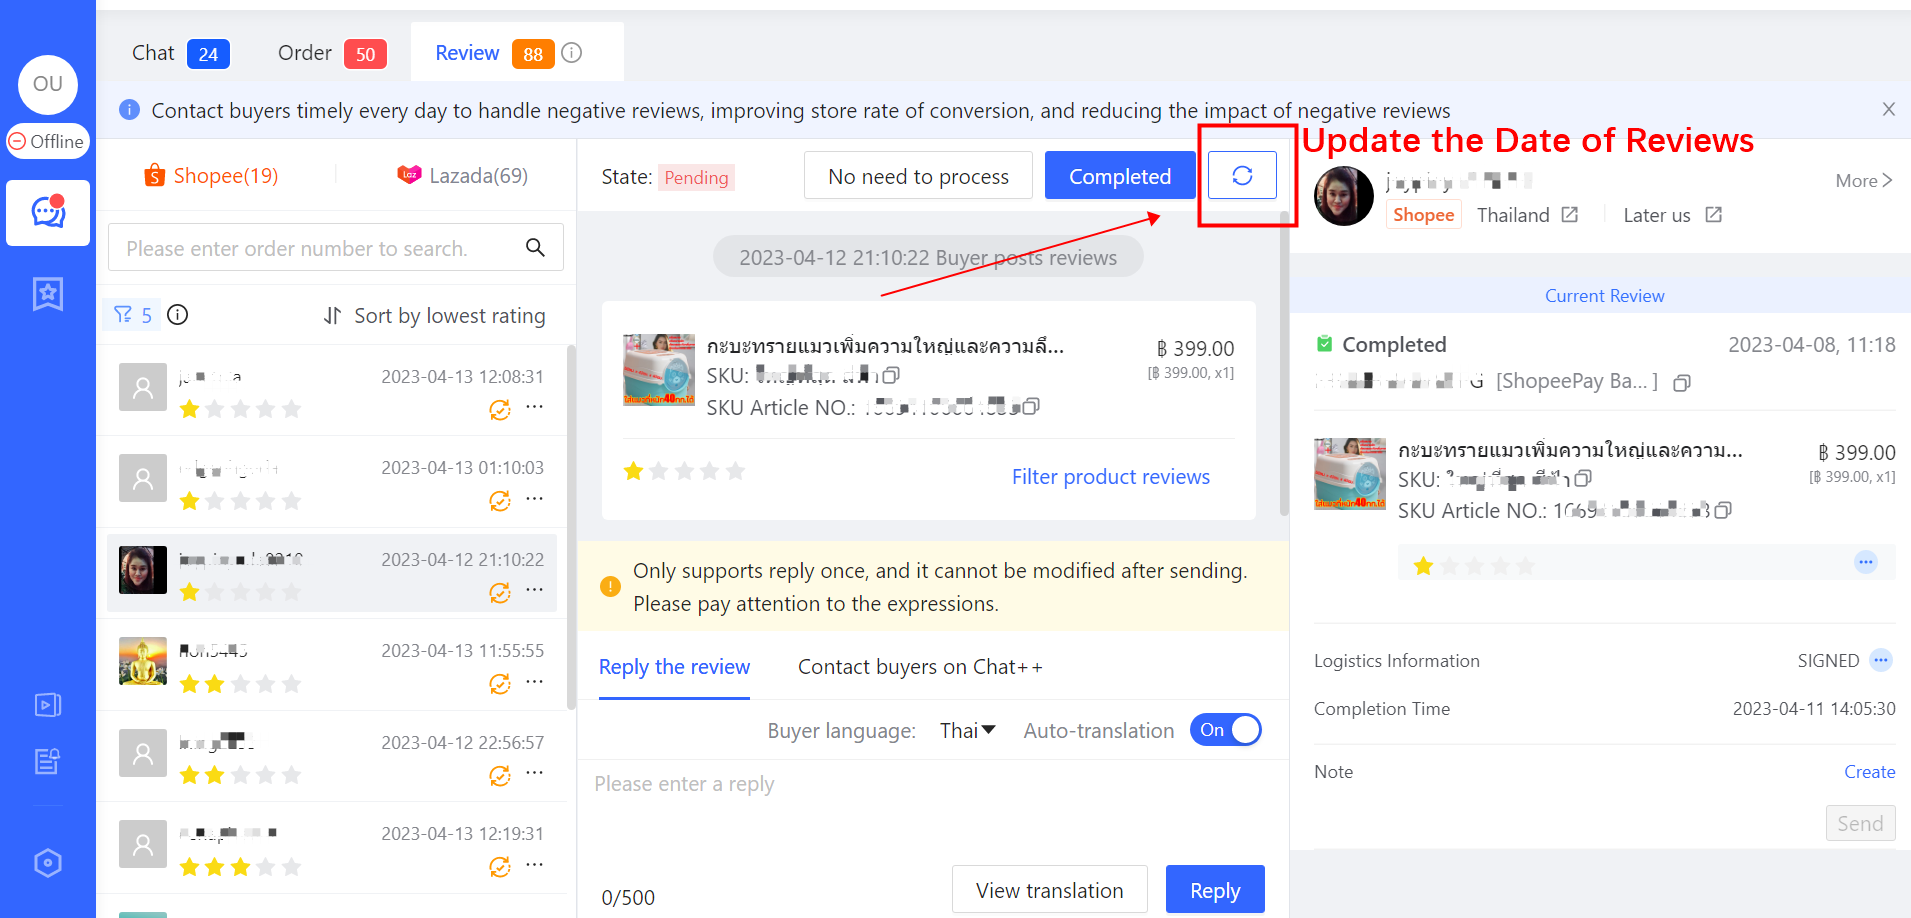
Negative Review Follow-up
(1)Negative Review Follow-up
When the buyer posts the negative review, the system will automatically send the script of negative review follow-up to the buyer, establish contact with the buyer through ChatPlusAI, communicate and negotiate with the buyer and guide the buyer to modify the review, so as to ensure the rating of the products and the store.
(2)Ensure the agent to follow up.
After following the negative reviews, AI Chatbot in the current conversation will suspend reception for 48 hours. The purpose is to ensure that the agent has priority in reception, so that the agent can better understand the reasons for the negative review posted by the buyer and give solutions.
(3) AI Chatbot continues receiving. (It will be showed the countdown of AI Chatbot suspension.)
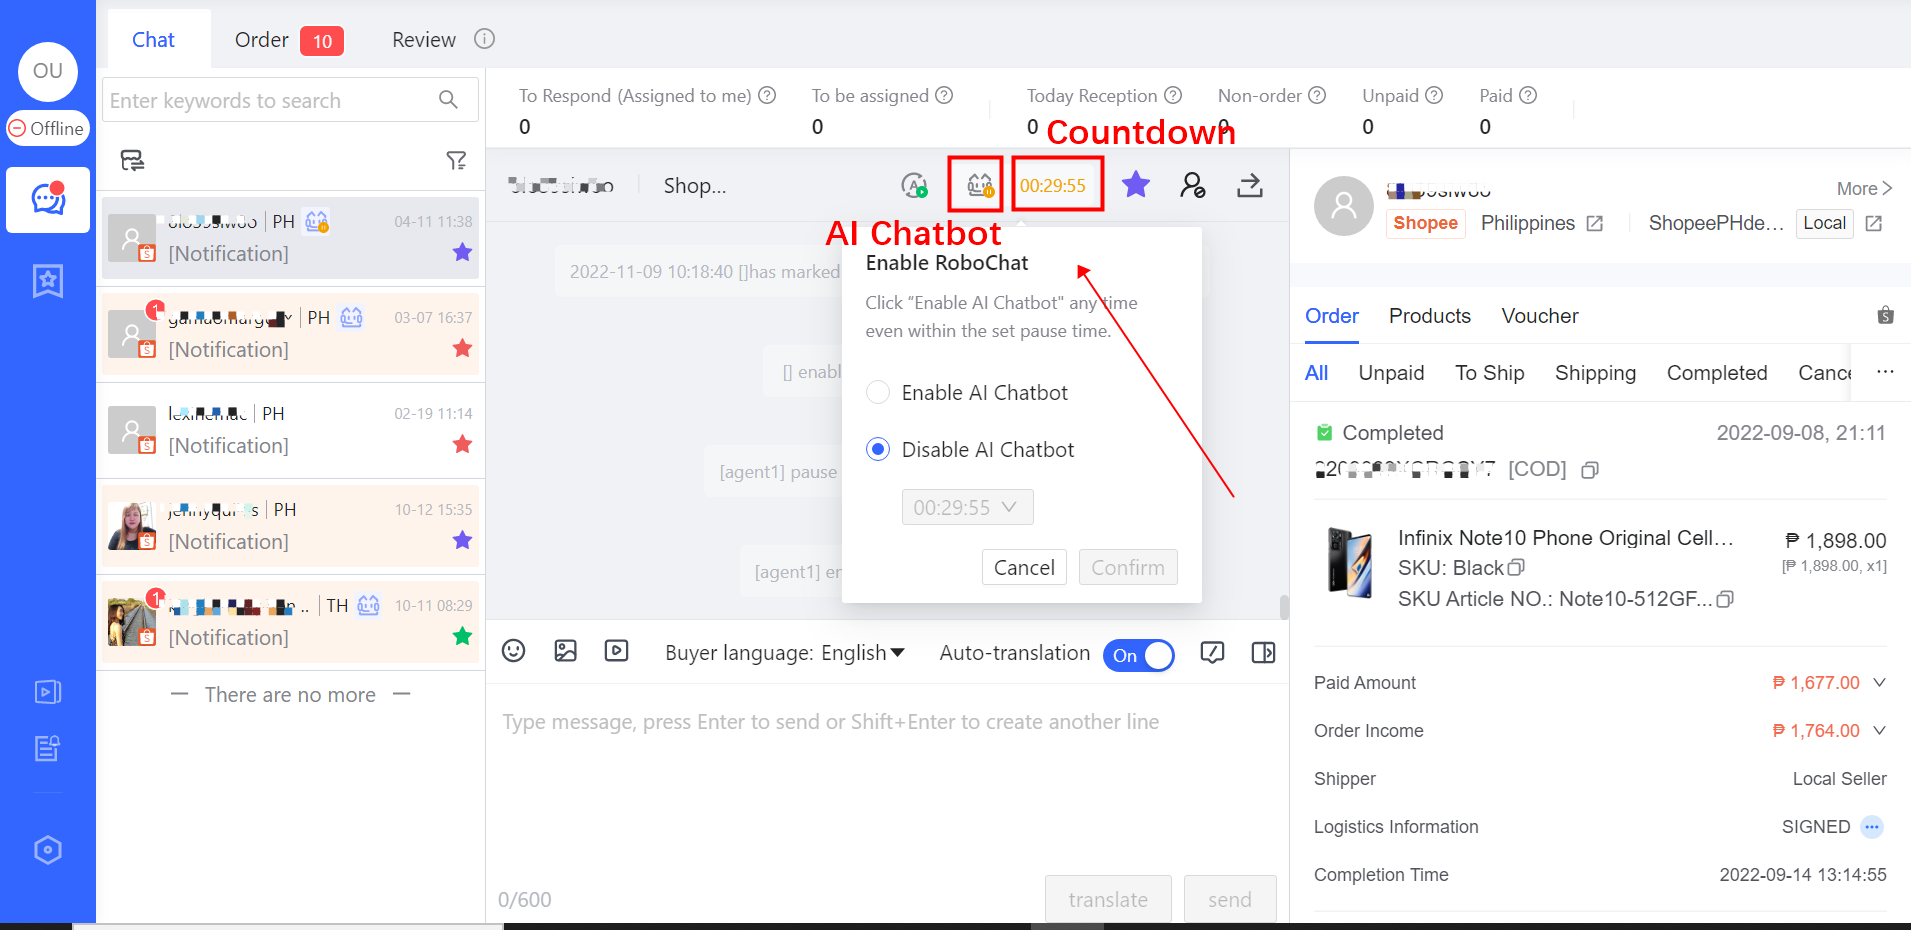
Application scenario Example 1: If the buyer does not respond to the negative review follow-up within 48 hours, AI Chatbot will monitor and receive the buyer again after the countdown.
Application scenario Example 2: If the buyer’s problem has been solved within 48 hours and the buyer has modified the review, AI Chatbot can be manually enabled to continue the reception, or AI Chatbot can be automatically enabled after the countdown ends.
How to Configure Negative Review Follow-up
Click 「Automation」in the left menu→「Review Booster」→「Negative Review Follow-up」, and then enter the configuration page of Negative Review Follow-up
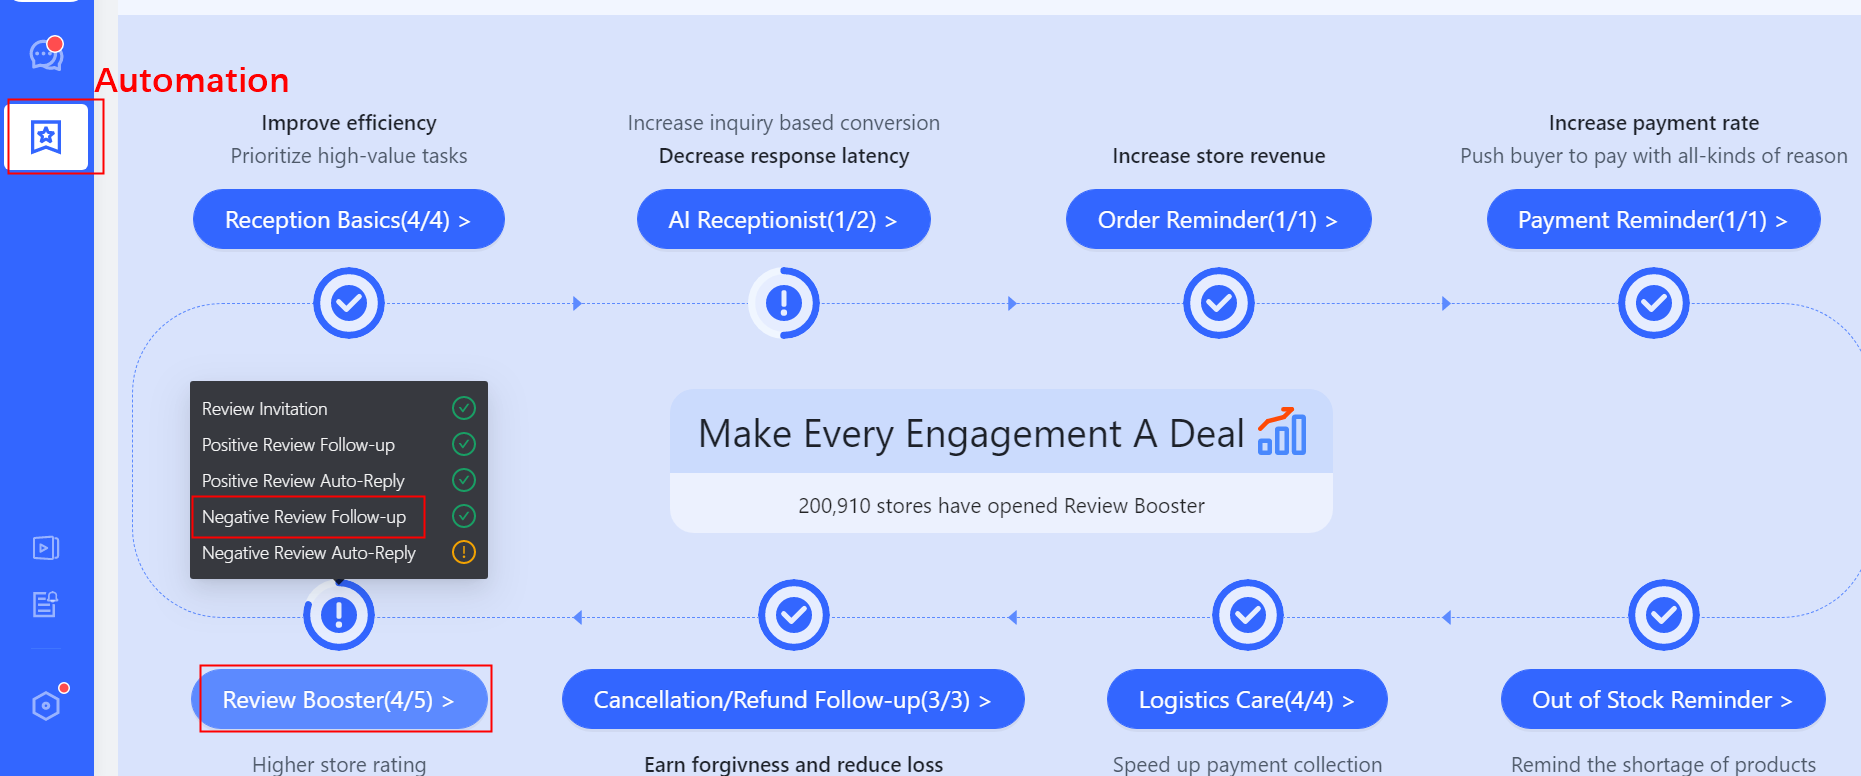
Notes:
- Related operations of reviews are different on Shopee and Lazada.
- It is only supported to view or search the reviews within 31 days.
- The reviews on Lazada update and synchronize in “real-time”, and the reviews on Shopee update and synchronize in “quasi-real time” (minute level latency).
- The review reply can only be sent once. The content cannot be modified after the reply. Please pay attention to the words of the reply.
- On Lazada, when there is no “text” content in the buyer’s review, it is not allowed to reply.
- The agent account can only operate the reviews of stores within the “limited scope of privilege”.
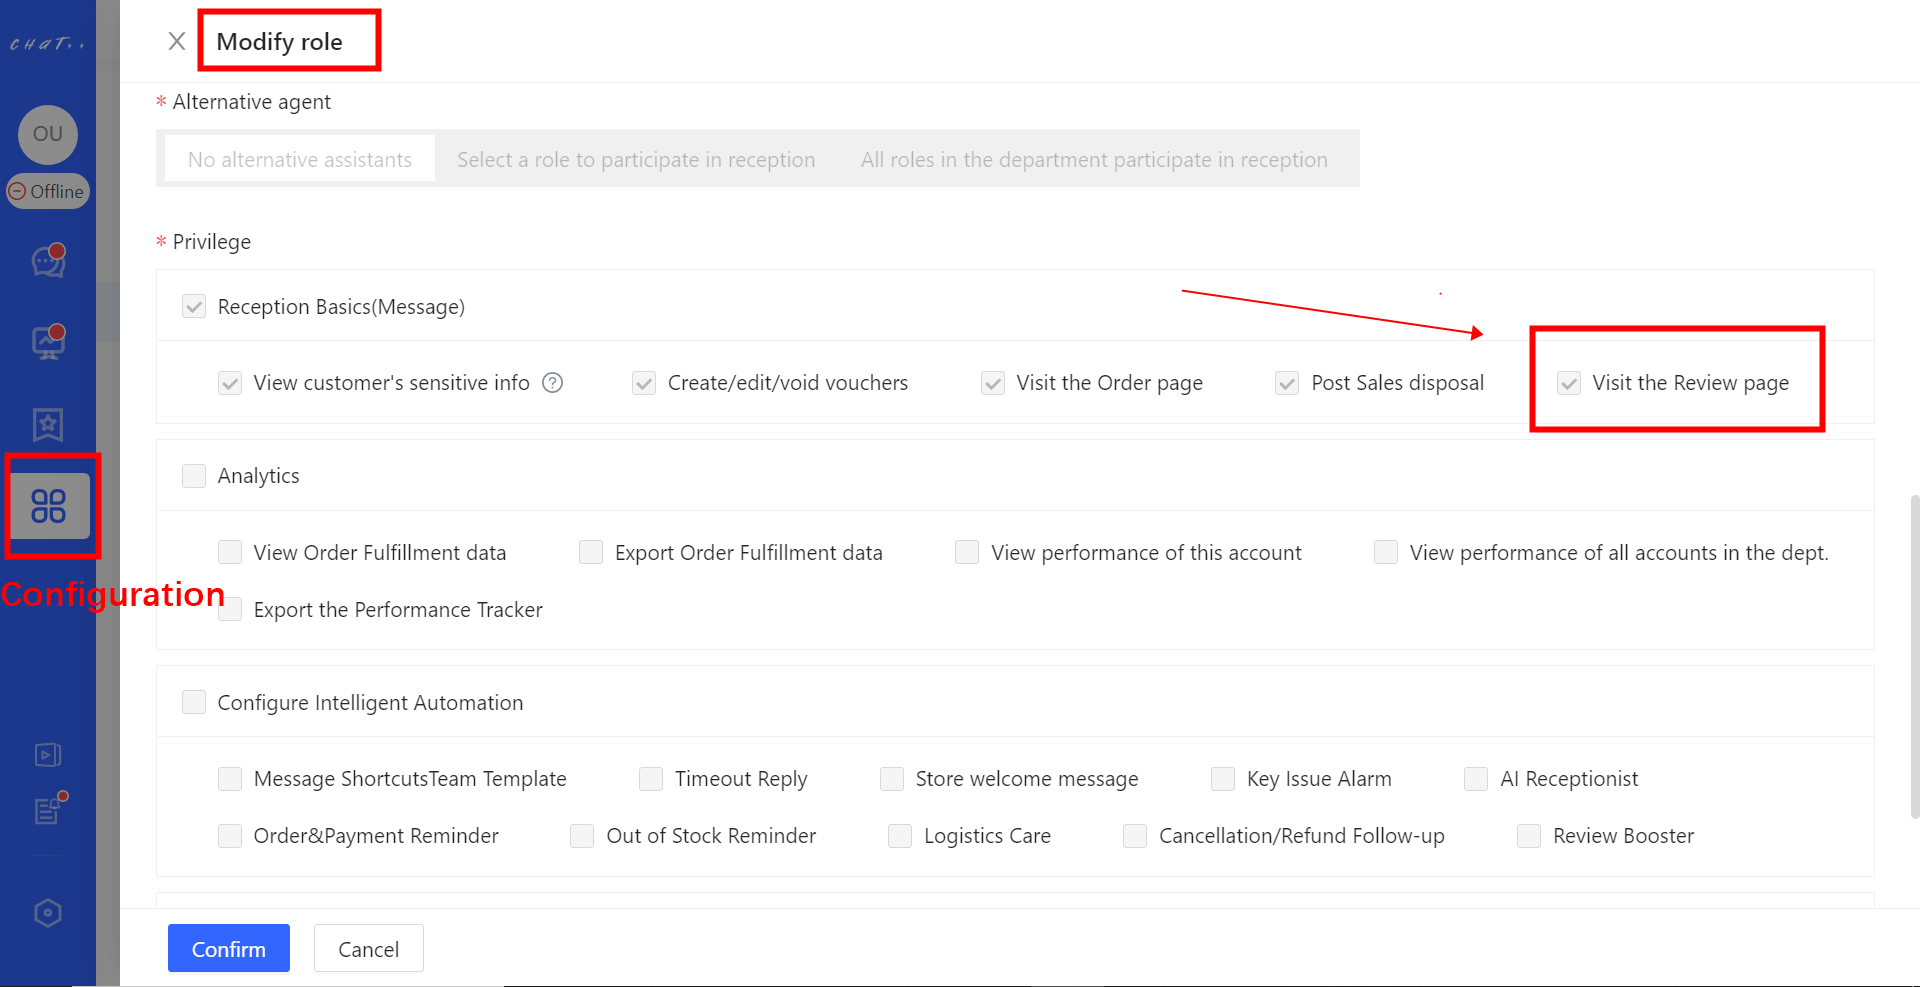
- If the authorization of the store in ChatPlusAI is invalid, the latest reviews will not be obtained and cannot be replied. Please re-add the store in time.
FAQ
Q1: Why is the rating displayed in the official background of Shopee 1 star, but the rating displayed in ChatPlusAI is 5 stars?
A1: Because the buyer has just modified the rating from 5 stars to 1 stars, the review in ChatPlusAI updates and synchronizes in “quasi-real time”. Currently the review has not been synchronized, resulting in inconsistent rating display. You can click “Update data of reviews” button to manually update and synchronize the review.
Q2: How did I reply to negative reviews by the content to positive reviews? When I replied the review, it was definitely positive.
A2: It is caused by the buyer changing the review to a negative review. The buyer’s initial review was indeed positive.
Q3: When contacting with the buyer to change the review on Lazada, I was reminded that “it only supports sending messages to buyers who have not been inquired within 7 days of placing an order on Lazada.”
A3: Limited by API interface of Lazada, sellers cannot send messages to buyers under two conditions:
- For silent order buyers who have not been inquired, it is not allowed to send messages more than 7 days after the order is placed;
- The buyer’s latest reply has been more than 7 days, and the buyer cannot be sent a message at this time.
In these two cases, it is suggested that the seller send a message in the seller center, and if the buyer reply, the agent can continue receiving the buyer on ChatPlusAI. ChatPlusAI is actively communicating with Lazada team to release the restriction of this interface, please look forward to it.
Q4: Why am I being reminded “Inputting box cannot be entered” or “Agent XXX is processing” when replying to the review?
A4: This is because the buyer is being received by the other agent. If you need to reply to the review, you can click “Contact the buyer on ChatPlusAI” to regain the reception permission of the buyer, so that you can reply back or contact the buyer on ChatPlusAI.
Q5: Why some reviews don’t show images or videos on Shopee? The review is seen in the seller center with a picture or video.
A5: Limited by the API interface of Shopee, ChatPlusAI can only get the words in the review, but cannot get the pictures and videos. Currently, the solution is to capture the review pictures and videos in the product page through Chatbot. However, for some popular products, when there are a lot of reviews, Chatbot may not be able to capture a small number of pictures and videos in the reviews. ChatPlusAI is actively communicating with Shopee team to release the restrictions of this interface, please look forward to it.
Ticket Management
❓Forgot the need to follow up on a certain inquiry
❓Buyers who need post-sales follow-up from an agent suddenly cannot be found
💡To facilitate smooth communication for CS agents to know which conversations require follow-up, support for both automatic system-generated tickets and manually created tickets is provided. When an CS agent completes a ticket, they can choose to inform the buyer about the handling results, ensuring buyers stay updated on the progress.
👉Supported marketplaces: Shopee, Lazada, TikTok
Permissions Required to Manage "Tickets"
- In the conversation list area, tickets associated with a conversation grant processing permissions to customer service agents and administrators. Customer service agents can routinely access and handle the latest tickets triggered by the buyer from the conversation sidebar or view all historical tickets for the buyer in the current store.
- For tickets across all conversations within the store, customer service agents and administrators have default management permissions. They can access and manage all tickets within their department by navigating to "Left Sidebar Messages → Ticket Processing Center". To deactivate this permission, click on "Left Sidebar Management Center → Department Management → Department Roles → Edit → Uncheck: Access Ticket Management Center" (Figure 1, Red ①). After disabling this permission, the role won't have access to the "Ticket Management Center" page and won't be able to centrally manage tickets. Please choose carefully when deactivating permissions.
- Customer service agents and administrators have default permissions for "Manually Create Tickets."
- Customer service agents and administrators have default permissions to "View Ticket Data" and can regularly check ticket handling status and trends from "Left Sidebar Data Center → Ticket Data." Administrators have default "Export Ticket Data" permission, allowing them to export detailed ticket data related to the department's store.
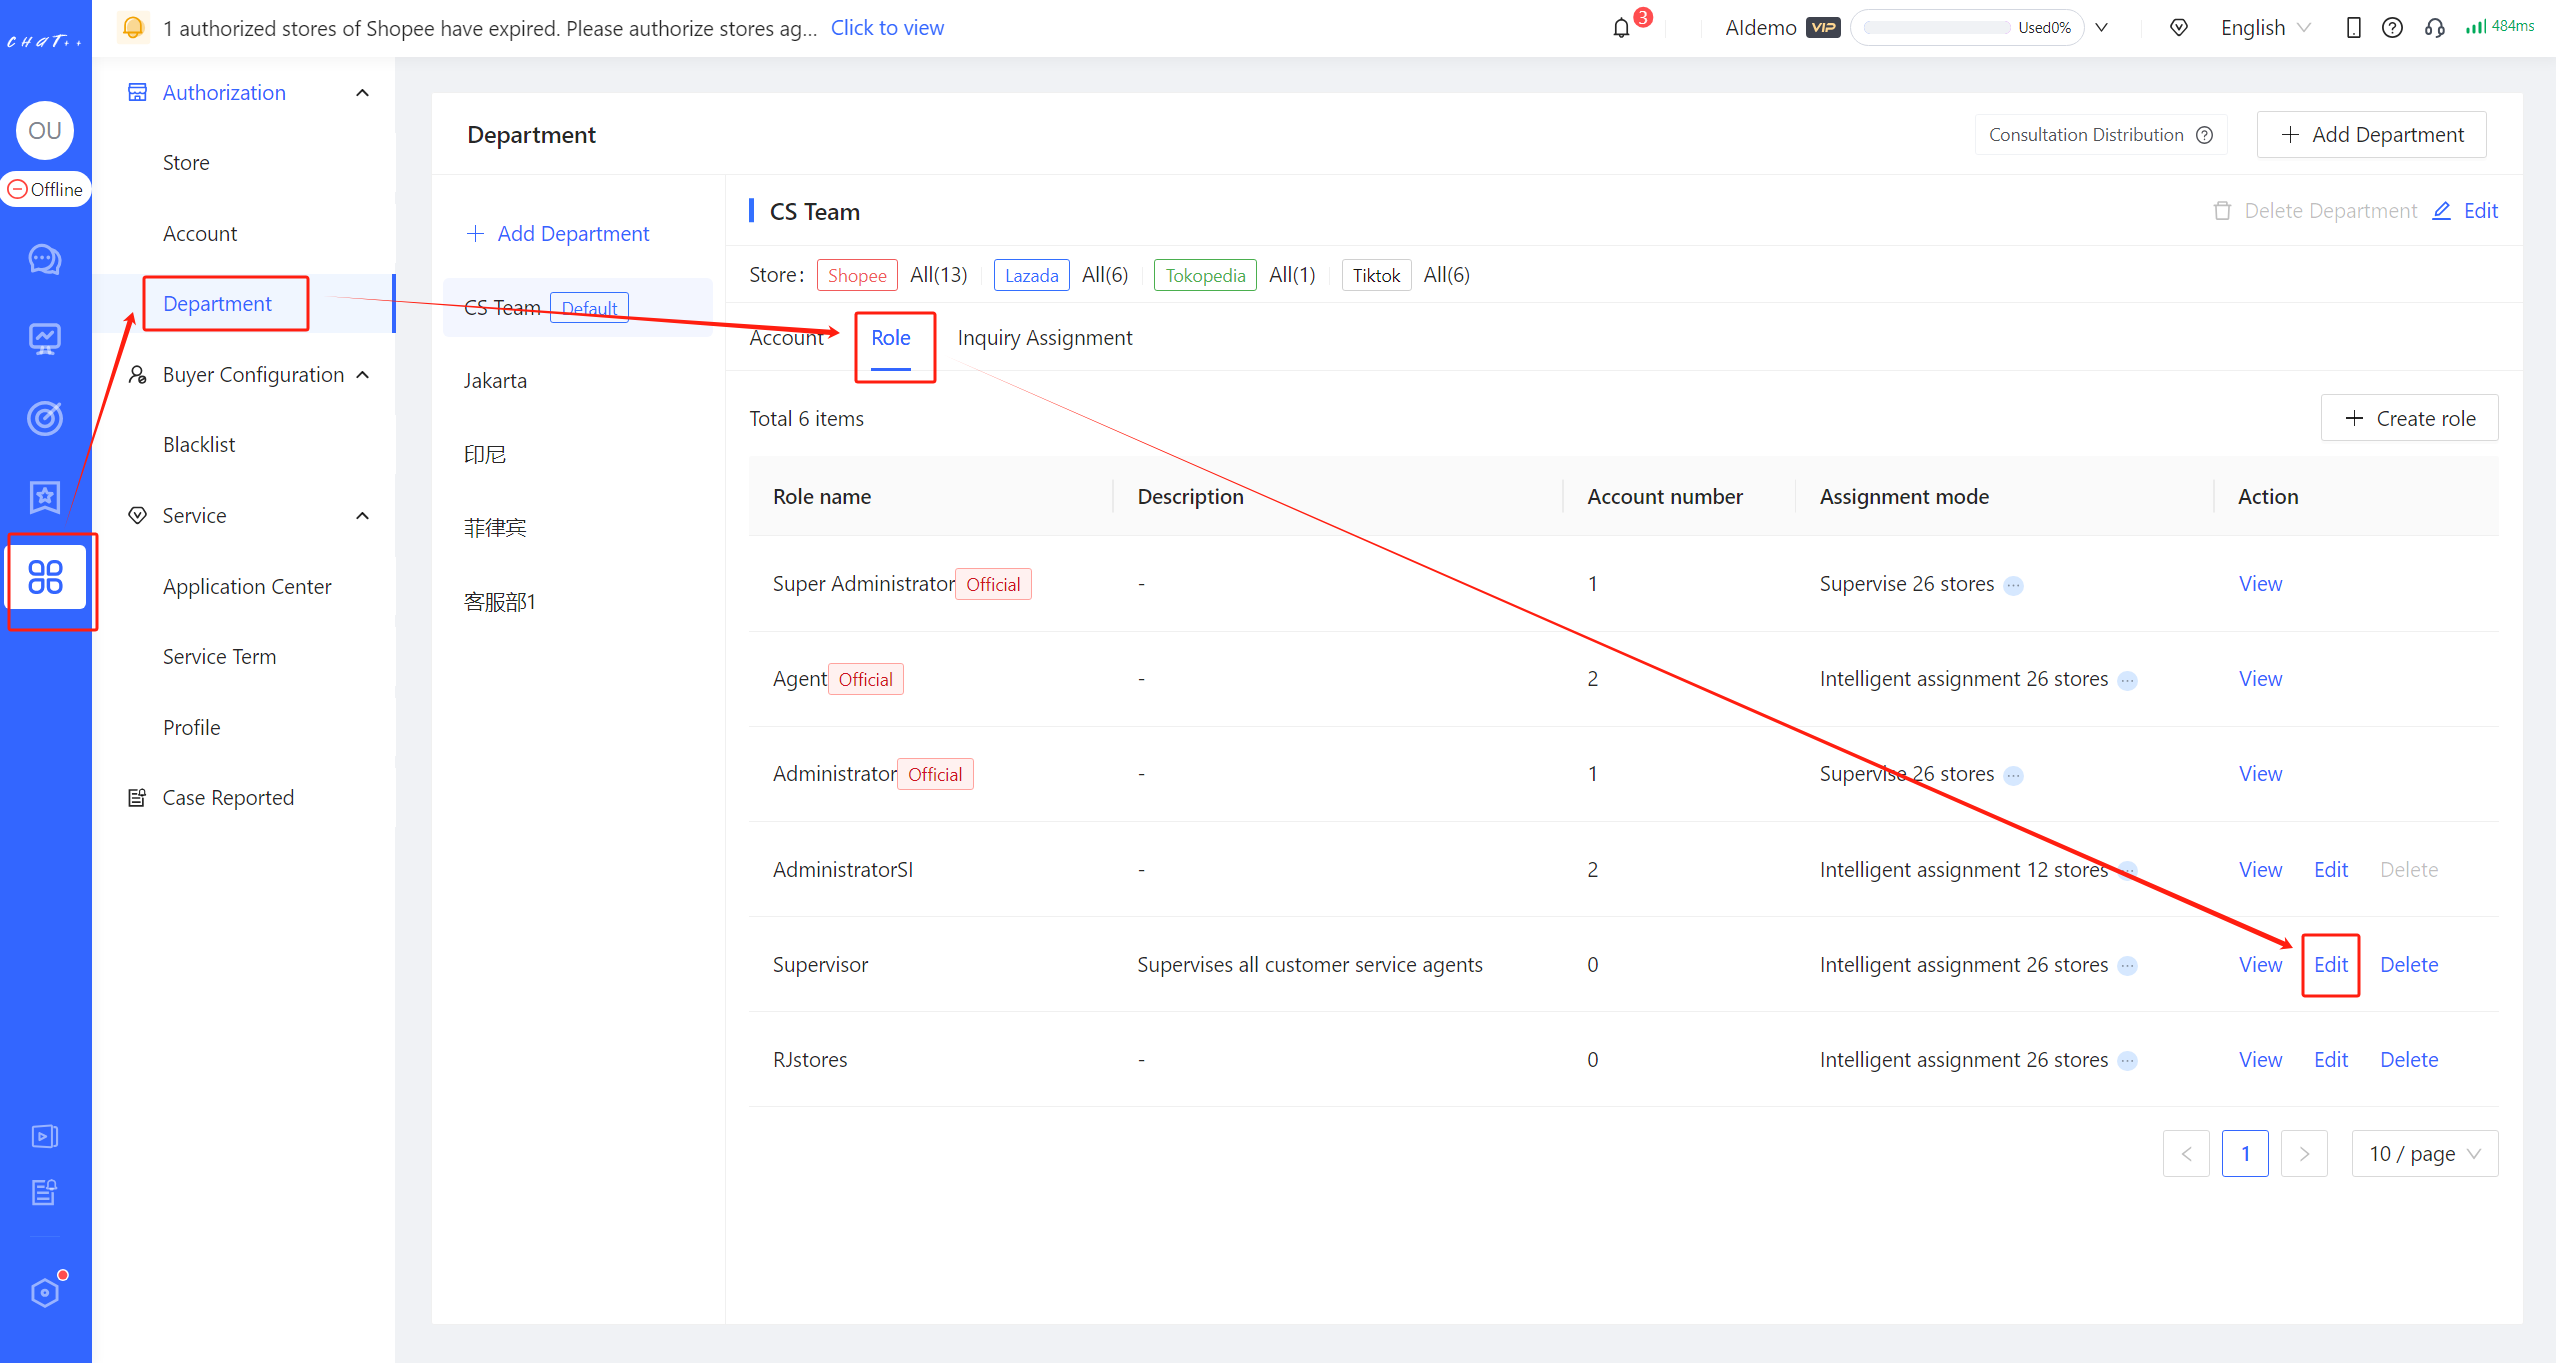
Figure1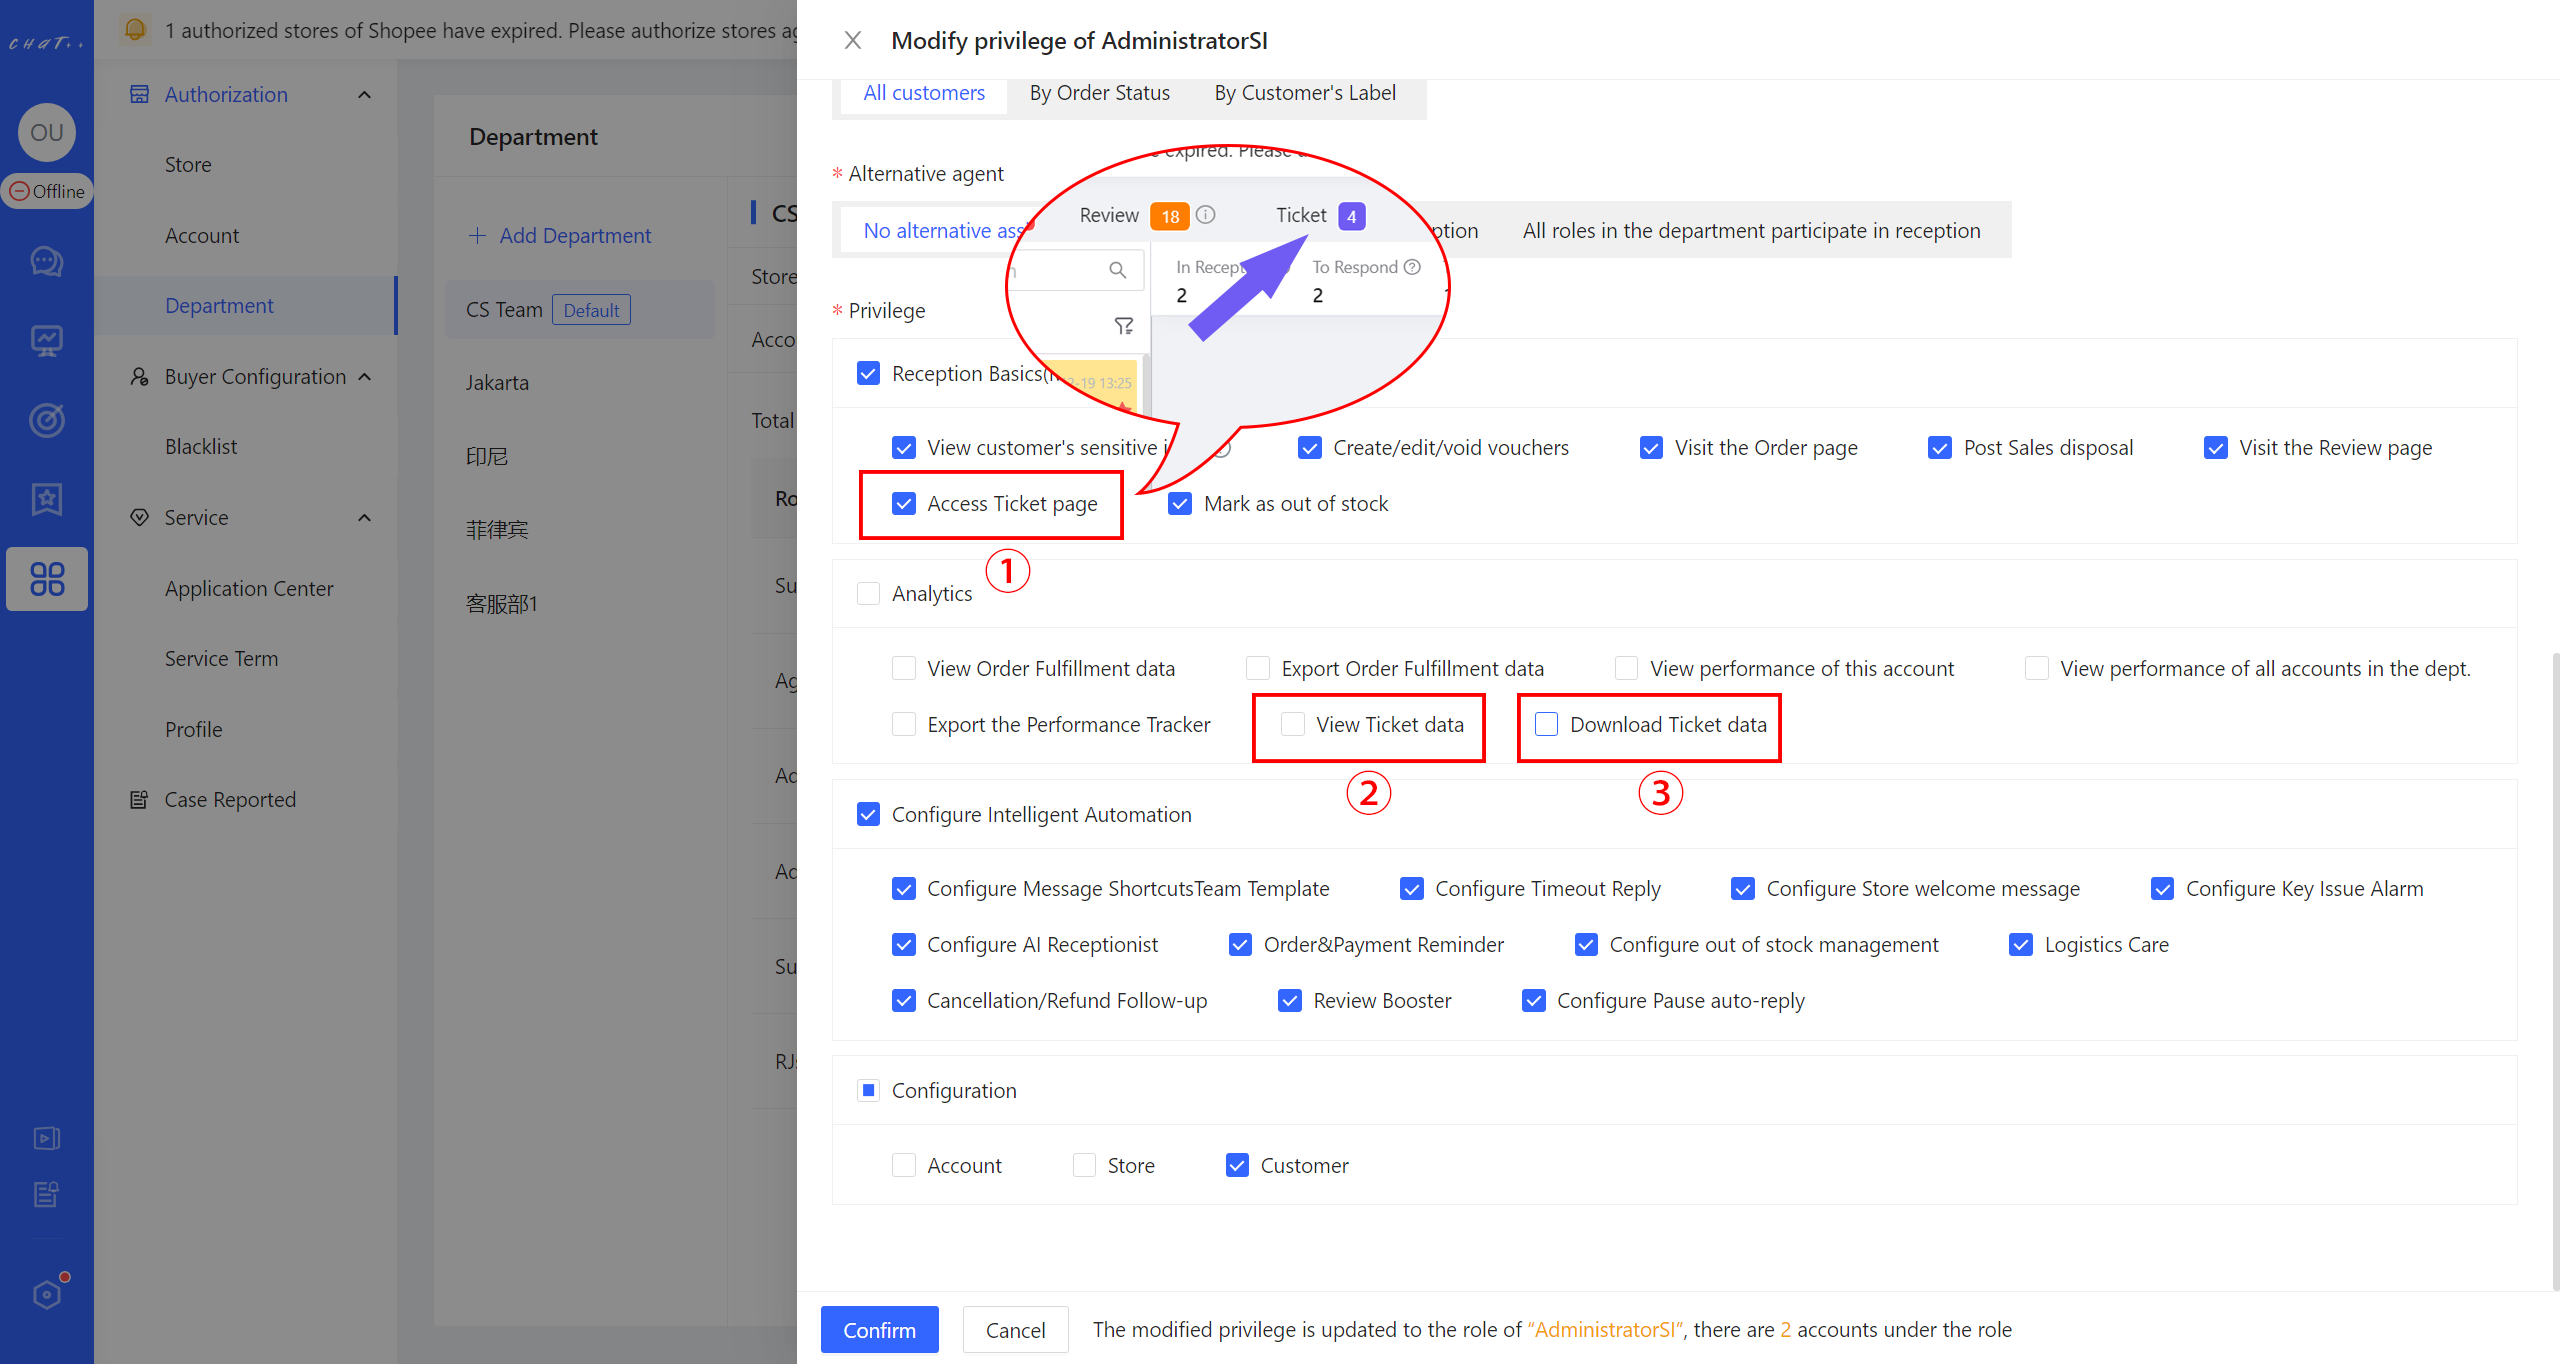
Figure2
Handling "Tickets"
1、Creating Tickets
Automated System Creation
When buyers inquire about the following issues, the system will instantly generate a ticket and prompt human agents to follow up in the "Ticket Management Center":
- Buyer requests a receipt or invoice: This scenario is closed by default. When you confirm that the store can provide a receipt or invoice to the buyer, you can navigate to Left Sidebar "Automation" → Reception Basics → Tickets → View Details → Enable 'Buyer Requests Receipt or Invoice' Scenario" (Figure 3 Figure 4). Once enabled, when a buyer requests a receipt or invoice and the bot is handling the conversation, the system will automatically create a ticket for the agent and display a real-time notification in the Ticket Management Center.
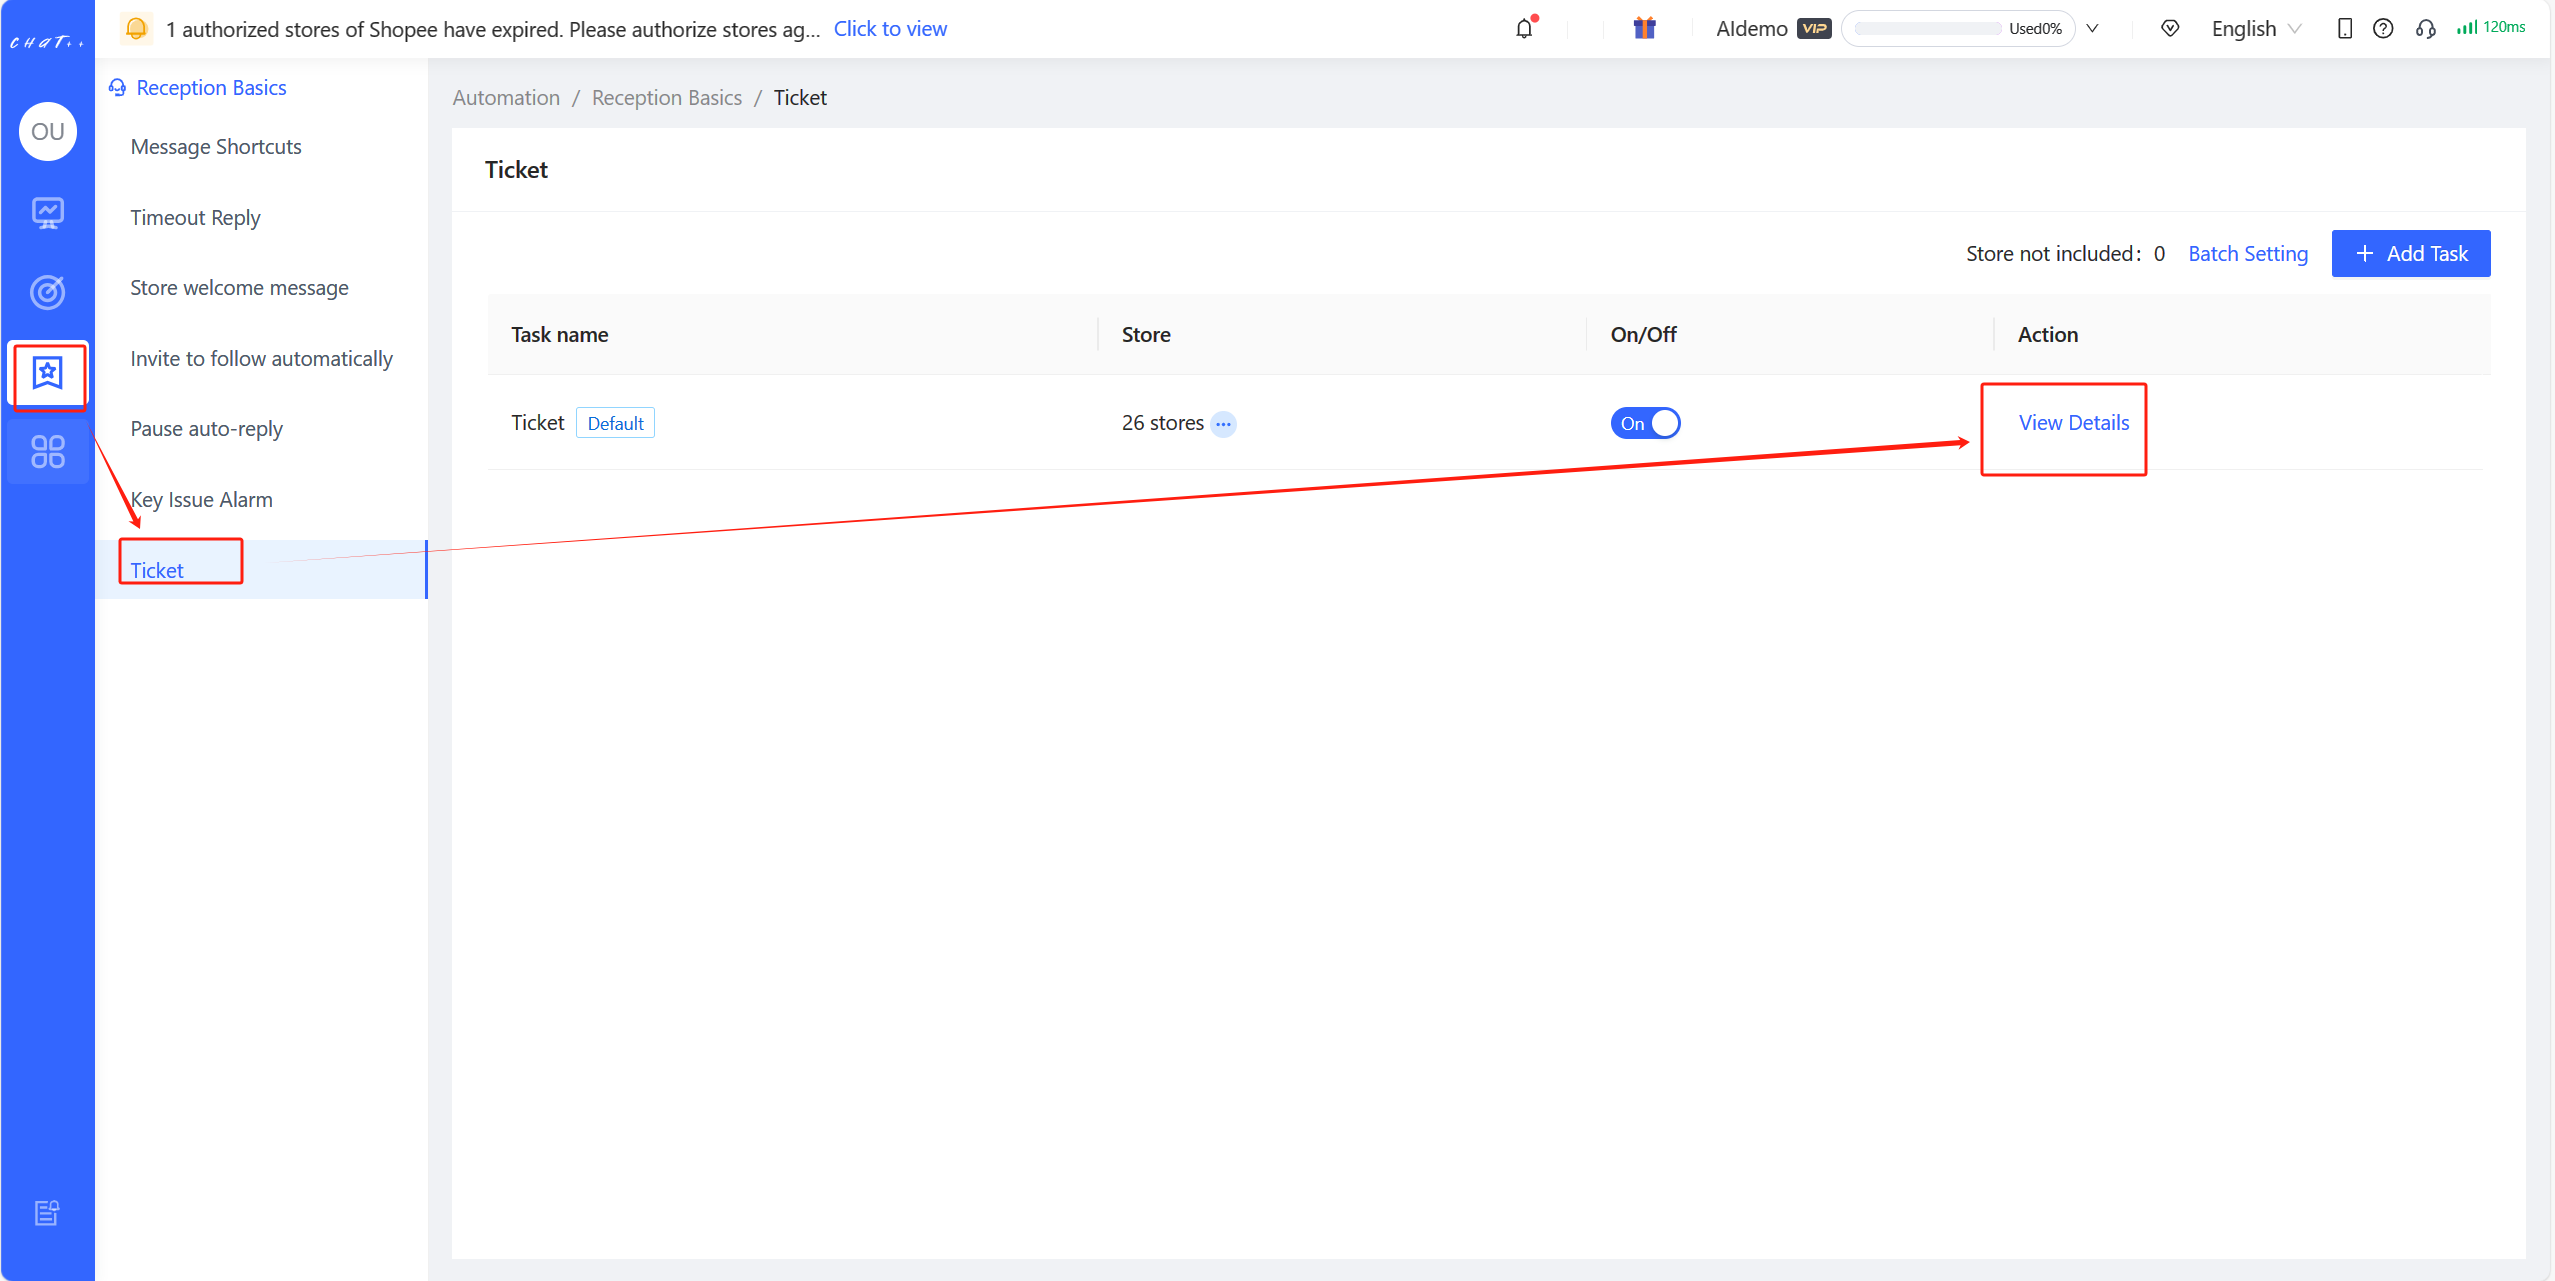
Figure3
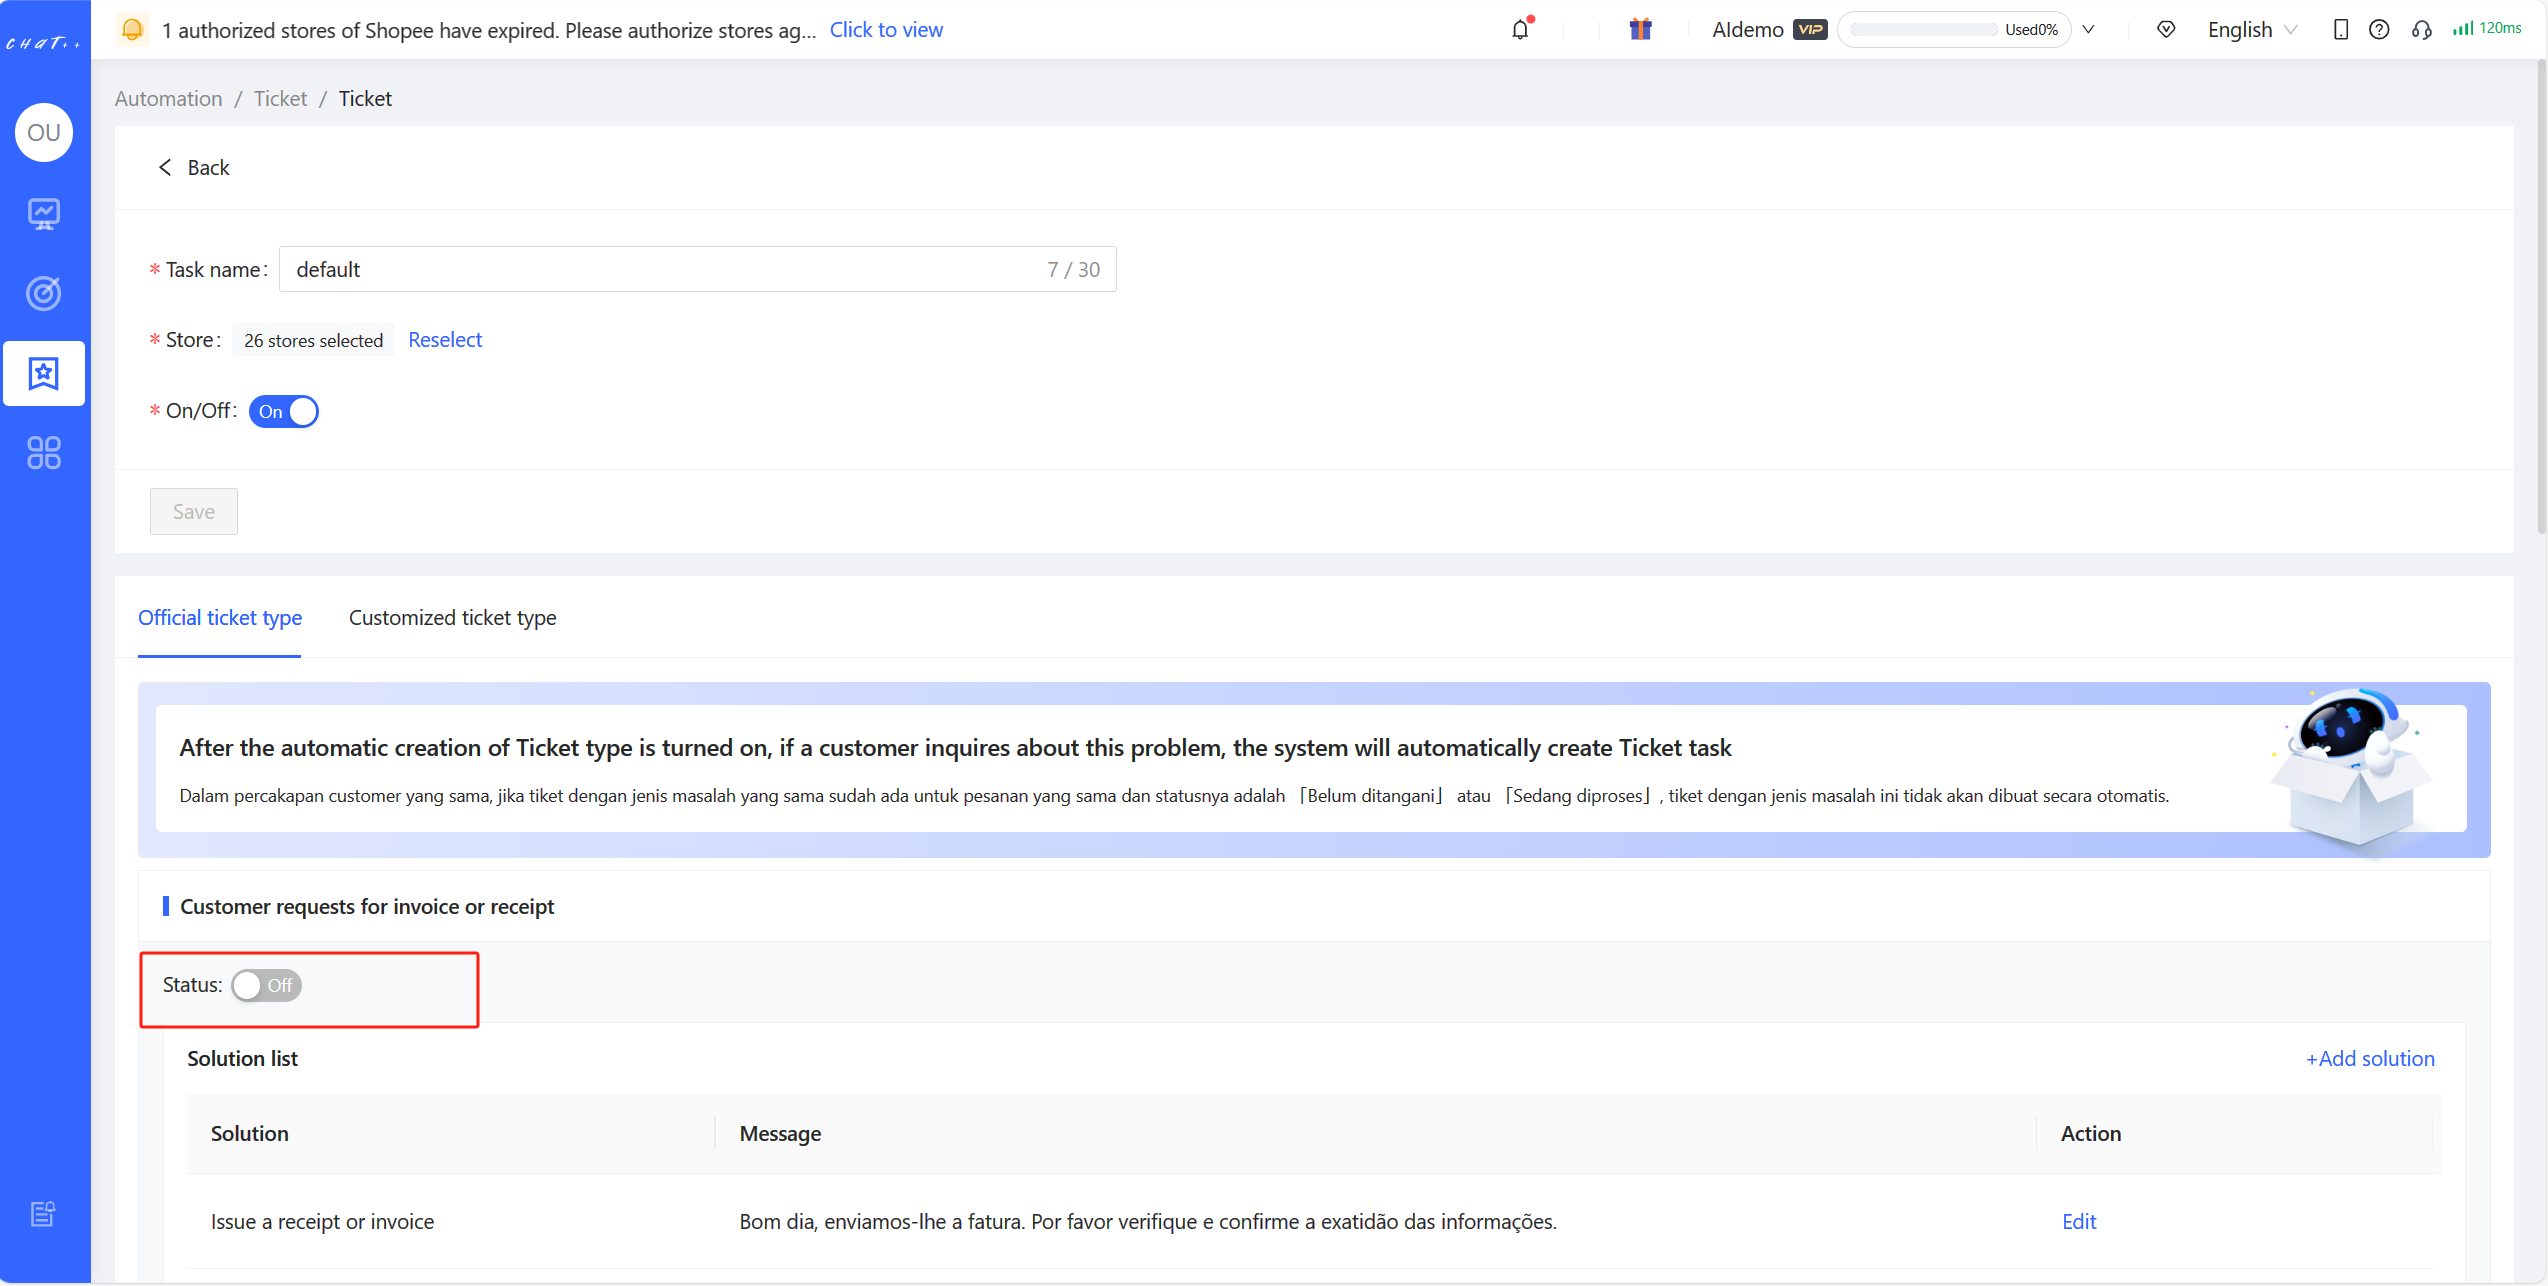
Figure4
- Buyer indicates missing or incorrect items received: This scenario is enabled by default. When a buyer reports missing or incorrectly shipped items, while the bot handles the conversation normally, the system instantly generates a ticket and provides a real-time notification in the Ticket Management Center.
- Buyer reports product usability issues: This scenario is enabled by default. When a buyer reports issues such as the product being unusable or any quality-related problems while the bot handles the conversation normally, the system automatically creates a ticket in real-time and notifies the Ticket Management Center.
- AI recognizes the buyer's inquiry regarding wholesale products: This scenario is enabled by default. When AI detects the buyer's intent to inquire about wholesale products, the system automatically generates a ticket. For these tickets, only remarks can be added to the ticket information with no associated content. Additionally, the system does not generate default solutions for such tickets. Customer service or administrators can add solutions in the "Automation → Reception Basics → Tickets" section.
⚠️ For the same buyer conversation, order, and type of unresolved ticket issue, the system avoids creating another ticket of the same issue type if the previous ticket remains unresolved. This is to prevent unnecessary workload for customer service agents.
Manually Creating Tickets
Create tickets from the sidebar - Ticket Creation Click on the buyer's message that needs to be marked as a ticket. From the "Conversation Sidebar - Tickets" section, click on "Add Ticket type"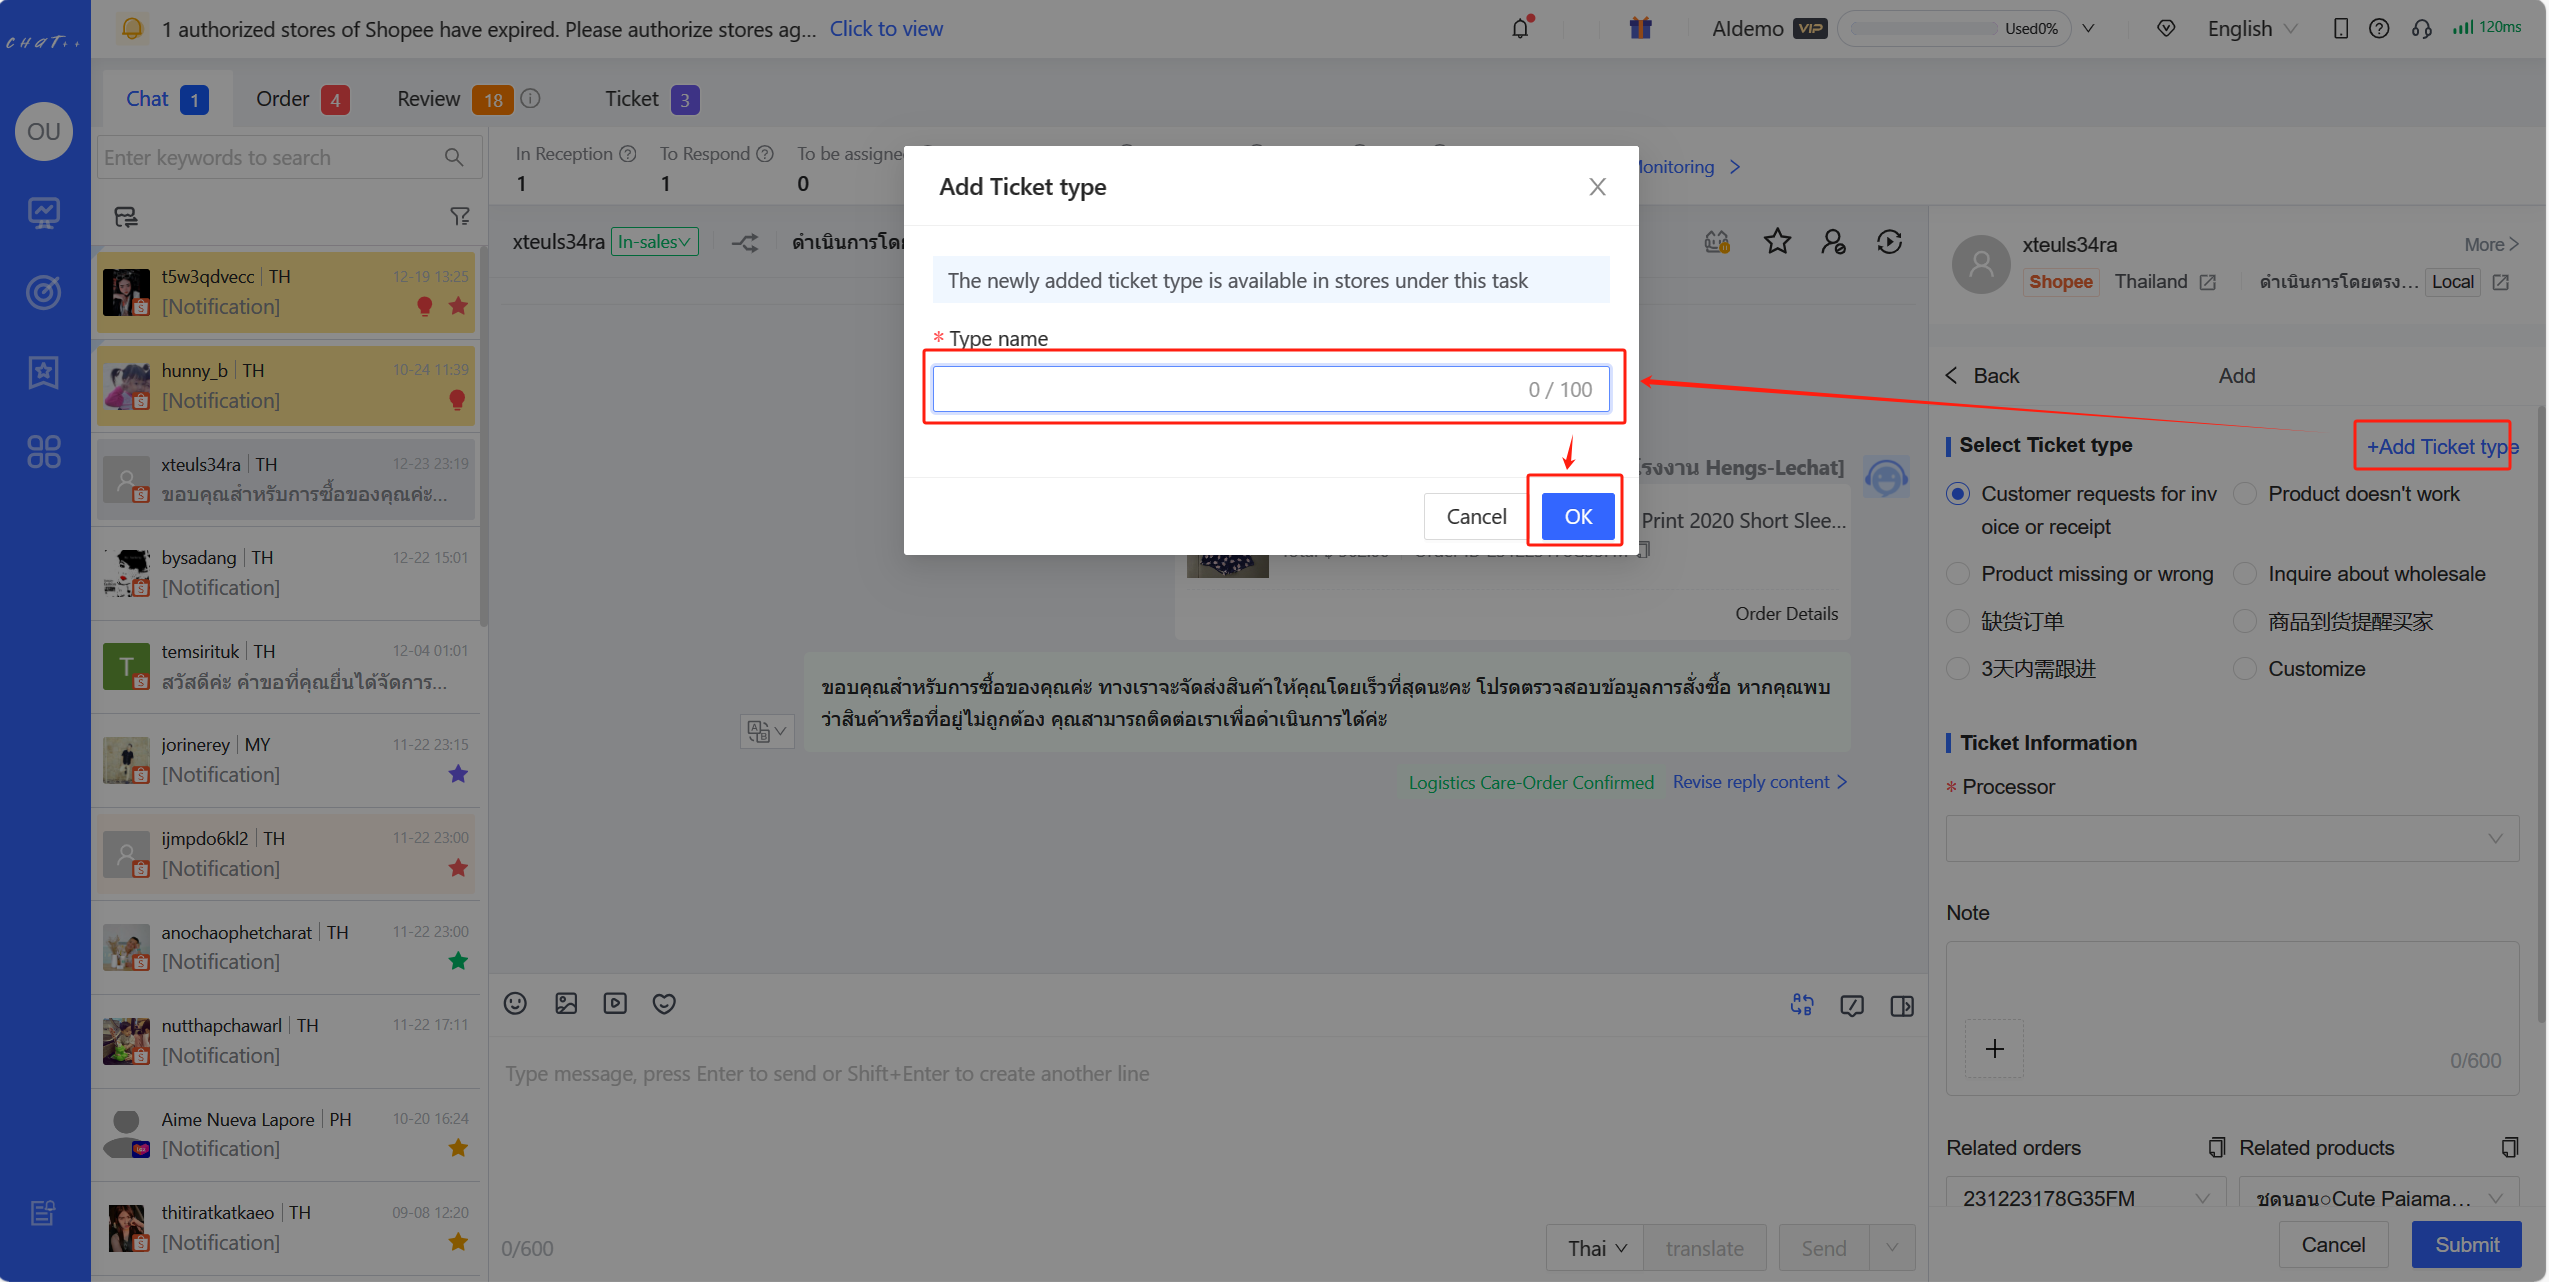
Figure5
To create a ticket from the buyer's conversation message Hover the mouse over the buyer's conversation message that needs to be marked as a ticket. Click once on the "Add Ticket type" button. This action will bring up the sidebar - Tickets. Then, click the "Add Ticket type" button again to open the new ticket creation page.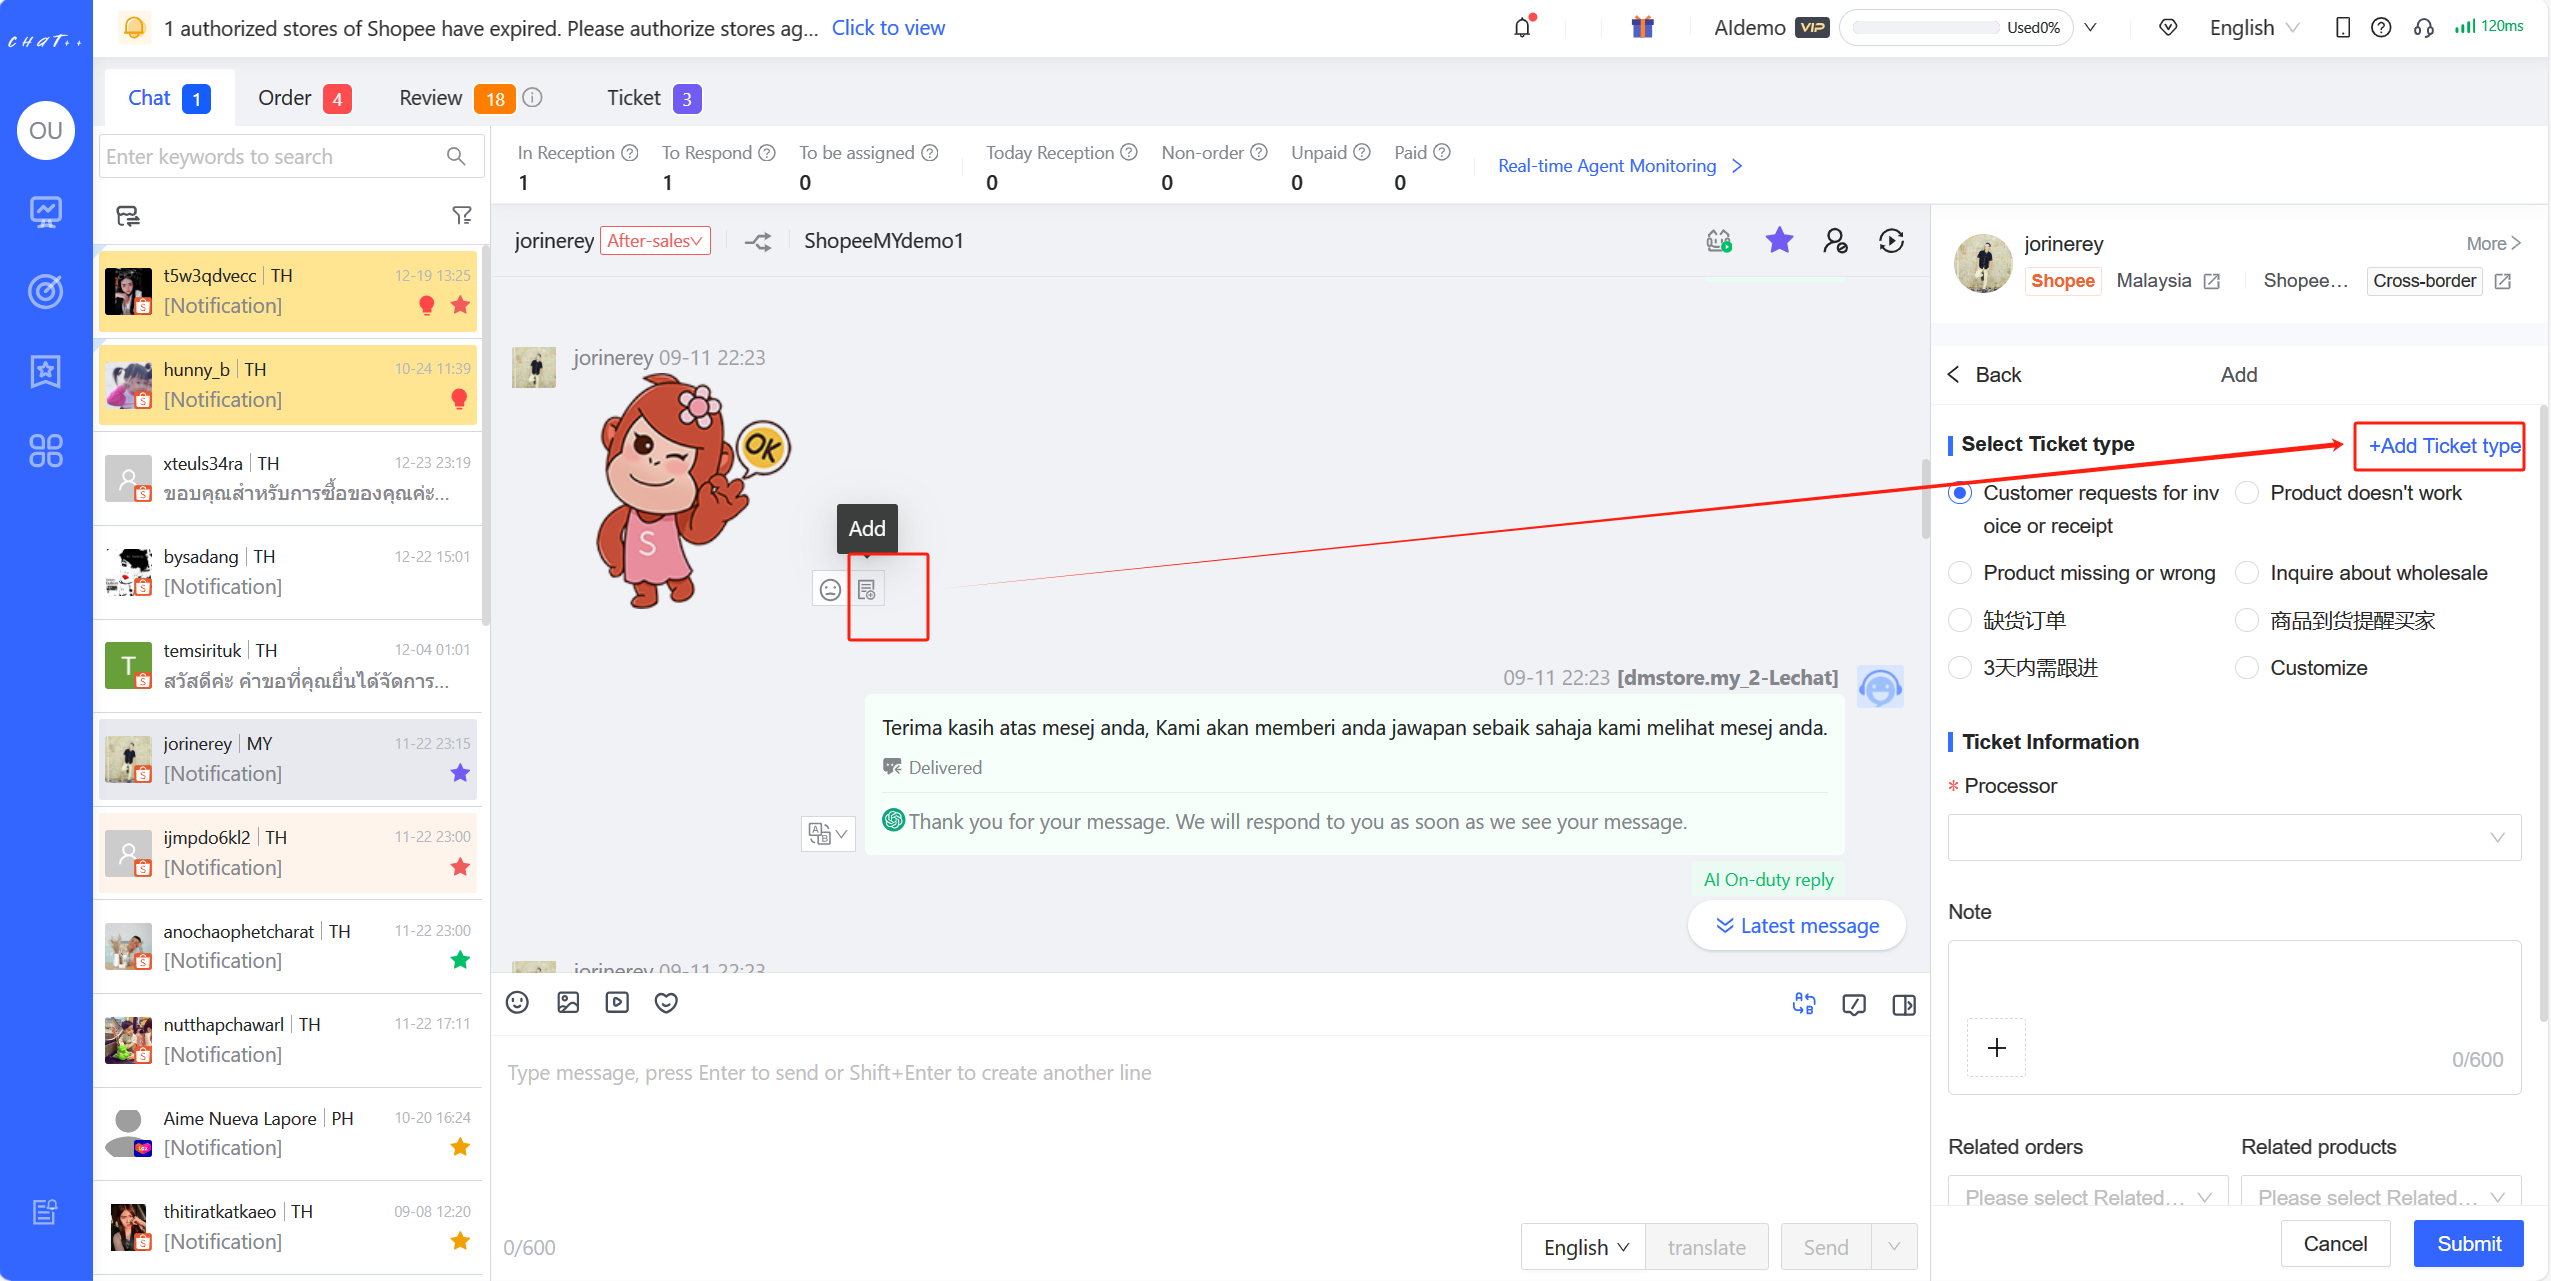
Figure6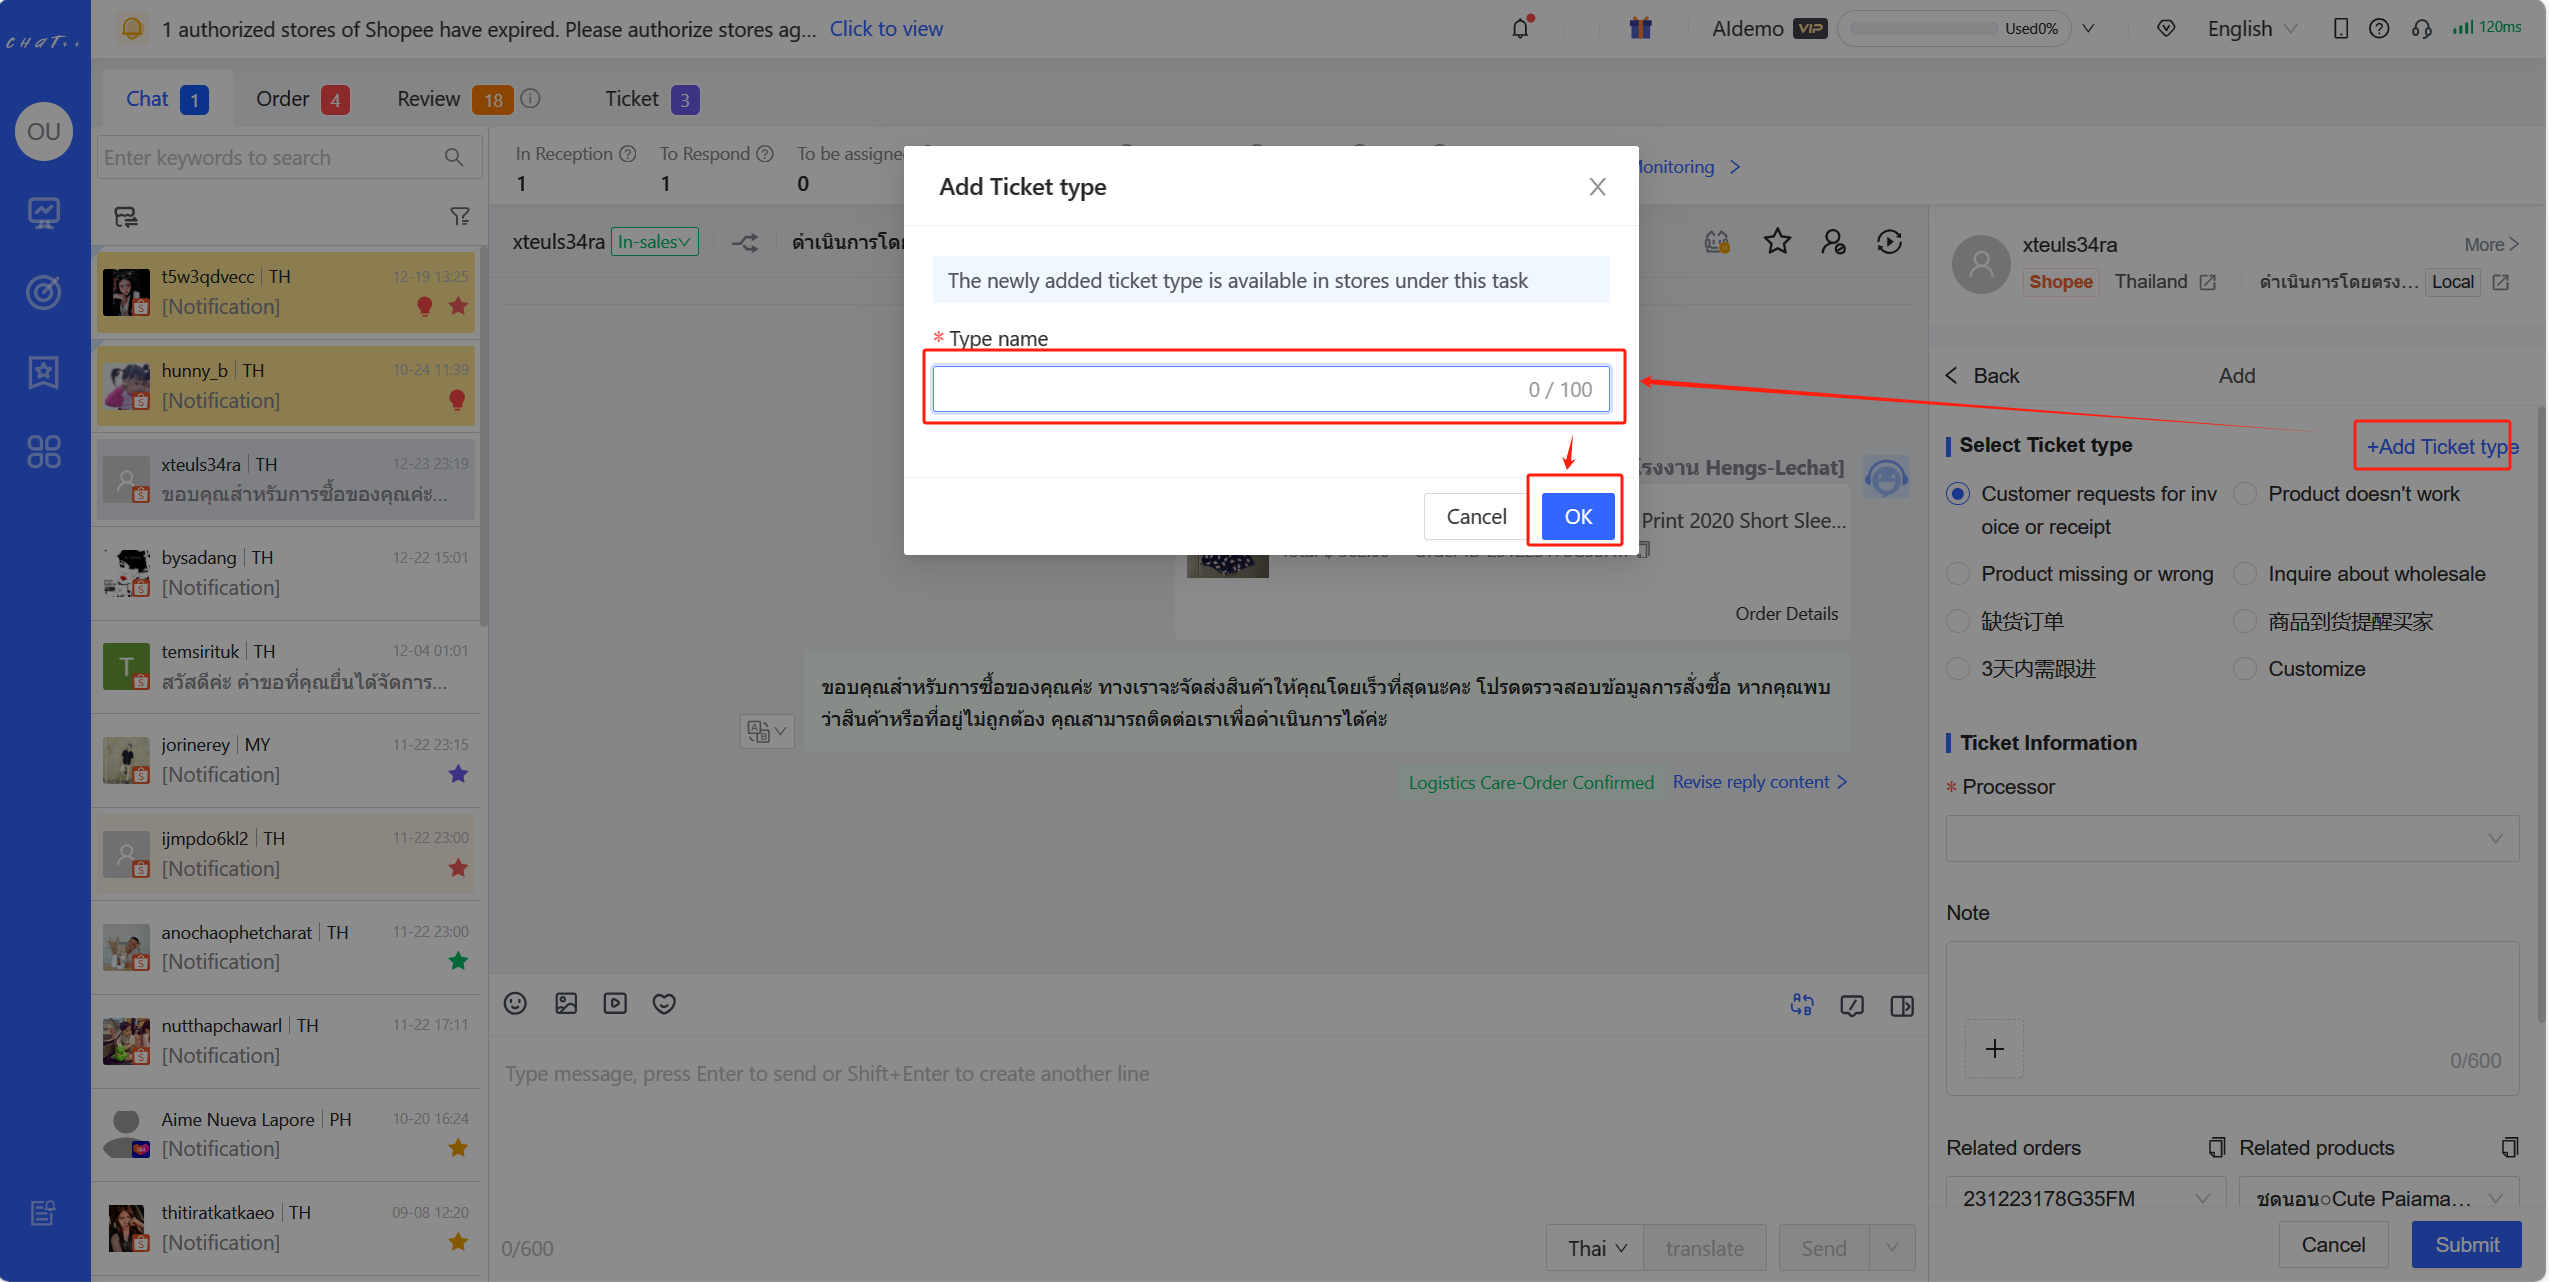
Figure7
To create a ticket from the Automation - Reception Basics Click on "Automation" on the left sidebar of the system. Then navigate to "Reception Basics" followed by "Tickets" and finally click on "View Details."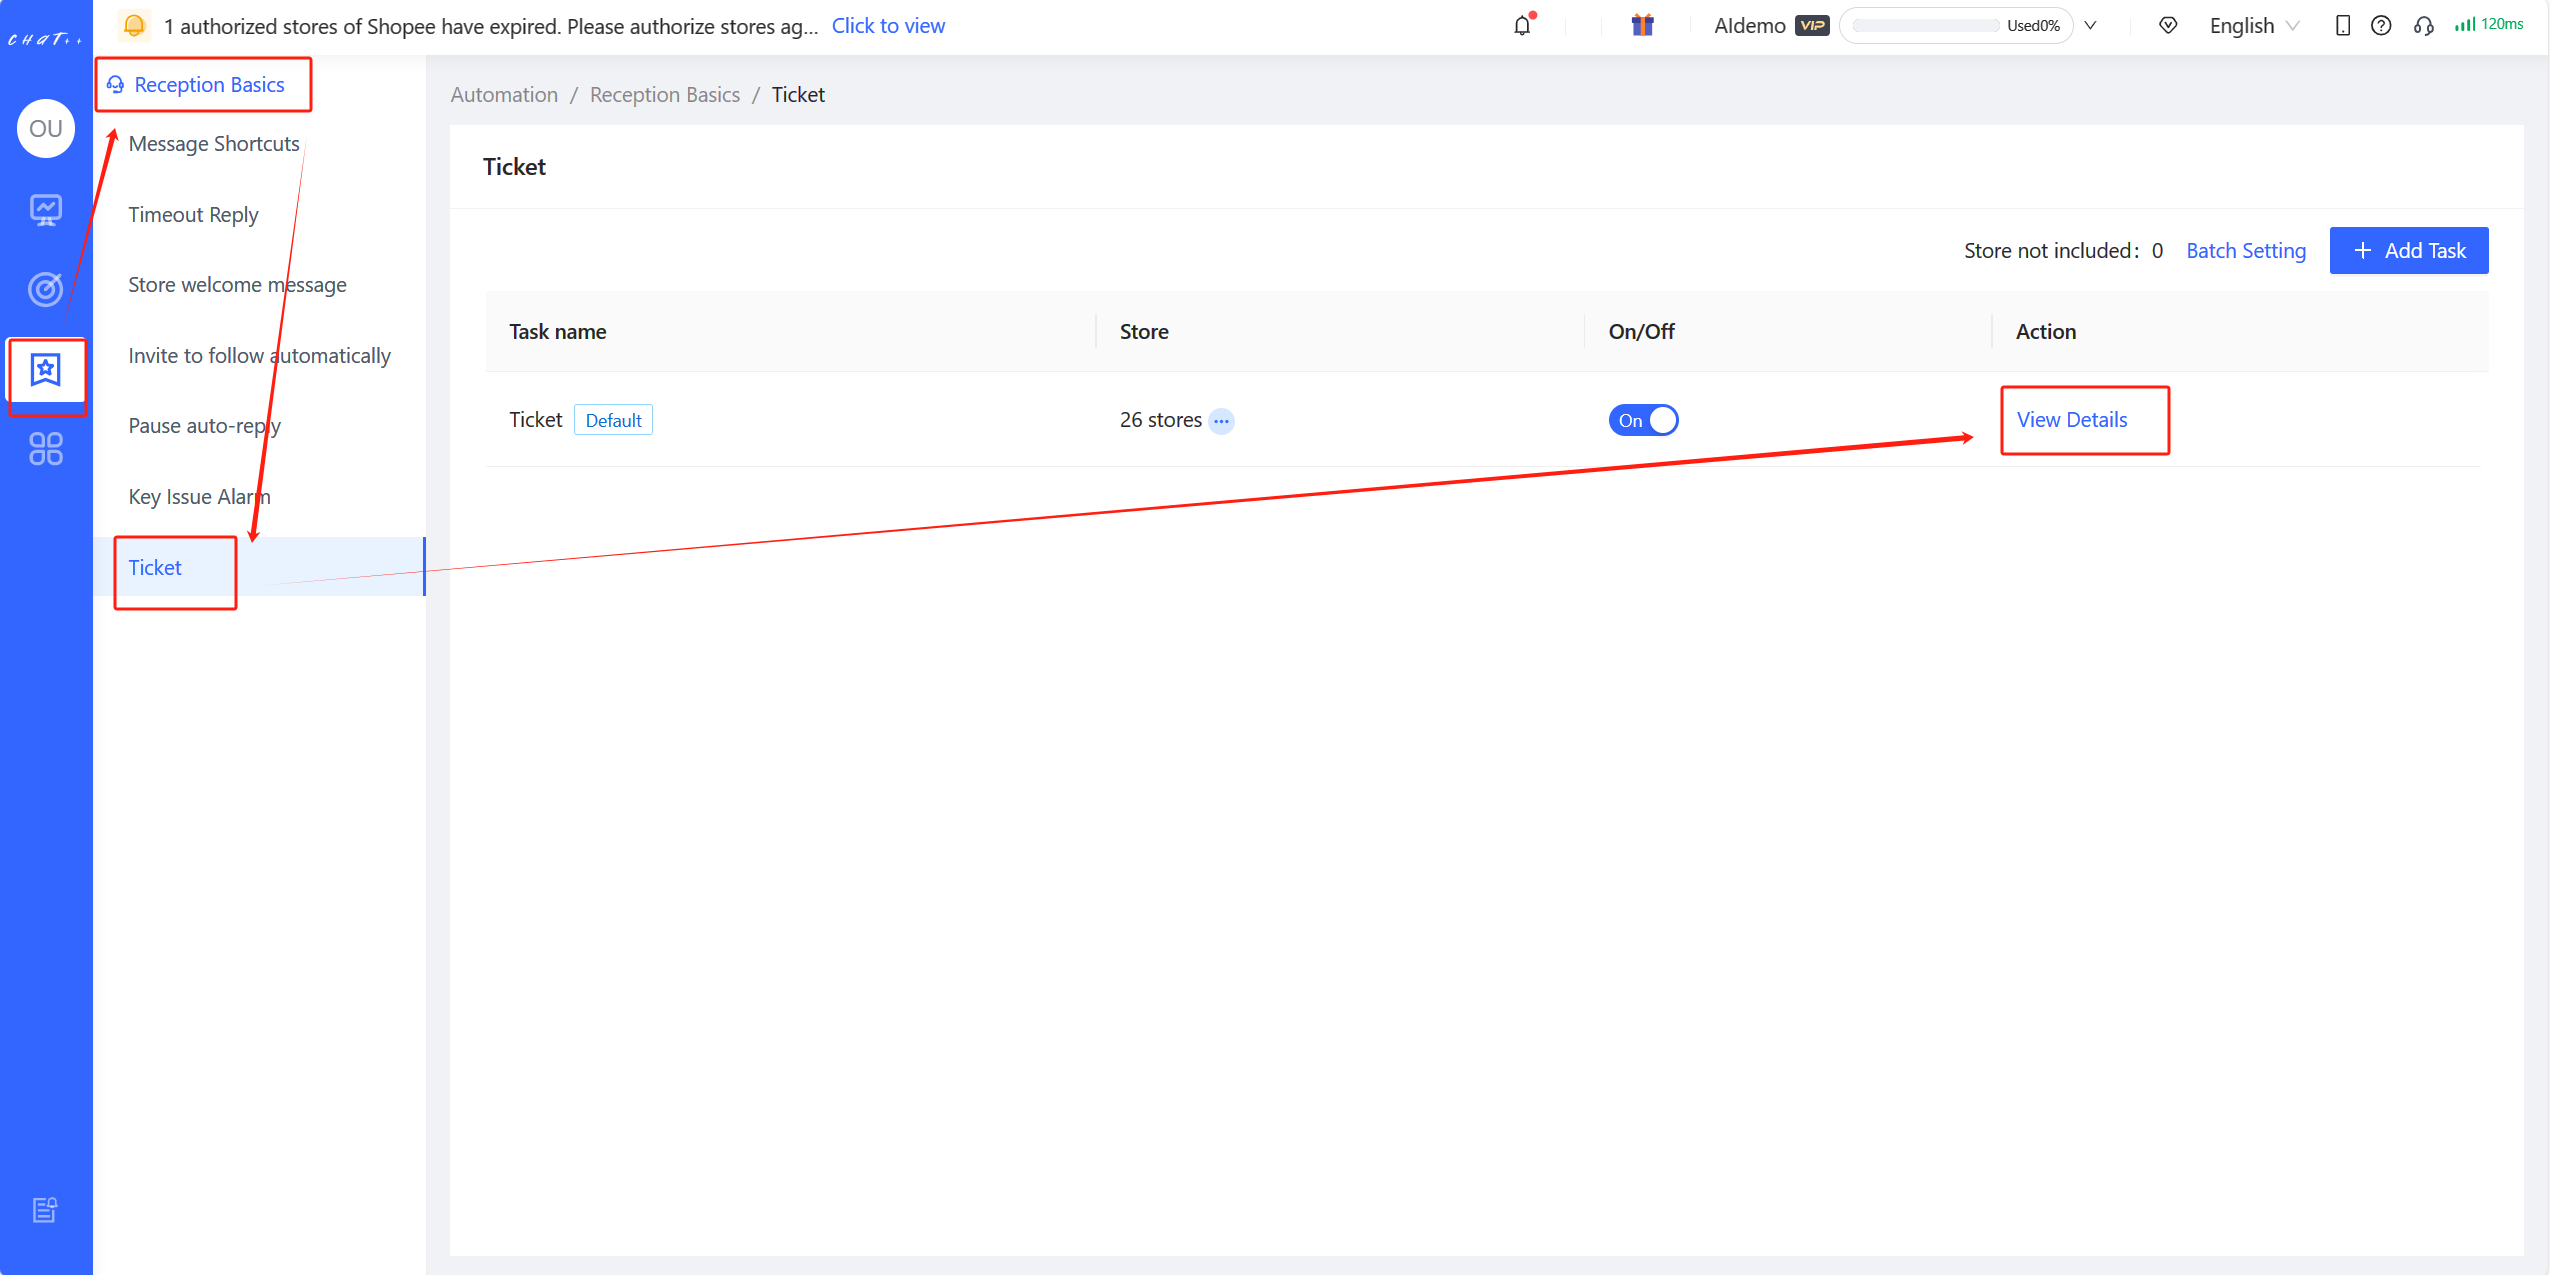
Figure8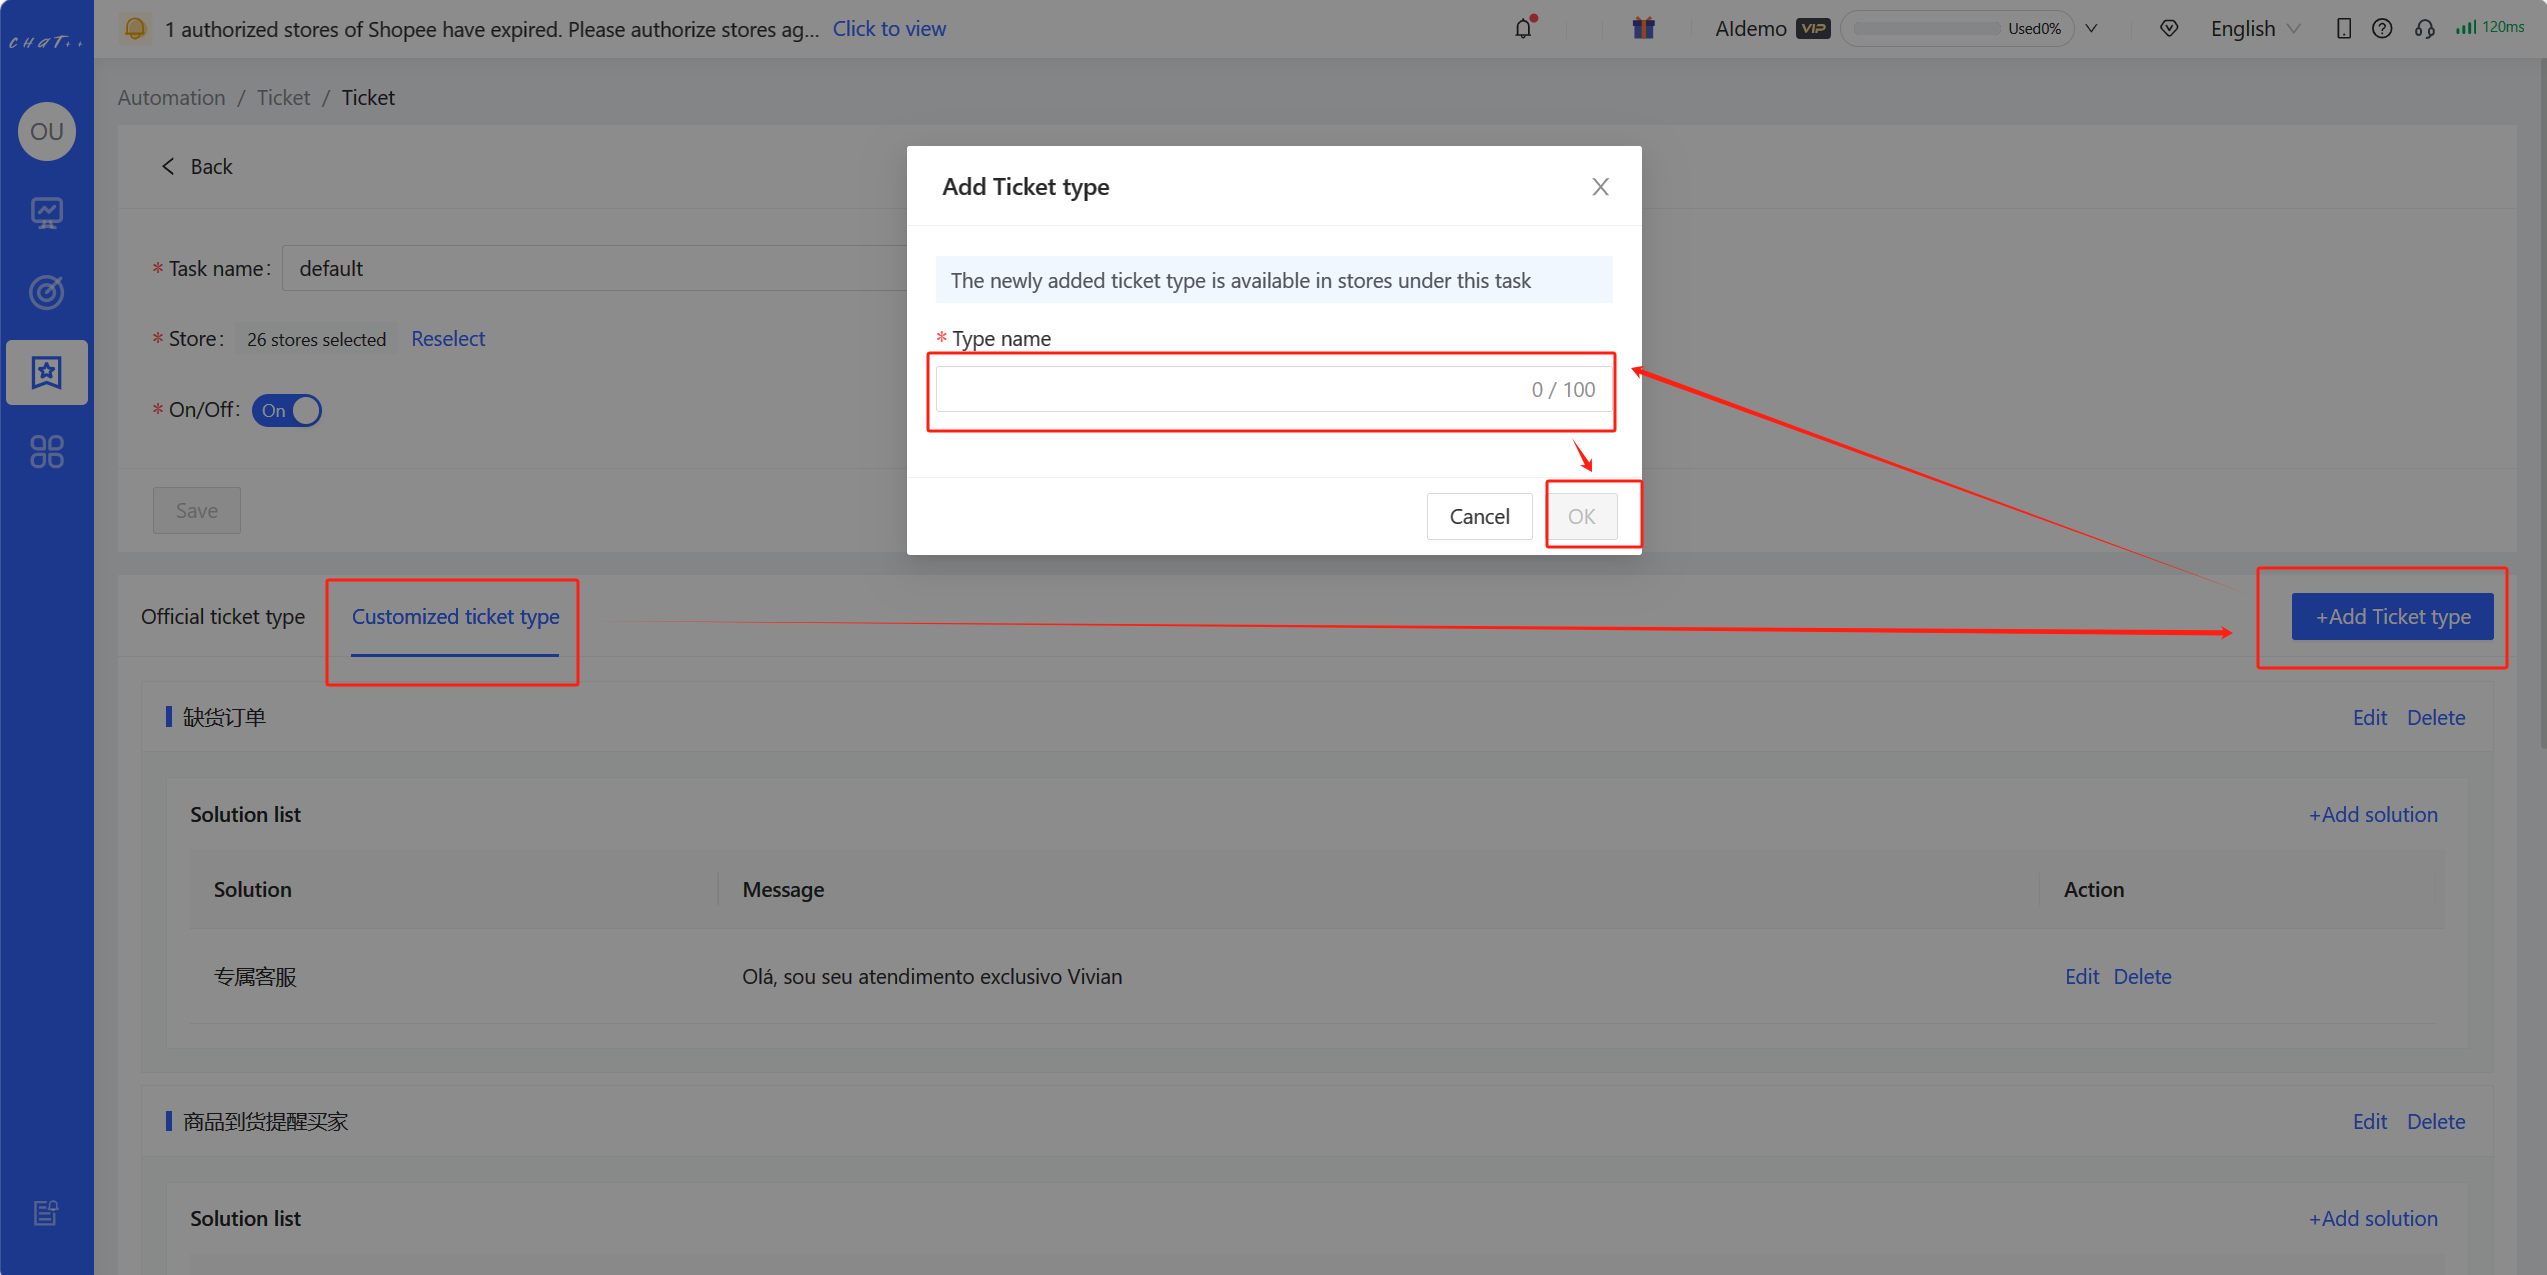
Figure9
When manually creating a new ticket type, it's necessary to input a type name that doesn't duplicate existing type names. The agent handling the ticket is by default set to the person manually creating the ticket. Once the ticket item is created, the default available solution is "[Other]." Additional solutions can be manually added later in "Automation → Reception Basics → Tickets."
2、Viewing Tickets
Accessing tickets from the conversation list
After clicking on a specific buyer's conversation, you can view all historical tickets for that buyer within the current store by navigating to "Conversation Sidebar - Tickets." This allows you to see the current status and progress of all tickets associated with that buyer.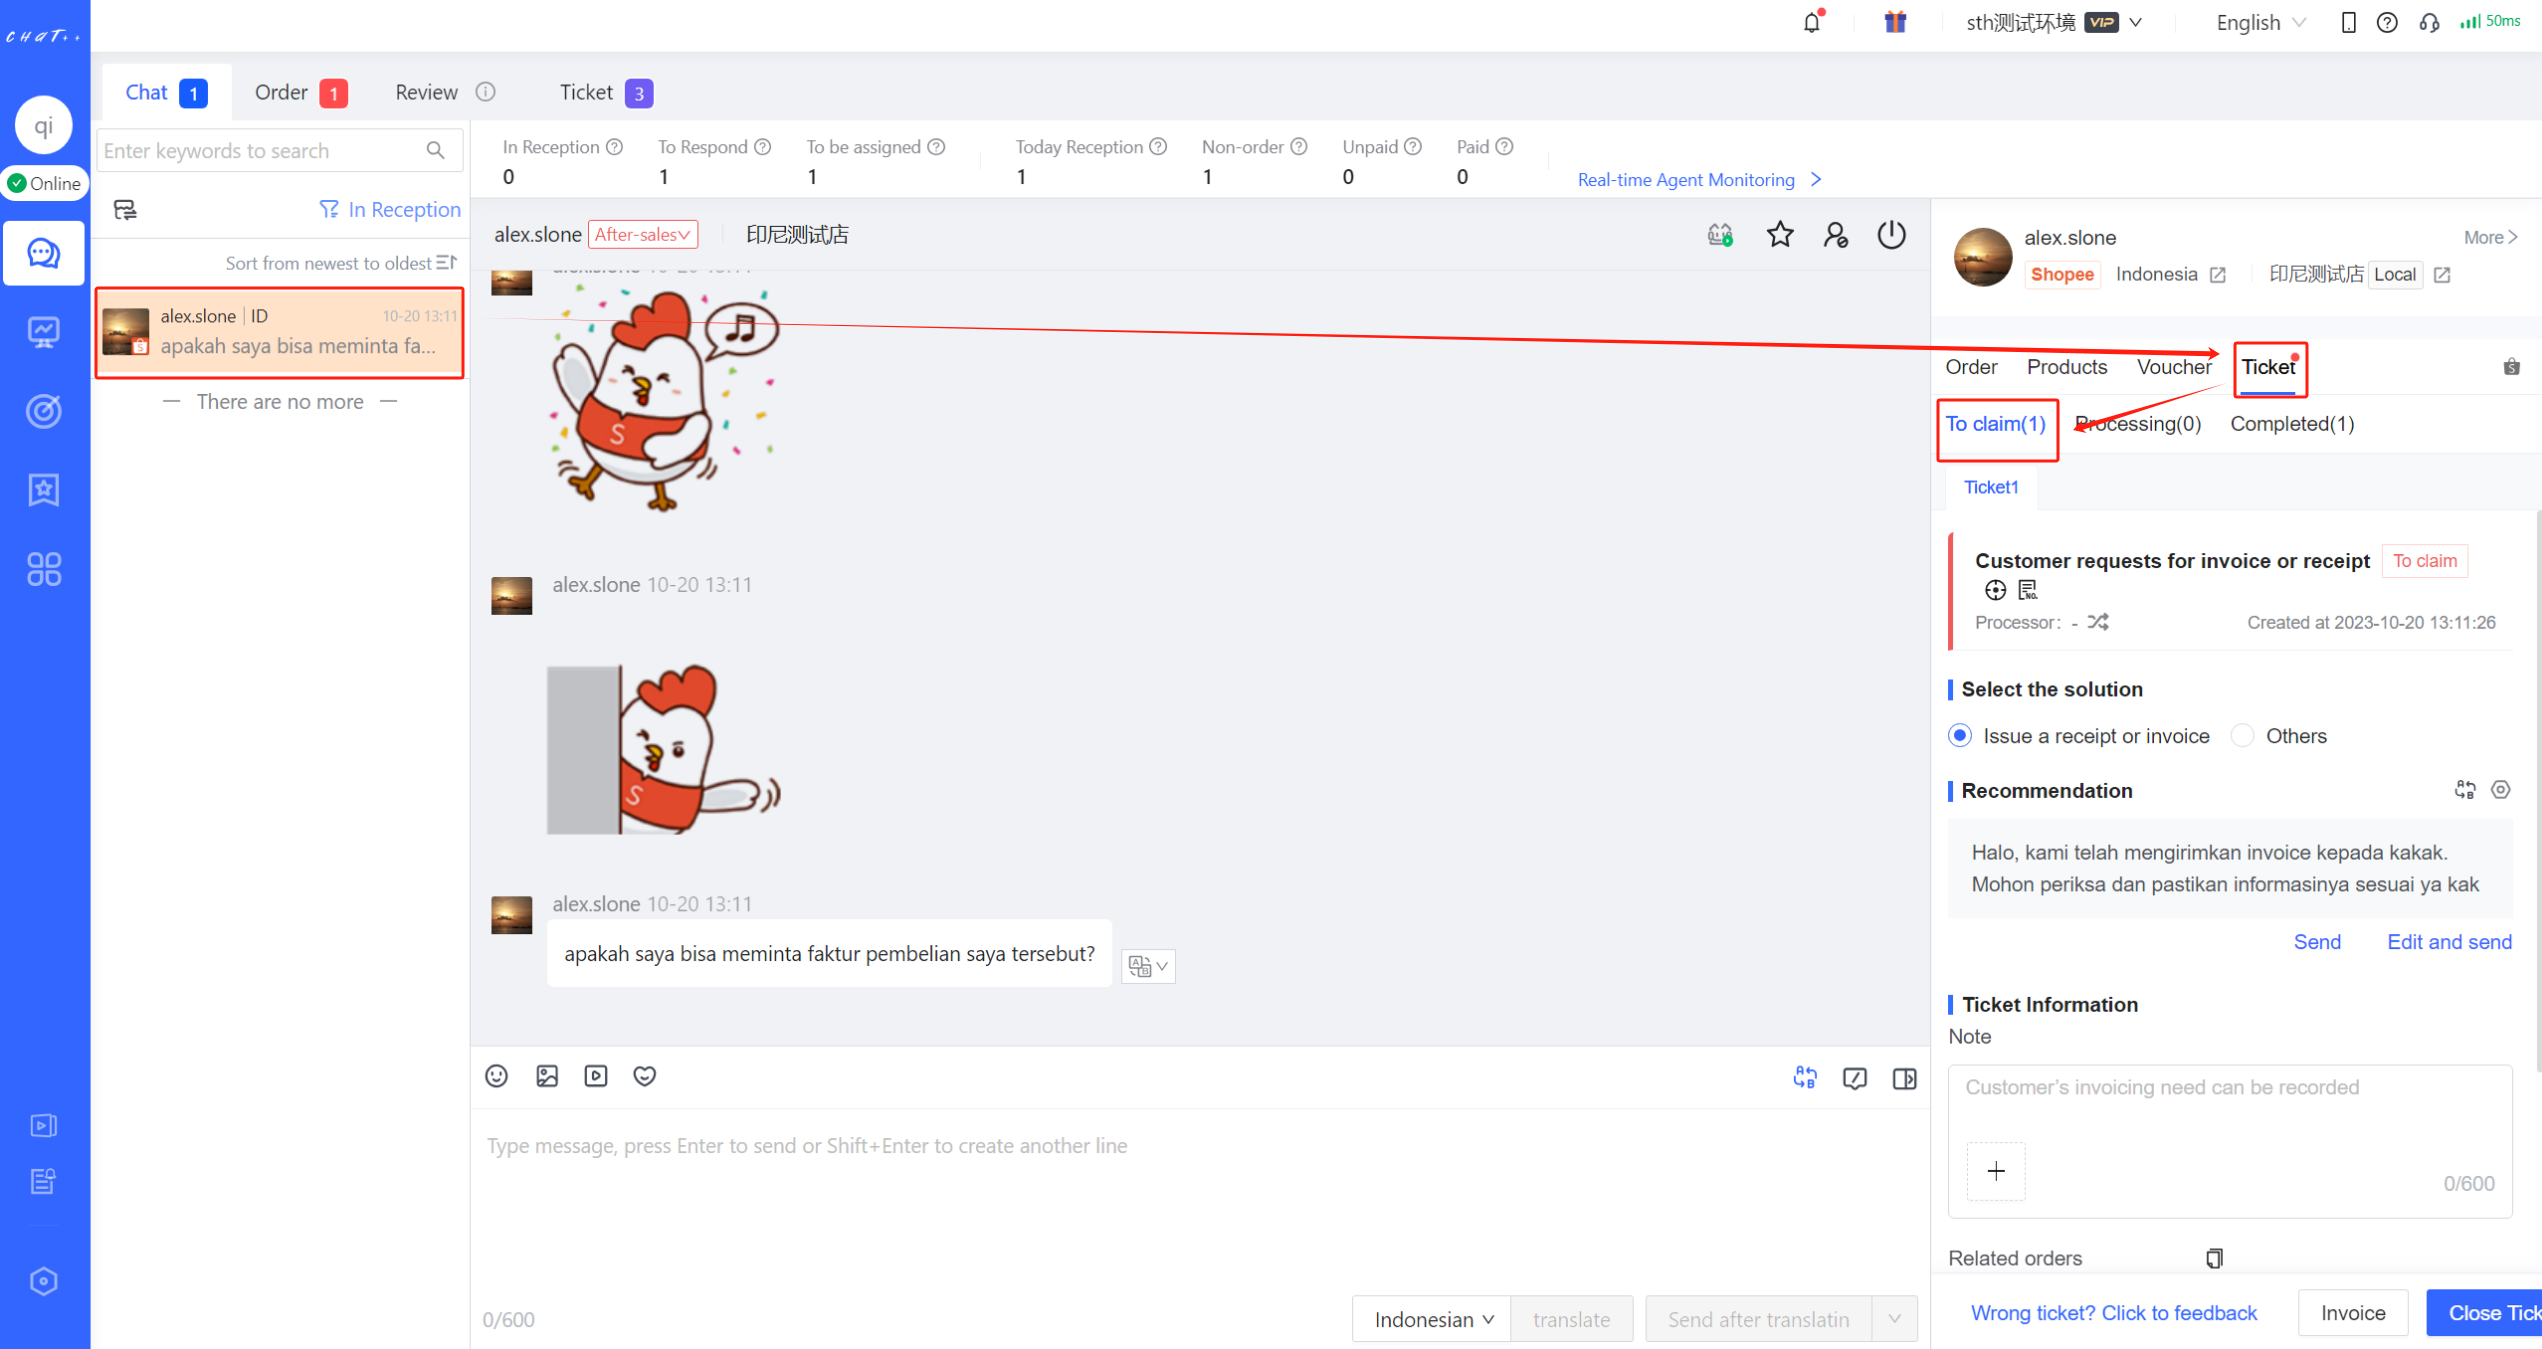
Figure10
Accessing Tickets from the Ticket Management Center
The number displayed on the right side of the "Ticket Management Center" represents the total count of tickets in the "Pending" and "In Progress" states.
Once the system automatically generates tickets, this number updates in real-time to prompt customer service to follow up.
By clicking on Left Sidebar "Messages → Ticket"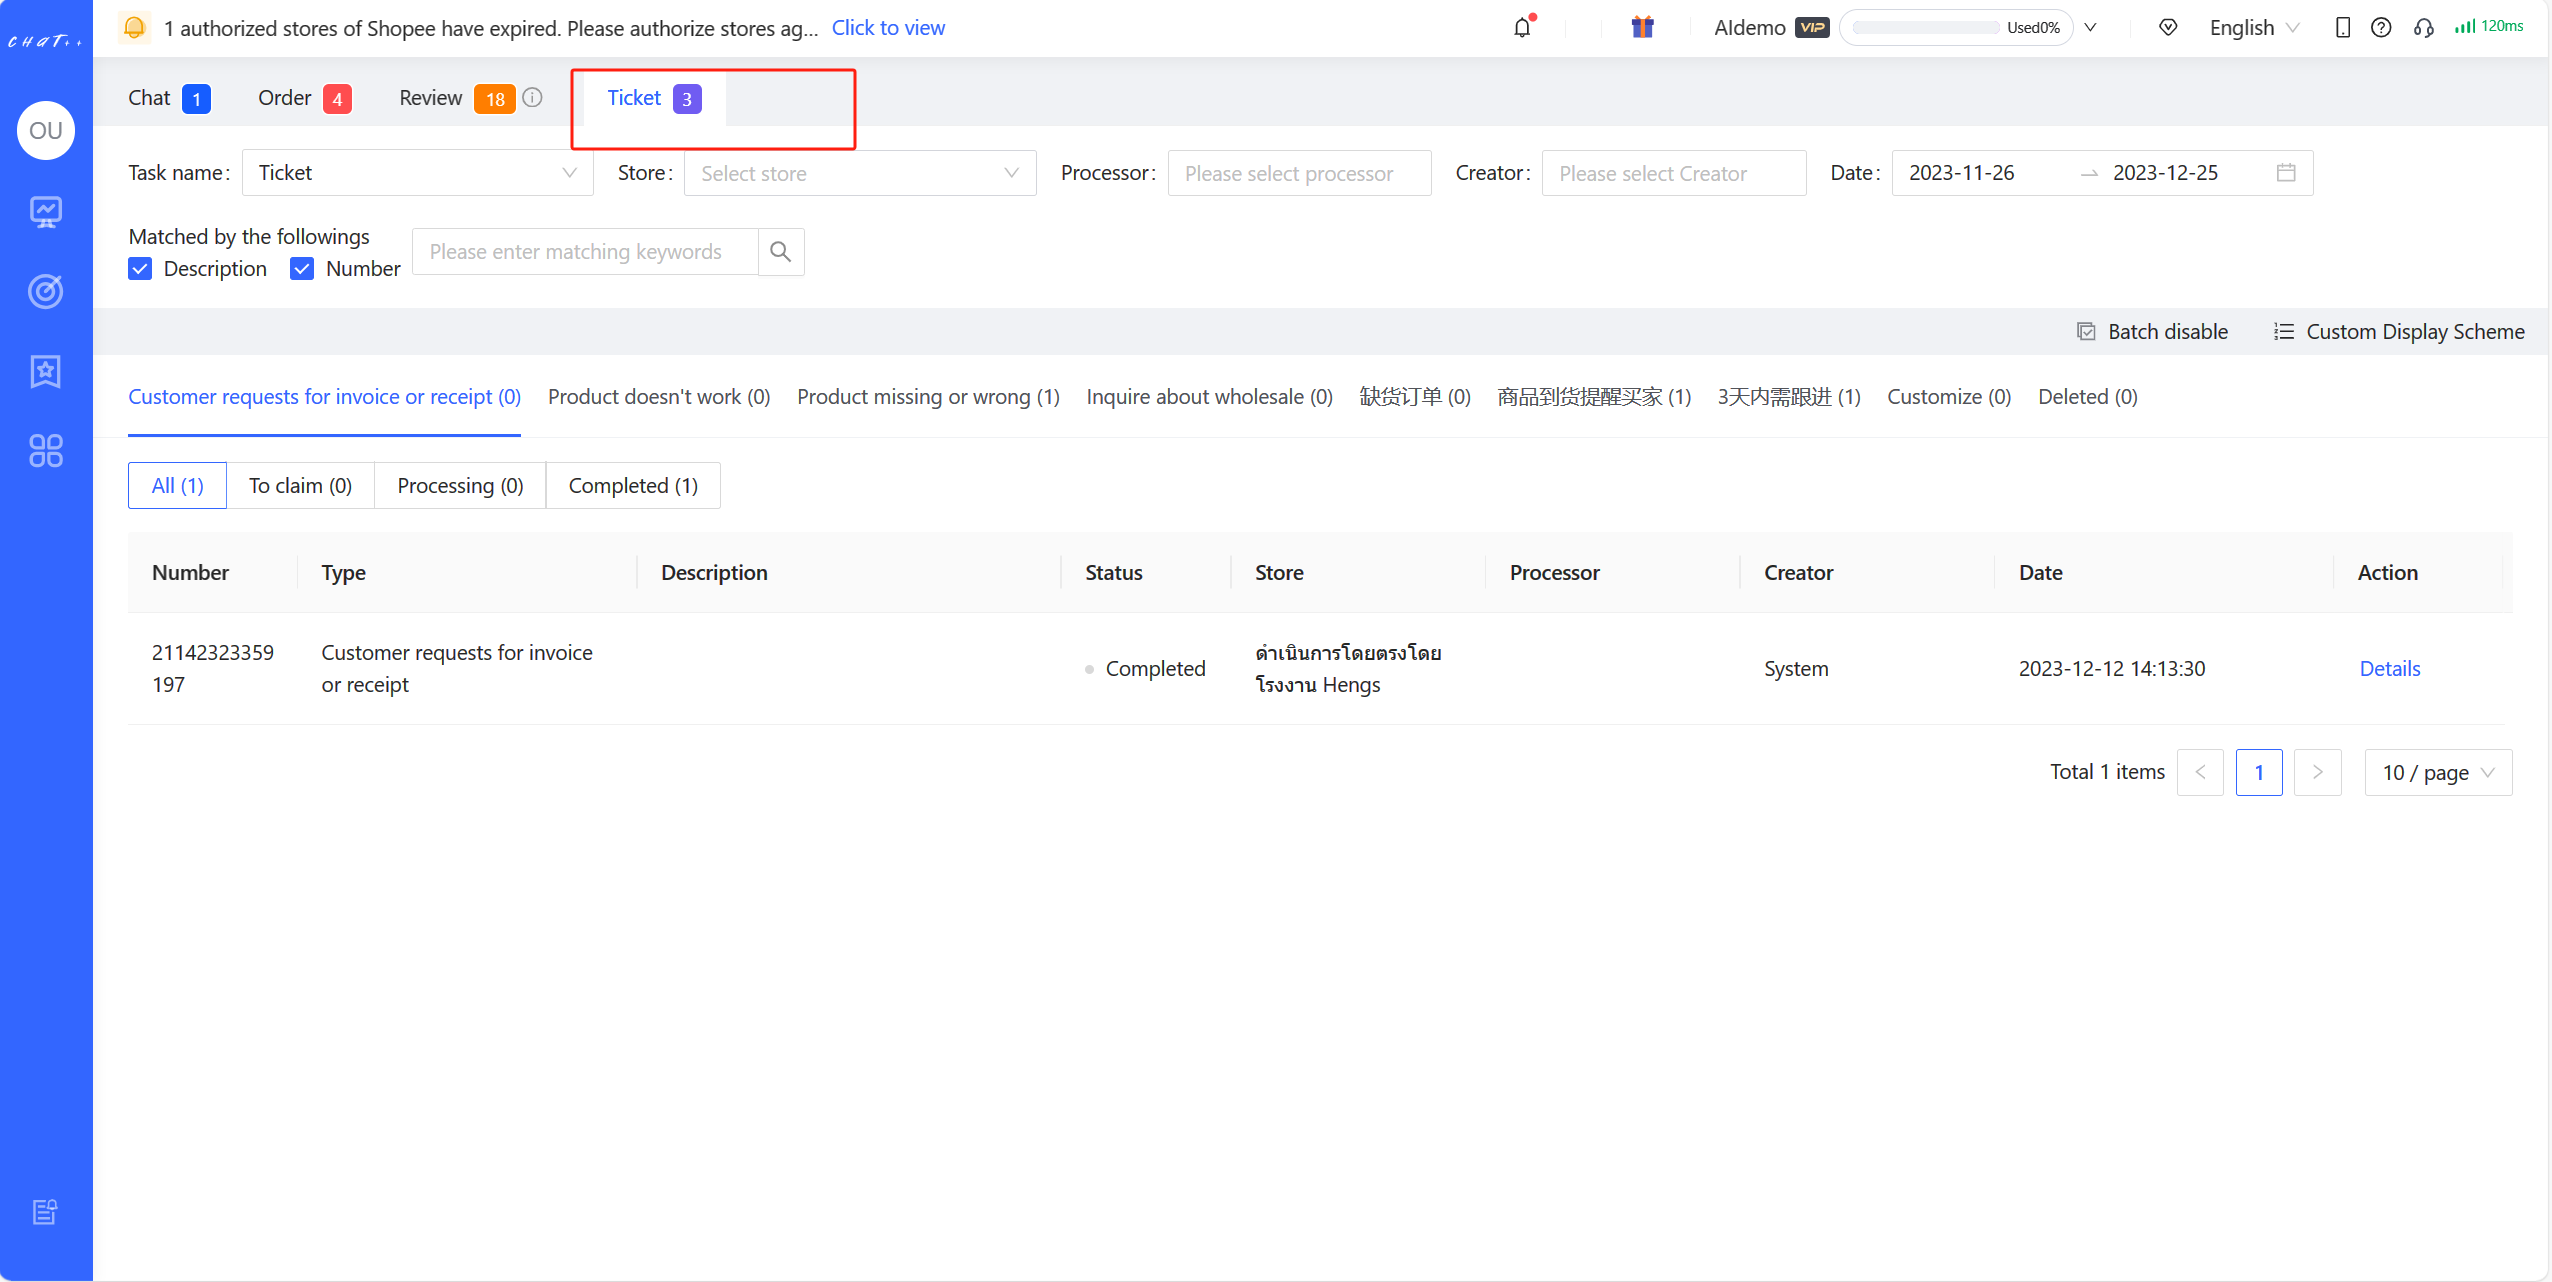
Figure11
3、Following up on Tickets
Following up on tickets from the conversation list
a. Claiming/Transferring Tickets
- First-time claiming of a ticket: For tickets in the "Pending" status, when any account (superadmin/admin/customer service account, etc.) responds to the buyer's message, they automatically become the "handling agent" for that ticket. The ticket status changes from "Pending" to "In Progress."
- Transferring tickets to a suitable handling agent (as shown below): If a ticket of a particular issue type needs to be transferred to another more suitable "handling agent" for follow-up, you can click the "Transfer" button and select the handling agent for the transfer. The ticket status changes from "Pending" to "In Progress."
- Automatic change of handling agent for tickets in "In Progress": If any user modifies key information of a ticket (e.g., modifying the solution), they automatically become the latest handling agent for that ticket.
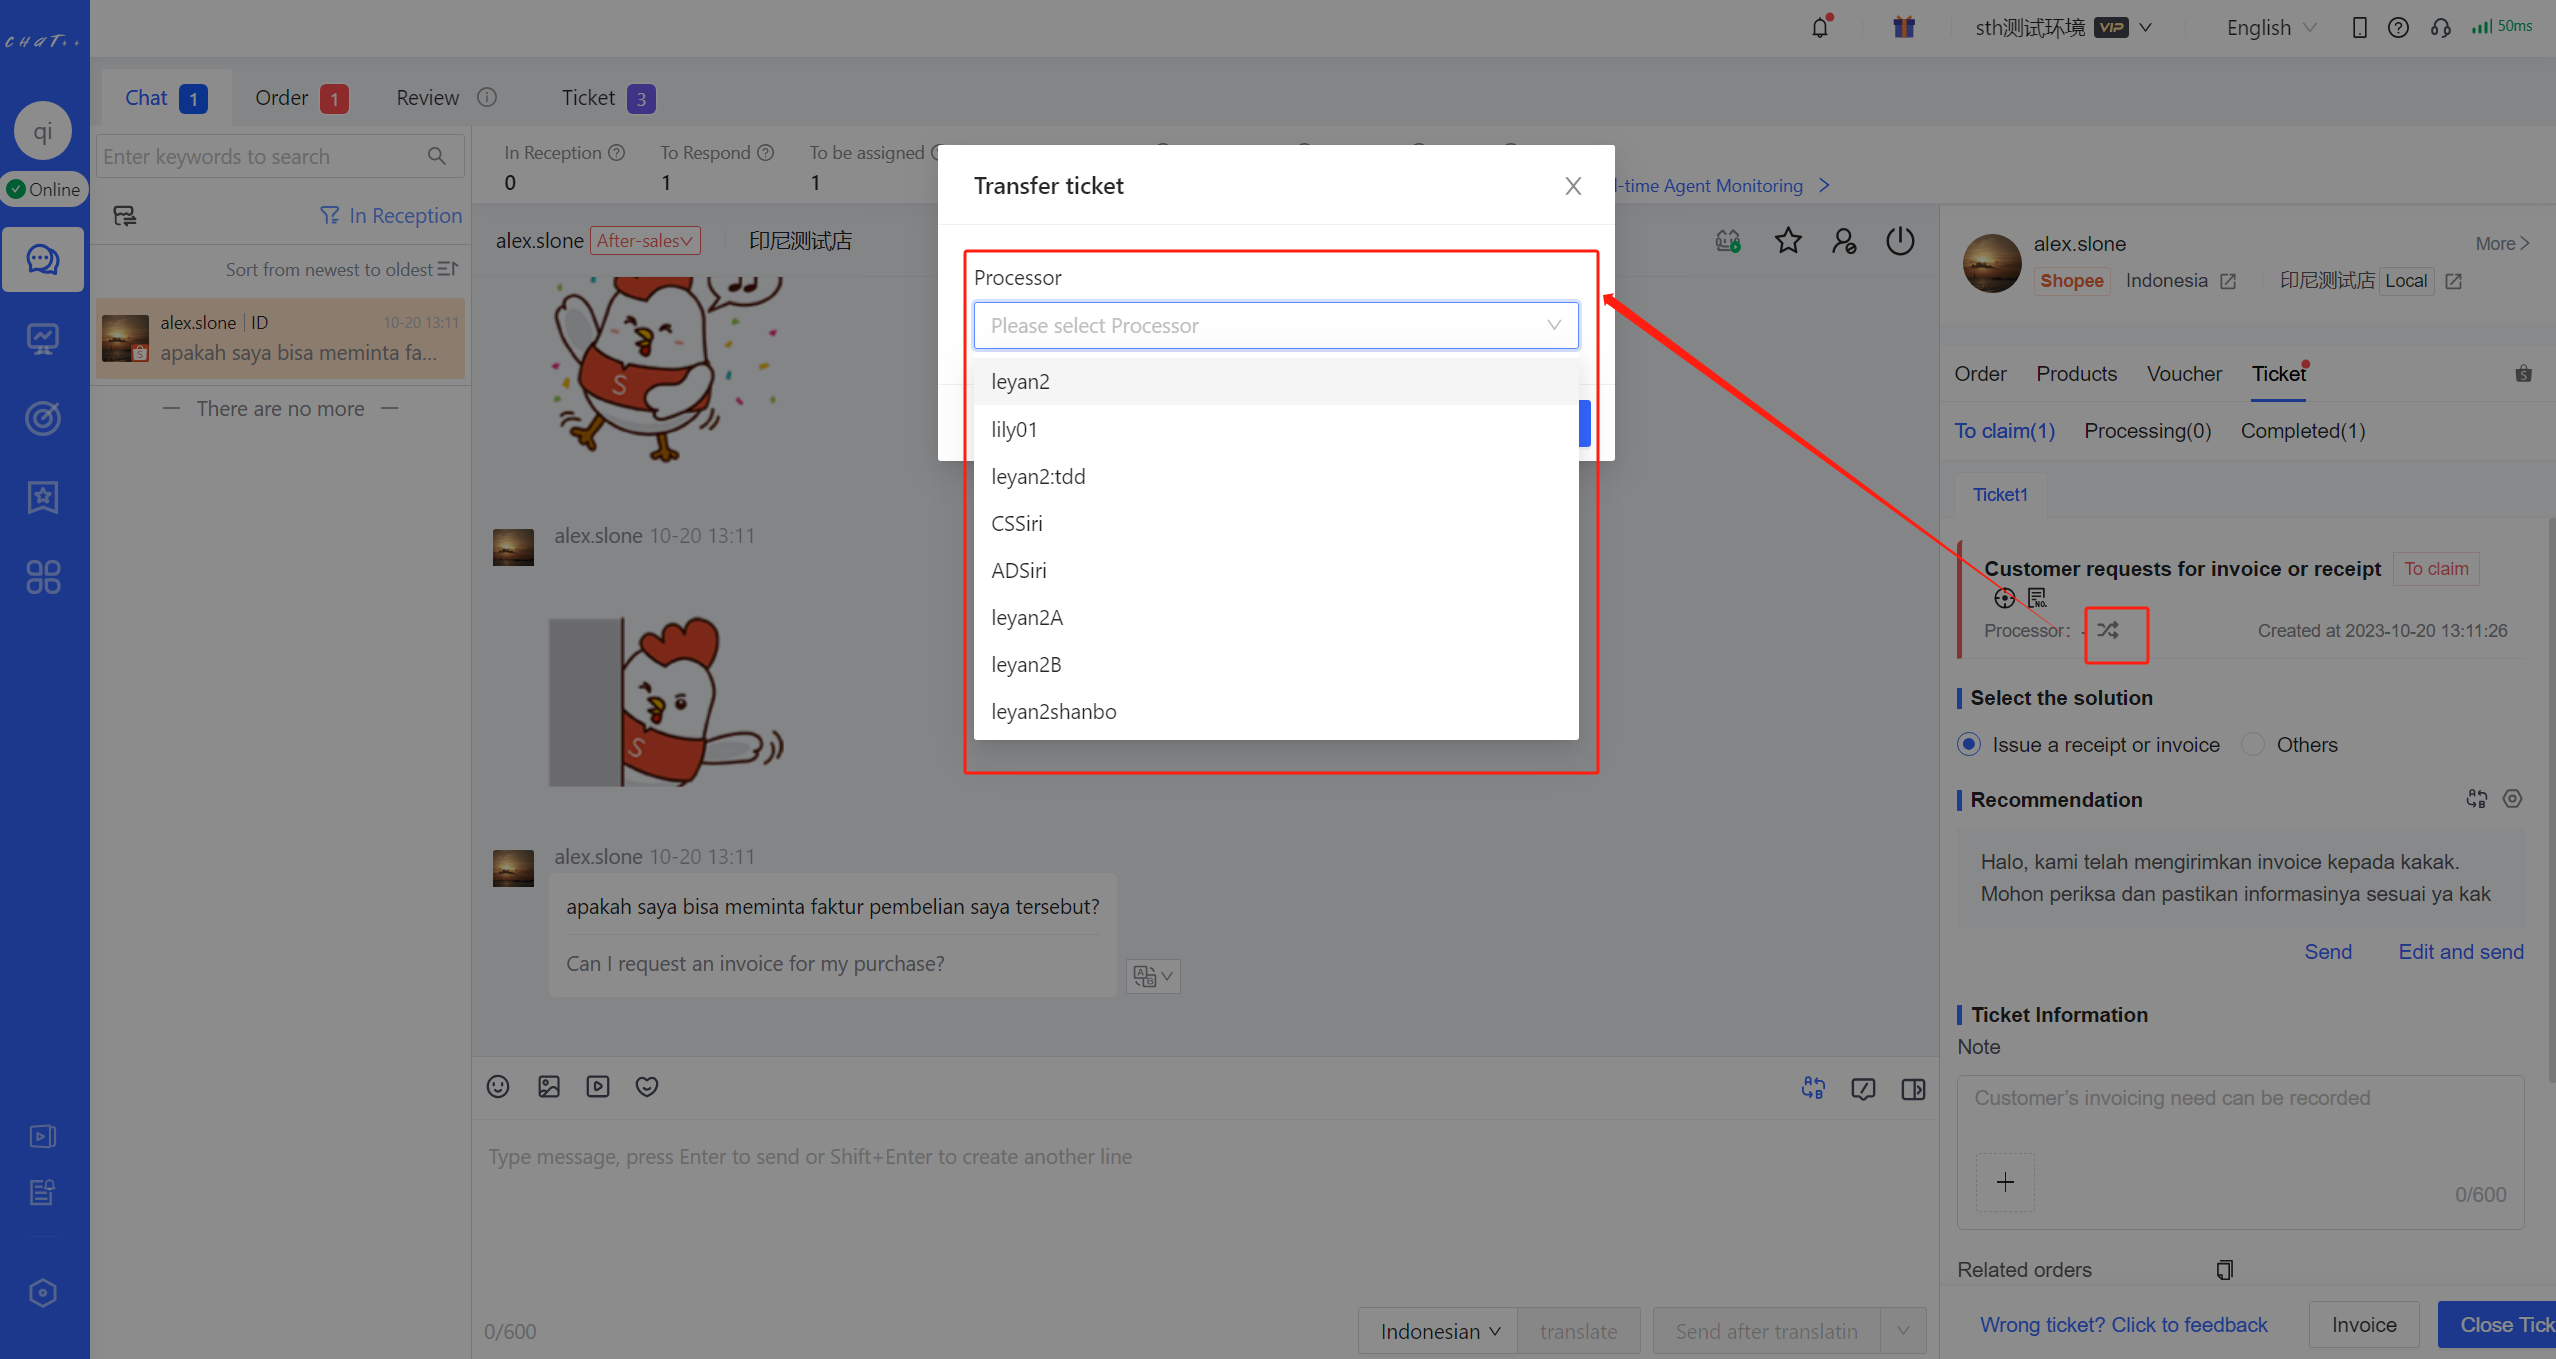
Figure12
b. Handling TicketsInterface Instructions
- Locating the position of the conversation triggering this ticket: Clicking on the "Locate" button as shown in the image will automatically locate and highlight the specific conversation that triggered this particular ticket task.
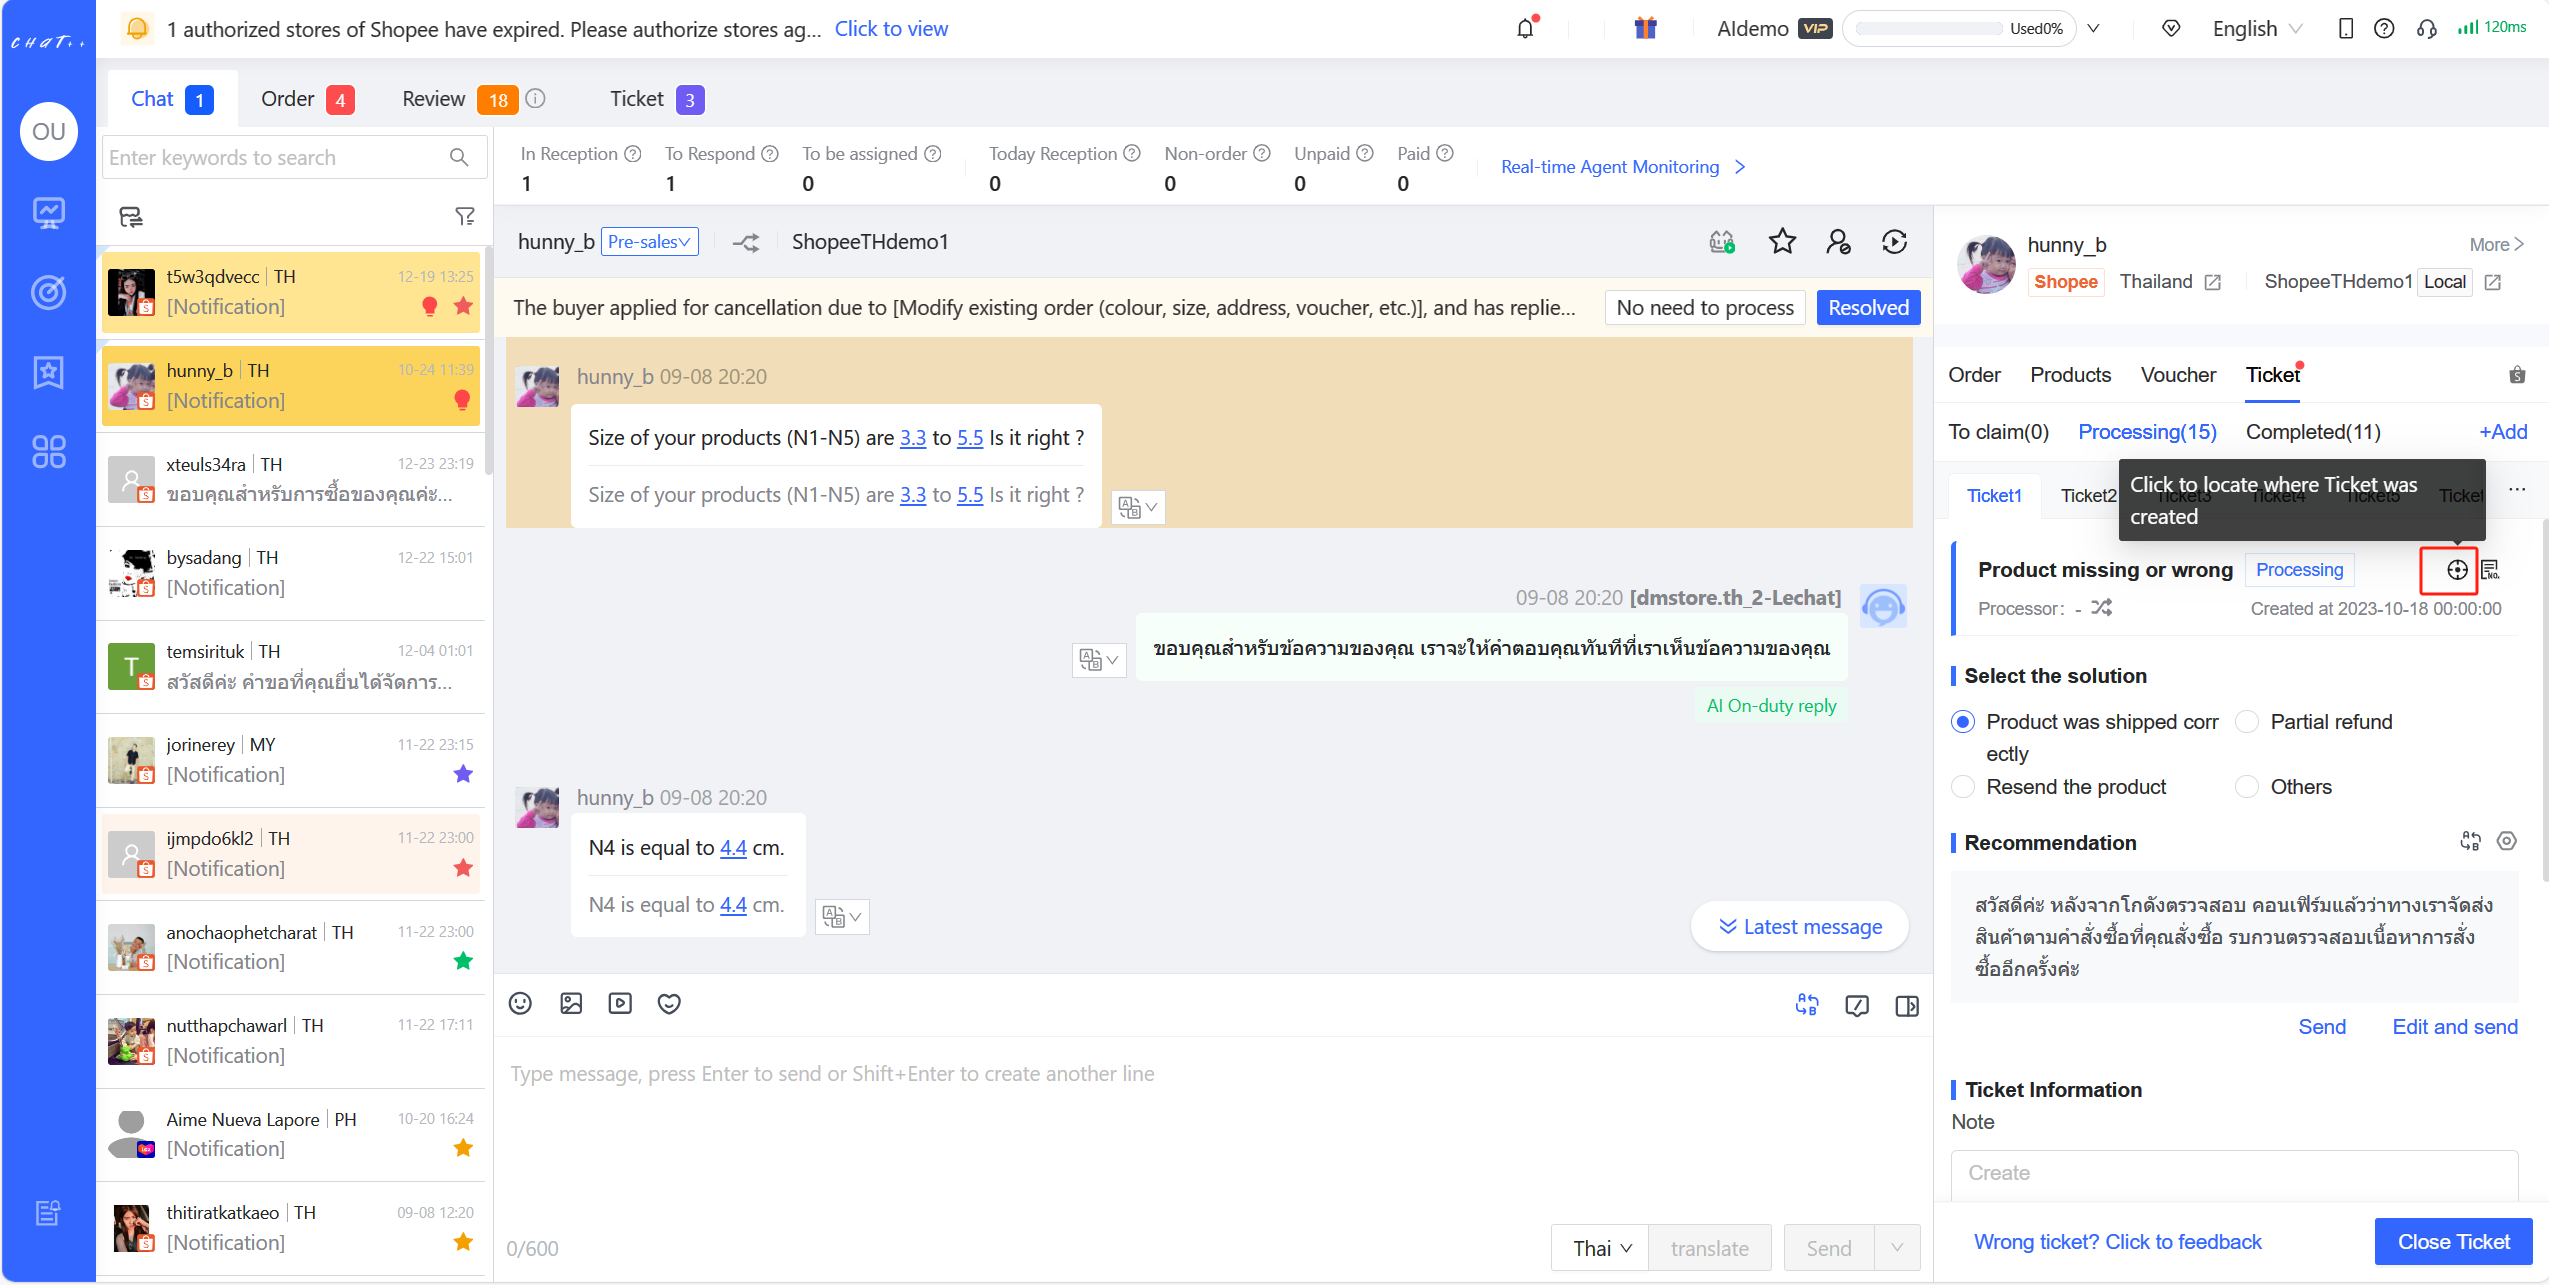
Figure13
- Select Solution: Different ticket issue types offer various "Handling Results" options. (If the preset options don’t match the actual requirement, the agent can also select "Other").
- Recommended Response: Choosing different "Solutions" will automatically correspond to different recommended response scripts in this section. Agents can choose to inform the buyer about the solution to this ticket, enabling the buyer to stay updated on the progress.
- Viewing translated responses: Clicking the "Translate" button on the right side of the "Recommended Response" section (refer to the image below) allows you to view the Google Translate or GPT translation results for that script.
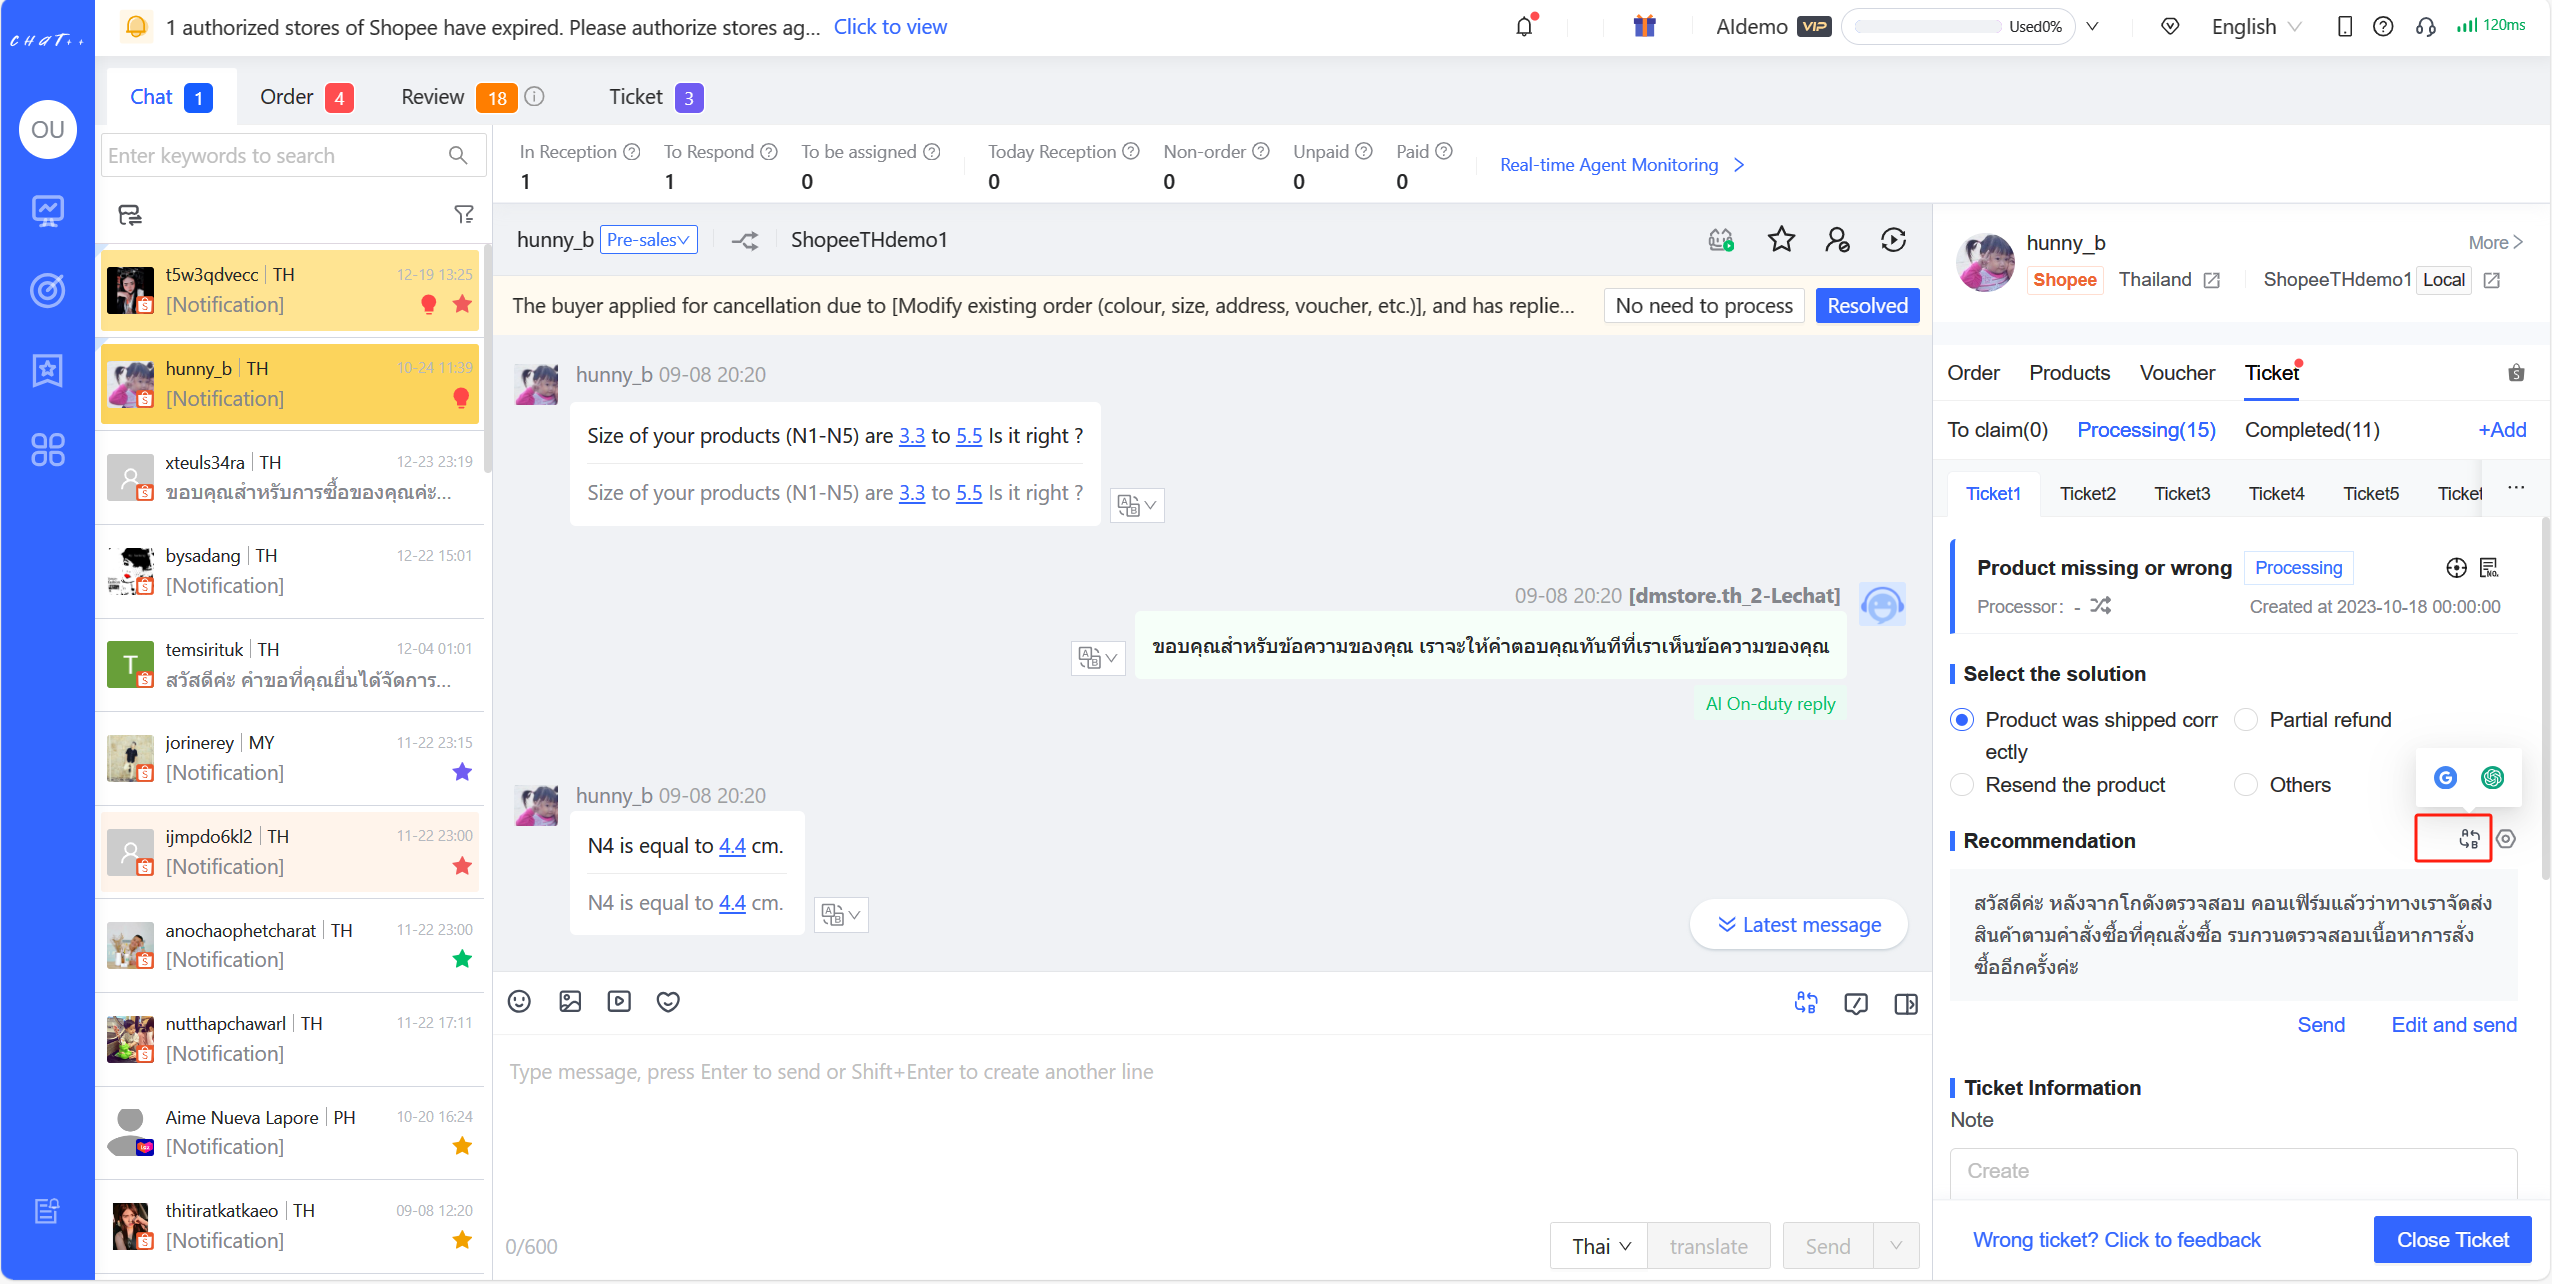
Figure14
Configuring the "Recommended Response" script for this solution: Clicking the "Configure" button on the right side of the "Recommended Response" section (as shown in the image below) enables you to uniformly configure the "Recommended Response" script corresponding to this solution.
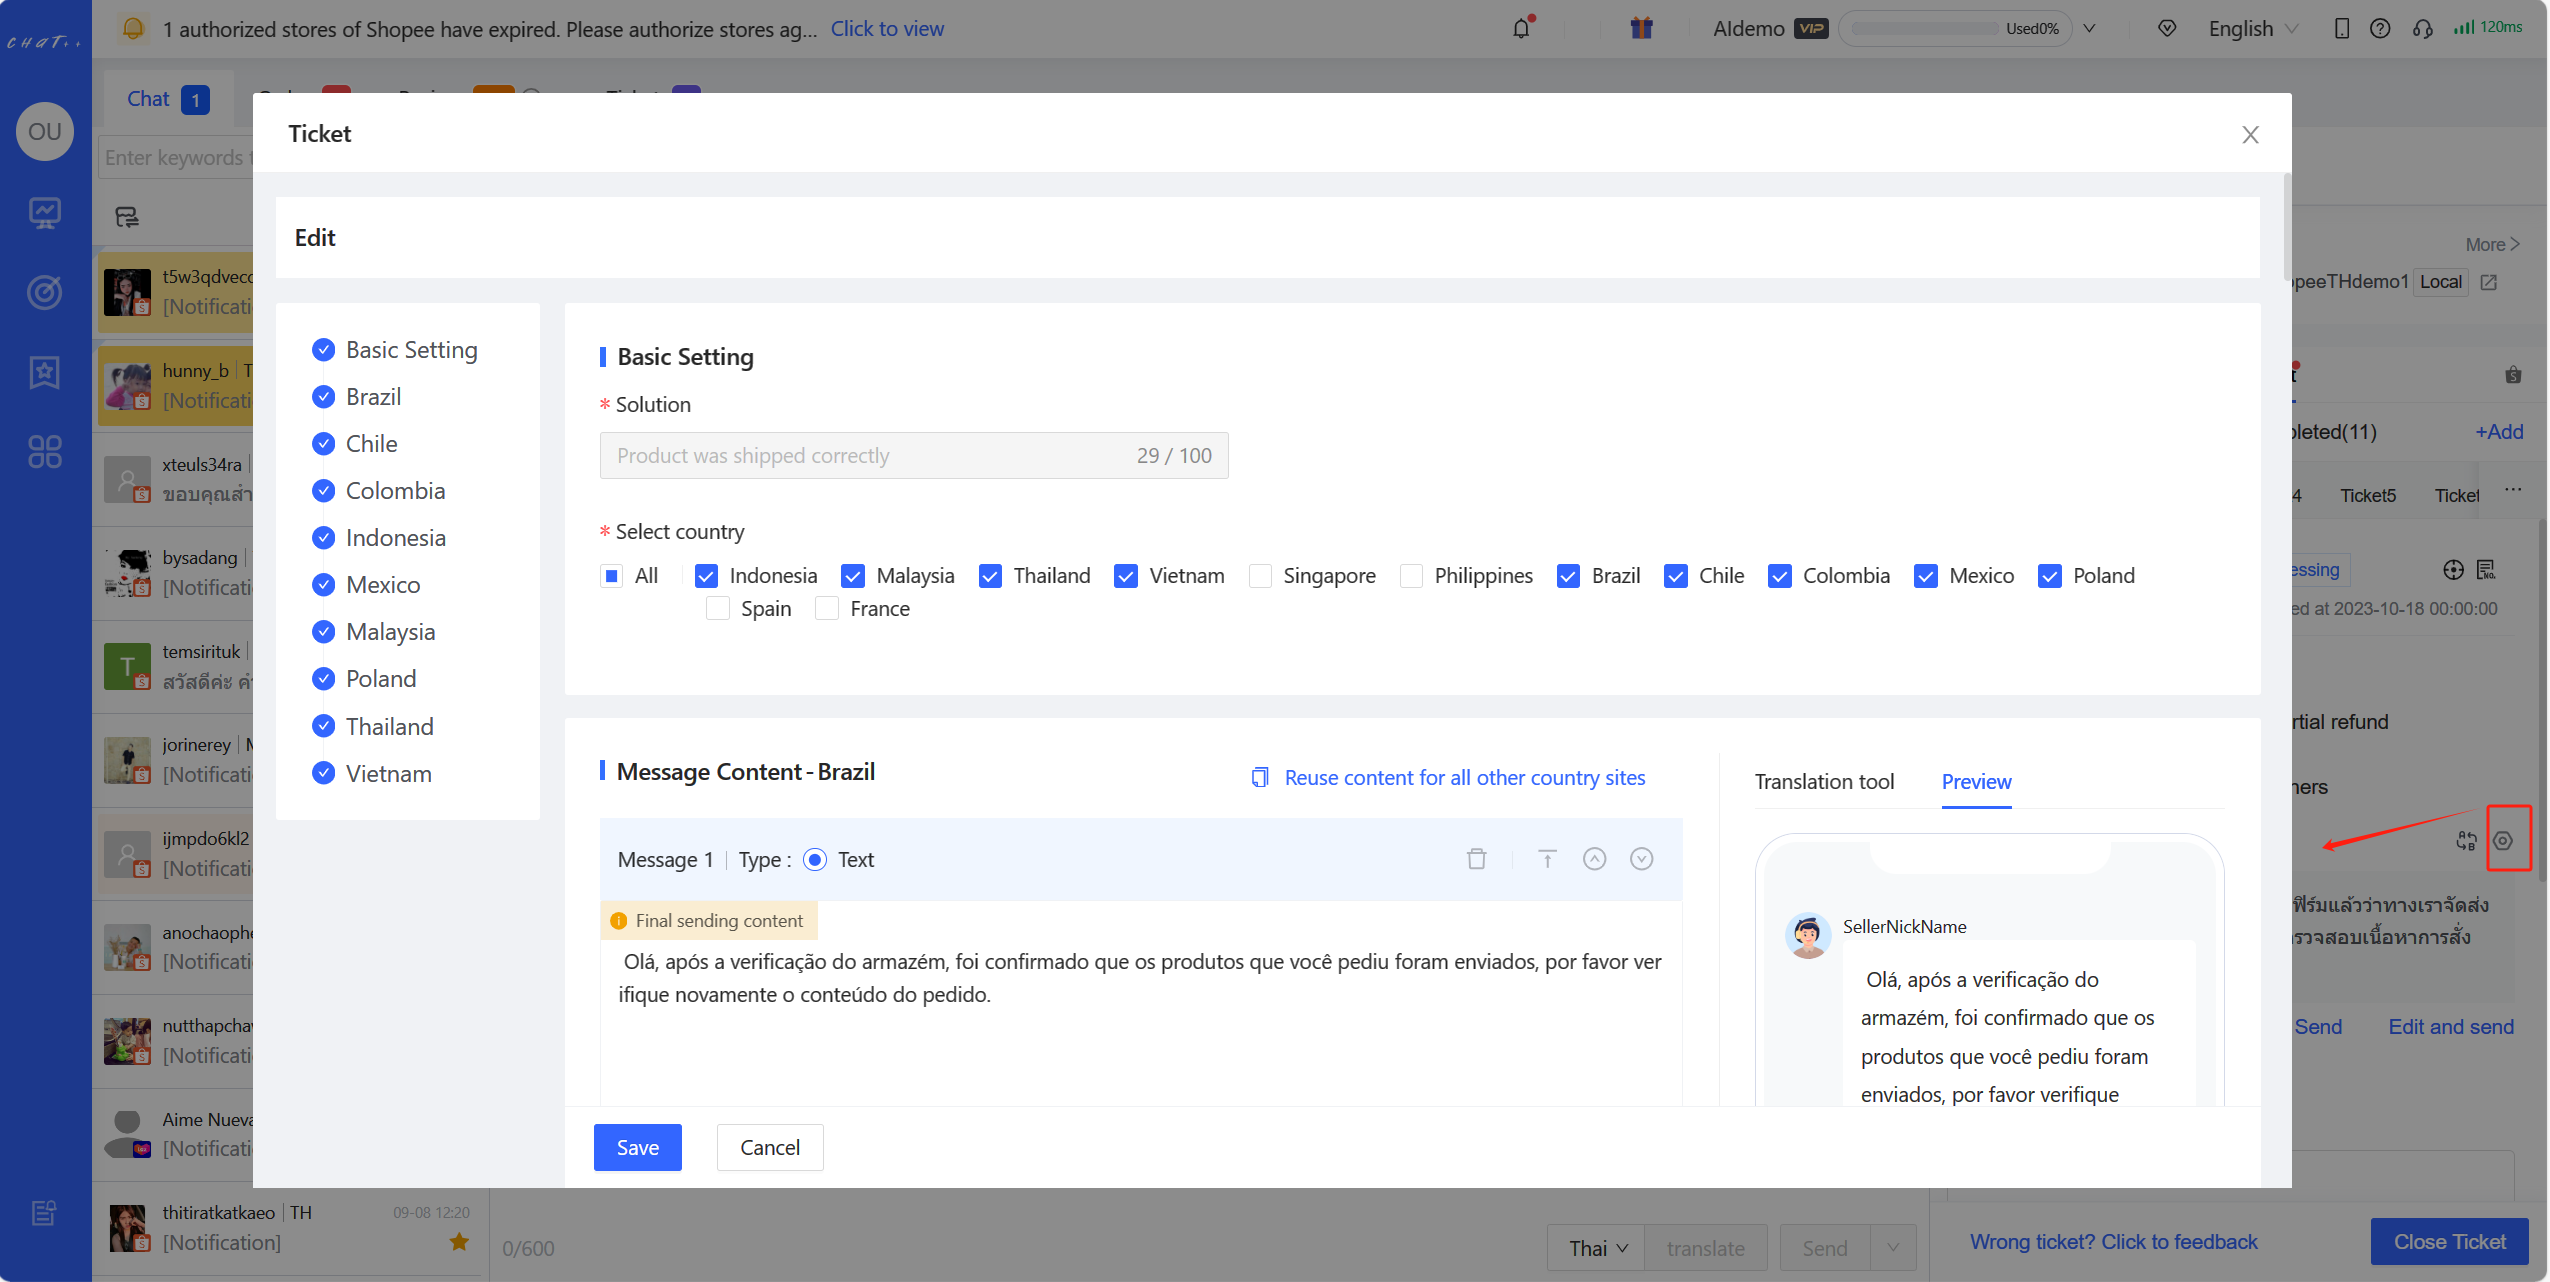 Figure15
Editing and sending the "Recommended Response" script: If you wish to make specific modifications to this particular response script without altering the uniform response script for this solution, you can click on "Edit and Send." The script will automatically populate into the conversation editing box. After making modifications, clicking "Translate" allows you to check the translation into the current site's language. Clicking "Send after Translation" will automatically translate the content in the editing box into the current site's language and send it to the buyer.
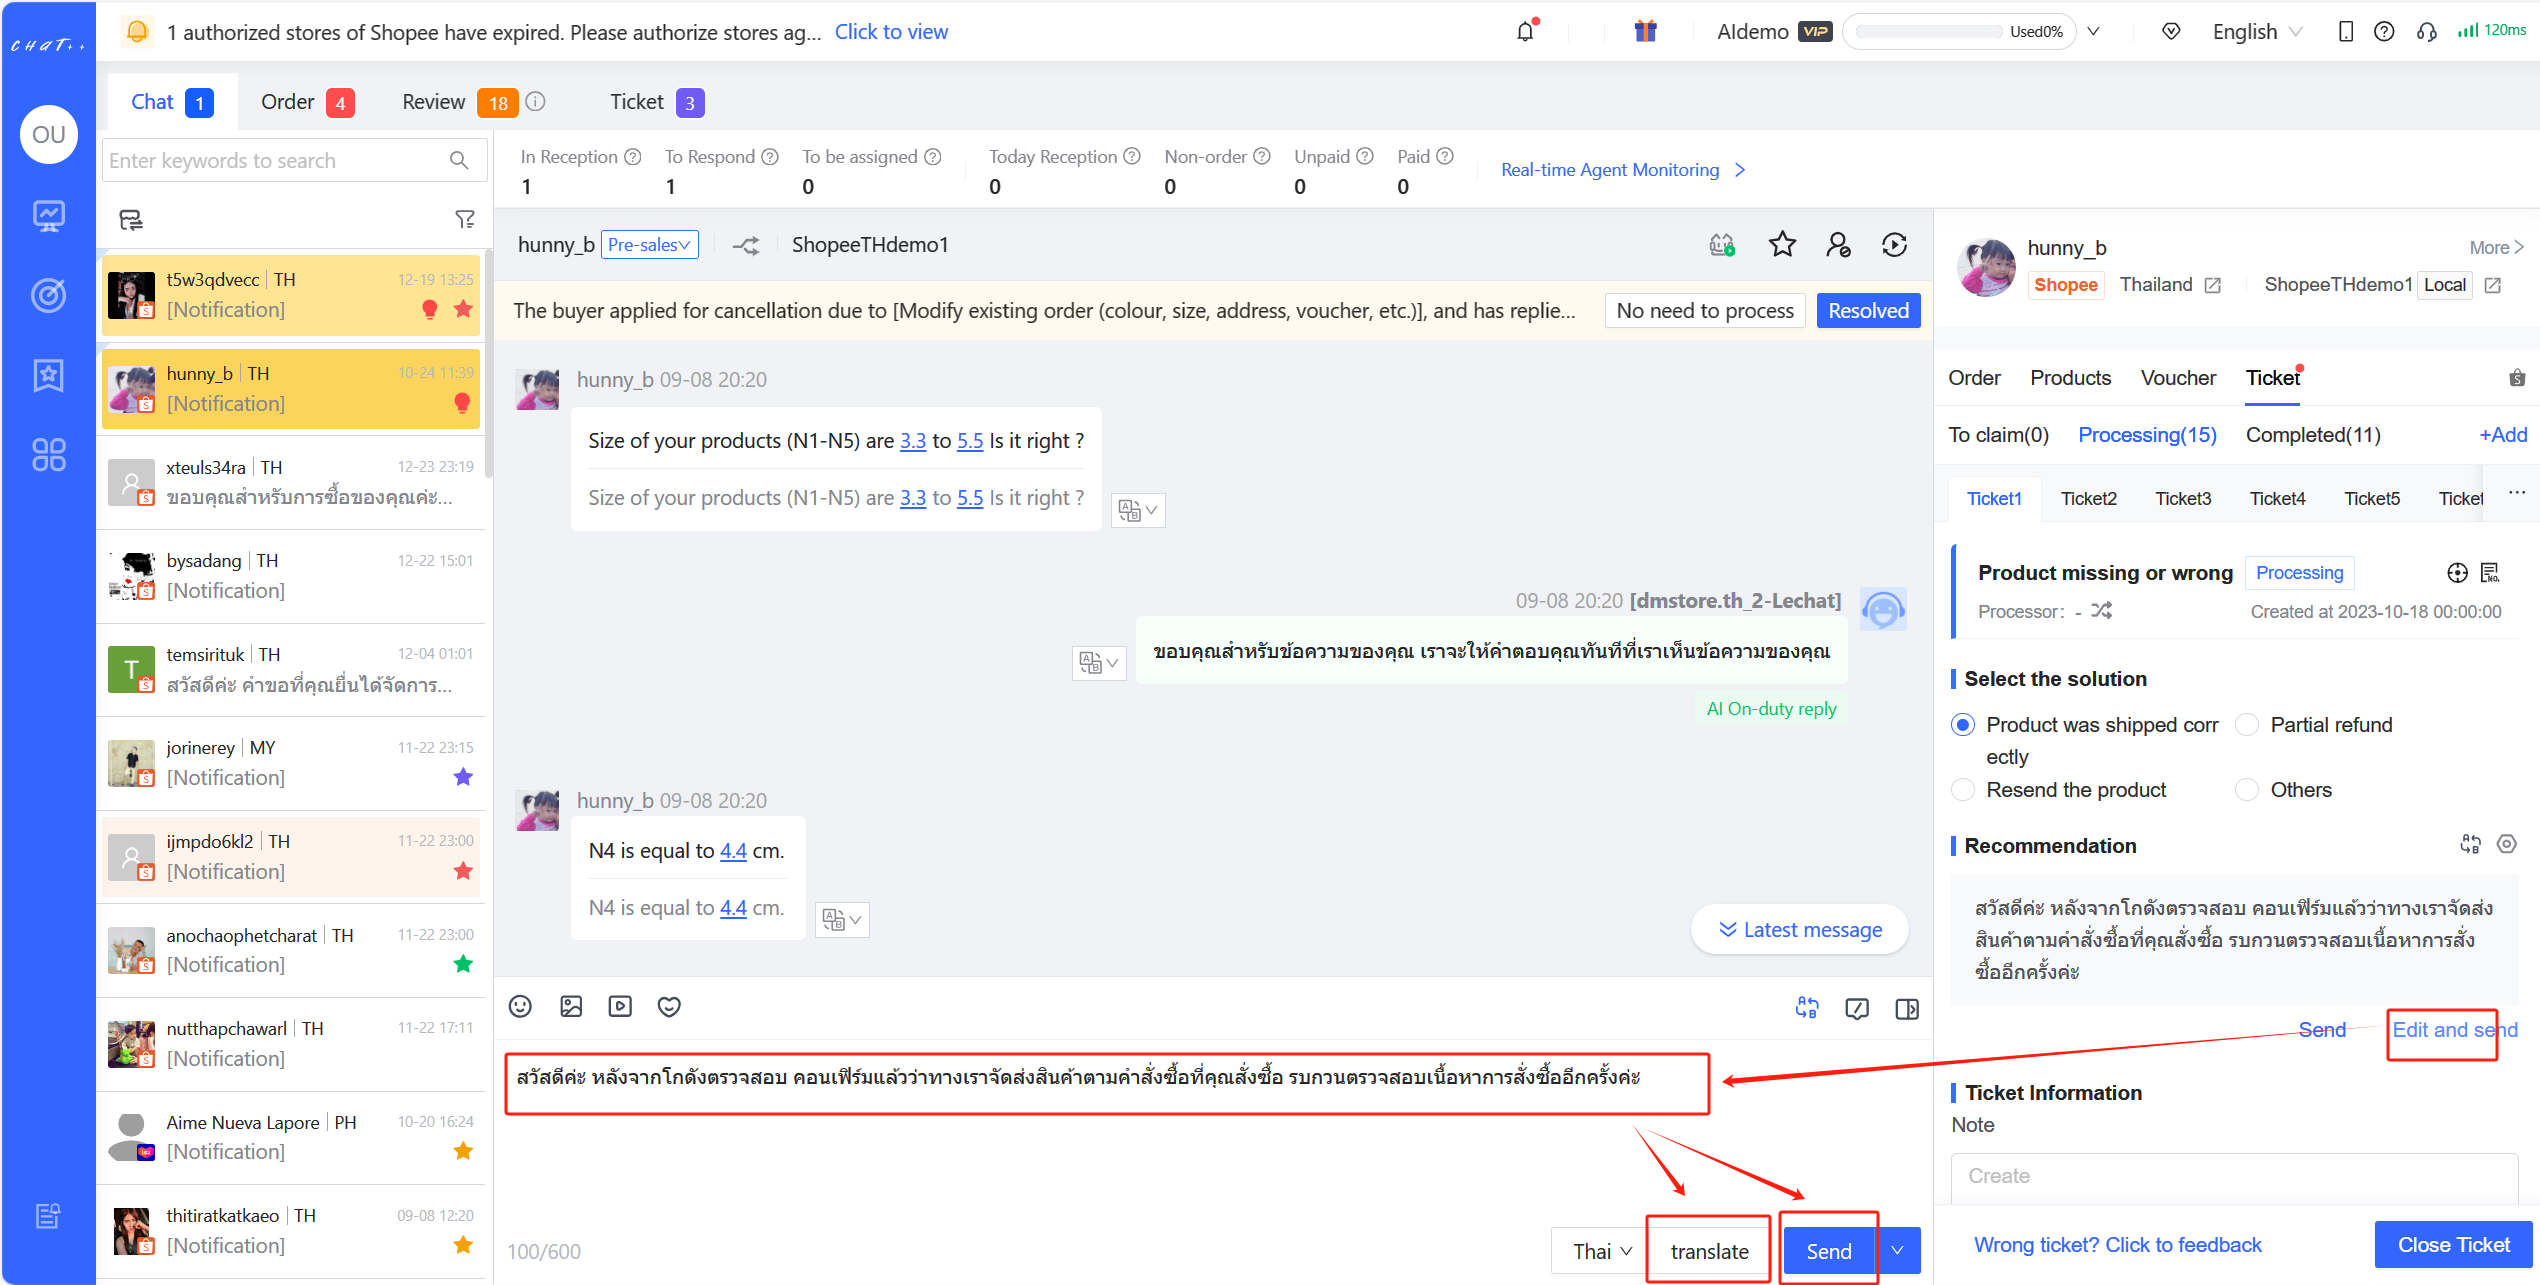
Figure16
Directly sending the "Recommended Response" script: Clicking the "Directly Send" button below the "Recommended Response" will send this script directly to the buyer.
- 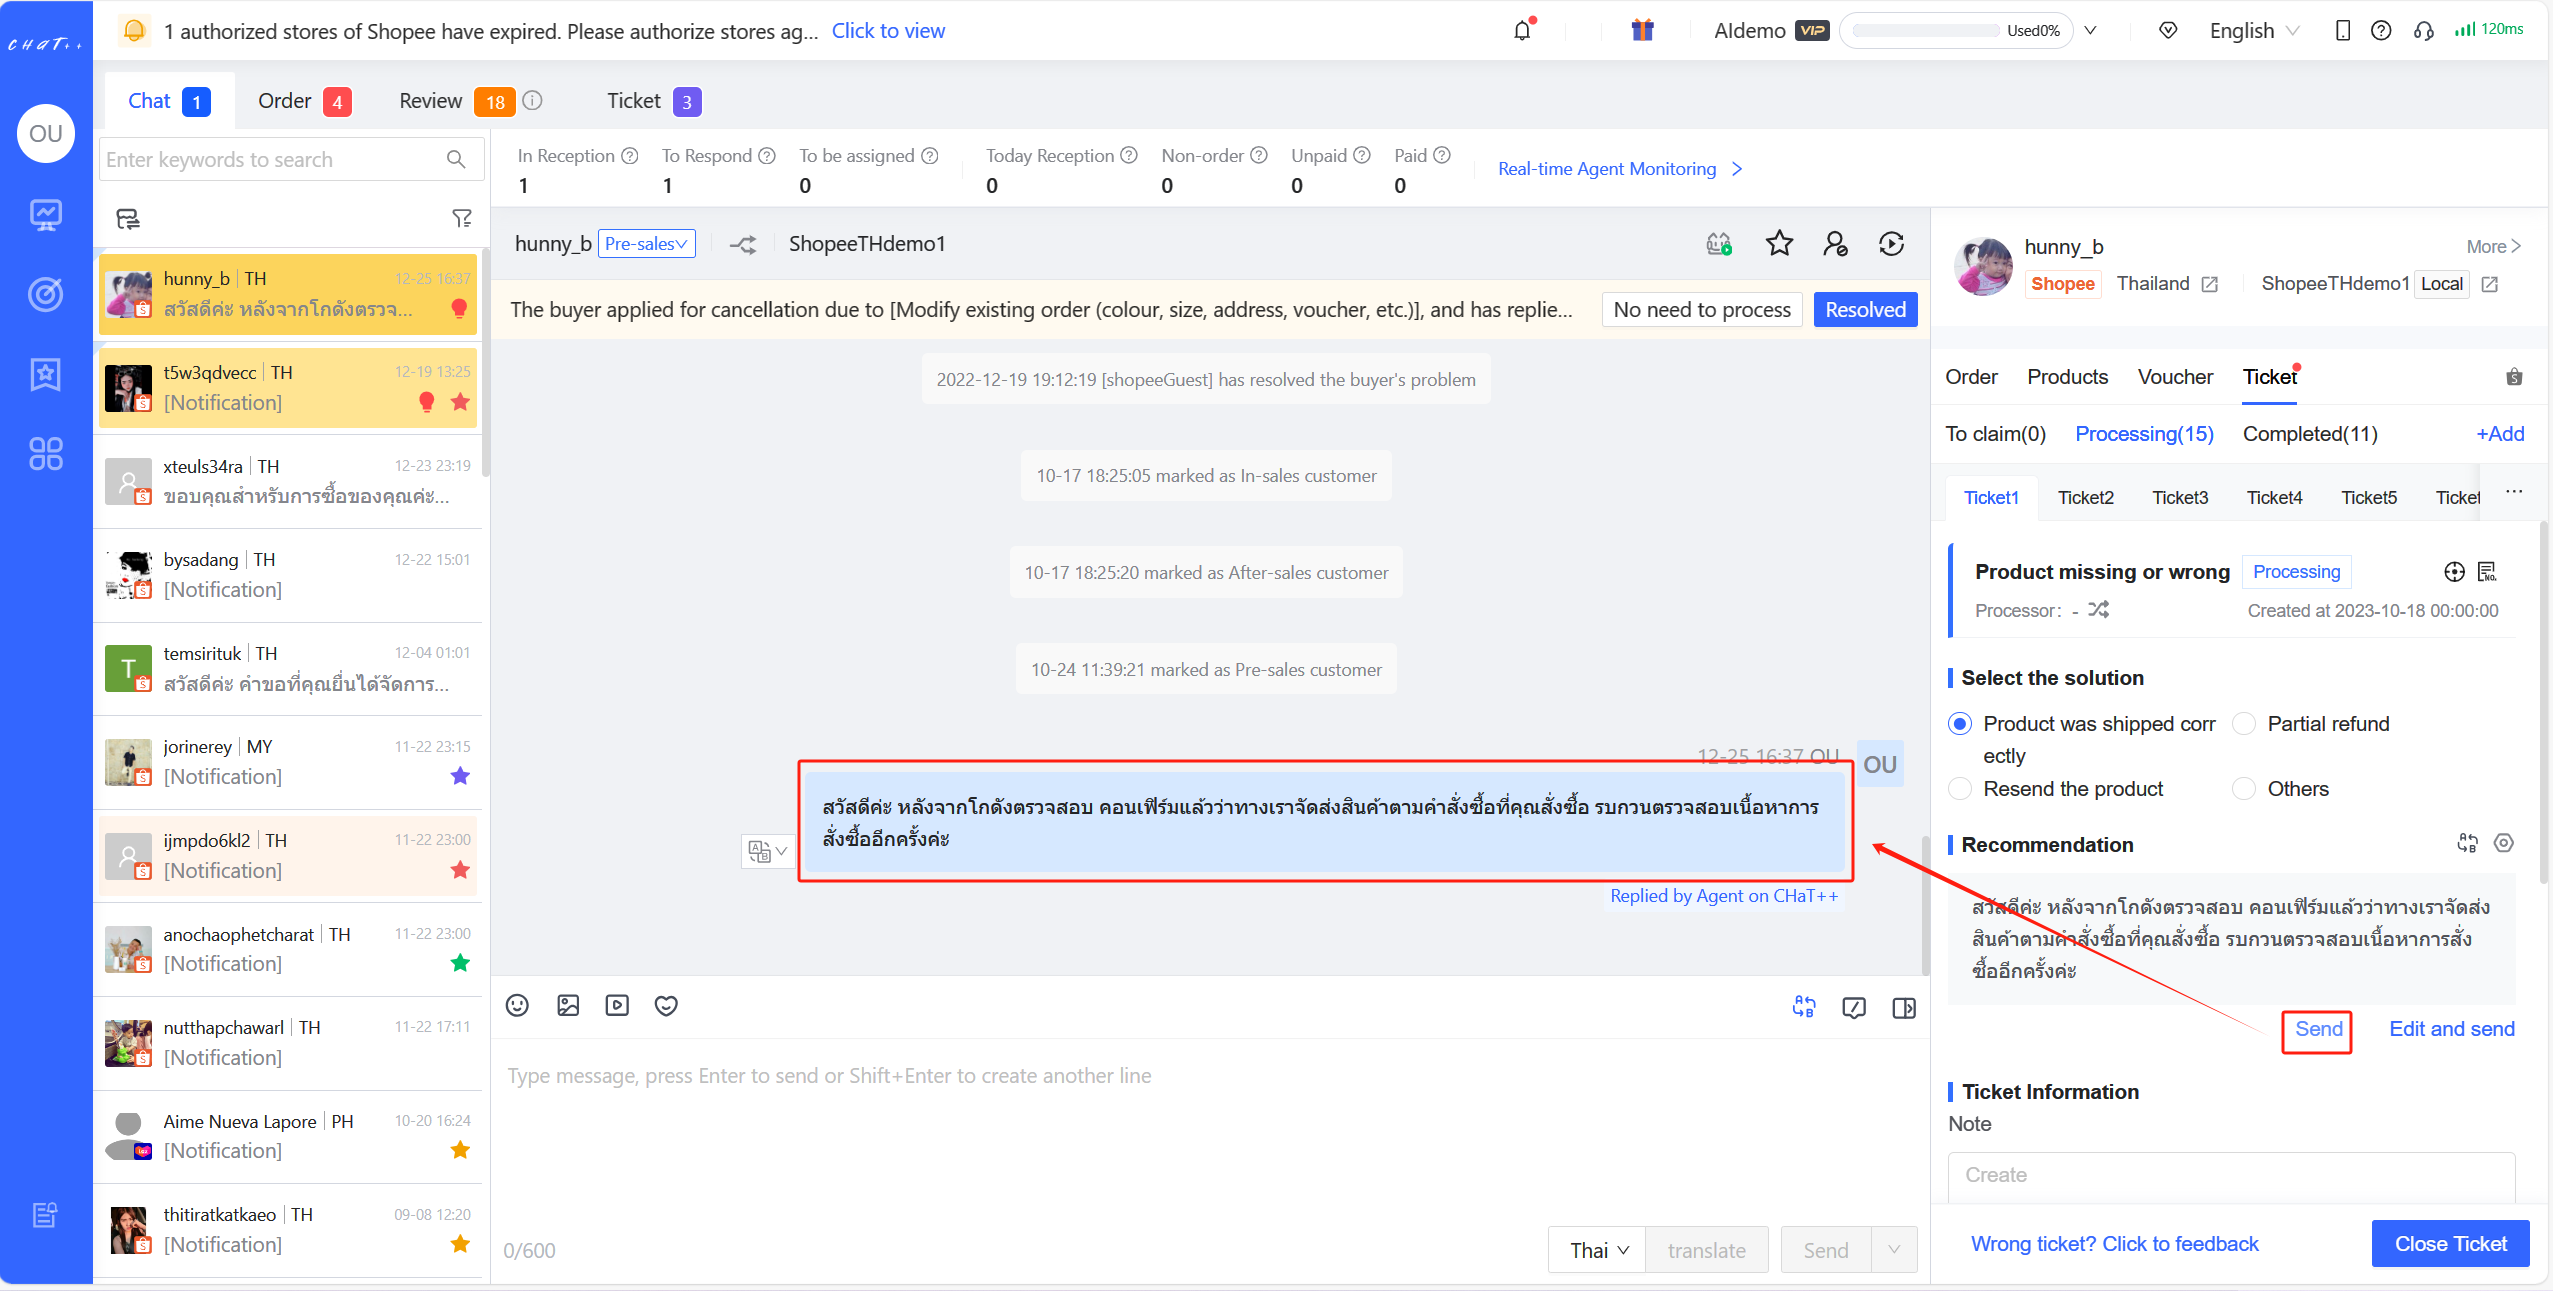 - Figure17Ticket Information: You can customize a description detailing the background or other relevant information about this ticket to help involved individuals quickly understand its context. It supports adding text, images (uploading locally or from the chat records).
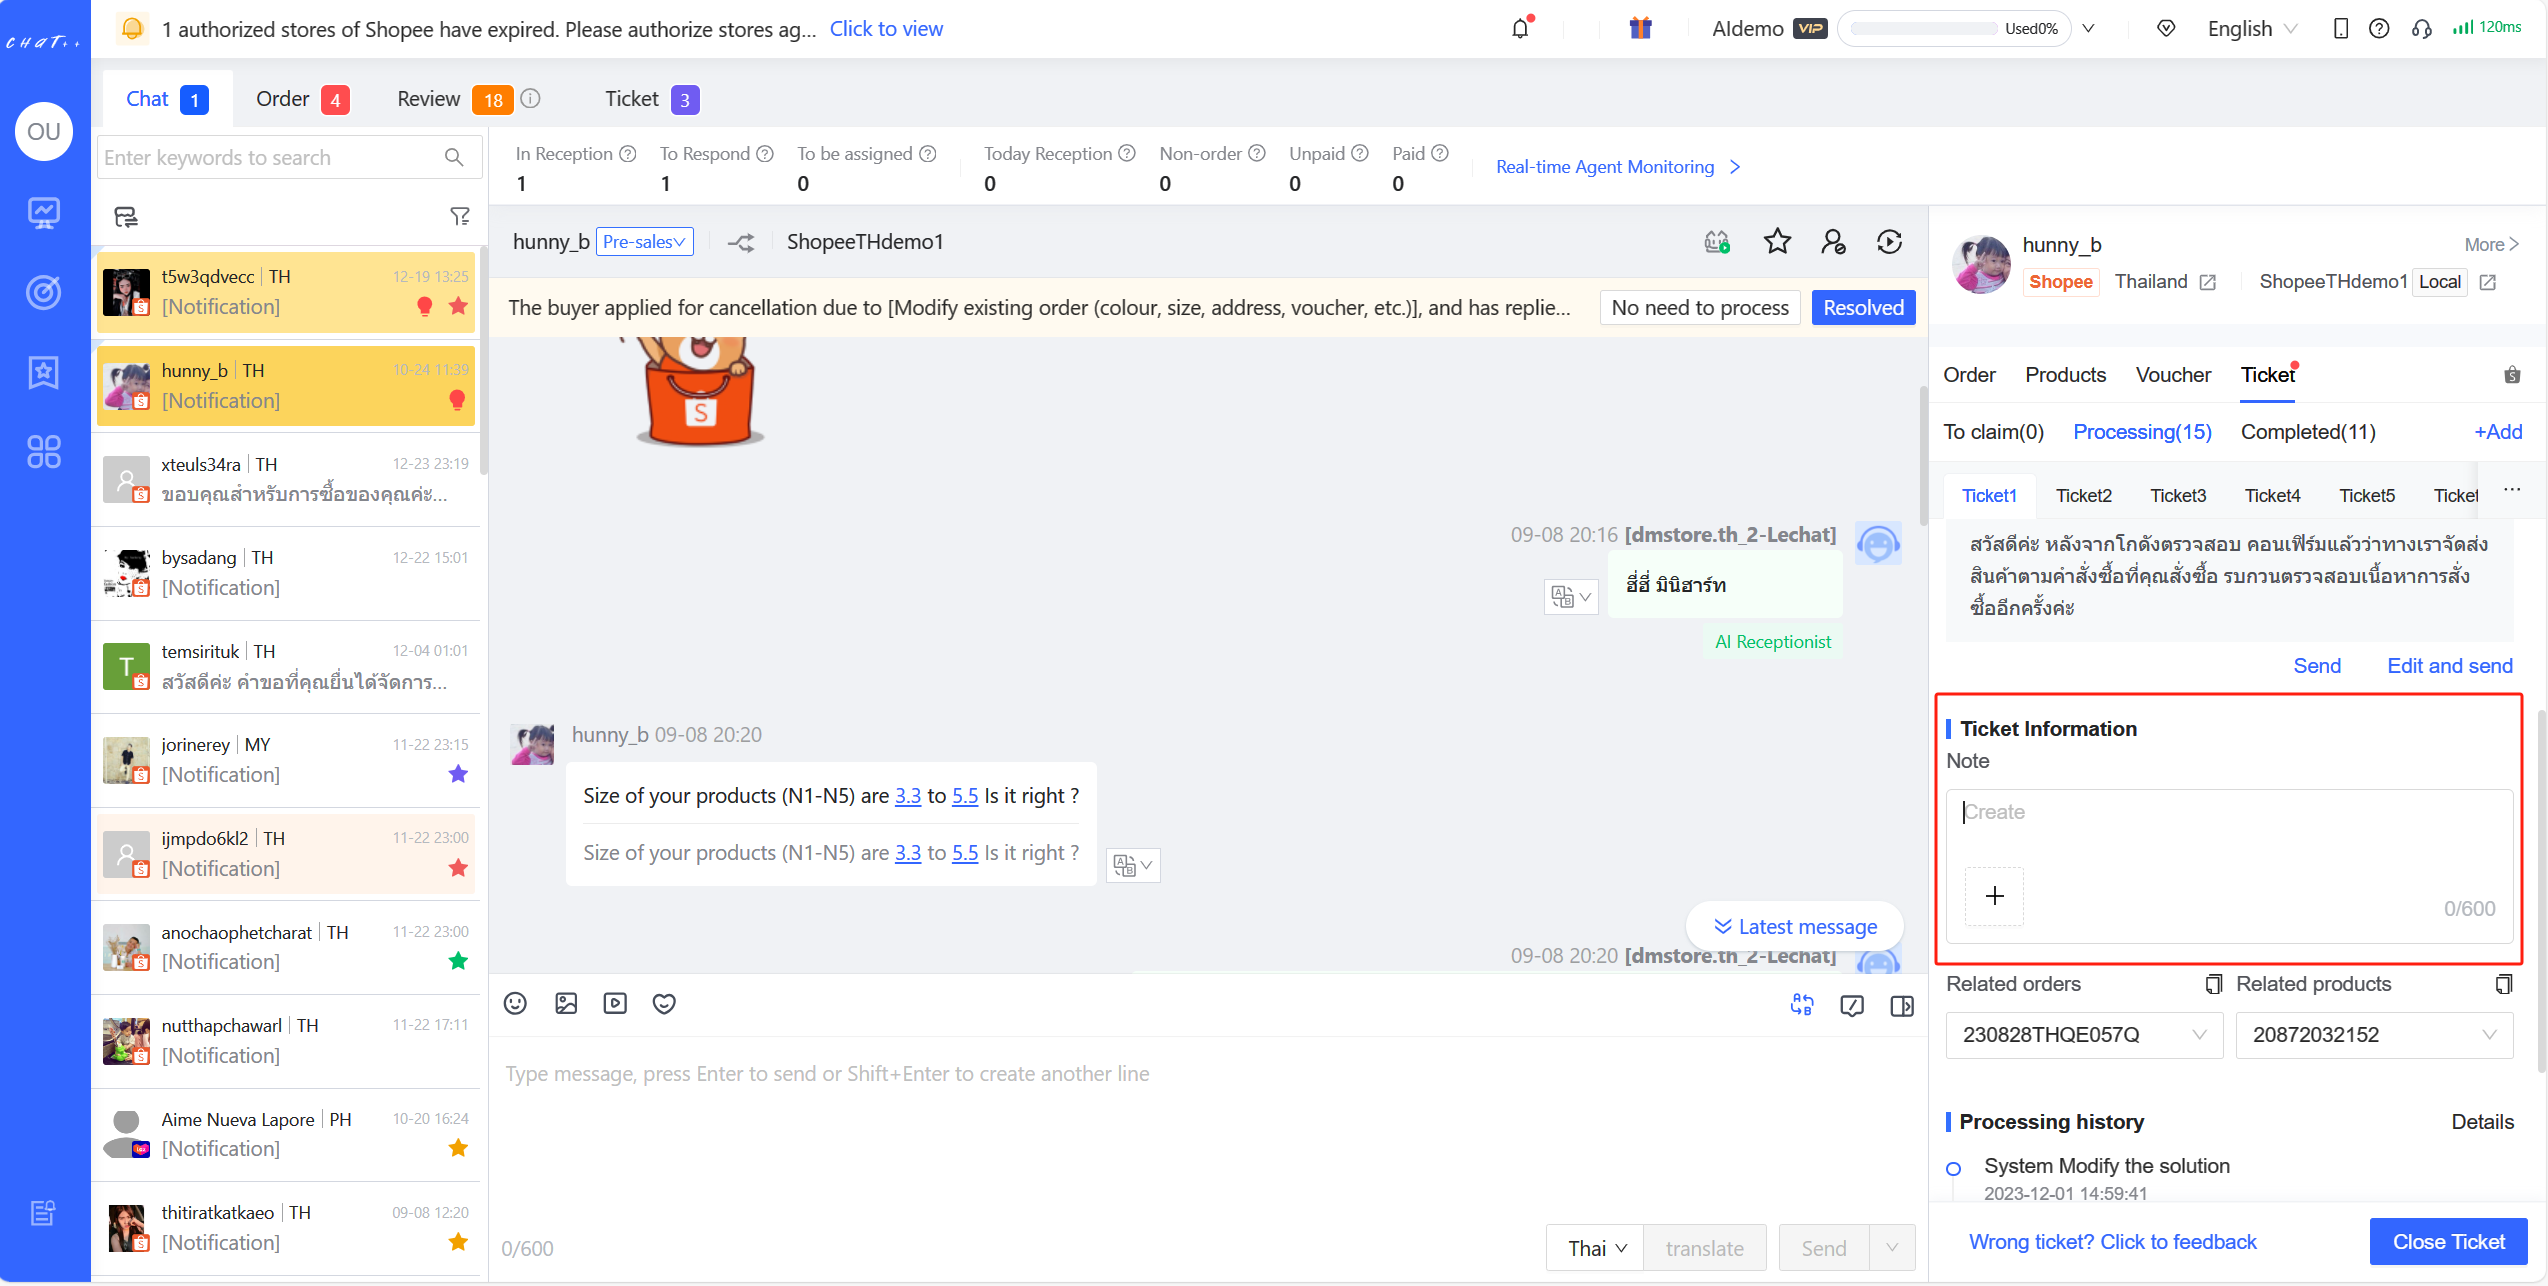
Figure18
⚠️ For the same buyer conversation, order, and unresolved ticket issue type, if the ticket status remains unresolved, the system won’t automatically create another ticket for the same issue type. If agents notice the need to modify the "Associated Order," it's advisable to promptly adjust it manually to ensure new tickets can be created correctly.
Associated Order/Product: When the system automatically generates a ticket, it includes the associated order/product, allowing for manual modifications.
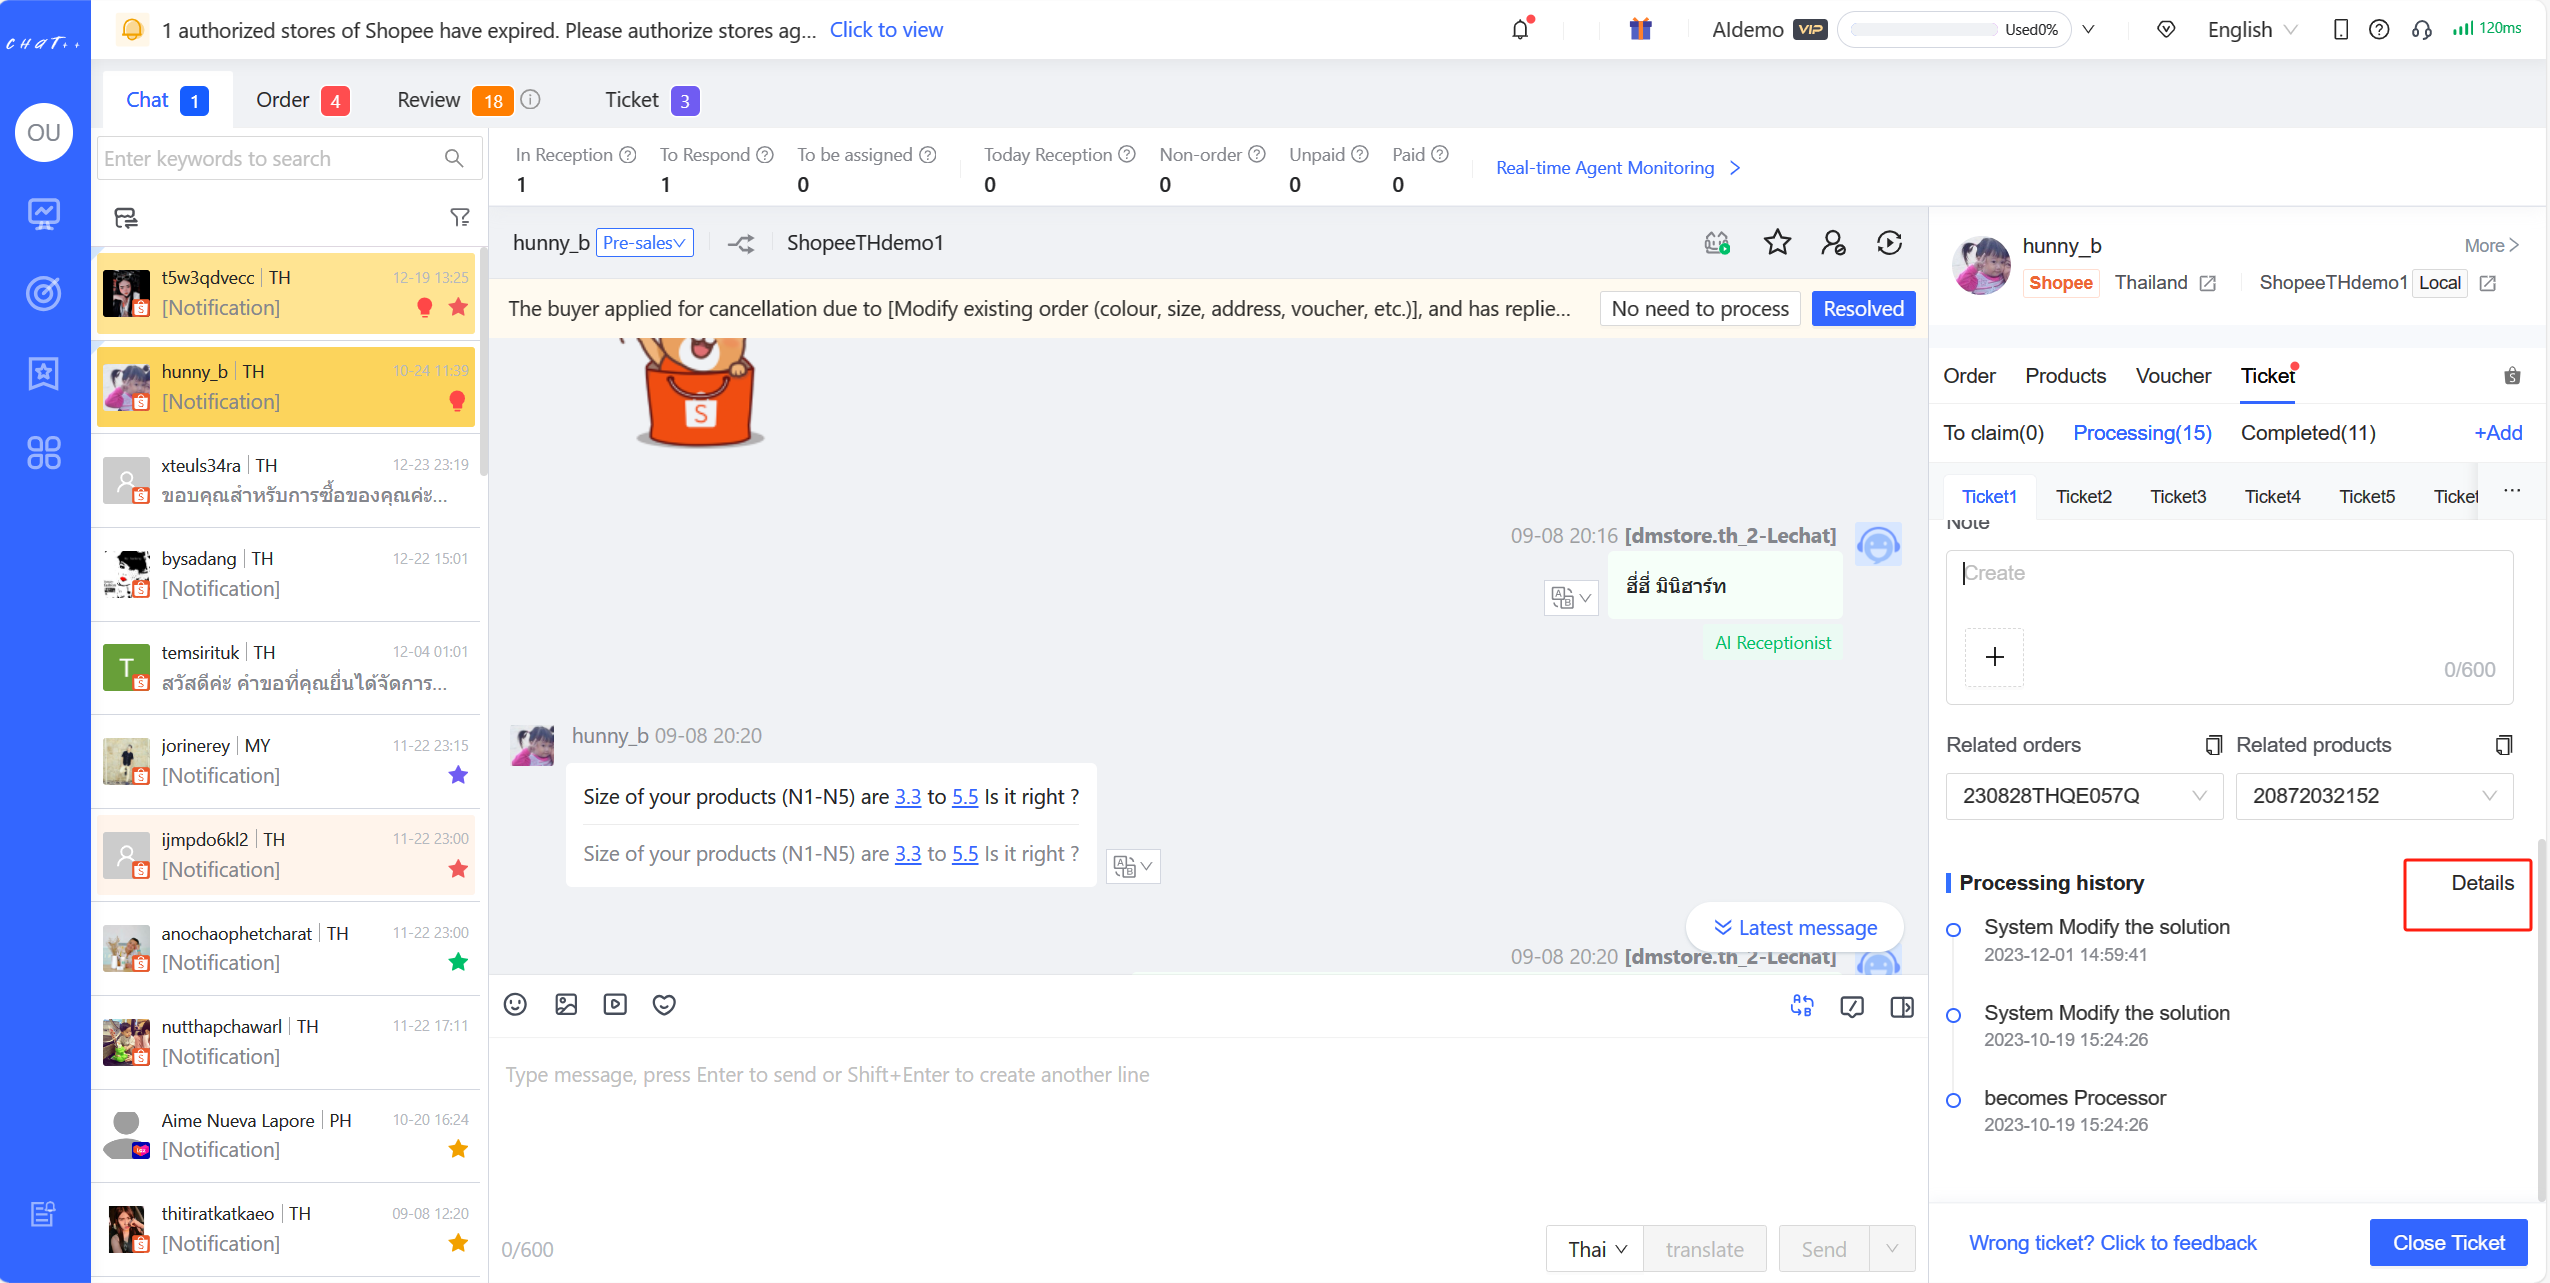
Figure19
- Reporting an erroneous ticket: If the system generates an incorrect ticket, you can click on the blue text "Ticket Error, Click to Provide Feedback," submit the issue, and close the erroneous ticket.
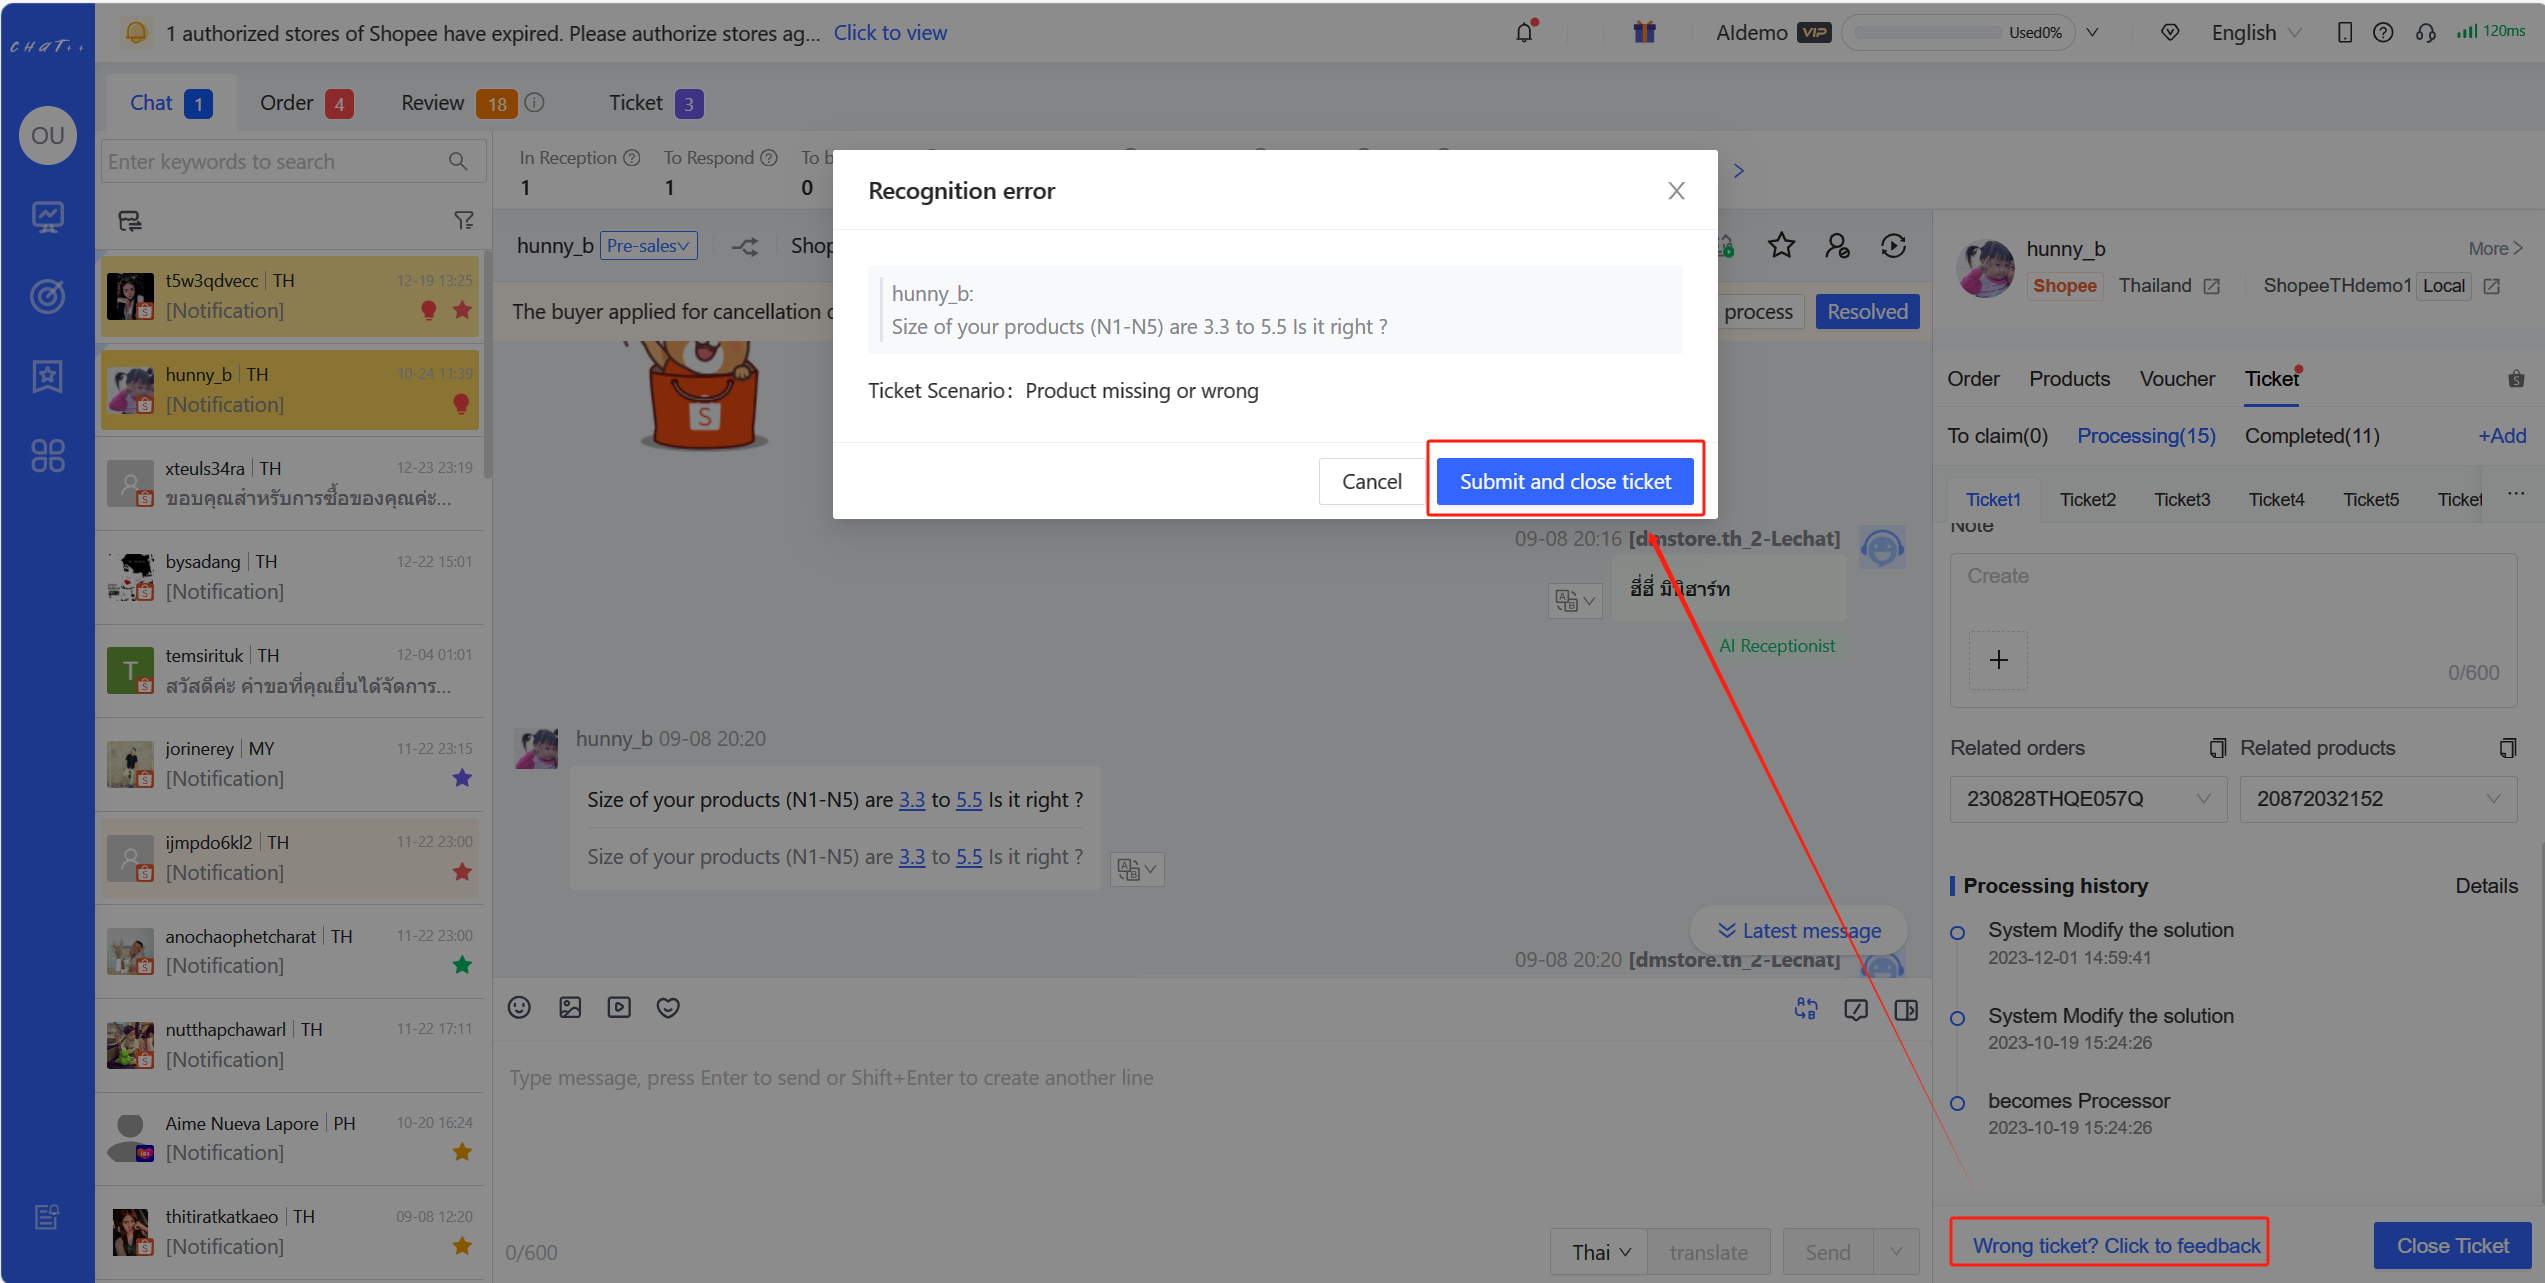
Figure20
c. Ending a ticket:
- Reporting and closing erroneous tickets
- Directly closing the ticket: If there's no need for additional notification to the buyer about the handling results, it's recommended for the customer service agent to first confirm whether the automatically selected solution for the system-generated ticket aligns with the handling situation. For manually created tickets with the only solution being "[Other]," it's advisable to add appropriate remarks about the solution. After confirming the solution, click on the "Close Ticket" button to directly end the ticket. The ticket status changes from "In Progress" to "Completed."
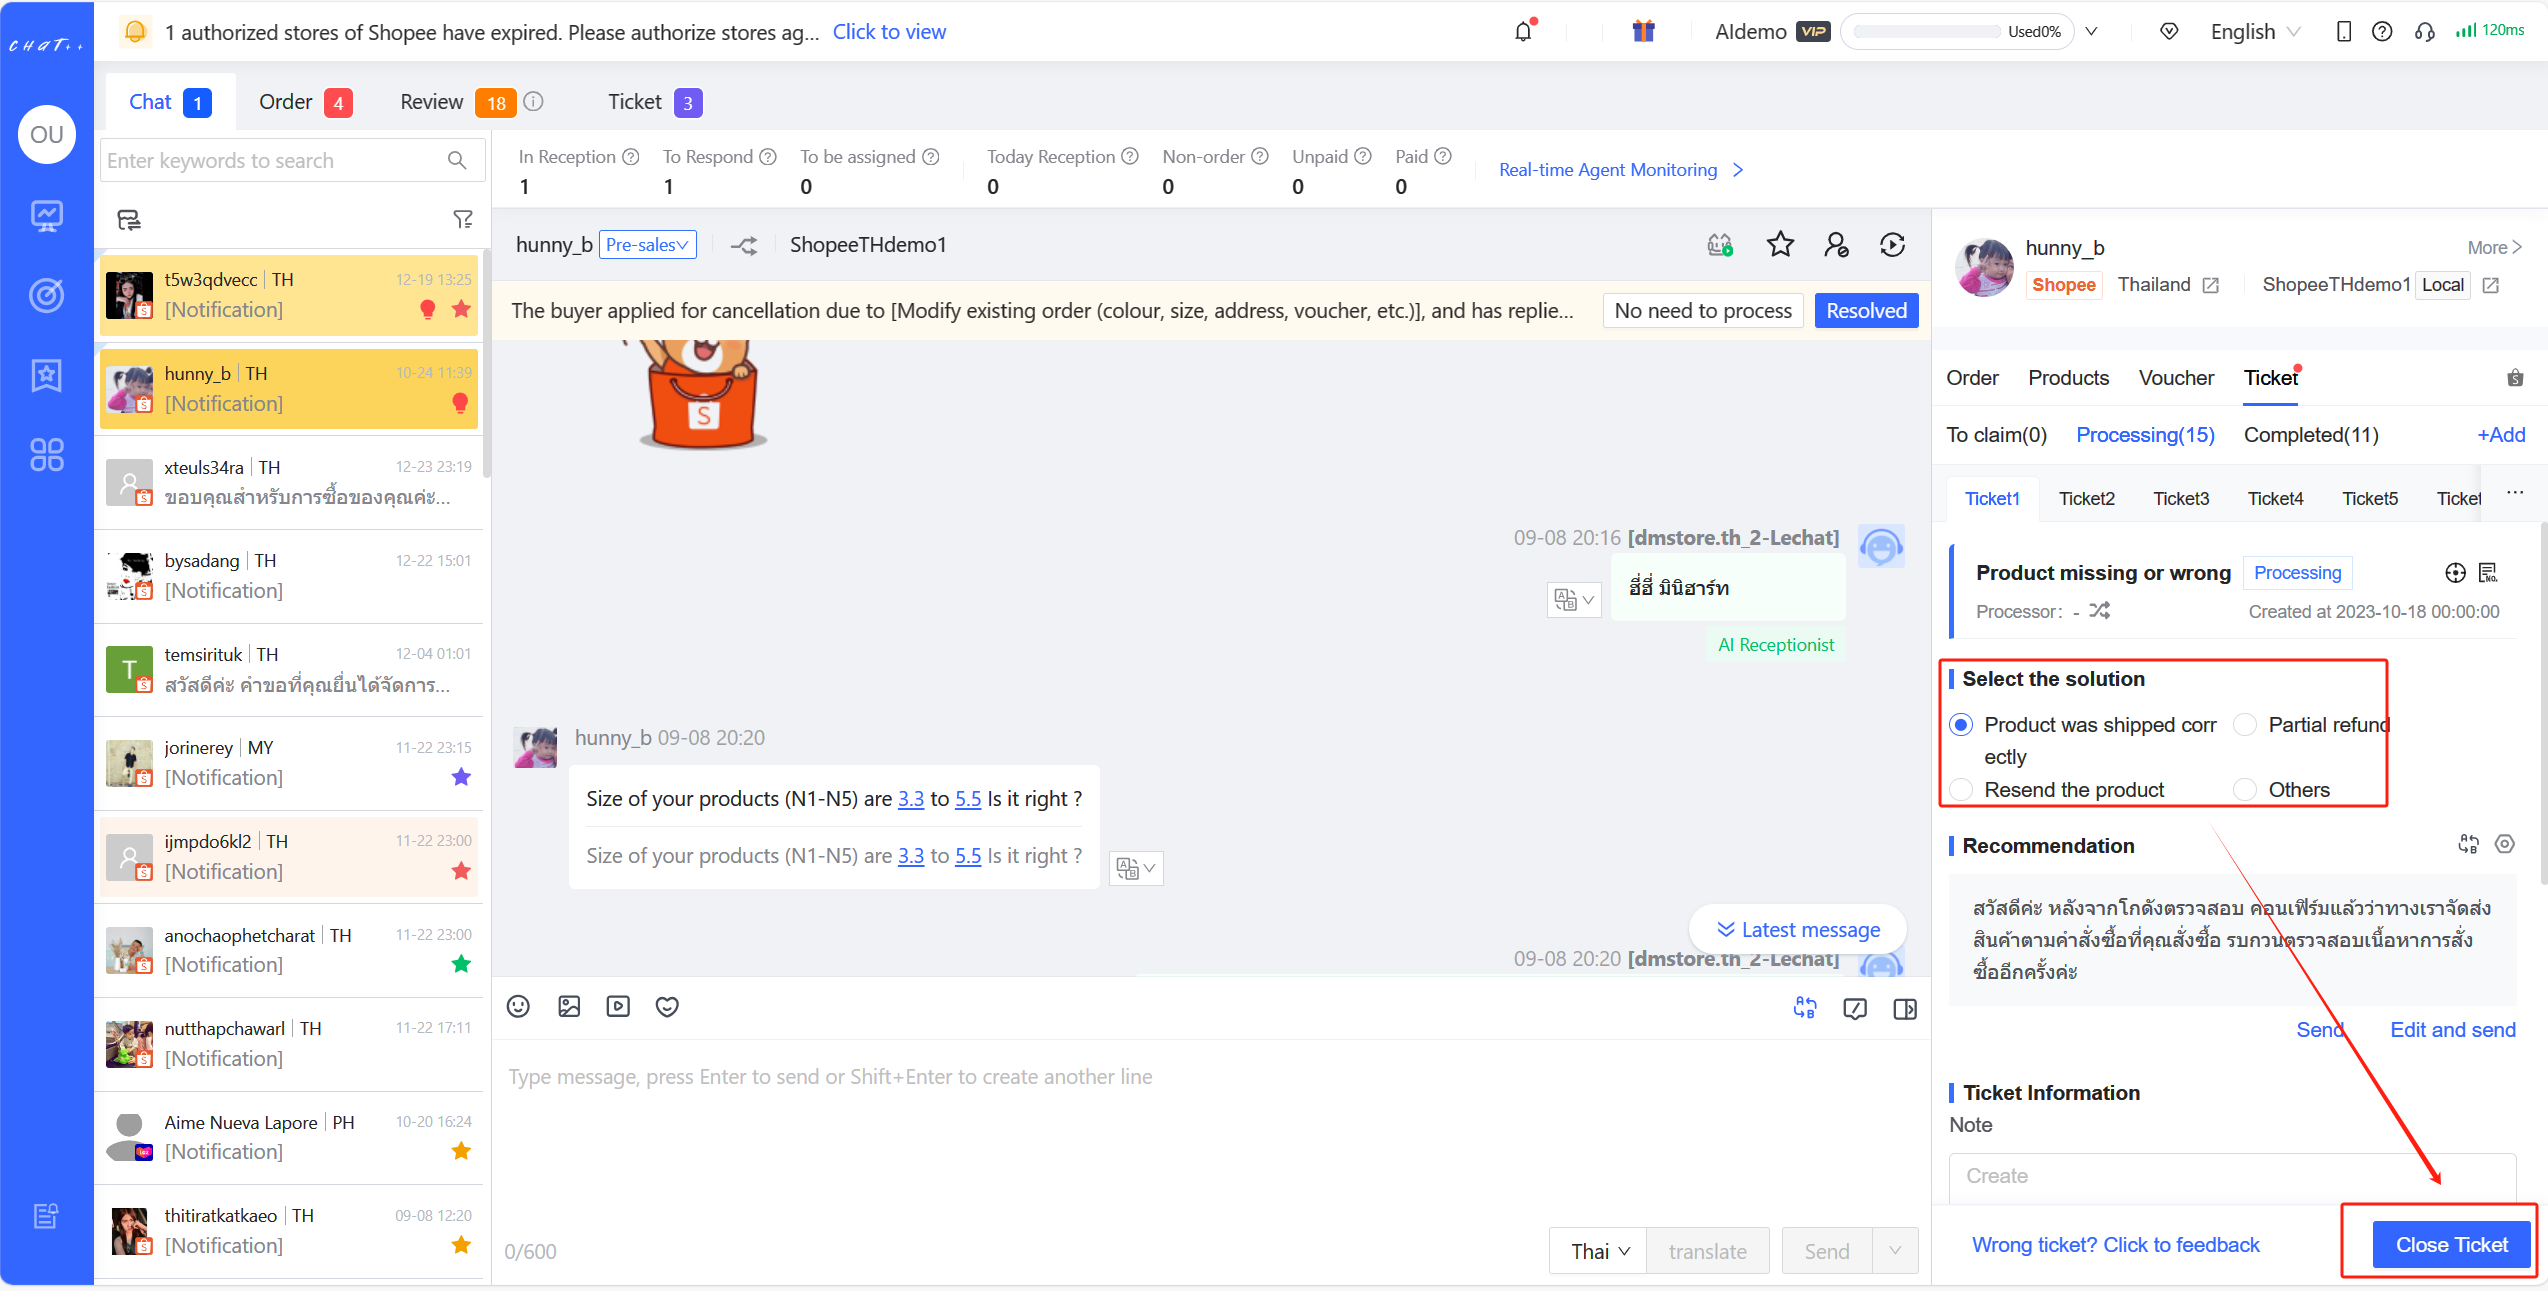
Figure21
🌰PS:For instance, when the ticket's resolution involves sending an invoice to the buyer: It's advisable for the customer service agent to first "Directly Send" the "Recommended Response" script to the buyer. Afterward, click on the invoice button at the bottom of the conversation sidebar, and then click "Send and Close Ticket."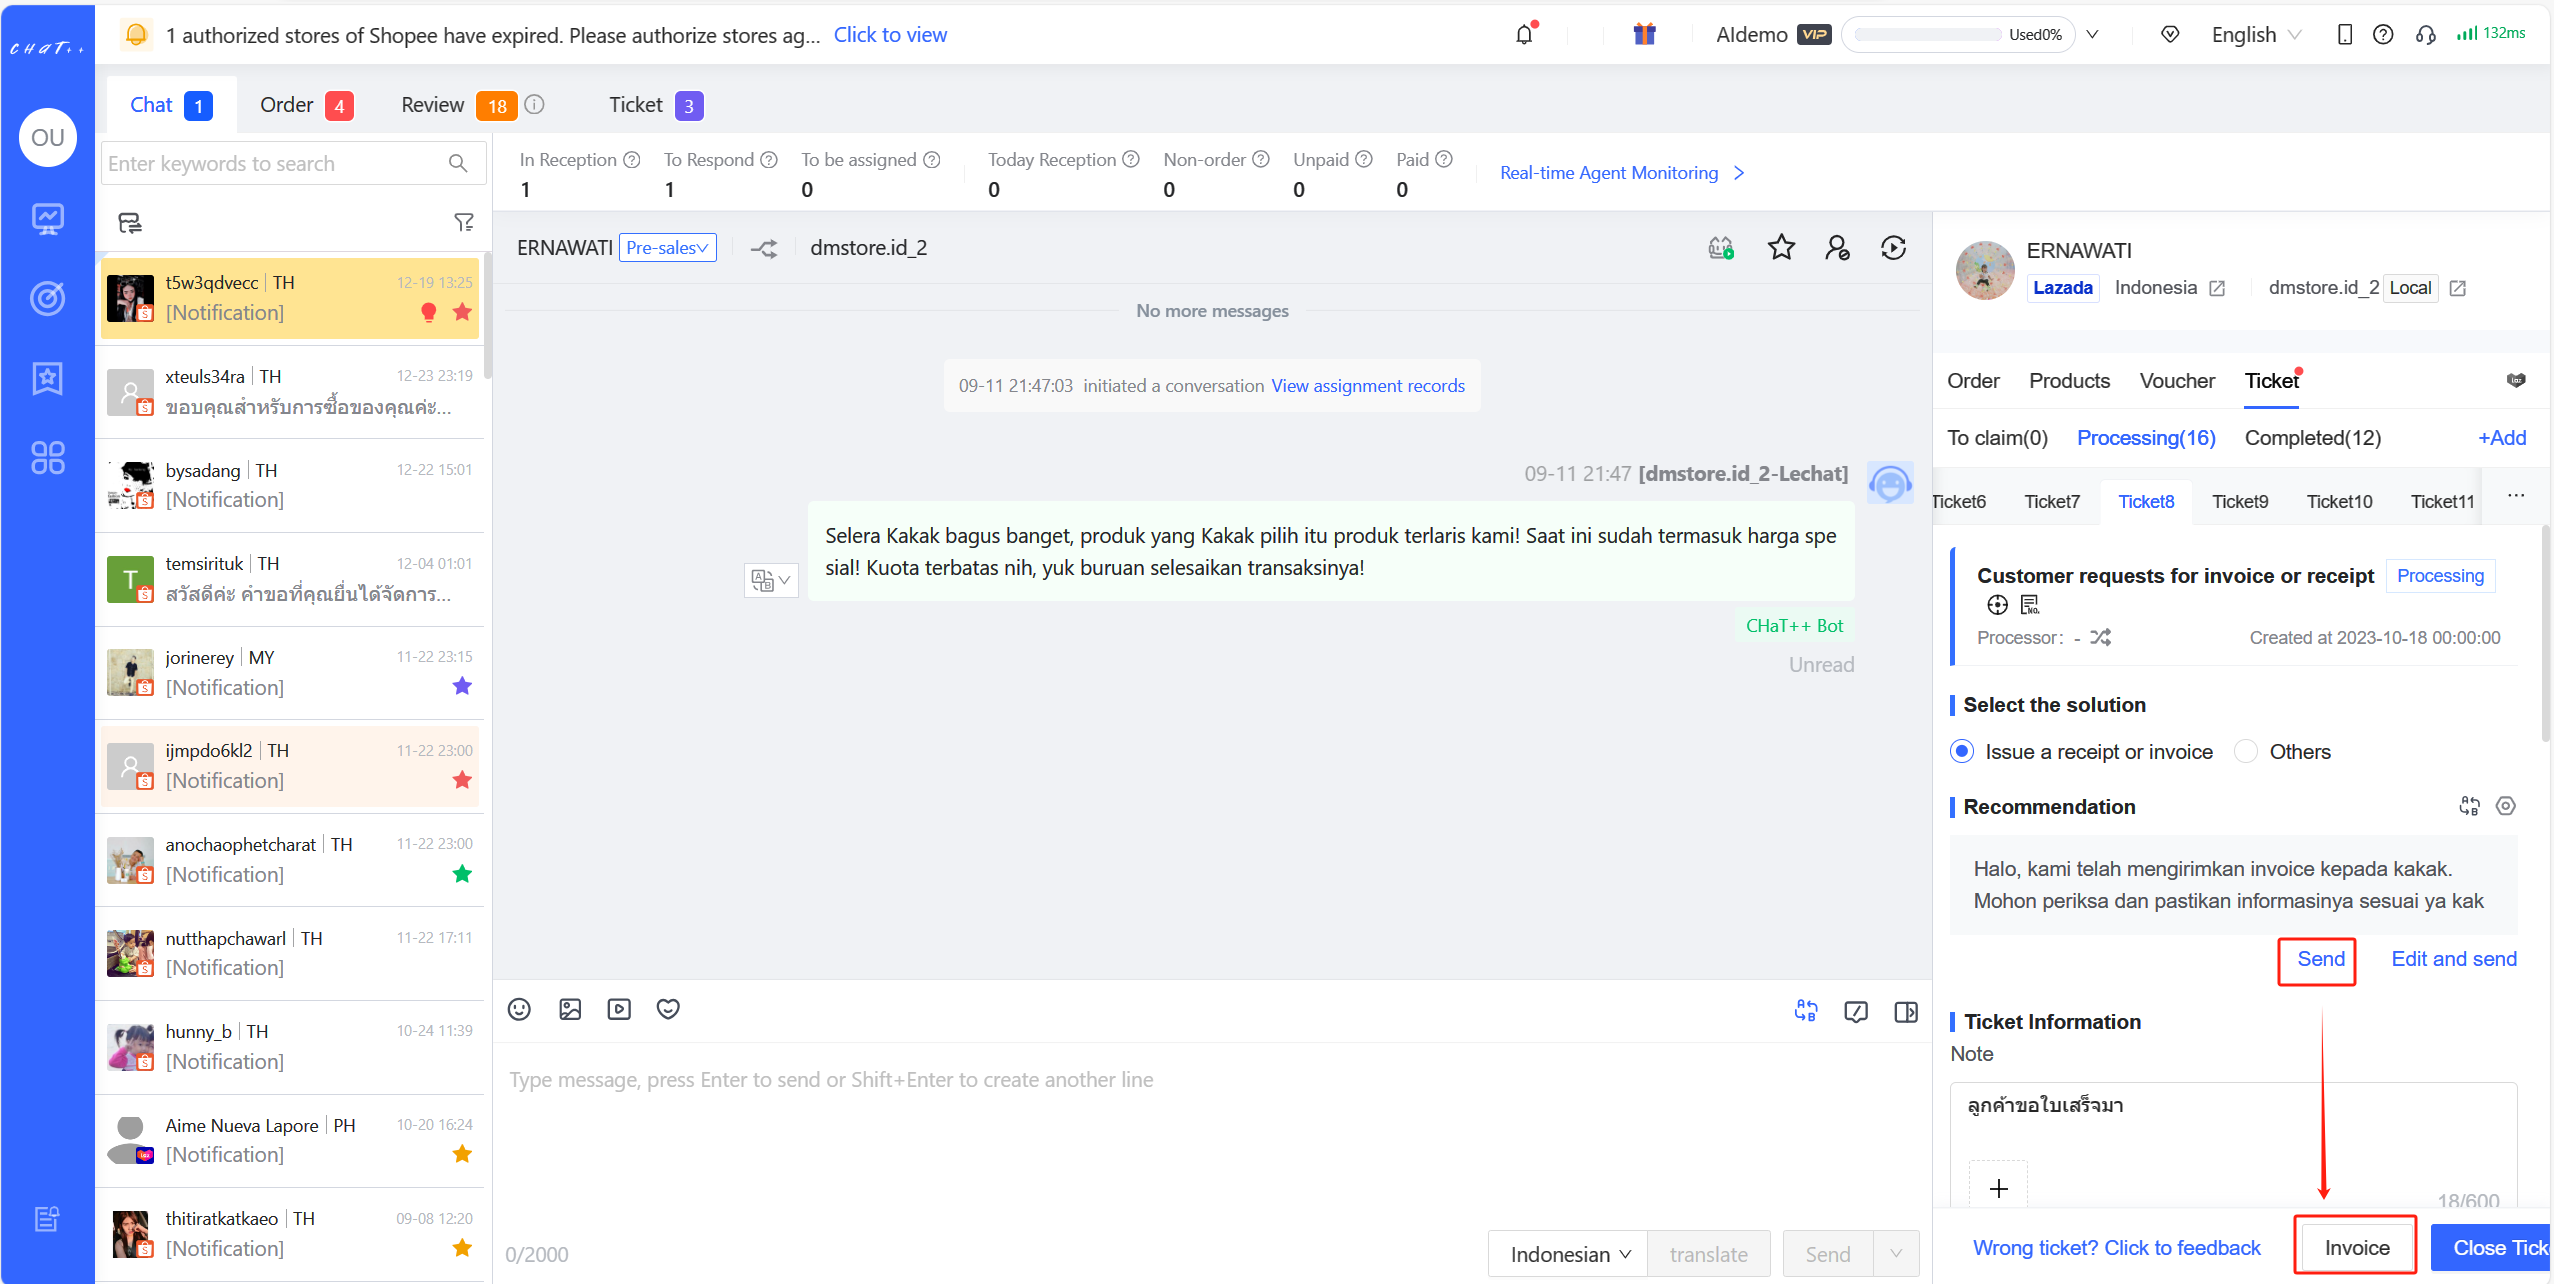
Figure22
- Batch Close Tickets: The system supports bulk closing of tickets that have been left unattended for an extended period.
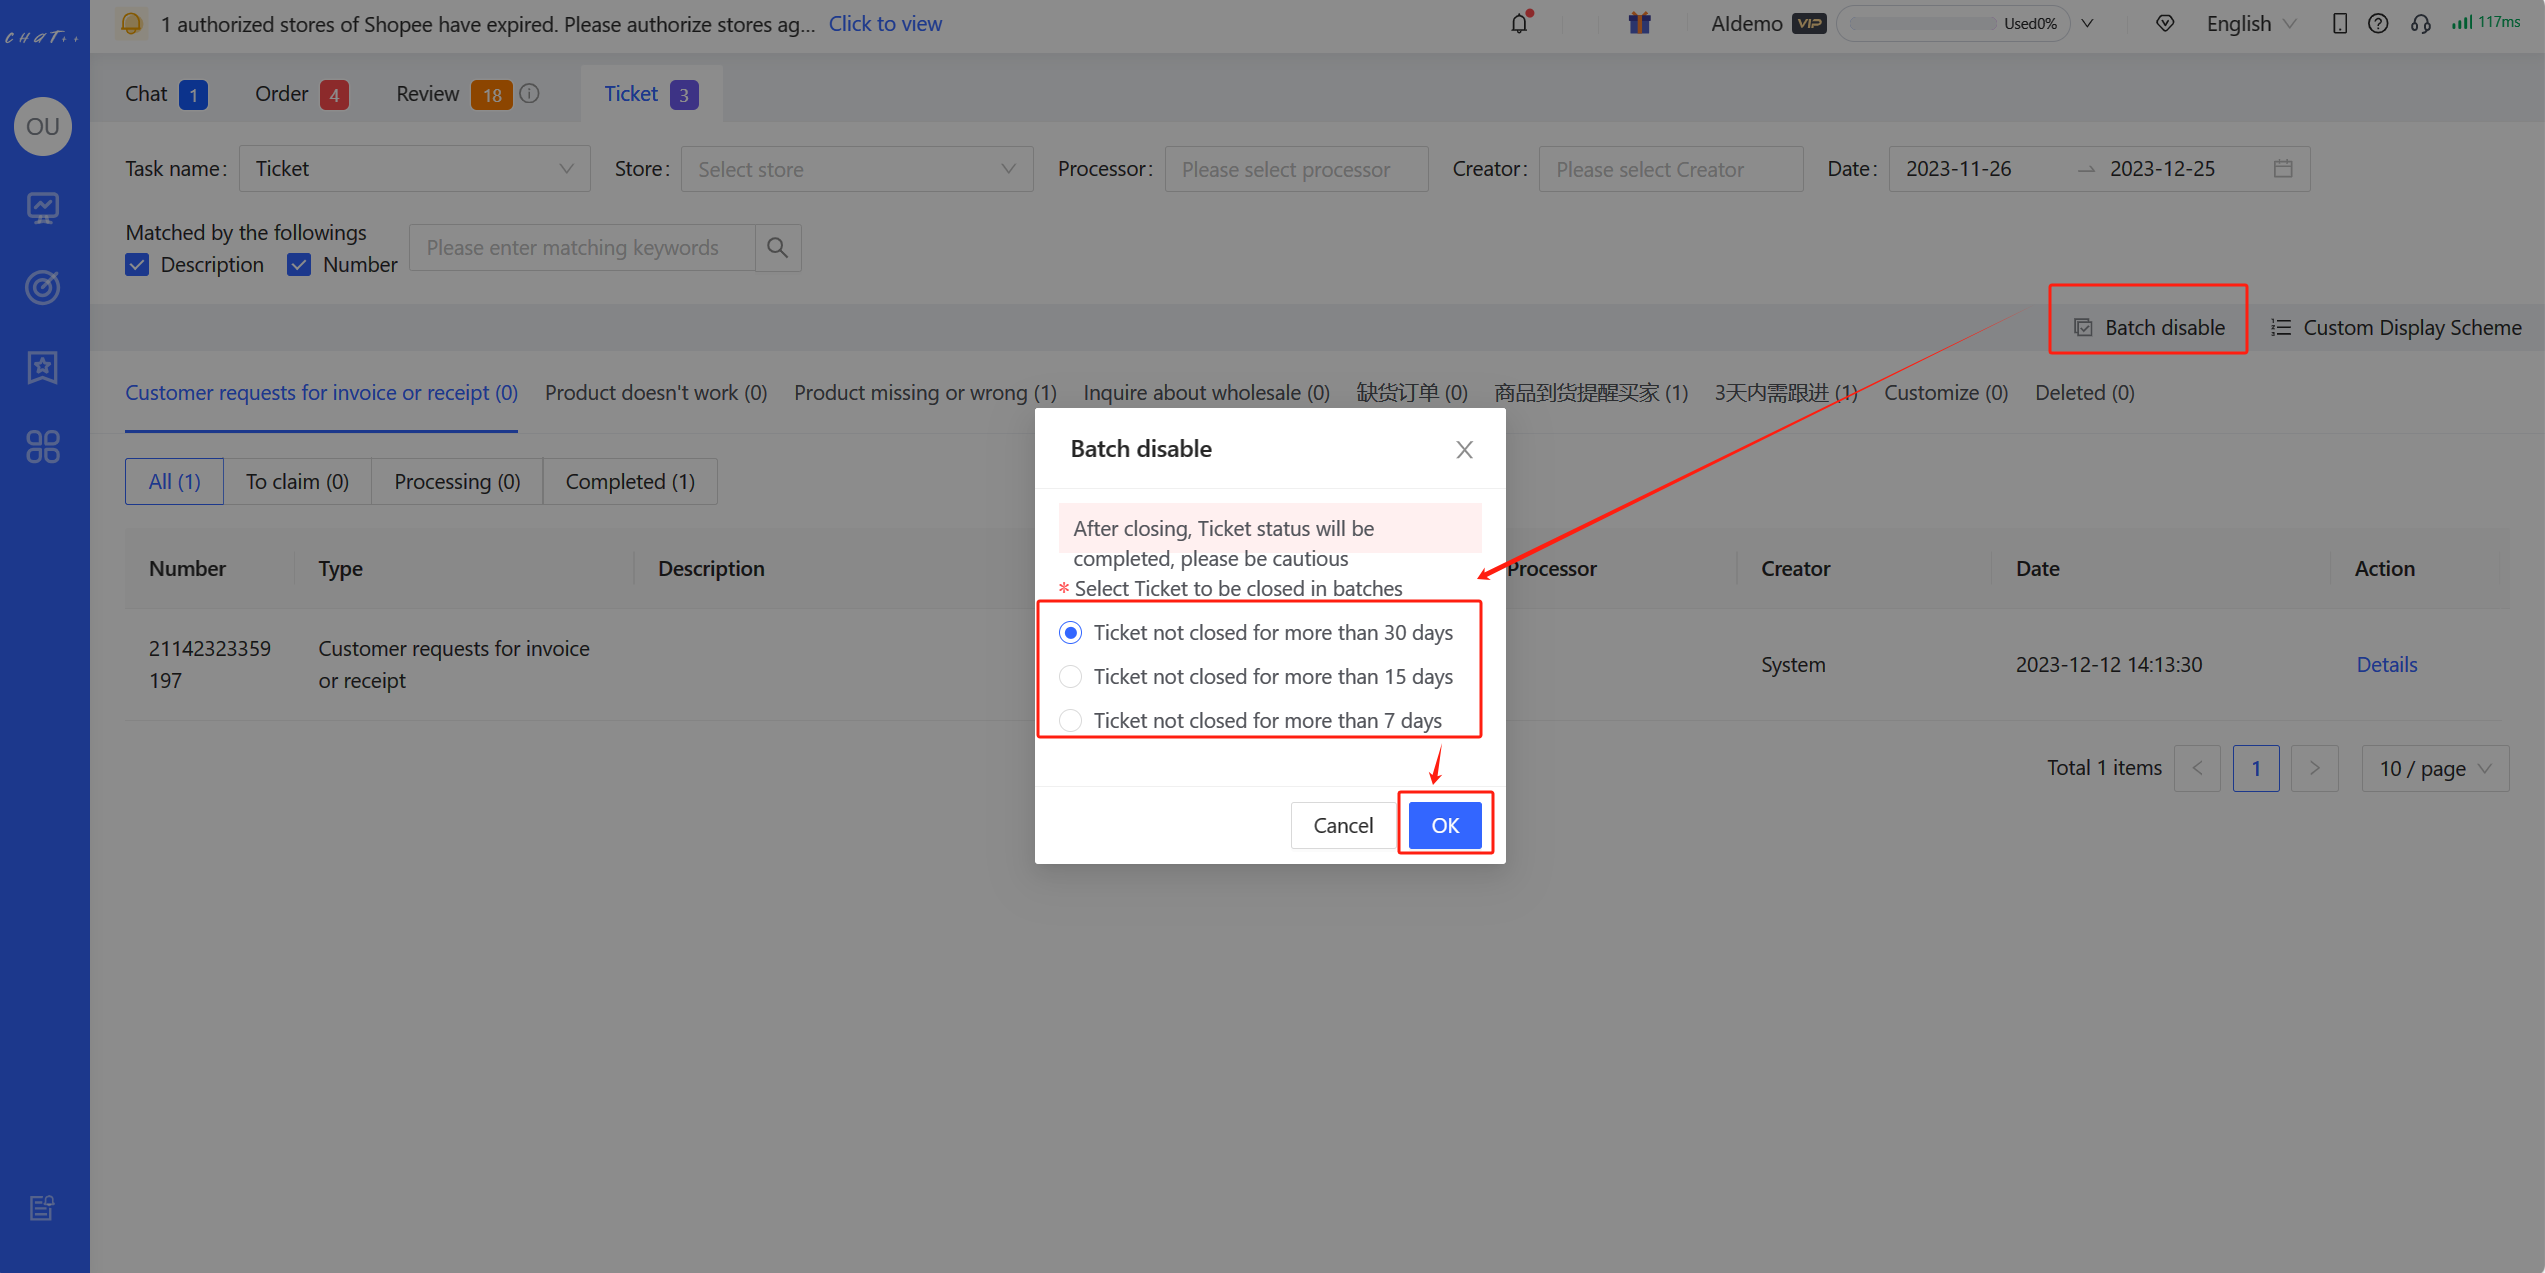
Figure23
Tracking tickets from the Ticket Management Center
a. Keeping track of ticket reminders Agents can track the count of "Pending" and "In Progress" tickets based on the number displayed on the right side of the "Ticket Management Center." When this number updates, it's advisable to promptly follow up.
b. Centralized ticket follow-up By clicking on "Left Sidebar Messages → Ticket Processing Center," agents can switch between different types of pending tickets. Clicking on "Details" in the ticket list allows for processing similar to the steps followed for managing tickets from the conversation list.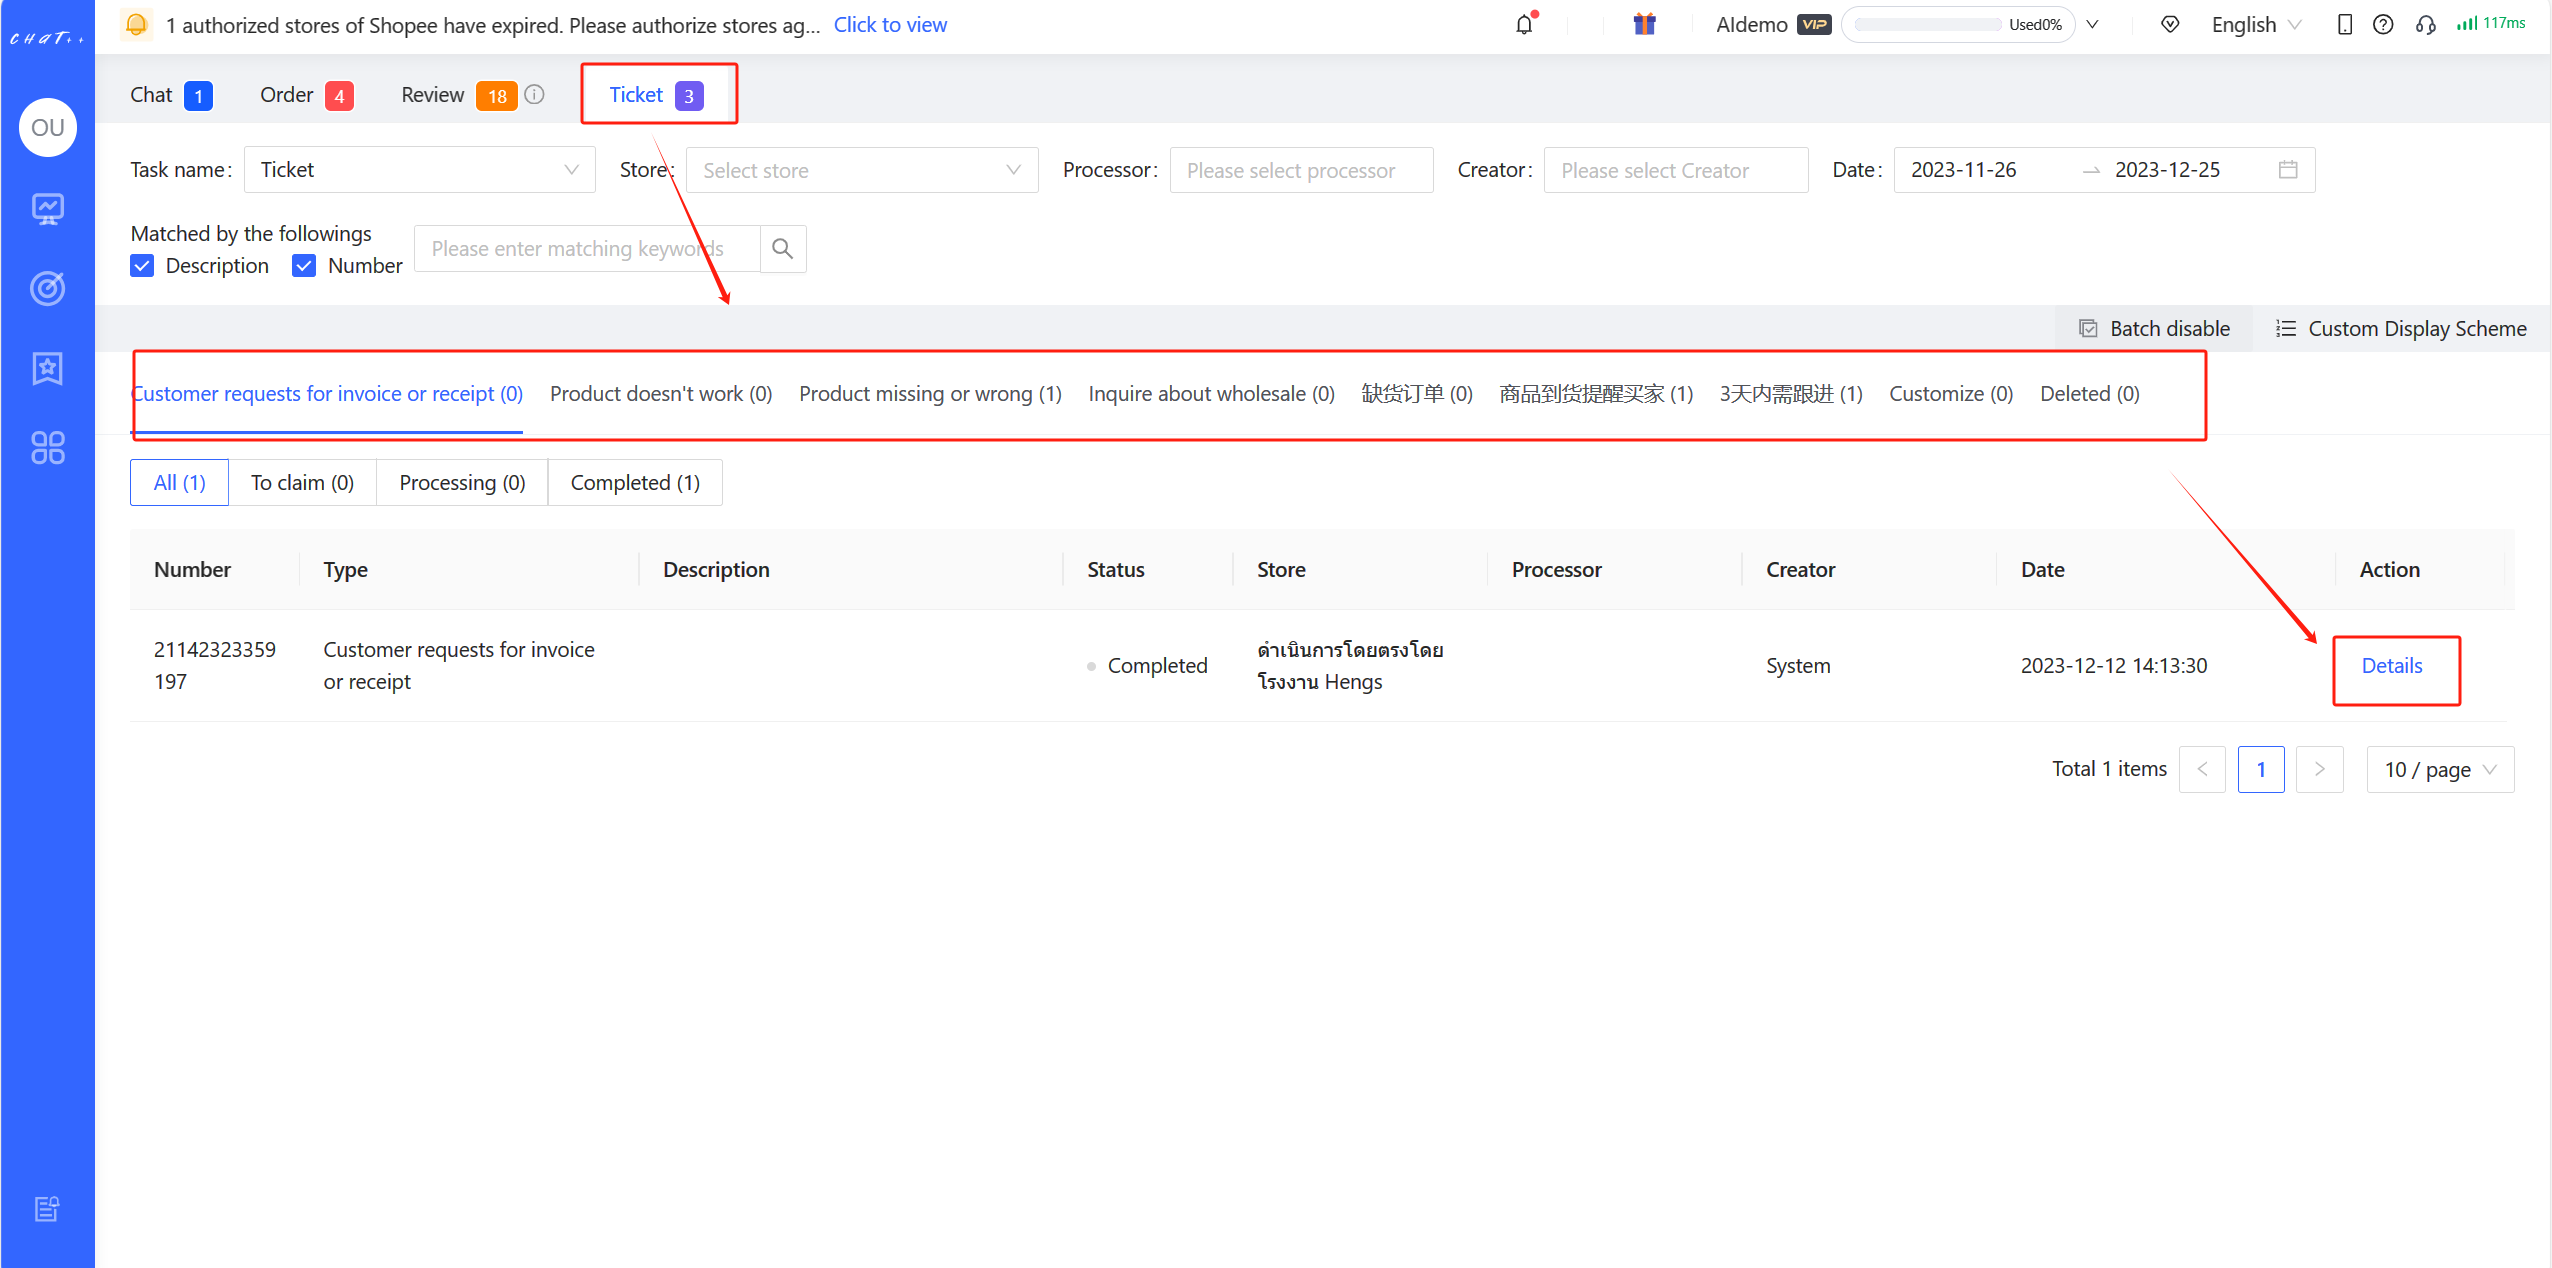
Figure24
- Custom Ticket Type: When manually creating a ticket, an option exists to choose a custom type rather than creating a distinct new ticket type.
- Deleted Ticket Types: Upon confirming deletion of manually created ticket types, the tickets under the deleted ticket type will be grouped under this section.
Adding/Editing Solutions for Tickets
Clicking on Left Sidebar "Automation→ Reception Basics → Ticket → View Details → Edit" allows for adding or editing default scripts for "Different Problem Ticket Types" and "Different Handling Results."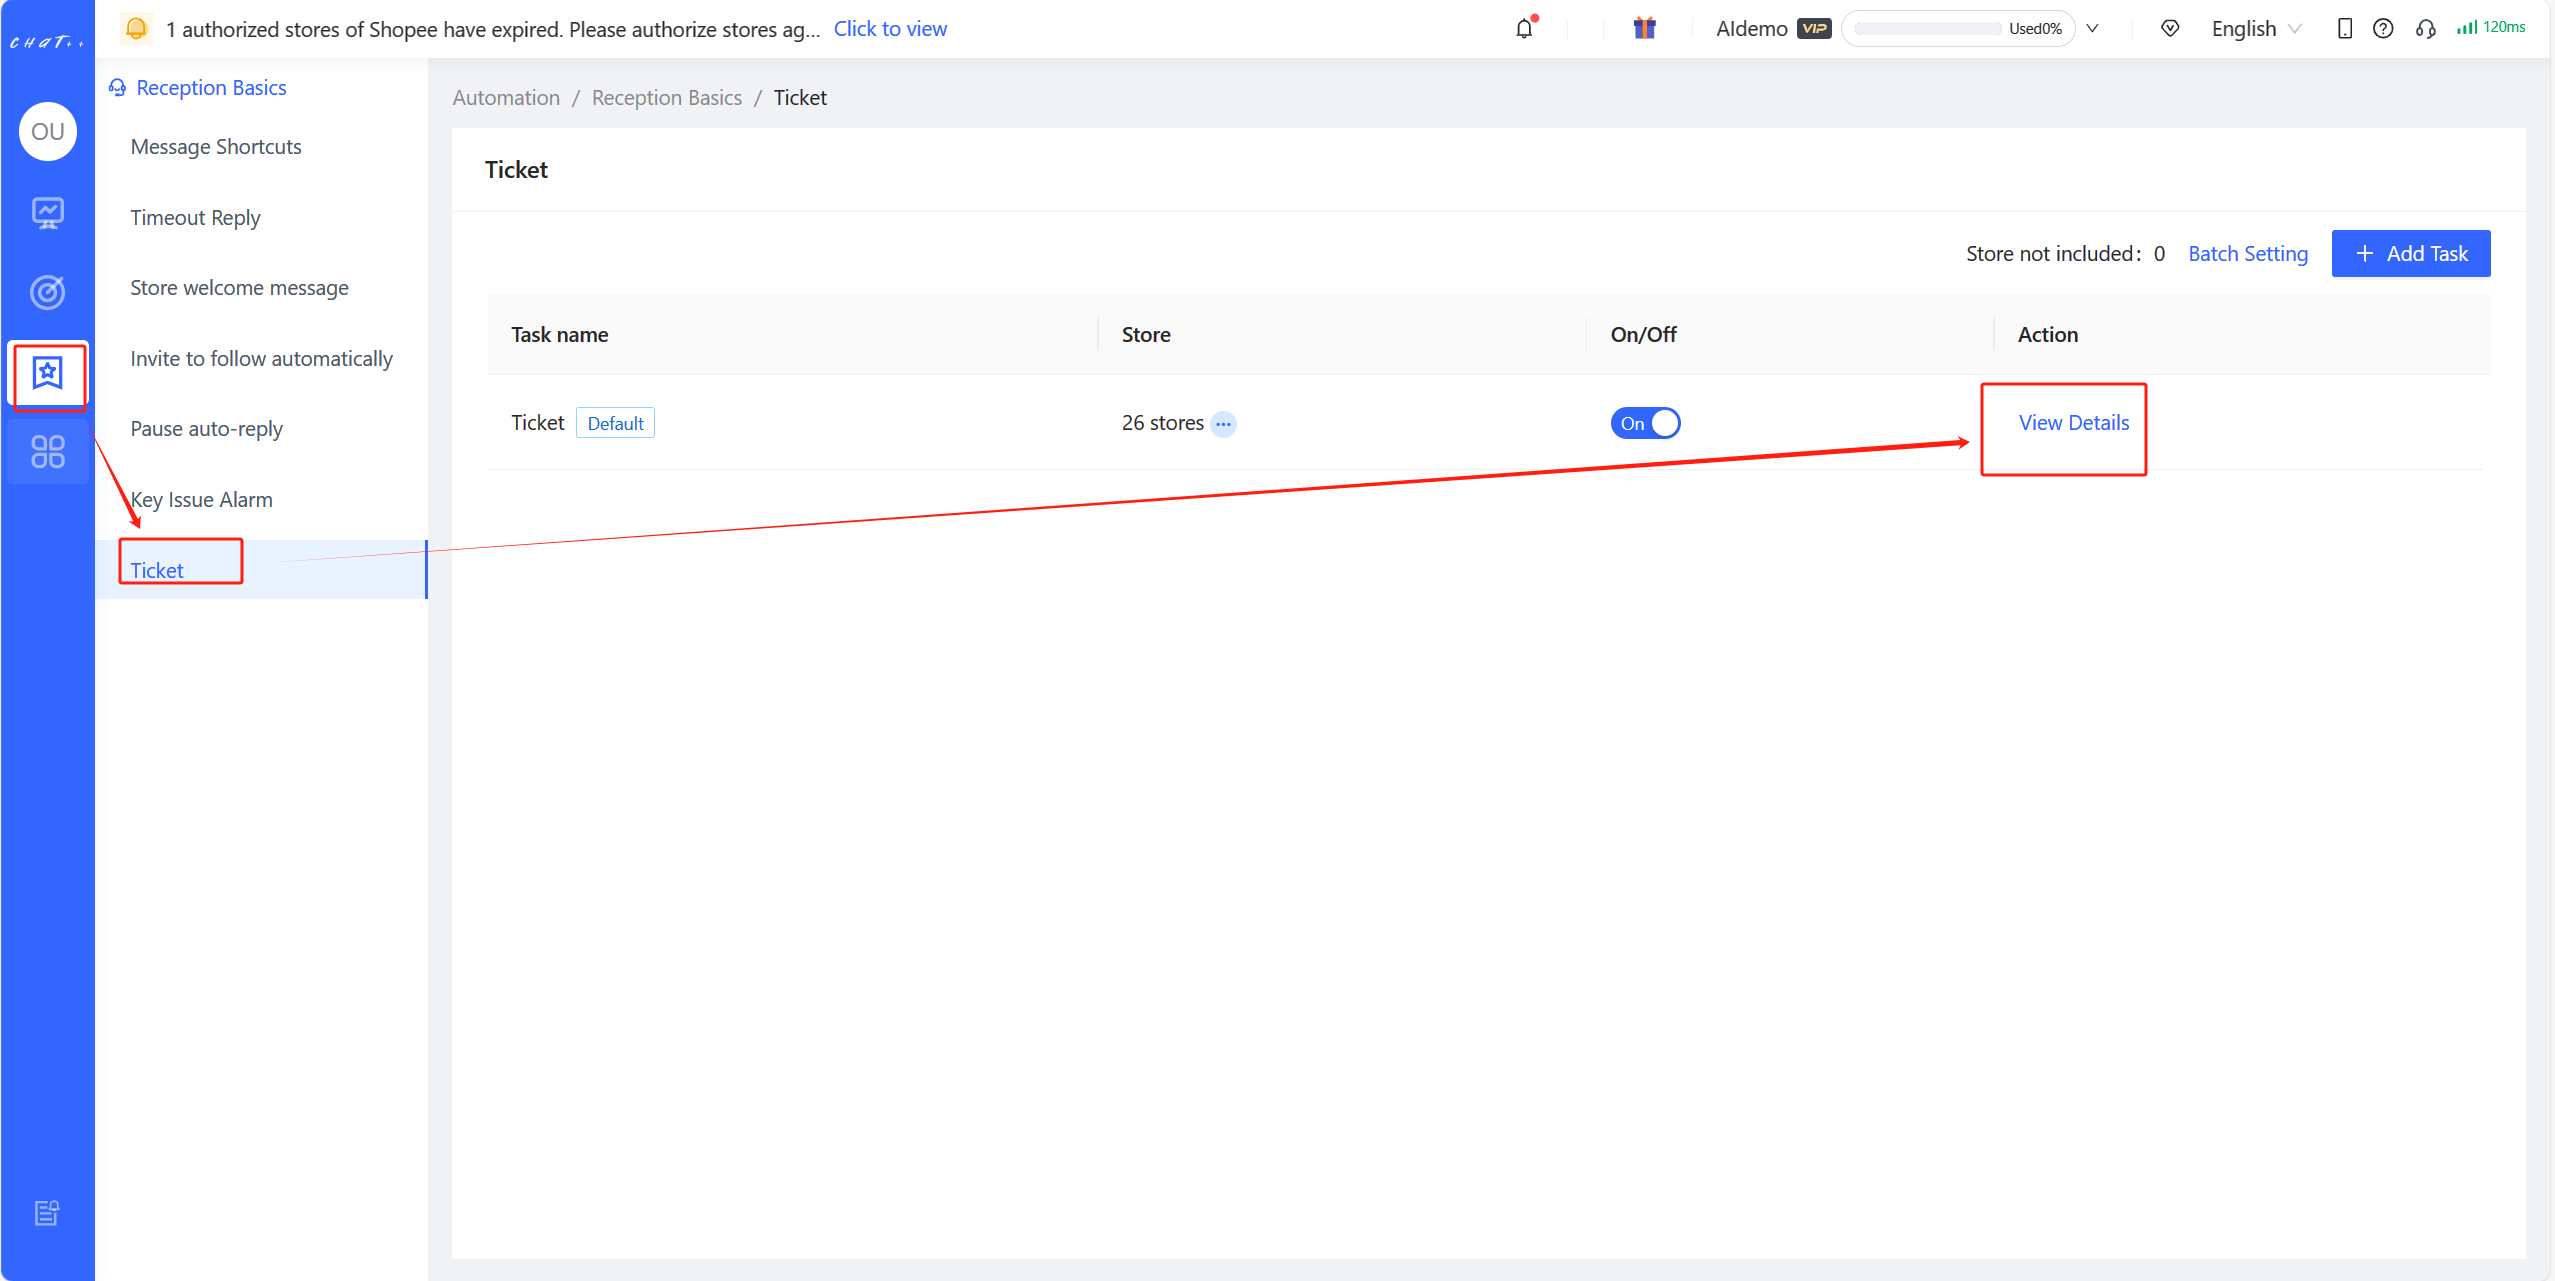
Figure25
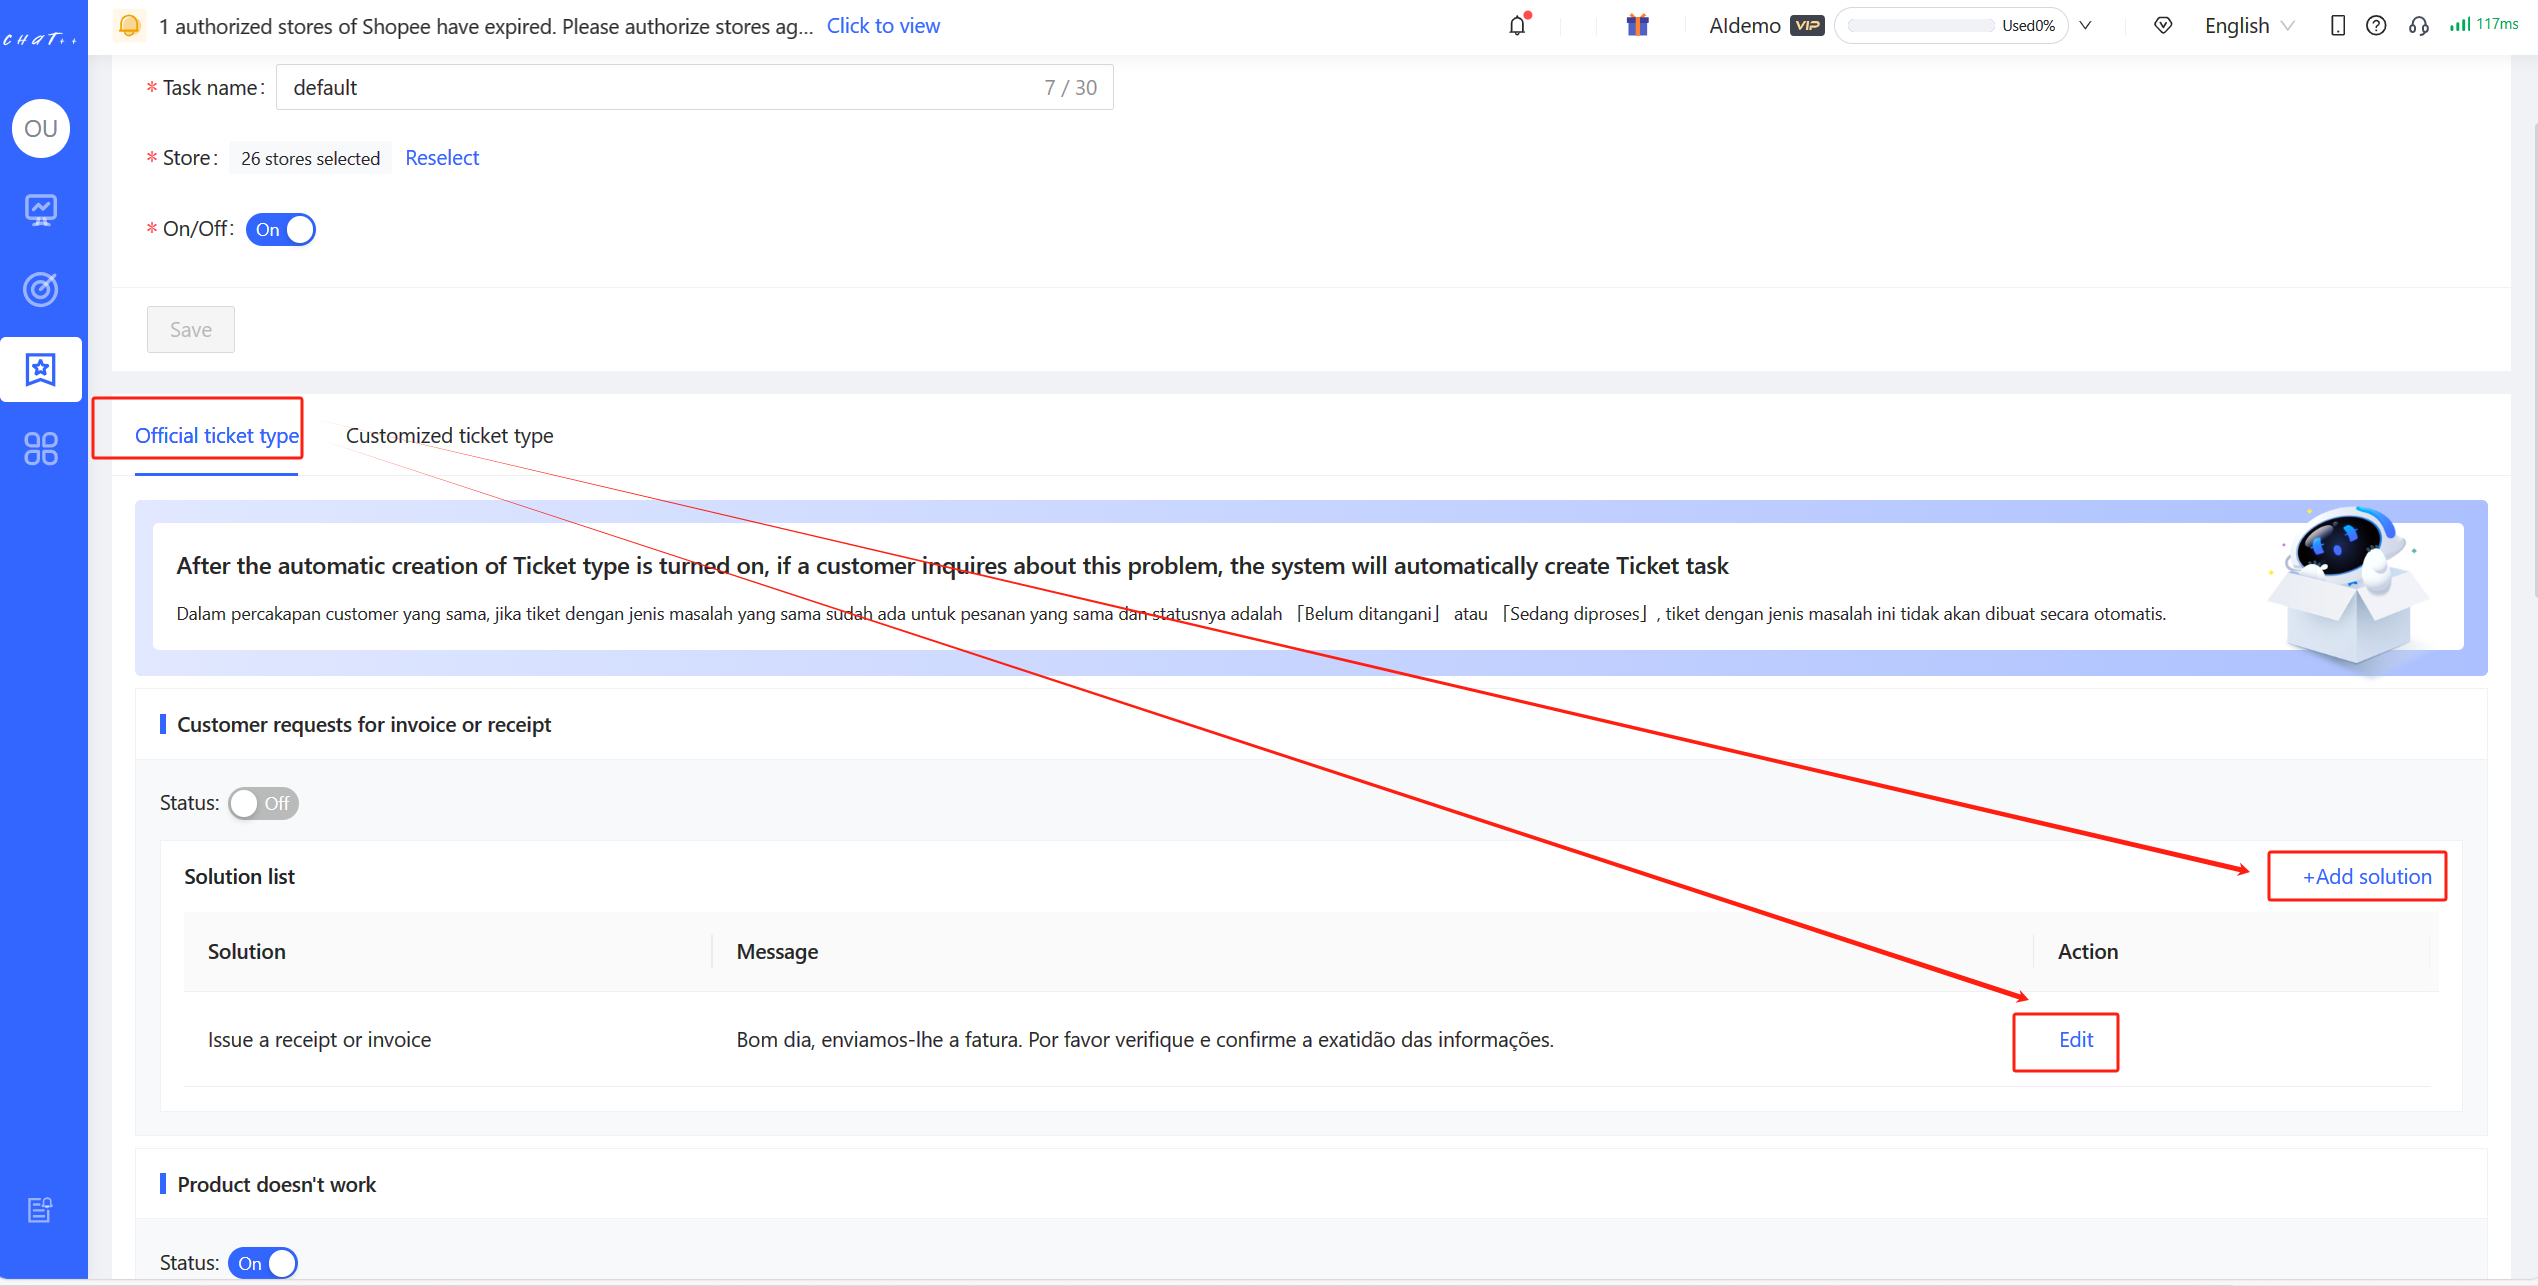
Figure26
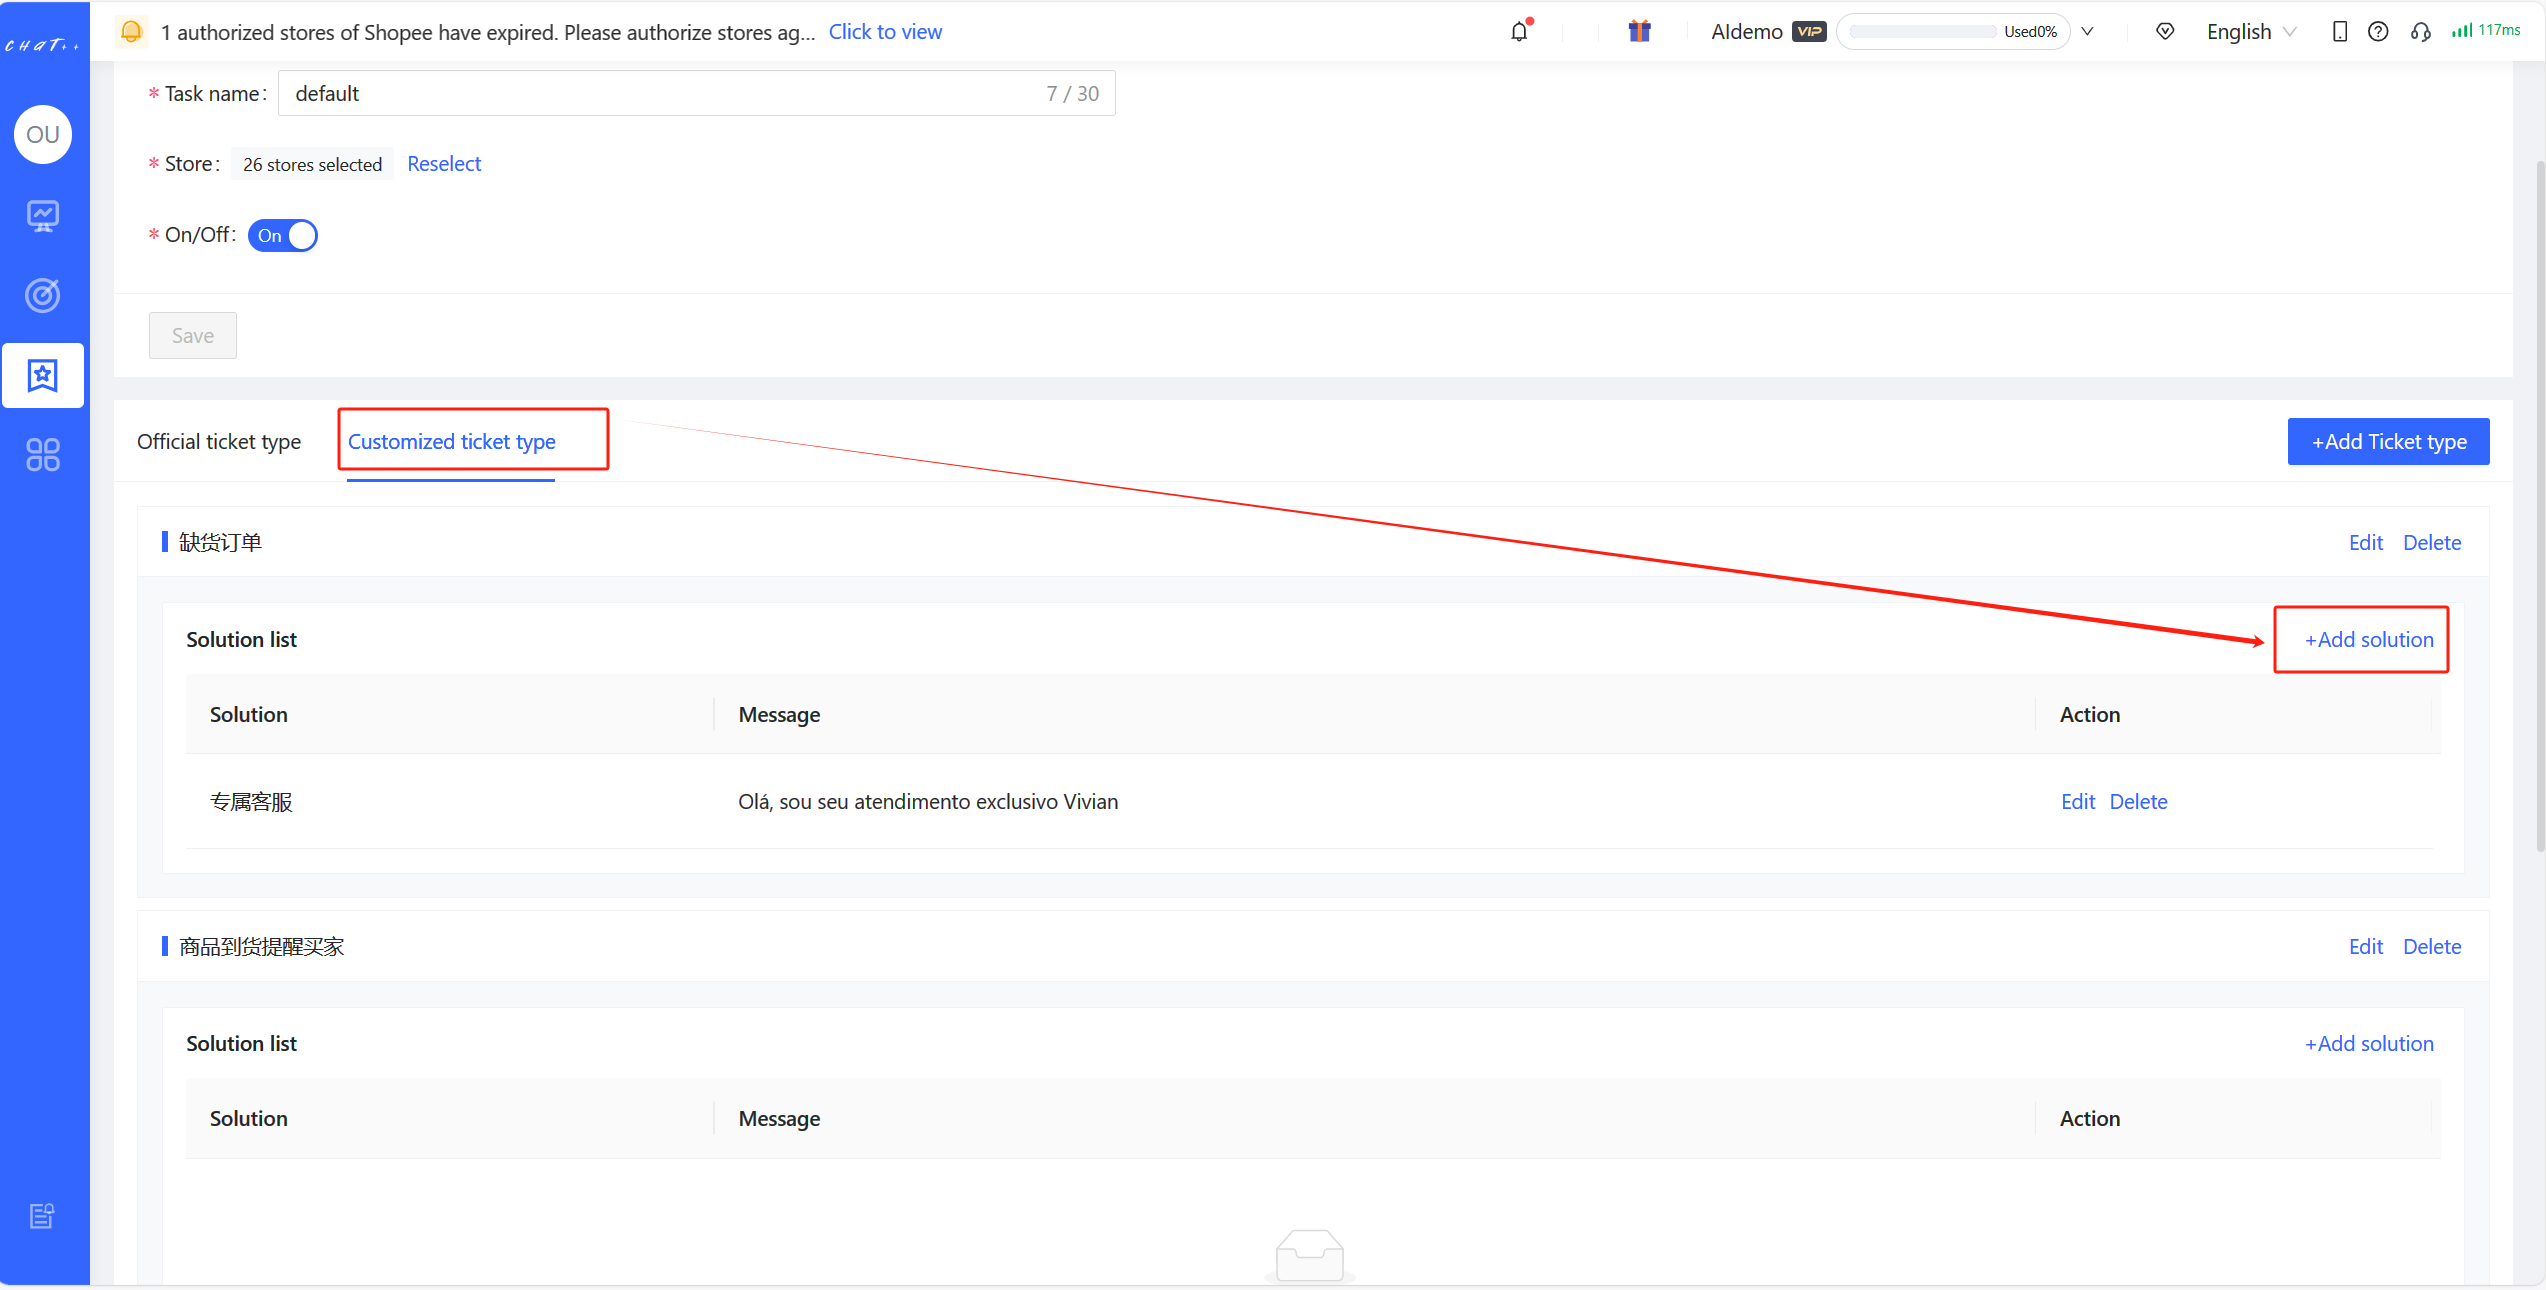
Figure27
Enabling/Disabling the "Ticket" Scenario
Enabling/Disabling different ticket scenes
To enable or disable specific ticket scenes for automatically created tickets, navigate to Left Sidebar "Automation → Reception Basics → Tickets → View Details." Here, you can enable or disable the corresponding ticket scenes.
⚠️ The prerequisite for the automatic creation of corresponding ticket scenes is that the "Task Master Switch" shown in the image below needs to be in the open/enabled state.
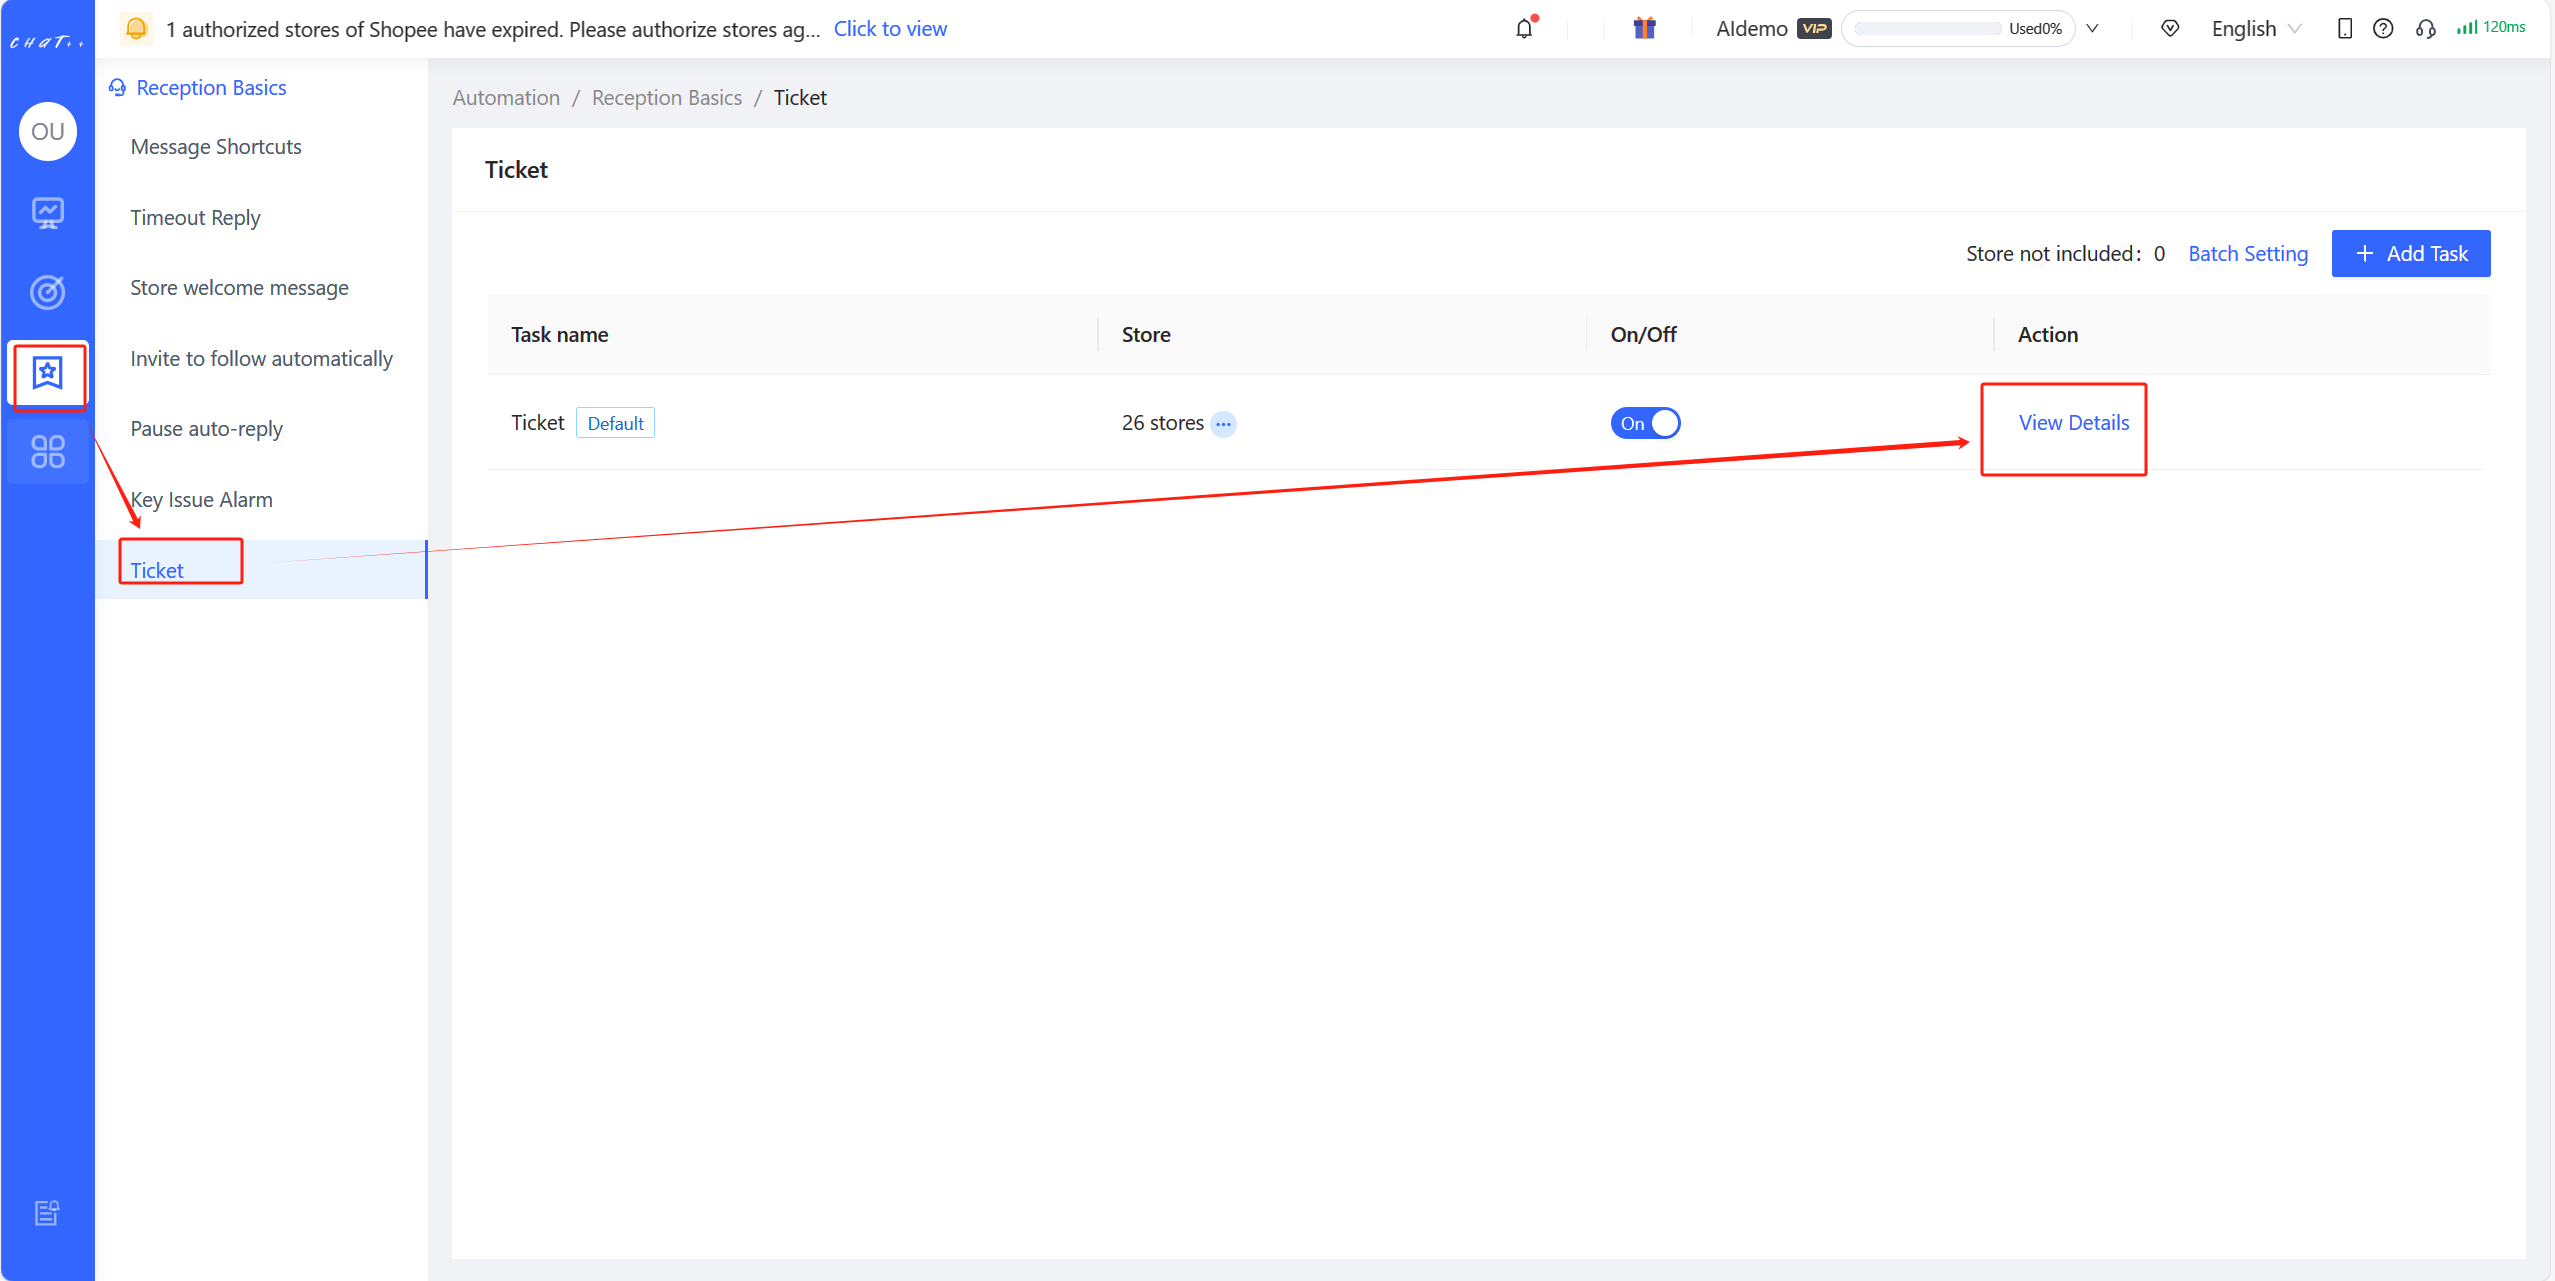
Figure28
- Buyer requests receipt or invoice: This scenario is initially disabled. When you confirm that your store can issue a receipt or invoice to the buyer, you can enable this scenario. Once enabled, when a buyer requests a receipt or invoice while the bot handles the conversation, the system automatically creates a ticket for the customer service team. This will provide real-time numeric reminders in the Ticket Management Center.
- Buyer reports missing or incorrect items: This scenario is initially enabled. When a buyer reports missing or incorrect items, while the bot continues handling the conversation, the system instantly generates a ticket. This will provide real-time numeric reminders in the Ticket Management Center.
- Buyer reports product quality issues: This scenario is initially enabled. When a buyer reports issues regarding product quality or usability, while the bot continues handling the conversation, the system immediately creates a ticket. This will provide real-time numeric reminders in the Ticket Management Center.
- AI detects buyer inquiring about wholesale products: This scenario is initially enabled. When AI identifies the buyer's intent to inquire about wholesale products, the system automatically generates a ticket and provides real-time numeric reminders in the Ticket Management Center.
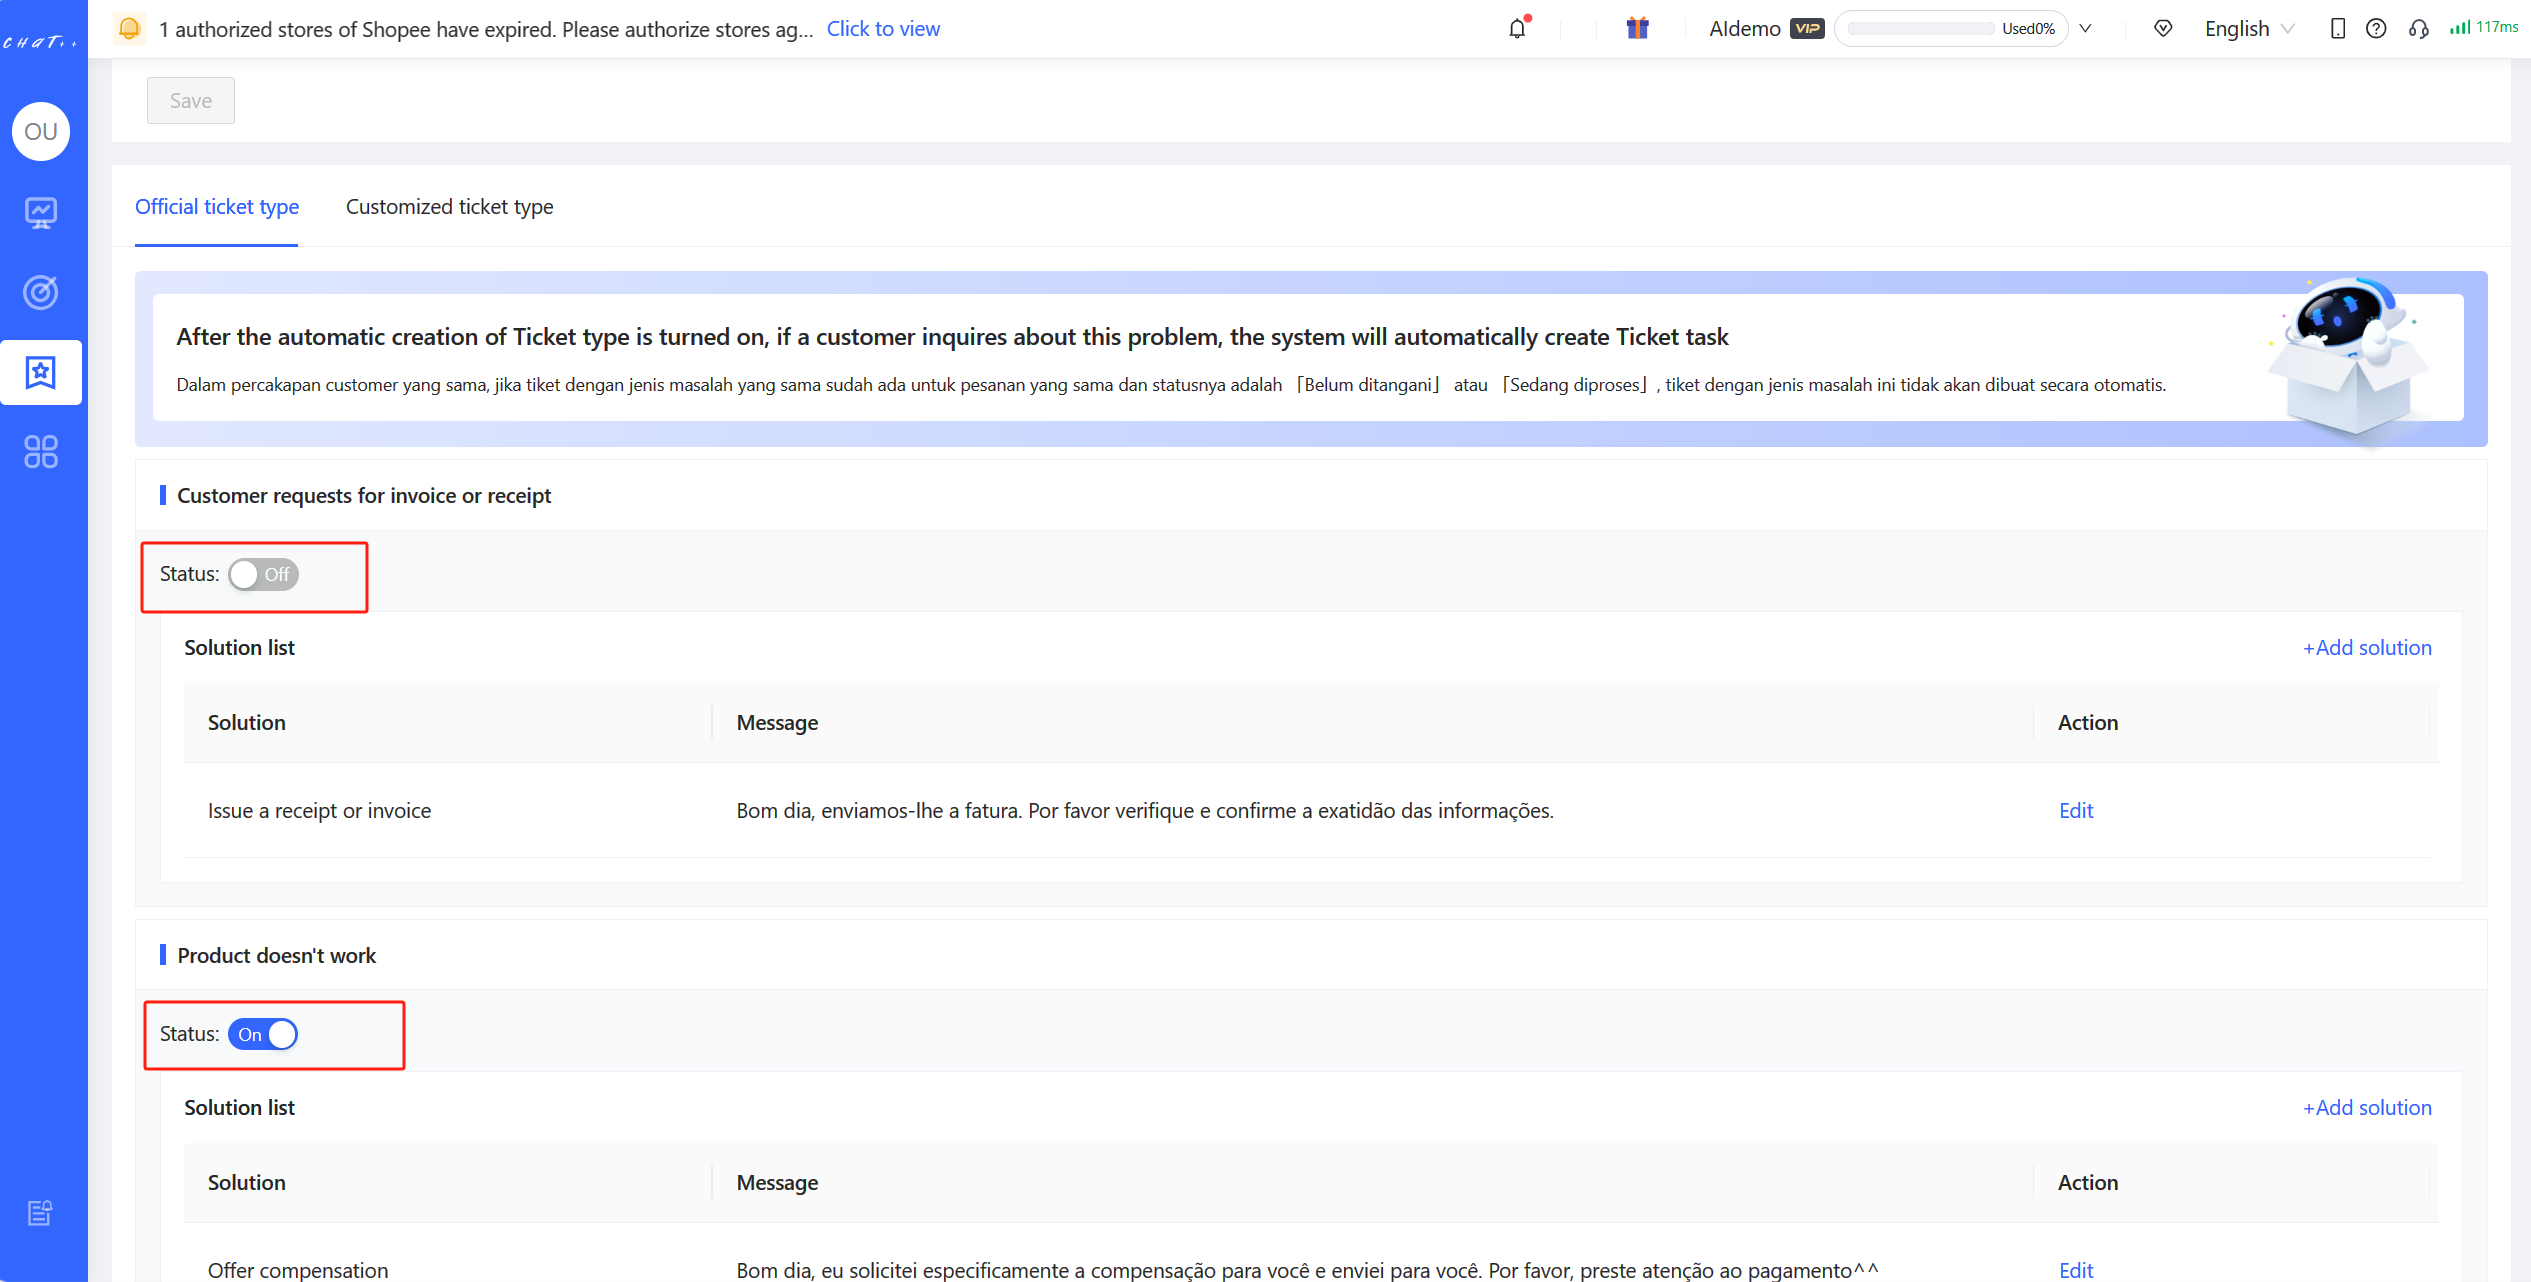
Figure29
Enable All Tickets
Click on Left Sidebar "Automation" → Reception Basics → Tickets → View Details" to activate the enable status button for all ticket scenes, along with the task switch (as shown in Image 29). Once all buttons are activated, the system will automatically create tickets for all current scenes for the customer service team.
⚠️ The prerequisite for enabling all tickets is that the "Task Master Switch" shown in the image below needs to be in the open/enabled state. ⚠️ When modifying the Task Master Switch on the page below, remember to click "Save."
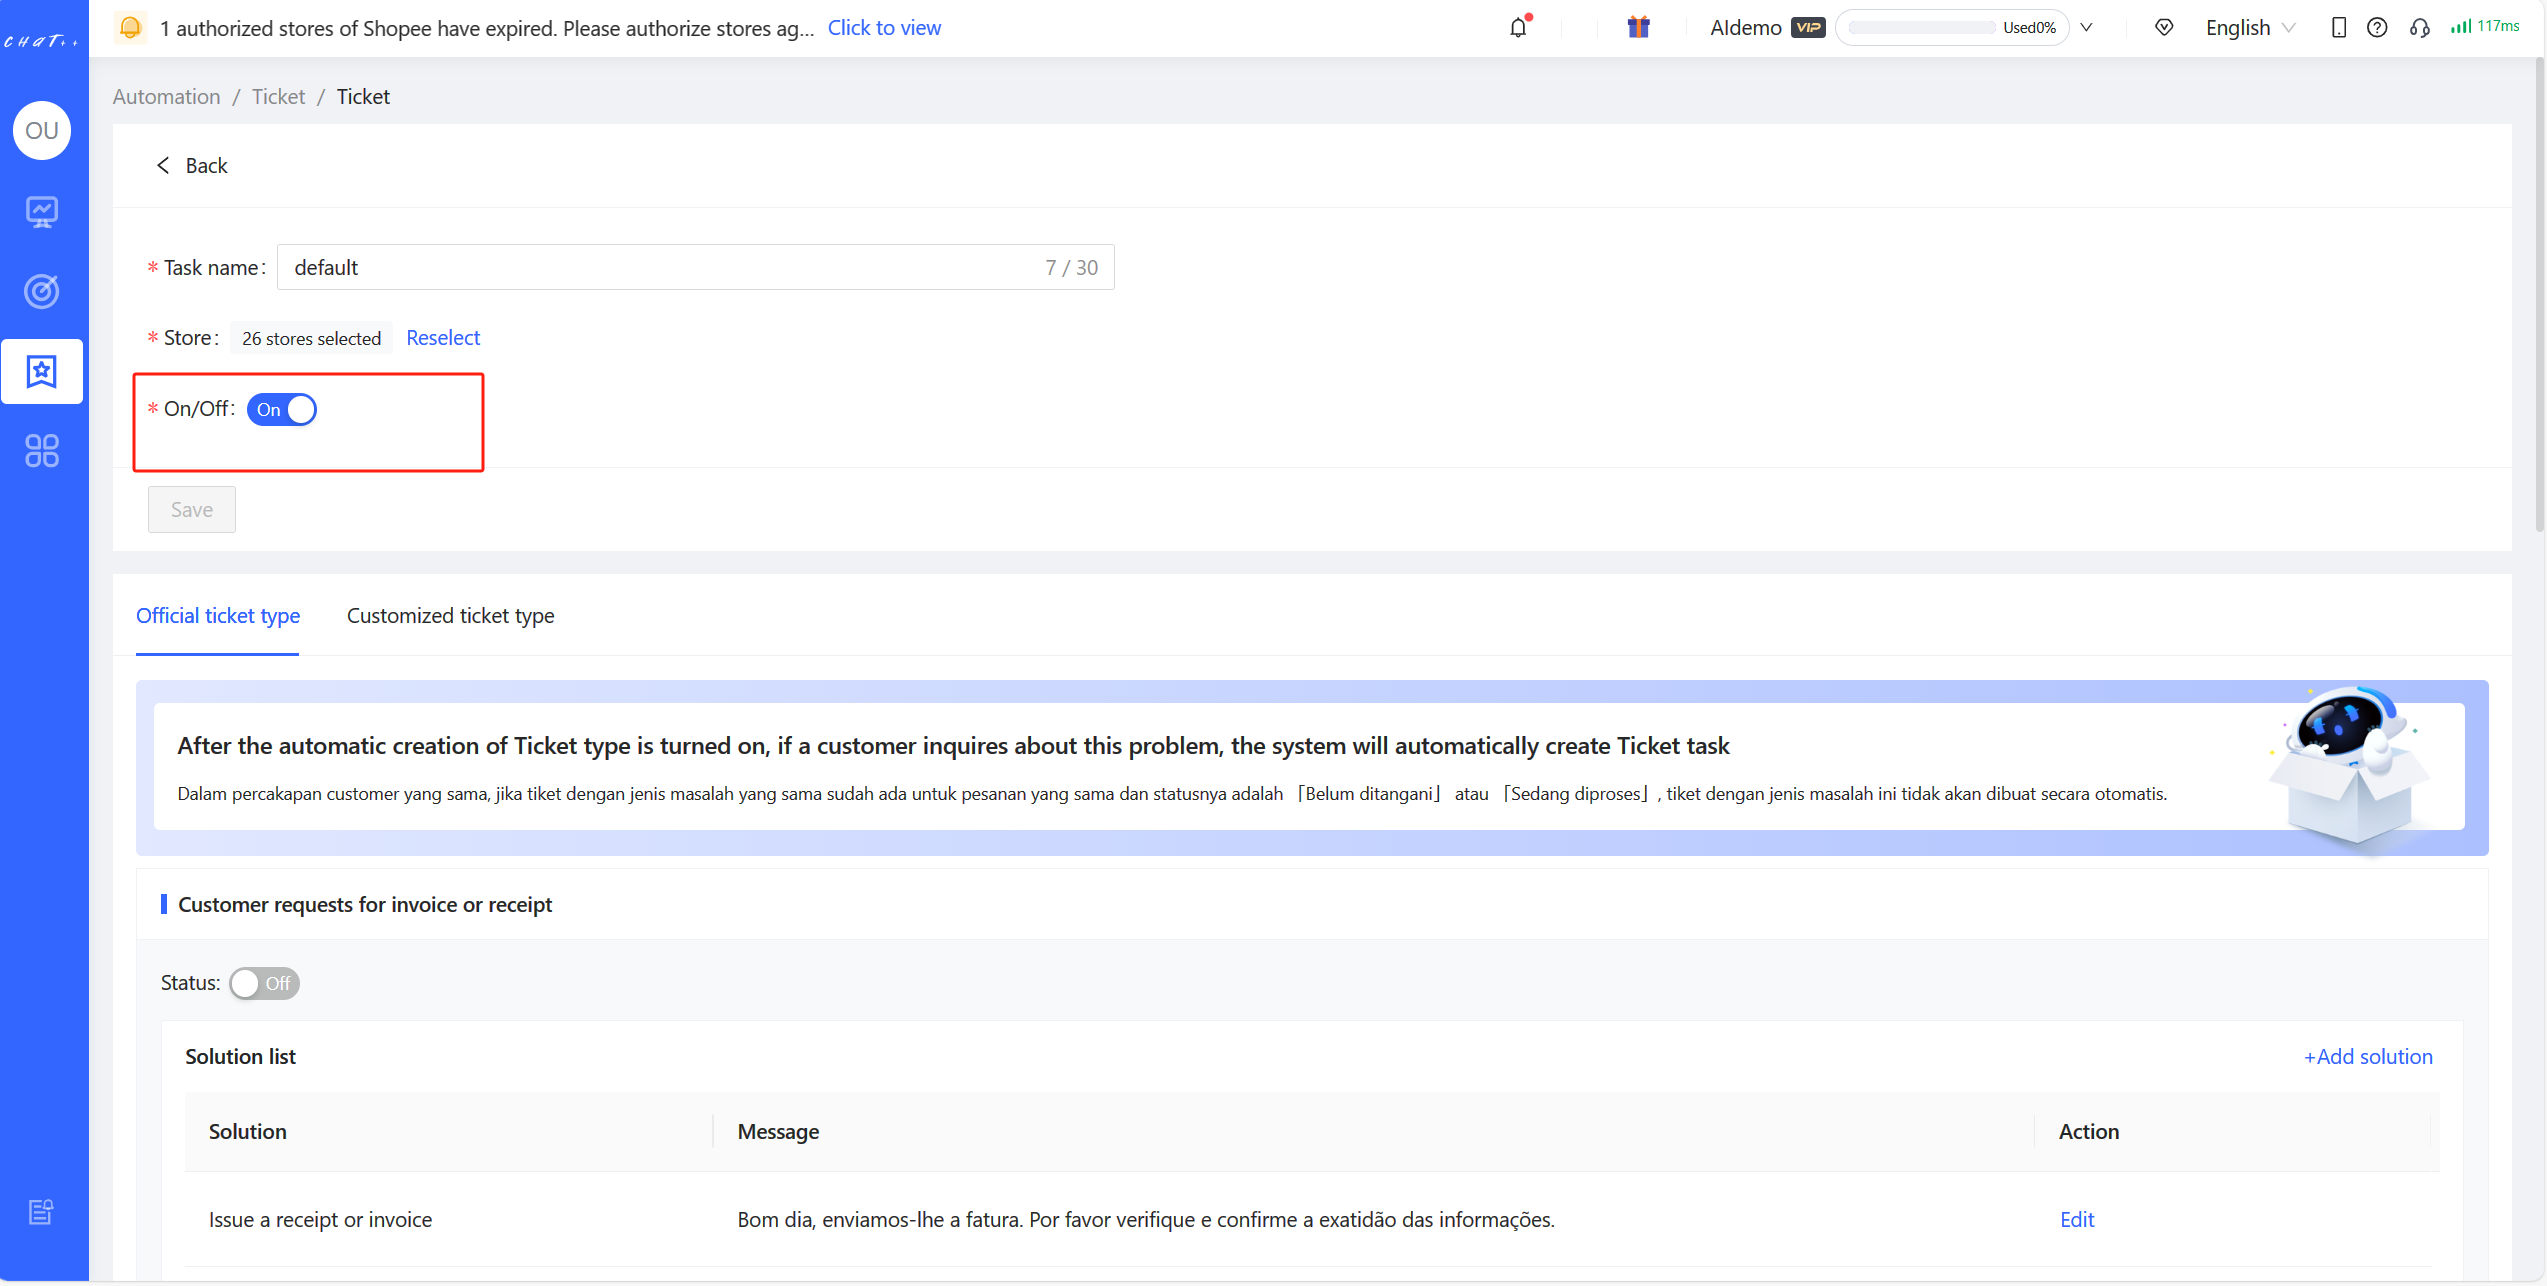
Figure30
Terminate All Tickets
By clicking on Left Sidebar "Automation" → Reception Basics → Tickets → Toggle Button," you can deactivate the task switch, thus terminating all tickets.
⚠️ After deactivating all tickets, the system will no longer automatically create tickets that require follow-up.
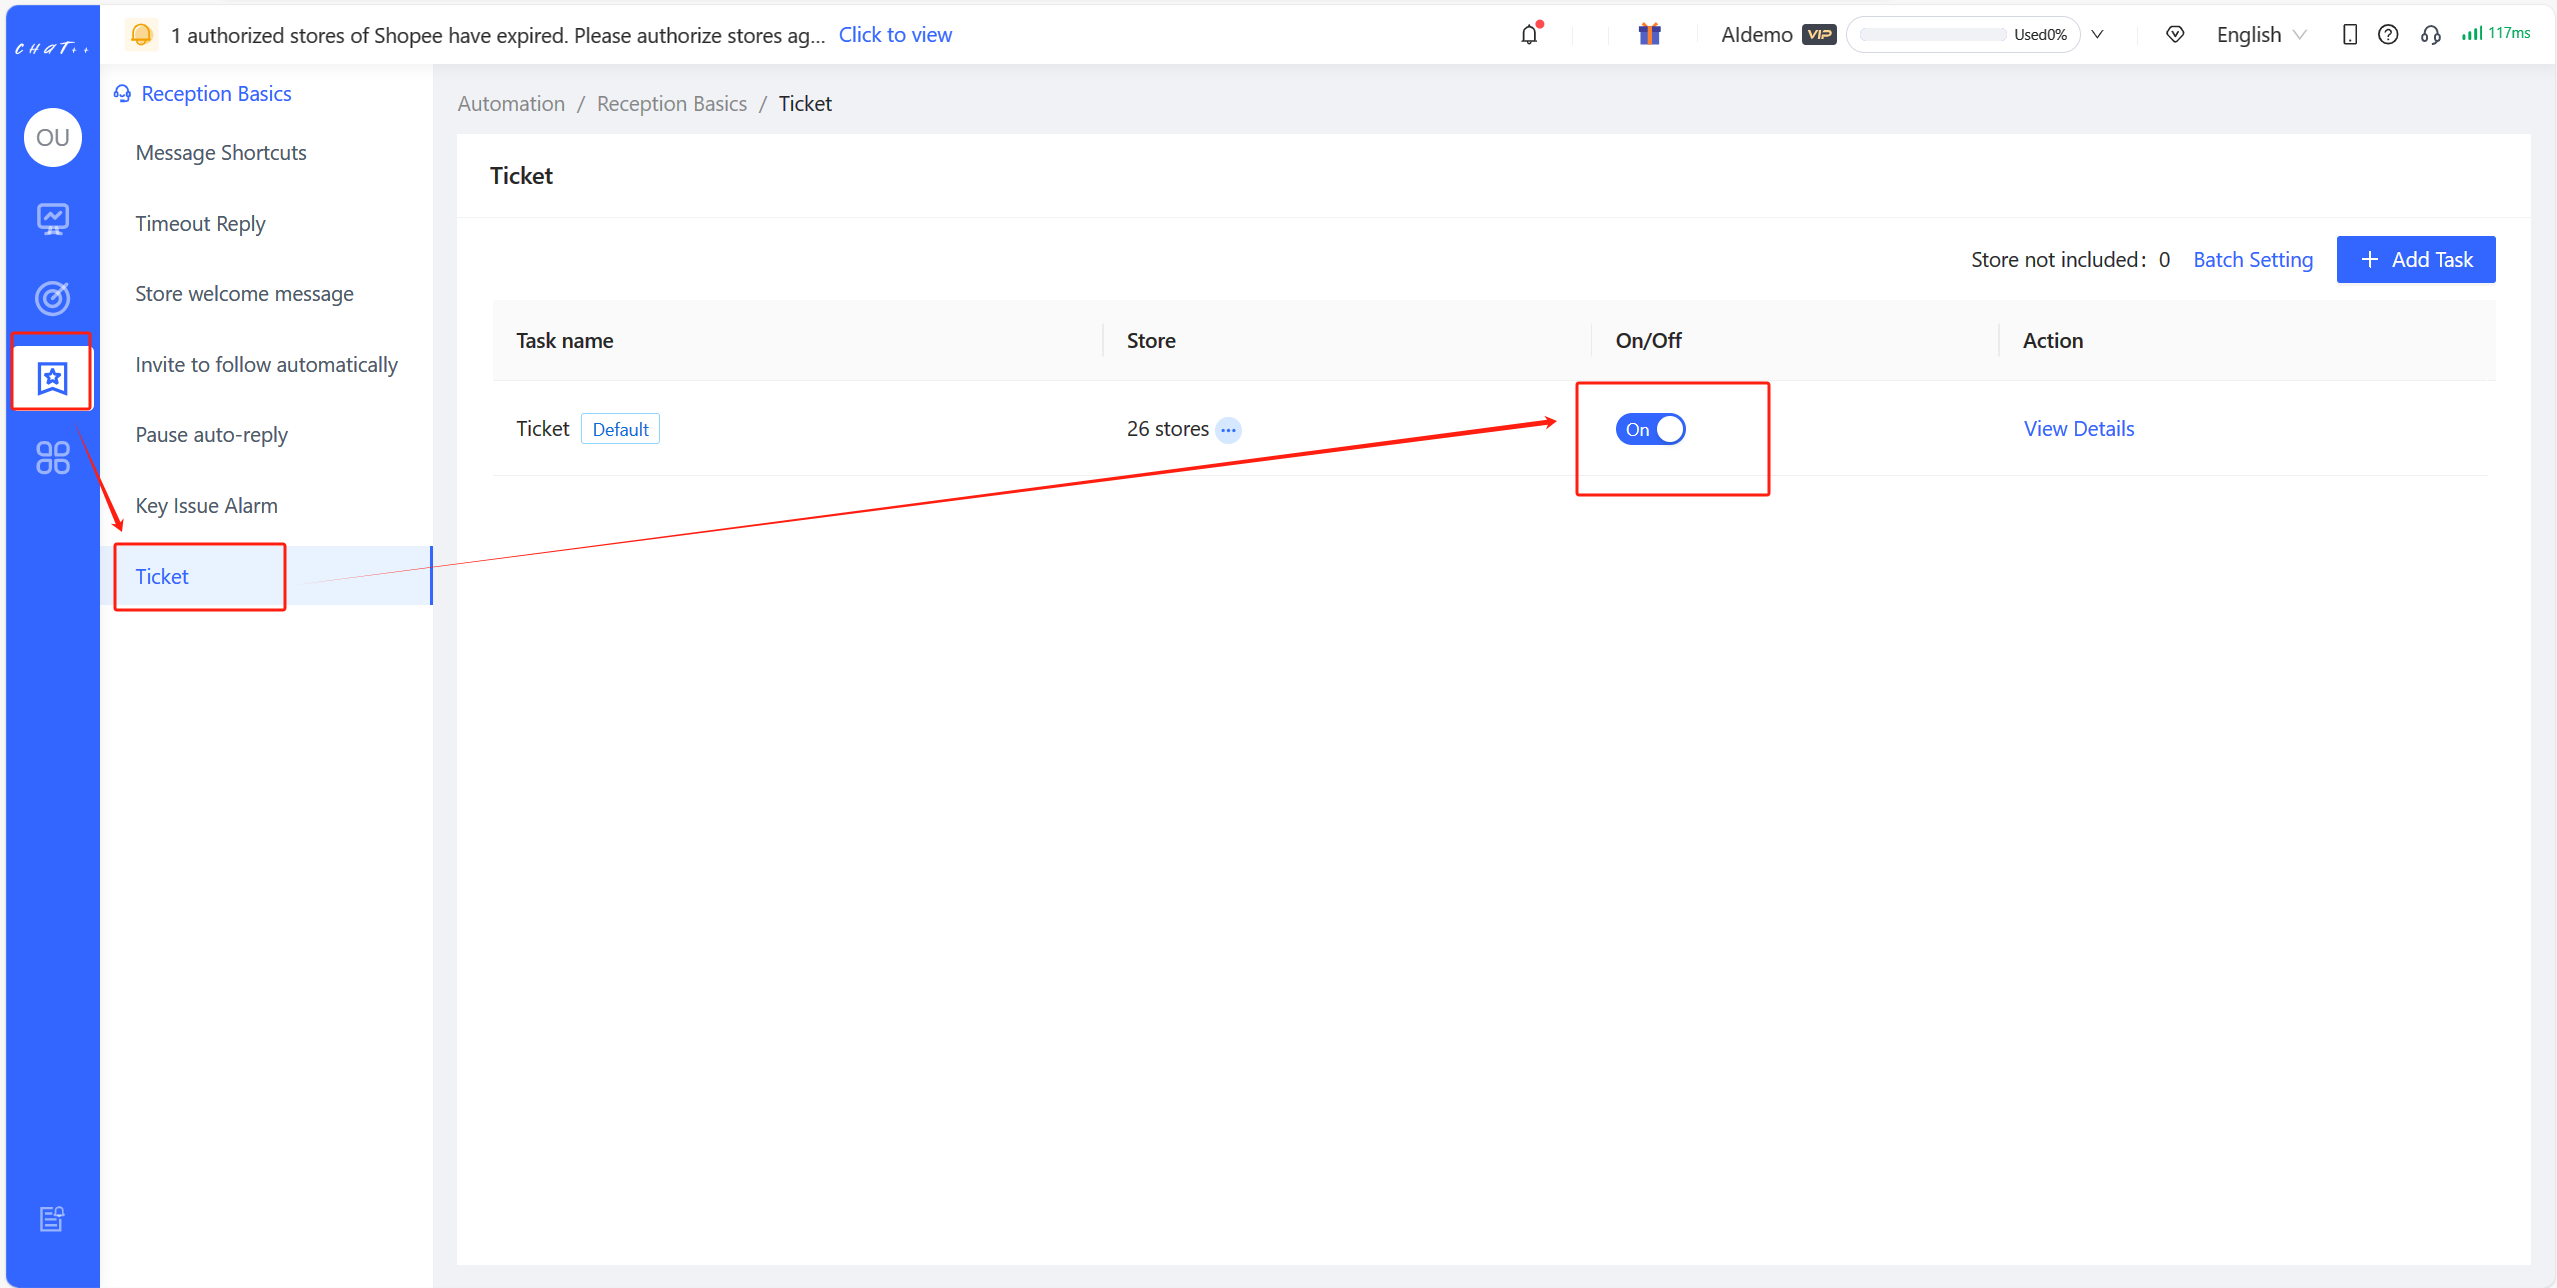
Figure31
Report Problems
Do you find problems with question and answer recognition, translation, etc, when receiving?
Is it too troublesome to contact the operation with the screenshot of the problem?
Would you like to suggest some optimization for us?
In order to improve the convenience and accuracy of problems reporting, ChatPlusAI provides a problem report entry for each message in the current conversation window. Any problem you have in the process of use can be submitted quickly and conveniently, helping us quickly locate the specific problem and repair it. The report will further improve Chatbot’s recognition ability, and your valuable advice will help us do better.
How to Report Problems
Enter「 Report 」
In the current conversation window, find the problematic message, hover the mouse over this message, and the report entry will appear. Click the “Crying Face” button to enter the report page.
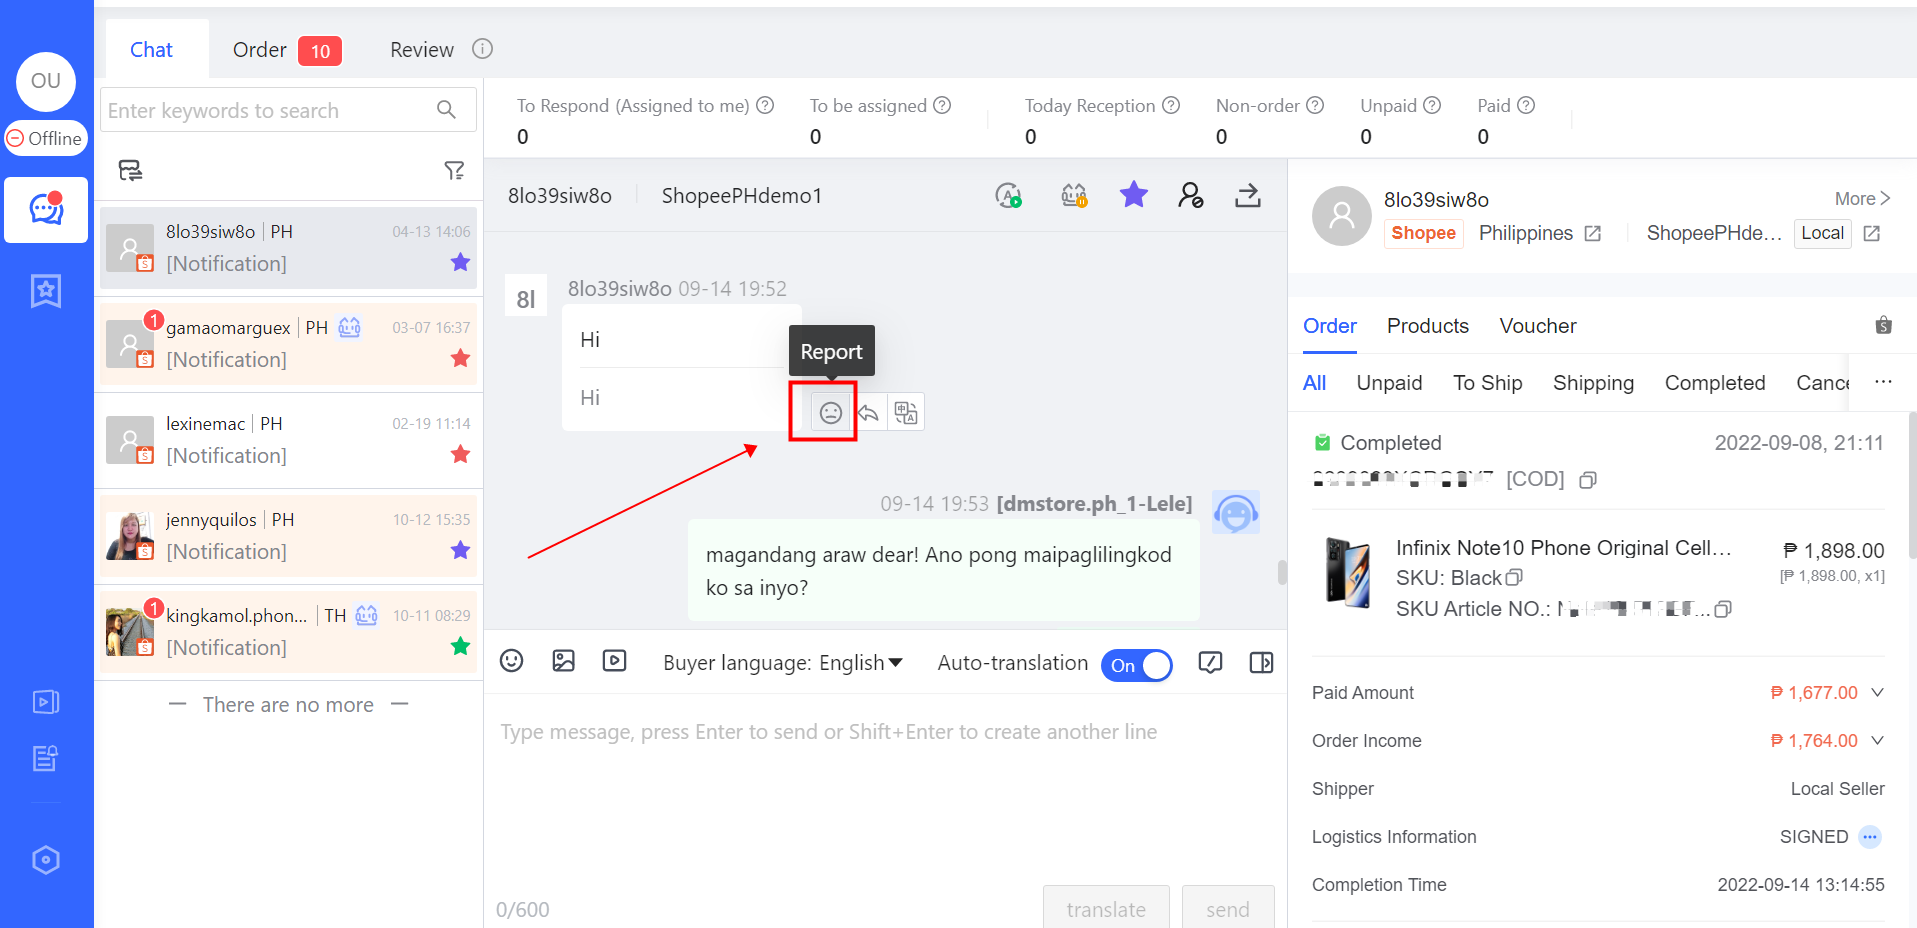
Supplement Information
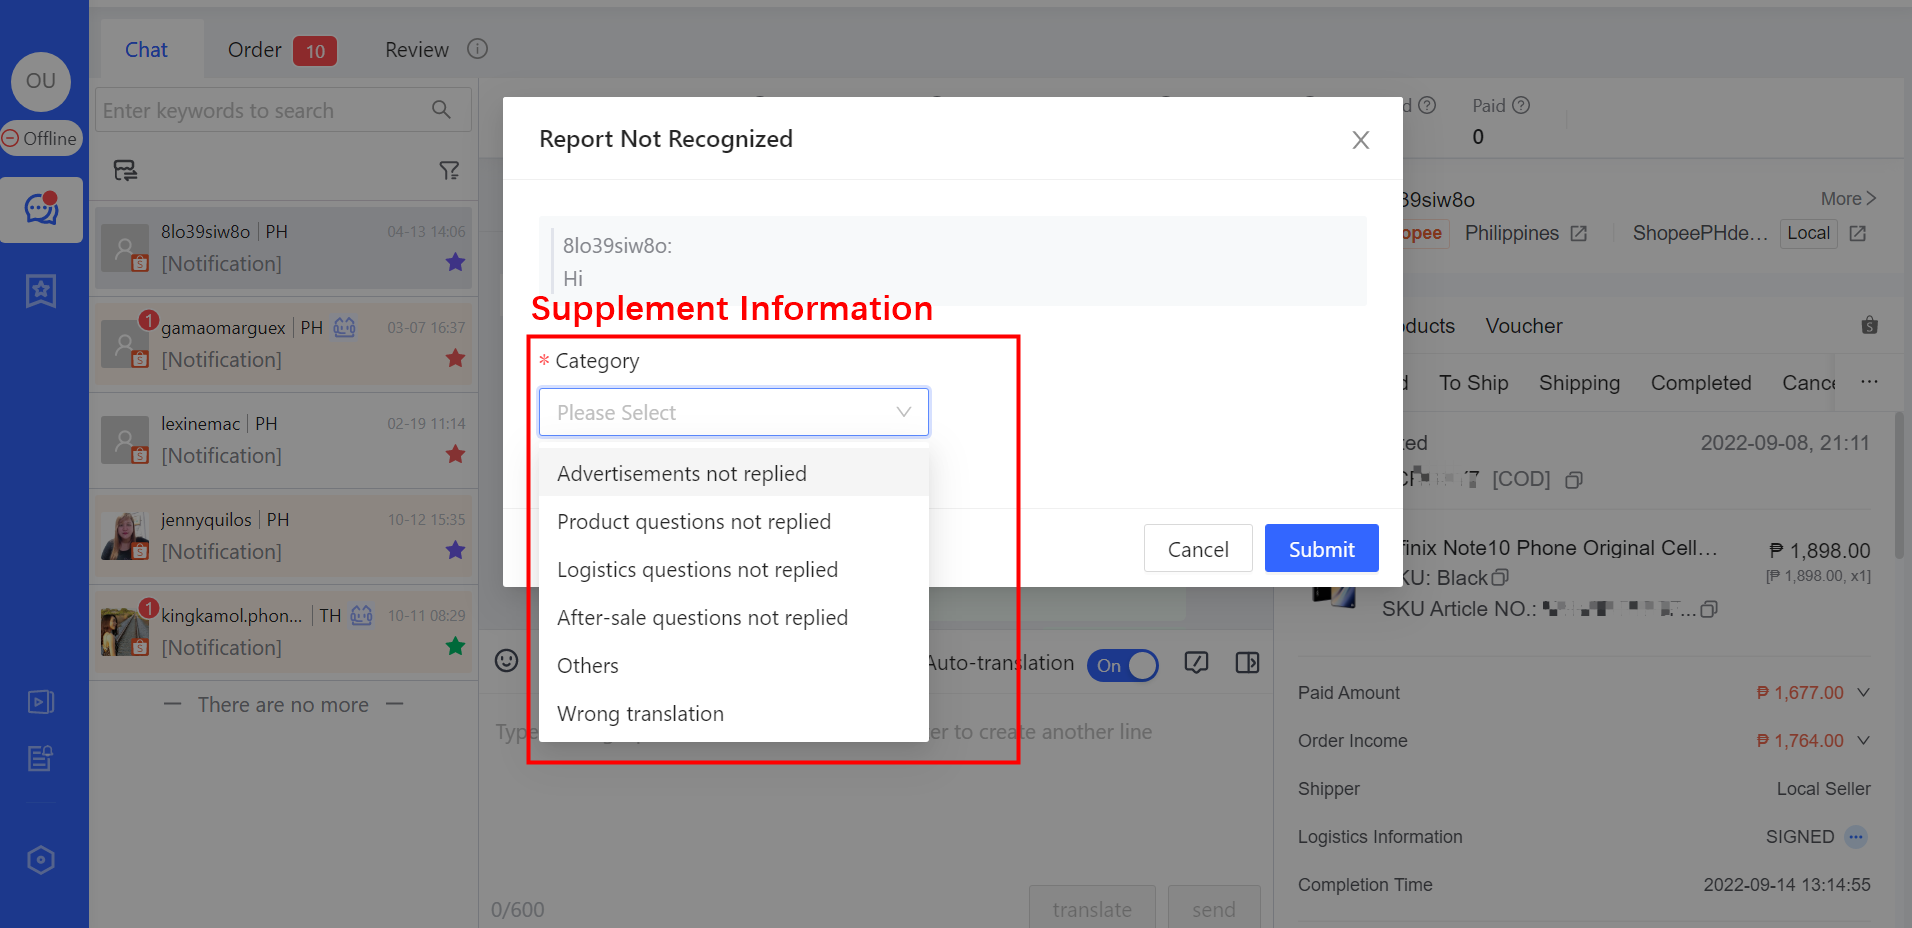
Check off the category of problem
When Chatbot does not reply to the buyer’s message, the agent can enter “Report” from the buyer’s problematic message, and check off the category of problem;
When Chatbot has replied to the buyer’s message, but the reply content needs optimization, the agent can enter “Report” from the buyer’s problematic message, and check off the category of problem;
When the agent or Chatbot replies to the buyer’s message unsuccessfully, the agent can enter “Report” from the buyer’s problematic message, and check off the category of problem;
ChatPlusAI team will immediately check and repair after receiving such report. If the official server of the marketplace cannot be sent normally due to instability, the R&D team will actively follow the processing progress of the marketplace to promote recovery.
After successful recovery, ChatPlusAI will send the feedback result.
When there is something wrong in translation of buyer’s message or seller’s message, the agent can enter “Report” from the buyer’s problematic message, and check off “Wrong translation”;
When the list of category for feedback is not available, the agent can check off “Others”. To ensure that the report is valid, the agent needs to describe it in the text box.
| Message Status | Category of Problem | Description | |
|---|---|---|---|
| Buyer's Message | When Chatbot doesn't reply | Advertisments not replied | When Chatbot doesn't reply to the advertisment sent by the buyer, the agent can enter “Report” from the buyer’s problematic message, and check off "Advertisments not replied" in the category of problem. The agent can directly block the buyer who sends advertisments. |
| Product questions not replied | Chatbot doesn’t reply to the product question sent by the buyer. It may be that the scenario "AI Receptionist" is not turned on, etc. A quick self-check entrance: “Automation → AI Receptionist → Official Scenario→ Product Question”. | ||
| Logistics questions not replied | Chatbot doesn’t reply to the logistics question sent by the buyer. It may be that the scenario "AI Receptionist" is not turned on, etc. A quick self-check entrance: “Automation → AI Receptionist → Official Scenario→ Shipment&Logistics”. | ||
| After-sales questions not replied | Chatbot doesn’t reply to the after-sales question sent by the buyer. It may be that the scenario "AI Receptionist" is not turned on, etc. A quick self-check entrance: “Automation → AI Receptionist → Official Scenario→ After-sale Service”. | ||
| Wrong translation | There is something wrong in translation of buyer's message. | ||
| Others | When the list of category for feedback is not available, the agent can check off “Others”. If the reply policy of some message types such as “the buyer ask for pictures” has been configure, It may be that the scenario "AI Receptionist" is not turned on, etc. A quick self-check entrance: “Automation → AI Receptionist → Official Scenario→Other Problems/Promotion......” | ||
| Seller's Message | When Chatbot has replied, but still needs optimization | Irrelevant answer | Chatbot replies to the buyer’s message irrelantly. |
| Unsuitable answer | The reply to the buyer still needs to be adjusted and optimized. After receiving your feedback, ChatPlusAI team will contact the agent to adjust the script. The agent can also inputted the modified content in the text box below. | ||
| Wrong answer about stocks | Chatbot’s reply about stocks is wrong. It may be that the scenario "AI Receptionist" is not turned on, etc. A quick self-check entrance: “Automation → AI Receptionist → Official Scenario→ Product Question”. | ||
| Message sending failed | The seller sends the message unsuccessfully. | ||
| Wrong translation | There is something wrong in translation of seller's message. | ||
| Others | When the list of category for feedback is not available, the agent can check off “Others”. To ensure that the report is valid, the agent needs to describe it in the text box within 100 characters. |
Click “Submit” button, the report can be sent to ChatPlusAI automatically. We will process and send the result as quickly as possible.
View the Feedback Results
Thank you for your feedback, we will speed up the progress of the repair and notify you as soon as the problem is fixed. When a small red dot appears on the right corner of “Case Reported” in the left menu, it has been processed and is waiting for confirmation.
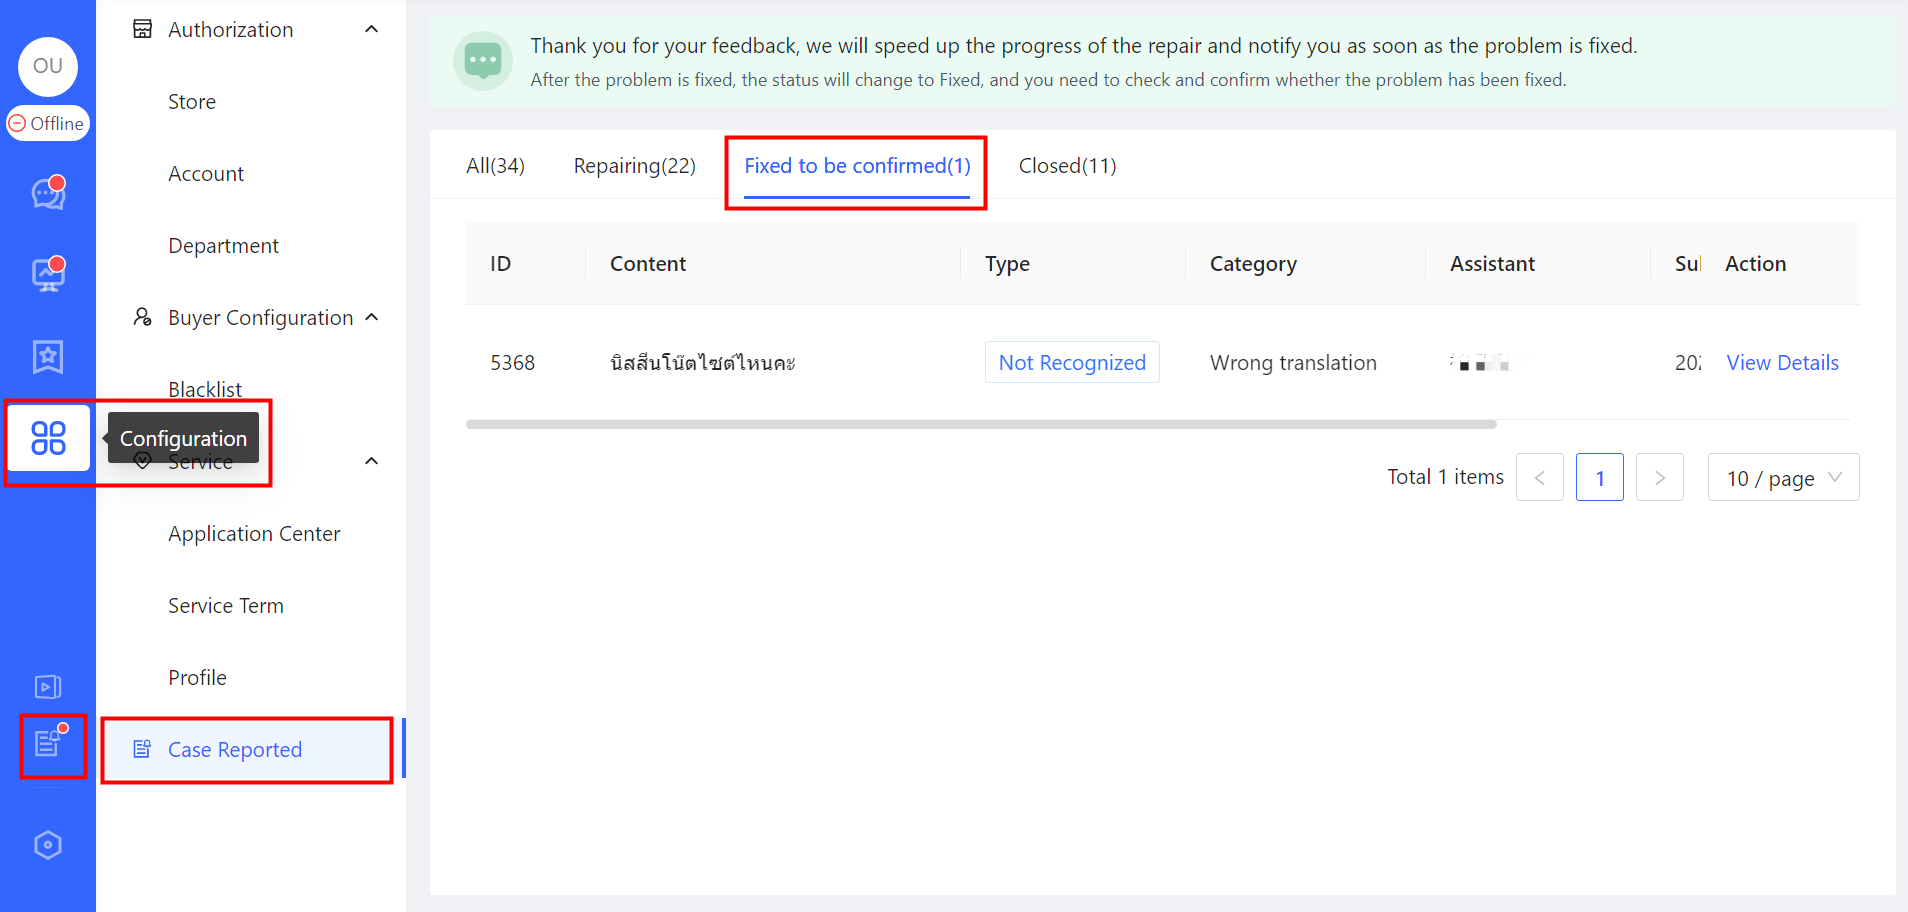
Repairing: After submitting the feedback, the problem will enter 「Repairing」, ChatPlusAI will process it as quickly as possible.
Fixed to be confirmed: After fixing the problem, it will enter 「Fixed to be confirmed」, the agent can click 「View Details」to check and confirm whether the problem is fixed.
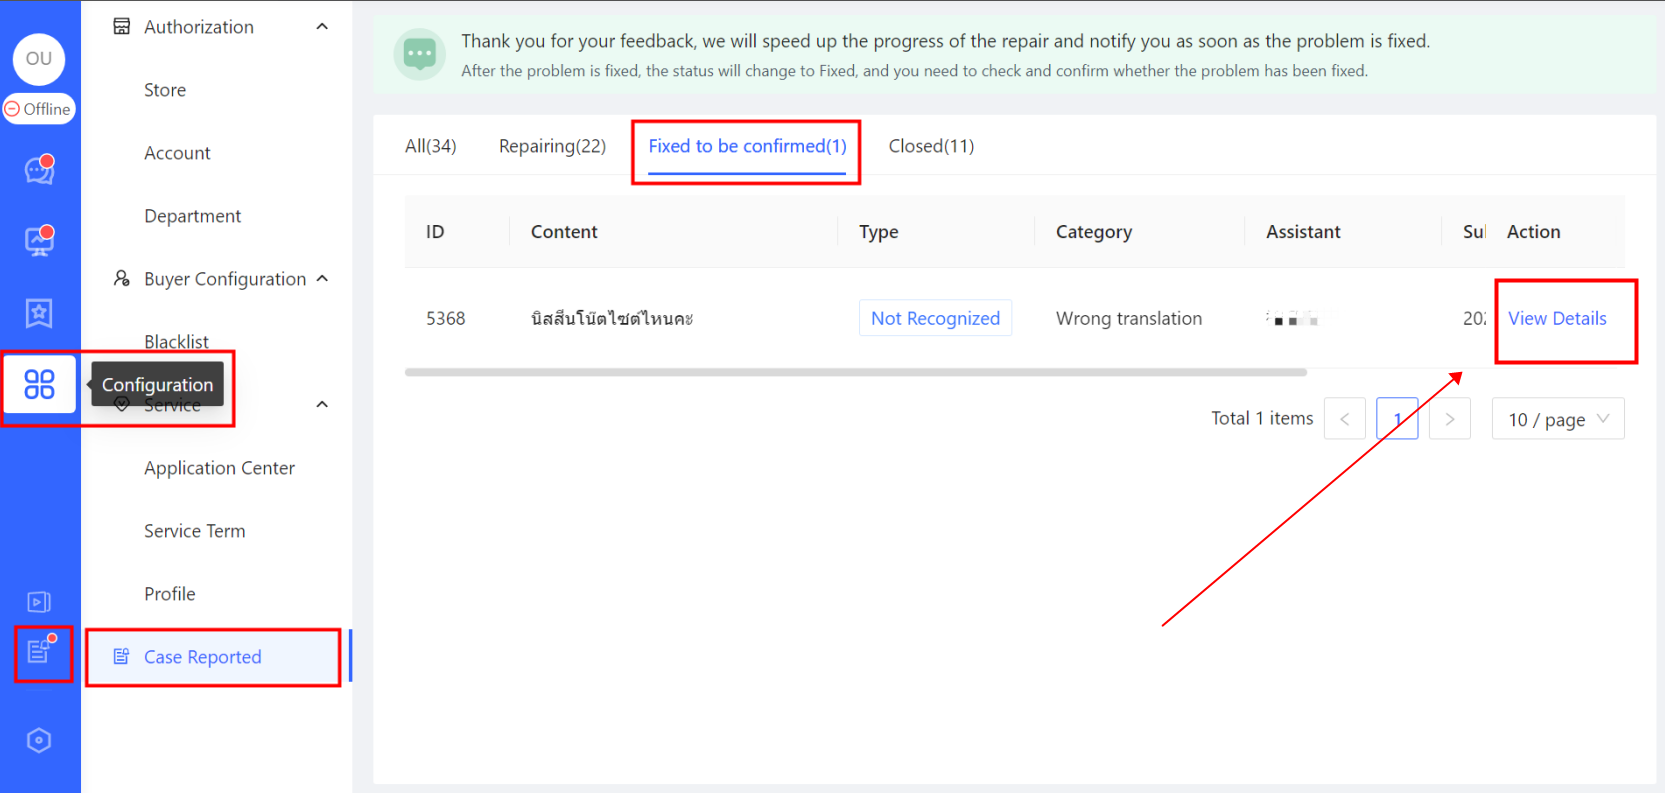
Closed: If the problem is fixed, the agent can click “Confirm fixed” to close the problem.
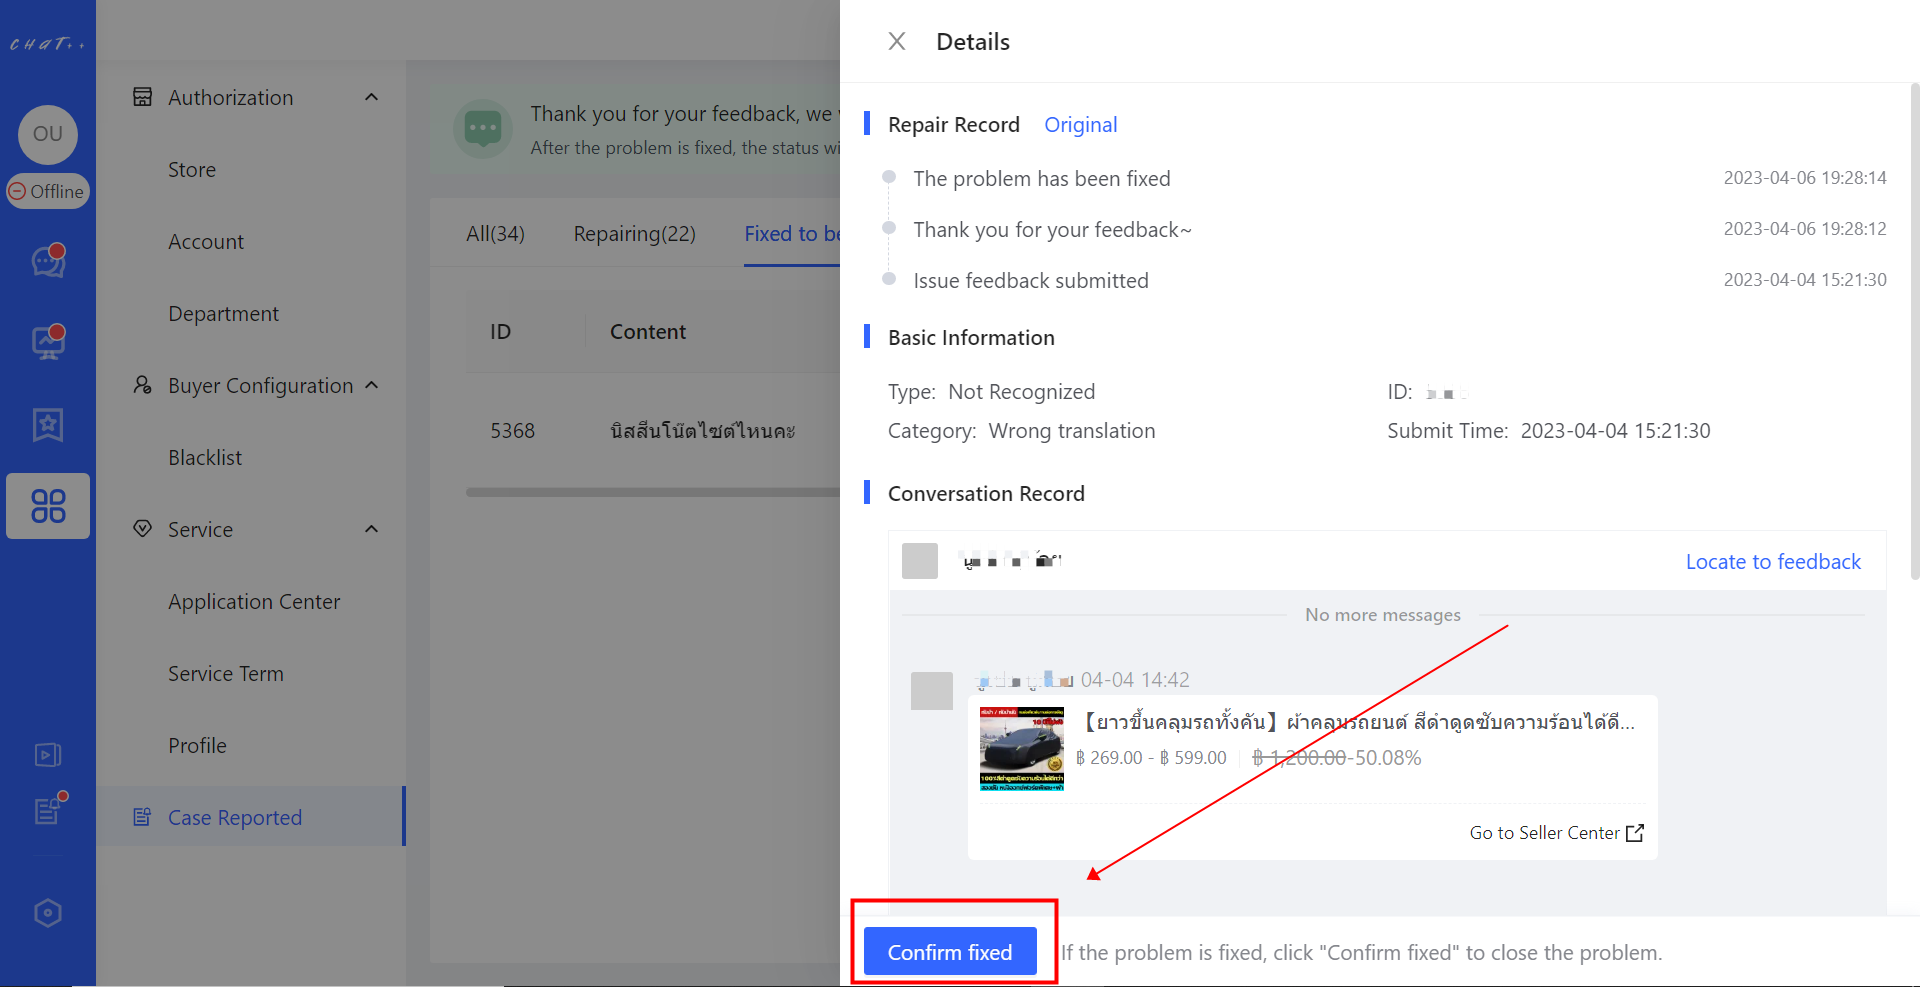
FAQ
Q1: Why doesn’t Chatbot reply?
A1: It may be that the scenario "AI Receptionist" is not turned on, etc. A quick self-check entrance: “Automation → AI Receptionist → Official Scenario”. If the switch in the scenario is not turned on, the agent can turn it on by himself.
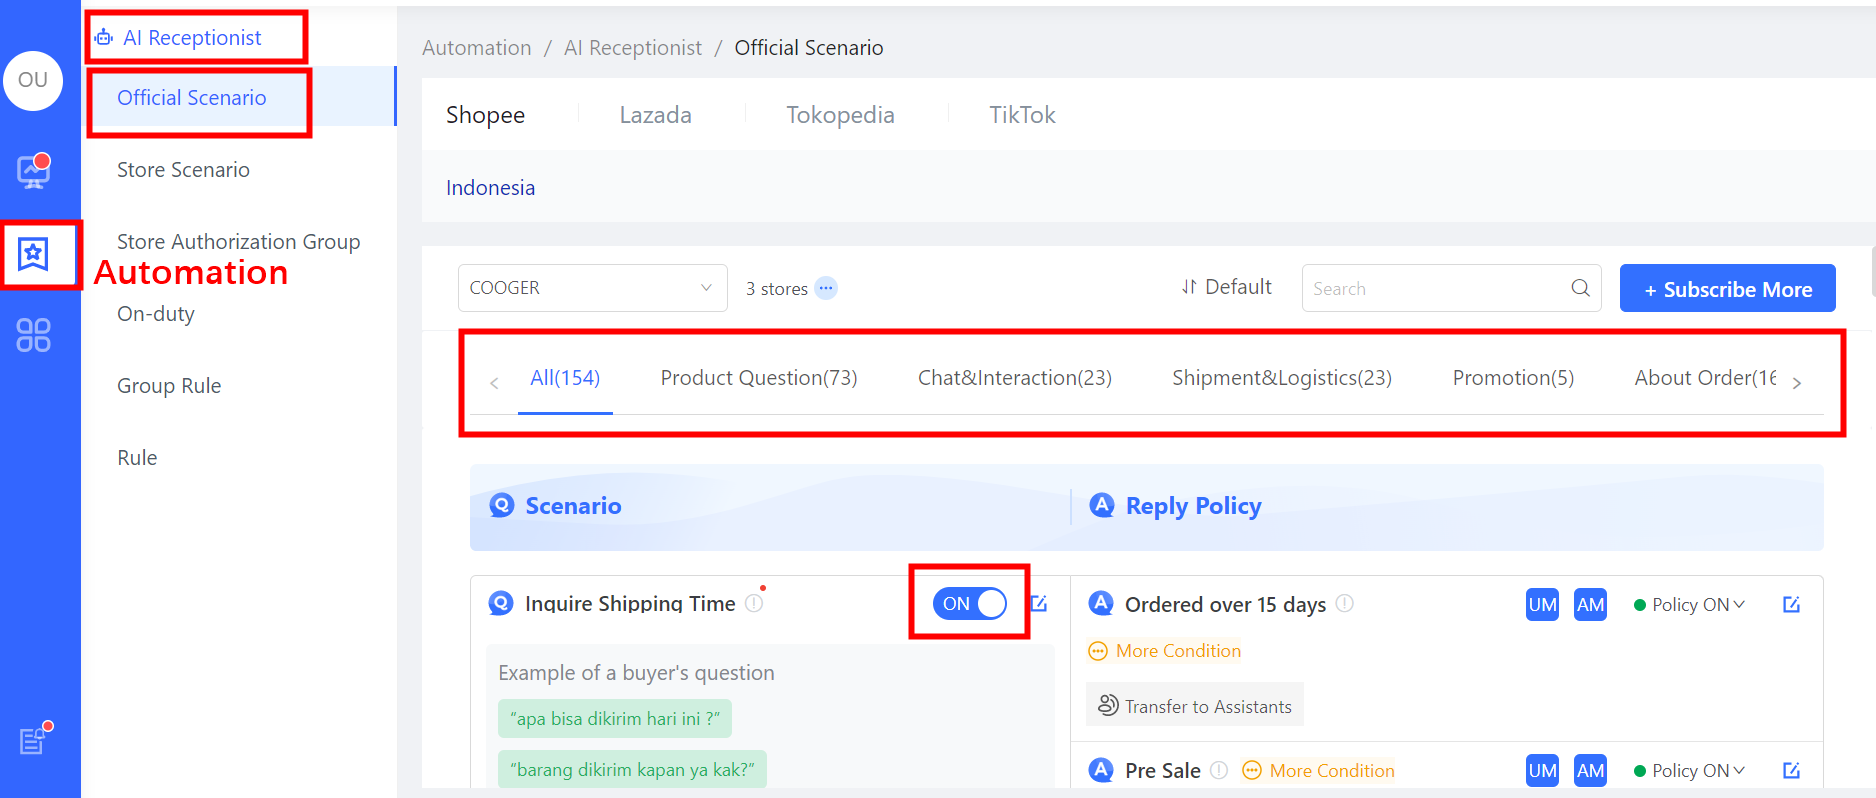
Report Entry
In the current conversation window, the agent can find the buyer’s message that Chatbot hasn’t replied, and hover the mouse over this message, and then the report entry will appear. Click the “Crying Face” button to enter the report page, and check off the category of problem.
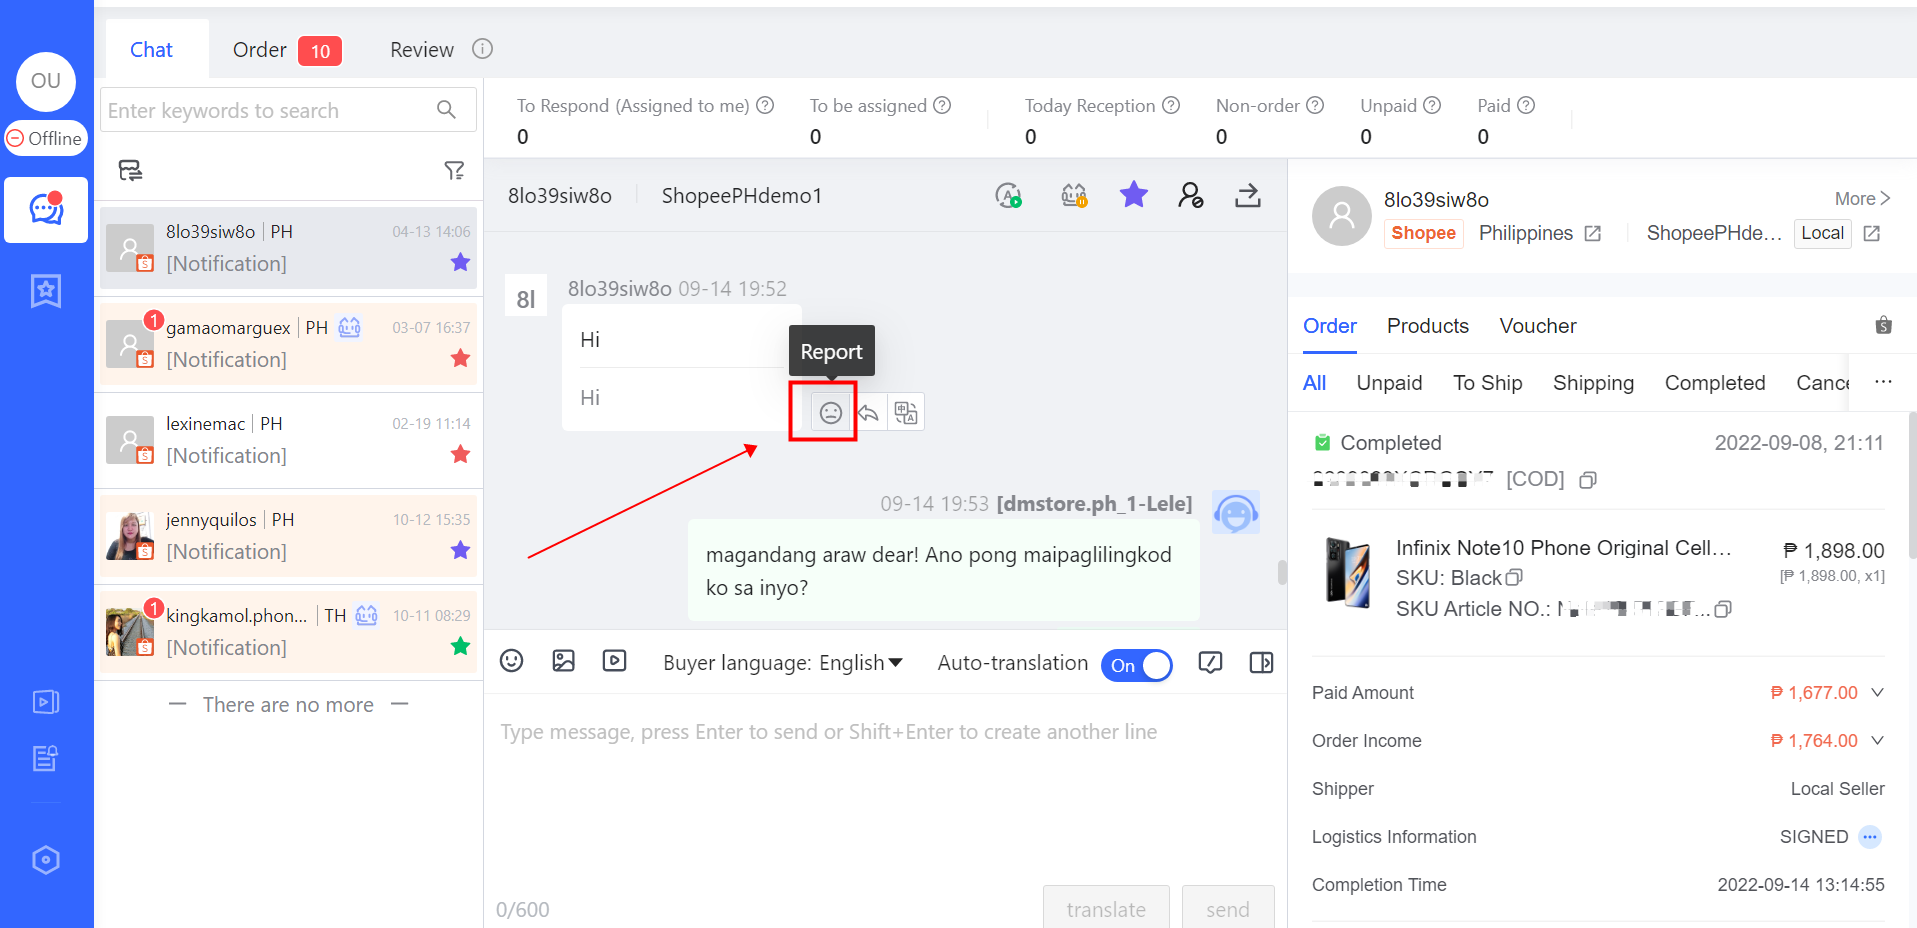
Q2: Where can I see the progress of the problem feedback?
A2: After submitting the feedback, the agent can click 「Configuration 」in the left menu→「 Case Reported 」to view the progress.
Admin Manual
Account
ChatPlusAI supports collaborative work among multiple users. Apart from the super admin account, which is generated upon registration, all other users need to create their login accounts within ChatPlusAI. This section will provide detailed information on "Account Management."
ChatPlusAI does not recommend sharing the same account among multiple users, including the super admin account. Each ChatPlusAI account only supports login from a single device at a time. Logging in from another device will result in the disconnection of the original device. (Simultaneous online access is supported for PC and mobile devices. However, Windows and macOS cannot be logged in simultaneously, and Android and iOS cannot be logged in simultaneously.)
To access the account management page, click on "Configuration" in the left-side menu (Figure 1, highlighted in red box①), and then select "Account" (Figure 1, highlighted in red box②).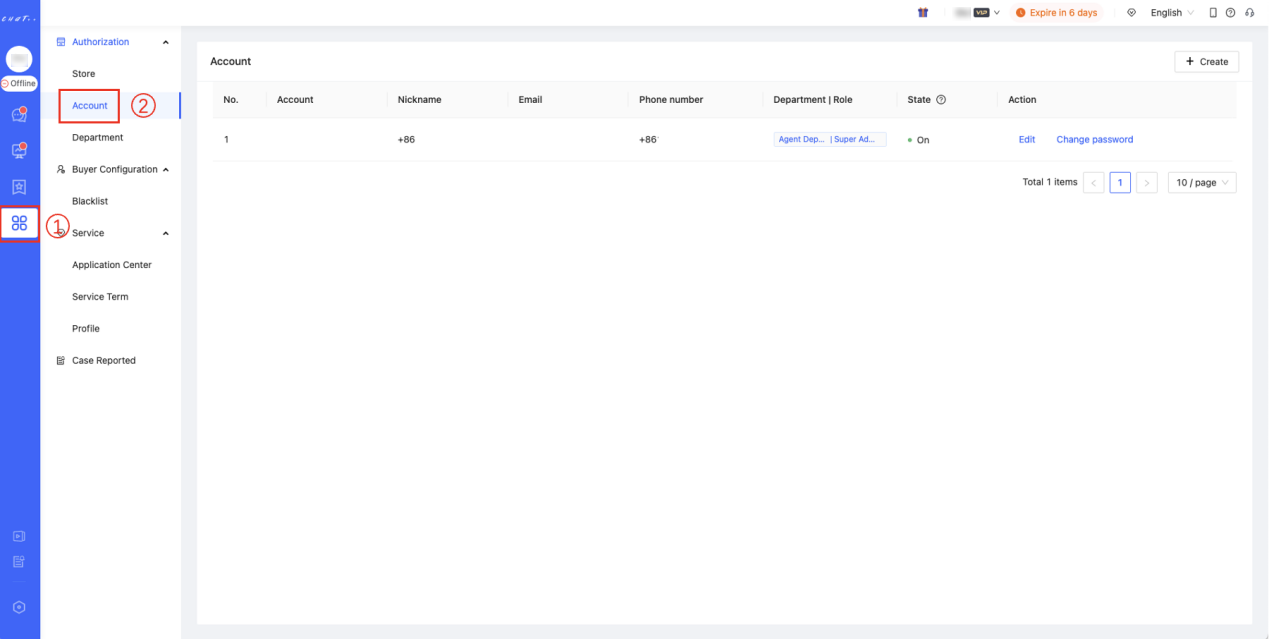
Figure 1
Creating Sub-Accounts
👆Click on "Creat"button, enter the account and password, confirm the nickname and role for the account, and create the new account. The login email and phone number can be added later. After providing the phone number, sub-accounts can log in to ChatPlusAI using a verification code sent to their mobile phones.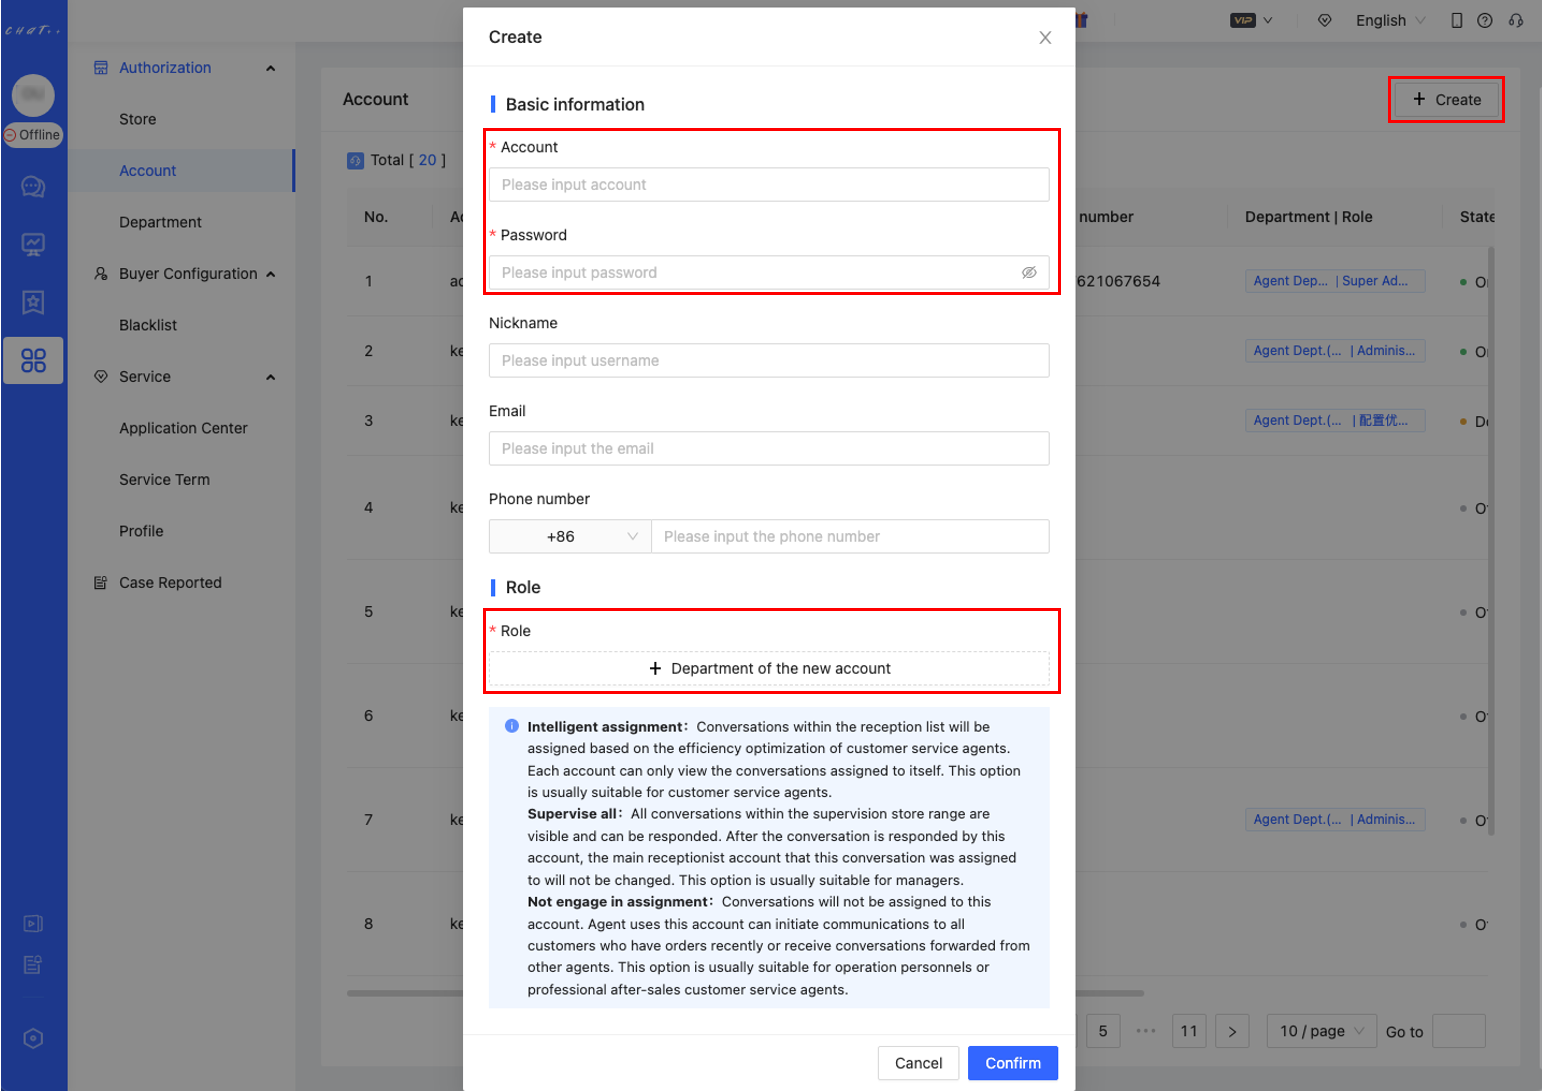
Figure 2
The official default roles are "Customer Service" and "Administrator." If the current account user is responsible for handling conversations, it is recommended to select the "Customer Service" role. If the current account user is not responsible for handling conversations, it is recommended to select the "Administrator" role. Custom roles can be created in the department management page. >>>For information on creating custom roles, please refer to the corresponding section.>>>For detailed information on account permissions, please refer to the relevant section.
🎁During the trial period, you can create sub-accounts without any limitations. After the trial period ends, the number of accounts that can be activated is determined by the ChatPlusAI package you have subscribed to. When the number of active accounts exceeds the limit, the sub-accounts created later will be automatically deactivated. If you need to create or activate more sub-accounts, you will need to upgrade your package.
Editing/Deactivating/Deleting Sub-Accounts
When editing a sub-account, the administrator can modify all the information except for the login account and can directly reset the login password for the sub-account. (Including the super admin, all ChatPlusAI accounts require entering the old password when changing their own passwords.)
Sub-accounts can have the following statuses:
- ✅Active: The default status after creating a sub-account, occupying a seat in the package.
- 💤Dormant: Sub-accounts that are in an active state but haven't logged in within the past 7 days. They still occupy a seat in the package. They can log in to ChatPlusAI normally, and upon login, they will return to the active state. It is recommended to deactivate dormant accounts first when you want to deactivate an account.
- ❎ Deactivated: Sub-accounts that have been deactivated by the administrator. They do not occupy a seat in the package and cannot log in to ChatPlusAI.
⚠️The administrator can edit the relevant information of sub-accounts at any time. However, only when a sub-account is offline, it can be deactivated, and only after deactivation can the account be deleted.
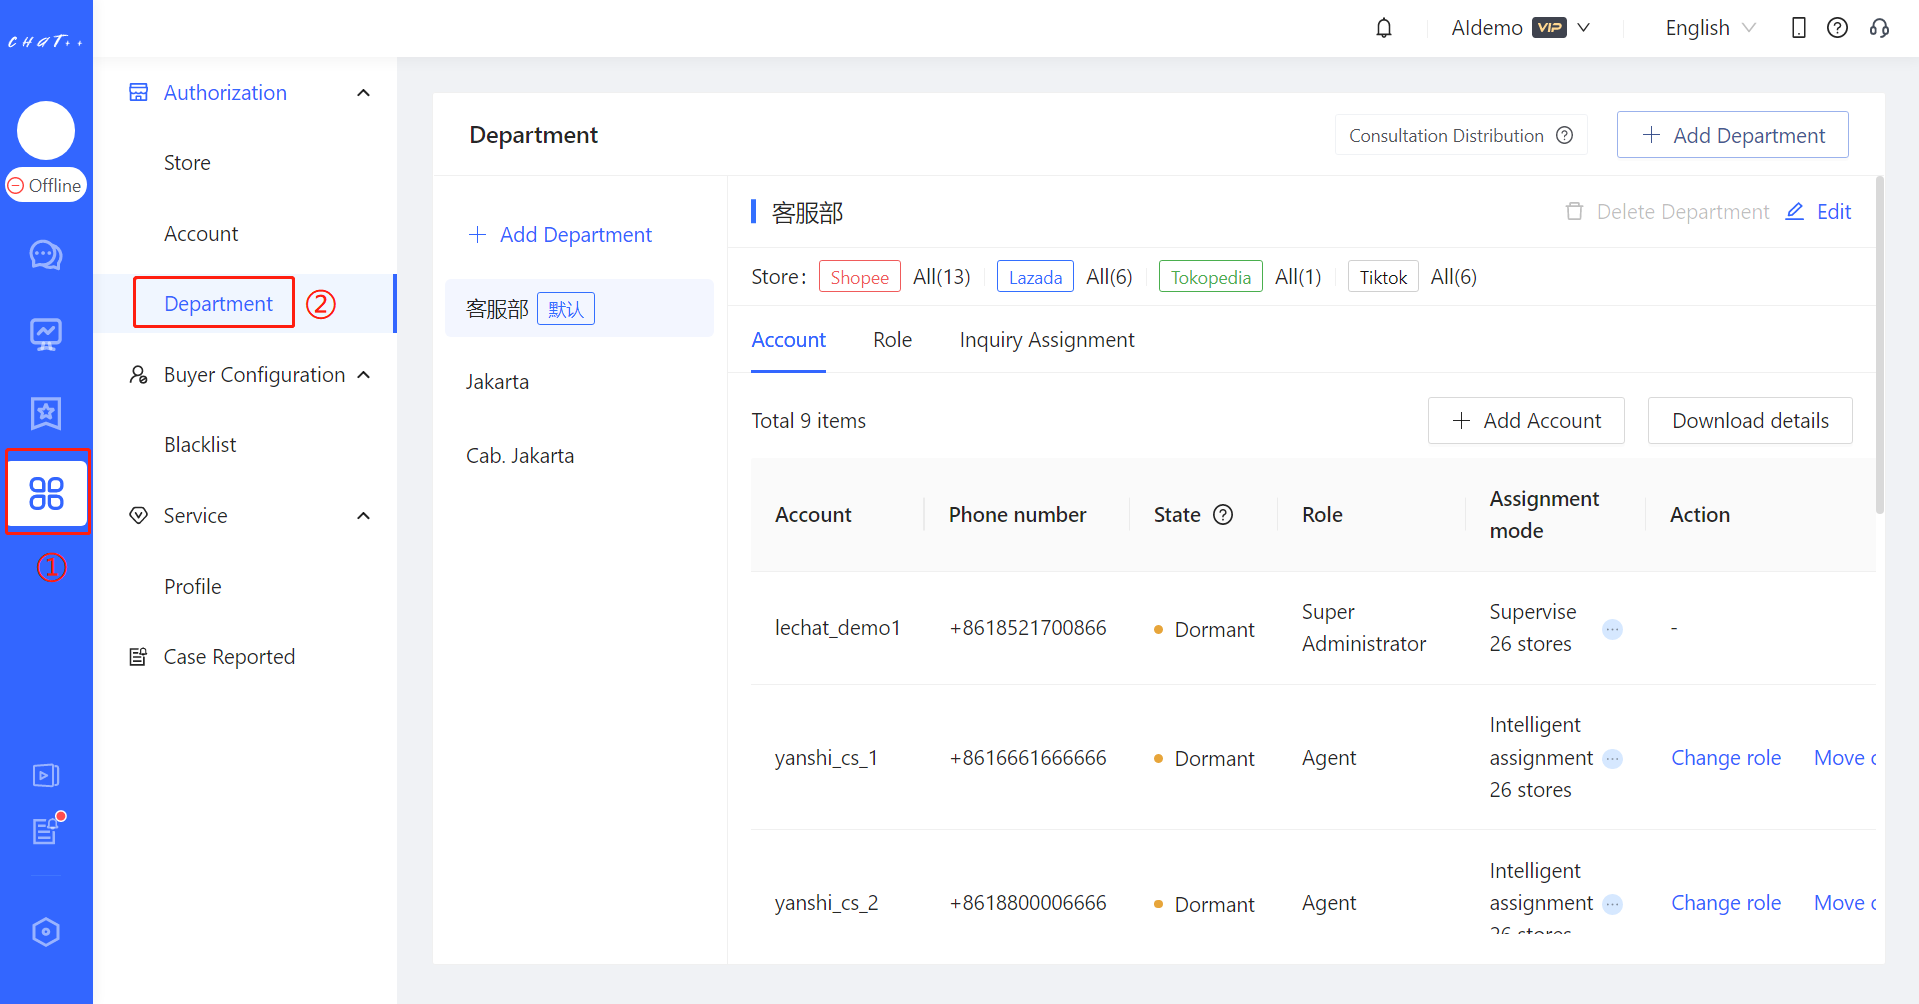
Figure 3
Permission Management
👉 Personnel using the ChatPlusAI system may assume different roles.
🌰For example:
Administrators need to view store data and supervise other staff,
Managers/Store Owners need to modify store configurations,
Customer service need to carry out reception work.
💡 Based on these needs, ChatPlusAI supports a "Permission Management" module.
- In the account permission management module, super administrators can grant "various store permissions" to "sub-accounts," allowing each sub-account to work within its own scope of authority and share the configuration tasks of the super administrator. The flexible way of dividing permissions can adapt to a diversified business architecture.
The account permission management module is divided into four sections: "Store Division," "Roles," "Permission Effect Description," and "Department Accounts." These will be introduced in the following sections.
⚠️ Before configuring account permissions, it is recommended to first complete two operations: "Authorizing Stores" and "Creating Accounts." >>>For authorizing stores, please refer to the respective section.>>>For creating accounts, please refer to the respective section.
👆Click on "Configuration" (marked as ① in the left sidebar in the diagram below) → "Authorization-->Department" (marked as ② in the diagram) to enter the configuration page.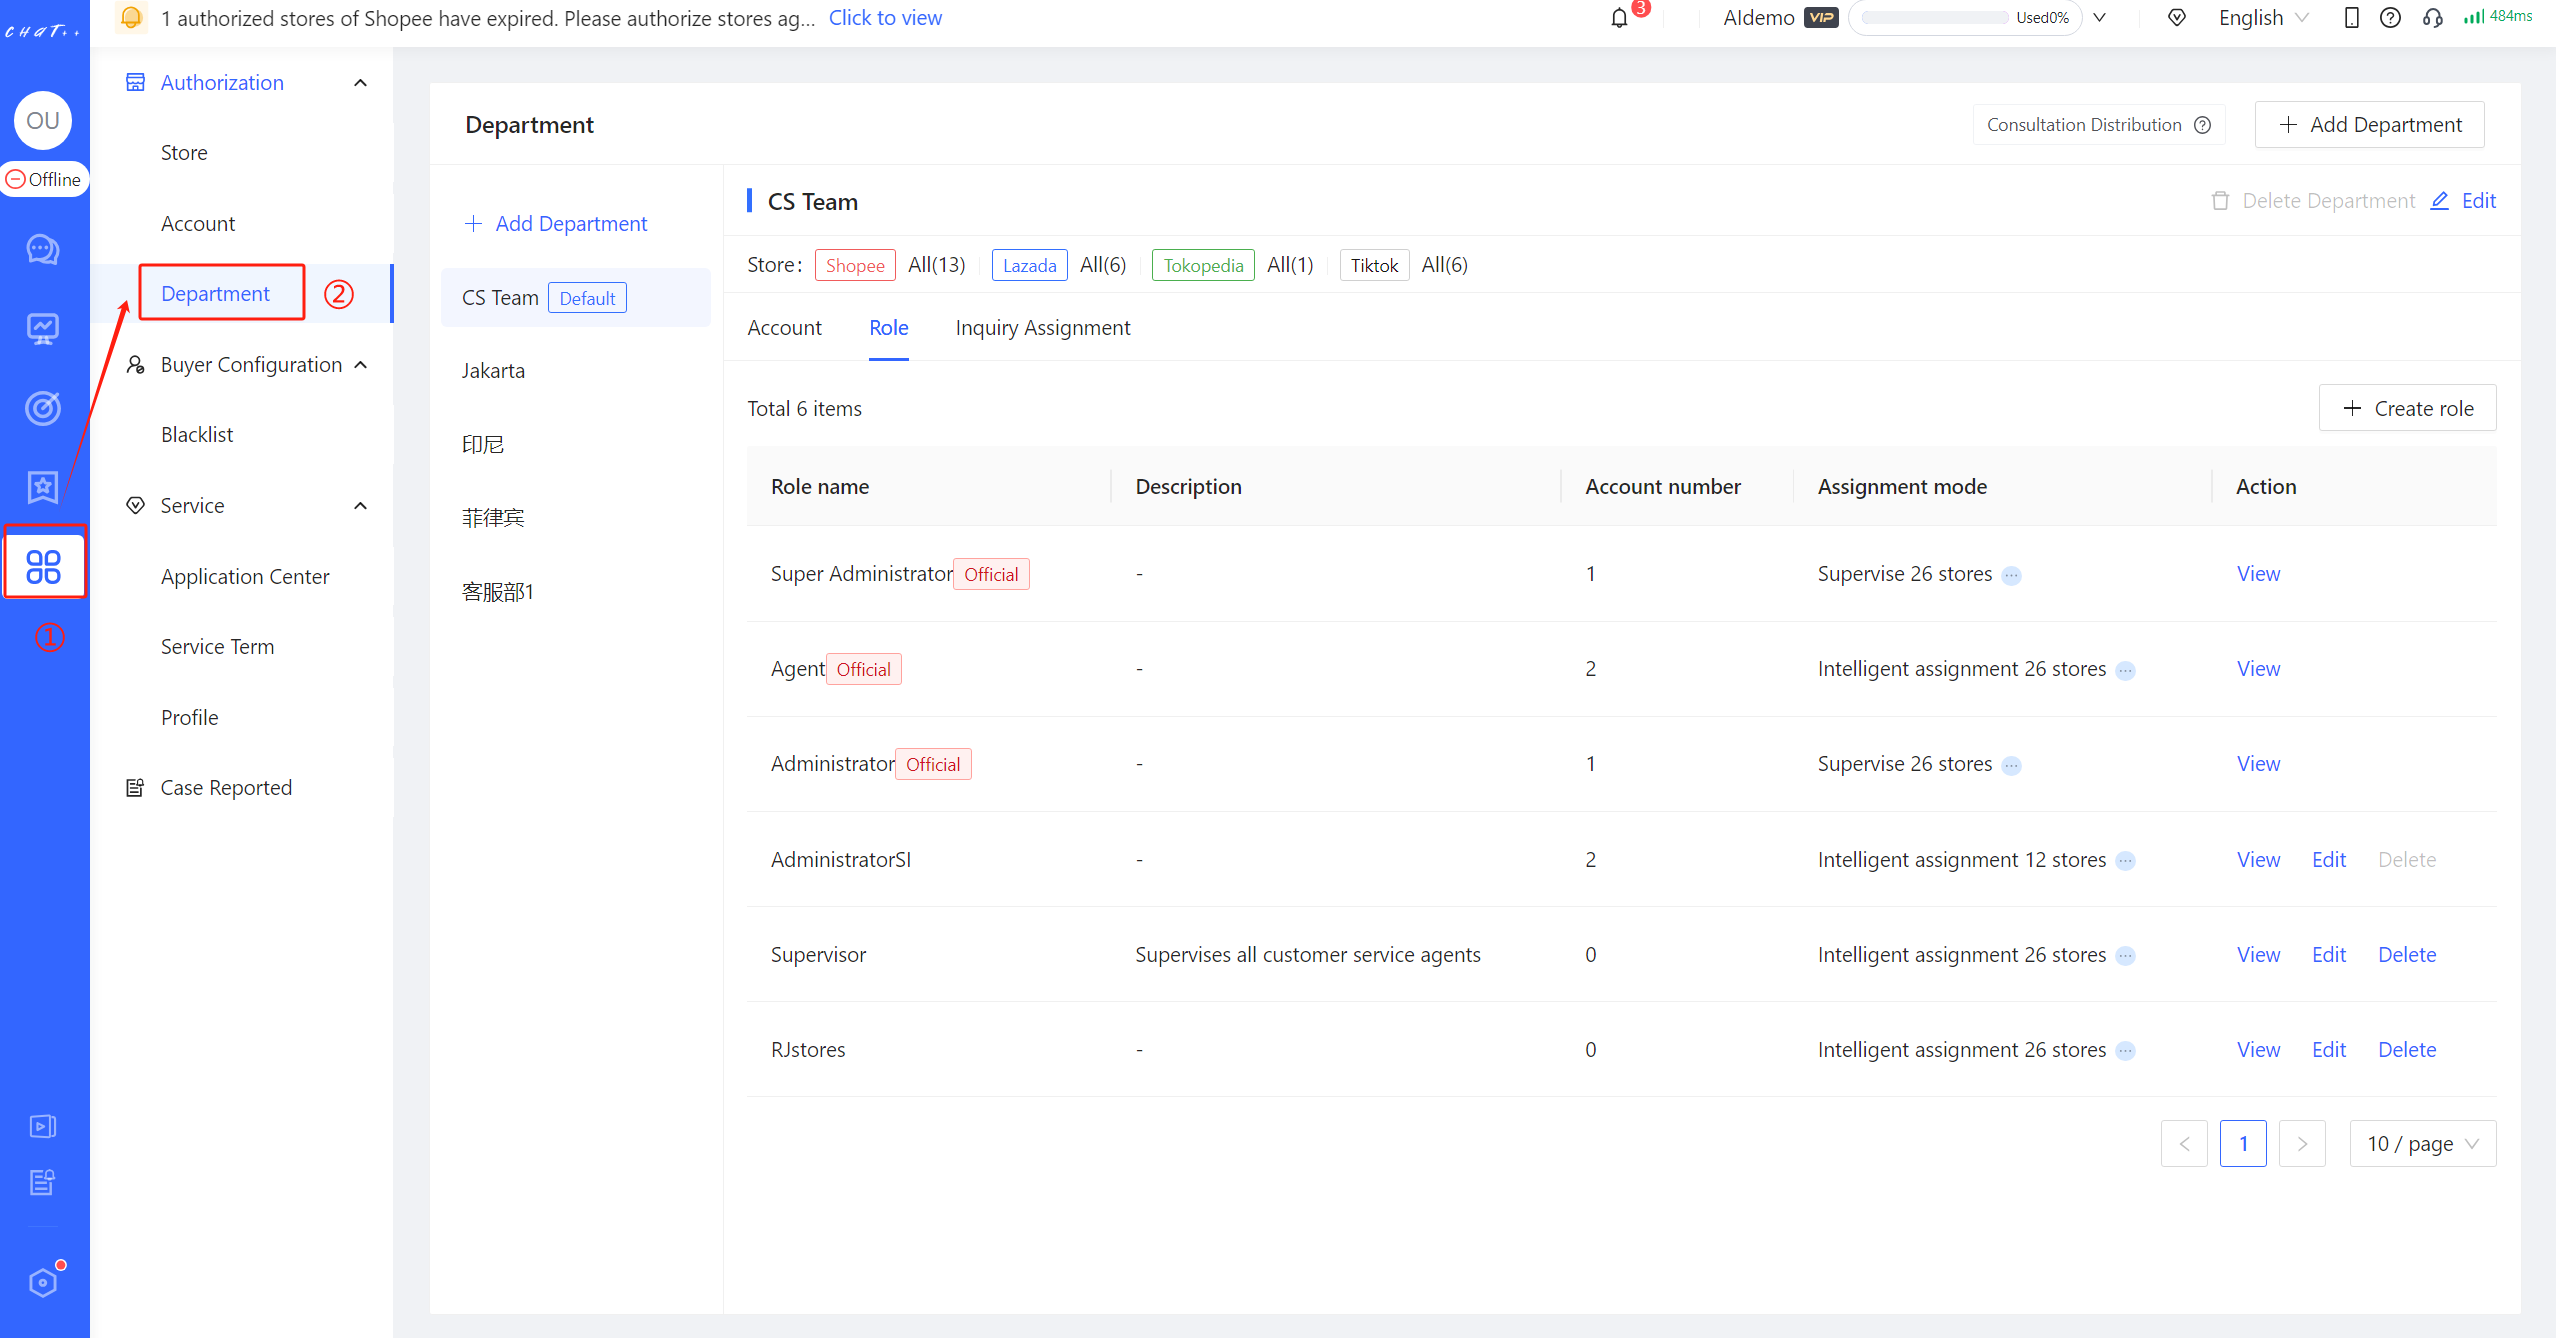
Figure1
Store Division
💡 Within ChatPlusAI, permissions are divided based on the store. Depending on the actual situation of the business, "stores" can be divided into different departments to facilitate subsequent permission settings.
Create a new department
To ensure that the "Super Administrator account" has permissions for all stores, the store scope for the first department "Customer Service Department (default)" encompasses all authorized stores. Therefore, splitting stores requires the creation of new departments.
👆Click on "Create New Department" → ✏️ enter the department name → 👆 click on "Select Responsible Store" (marked in the diagram as 2 in red), to enter the store selection page.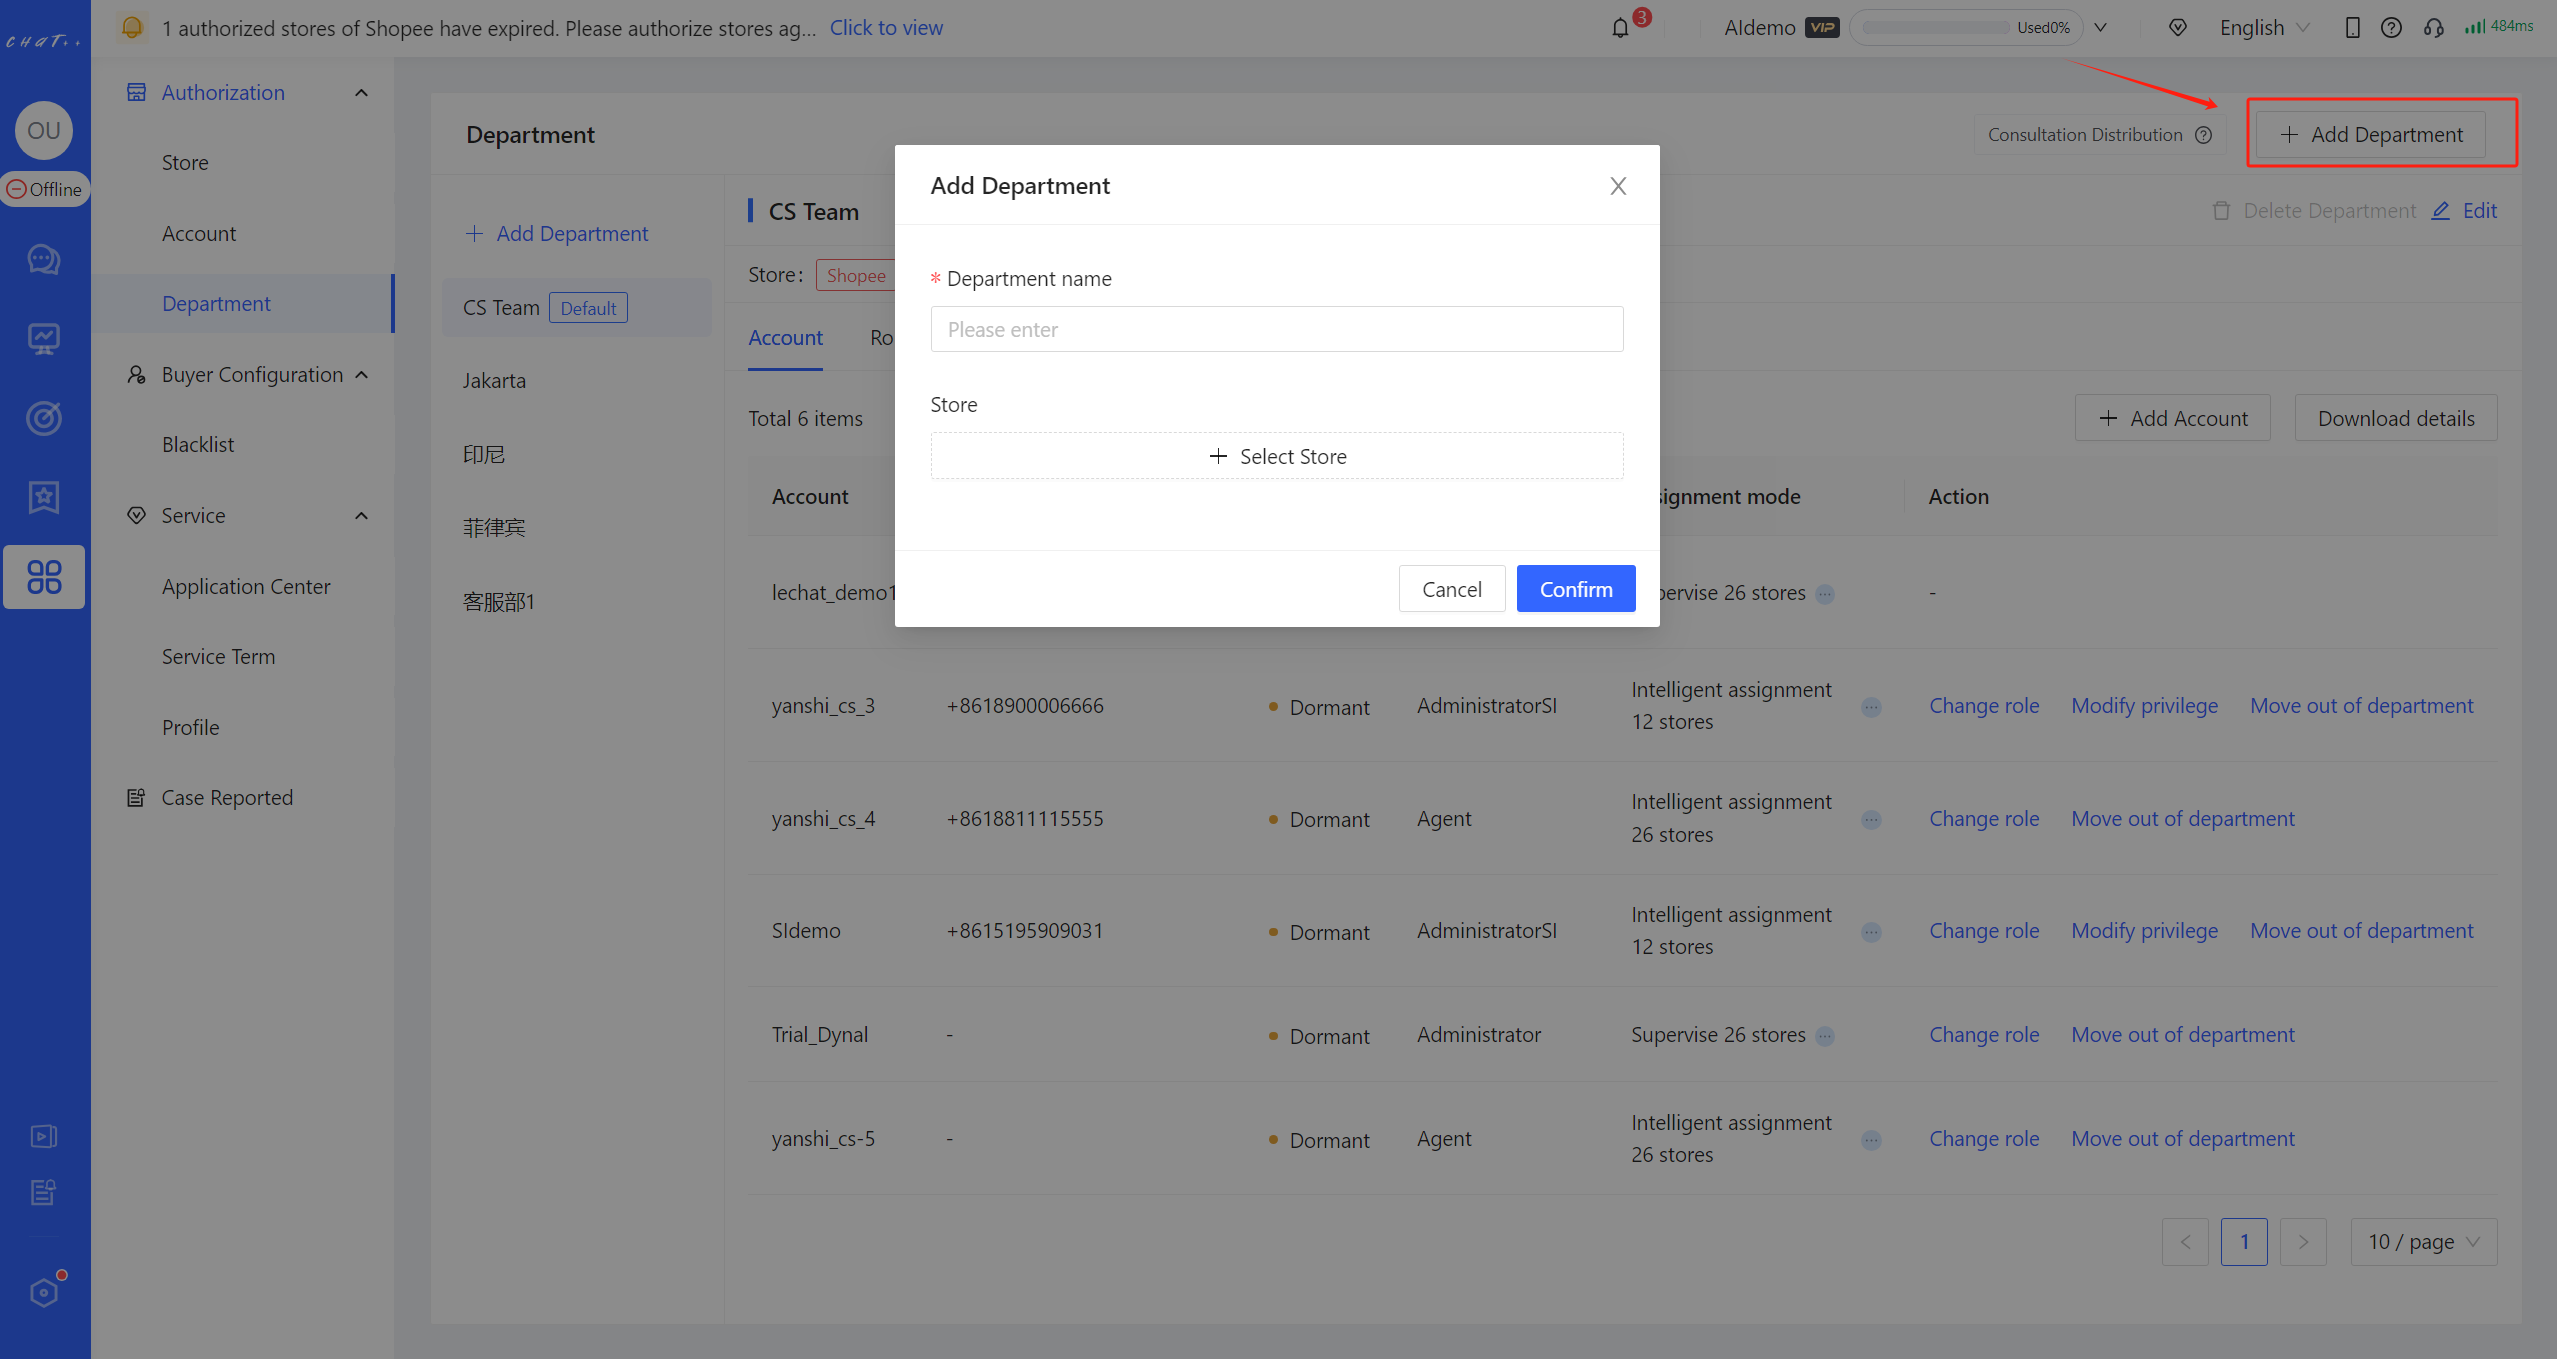
Figure2
A single store can exist in multiple departments simultaneously. Currently, store selection supports two methods: "By Marketplace" and "Bulk Import".
👉"By Marketplace" selection of stores:
In the by marketplace method, there are two ways to select stores:
- Method 1 (marked as ① in red in the diagram): Directly tick the checkbox to the left of the marketplace name to select the entire marketplace.
- Method 2 (marked as ② in red in the diagram): After filtering stores by marketplace, select each store individually.
⚠️ The difference between the two methods is: With the first method, after selecting a marketplace, any store subsequently authorized under that marketplace will automatically join the department, eliminating the need to adjust the department's store scope after each authorization.
Figure3
👉 "Bulk Import" selection of stores:
In the bulk import method, it supports selecting stores in bulk through the store's alias, name, or official ID. You can export the store list from the store management page, organize the stores needed by the current department in Excel, copy and paste the list of store names into the input box, and click to start importing, quickly selecting a large number of stores.
💡Stores with the same name can be filtered by marketplace or country site.
After selecting the stores, click "Confirm Selection." Then, in the new department creation popup, click "Confirm New Department" to successfully create the new department.
Figure4
Edit/Delete Department
For newly created departments, you can 👆 click "Delete Department" to remove it, or 👆 click "Edit" to modify its name and store scope.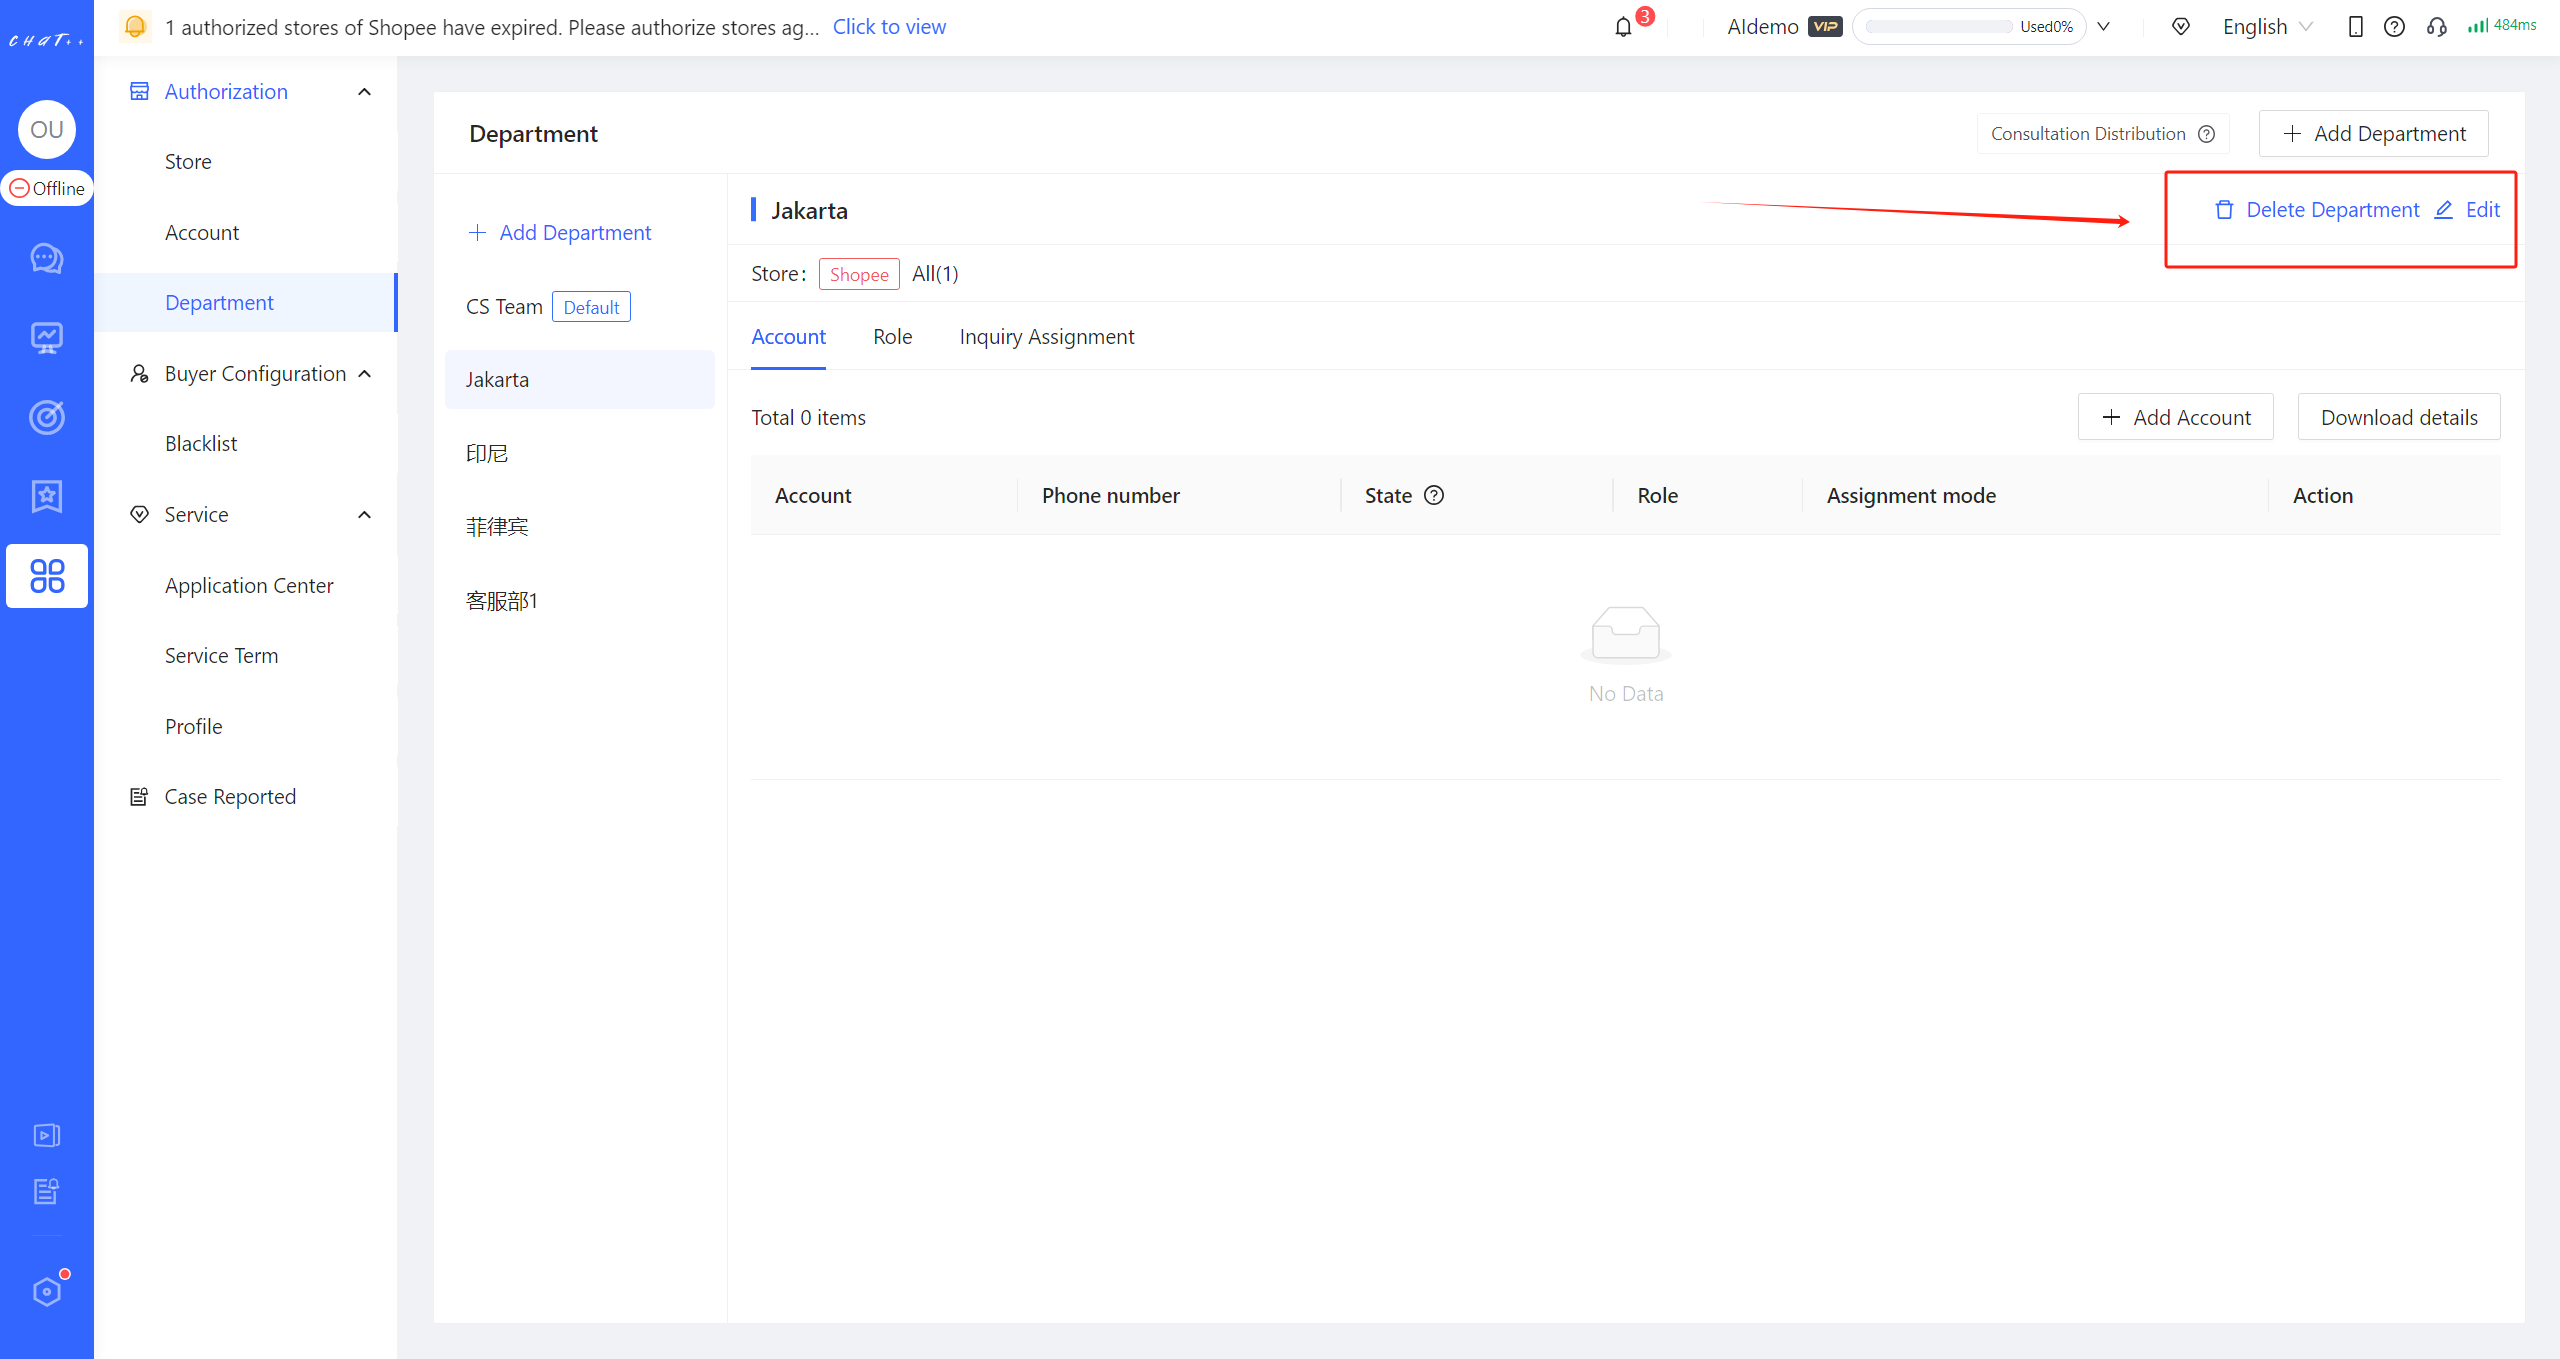
Figure5
Roles
After the store division is complete, the permissions of employees in different positions within the department need to be further differentiated.
In the department list, 👆 select a department and 👆 click "Department Roles" (marked in red in the diagram). This will take you to the department roles page, where you can view the list of roles in the current department and how many accounts each role has been applied to.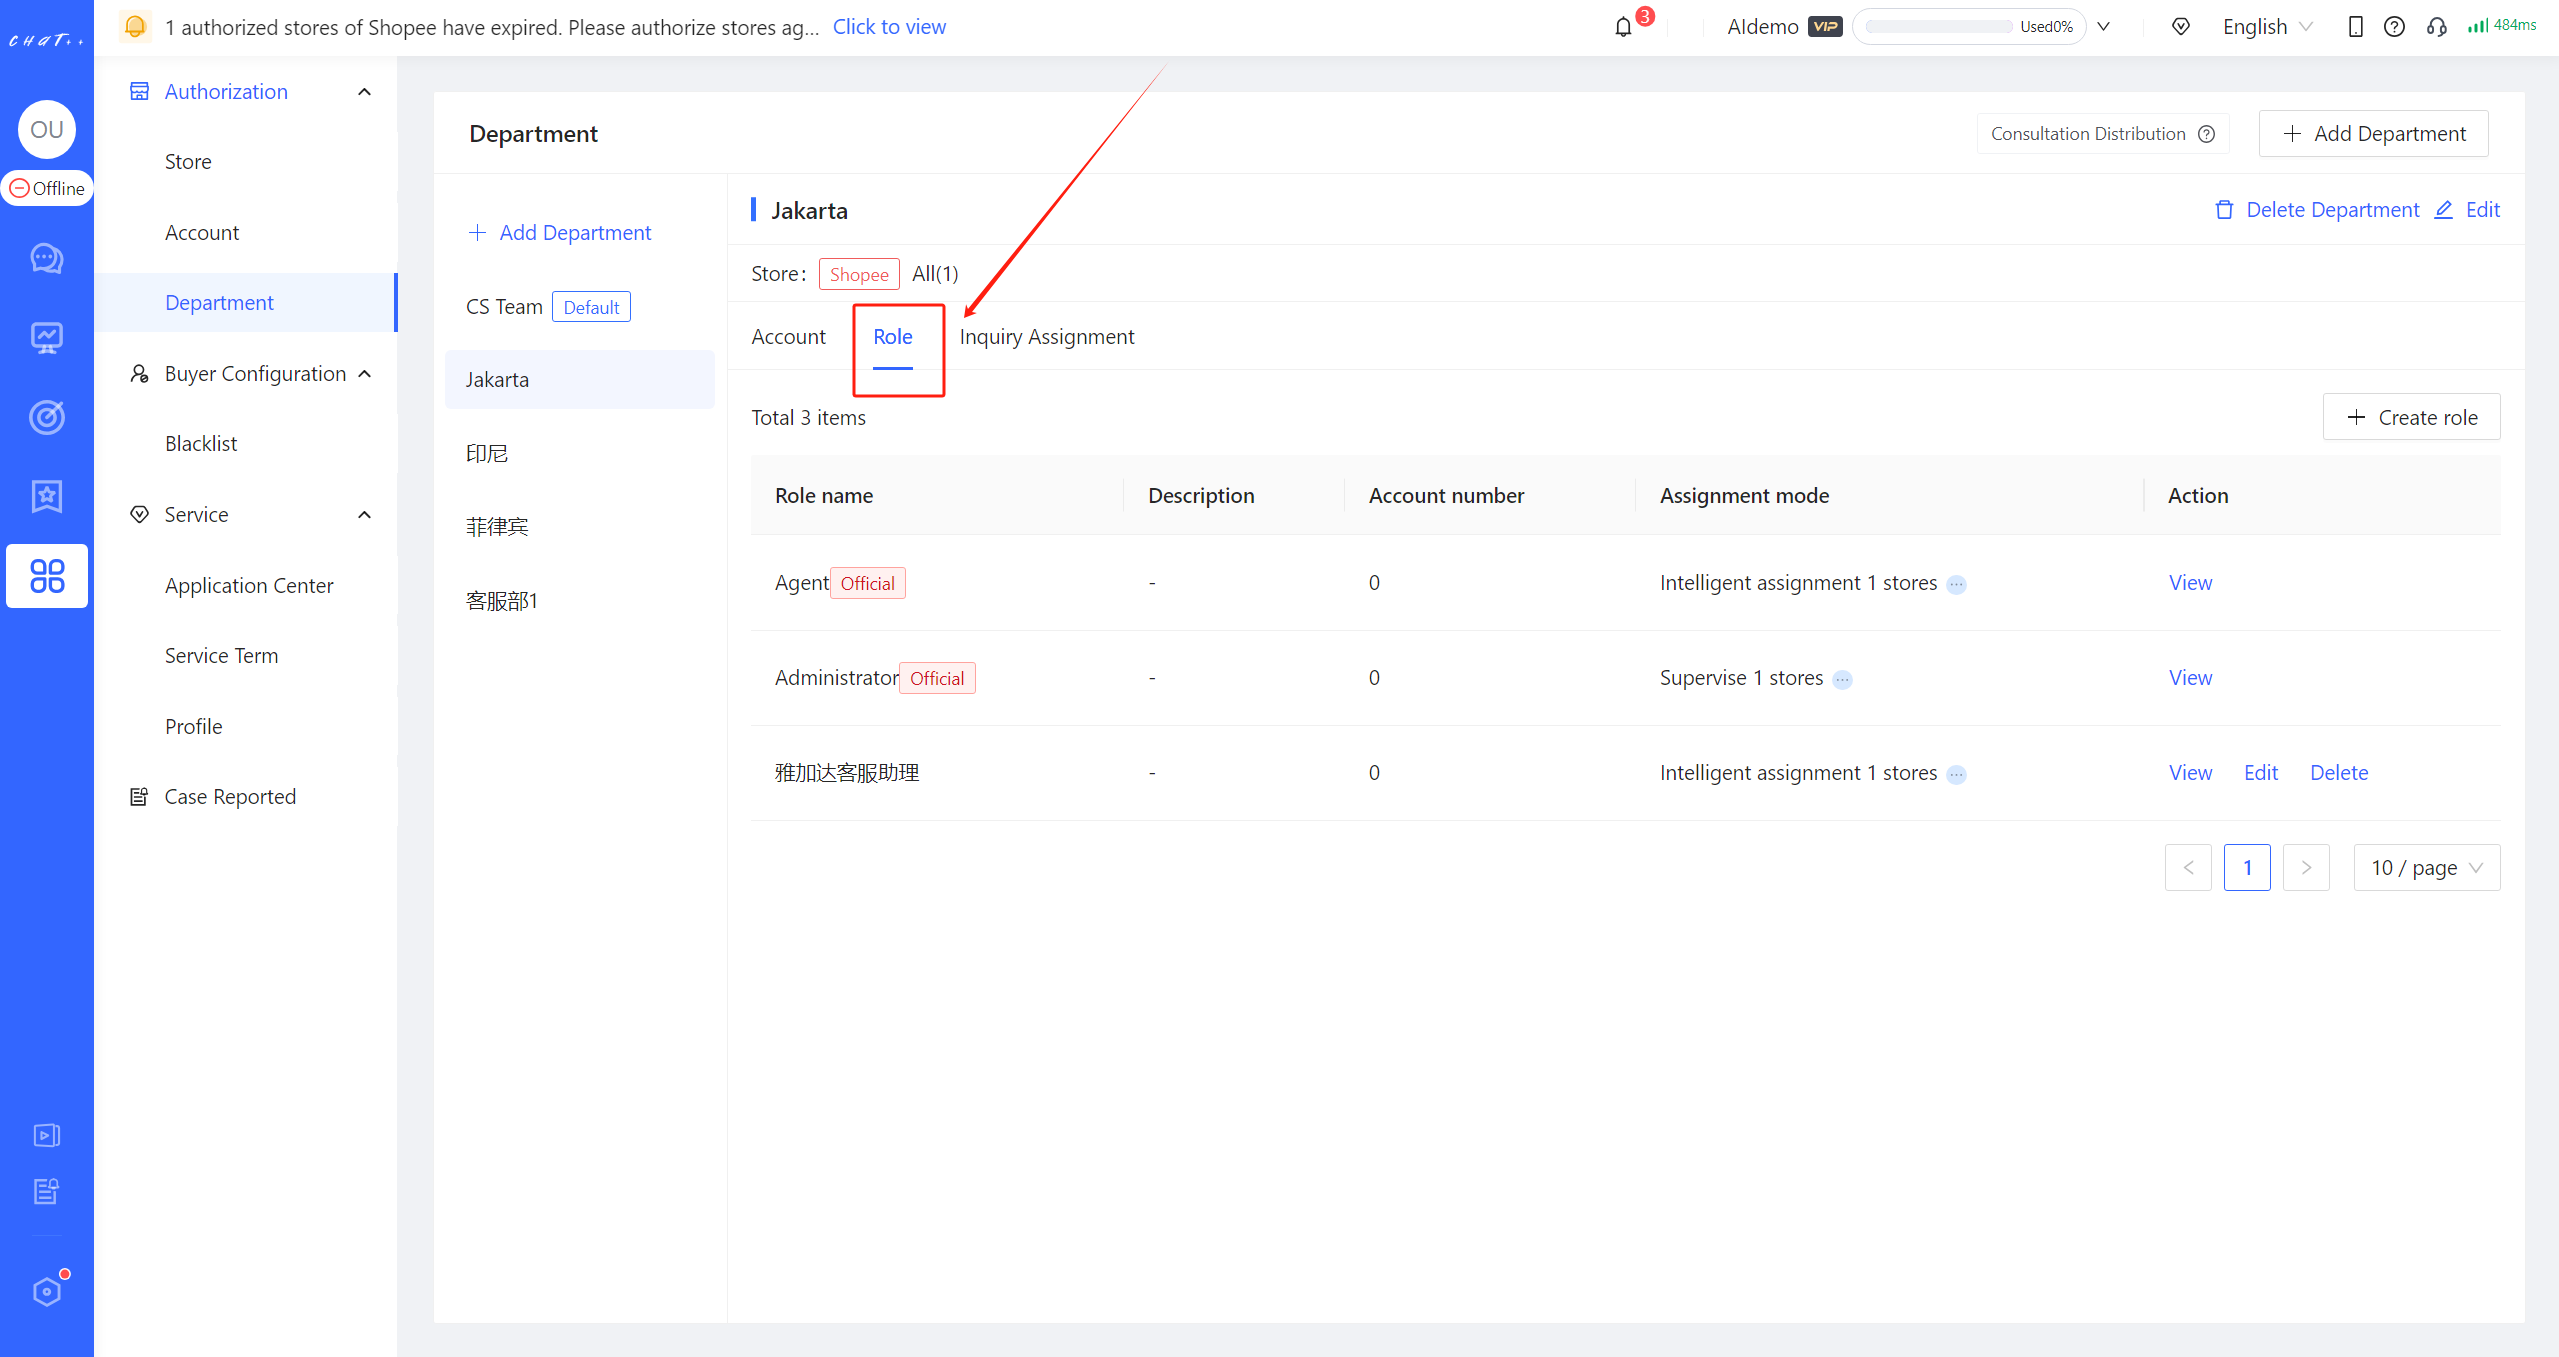
Figure6
ChatPlusAI's Role Introduction
-For commonly seen roles in actual business, the department has preset some roles, the permissions of which cannot be modified.
-In situations where it's unnecessary to further assign stores to different personnel under a department, it's recommended to use ChatPlusAI's roles.
The current ChatPlusAI's Roles are as follows:
● Super Administrator: Default role bound to the registered account, cannot be unbound or applied to other accounts, has all permissions of the enterprise, can view all conversations and respond, does not participate in consultation distribution or performance assessment.
● Administrator: Has all permissions of the current department, can view all conversations under the department and respond, does not participate in consultation distribution or performance assessment.
● Agent: Has related permissions in the message module, participates in buyer reception for all stores within the department, can only view conversations assigned to themselves, and other conversations can be viewed through search.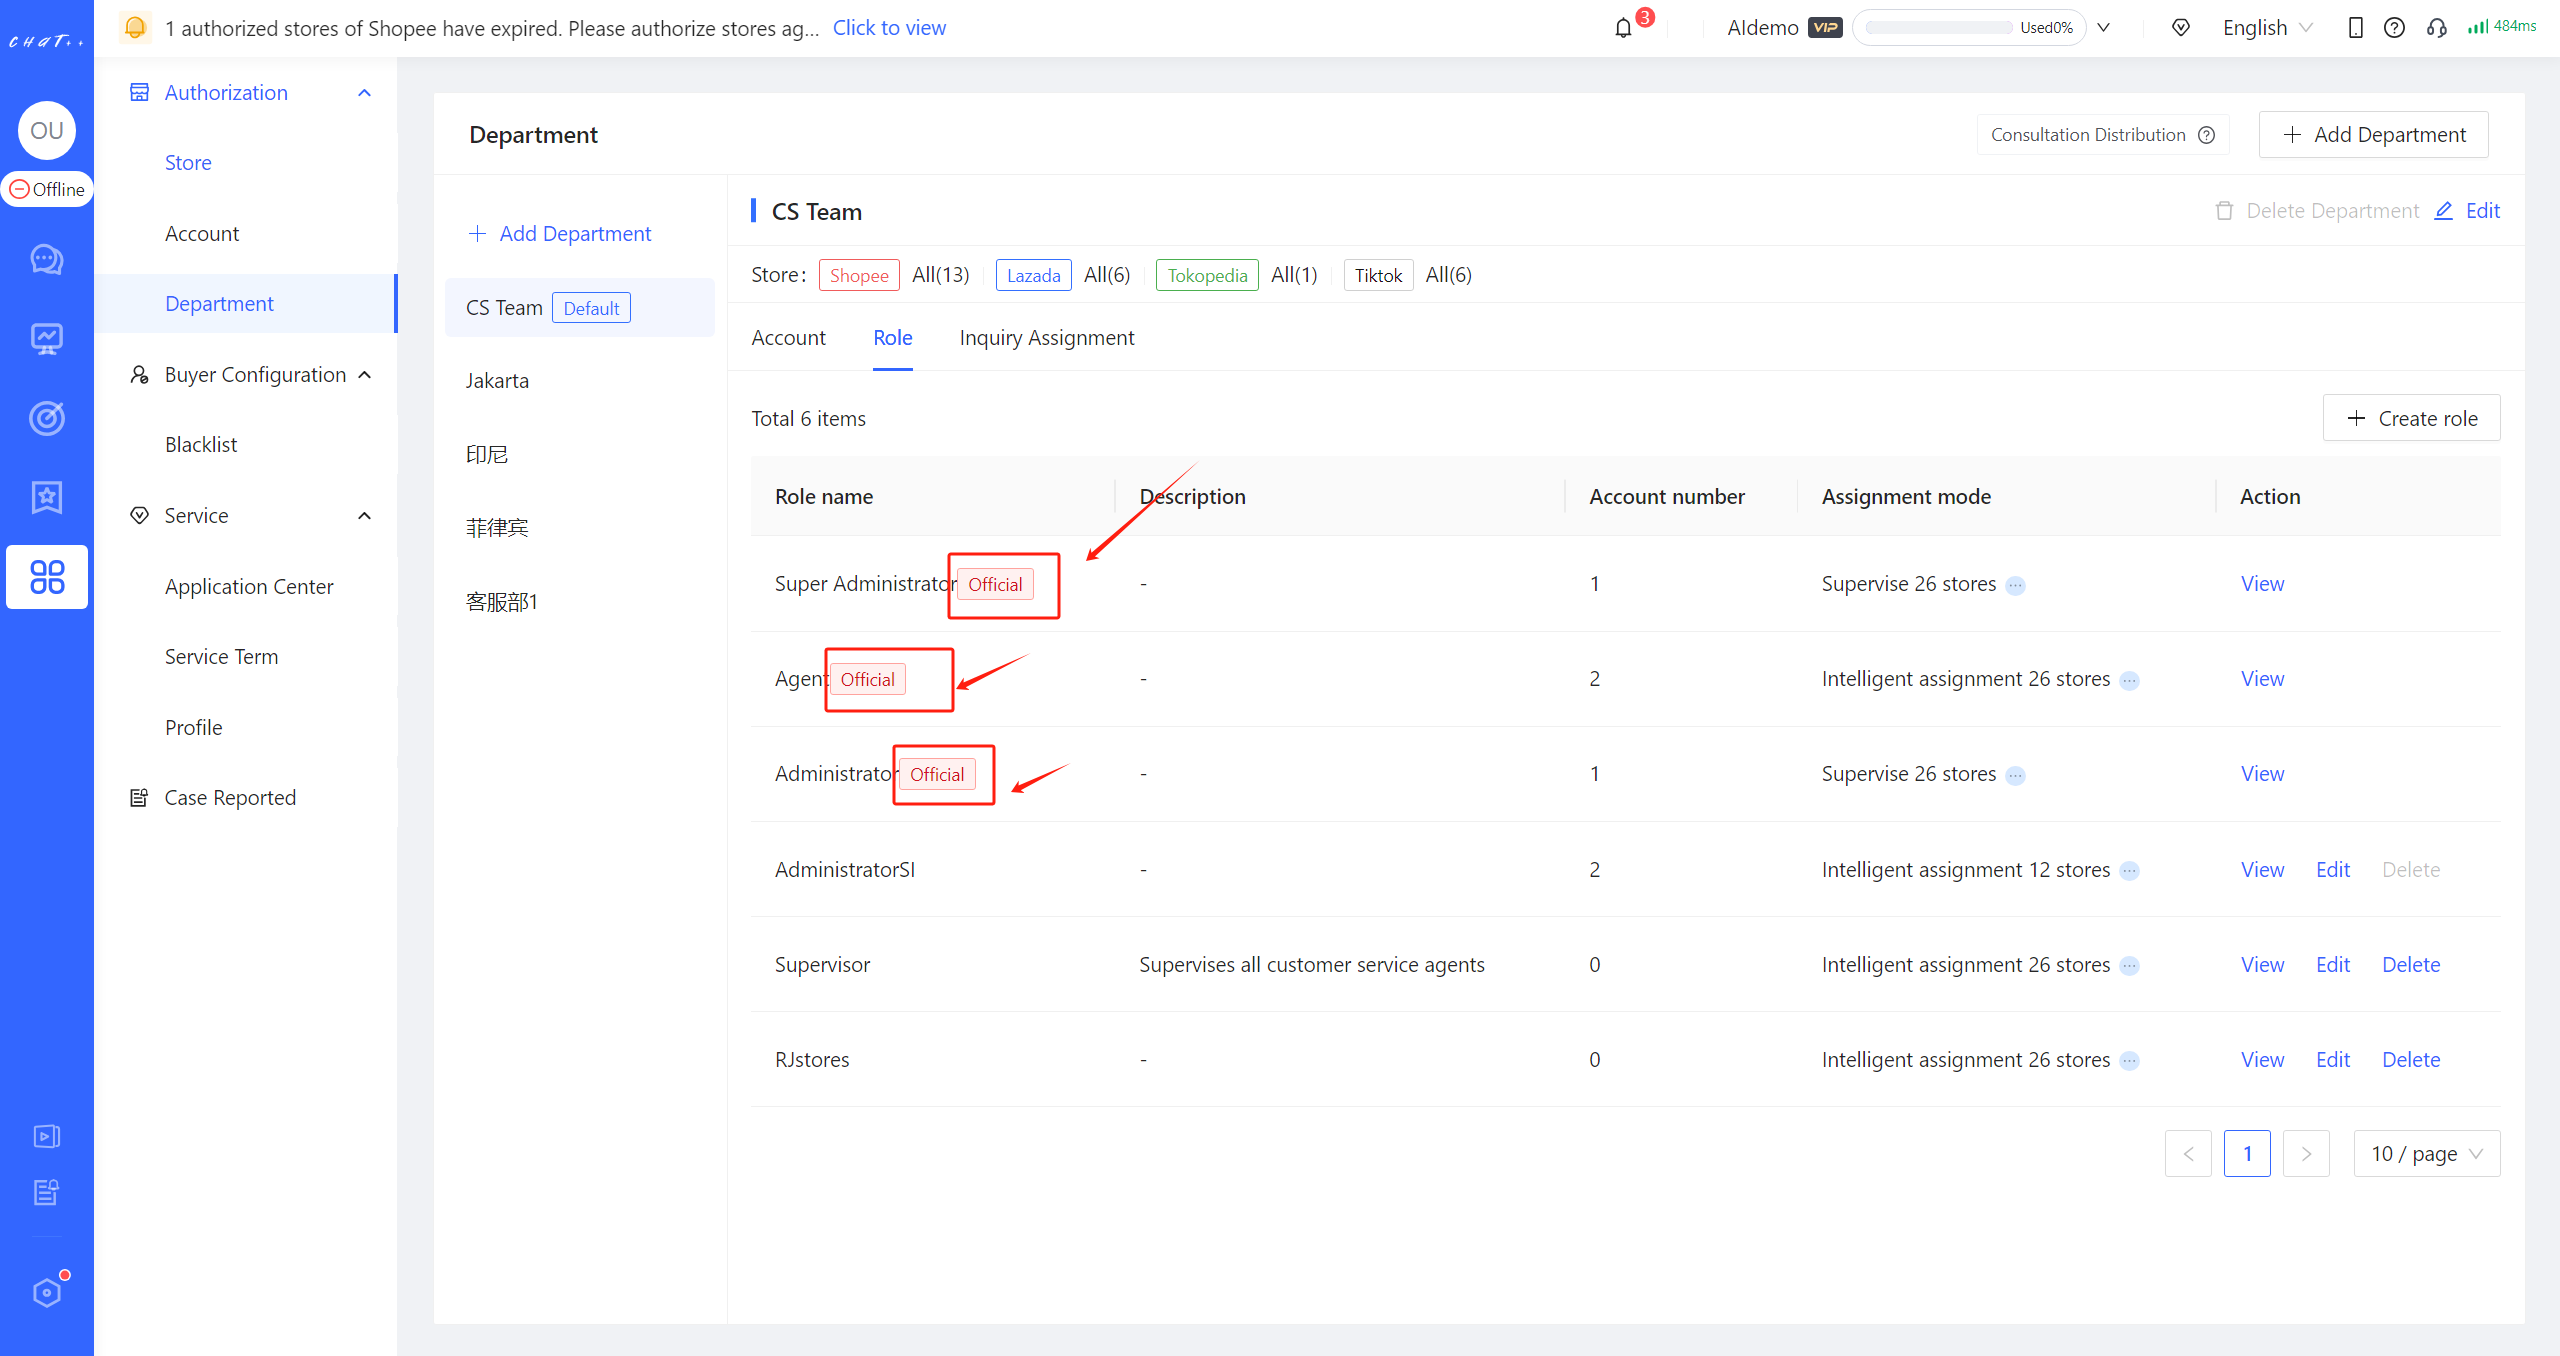
Figure7
Create Custom Role
In the process of using ChatPlusAI, if you find that official roles do not meet the requirements for permission division, you can create custom roles.
In the department roles section, 👆 click "Create New Role" (marked in red in the diagram), to enter the create role page.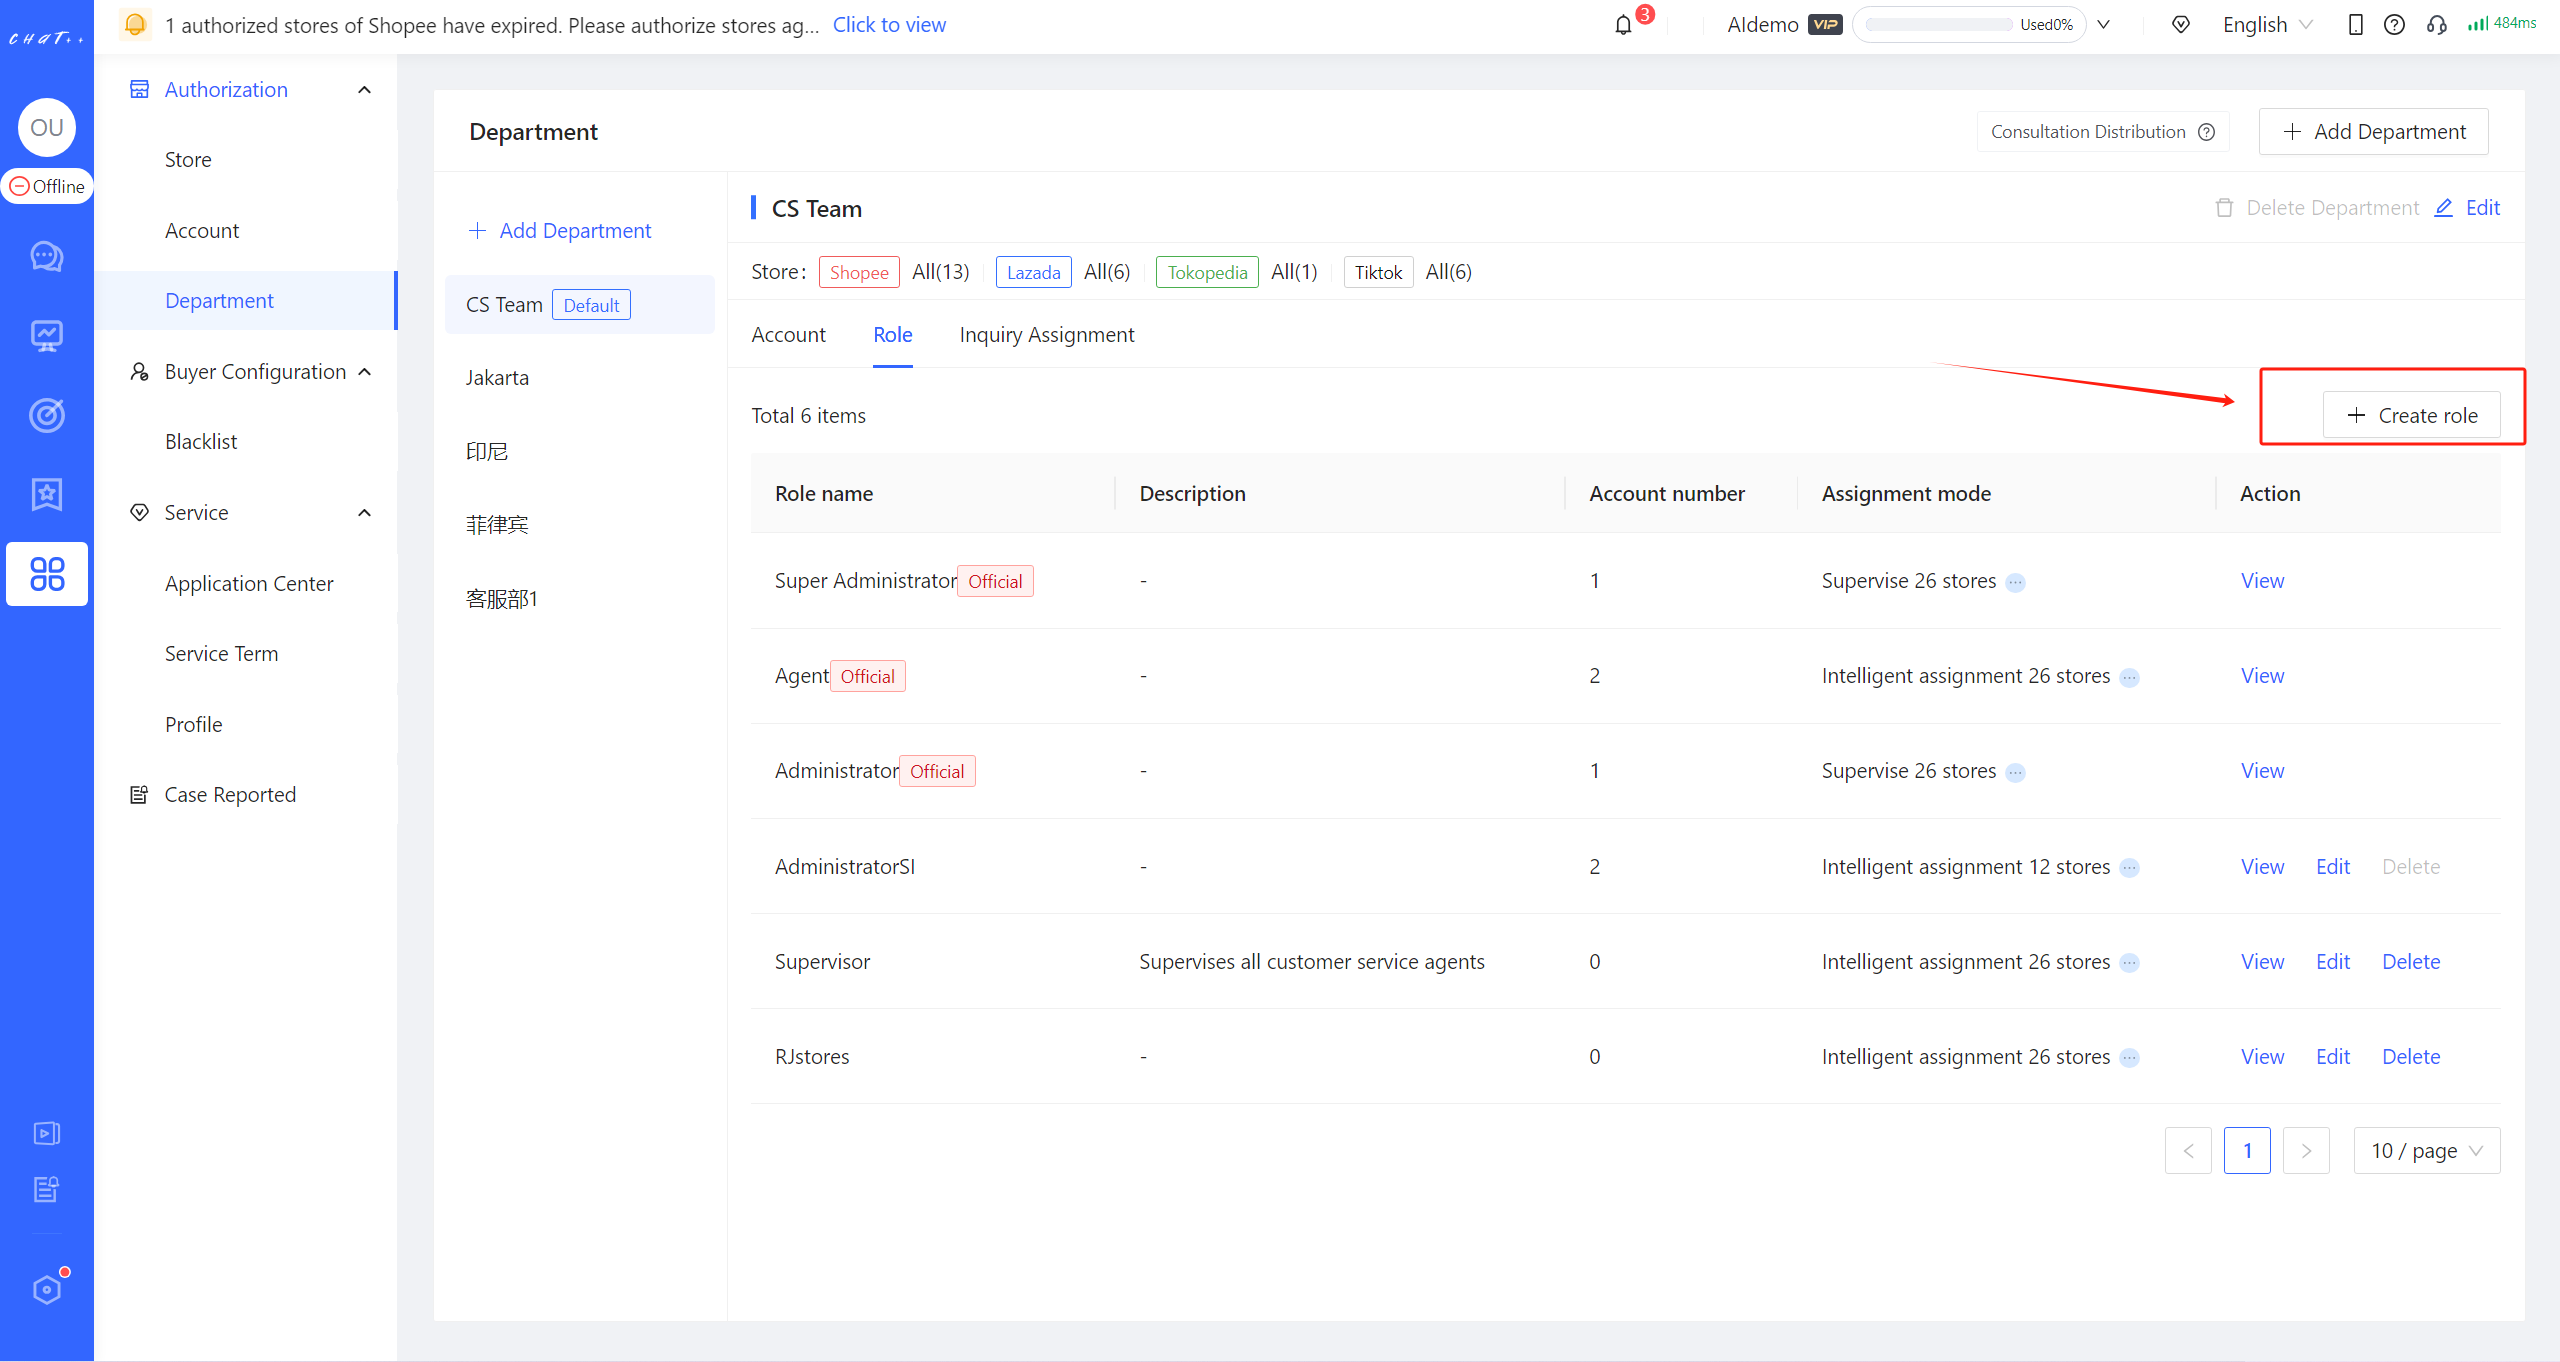
Figure8
When creating a new role, you need to confirm the following information:
Role Basic Information: Enter the role name, and then you may choose an existing role as a reference role, copying its permissions so as to make fine adjustments based on the existing role's permissions.(Figure9)。
⚠️ Note: The reference role will only affect the current role's permission configuration when it is selected. Subsequent adjustments to the permission configuration will not affect the referenced role.
Role's Responsible Store Scope: When configuring permissions, you can choose whether the store scope of each permission for the current role should be consistent (for example, whether there exists a role that can view orders of all stores under the department, but can only operate on a subset of those stores).
Intelligent Distribution Configuration: This includes "Buyer Consultation Reception Distribution Mode," "Scope of Buyers Received," and "Substitute Reception Plan when the Current Role is Busy."
Role Permission Settings: In the permission list, select the permissions that need to be authorized for the current role.
Once all the information is confirmed, you can complete the role creation.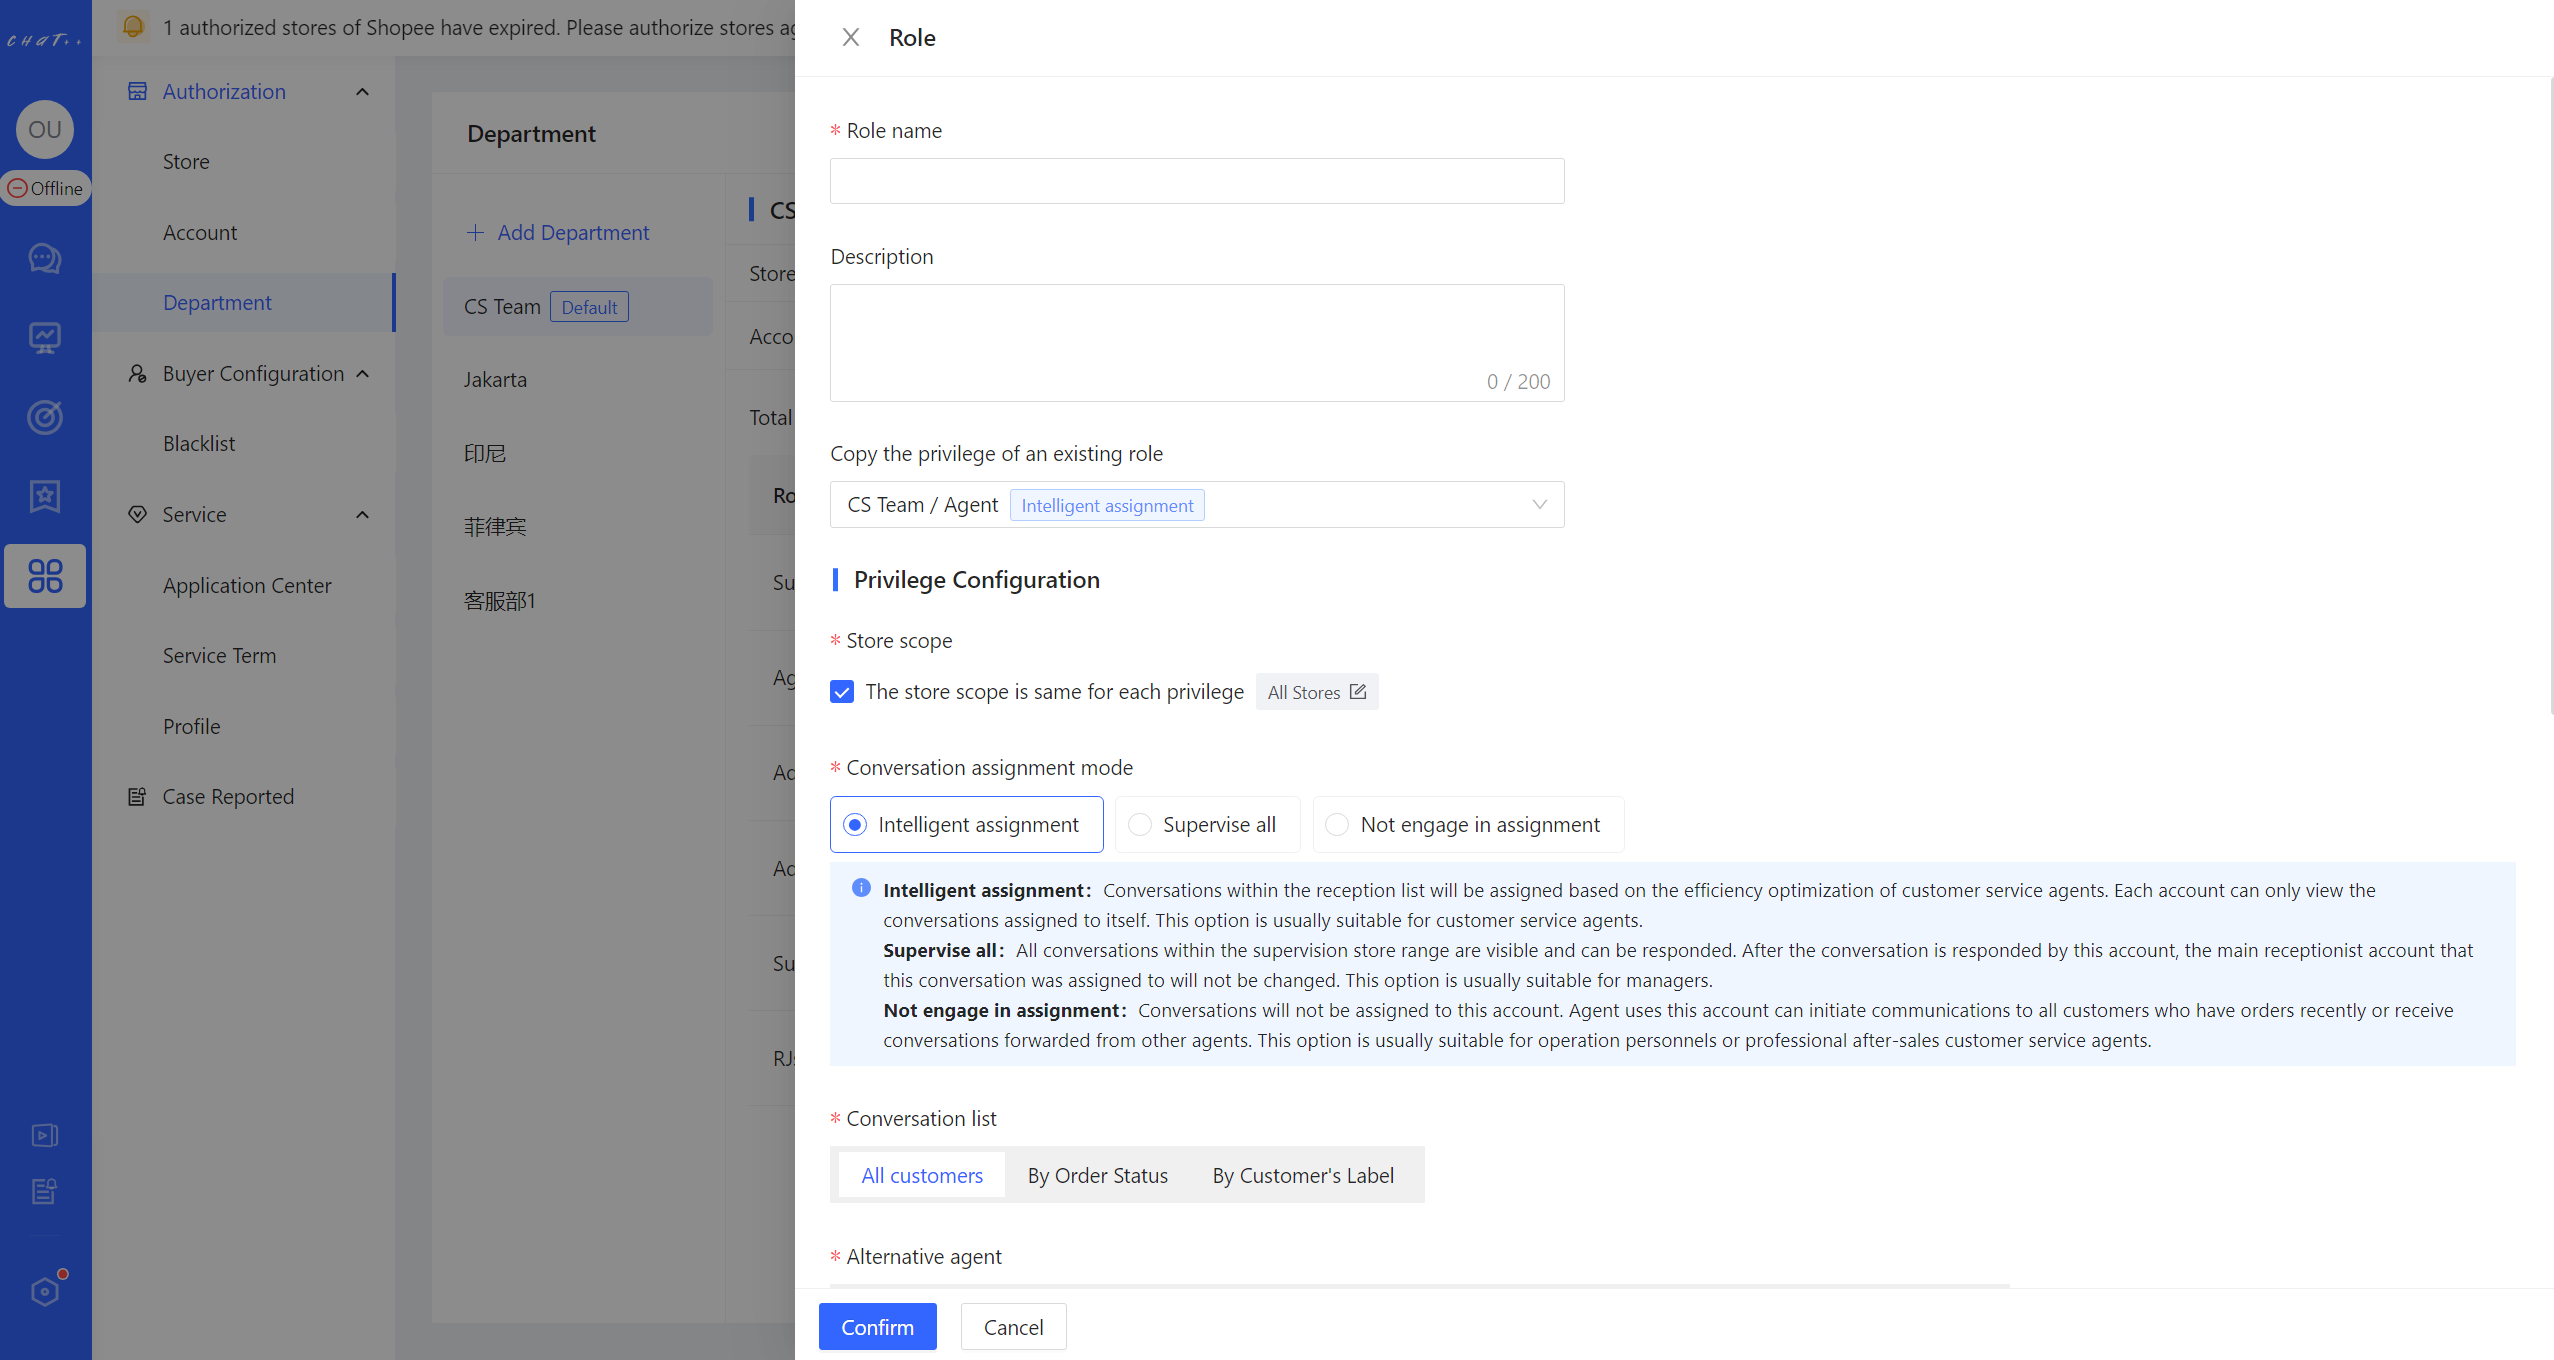
Figure9
Edit/Delete Role
For custom roles, you can 👆 click "Configuration" in the left sidebar → "Authorization-->Department" → "Department Roles" → "Edit" to modify its name and permissions, or 👆 click "Delete" to remove it.
However, if the current role has been applied to accounts, you need to first modify the role of the accounts in the current department before you can delete the role. 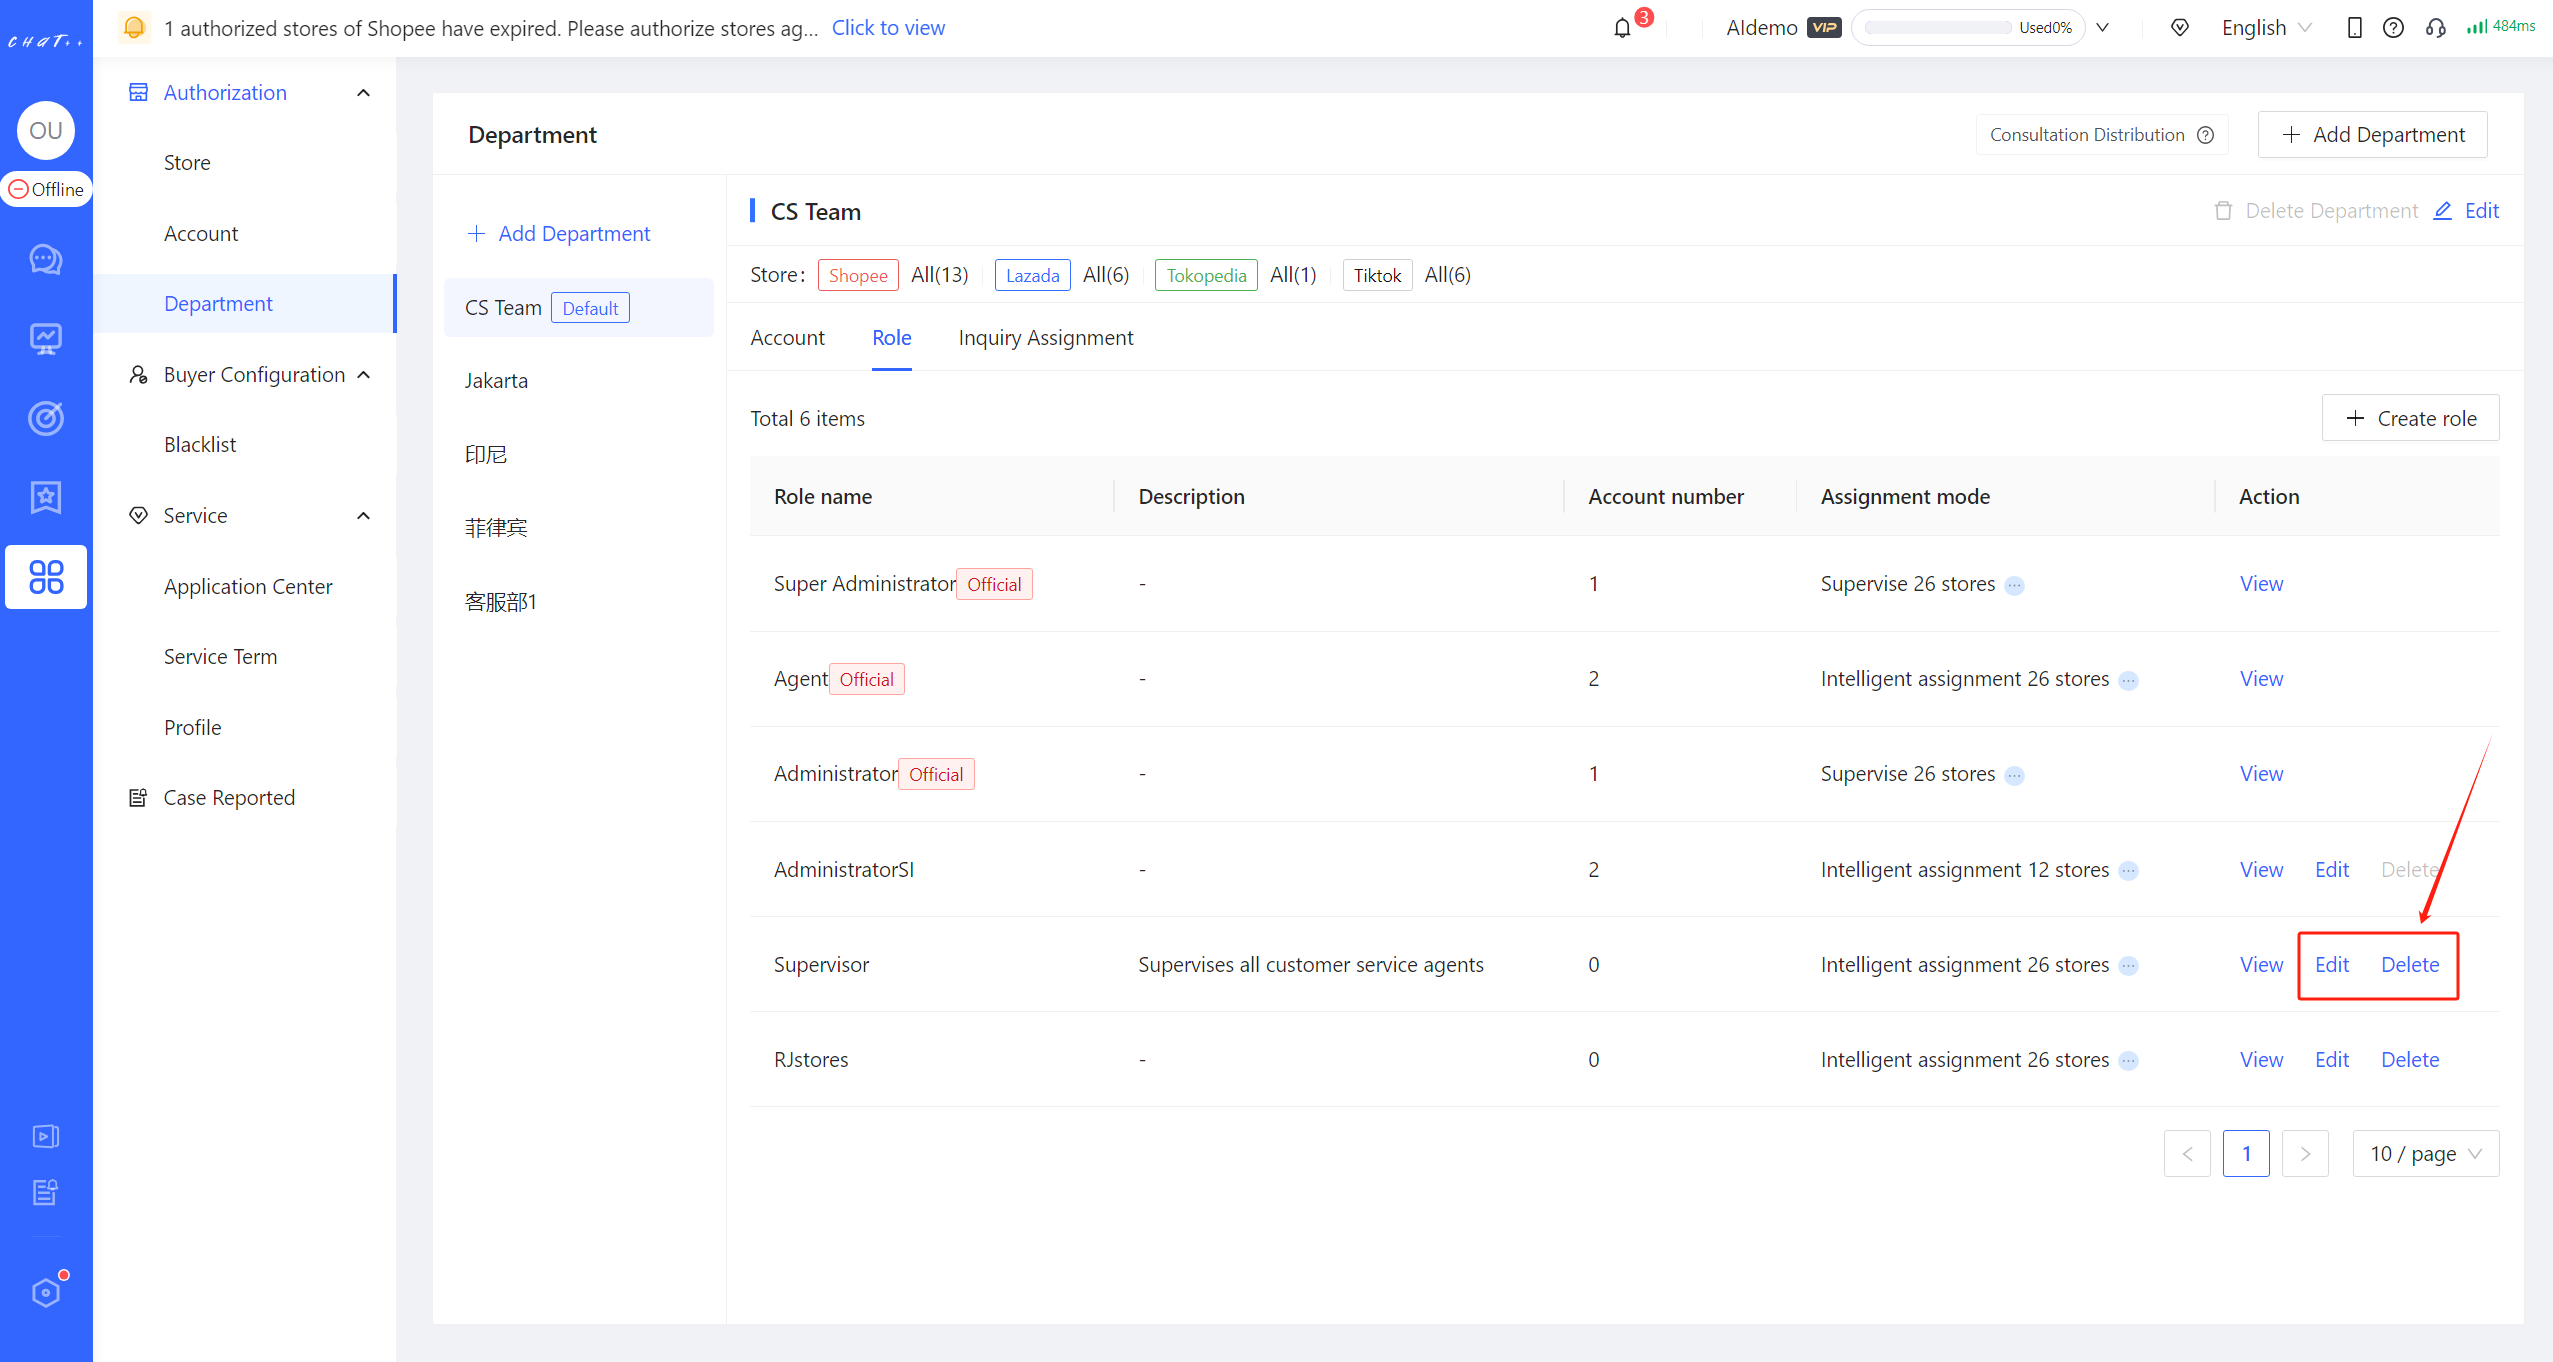
Figure10
Permission Effect Description
Basic Customer Service Reception Permissions
The permissions in this section affect the various pages in the "Messages" section of the menu bar. >>>For an introduction to the "Messages" module, please refer to the respective section.
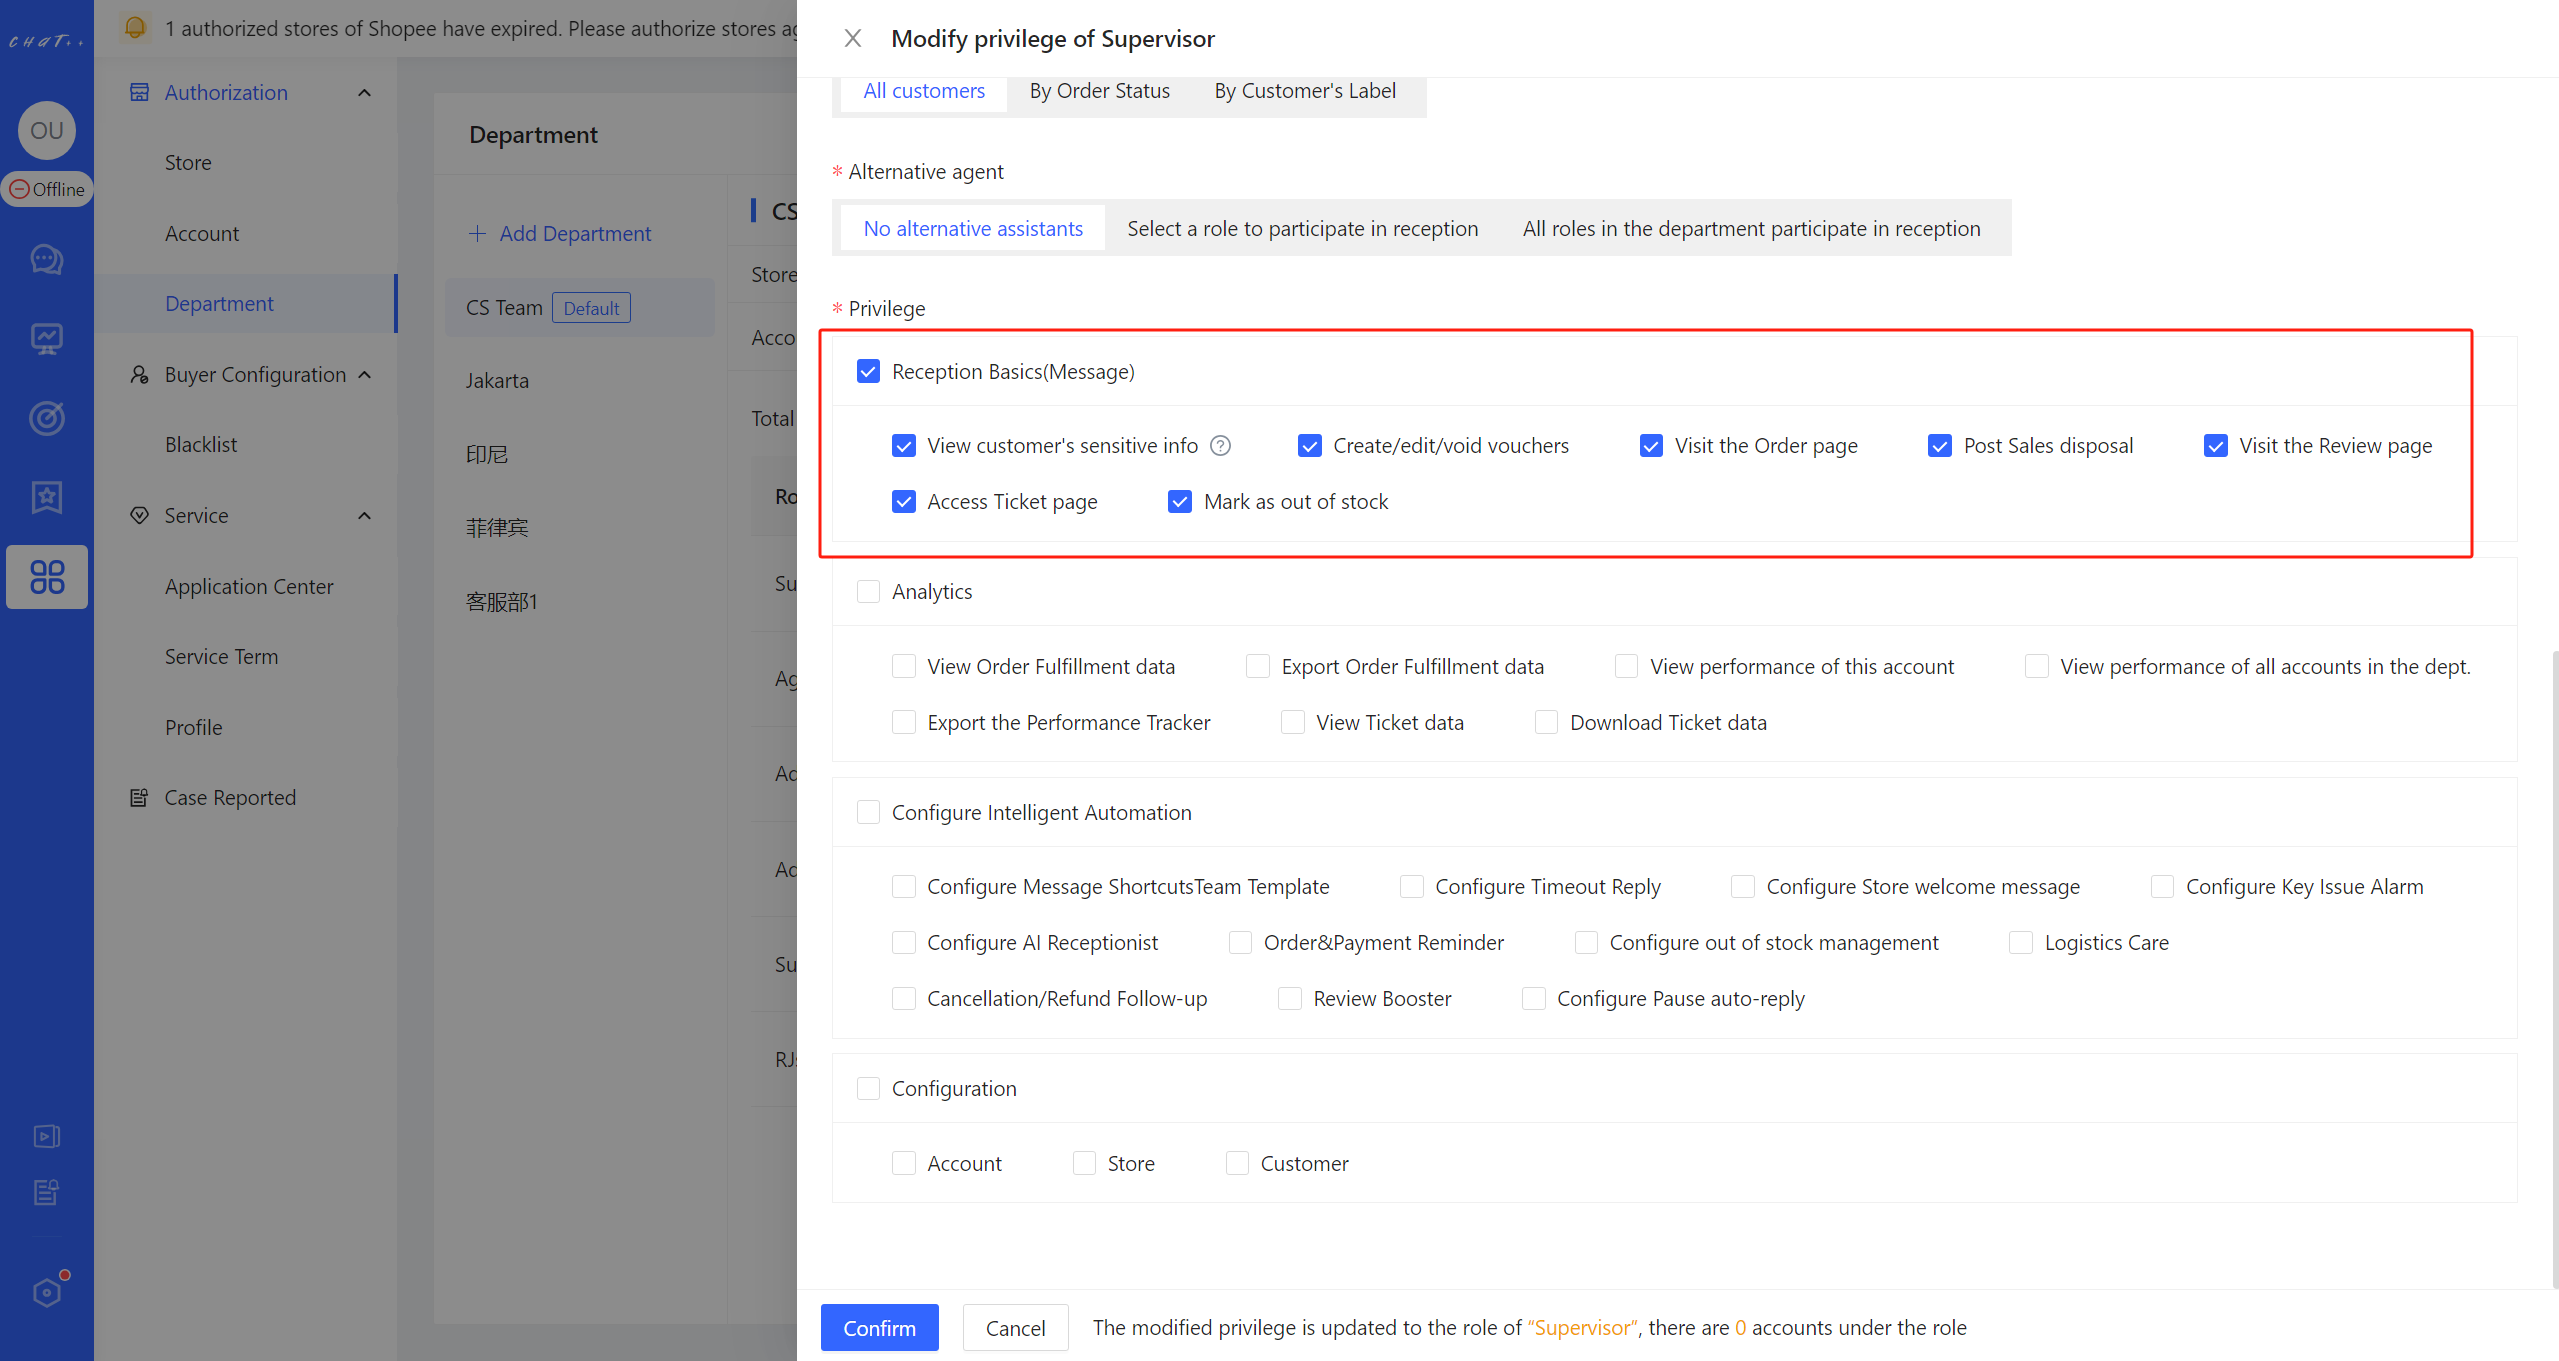
Figure11
- The permission to "View Buyer Sensitive Information" allows sub-accounts, in the "Messages" section of the left sidebar menu, specifically on the "Orders" (marked as ① in red in diagram 12) and "Abandoned Orders" (marked as ② in red in diagram 12) pages, to view the actual revenue from authorized stores' orders and access information such as the buyer's phone number and shipping address within those orders.
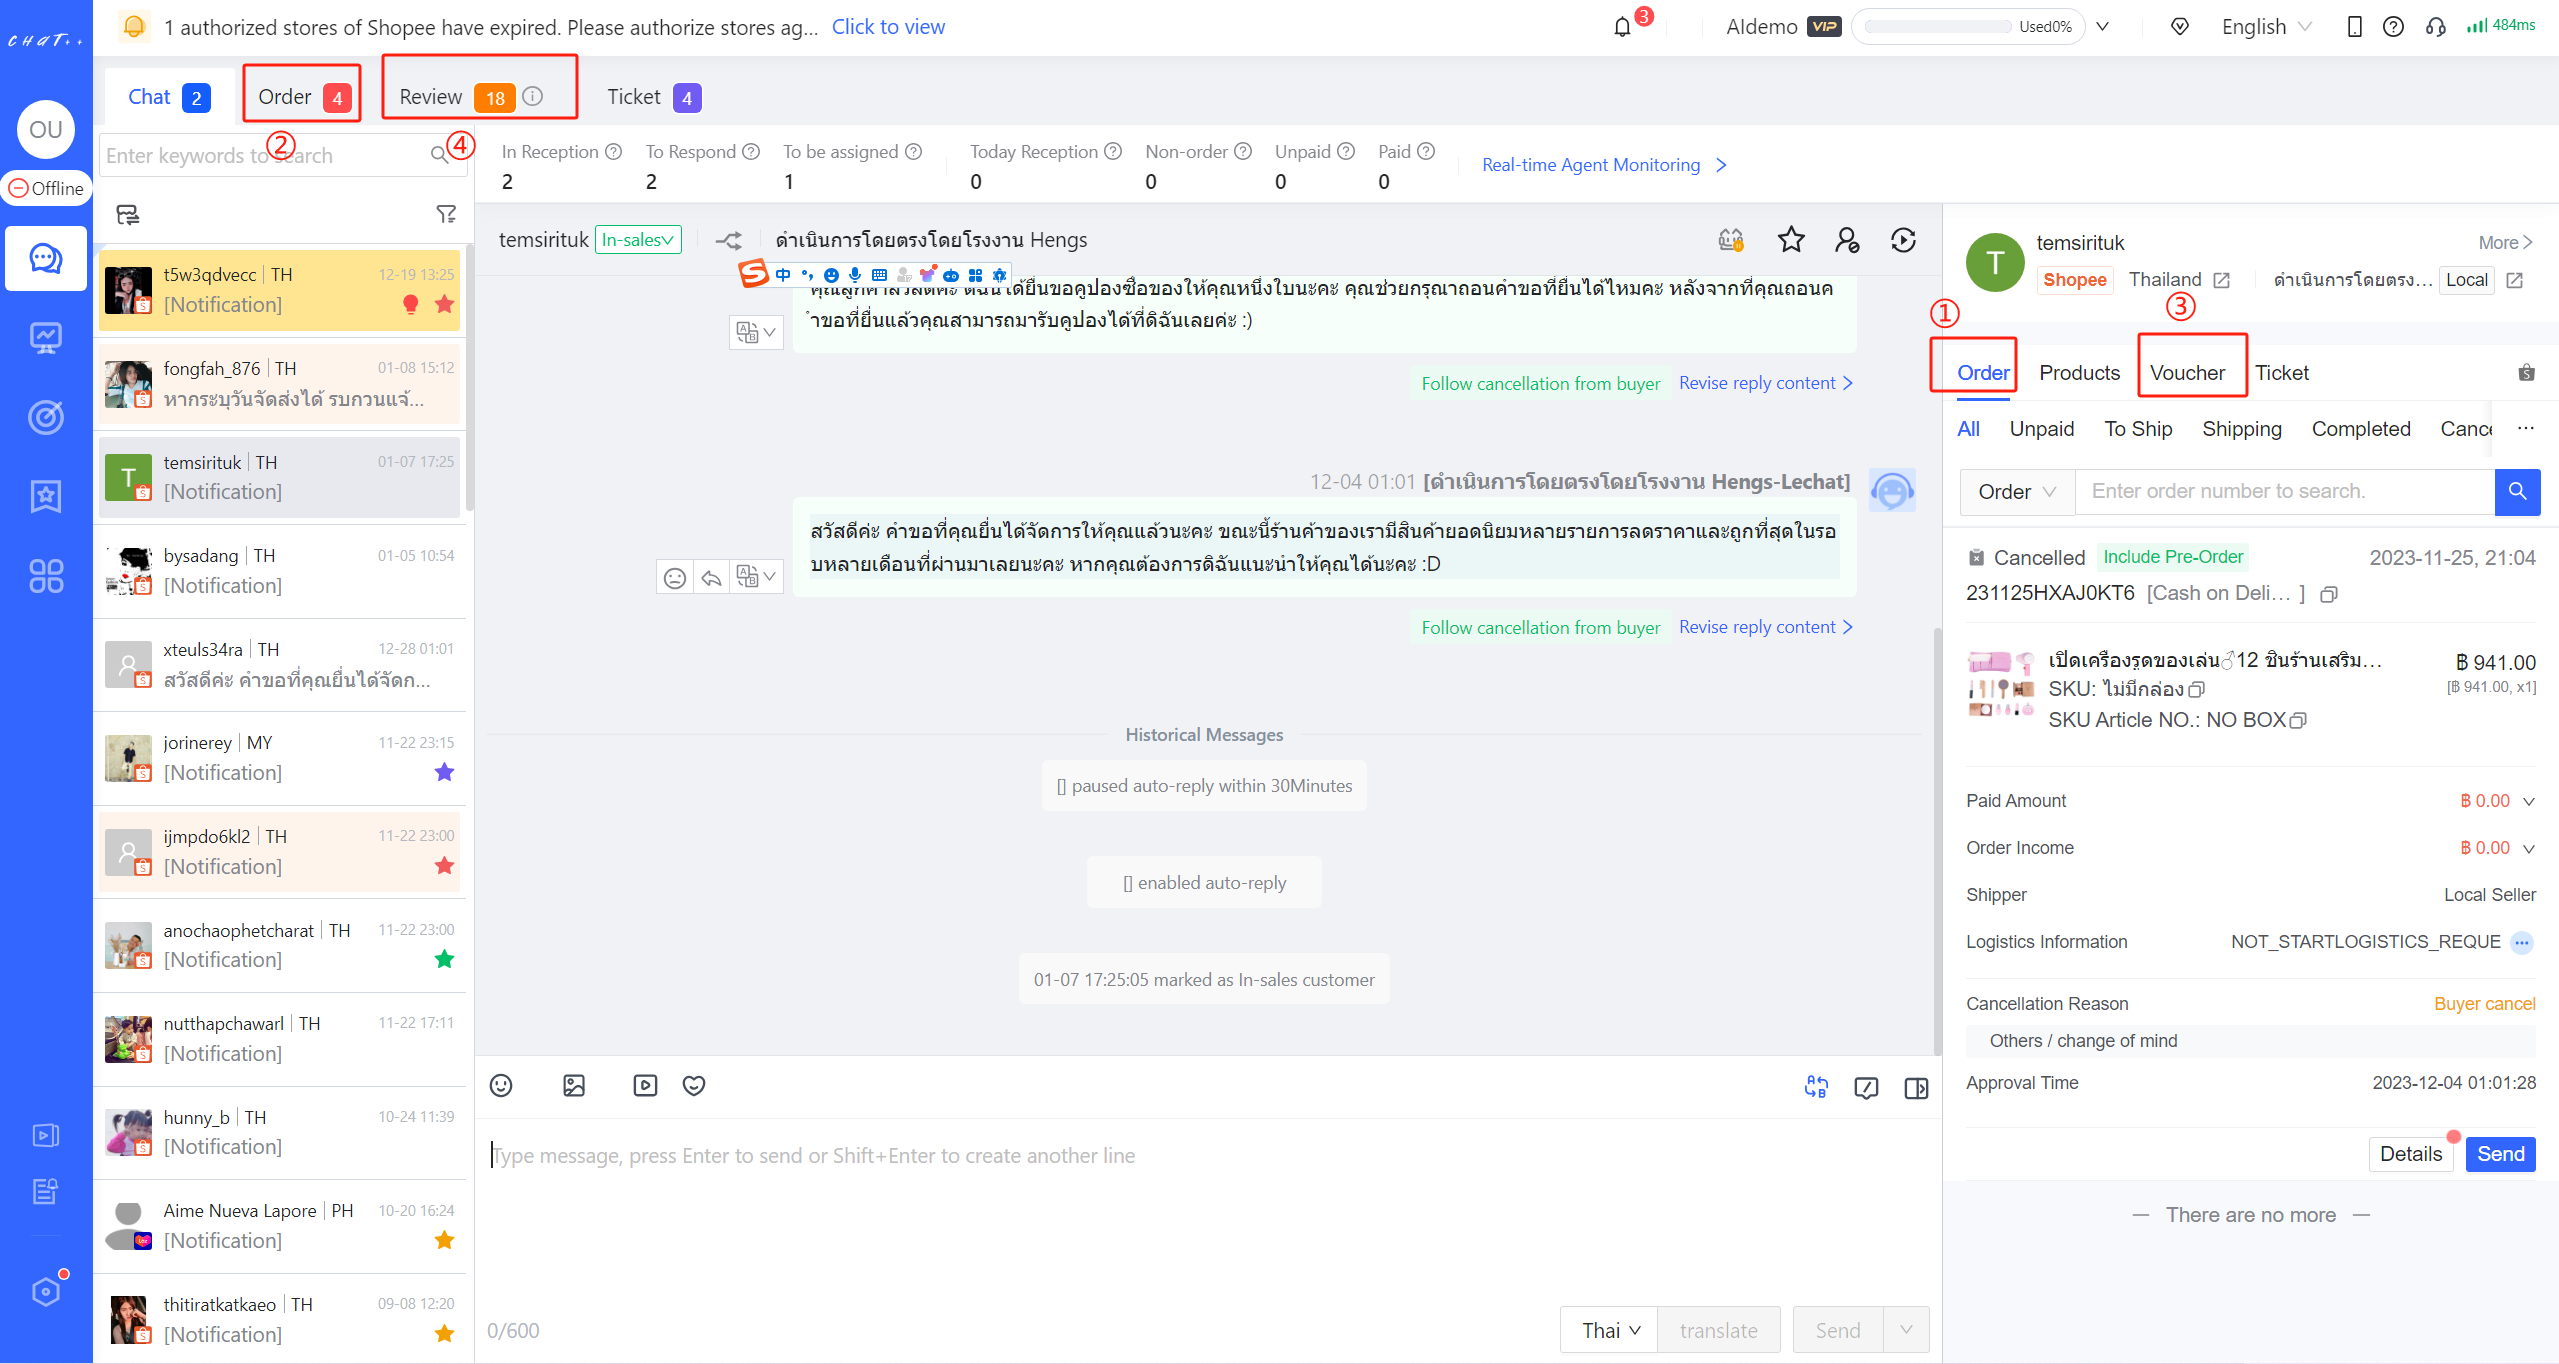 Figure12
- The permission to "Create/Edit/Invalidate Vouchers" allows sub-accounts, in the "Messages" section of the left sidebar menu, specifically on the "Vouchers" (marked as ③ in red in diagram 12) page, to add/invalidate/edit vouchers for authorized stores. Without this authorization, sub-accounts can only send vouchers.
- The permission to "Access Order Aggregation Page" allows sub-accounts, in the "Messages" section of the left sidebar menu, specifically on the "Abandoned Orders" (marked as ② in red in diagram 12) page, to view returns/refunds/cancelled orders for authorized stores.
- The permission for "After-sales Disposal Rights" allows sub-accounts, in the "Messages" section of the left sidebar menu, specifically on the "Orders" (marked as ① in red in diagram 1) and "Abandoned Orders" (marked as ② in red in diagram 1) pages, to perform actions such as agreeing, rejecting, disputing, and proposing partial refunds for orders. When authorizing this permission, the "Access Order Aggregation Page" permission is automatically granted.
- The permission to "Access Review Aggregation Page" allows sub-accounts, in the "Messages" section of the left sidebar menu, specifically on the "Reviews" (marked as ④ in red in diagram 12) page, to view order review information for authorized stores and respond to order reviews.
Permissions for the "Analytics"
The permissions in this section affect various pages in the "Analytics" section of the menu bar.
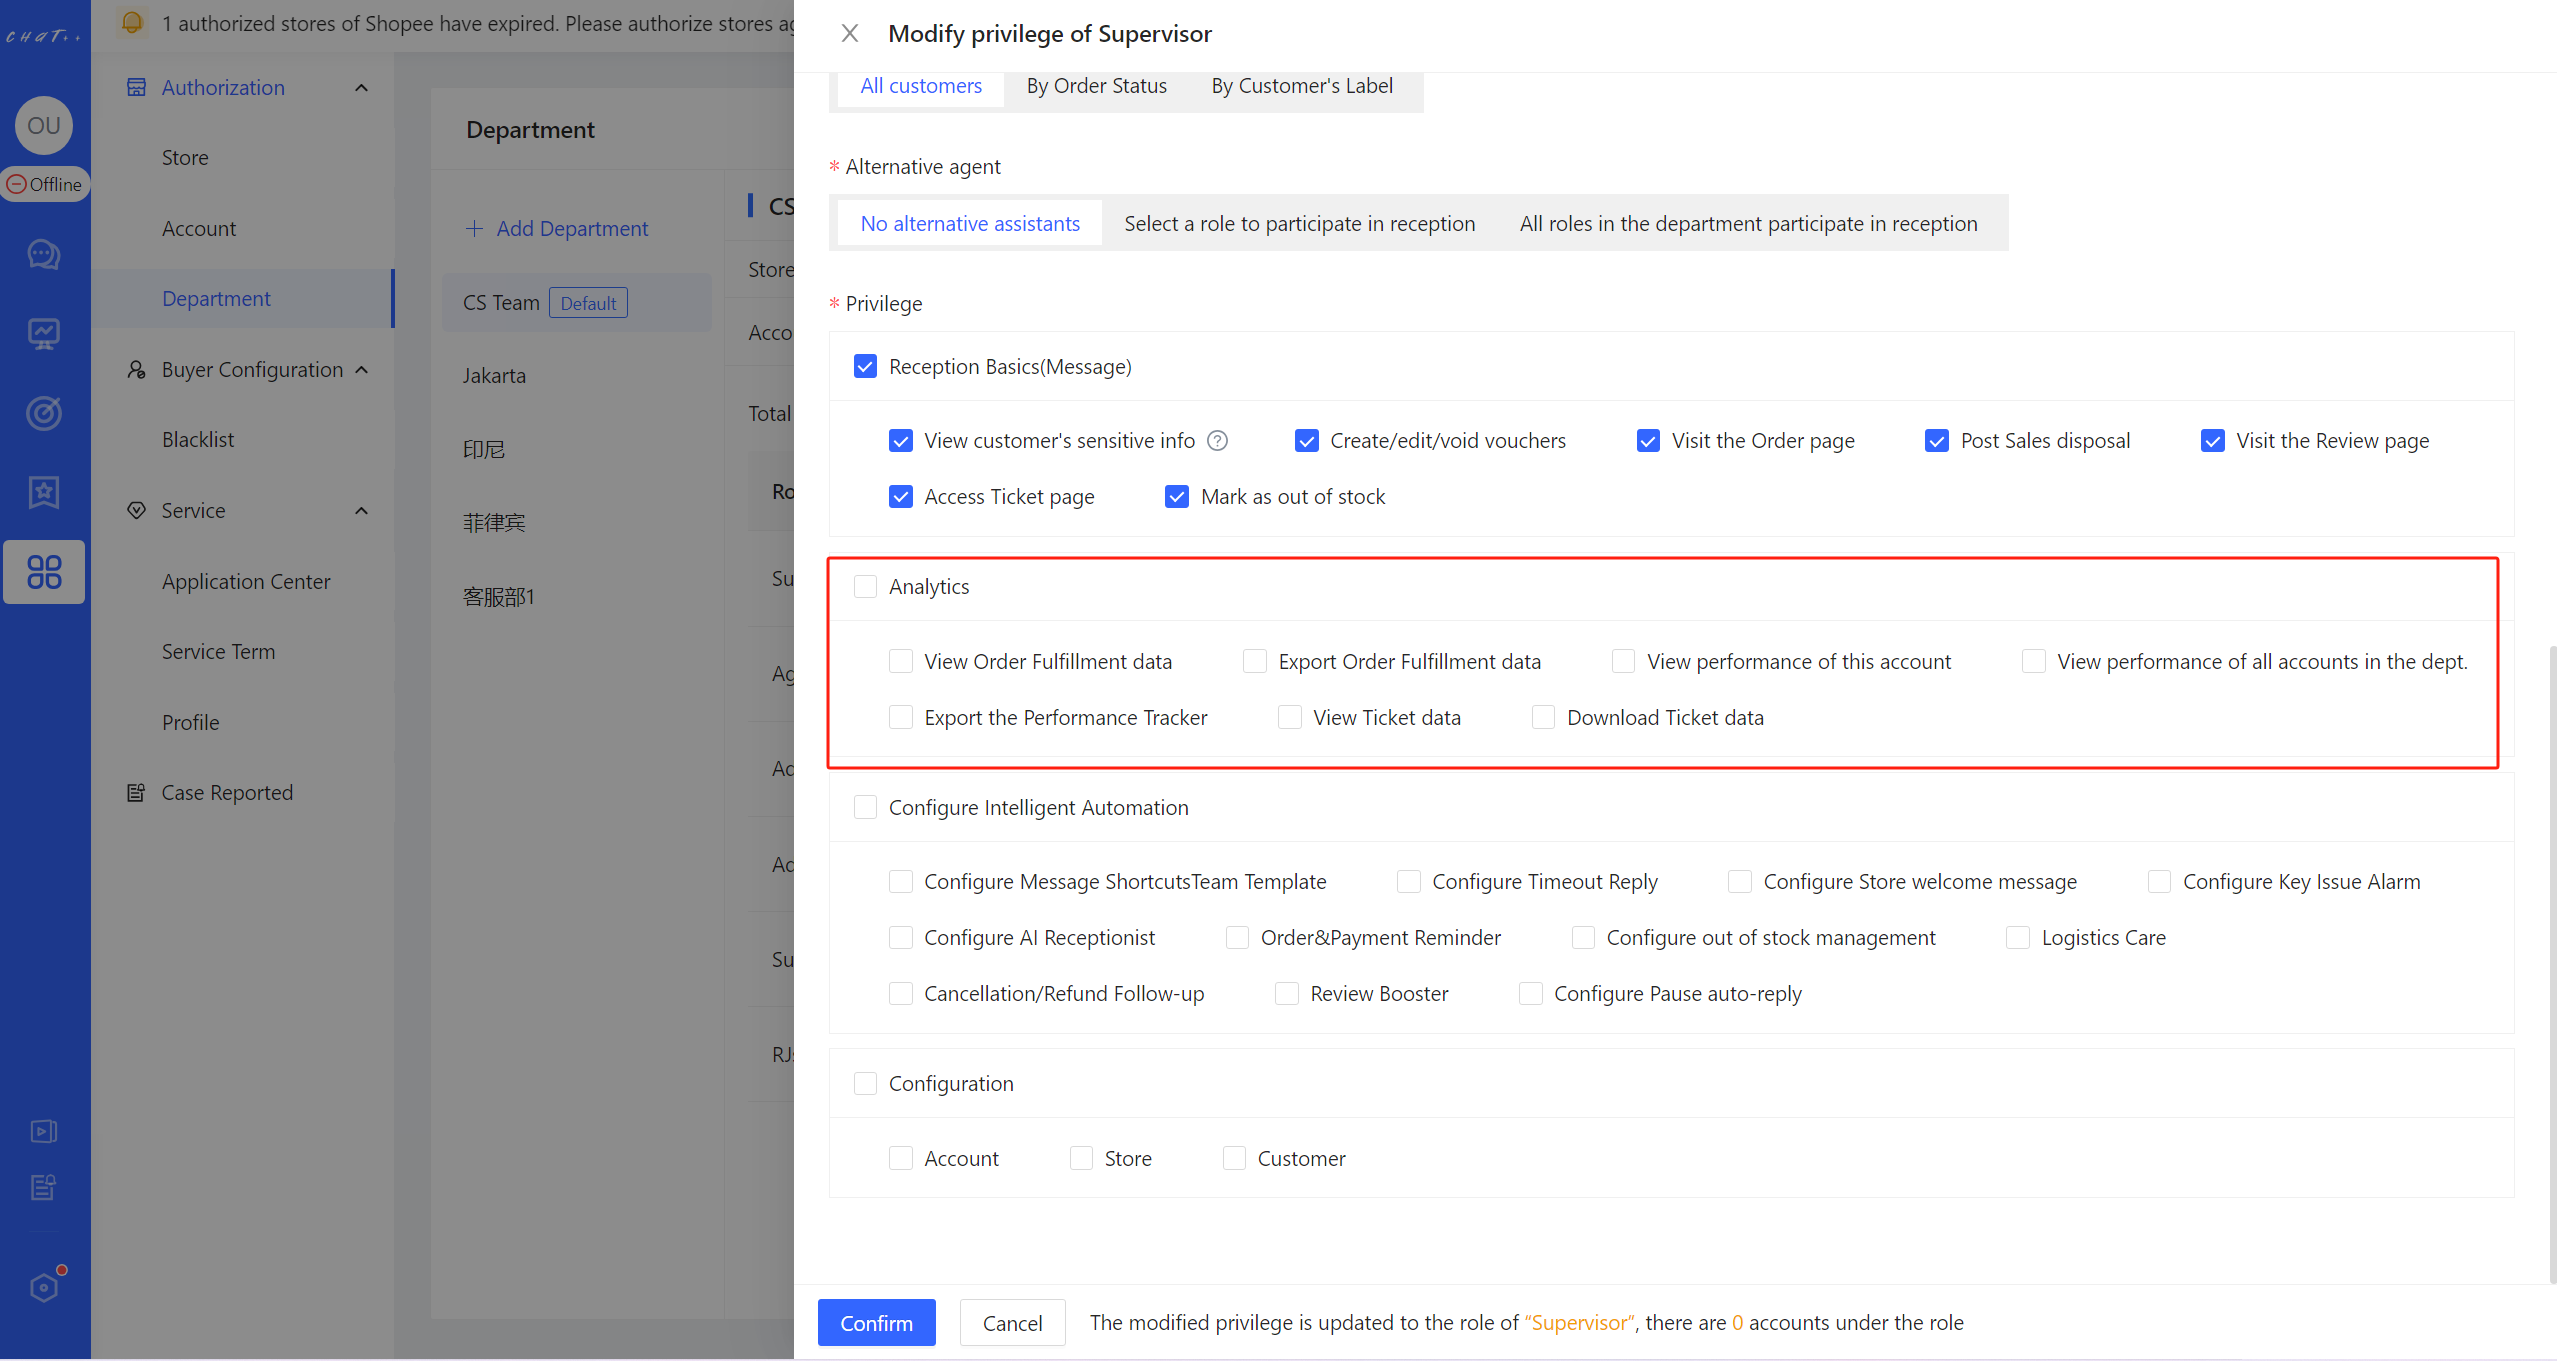
Figure13
- Permission for the "View Order Fulfillment data": After authorization, sub-accounts can, in the "Analytics" section of the left sidebar menu, specifically on the "Order Fulfillment" (marked as ① in red in diagram 14) page, view order data for authorized stores.
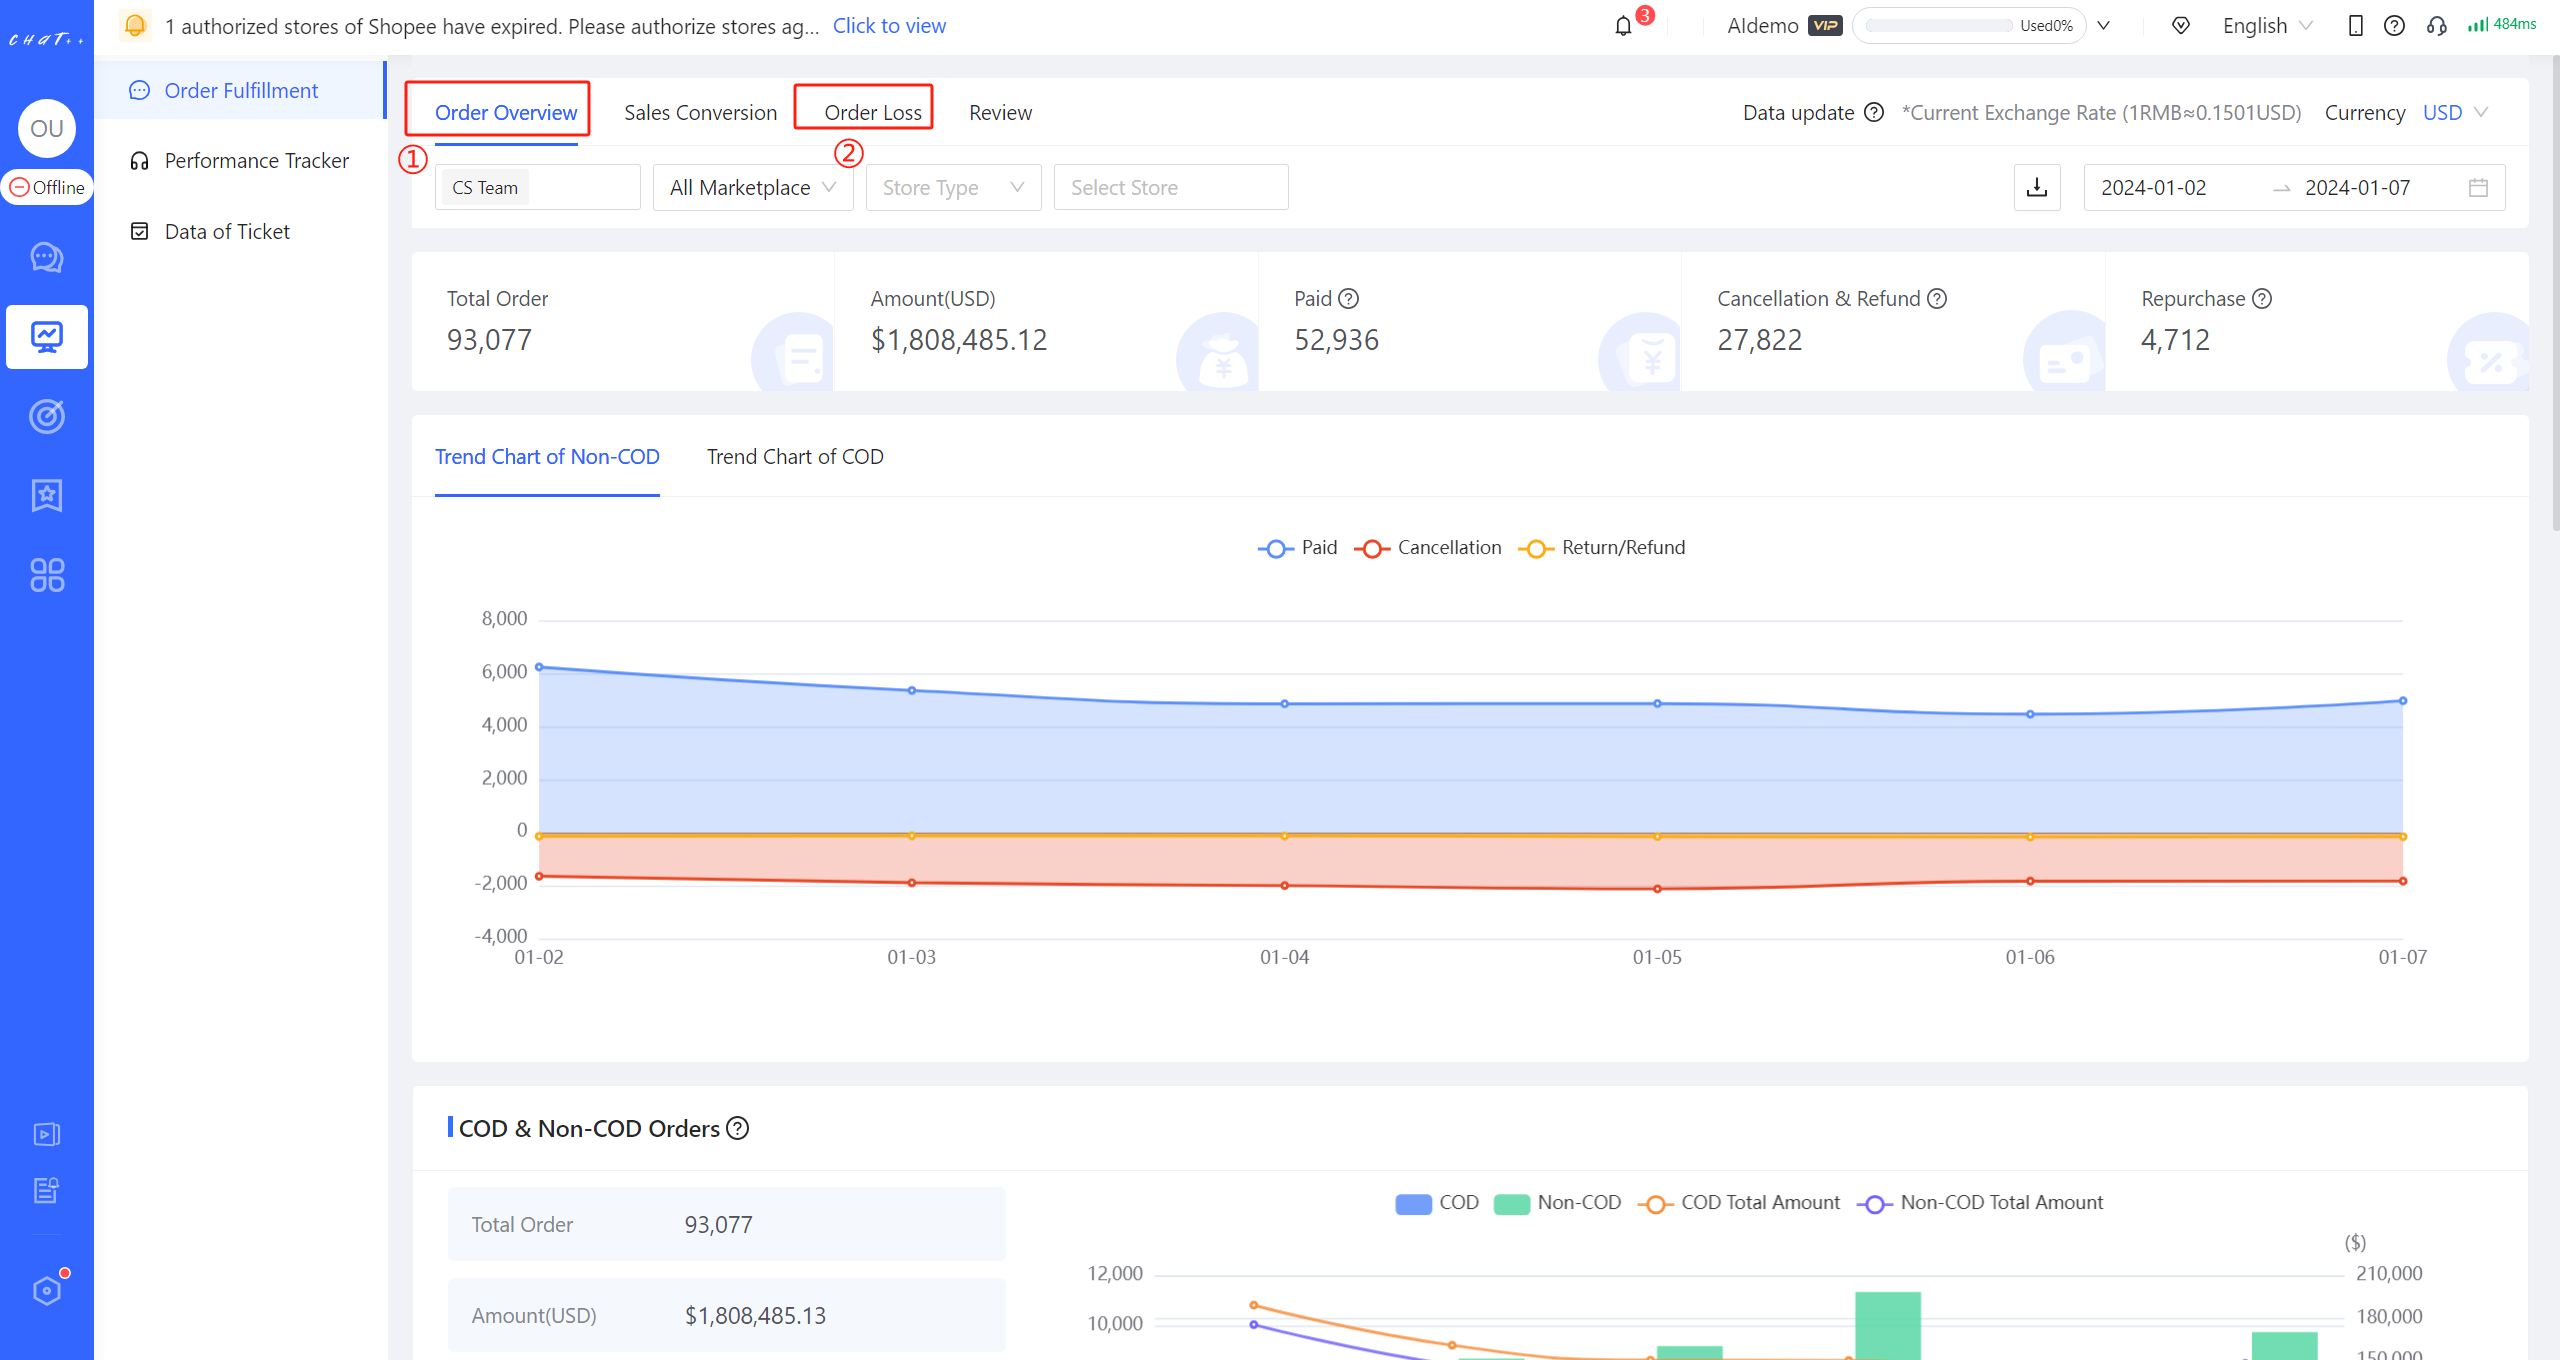
Figure14
Permission for the "Export Order Fulfillment data":After authorization, sub-accounts can, in the "Analytics" section of the left sidebar menu, specifically in the "Performance Tracker" → "Order Loss" (marked as ② in red in diagram 14) section, export detailed data. When authorizing this permission, the "View Performance Data" permission is automatically granted.
Permission for the "View Order Fulfillment data":After authorization, sub-accounts can, in the "Analytics" section of the left sidebar menu, specifically on the "Performance Tracker" (marked as ① in red in diagram 15) page, only view the performance data for their own account.
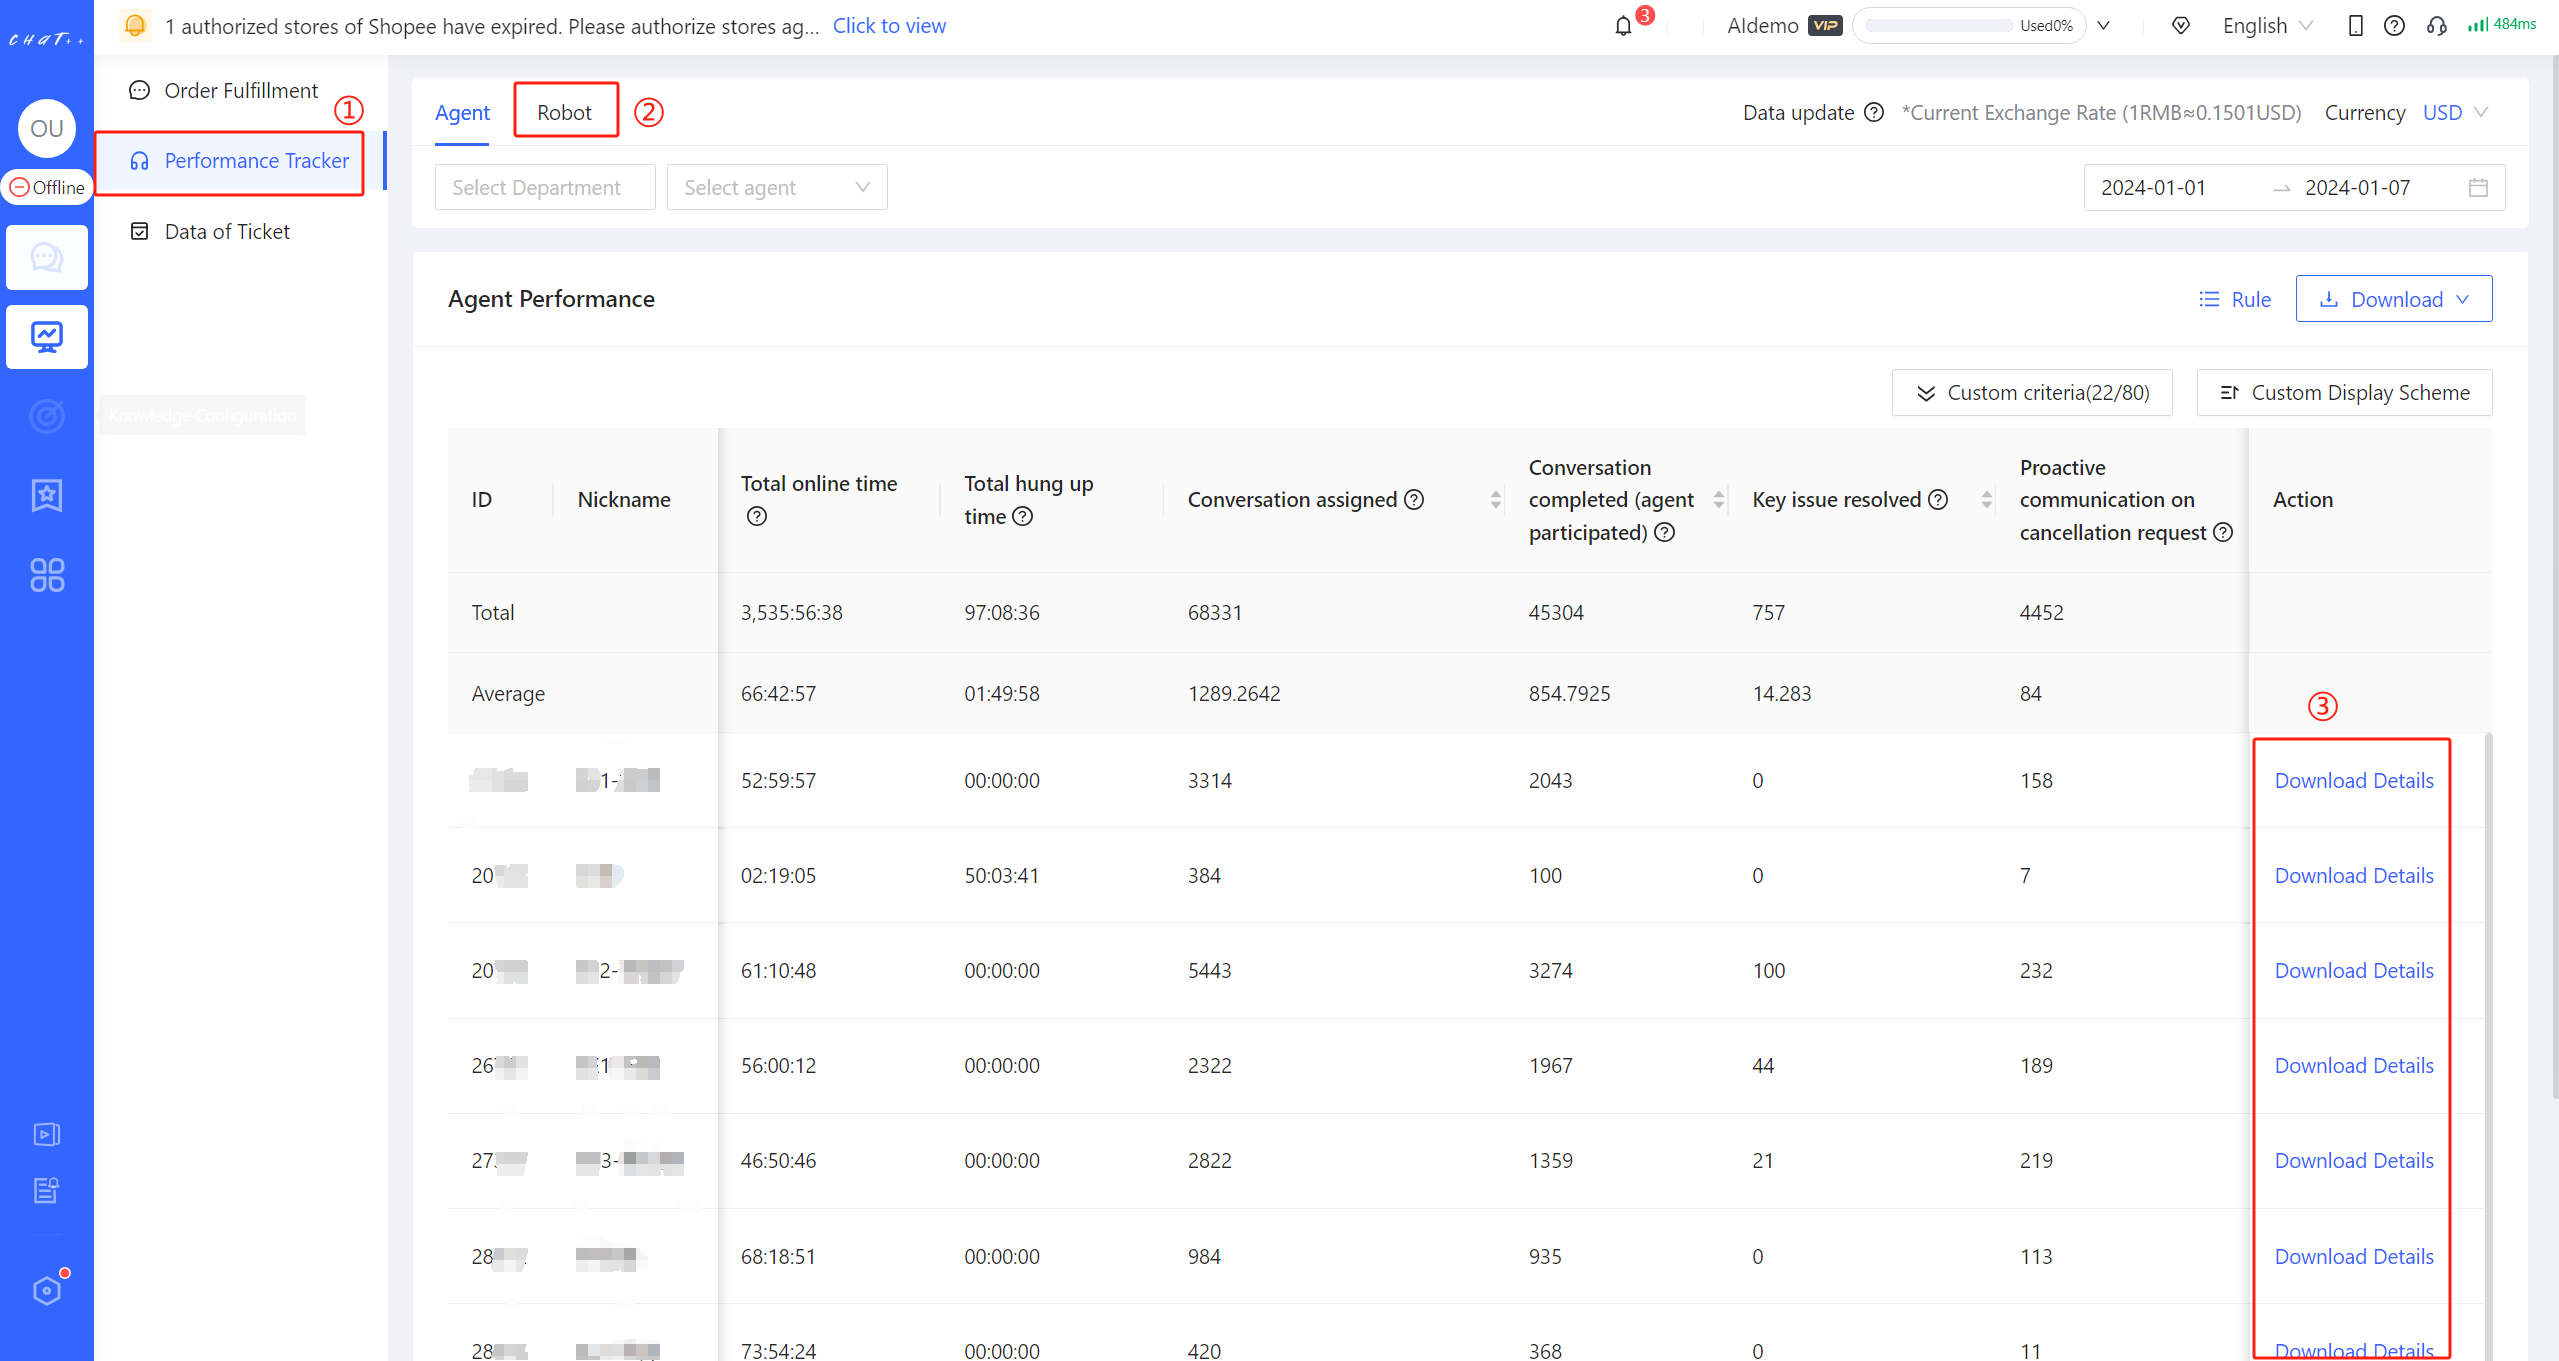 Figure15
Permission for the "View performance of all accounts in the dept"
After authorization, sub-accounts can, in the "Analytics" section of the left sidebar menu, specifically on the "Performance Tracker" (marked as ① in red in the diagram), view the performance data for accounts under the department with the distribution mode set as "Intelligent Distribution," and can also view the robot contribution for the current department (marked as ② in red in the diagram). When authorizing this permission, the "View performance of this account" permission is automatically granted.Permission for the "Export Order Fulfillment data" After authorization, sub-accounts can, in the customer service performance and robot contribution sections of the performance reports, export detailed data (marked as ③ in red in the diagram). When authorizing this permission, both the "View performance of this account" and "View Performance Data for All Accounts under the Department" permissions are automatically granted.
Permission for the **"Intelligent Automation Configuration"
The permissions in this section affect various pages in the "Automation" section of the menu bar.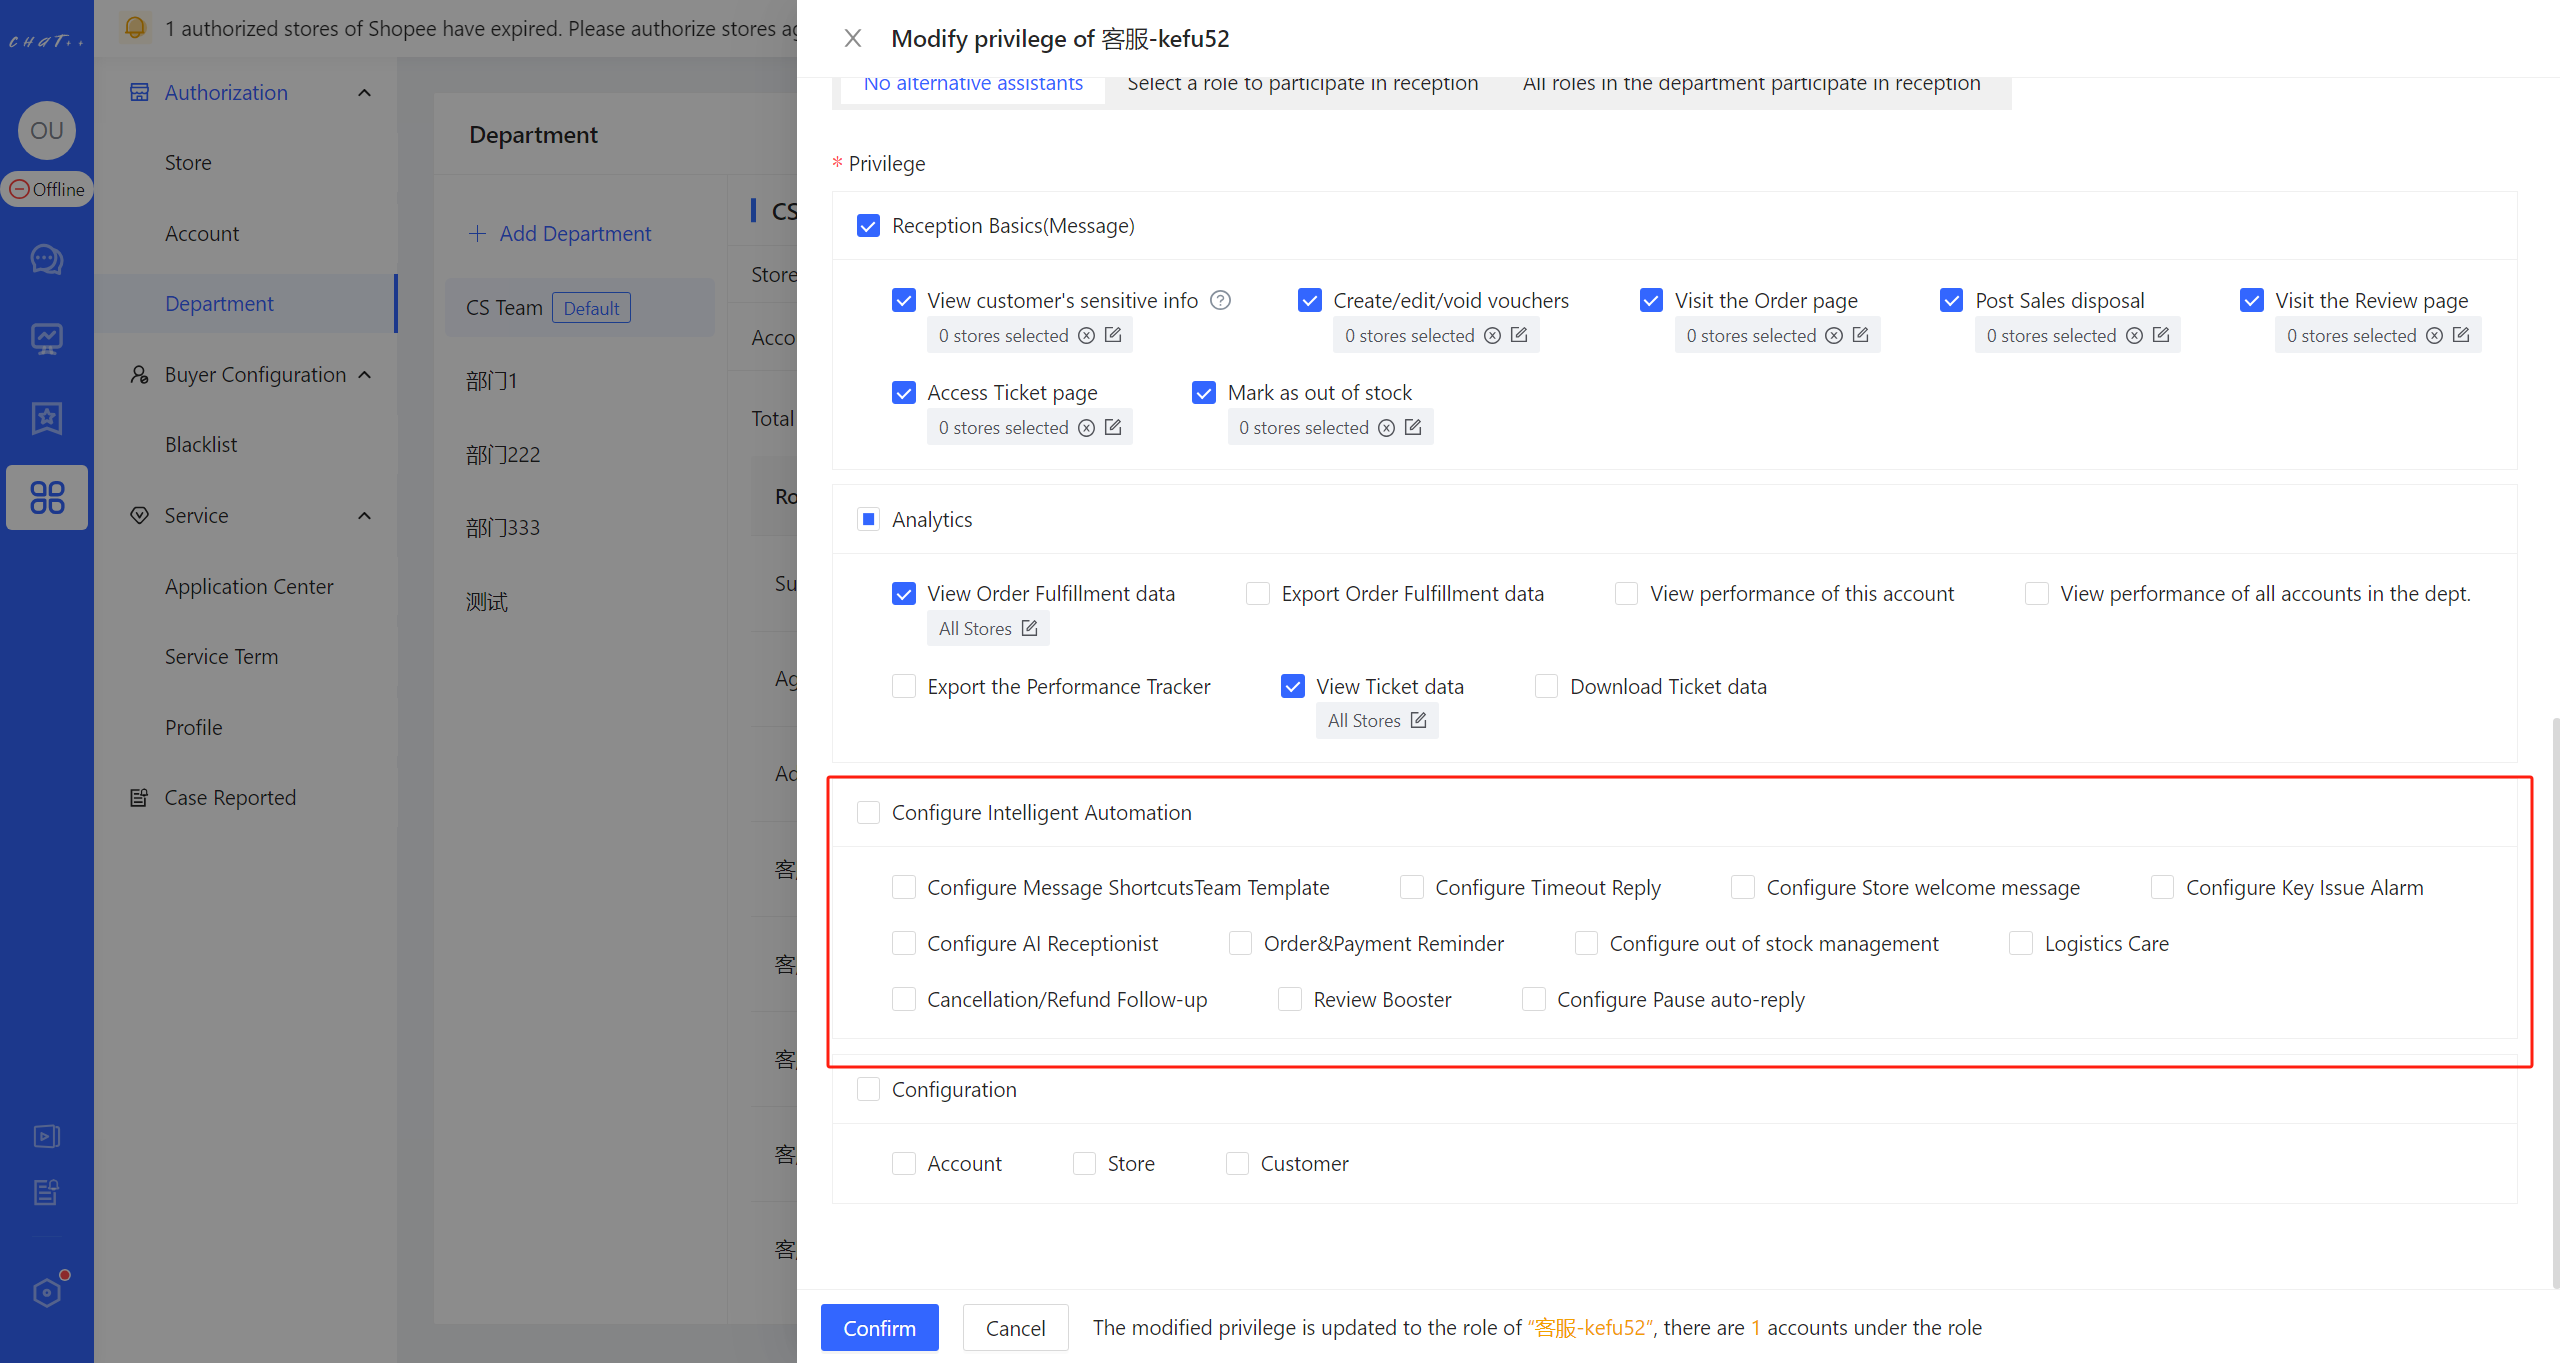
Figure16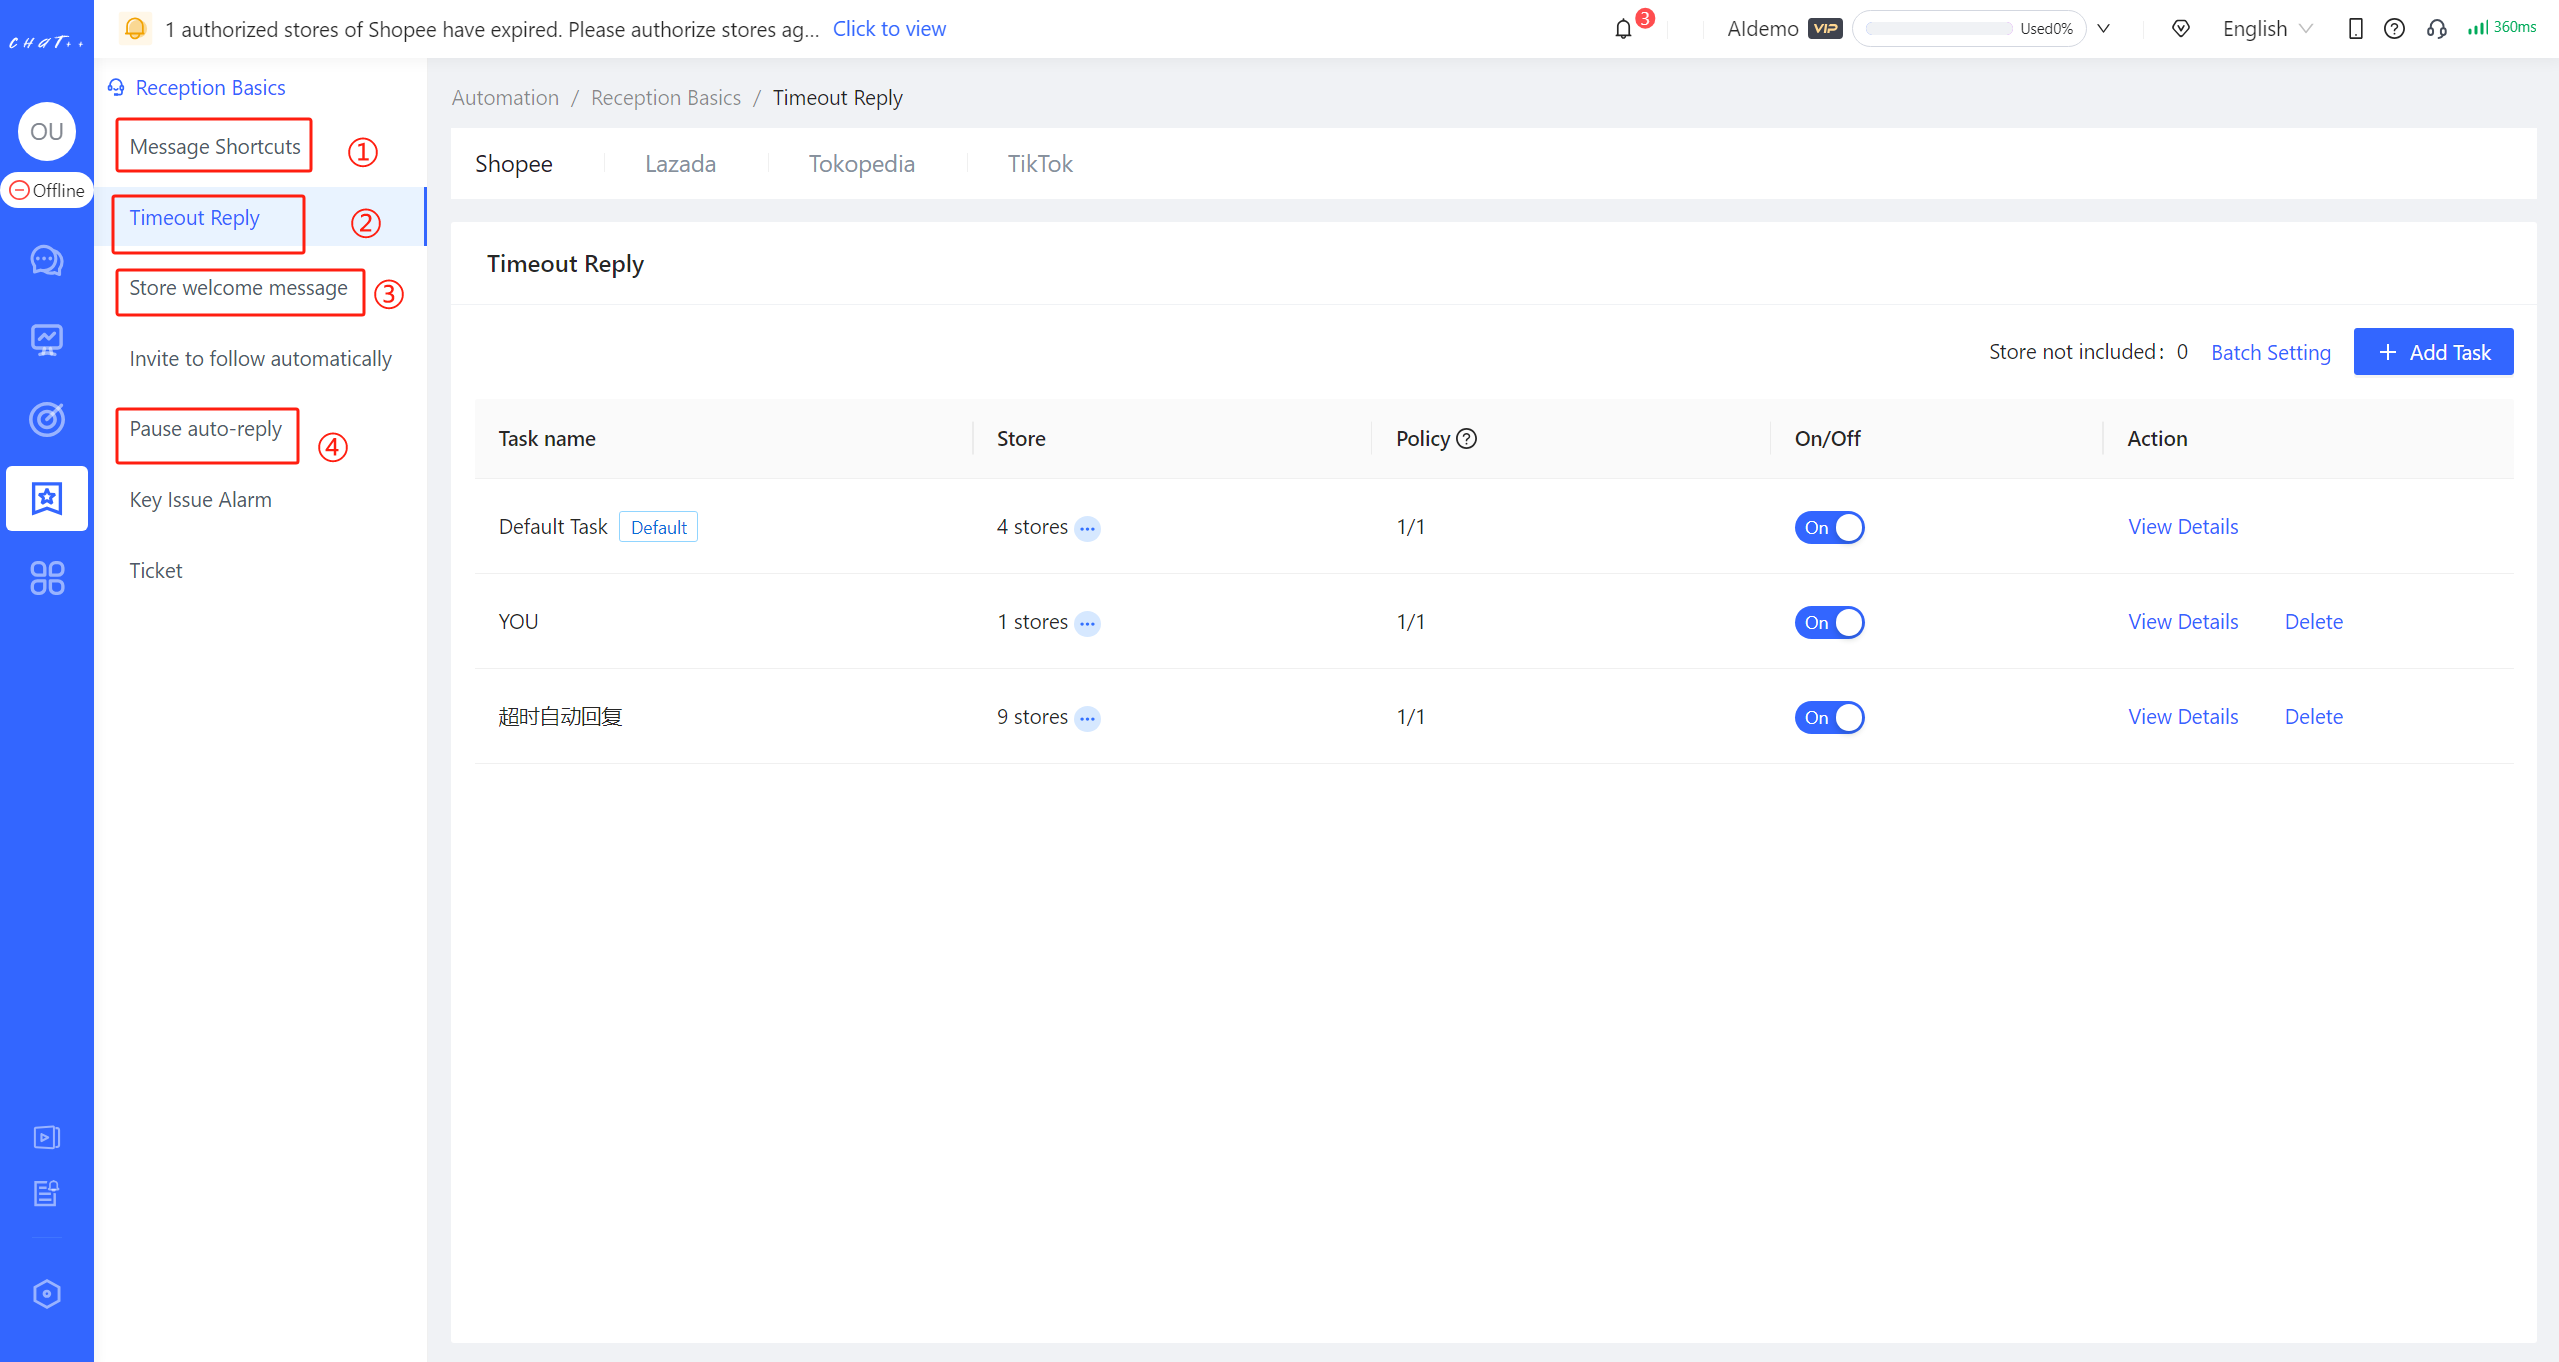
Figure17
- Permission for the "Message ShortcutsTeam Template Configuration": After authorization, the sub-account can modify the team's quick responses on the page of 【left menu bar 'Automation' → 'Reception Basics' → 'Message Shortcuts' (upper picture in red frame ①)】.
- Permission for the "Timeout Reply Configuration": After authorization, the sub-account can view the 【left sidebar 'Automation' → 'Reception Basics' → 'Timeout Reply' (upper picture in red frame ②)】 page and can modify the timeout auto-reply tasks for the authorized store.
- Permission for the "Store welcome message Configuration": After authorization, the sub-account can view the 【left sidebar 'Automation' → 'Reception Basics' → 'Store Welcome Message' (upper picture in red frame ③)】 page and can modify the store welcome message tasks for the authorized stores.
- Permission for the "Key Issue Alarm Configuration": After authorization, the sub-account can view the 【left sidebar 'Automation' → 'Reception Basics' → 'Key Issue Alarm' (upper picture in red frame ④)】 page and can modify the Key Issue Alarm configuration.
- Permission for the "AI Receptionist Configuration": After authorization, the sub-account can view the 【left sidebar 'Automation' → 'AI Receptionist' (lower picture in red frame)】 page and can modify the AI chatbot configuration for the authorized stores.
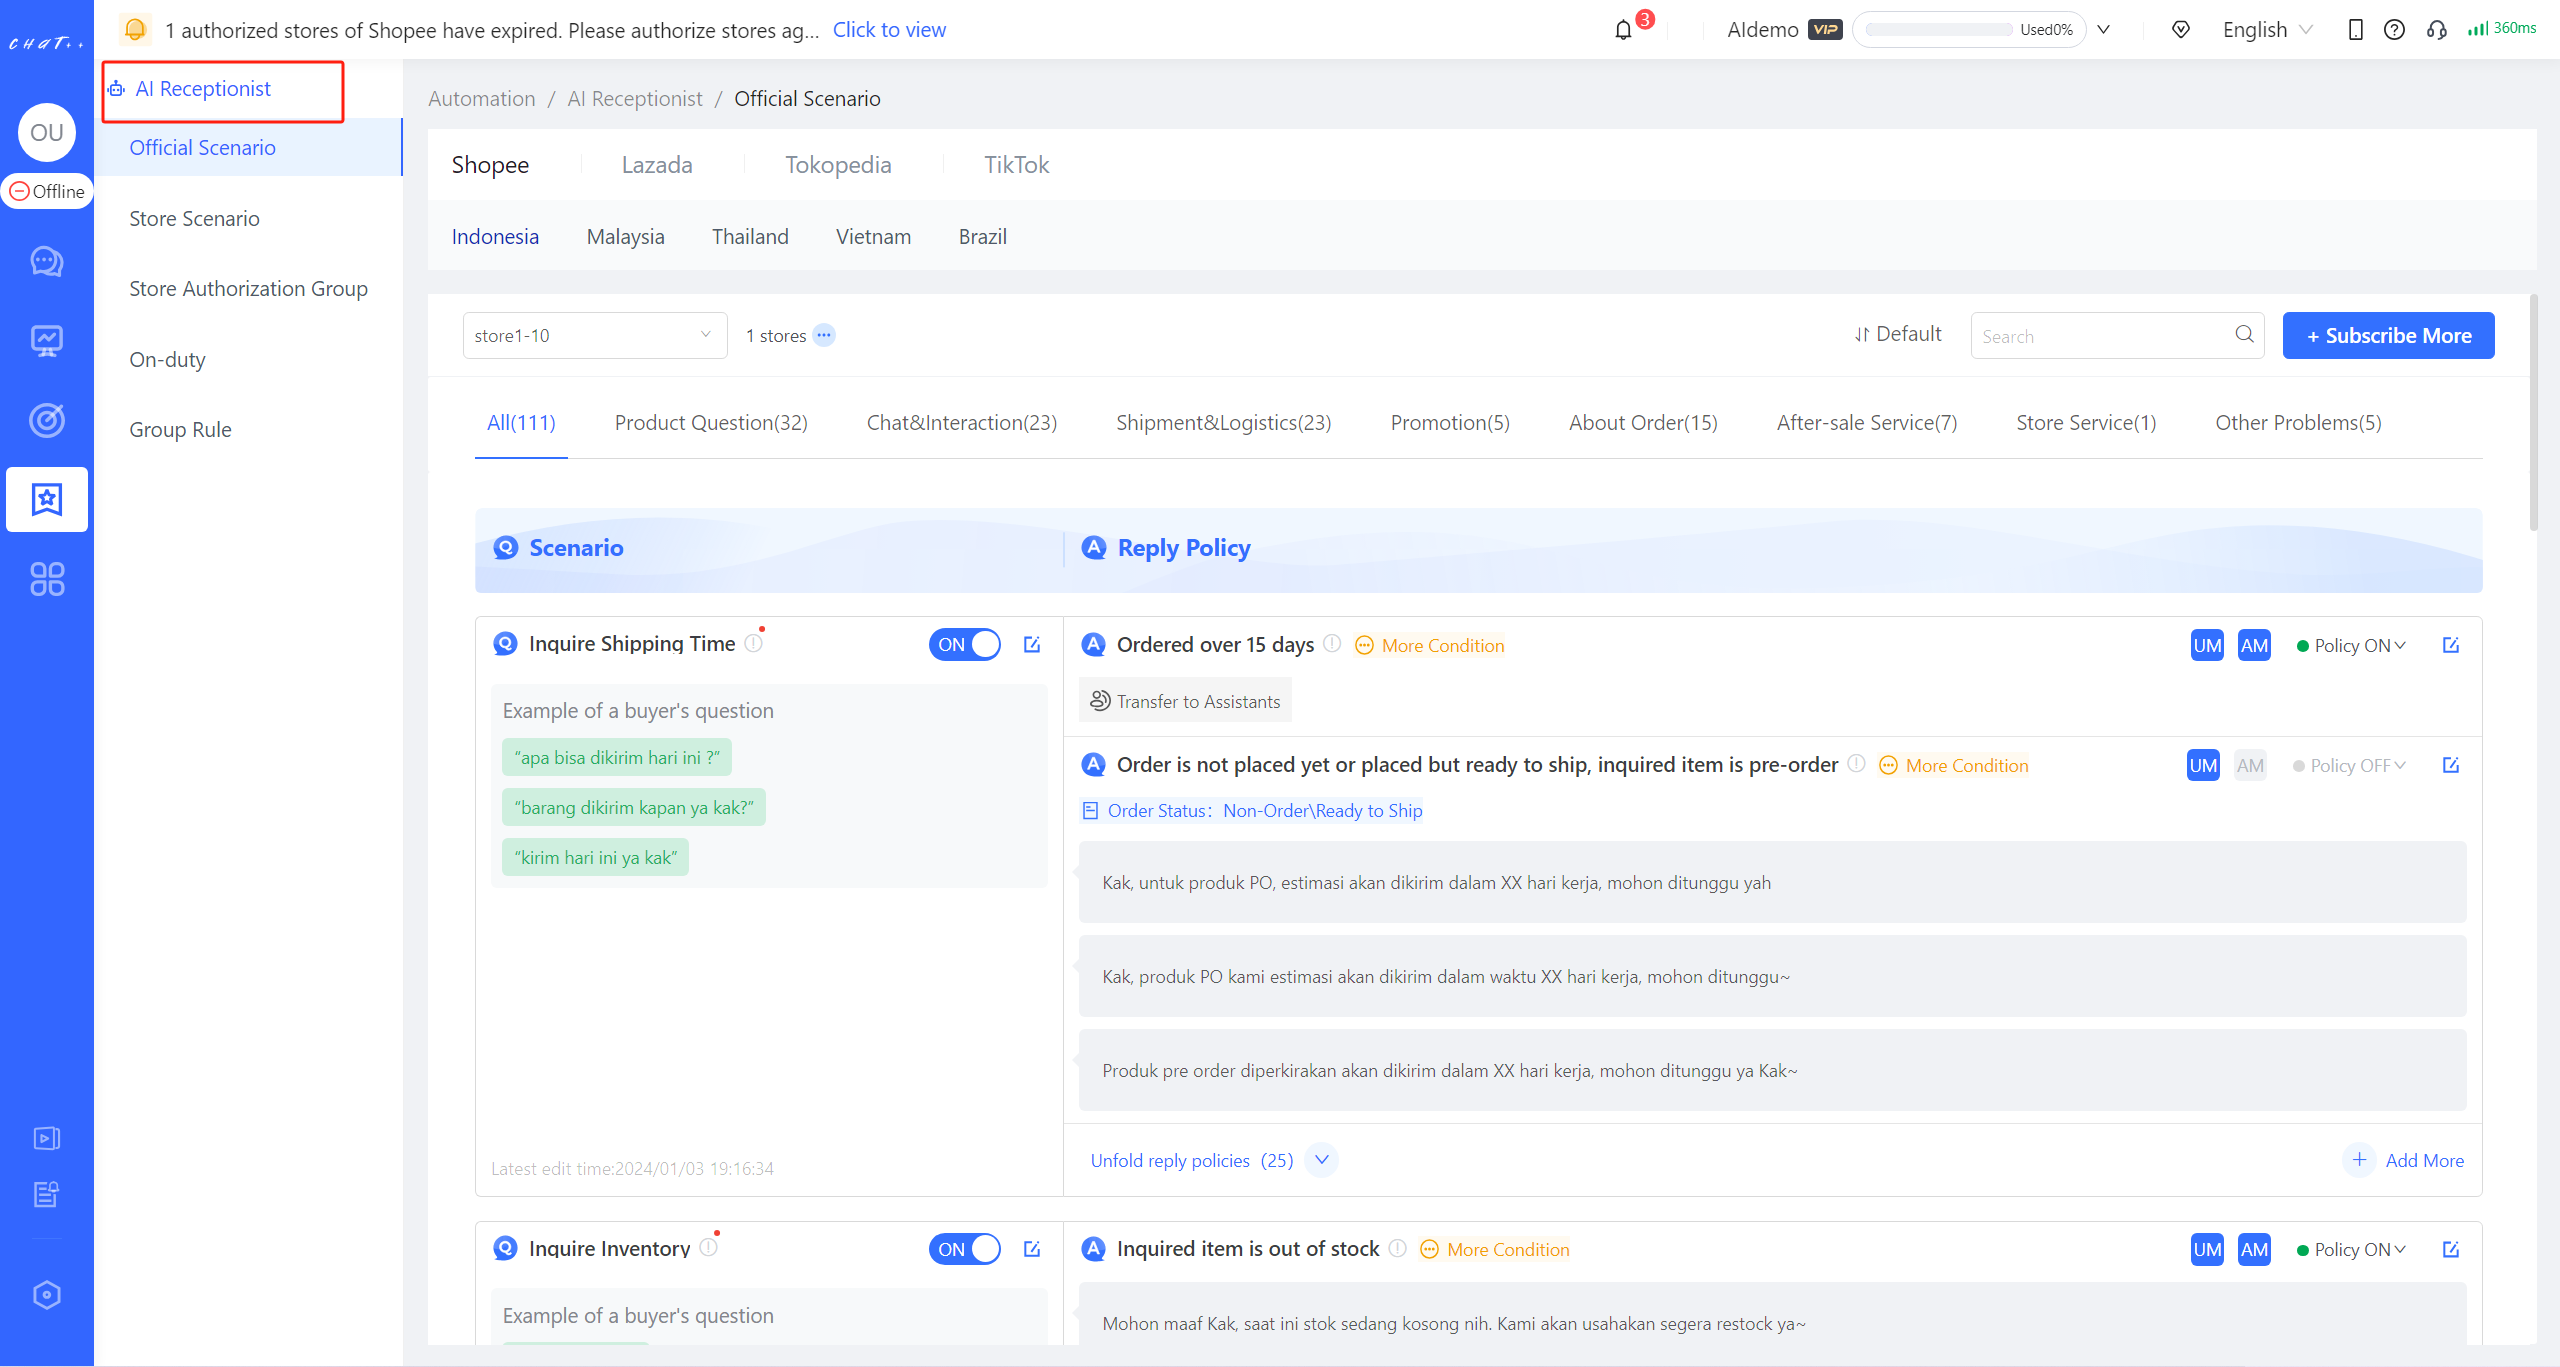
Figure18
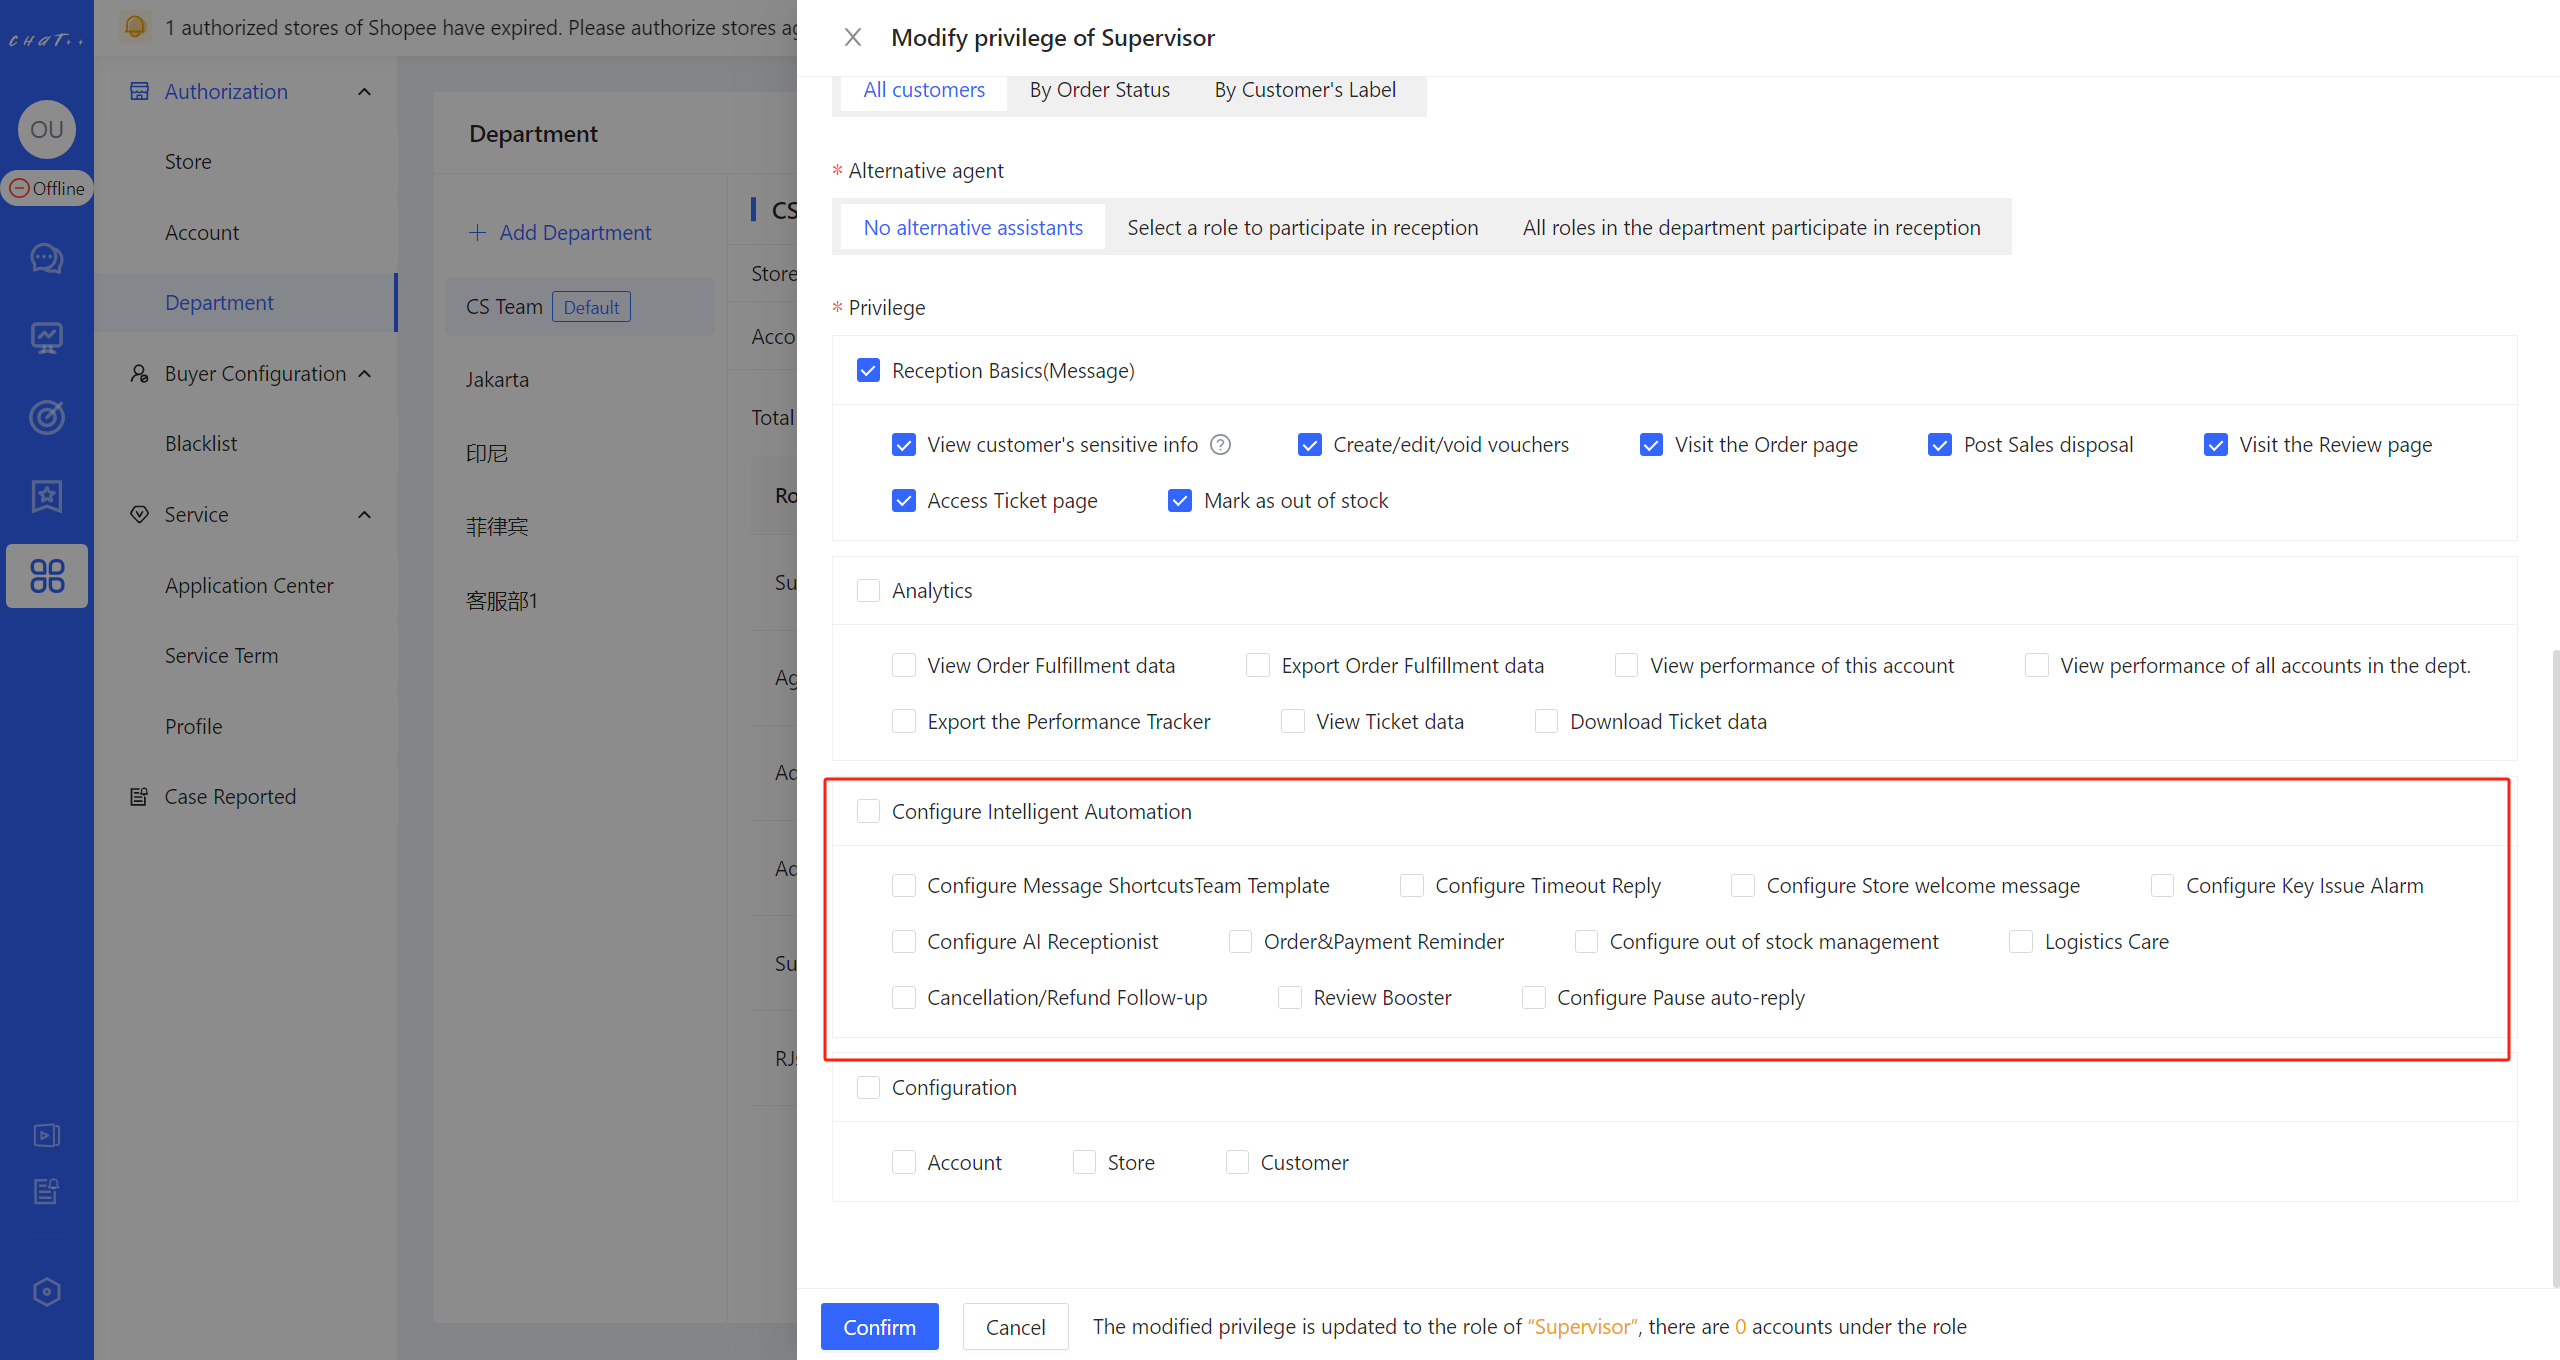
Figure19
- Permission for the "Order Reminer Configuration": After authorization, the sub-account can view the scenarios for prompting order reminder and can modify the task configuration for the authorized stores.
- Permission for the "Out of Stock Management": After authorization, the sub-account can view the out of stock scenarios and can modify the task configurations for the authorized stores.
- Permission for the "Logistics Care Configuration": After authorization, the sub-account can view the various scenarios under the logistics care section and can modify the task configurations for the authorized stores.
- Permission for the "Cancellation/Refund Follow-up": After authorization, the sub-account can view the various scenarios under the Cancellation/Refund Follow-up section and can modify the task configurations for the authorized stores.
- Permission for the "Review Booster": After authorization, the sub-account can view the scenarios under the review booster section and can modify the task configurations for the authorized stores.
⚠️ Attention:
❗'Message Shortcuts - Team Template' and 'Key Issue Alarm' currently do not support configuration by distinguishing between stores. Once modified, it will take effect globally, and caution should be taken when granting authorization.❗In the "Timeout Reply, Store Welcome Message, AI Receptionist, Order Reminder, and other Automation scenarios," for the issue of configuring multiple stores, it supports adding multiple stores to one task. Therefore, as long as any one of the stores in the task is authorized, the sub-account can modify the task configuration. This may affect unauthorized stores, so it is recommended to create tasks with the same store scope in each Automation scenario when creating departments or roles.
Permission for the "Authorization"
The scope of authority in this section affects the various pages in the 'Authorization' menu bar.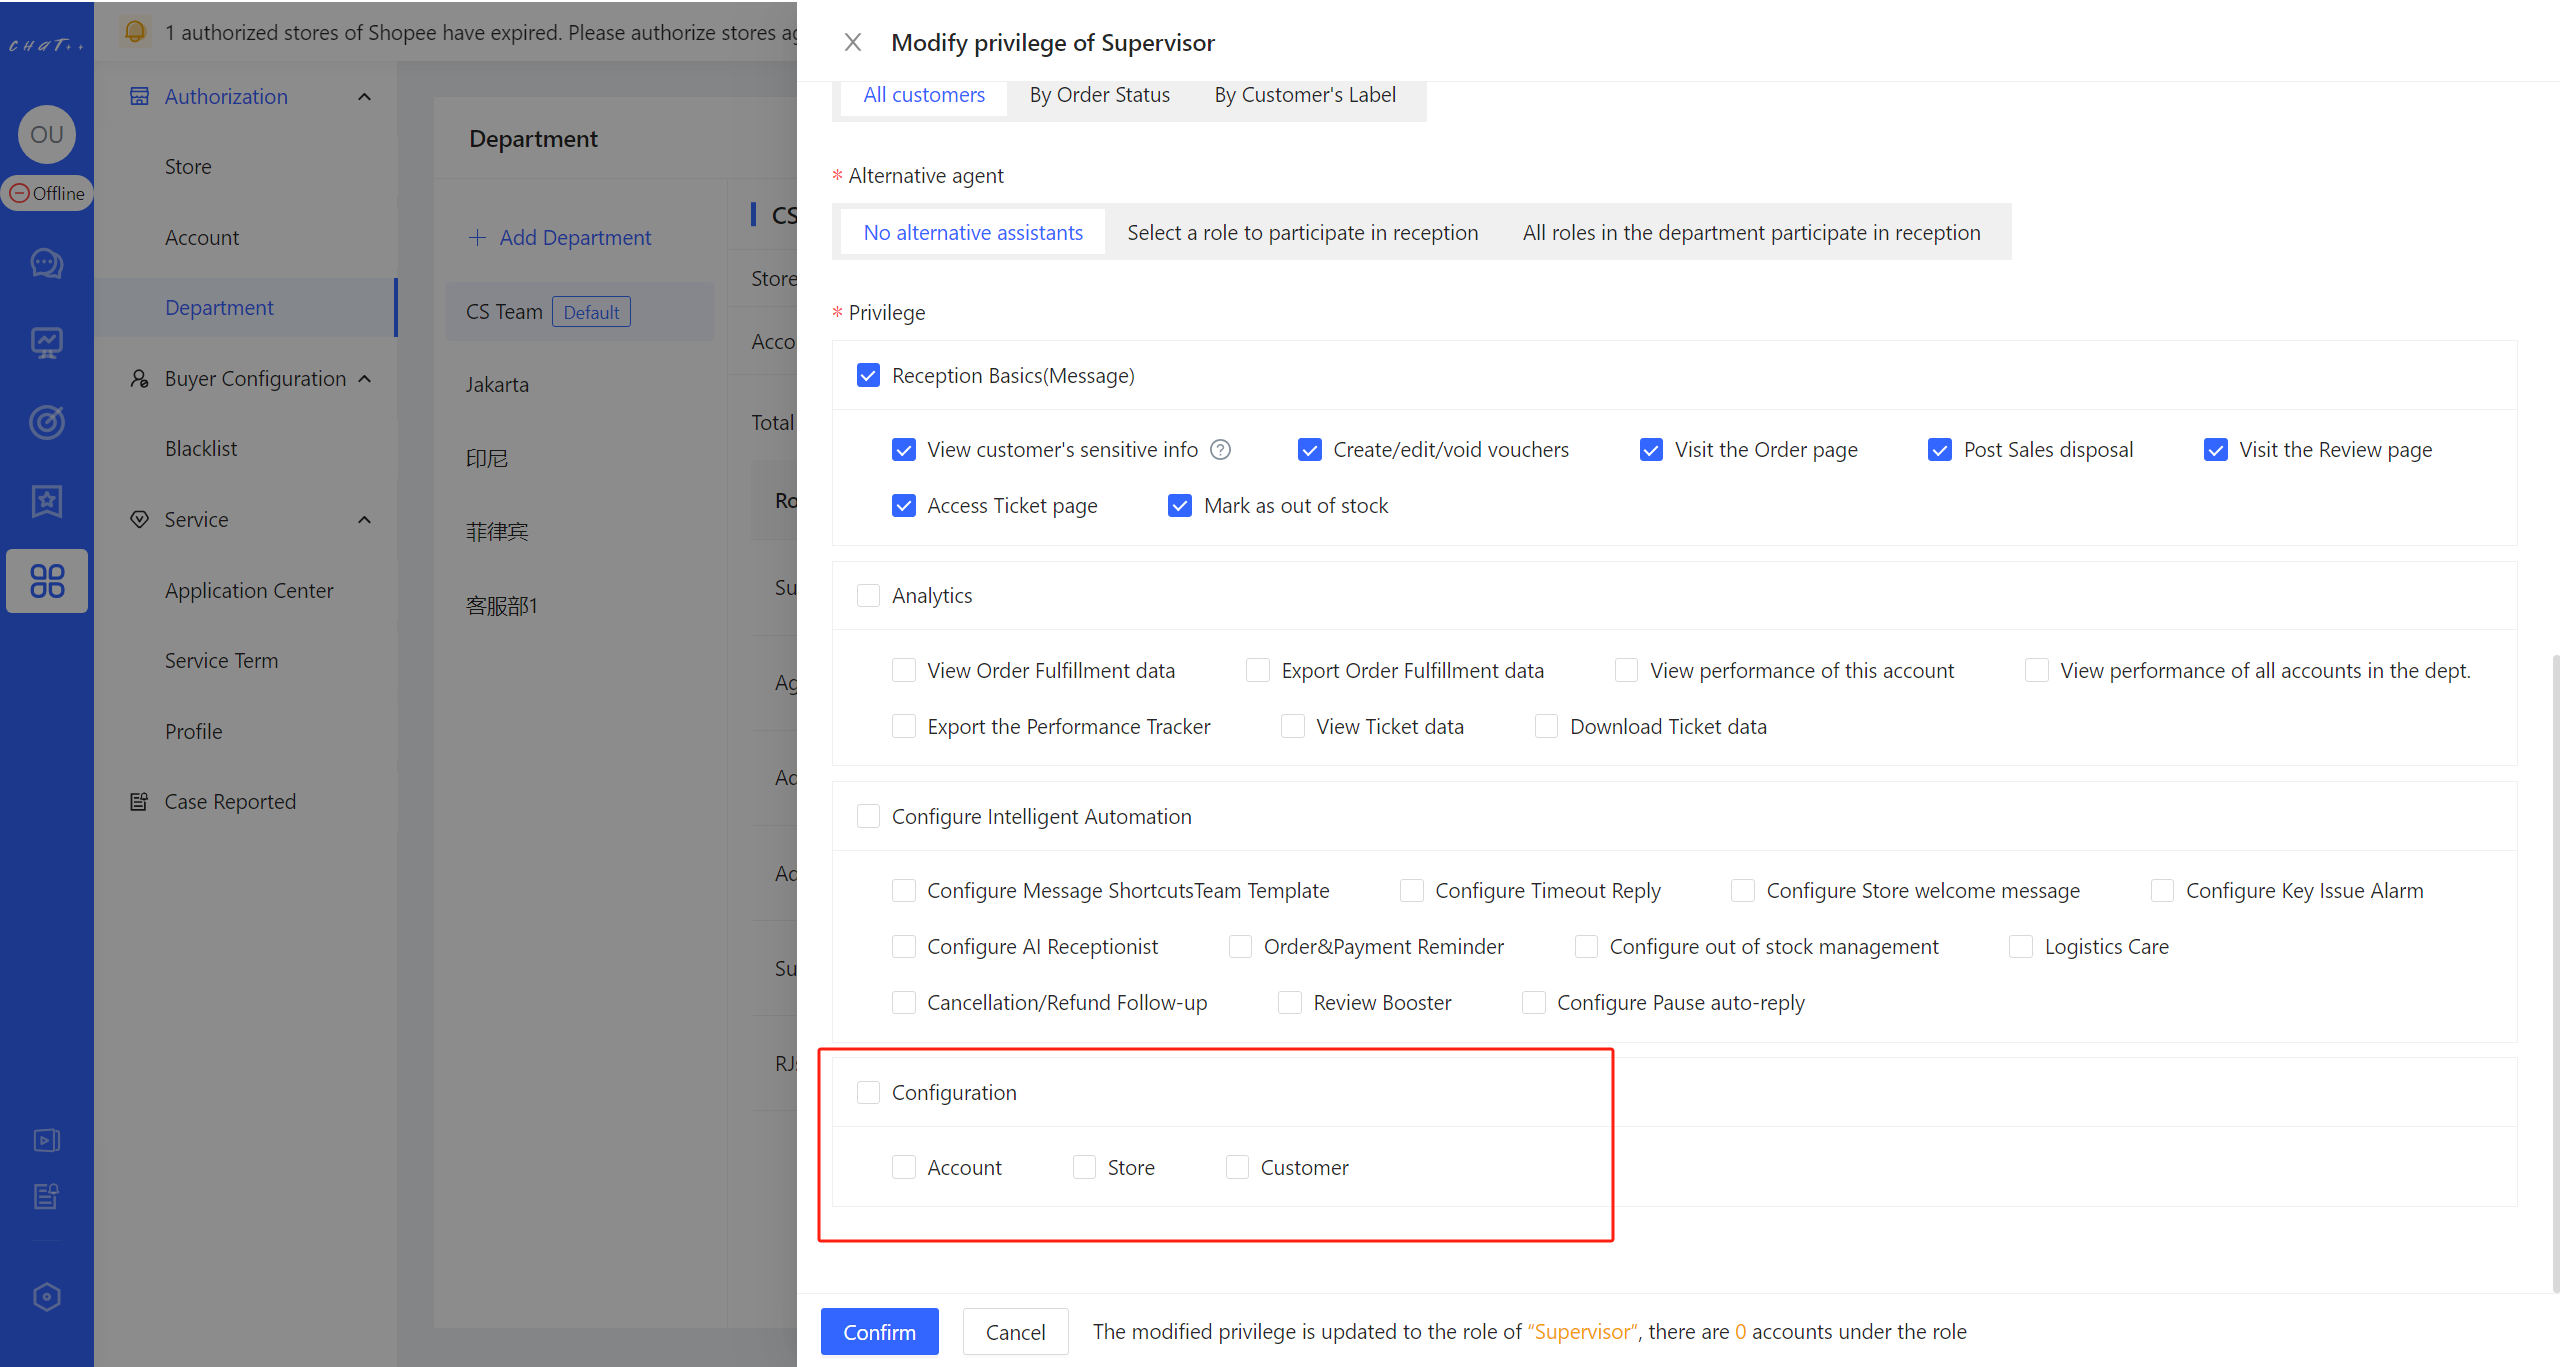
Figure20
- Store Authorization: After authorization, the sub-account in the 【left sidebar 'Authorization' → 'Store Authorization' (lower picture in red frame ①)】 page can add and remove stores, view authorized stores, and modify the aliases of the authorized stores.
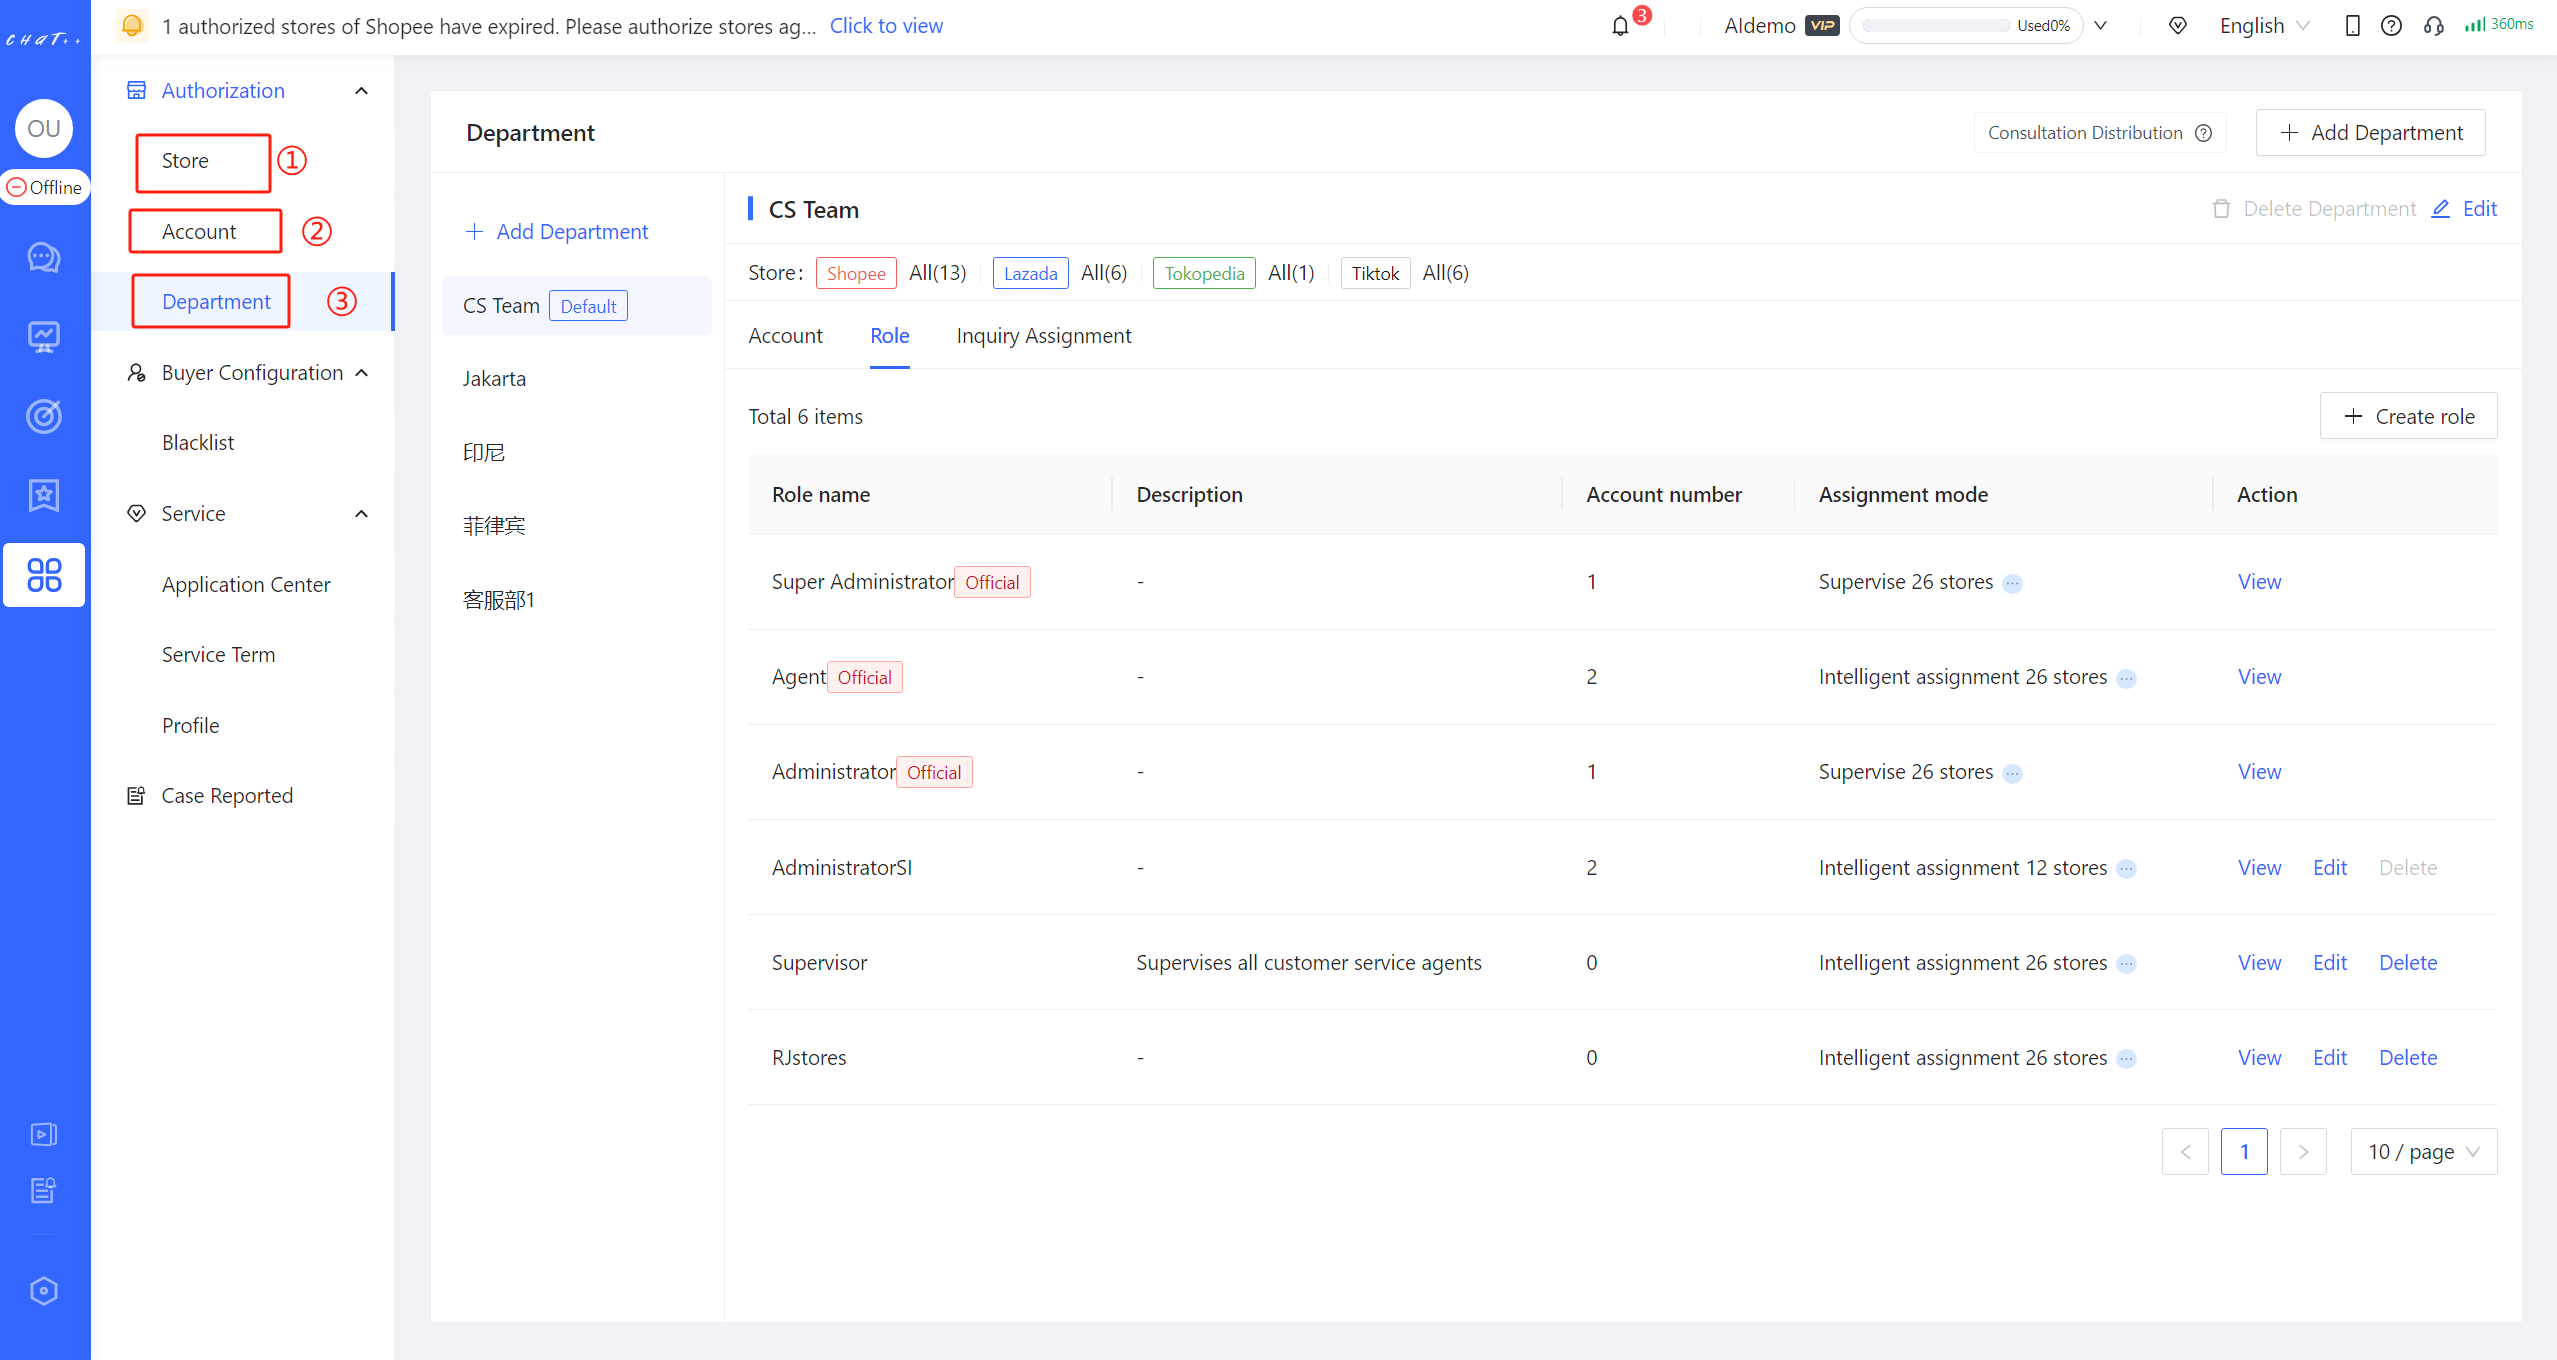
Figure21
- Account Authorization: After authorization, the sub-account in the 【left sidebar 'Authorization' → 'Account Authorization' (upper picture in red frame ②) and 'Department Management' (upper picture in red frame ③)】 page can manage all sub-accounts under the current department and account.
- Buyer Configuration: After authorization, the sub-account in the 【left sidebar 'Authorization' → 'Buyer Configuration' → 'Blacklist' (lower picture in red frame)】 page can view blacklist information and modify blacklist settings, as well as remove buyers from the blacklist.
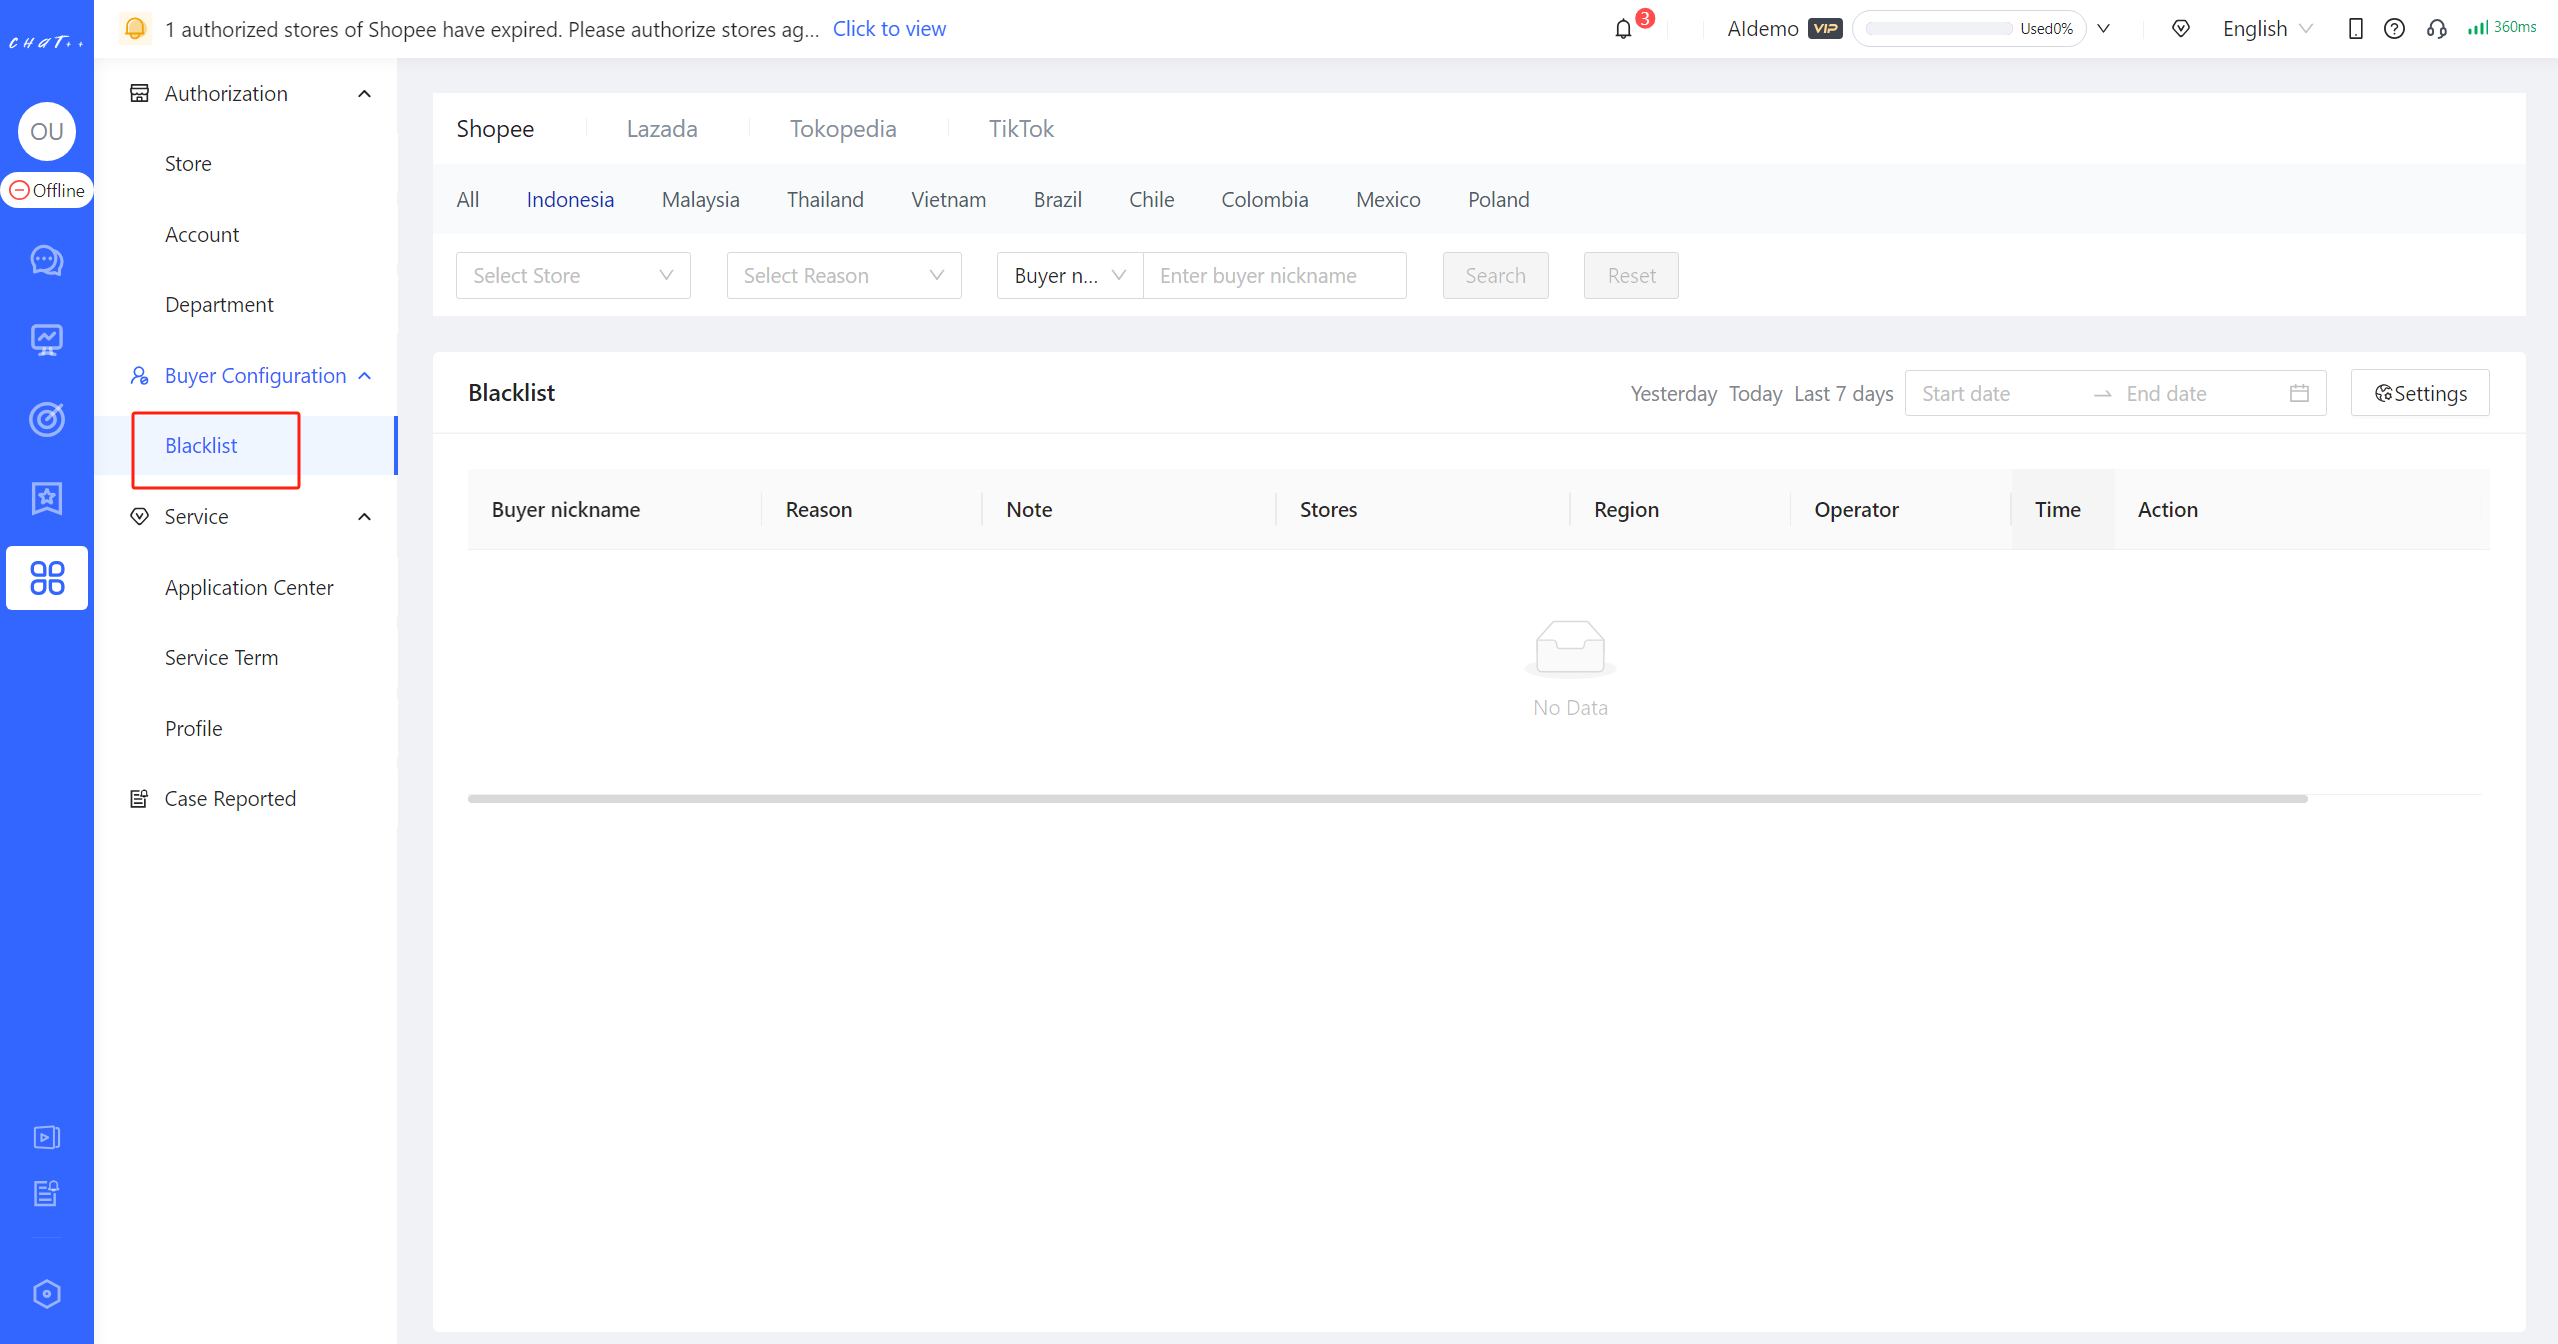
Figure22
⚠️ Note: The permissions within the Authorization module are mostly managerial. Please exercise caution when authorizing sub-accounts.
Department Authorization
Through the two steps of 'Store Division' and 'Role Creation,' all permissions have been allocated. Finally, the account needs to be added to the Department Authorization and associated with a Role to complete the distribution of account permissions.
Select a department from the department list, then click on 'Department Authorization' (lower picture in red frame) to enter the department account page.
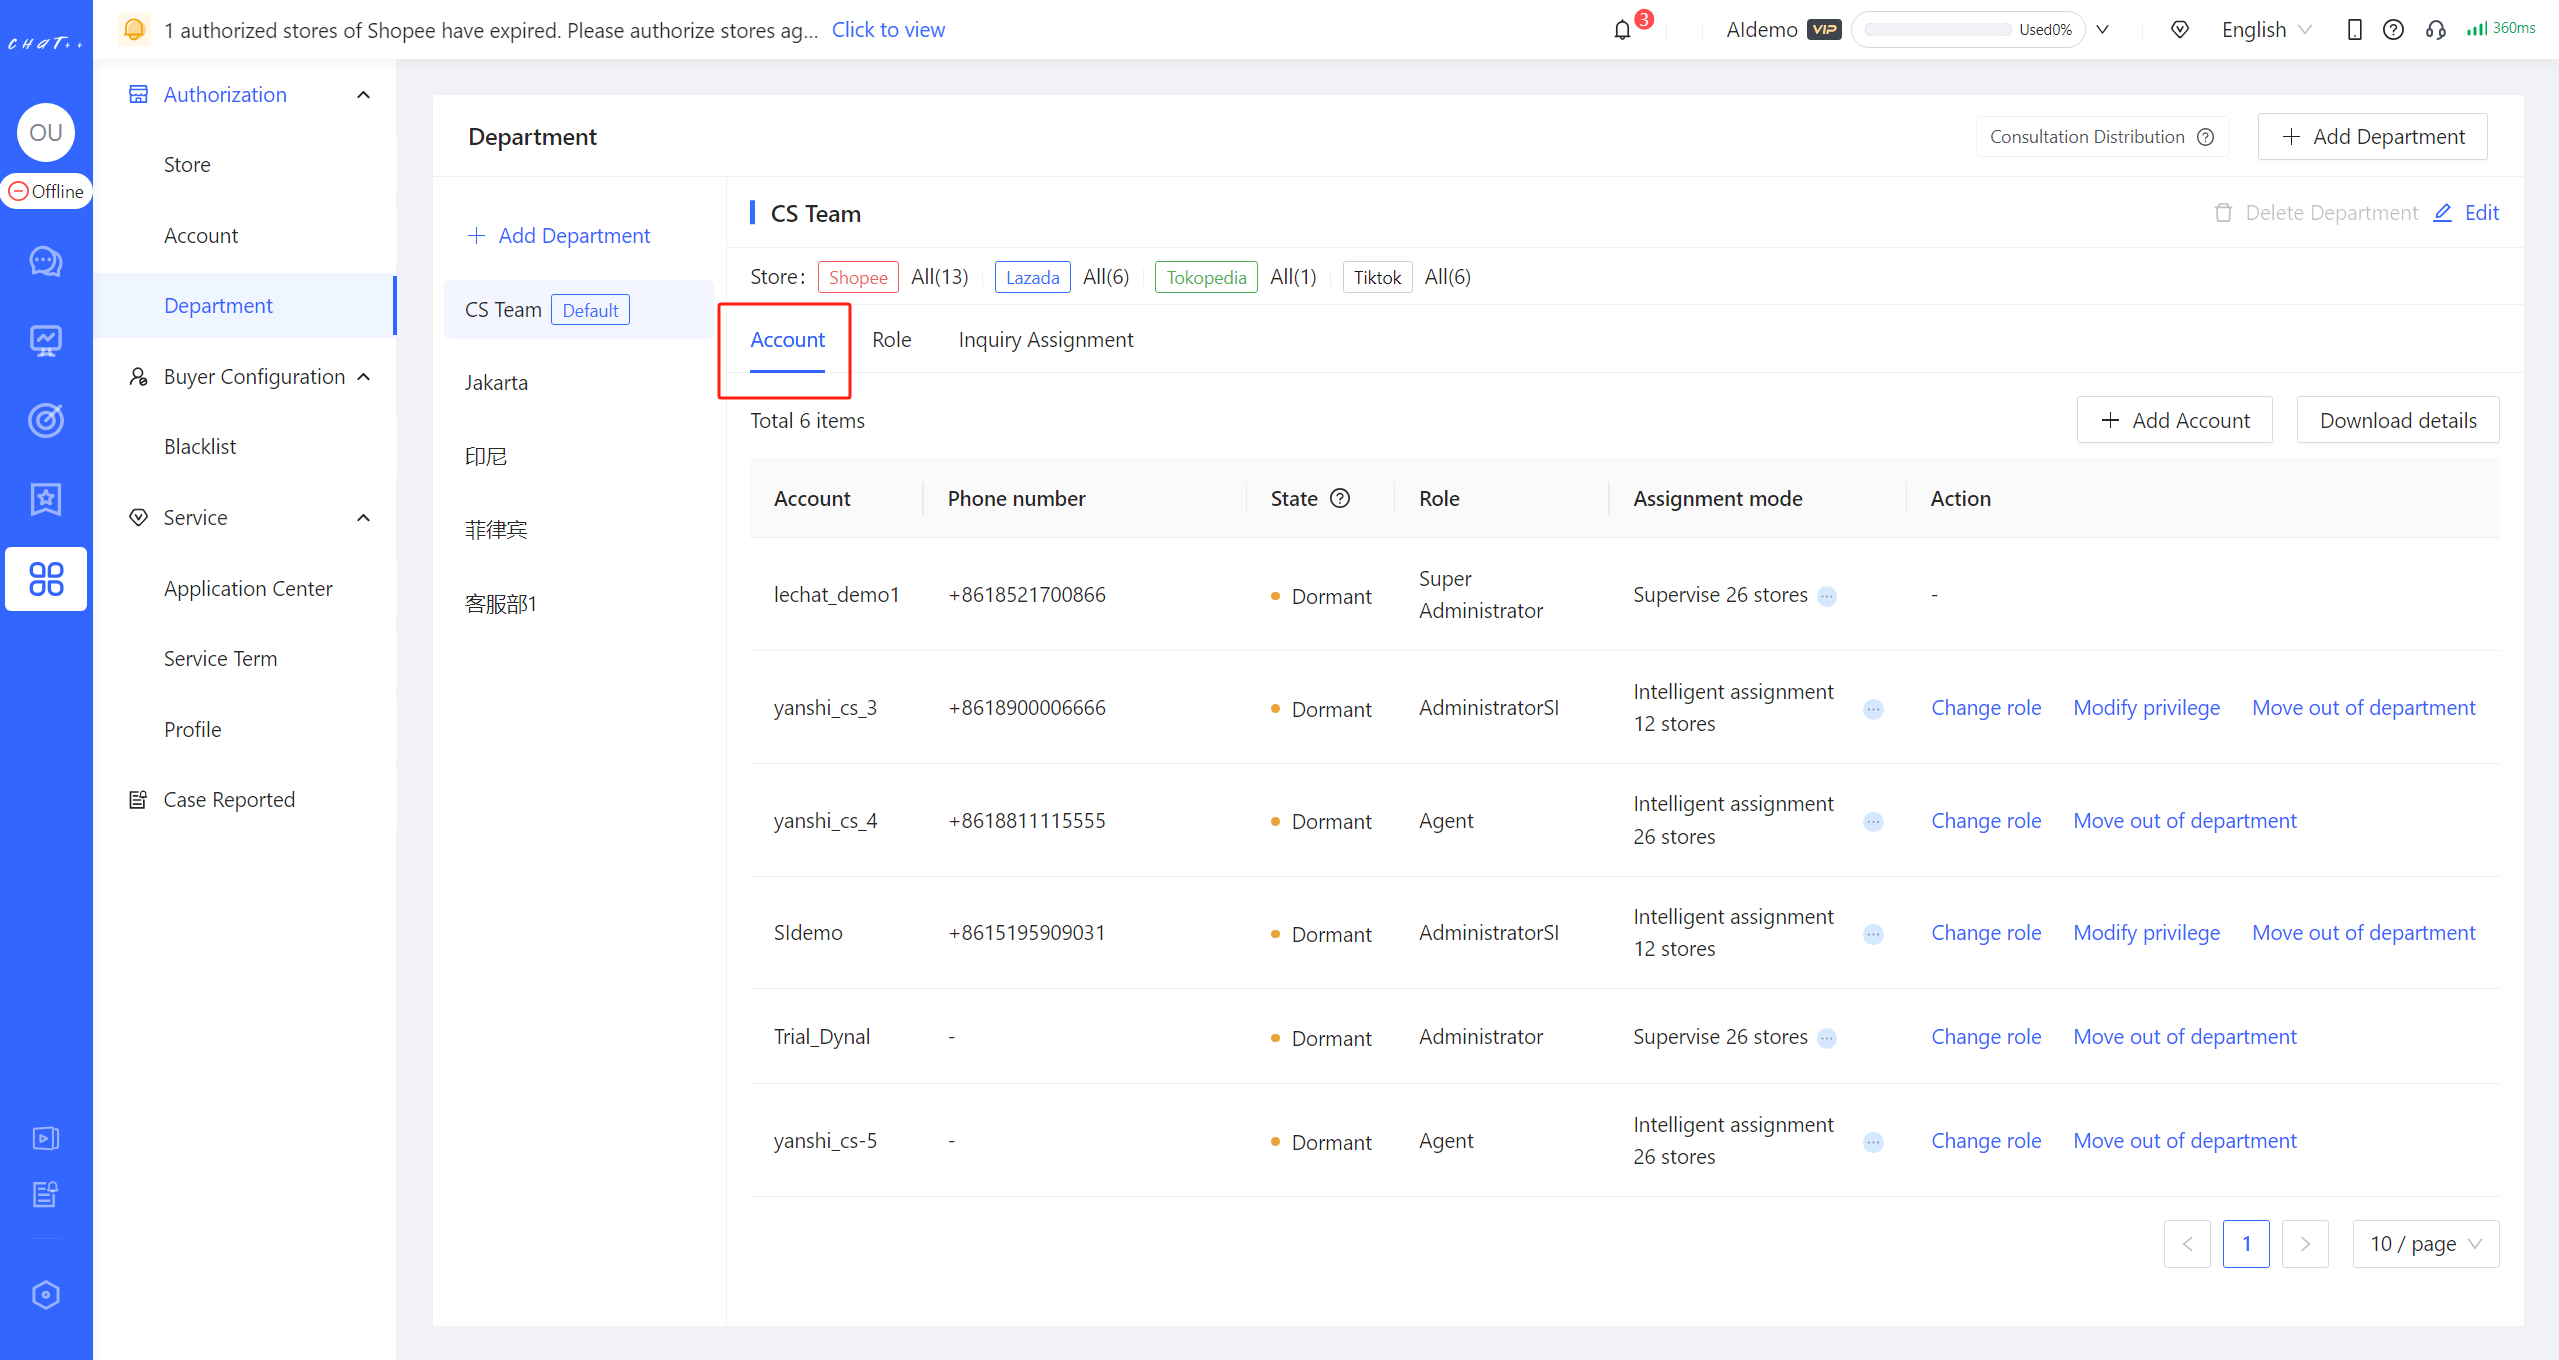
Figure23
Creat Department Account
👆Click on 'Add Account' (lower picture in red frame), select the account you need to add, as well as the role that the sub-account will hold in the department, to complete adding the department account. 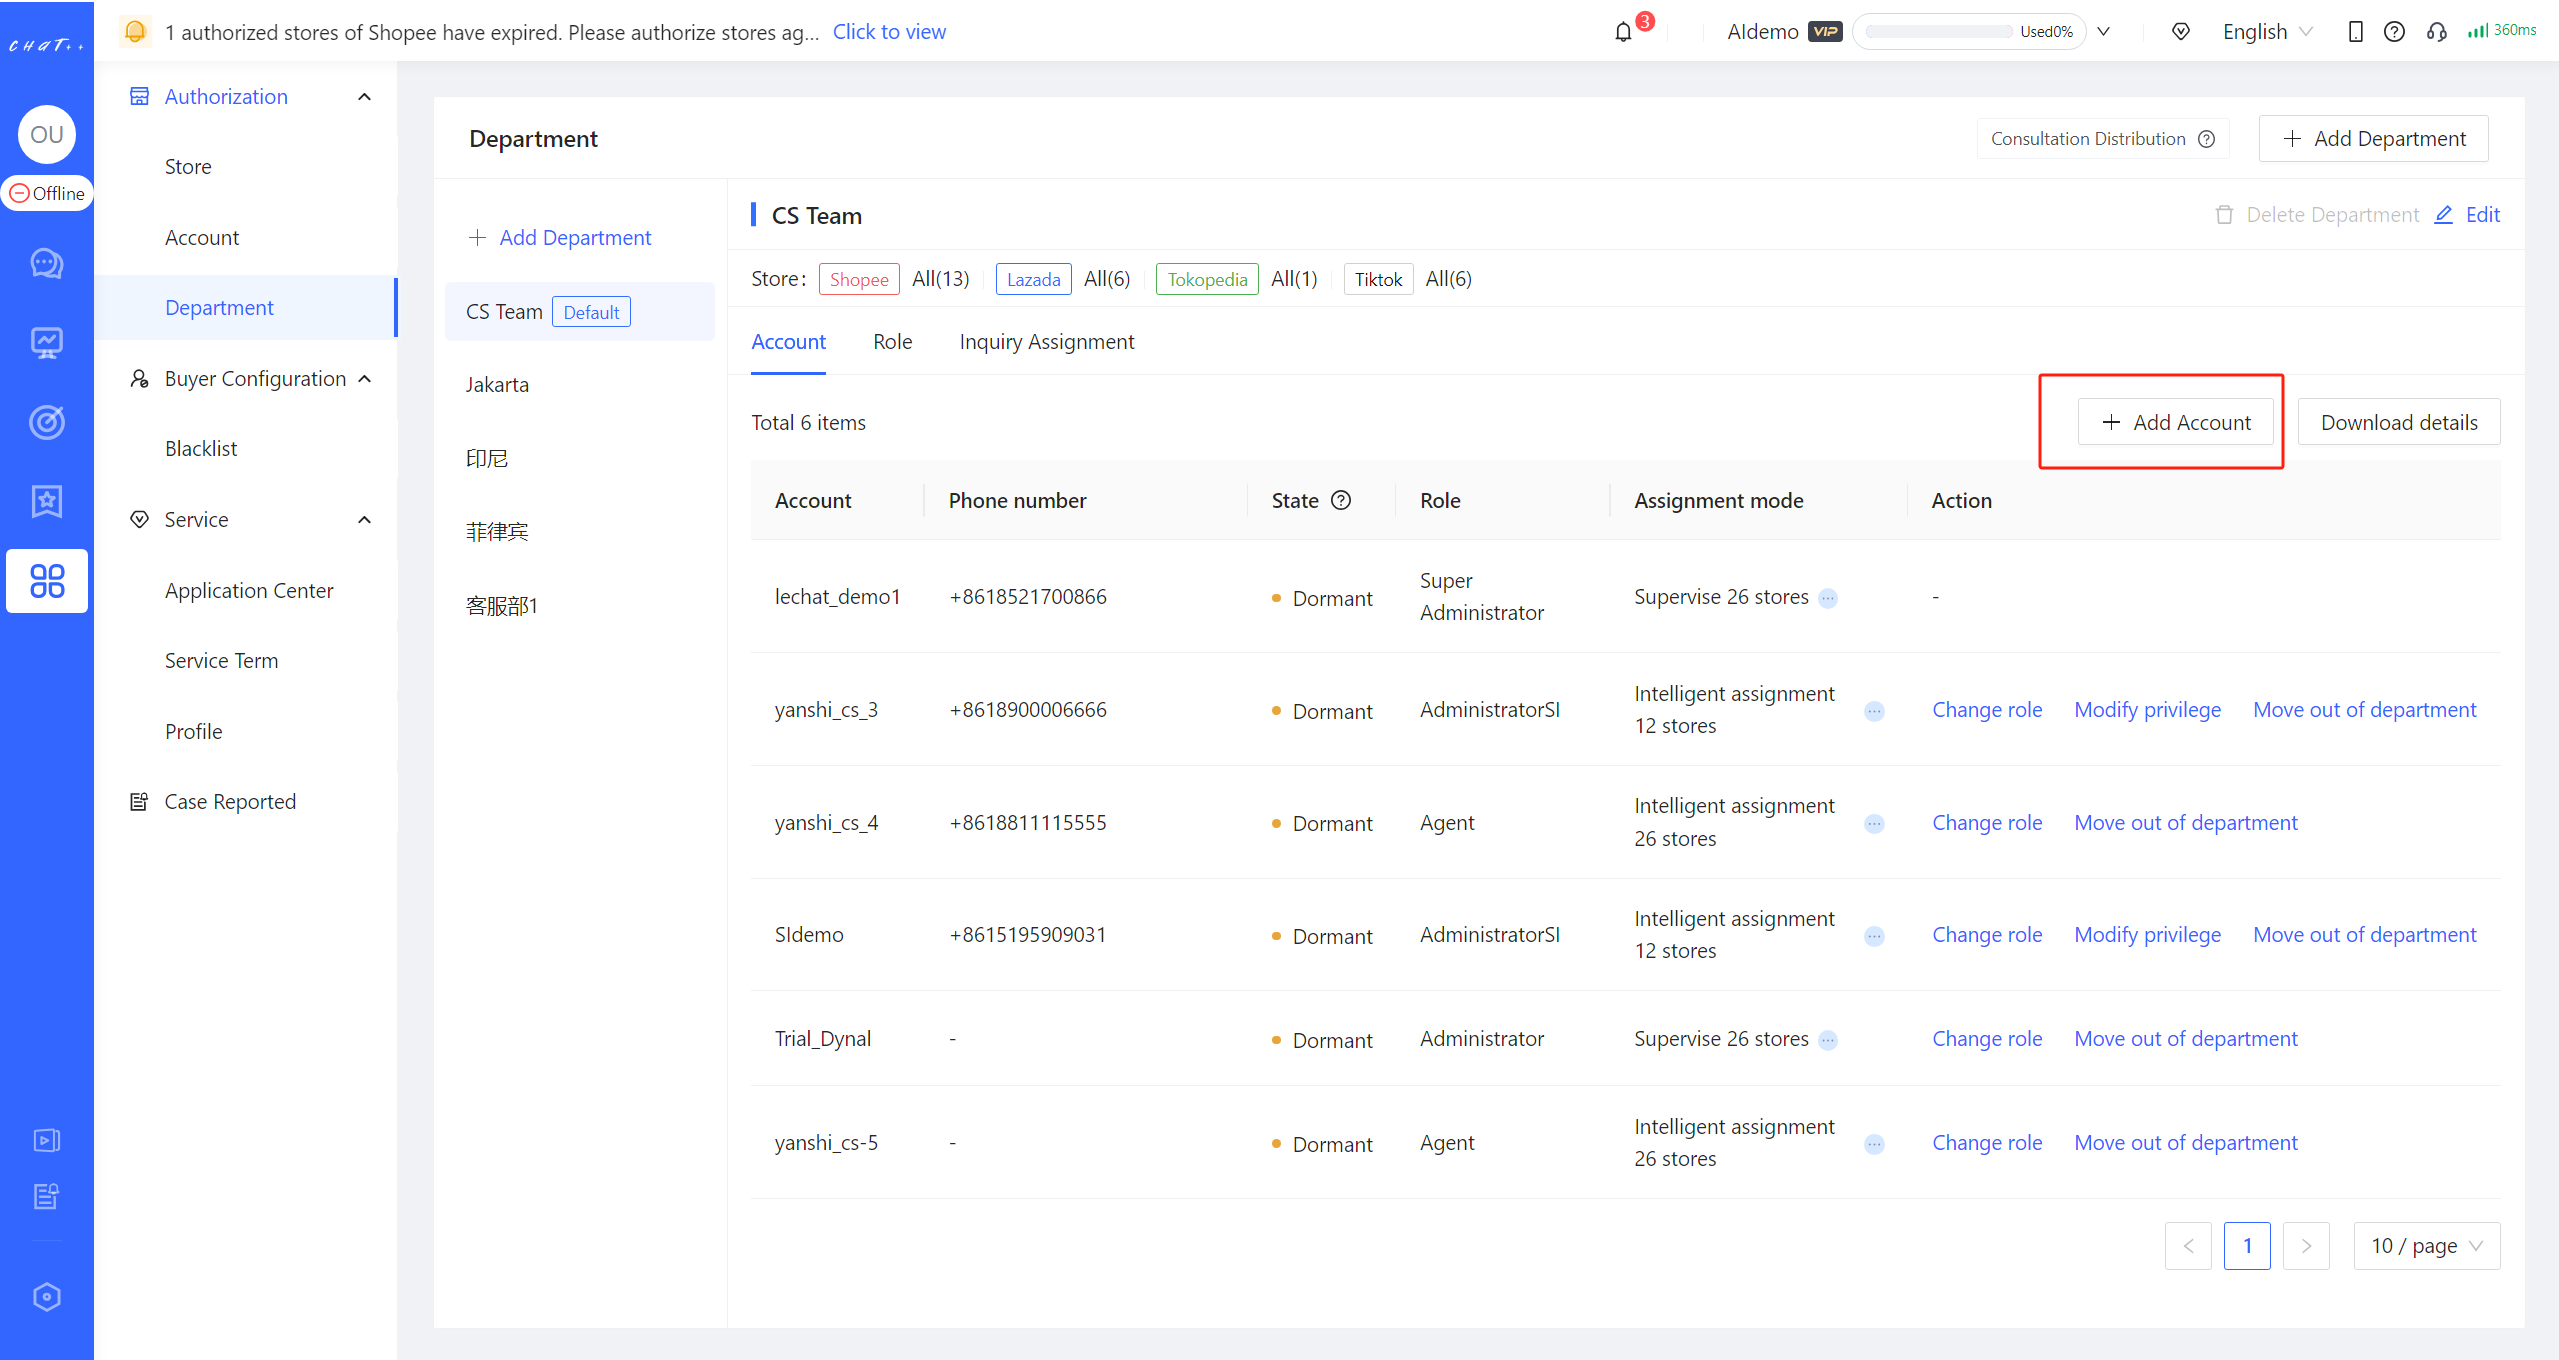
Figure24
- A sub-account can join multiple departments at the same time, but in each department, it can only hold one Role.
⚠️ It is important to ensure that each Role a sub-account holds in different departments has consistent 'Administrator View,' 'Store Authorization,' and 'Add/Delete Sub-account' permissions. Otherwise, inconsistent permissions can lead to conflicts and failure to add the account.
👉 Each permission needs to be consistently authorized. For example, if all roles grant 'Store Authorization' permission and none grant 'Add/Delete Sub-account' permission, there will be no conflicts
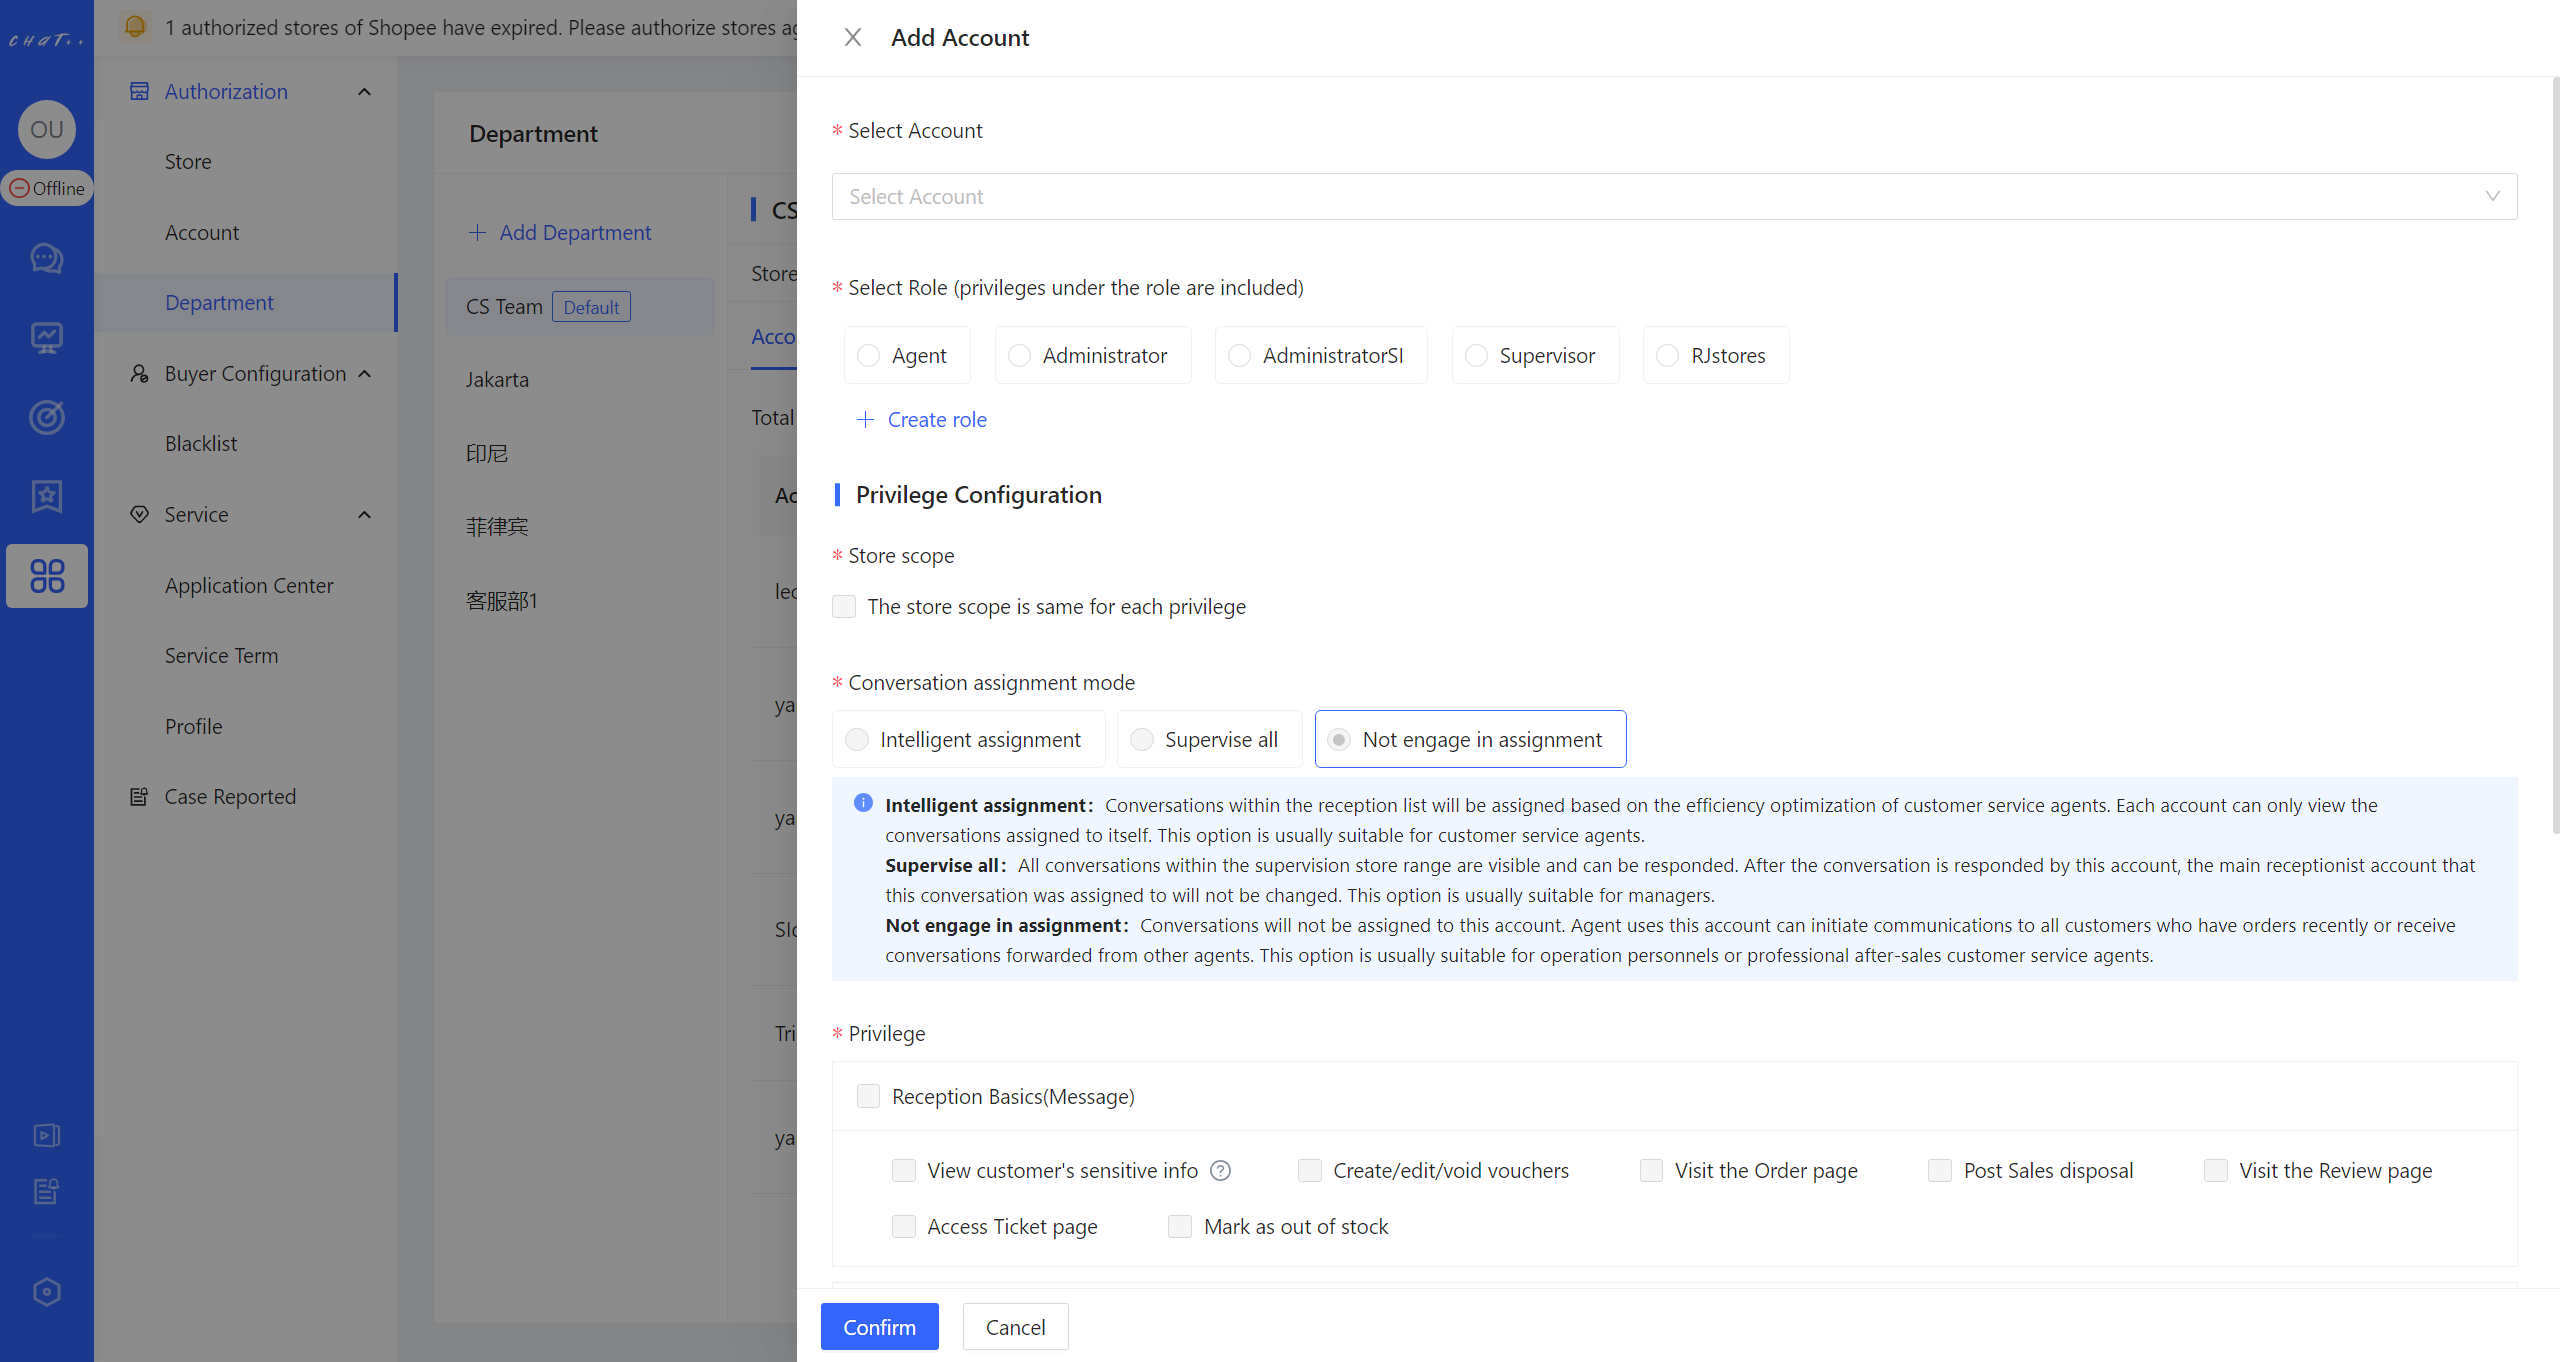
Figure25
Change Role
- After the sub-account joins the department, you can switch its role within the department by clicking on 'Change Role' in the left menu bar under 'Configuration' and then 'Department' (as indicated by the red box in the image)
Modify Priviledge
- After the sub-account joins the department, you can modify its permissions by clicking on 'Modify Priviledge' in the left menu bar under 'Configuration' and then 'Department' (as indicated by the red box in the image).
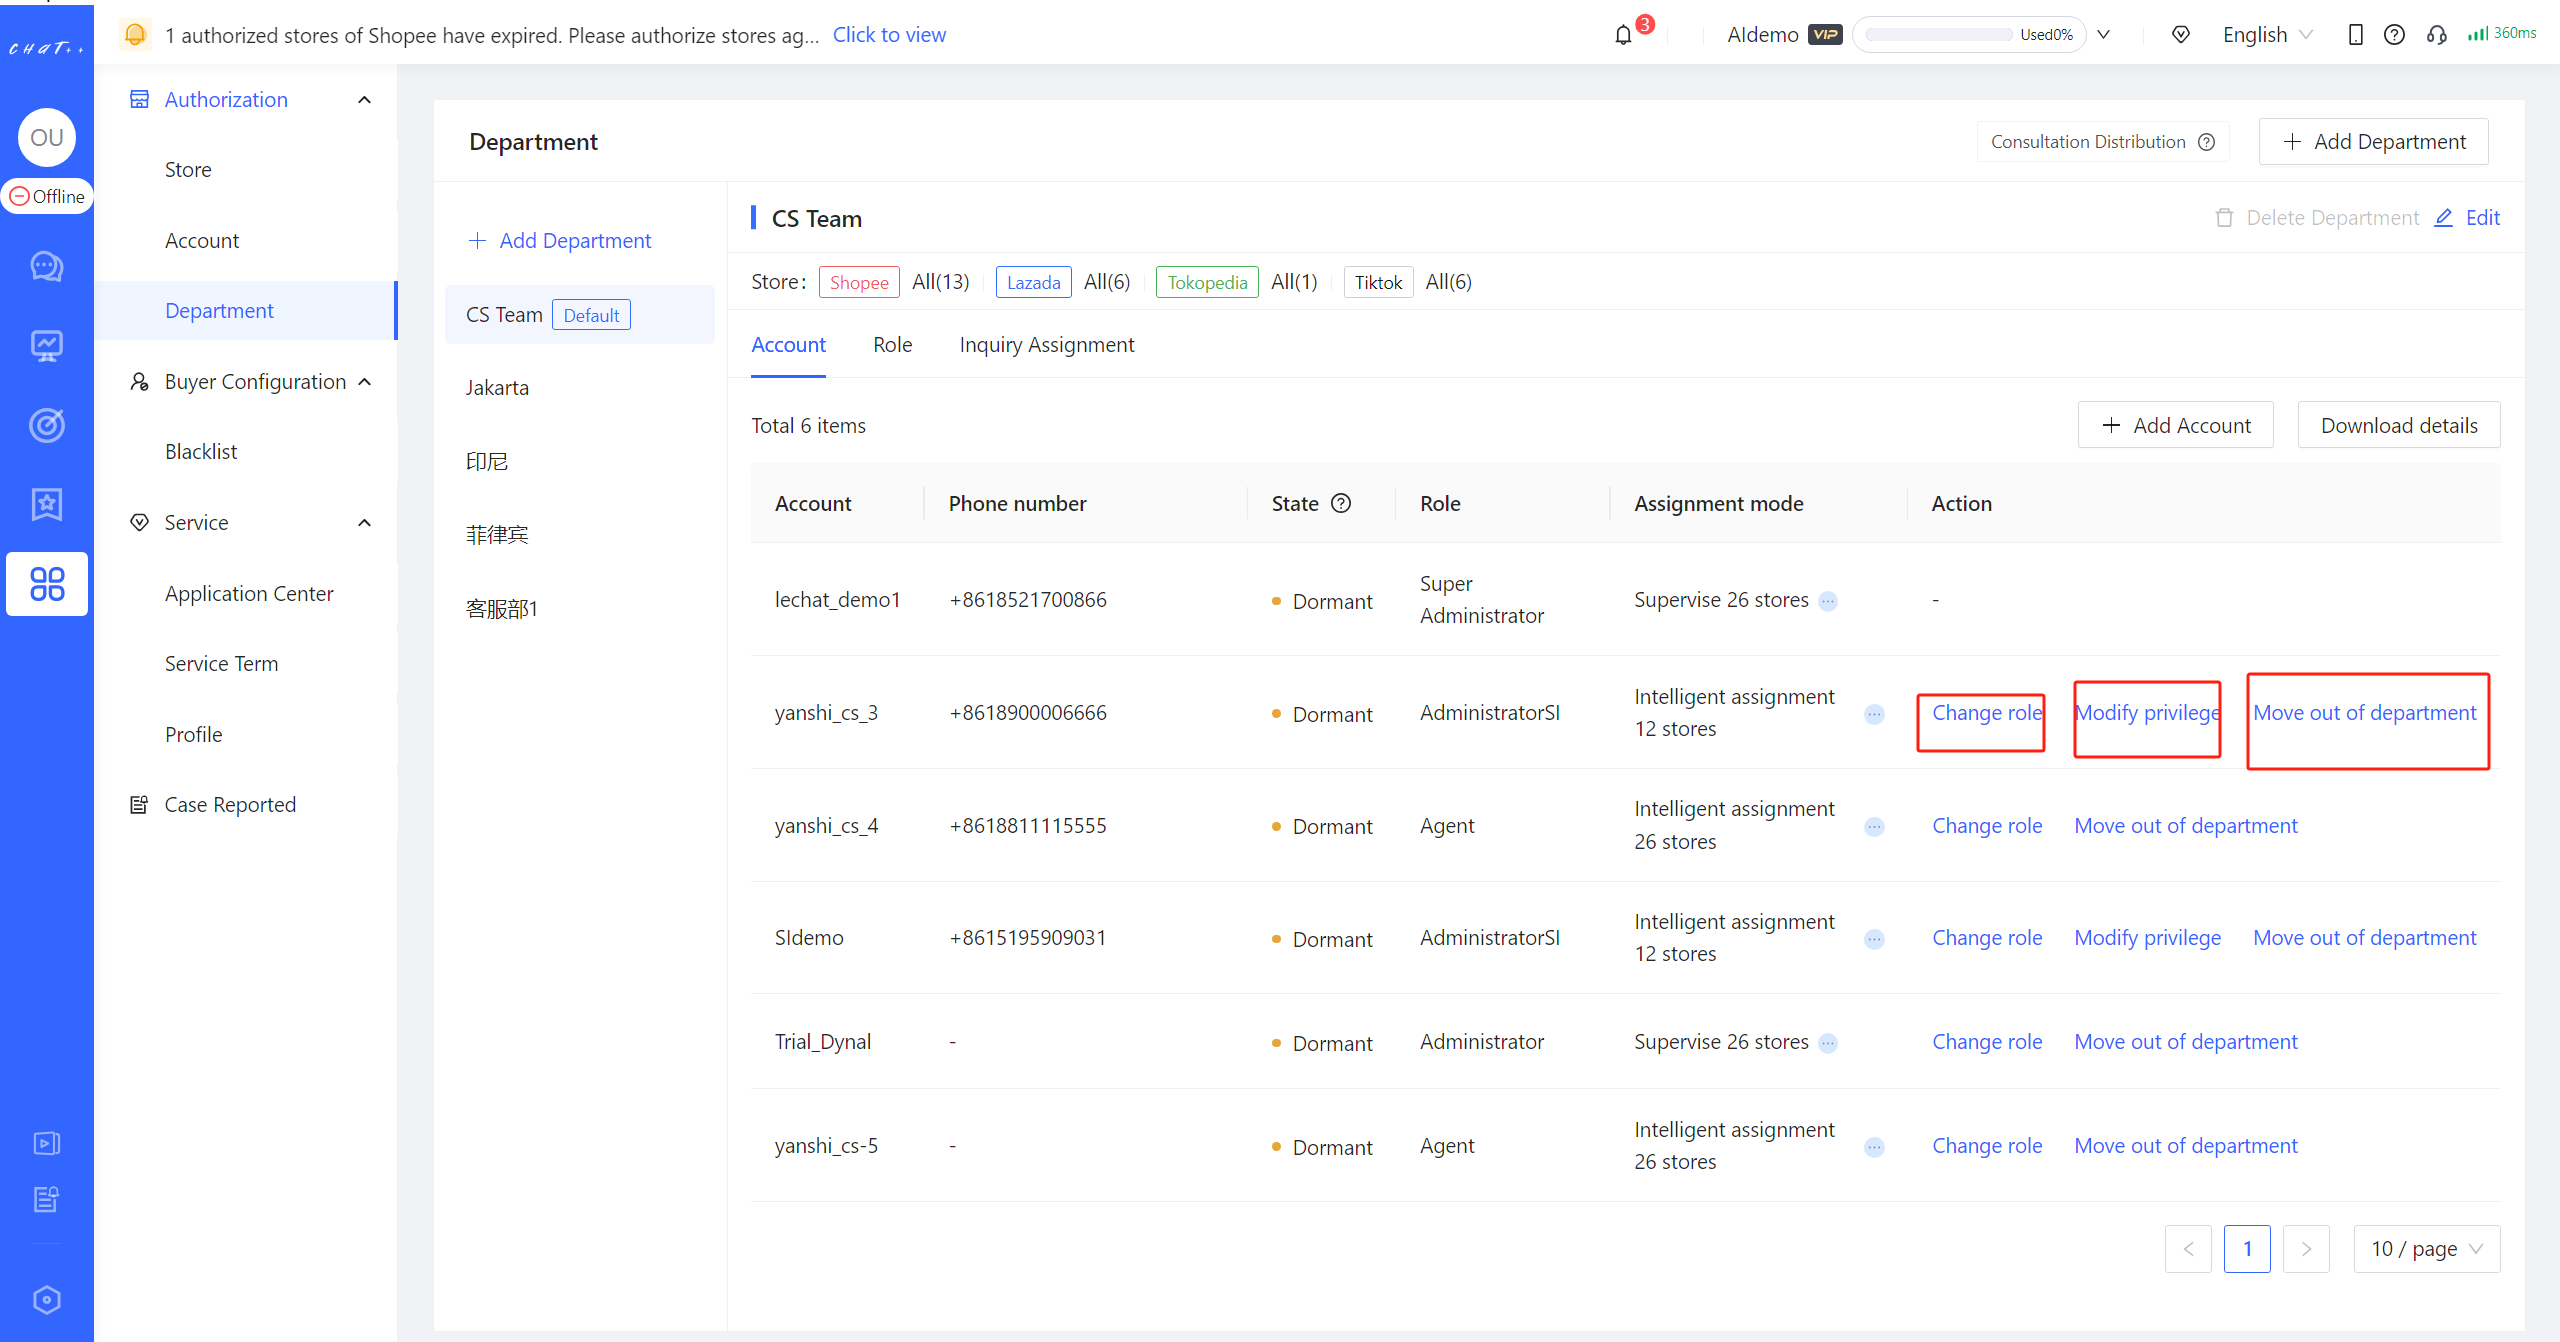
Figure26
- In the 'Configuration' under the left menu bar, navigate to 'Account' On this page, you can also modify the department and role of sub-accounts from the perspective of individual accounts >>>For a detailed introduction to account management, please refer to the provided link by navigating to 'Configuration' in the left menu bar and selecting 'Account'
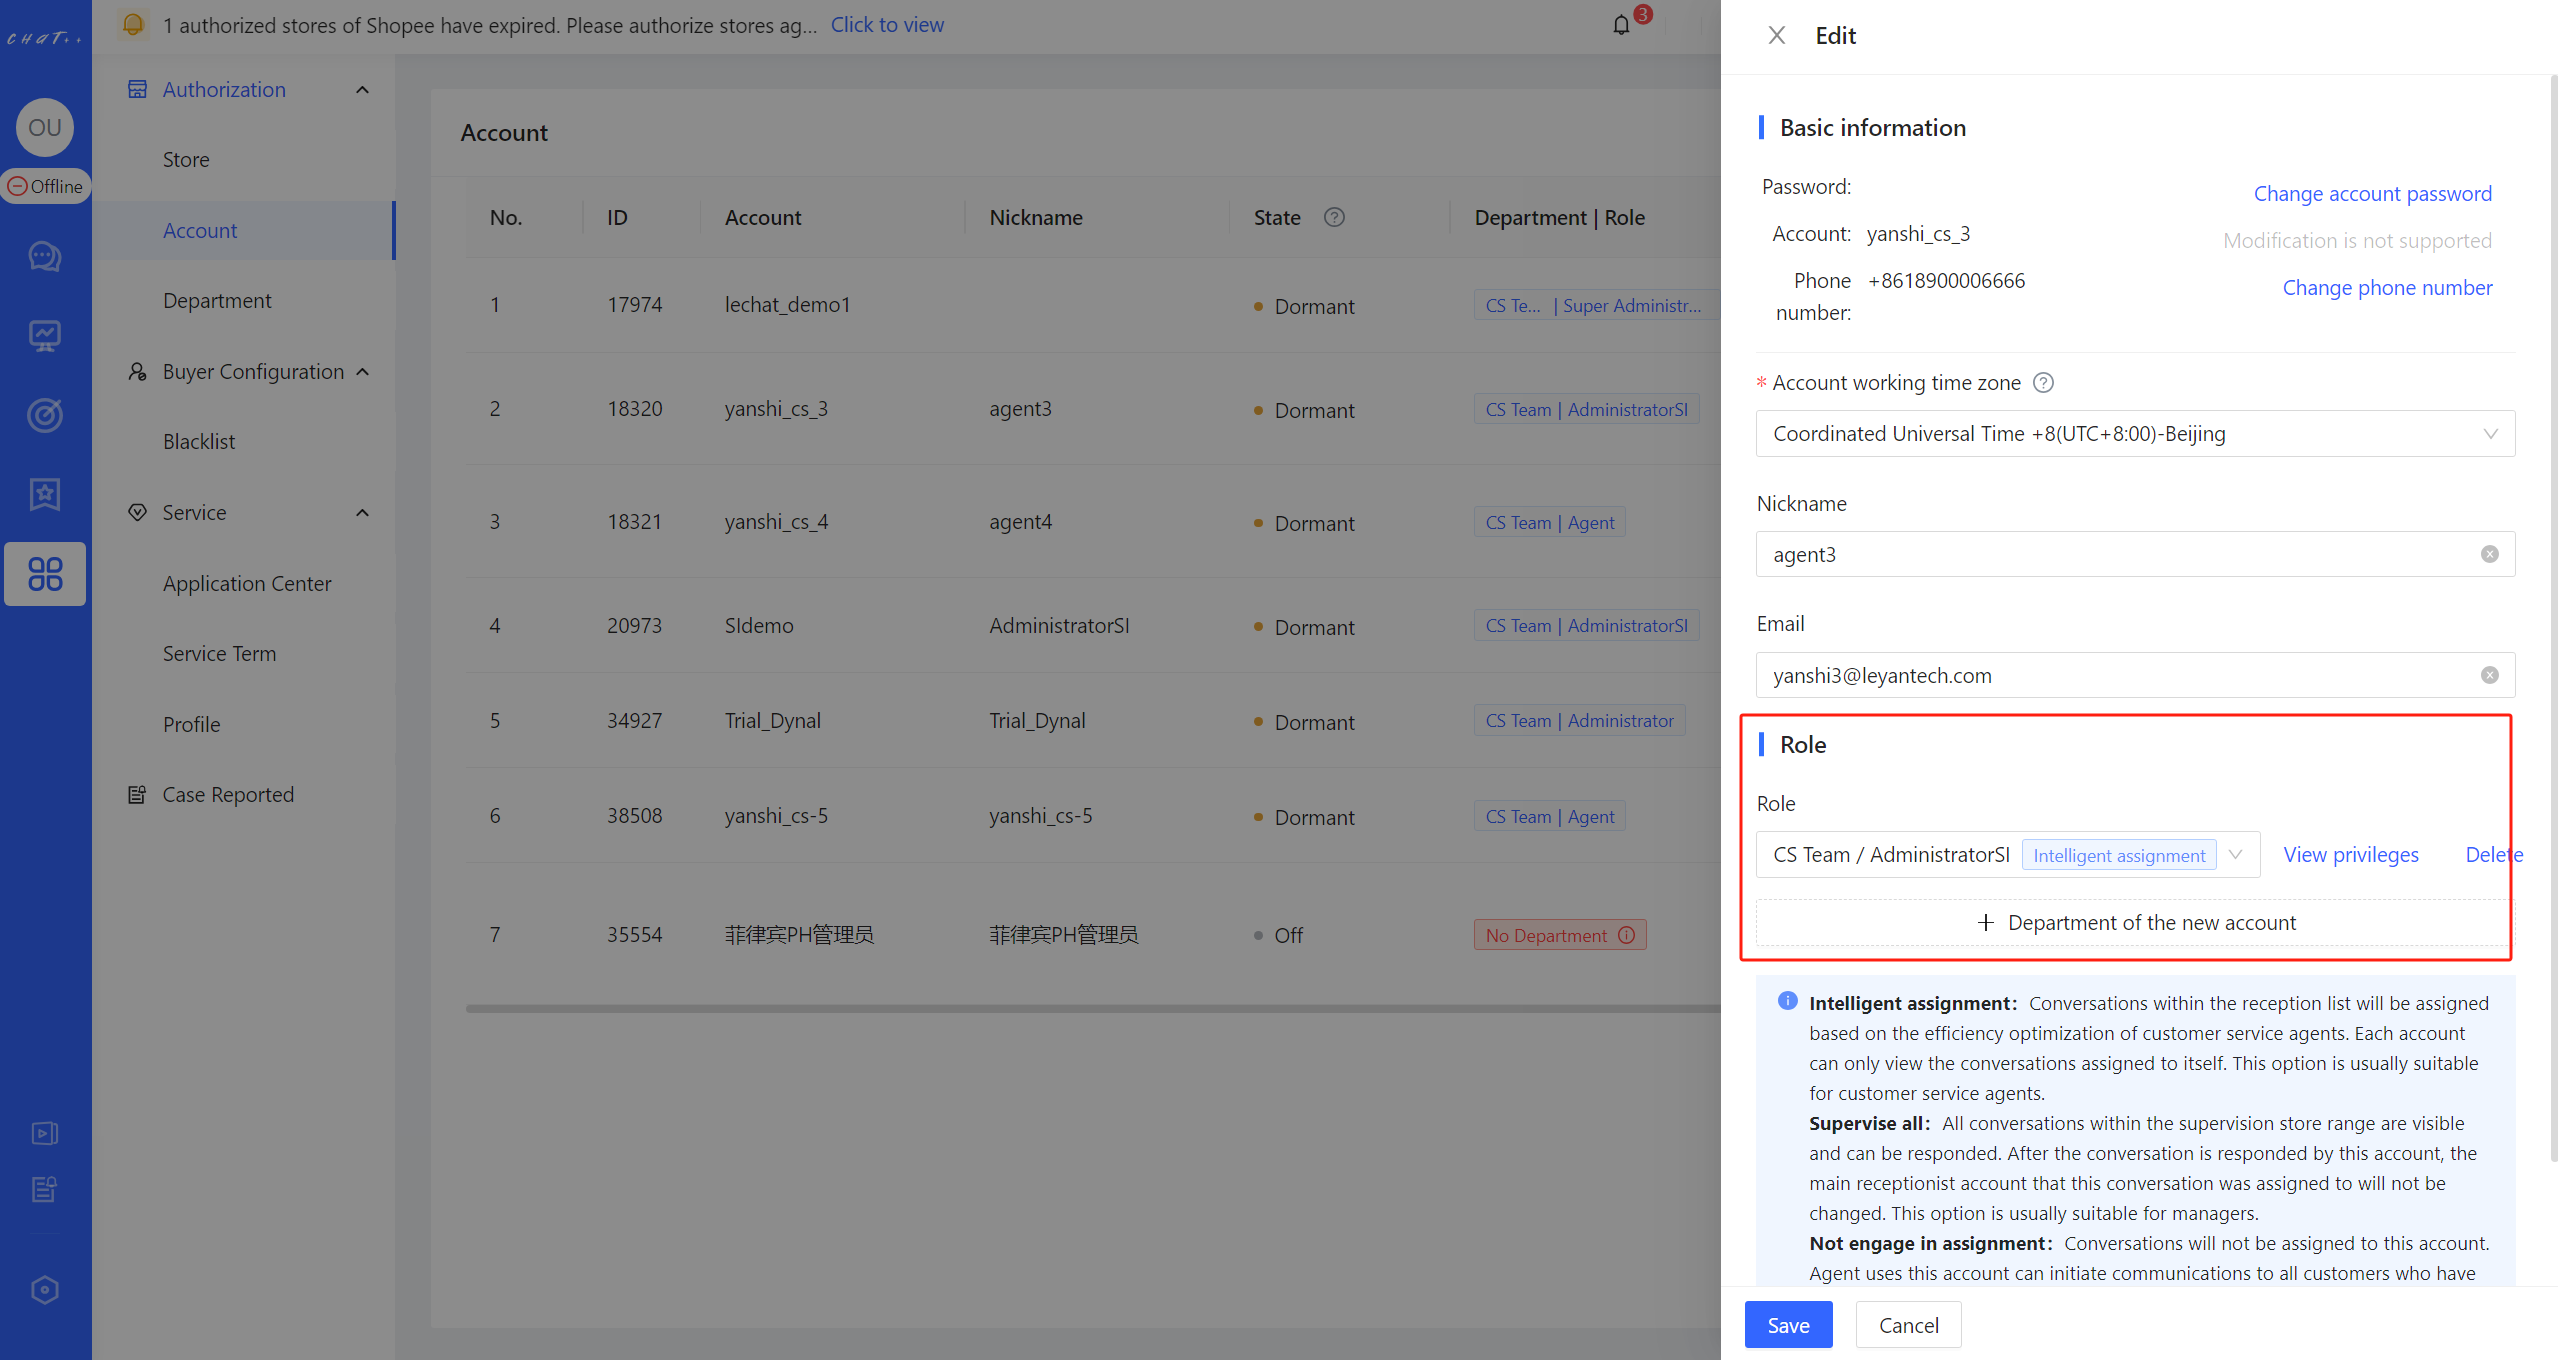
Figure27
FAQ
Q1:How to Modify Account Permissions/Name?
A1:
- The permissions of the ChatPlusAI role cannot be modified.
- For custom roles, you can click on the left menu bar 'Configuration' (as indicated by the red box ① in the image below) → 'Department' (red box ②) → 'Roles' (red box ③) → 'Edit' (red box ④) to modify their name and permissions (as shown in the image below ⑤).
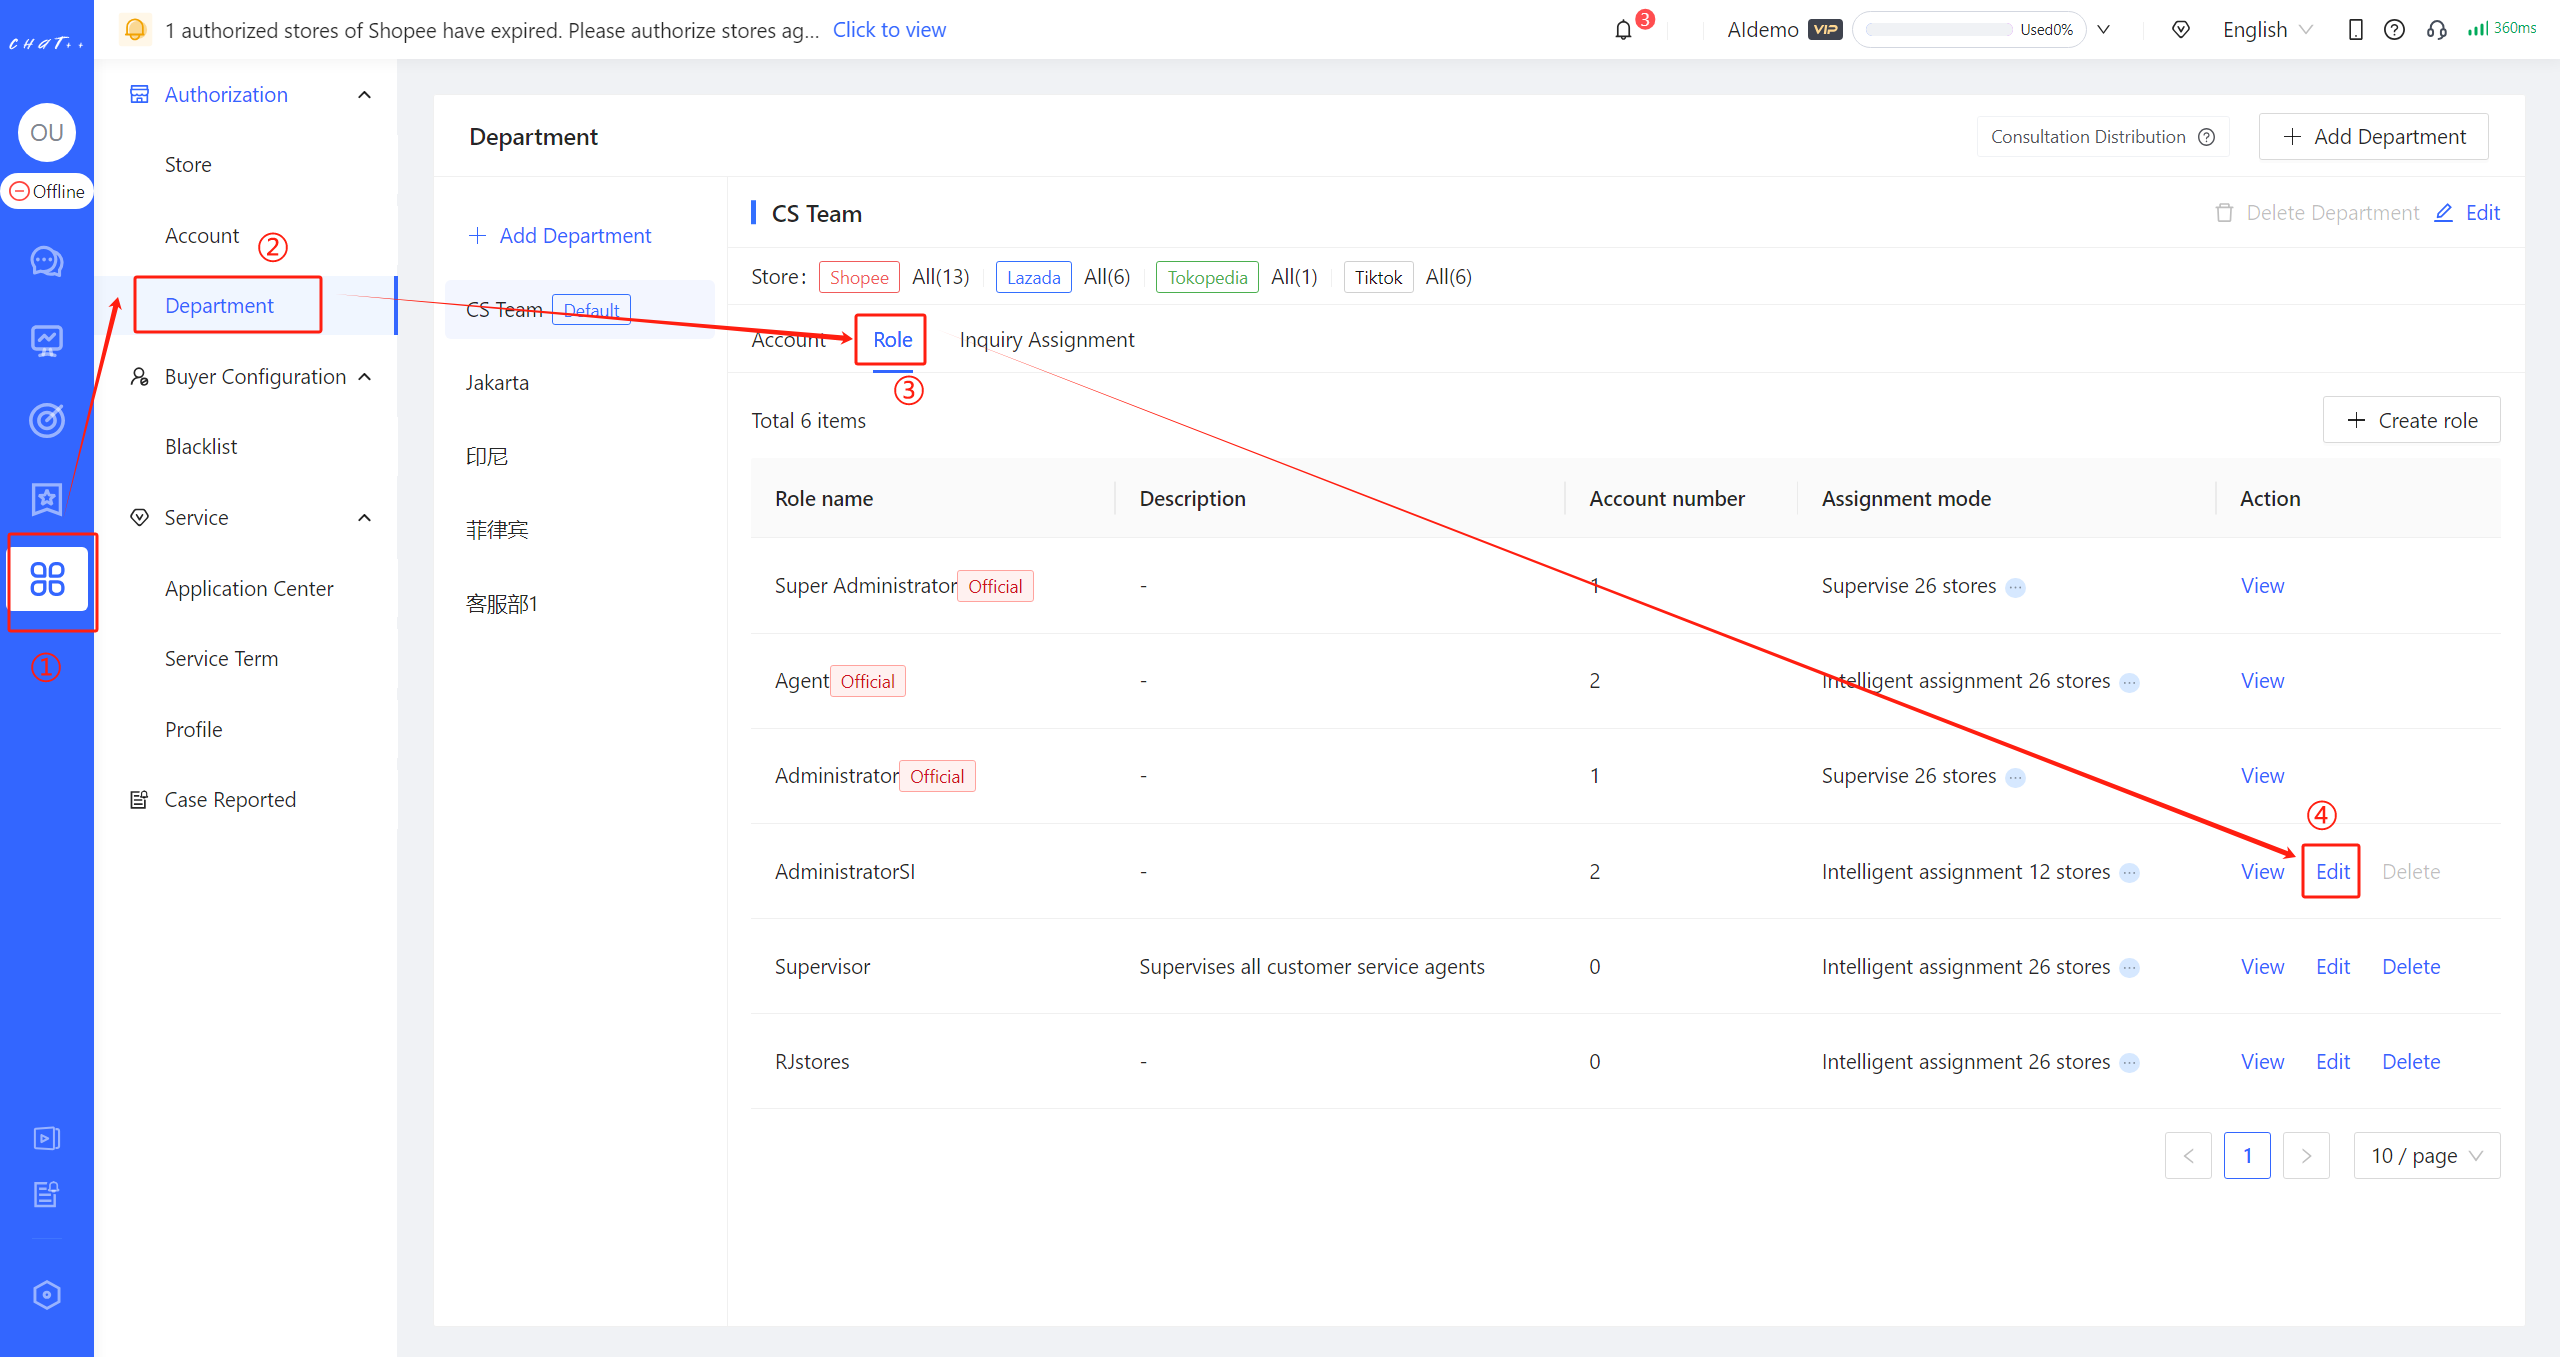
Figure28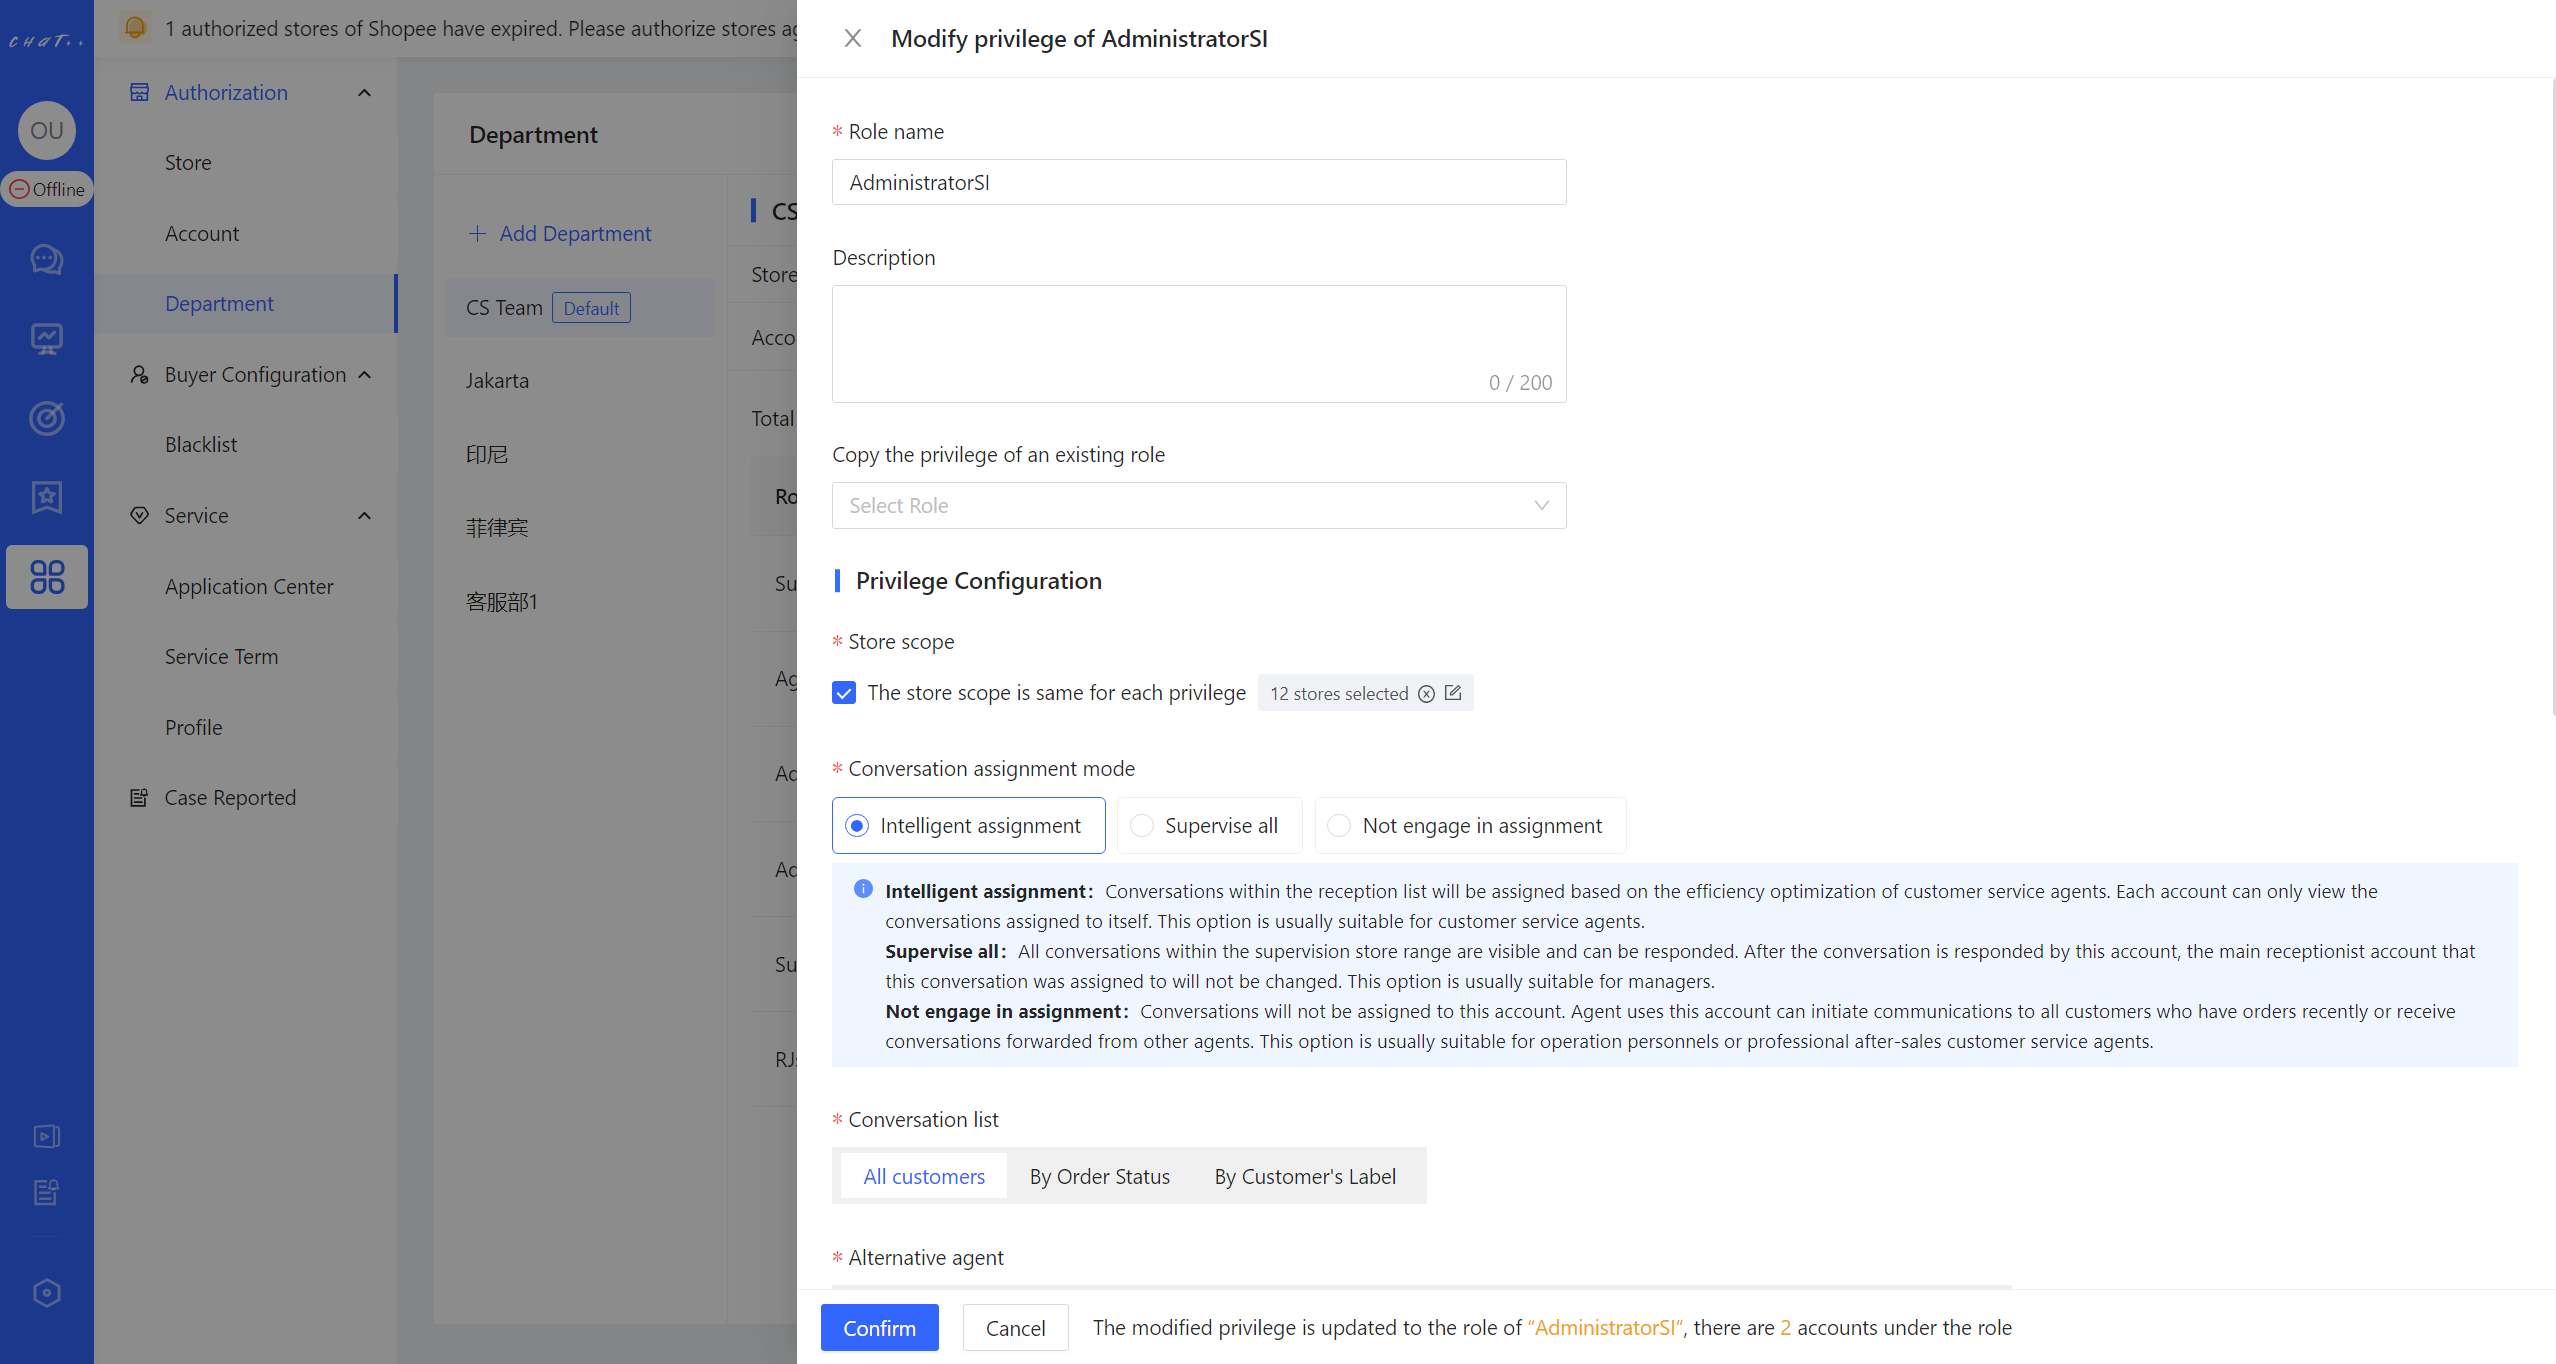
Figure29
Analytics
💡ChatPlusAI provides comprehensive data analysis for shop operators, covering pre-sale, in-sale, and after-sale customer flow. By combining key data from each core stage, it quickly helps operators identify various issues during pre-sale conversion, in-sale, and post-sale fulfillment. It collaborates with industry benchmarks to understand the actual operational status of the store and formulate detailed operational goals in the short to medium term.
💡In customer service reception work, there is a targeted and focused work plan. At the same time, this section serves as a dashboard to verify the actual effects of customer service adjustments and optimizations, assisting customer service and operations teams in continuously refining from a data perspective.
Permission
- Ticket Data: Customer service and administrator roles default to having "View Ticket Data" permission. They can regularly check the status and trends of ticket processing from the Left Sidebar "Analytics → Ticket Data."
- Order Fulfillment Data: Users can only see the "Order Fulfillment Data" section if authorized by a super administrator or an administrator with the corresponding permissions.(This section includes: Order Overview、Sales Conversion、Order Loss、Review)
Refer to the various analytics-related permissions within the red box in the following figure 2 for corresponding data display and export capabilities in this chapter.
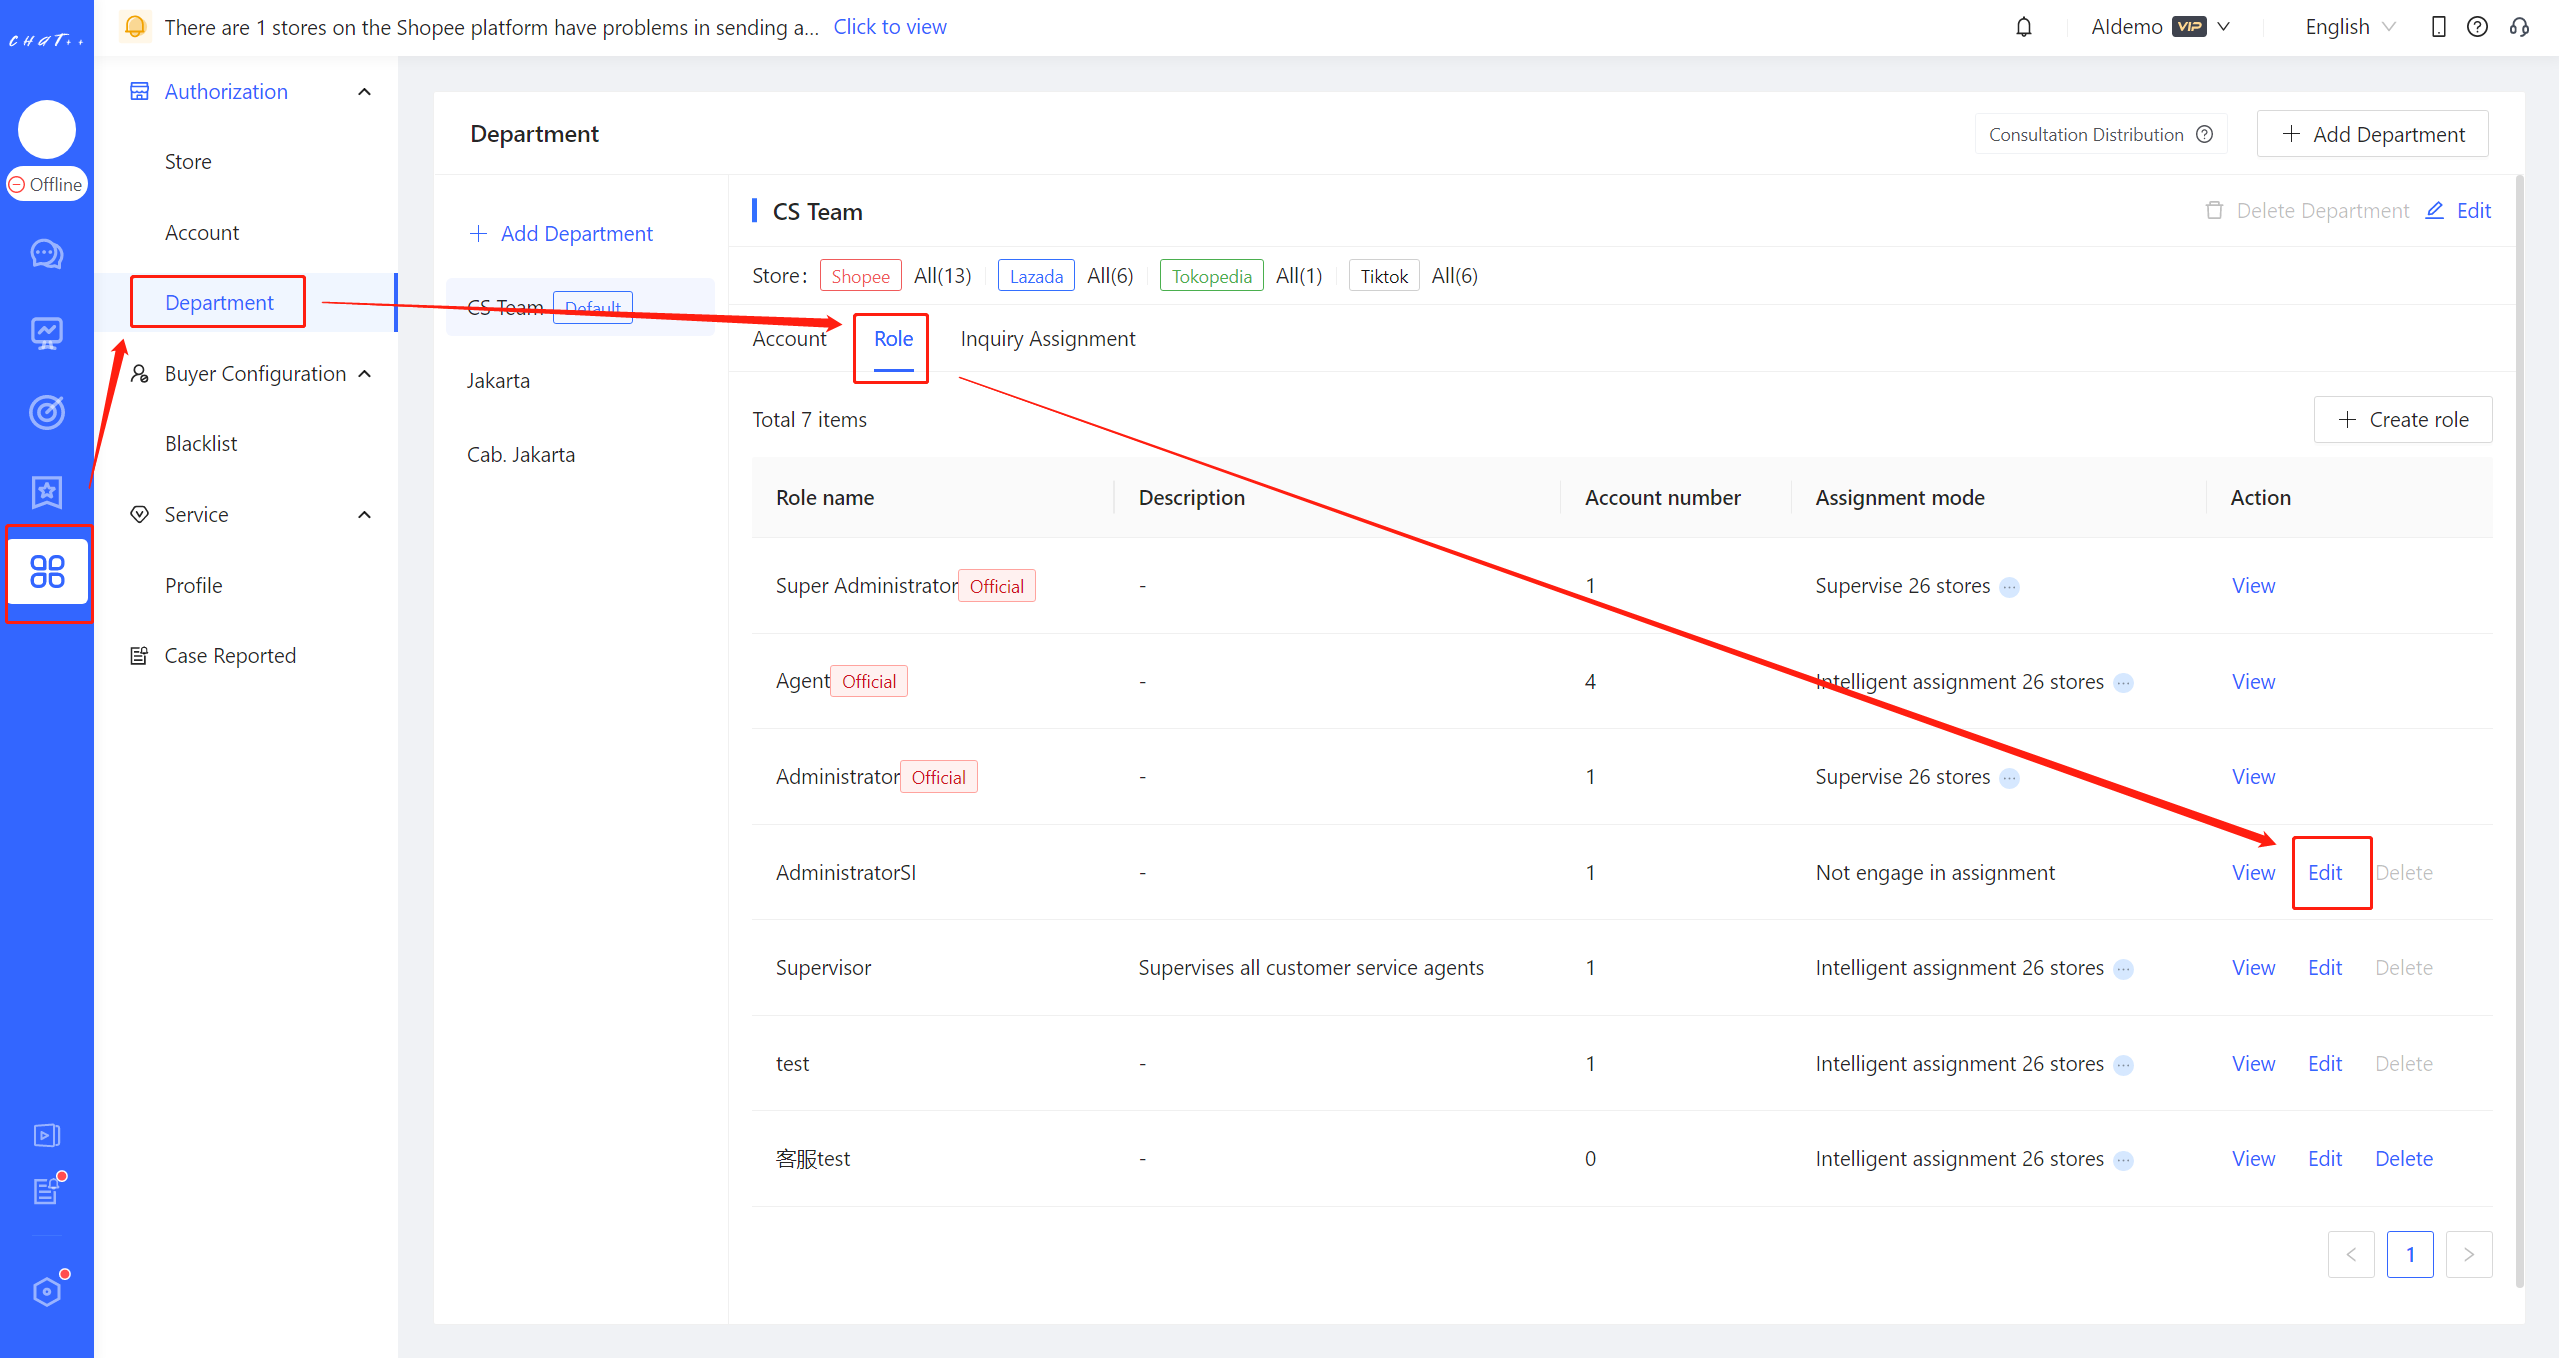
Figure 1 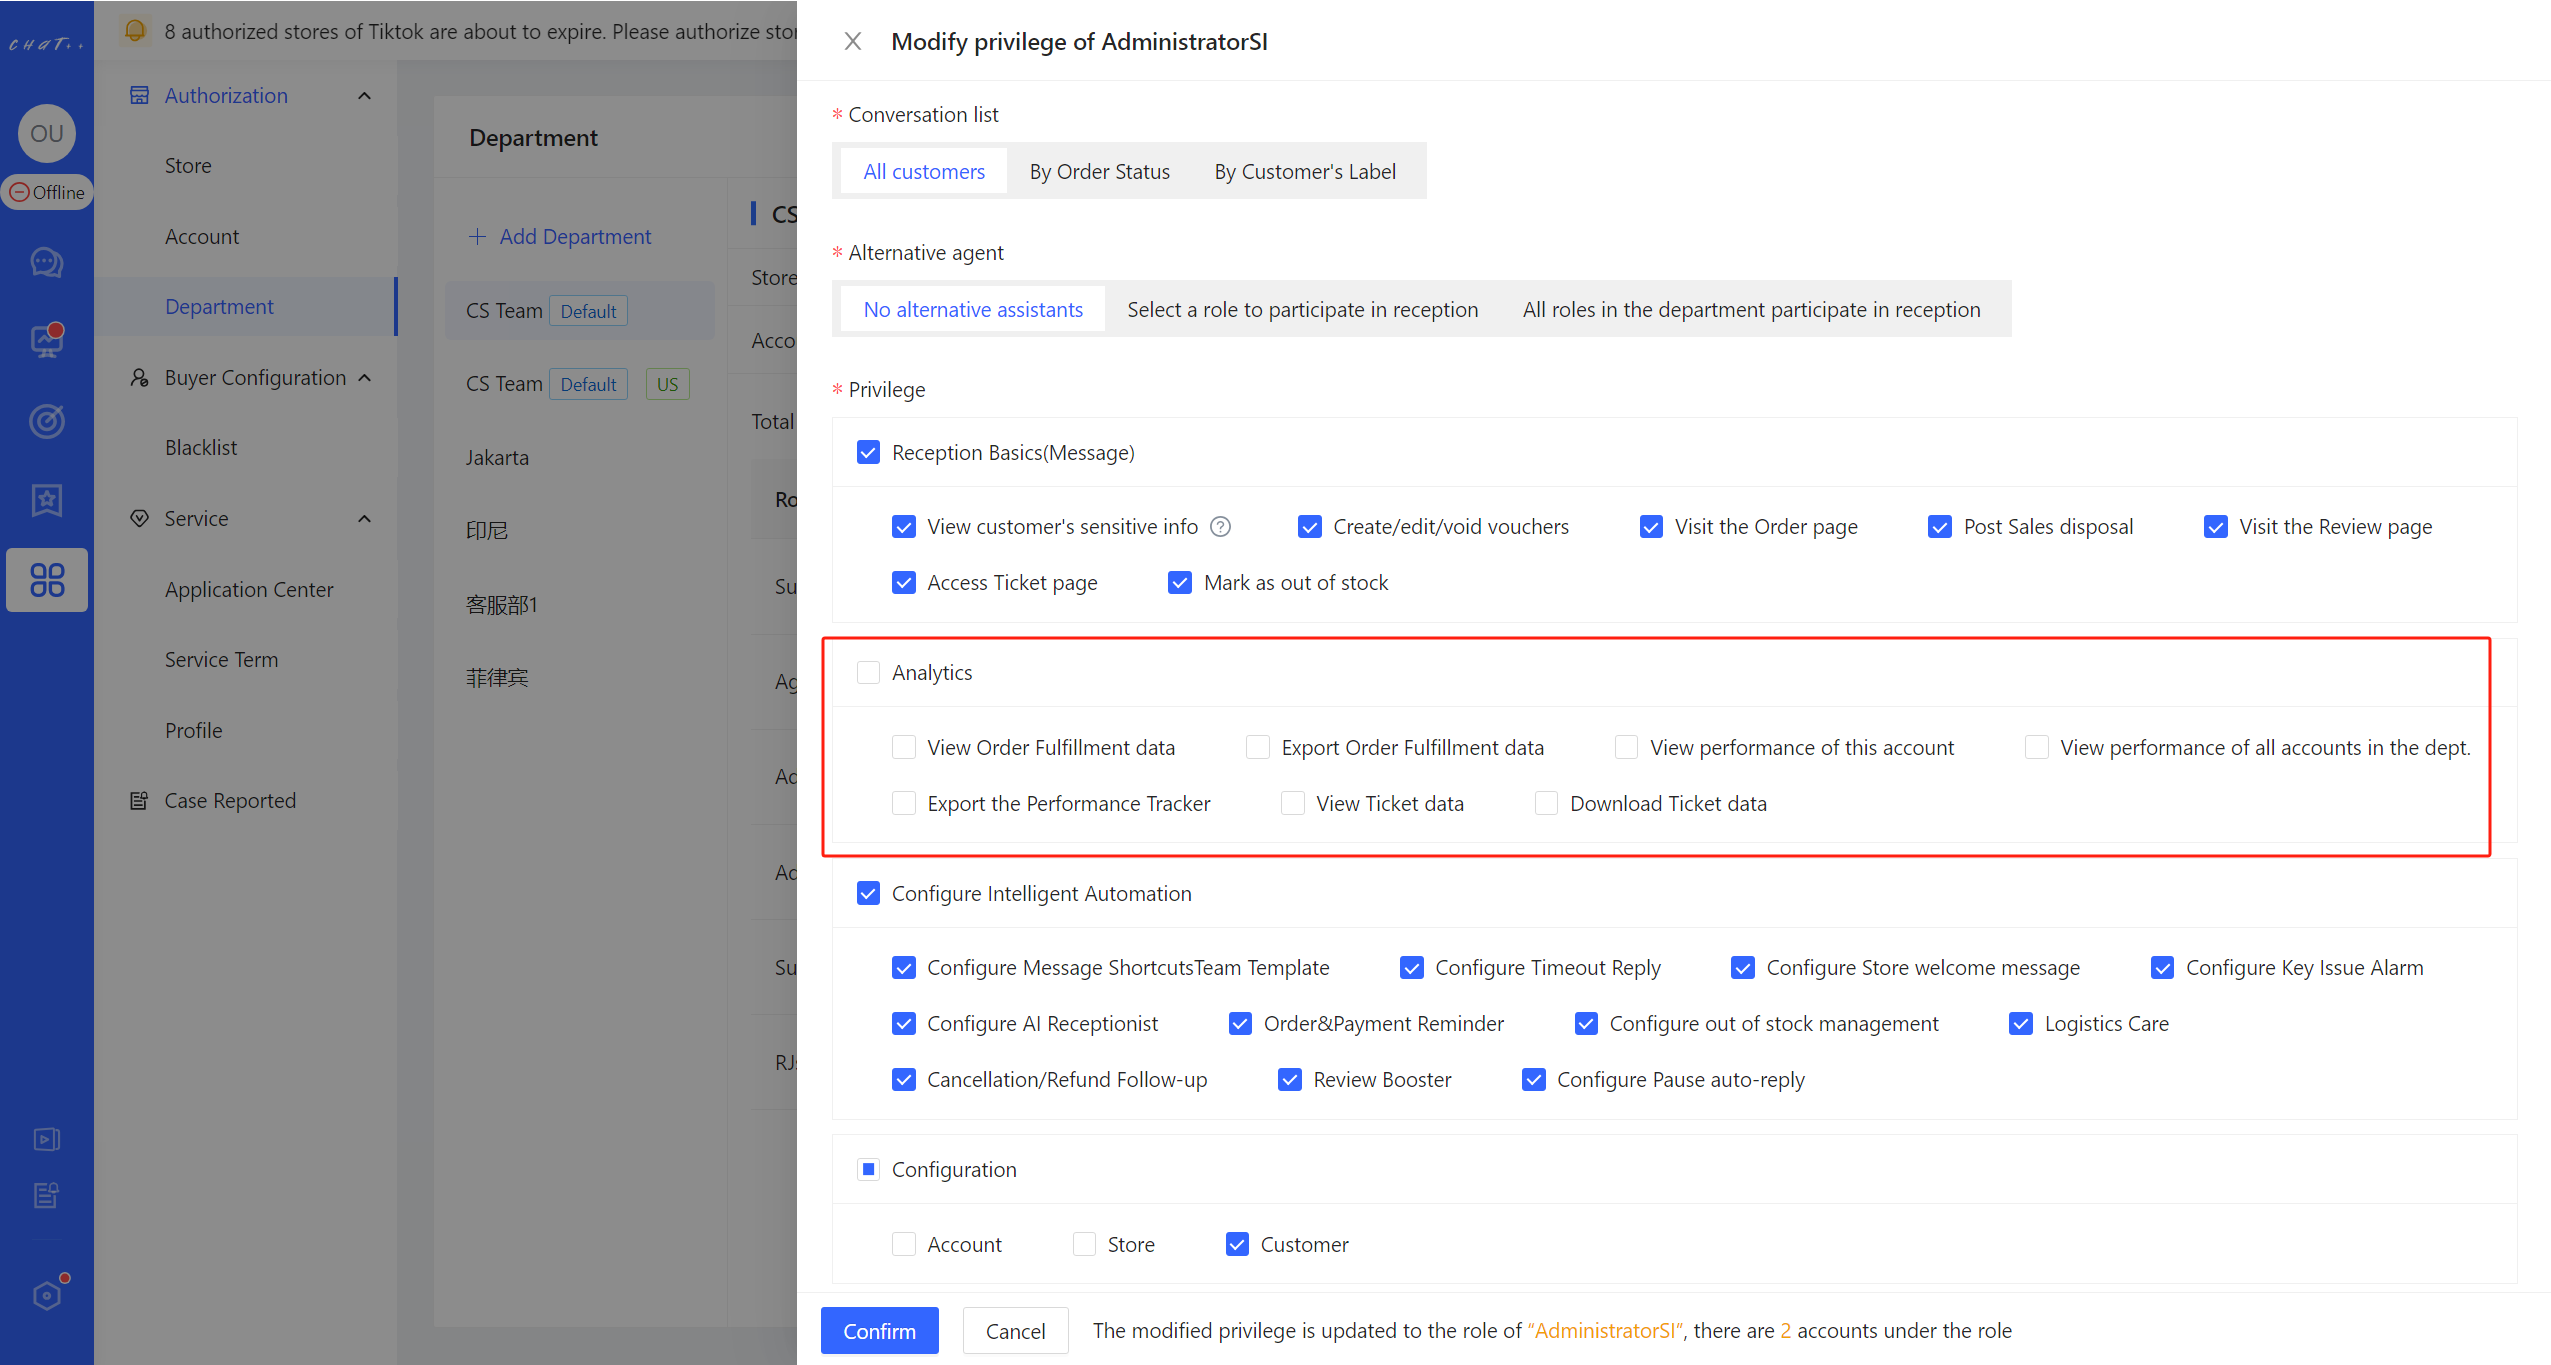
Figure 2
Order Overview
👆Click on the "Analytics" in the left menu bar (the red mark ① in the figure below) → "Order Fulfillment" (the red mark ② in the figure below) → "Order Overview" (the red mark ③ in the figure below) to enter the order overview page.
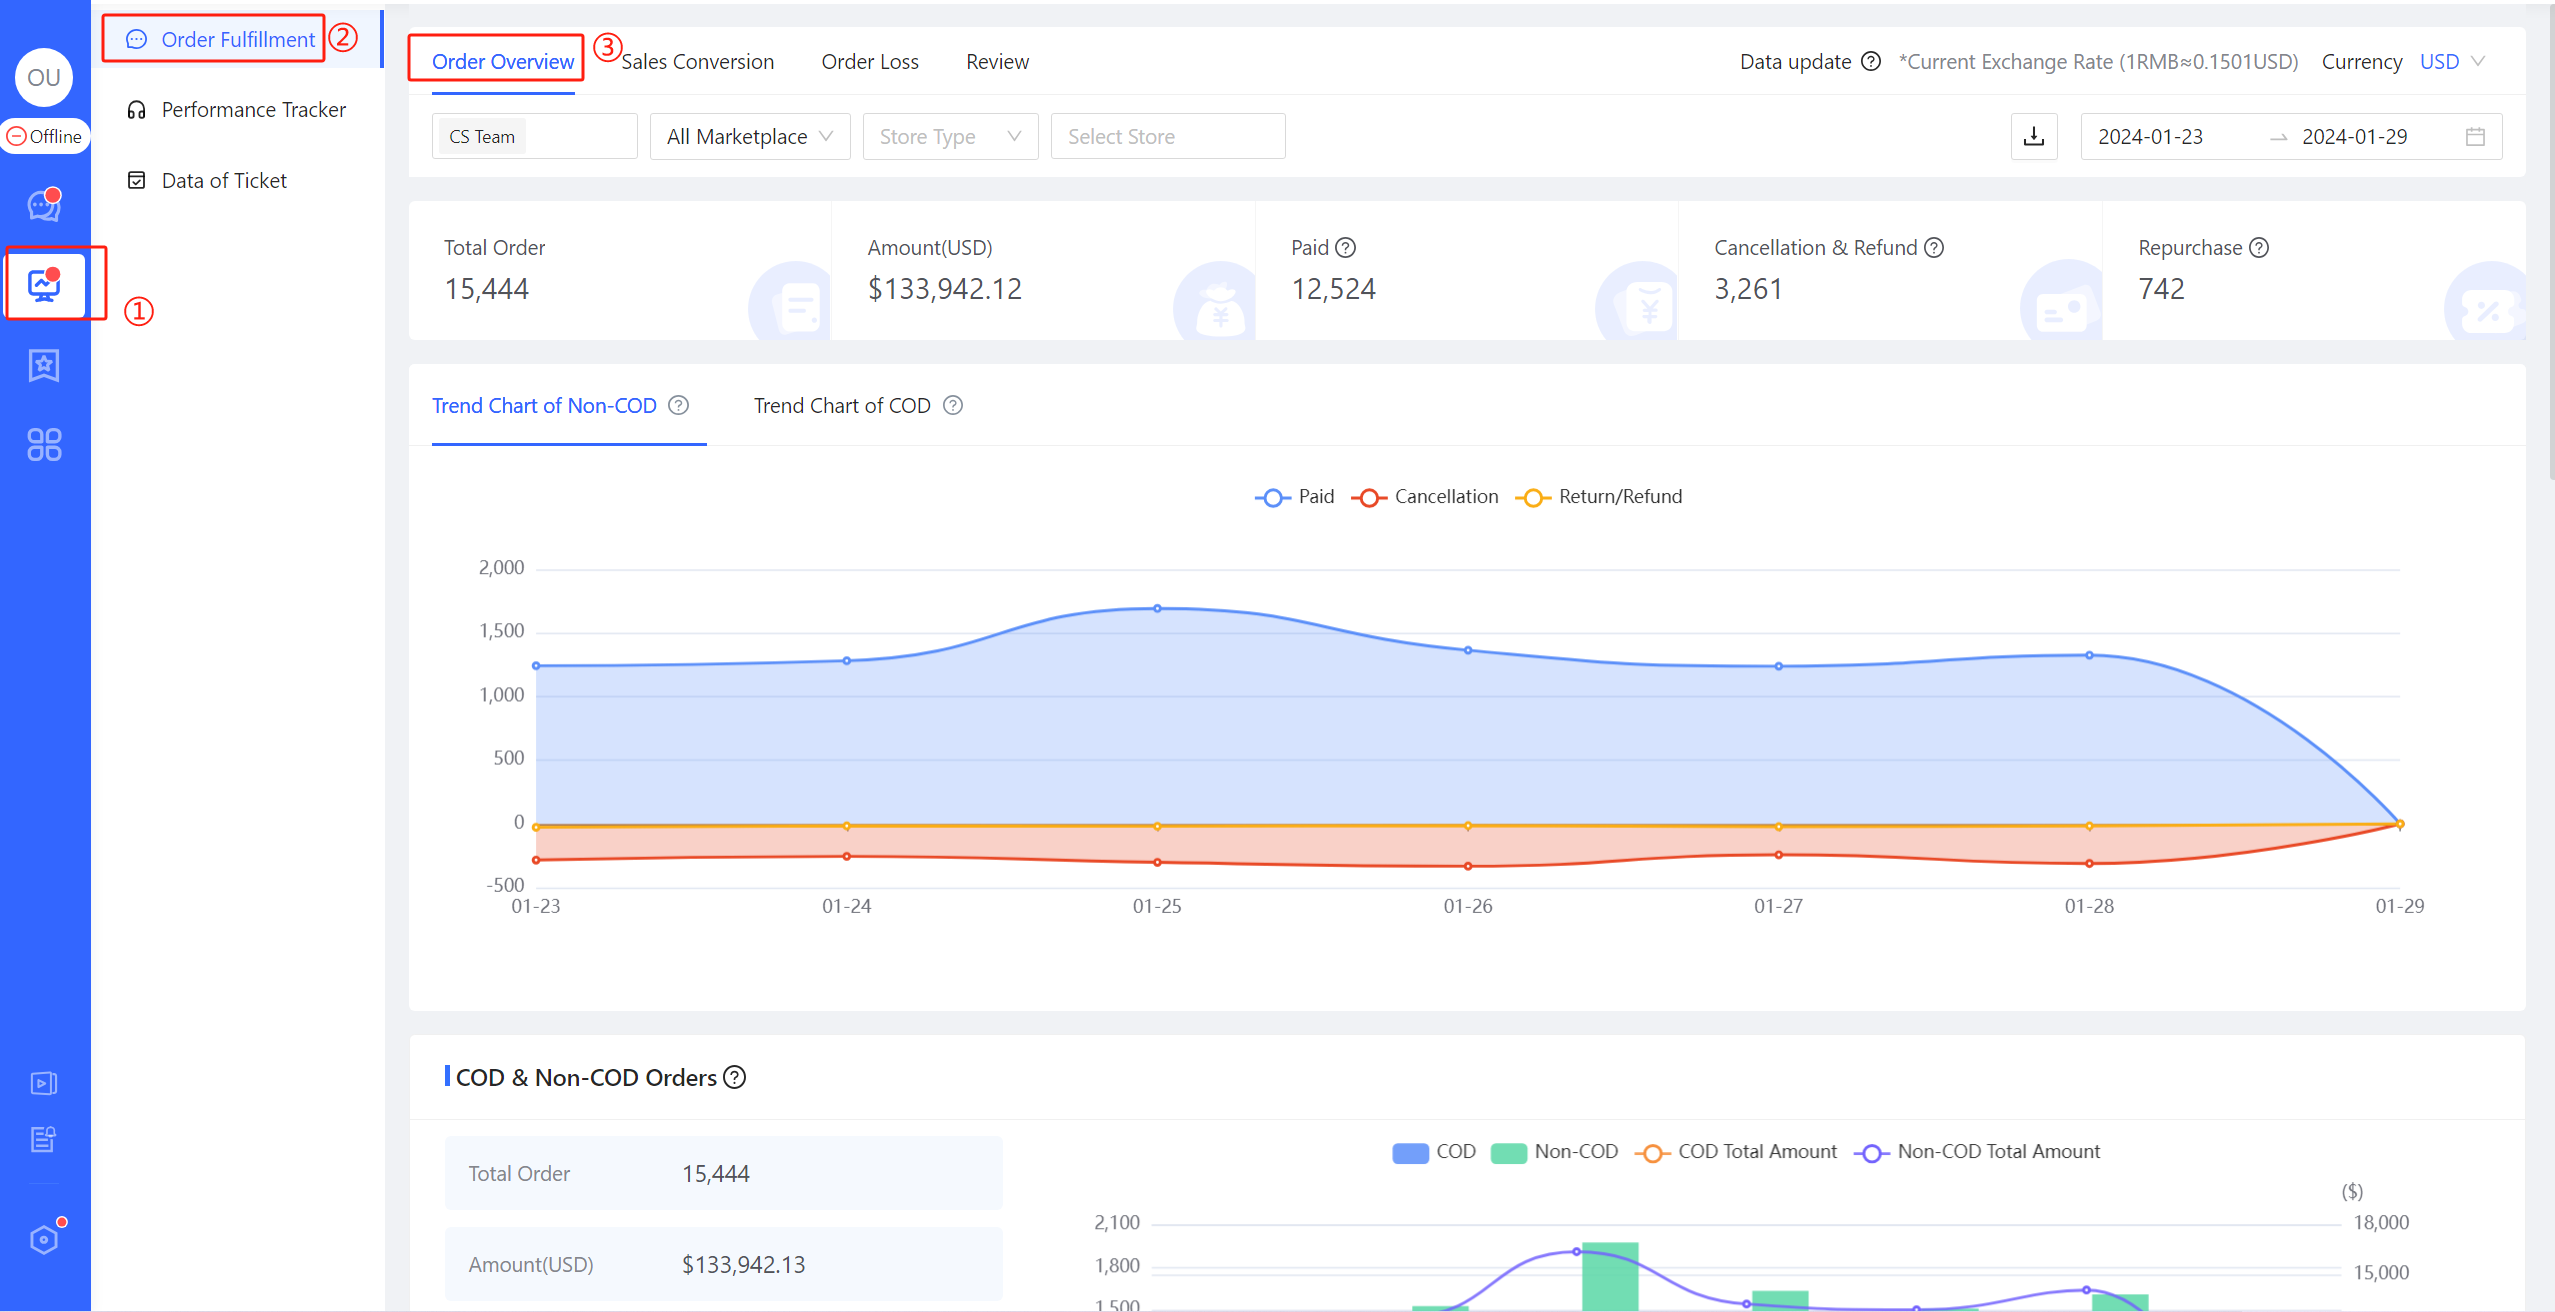
Figure 3
Basic Operations
Common filters on the Analytics page are shown in the following figure:
- Red mark①: The corresponding data of the specific "Department" can be chosen to be displayed. >>>Please refer to the introduction of Department for the definition of "Department".
- Red mark②: The relevant data of specific "Marketplace" can be chosen to be displayed, including all marketplace where the corresponding stores have been authorized to link to ChatPlusAI. For example: Shopee, Lazada, TikTok, Tokopedia. The default selection covers all authorized stores on marketplace.
- Red marker③: The corresponding data of the specified "Store Type" can be chosen to be displayed, where the store type refers to cross-border stores/local stores. The default option covers both cross-border stores and local stores.
- Red mark④: The corresponding data of specified stores (multiple selections allowed) can be chosen to be displayed, and the option for the national site is provided for convenience. The default setting (not selecting any stores) covers all stores.
- Red mark⑤: The corresponding data within a specified time range can be chosen to be displayed.
- Red marker⑥: The currency unit for displaying the amount-related data can be chosen to be displayed.
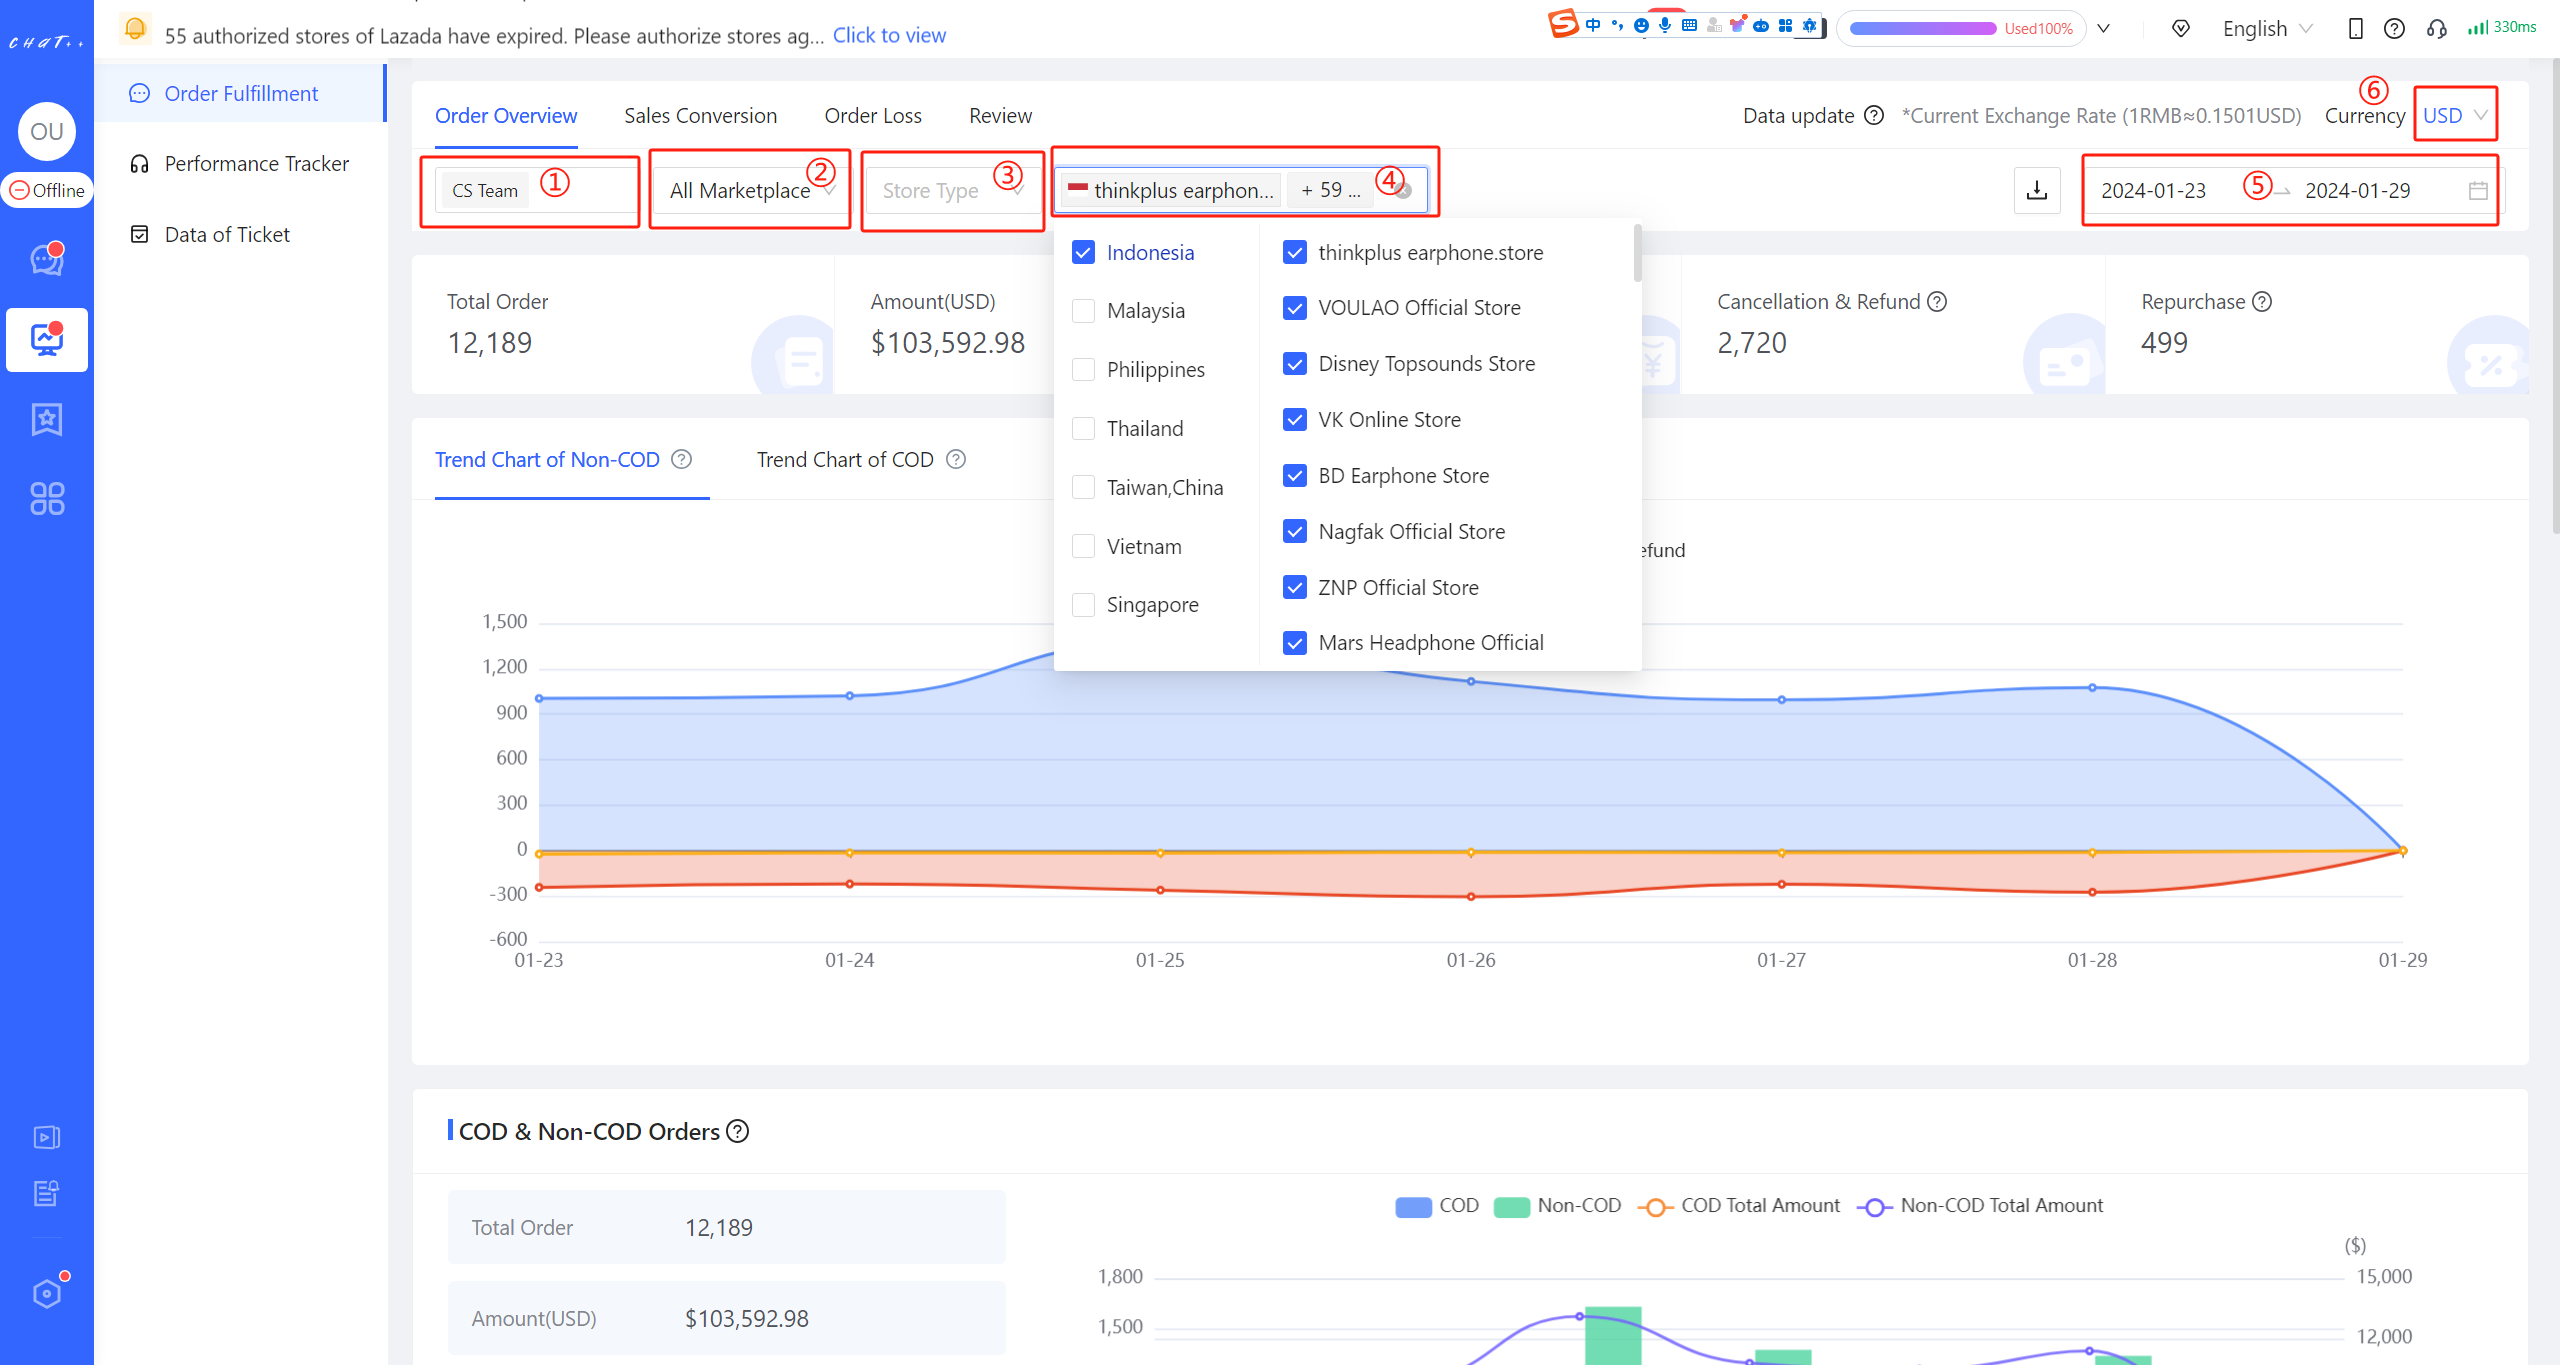
Figure 4
Daily Order Change
The figure provides the daily order changes for both COD and non-COD. Clicking on "Trend Chart for Non-COD" or "Trend Chart for COD" toggles between the two. Placing the mouse over the red mark ① in the figure displays the order changes for the corresponding date.
As shown in the figure below, non-COD orders can be easily checked for the daily volume of paid orders, the daily volume of cancellation (including orders placed but not paid), and the daily volume of return or refund. This allows operators to understand not only the daily volume of orders placed/paid, but also the daily volume of orders lost.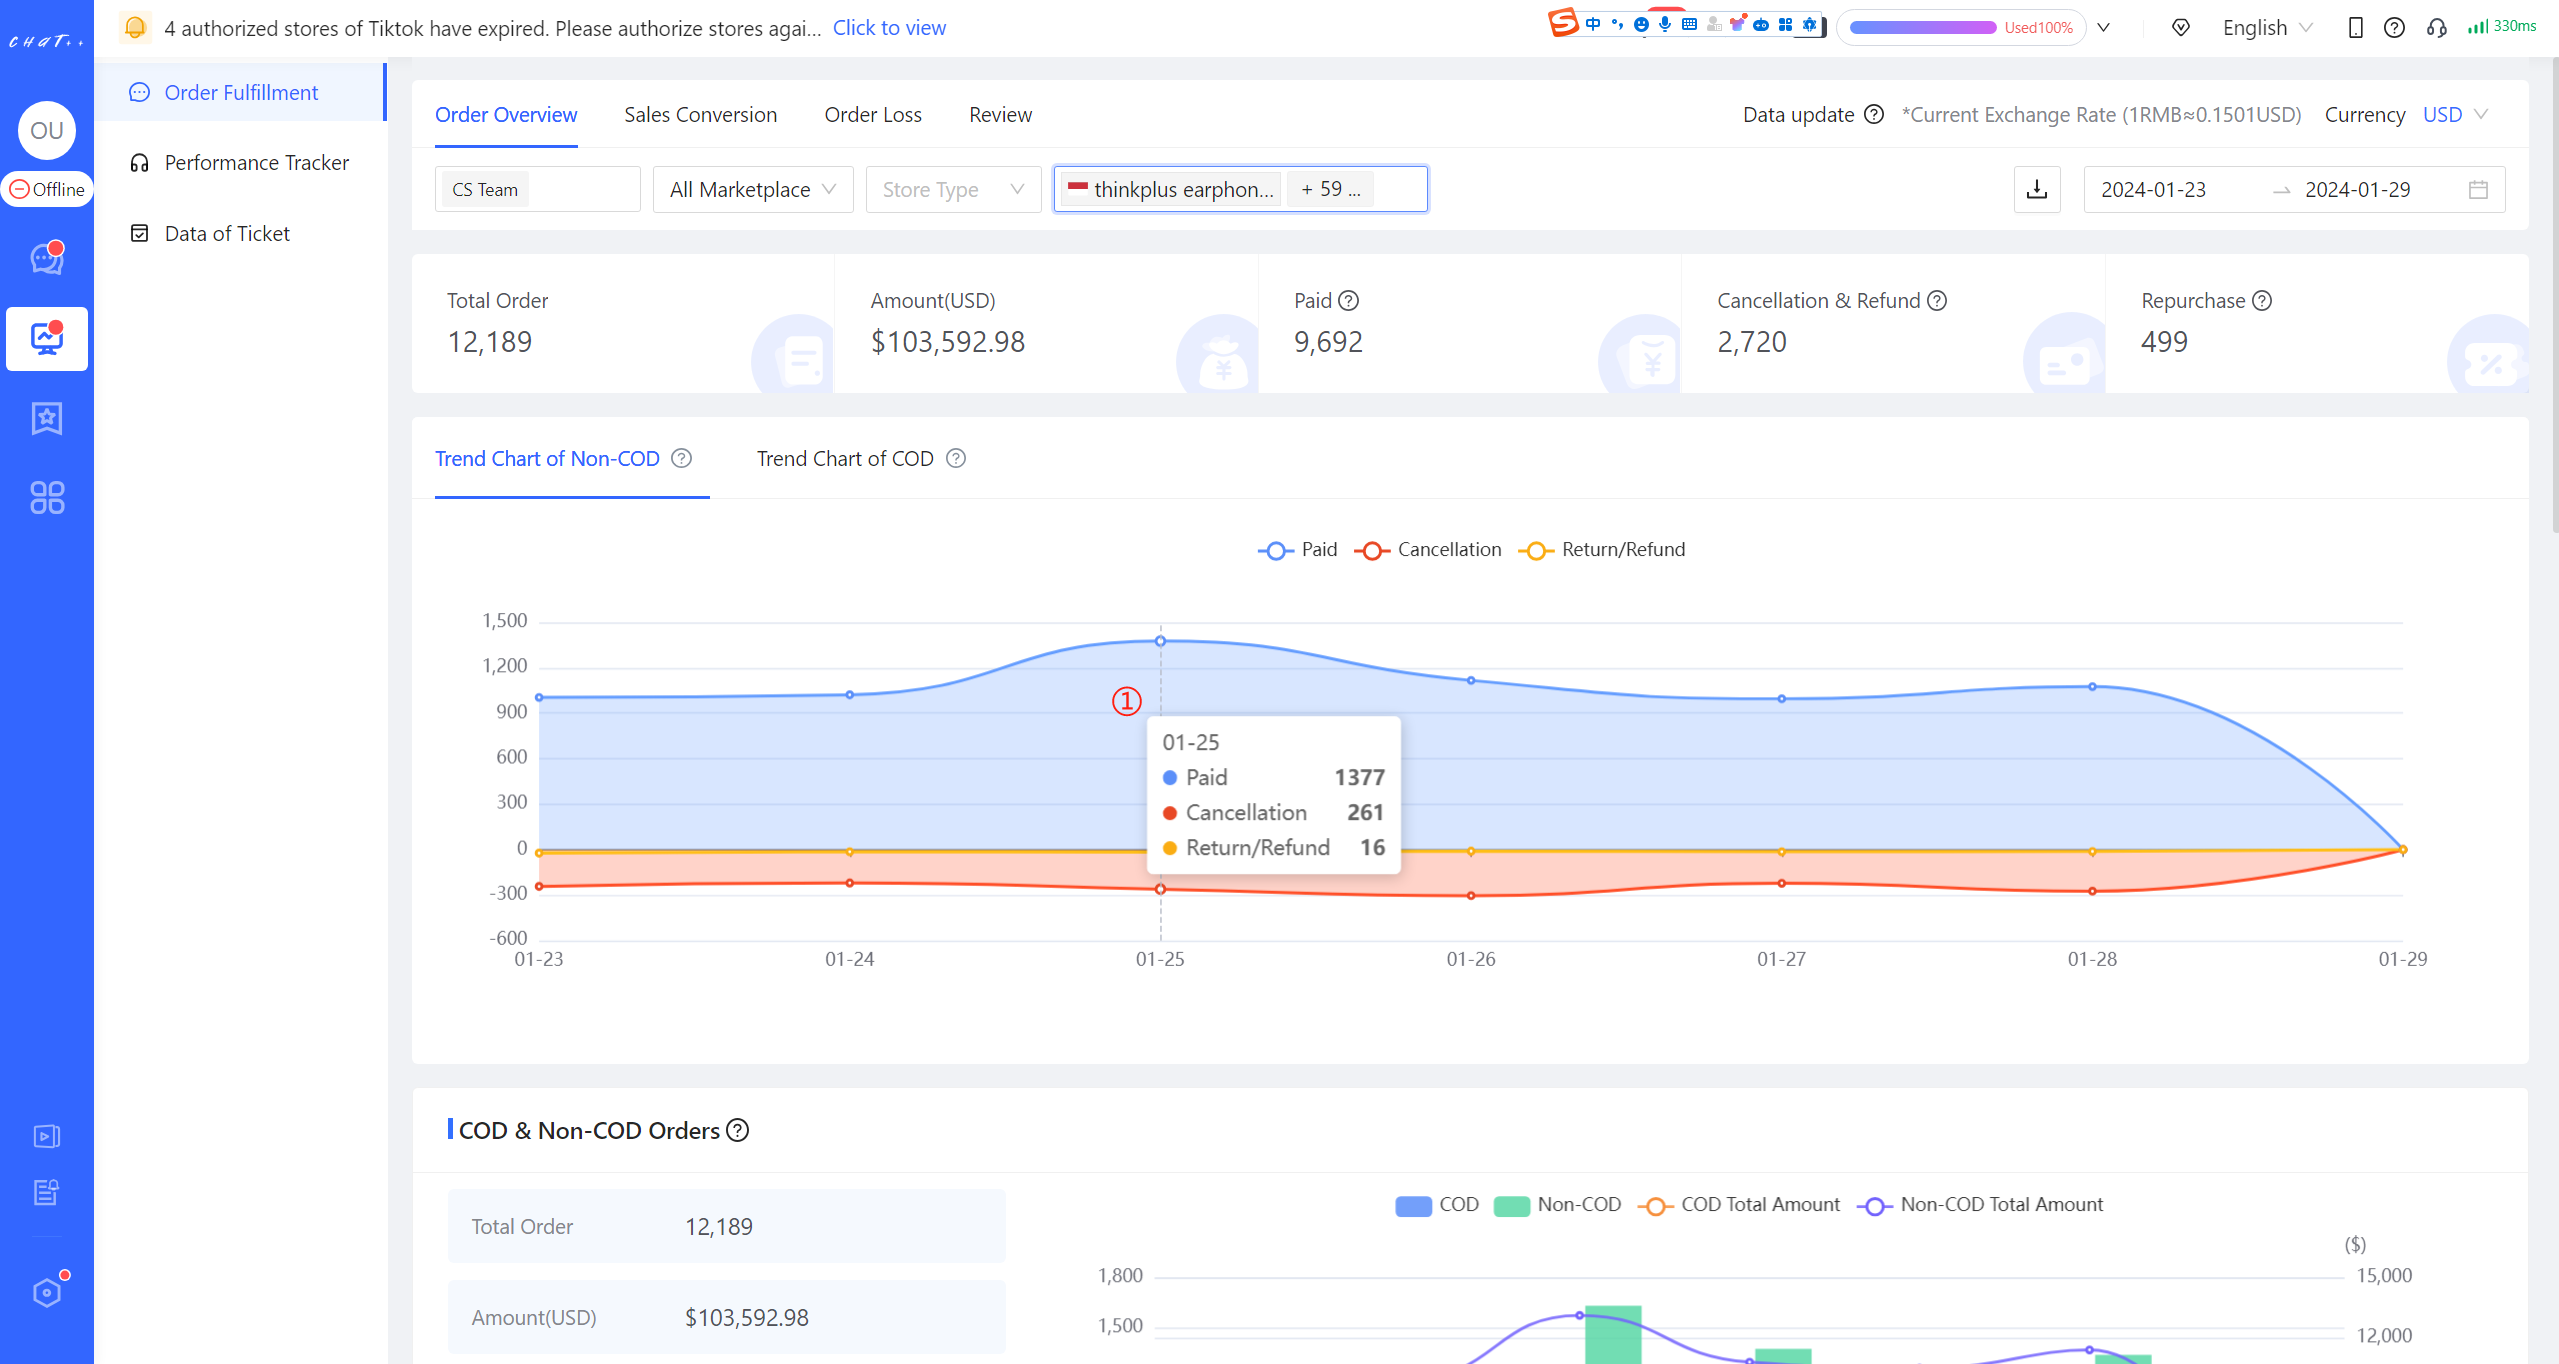
Figure 5
The figure below shows the trend chart of COD. Compared to non-COD orders, the status of the orders is slightly different. It includes "Total Order", "Cancellation", "Return/Refund", and "Rejected Order" (COD refusal to sign).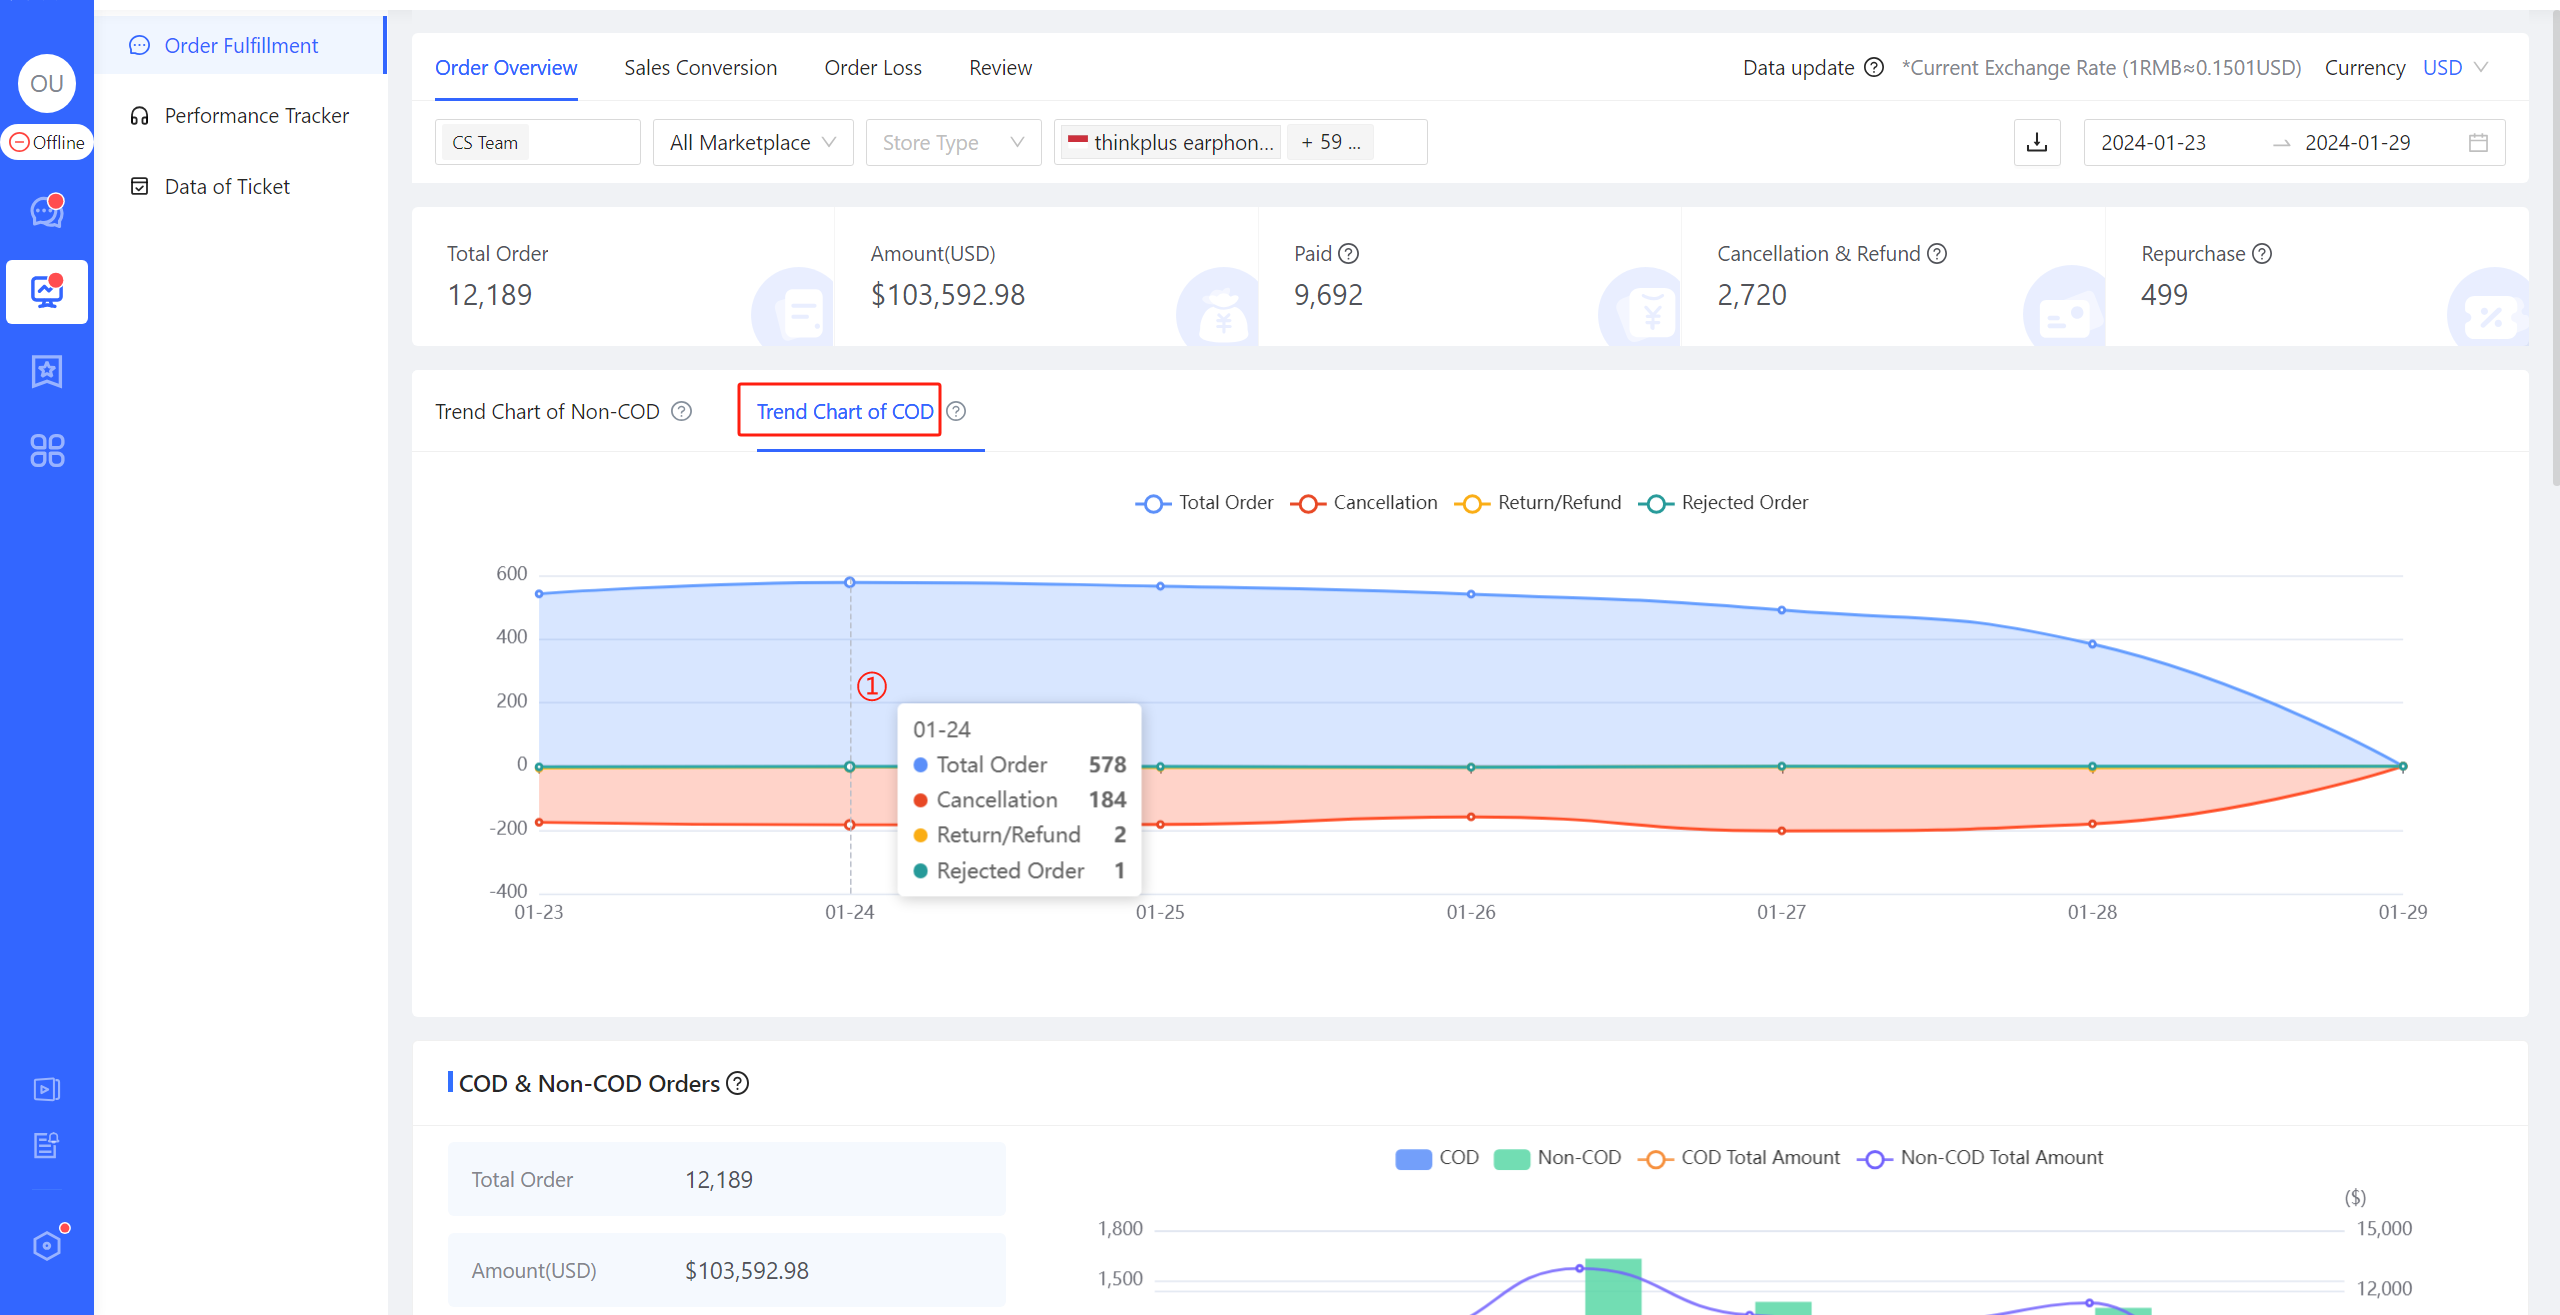
Figure 6
Percentage of COD and Non-COD Orders
The following figure analyzes the proportion of COD and non-COD orders from the perspective of order placement, including the number of orders and the order amount.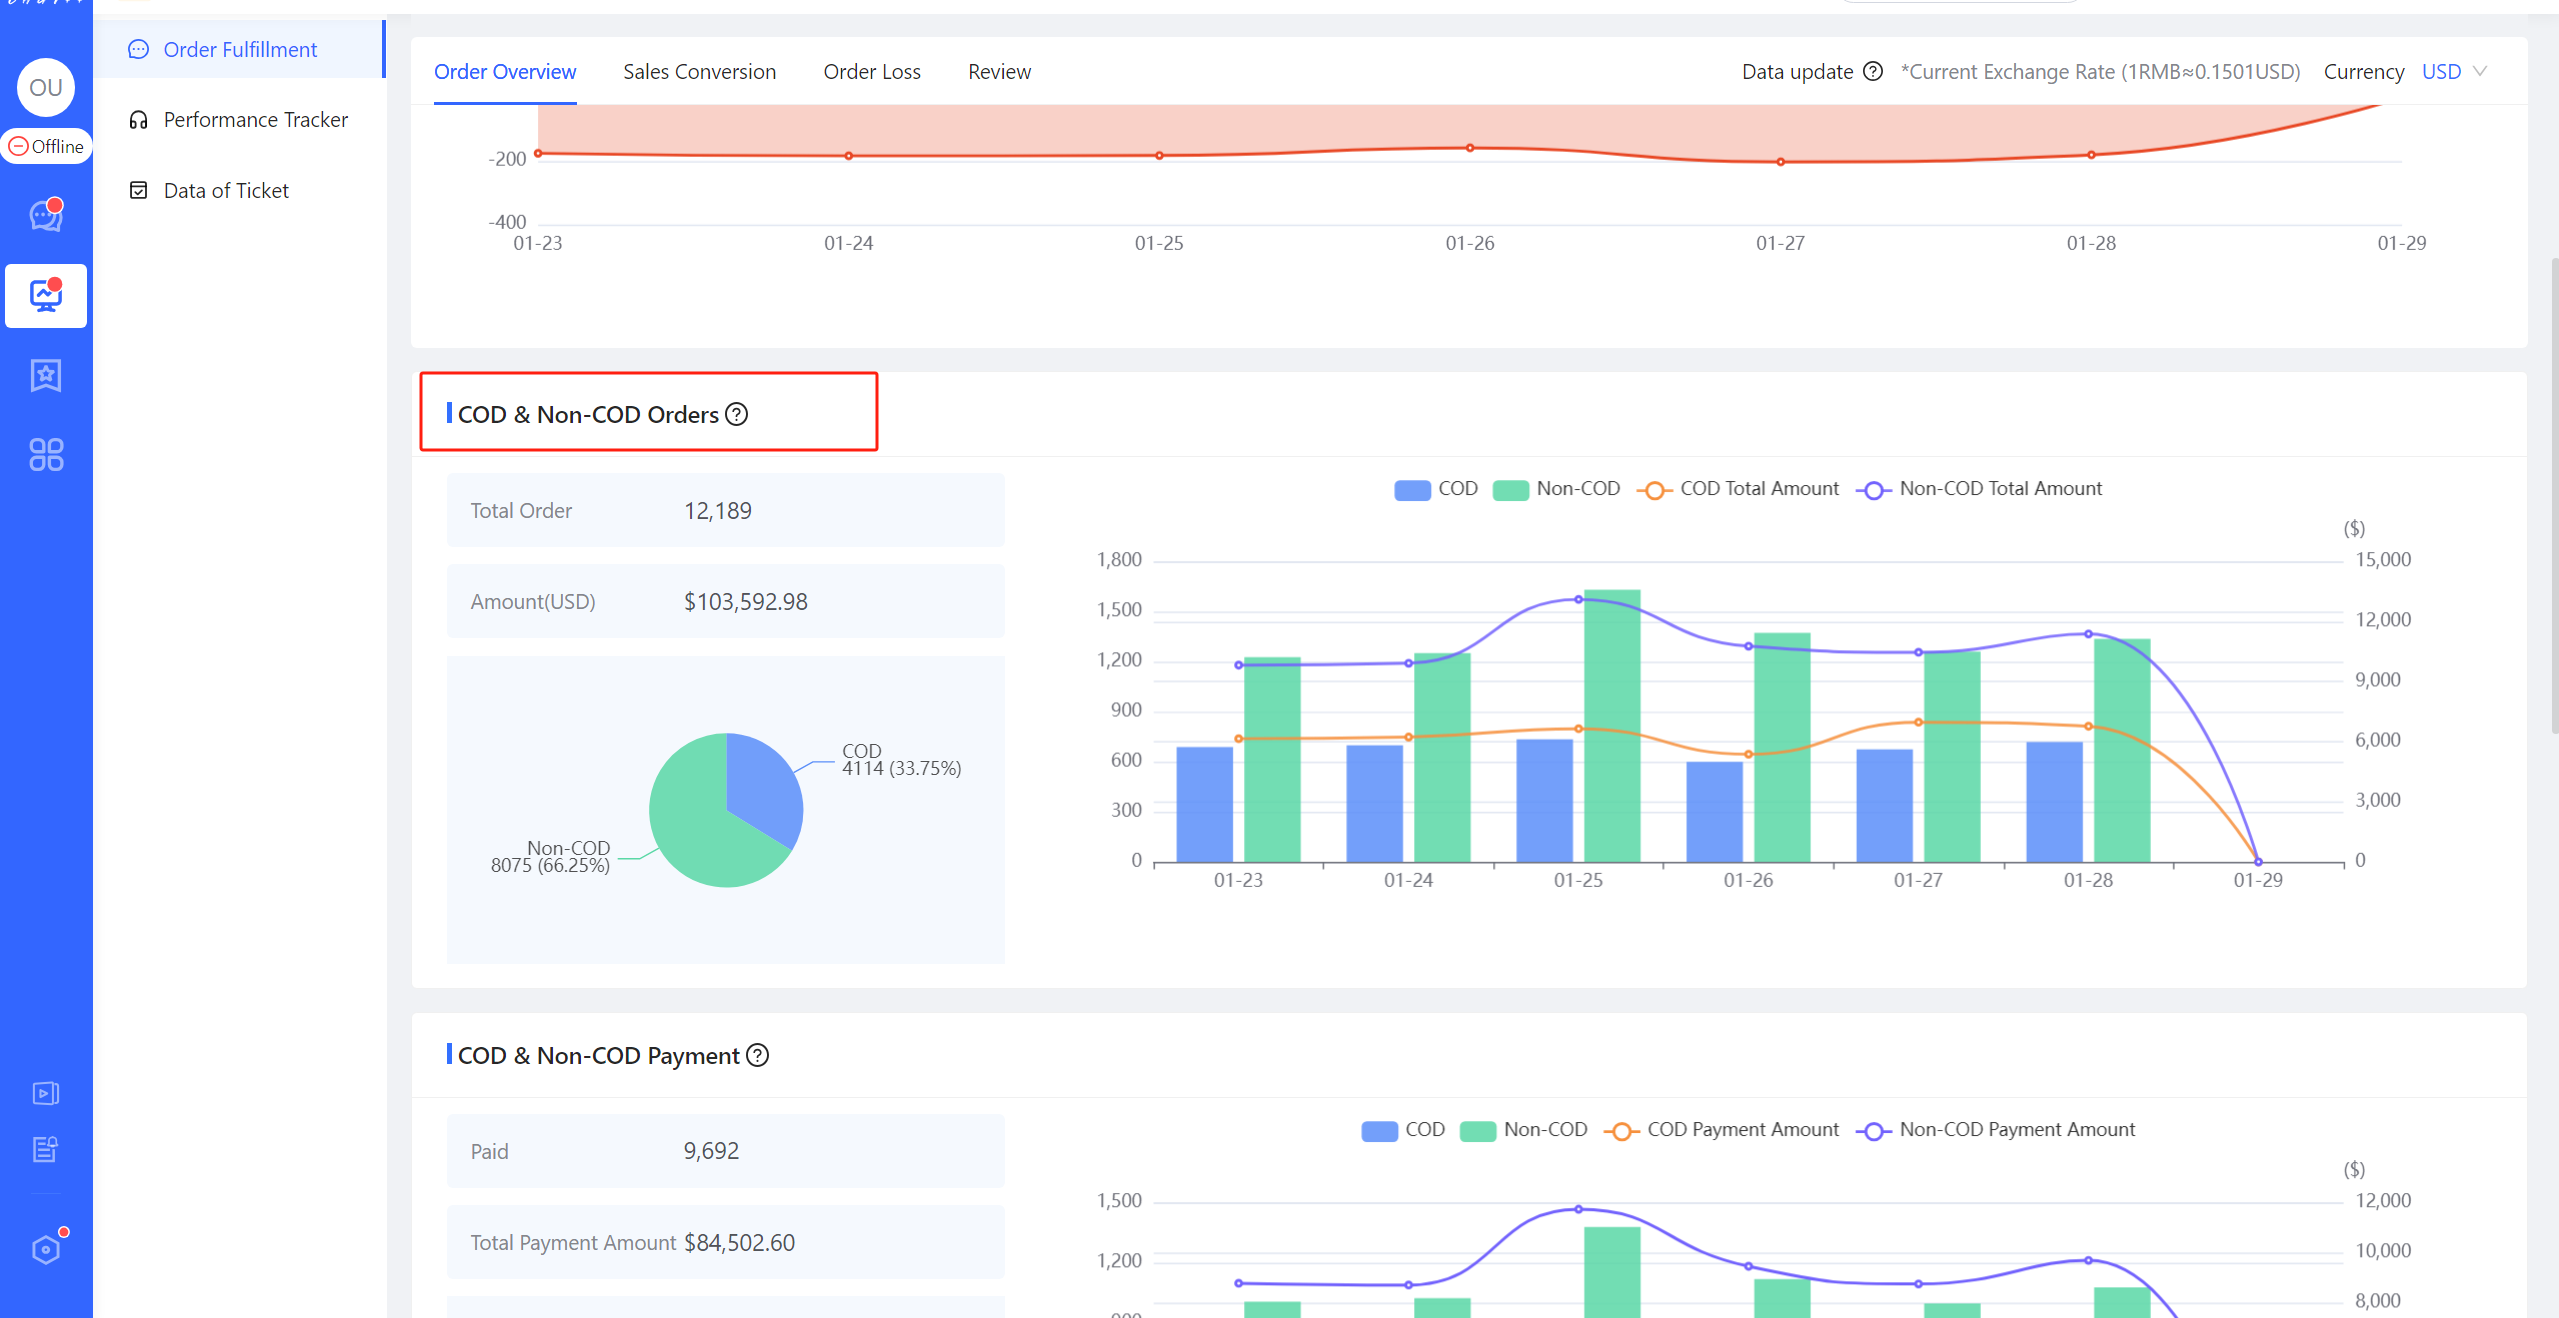
Figure 7
The following figure analyzes the proportion of COD and non-COD orders from a payment perspective, including the number of paid orders and payment amounts.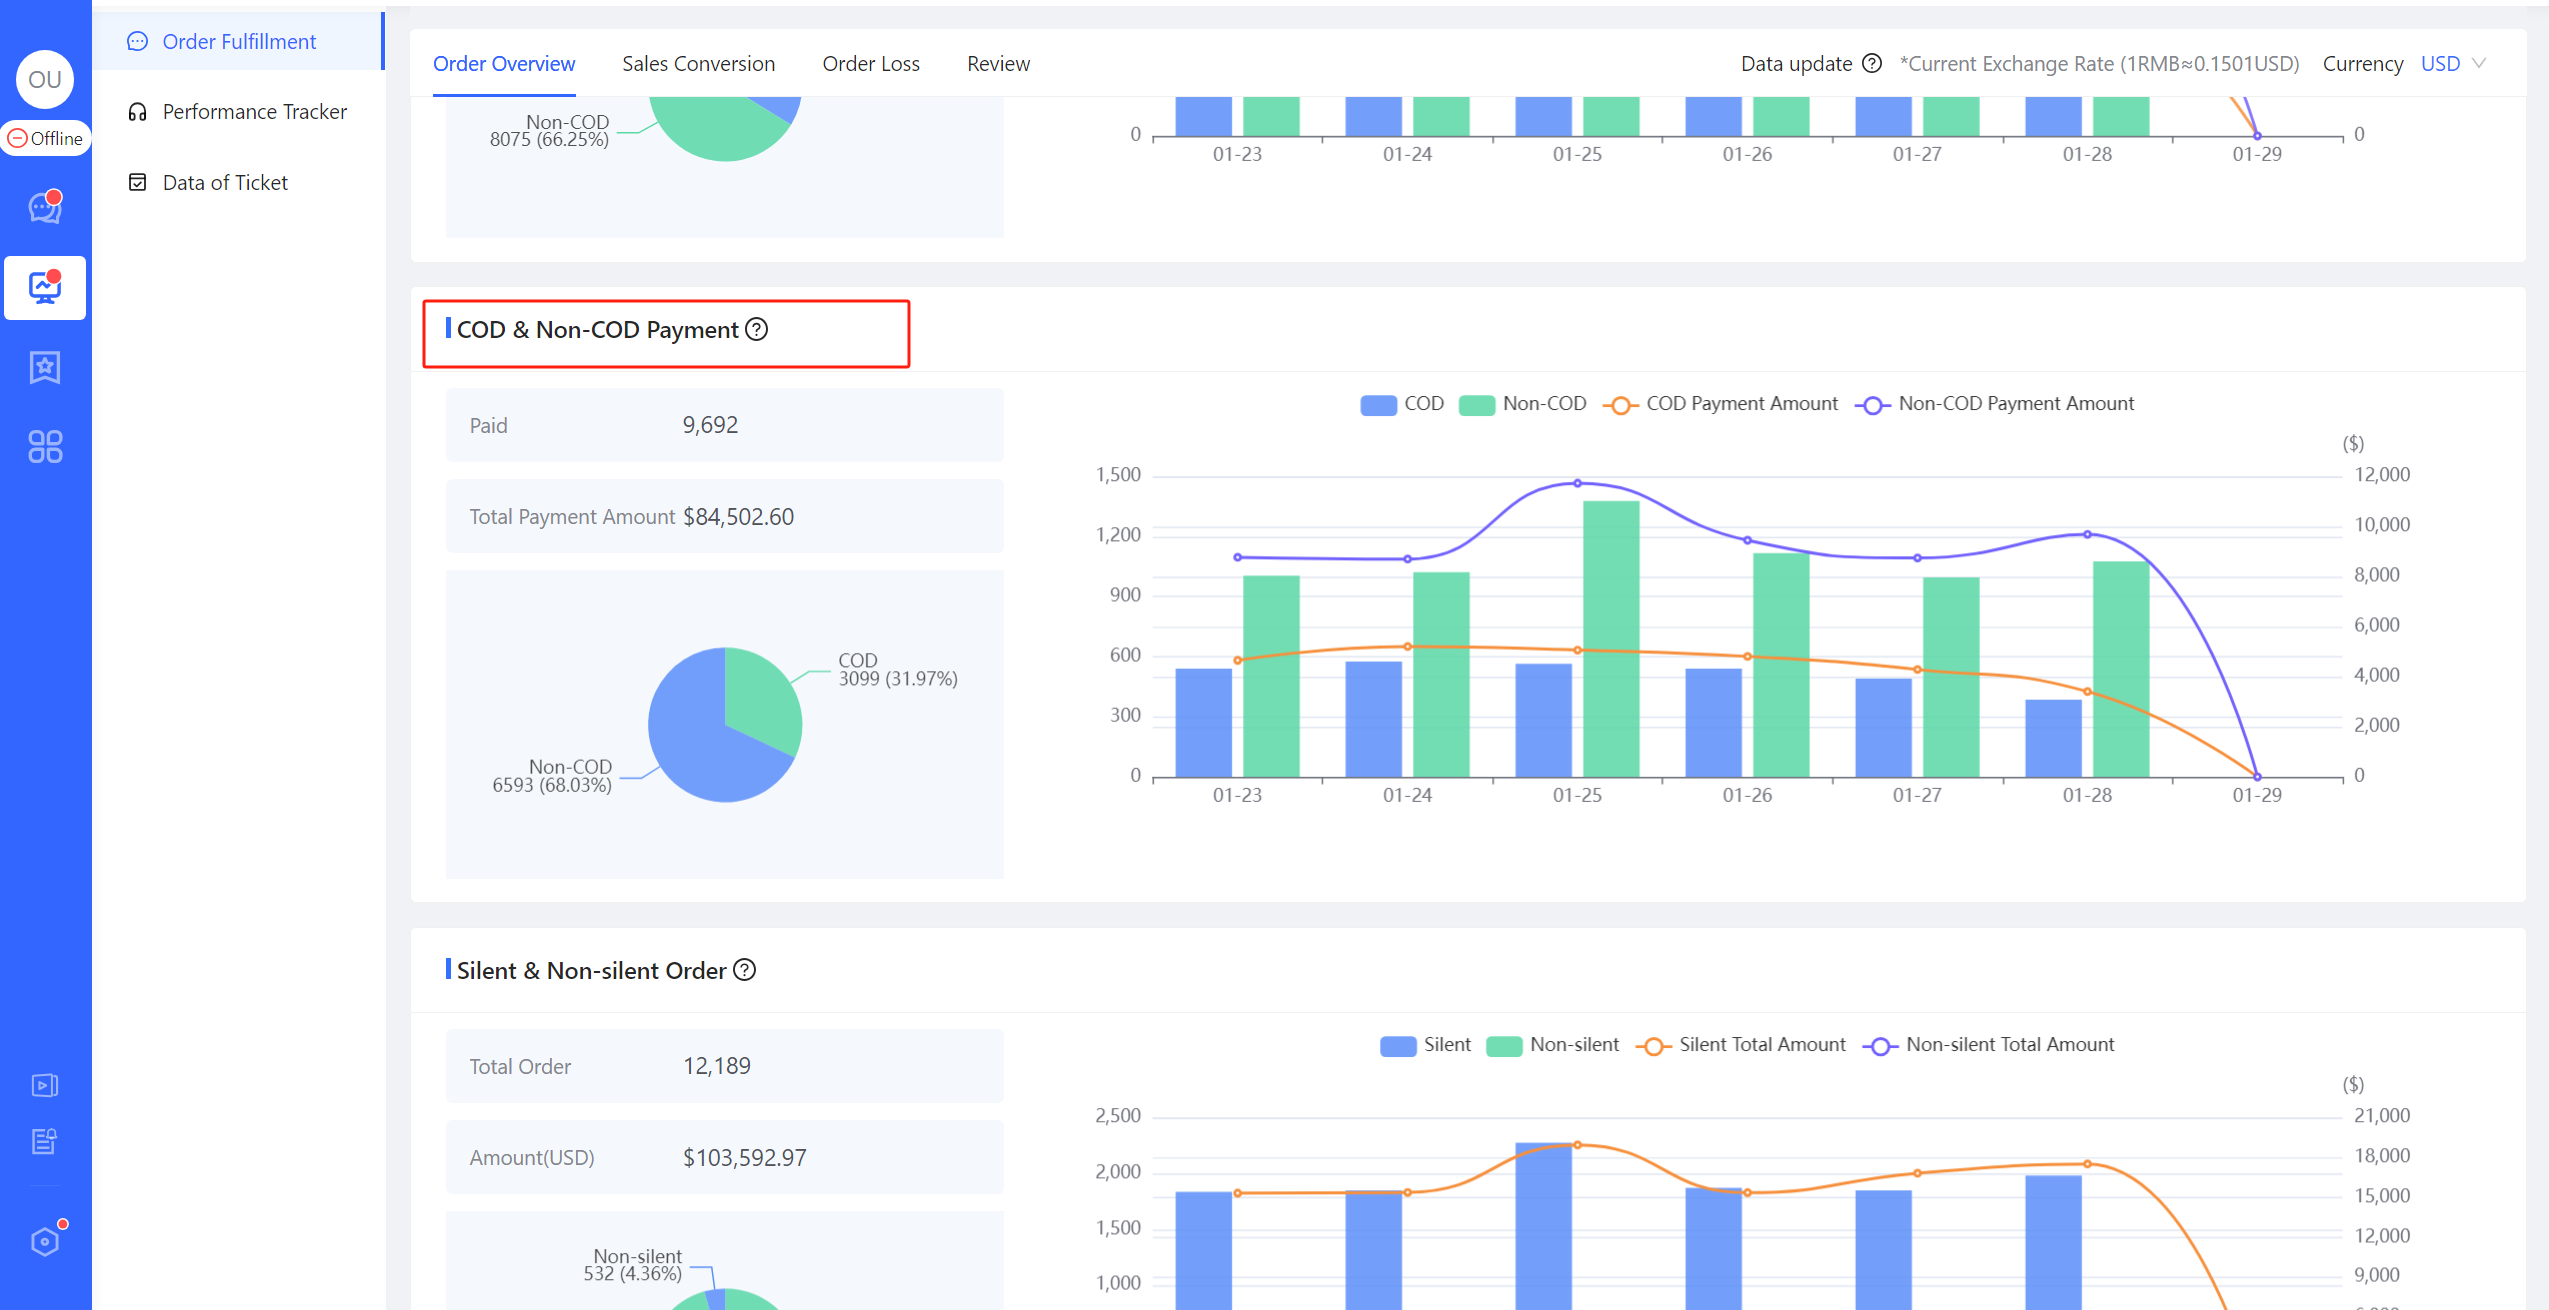
Figure 8
Silent Order
Silent order refers to an order placed by a buyer without consulting the seller, while non-silent order refers to an order placed by a buyer after consulting the seller. The proportion of silent orders can be increased by optimizing the product details page and increasing the repeat purchase rate of existing customers, thereby reducing the workload of the customer service team.
On the other hand, the proportion of silent orders on overseas e-commerce platforms is much lower than that of mainstream domestic e-commerce platforms (such as Taobao, Pinduoduo, JD), due to the low response rate and long response delay of overseas customer service. In the pre-sale stage, buyers often cannot get accurate answers quickly from customer service, leading to a reduction in pre-sale consultation. The conversion rate after pre-sale consultation for Taobao's e-commerce can be as high as 60%, with an average level of over 30%.
💡When the store can ensure nearly real-time reception, guiding buyers to make pre-sale inquiries is a shortcut to improvement of store conversion rates overseas.
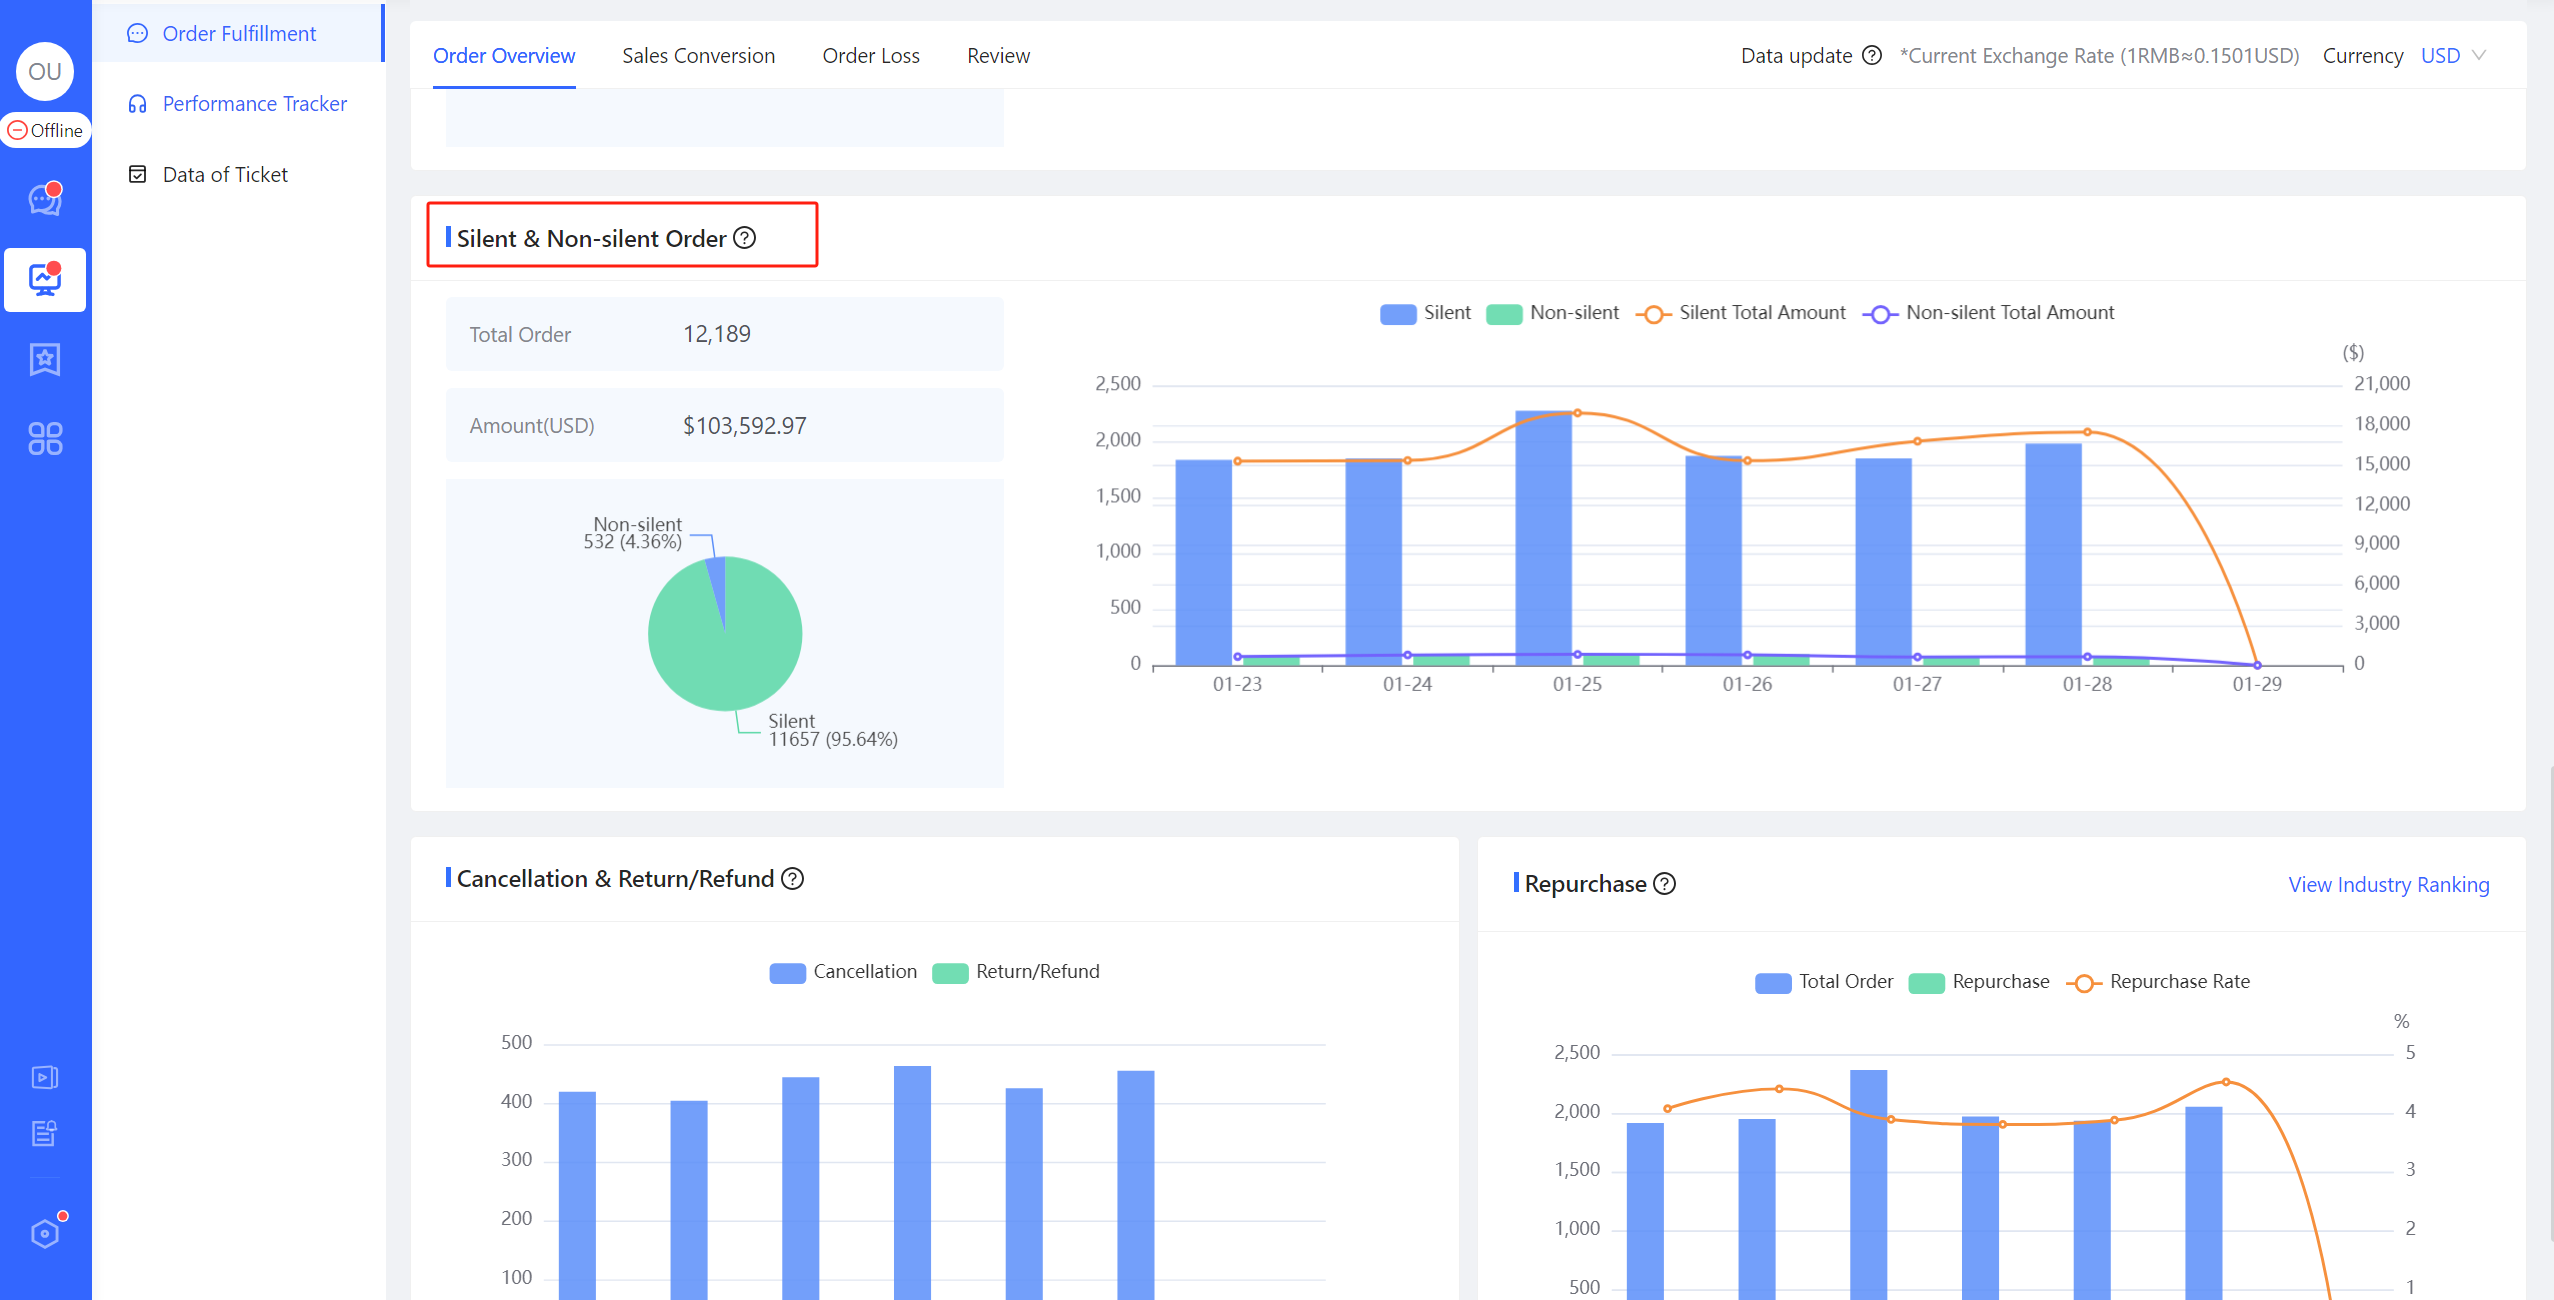
Figure 9
Cancellation or Return/Refund
The following figure shows the daily data for return/refund, and cancellation (including non-COD orders placed but not paid for). In this context, abandoned order refers to the total of return/refund, and cancellation. Hovering over the corresponding date will display the details for that day.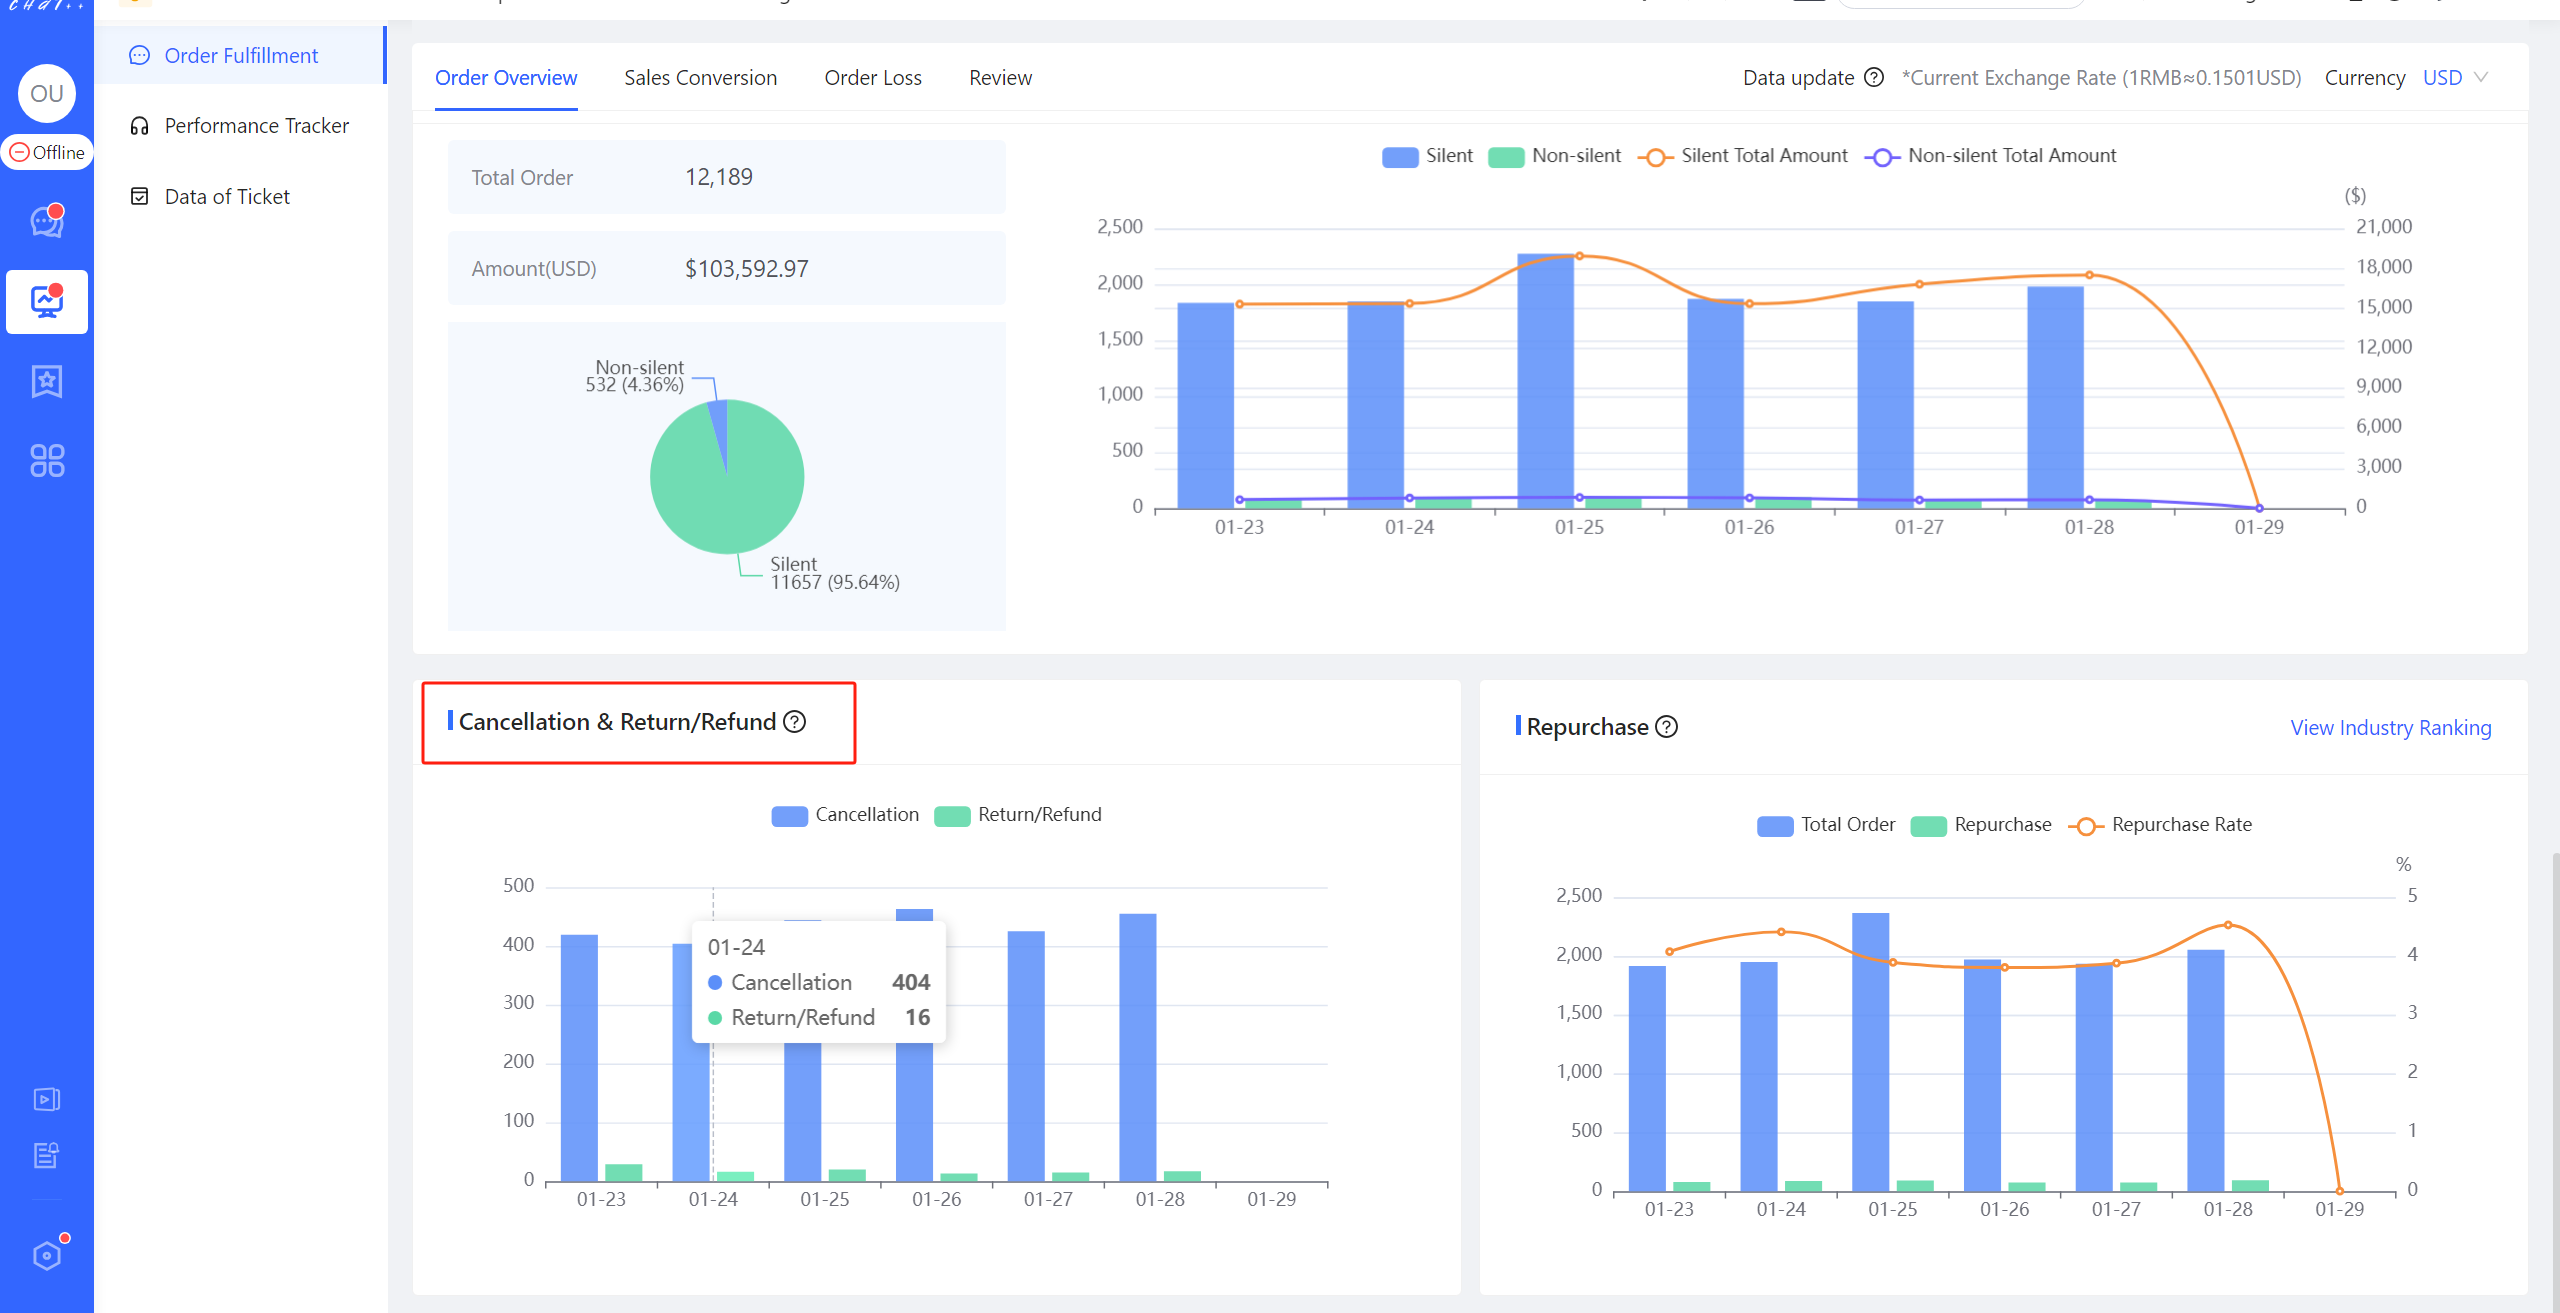
Figure 10
Repurchase Rate
Repurchase refers to orders placed by buyers who have completed orders within 180 days. The following figure shows the store's daily repurchase rate.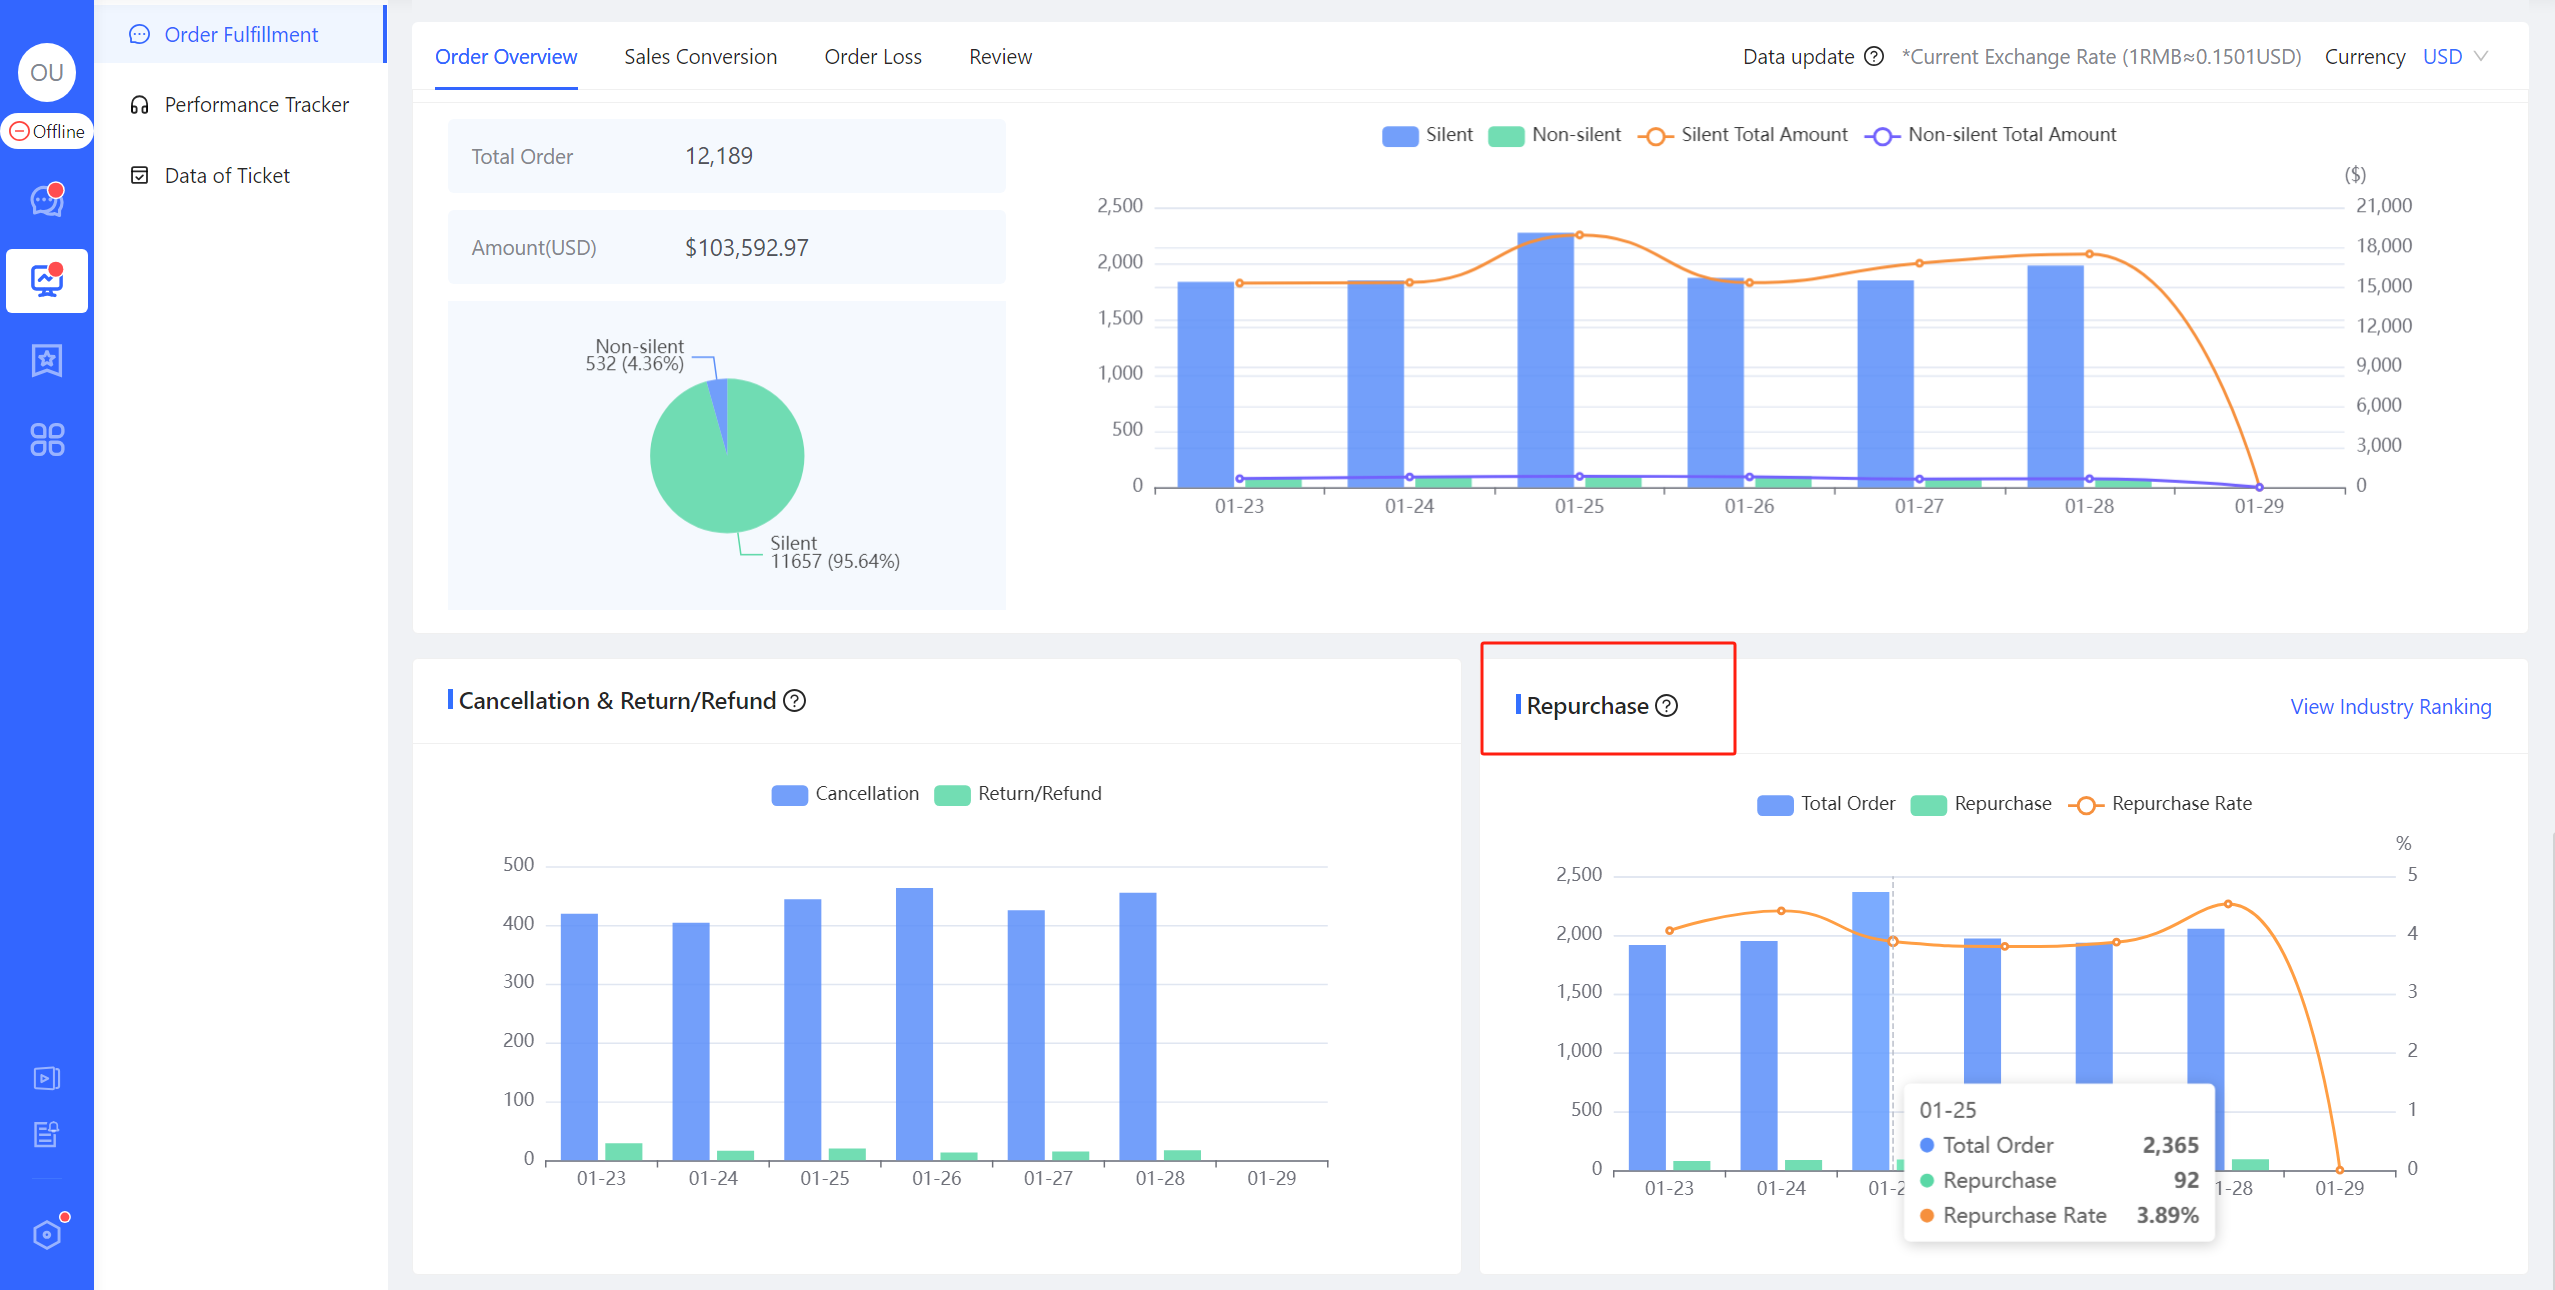
Figure 11
Sales Conversion
👆Click on the [ "Analytics" in the left menu bar (marked in red as① in the figure below) → "Order Fufillment" (marked in red as② in the figure below) → "Sales Conversion" (marked in red as③ in the figure below)] to enter the sales conversion display page.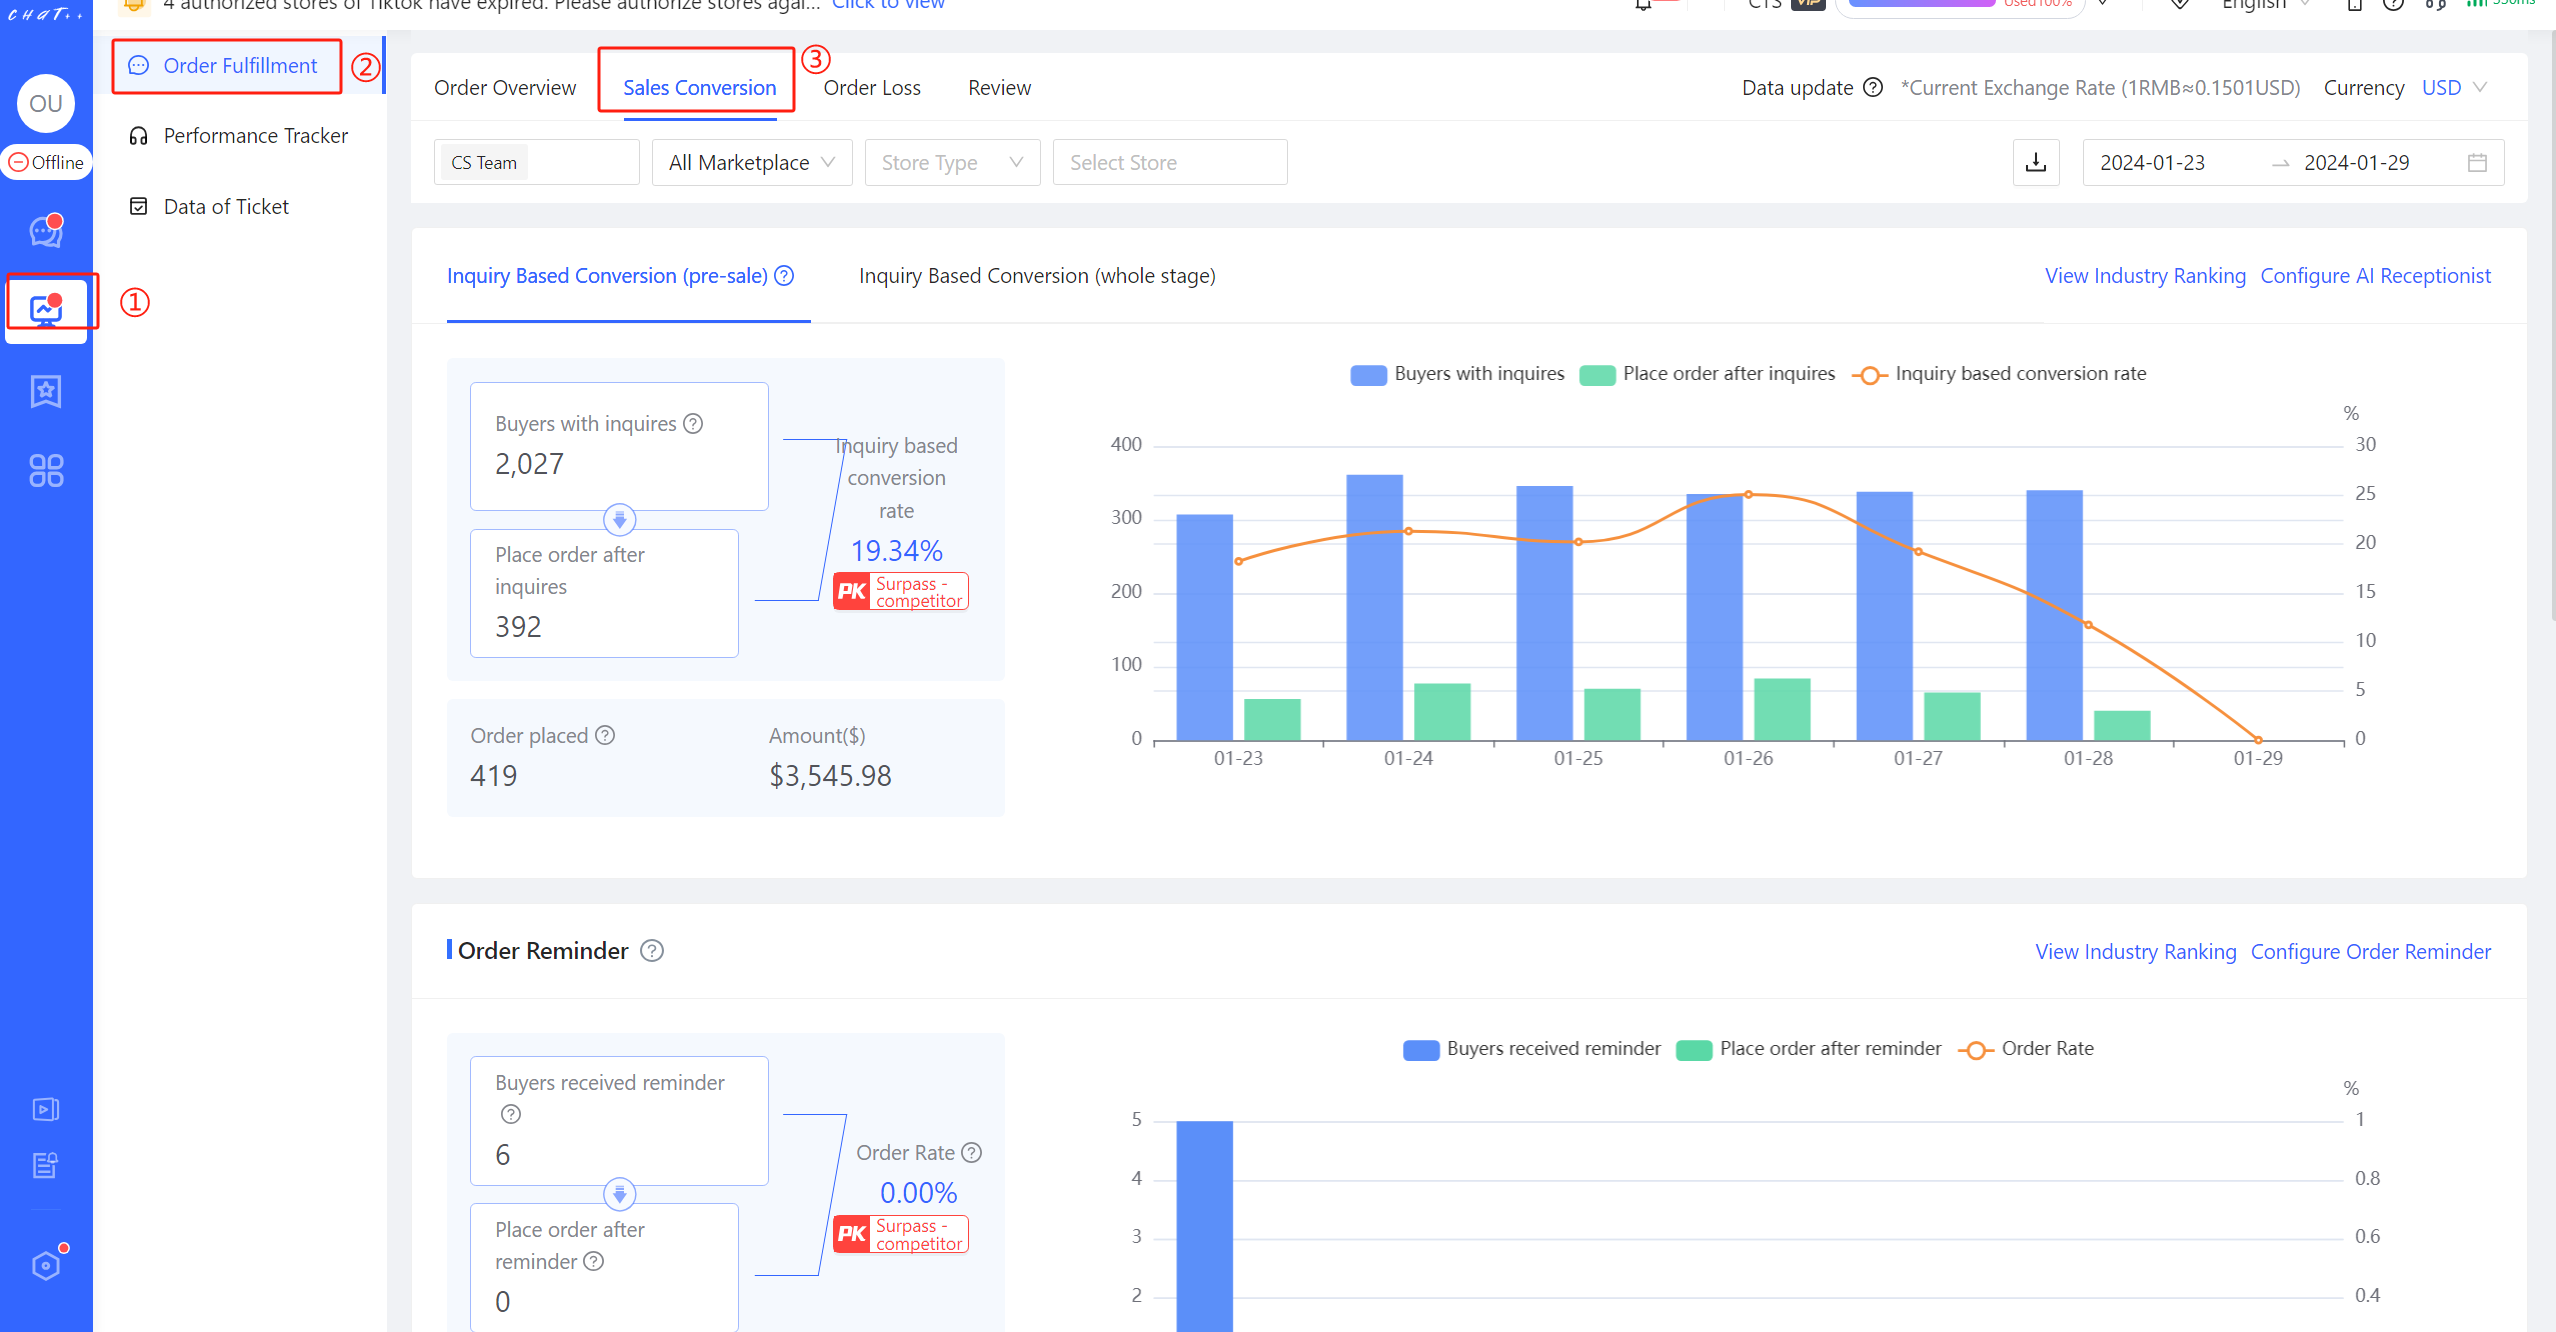
Figure 12
Inquiry Based Conversion
💡 Inquiry based conversion rate is one of the core indicators for evaluating customer service reception capabilities, especially the "conversion rate of buyers with inquiries to customer service (pre-sale)" is the most important indicator in the pre-sales stage and the key to maximizing the value of store traffic.
Inquiry based conversion rate (pre-sale) refers to the proportion of buyers who place an order within 48 hours after initiating a pre-sale consultation (not placing and order within 21 days before consultation). The numerator is the number of buyers who place an order within 48 hours after the pre-sale consultation, and the denominator is the number of buyers who have had a pre-sale consultation.
Inquiry based conversion rate (whole stage) refers to the proportion of buyers who place an order within 48 hours after initiating a consultation, which removes the pre-sale restriction. The numerator is the number of buyers who place an order within 48 hours after consultation, and the denominator is the number of buyers who have had consultations.
As shown in Figure 2, ChatPlusAI displays the "Inquiry Based Conversion Rate (pre-sale)" and the "Inquiry Based Conversion Rate (whole stage)" on a daily basis. The conversion rate is attributed to the date initiating consultation, not the order placement date. For example, if a pre-sale consultation occurred on August 15th and an order was placed on August 16th, the conversion rate is attributed to August 15th.
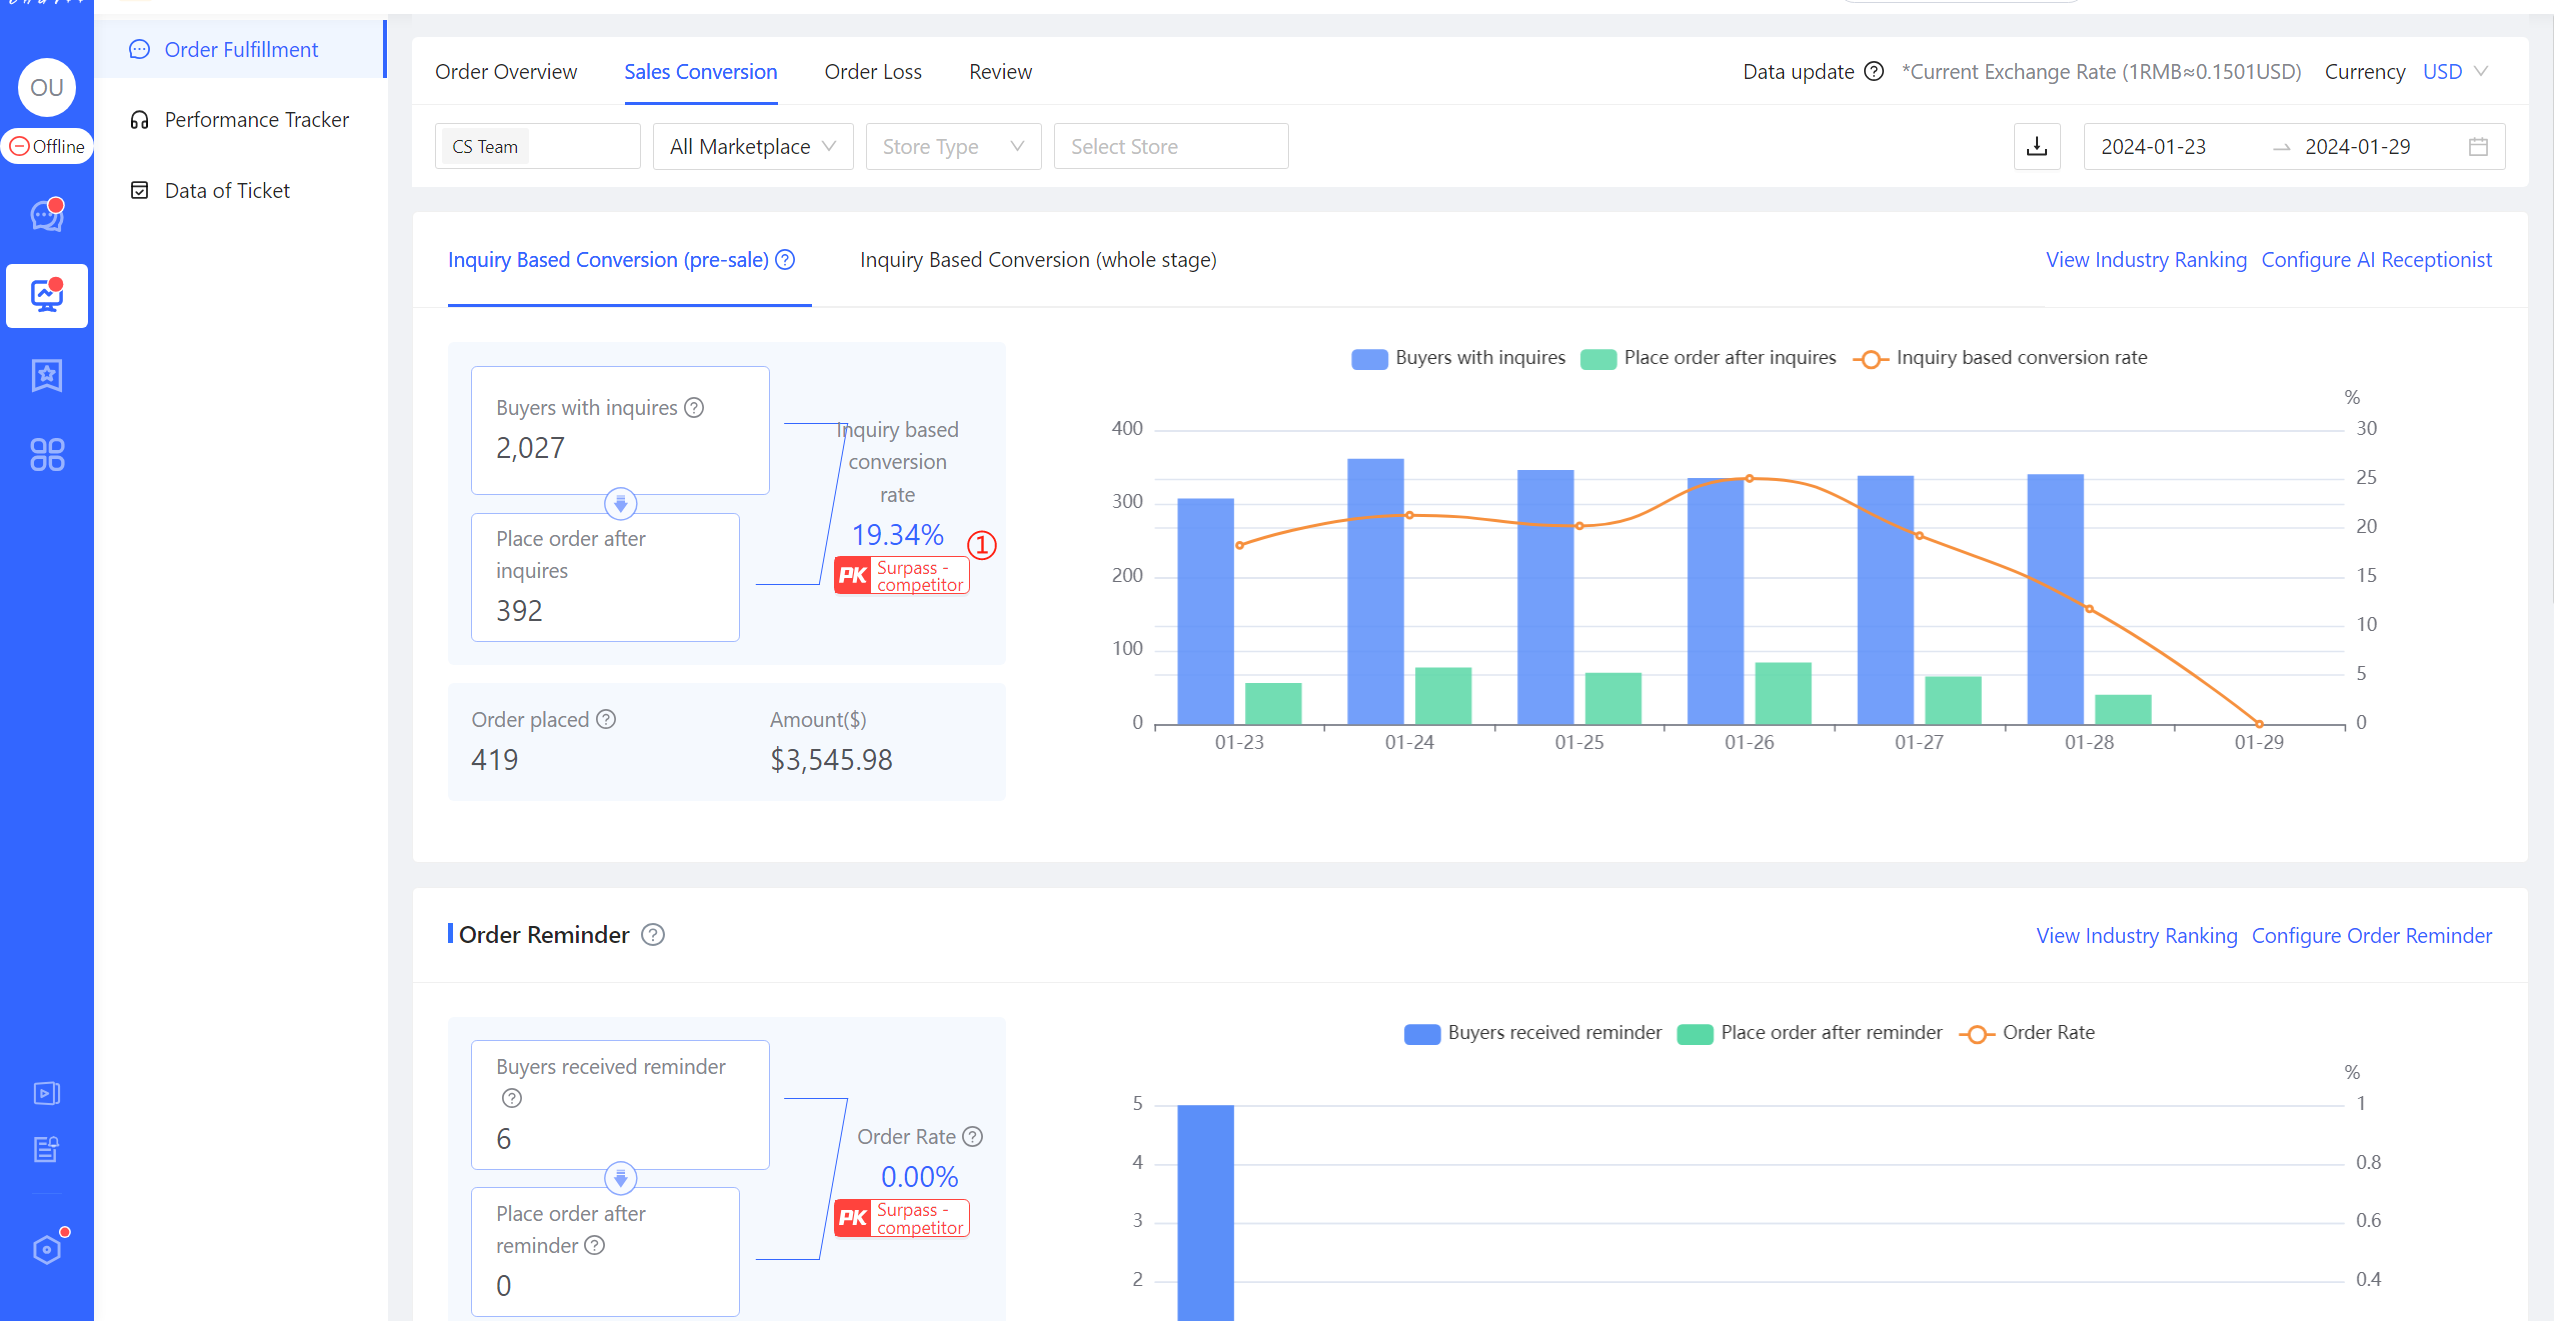
Figure 13
👆Click on the PK icon at the red mark ① in the figure 2 above, to view the industry benchmarking data comparison as shown in the following figure.
Pull down the "Select Industry" list at the red mark ① the figure 3 below, which shows the industries involved when operators join the ChatPlusAI store.
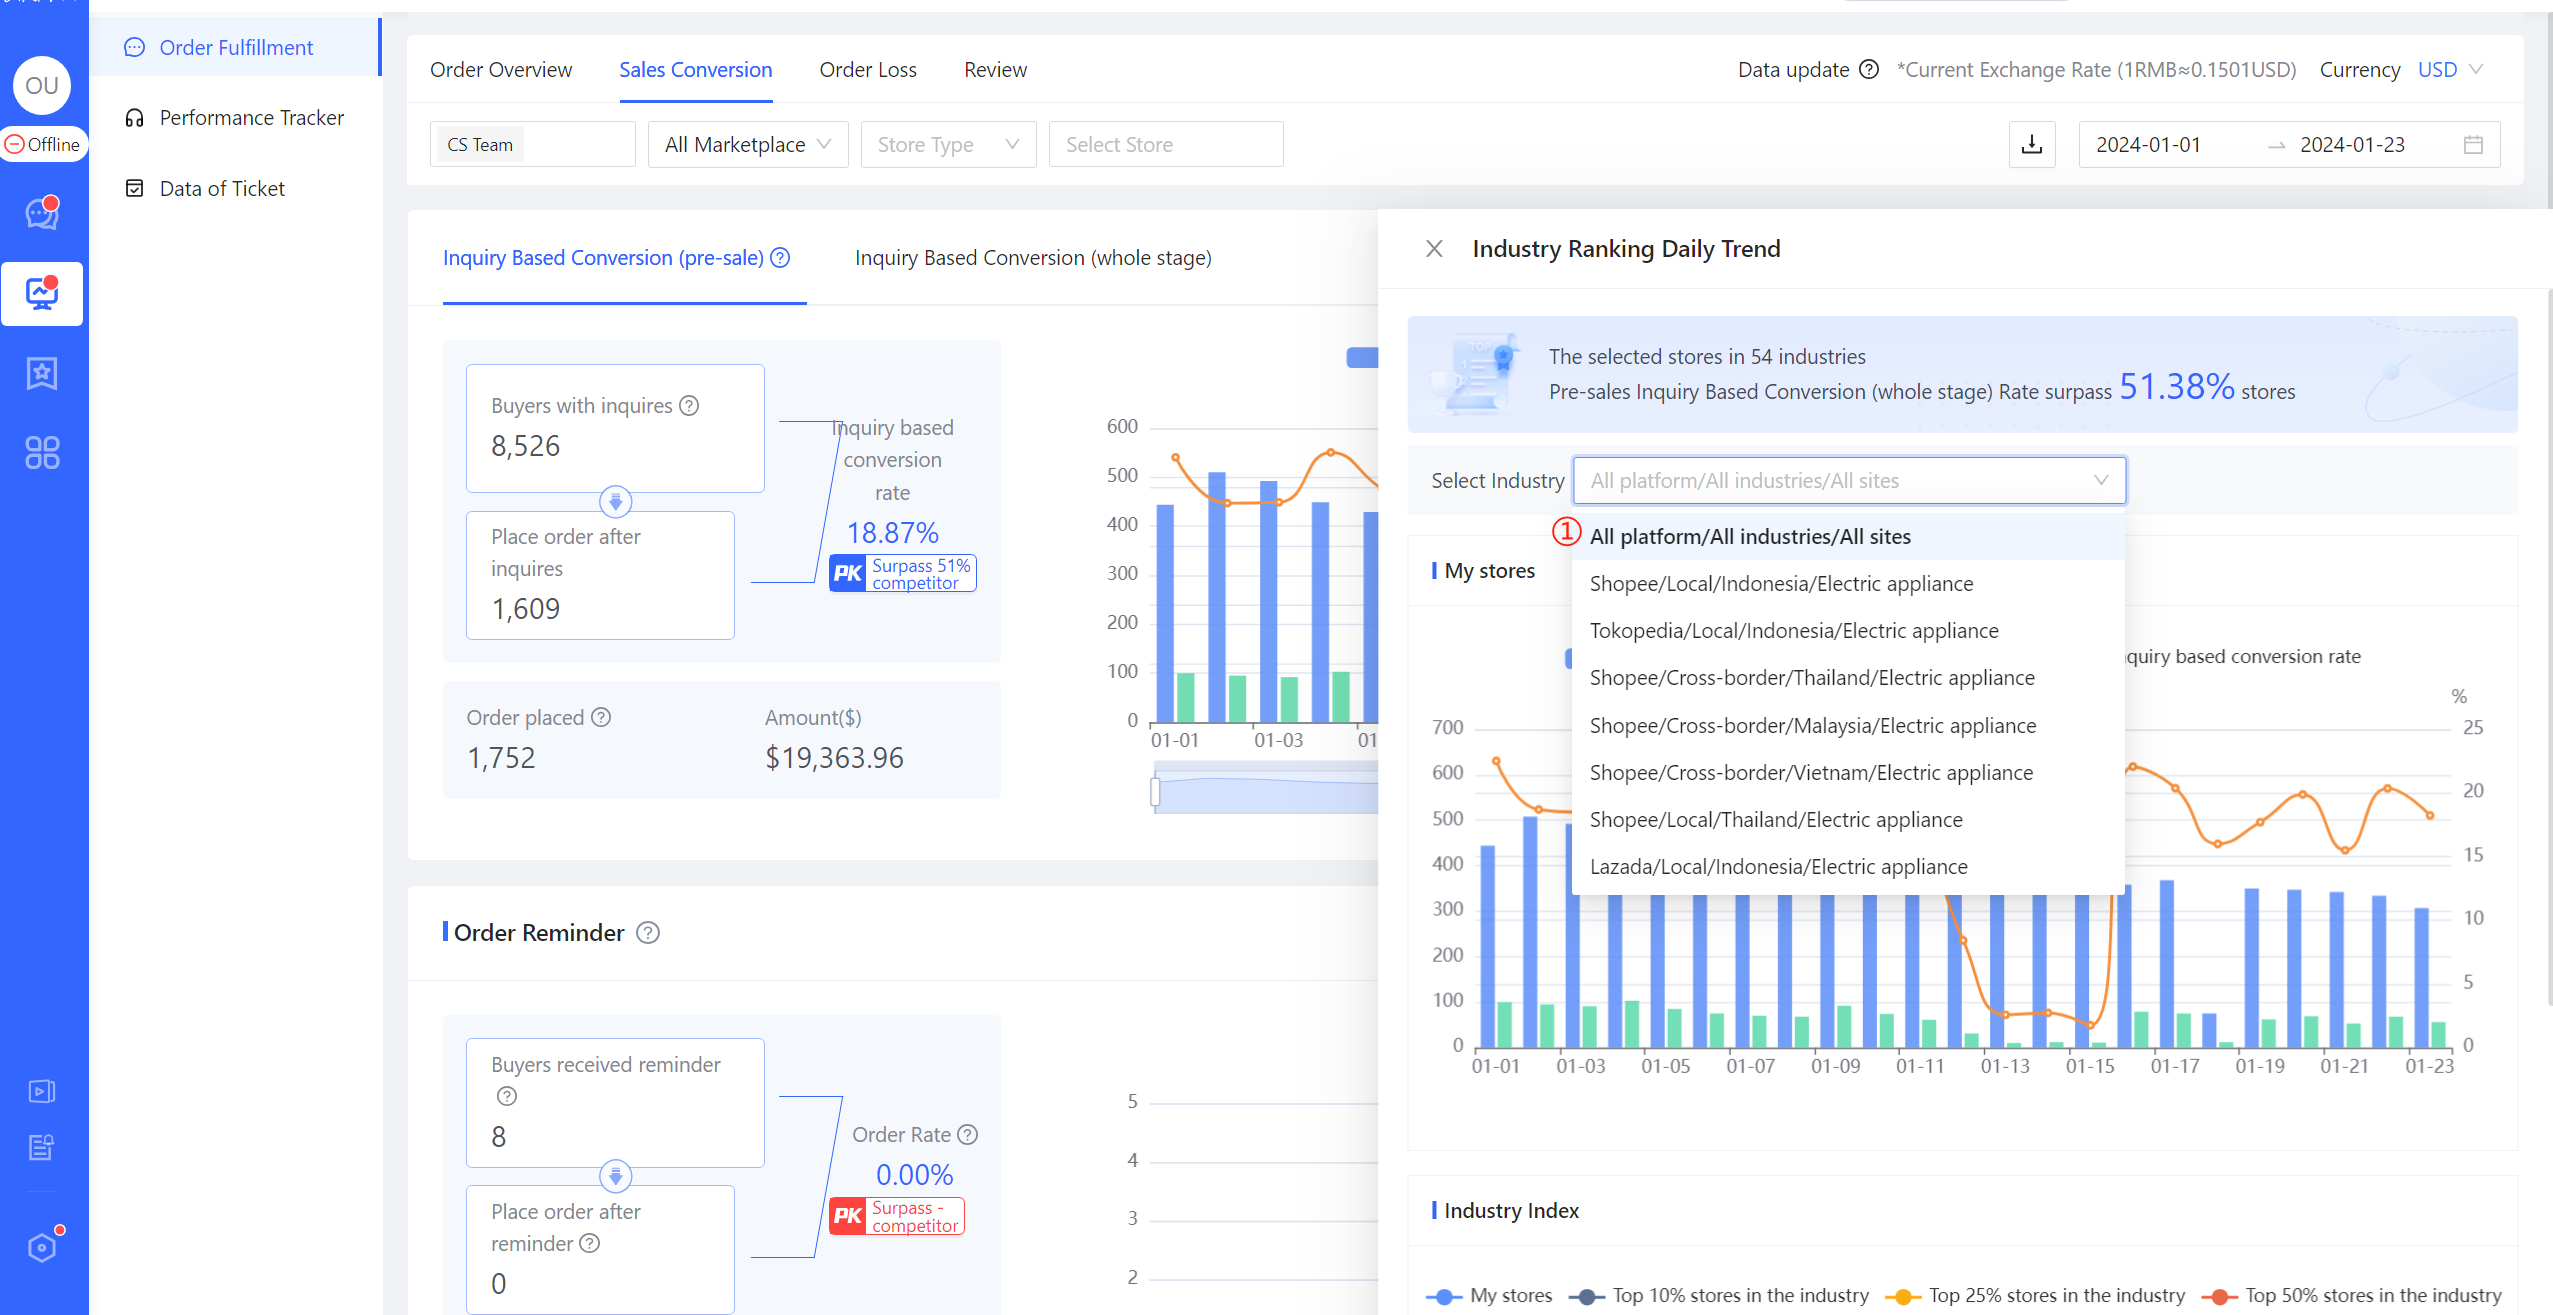
Figure 14
👆Selecting an industry (such as Tokopedia/Local/Indonesia/Electric appliance) will show the level at which the operator's store in the industry, surpassing 82.52% stores of Tokopedia/Local/Indonesia/Electric appliance. This value is a weighted average based on order volume within the selected period.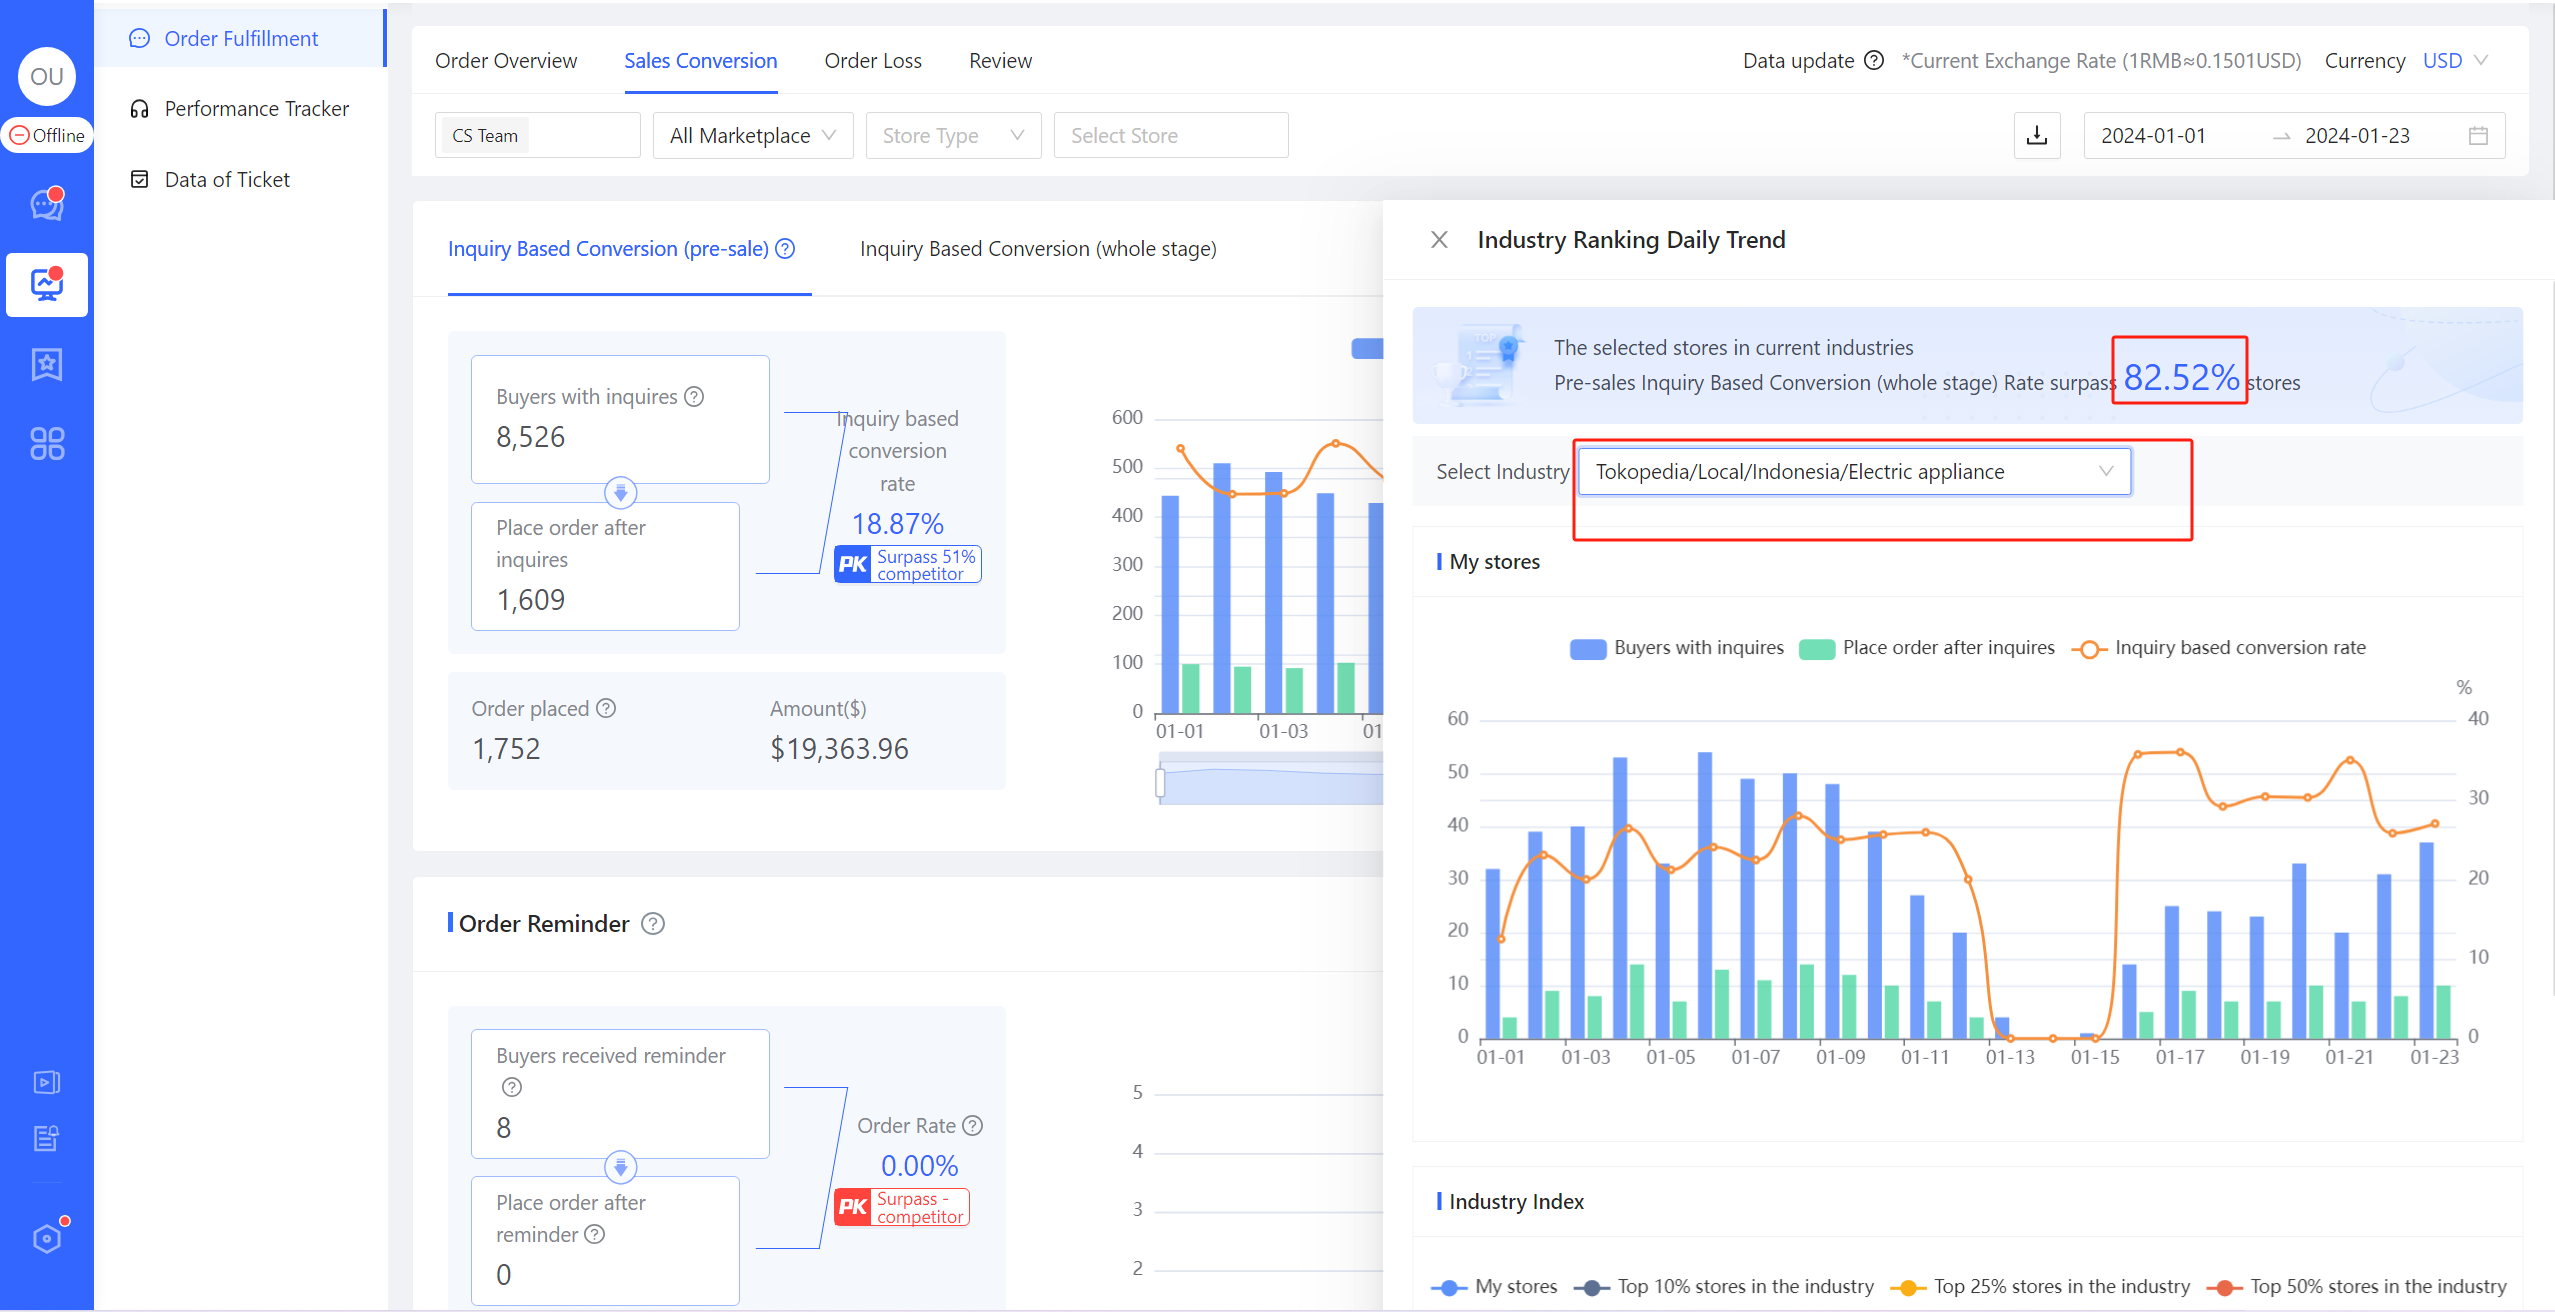
Figure 15
Scrolling down the page, top 10%, 25%, and 50% stores in the industry as well as the daily changes of My Stores. The blue indicator represents the trend of inquiry based conversion rate of My Stores.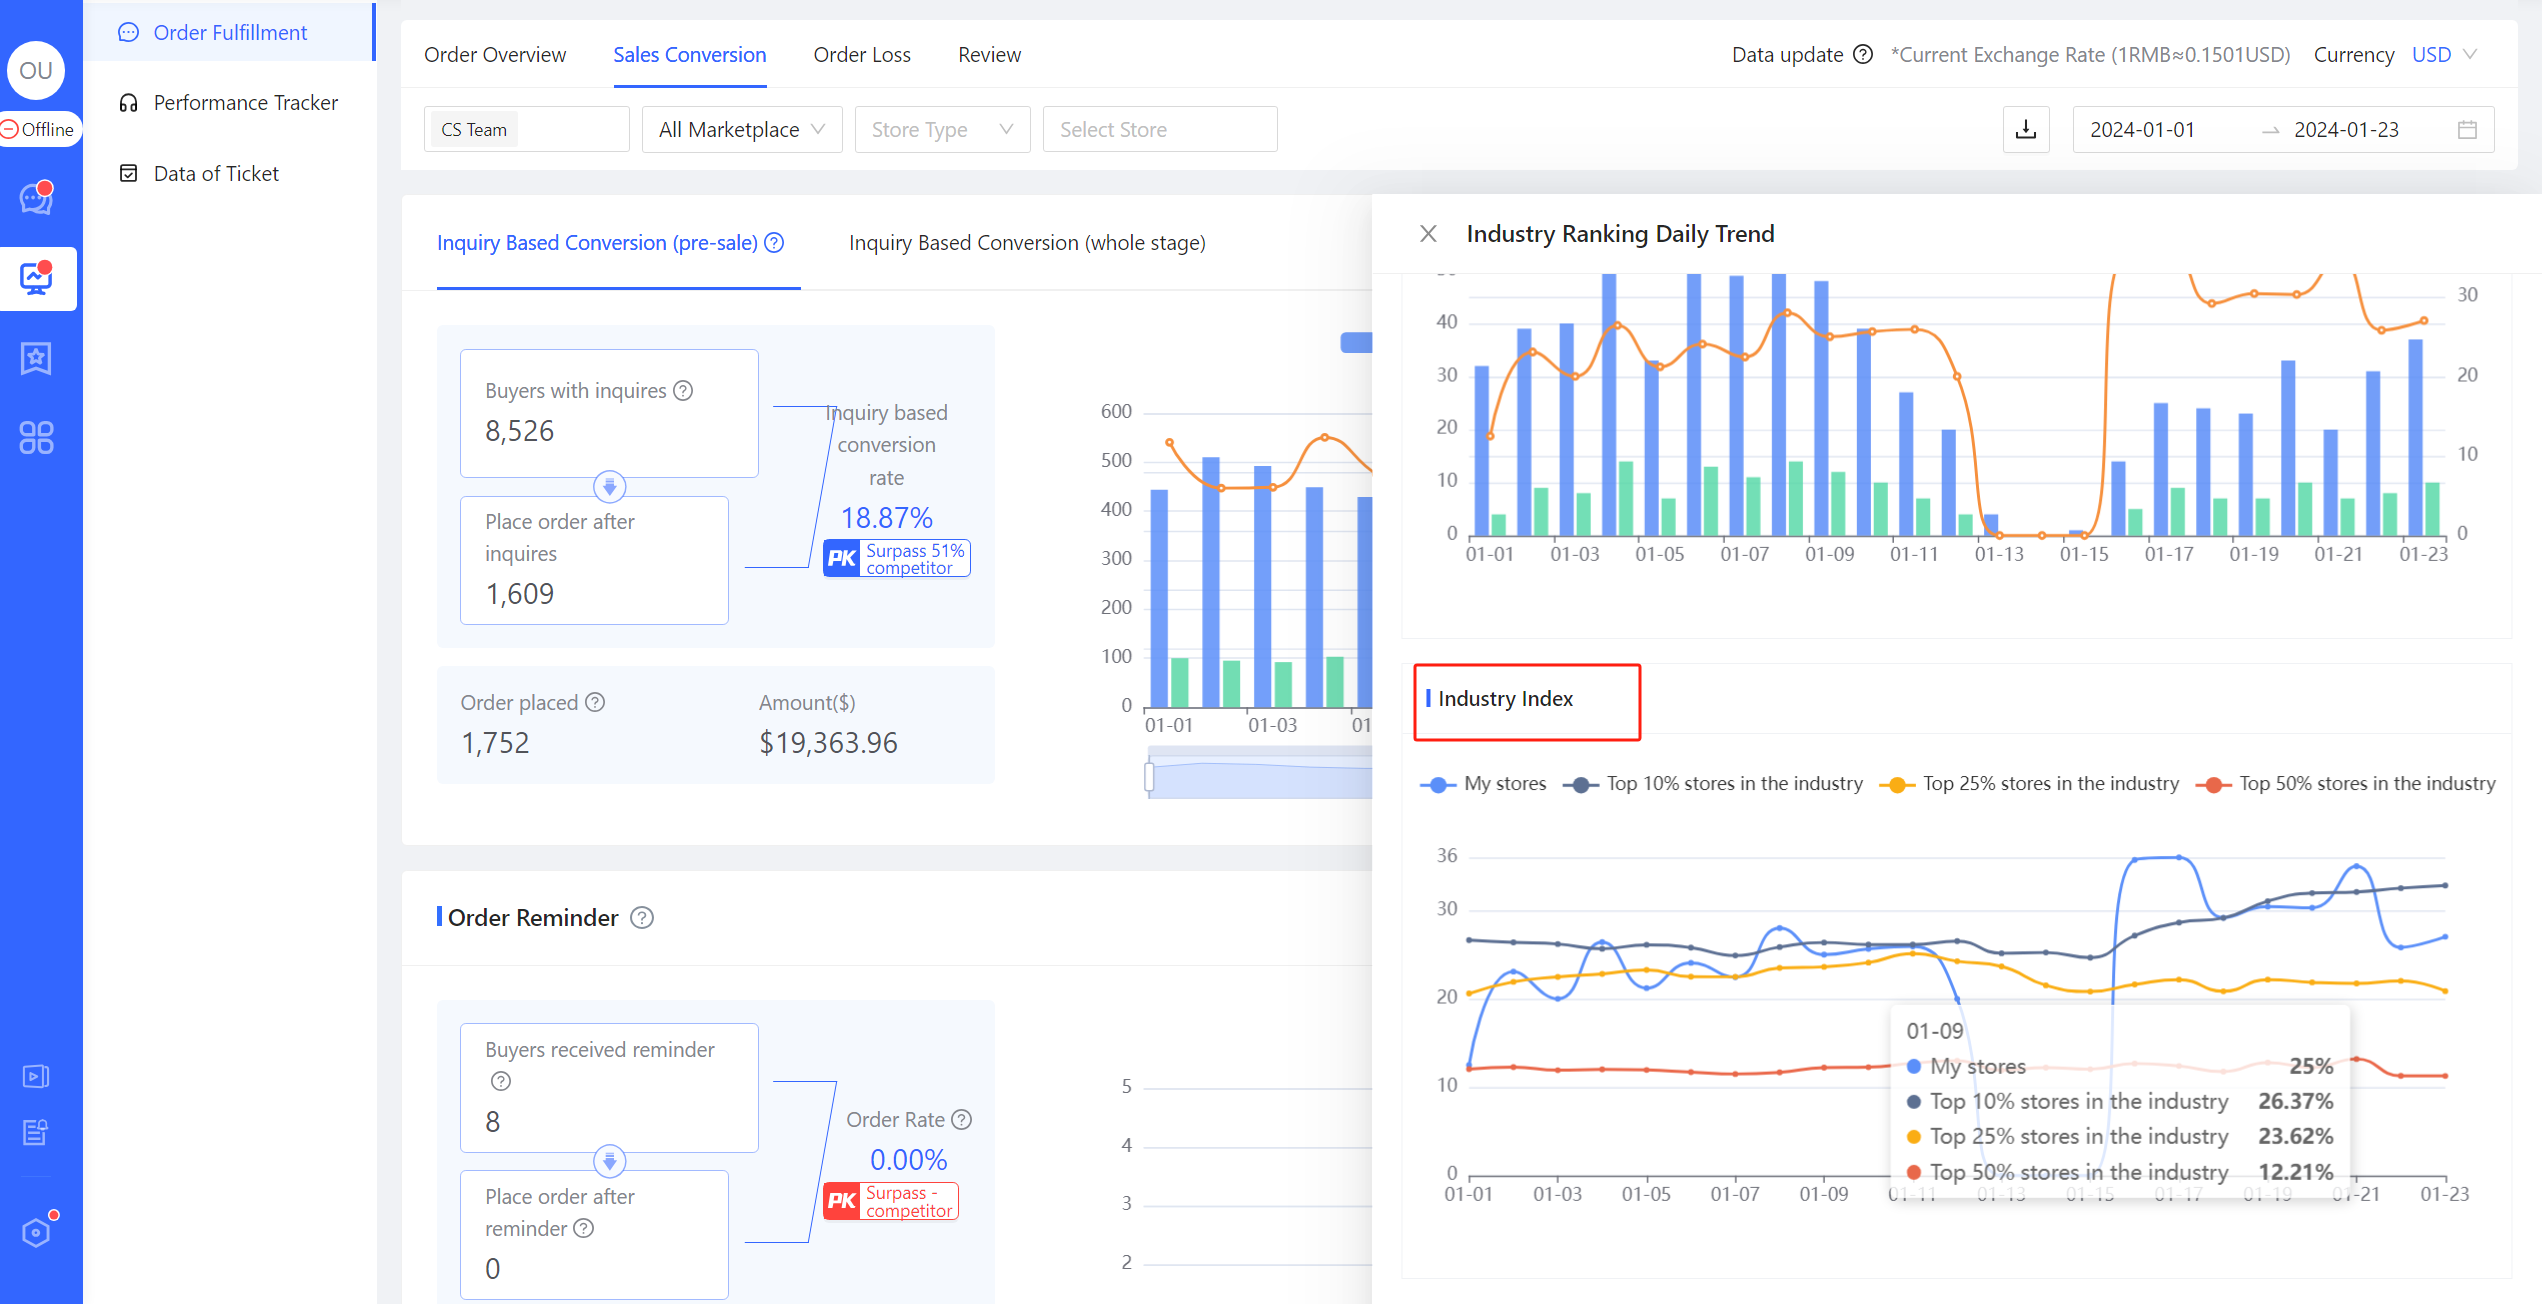
Figure 16
Order Reminder
Reminder refers to that the customer service uses a variety of strategic language through a chatbot to encourage a buyer to place an order when the buyer makes pre-sale consultation with customer service but hesitates to place an order even if his/her questions are answered.
Order reminder demonstrates the effectiveness of reminders. When a reminder occurs, the buyer's ordering behavior within 48 hours will be attributed to the order reminder brought by the reminder.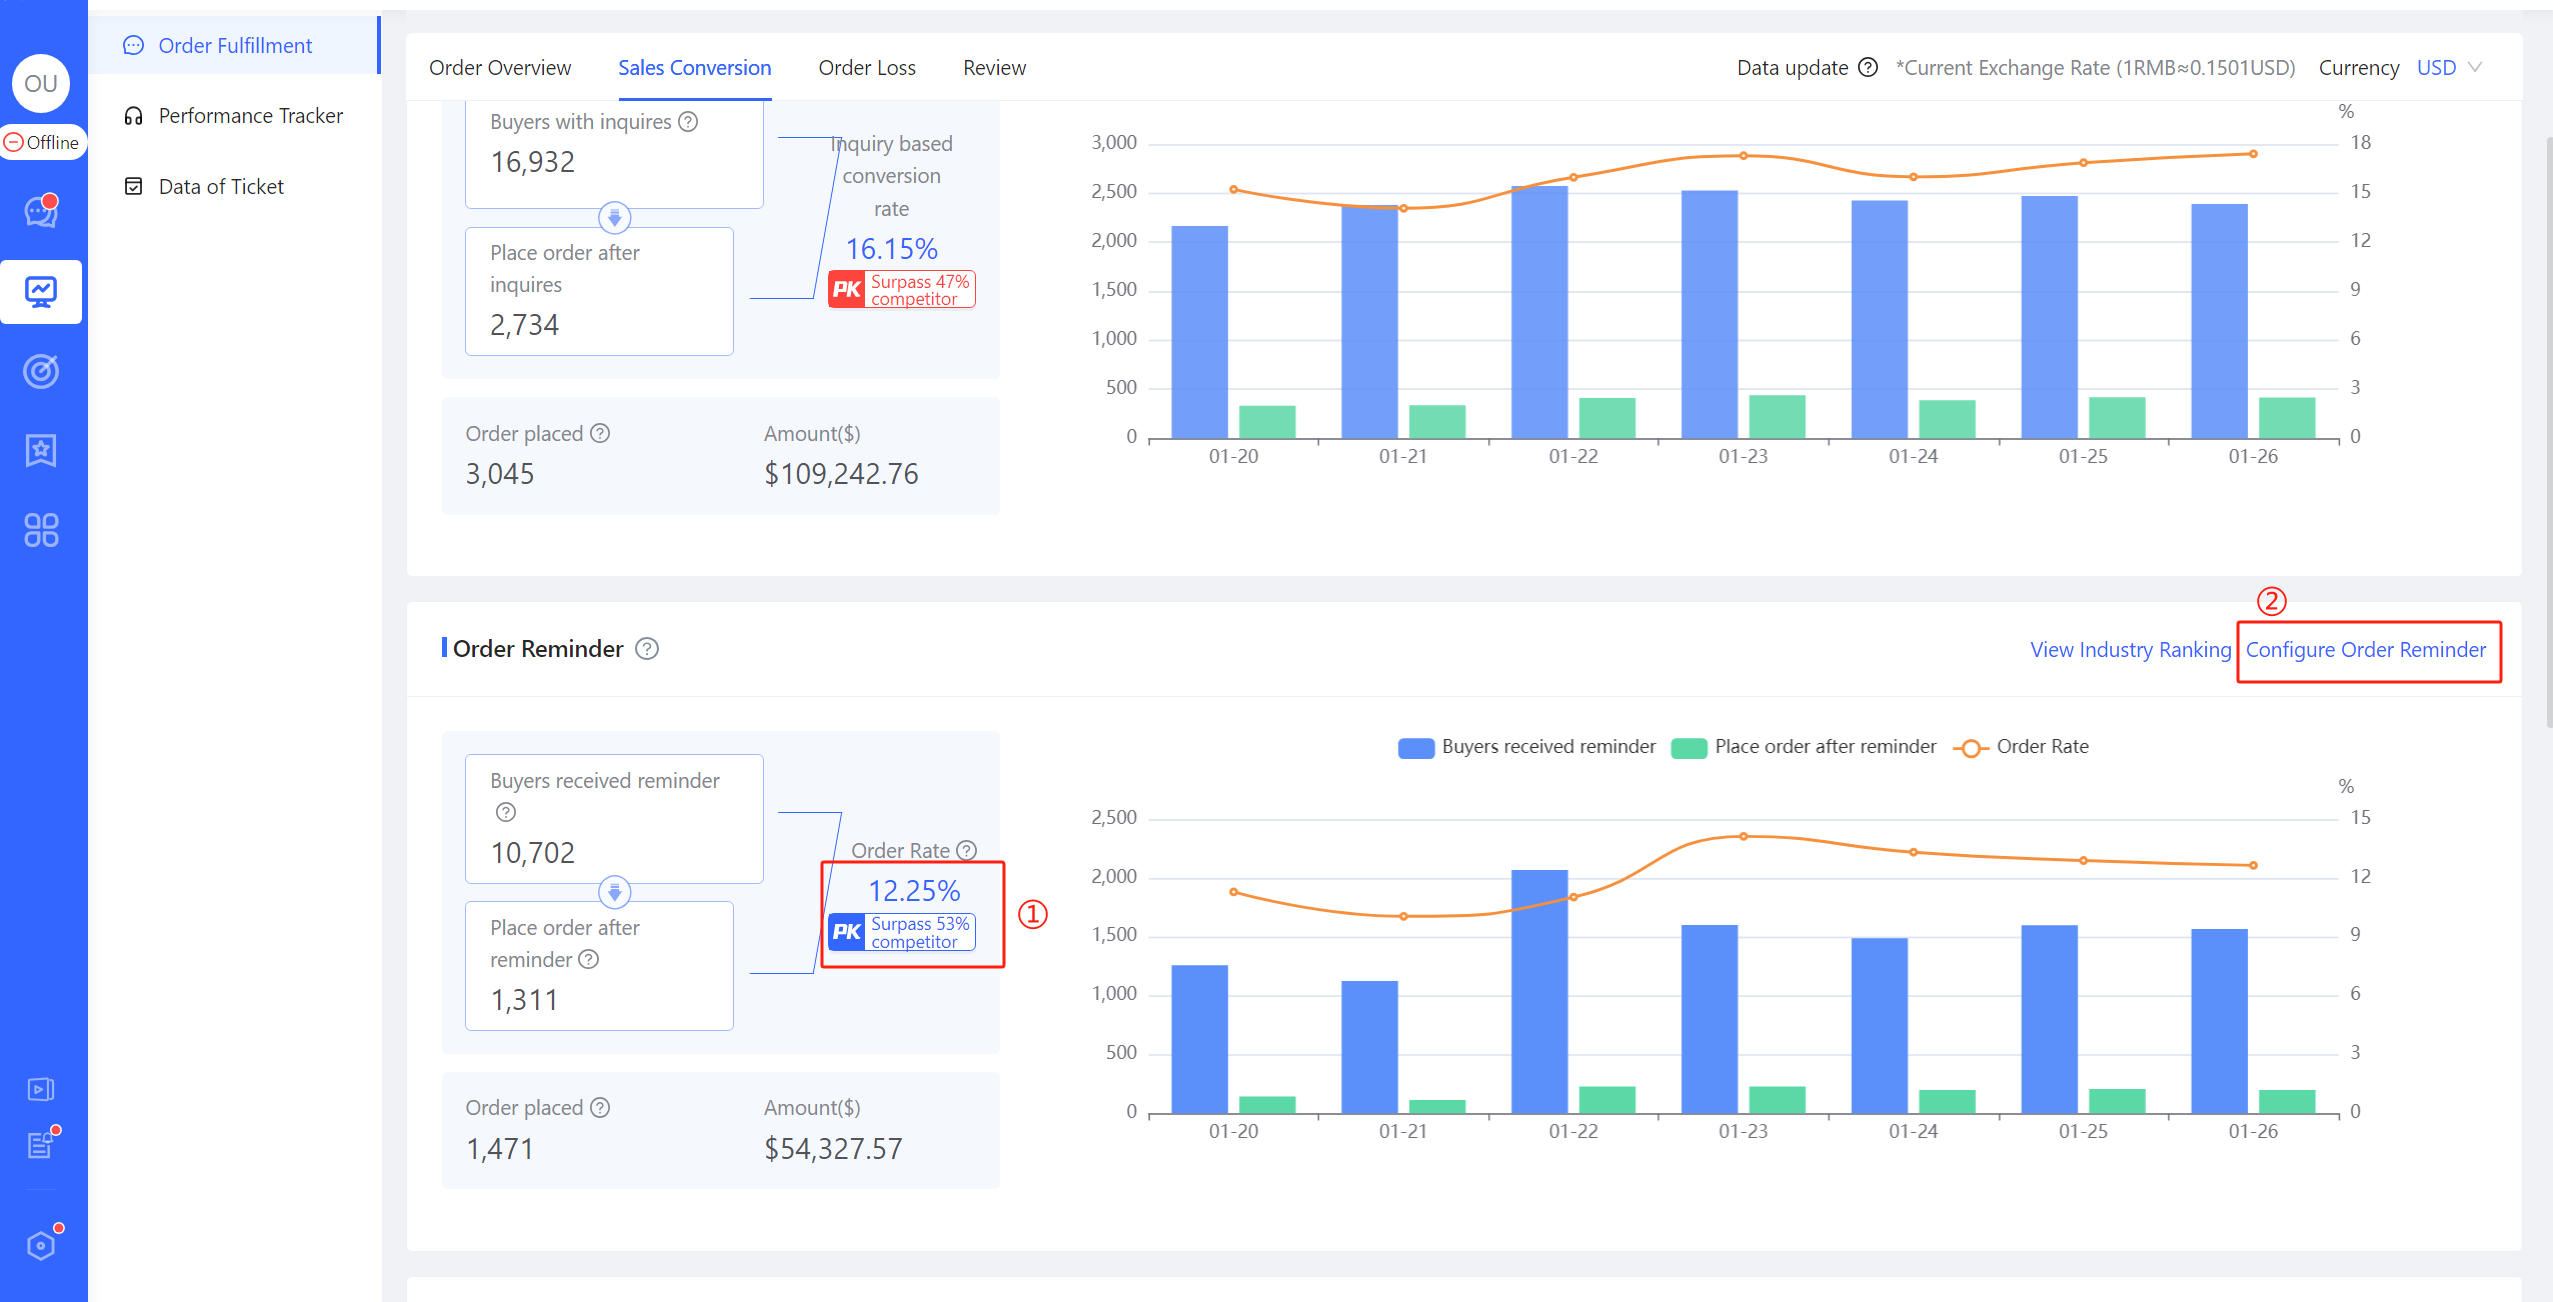
Figure 17
- Click on the red mark ① in the above picture to check the ranking of the index for reminder orders in the industry to which the store belongs.
- Click on the red mark ② in the above picture to configure order reminder. >>>For details, please click to jump
FAQ
Q1:Why is the data for order reminder empty, i.e., the number of buyers received reminder is 0 (see figure 6)?A1:Because the reminder task has not been initiated yet. Please configure by clicking on the red mark ② in the figure 6 above.
Q2:When the count of surpassing competitor is only 10 to 20% higher to the competitors (red mark ① in the figure 6 above), what should be done?A2:The optimization the reminder strategy and wording is recommended. >>>For details, please click to jump
Payment reminder(Non-COD)
Reminder refers to the buyer not paying in a timely manner after placing a non-COD order. After a certain period of time (commonly a few minutes), customer service uses a multi-strategy script through a chatbot to encourage the buyer to make the payment.
Payment reminder demonstrates the effectiveness of reminders, attributing the buyer's payment behavior within 48 hours of the reminder to the conversion brought about by the order reminder.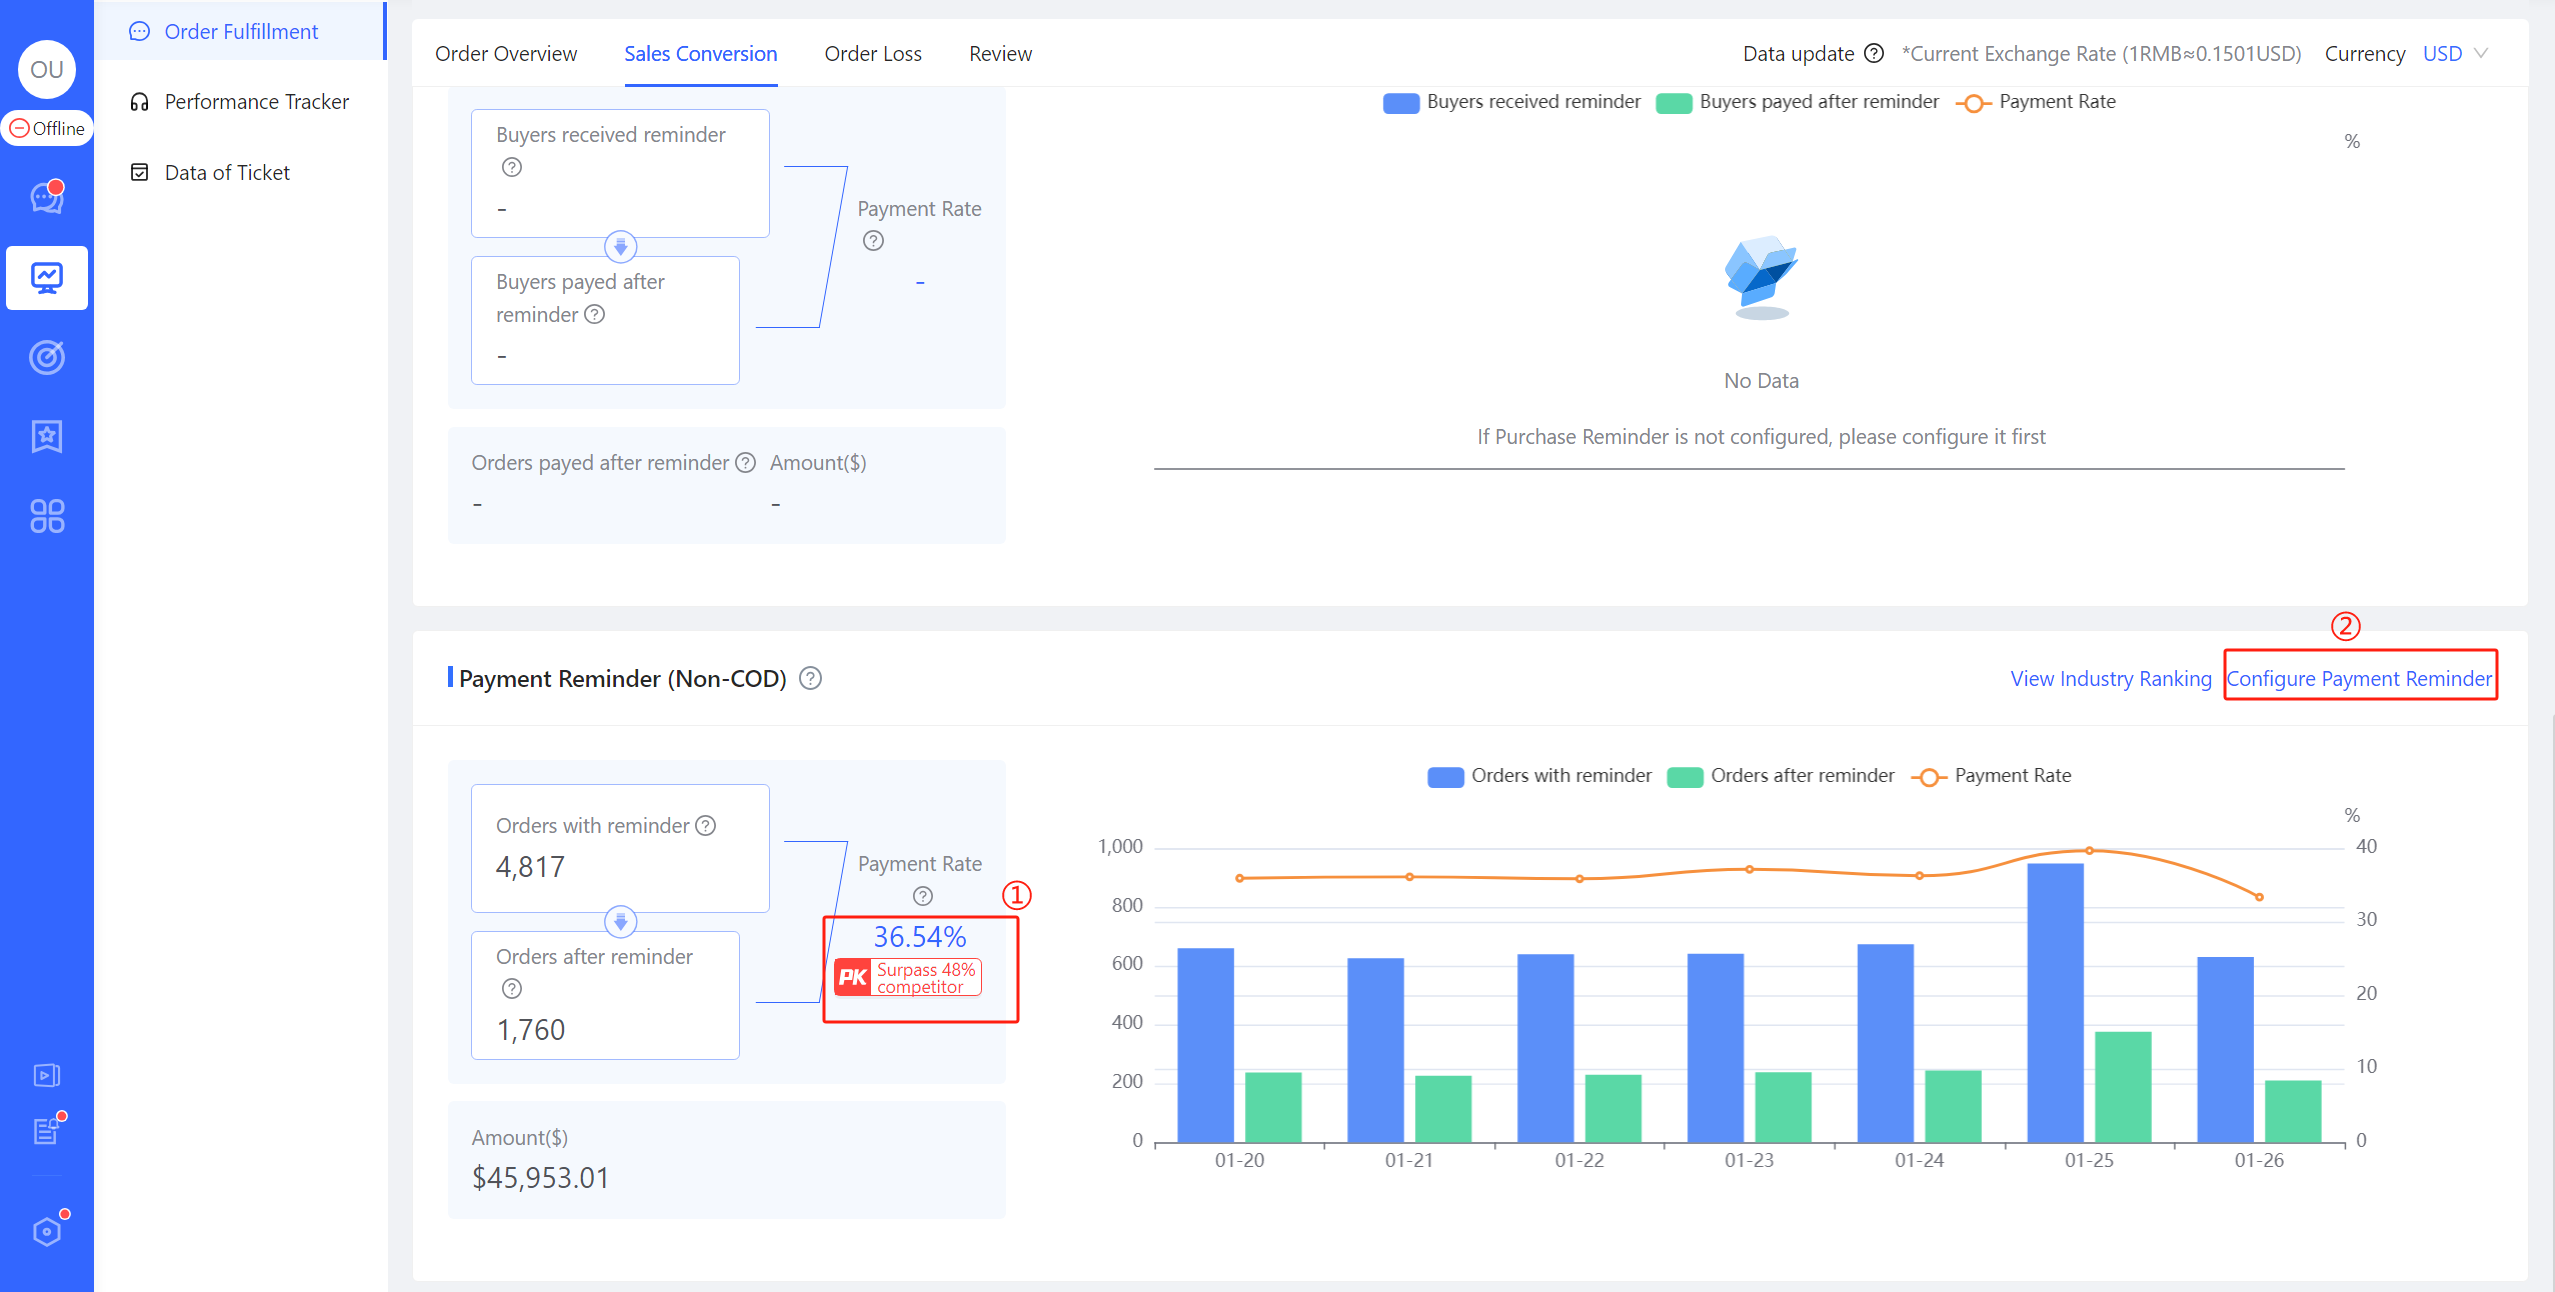
Figure 18
- Click on the red mark ① in the above picture to check the ranking of the payment reminder index within the industry to which the store belongs.
- Click on the red mark ② in the above picture to configure payment reminder. >>> For specific details, please click to jump
FAQ
Q1:Why is the data for payment reminder empty, i.e. the number of orders with reminder is 0 (see figure 7)?A1:Because the reminder task has not been initiated yet. Please configure by clicking on the red mark ② in the above figure.
Q2:When the count of surpassing competitor is only 10 to 20% higher to the competitors (red mark ① in the figure 7 above), what should be done?A2:The optimization the reminder strategy and scripts is recommended. >>> For specific details, please click to jump.
Order Loss
**👉 **"Cancellation/Refund" refers to issues such as non-payment, order cancellation, and return/refund problems that buyers encounter after placing an order. A high cancellation/refund rate can significantly impact the store's operations, causing substantial damage to profits.
💡 Reducing the occurrence of cancellations and minimizing losses in the event of cancellations are core tasks of fine-tuned customer service. ChatPlusAI provides daily-level data reports, allowing operators to have a clear understanding of relevant data indicators related to order loss.
Order Loss Process Analysis
Click on the 【Left Menu "Analytics" (Red Marking ①) → "Order Fulfillment" (Red Marking ②) → "Order Loss" (Red Marking ③)】 to access the Order Loss data display page. You can easily switch between COD and non-COD orders at the red marking ④, as the fulfillment process and status differences between the two are significant, warranting a separate page for displaying relevant data.
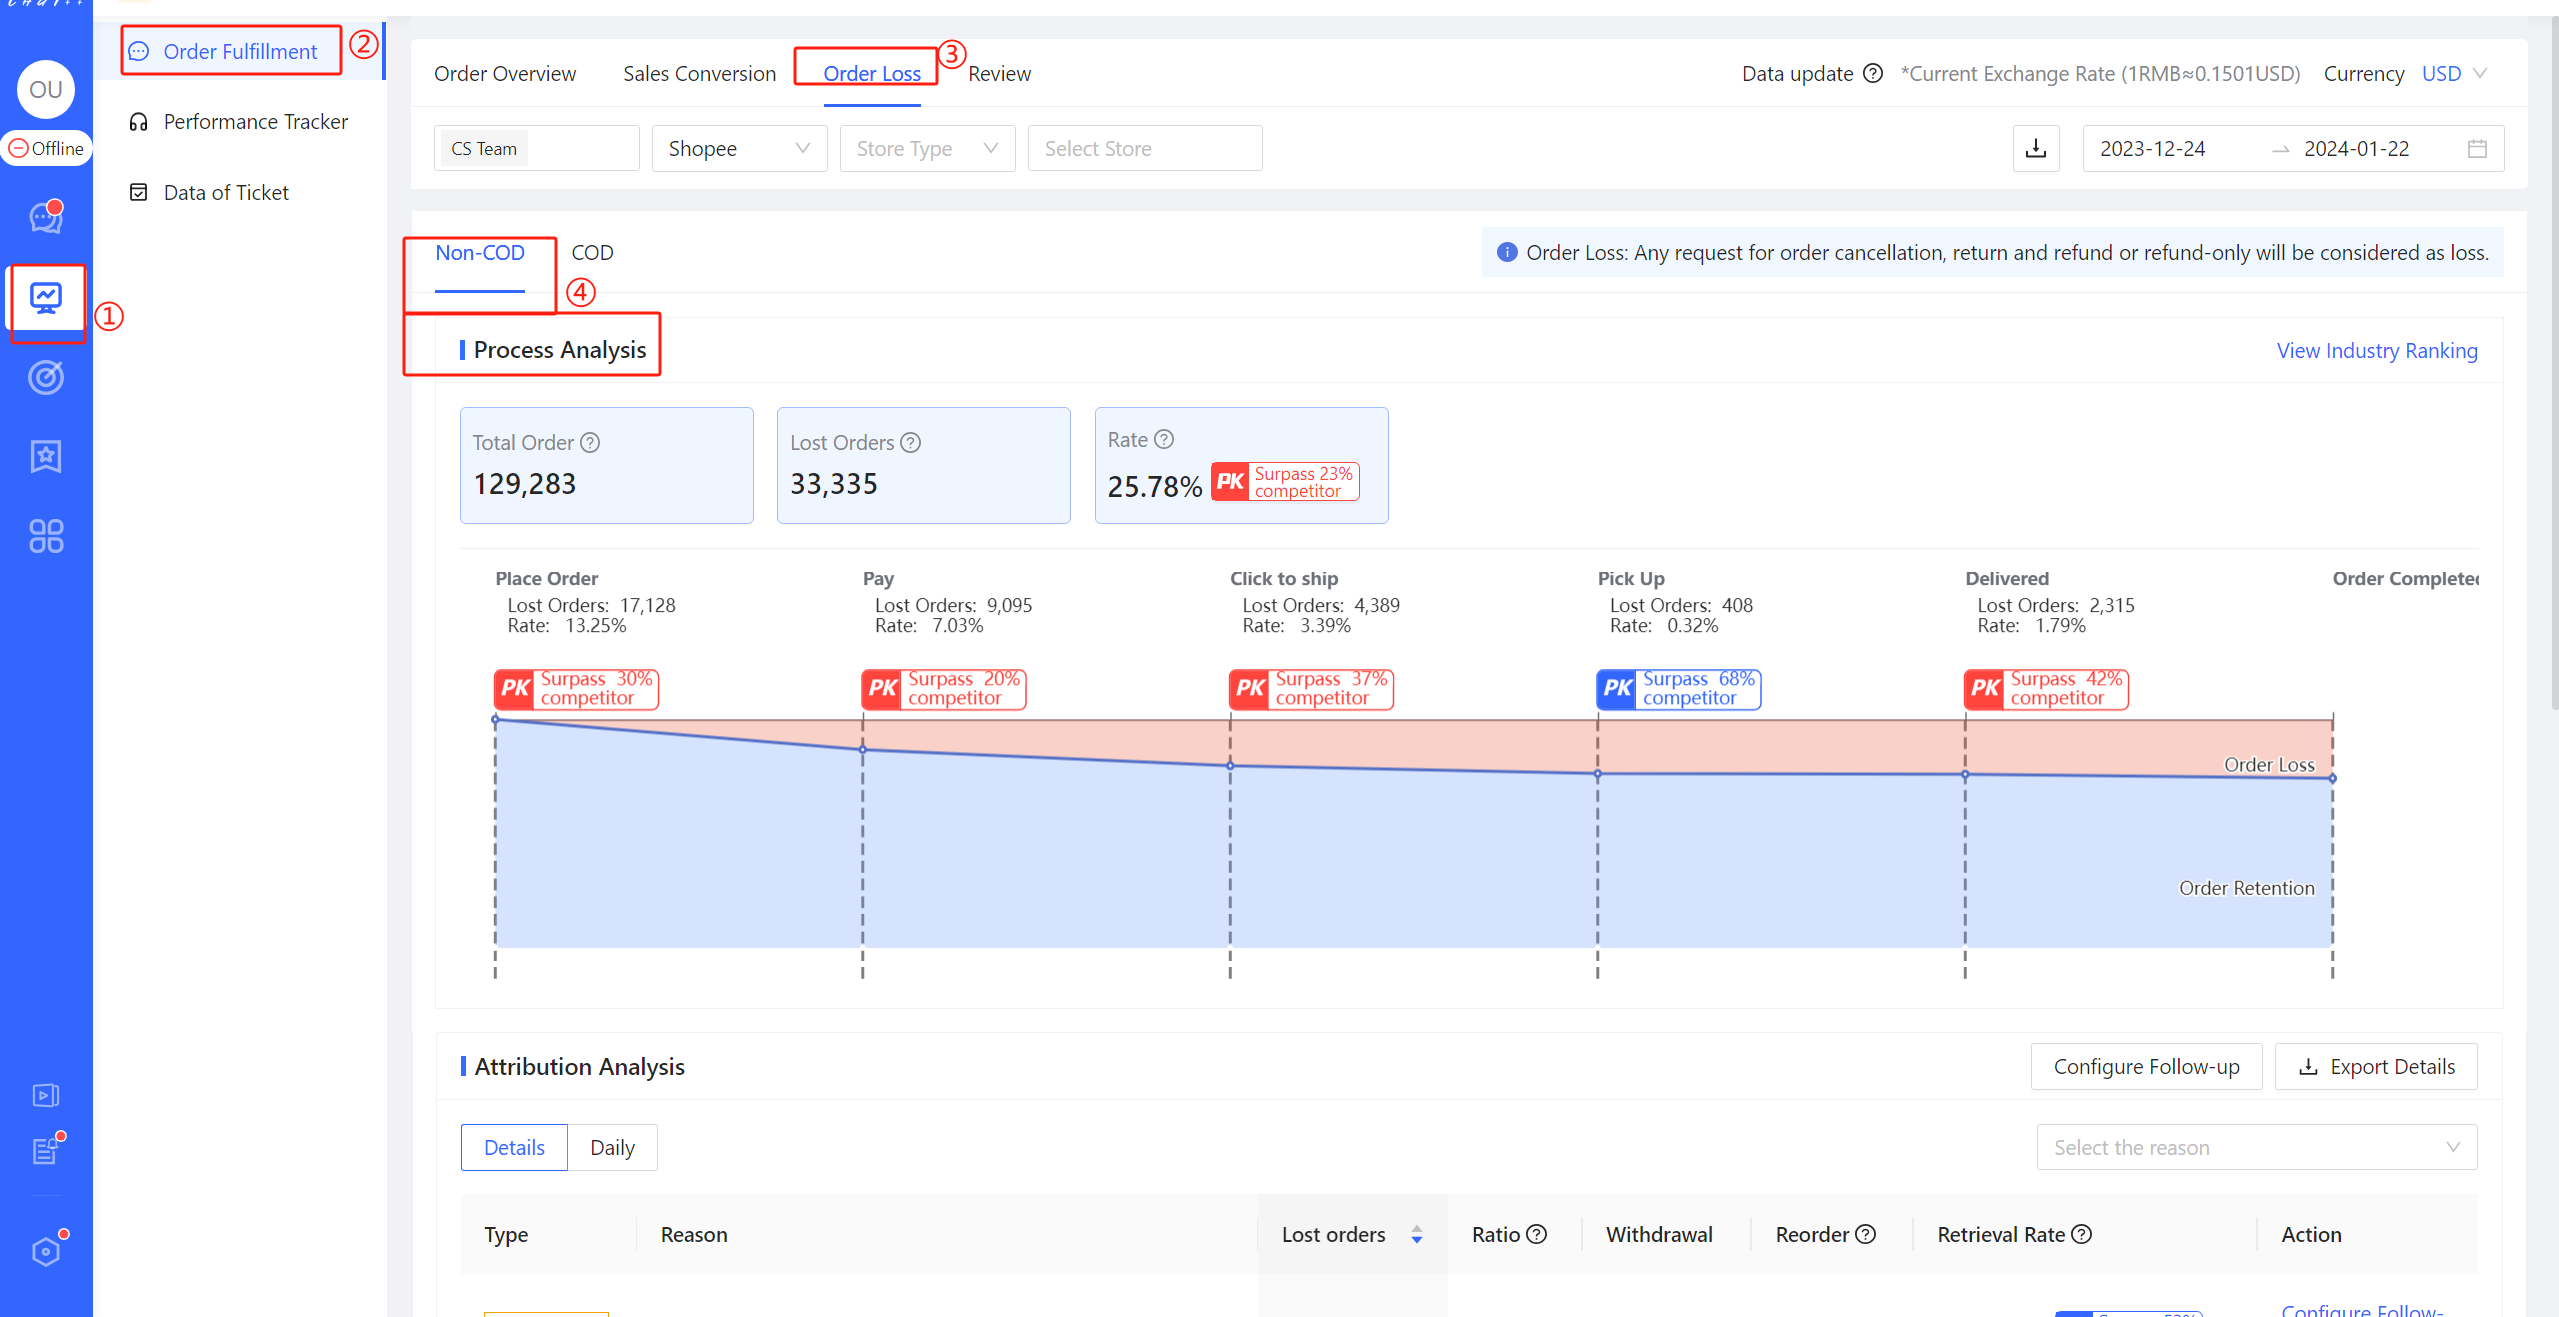
Figure 19
The following figure illustrates the occurrence of order cancellations at various stages of the order flow, helping operators clearly understand where there is room for optimization in the order fulfillment process. Depending on the order type, COD orders and non-COD orders have different routes of order status changes.
- For non-COD orders, the main core nodes are as follows: Place Order -> Payment -> Seller Clicks to Ship -> Platform Pickup -> Buyer Receives -> Order Completed.
- For COD orders, the main core nodes are as follows: Place Order -> Order Confirmation -> Seller Clicks to Ship -> Platform Pickup -> Buyer Receives -> Order Completed.
- Red Marking ①: The order loss quantity refers to the initiation of cancellations by the buyer, including cancellations for various reasons, returns/refunds, and COD rejections (in the case of COD orders). Please note that some cancellations are triggered by platform timeouts, such as orders that are not paid within 48 hours for non-COD, resulting in cancellations with the reason "Not Paid."
- Red Marking ②: Move the cursor to the line indicated by the red mark ② in the figure to display the orders retained at that line corresponding to the order status.
- Red Marking ③: Display the number of cancellations that occurred between two adjacent order statuses. For example, 4222 orders were lost between placing an order and payment, indicating the number of non-COD orders that were placed but not paid. It is recommended to select a date window of 2 weeks or more from the current date so that cancellations for orders within that date window have fully occurred.
- Red Marking ④: All icons with the "PK" label can be clicked to enter the industry benchmark ranking details. This allows you to understand the ranking of your store's specific indicator among similar industry and type stores. Leading by 68% indicates that the indicator is better than 51% of the industry peers. When the value is below 68%, displayed in red, it indicates that it is below the industry median level and deserves attention.
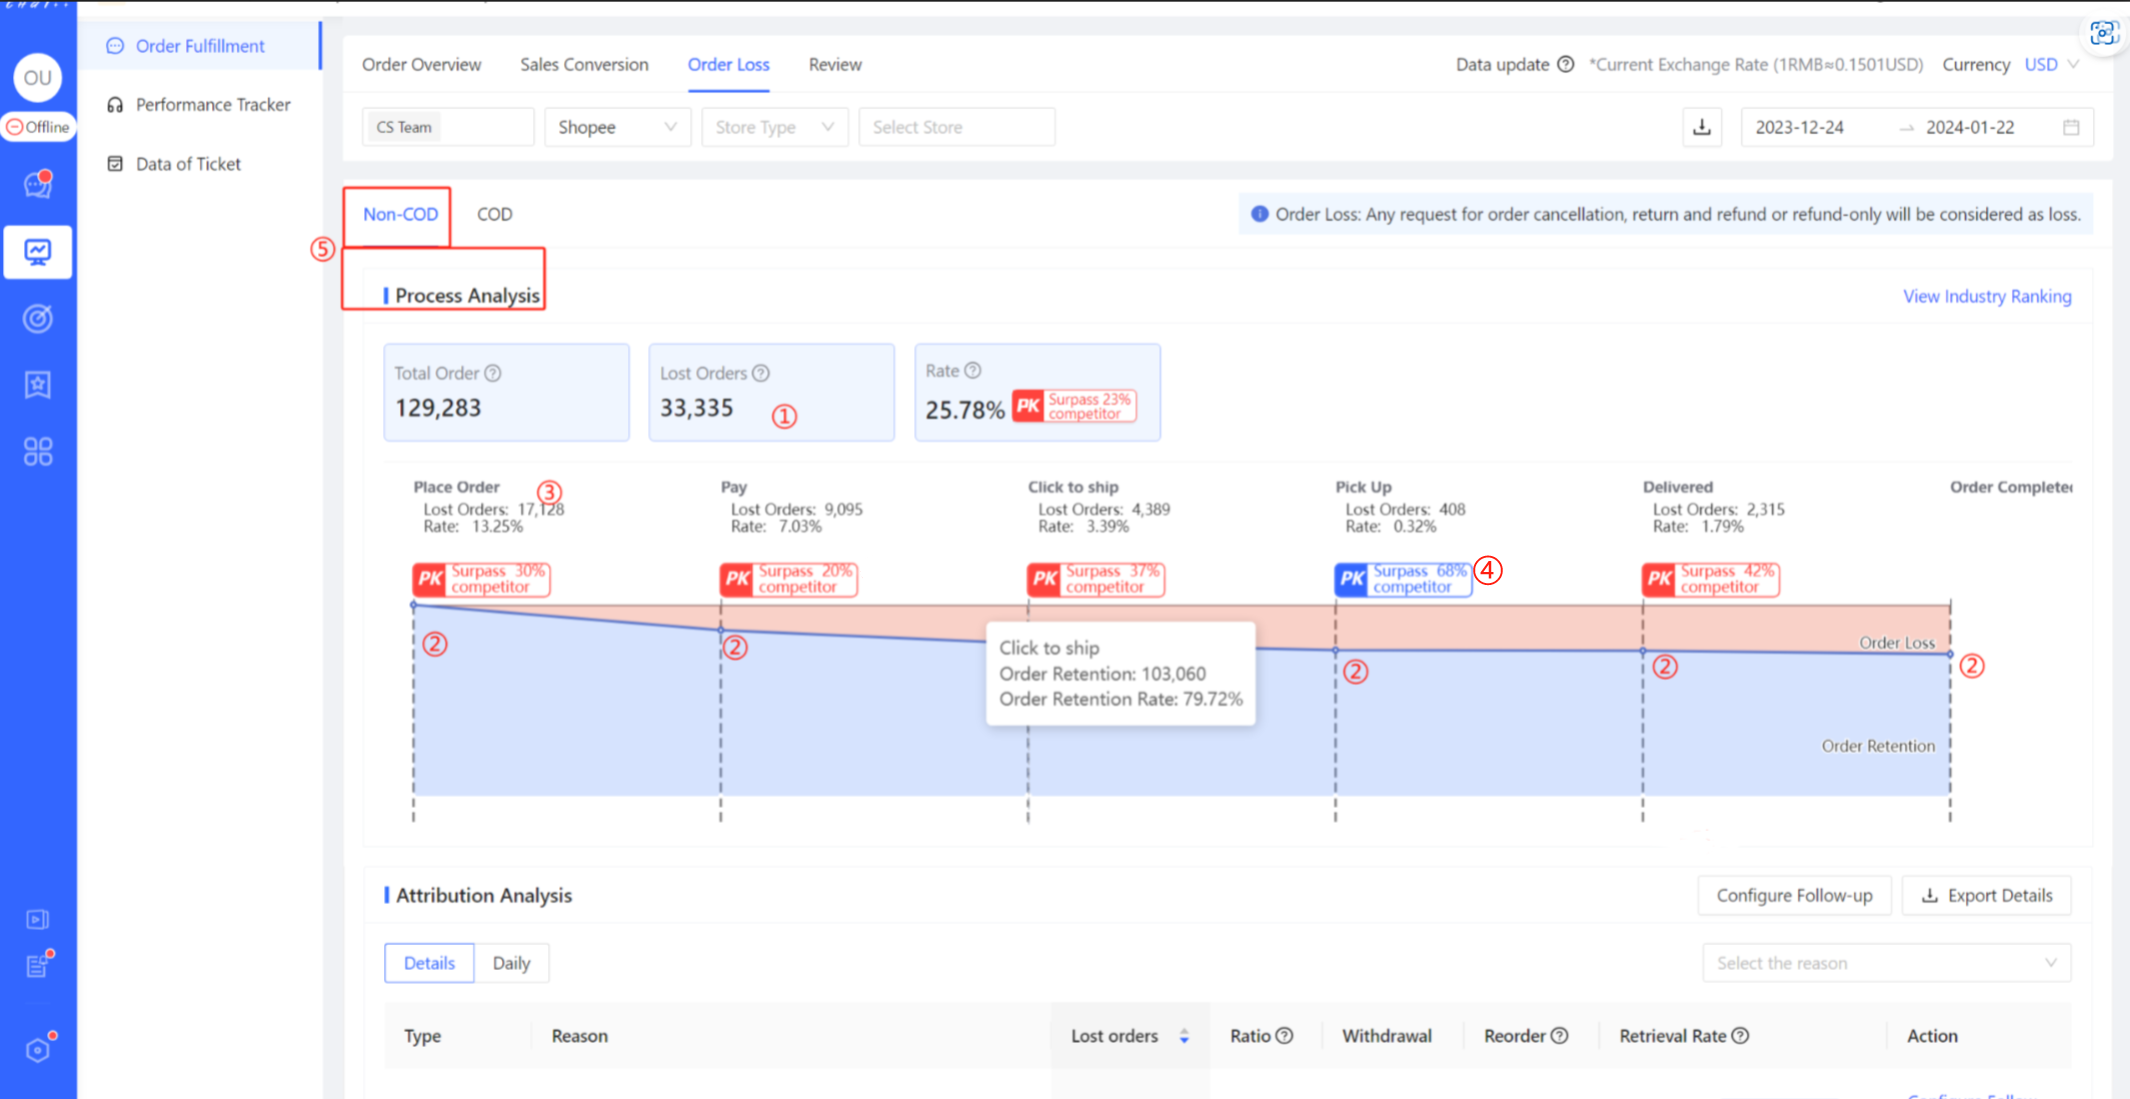
Figure 20
The order status flow process for COD orders and non-COD orders is different. At the red marking ⑤ in the above figure, you can switch between the analysis of order loss processes for non-COD orders and COD orders. The following figure illustrates the order loss process analysis for COD orders.
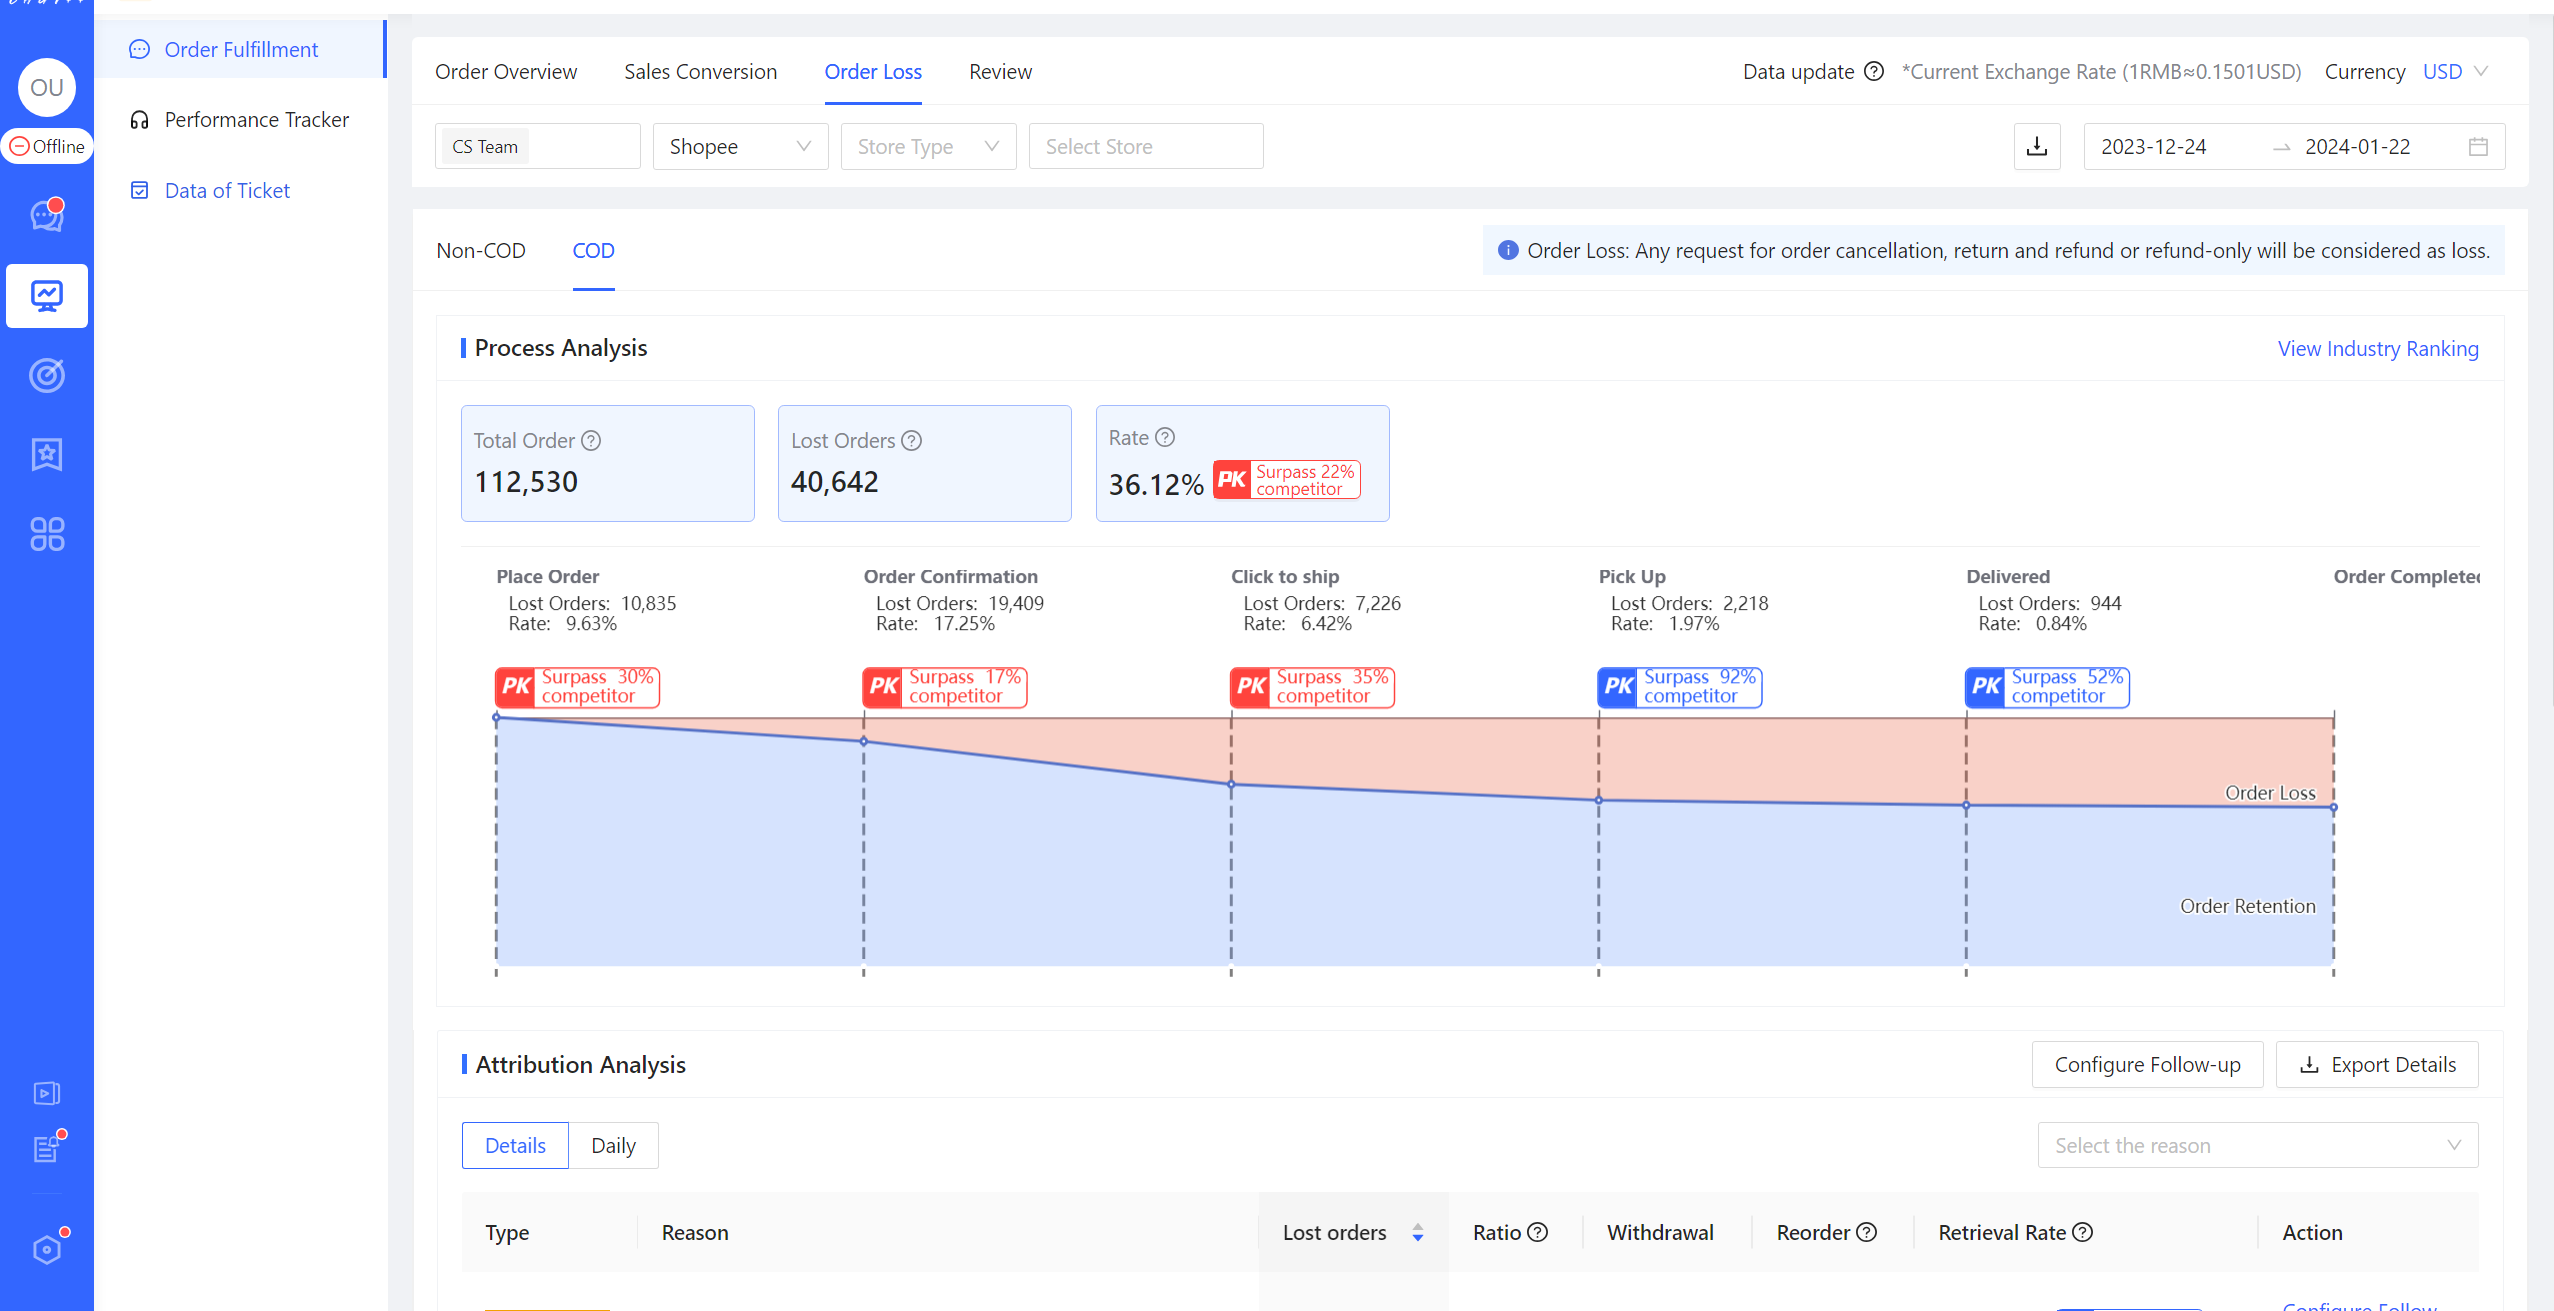
Figure 21
Order Loss Attribution Analysis
👉 Order cancellations mainly consist of two types: "Initiated by Buyer" or "Initiated by Platform Timeout." >>>For the definition of order cancellation/refund, please click to refer.
💡 When buyers initiate order cancellations, returns/refunds, or refund-only requests on the platform, the marketplace may ask the buyer to provide a reason. Additionally, the marketplace initiates order cancellations in some events where certain deadlines are not met, such as buyers not paying on time or sellers not shipping on time. ChatPlusAI conducts detailed data analysis on the causes of such order cancellations by integrating with marketplace data.
👆To access the order loss data display page, click on the 【Left Menu "Analytics" (Red Marking ①) → "Order Fulfillmen" (Red Marking ②) → "Order Loss" (Red Marking ③)】. At the red marking ④, you can easily switch between COD and non-COD orders, as the fulfillment process and status differences between the two are significant, warranting a separate page for displaying relevant data.
The red box in the following figure represents the "Order Loss Attribution Data Analysis."
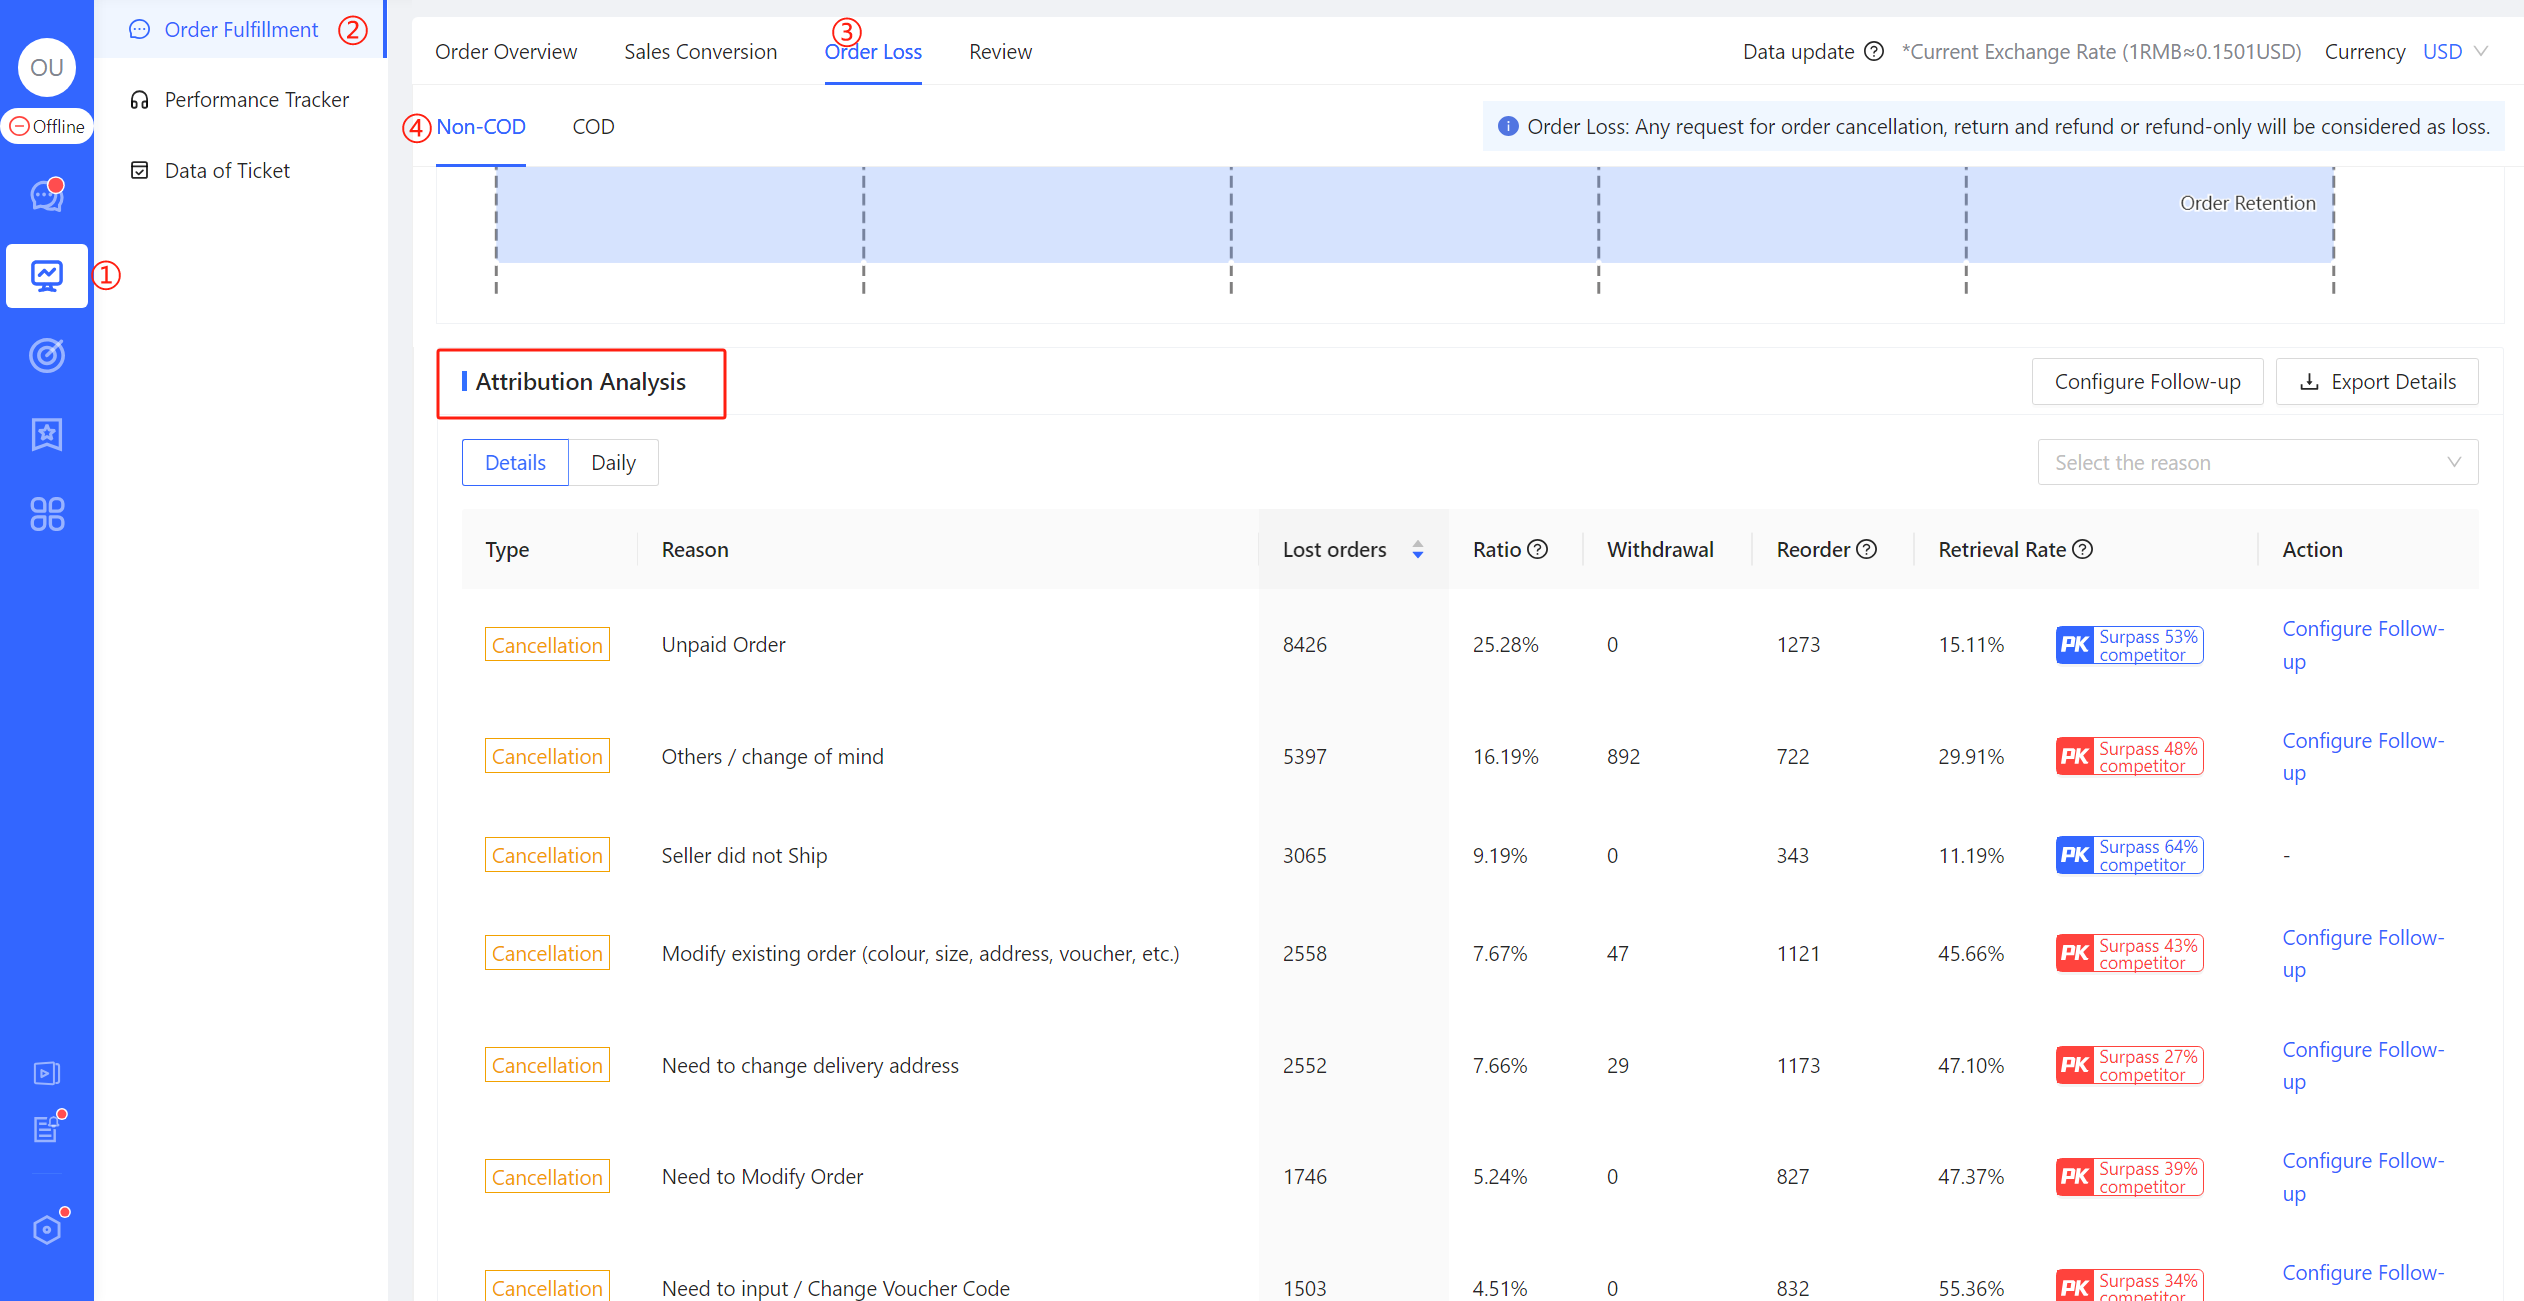
Figure 22
In the following figure, various reasons for order cancellations are displayed by default in descending order of the number of lost orders:
- Red Marking ①: Provides a description of the reason for order cancellation/refund.
- Red Marking ②: Displays the number of lost orders, referring to the quantity of initiated cancellations/refunds (including orders that were subsequently recovered through various efforts).
- Red Marking ③: Displays the number of cancellations initiated by buyers that were subsequently canceled by the buyers.
- Red Marking ④: Displays the number of canceled orders for which the buyer placed a new order within 48 hours at the same store after the cancellation. This includes the quantity of orders that meet the criteria for placing a new order after cancellation/refund.
- Red Marking ⑤: Represents the calculated "Order Cancellation Recovery Rate," which is the ratio of the number of recovered cancellations (canceled by the buyer or new order placed after cancellation) to the total number of lost orders (initiated cancellations/refunds).
- Red Marking ⑥: Provides the recovery rate for the specified reason for order cancellation compared to the industry benchmark. Clicking the PK icon allows you to access detailed information.
- Red Marking ⑦: Serves as the entrance to configure automatic recovery strategies for order cancellations with a specified reason. Different reasons for order cancellation point to different automatic recovery strategies. >>> For details, please refer to Order Cancellation/Refund Follow up.
- Red Marking ⑧: Allows easy export of all details of canceled orders and subsequent recovery efforts.
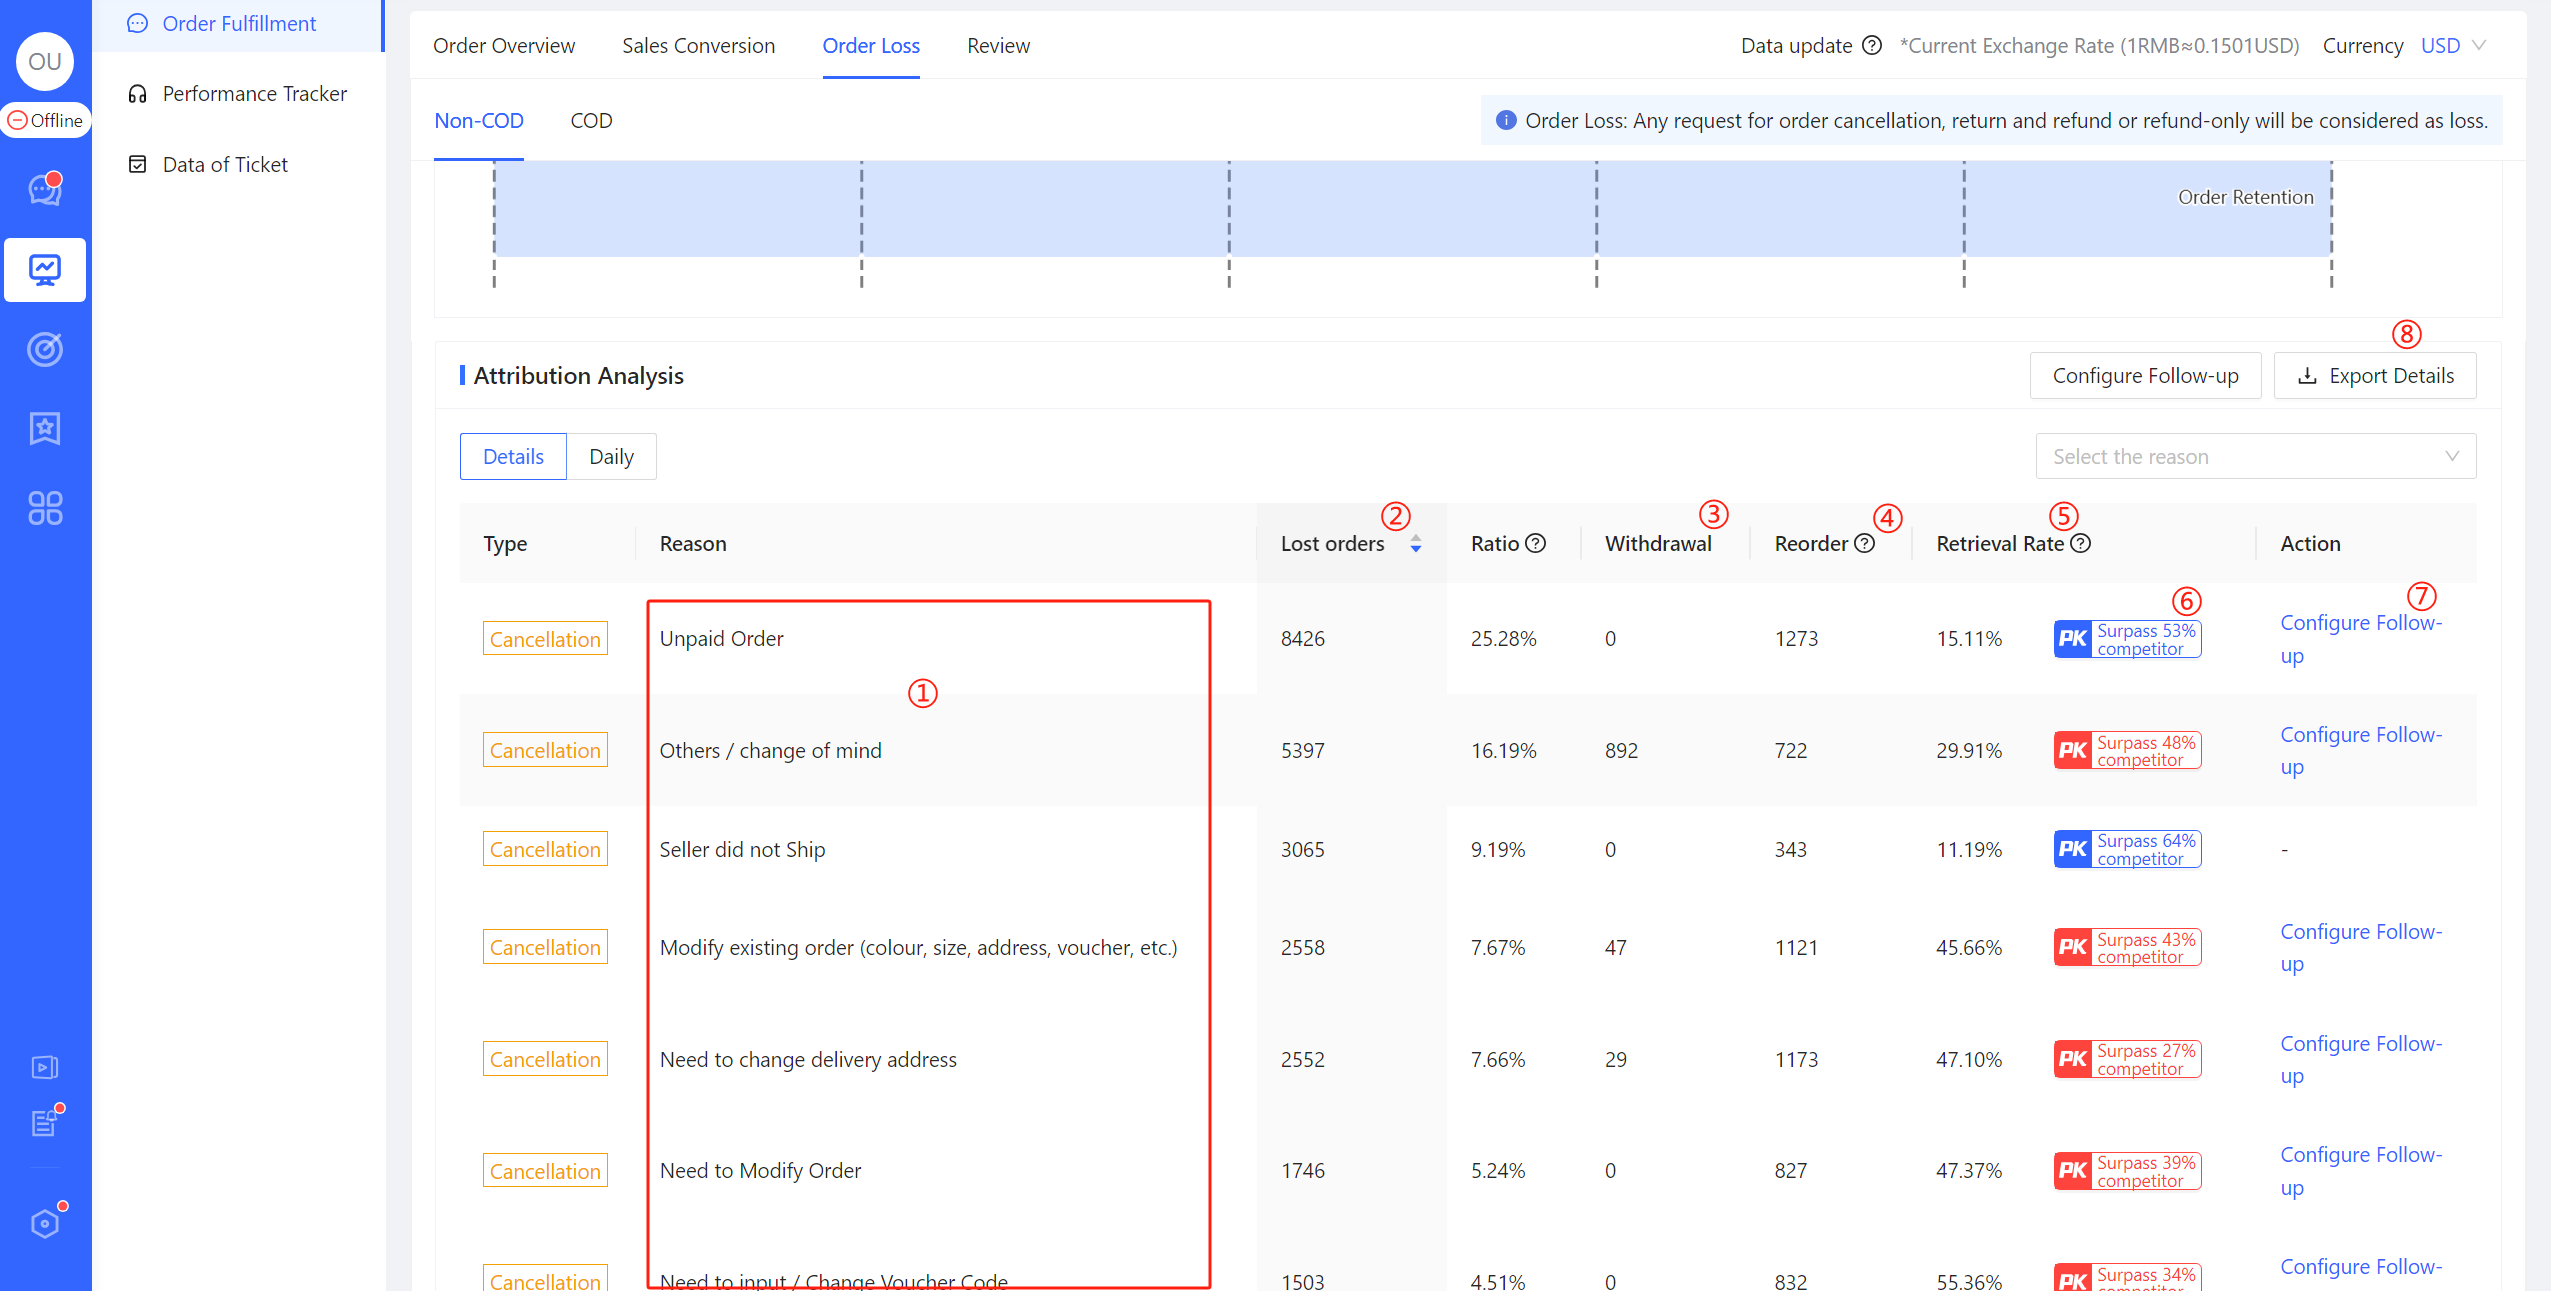
Figure 23
As shown in the figure, by clicking on the red marking ① for daily losses, you can view the daily change curve for the overall quantity of initiated cancellations/refunds, cancellations/refunds by buyers, orders placed again, and the recovery rate. This provides an easy way to track the effects after adjusting recovery strategies.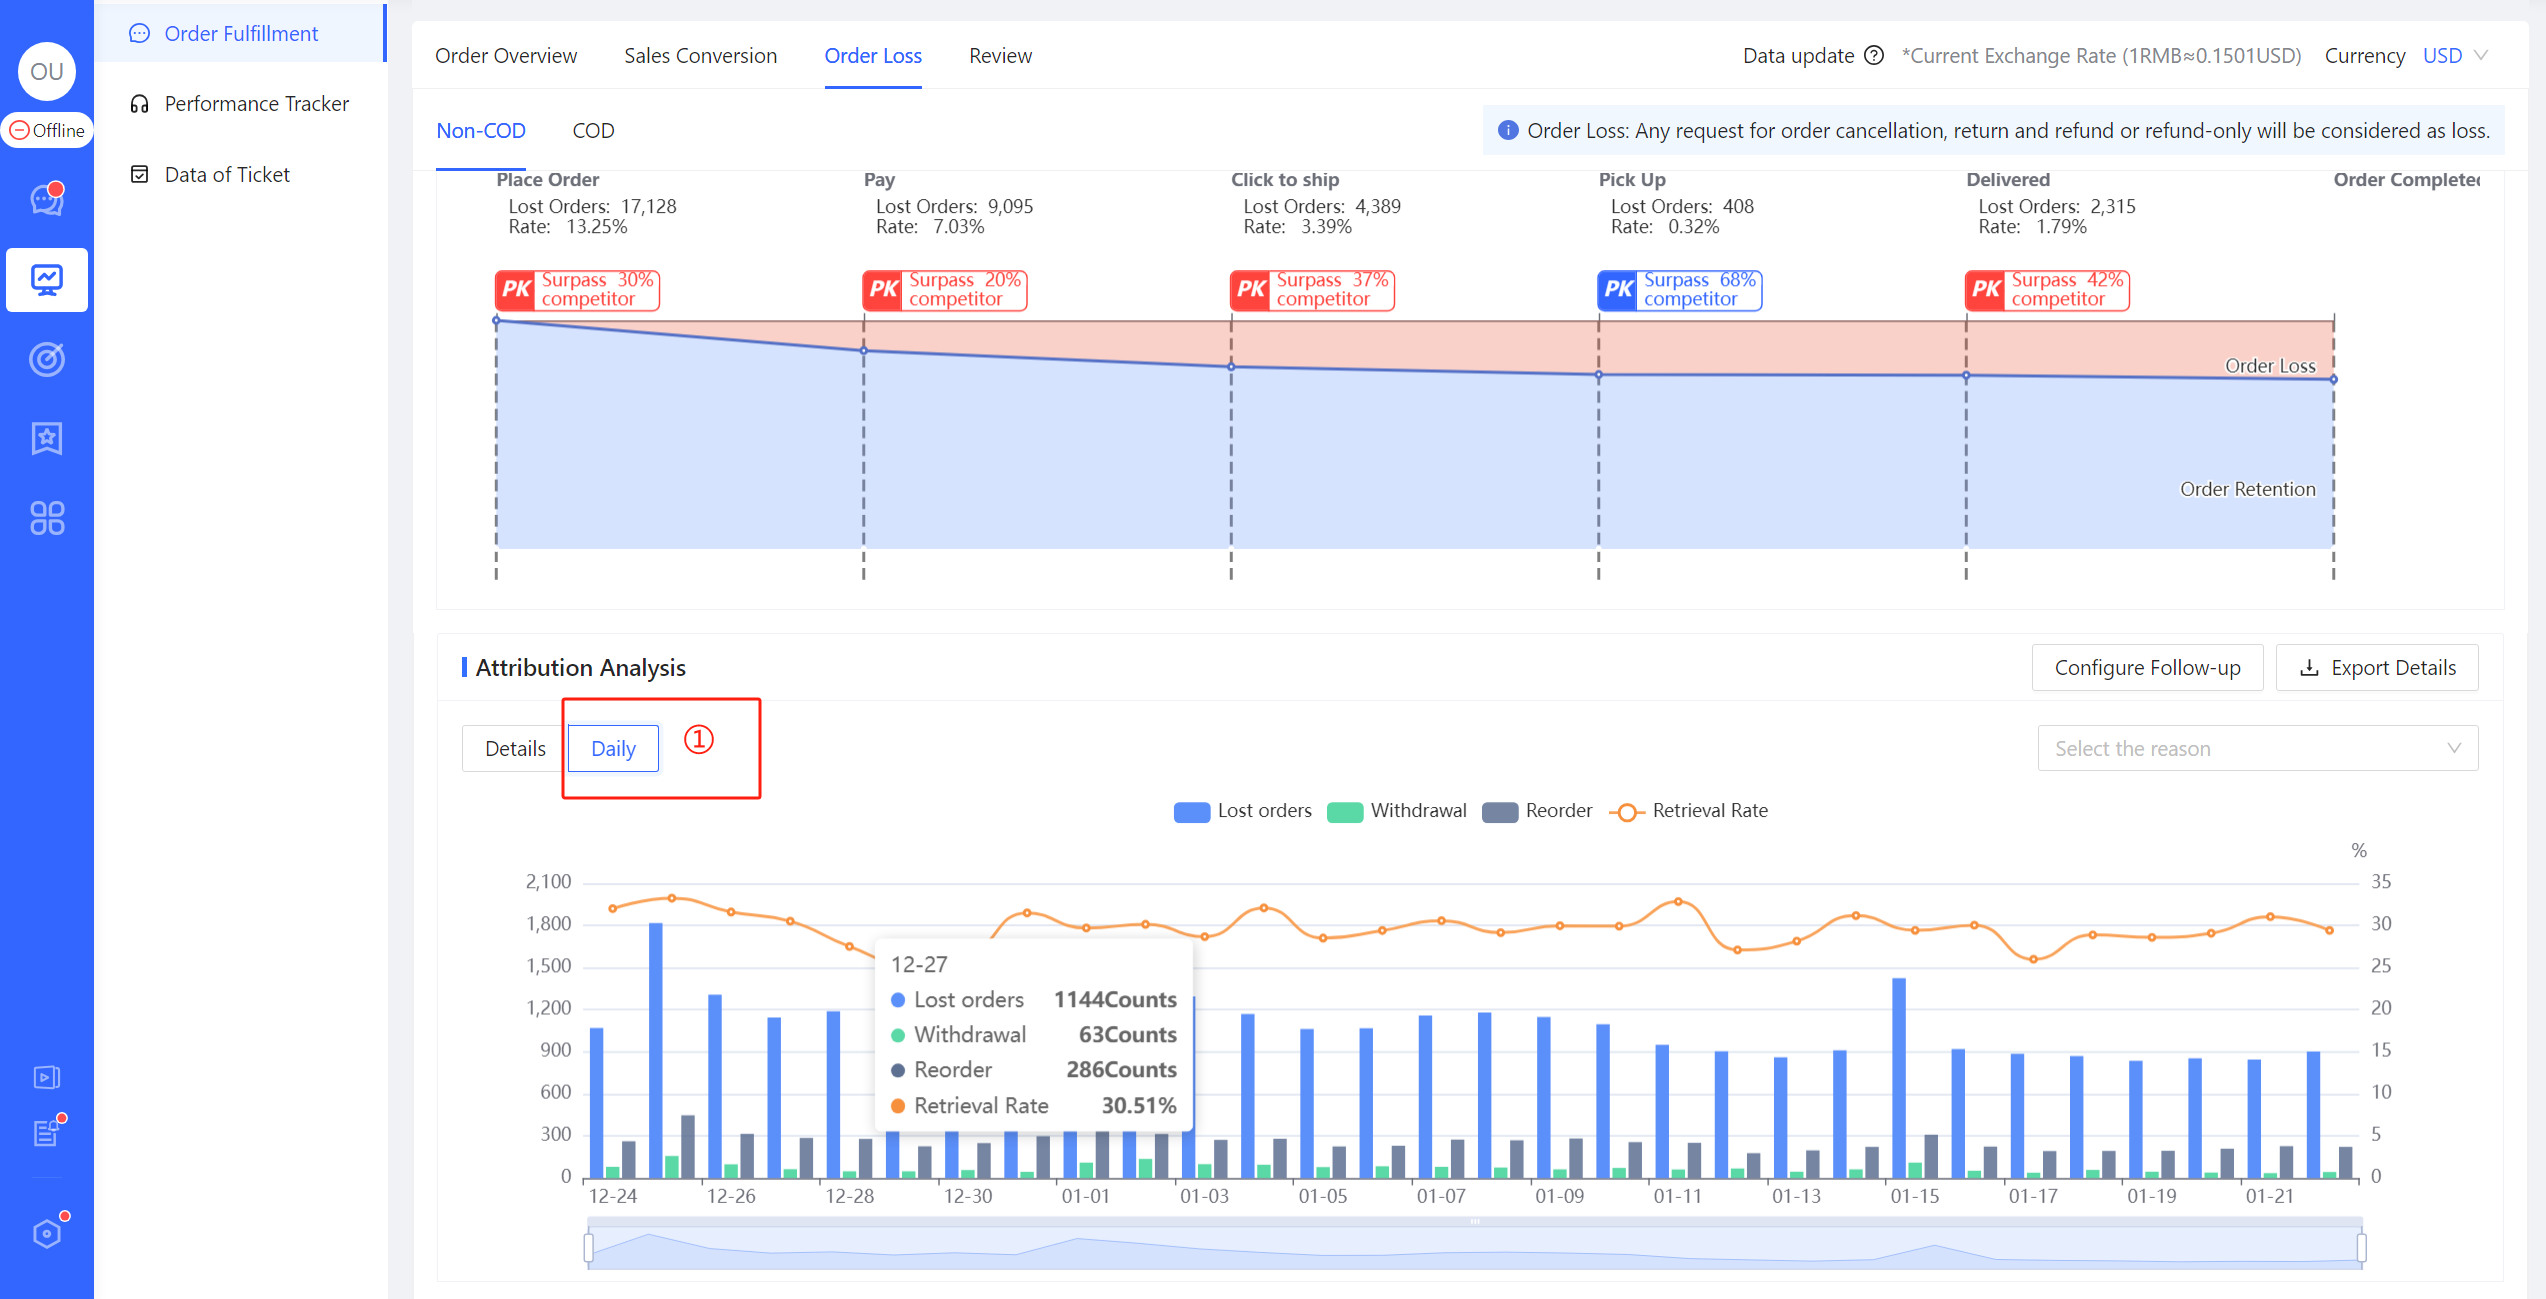
Figure 24
FAQ
Q1:If you find that the recovery data for certain attributions in the figure 22 is relatively poor compared to the industry average, for example, with a red warning indicating that it is only higher than 20% of peers, and the actual quantity of order losses for this attribute is high, what should you do in this situation?A1:In this case, it is recommended to enable automatic recovery and optimize the Cancellation/Refund Follow up.>>>For details, please refer to the Cancellation/Refund Follow up
Q2:How can I switch between COD and non-COD in the Order Loss Attribution Analysis chart?A2:Scroll to the top of the current page to switch between COD and non-COD.
Review Analytics
💡ChatPlusAI provides Review Analytics.
👆Click on the 【Left Menu "Analytics" (Red Marking ①) → "Order Fulfillment" (Red Marking ②) → "Review" (Red Marking ③)】 to enter the feedback data display page.
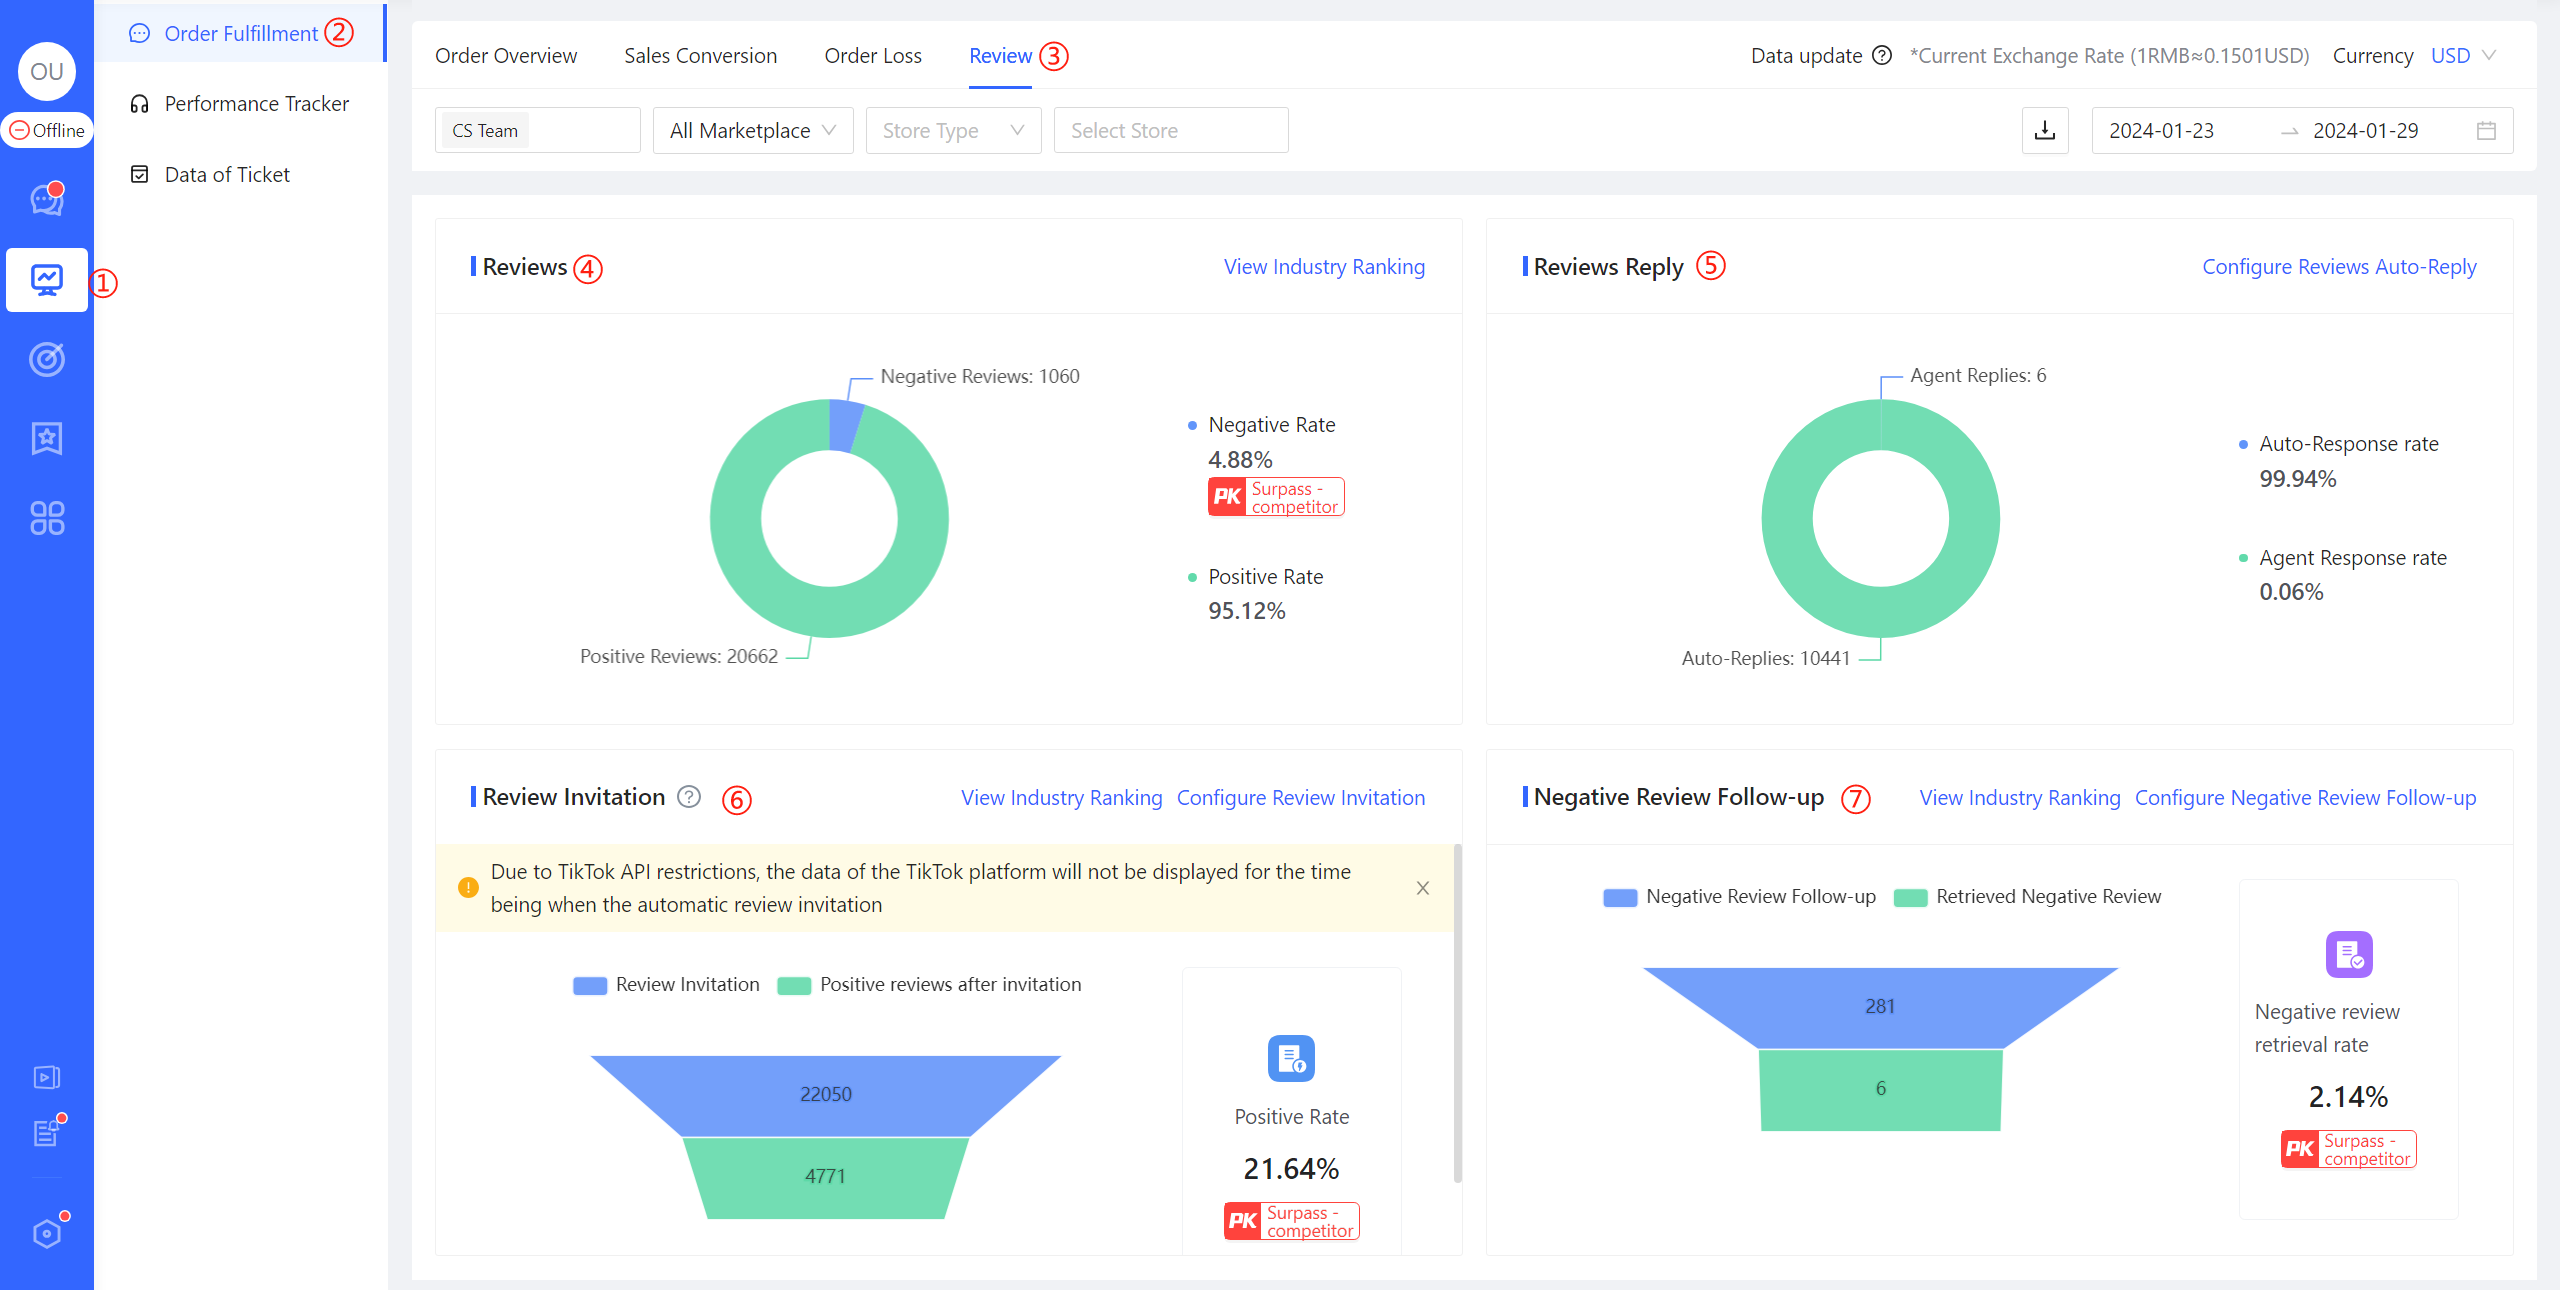
Figure 25
Review Data
As shown at the red marking ④ in the above figure, ChatPlusAI provides daily updated positive review rate data and indicates the ranking within the industry.
Reviews Reply Data
As shown at the red marking ⑤ in the above figure, ChatPlusAI provides daily updated follow-up review data after reviews and indicates the proportion of follow-ups coming from customer service versus those automatically generated by the chatbot. It is recommended for the chatbot to automatically respond only to positive feedback, while negative and neutral feedback should still be handled by human customer service for further follow-up. The platform also offers a convenient entrance for configuring automated follow-up responses.
>>> For an introduction to the automatic follow-up of positive review, please click to refer. >>>For an introduction to the automatic follow-up of negative review, please click to refer.
Review Invitation Data
As shown at the red marking ⑥ in the above figure, ChatPlusAI provides success rate metrics for the automatic positive review invitation feature. This includes the quantity of positive feedback received and the positive review rate after the automatic reminder is sent. ChatPlusAI also offers a convenient entrance for configuring the automatic positive review invitation.
>>>For an introduction to the automatic positive review invitation, please click to refer.
Negative Review Follow-up Data
As shown at the red marking ⑦ in the above figure, ChatPlusAI provides success metrics for the recovery of negative review, including the quantity and proportion of successfully recovered review. ChatPlusAI also offers a convenient entrance for configuring the automatic recovery of negative review. >>>For an introduction to the recovery of negative review, please click to refer
Ticket Analytics
Customer service and administrator default to having the "privilege for data of ticket" and can access the "Data of Ticket" from the "Analytics" on the left menu.
Department/Marketplace/Store, types of ticket and time periods can be selected to quickly view the processing of ticket and trend chart of ticket created within different scopes.
The administrator by default has the privilege to "export data of ticket" for the details of the department's store.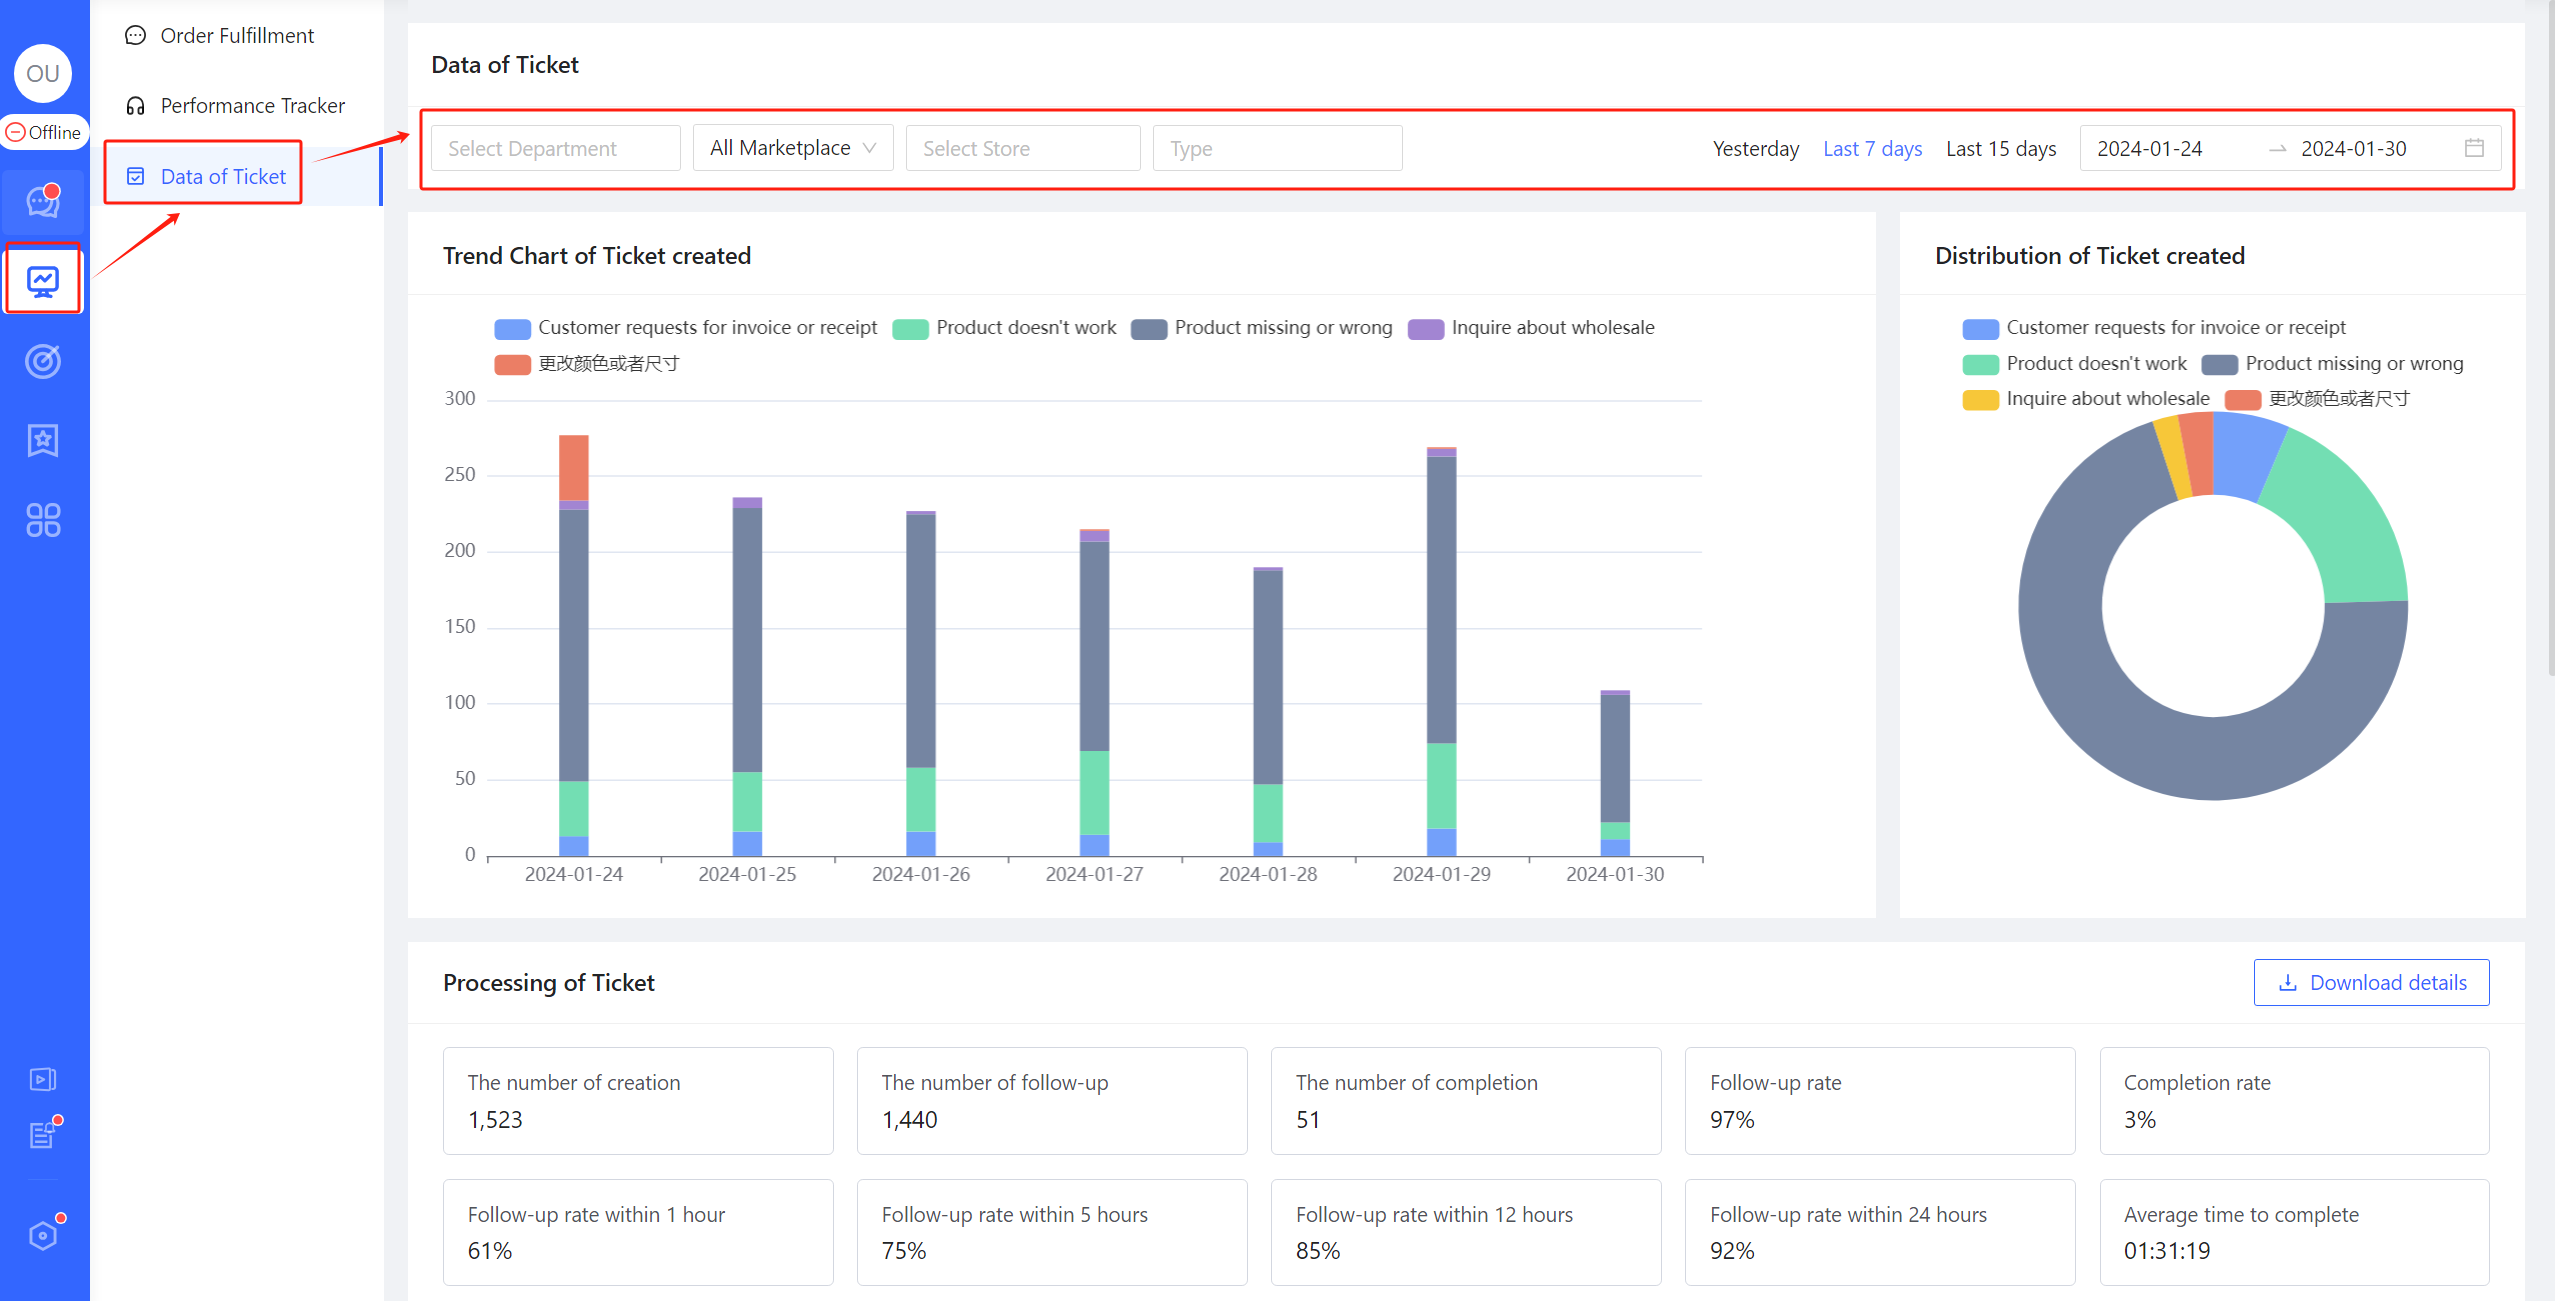
Figure 26
Trend Chart of Ticket created
As shown in the figure below, ChatPlusAI provides a "Trend Chart of Ticket created", which displays a bar chart showing the number of tickets created for different types within the selected time range.
This can help administrators quickly determine which types of tickets are trending up, down, or remaining stable.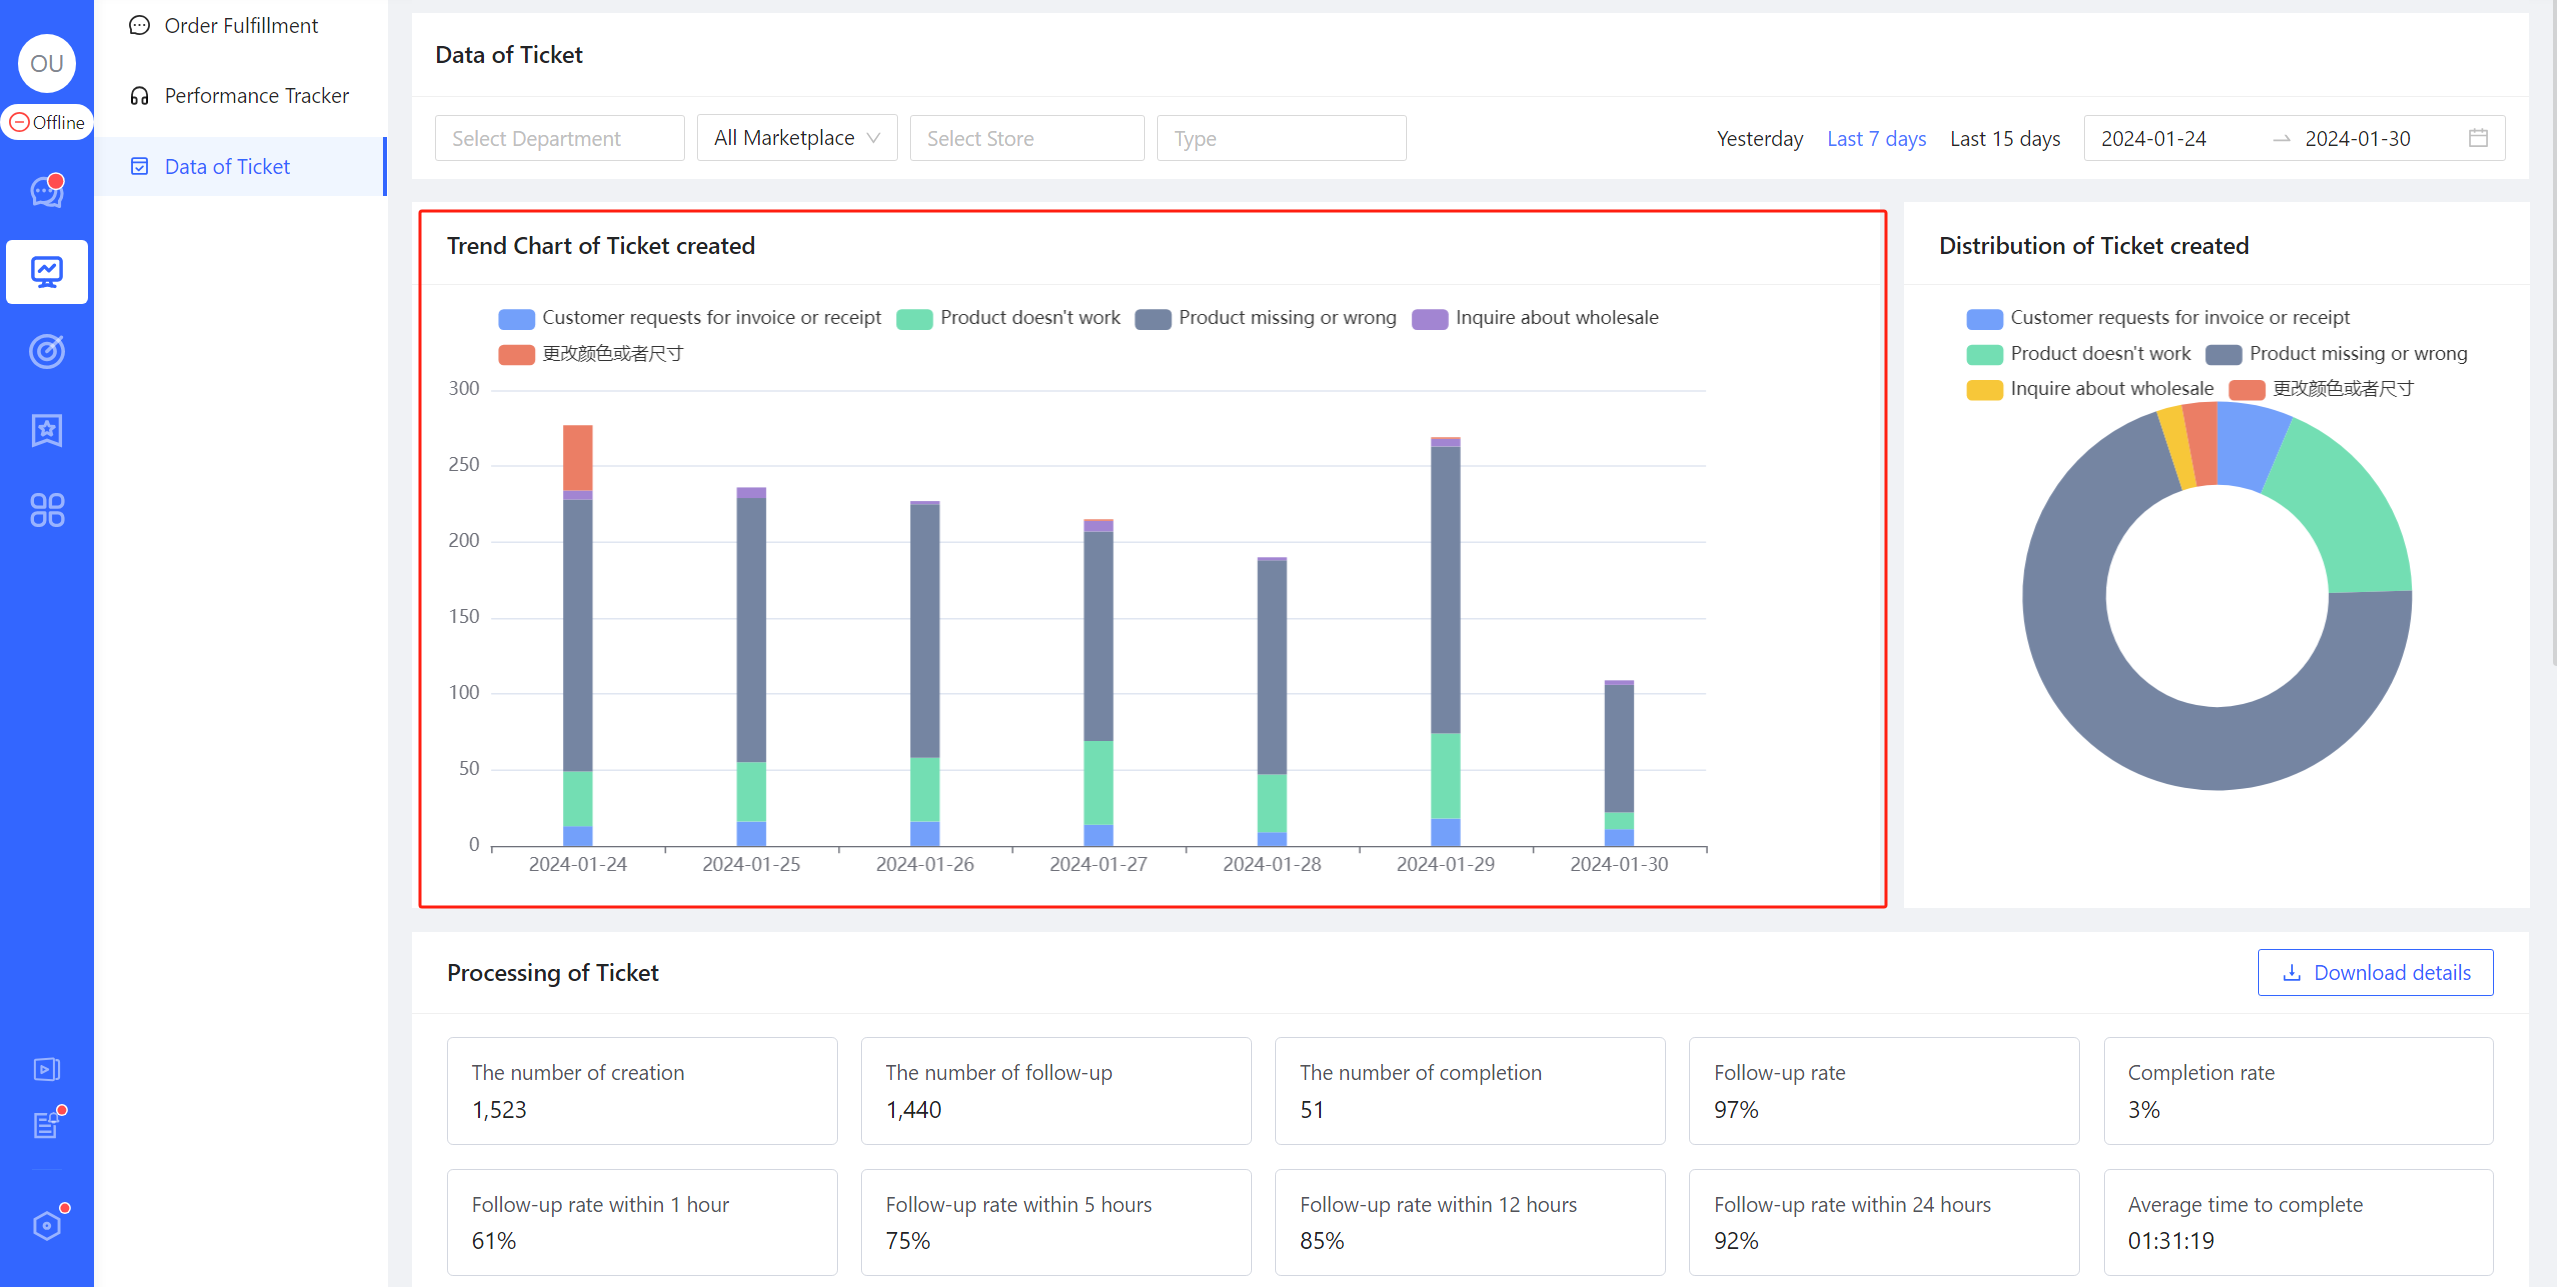
Figure 27
Distribution of Ticket created
As shown in the figure below, ChatPlusAI provides a "Distribution of Ticket created" that displays a pie chart showing the type distribution of ticket created within the selected time range.
This can help administrators better understand the composition of tickets, thereby more effectively identifying and managing issues in reception.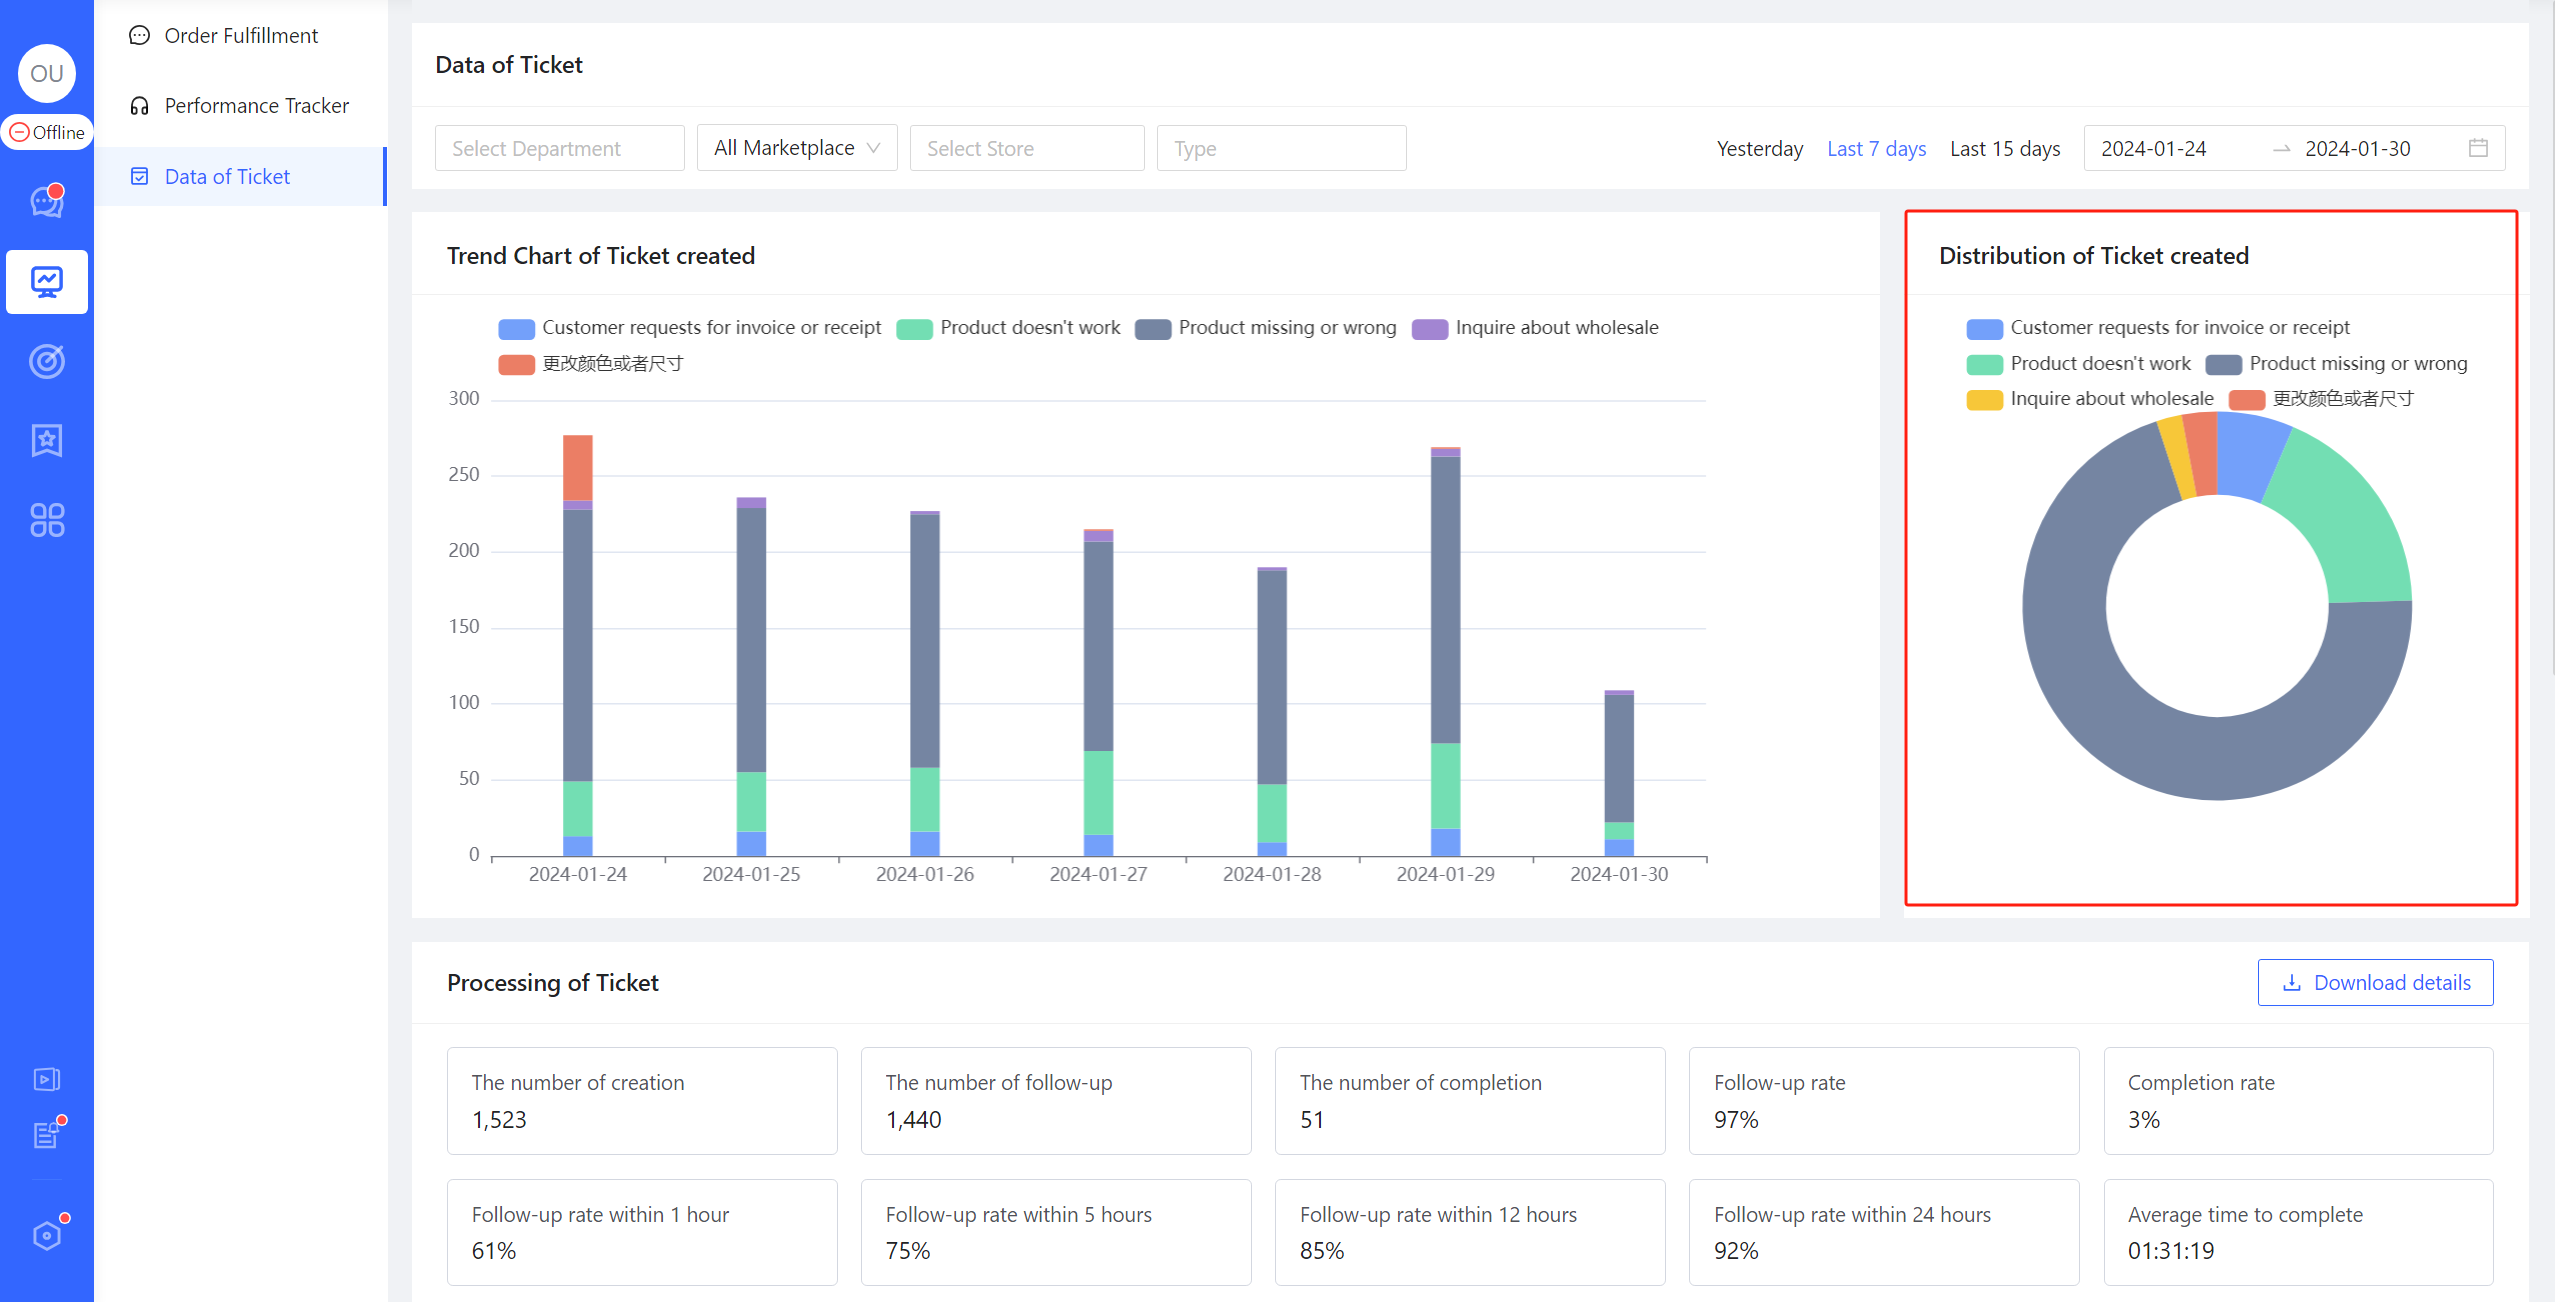
Figure 28
Processing of Ticket
As shown in the figure below, ChatPlusAI provides the details of tickets in each selected store within the specified time range.
It helps administrators better understand the follow-up status of tickets, measure and predict the workload of customer service, and take necessary measures to optimize workflow. This is very helpful for improving work efficiency and team collaboration.
- The Number of Creation: The number of tickets created for the corresponding store within the specified time.
- The Number of Follow-up: The sum of creation, follow-up and completion for the corresponding store within the selected time period.
- The Number of Completion: The number of completion of the ticket created by the corresponding store within a specified timeframe.
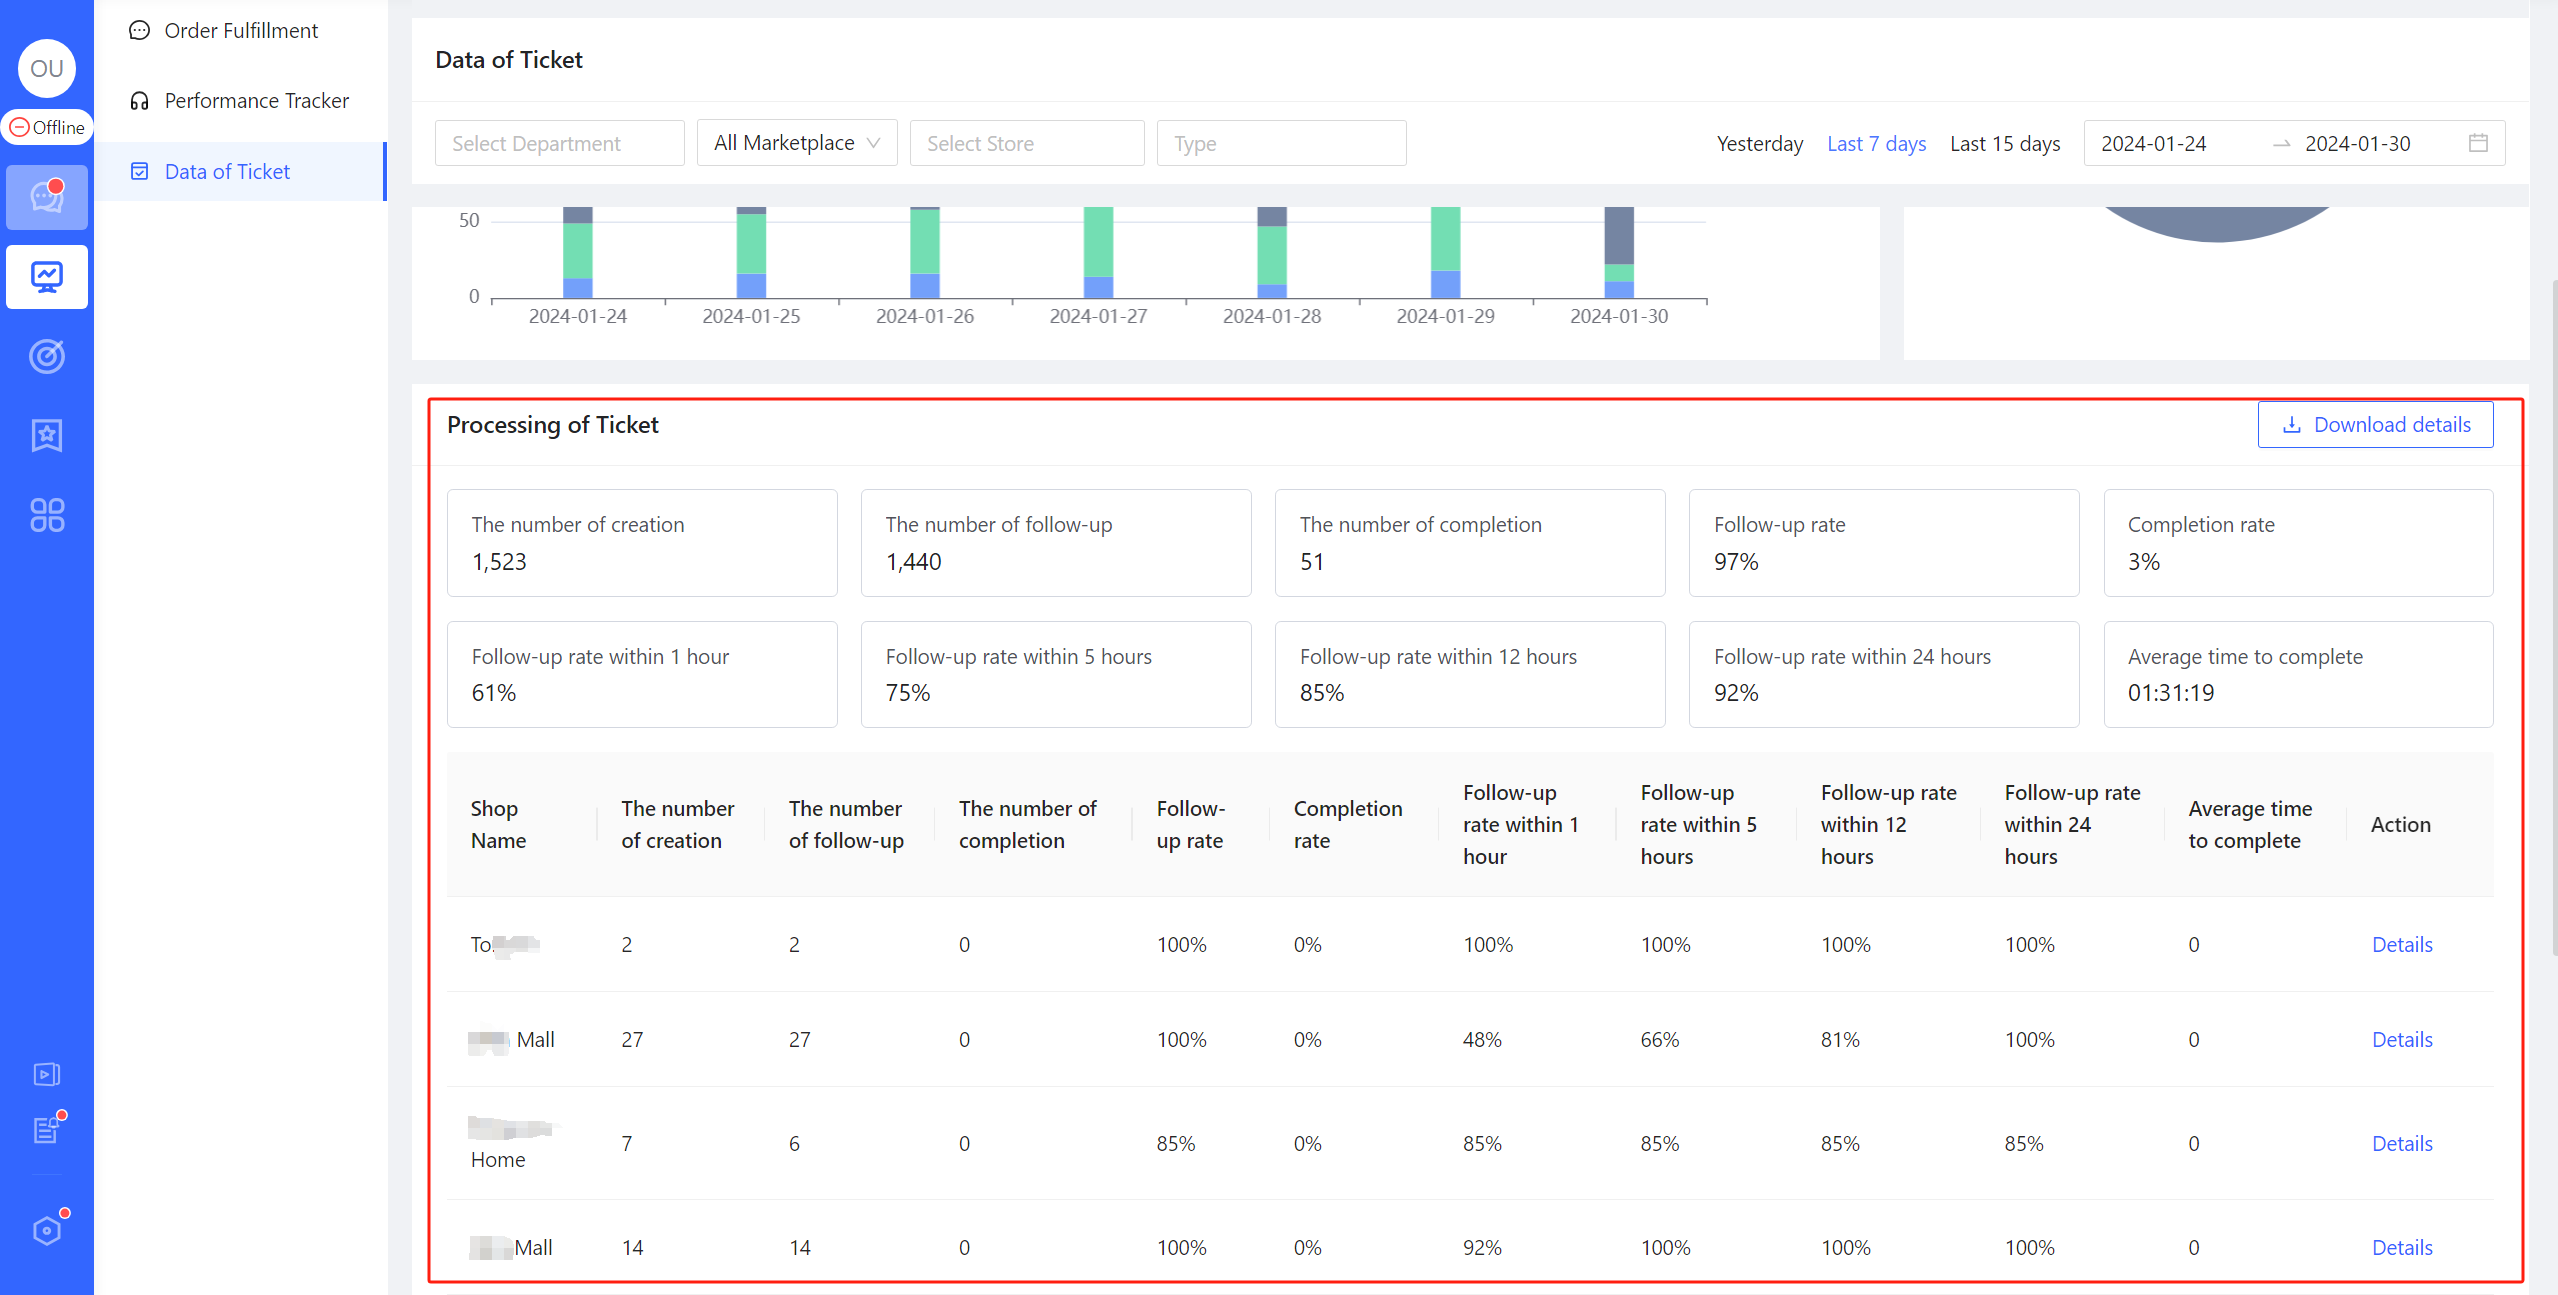
Figure 29
AI Receptionist
ChatPlusAI AI Receptionist uses deep artificial intelligence models to increase the accuracy of buyer problem identification to over 95%. It can also combine buyer's order/logistics/product and other related information, select golden CS agents' response tactics to answer buyer questions, effectively reducing the pressure on CS agents, and helping to significantly increase the conversion of pre-sales consultations during major promotional periods.
❓When to recommend using the AI Receptionist service
- ❌When there are too many messages and CS agents can't respond in time, affecting the response rate.——————Recommend✅
- ❌When CS agents only use simple shortcut phrases for replies, leading to overly mechanical responses.————Recommend✅
- ❌When CS agents are off duty and no one is available to attend to buyers, affecting the store's order completion.——————Recommend✅
- ❌When there is a language barrier, and CS agents attending to buyers across languages are akin to talking past each other.————Recommend✅
Show cases
- After completing the configuration for the AI Receptionist, the robot begins to work and automatically responds to buyer inquiries.
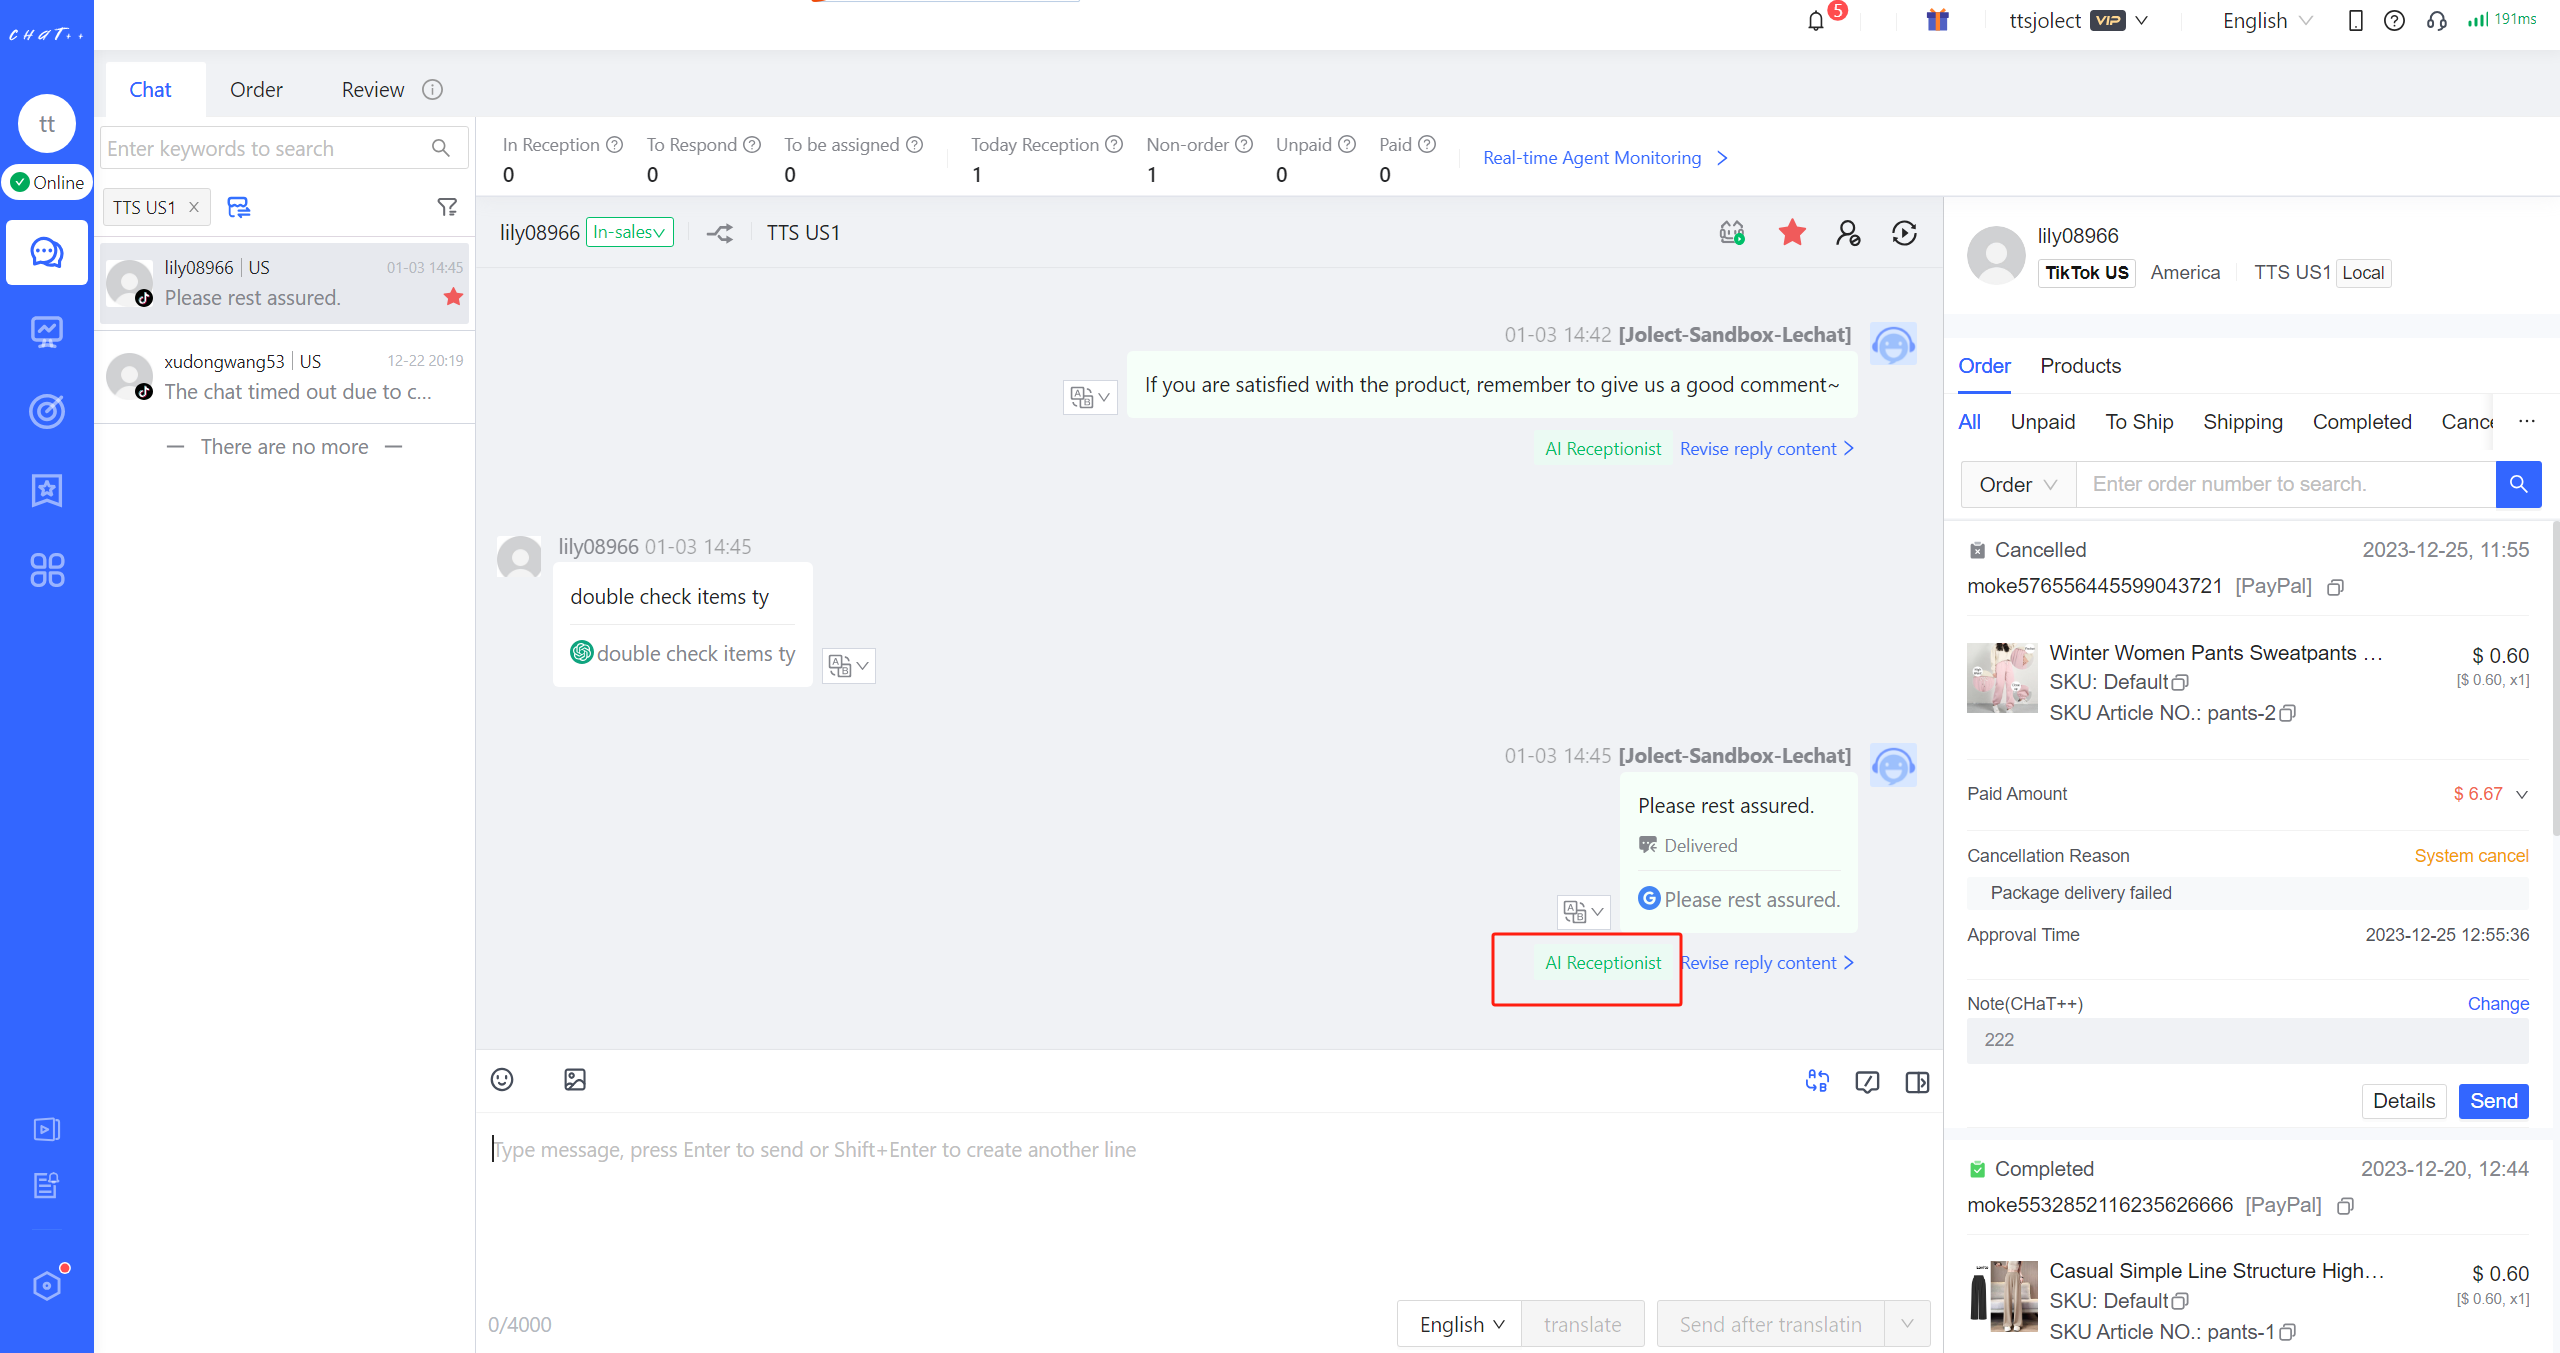
Figure 1
The package required to activate 'AI Receptionist' service
After logging into ChatPlusAI, please follow the steps in the diagram below to contact ChatPlusAI customer experts to upgrade to ChatPlusAI Enterprise and activate the AI Receptionist service:
- ① 👆Click 'Automation→AI Receptionist' (as shown in Figure 2)
- ② 👆Click the 'Contact Us' button (as shown in the red box in Figure 3)
- ③ Scan the QR code that pops up with WeChat to add ChatPlusAI's Chief Customer Expert (as shown in the red box in Figure 3)
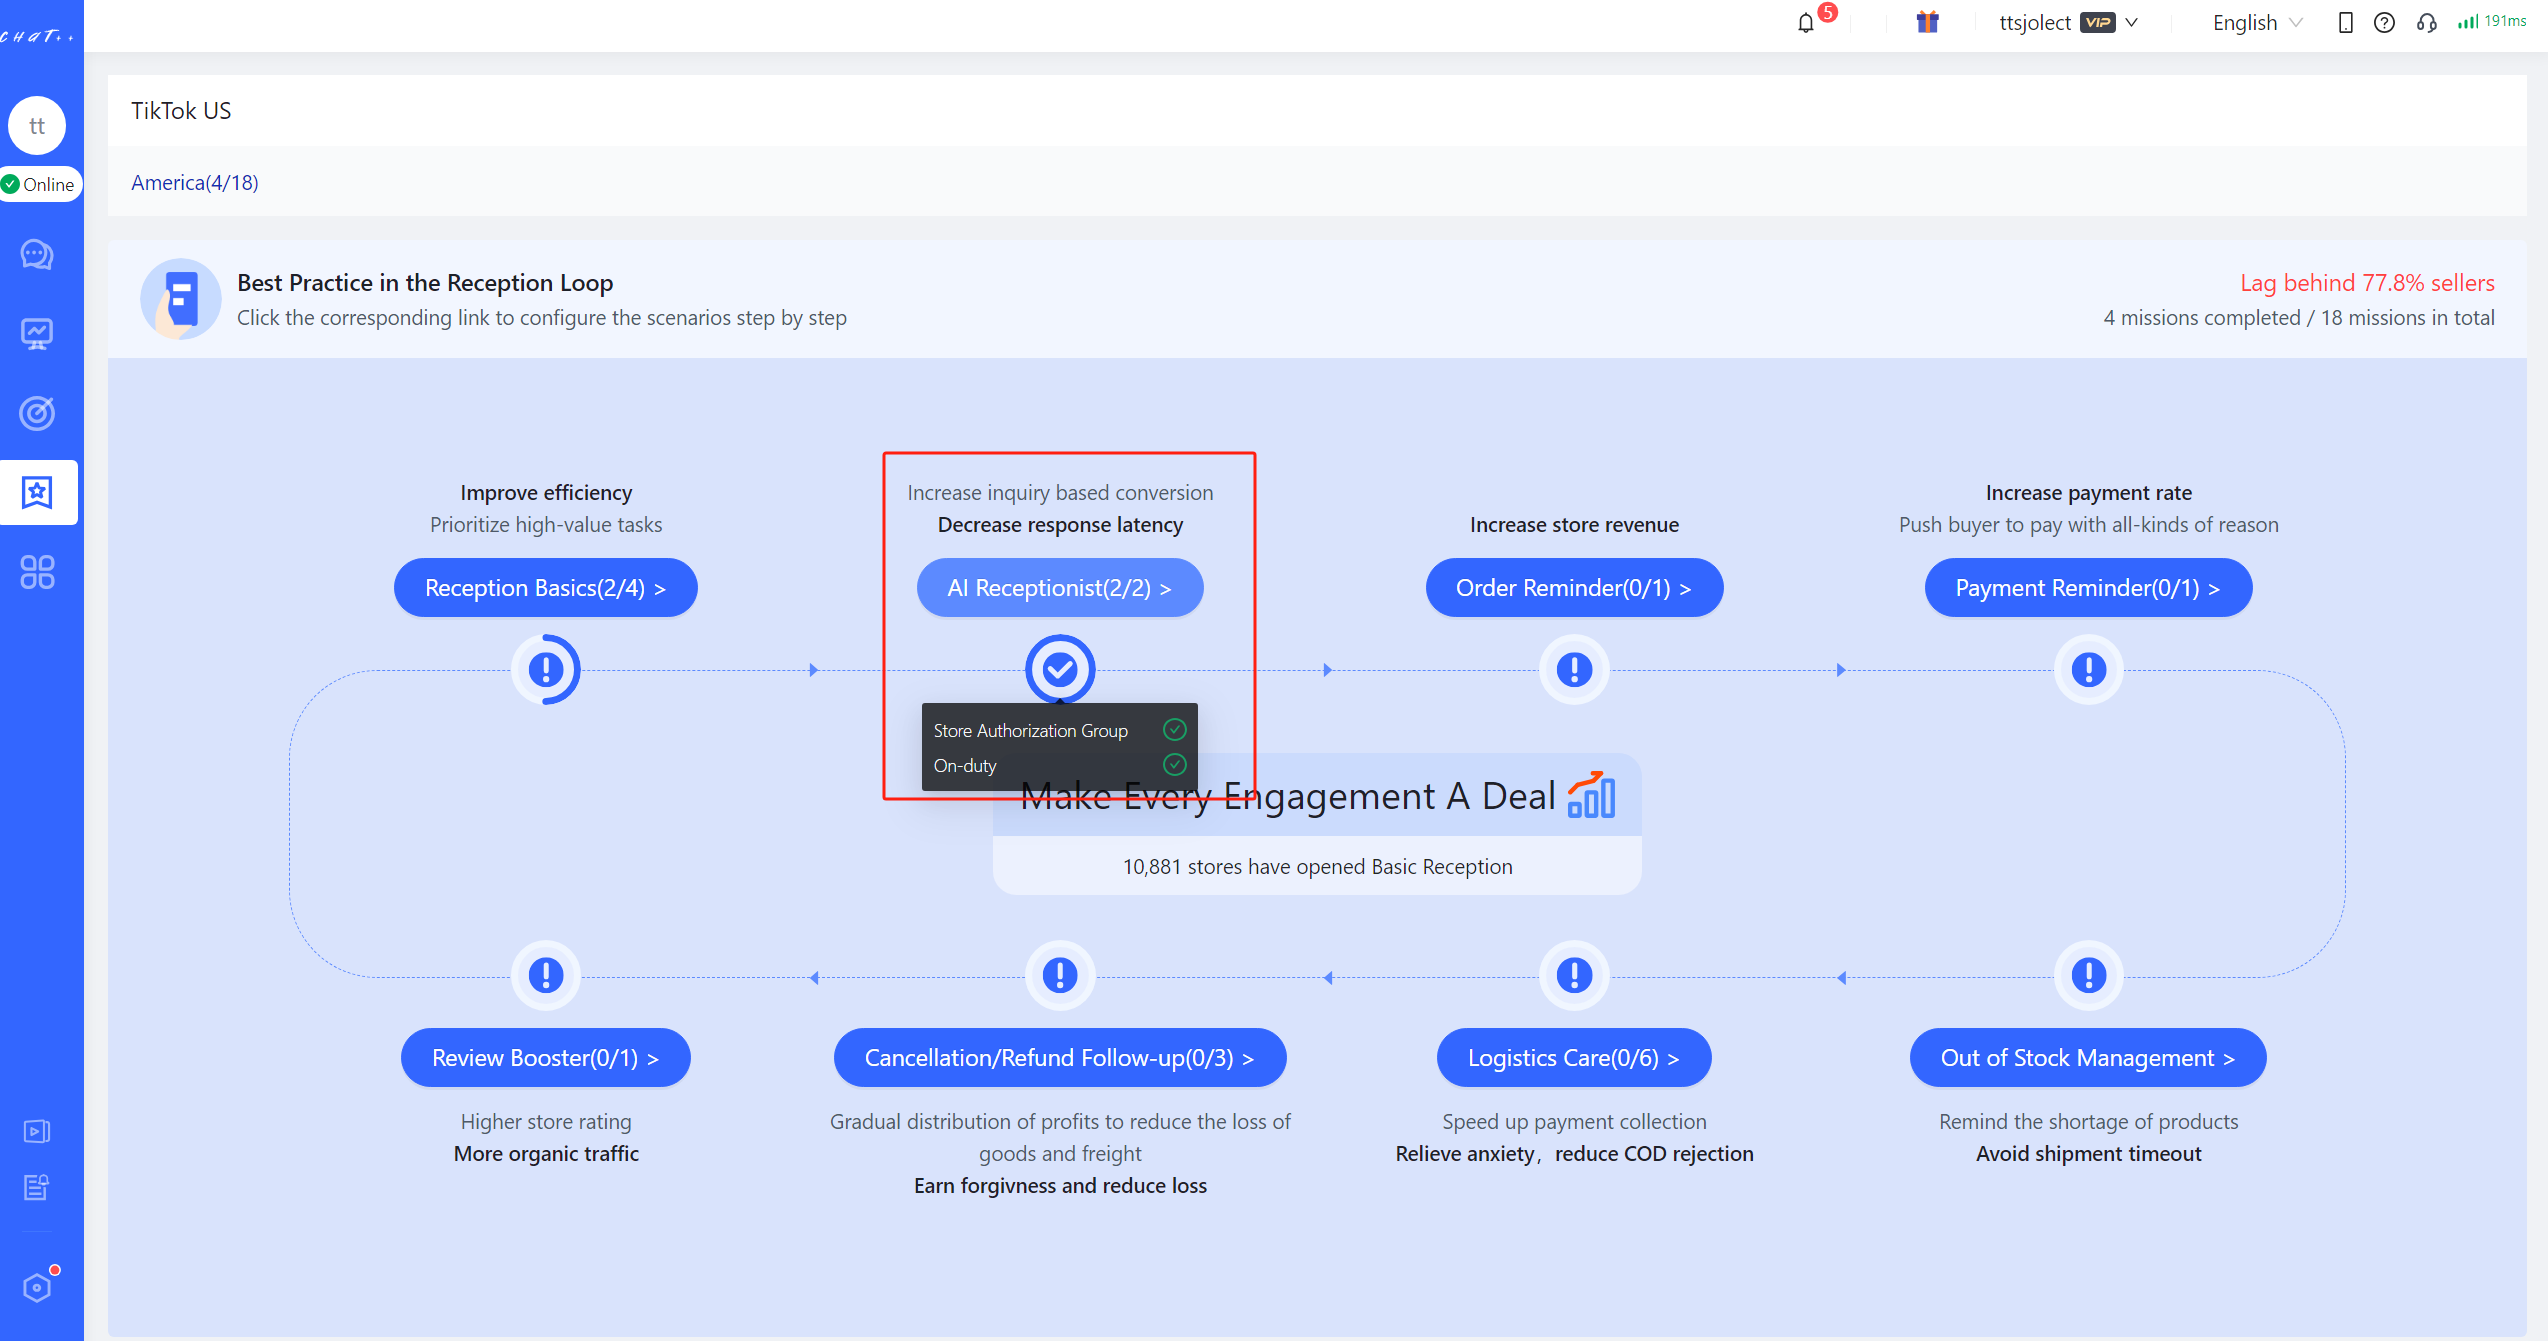
Figure 2
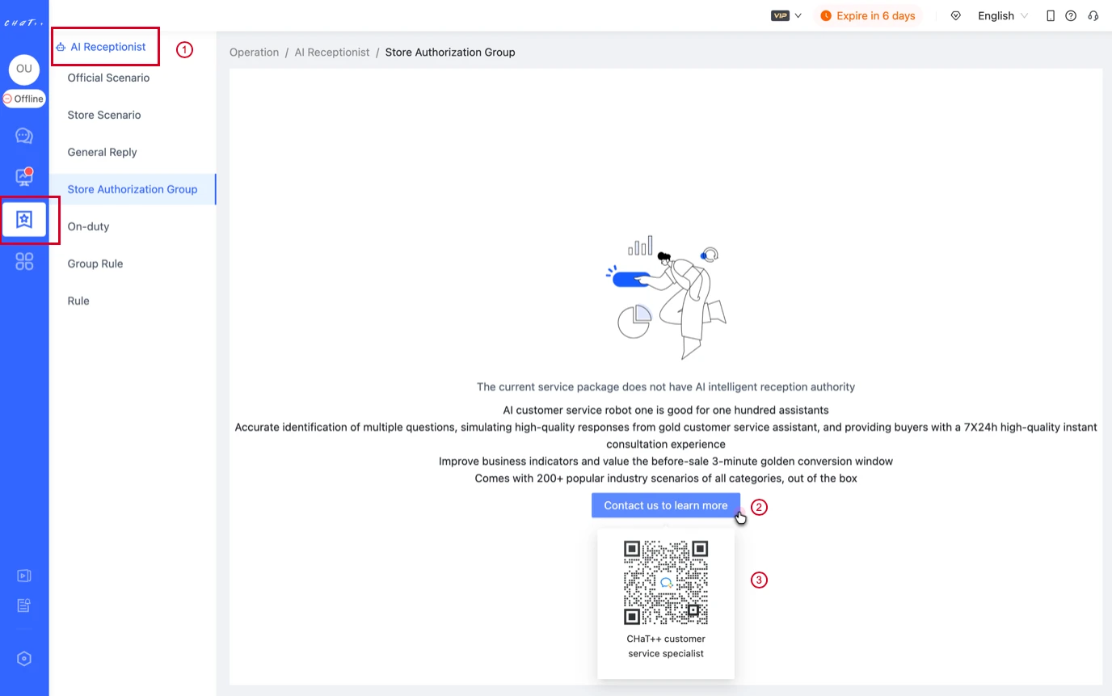
Figure 3
Privileges required for configuration
The 'Configure AI Receptionist' permission is selected on the 'Configuration→Authorization→Department' page, you can configure the permission on this page."
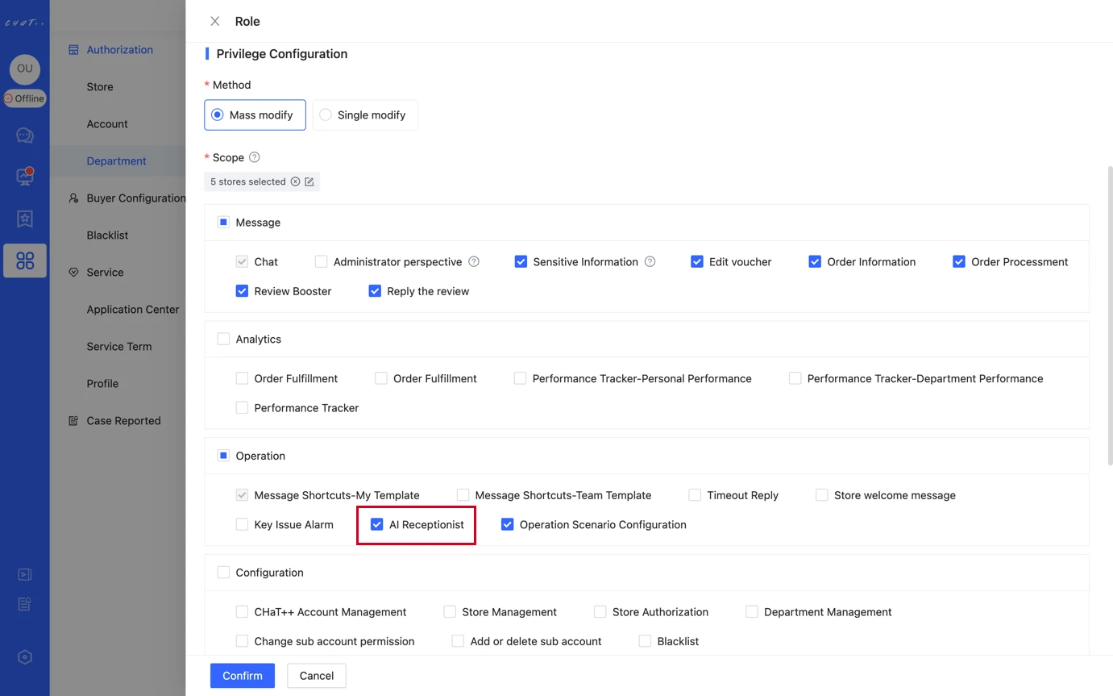
Figure 4
How to enter the configuration of AI Receptionist
- Regular Configuration Entry: Click on the left menu 'Automation' (as shown in the red box in Figure 5①) → 'AI Receptionist' (as shown in the red box in Figure 5②) to enter the AI Receptionist configuration page (Above Figure 3)
- Function: The page accessed here allows viewing and modifying all configurations related to the AI Receptionist .
- Applicable Scenario: This entry is more suitable for scenarios that require systematic adjustments to the AI Receptionist's configurations.
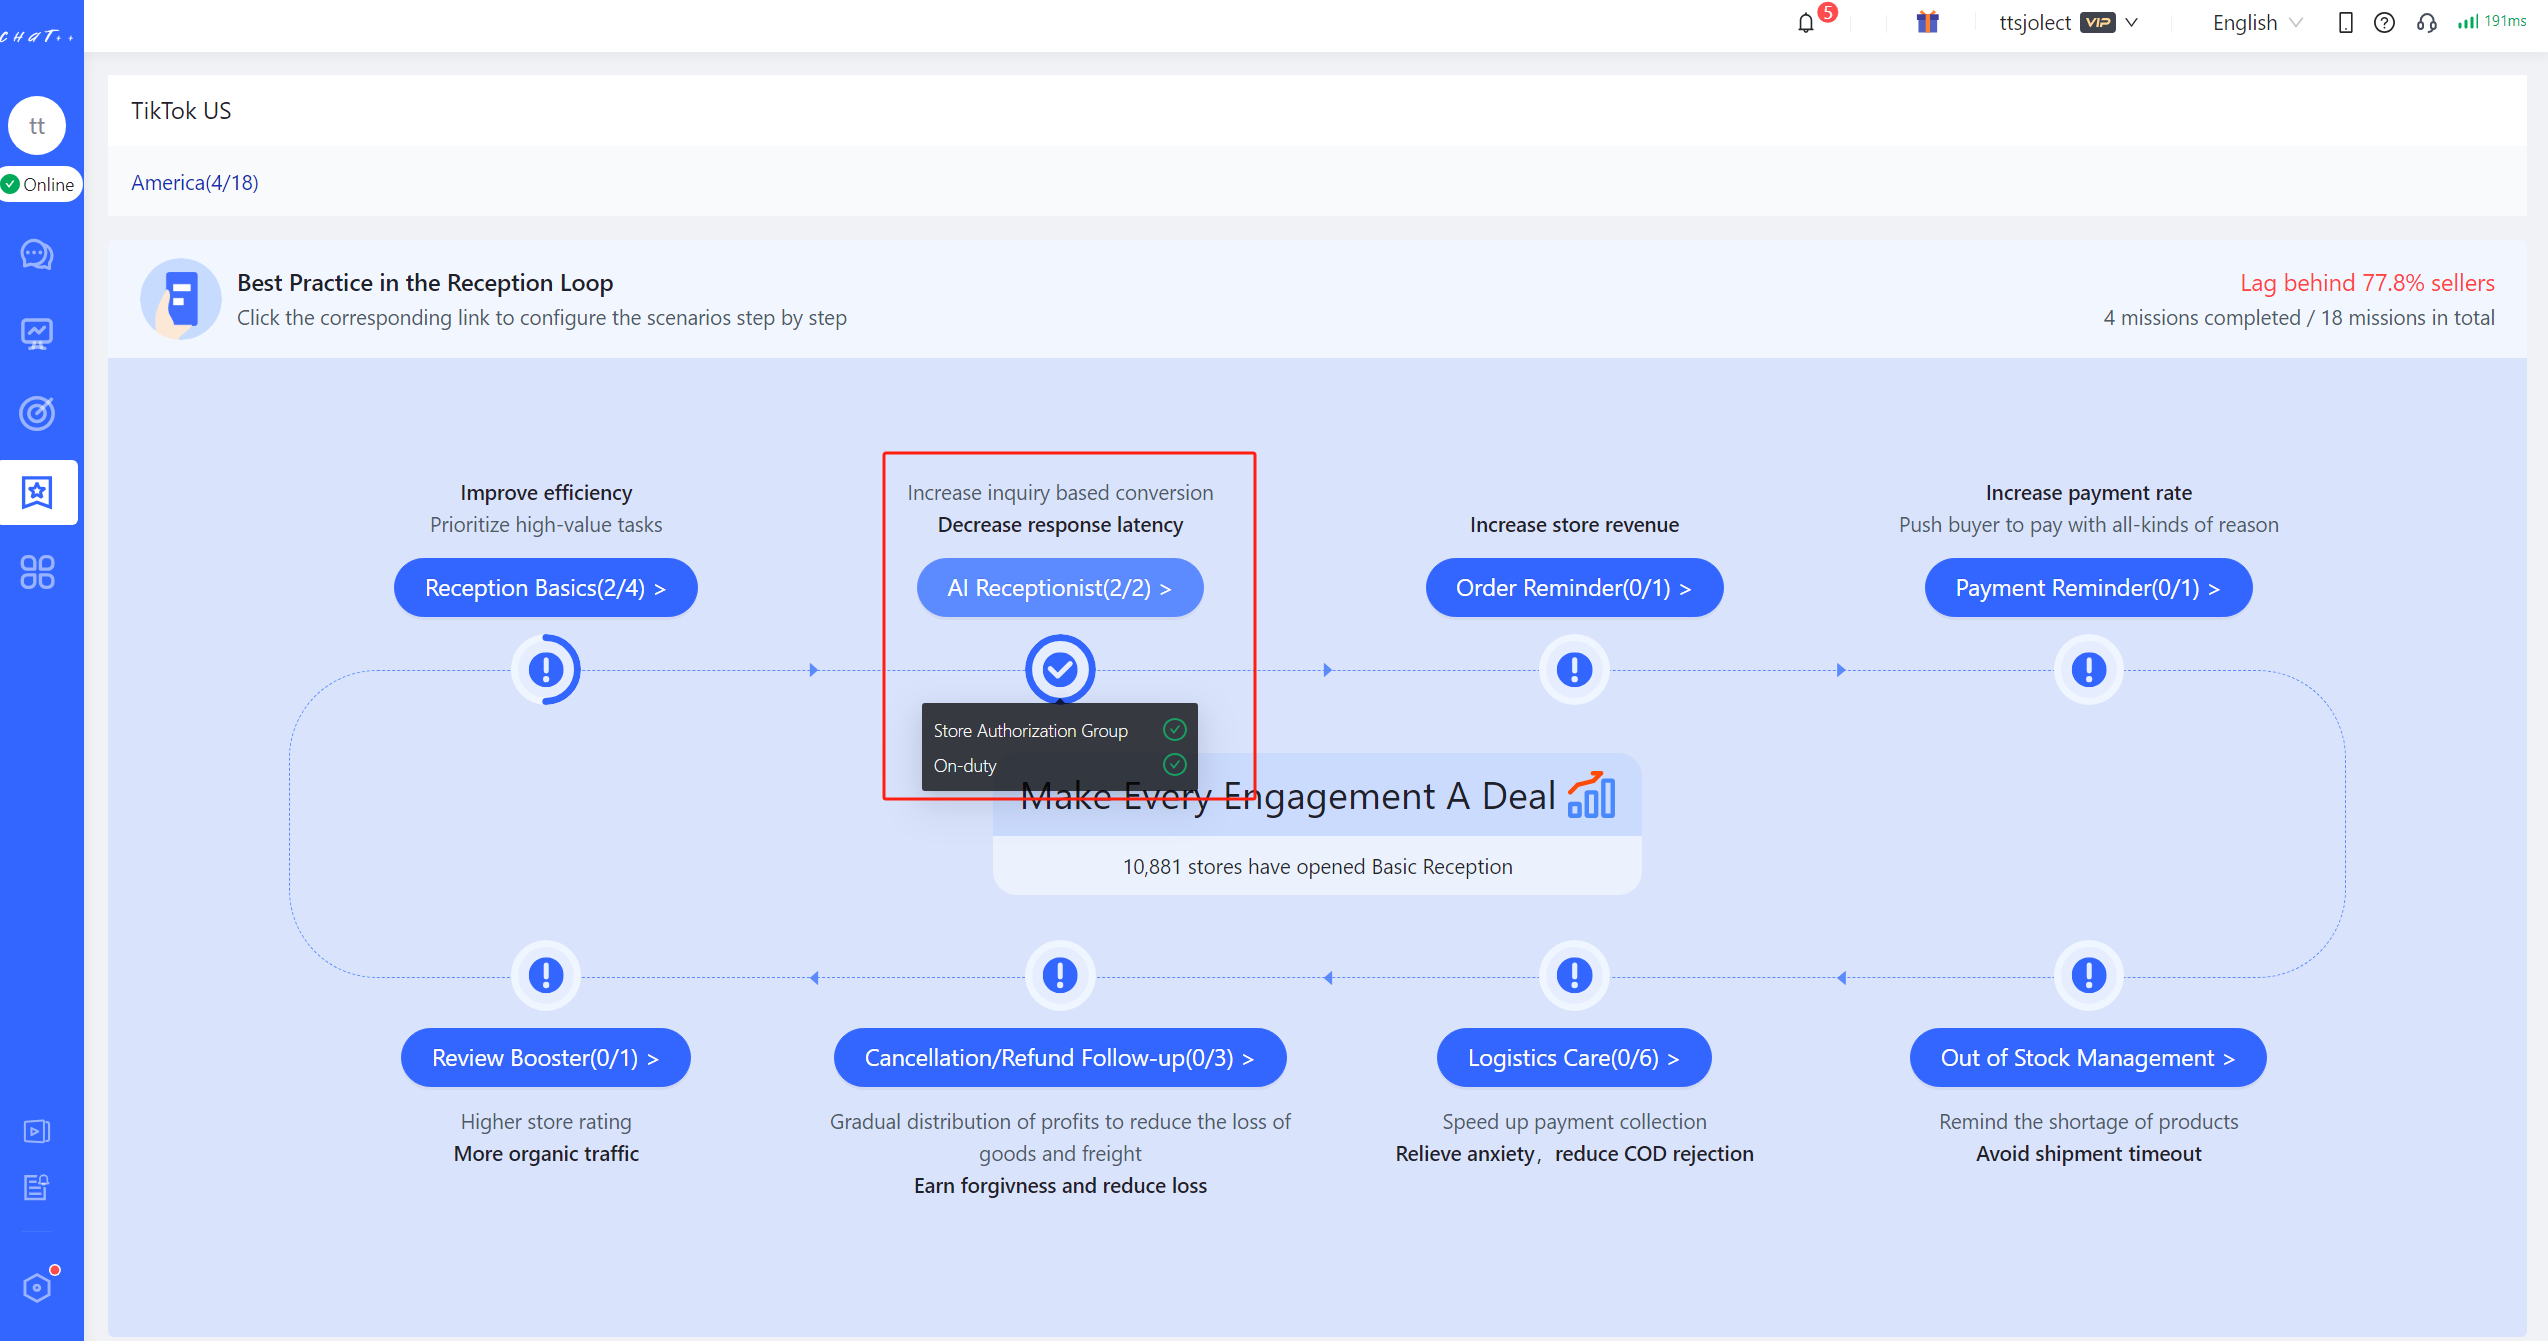
Figure 5
- Quick Configuration Entry: On the 'Messages' page, enter any conversation where the chatbot has a record of replies. When you find the chatbot's reply type marked in green as 'AI Receptionist' below any chatbot's reply message, click the 'Adjust Reply Content' button on the right side of it (as shown in the red box), and you will automatically enter the scenario strategy configuration page belonging to the current chatbot's reply.
- Function: The page accessed here allows viewing and modifying the scene and strategy associated with the current chatbot's reply
- Applicable Scenario: This entry is more suitable for situations that require a quick adjustment to a particular chatbot's reply tactics
⚠️ : If the AI Receptionist service has not been activated before (no AI Receptionist reply records exist), it is not possible to enter the scene strategy configuration page through this entry.
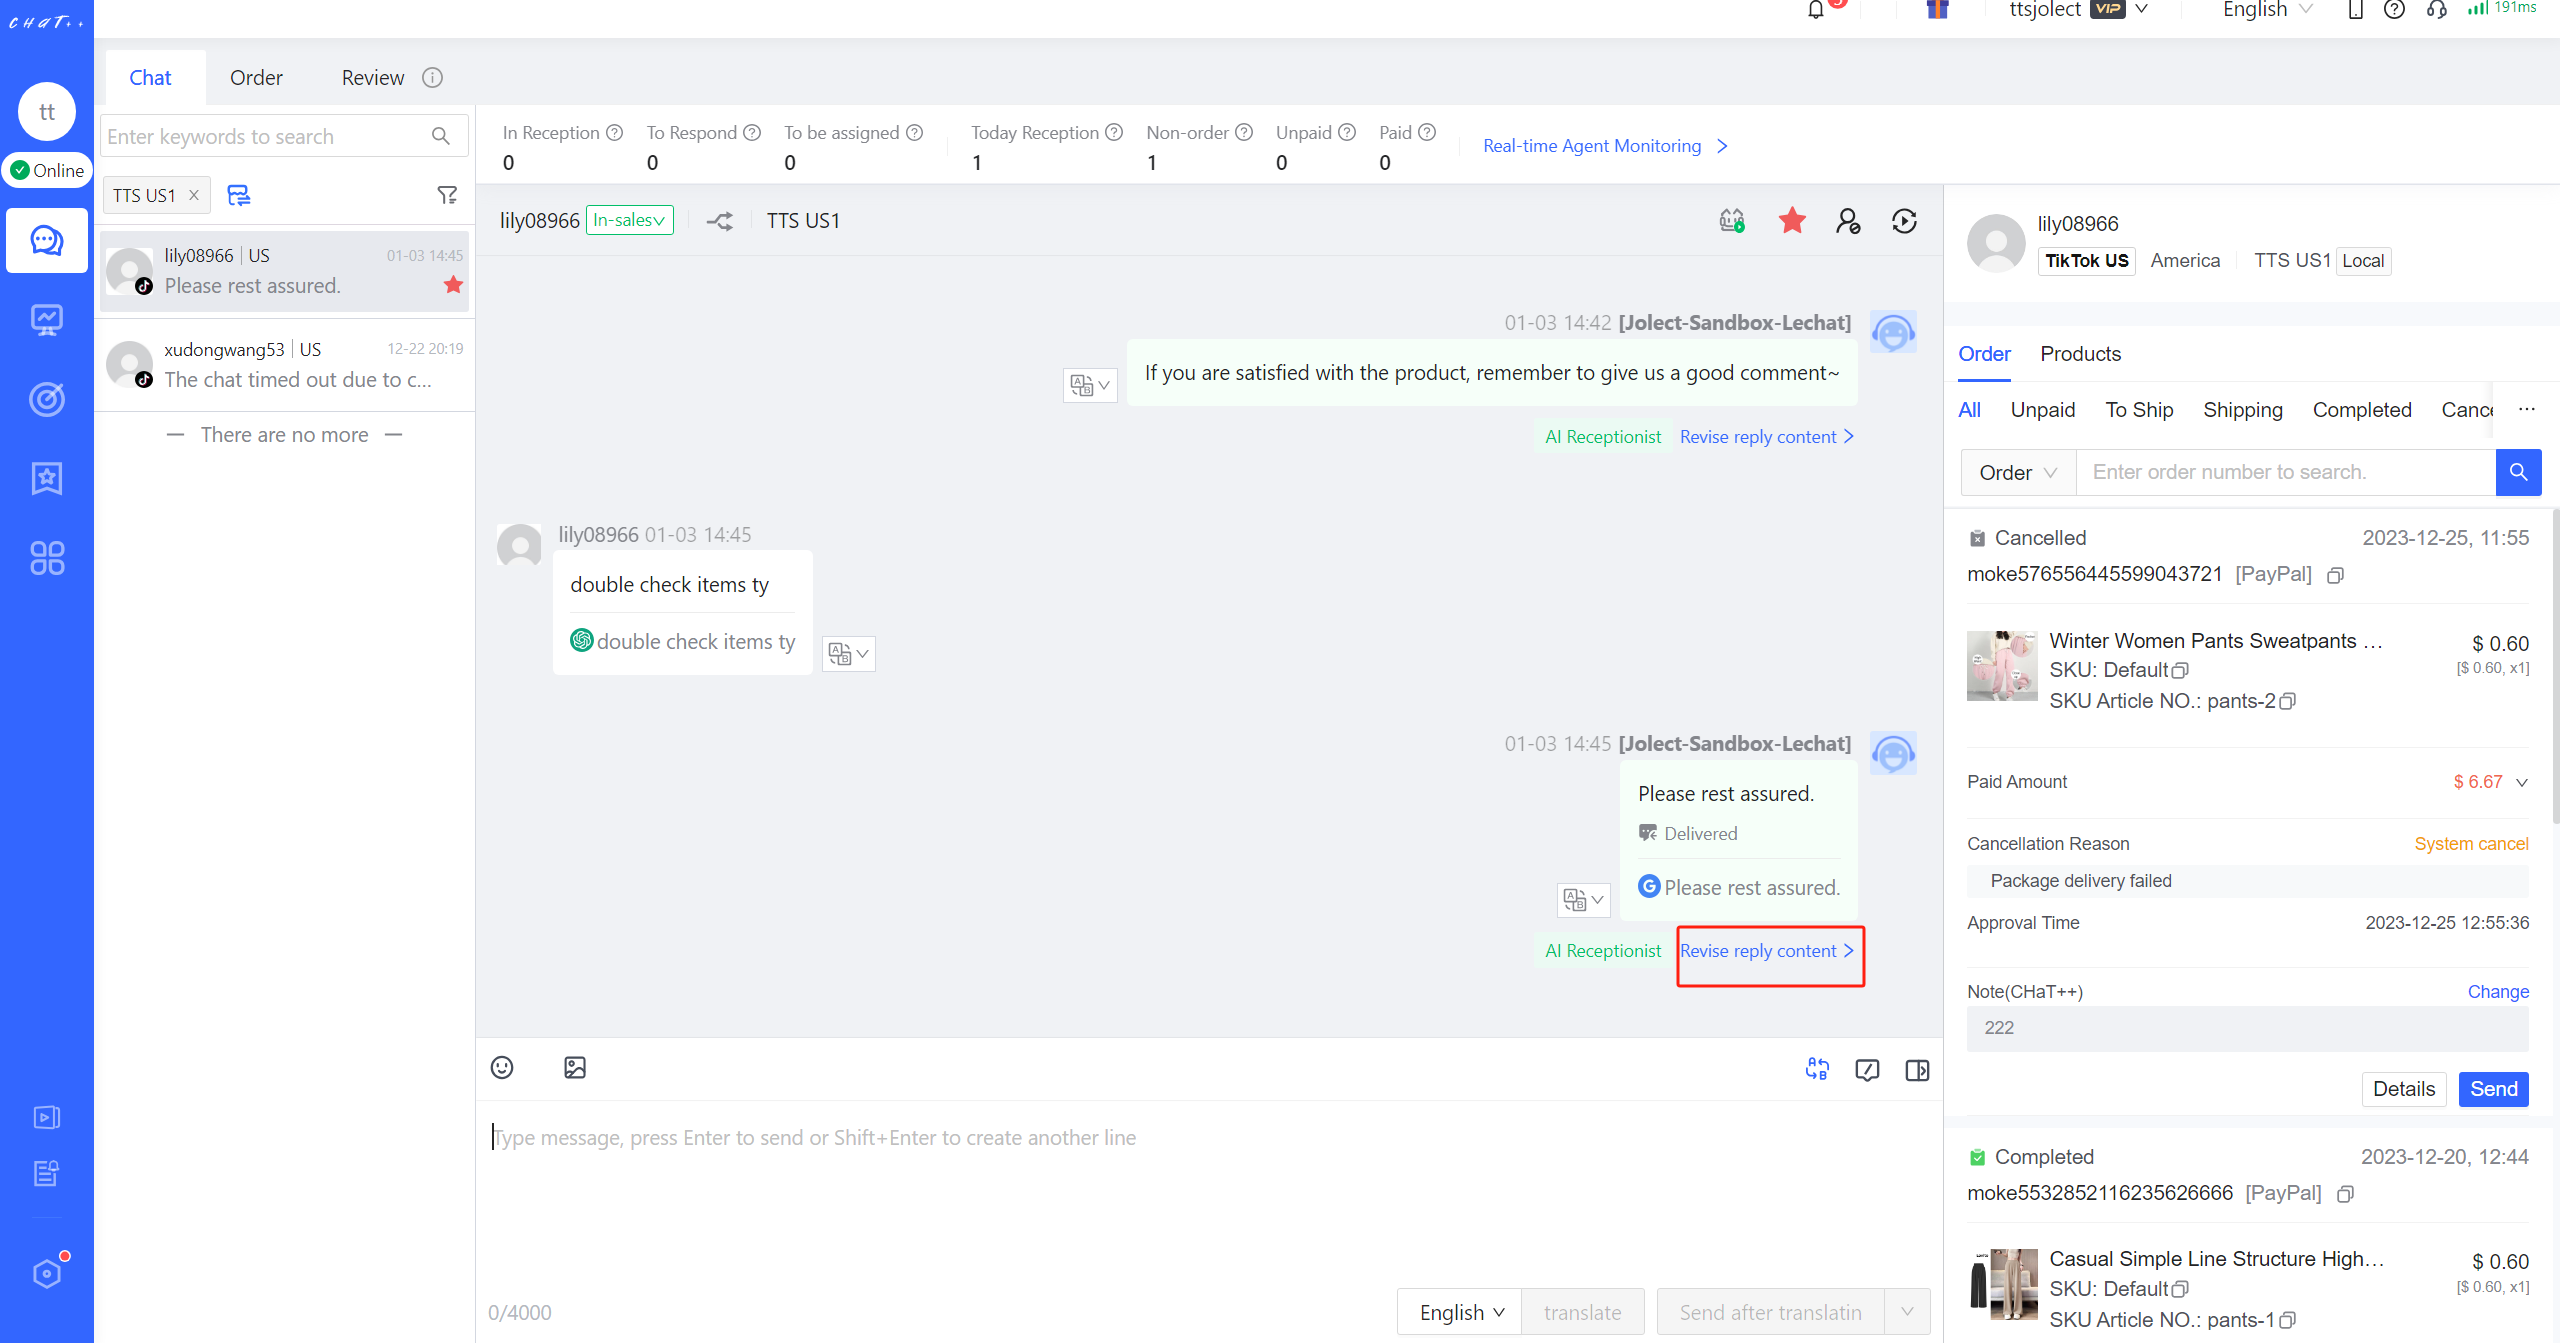
Figure 6
How to Configure AI Receptionist
Create a store configuration group
'Store Configuration Group' refers to applying the AI Receptionist robot's configurations (such as robot reply content) to a group of stores under the same marketplace. Once configured, any content changes within this store configuration group will take effect for all stores in the group.
- You can add all stores under the same marketplace to one store configuration group. In this case, only a unified AI Receptionist robot configuration is needed for the same marketplace;
- You can also select stores based on the main type of goods they sell or the administrators they belong to, add them to different store configuration groups, and perform separate AI Receptionist robot configurations for different types of stores。
Therefore, before starting to configure the AI Receptionist robot, it is necessary first to create a Store Configuration Group. The specific process is as follows:
- Step One: In the red box shown in the figure below, click on the 'Create Store Configuration Group' button to begin creating a store configuration group.
Figure 7
- Step Two: Select the applicable stores (i.e., choose which stores to add to the current store configuration group)
- In the red box shown in the figure below, set the name for the store configuration group.
- In the red box shown in the figure below, select the applicable stores according to the configuration needs.
  - 🌰Example
     - If all stores under the site can use the same set of AI Receptionist configurations, then select all stores under the site;
     - If only the stores specializing in electronic products under the site use the same set of AI Receptionist configurations, then select the stores specializing in electronic products under the site.
- In the red box shown in the figure below, proceed to the next step.
Figure 8
- Step Three: Select the subscription scenario package, save the store configuration group, and enter the specific configuration page
- In the red box shown in the figure below, the ChatPlusAI system automatically recommends industry scenario packages suitable for the current store configuration group based on the stores you selected in Step Two. In addition to the default subscription to the general scenario package (applicable to all types of stores), it will also recommend specific industry-applicable scenario packages (such as those suitable for the electronics industry). You can choose whether to subscribe according to the actual needs.
- After selecting the subscription scenario package in the red box shown in the figure below, save and enter the specific AI Receptionist configuration page.
Figure 9
Configure Official Scenarios
💡 ChatPlusAI has accumulated 6 years of e-commerce intelligent customer service industry experience, coming equipped with 200+ e-commerce industry applicable scenarios, covering 10+ industries and 100+ sub-industries. You simply need to activate the scenarios that meet your store's needs in the ChatPlusAI 'Official Scenarios', and the AI Receptionist robot will immediately begin serving your store.
The definition of a scenario
An official scenario in ChatPlusAI is equivalent to a collection of a type of buyer inquiries (including various ways of asking), and the same type of buyer questions (e.g., about shipping) may require different reply strategies due to different situations.
💡 Designing different reply strategies based on different situations allows the AI Receptionist robot to provide more targeted and accurate answers to buyer's questions. This approach truly aims to provide high-quality reception service to buyers and improve the efficiency of store reception.
- 🌰 For example, the scenario of buyers urging for shipment.
- When buyers are urging for shipment and the order has not been shipped yet, the chatbot's reply strategy is to soothe the buyer's emotions and inform them of the estimated shipping time.
- When the order has already been shipped, the chatbot's reply strategy is to inform the buyer that the order has been shipped and provide the order's logistics information.
The content of the scenario
A scenario includes the following elements:
(1) The information about a scenario includes the following elements:
① Scenario Content: This section displays specific details about the scenario.
② Scenario Name: It provides a quick reference for understanding the scenario definition.
③ Scenario Description: It offers a detailed explanation of the scenario definition.
④ Buyer Question Examples: Real buyer questions are provided as examples to illustrate the scenario more concretely.
⑤ Scenario Switch: Enabling this option means that when a buyer inquires about a topic relevant to this scenario, the robot will respond to the buyer's query. Disabling it means that when a buyer's question falls under this scenario, it will be answered by a human customer service agent.
⑥ Scenario Editing Access: This is where you can access the detailed editing page for the current scenario to view the complete scenario strategy information.
Figure10
(2) About the reply strategy** **:In a scenario, the reply strategy information includes the following elements:
① Strategy Content: This section displays specific details about the strategy.
② Strategy Name and Description: It defines the strategy, and clicking the "On Duty" icon on the right can provide specific instructions and suggested directions for designing reply content.
③ Limiting Parameters: These are the conditions that need to be met for the AI Receptionist to use this strategy's reply content to respond to the buyer.
④ Reply Content: This is the content that the AI Receptionist uses to respond to the buyer's inquiry (click here to quickly modify the content).
⑤ Applicable Modes: The strategy's reply content is used when the AI Receptionist is in Assisting Reception mode or Guarding mode by default. You can enable or disable support for each mode if you want the robot to use or not use this strategy's reply content in a specific mode.
- Assisting Reception Mode: When human customer service agents are involved in reception assignments, the AI Receptionist operates in Assisting Reception mode, collaborating with human agents to serve buyers.
- Guarding Mode: When no human customer service agents are involved in reception assignments, the AI Receptionist automatically enters Guarding mode, taking full responsibility for serving buyers.
- Note: If you want the chatbot not to use this strategy's reply content in either of the above modes, you can click the corresponding mode button to disable support for that mode. For example, if you don't want the robot to use the "Buyer Hasn't Paid Yet" strategy's reply content in Guarding Mode, click the Guard button to turn it gray.
⑥ Strategy Switch: Under the premise of enabling the scenario and enabling the strategy, when a buyer's question falls under this scenario, and the AI Receptionist determines that this strategy should be selected, the robot will use this strategy's reply content to respond to the buyer.
- Note: The AI Receptionist can only use this strategy's reply content to respond to buyers when both the scenario and strategy are enabled.
⑦ Strategy Editing Access: You can access the detailed editing page for the current strategy here to view specific strategy information.
⑧ More Reply Strategies: Click here to view more (3) strategies within this scenario.
⑨ Expand All Strategies: Click here to view all remaining strategies within this scenario.
⑩ Add Reply Strategy: If the existing reply strategies within this scenario do not meet your store's needs, you can click here to create a new reply strategy, adding a new reply strategy.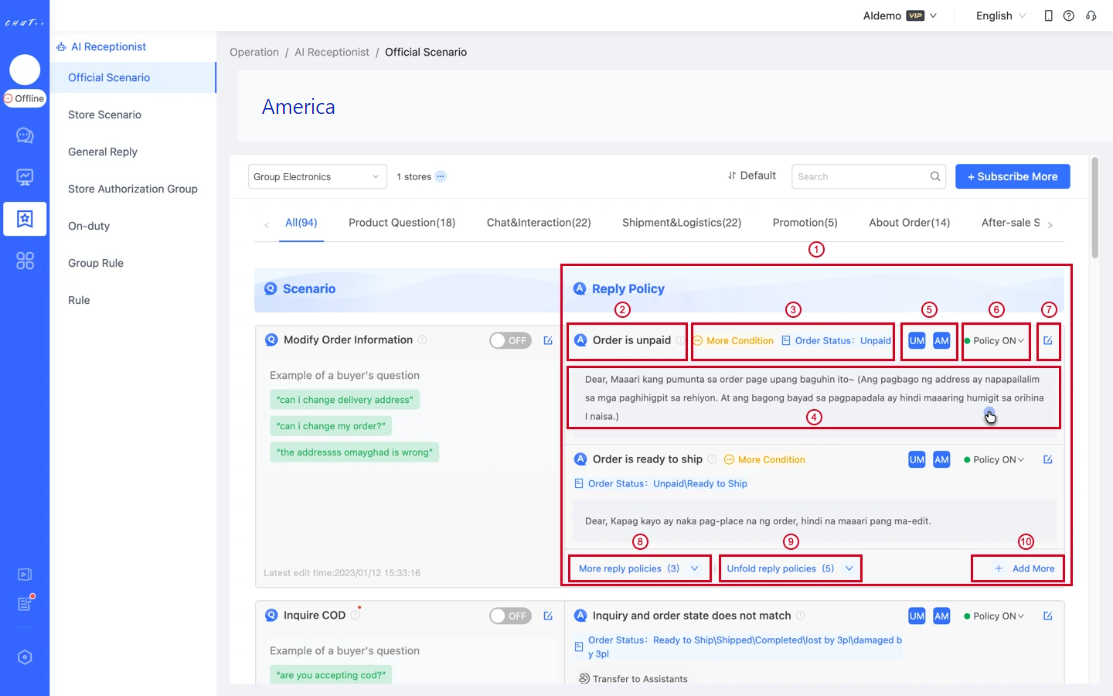
Figure11
Example of Scenario Configuration
Using the scenario "Buyer Requests to Modify Order Information" as an example
Quick Configuration Method
- Suitable for cases where only the reply content needs to be modified, and the scenario/strategy switches need to be adjusted; can be used when multiple scenarios need quick adjustments.
- (1) Expand all strategies to quickly view all strategies in this scenario (as shown in the red box① in the image below).
- (2) If you need to modify the wording in a strategy, you can click directly on the reply content box to make changes, and after modification, click "Save" (as indicated in the red boxes ②③④ in the image below).
- (3) Once you have confirmed that the wording is correct, adjust both the scenario and strategy switches to the "Open" state. After this, when a buyer inquires about this scenario, the AI Receptionist can use the scenario's strategy reply content to respond to the buyer.
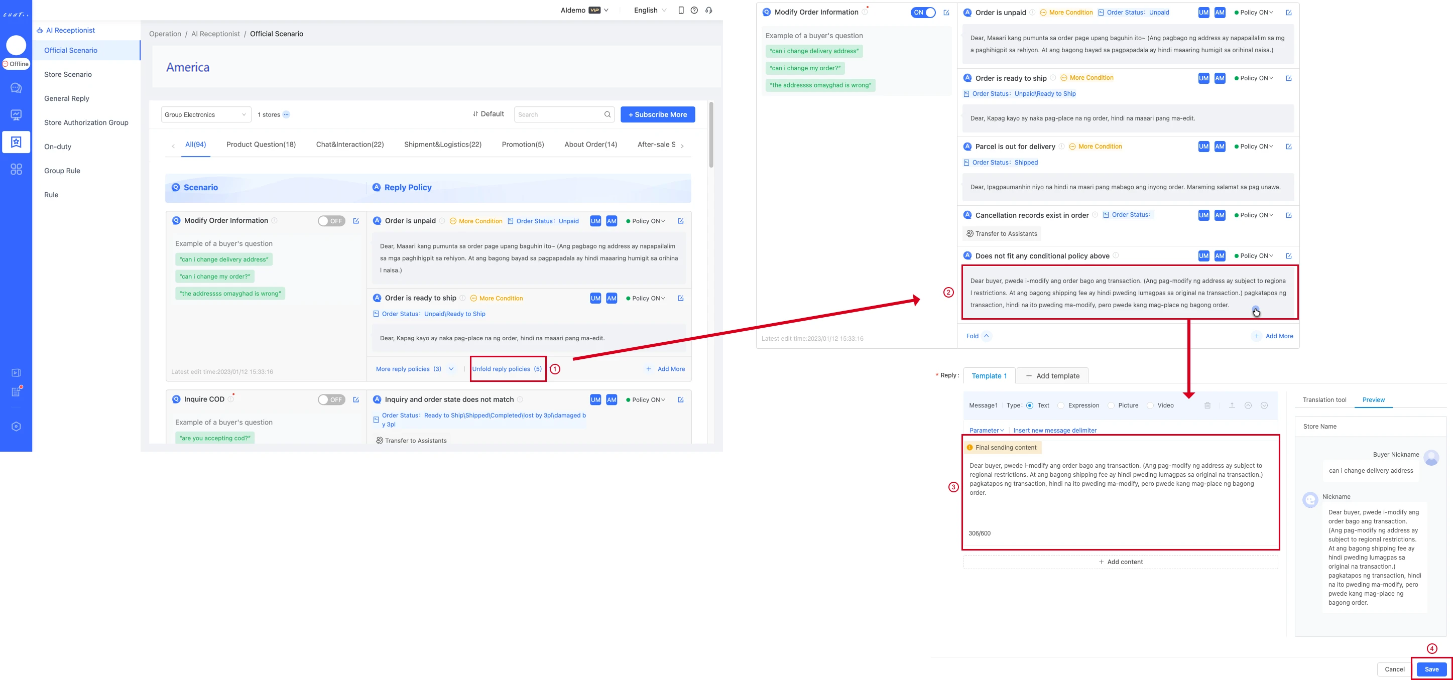
Figure12
Detailed Configuration Method
- (1) Click the edit access button for the scenario (as shown in figure①) to enter the detailed editing page of the current scenario and view the complete scenario strategy information.
- (2) Click the edit access button for the strategy (as shown in figure②) to enter the detailed editing page of the current strategy. After making the necessary changes, click the "Save" button. You can also adjust the strategy order (i.e., the order in which the robot selects reply wording) by clicking the "More" button (as shown in figure③).
- (3) After completing the modifications to the scenario, in the "Edit Scenario" page:
- Confirm that the scenario switch is in the "Open" state (as shown in figure⑤).
- Ensure that the required strategies are also in the "Open" state.
- Click the "Save" button (as shown in figure⑥) to complete the scenario configuration. From then on, when a buyer inquires about this scenario, the AI Receptionist can use the scenario's strategy reply content to respond to the buyer.
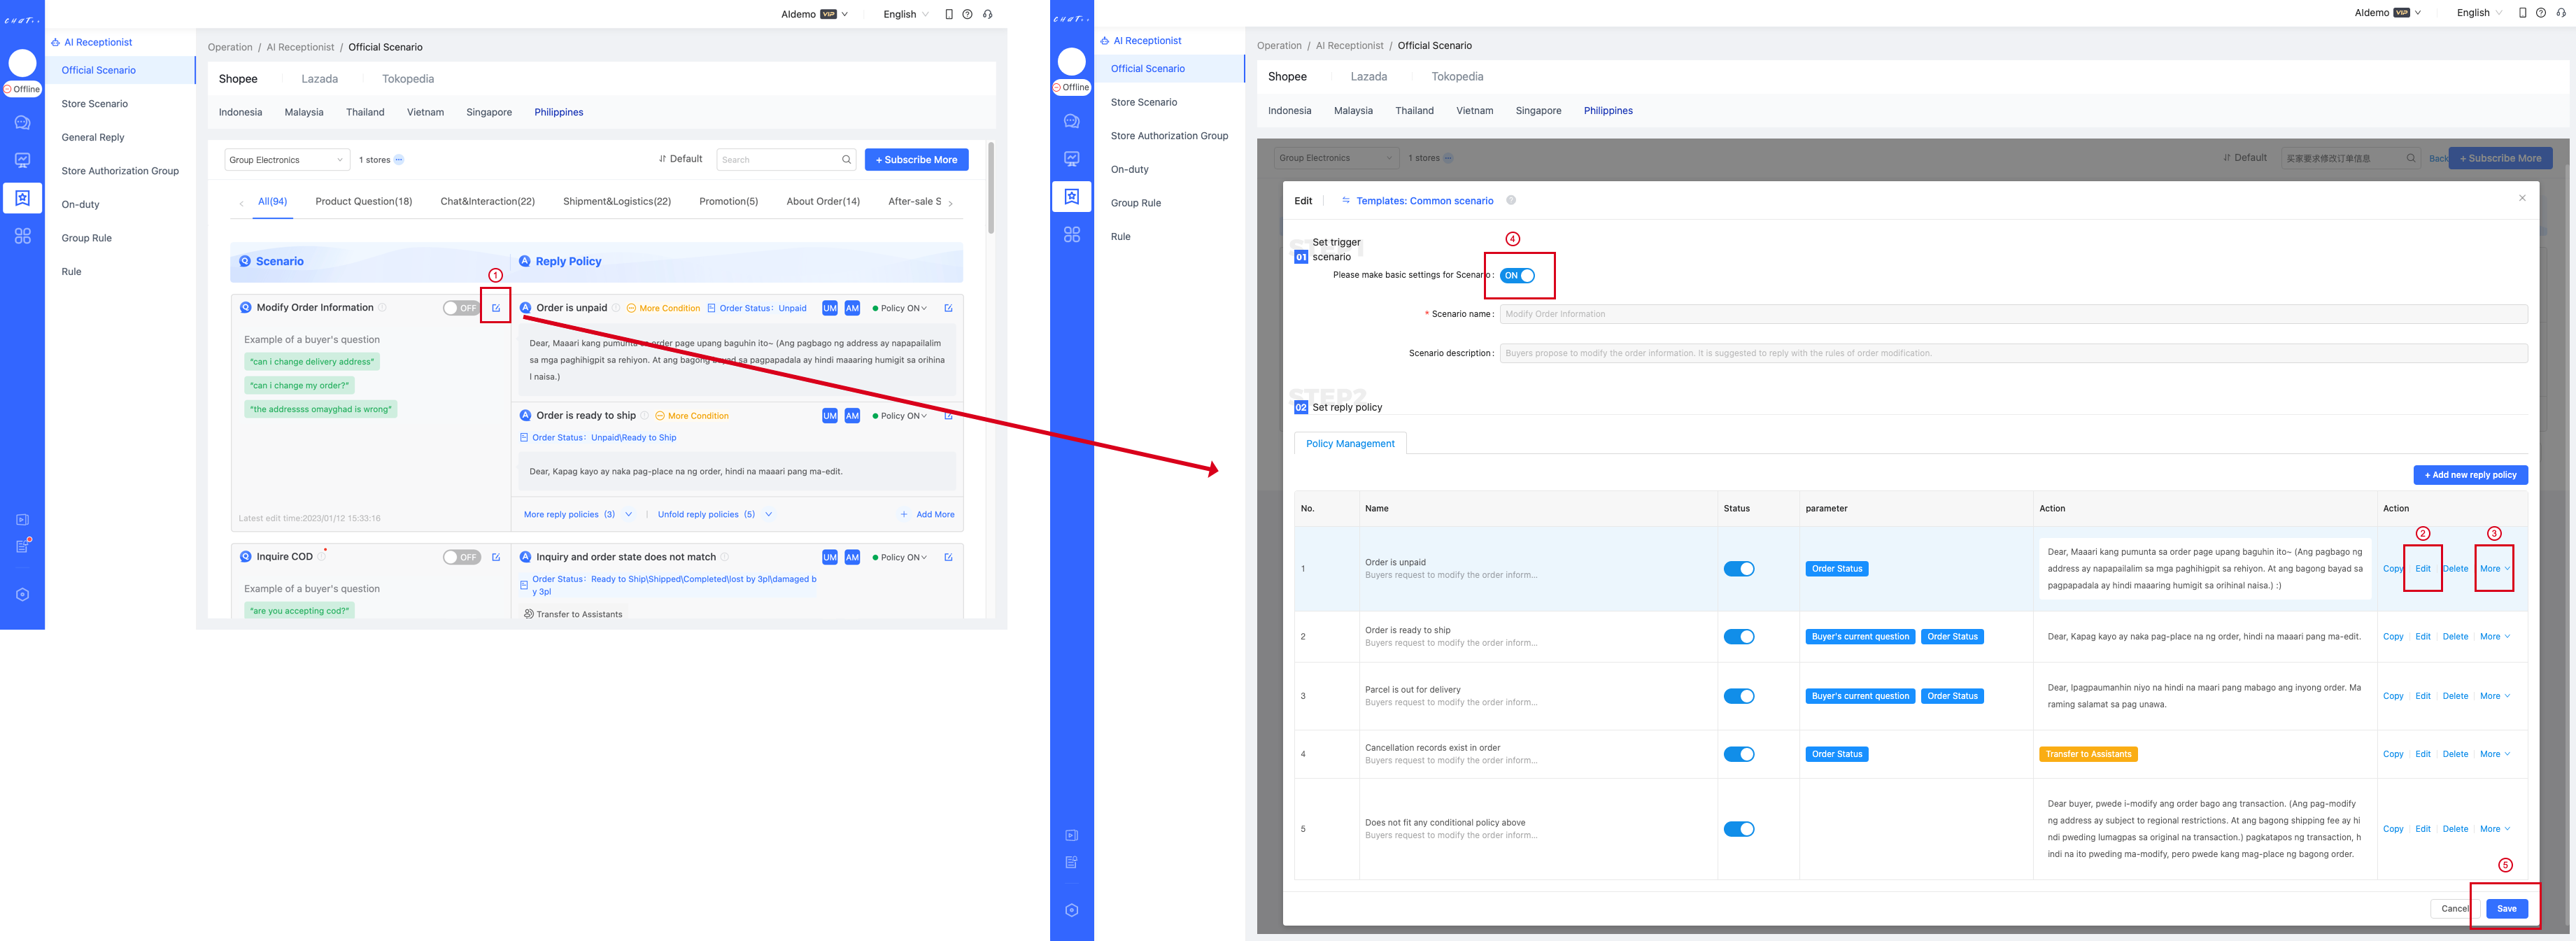
Figure13
Strategy Design Tips:
- Strategy Parameters: When designing a strategy, you can use the parameters provided by ChatPlusAI to set the conditions for the strategy to meet.
Note: If multiple parameters are used, the strategy is considered satisfied only when all parameters are met
Example:
- Order status:Unpaid/Not Shipped Yet
- Product ID:12345678
- In this case, the strategy is considered satisfied only when the buyer inquires about an order with the status "Unpaid" or "Not Shipped Yet" and the product ID is "12345678". The robot can use this strategy's reply wording to respond to the buyer.
Below are the parameters recommended for use when designing reply strategies:
Order Status: When the order status of the buyer's inquired order matches any of the selected order statuses, the robot will use this strategy's reply content to respond to the buyer.
Order's Logistics Status: The logistics status of the buyer's inquired order that is not yet completed.
Product ID: The SpuID of the associated product inquired by the buyer.
Inquiry Time (Start and End): The time when the buyer made the inquiry. You can select a time range, and it will be effective until the expiration date and will expire after that. It is recommended to use this parameter when configuring strategies with clear time limits (e.g., for events like Singles' Day, you can use this parameter to set the event time and configure strategy reply wordings for the event period).
Strategy Sorting: In ChatPlusAI scenarios, you can design multiple strategies. When the chatbot selects a strategy for replying, it will search from top to bottom according to the order of strategies in the scenario. Therefore, if you want the chatbot to prioritize selecting a strategy for replies, you should place the strategy with the preferred order above other strategies (for example, strategies with added parameters should have a higher order than strategies without added parameters).
For ChatPlusAI official scenarios, the strategies come with default reply wordings designed for the store, and based on accumulated industry experience, some strategies have been designed with a 'Transfer to CS Agent' mode. When a buyer inquires and meets the criteria of such a strategy, it is automatically transferred to a CS agent for further handling.
⚠️ Some of the strategy reply wordings may require your confirmation. When you contact the ChatPlusAI operation expert, the expert will go through them with you one by one to confirm.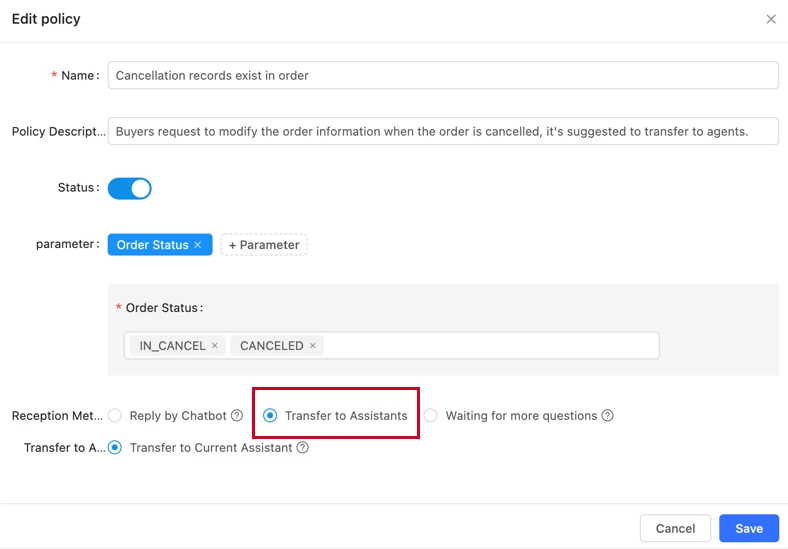
Figure14
Tips for Enabling Scenarios
- For official scenarios, it is recommended that you can enable all of them for use once you have checked and confirmed that the wordings no longer need adjustments.
- You can also choose to enable scenarios based on the actual needs of your store.
Show case
- After completing the AI Receptionist configuration mentioned above, the chatbot starts working and automatically responds to buyer inquiries. At this point, you can view the chatbot's reply results on the 'Messages' page as shown in the image below:
- At this point, below the chatbot's reply content, you will see the AI Receptionist icon, which allows you to quickly understand the type of response generated by the chatbot.
Figure15
Scenario Search Tool
💡 ChatPlusAI offers a large number of official scenarios with diverse types. To make it convenient for you to quickly find scenarios during configuration, ChatPlusAI provides a scenario search tool. You just need to enter the scenario or strategy content in the search box as shown below, and the system will automatically search and display scenarios or strategies that contain the search content.
🌰 Example: Searching for 'Buyer Requests to Modify Order Information.' After the system's query, it found the scenario with the same name and displayed it on the page.
Figure16
Figure17
How to set up On Duty Mode
✅ It only becomes active when all human customer service agents are offline, and the chatbot is unable to provide effective responses.
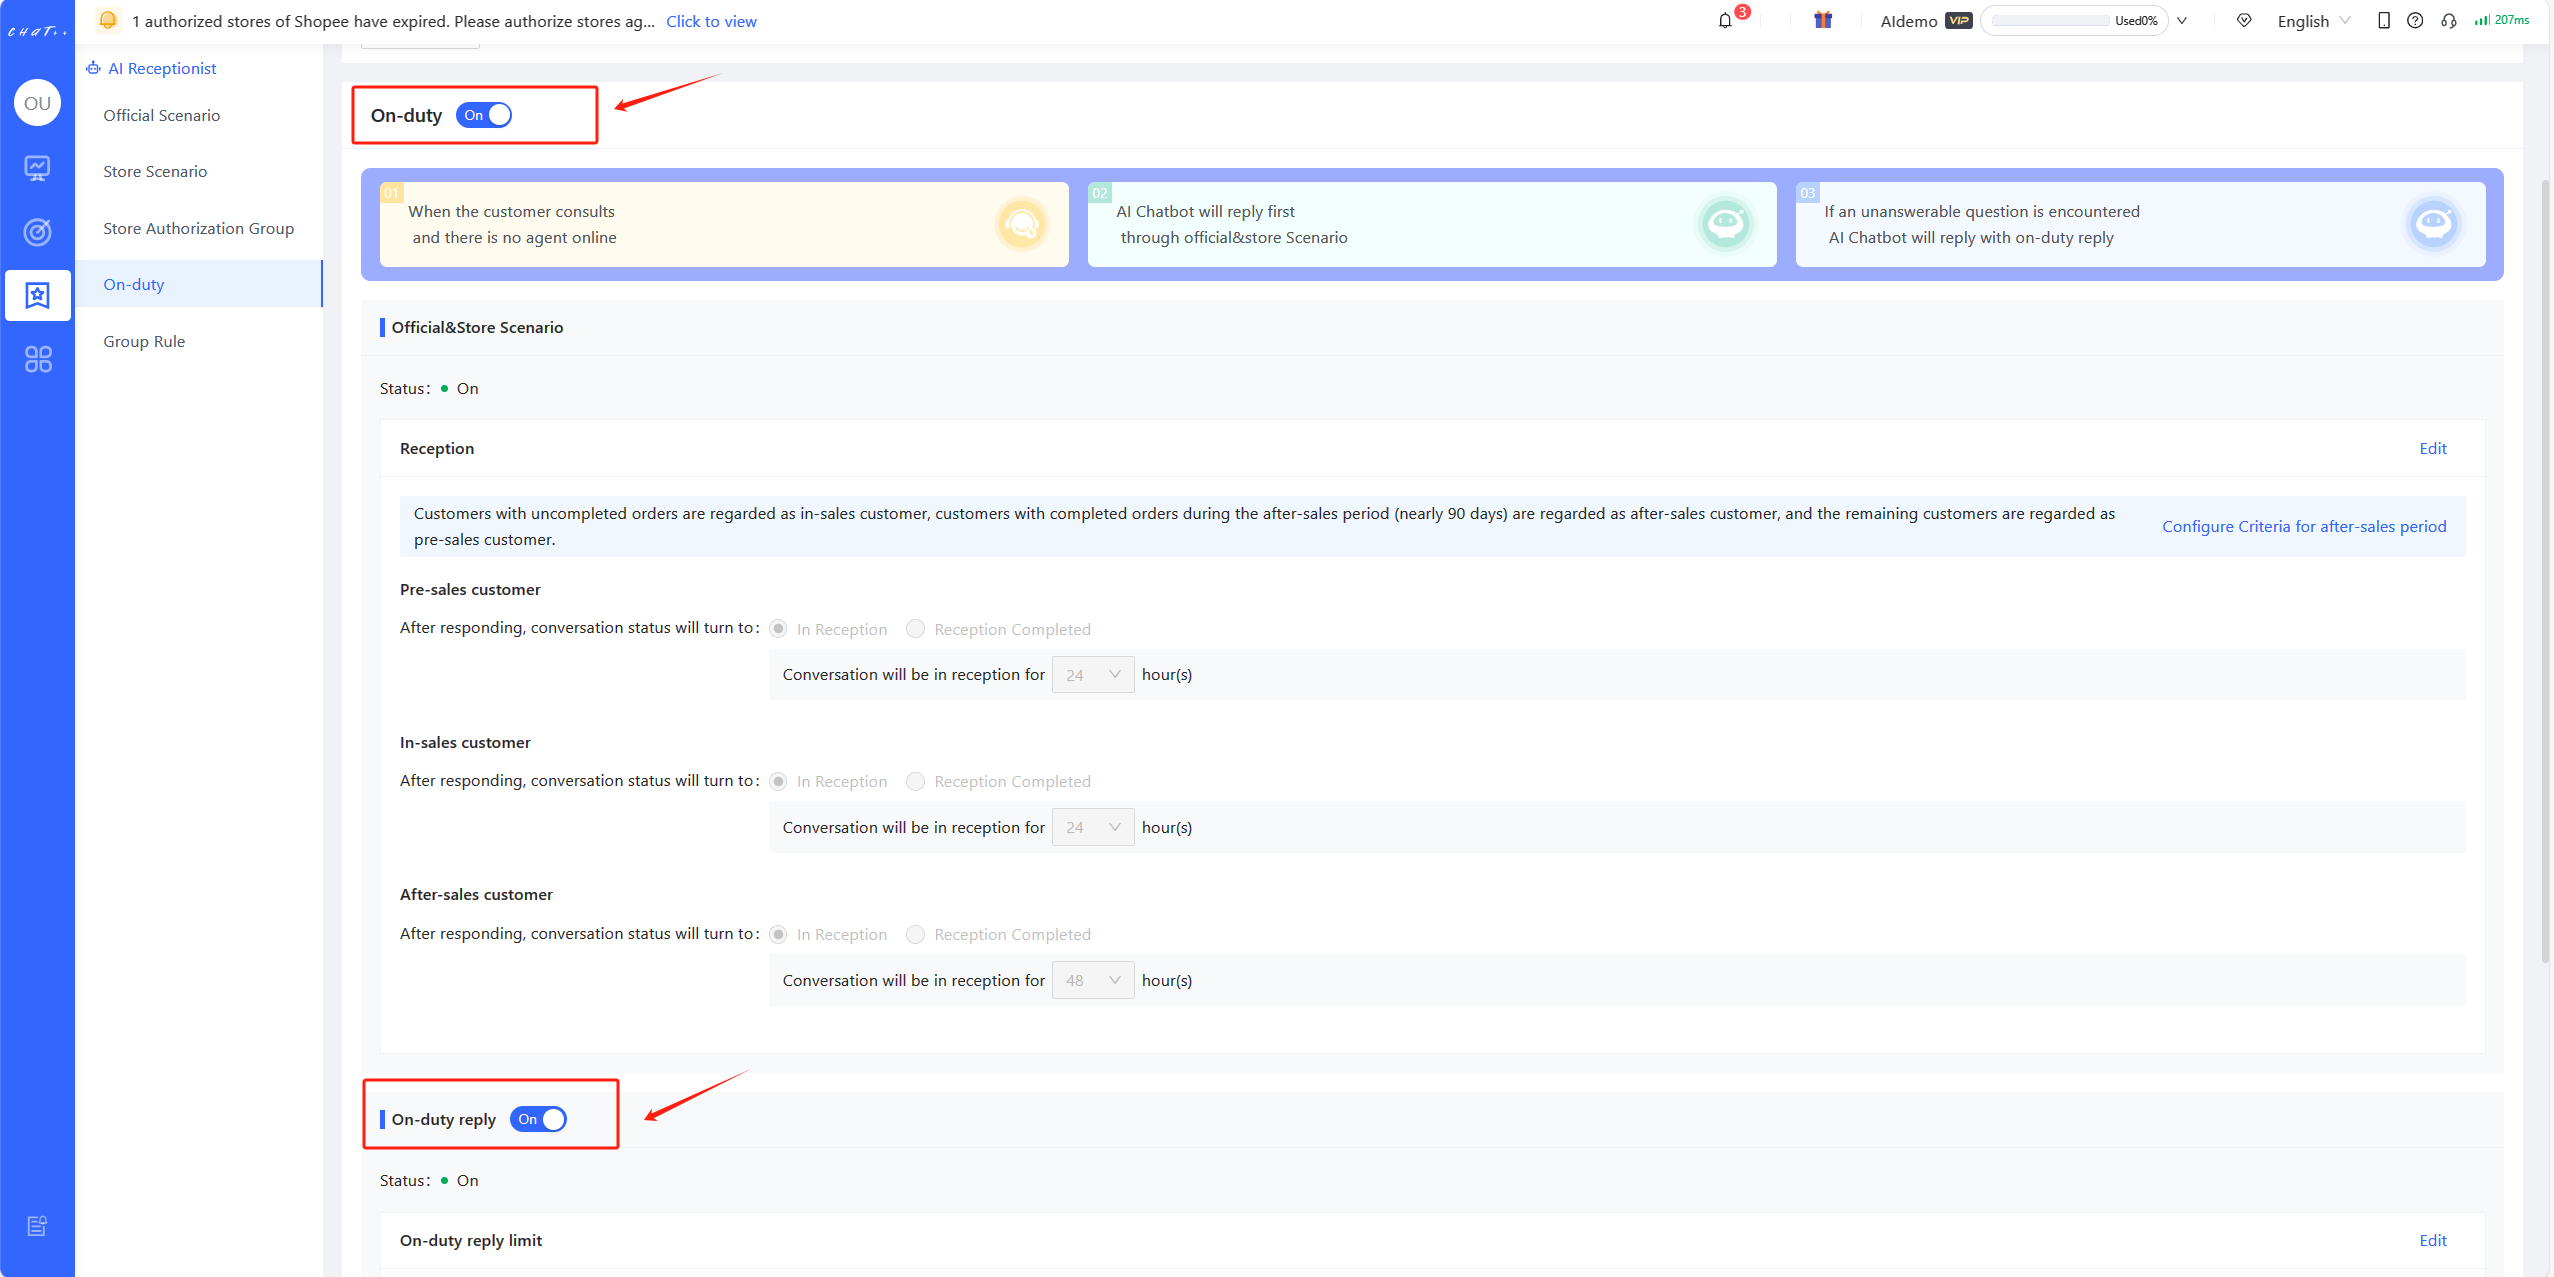
Figure18
Show case
- Questions that the robot can respond to: Under the reply content, there is the AI Receptionist icon.
- Questions that the robot cannot respond to: Under the reply content, there is the AI On-duty reply Mode icon, and it reminds human customer service agents to continue handling when they come back online.
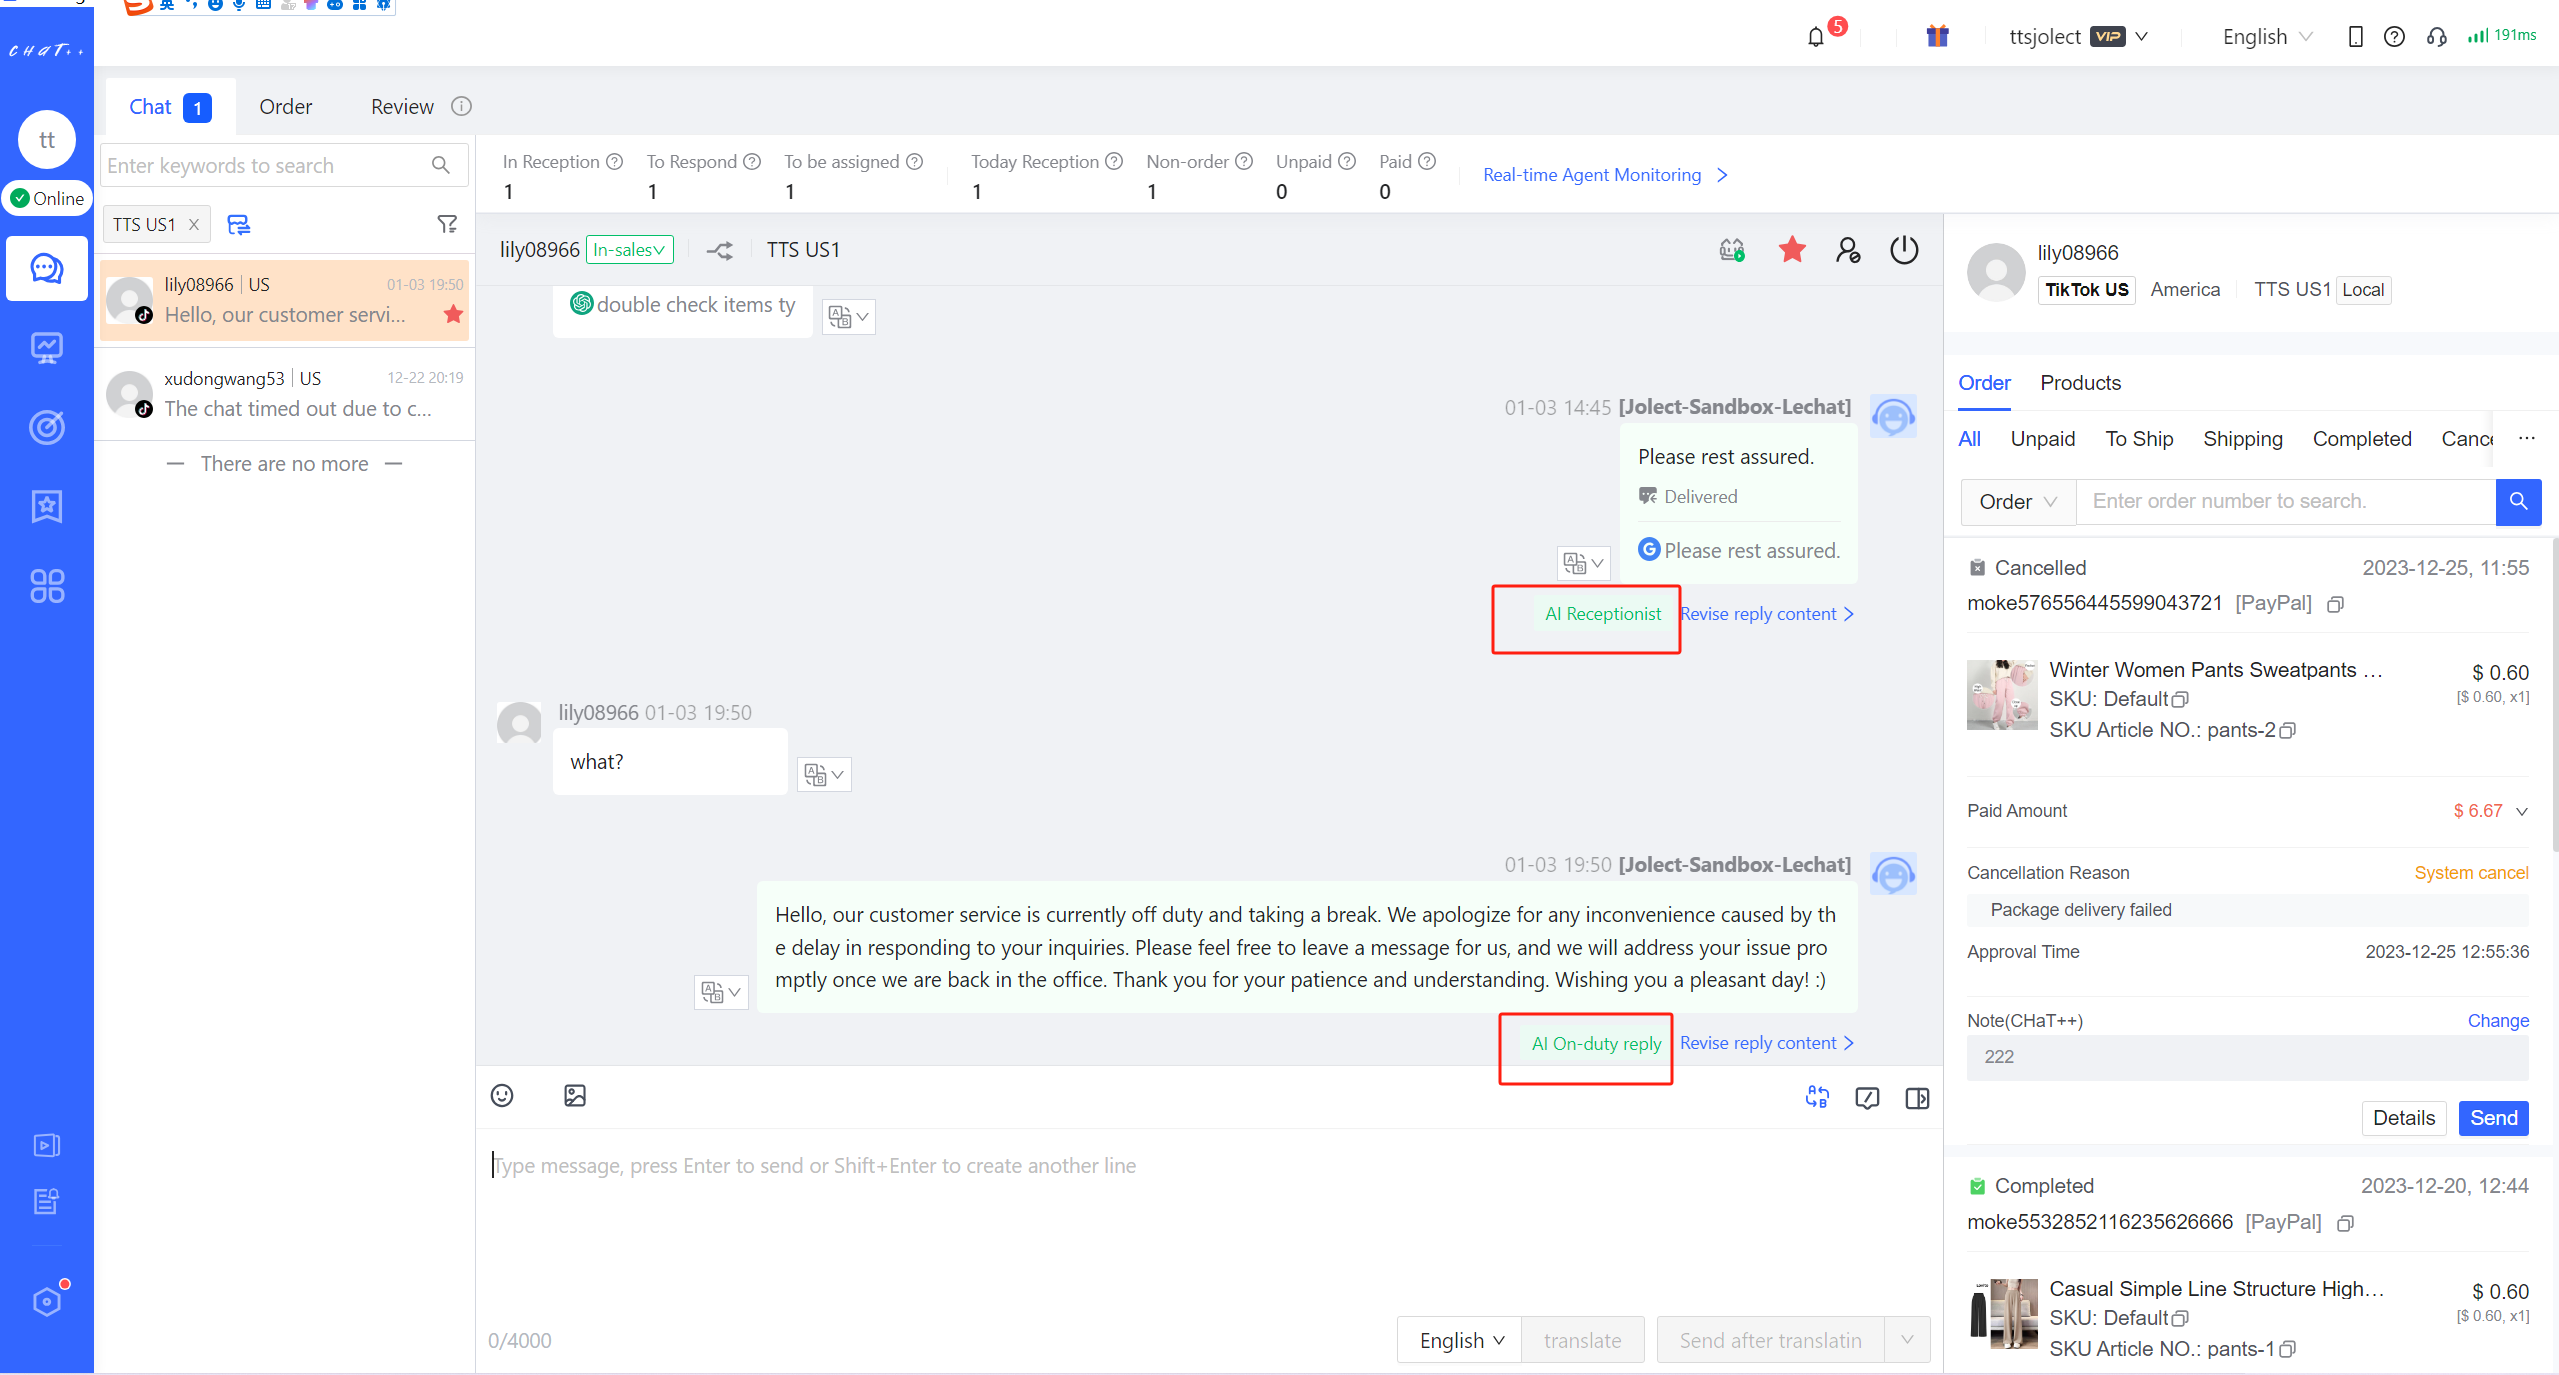
Figure19
FAQ
Q1:What should I do if I don't want the robot to respond?
A1:There may be the following situations where you do not want the robot to respond:
(1) In this scenario, you do not want the robot to respond; you want it to be handled by human customer service.
- Example: When a "Buyer Requests a Refund," and you want human customer service to handle the response entirely, you can choose to disable the "Buyer Requests a Refund" scenario.
(2) In a specific situation within this scenario, you may want the robot not to respond and have human customer service handle the response.
- Example: In the "Buyer Requests a Refund" scenario, there are two strategies:
- Strategy 1: When the buyer requests a refund, and the order has not yet been shipped.
- Strategy 2: When the buyer requests a refund, and the order has already been shipped.
- If you want buyers to apply for a refund when the order has not yet been shipped to be automatically replied to by the robot, but when a buyer applies for a refund when the order has already been shipped, it should be handled by human customer service. In this case, you can set it as follows:
- Strategy 1: Enabled
- Strategy 2: Disabled
Q2:During the process of serving buyers, how to make Chatbot pause replies first? A2:When Chatbot encounters a question from a buyer that it can reply to, it will automatically select the reply content and respond to the buyer; if you wish to pause AI Chatbot auto-reply first during the process of serving buyers, you can do so by setting "Pause AI Chatbot auto-reply"
There are two modes available for pausing auto-reply. You can choose to activate either mode according to your usage needs, or activate both modes simultaneously.
(1) Agent has priority over AI Chatbot auto-reply: If it is activated, when the agent enters the customer's conversation, AI Chatbot auto-reply will be paused, ensuring priority for agents to serve customers. When the agent leaves the customer's conversation, AI Chatbot auto-reply will be restarted.
(2) Agent pauses AI Chatbot auto-reply manually: Upon activating this pause mode and setting the pause time, agents can manually pause AI Chatbot auto-reply while serving customers in the conversation interface. Once the pause time elapses, AI Chatbot auto-reply will restart.
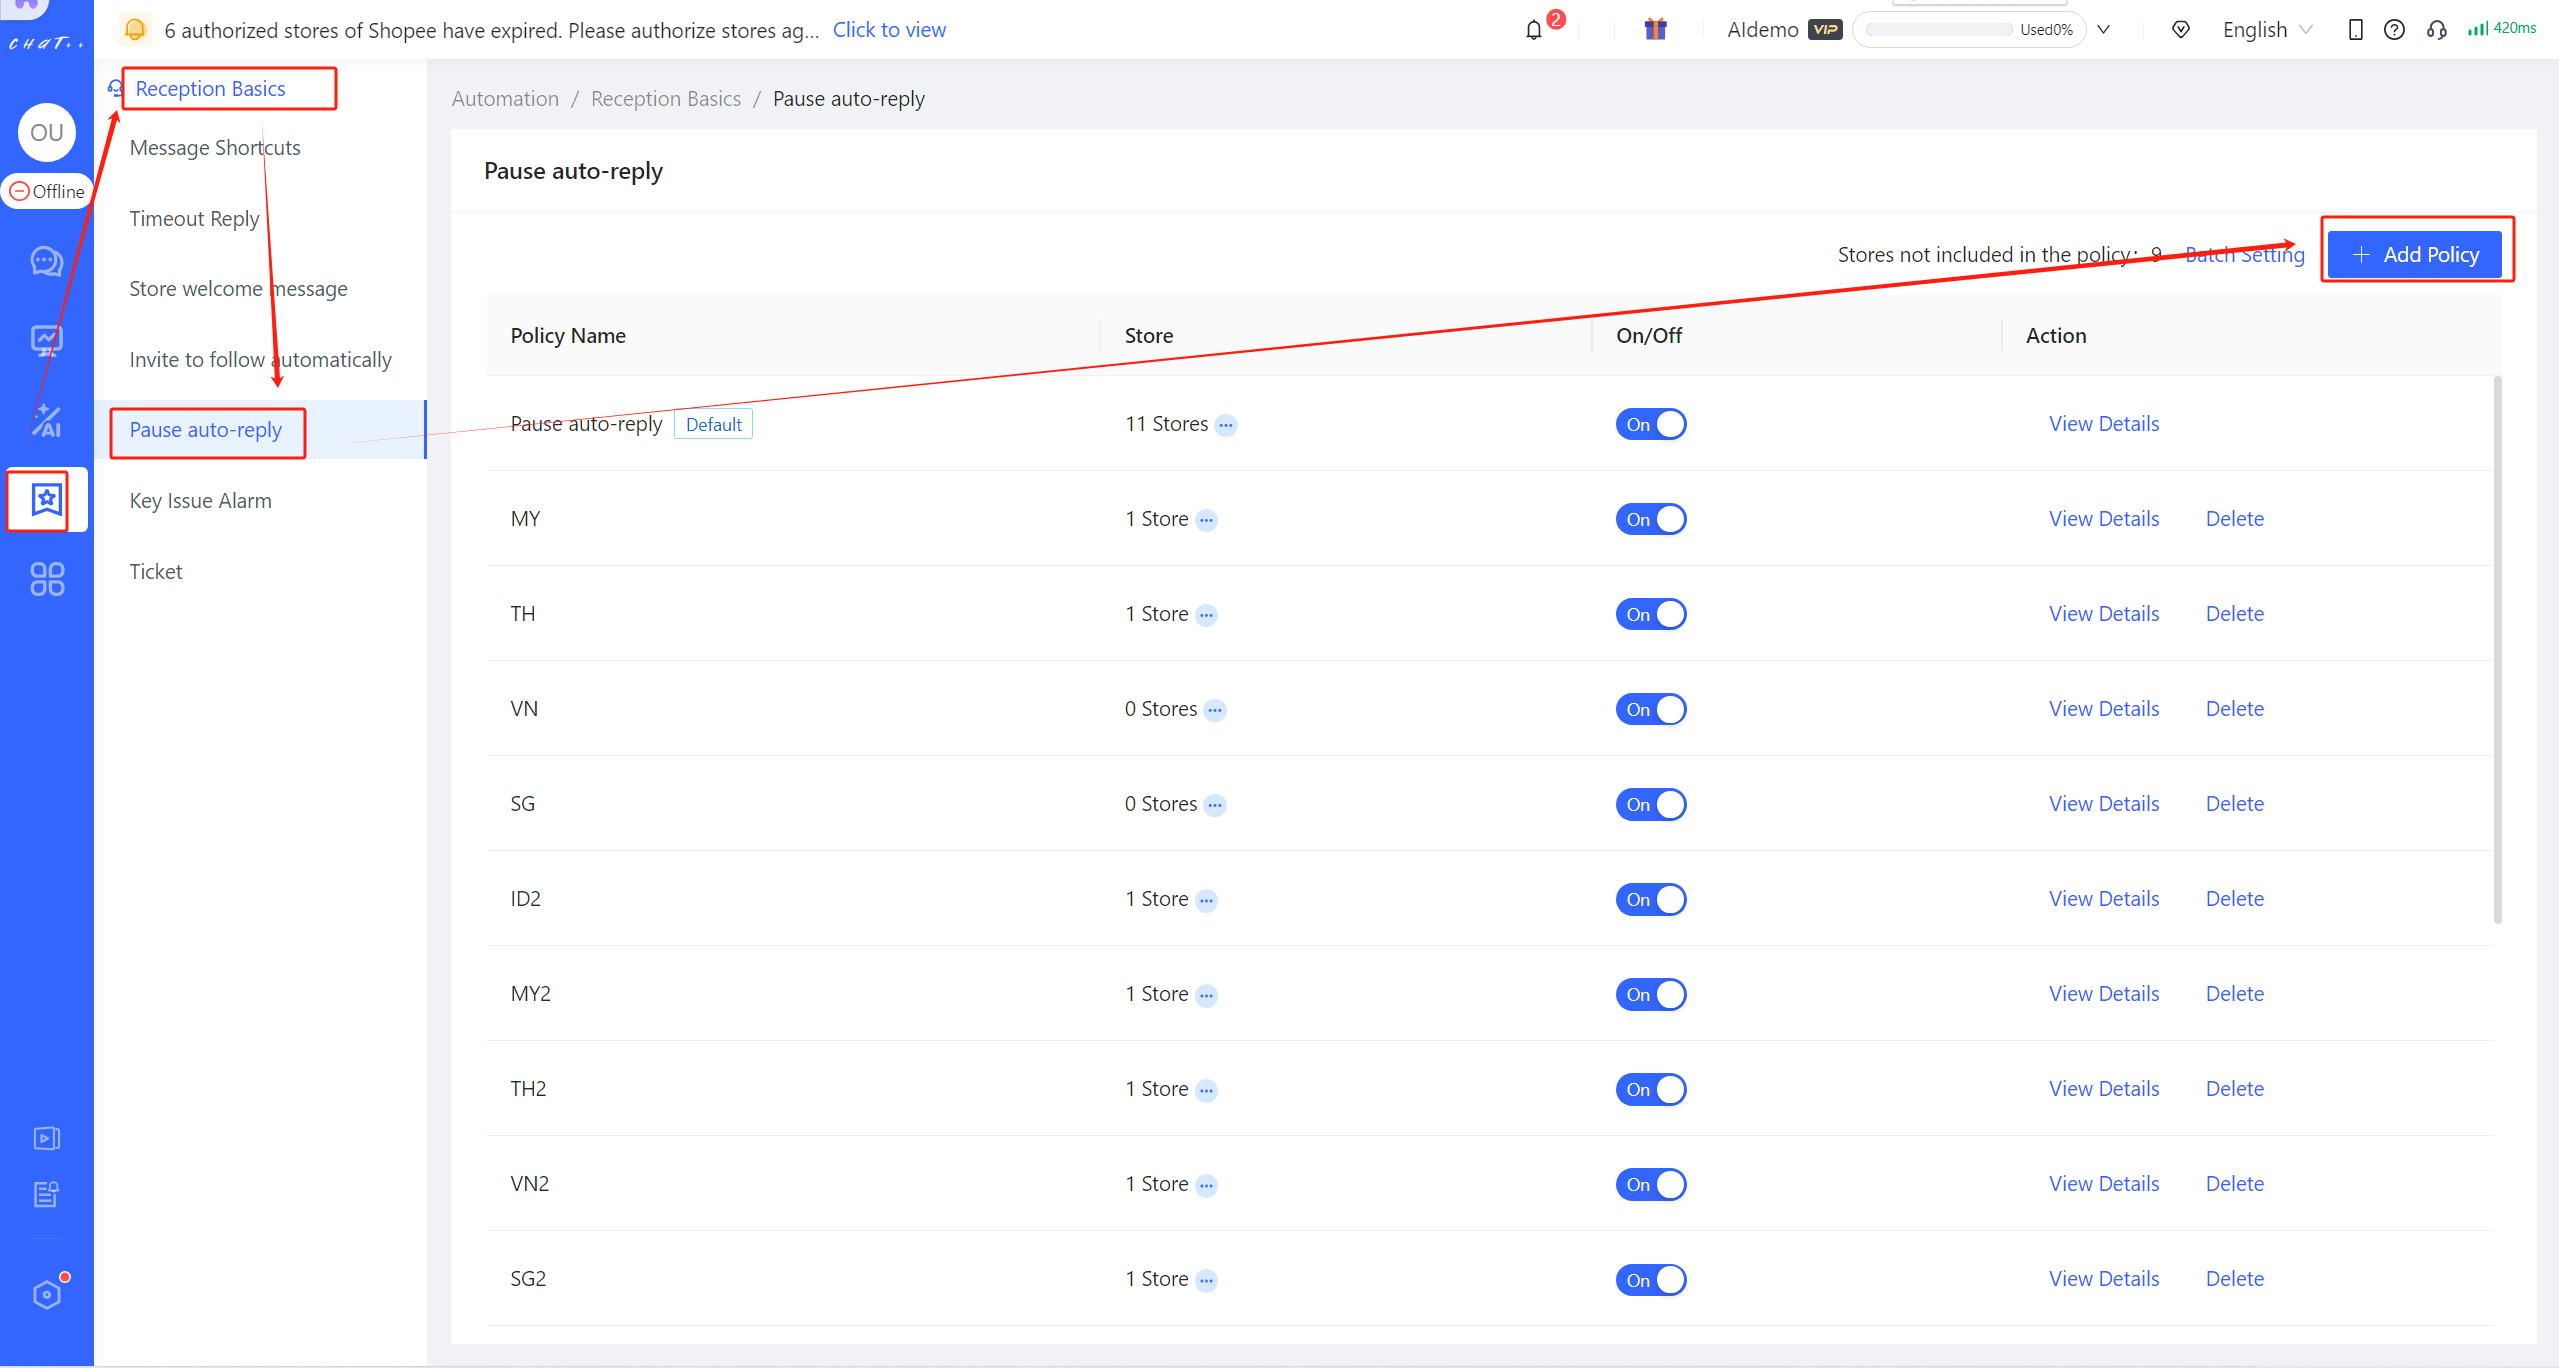
Figure20
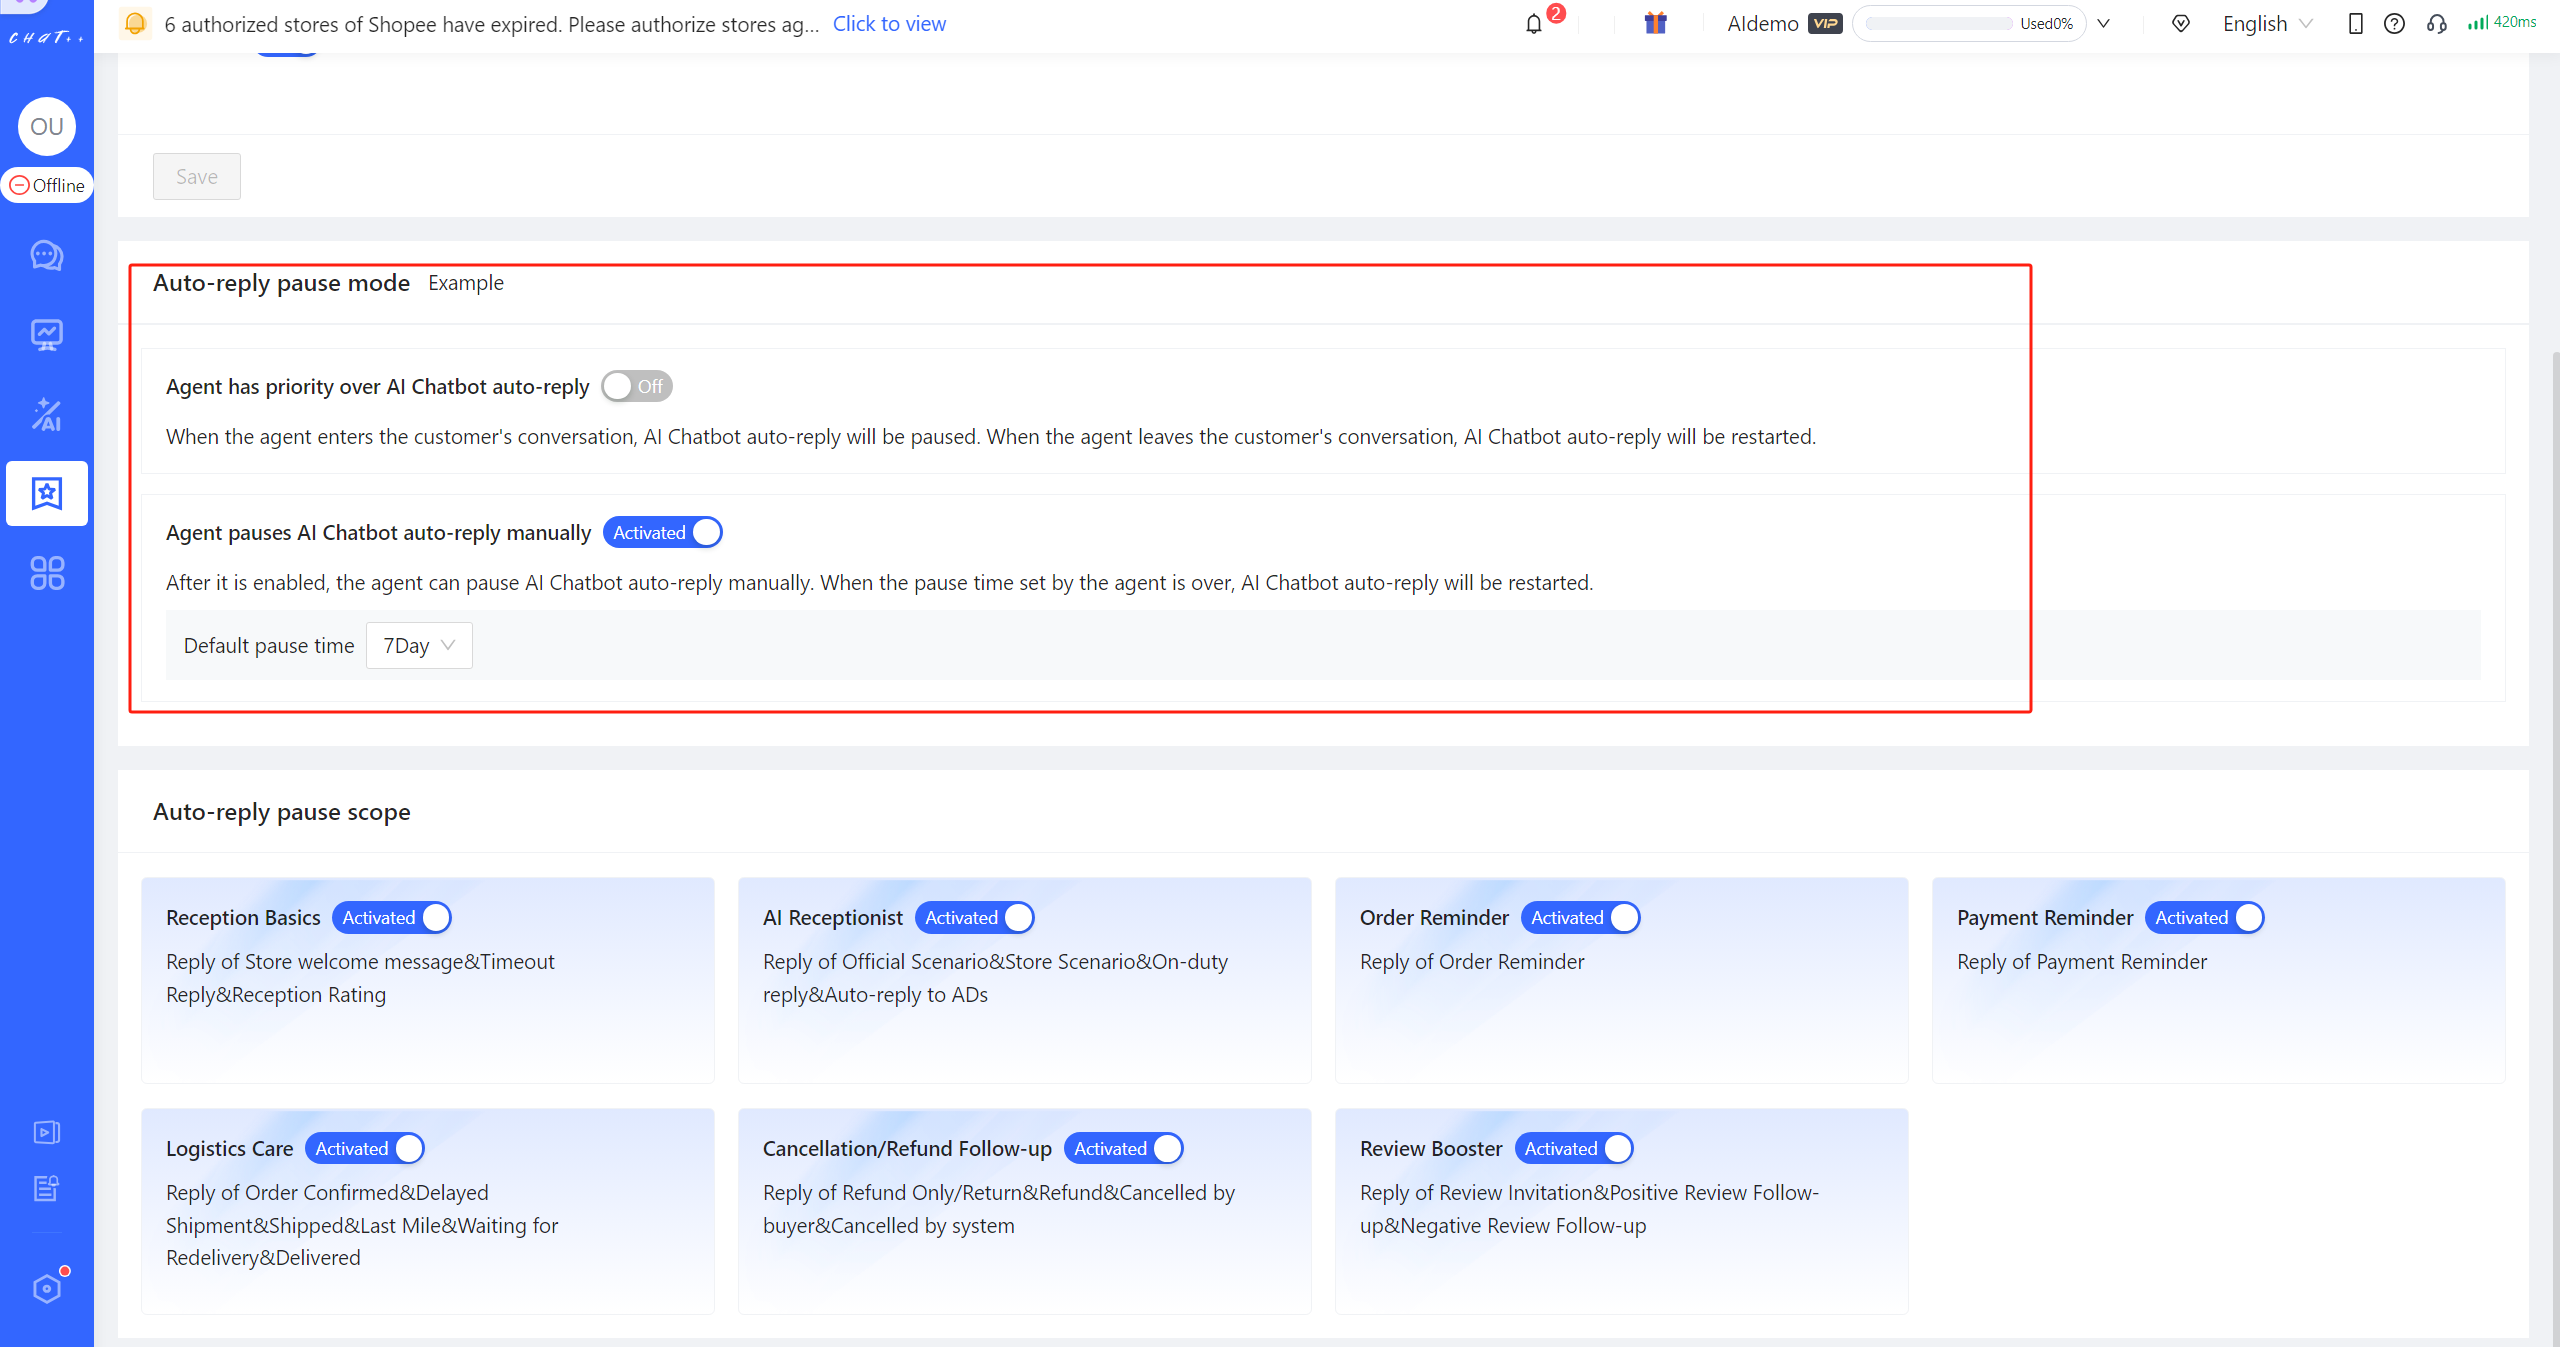
Figure21
(3)If both of the aforementioned pause modes are activated simultaneously, the scenario is illustrated as follows: When Agent A enters the customer conversation, AI Chatbot auto-reply will be paused. While the agent serves this customer, the agent simultaneously manually pause the auto-reply, and the pause time is set to 7 days. Therefore, within the 7-day period, AI Chatbot auto-reply will remain paused.
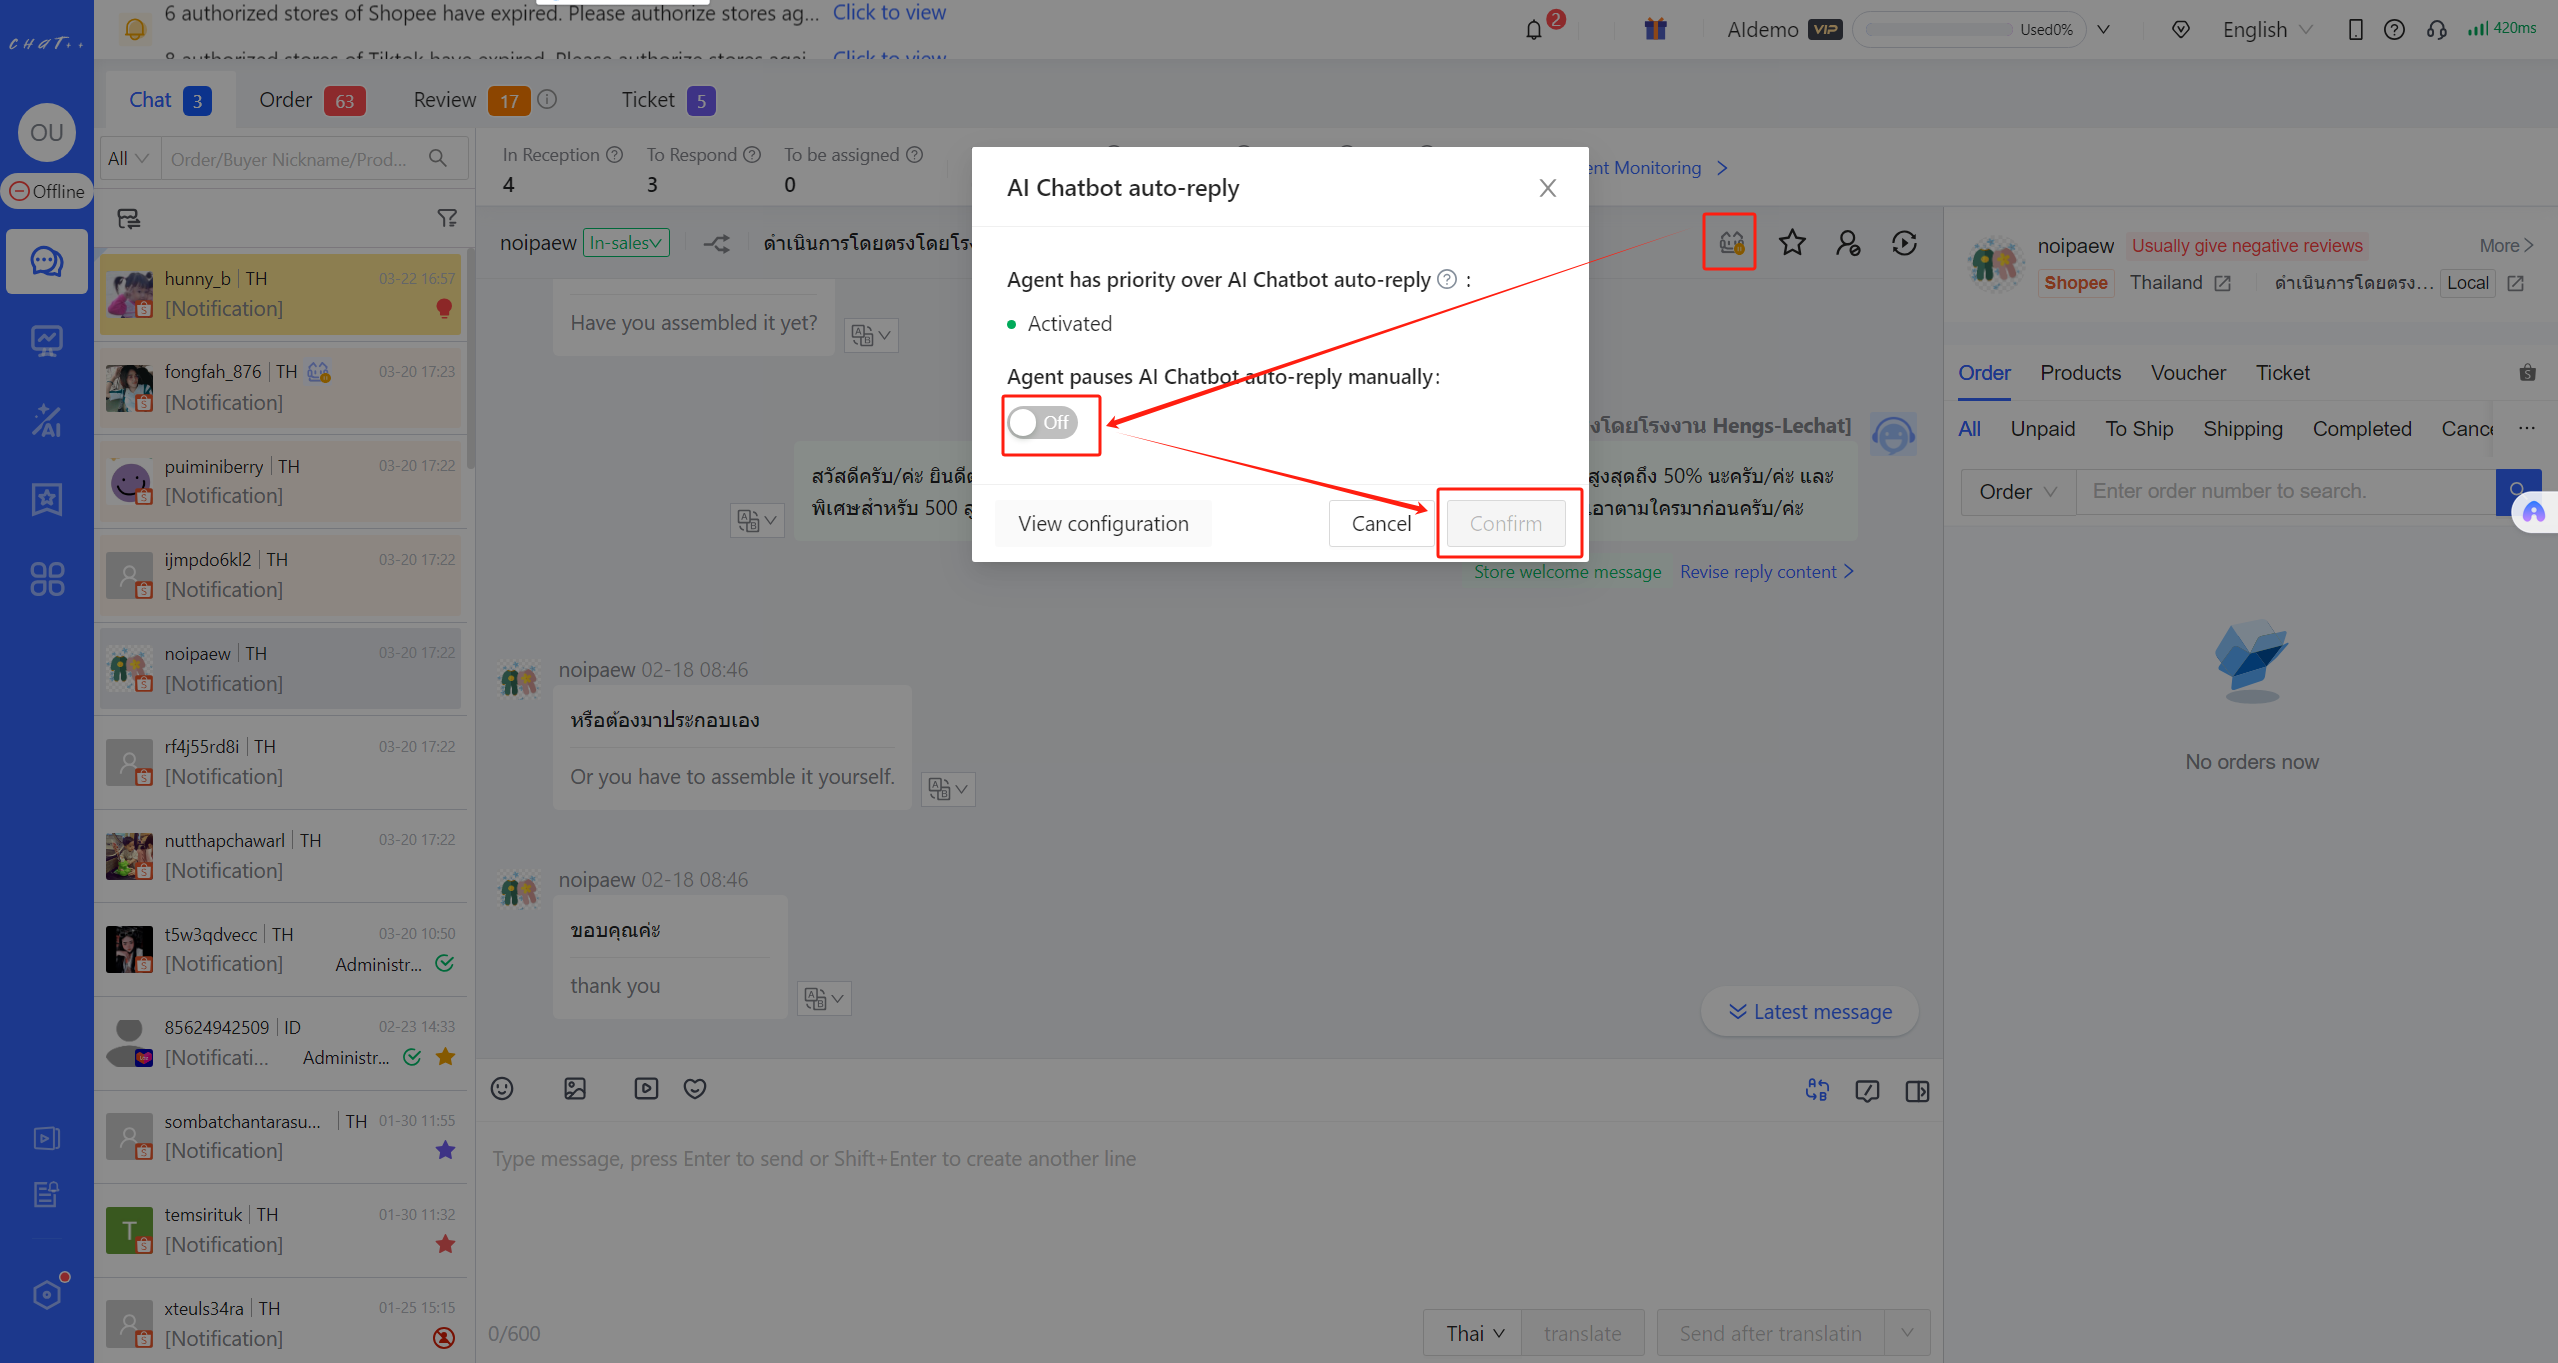
Figure22

Figure23
The official roles "Administrator" and "Agent" in ChatPlusAI are granted default permissions to "configure pause AI Chatbot auto-reply." Official roles do not support modifying permissions. If adjustments to permissions are needed, administrators can create new roles. Therefore, if the agent cannot configure pause AI Chatbot auto-reply in the conversation interface, he should contact the administrator to confirm the permissions associated with his account's assigned role.>>>For details, please click to jump
Q3:How to provide feedback if you encounter issues with the robot's recognition ability, translation, or other problems during use?
A3:How to check the progress of your feedback are as follows:
① You can find the message with the issue in a specific conversation window on the Messages page. Place your mouse over the message, and three small buttons will appear on the left side. Clicking on the first button from the left will take you to the problem feedback page.
② In the problem feedback page, select the category to which the issue you found belongs and provide additional feedback information.
③ Click 'Report,' and your feedback will be automatically sent to the ChatPlusAI development team."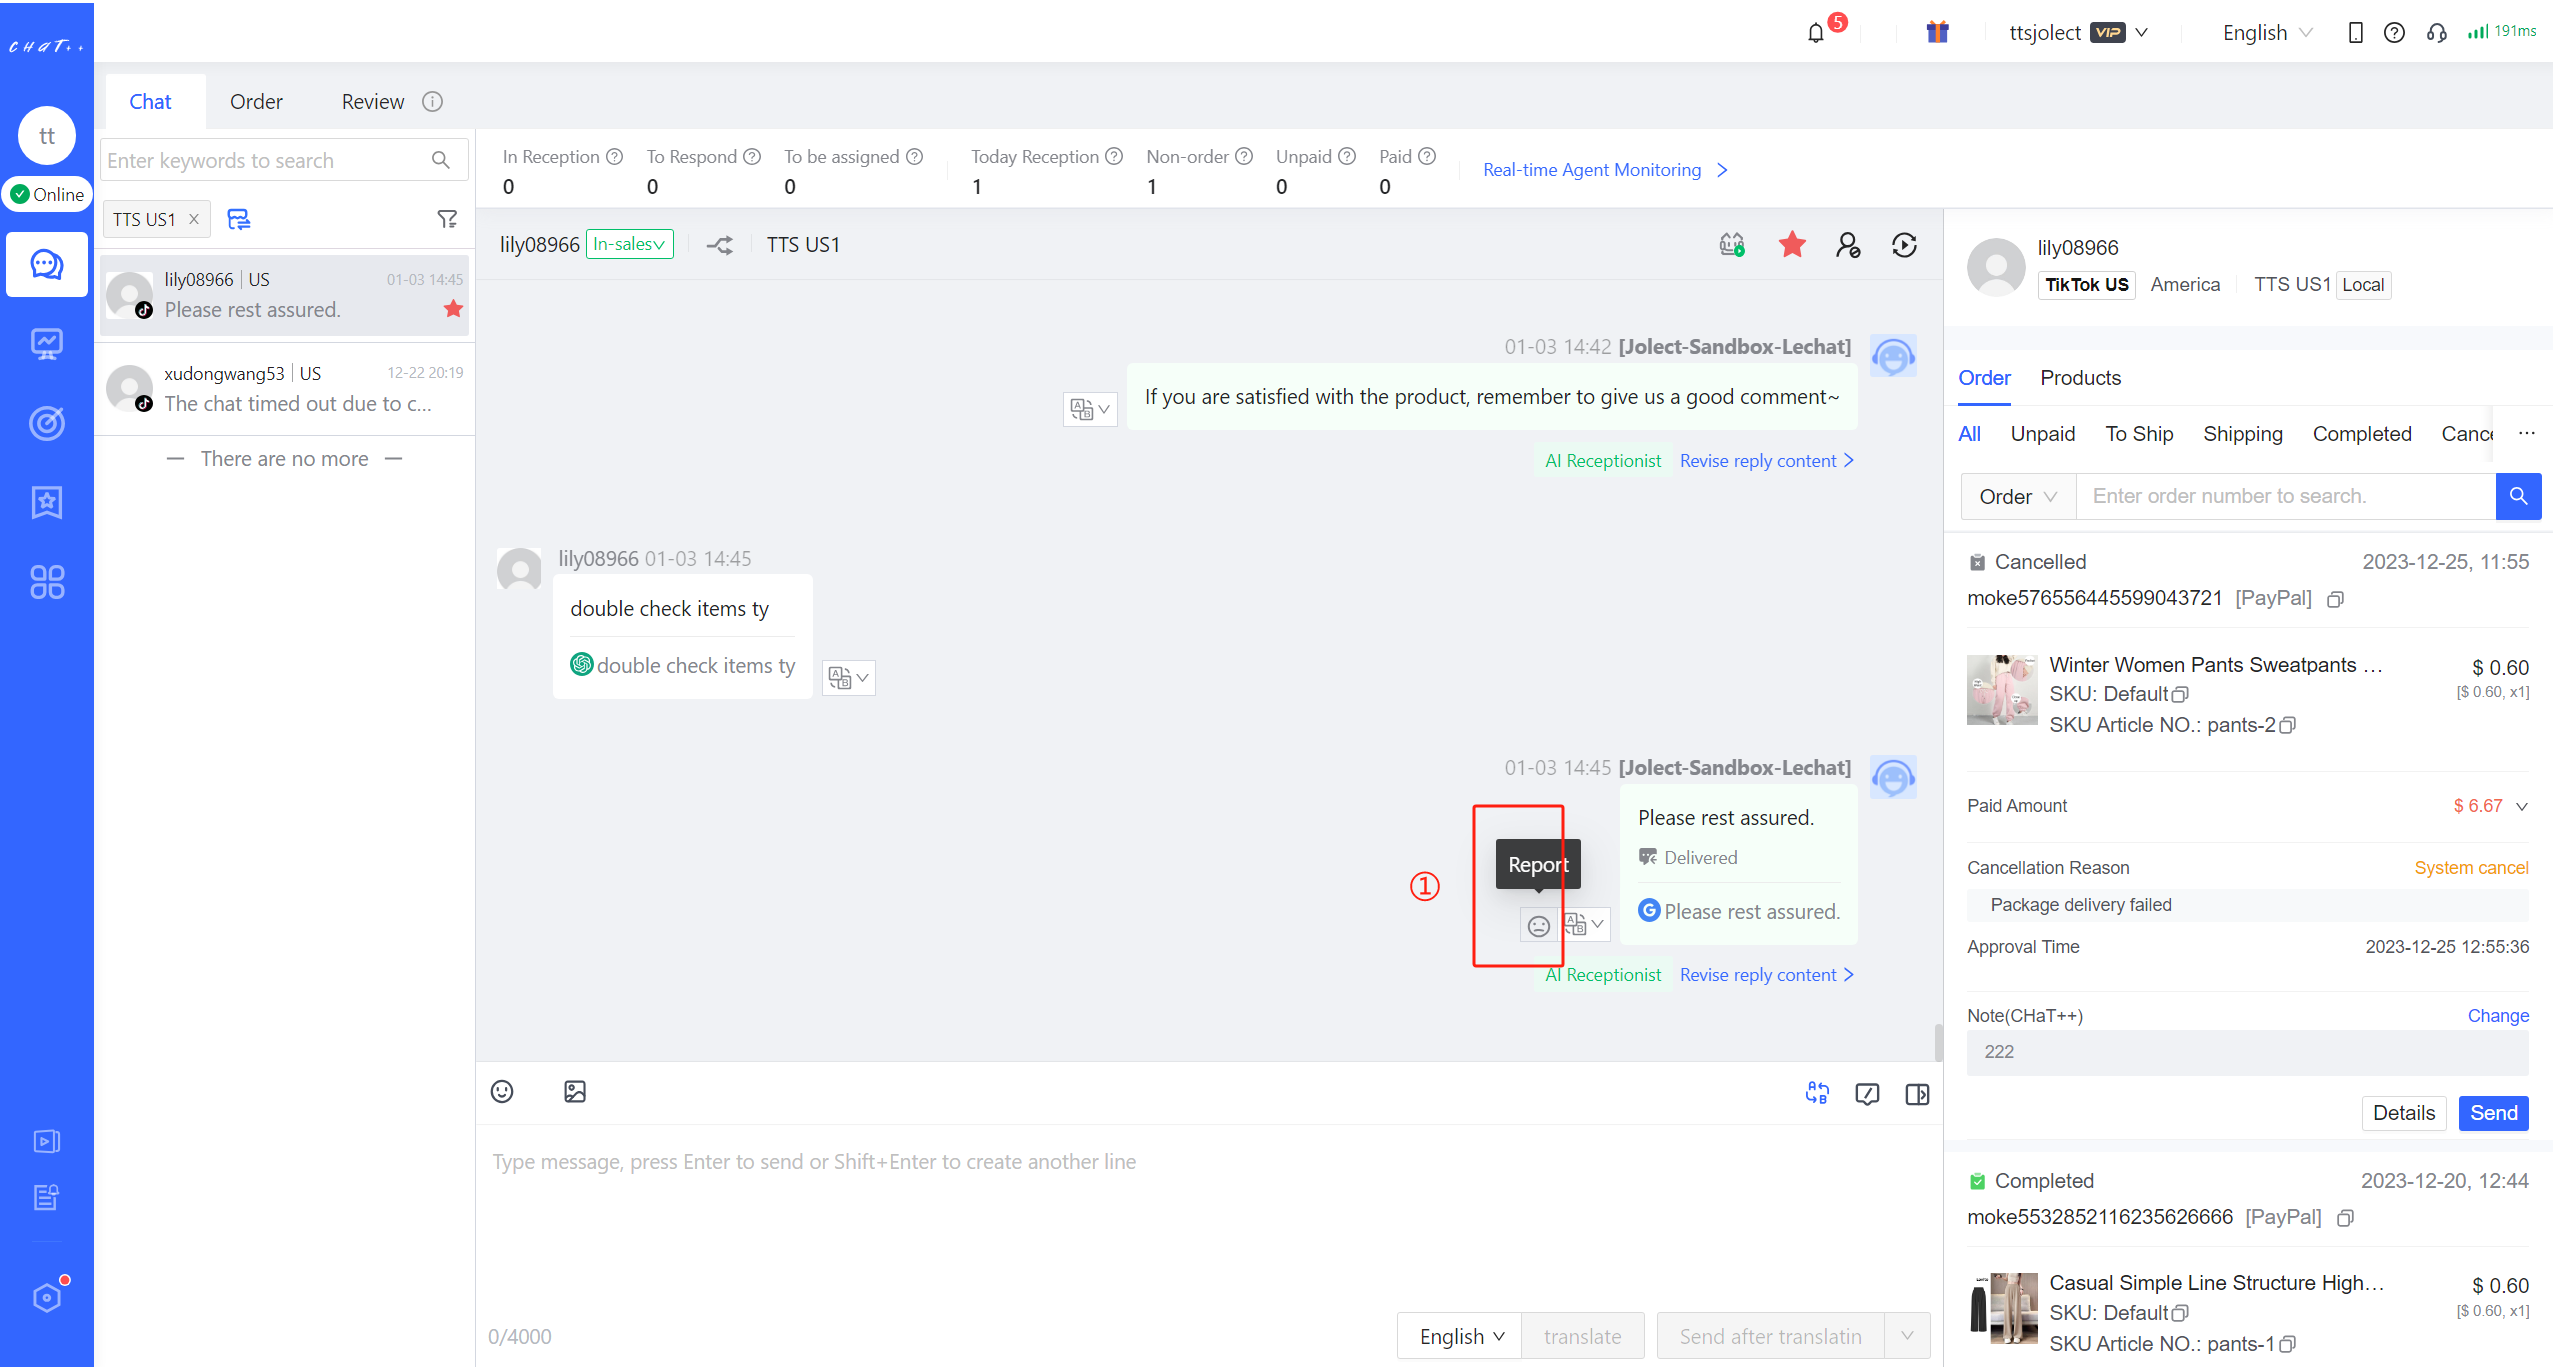
Figure24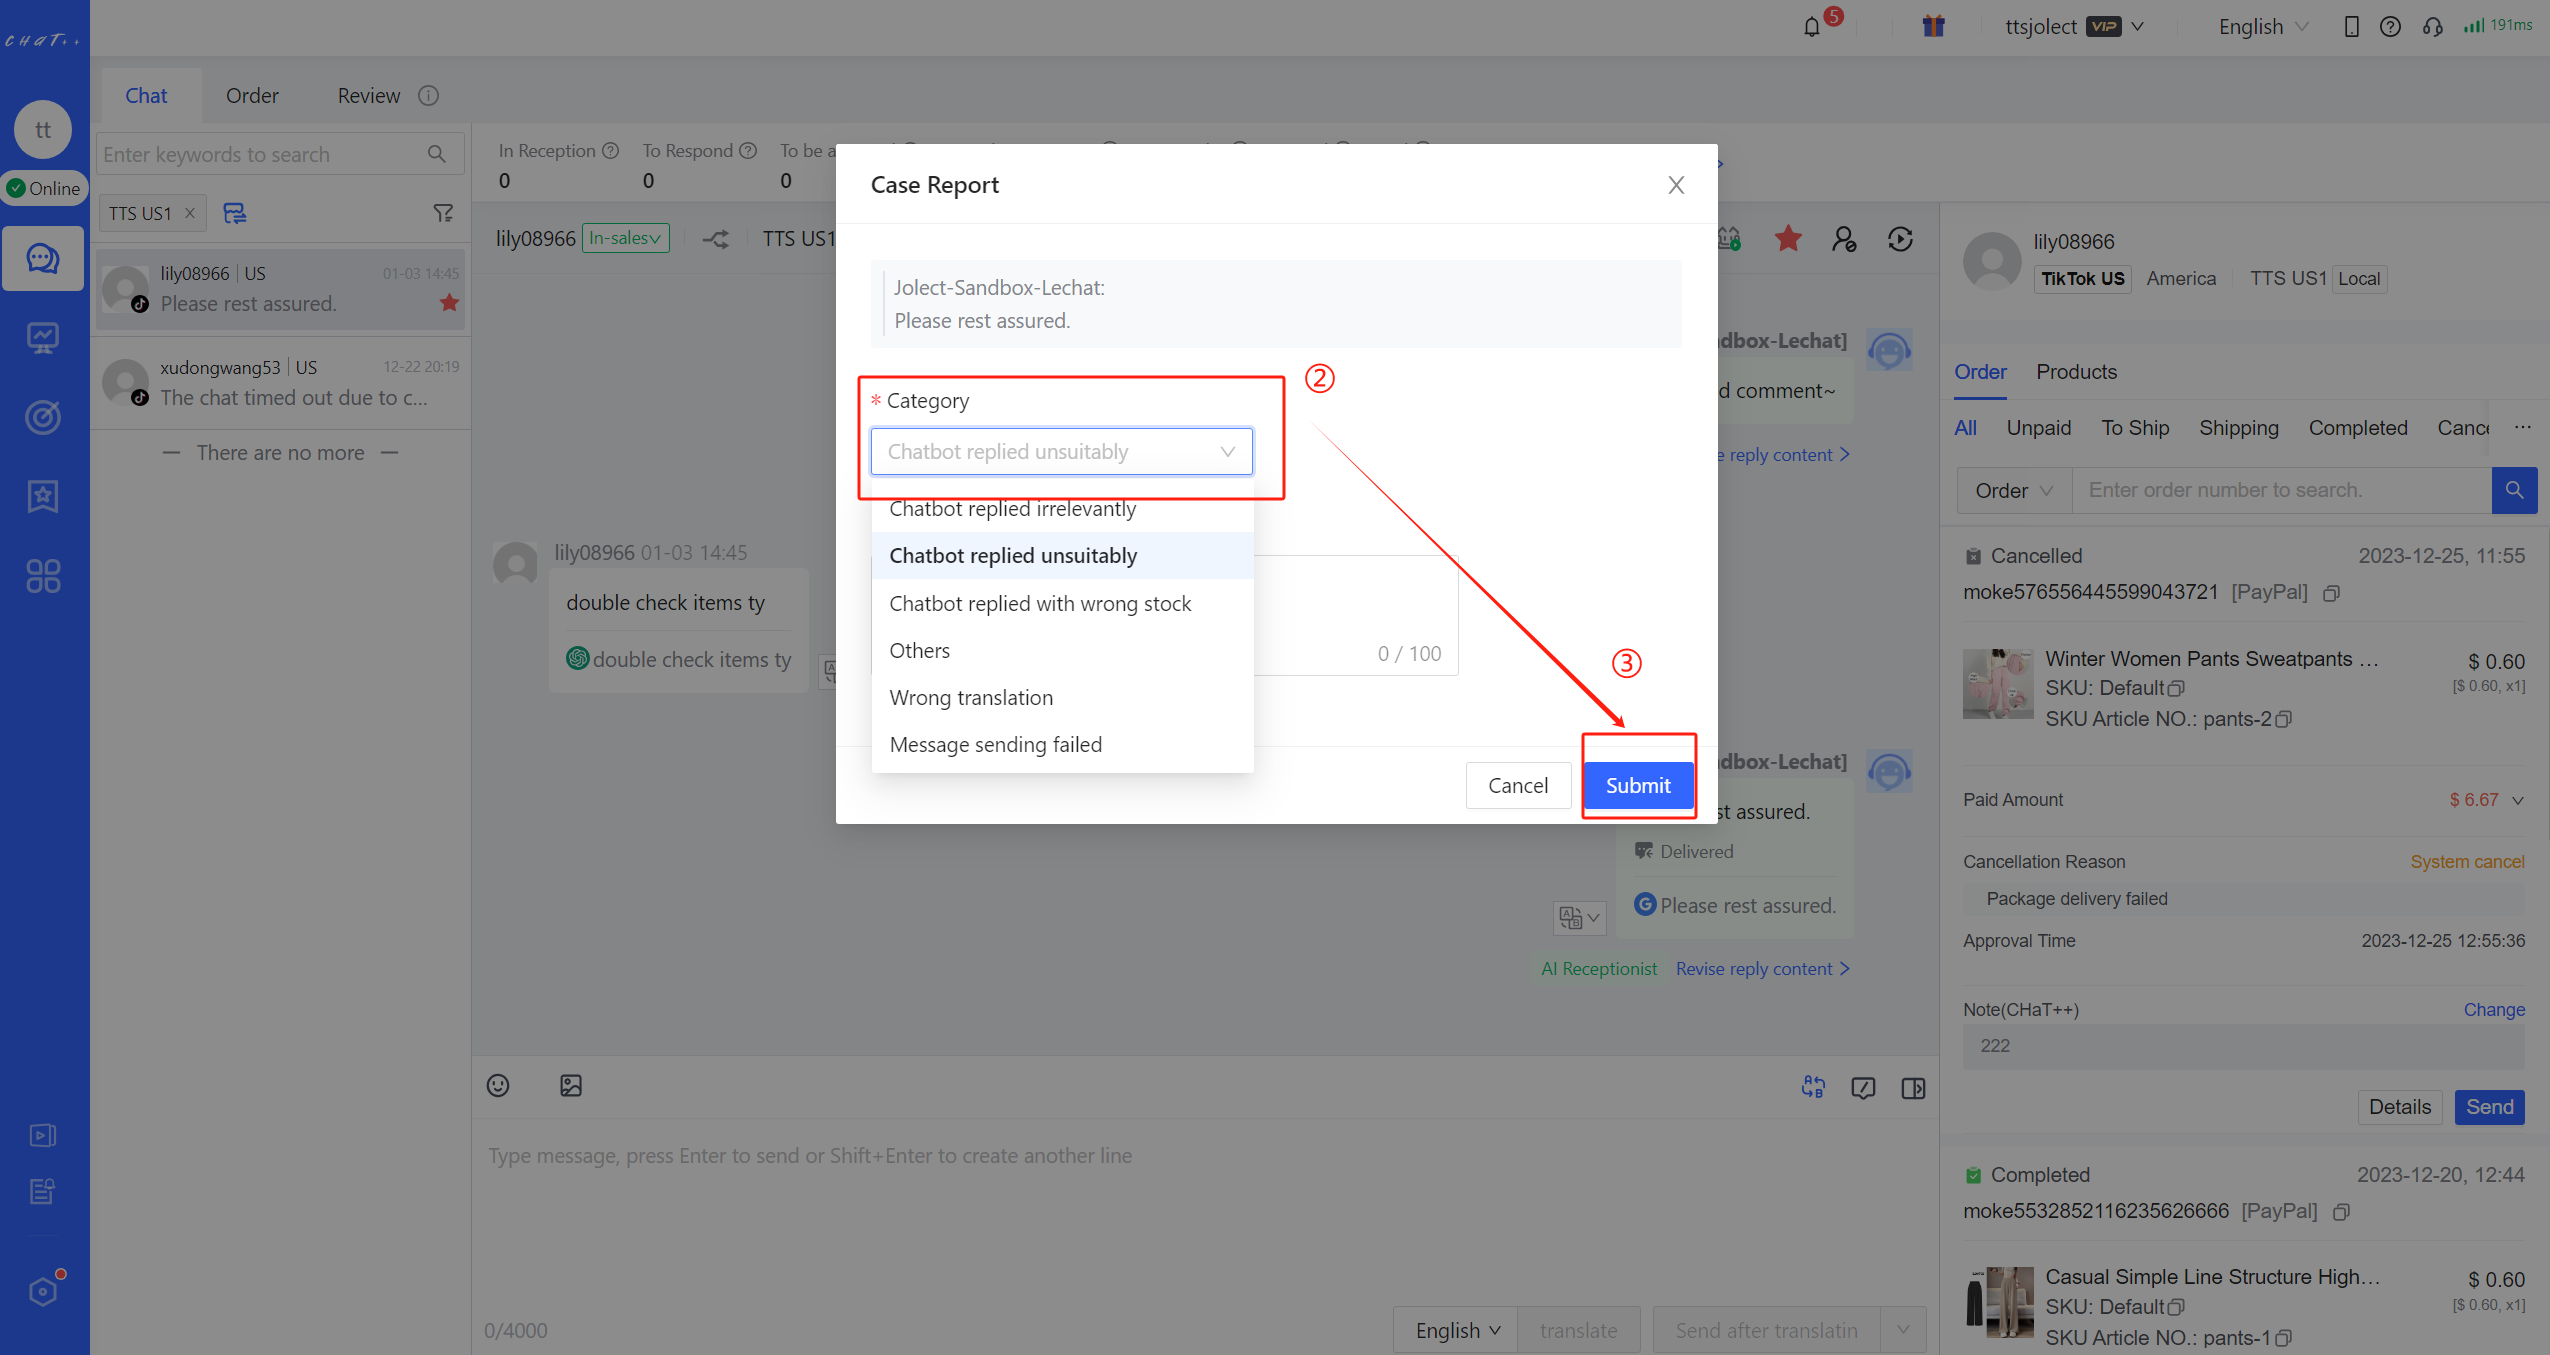
Figure25
④ After reporting feedback, you can check the current processing progress of your submitted feedback on the feedback progress page. The ChatPlusAI development team will register and process the results as soon as possible according to the process.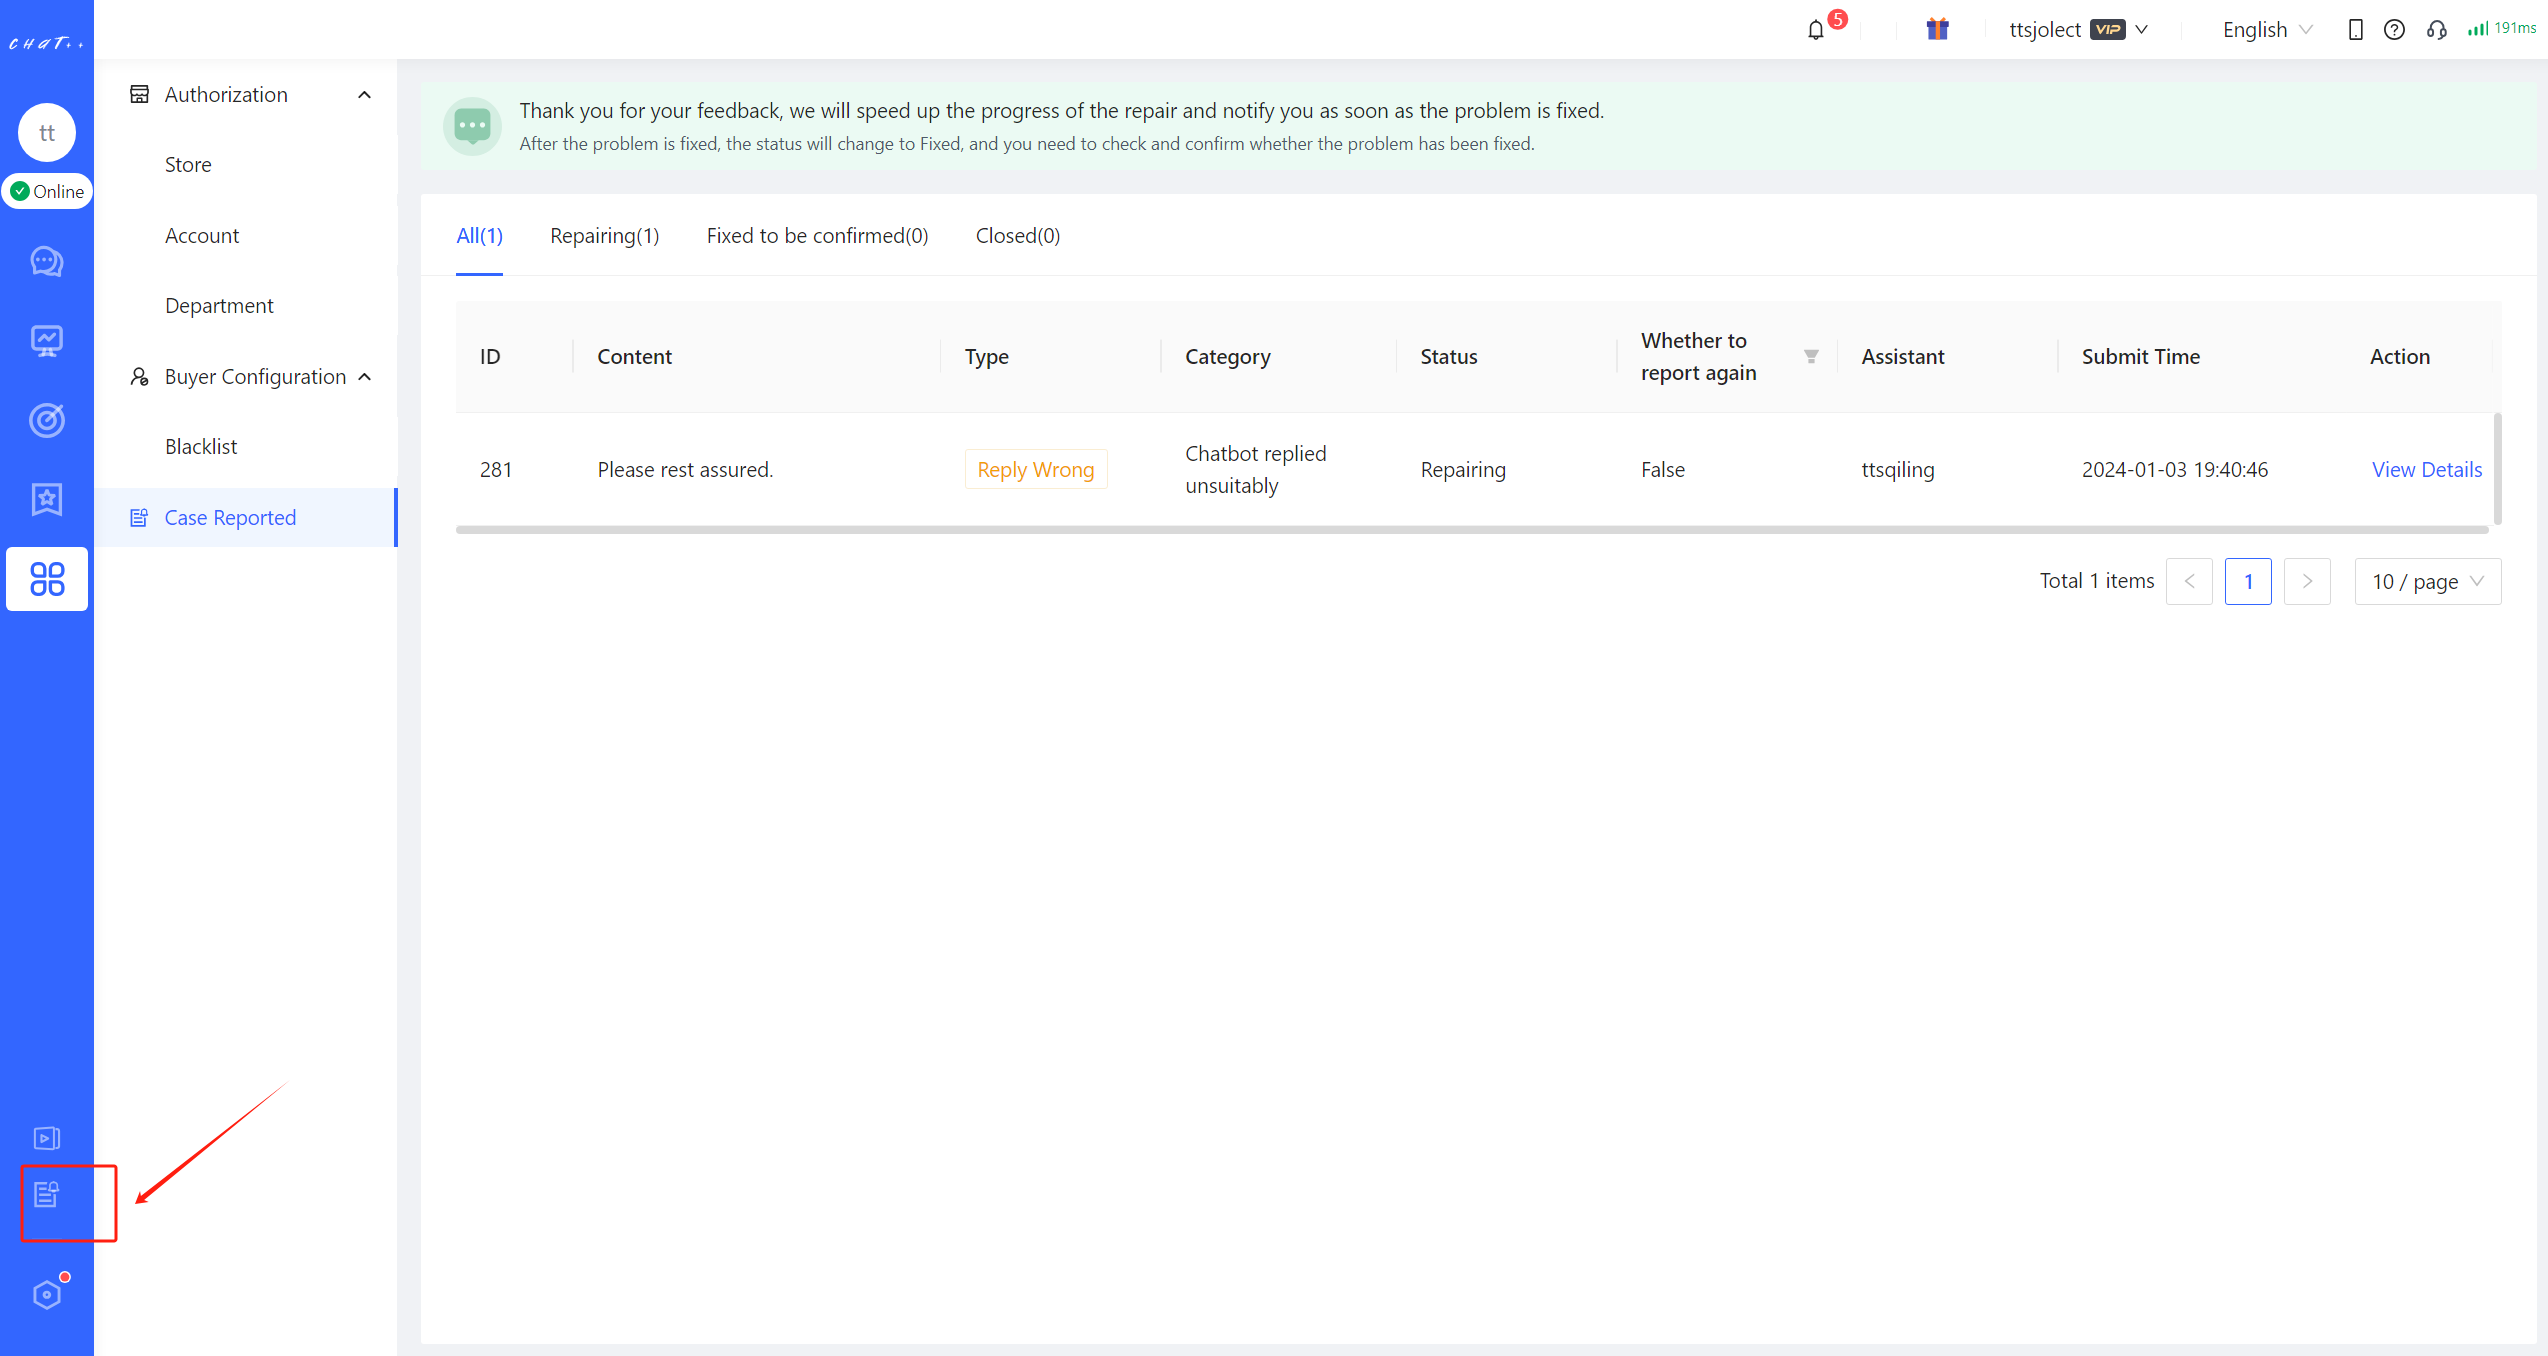
Figure26
Order Reminder
If the customer does not place an order after inquiring about a product, the system will automatically send the customer a message to remind him to place an order after the conversation is closed. Boost the sales in the store. This is the function called Order Reminder.
Show Cases
When the customer has not placed an order within 5 minutes after the conversation closed (this merchant set 5 mins interval), the order reminder message is sent automatically.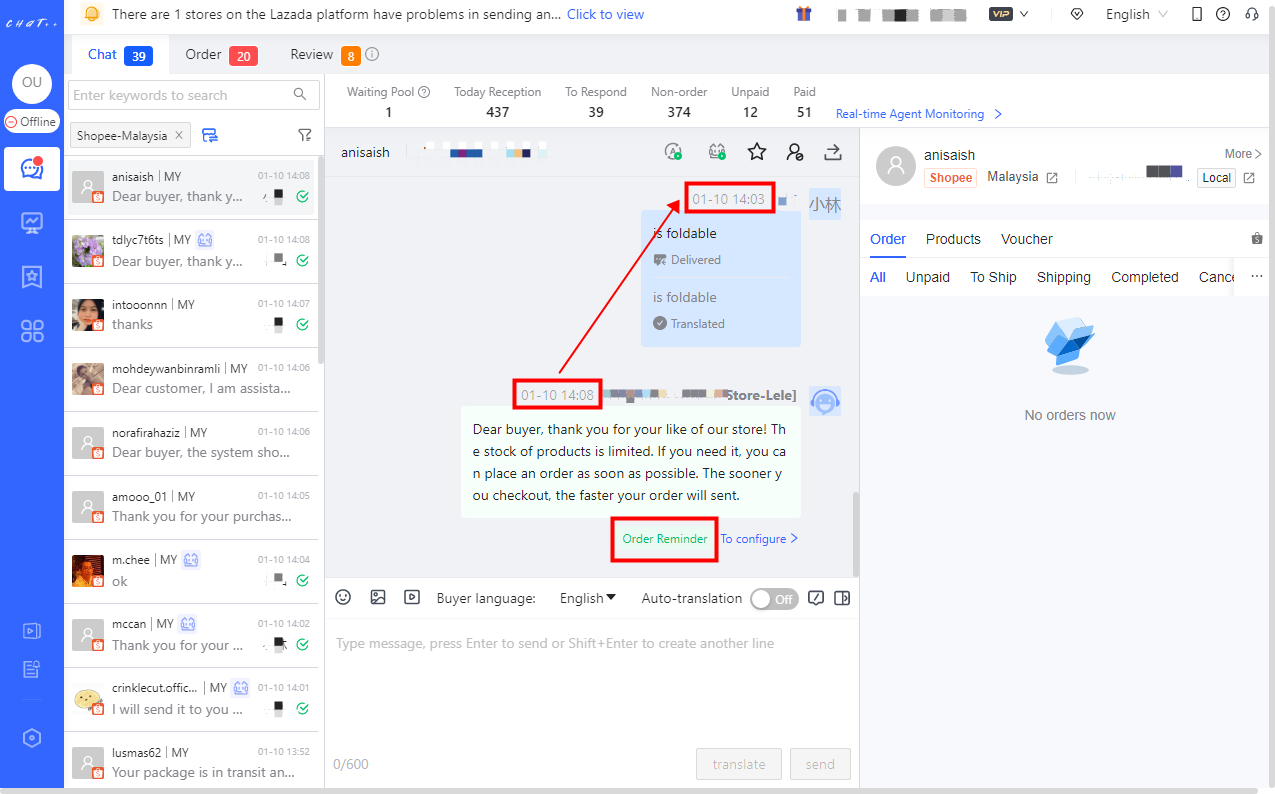
Figure 1
Privileges required for configuration
Privilege of "Order&Payment Reminder" needs to be enabled for the role who need configure the order reminder. The super administrator and administrator already have this privilege by default.
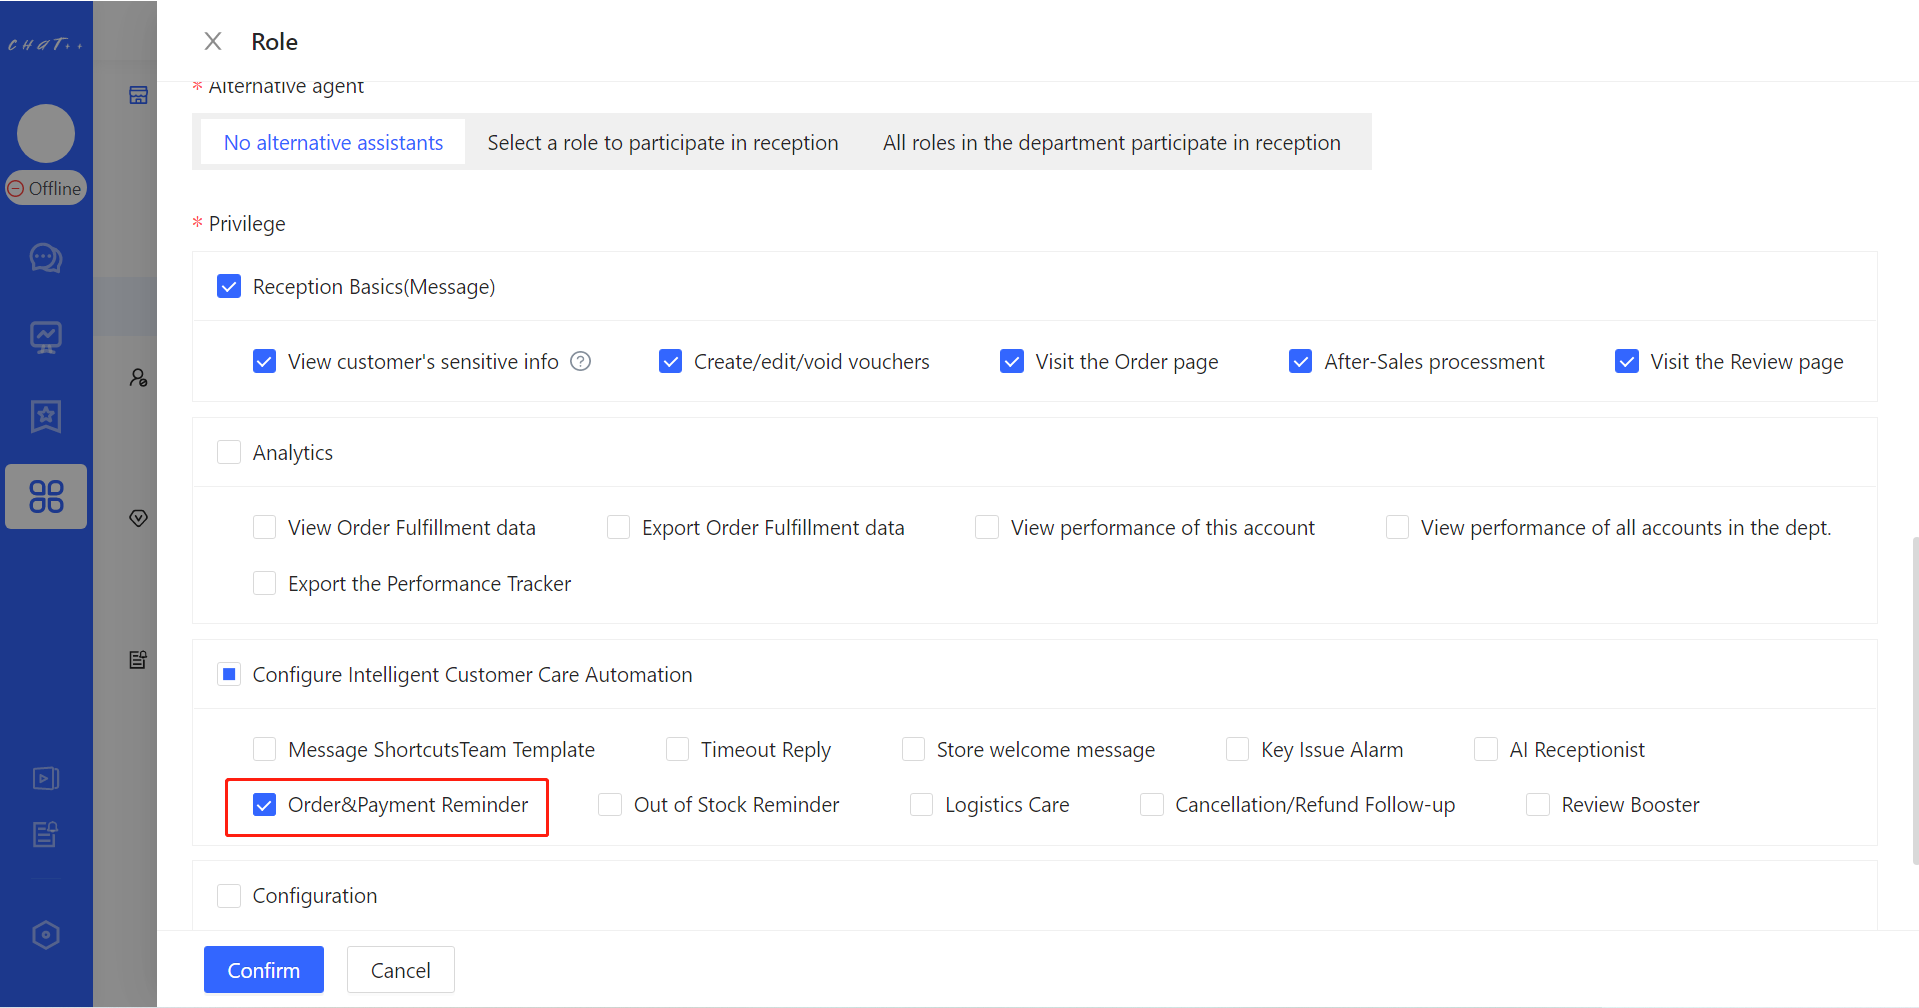
Figure 2
How to configure
Click「 Automation 」 in left menu(Shown as Figure 3 red box①)→「 Order Reminder 」(Shown as Figure 3 red box②),Access the configuration page.(Shown as Figure 4)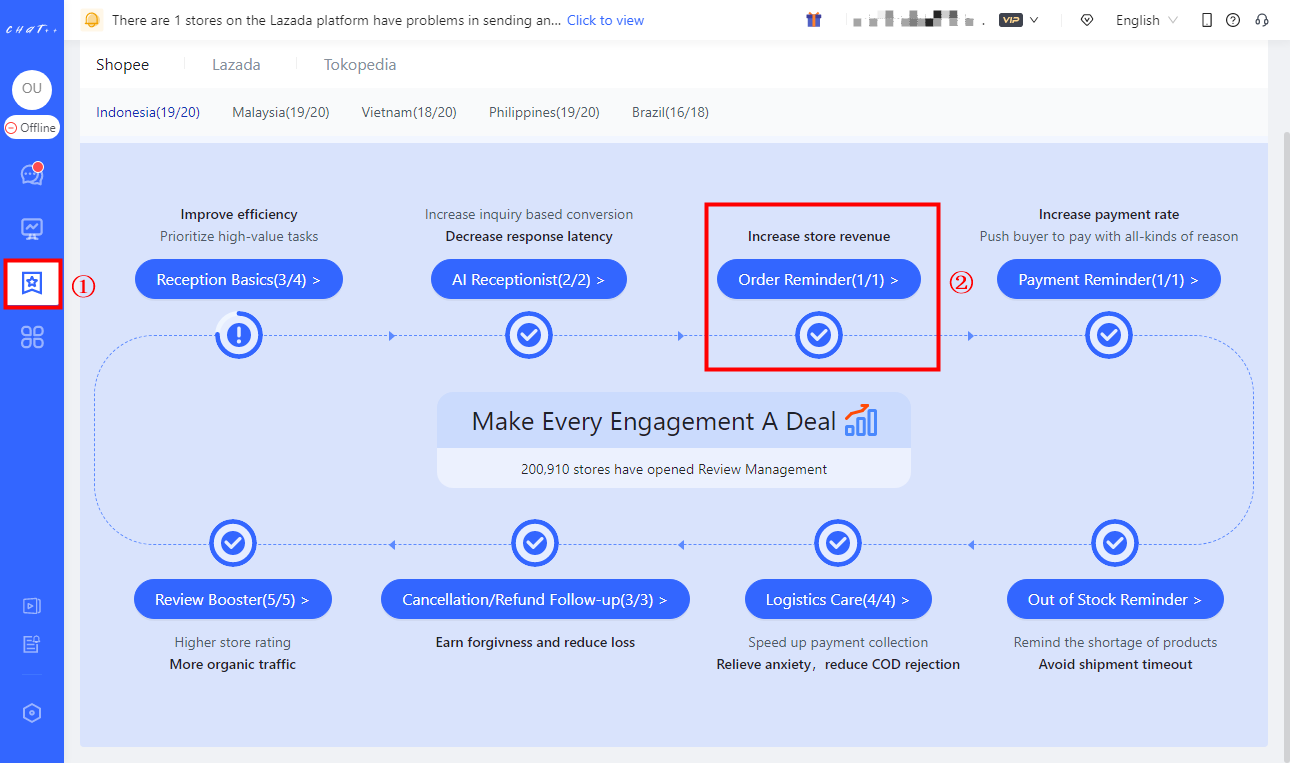
Figure 3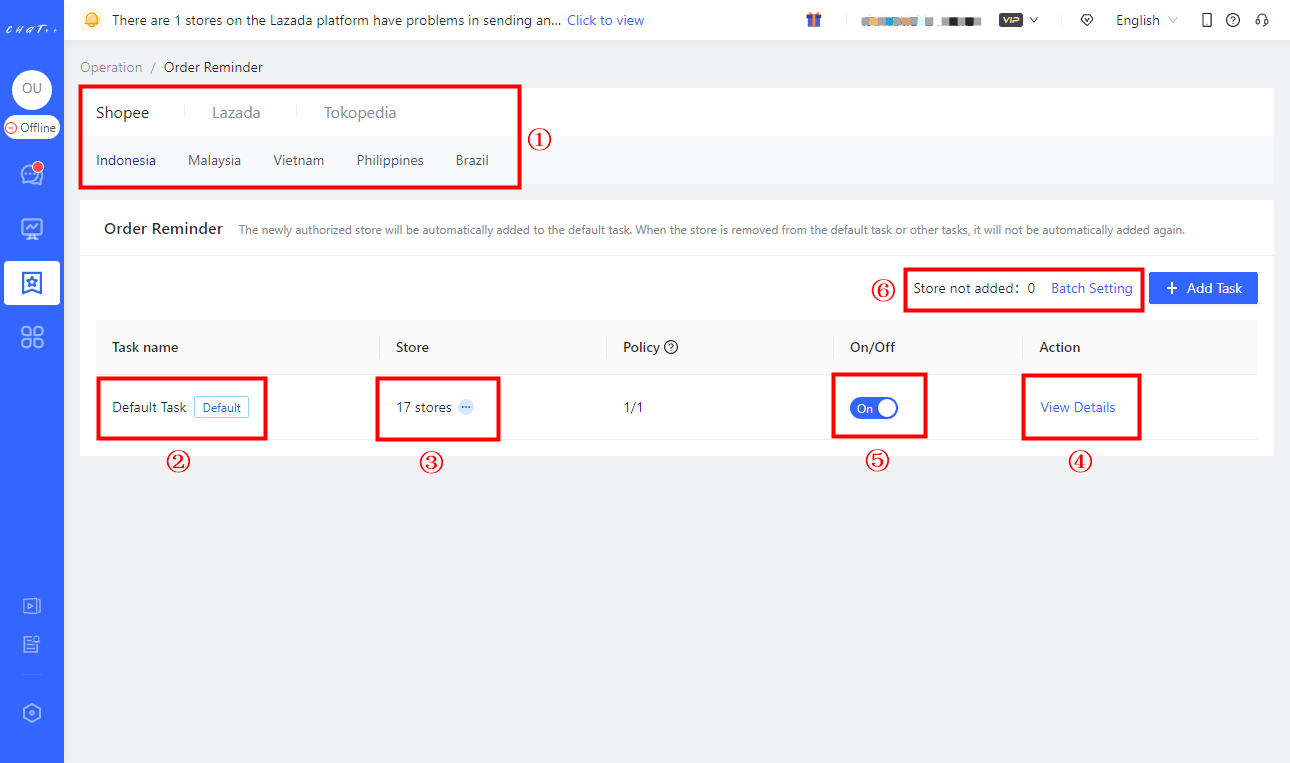
Figure 4
⚠️ Order Reminder can be set up for 4 marketplaces, Shopee, Lazada, TikTok Southeast Asia, and TikTok US. Tokopedia will be avaliable soon, kindly stay tuned.
【Default Task】Description
(Shown as Figure 4 red box②)
A default task has been created for each country site and marketplace, and all stores in the country have been included in the task. This makes the configuration much more convenient. All you have to do is click "View Details" button to edit the policy or directly enable the default task (shown as Figure 4 above).
Newly authorized stores will be automatically included to the 【Default task】. However, the store will not be automatically added again after they are removed from the default task or other tasks. It will be counted as "Store not included" (Shown as Figure 4 red box⑥). You can click "Batch Settings" button (Shown as Figure 4 red box⑥) to add massive stores into the certain task quickly.
Kindly make sure that all stores have been included to the right task (that means the "Store not included" shown as Figure 4 red box⑥ is 0), in case the store is neglected from any order reminder task.
【Filter】Description
Filter after-sales customer: By default, Order Reminder are only dispatched to customers who inquire before purchasing. Customers who have confirmed receipt/requested for a refund/had their order canceled by the system in the past 90 days are regarded as after-sales customers. If after-sales customers inquire about products other than those ordered, Order Reminder can still be triggered.
Filter customer who usually gives negative reviews: Within the past six months, among nearly 4 million Southeast Asian stores using ChatPlusAI, customers who have given two or more negative reviews are considered who usually give negative reviews (including cases where they later revised their review to positive). The system automatically identifies such customers. Order Reminder allows for filtering out these customers and not sending them messages.
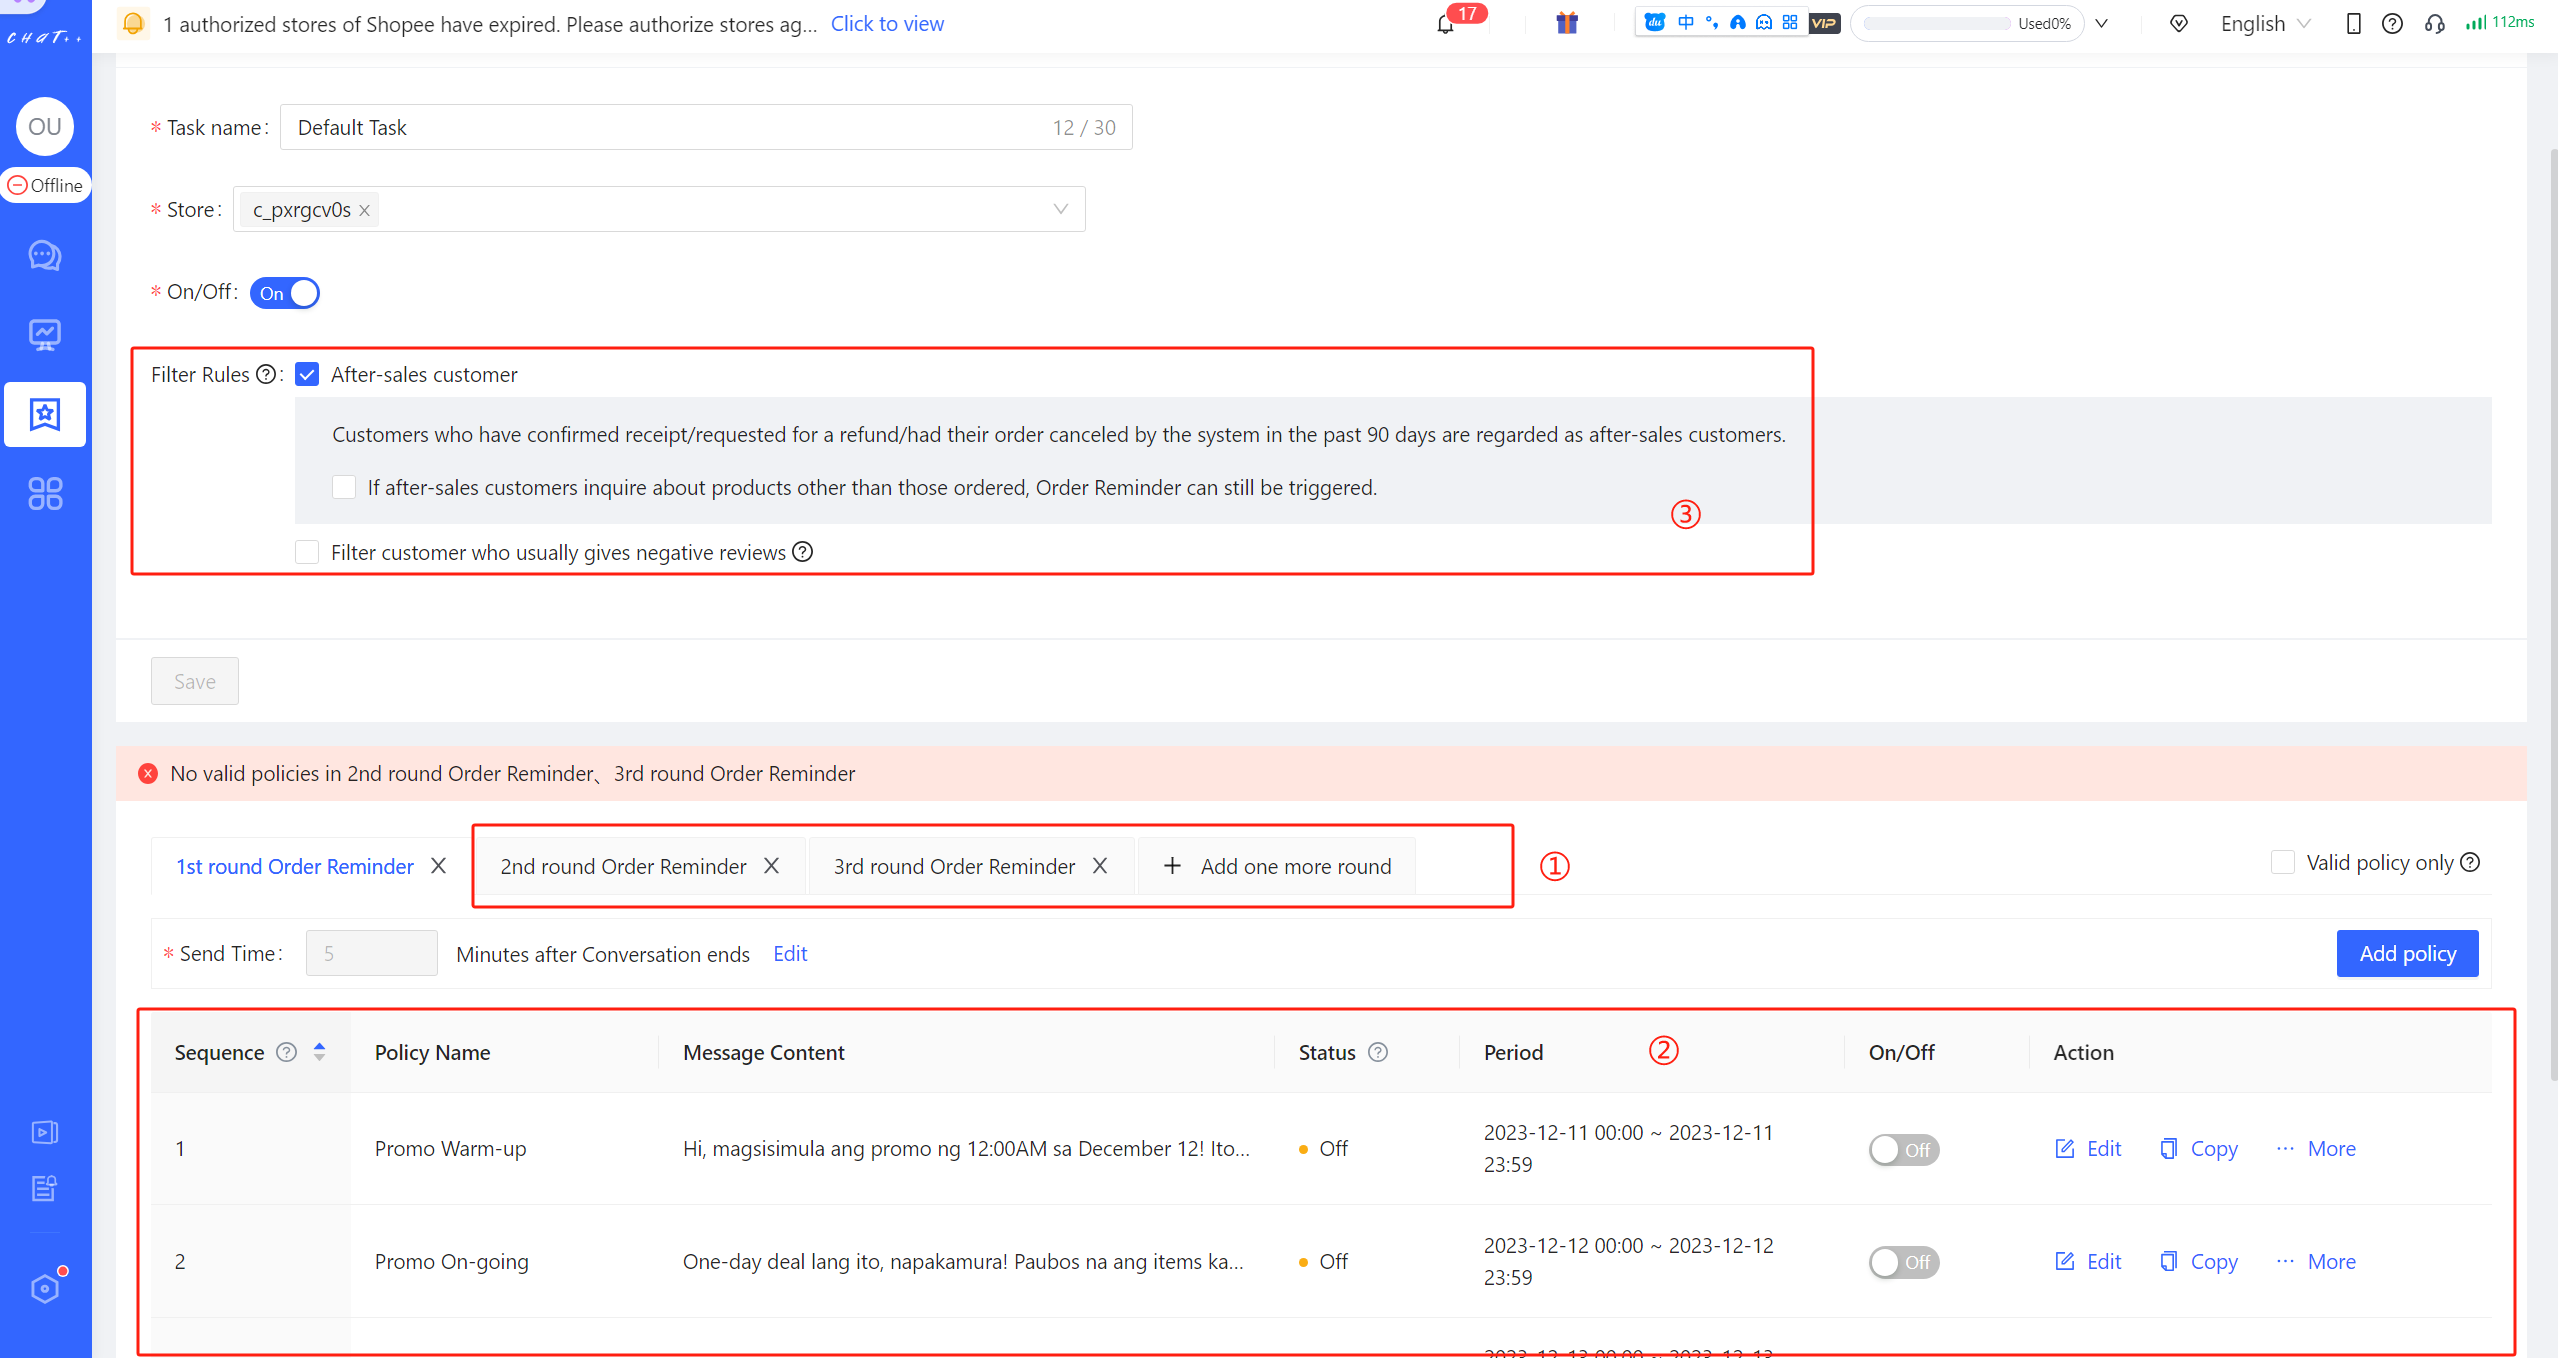
Figure 5
To increase sales conversion rate, multi-rounds order reminder is introduced
(Shown as Figure 5 red box①)
Only one round of Order Reminder is configured by default, but you can add more rounds depend on your needs. Any round order reminder can be executed unless the buyer place the order. When you add one more round, you can choose to reuse the last round policy or customize a new policy (Shown as Figure 6 red box②).
You can modify the「Send Time (trigger time)」and「 Policy Collection 」for every round (Shown as Figure 5 red box②).
Note: Up to four rounds of Order Reminder are supported, but it is recommended to set equal to or less than two rounds, in case customers complain about being disturbed frequently.
【Execution Time (trigger time)】Description
(Shown as Figure 7 red box①)
The「Execution Time (trigger time)」is different for every round. For the first round, Order Reminder is triggered N minutes (5 mins by default) after conversation closed (Shown as Figure 7 red box①) . The subsequent round is triggered N minutes (10 mins by default) after the last round of reminder or new conversation closed (the conversation happens after last round order reminder). The trigger time can be changed (Shown as Figure 7 red box②).
Note: After one Order Reminder round is triggered, one of the policies under that round can be executed. 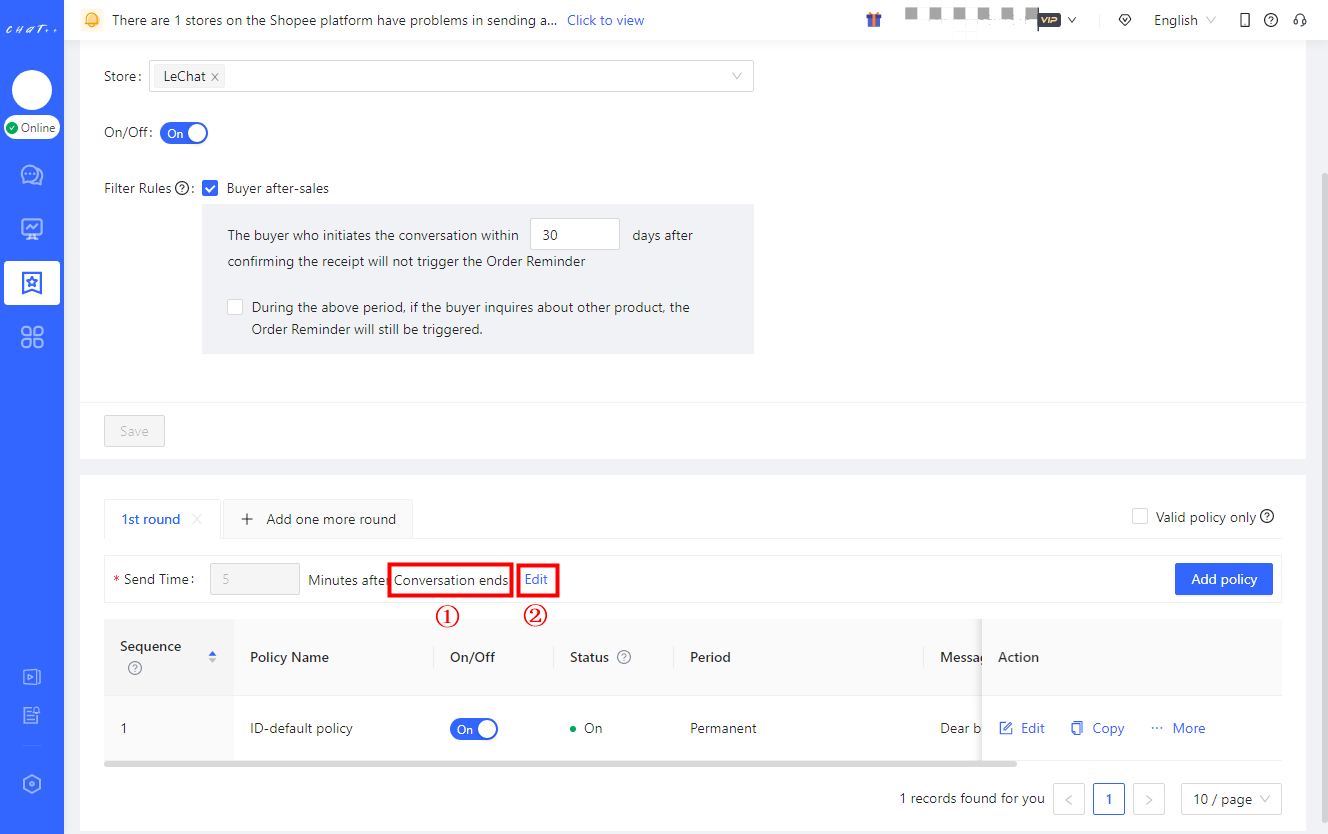
Figure 7
【Policy branch】Description
Policy branch is composed of factors such as Message Content, Period and Filter Rules.
● Period: The policy branch takes effects in this period which can be set as Permanent, Start and end(daily) and Fixed period(within a specific time period)
● Execution Time (trigger time): The「Execution Time (trigger time)」is different for every round. For the first round, Order Reminder is triggered N minutes (5 mins by default) after conversation closed. The subsequent round is triggered N minutes (10 mins by default) after the last round of reminder or new conversation closed (the conversation happens after last round order reminder). The trigger time can be changed. Note: Note: After any round of Order Reminder is triggered, the system will execute the first policy branch that meets the conditions of that round of Order Reminder.
● Message Content: Within the valid period and if the customer does not meet the filtering rules, the corresponding message will be sent.When multiple policy branches is set under one round of order reminder, the first policy branch in its period will be executed.
Set multiple policy branches with different scripts for different sales promotion with different period of validity, this strategy makes script best match the promotion, good for sales conversion.
For each round of order reminder, different policy branch strategies could be applied.
As shown in the red box in figure 8 below, the period selected in the example is the whole month of February. That means this policy will only match with buyers who inquired in February.
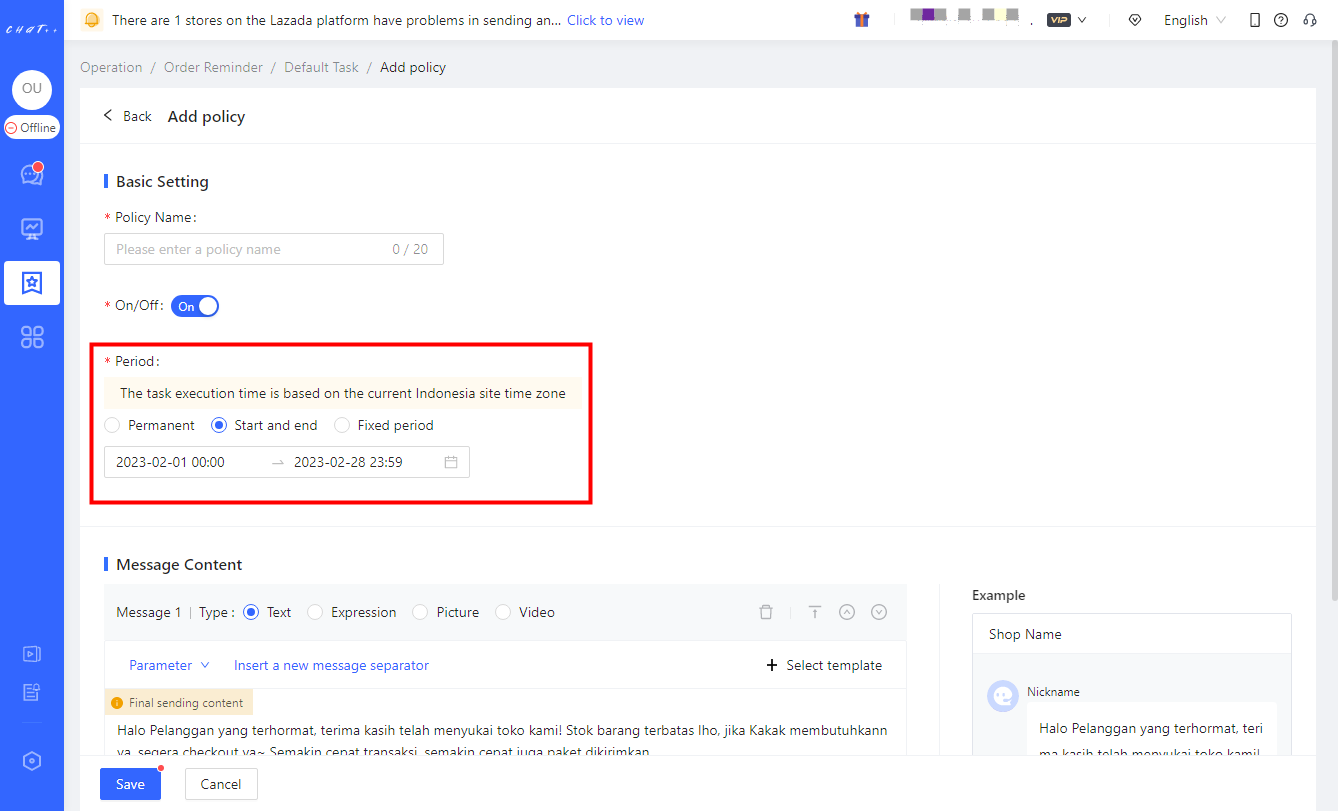
Figure 8
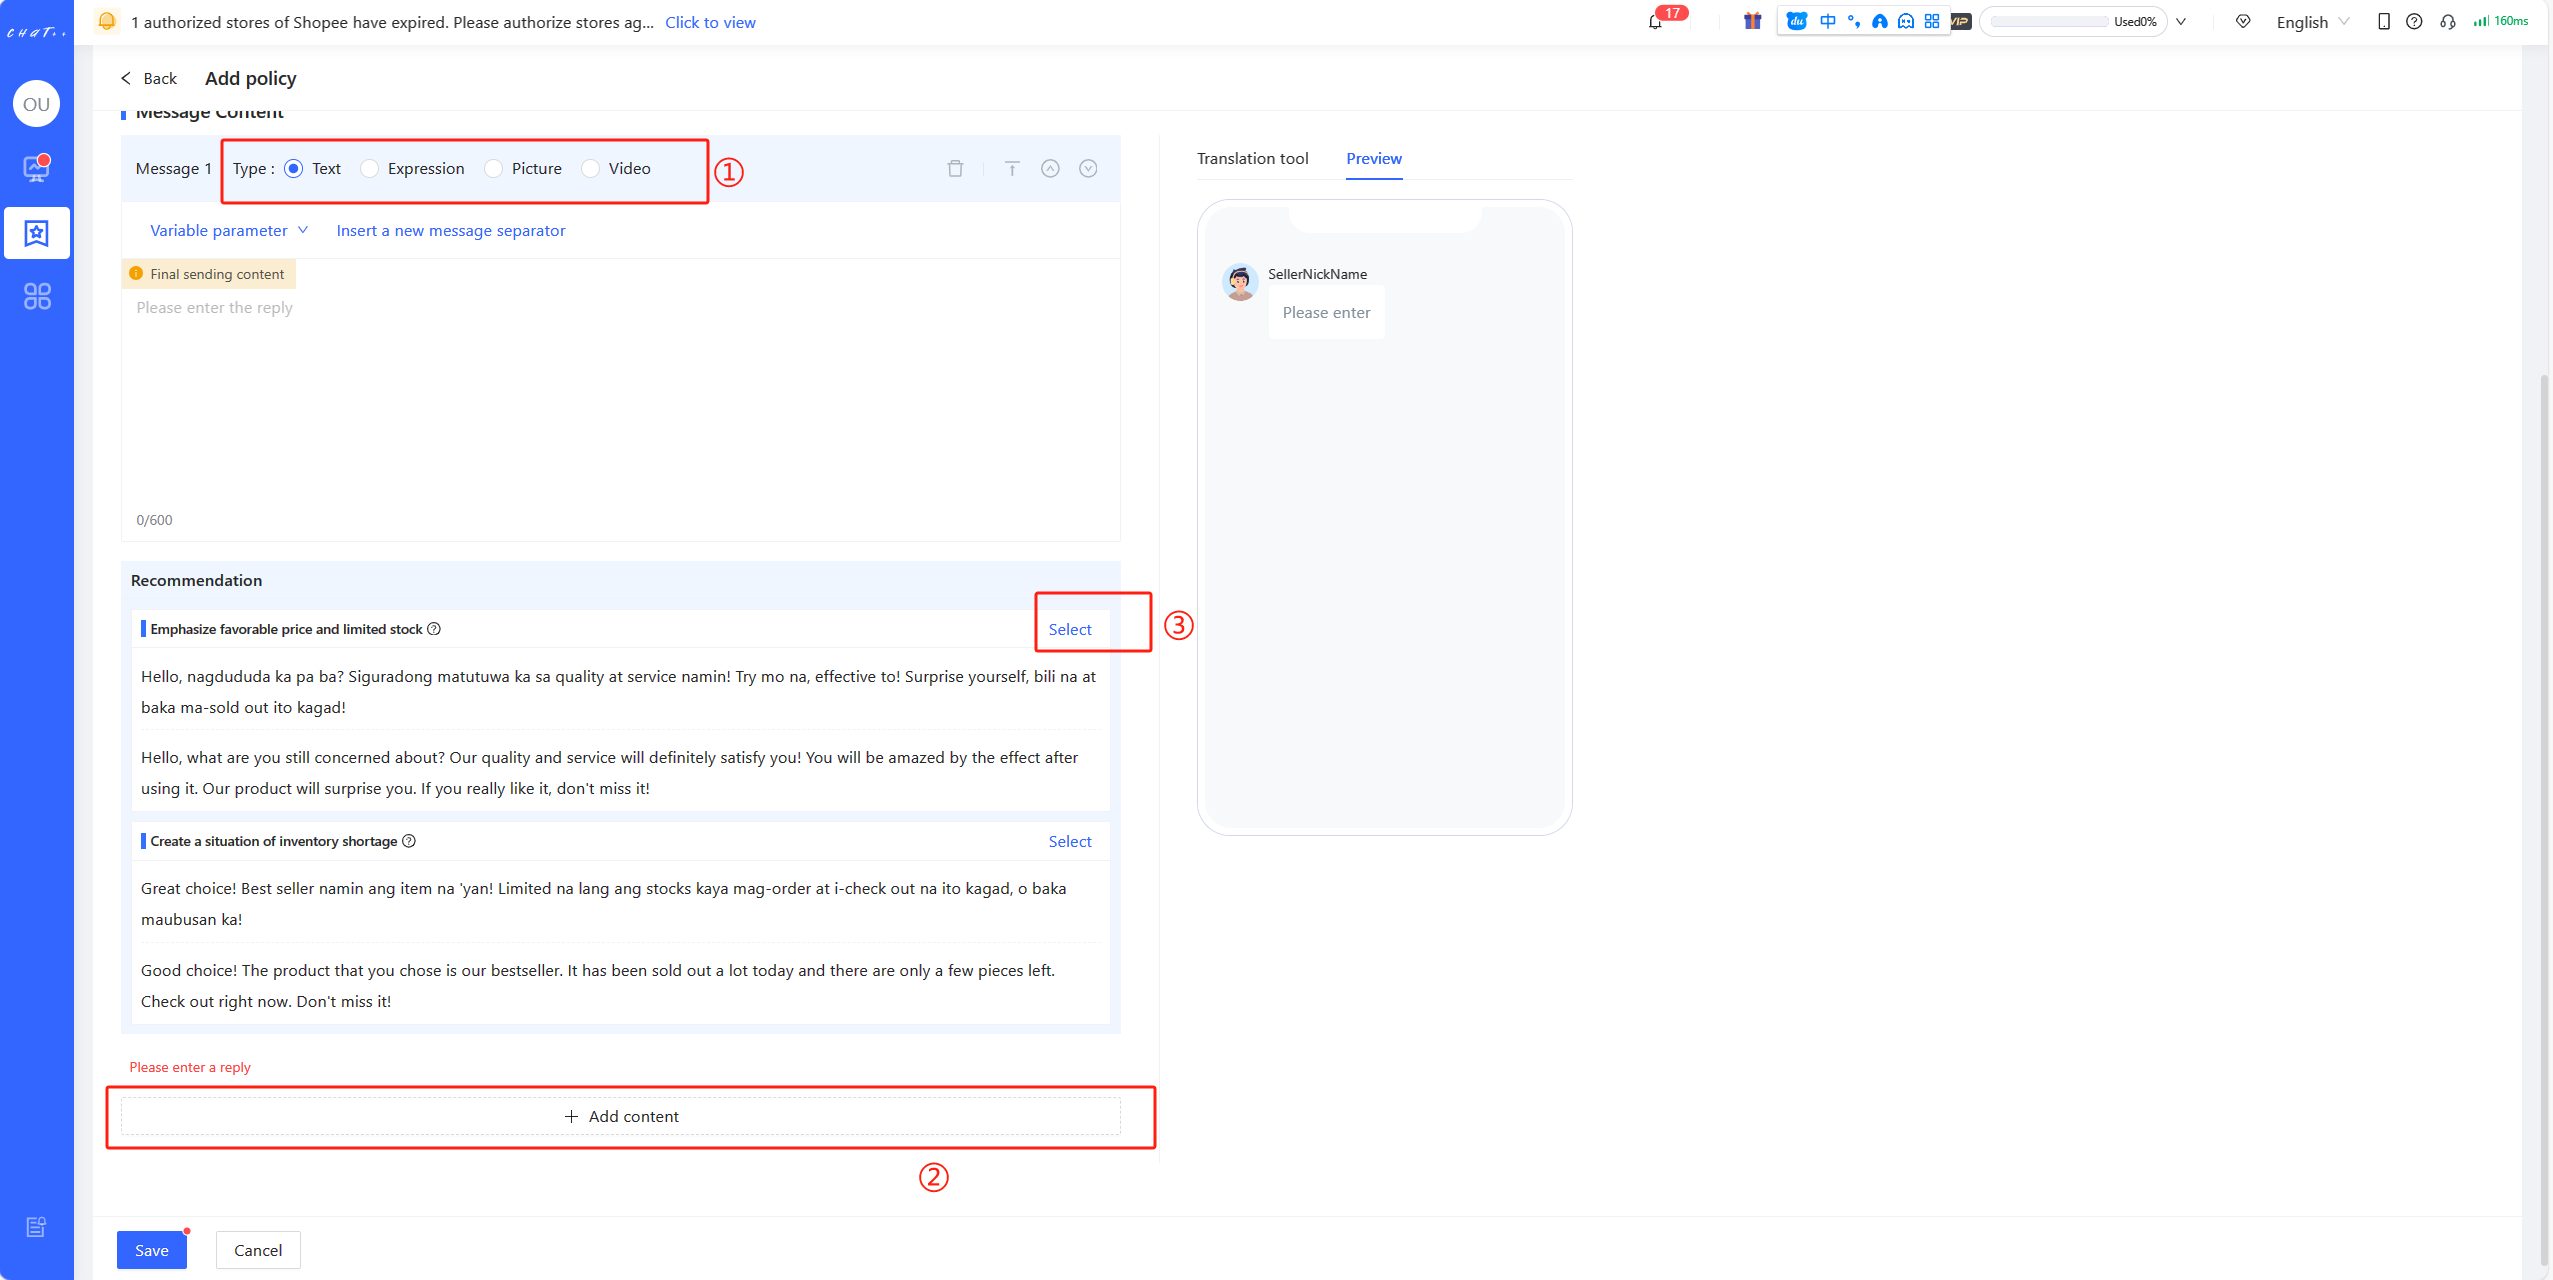
Figure 9
Various message types (text, image, sticker, video) are supported for the script
(Shown as Figure 9 red box①)
Click “Add content” and you can add script with various message types. (Shown as Figure 9 red box②) . Different types of messages can be used to generate attractive content encouraging customer to place the order.
ChatPlusAI provides a message template for reference and use (Click the red box③ in Figure 9 above and the message template page will pop up).
【Policy branch Execution Sequence】Description
If there are several policy branches under the task, system try to execute the branch from top to down(Shown as Figure 10 red box①). After one policy branch is executed, the following policy branch will no longer be executed. The policy branch execution order can be modified by clicking the button “Top/Up/Down/Bottom”(Shown as Figure 10 red box②) when you click「More」
Note: If no policy branch is in period of validity, this round of order reminder will be skipped.
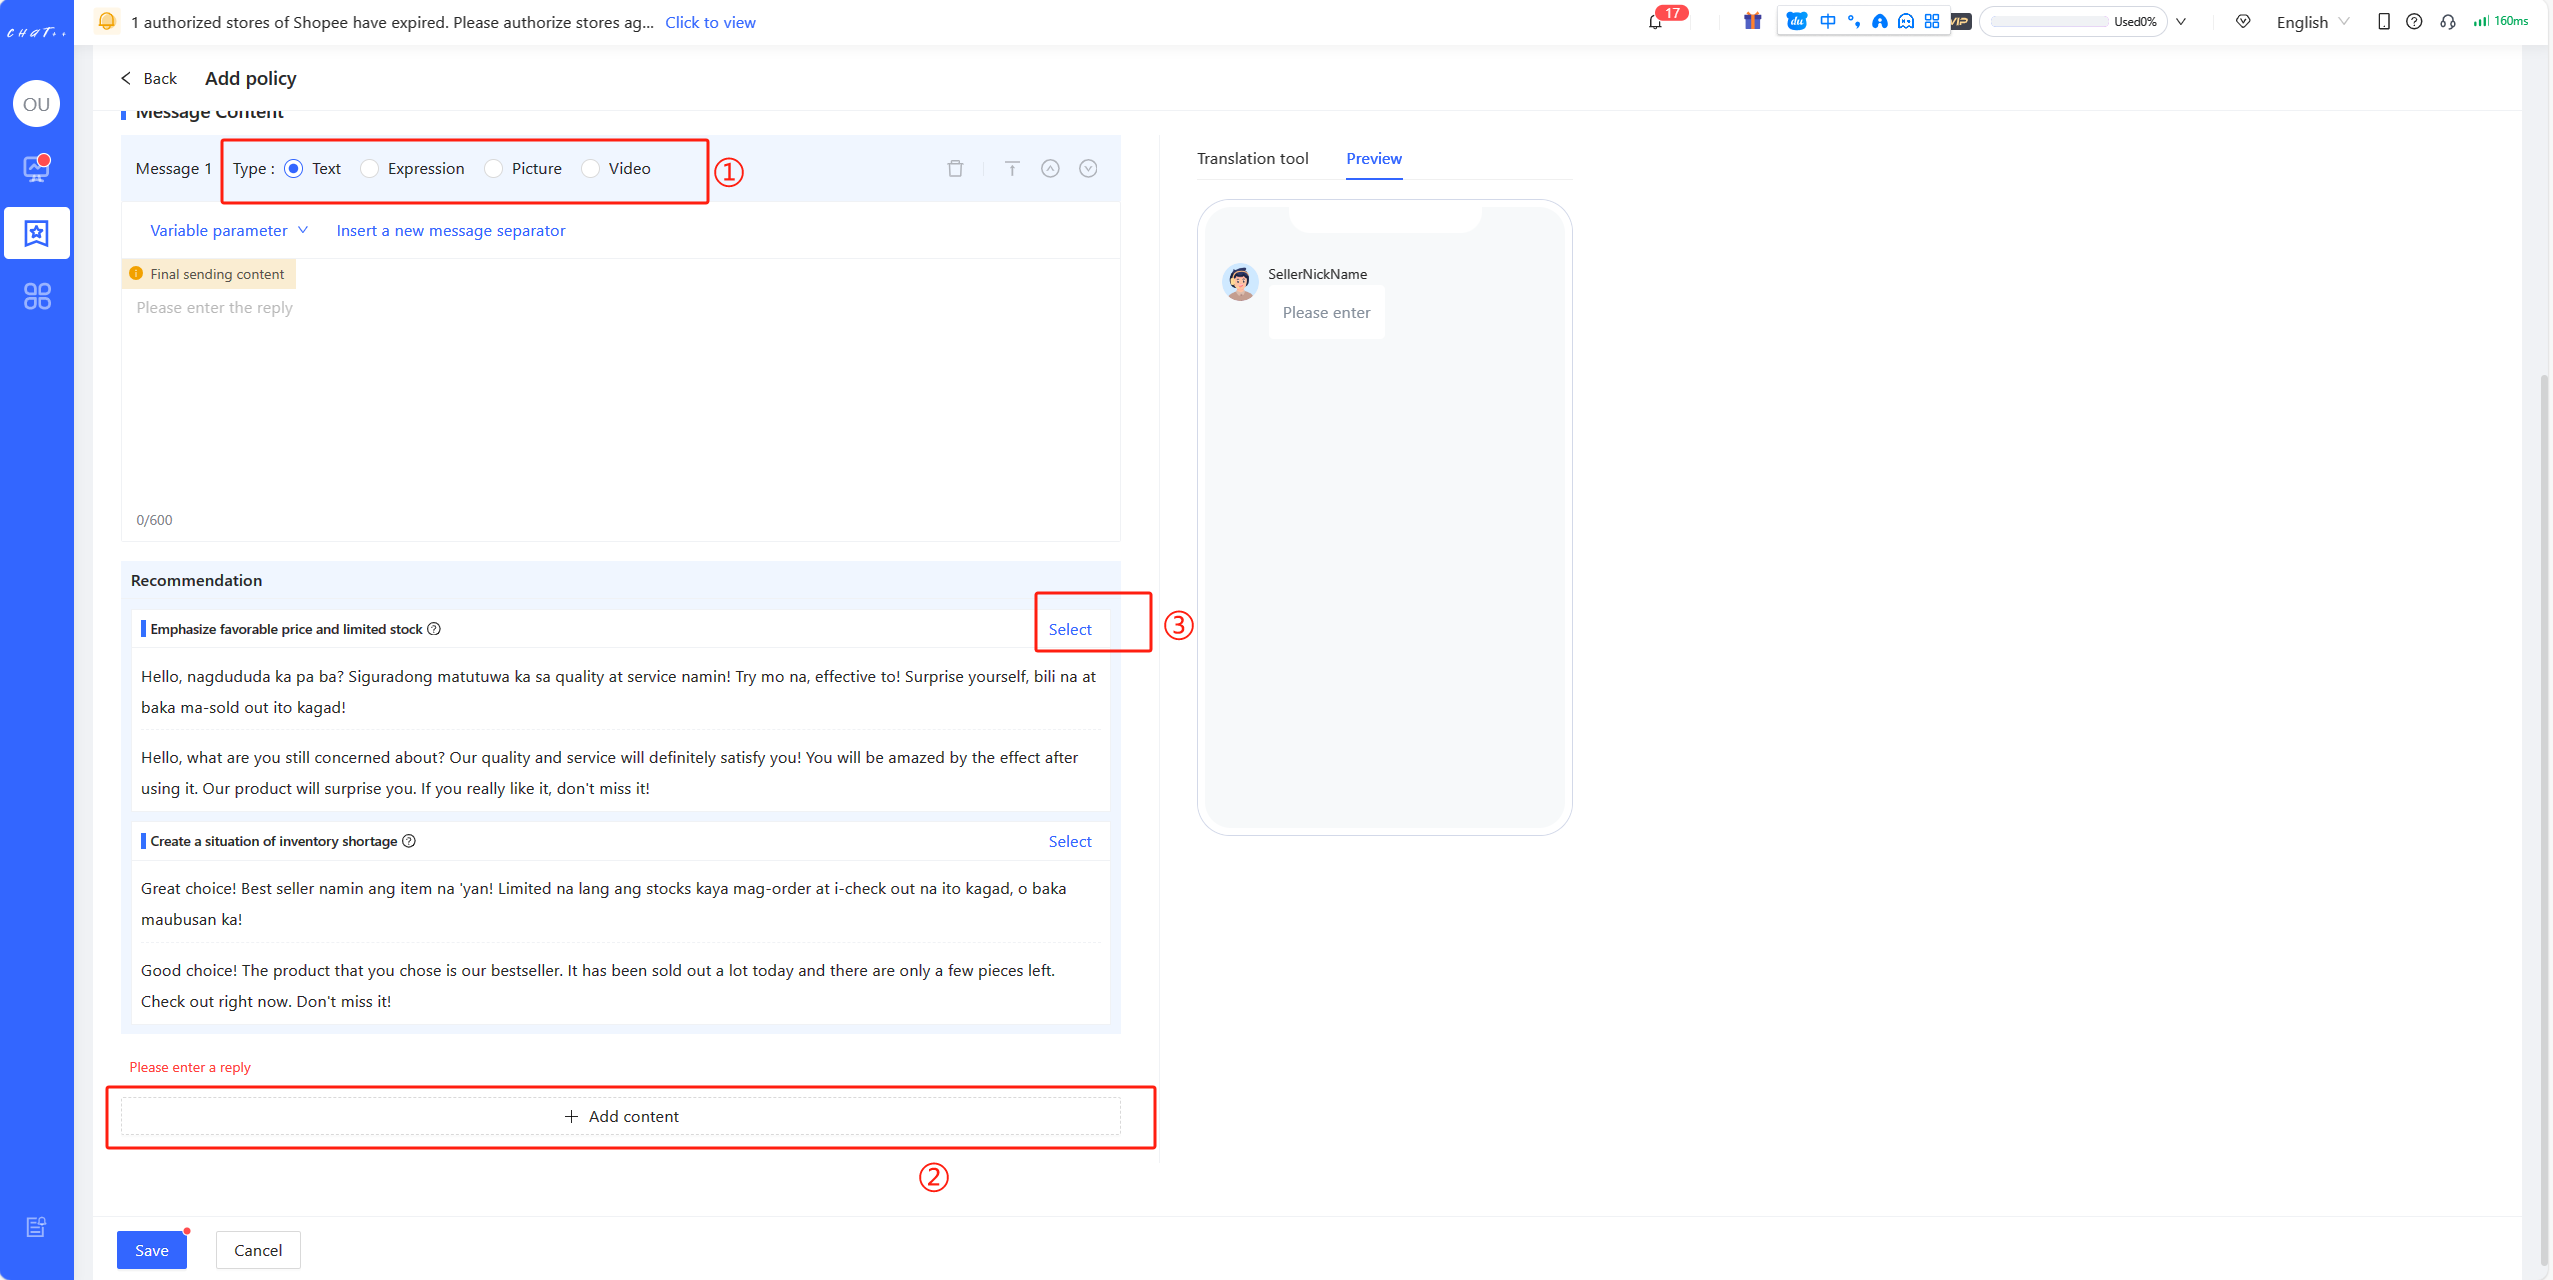
Figure 10
If you want to customize policy strategies for different stores, you can create different 【Task】for stores.
(Shown as Figure 11&12)
In order to guarantee that one store is only included in one Order Reminder task, the store you added in the new task will be removed from the task the store previously belongs to.
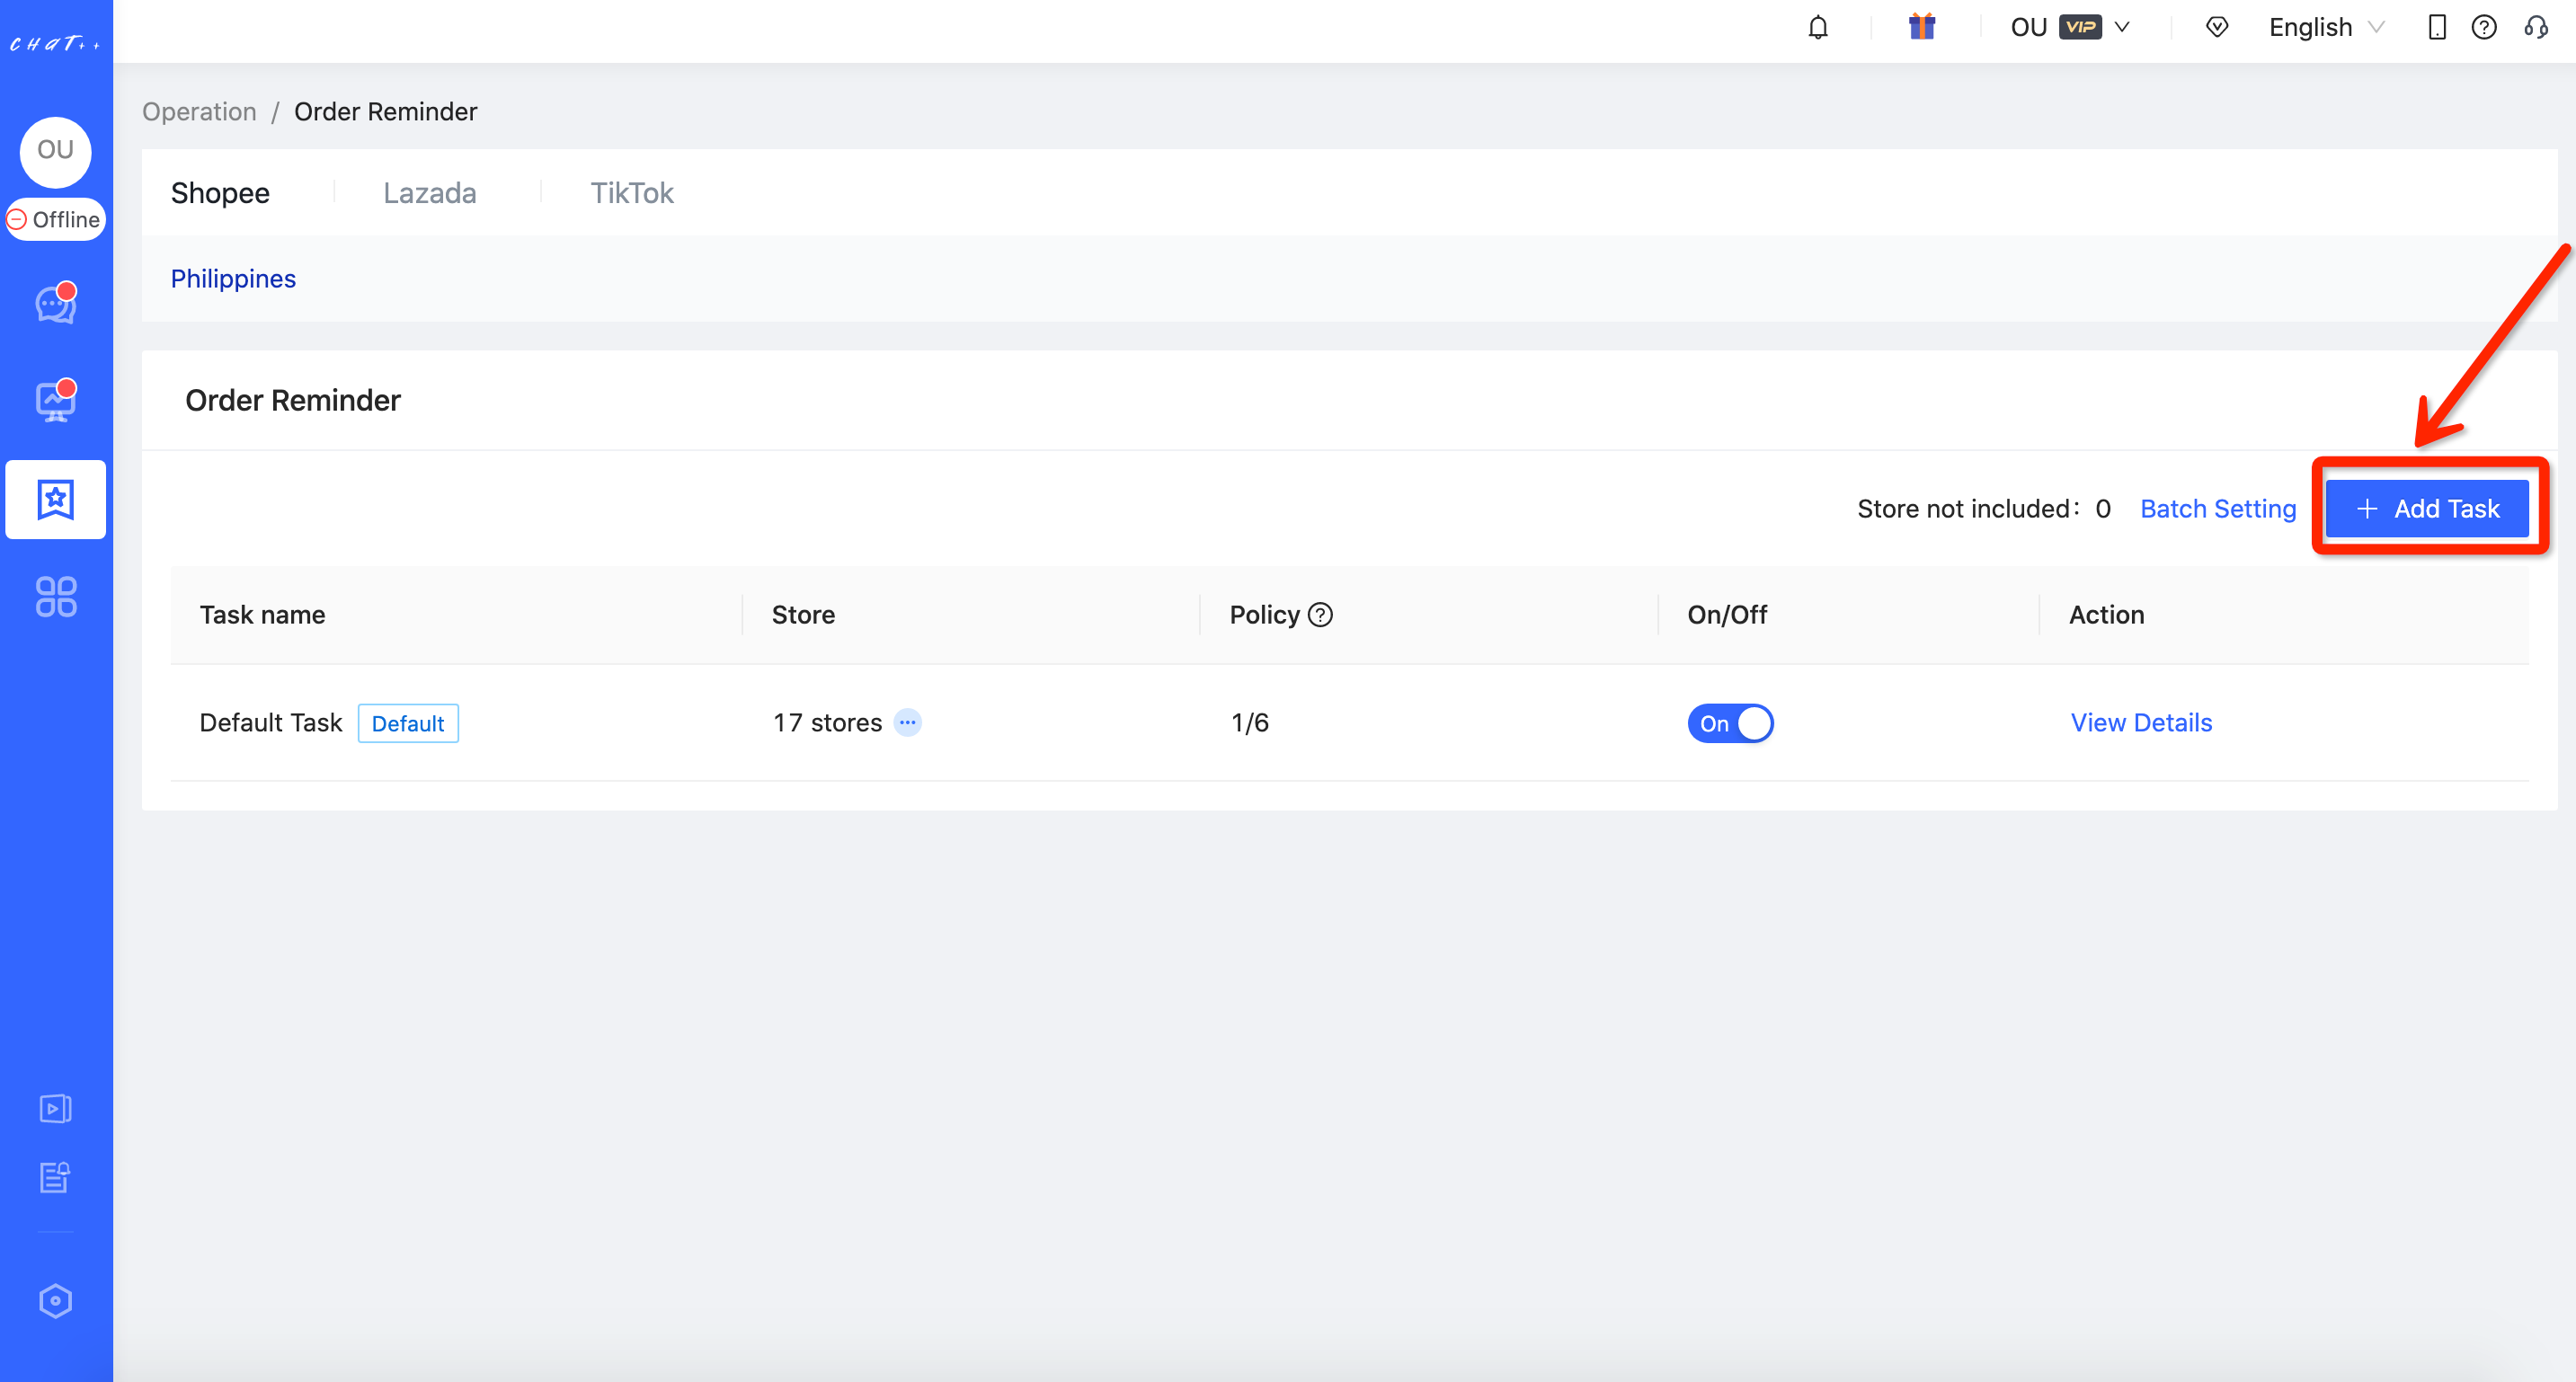
Figure 11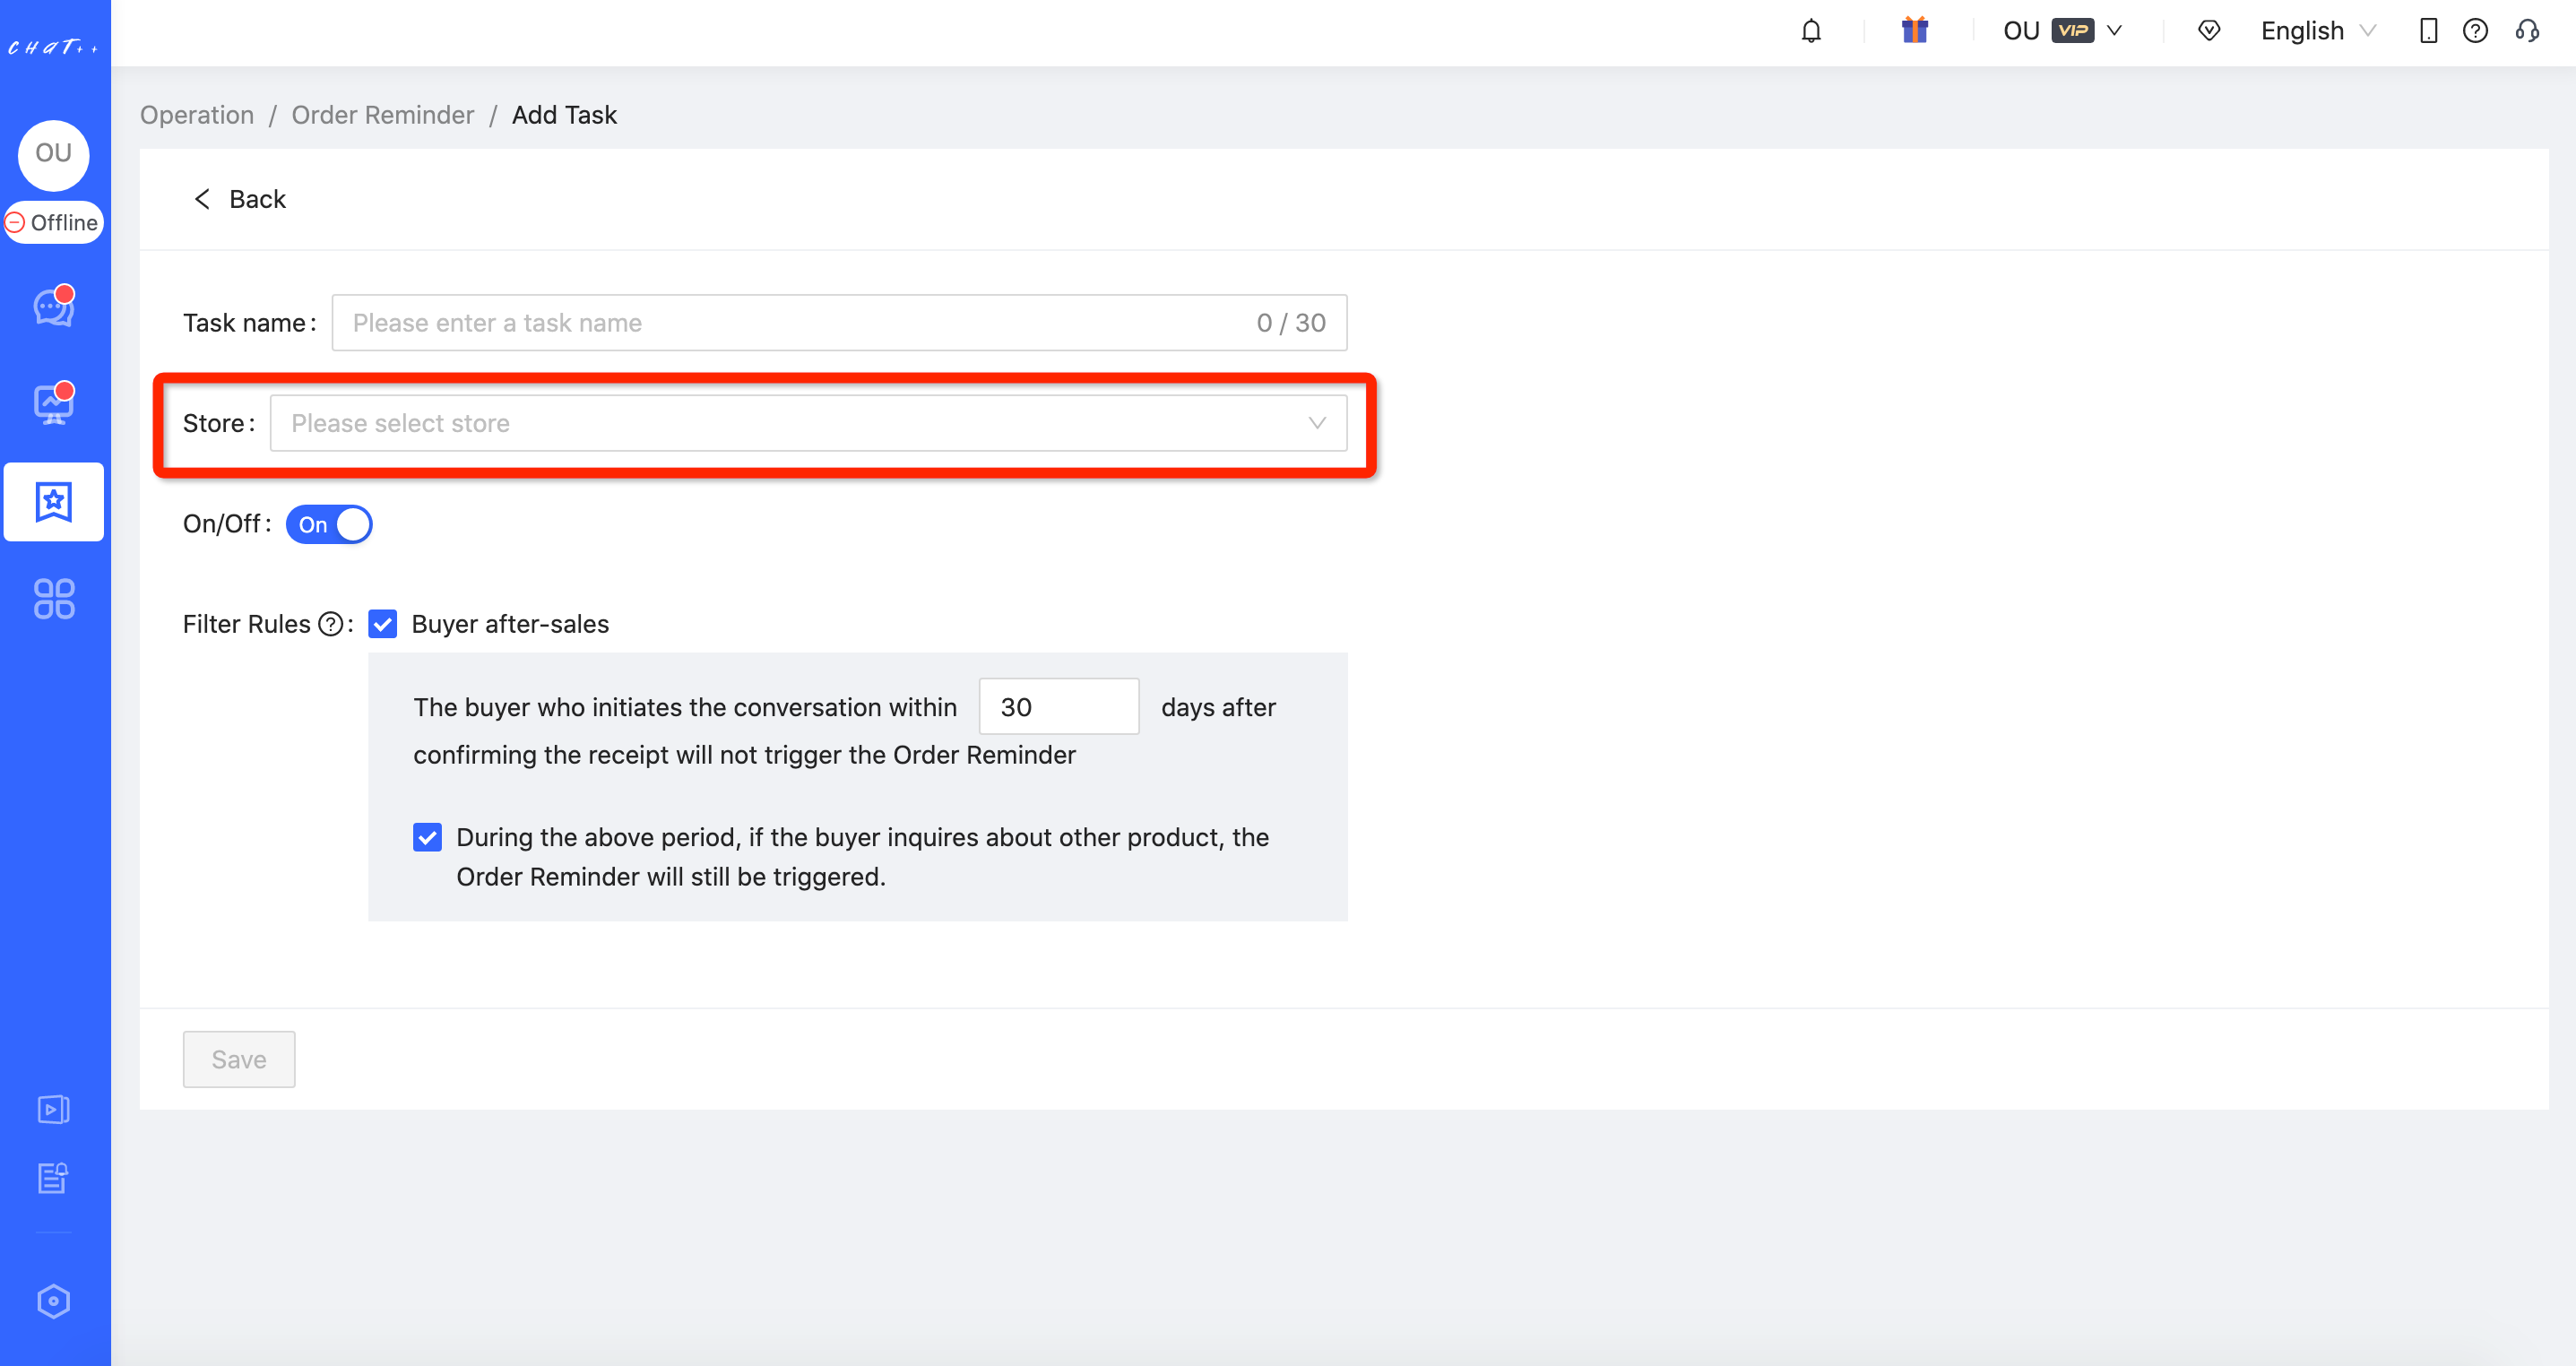
Figure 12
Attention
⚠️ 1. Order Reminder tasks can be customized differently for marketplaces. For now Shopee, Lazada, TikTok Southeast Asia, and TikTok US are supported. Tokopedia will be avaliable soon, kindly stay tuned. ⚠️ 2. Each country site of the marketplace has its own Order Reminder task, you need configure them respectively.
⚠️ 3. It is recommended to set one or two rounds Order Reminder, too many rounds will disturb the customer.
Payment Reminder
If the customer does not pay in a certain time after order is placed(except for COD order), system will automatically send the customer a message to remind him to pay and this boost the store sales. This function is called "Payment Reminder".
Show Cases
When the customer has not pay within 5 minutes after order was placed (this merchant set 5 mins interval), the Payment Reminder message is sent automatically.
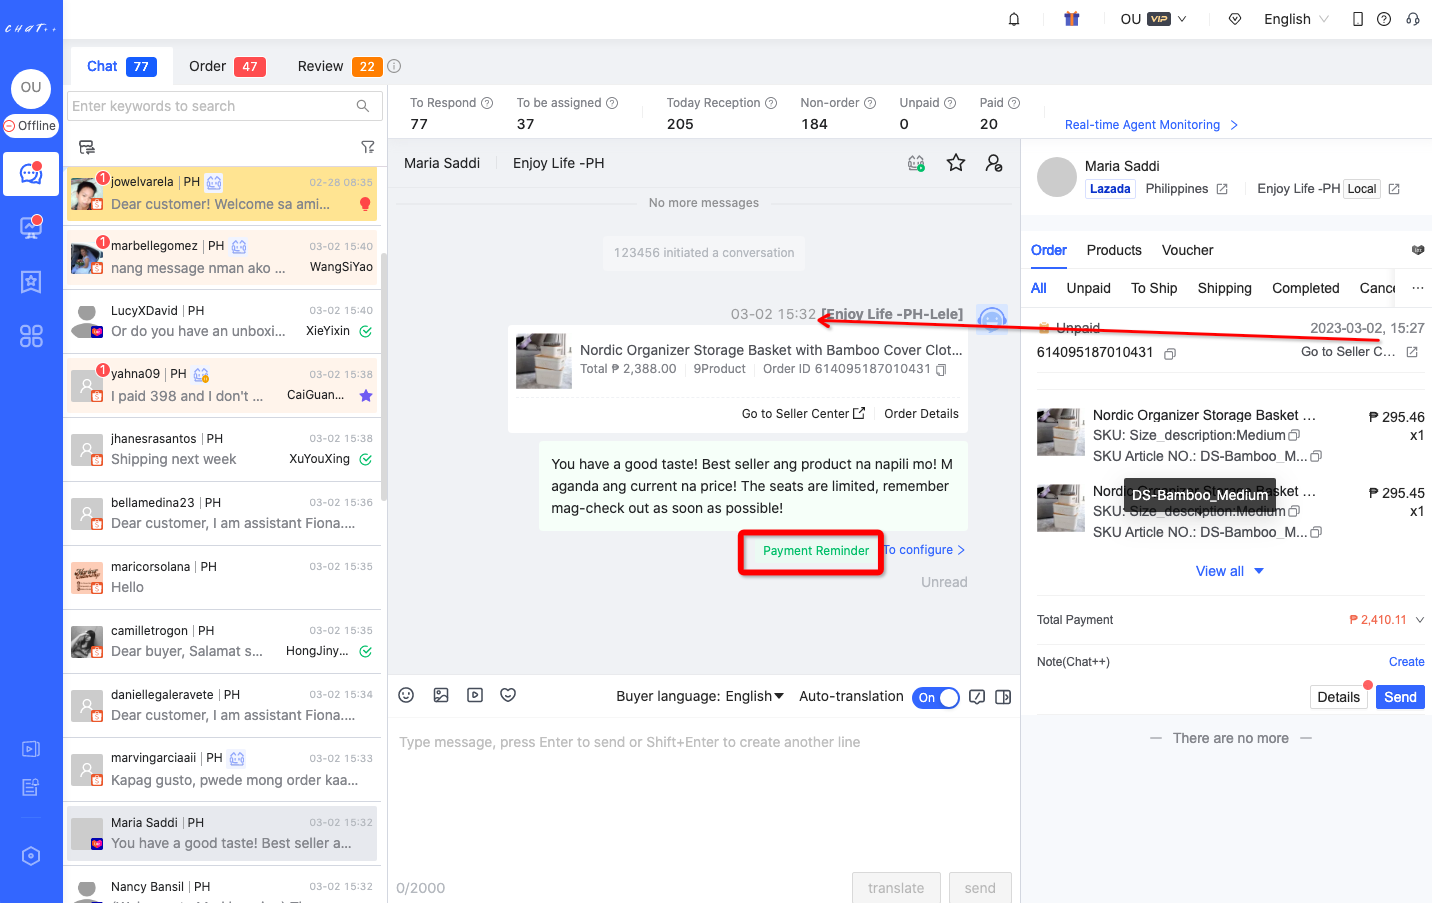
Figure 1
Privileges required for configuration
Privilege of "Order&Payment Reminder" needs to be enabled for the role who need configure the Payment Reminder. The super administrator and administrator already have this privilege by default.
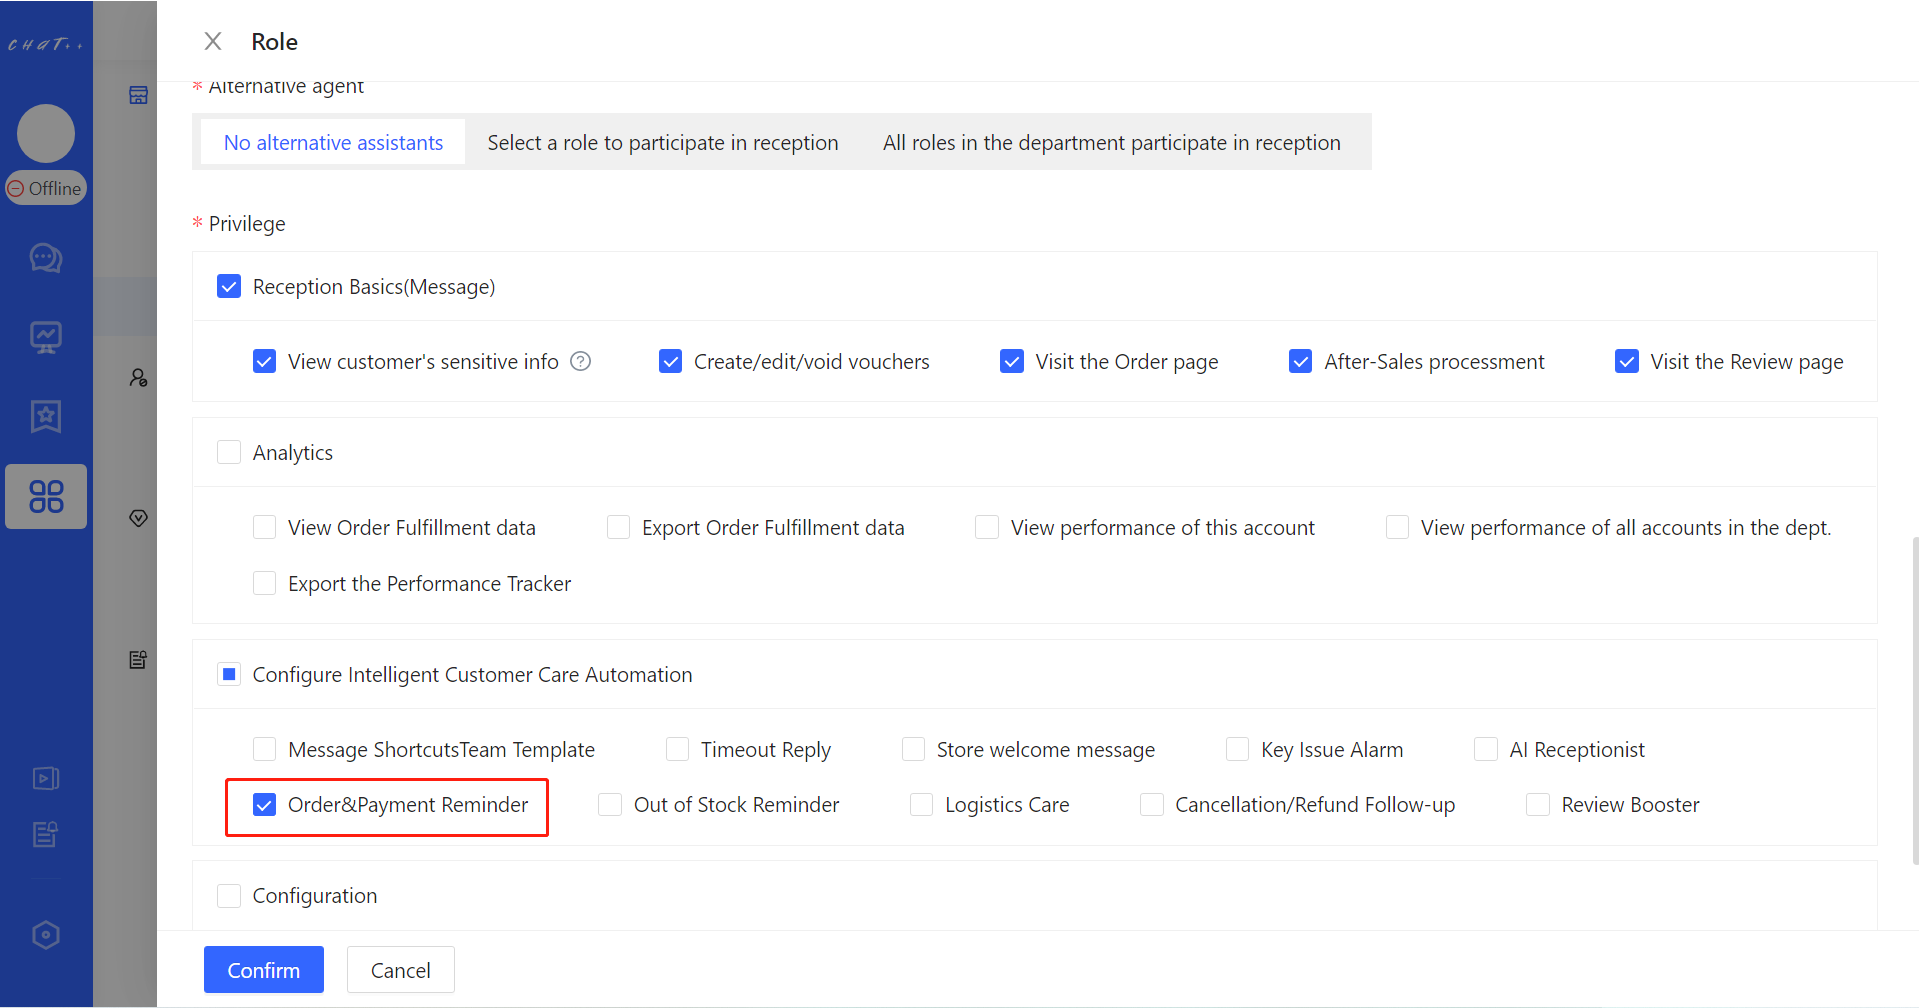
Figure 2
How to configure
Click 【「 Automation 」 in left menu(Shown as Figure 3 red box①)→「 Payment Reminder 」(Shown as Figure 3 red box②)】,Access the configuration page.(Shown as Figure 4)
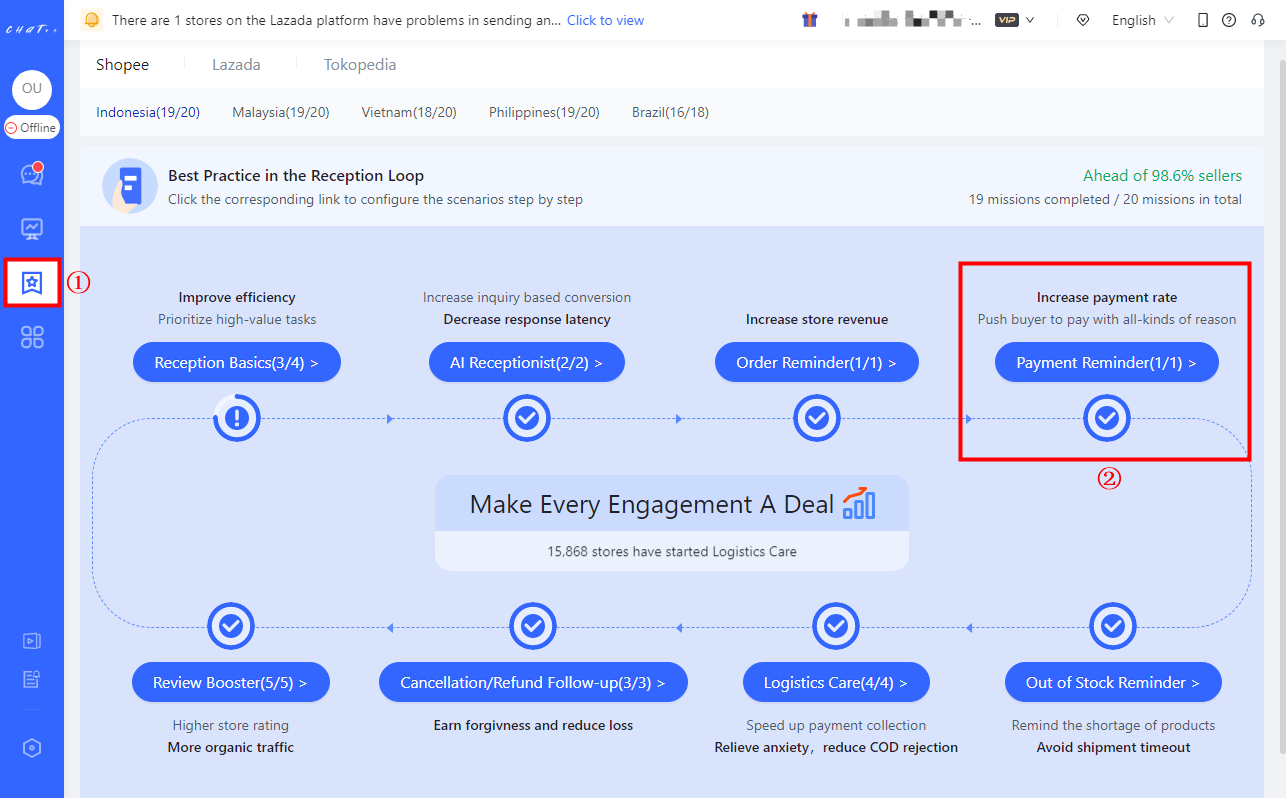
Figure 3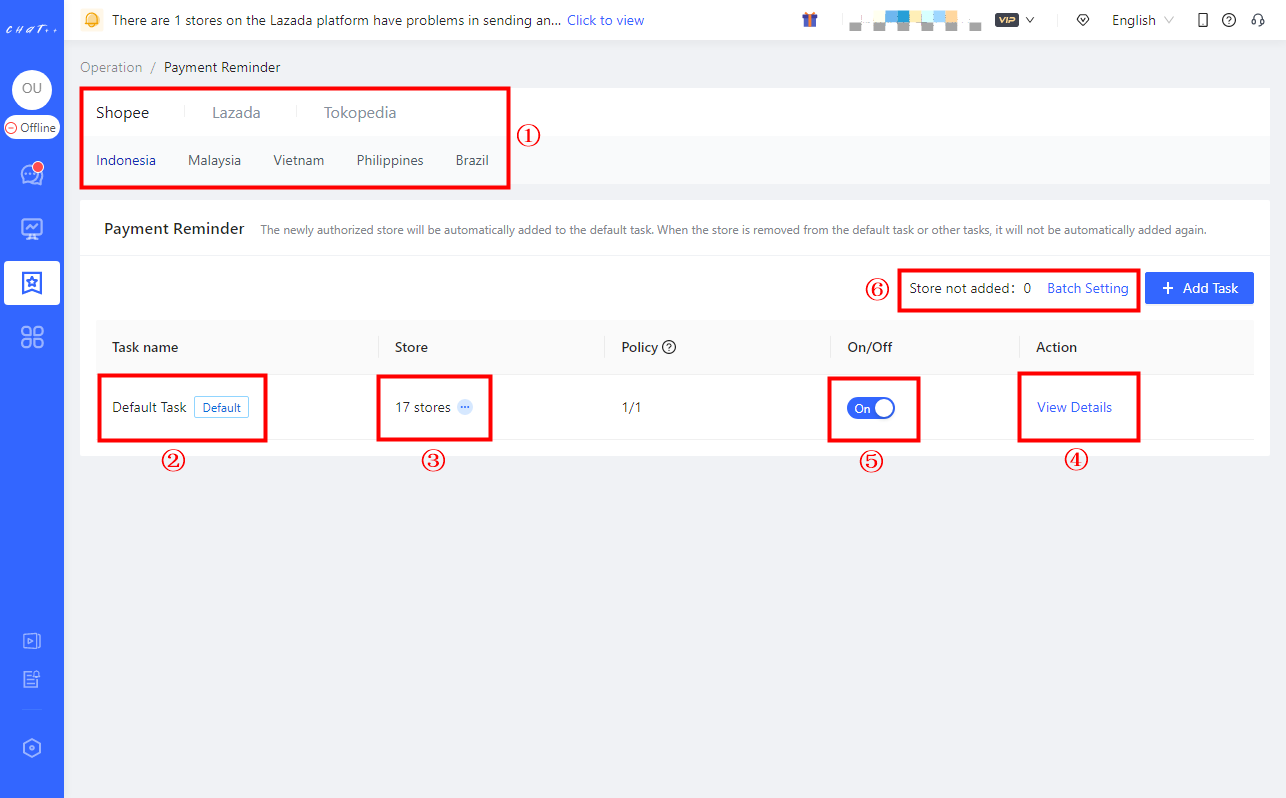
Figure 4
Payment Reminder tasks can be customized differently for marketplaces. For now Shopee, Lazada, TikTok Southeast Asia, and TikTok US are supported. Tokopedia will be avaliable soon, kindly stay tuned.
【Default Task】Description
A default task has been created for each country site and marketplace, and all stores in the country have been included in the task. This makes the configuration much more convenient. All you have to do is click "View Details" button to edit the policy or directly enable the default task (shown as Figure 4 above).
Note: The policy will be introduced in detail below, If you'd like to view it now, just click the link.
Newly authorized stores will be automatically included to the 【Default task】. However, the store will not be automatically included again after they are removed from the default task or other tasks. It will be counted as "Store not included" (Shown as Figure 4 red box⑥). You can click "Batch Settings" button (Shown as Figure 4 red box⑥) to add massive stores into the certain task quickly.
Kindly make sure that all stores have been included to the right task (that means the "Store not included" shown as Figure 4 red box⑥is 0), in case the store is neglected from any Payment Reminder task.
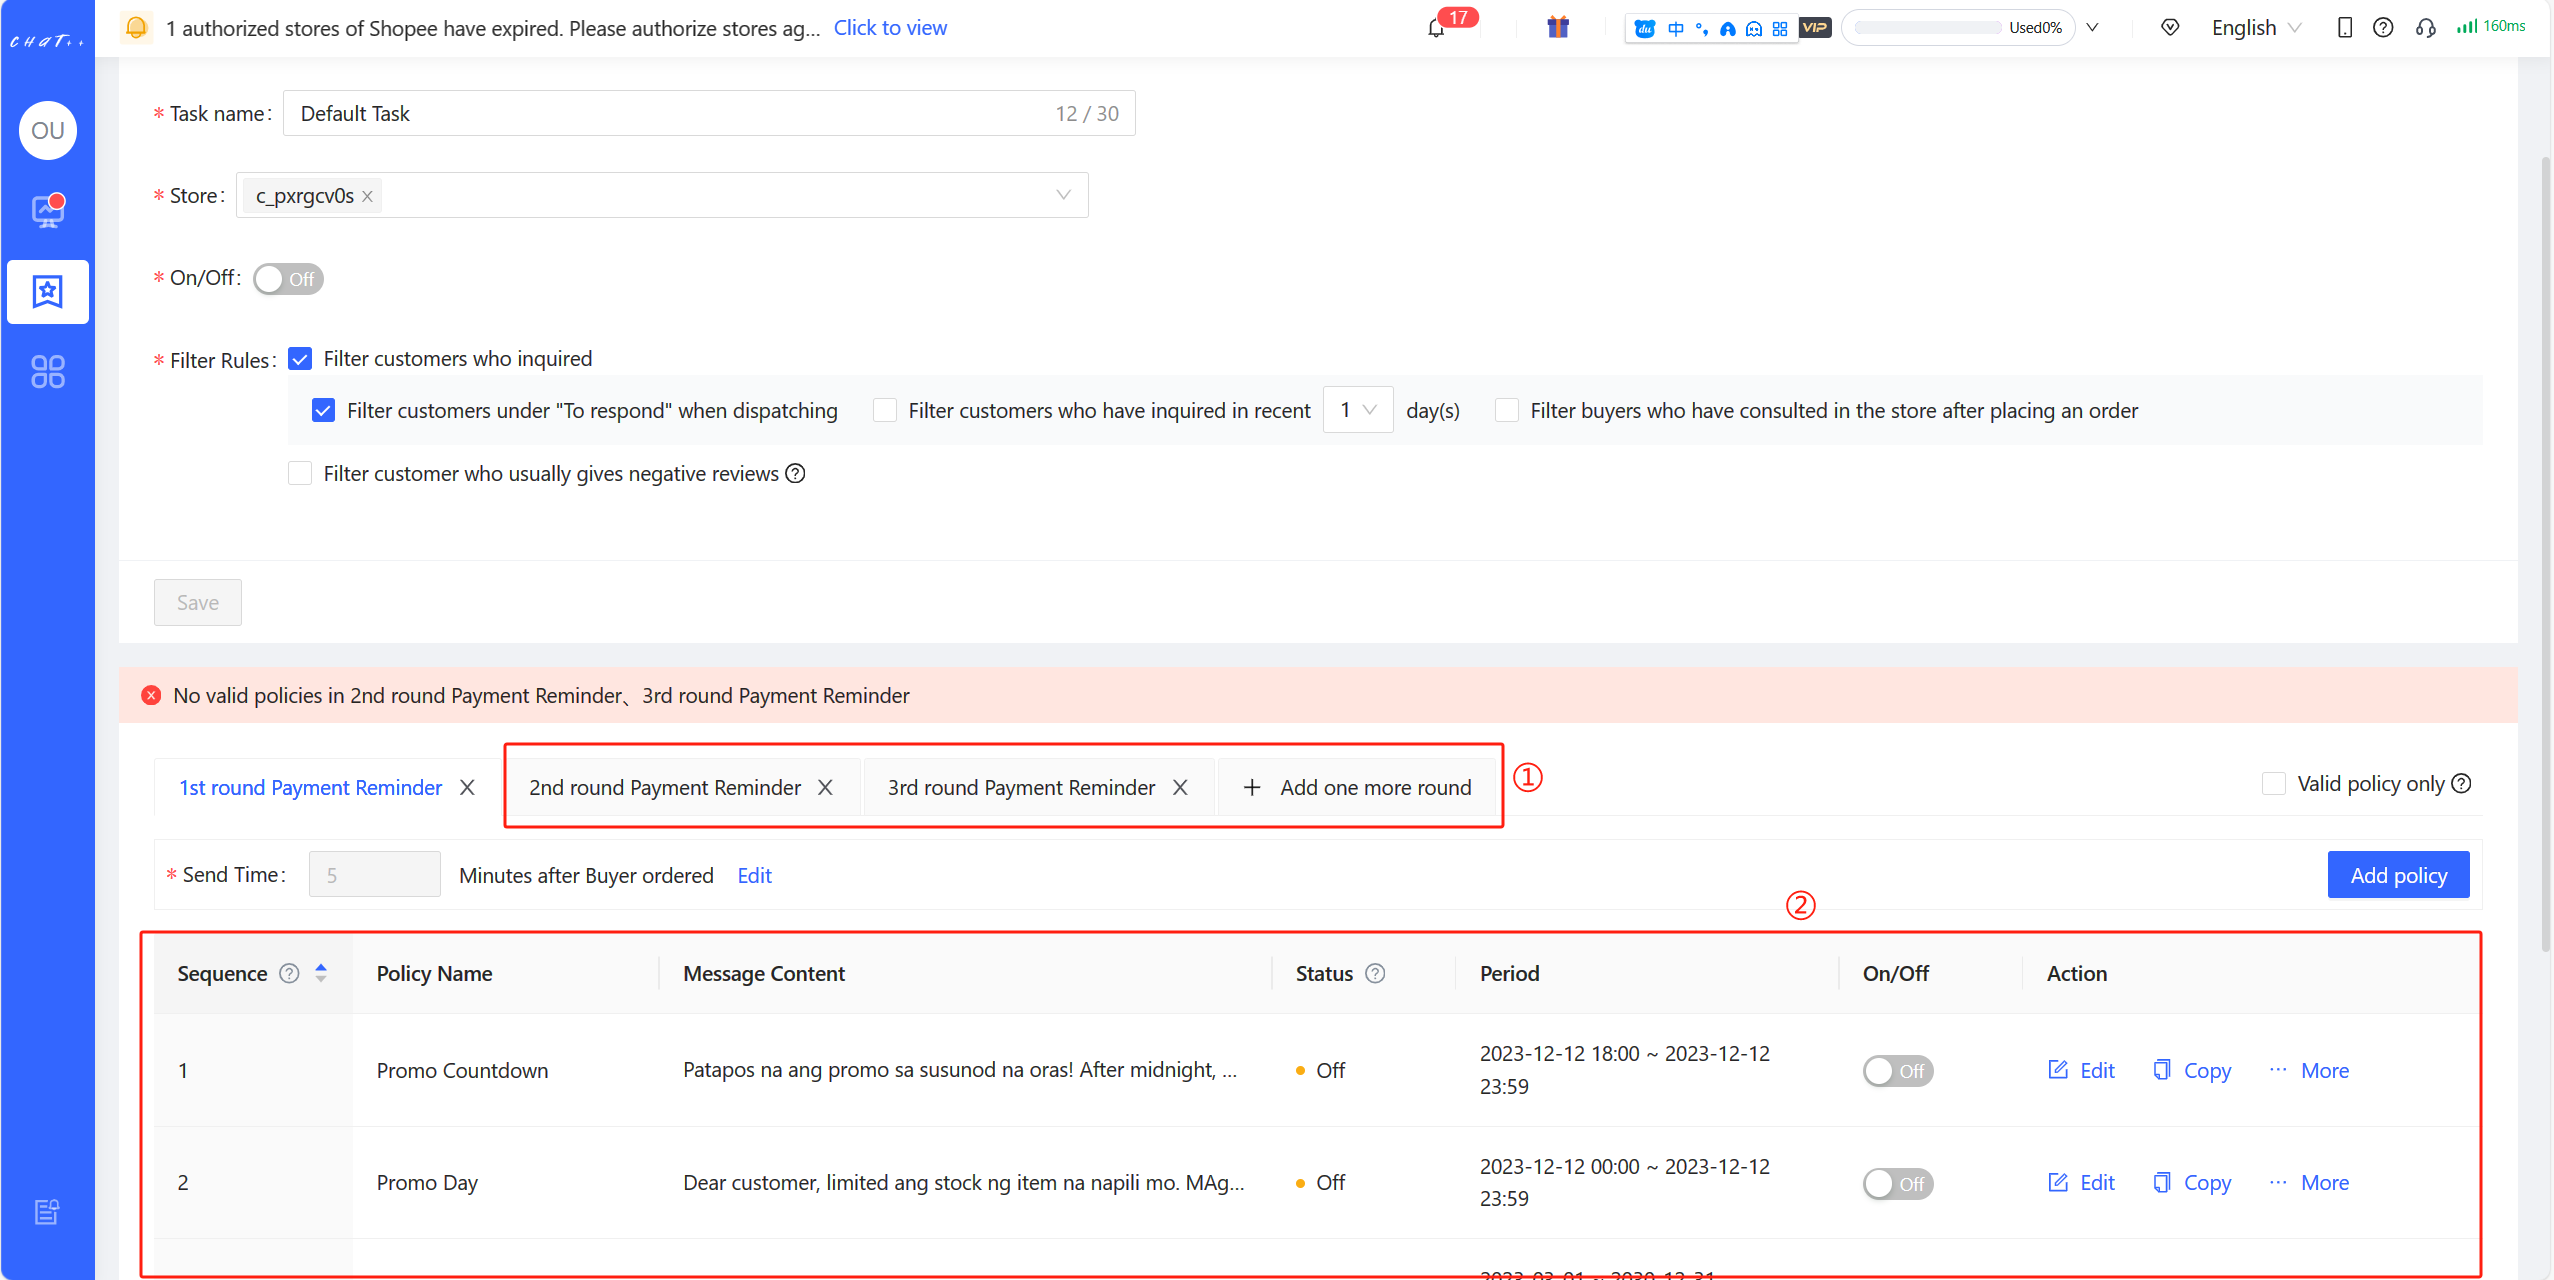
Figure 5
To increase sales conversion rate, multi-rounds Payment Reminder is introduced:
Only one round of Payment Reminder is configured by default, but you can add more rounds depend on your needs. Any round of Payment Reminder can be executed when the order is placed but unpaid. When you add one more round, you can choose to reuse the last round policy or customize a new policy (Shown as Figure 5 red box②).
You can modify the「Execution Time (trigger time)」and「 Policy Collection 」for every round (Shown as Figure 5 red box②).
Note: Up to four rounds of Payment Reminder are supported, but it is recommended to set equal to or less than two rounds, in case customers complain about being disturbed frequently.
【Execution Time (trigger time)】Description
The「Execution Time (trigger time)」is different for every round. For the first round, Payment Reminder is triggered N minutes (5 mins by default) after order is placed but unpaid(except for COD orders) (Shown as Figure 6 red box①) . The subsequent round is triggered N minutes (10 mins by default) after the last round of reminder. The trigger time can be changed (Shown as Figure 6 red box②).
Note: After one Payment Reminder round is triggered, one of the policies under that round can be executed.
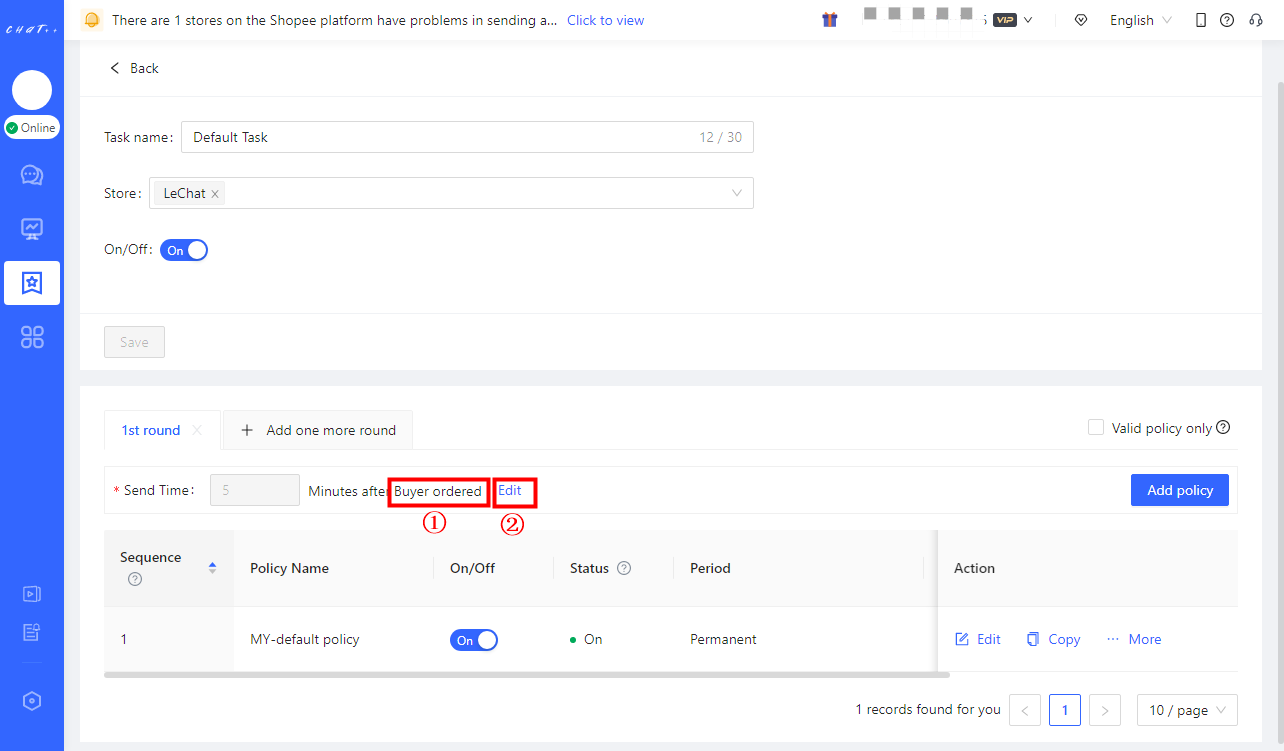
Figure6
【Policy branch】Description
- Policy branch is composed of factors such as Period, Limitation(Products), Filter Rules and Message Content.
- Period: The policy branch takes effects in this period which can be set as Permanent, Start and end(daily) and Fixed period(within a specific time period)
- Limitation(Products): The policy branch takes effects when the customer ordered specific products. There are 4 options to check: All products, Pick SKU, Pre-order or In-stock.
- "Pick SKU" supports selecting specific products by searching the "Product Name", "Product ID", "SPU Article NO." and "SKU Article NO.", meanwhile checking "Product ID" or "SPU Article NO." can quickly select various products. Multiple products are seperated by Enter.
- "Pick SKU" supports selecting specific products by searching the "Product Name", "Product ID", "SPU Article NO." and "SKU Article NO.", meanwhile checking "Product ID" or "SPU Article NO." can quickly select various products. Multiple products are seperated by Enter.
- Filter customers who inquired: By default, Payment Reminder tasks filter out customers under "To respond" when dispatching. When a customer's conversation has been assigned to CS and the last message has not yet been effectively responded to, Payment Reminder tasks are not dispatched to these customers by default, to avoid situations where customers are waiting for a response but receive payment reminders instead. It is not recommended to select options such as "Filter customers who have inquired in recent X day(s)" and "Filter customers who have consulted in the store after placing an order", as they significantly filter out potential recipients.
- Filter customer who usually gives negative reviews: Within the past six months, among nearly 4 million Southeast Asian stores using ChatPlusAI, customers who have given two or more negative reviews are considered who usually give negative reviews (including cases where they later revised their review to positive). The system automatically identifies such customers. Payment Reminder allows for filtering out these customers and not sending them messages.
- Execution Time (trigger time): The「Execution Time (trigger time)」is different for every round. For the first round, Payment Reminder is triggered N minutes (5 mins by default) after order is placed but unpaid(except for COD orders). The subsequent round is triggered N minutes (10 mins by default) after the last round of reminder. The prerequisite for any round of Payment Reminder is that the customer has not yet paid. The trigger time can be changed. Note: After one Payment Reminder round is triggered, the system will execute the first policy branch that meets the conditions.
- Message Content: Within the valid period and limited products and if the customer does not meet the filtering rules, the corresponding message will be sent.
- When multiple policy branches is set under one round of payment reminder, the first policy branch in its period will be executed.
Set multiple policy branches with different scripts for different sales promotion and products with different period of validity and product limitation, this strategy makes script best match the promotion and product, good for sales conversion.
As shown in the red box in figure 7 below, the period selected in the example is the whole month of February and the product selected is pre-order. That means this policy will only match with buyers who ordered pre-order products in February .
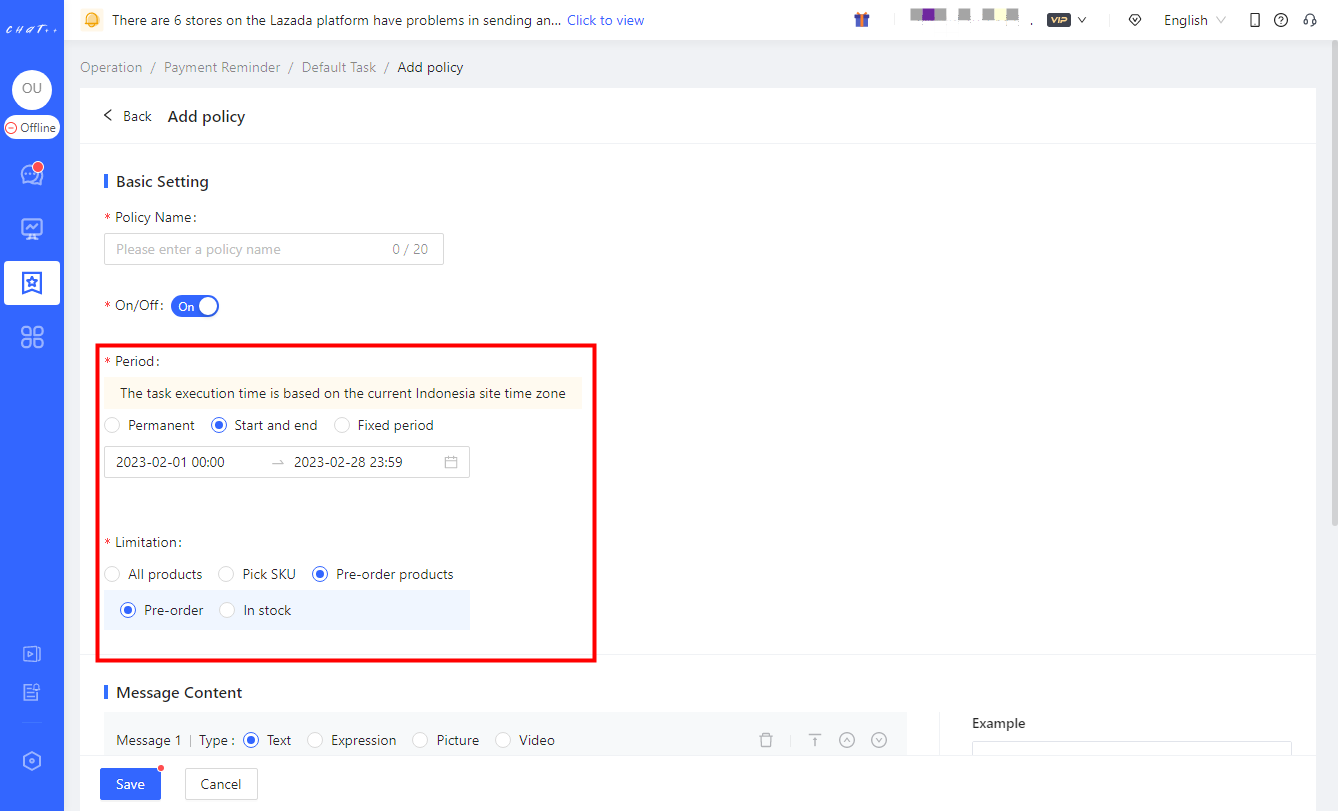
Figure 7
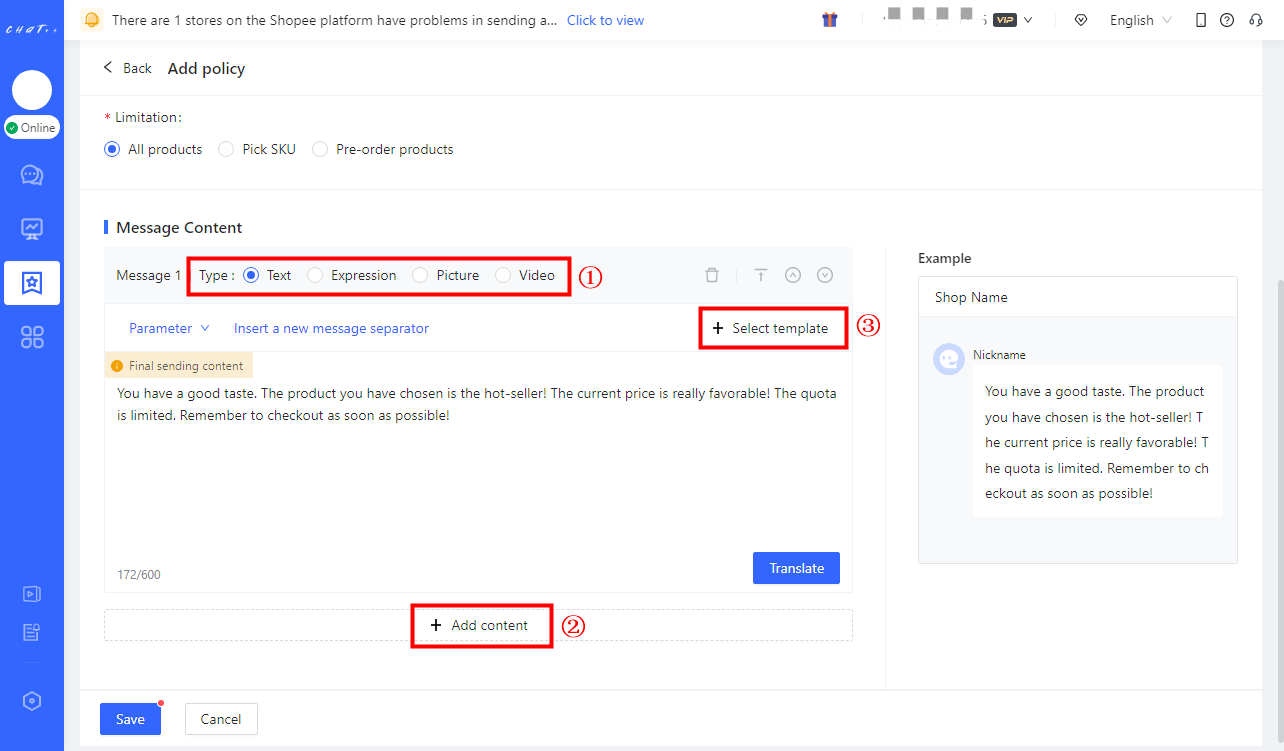
Figure 8
Various message types (text, image, sticker, video) are supported for the script
Click “Add content” and you can add script with various message types. (Shown as Figure 8 red box②) . Different types of messages can be used to generate attractive content encouraging customer to pay for the order.
ChatPlusAI provides a message template for reference and use (Click the red box③ in Figure 8 above and the message template page will pop up).
【Policy branch Execution Sequence】Description
If there are several policy branches under the task, system try to execute the branch from top to down(Shown as Figure 9 red box①). After one policy branch is executed, the following policy branch will no longer be executed. The policy branch execution order can be modified by clicking the button ”Top/ Up/Down/Bottom” (Shown as Figure 9 red box②) when you click「More」.
Note: If no policy branch is in period of validity or match the product that the customer ordered, this round of Payment Reminder will be skipped.
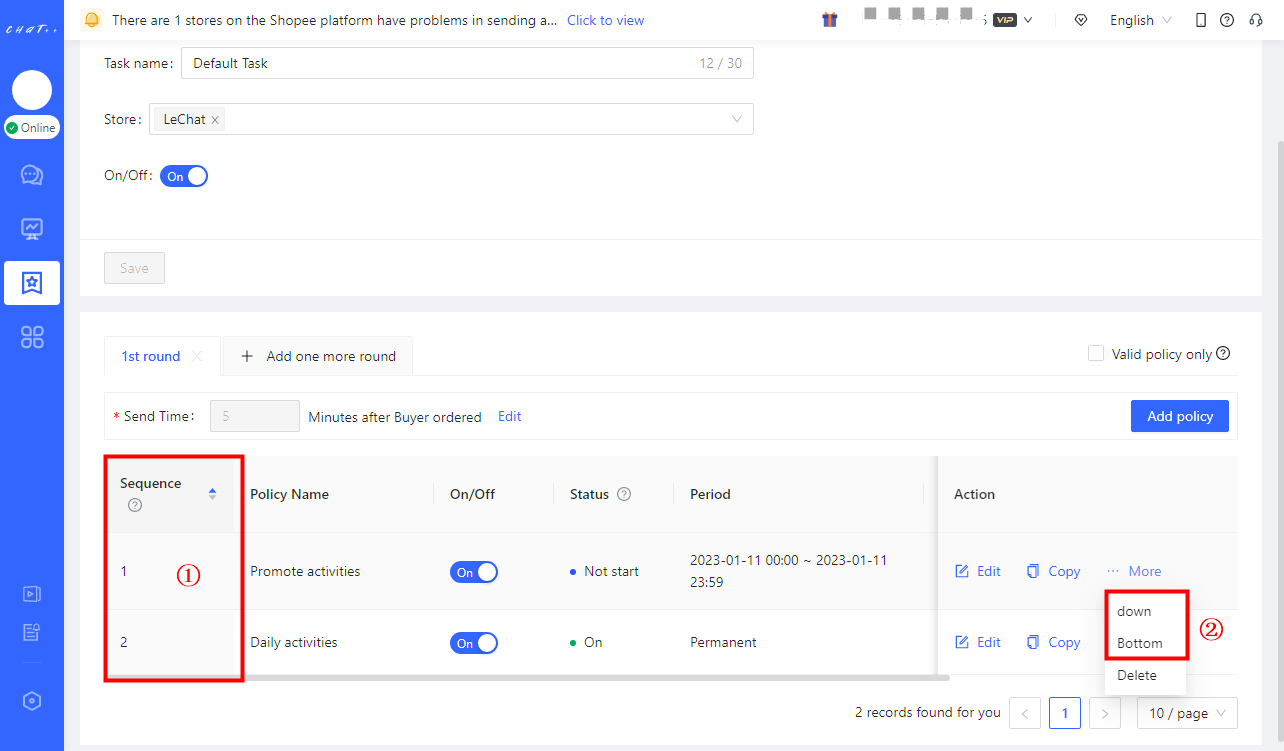
Figure 9
If you want to customize policy strategies for different stores, you can create different 【Task】for stores.
(Shown as Figure 10&11)
In order to guarantee that one store is only included in one Payment Reminder task, the store you added in the new task will be removed from the task the store previously belongs to.
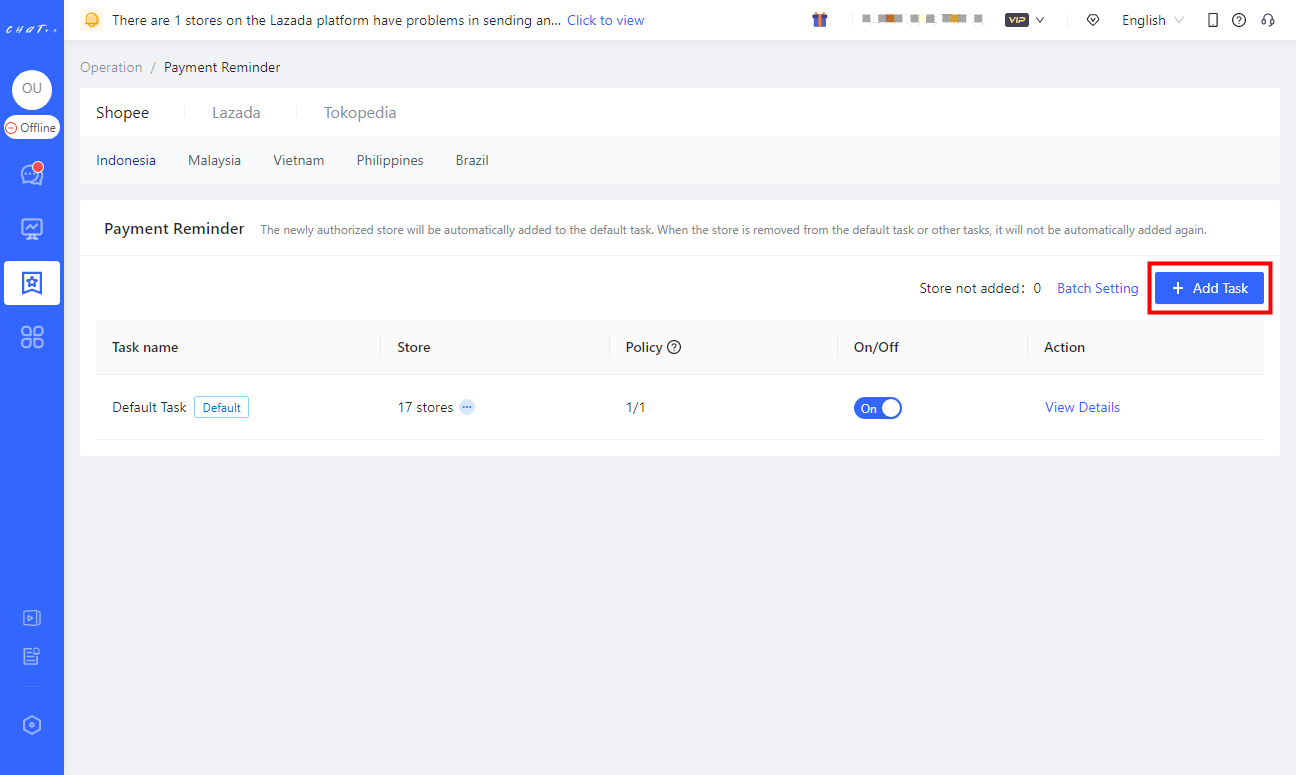
Figure 10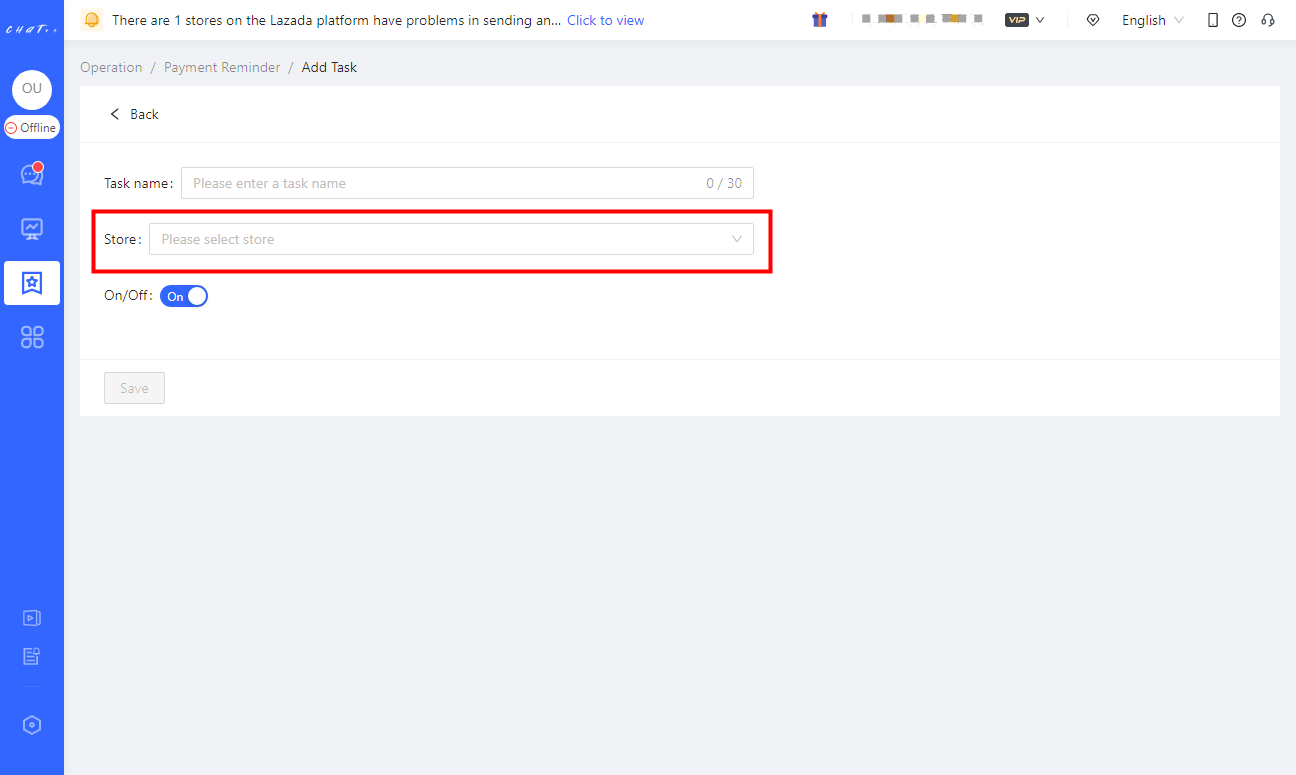
Figure 11
Attention
⚠️ 1. Payment Reminder tasks can be customized differently for marketplaces. For now Shopee, Lazada, TikTok Southeast Asia, and TikTok US are supported. Tokopedia will be avaliable soon, kindly stay tuned. ⚠️ 2. Each country site of the marketplace has its own Payment Reminder task, you need to configure them respectively. ⚠️ 3. It is recommended to set one or two rounds of Payment Reminder, too many rounds will disturb the customer
Bulk Orders Follow-up
💡 During the period from when a customer places an order to when order is received, there are several important points (such as out of stock reminder, negative review follow-up, and marketing-related scenarios) that require different notifications to be sent. ChatPlusAI supports the import of order numbers through documents, allowing customized content to be sent in bulk, following up on multiple orders simultaneously. This not only saves the manpower costs of customer service contacting customers individually but also reduces losses caused by order issues, achieving better conversion rates.
Marketplace: Shopee, Lazada, TikTok Southeast Asia, TikTok US, Mercado
The currently supported scenarios for order follow-up include:
[ Out of Stock Management ] and [ Order Issue Follow-up ].
[ Out of Stock Management ]
● Applicable Situations:
🛒 When customers "inquire" about product A, which is actually out of stock, but the seller fails to update the inventory of the e-commerce marketplace timely, the product is still shown as available. In such cases, it often requires CS to individually notify customers inquiring about product A that "the product is out of stock, and provide restock time," which is inefficient.
🛒 When the product B that customers "purchase" is out of stock, it may lead to delayed order fulfillment and affect the marketplace's assessment of on-time shipment rates, resulting in penalties such as deductions from the store's rating.
● Features:
Out of stock mark: For products with insufficient inventory, ChatPlusAI supports sellers to mark the product as out of stock within ChatPlusAI system (which will not synchronize with marketplaces). When customers inquire about products that have been marked as out of stock, for stores with AI Chatbot enabled, AI Chatbot will respond to customers based on the product inventory situation. CS can also reply to customers based on the out of stock mark during reception.
Out of stock reminder: When products in a customer's order are out of stock, ChatPlusAI supports timely, bulk, multi-site, and multi-store notification to customers about product stockouts, and recommends related similar products, guiding customers to proactively cancel orders. Both of these outcomes greatly assist in maintaining on-time shipment rates.
● Sending Requirements:
Out-of-stock notifications cannot be sent for orders that are in the process of cancellation, have been canceled, or have been completed.
Within 60 days after a customer receives an out-of-stock notification, the same order will not be subject to order cancellation, refund-only or return&refund follow-up.
The same order number and the same out-of-stock product can only receive one out-of-stock notification within 24 hours.
[ Order Issue Follow-up ]
Applicable Situations: There is a batch of problematic orders that need to be notified via order number.
Features: ChatPlusAI supports timely, bulk, and multi-site, multi-store message sending based on order numbers, such as informing customers about order-related issues or inviting customers to take order-related actions.
Sending Requirements: There are no restrictions on order status. The daily sending limit is 200 messages for the non-enterprise version and 500 messages for the enterprise version.
Show Cases
- Chatbot sends a product Out of Stock Reminder to customers and guides them to order similar substituted products in ChatPlusAI.
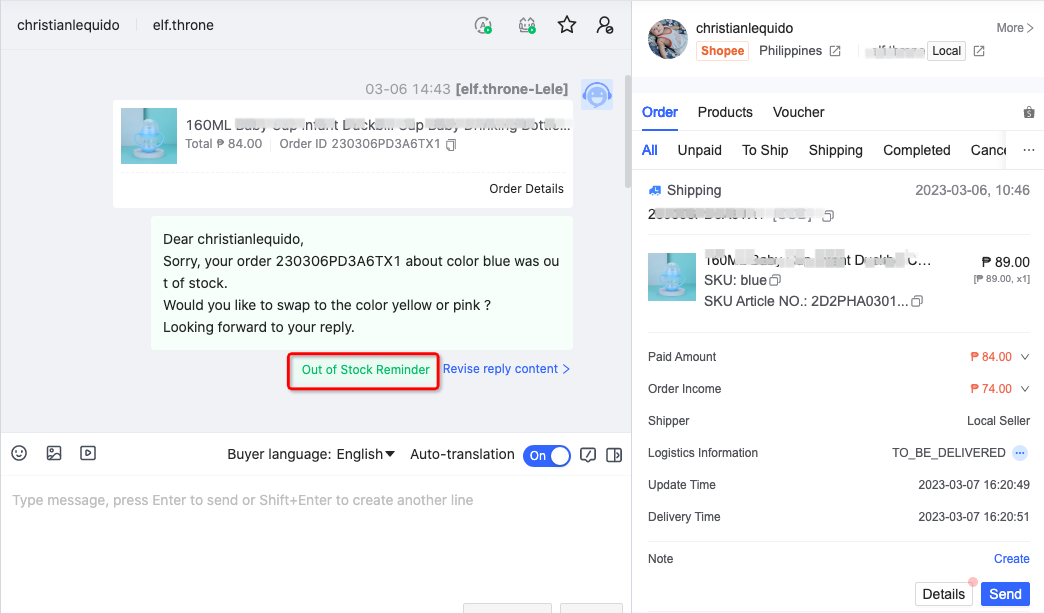 Figure 1
Permissions required to configure " Bulk Orders Follow-up "
- When CS serves customers, permission of 「 Reception Basics(Message)—Mark as out of stock 」 is required ( see position ① in the red box in the image below ). The official roles "Agent" in ChatPlusAI are granted default permissions to configure Mark as out of stock. Official roles do not support modifying permissions. If adjustments to permissions are needed, administrators can create new roles. Therefore, if CS cannot mark as out of stock in the conversation interface, he should contact the administrator to confirm the permissions associated with his account's assigned role.>>>For details, please click to jump
- When the admin configures 「 Bulk Orders Follow-up 」, permission of 「 Configure Intelligent Automation—Configure bulk orders follow-up 」(see position ② in the red box in the image below) is required. The official role "Administrator" in ChatPlusAI are granted all permissions by default.
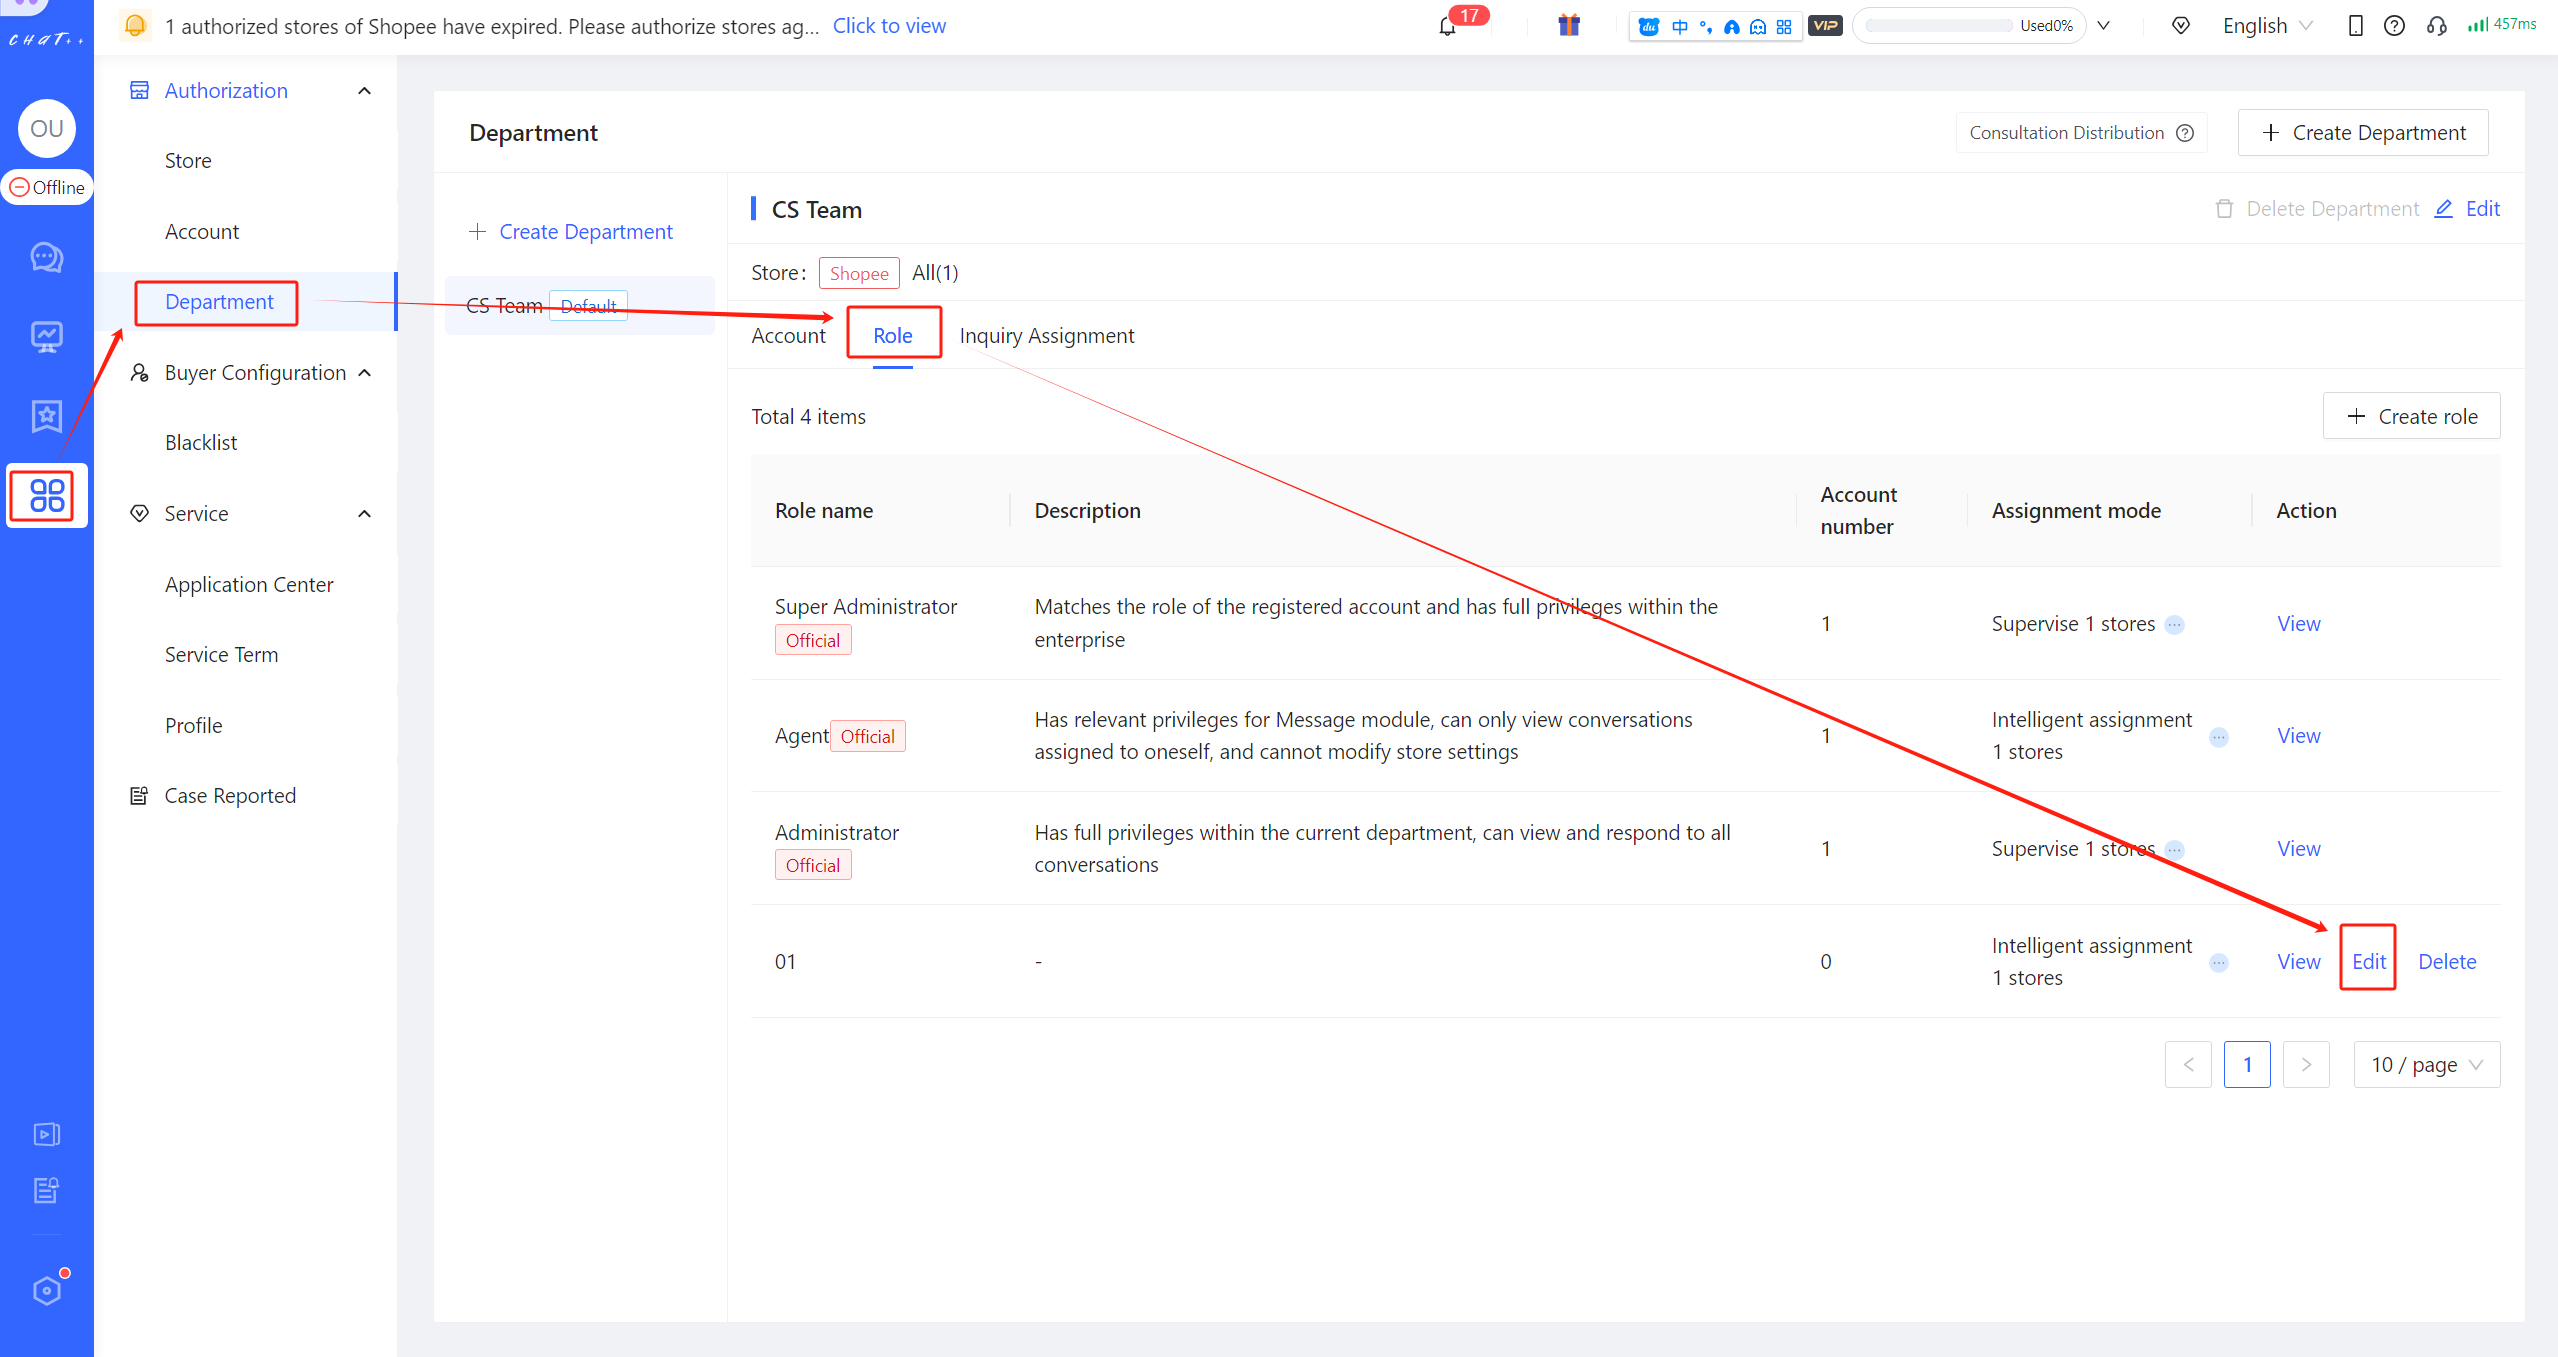 Figure 2
 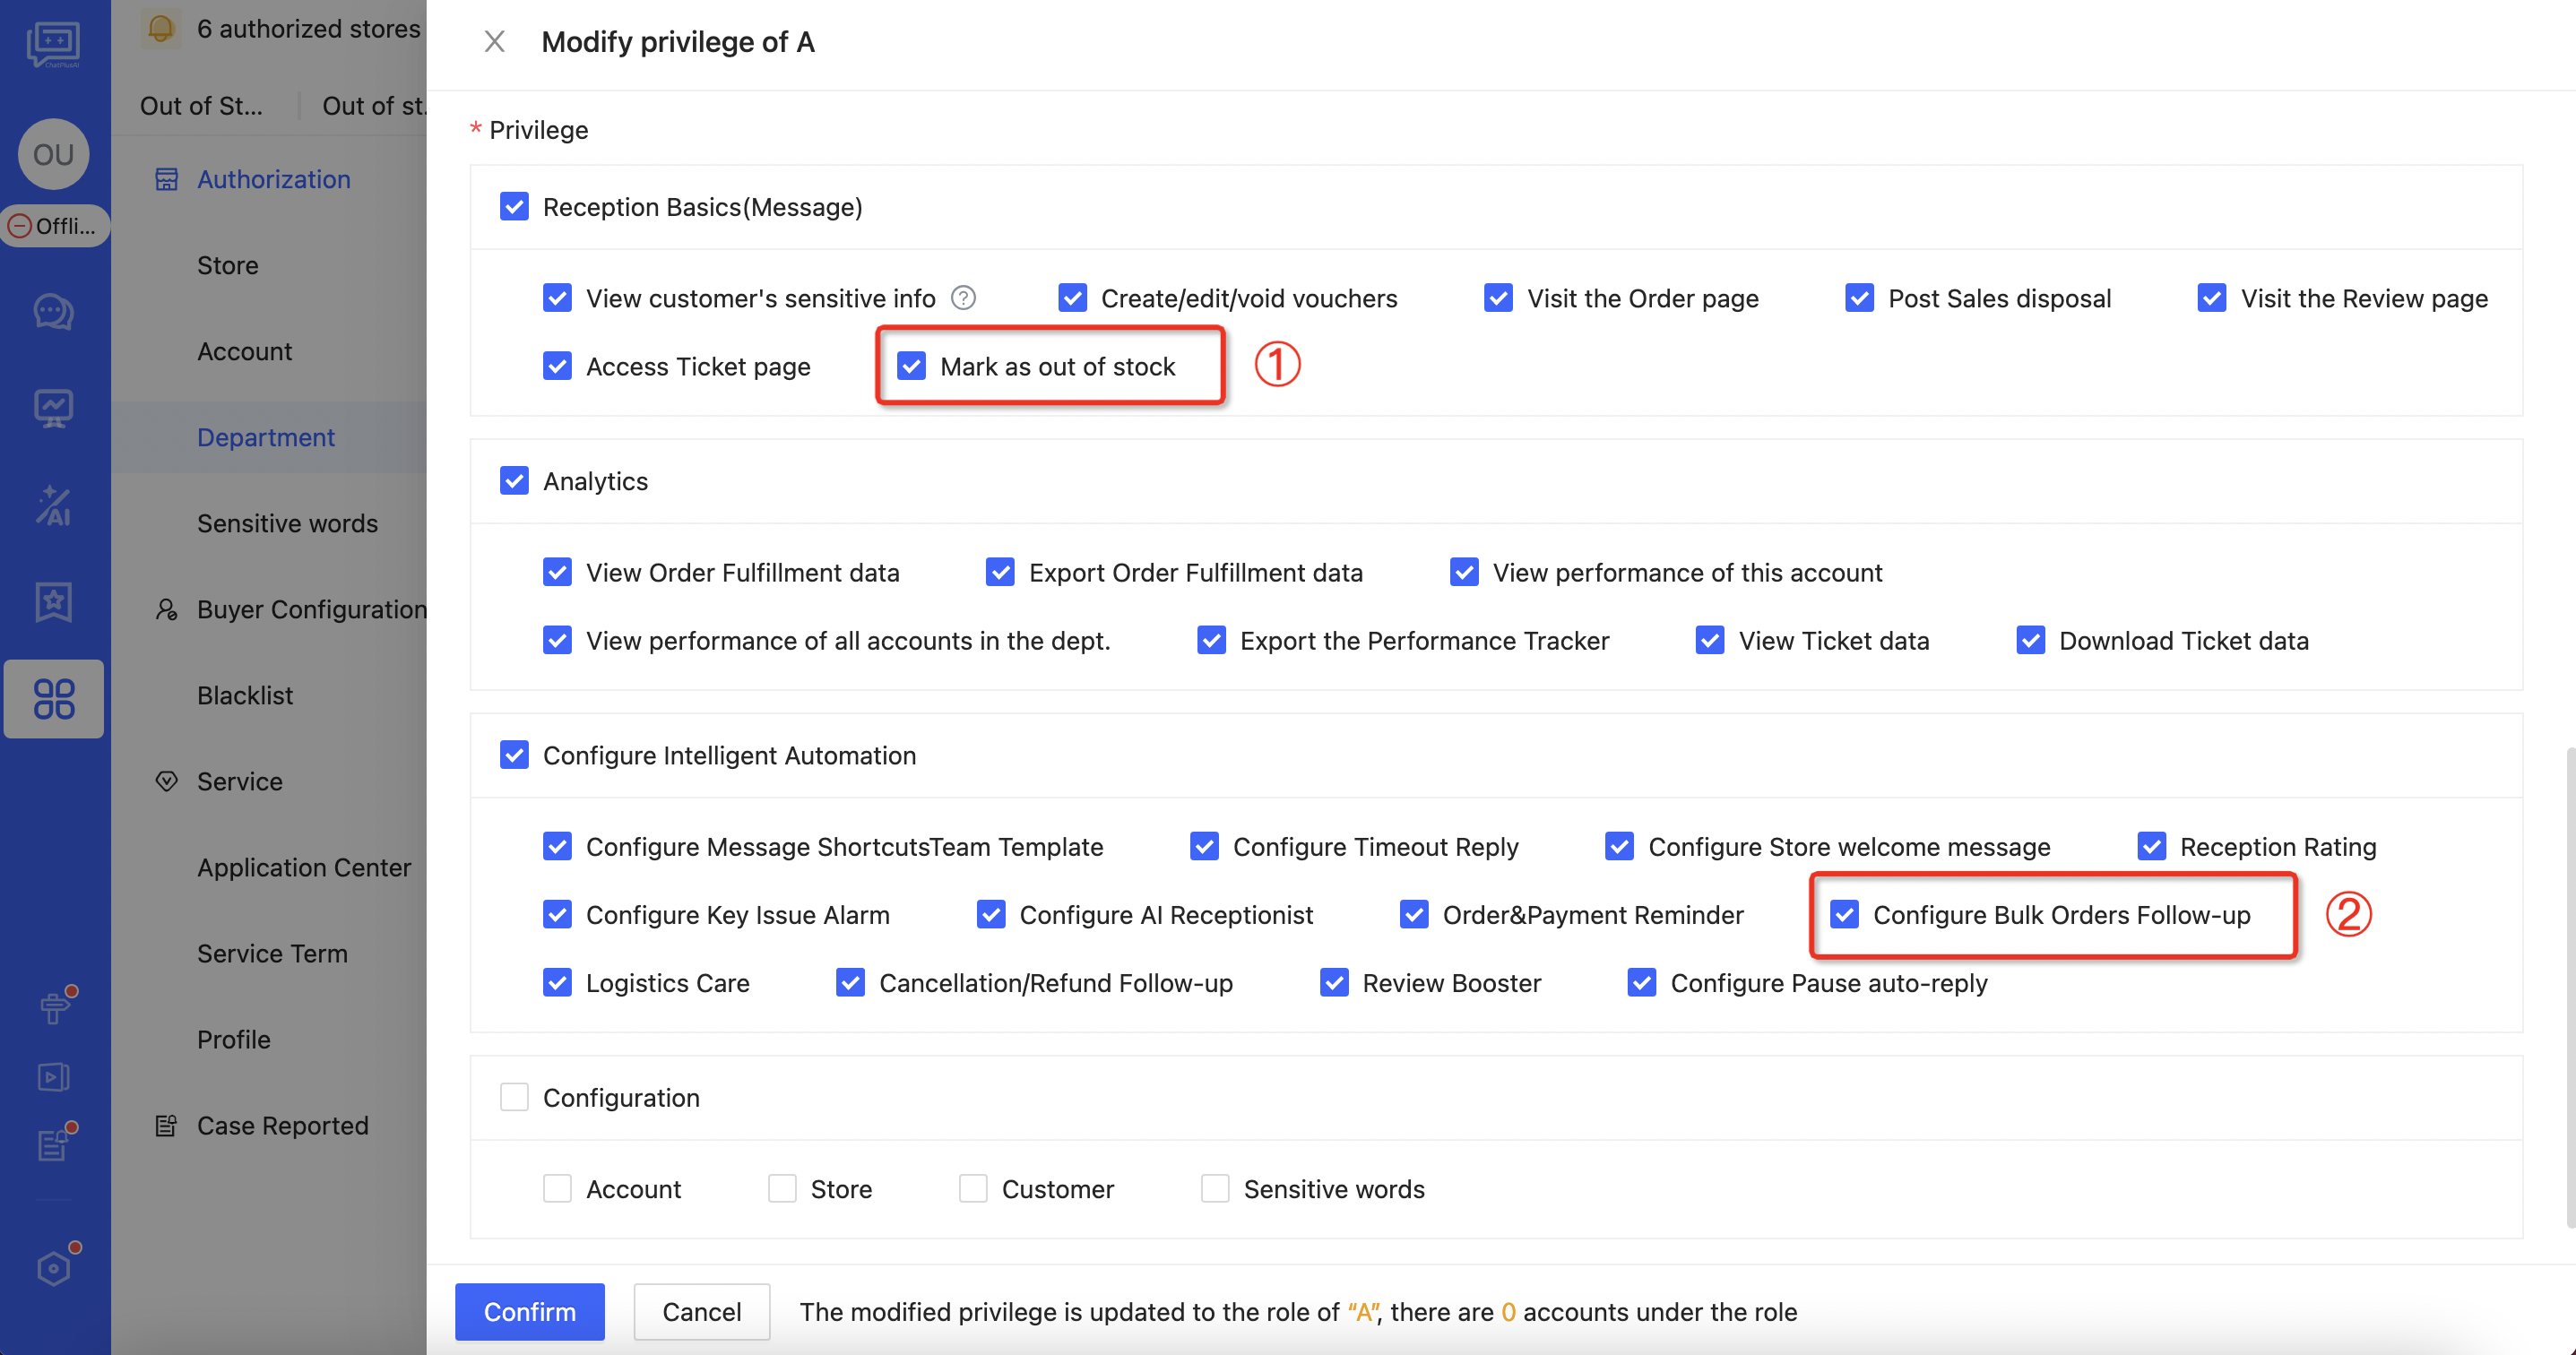 Figure 3
Out of stock mark
Mark as out of stock by CS
Click ["Messages" in the left menu bar→ Conversation Sidebar "Products"], find the main product link where the out-of-stock SKU is located, and click "Mark as out of stock" (see position ② in the red box in the image below).
The bottom left corner of the link shows the inventory status of all SKUs under this main product:
- In Stock: Indicates that real-time inventory status of all SKUs under this main product on the e-commerce marketplace is "in stock".
- Some SKUs are out of stock: Indicates that some SKUs under this main product on the e-commerce marketplace are "out of stock"; or for some SKUs, CS has marked them as out of stock within ChatPlusAI, and they are still within the out-of-stock period set by CS.
- Out of stock: Indicates that all SKUs under this main product are either "out of stock" on the e-commerce marketplace or have been marked as out of stock by CS within ChatPlusAI, and they are still within the out-of-stock period set by CS.
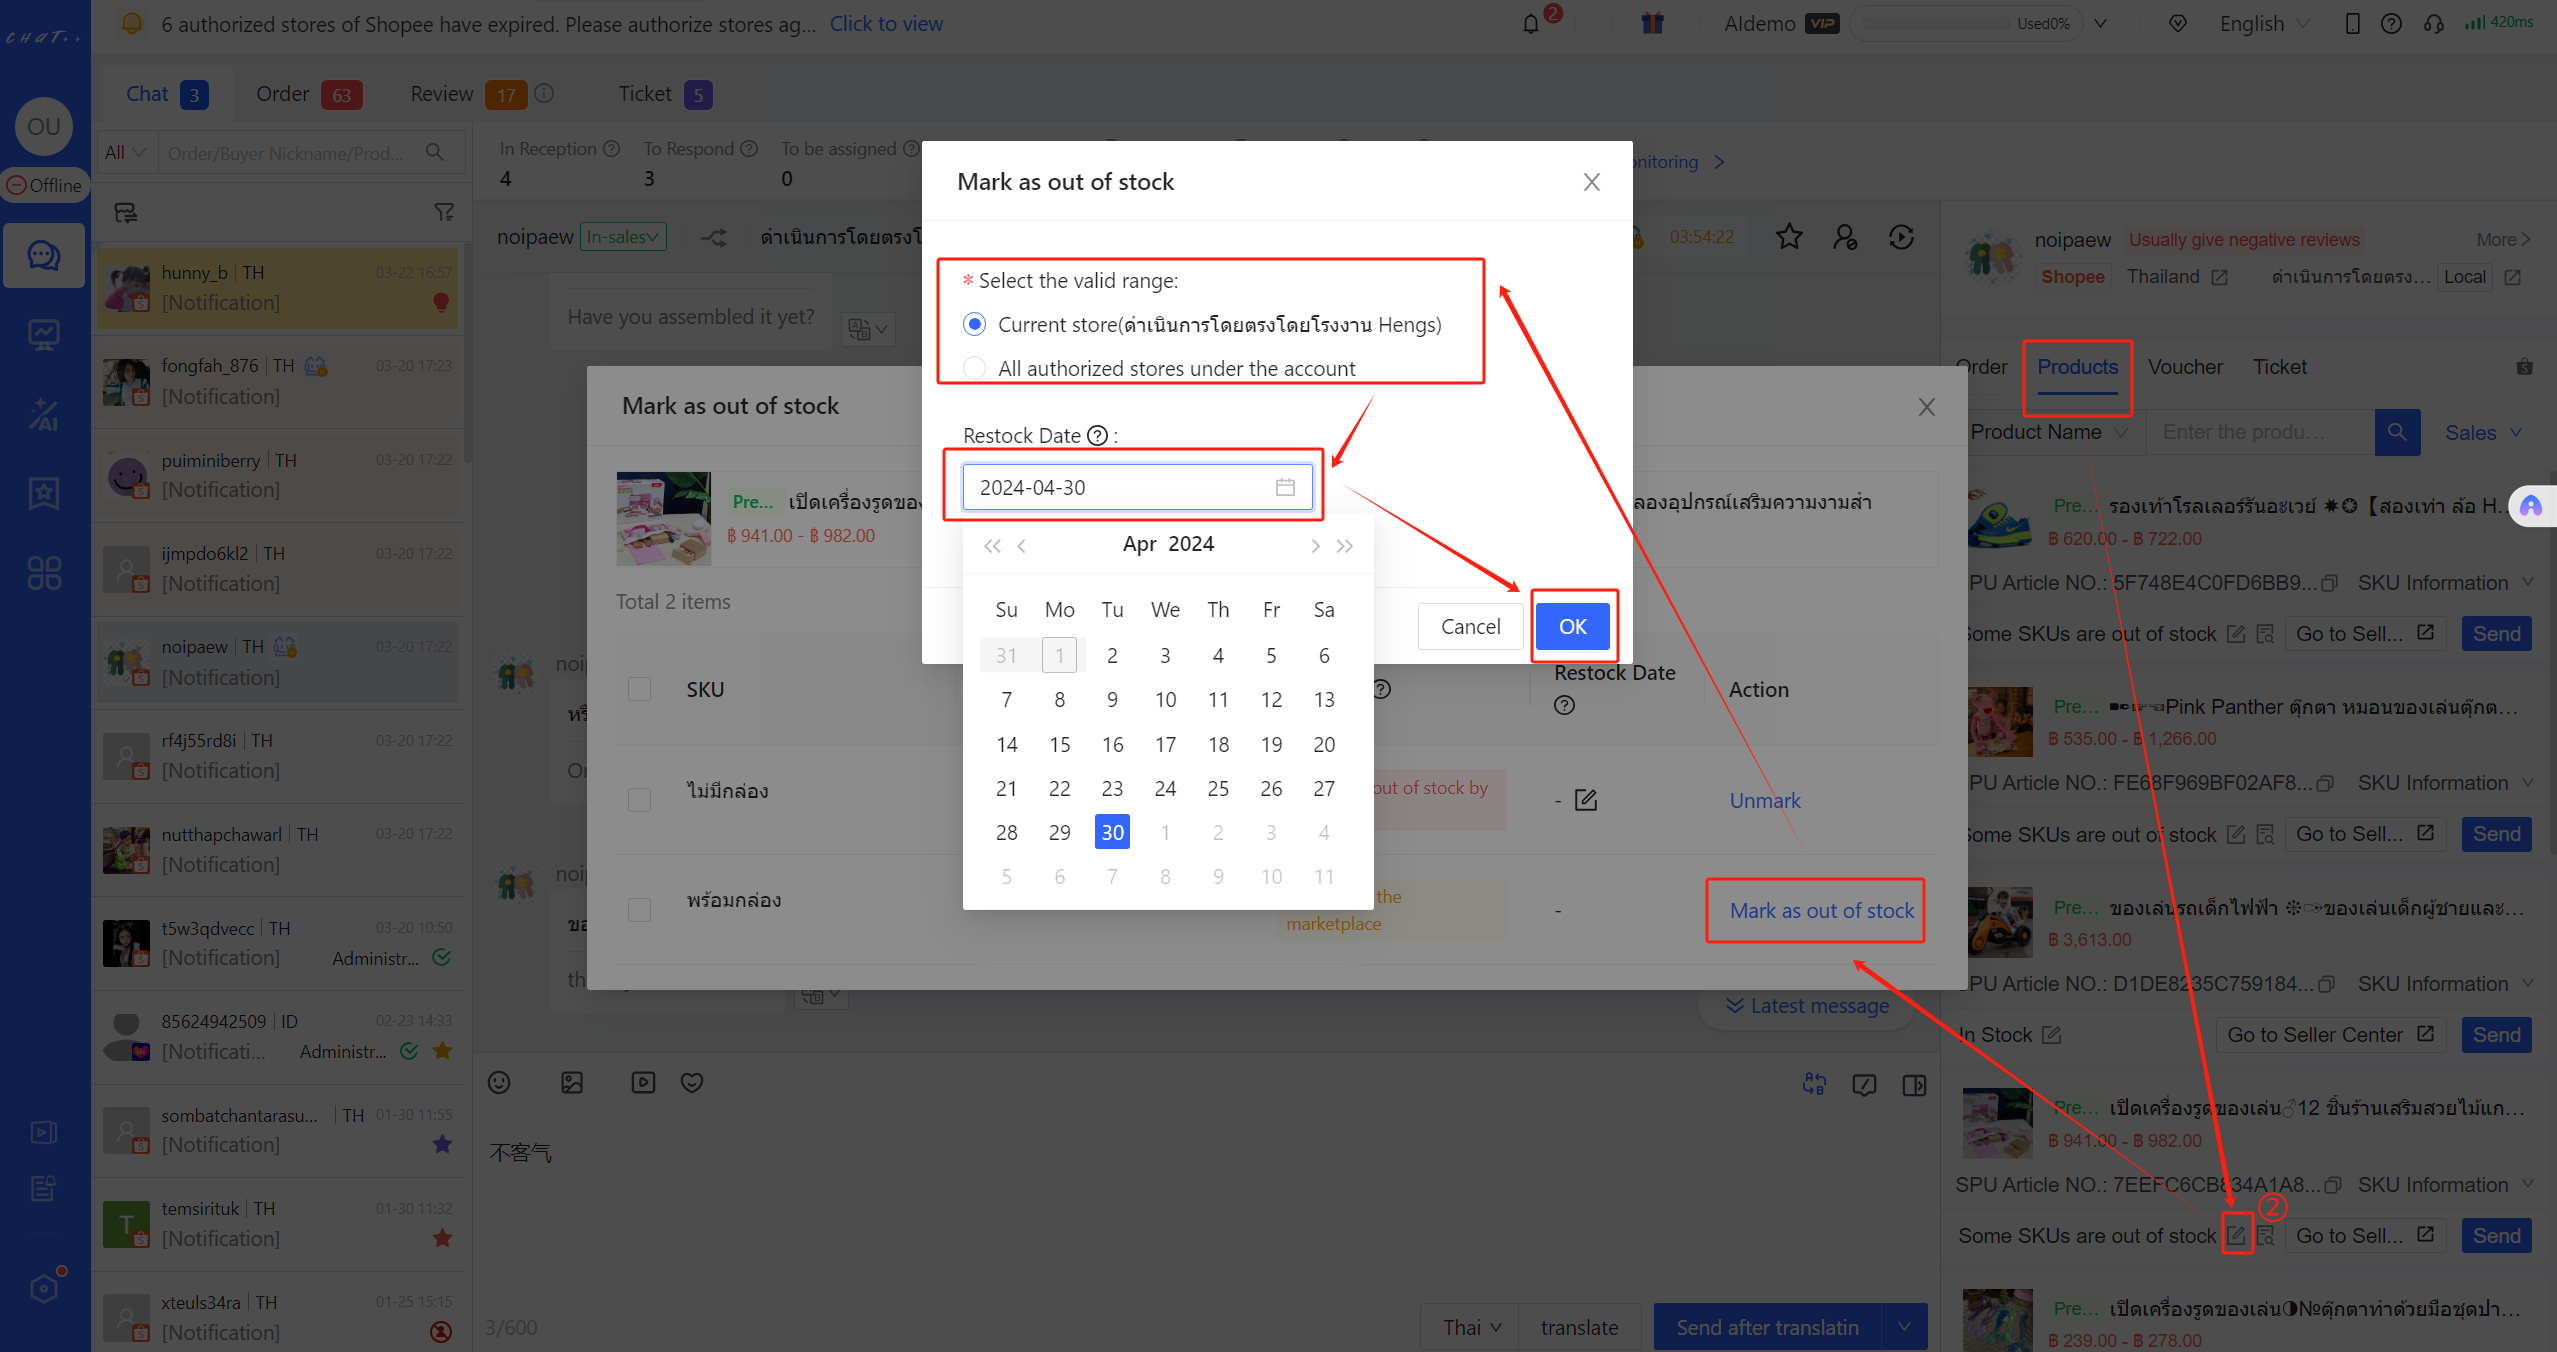 Figure 4
On the popped-up page for marking as out of stock, locate the out-of-stock SKU and mark it as out of stock (the image above). Select the valid range:
- Current store: The out of stock mark for this SKU will only apply to the current store.
- All authorized stores under the account: The out of stock mark for this SKU will apply to all stores authorized under the account that are connected to ChatPlusAI.
Restock Date:
- On the specified restock date, out of stock mark for this product will automatically be removed in ChatPlusAI.
- If no "Restock Date" is provided, the product will remain marked as "out of stock" within ChatPlusAI indefinitely.
If there are multiple out of stock SKUs under the main product, CS can select multiple items and click "Mass Mark" (the image below). 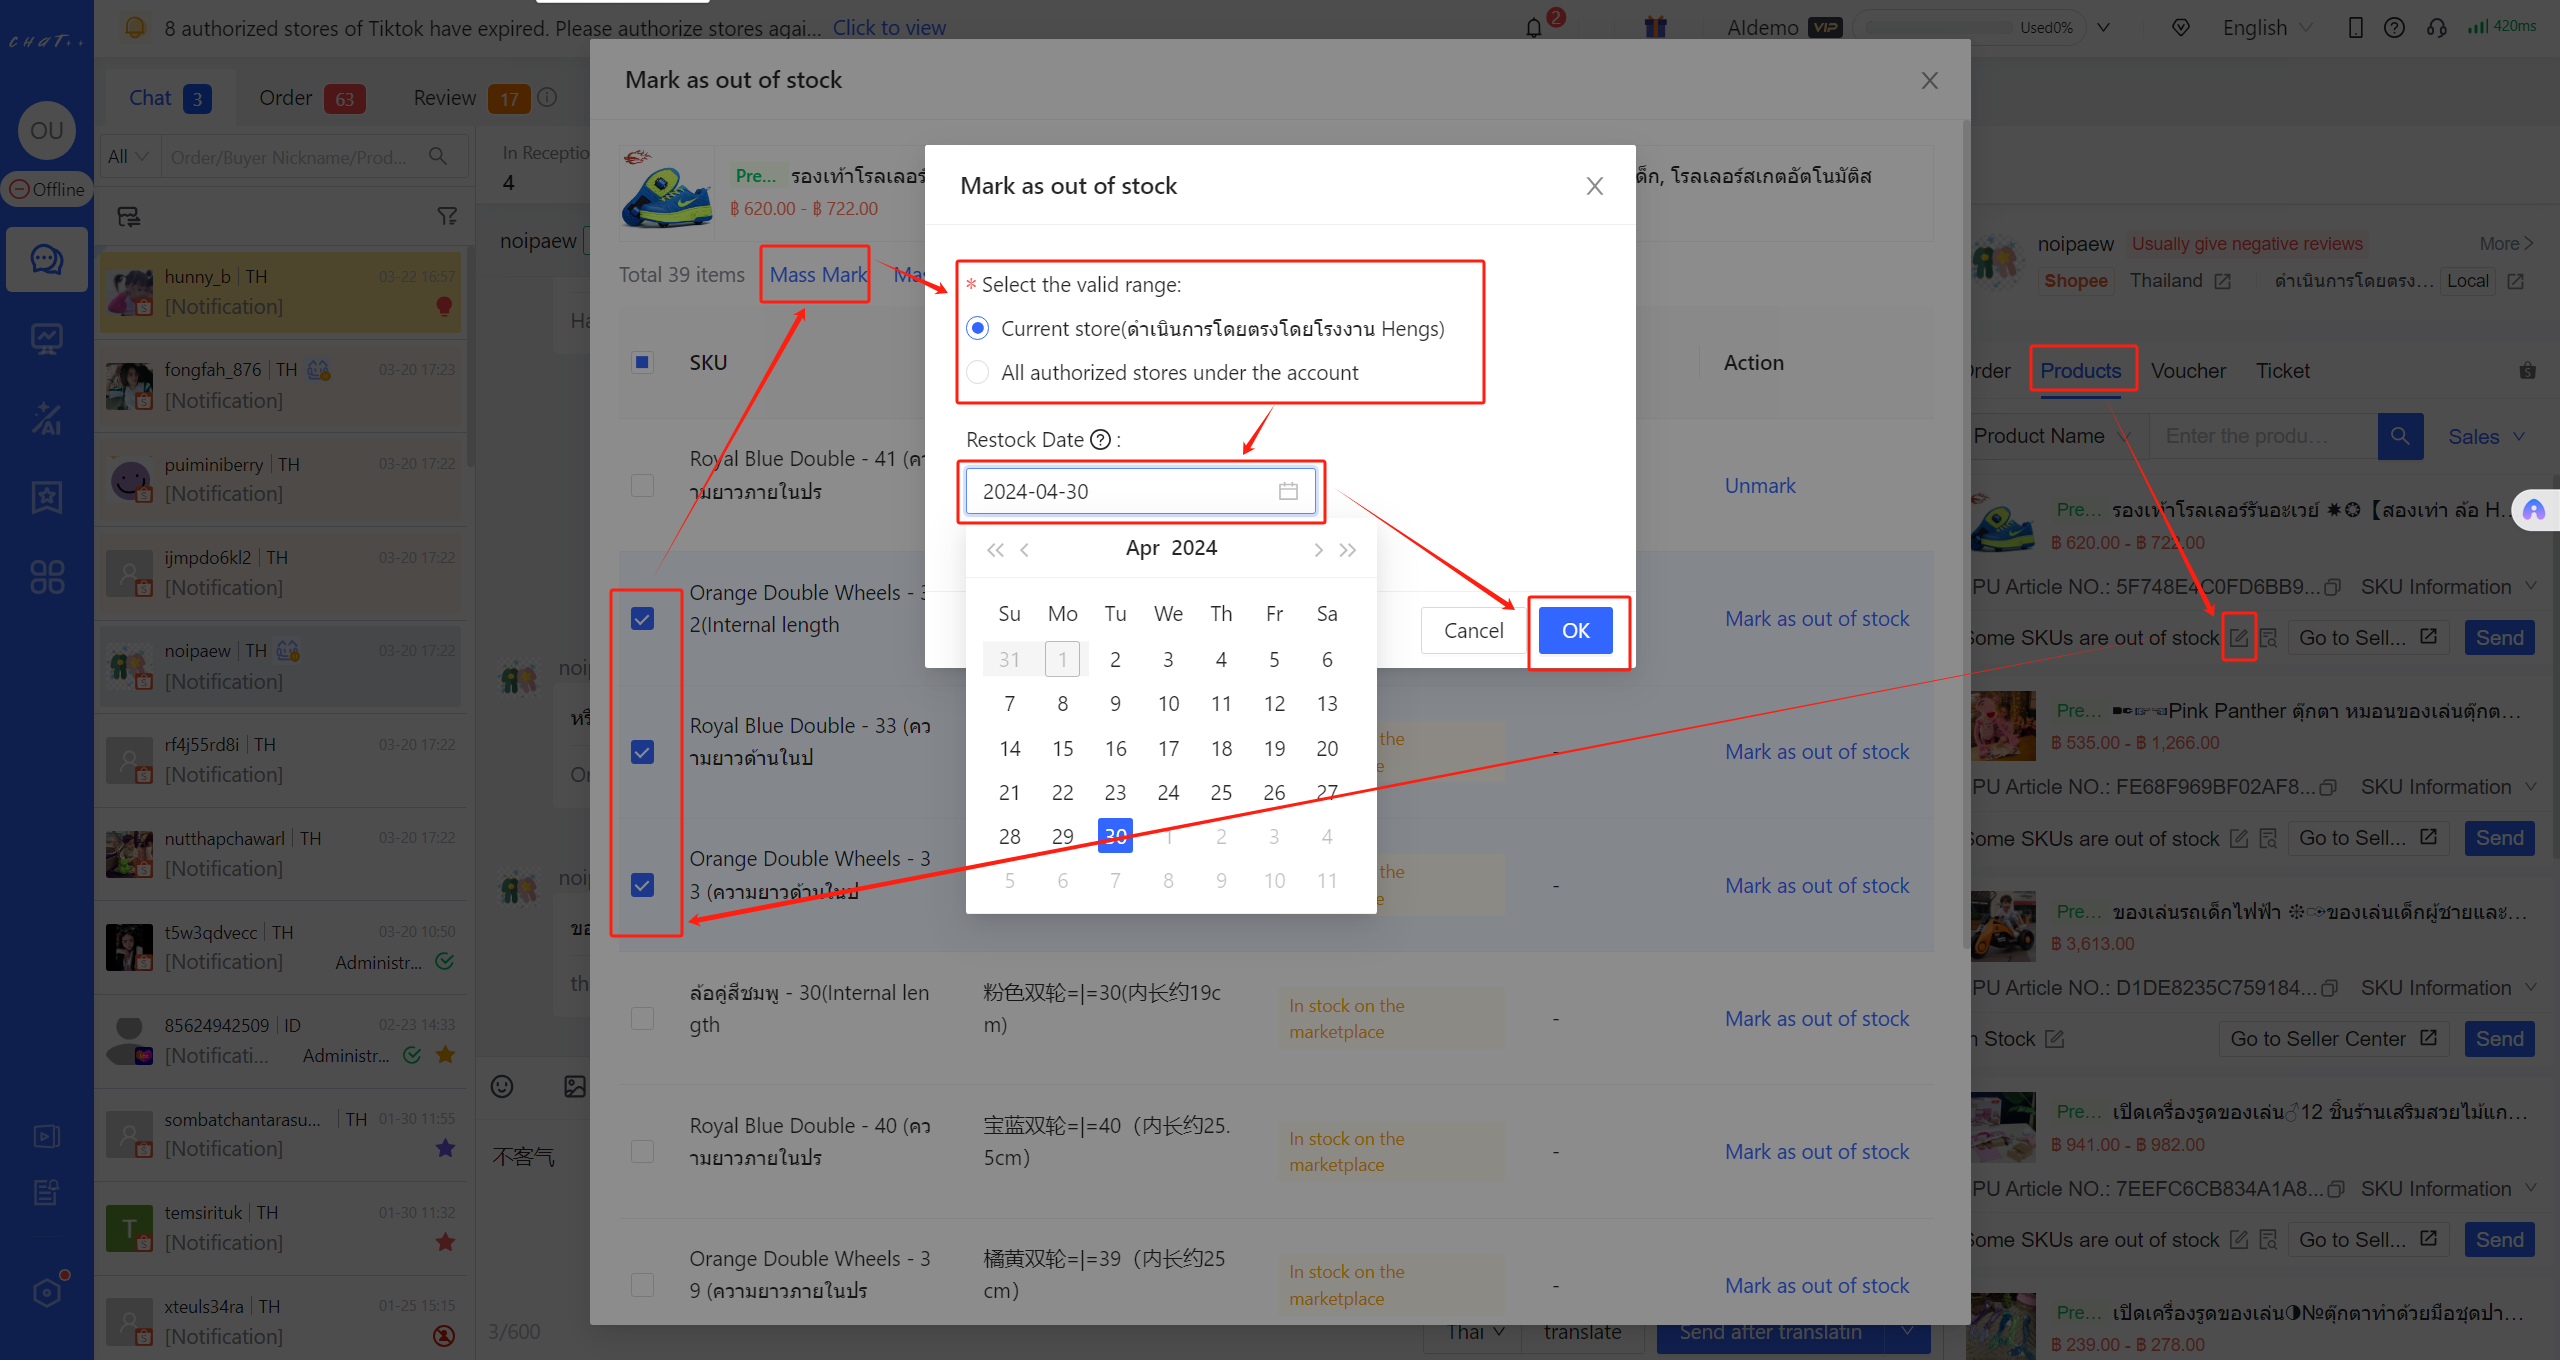 Figure 5
 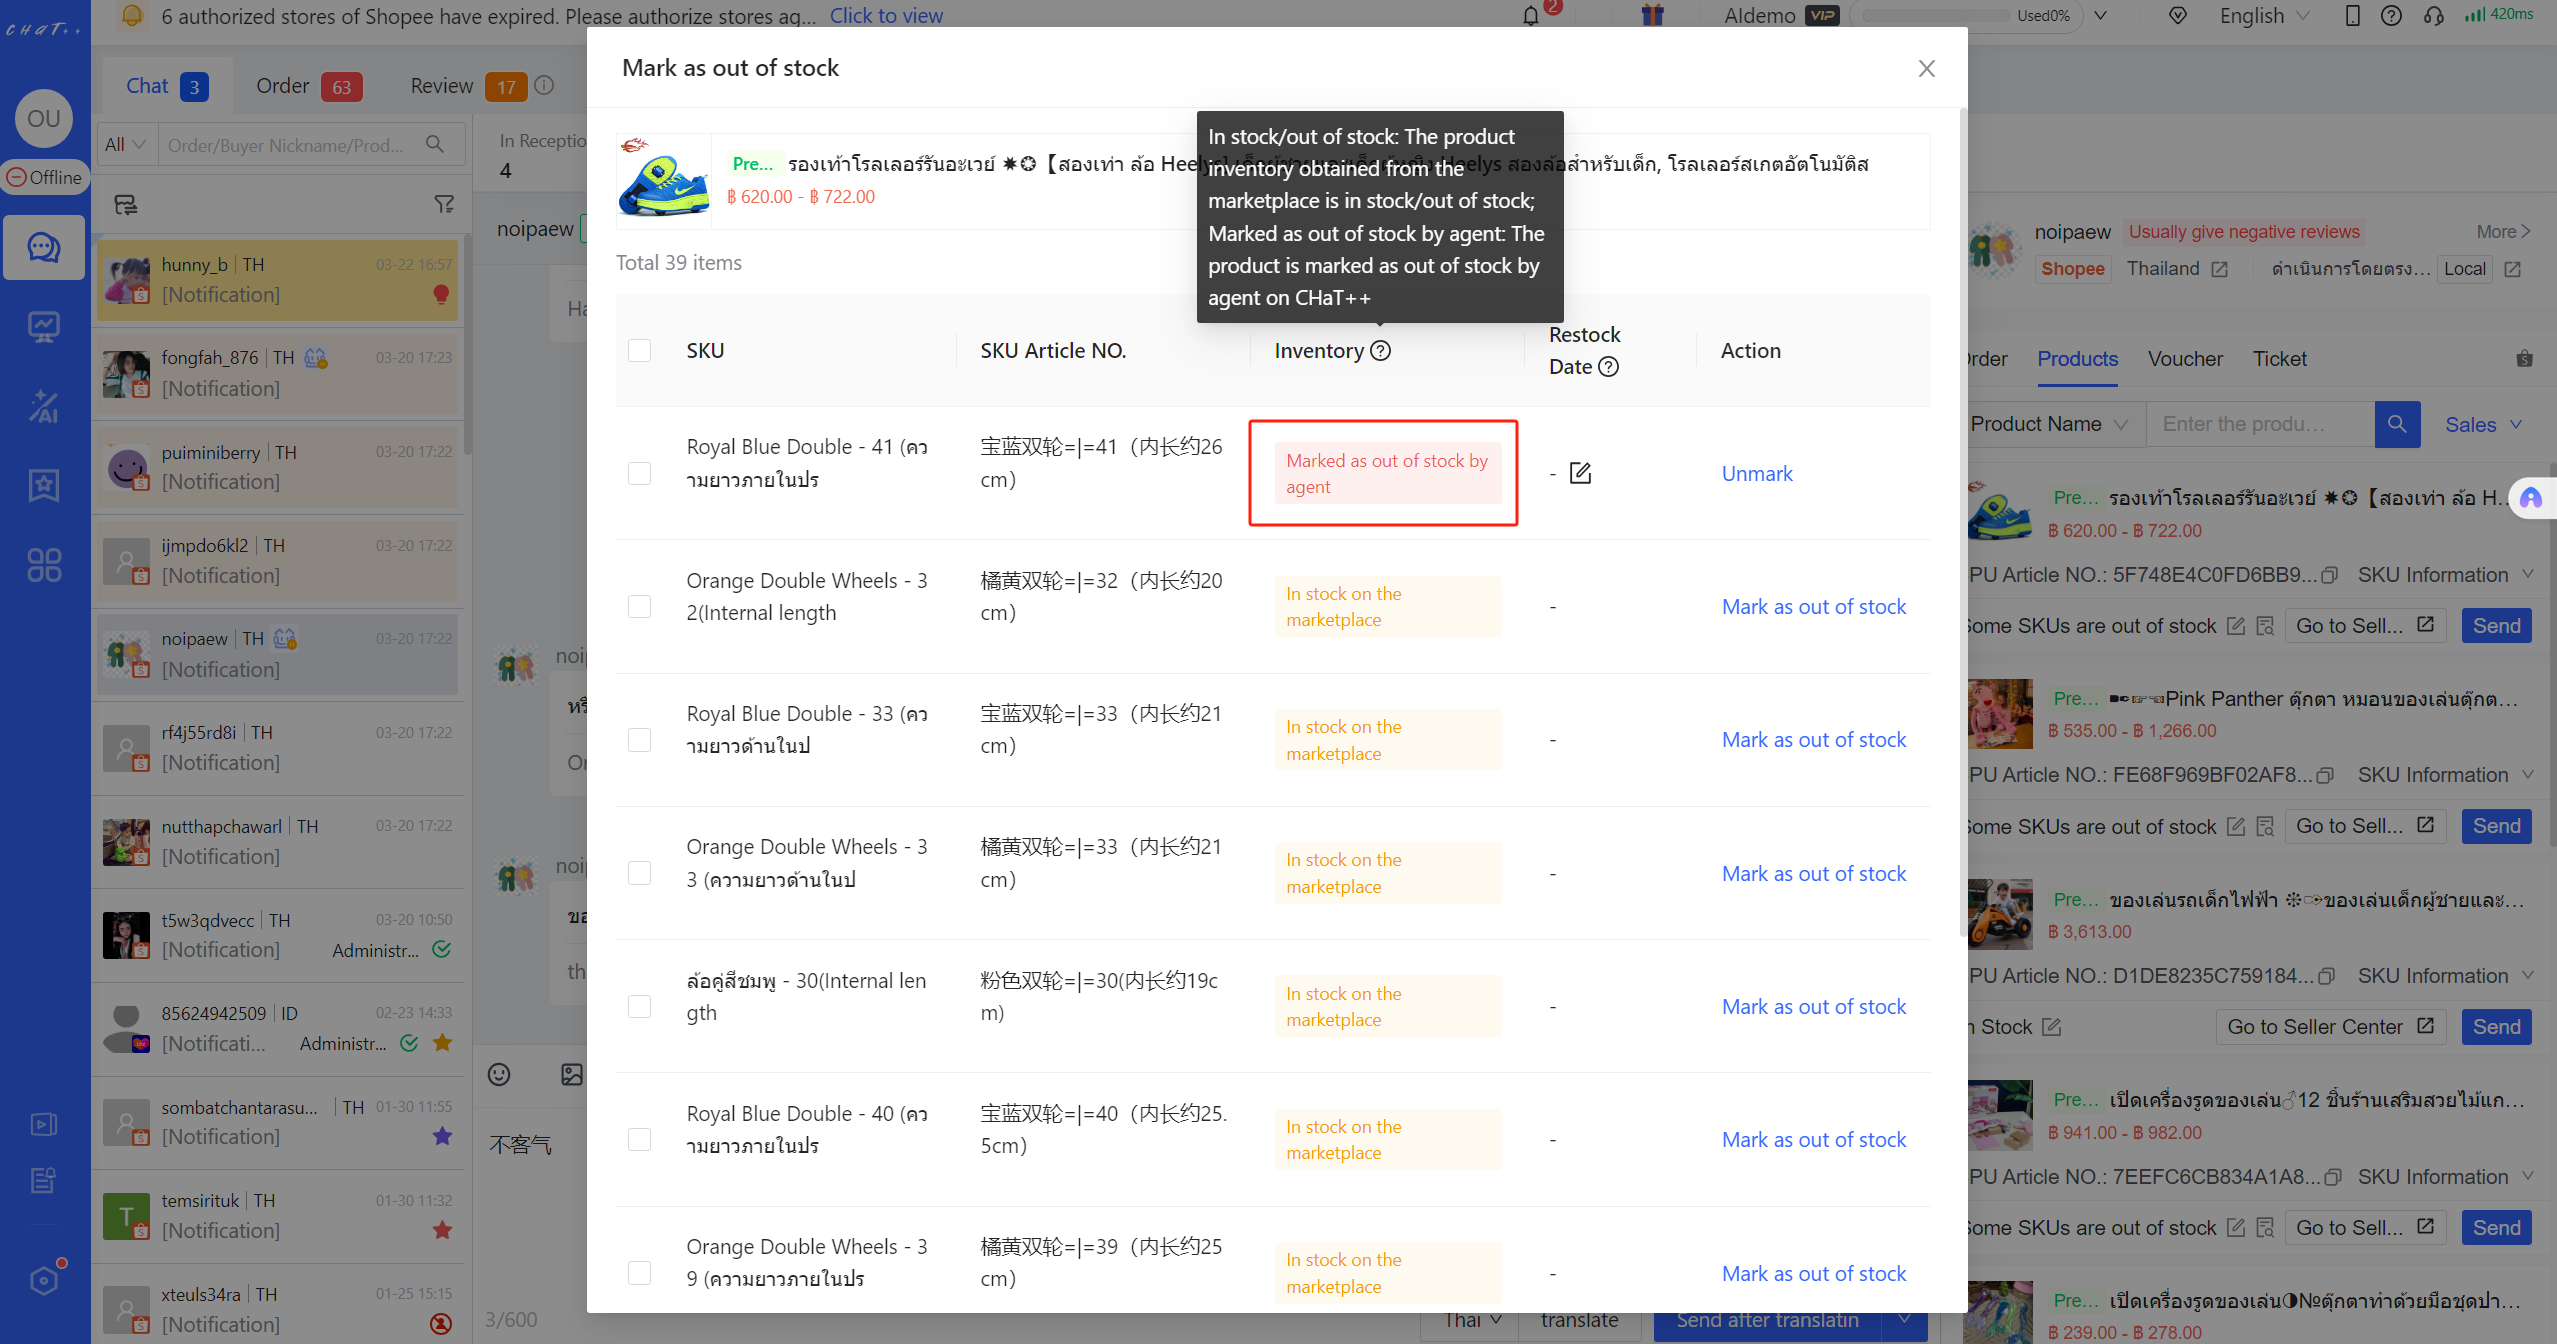 Figure 6
Mark as out of stock by Admin
Click [「 Automation」in the left menu→「 Out of Stock Management 」→「Out of stock mark」→「 Add mark 」] 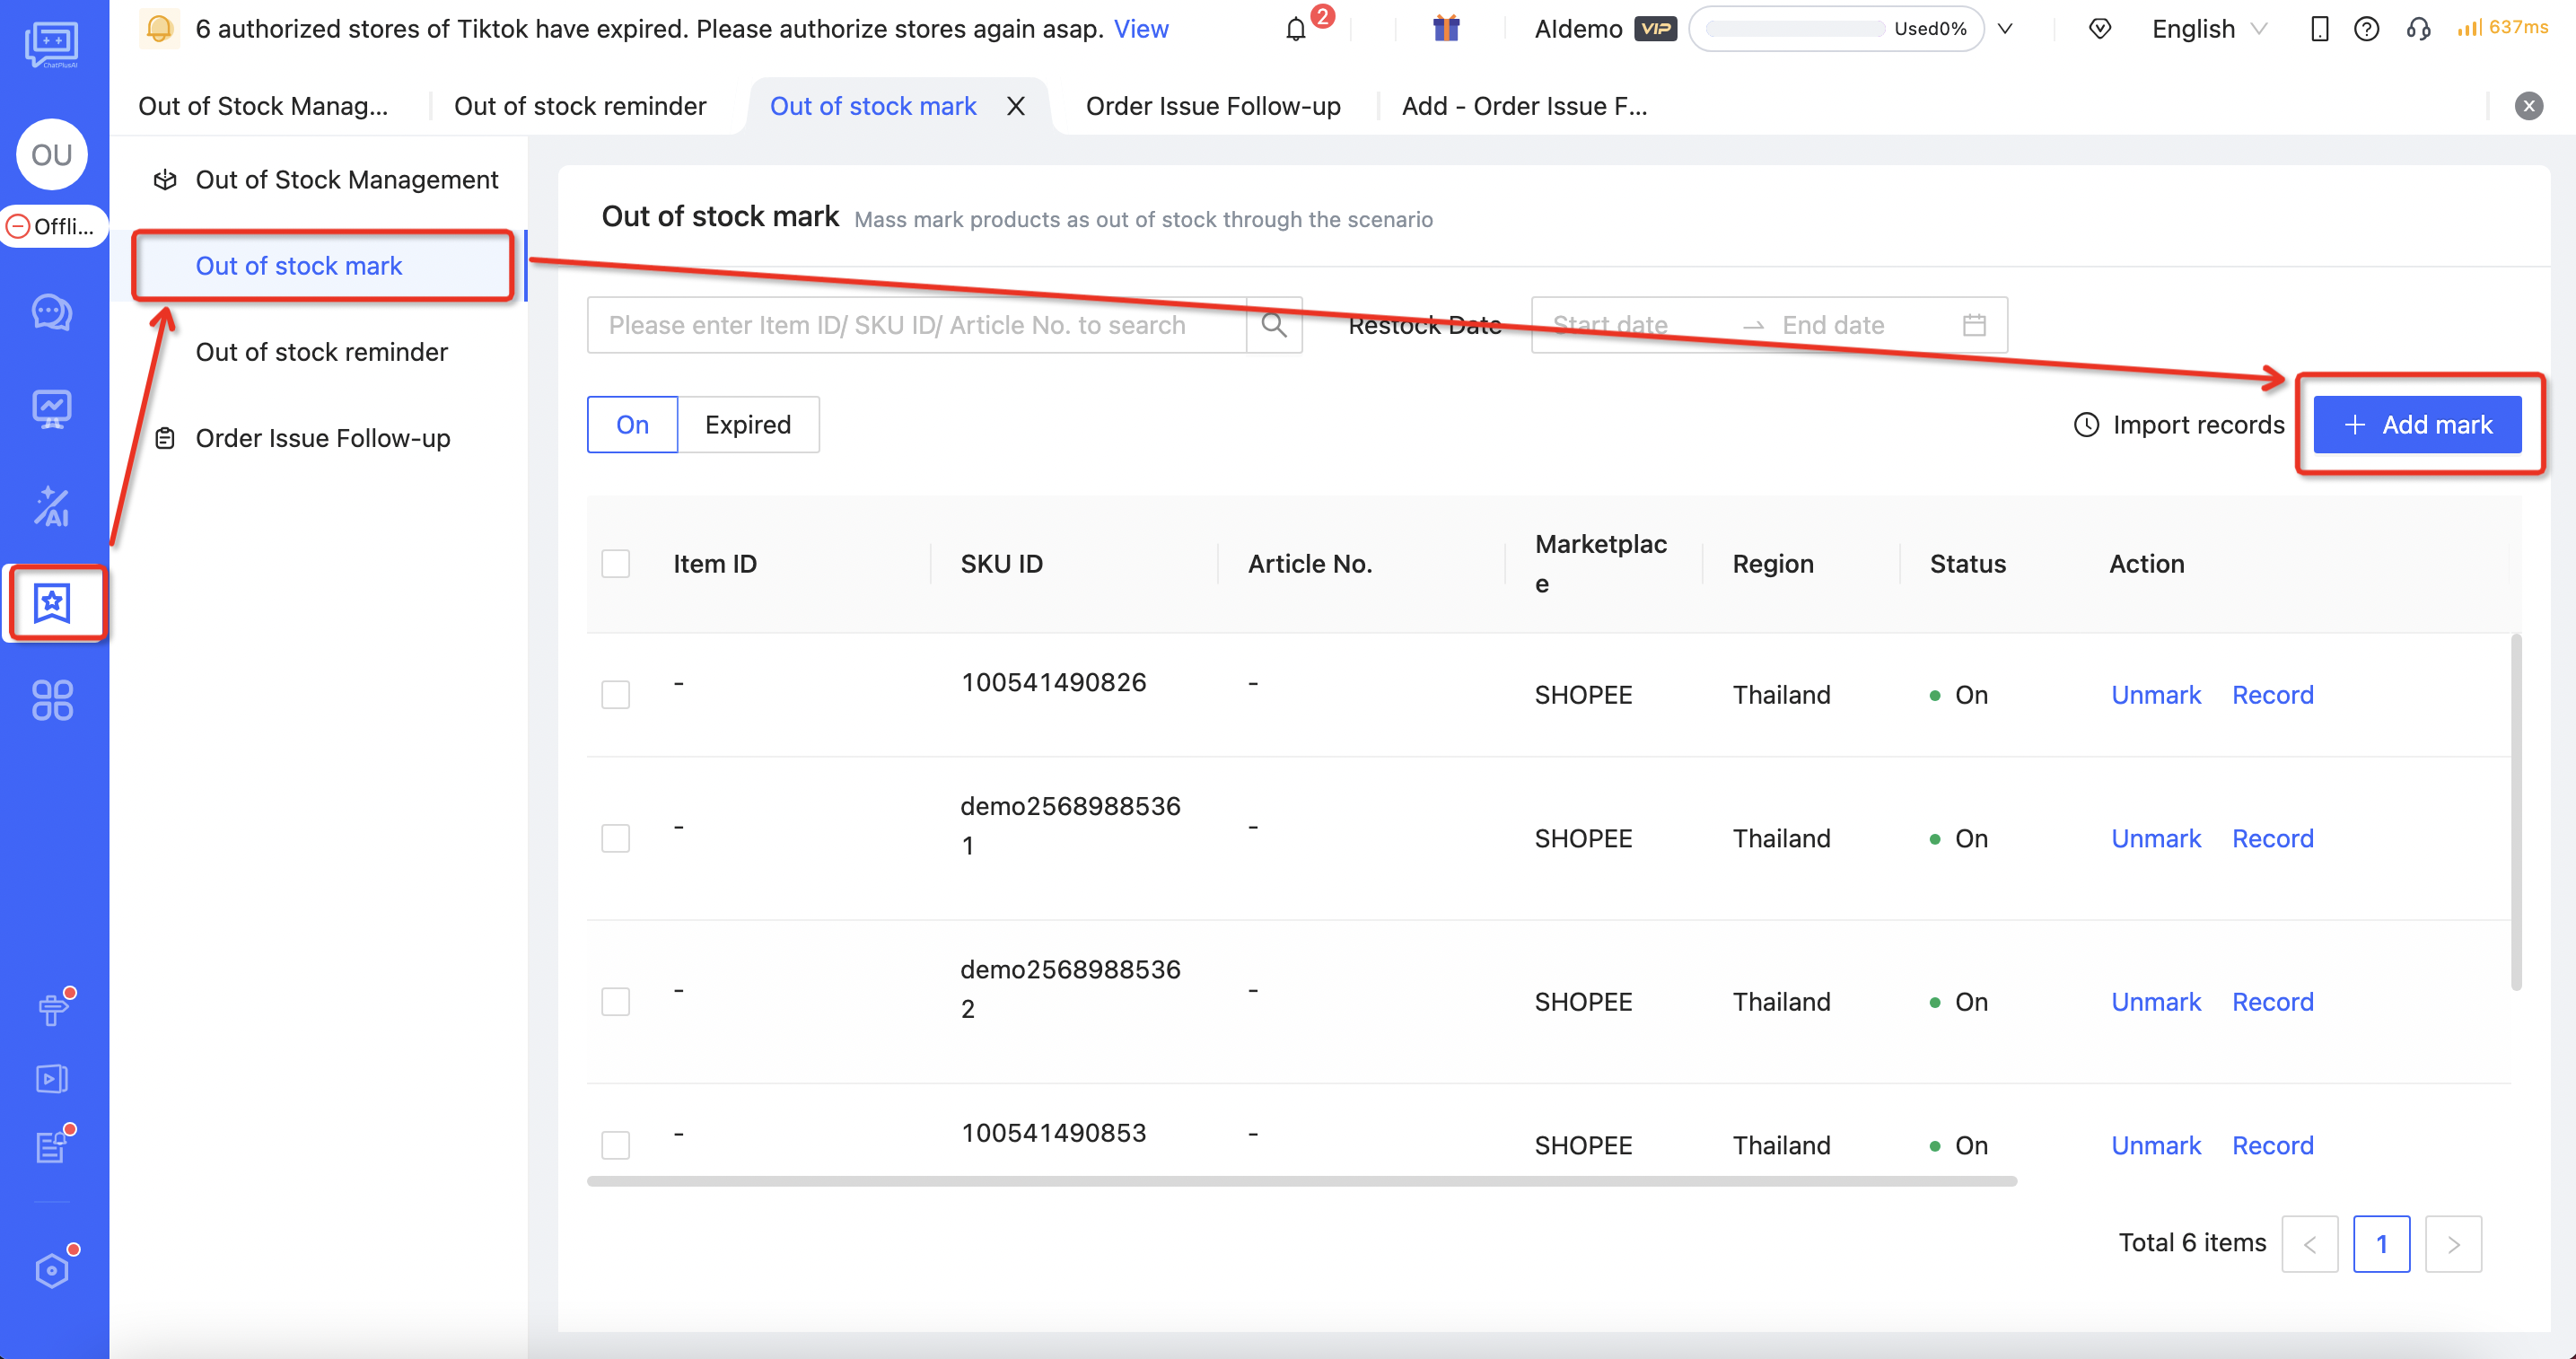 Figure 7
- Select the way to mark as out of stock: Mark as out of stock by selecting "Item ID", "SKU ID", or "Article No."(different marking ways correspond to different templates)
- After selecting the marking way, download the corresponding template;
- Fill in the main information of out of stock products in the "Upload Form". After filling it out, upload the file and click "Confirm".
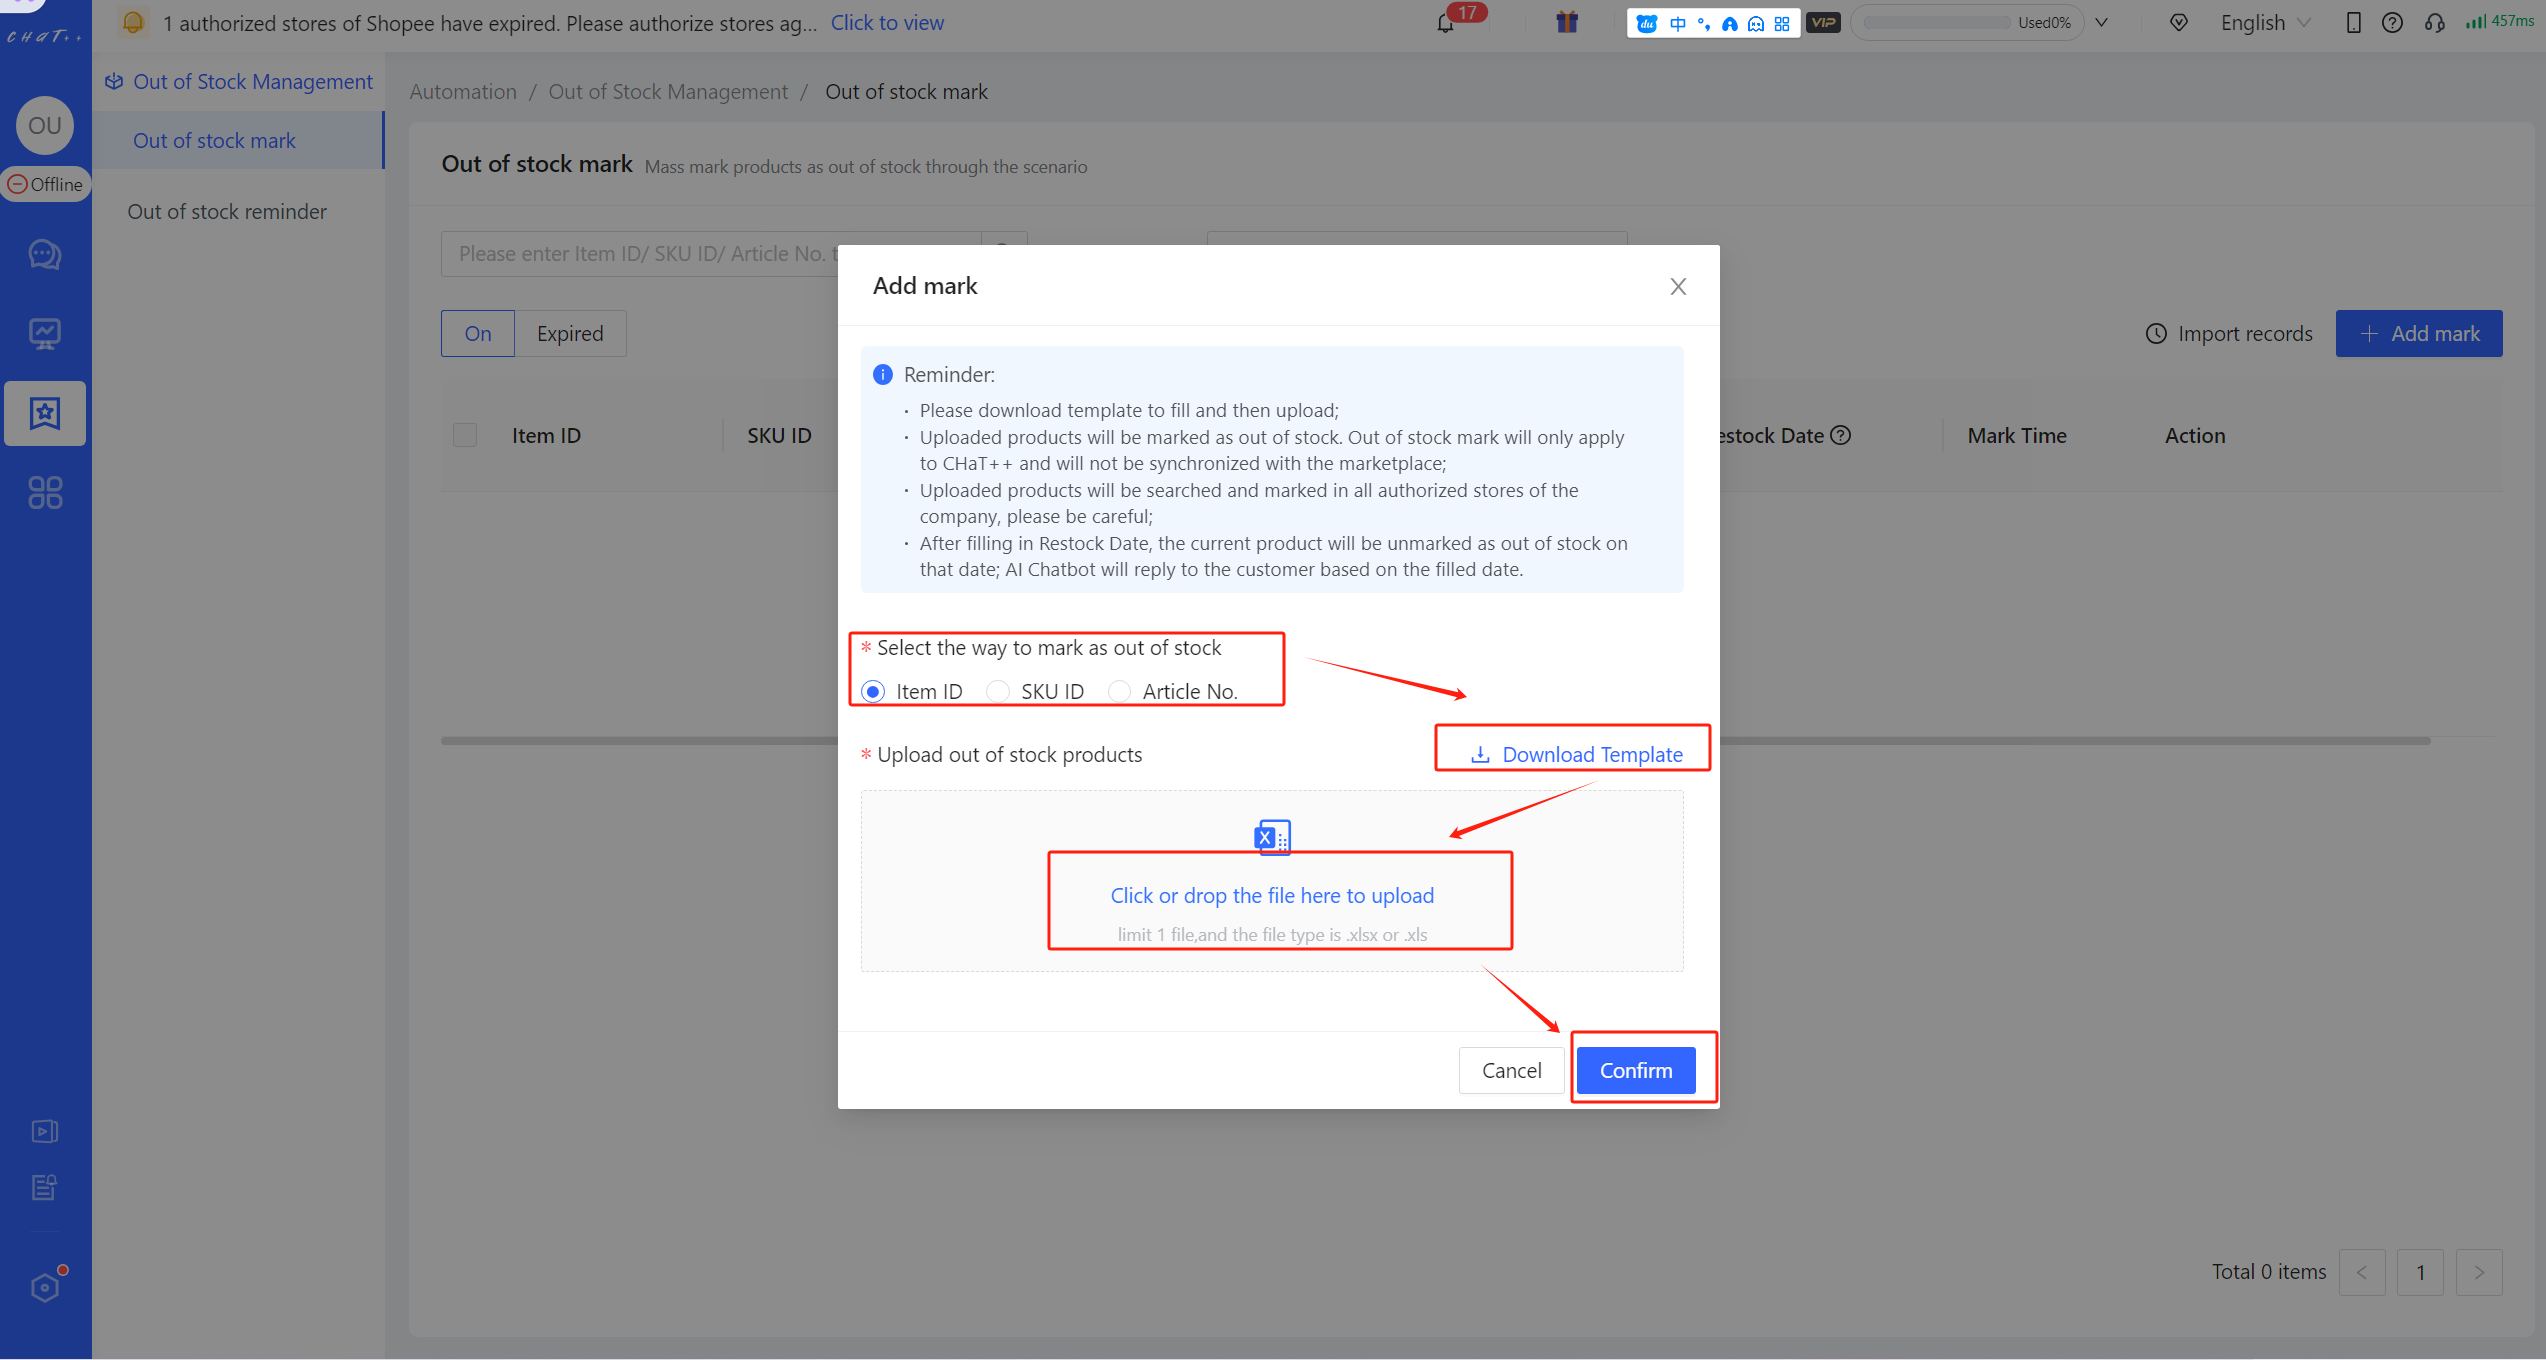 Figure 8
Instructions for "Out of Stock Mark Upload Form"
- Marketplace Item ID/ Marketplace SKU ID/ Article No.(Required): The Marketplace Item ID/ Marketplace SKU ID/ Article No. corresponding to the out-of-stock product
- Marketplace and Country site (Required when marking out of stock by selecting "Item ID" or "SKU ID"): The marketplace and country site corresponding to the out-of-stock product.
- Restock Date (Optional): The date when the out-of-stock product is expected to be available. Chatbot will reply to customers with restock date of the out-of-stock product based on this information.
- On the specified restock date, out of stock mark for this product will be removed in ChatPlusAI, and AI Chatbot will respond based on the inventory of the e-commerce marketplace.
- If no "Restock Date" is provided, the product will remain marked as "out of stock" within ChatPlusAI indefinitely.
⚠️ Note: Uploaded products will be searched and marked in all authorized stores of ChatPlusAI, please be careful. If you need to mark products as out of stock for a single store, please refer to steps in "Mark as out of stock by CS" 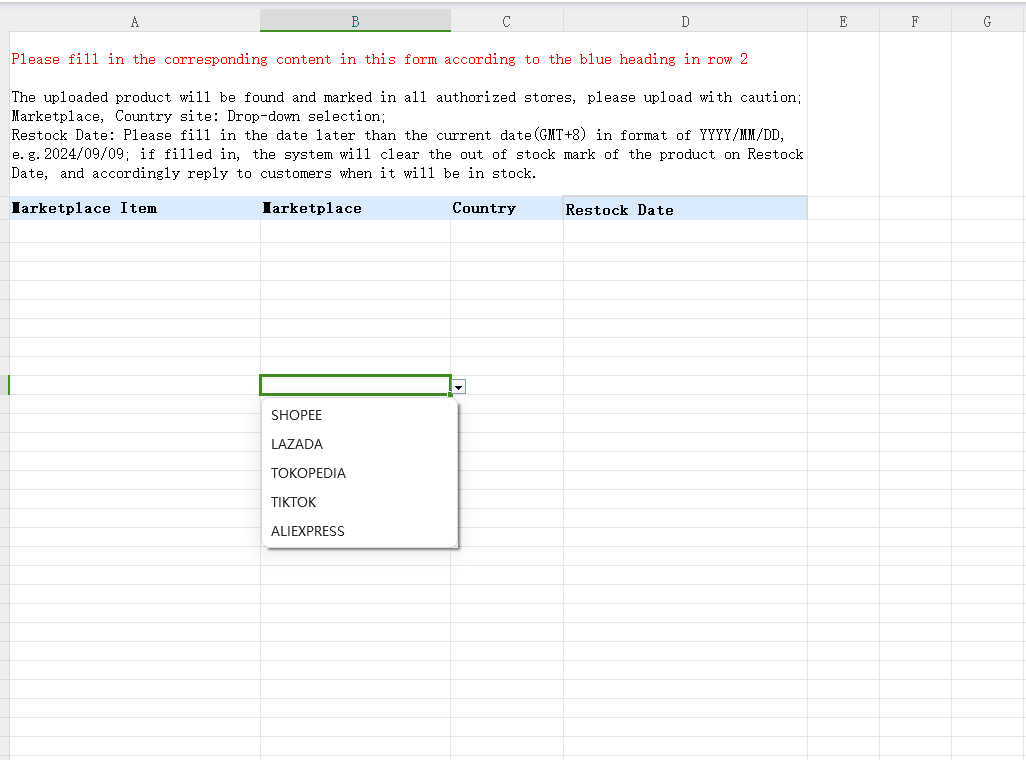 Figure 9
Unmark out of stock
Automatic unmarking by the system
- On the specified restock date, out of stock mark for this product will be automatically removed in ChatPlusAI
- If no "Restock Date" is provided, the product will remain marked as "out of stock" within ChatPlusAI indefinitely.
Manual unmarking by CS during reception
Click ["Messages" in the left menu → "Products" in conversation sidebar], find the main product link where the SKU that needs to be unmarked is located, click the "Mark as out of stock" button (the red box② in the image below), and select "Unmark". After unmarking, the SKU will display inventory information based on the marketplace's inventory in ChatPlusAI. 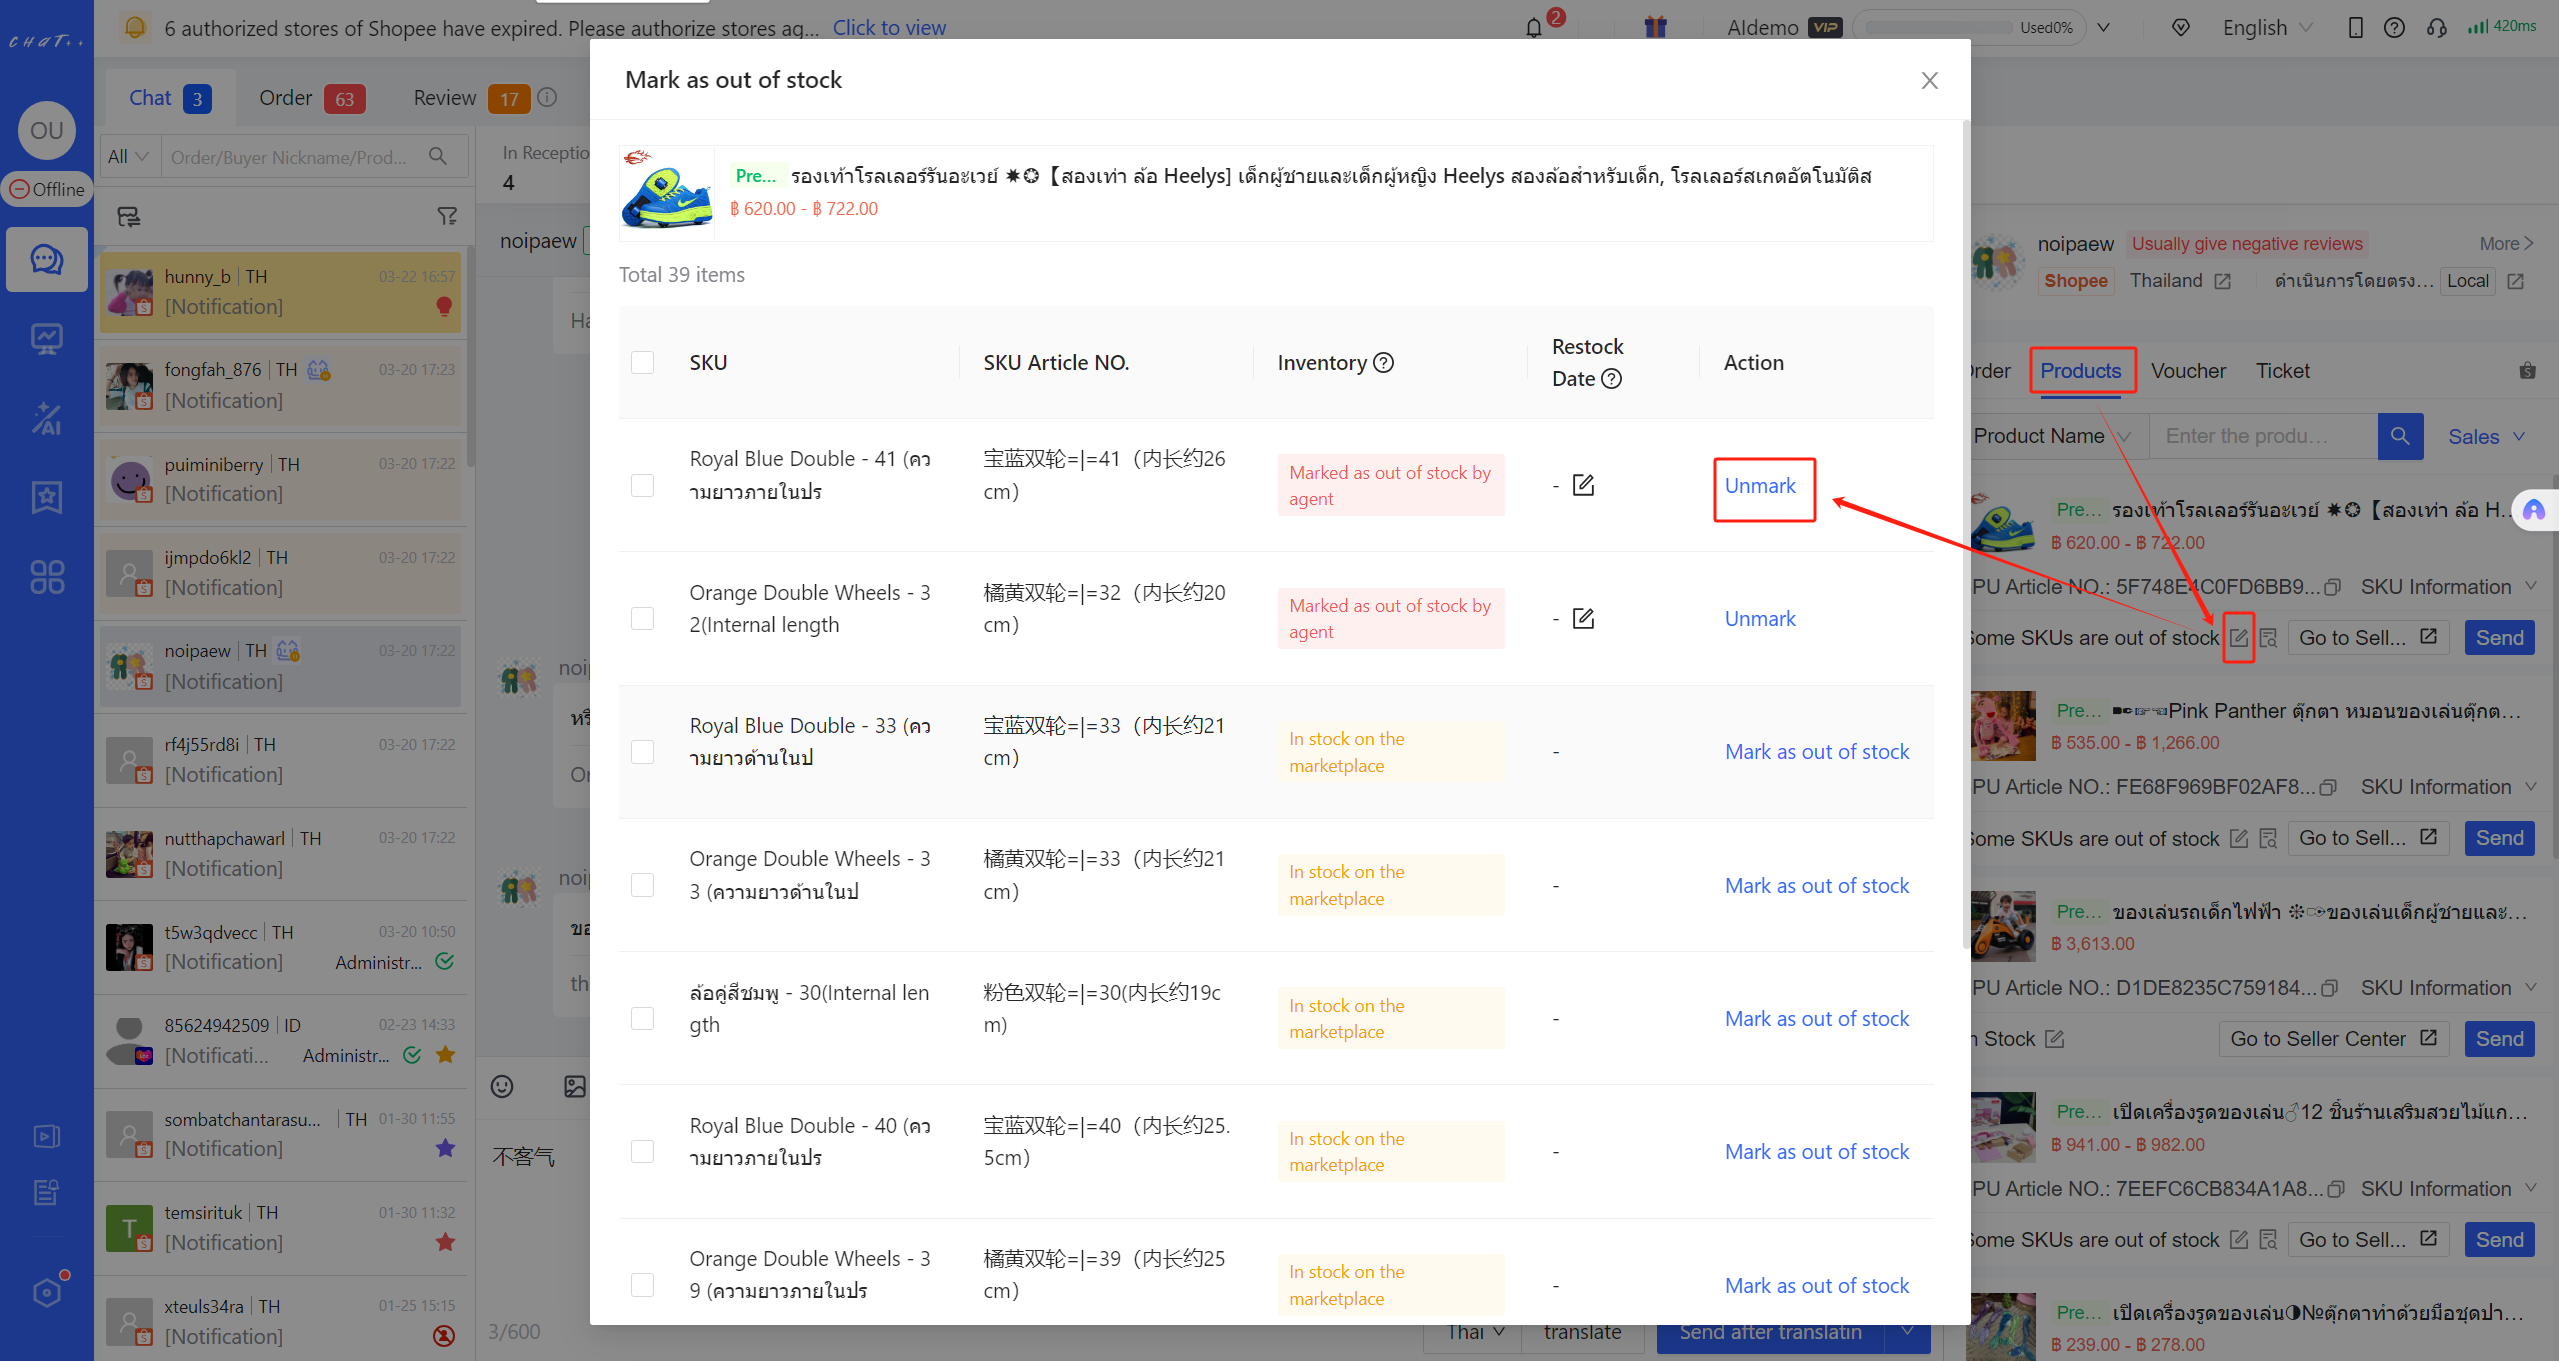 Figure 10
If there are multiple out of stock SKUs under the main product, CS can select multiple items and click "Mass Unmark".
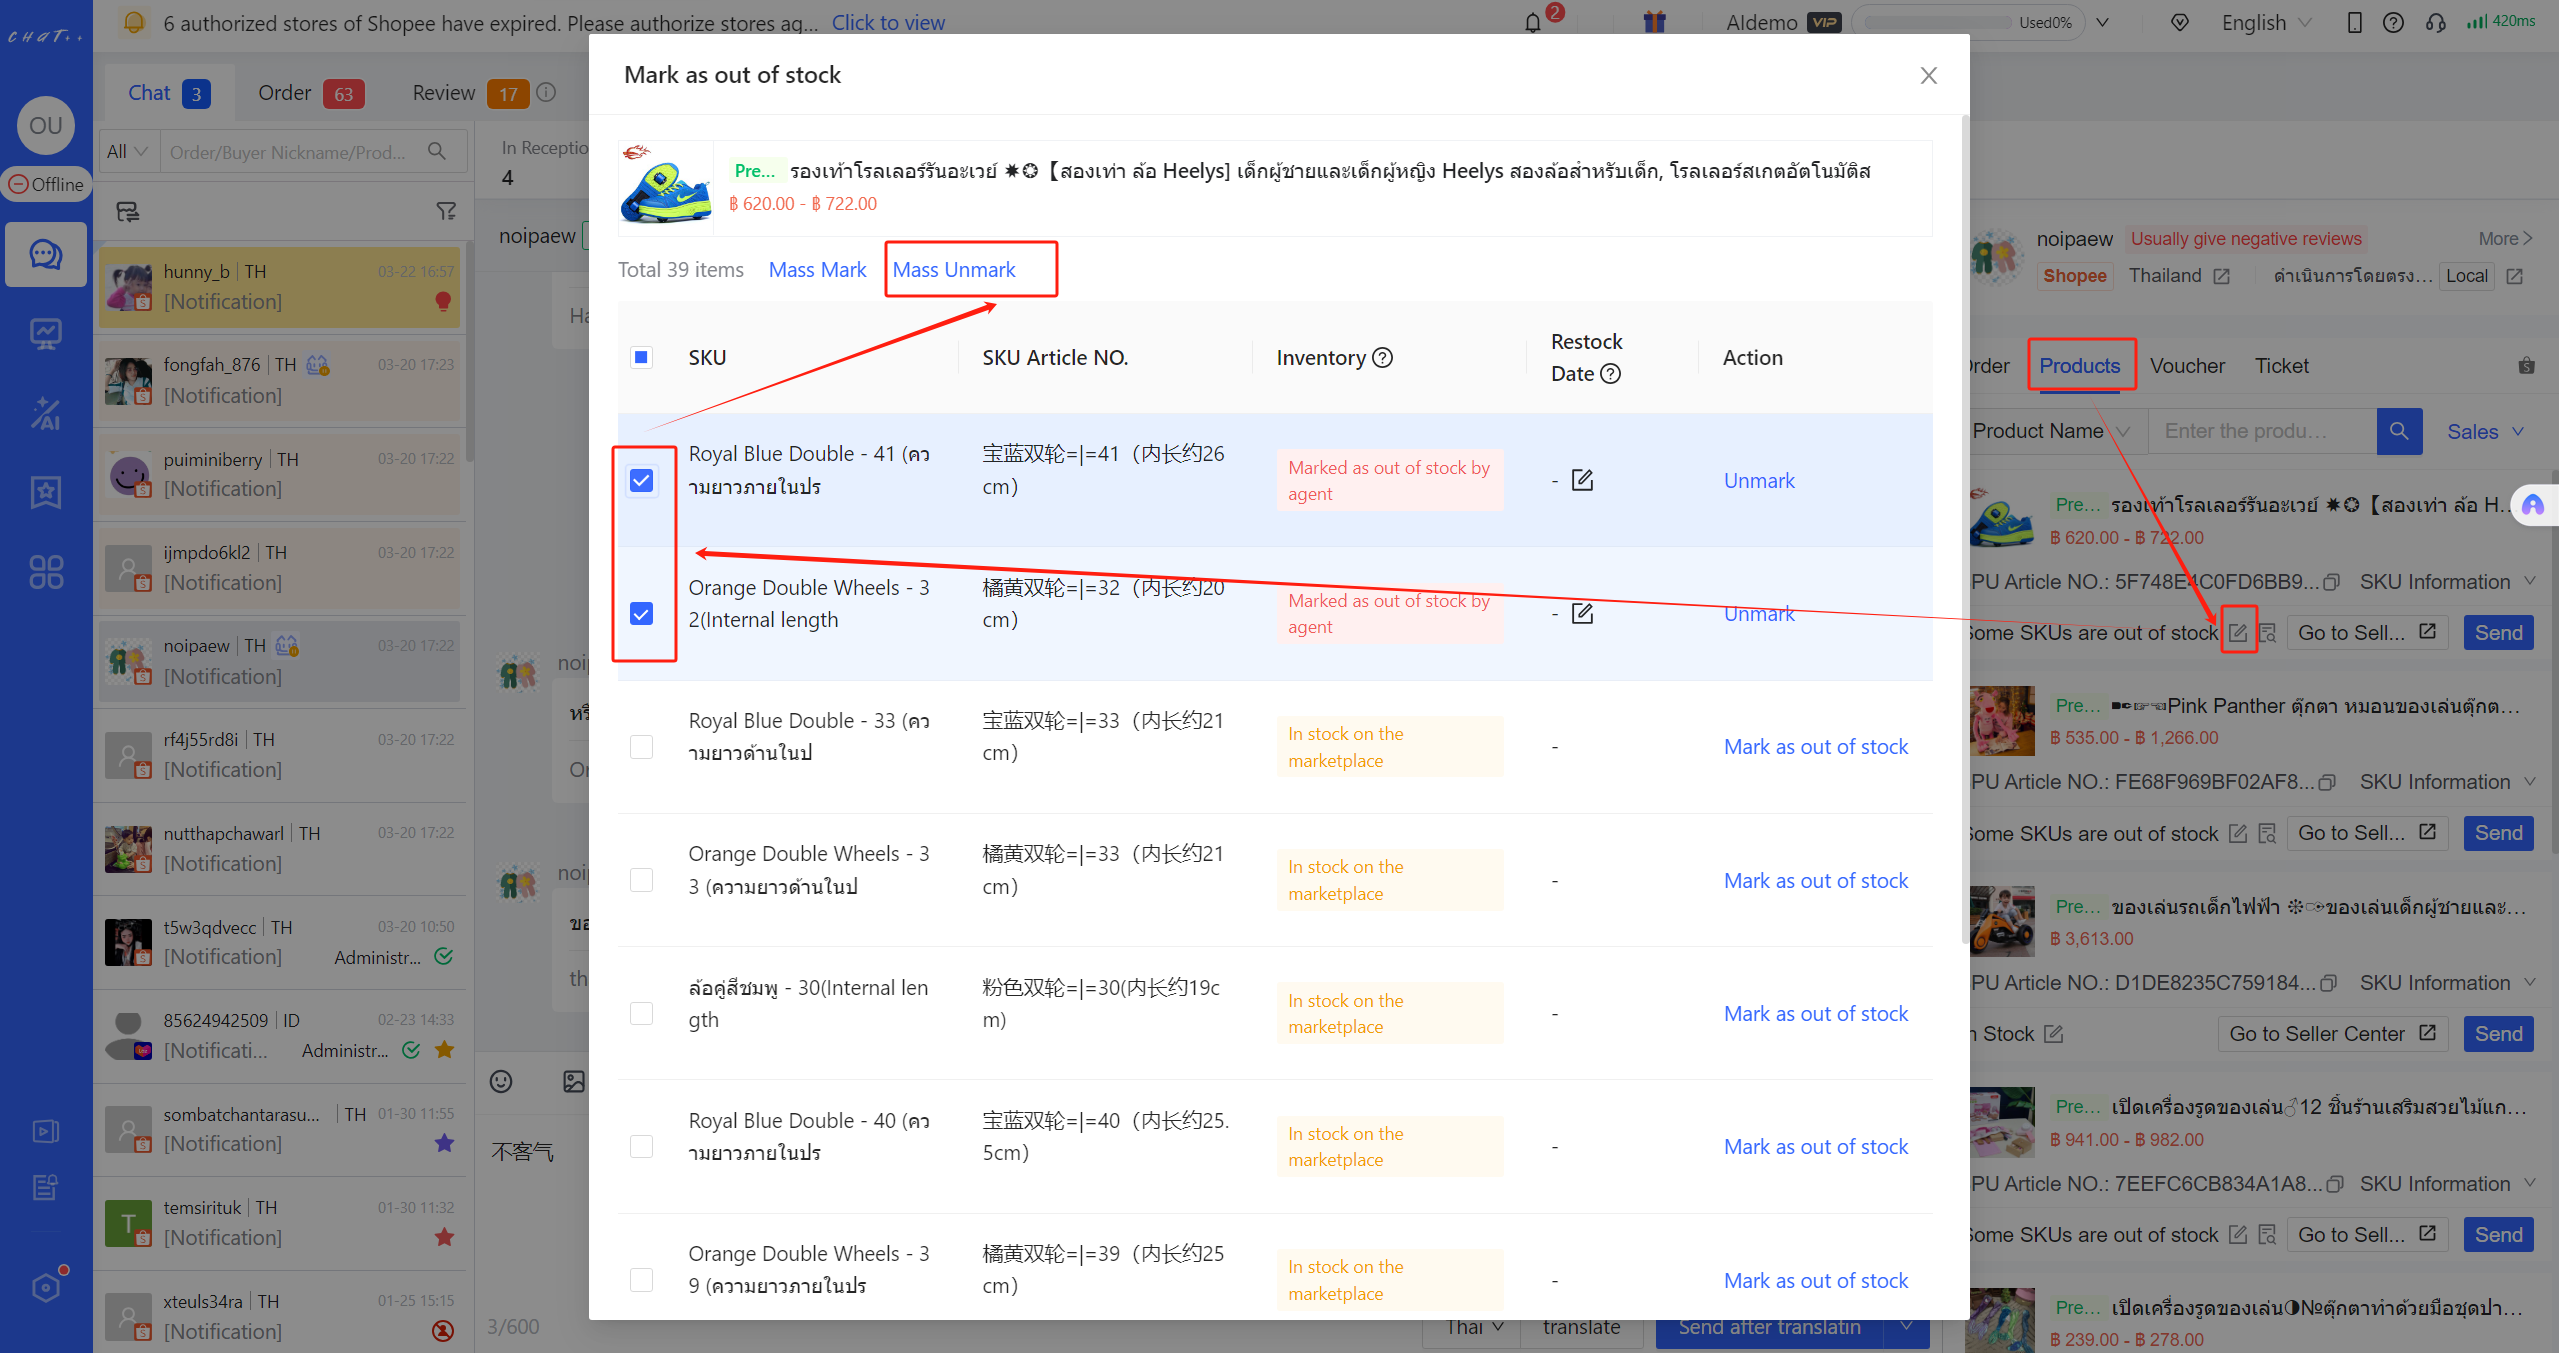 Figure 11
Unmarking by Admin
Click [「 Automation」in the left menu→「 Out of Stock Management 」→「Out of stock mark」→「 Unmark 」] 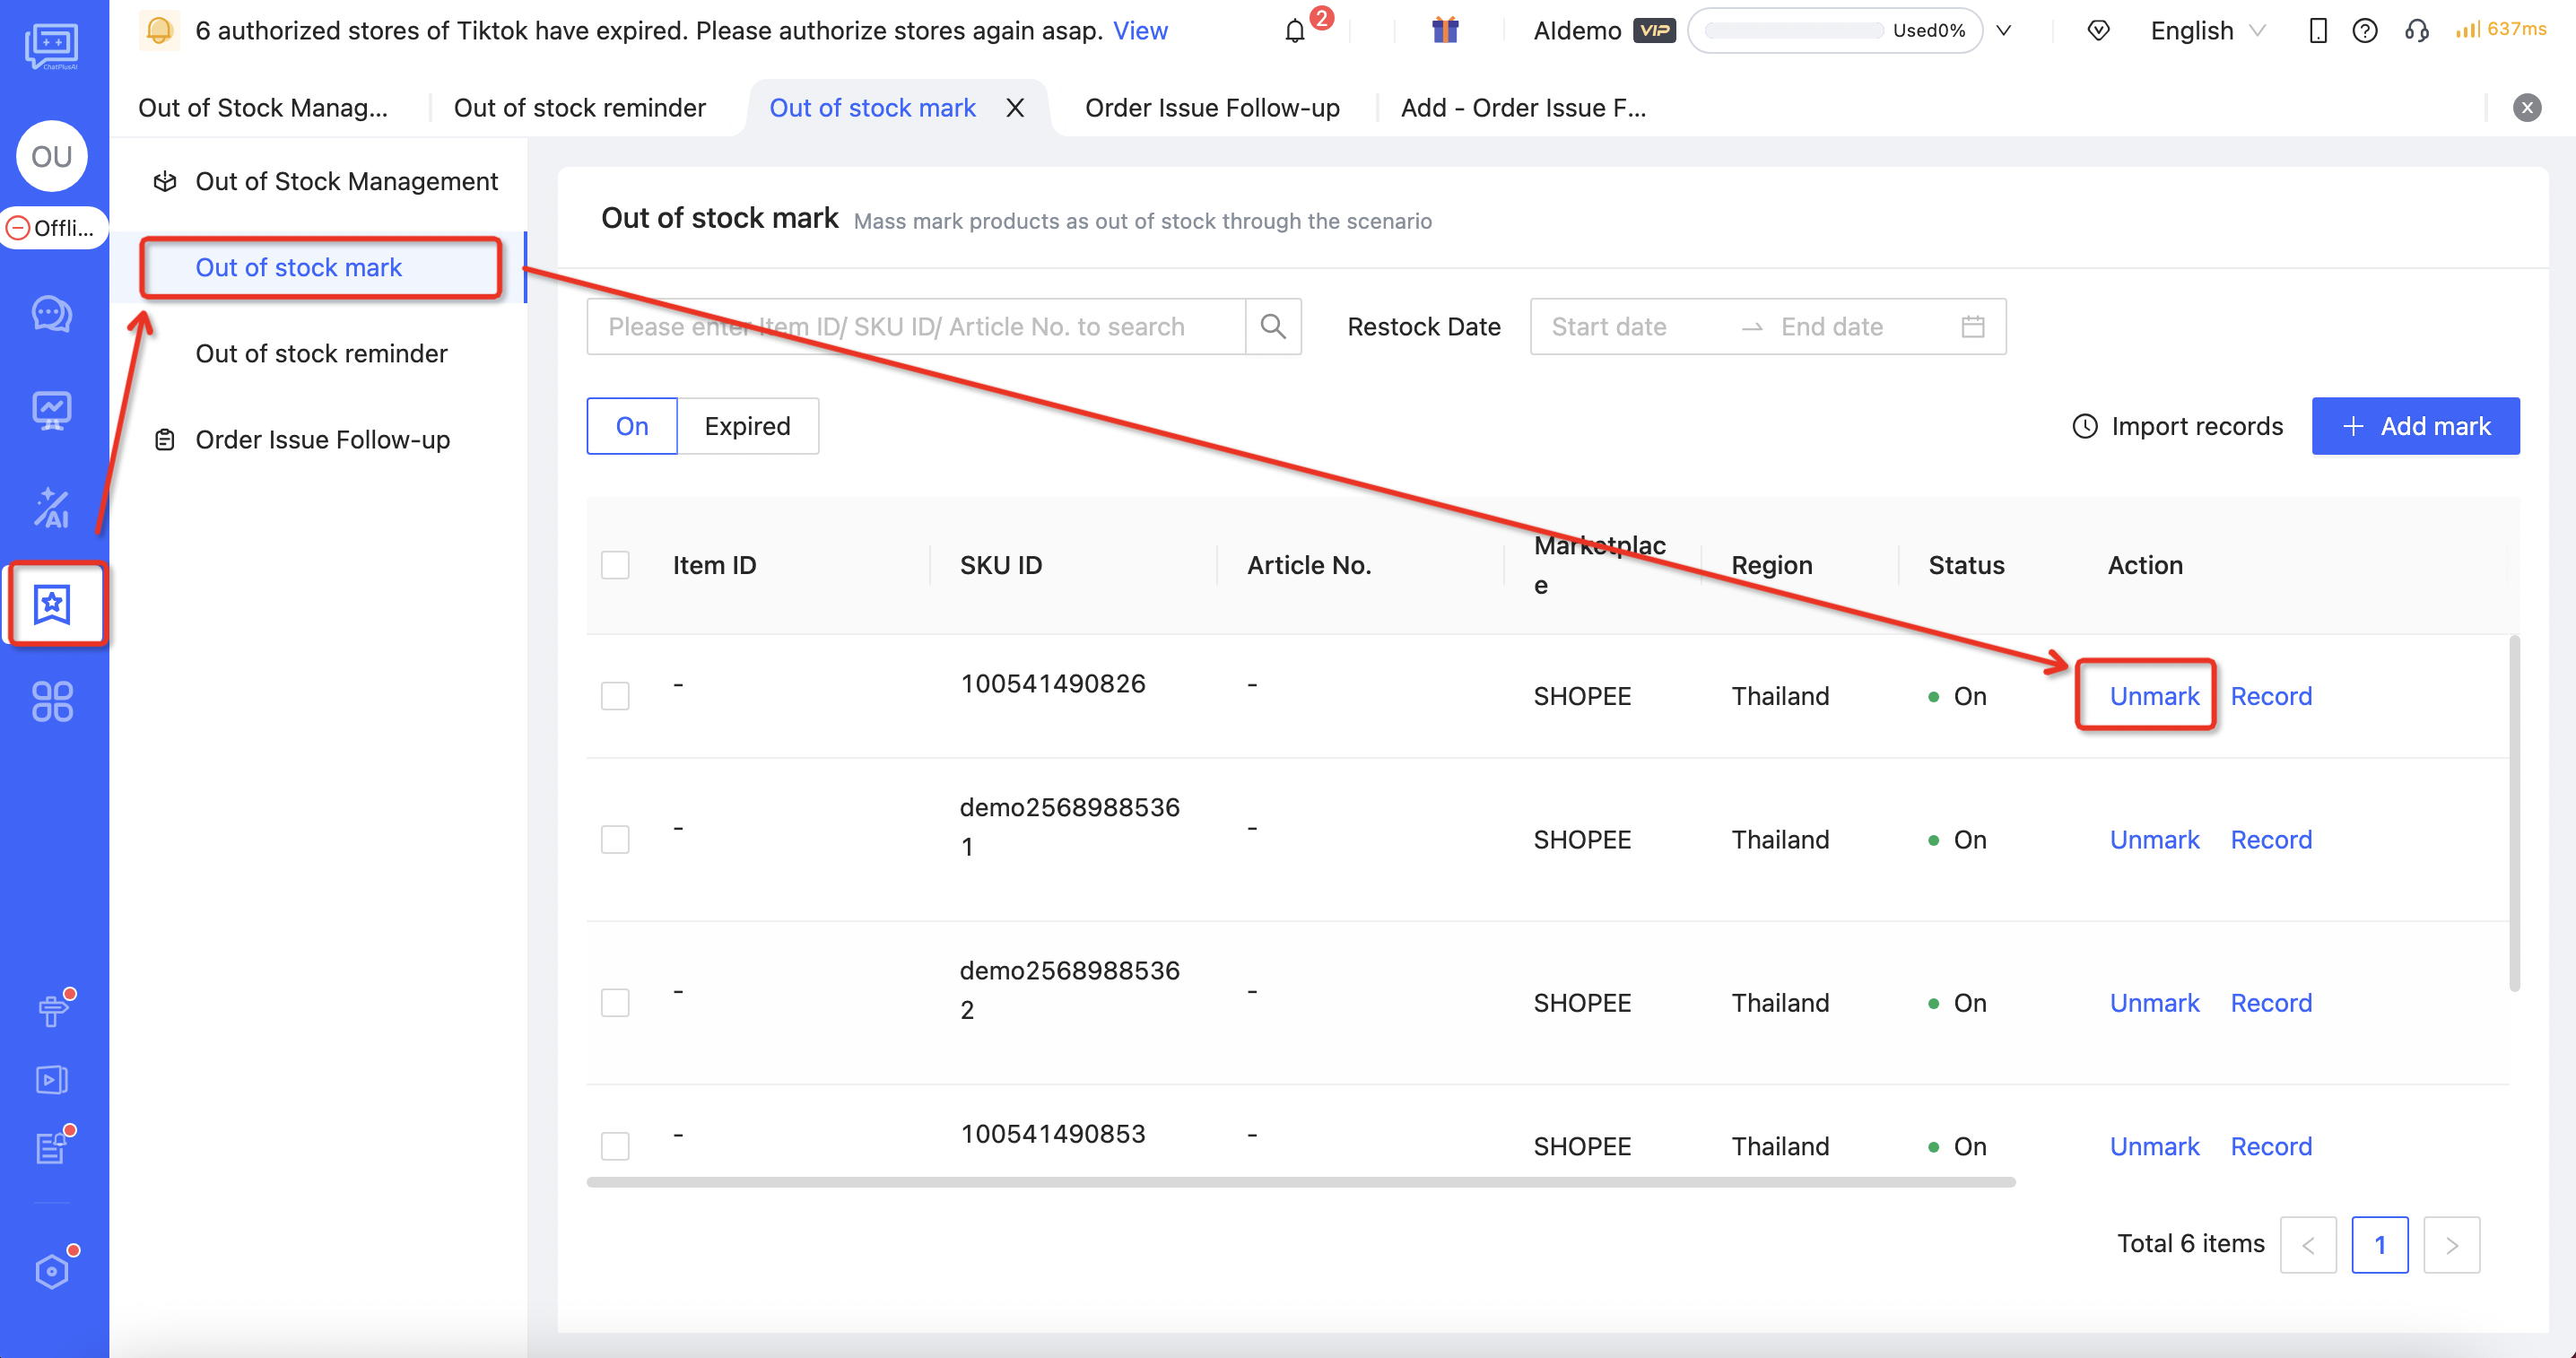 Figure 12
If multiple items are required to unmark, the admin can select multiple items and click "Mass Unmark"(the image below). 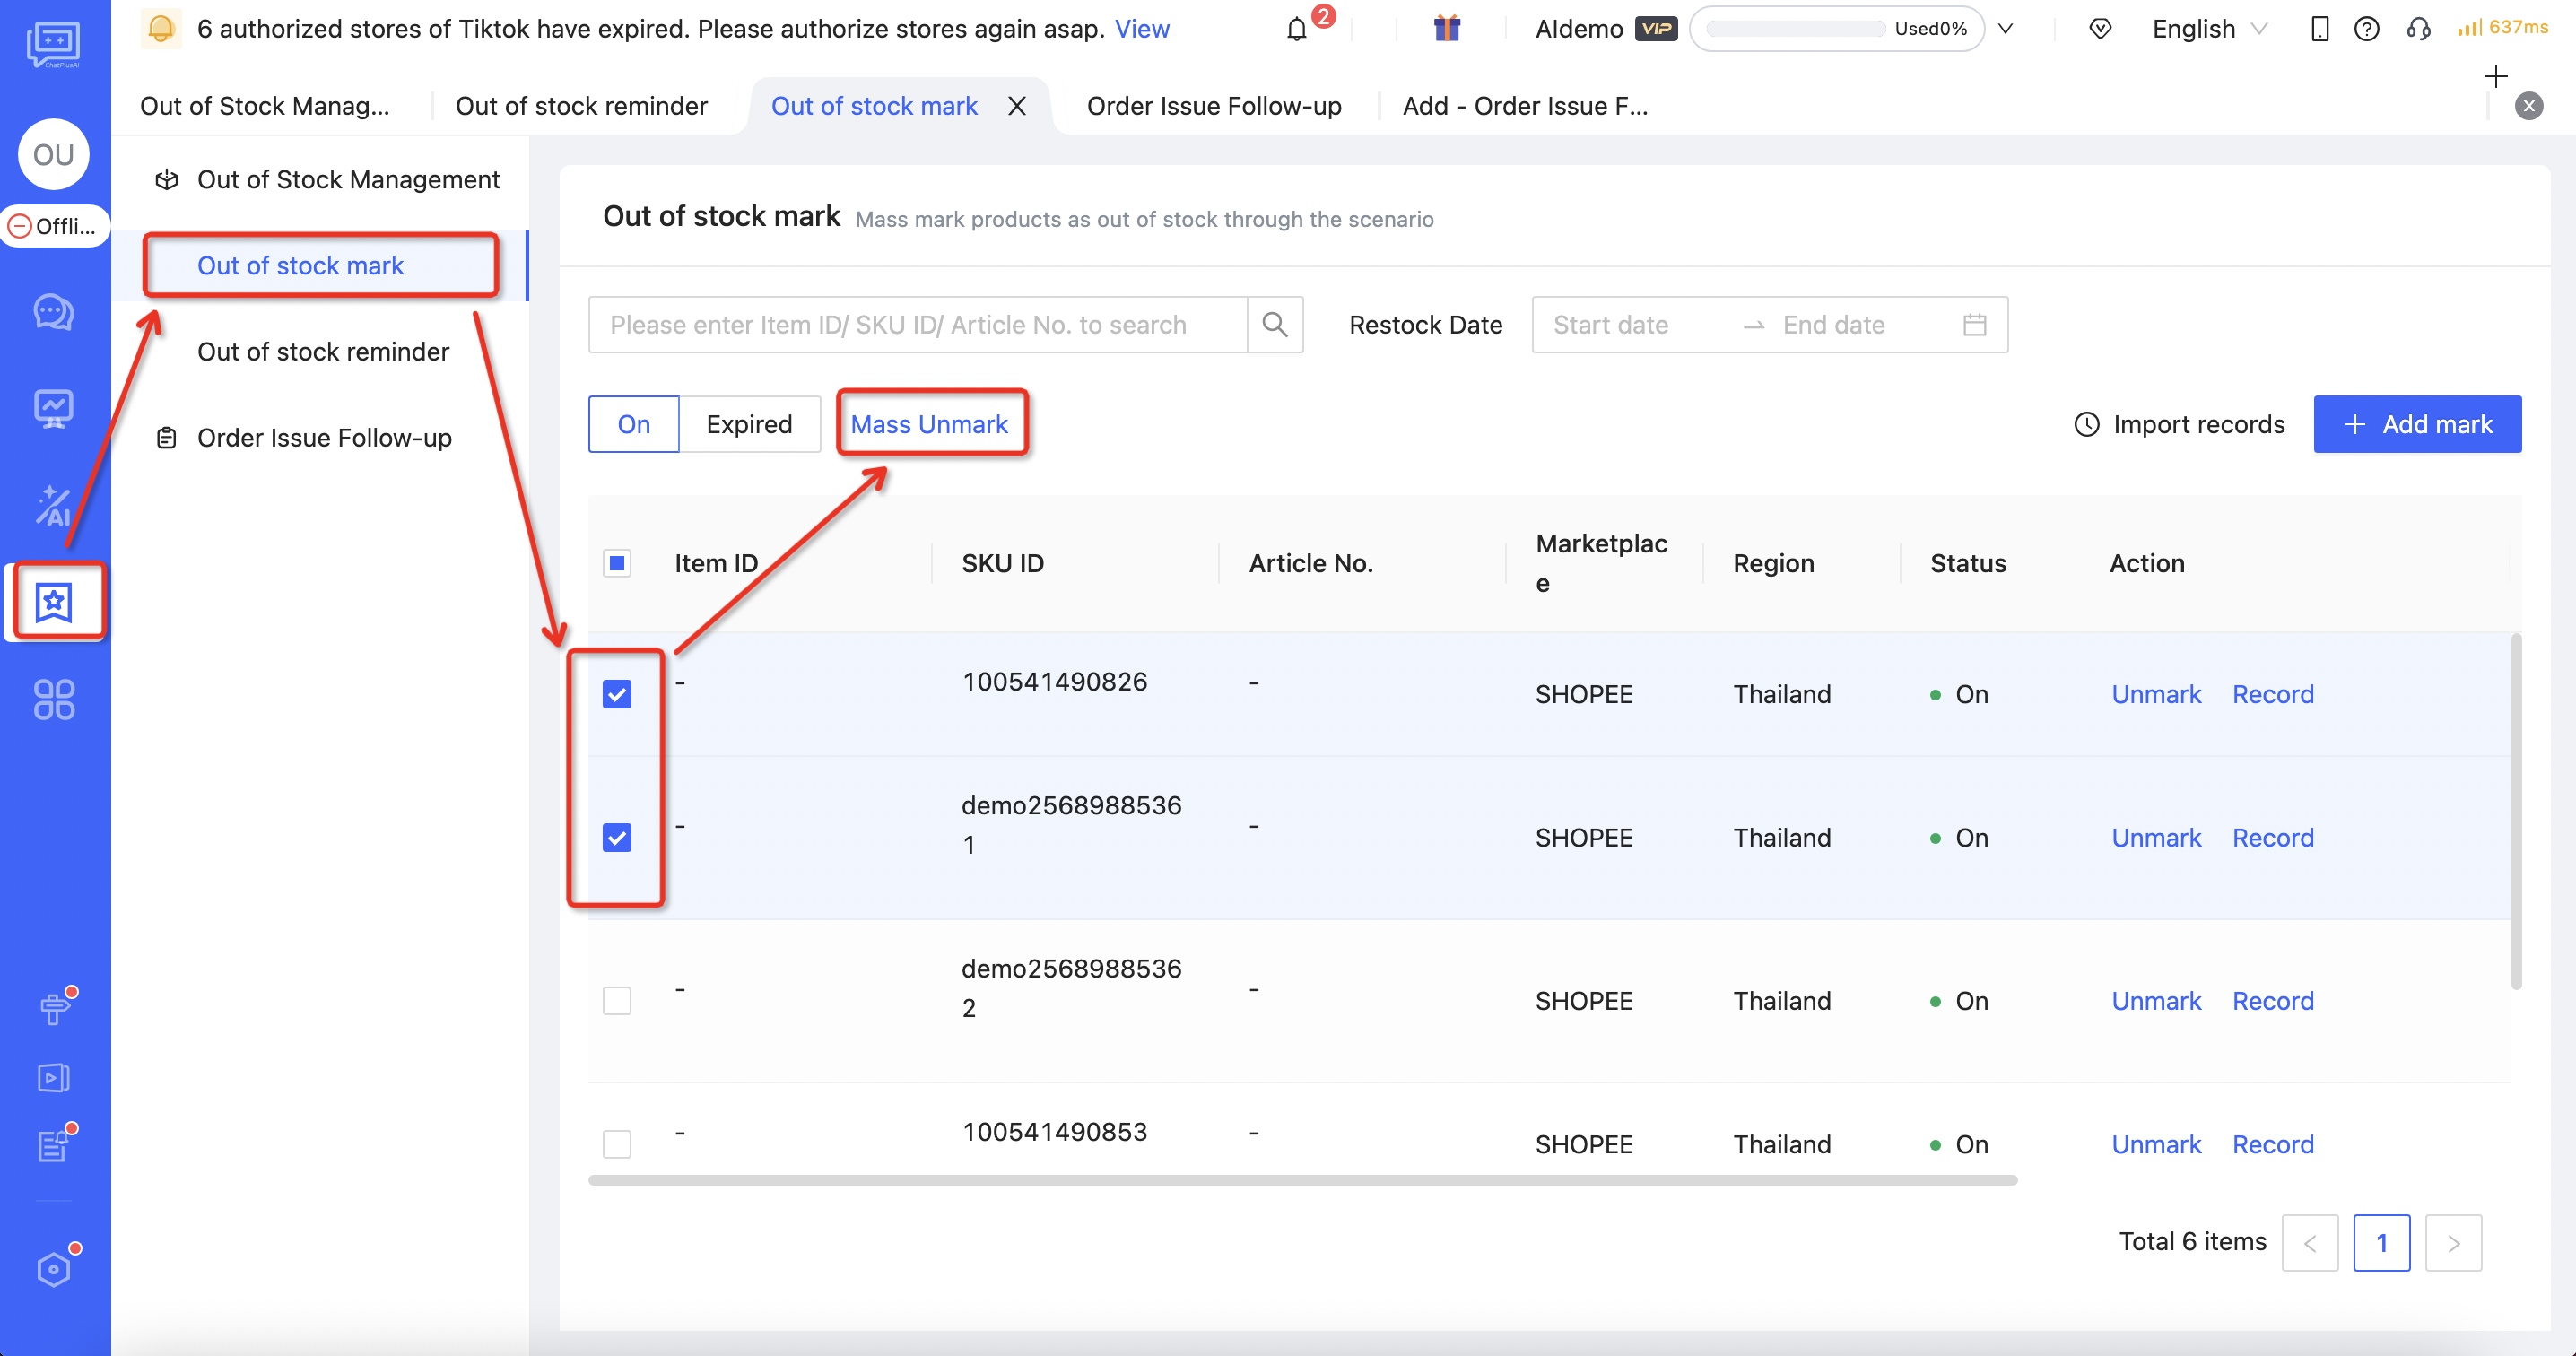 Figure 13
Basic Task Configuration
Configure 「 Out of stock reminder 」
Click [「 Automation」in the left menu→「 Out of Stock Management 」→「Out of stock reminder」→Select the marketplace→「 Add Task 」]
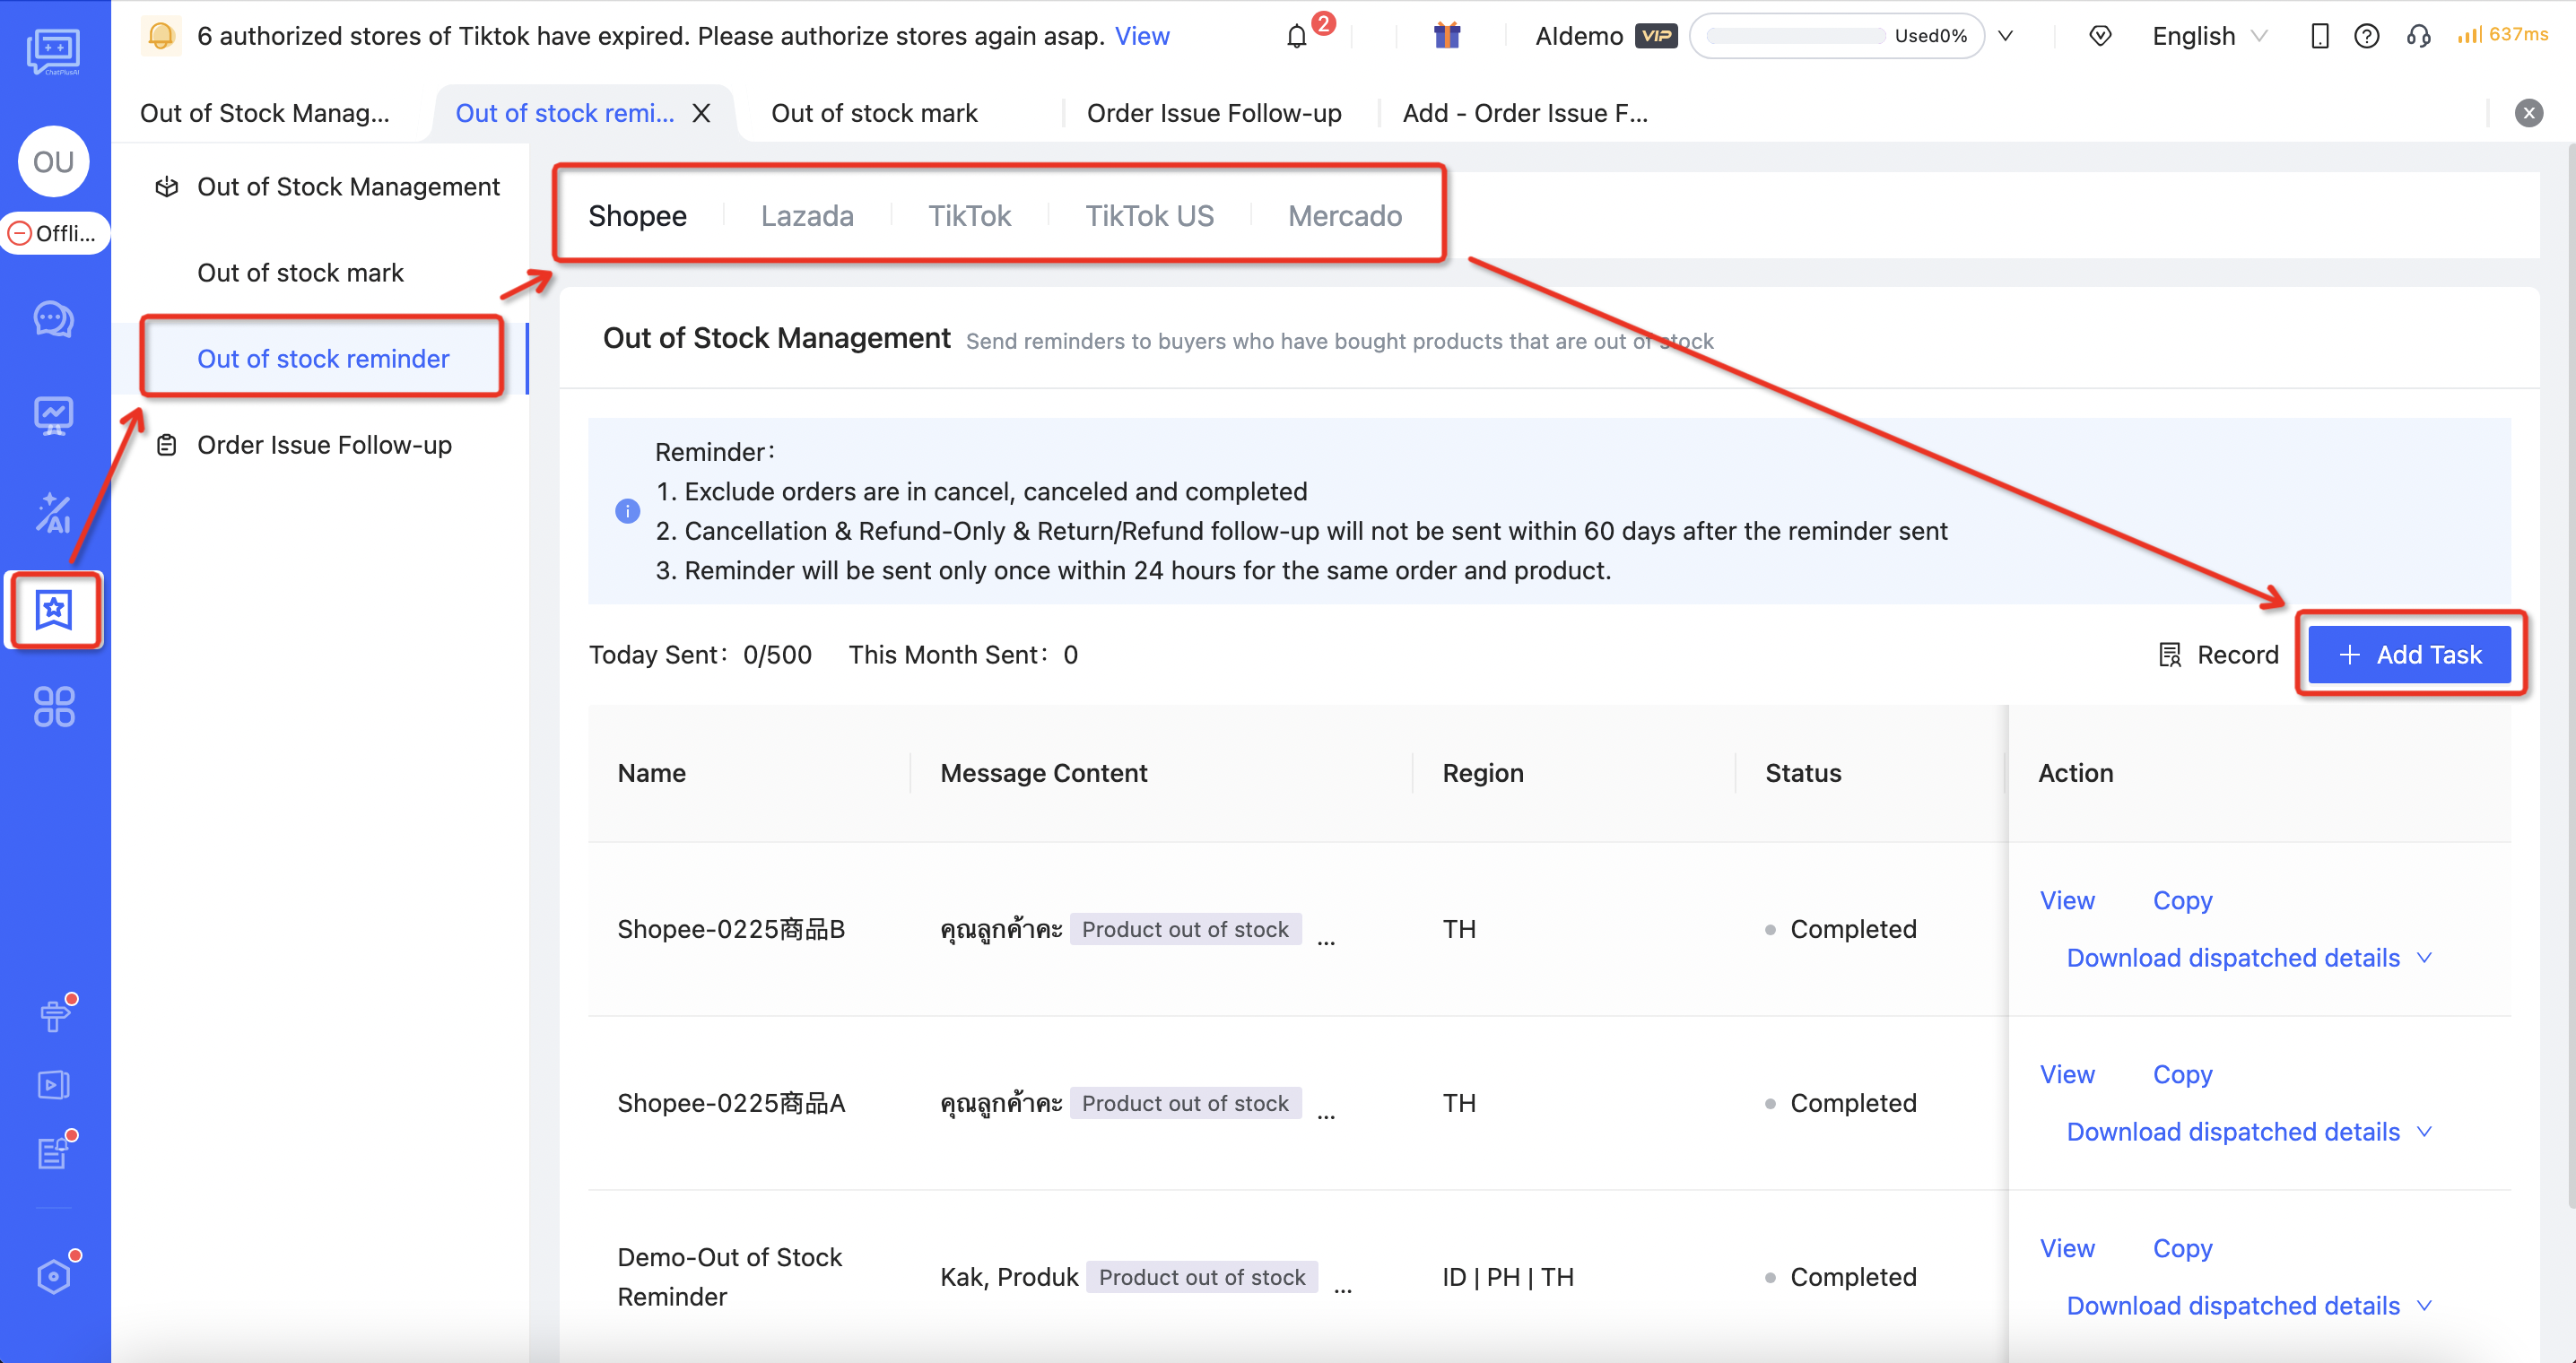 Figure 14
Out of Stock Reminder Dispatching
- Filter SIP Stores: Shopee supports providing out of stock reminder for SIP stores. To avoid duplicate reminders sent to customers by Shopee and ChatPlusAI, ChatPlusAI's reminders will be filtered by default for SIP stores.
- For "Cancellation in Progress"/"Cancelled"/"Completed" orders, sending out of stock reminders is meaningless, so reminders are not sent for these three types of orders.
- The system dispatches reminders mainly to guide customers to purchase other products or to guide customers to cancel orders in order to avoid affecting the store's on-time shipment rate. customers often choose to close the order after receiving the out of stock reminder, and there is no need to retain them. Therefore, within 60 days after customers receive the reminder, the system will not attempt to "follow cancellation", "follow partial refund", or "follow return&refund" for the same order.
- For the same order No. & the same out of stock product, out of stock reminder can only be sent once within 24 hours.
AI Receptionist stop replying: After sending out of stock reminder, AI Receptionist will stop for 1 day by default.
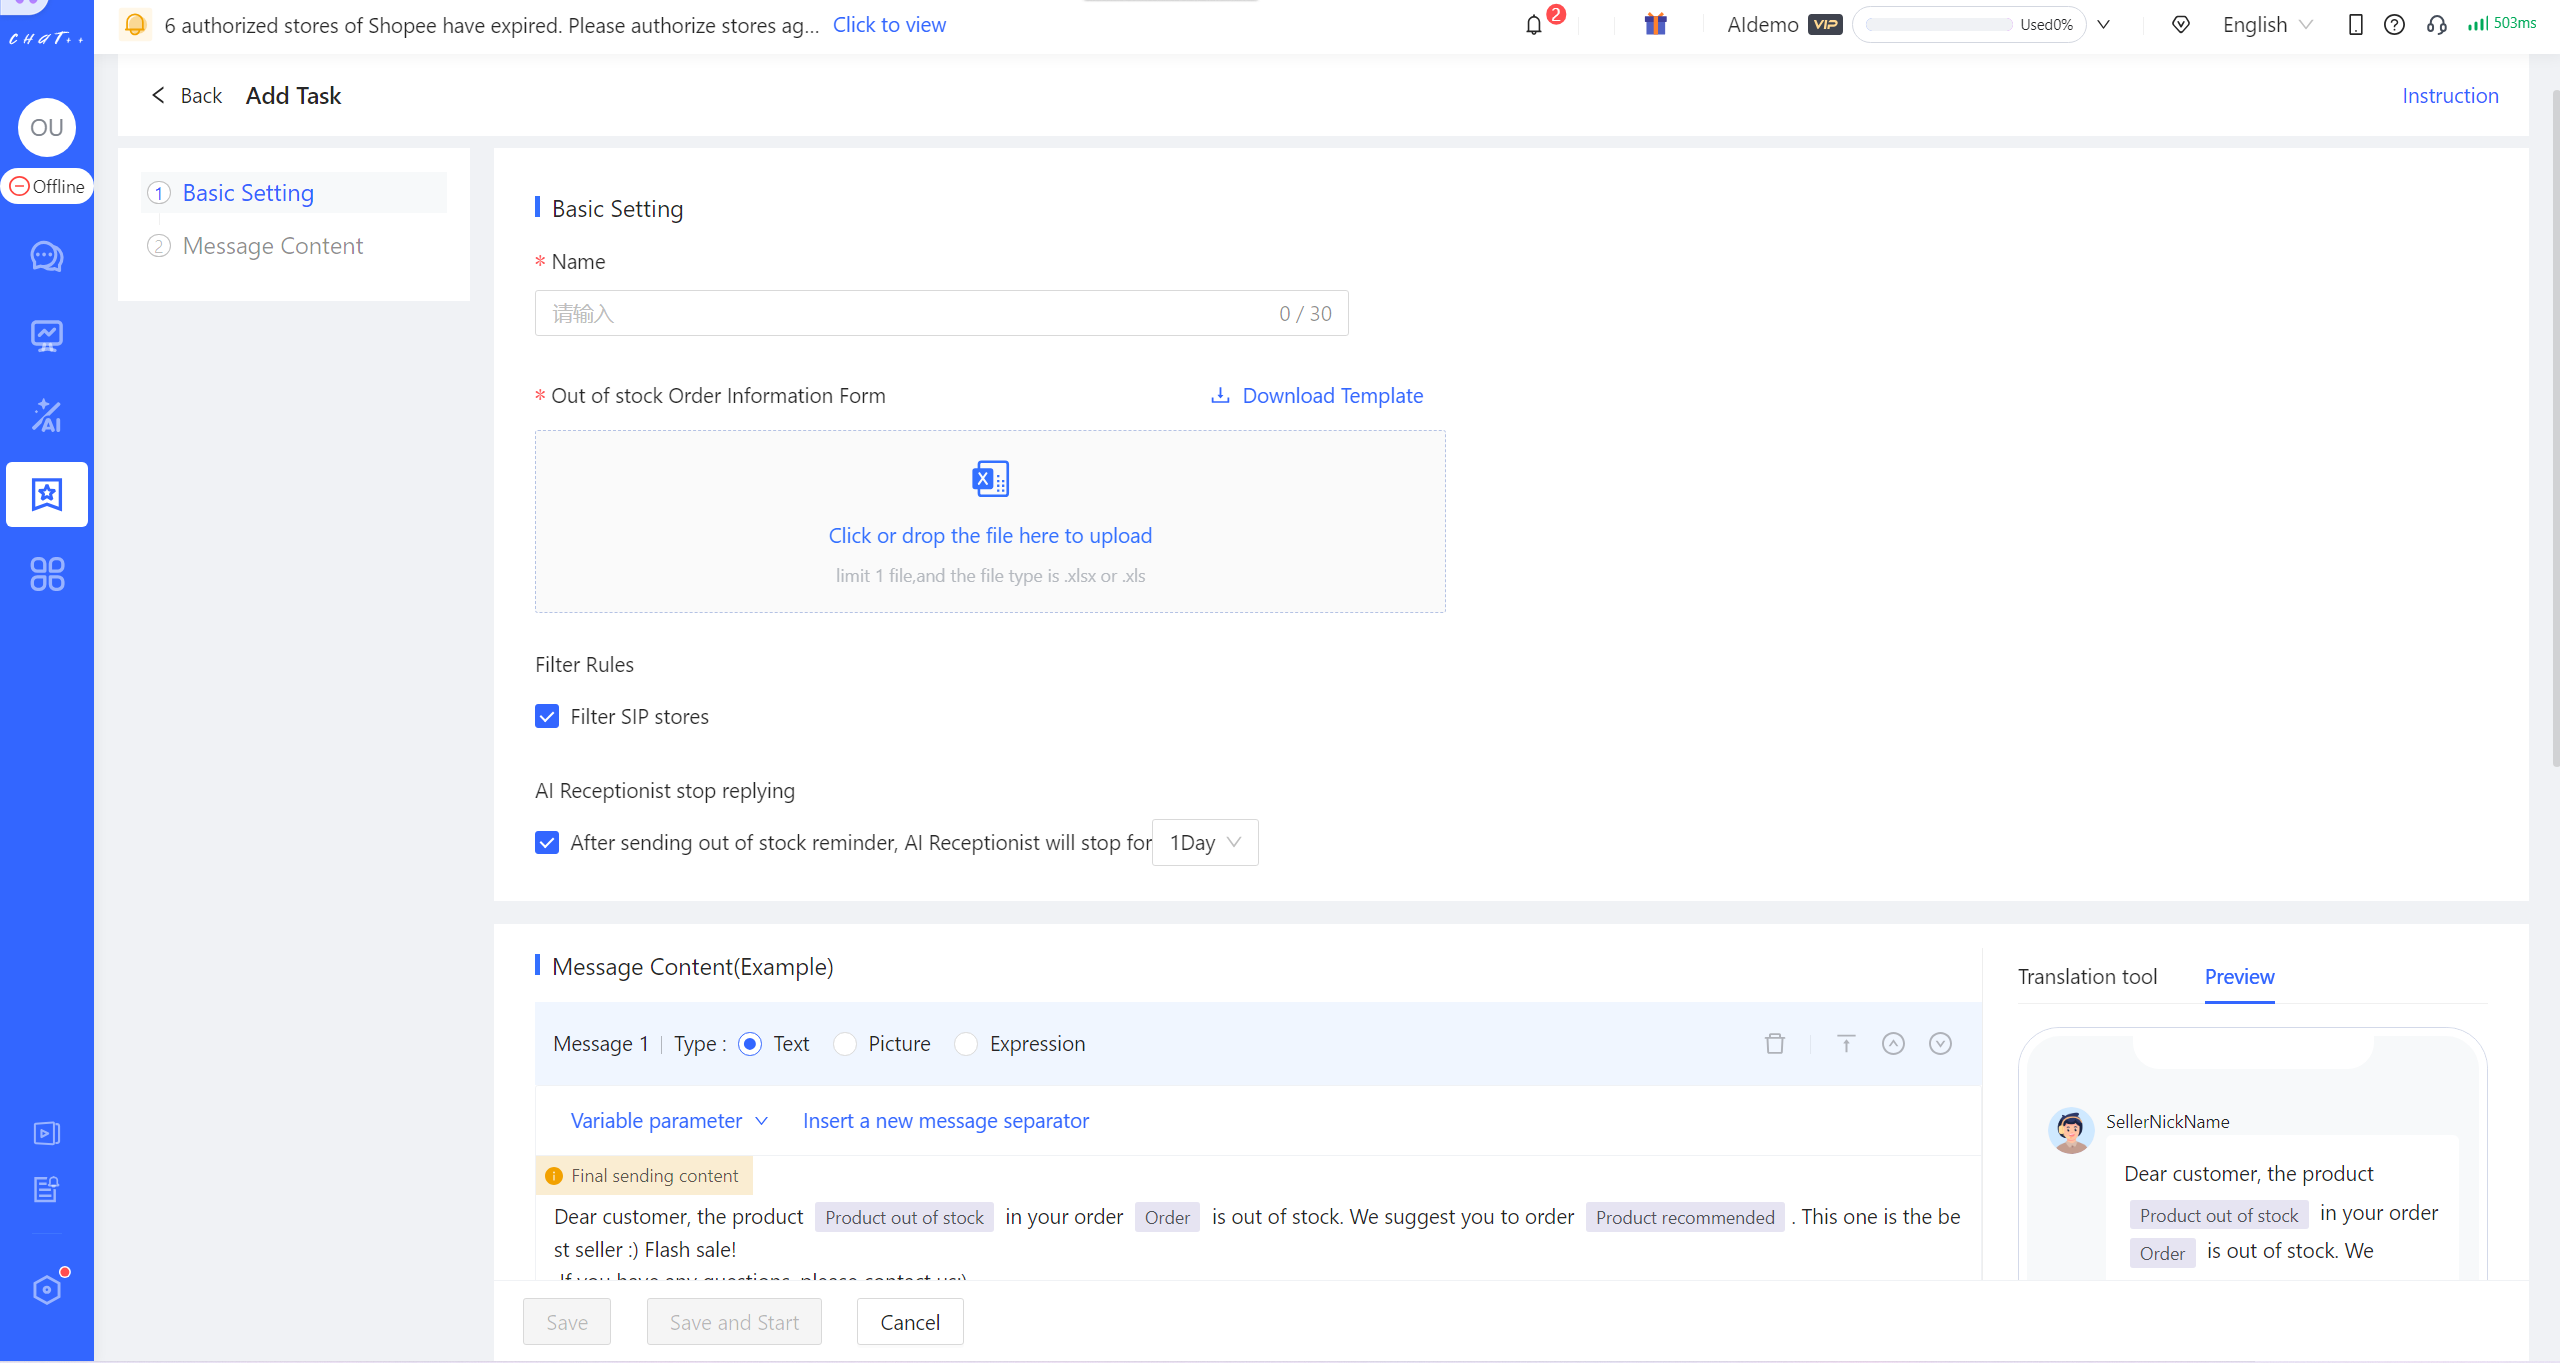 Figure 15
"Out of stock Order Information Form" Instruction
Click on "Download Template", the form currently contains 4 pieces of information: Order No., Product out of stock, Product recommended, Store ID (only for Lazada). That is, which orders involve which products being out of stock and what alternative products are recommended after stockout occurs.
- Order No.(Required): Refers to the order number corresponding to the out-of-stock product.
- Product out of stock(Required): Specifies the specific out-of-stock product. You can enter a product alias or nickname that customers can easily understand (e.g., "KN95 - White").
- Product recommended(Optional): Content recommending alternative products to customers. It is recommended to fill in the name, link, and reason for recommending the alternative product (e.g., "KN95 - Pink http://shopee.sg.com/item=12353-999, this product has similar functionality to the one you selected")
- Store ID (only for Lazada)(Required): The store ID to which the out of stock product and the recommended product belong. Store ID can be checked on the page of "Configuration → Authorization → Store".
⚠️ The templates for "Out of stock Order Information Form" corresponding to Shopee/Lazada/TikTok Southeast Asia/TikTok US are different. Therefore, if the same out of stock product is listed on multiple marketplaces, it needs to be configured separately by "Adding Task" on the "Out of stock reminder" page.
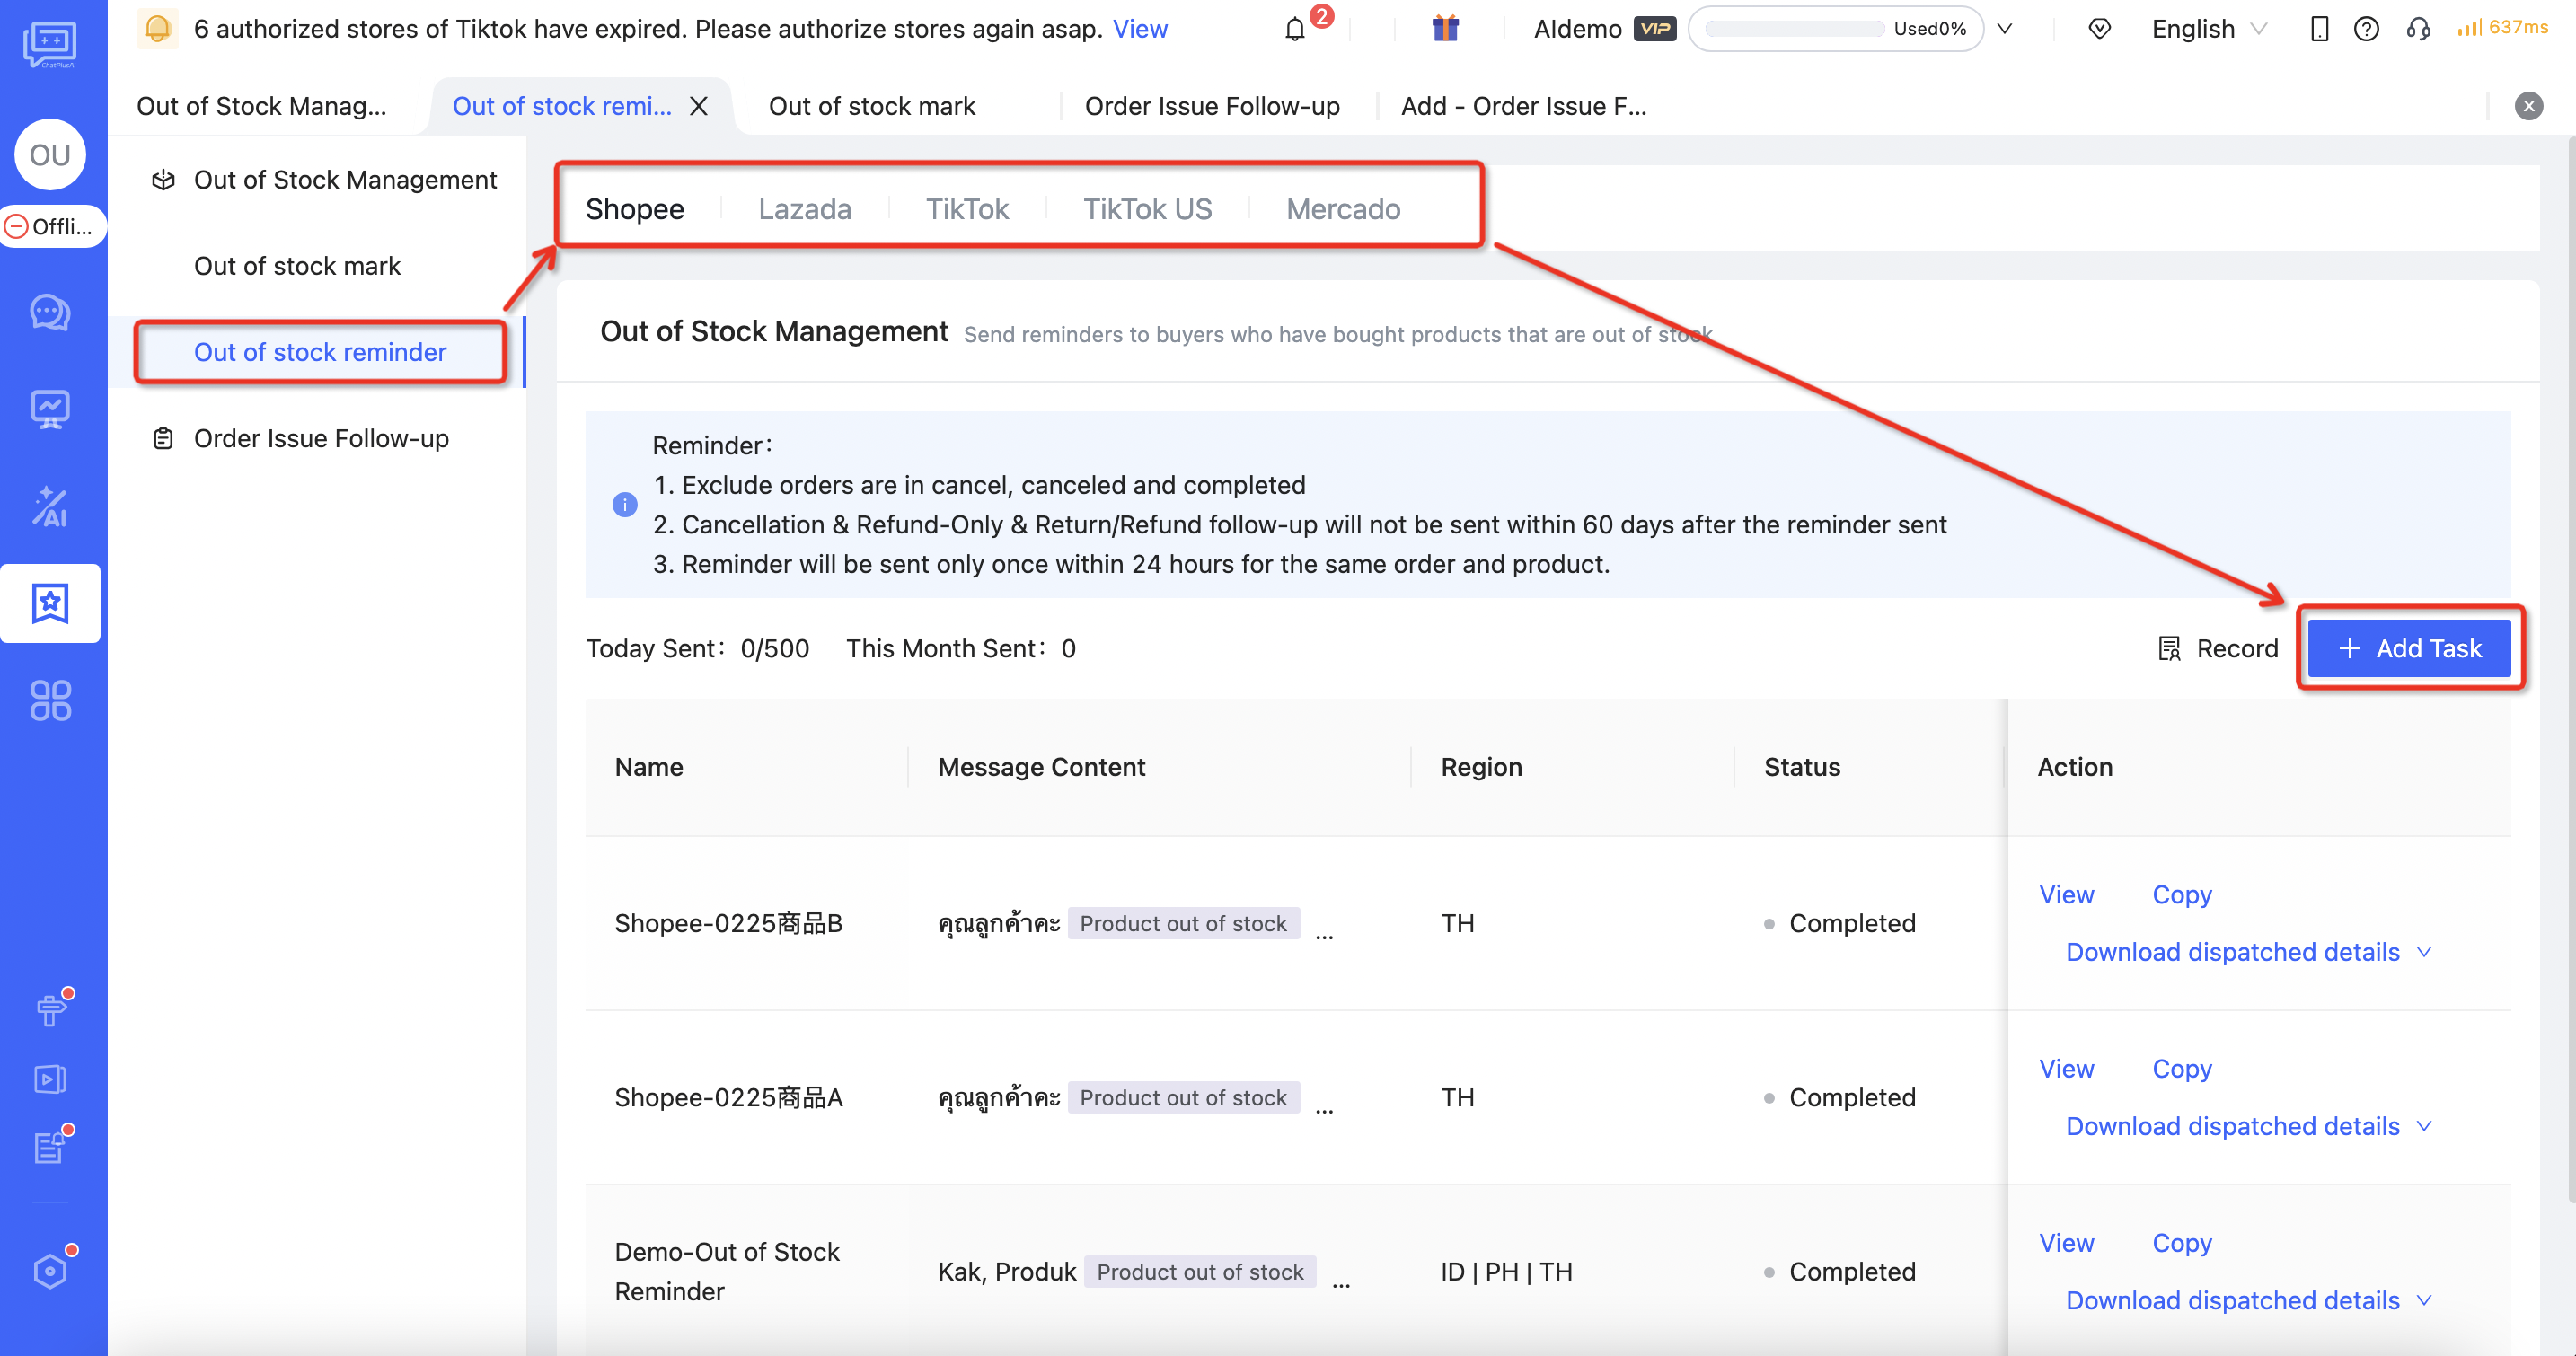 Figure 16
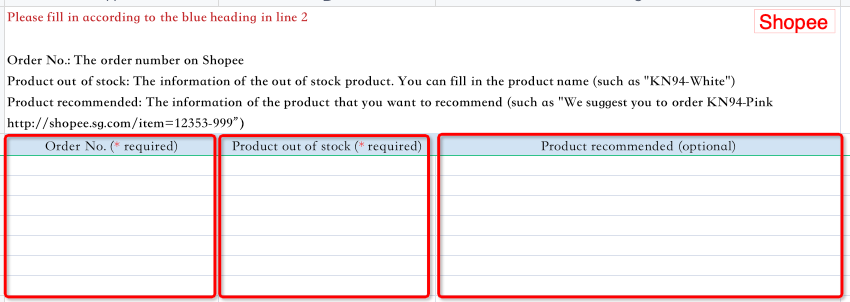

Figure 17
After the file is successfully uploaded, ChatPlusAI will pop up a corresponding content editing box for the sites involved in the orders in the file. One "Out of stock Order Information Form" can contain out of stock orders from multiple country sites. For example, if the uploaded form includes orders from four sites: Malaysia, Philippines, Thailand, and Vietnam, then content editing boxes for out of stock reminders for the four country sites will be prompted.
Configure 「 Order issue Follow-up 」
Click [「 Automation」in the left menu→「 Bulk Orders Follow-up 」→「Order issue Follow-up」→Select the marketplace→「 Add Task 」]
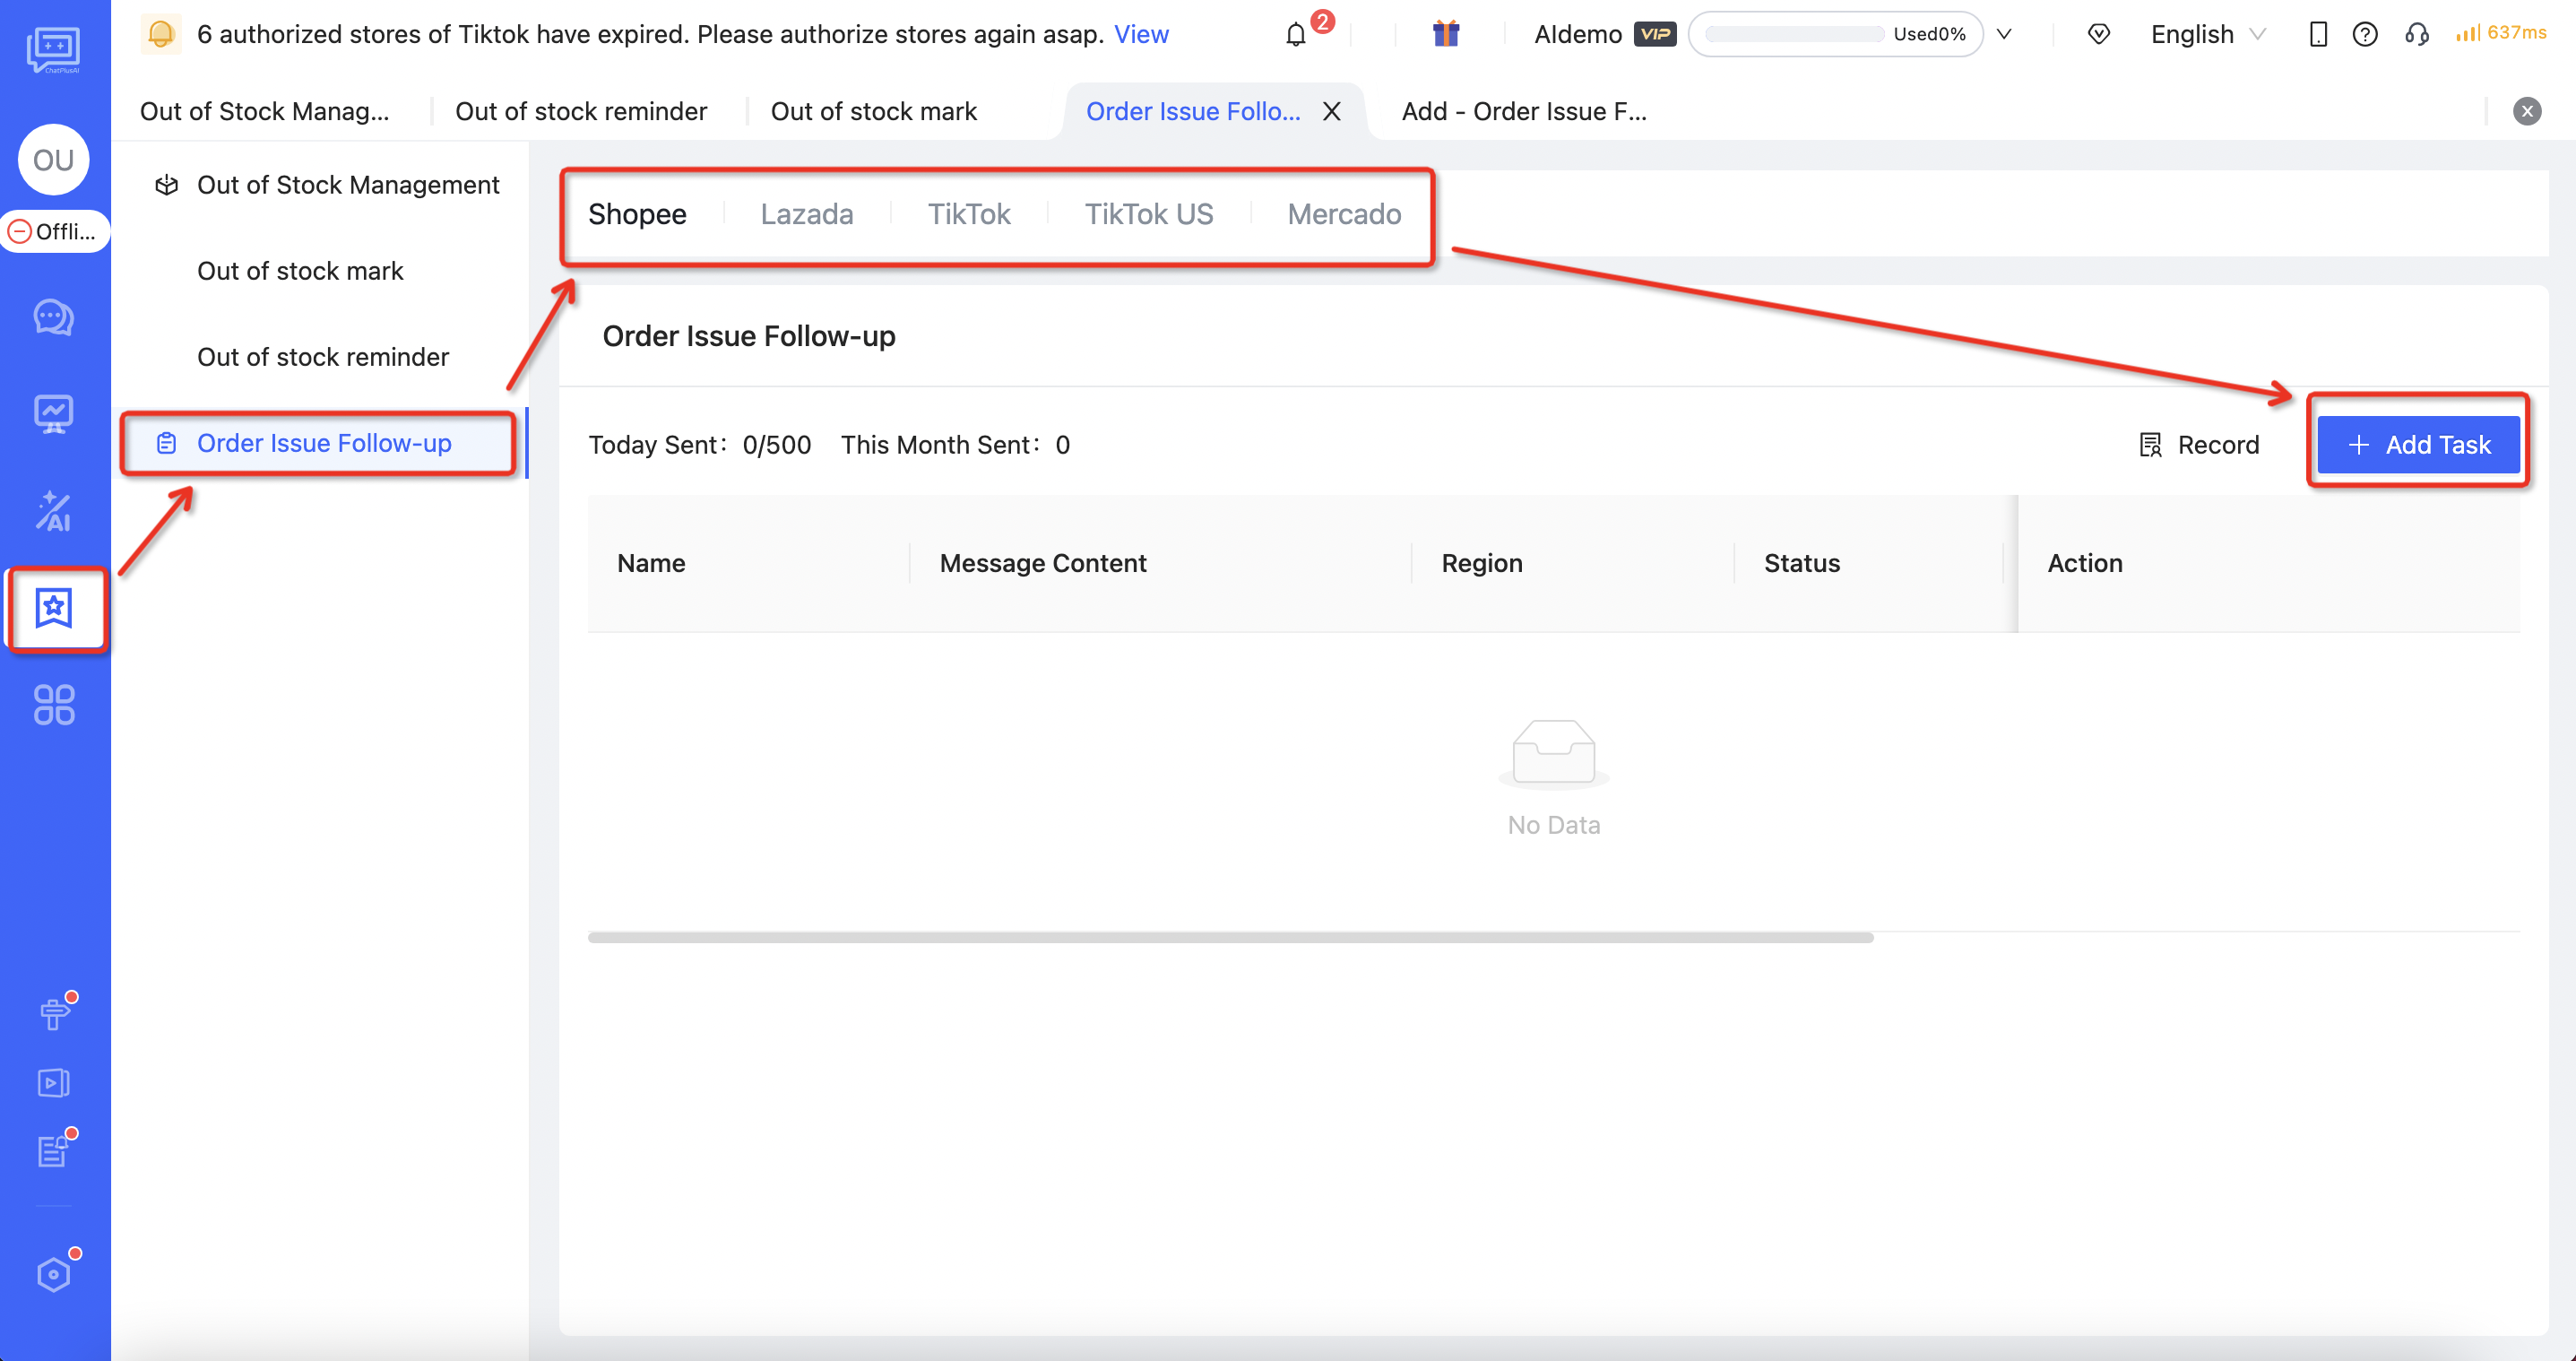 Figure 18
Order issue Follow-up Dispatching
- Filter SIP Stores: Shopee supports providing order issue follow-up for SIP stores. To avoid duplicate reminders sent to customers by Shopee and ChatPlusAI, ChatPlusAI's reminders will be filtered by default for SIP stores.
- AI Receptionist stop replying: After sending order issue follow-up, AI Receptionist will stop for 1 day by default.
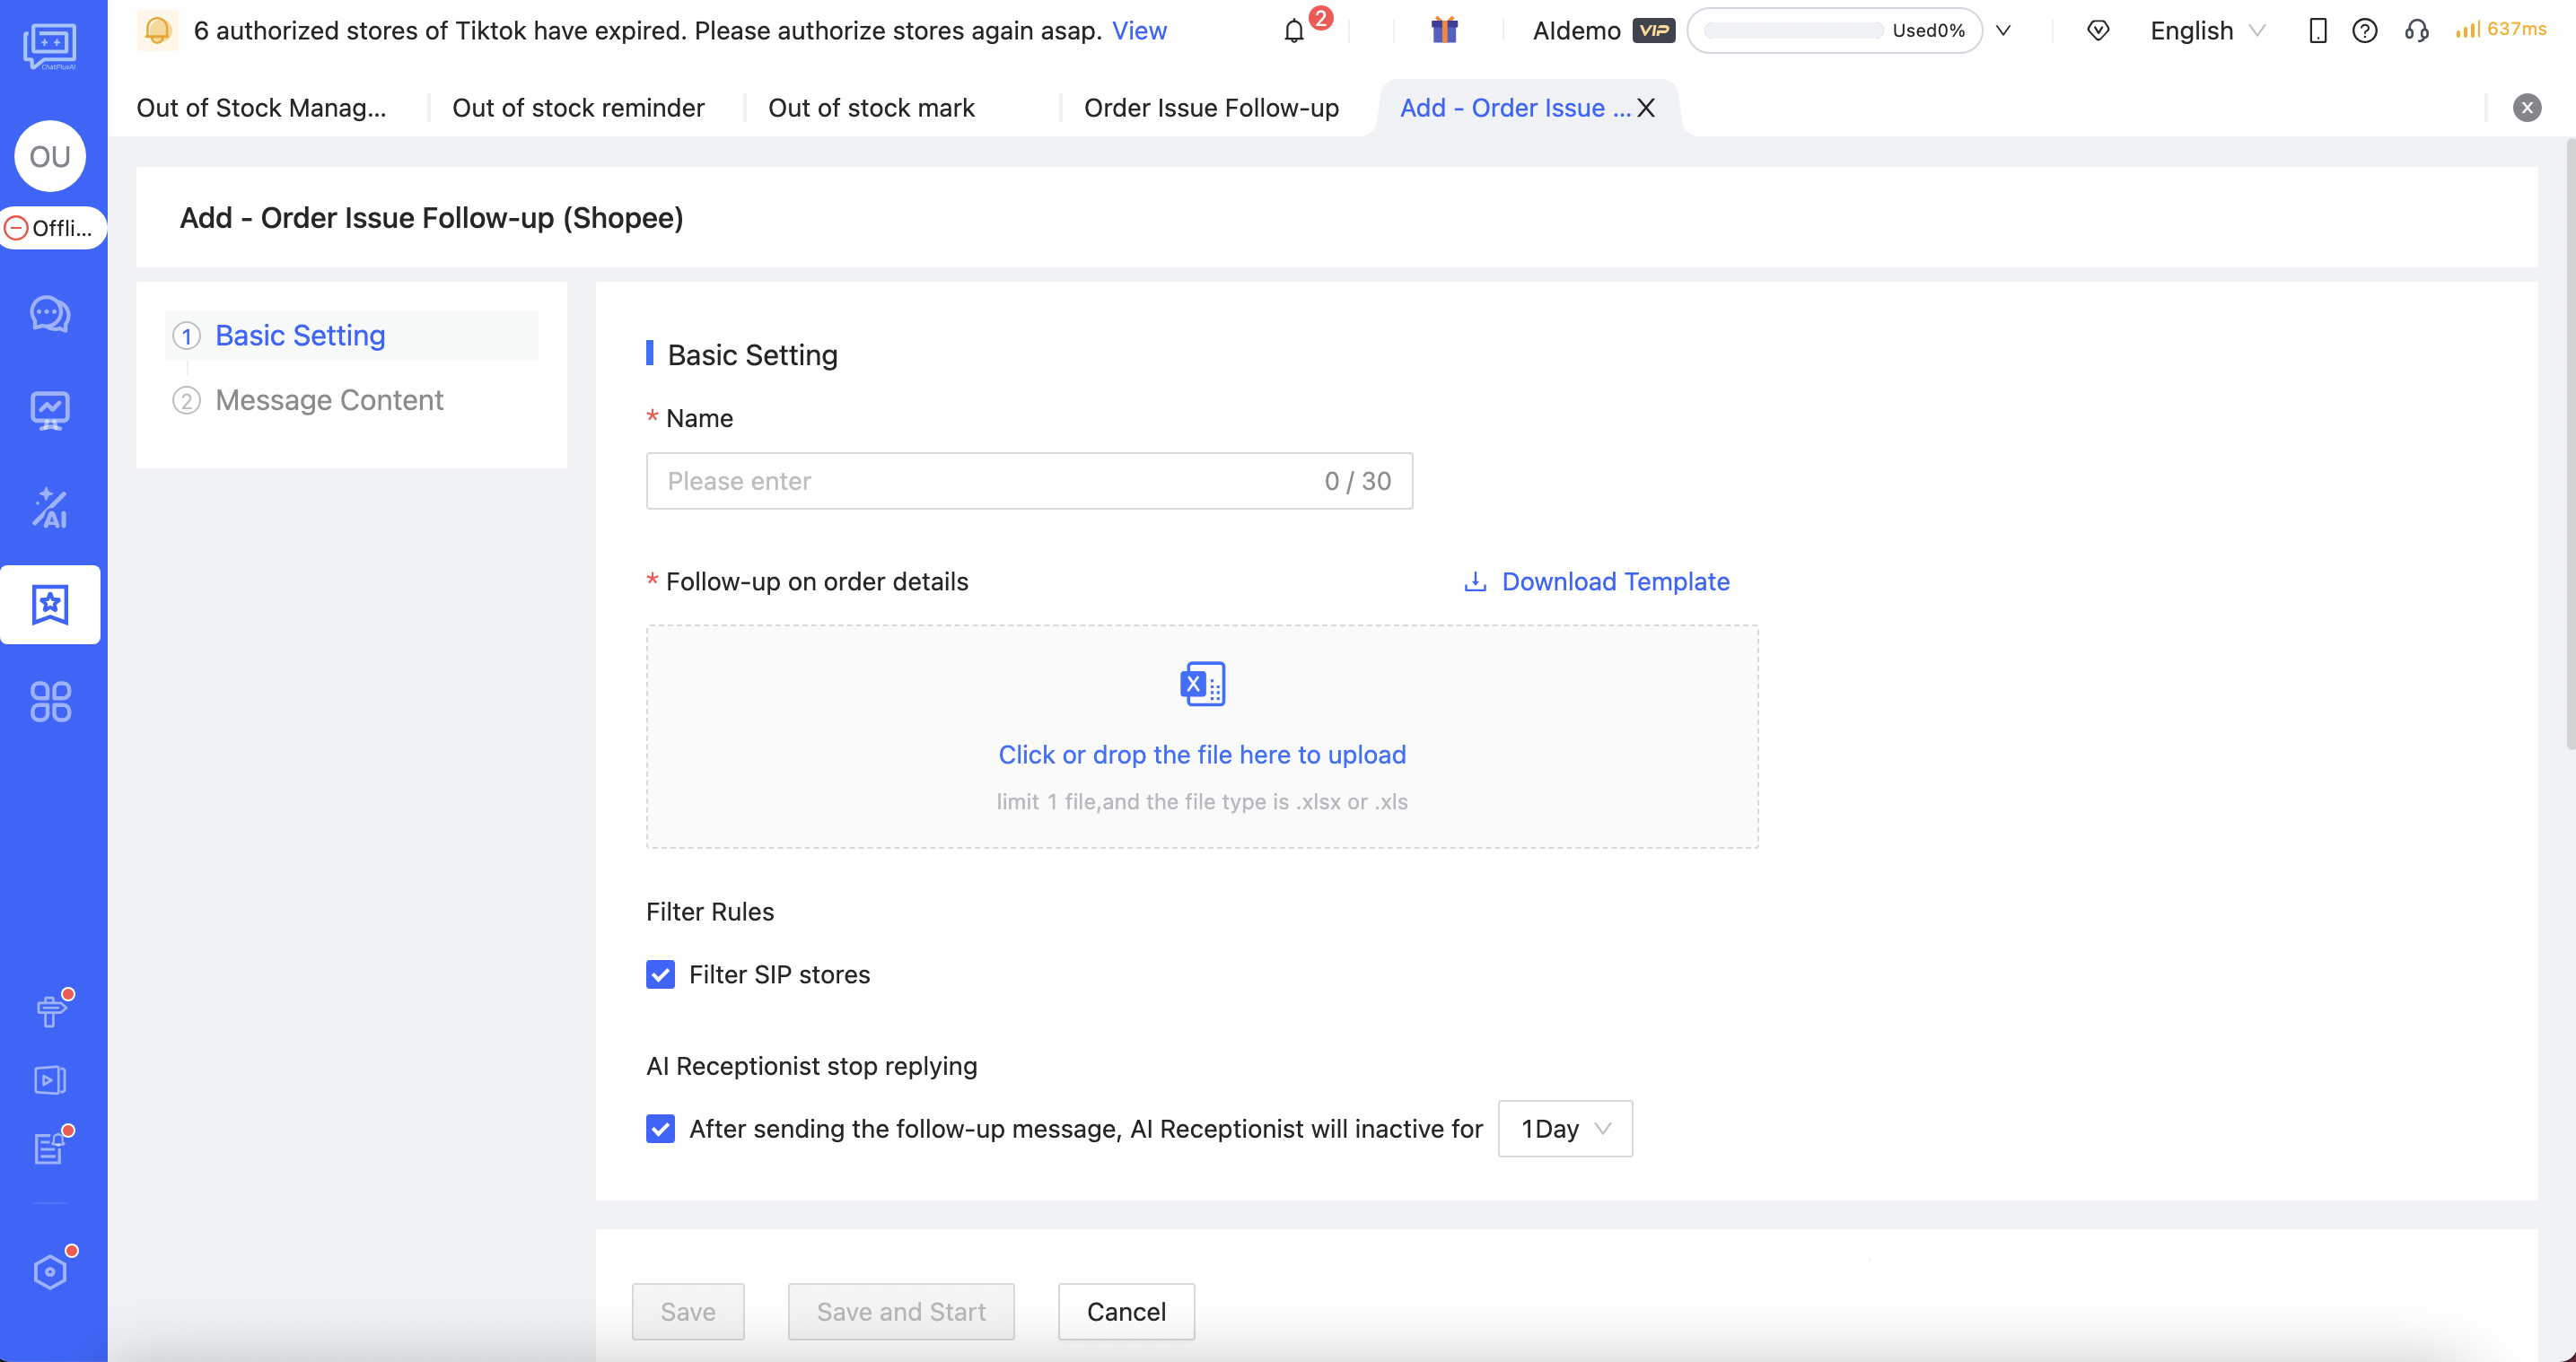 Figure 19
"Follow-up Order Information Form" Instruction
Click on "Download Template", the form currently contains 2 pieces of information: Order No. and Store ID (only for Lazada).
- Order No.(Required): Refers to the order number that need to be used for bulk messaging .
- Store ID (only for Lazada)(Required): The store ID associated with the order numbers can be found on the ChatPlusAI "Management Center → Seller Management → Store Management" page.
⚠️ The templates for "Follow-up Order Information Form" corresponding to Shopee/Lazada/TikTok Southeast Asia/TikTok US are different. Therefore, each task can only belong to one platform. If there are orders from different platforms, you need to separately configure them on the "Add Task" page in the "Order Issue Follow-Up" configuration section.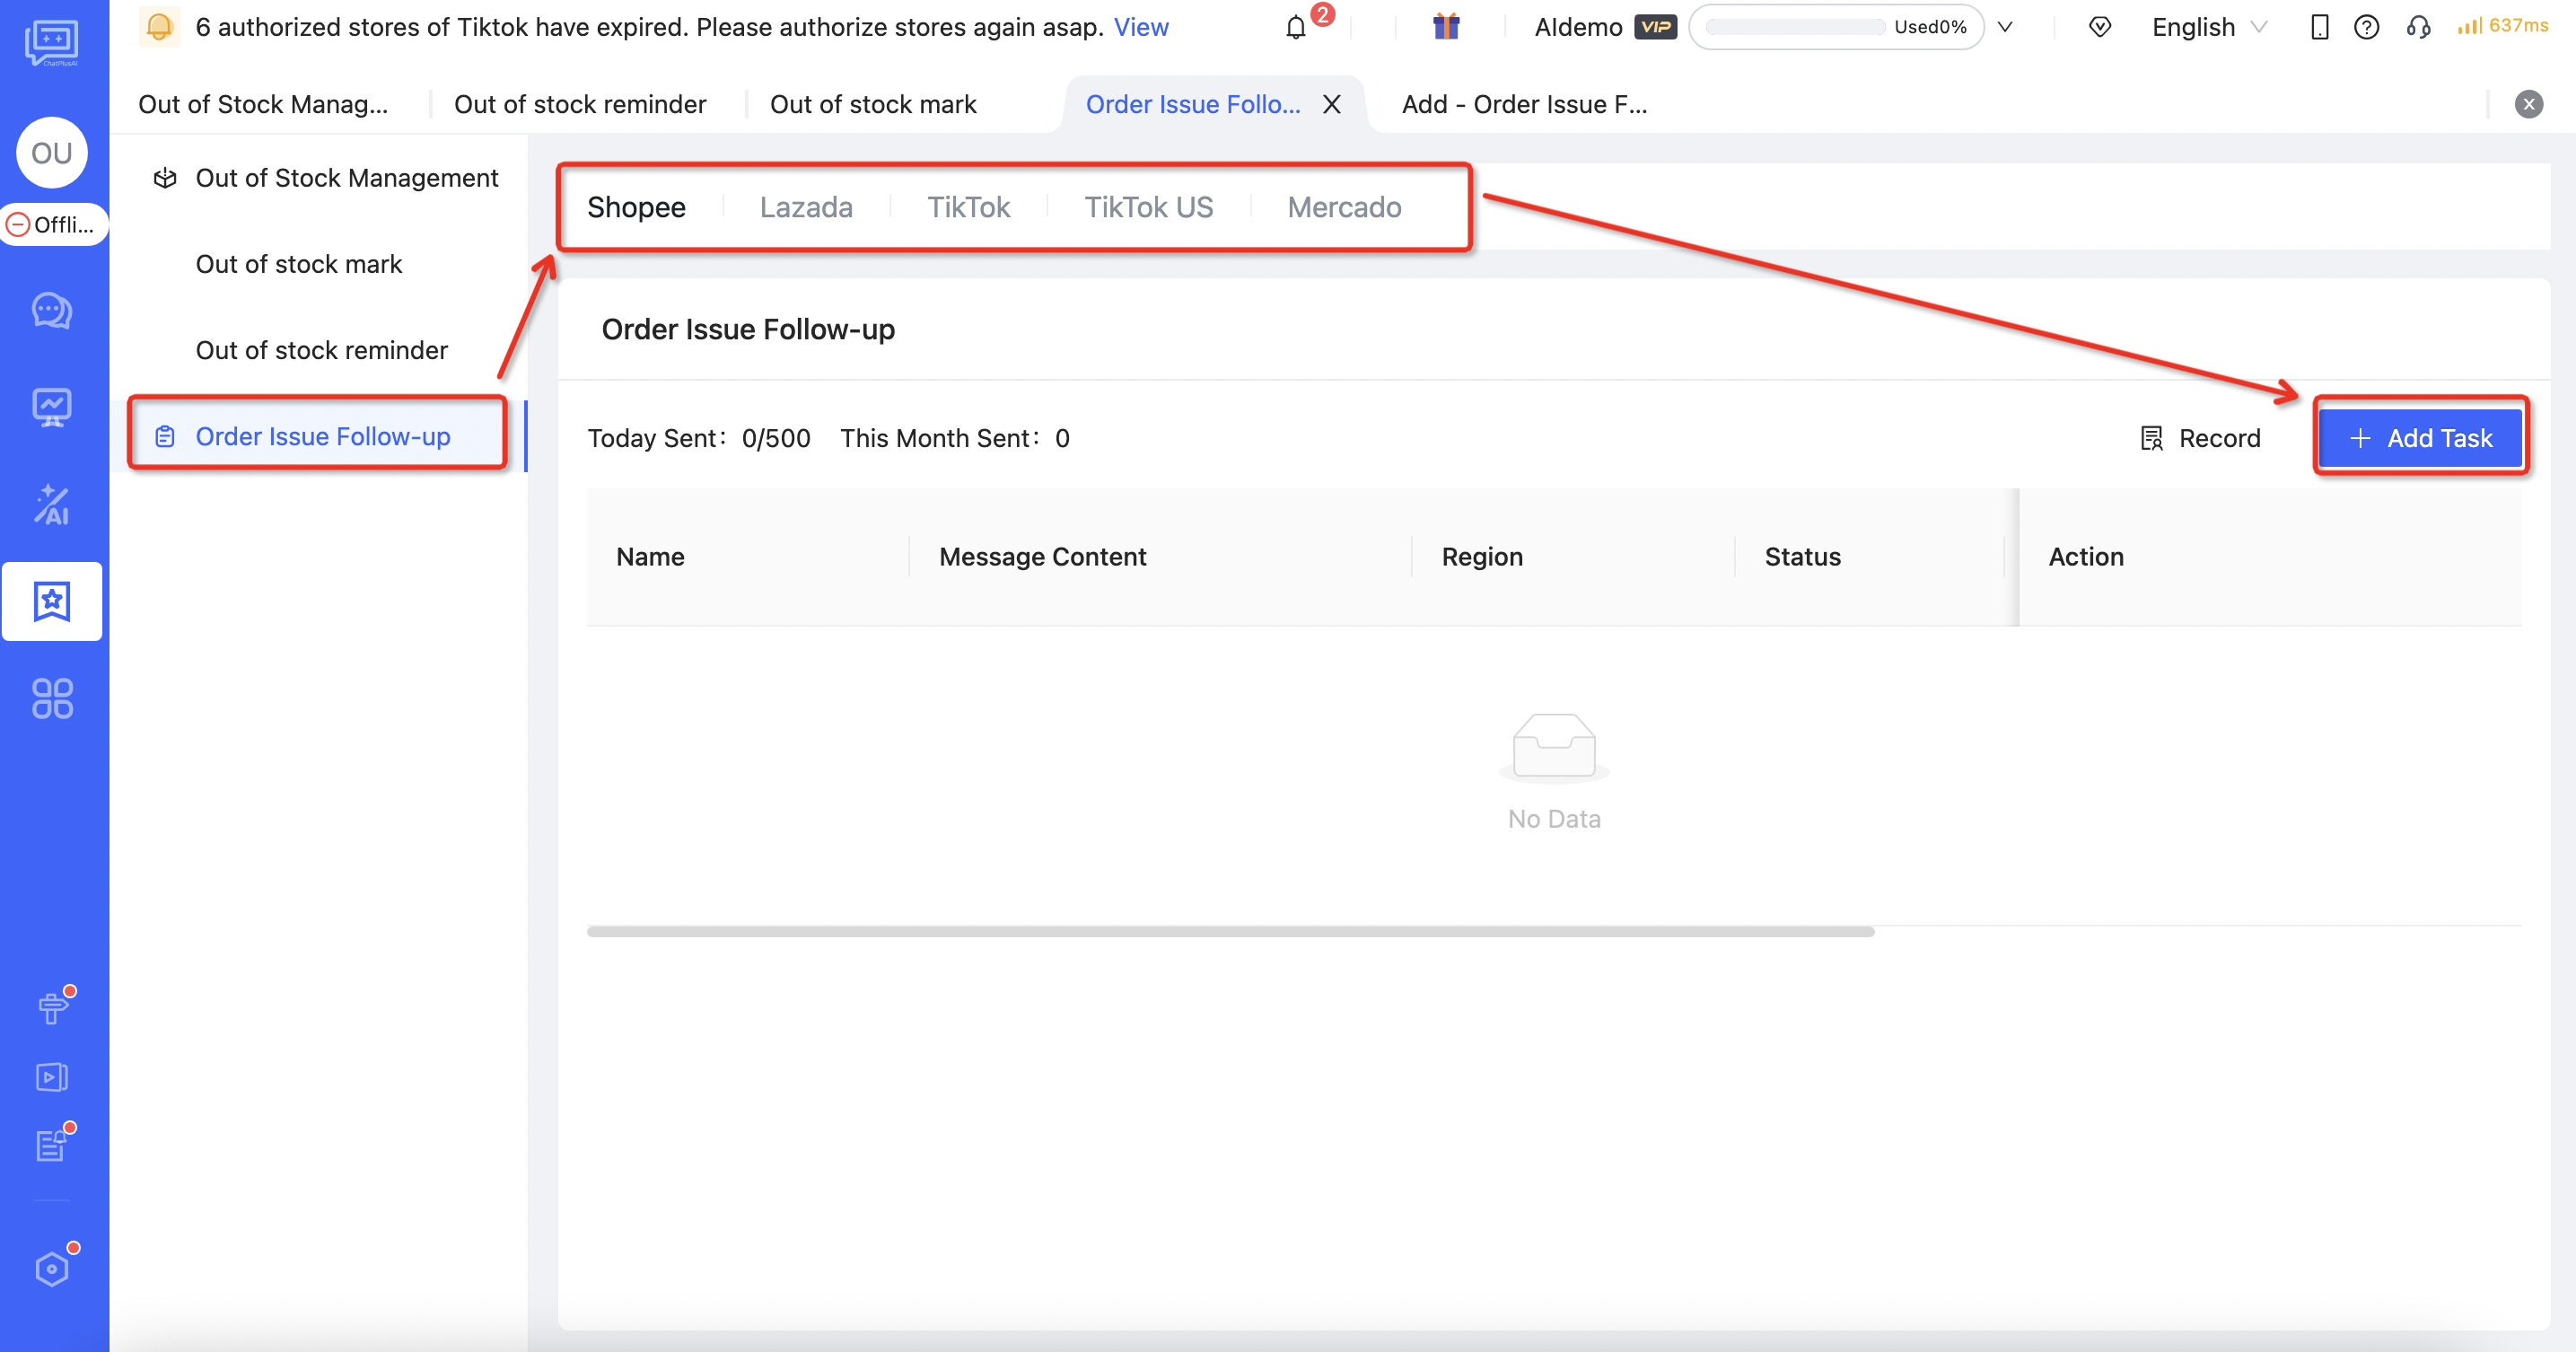
Figure 20
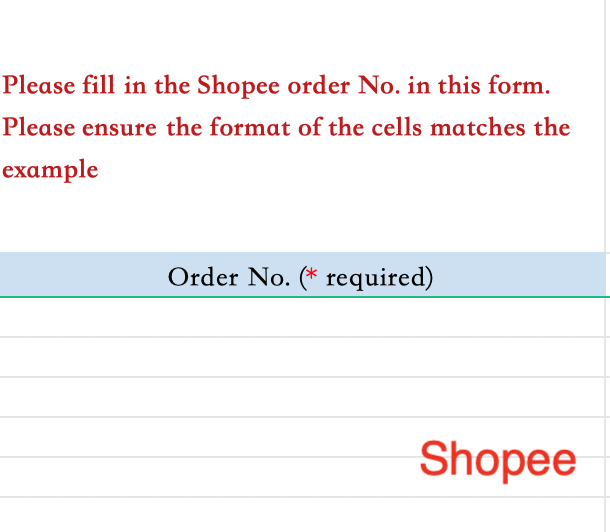
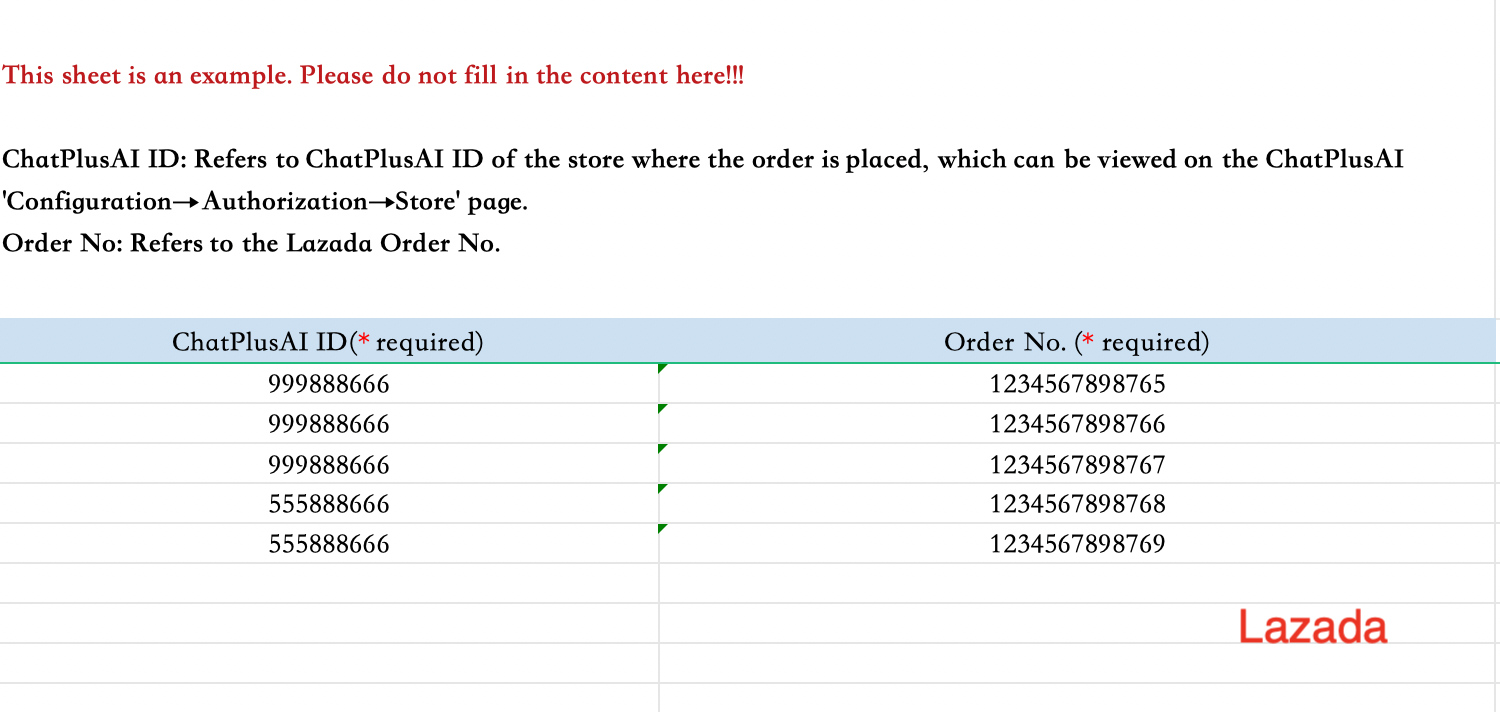 Figure 21
After the file is successfully uploaded, ChatPlusAI will pop up a corresponding content editing box for the sites involved in the orders in the file. One " Follow-up Order Information Form" can contain out of stock orders from multiple country sites. For example, if the uploaded form includes orders from four sites: Malaysia, Philippines, Thailand, and Vietnam, then content editing boxes for the four country sites will be prompted.
Message Content Translation and Sent
Message Content Sent
It refers to messages sent to customers after the task is initiated (as shown in the green area in the image below).
- Out of Stock Reminder: You can inform the customer which product from their order is out of stock and recommend a similar product. If the customer does not accept the alternative, you can also guide them to cancel the order themselves. Self-cancellation by the customer will not affect the marketplace's on-time shipment rate assessment.
- Order Issue Follow-up: You can customize the script content based on the specific issues with the batch of orders, but be mindful of risk control and ensure compliance with marketplace rules.
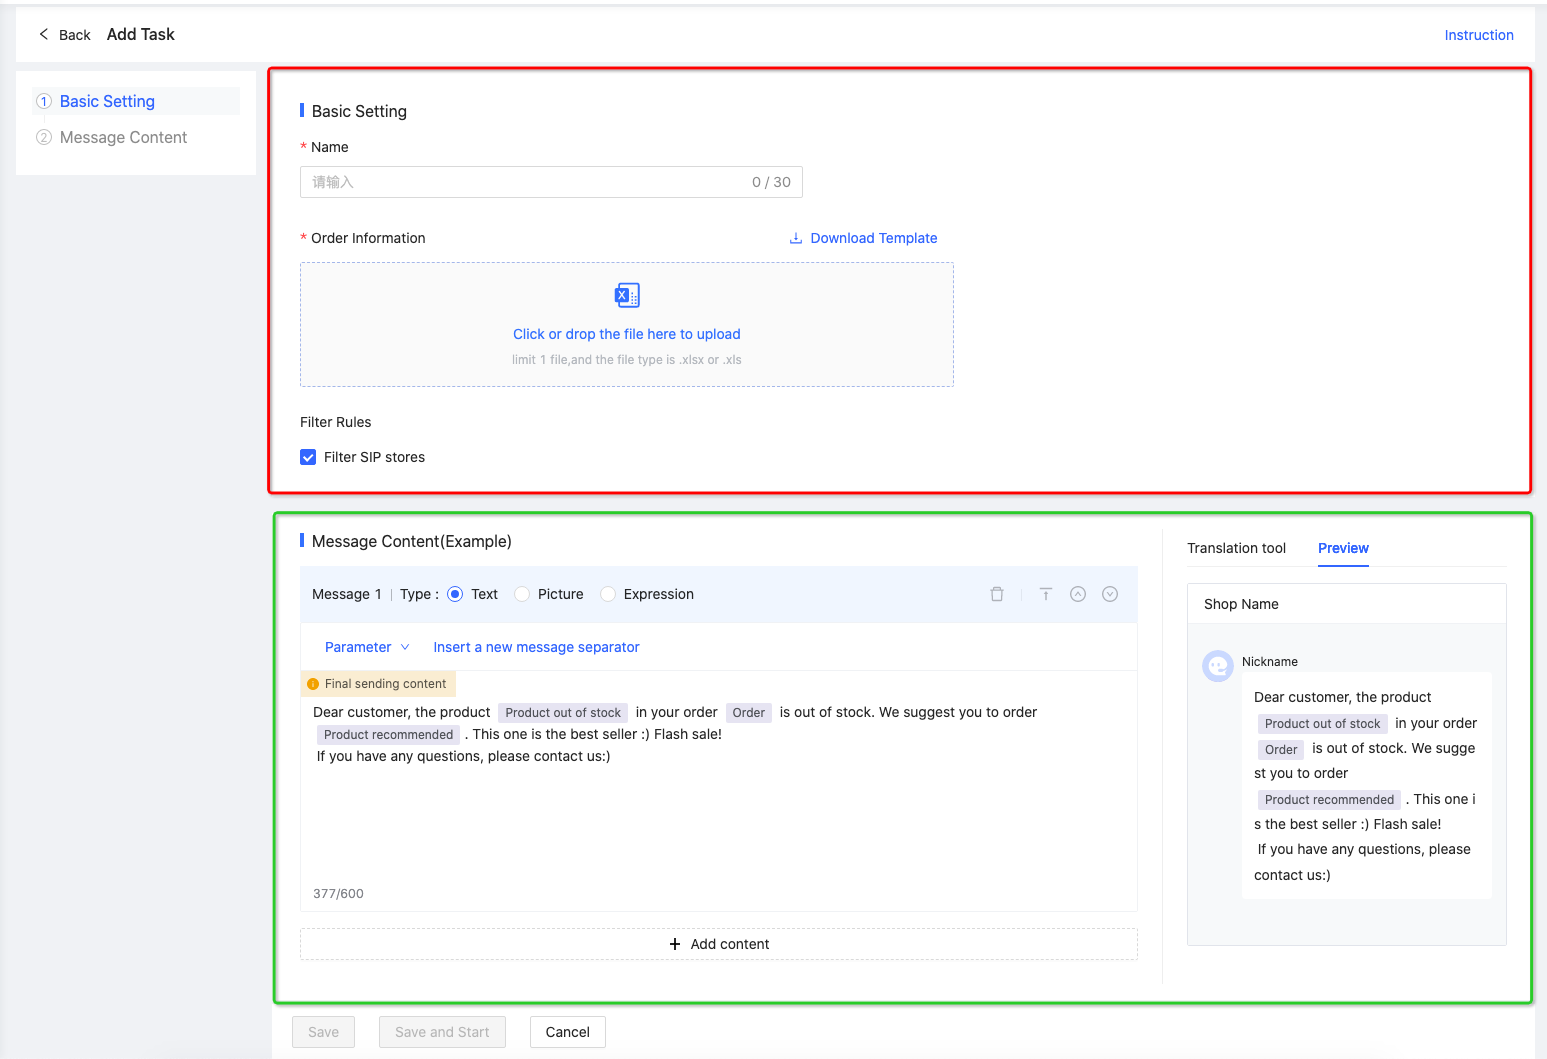 Figure 22
Message Content Editing Box
The editing box contains the content that will be ultimately sent to the customer. The types of content that can be sent include text, picture, and expression.
- Out of Stock Reminder: For text-type scripts, you can insert variables such as "Buyer Nickname," "Order No.," "Product out of stock," and "Product Recommended ," which are related to the out-of-stock order. You can use these variables as needed by clicking "Parameters" to insert them.
- Order issue Follow-up: For text-type scripts, you can insert variables such as "Buyer Nickname" and "Order No.," which are related to the order. You can use these variables as needed by clicking "Parameters" to insert them.
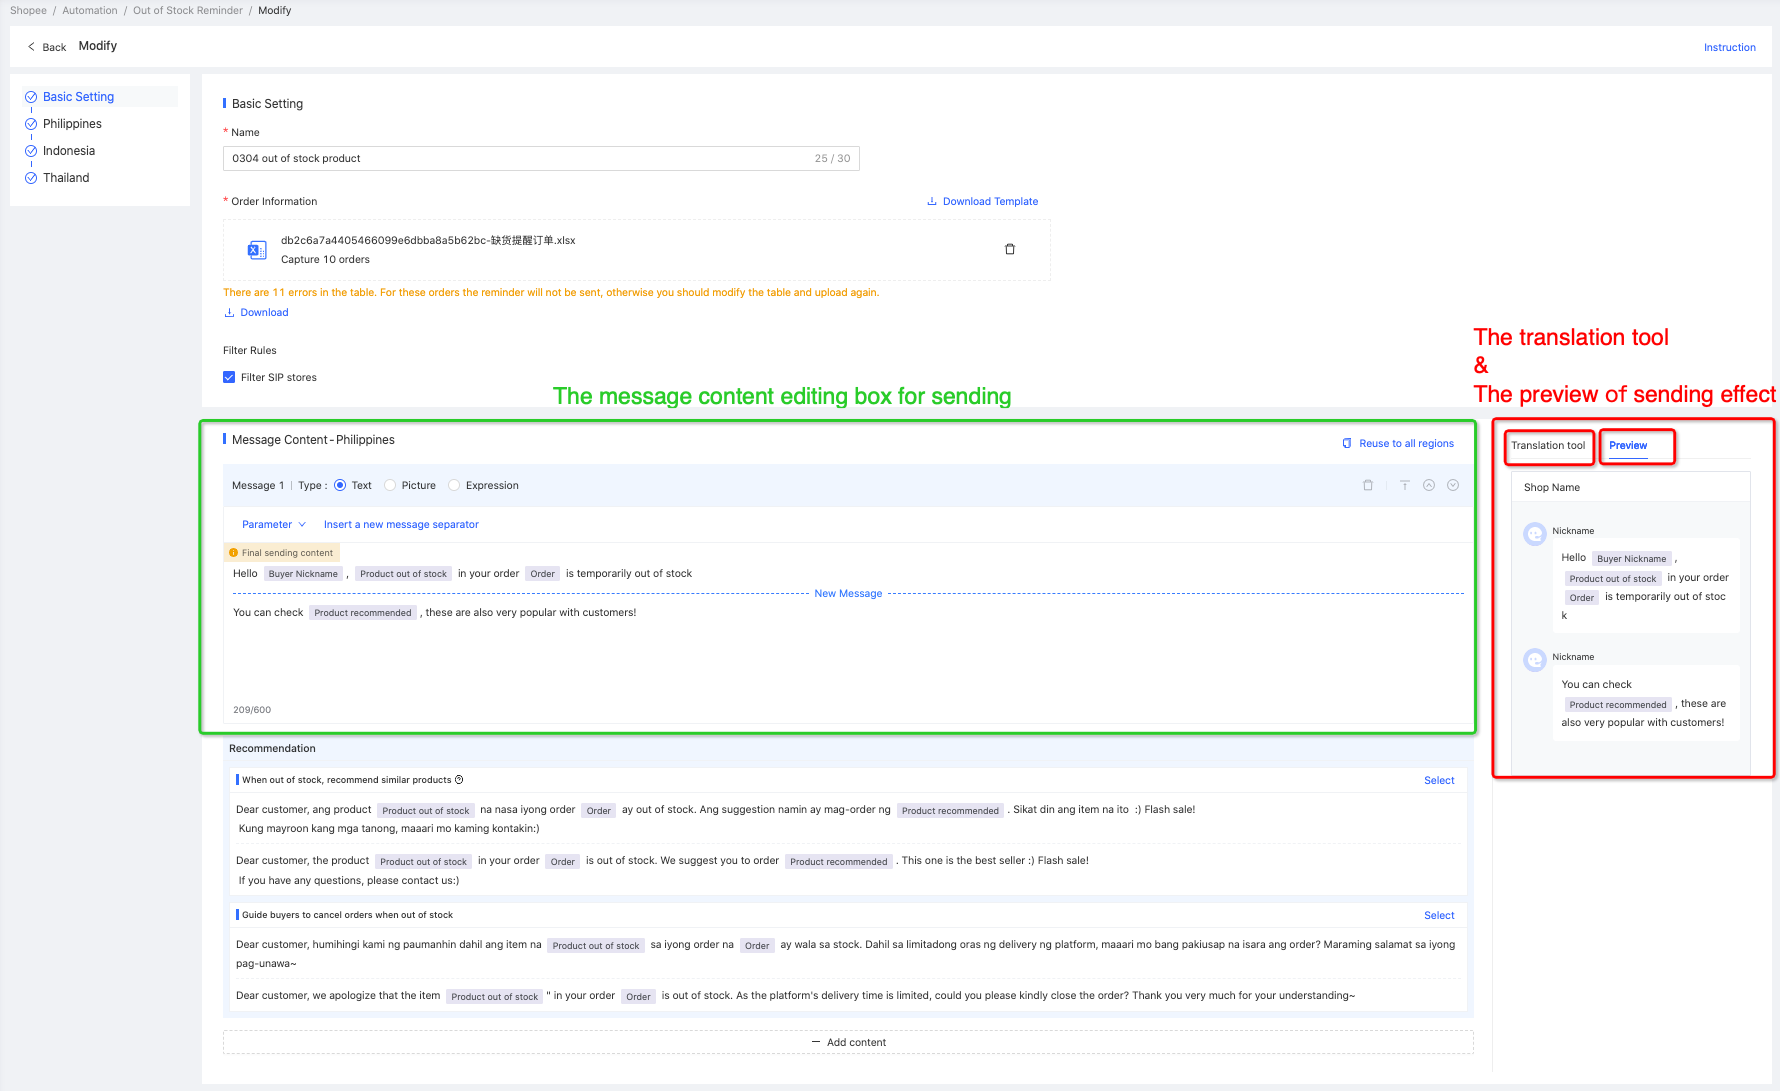 Figure 23
ChatPlusAI supports one-click migration of content across multiple country sites. After editing the content to be sent on one site, you can click "Reuse content for all other country sites" in the top right corner of the editing box (Note: Because different country has different expression and image, only text can be copied with one click). However, please note that for optimal use, we strongly recommend using local languages for messaging in each country, rather than using English exclusively. You can use the editing tools on the right to translate into the local language.
In "Out of Stock Reminder", **ChatPlusAI provides two types of default message templates, as shown in the figure below. 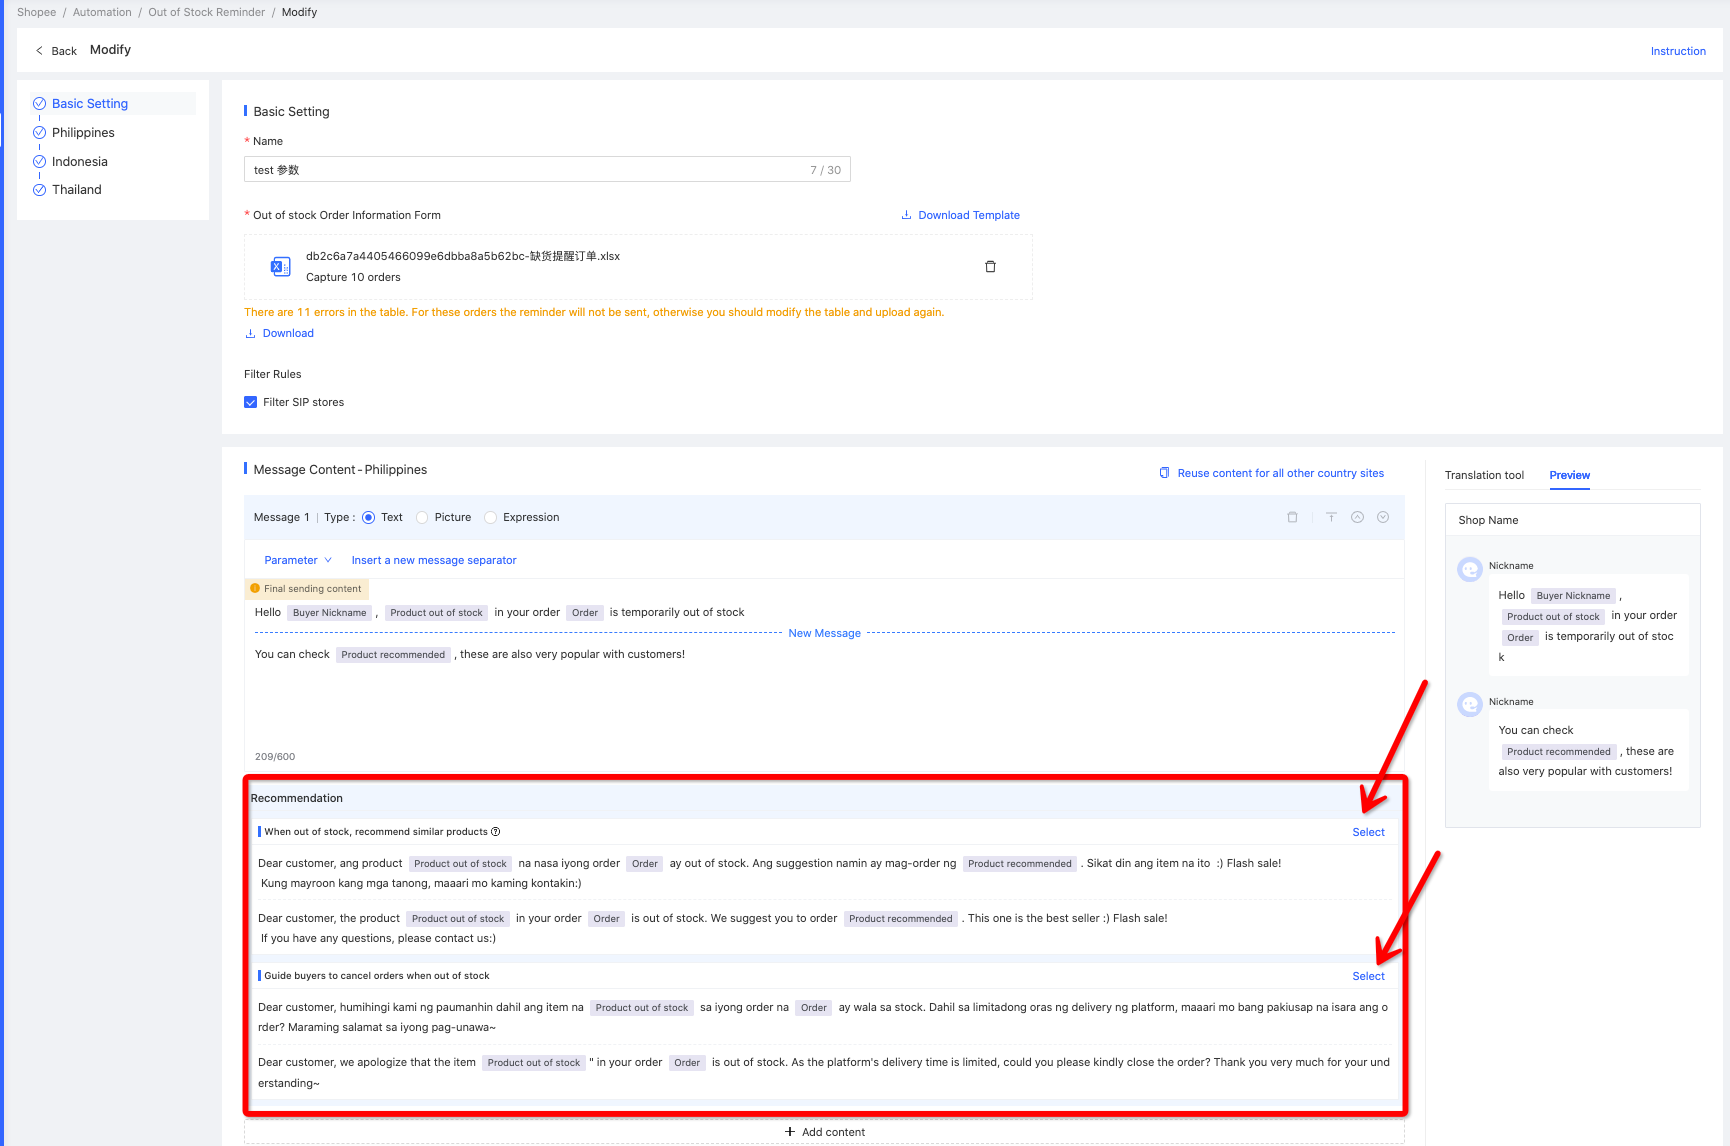 Figure 24
Preview of sending effect
Display the final effect received by the customer. After filling in the content editing box, you can see the final content and its effects received by the customer instantly on the right side of the content editing box. 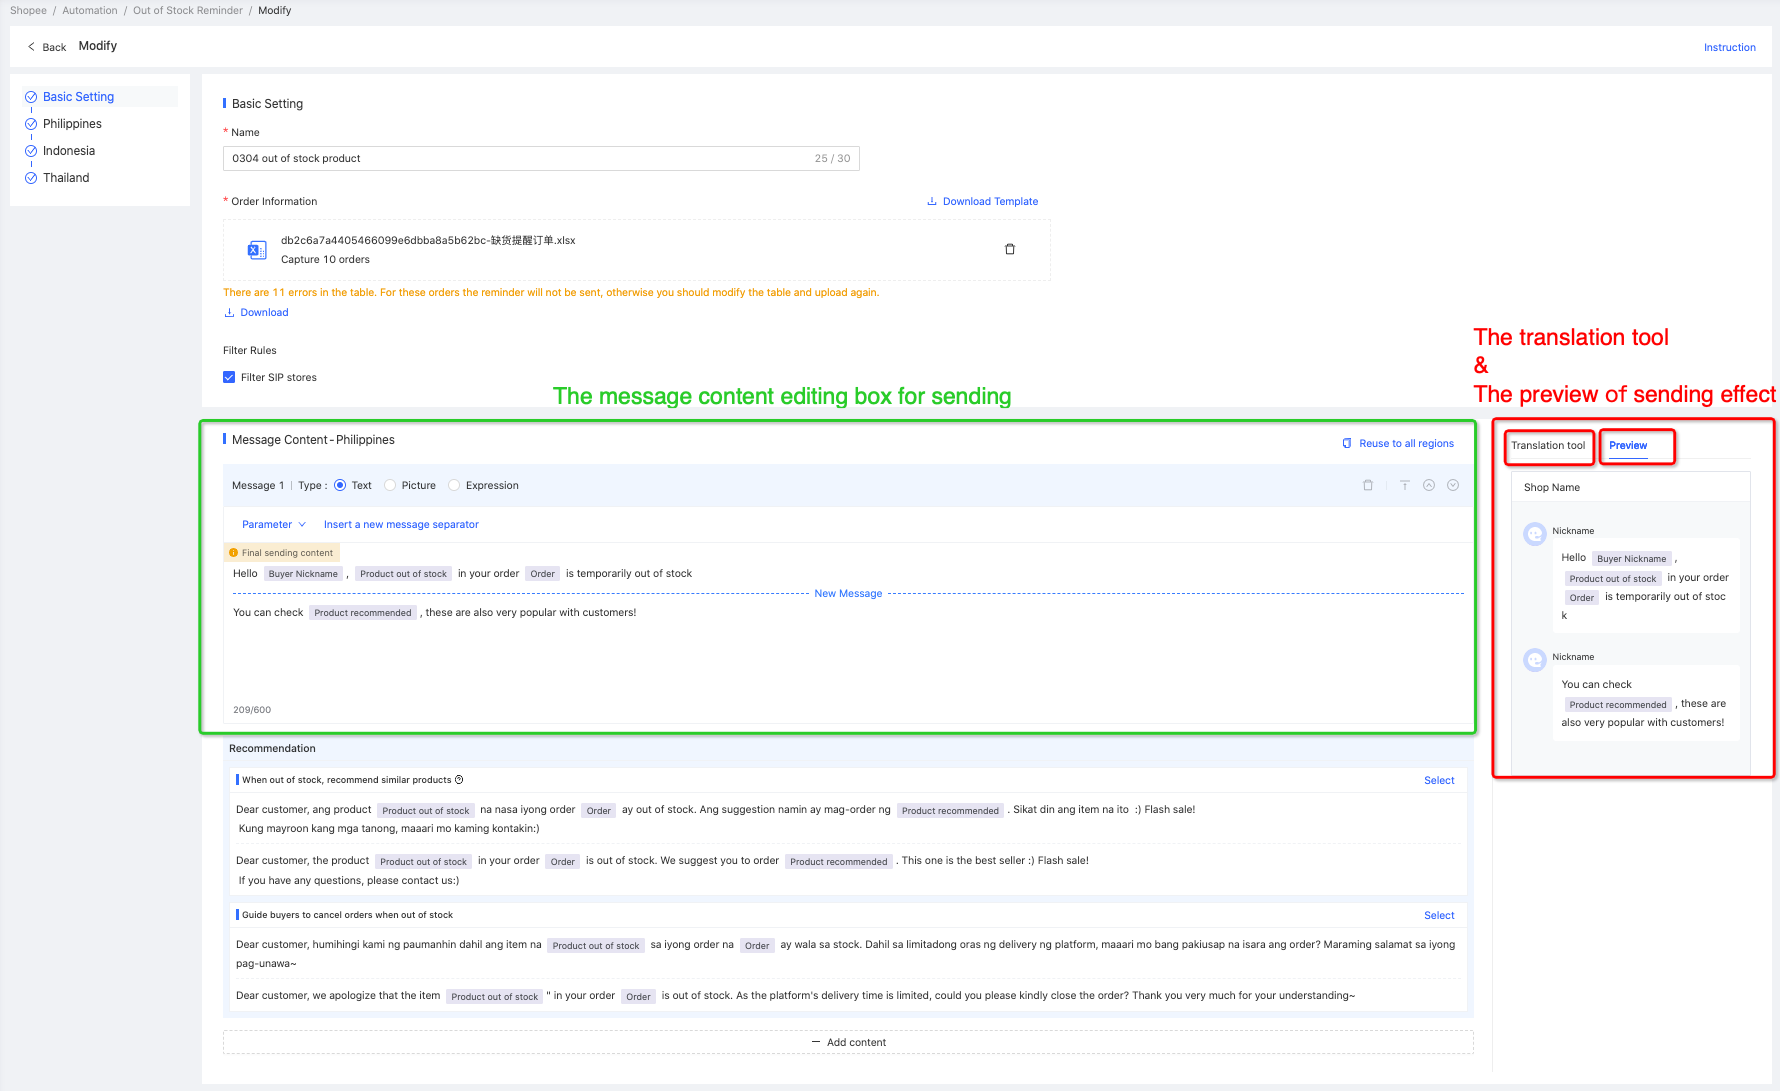 Figure 25
Translation tool
Considering the language issues of multi-country sites, to facilitate local language content verification by operations and management personnel proficient in both Chinese and English, a translation tool has been provided on the right side of the content editing box. This tool supports one-click translation into Chinese/English. After checking, if modifications are needed, they can be made directly in the right-side translation editing box. Then, the content can be translated back to the corresponding site language with one click. Finally, click "Copy to Final Sending Content" below to complete the modification of the final sending content. 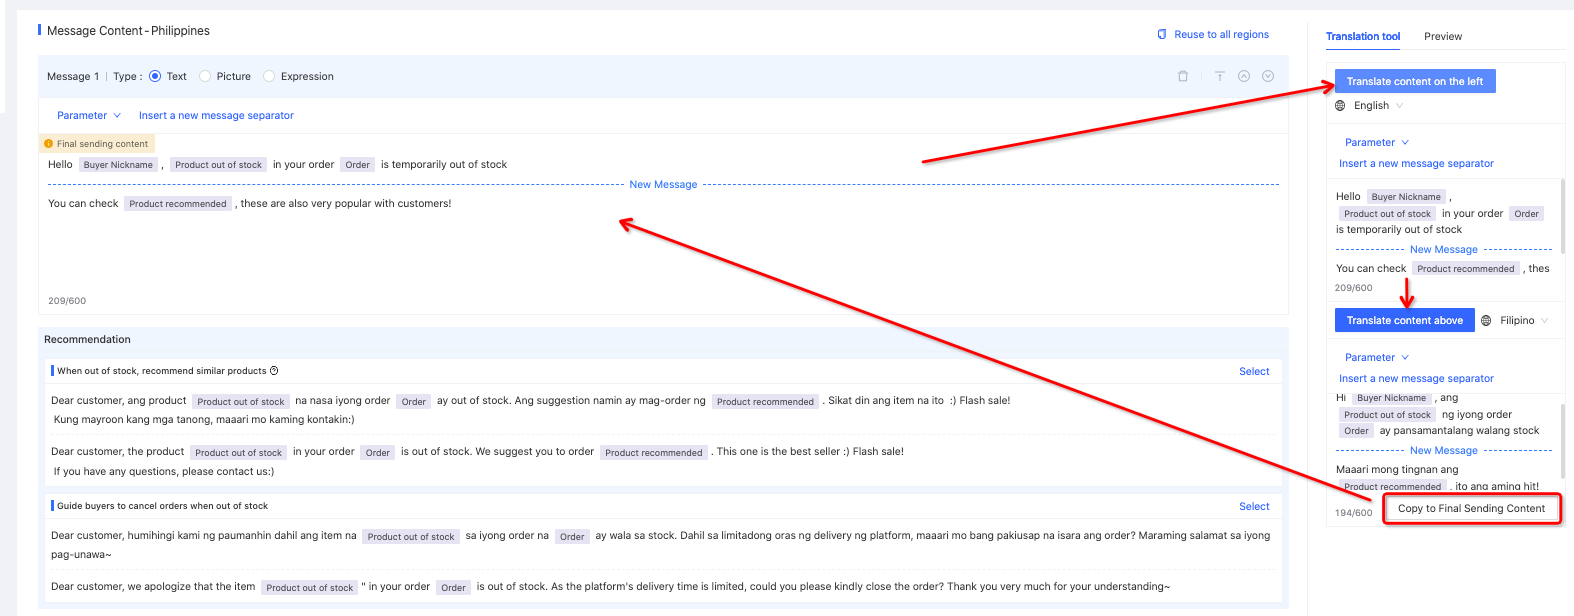 Figure 26
Save and Start Task
- Once the configuration is completed, clicking "Save and Start" will immediately activate the task.
- If you click "Save" after completing the configuration and the task is not initiated for distribution, the administrator can manually start the task at a suitable time.
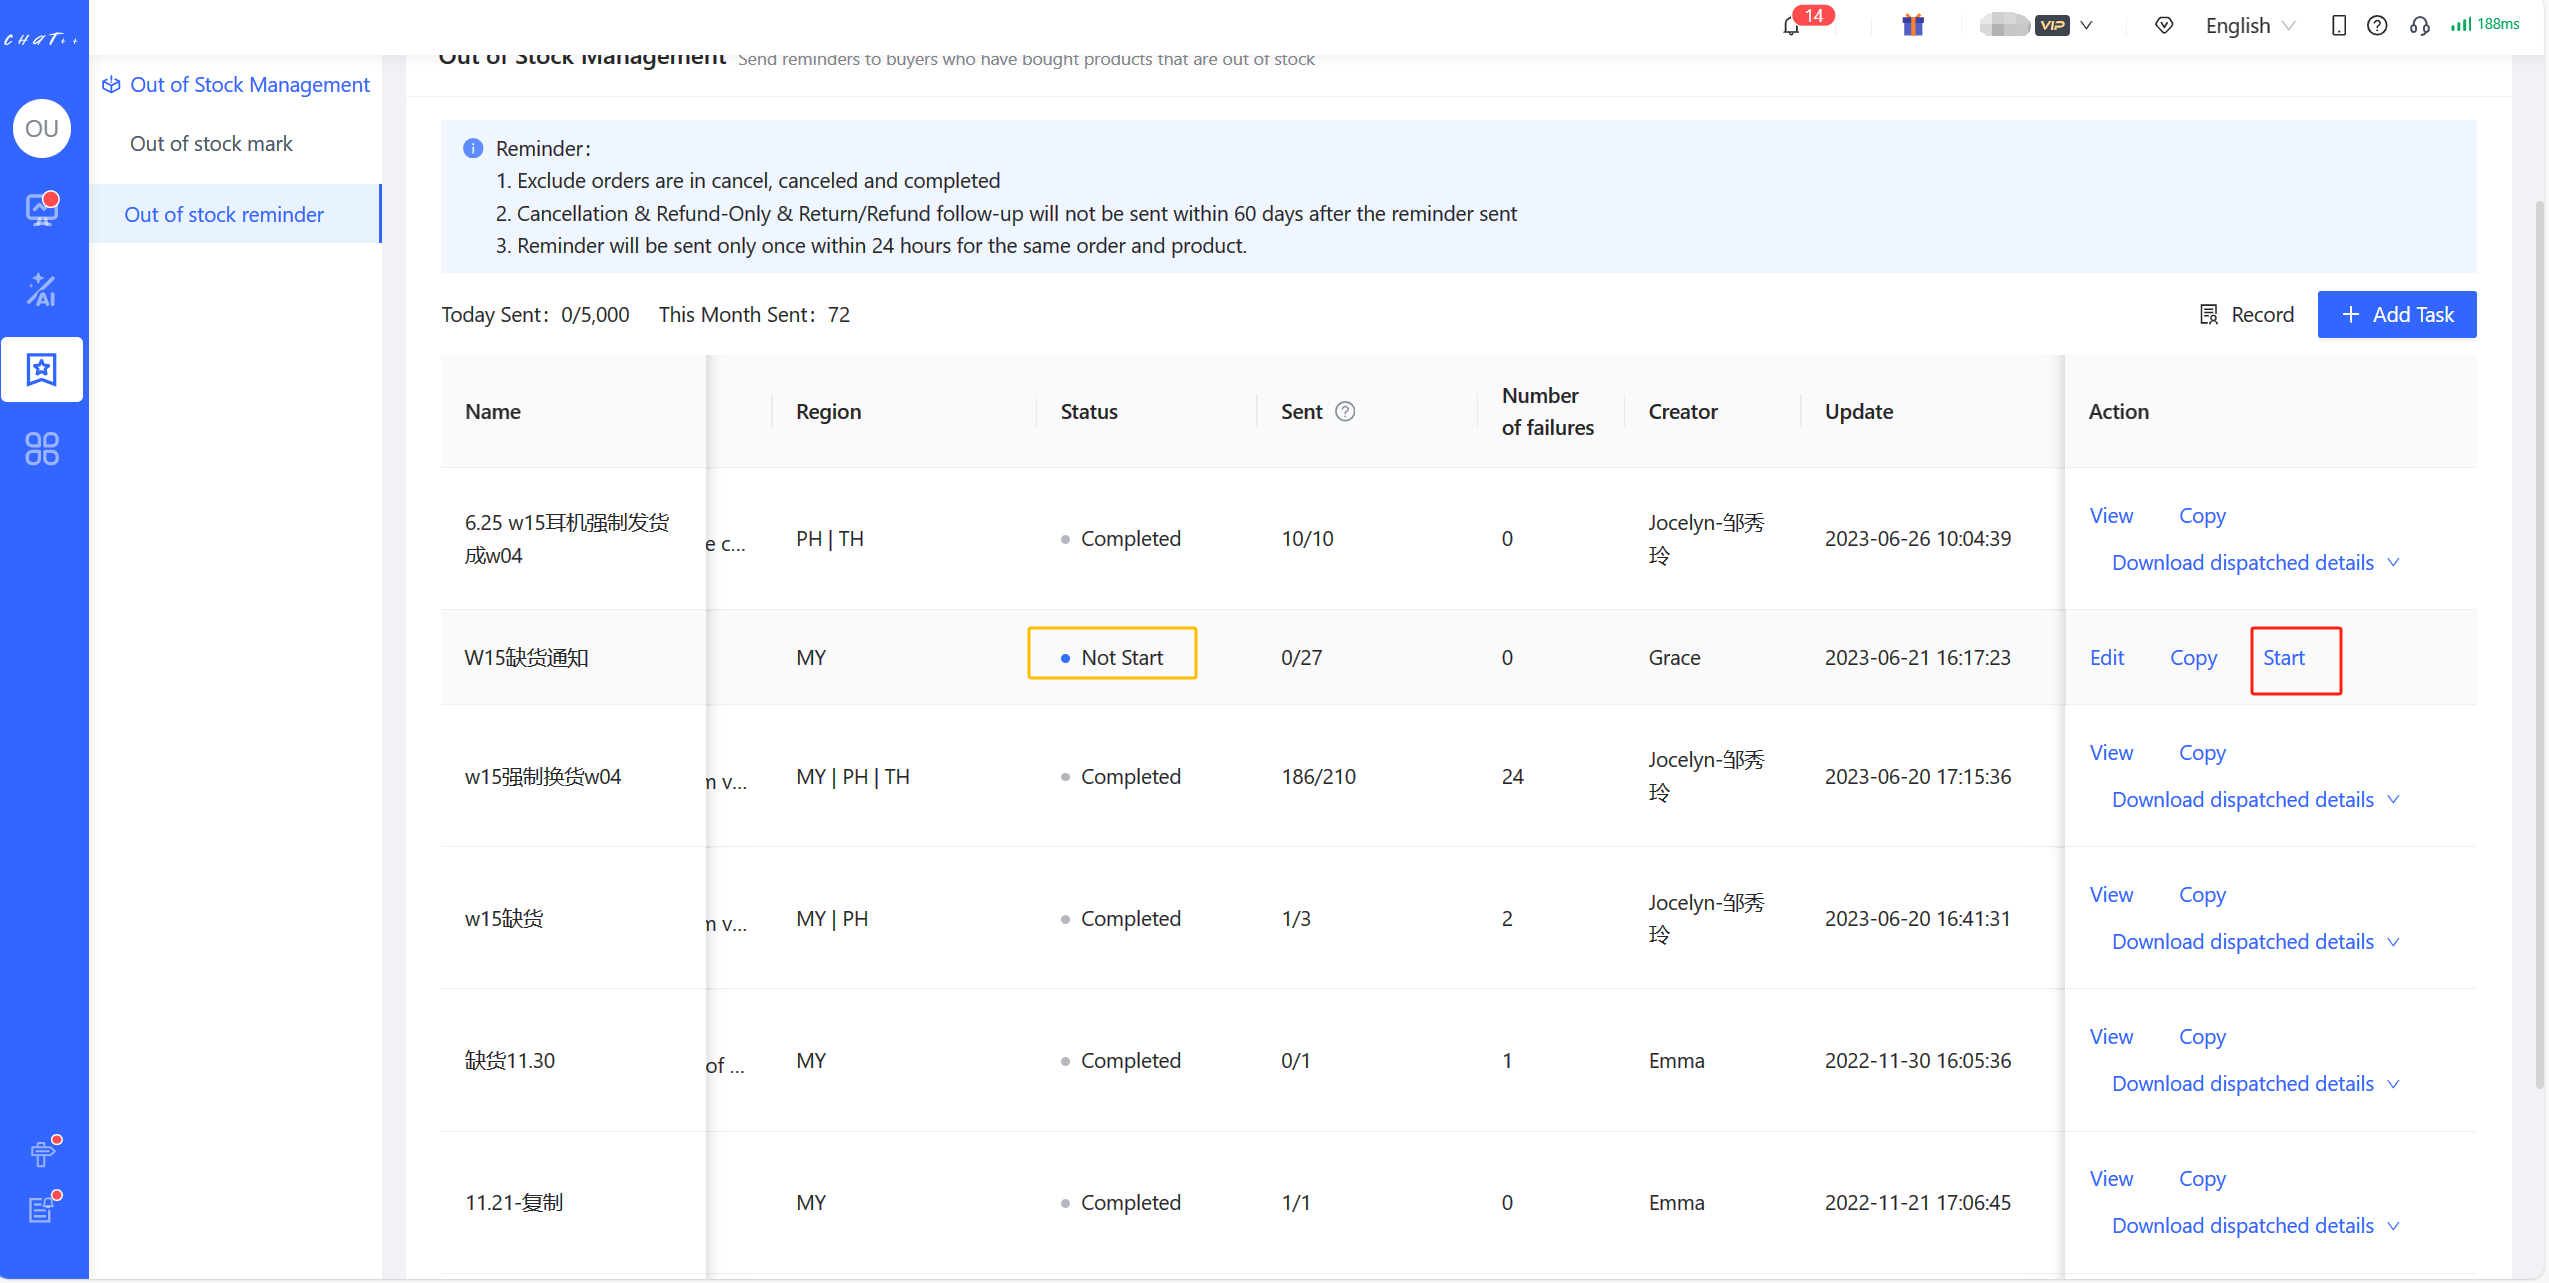 Figure 27
Task Management
To facilitate viewing and managing "Out of Stock Reminder" and "Order Issue Follow-up" tasks, their corresponding task lists display the following information: task name, sending content, site, status, number of sends, last updated time, and actions.
Status
- Not Start: If the administrator selects "Save" instead of "Save and Start" on the configuration page, the task is saved but not activated. The administrator can choose to manually start it at an appropriate time.
- Ongoing: The task has been activated and is currently in progress. For ongoing tasks, administrator can manually stop them.
- Completed: Includes tasks with all successfully dispatched, partially dispatched, and completely failed dispatches.
Sent: Displays Number of times sent and Number of times should be sent
- Number of times sent: The number of times the task has been successfully dispatched.
- Number of times should be sent: The total number of times the task should be dispatched.
- Number of failures: Tasks may fail to distribute out-of-stock reminder messages if they are manually stopped, exceed the distribution limit, or if there are errors in the provided information. Administrators can download the distribution details to view the specific reasons for the failure.
The task lists for "Out of Stock Reminder" and "Order issue Follow-up" display the "Today's Sent" and "This Month's Sent" on the left side. Out of Stock Reminder and Order issue Follow-up have separate cumulative sending limits. Once the daily/monthly limit is reached, no further tasks of that type can be performed.
- **Out of Stock Reminder Sending Limits: **Each script sent counts as one entry. Marketplace-level daily total: 500 times/day for enterprise version, 50 times/day for non-enterprise version.
- **Order issue Follow-up Sending Limits: **Each script sent counts as one entry. Marketplace-level daily total: 500 times/day for enterprise version, 200 times/day for non-enterprise version.
To facilitate task processing and management, the "Record" on the right side provides records of each task's operations (task operator, operation time, task name).
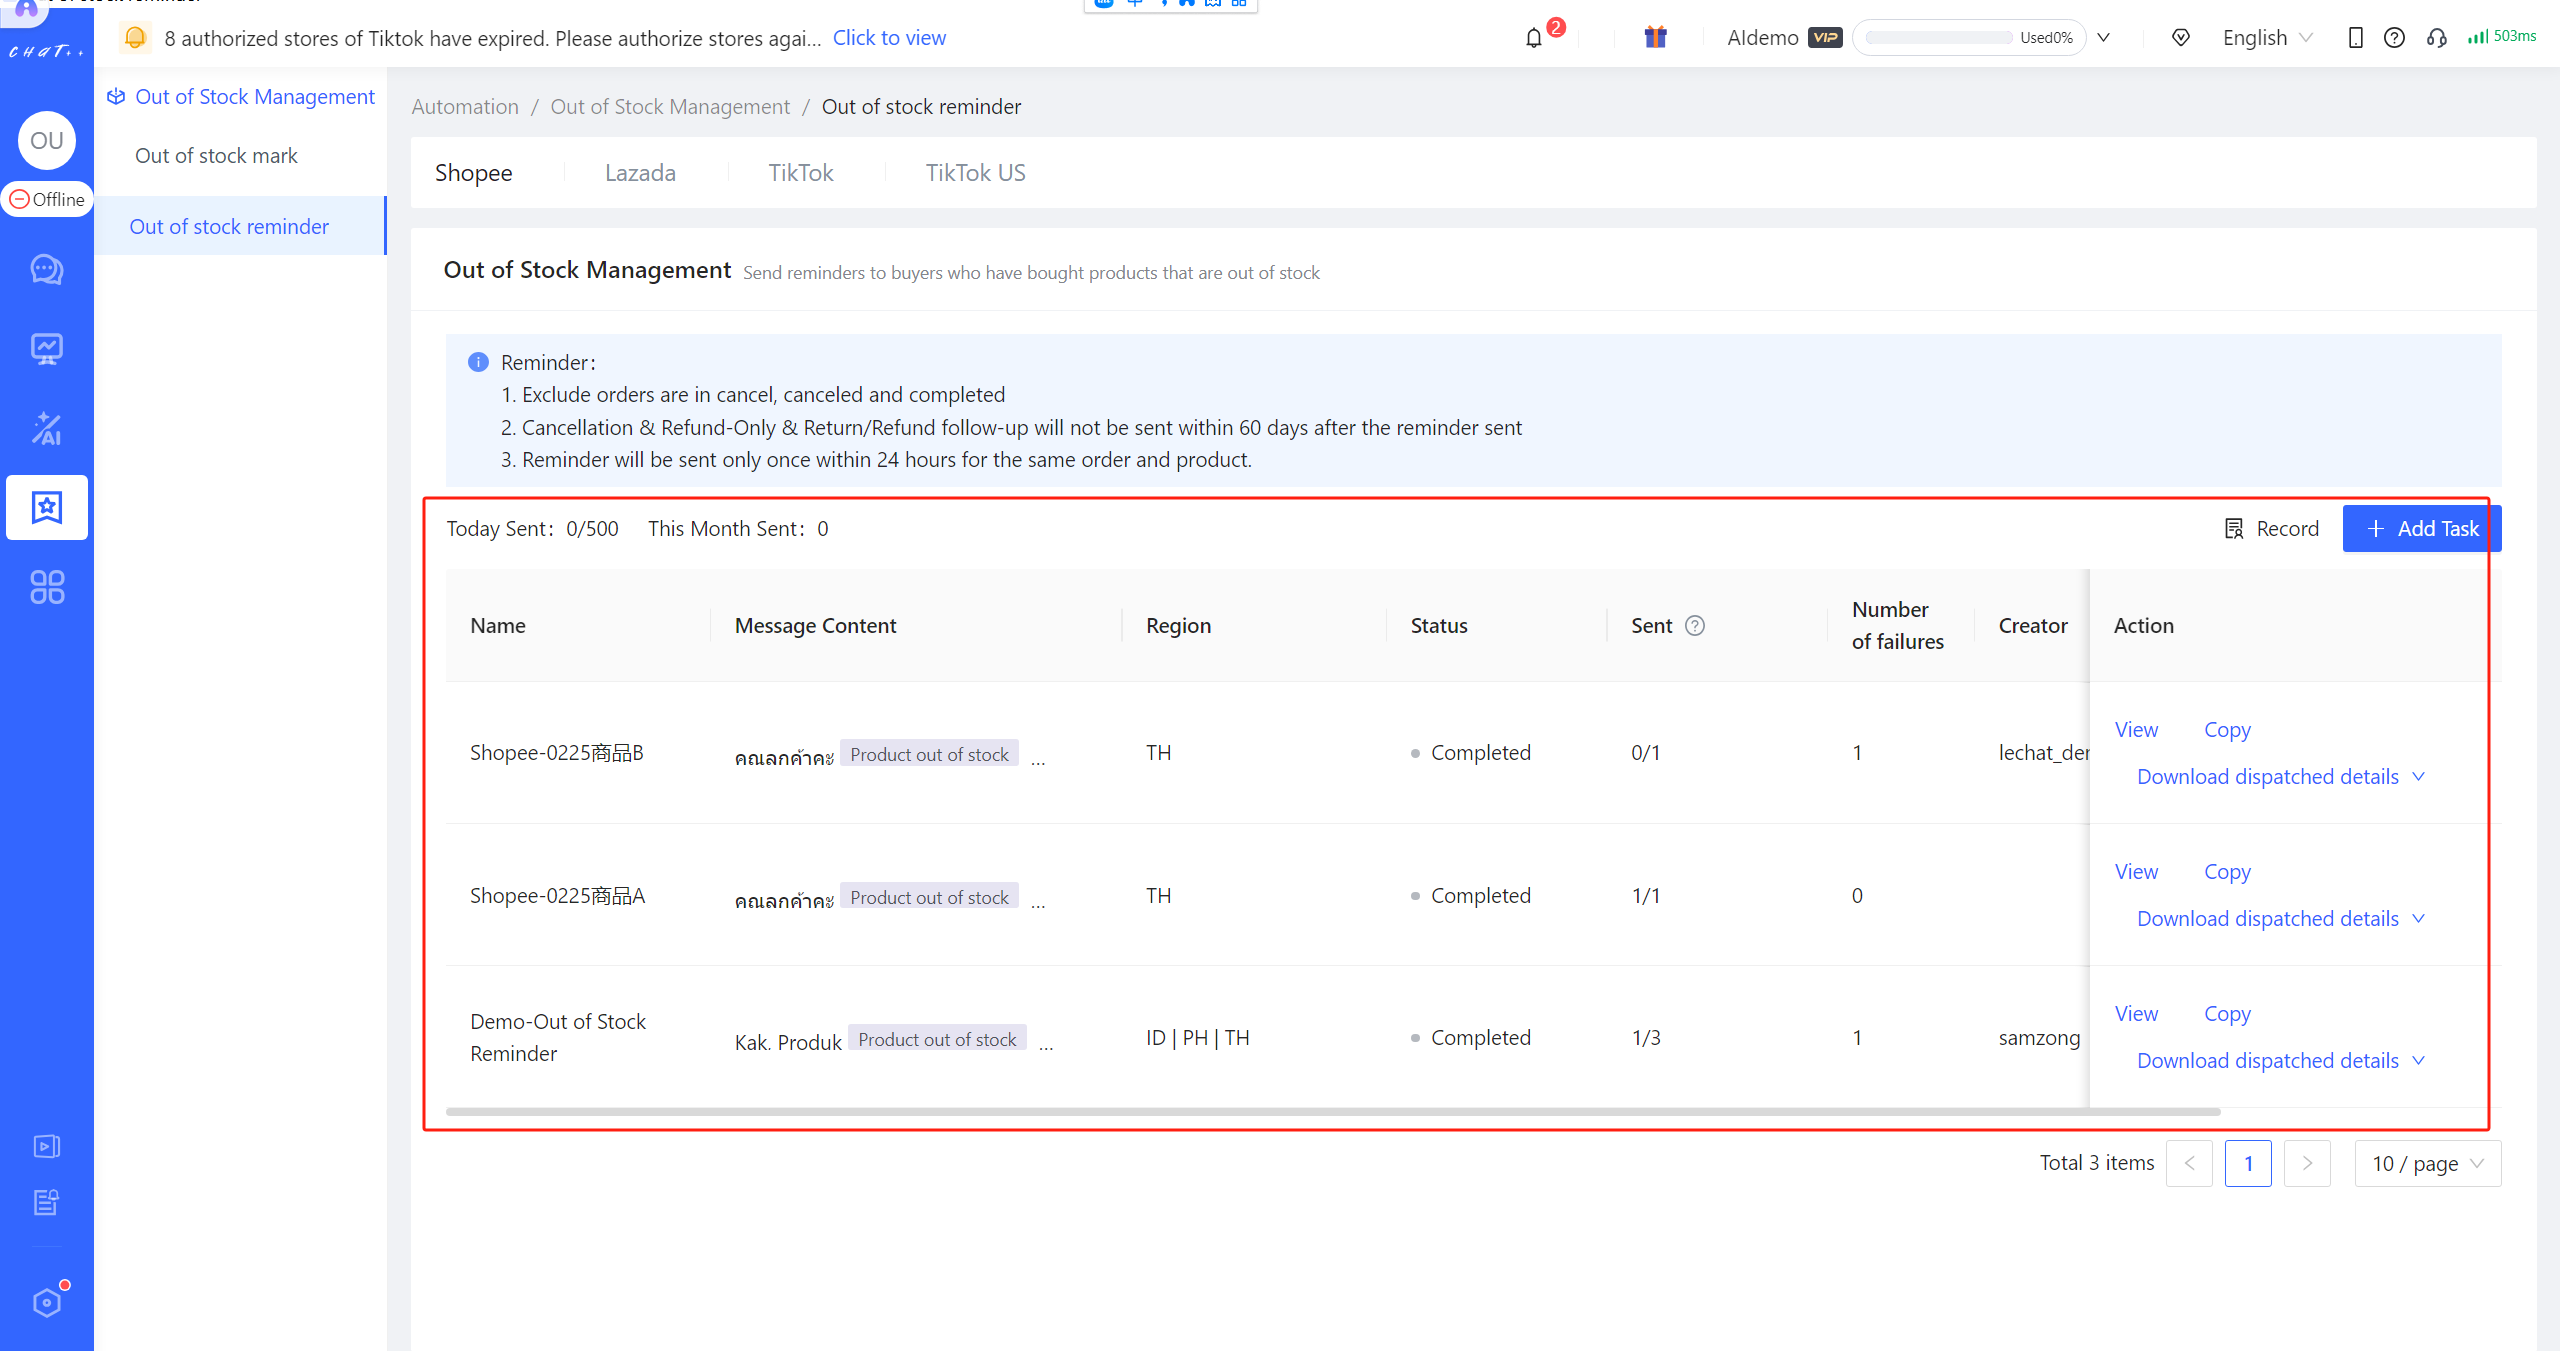 Figure 28
FAQ
Q1:Why the sent times shown in the task list are less than the times it should be sent?
A1: When the number of sent messages is less than the number of messages that should be sent, there may be failed orders in the task. You can check the reasons for the failed distribution by navigating to "Out of Stock Reminder/Order Issue Follow-up >> Task List >> Actions >> Download Dispatched Details". When the number of sent messages equals the number of messages that should be sent, it indicates that the task has been completed successfully.
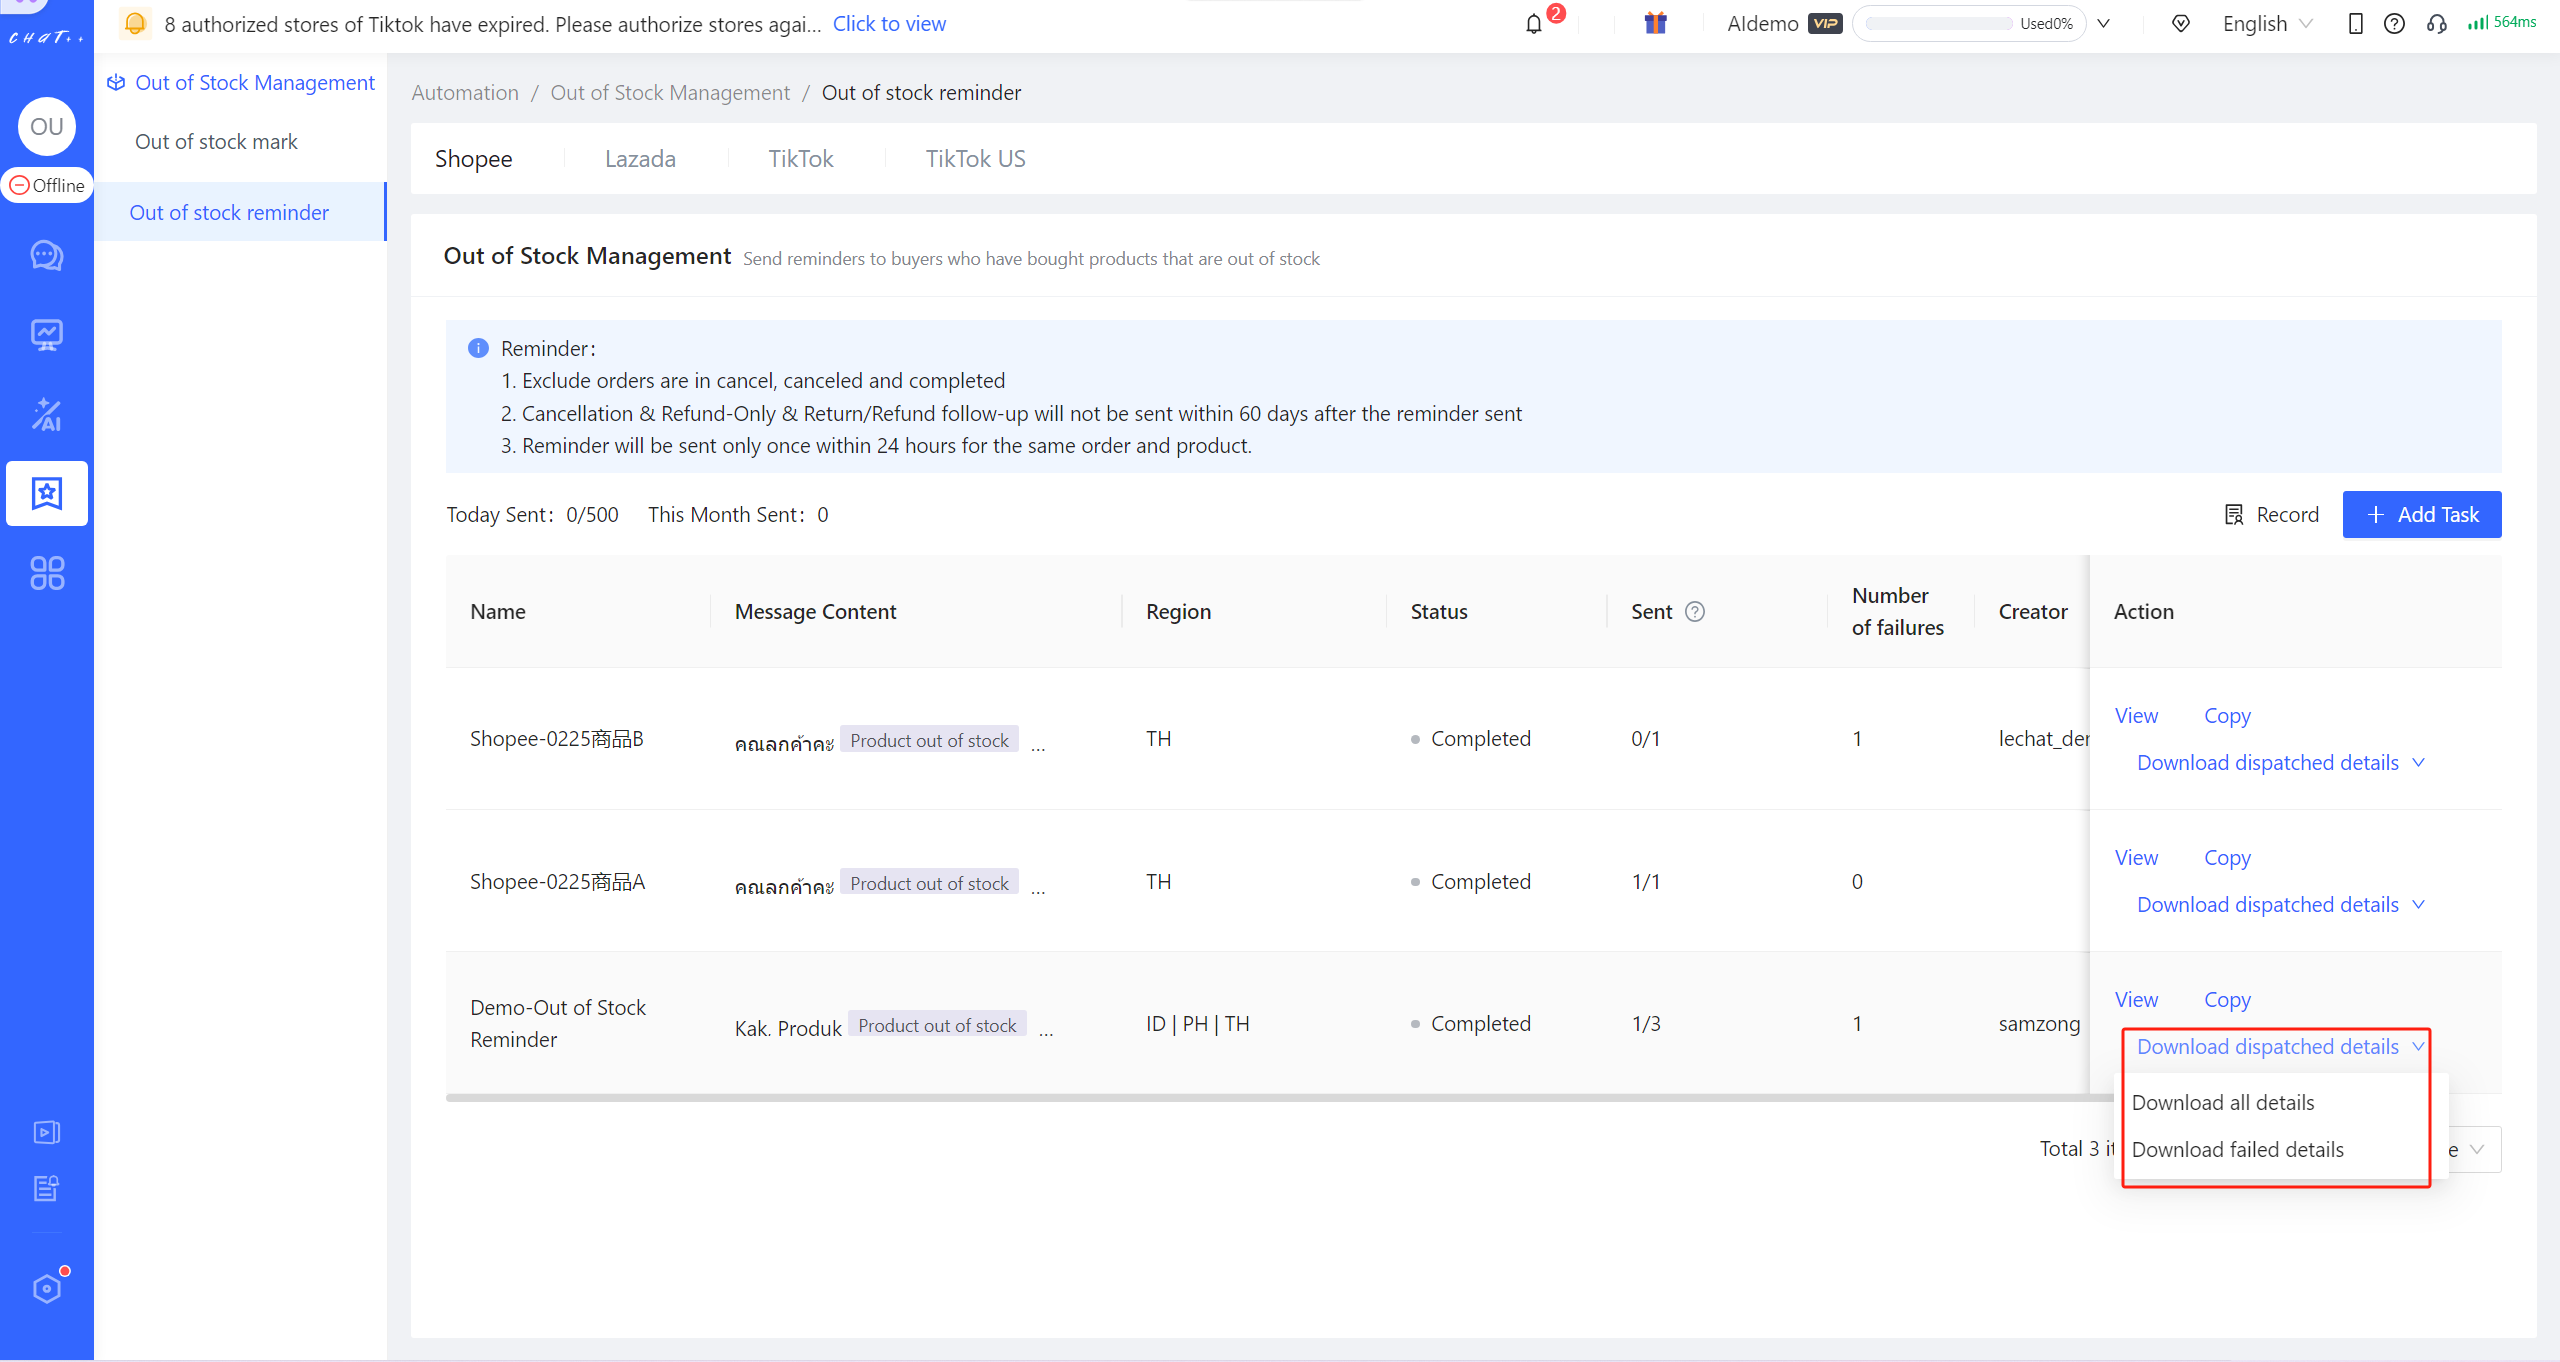 Figure 29
Q2:Why the Out of Stock Reminder dispatched failed?
A2: There are following reasons:
- The button "Filter SIP stores" is ticked but there are several orders belong to SIP stores in the file "Out of stock Order Information Form". In this case, those orders belong to SIP stores will be neglected automatically and that results in several reminders sent failed.
- The current sending quota is used up and the task will pause automatically. The rest reminders in this task will not be sent no longer.
- If the parameter information in the final sent content does not match the information in the uploaded document, the system will automatically skip the distribution. For example, if the Out-of-Stock Reminder content references the "Product Recommended " but this parameter is missing in the uploaded "Out of stock Order Information Form," the system will not process the message.
Q3: I have filled in the order information in the uploaded Excel document. Why does it show that the Excel content is empty after uploading?
A3:In this case, please check whether the order information is filled in the first sheet called [Template (Edit in this sheet)]. 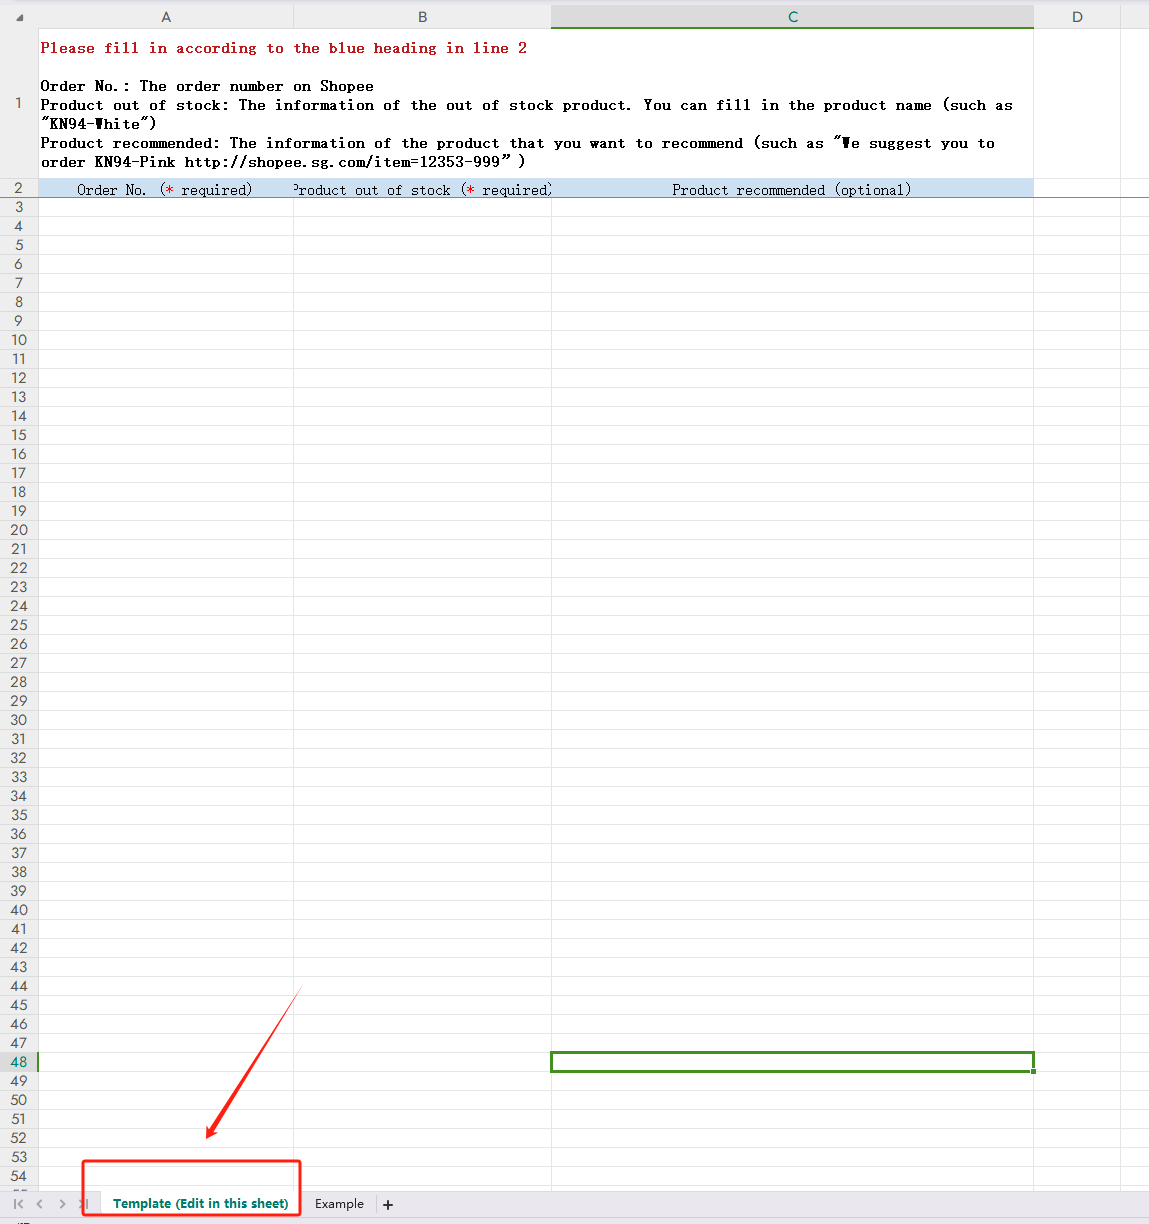 Figure 30
Q4:Where can I view the operation records of tasks?
A4:You can view the operation records of tasks by clicking on "Record" in the task list. 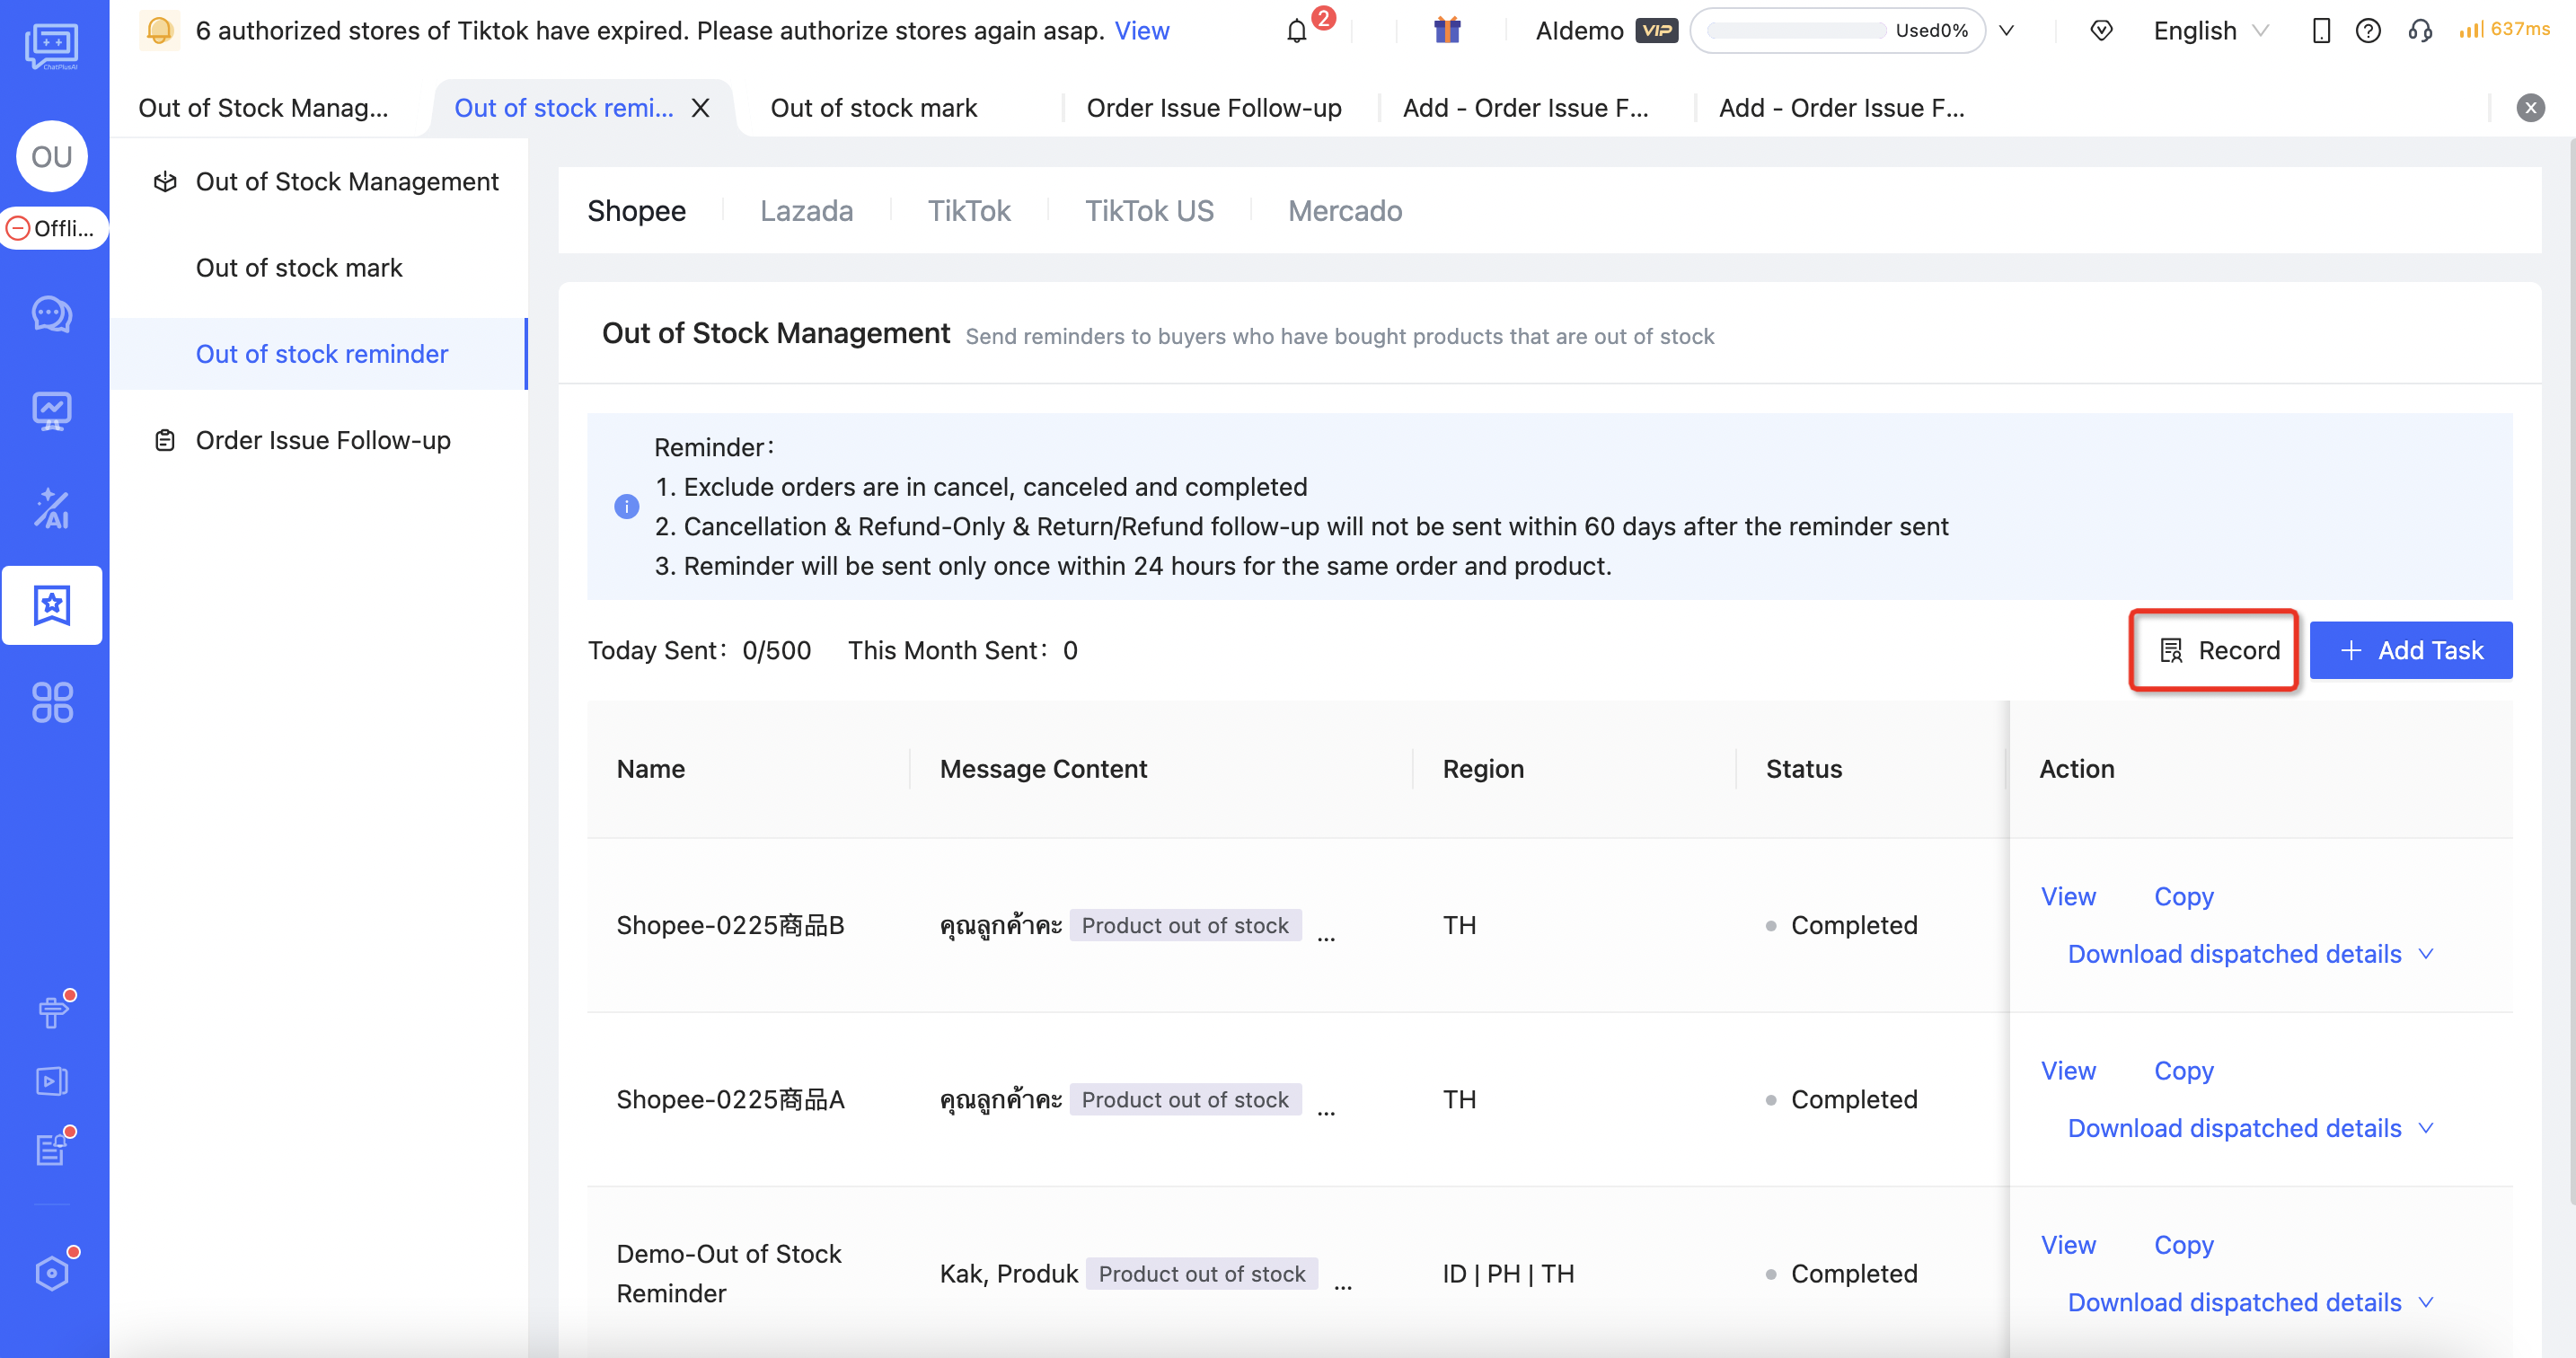 Figure 31
Logistics Care
💡 Throughout the entire fulfillment process from the buyer's payment until the item is received, the system supports automatic message prompts for several crucial stages. This enhances the buyer's shopping experience while effectively preventing potential after-sales disputes.
The logistics care covers various scenarios and can be tailored to different marketplaces. Currently, the following marketplaces are supported: Shopee, Lazada, and TikTok Southeast Asia, and TikTok US. The functionality for the Tokopedia marketplaces will be launching soon. Stay tuned for updates.
- Currently, Logistics Care supports the following scenarios: :【 Order Confirmed】、【 Delayed Shipment 】、【 Shipped 】、【 Last Mile 】、【 Waiting for Redelivery 】、【 Delivered 】。
- 【** **Order Confirmed 】The system automatically detects orders with successful payments and promptly informs the buyers to verify their order details. Recommended message content is as follows: Please verify your order information to avoid potential cancellation due to incorrect details, which might result in loss of shipping fees.
- 【** **Delayed Shipment 】The system identifies orders that haven't been shipped as per the agreed timeline and promptly reassures buyers to prevent potential complaints or order abandonment. Recommended message content: We apologize for the delay in shipping, which might be due to high demand. Rest assured, we're expediting the process.
- 【 Shipped 】The system recognizes orders that have been shipped and promptly informs buyers about the shipment to prevent misconceptions about the delivery status. Recommended message content: Your order has been shipped! You can expect it to arrive at your destination by estimated date.
- 【 Last Mile 】The system recognizes orders that have been shipped and promptly informs buyers about the shipment to prevent misconceptions about the delivery status. Recommended message content: Your order has been shipped! You can expect it to arrive at your destination by estimated date.
- 【** **Waiting for Redelivery 】In case of delivery failure, the system synchronizes with the buyer and advises them to watch for the next delivery attempt. Recommended message content: We regret to inform you that the delivery attempt was unsuccessful. We'll make another delivery attempt soon. Please keep an eye on delivery notifications and double-check your address details.
- 【 Delivered 】The system recognizes when the buyer has received the item and takes advantage of this prime opportunity to engage with the buyer. Recommended message content: Thank you for your purchase! Here are some usage instructions for your product. If you have any questions or concerns during your usage, feel free to chat with us directly. No need to rush for initiating after-sales support.
⚠️ Due to restrictions of the Lazada official interface, ChatPlusAI is currently unable to reach buyers who haven't made inquiries in the past 5 days or placed orders in the last 7 days. So messages for the 【 Last Mile 】and 【 Delivered 】scenarios cannot be sent to these buyers. ChatPlusAI is actively engaging with Lazada officials to lift these interface restrictions. Please stay tuned for updates.
Show Cases
- For buyers who have placed Cash on Delivery (COD) orders, the system immediately sends an order confirmation message.
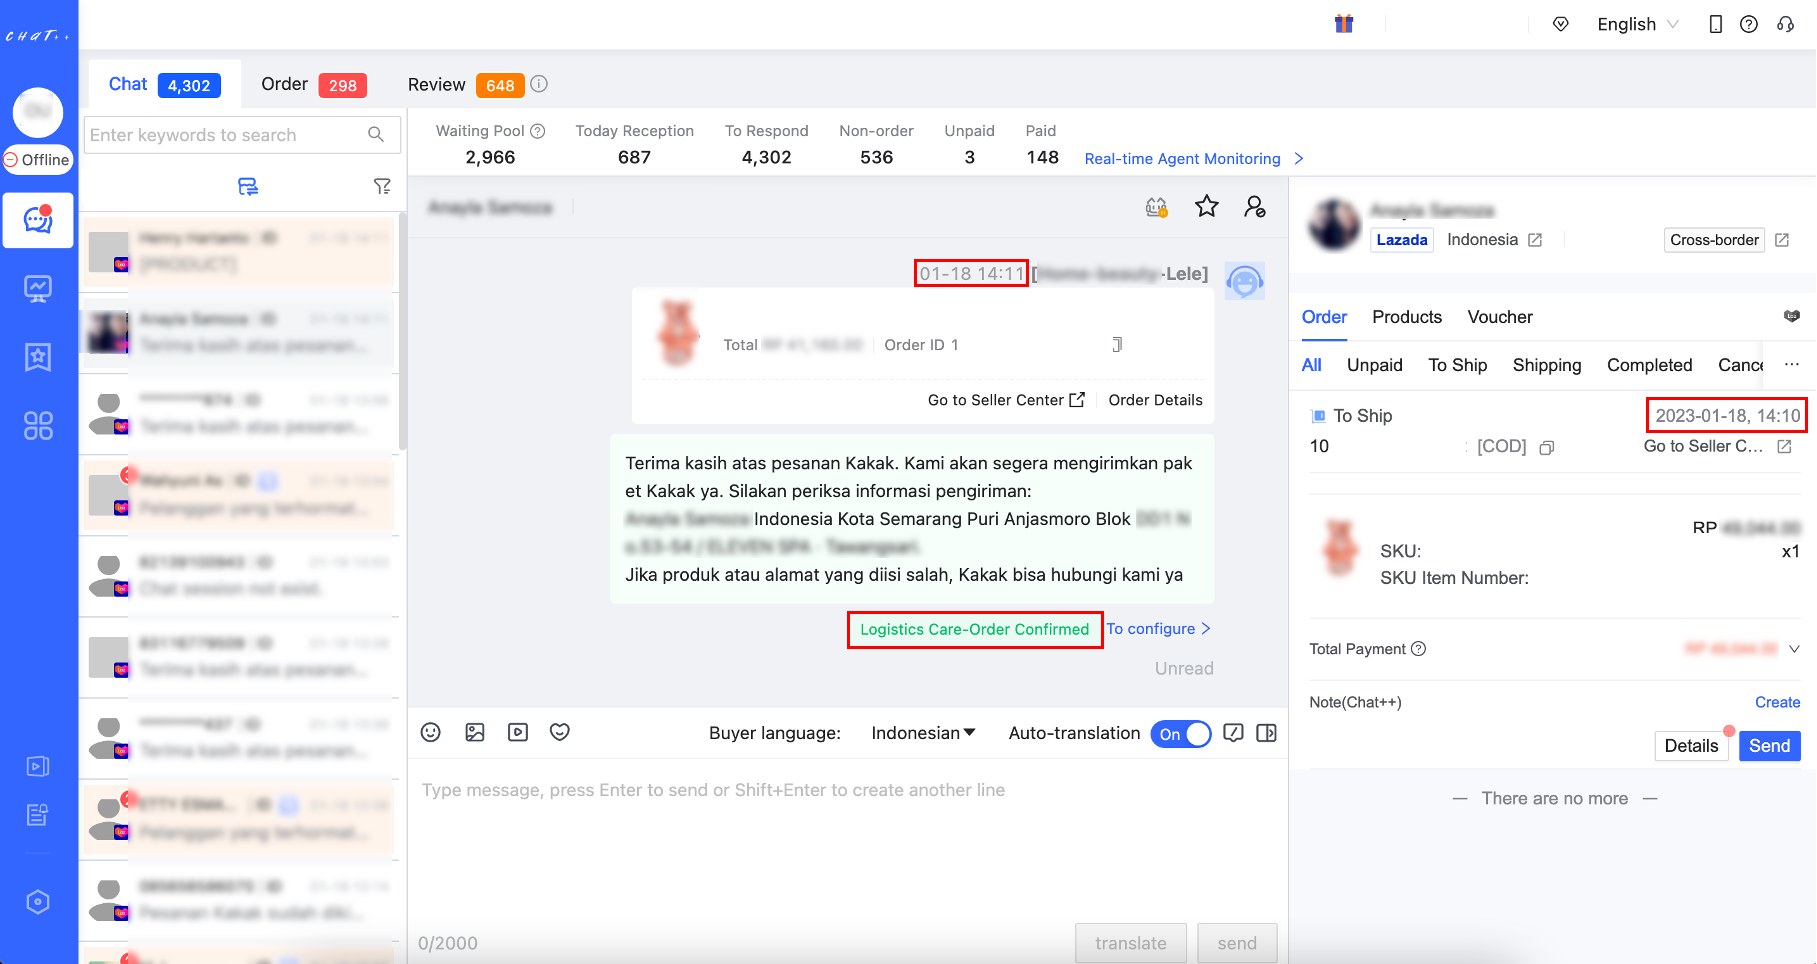
Figure 1
Privileges required for configuration
Configuring "Logistics Care" requires the "Configure Logistics Care Tasks" permission to be enabled for the role assigned to the employee account. Super admins and admins have this permission by default.
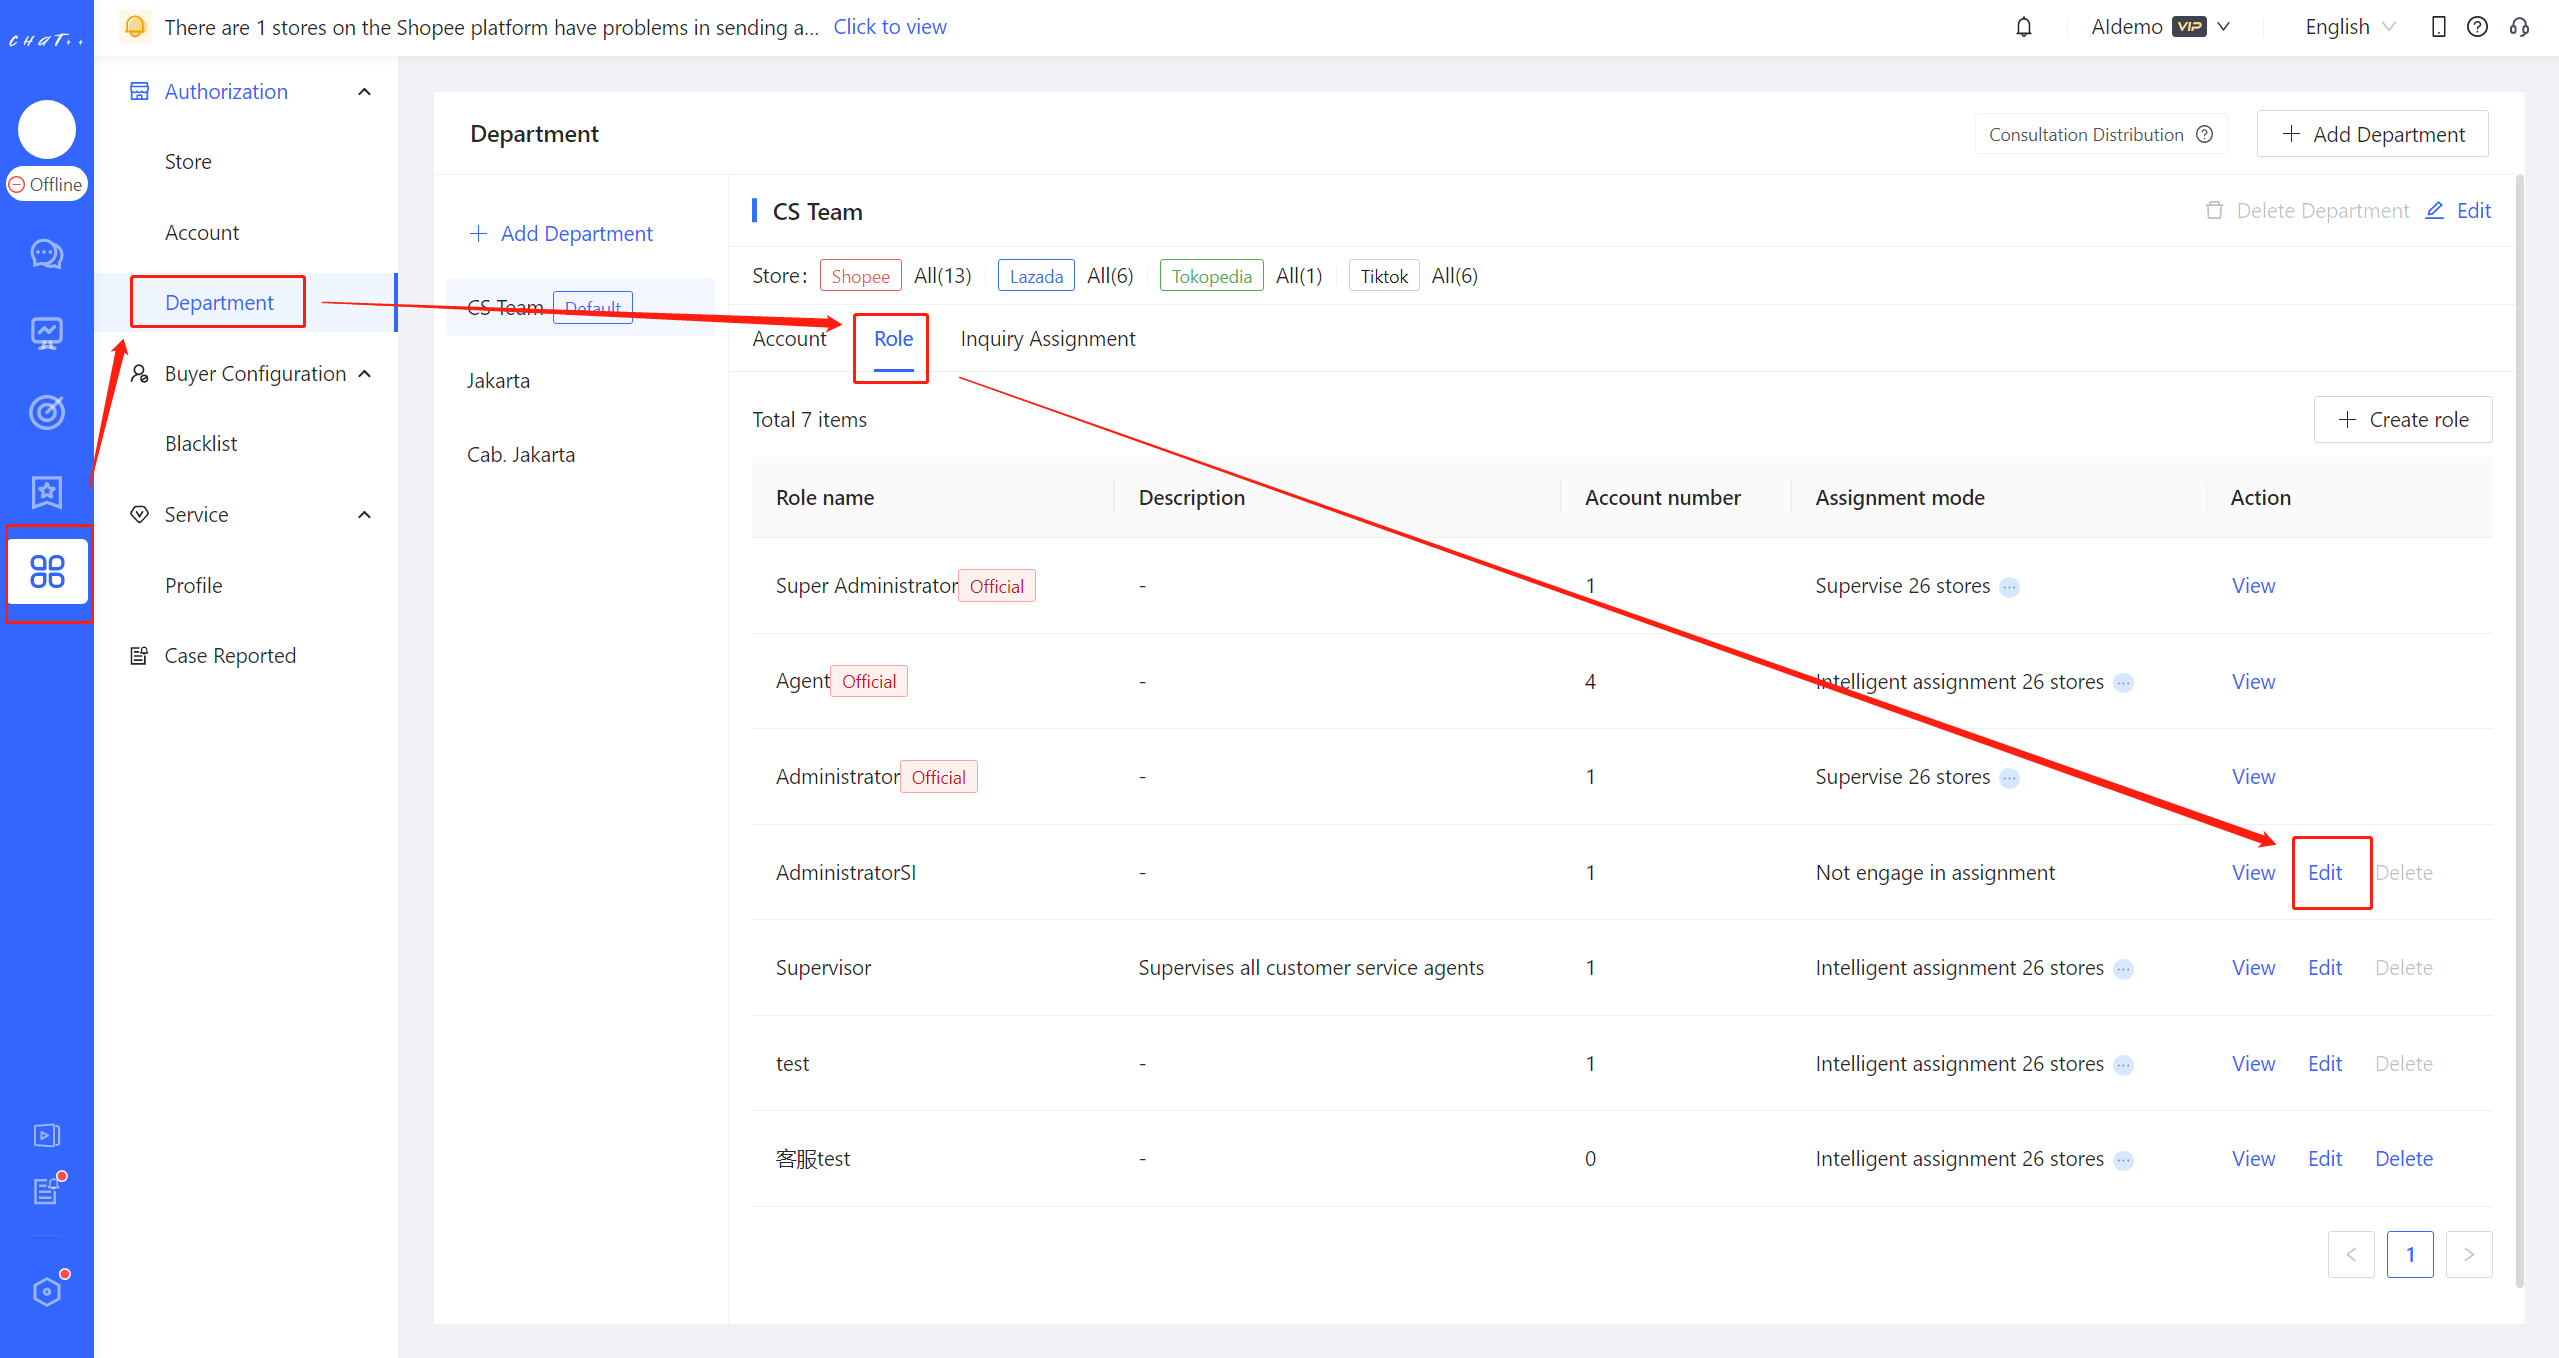
Figure 2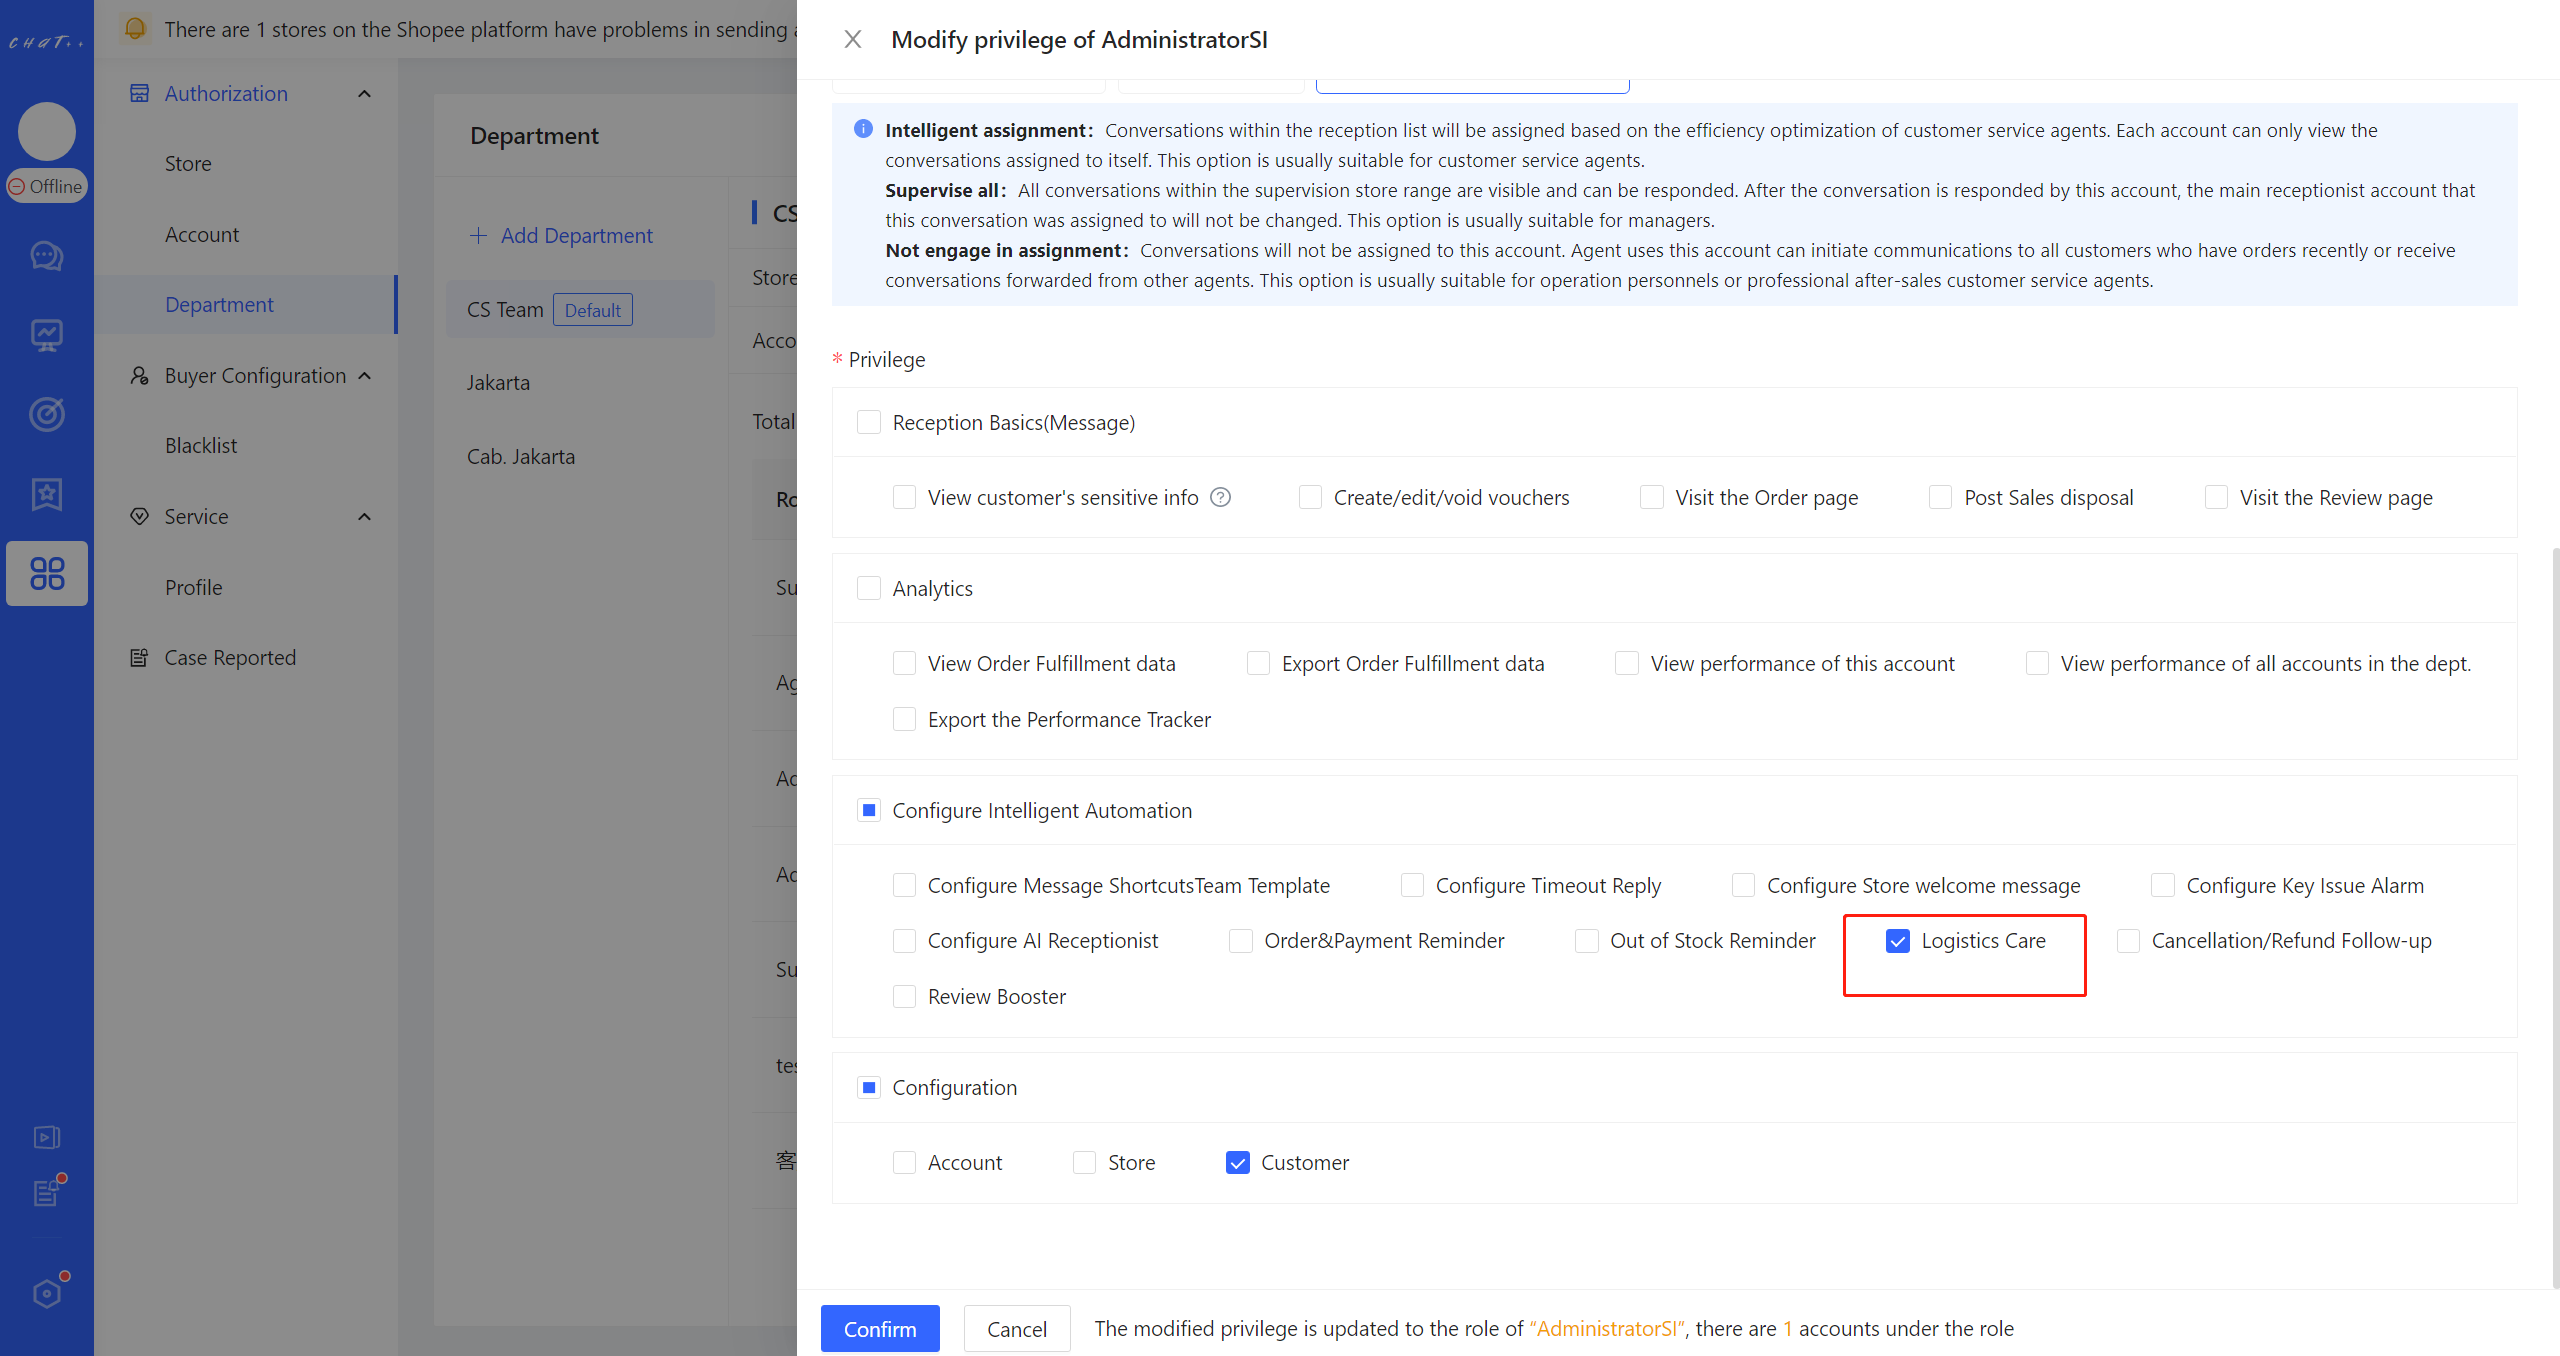
Figure 3
How to configure
👆 Click「 Automation 」 in left menu(Shown as Figure 4 red box①)→「 Select the desired marketplaces and site for configuration 」→「 Logistics Care 」(Shown as Figure 4 red box③),Access the configuration page.(Shown as Figure 5)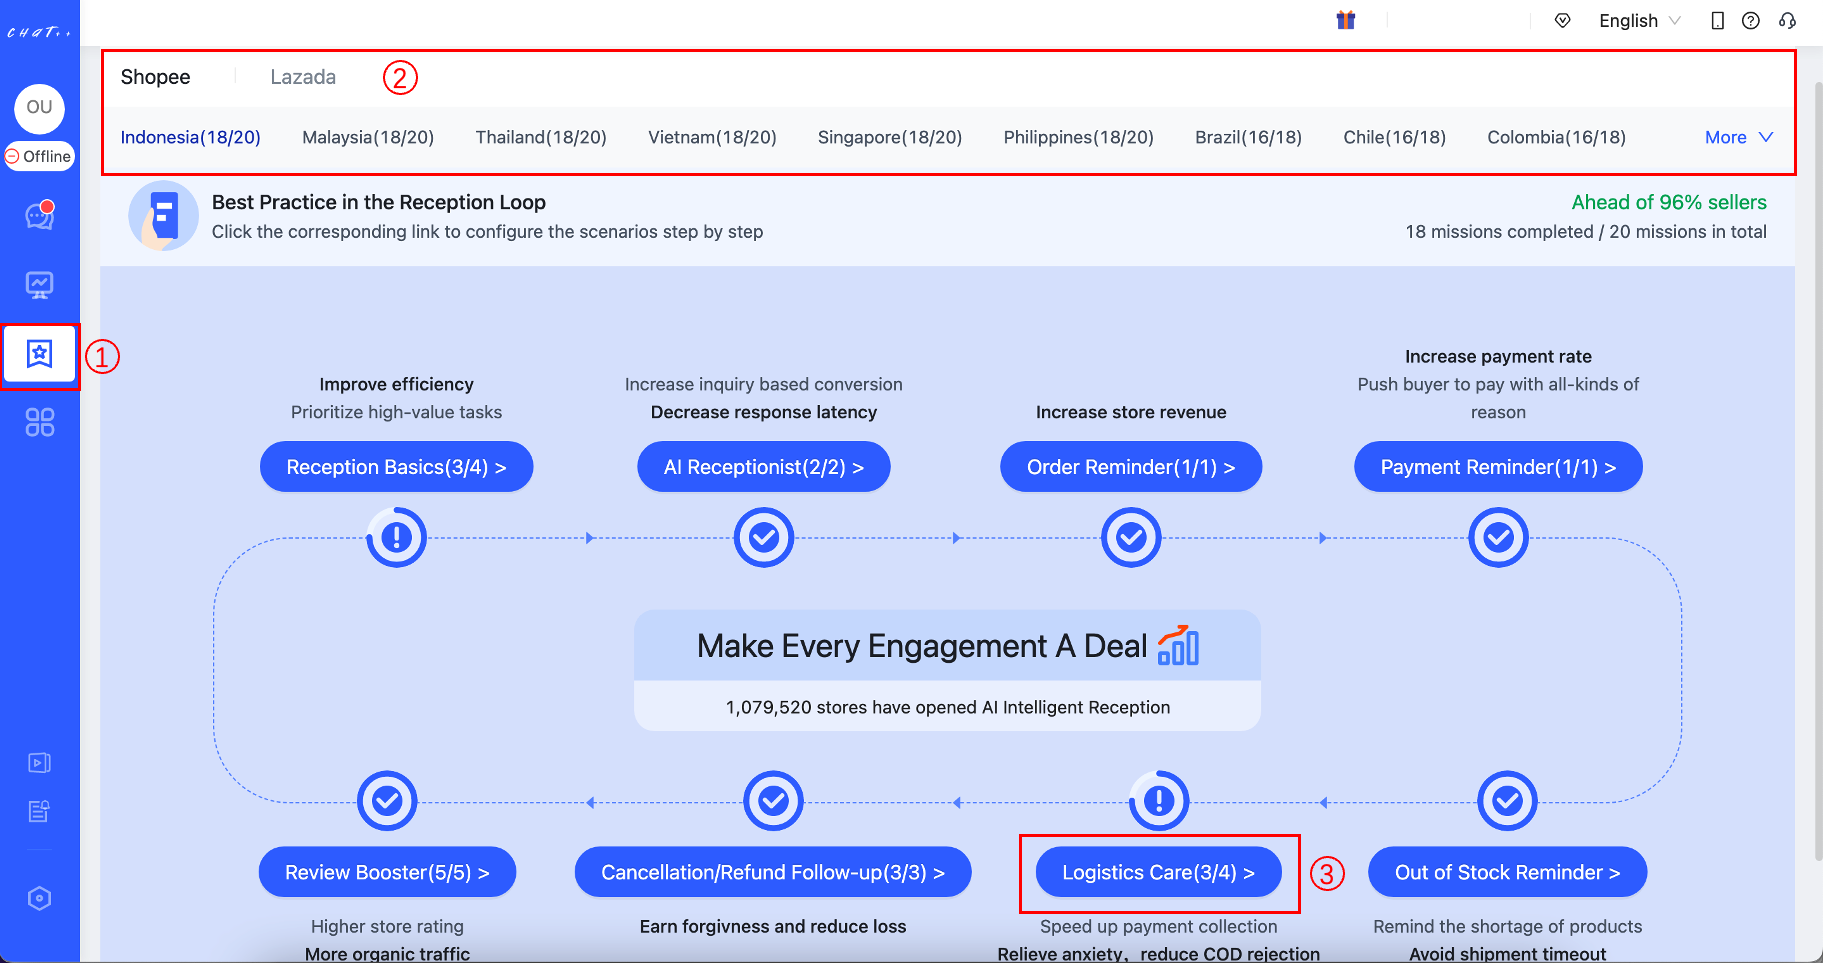
Figure 4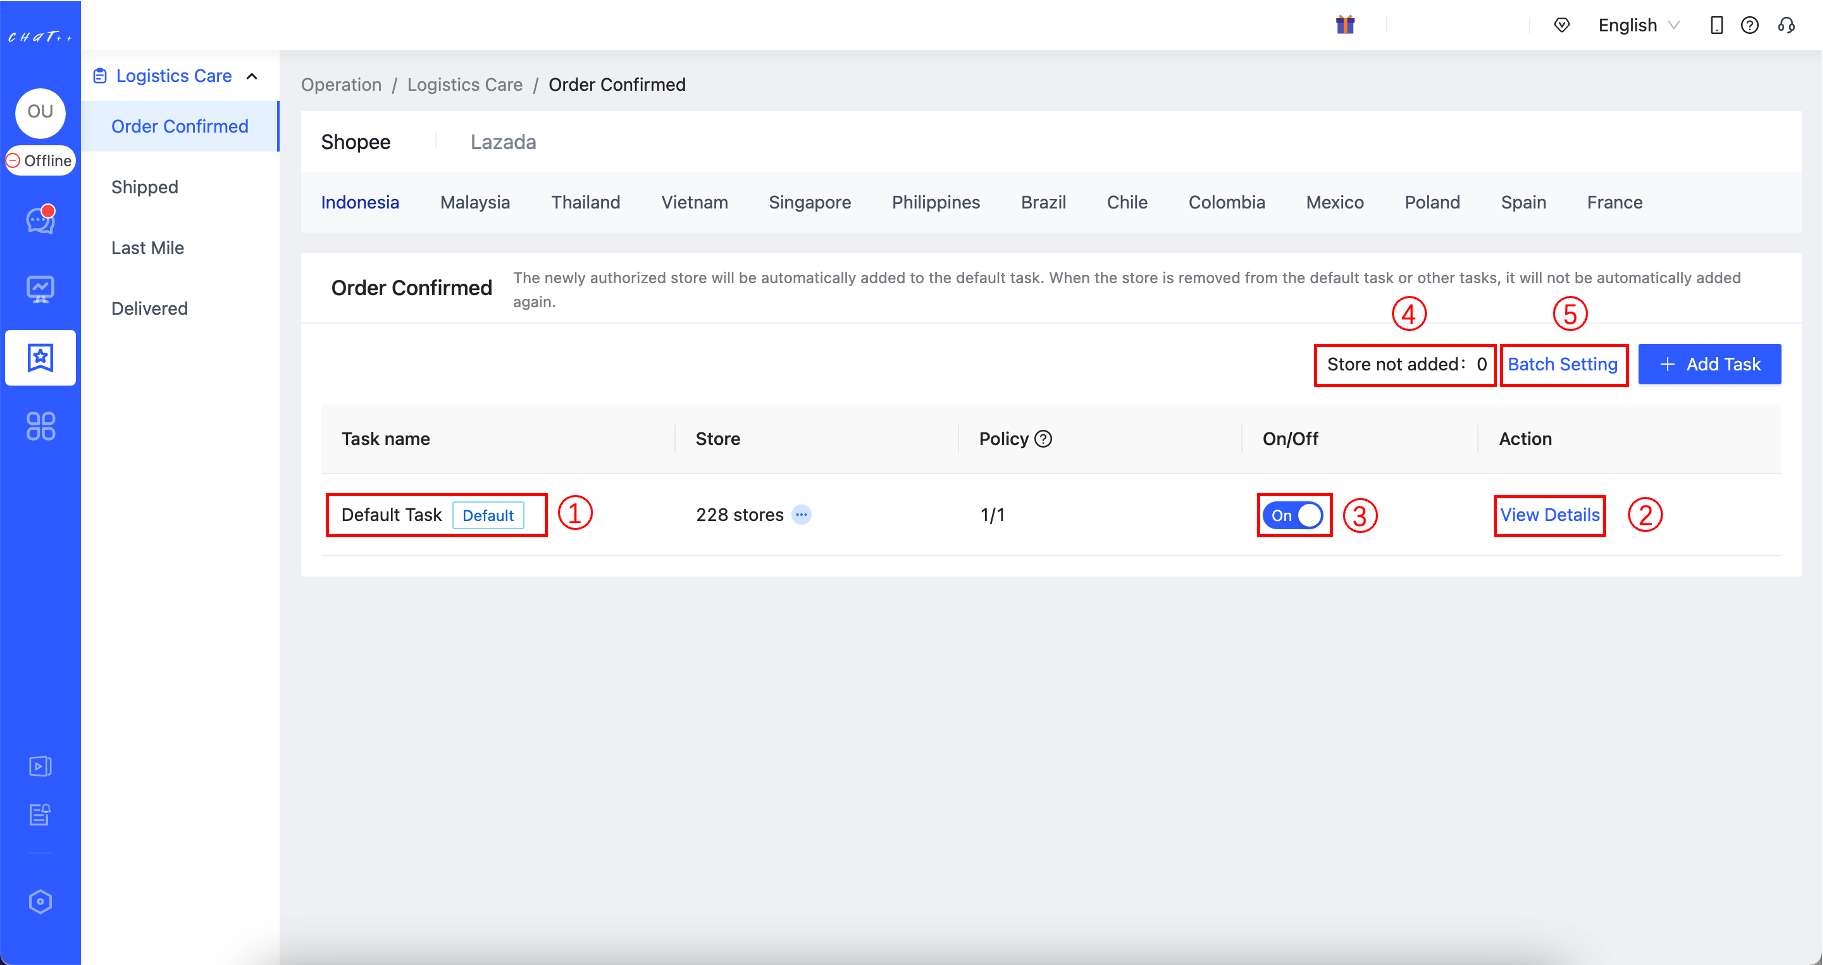
Figure 5
【Default Task】Description
(Shown as Figure 5 red box①) A default task has been created for each country site and marketplace, and all stores in the country have been included in the task. This makes the configuration much more convenient. All you have to do is click "View Details" button to edit the policy or directly enable the default task (shown as Figure 5 above).
Newly authorized stores will be automatically included to the 【Default task】. However, the store will not be automatically included again after they are removed from the default task or other tasks. It will be counted as "Store not included" (Shown as Figure 5 red box④). You can click "Batch Settings" button (Shown as Figure 5 red box④) to add massive stores into the certain task quickly.
Kindly make sure that all stores have been included to the right task (that means the "Store not included" shown as Figure 5 red box④is 0), in case the store is neglected from any Logistics Care task.
【Filter Rules】Description
Filter customers who inquired: By default, Logistics Care tasks filter out customers under "To respond" when dispatching. When a customer's conversation has been assigned to CS and the last message has not yet been effectively responded to, Logistics Care tasks are not dispatched to these customers by default, to avoid situations where customers are waiting for a response but receive logistics care messages instead. It is not recommended to select options such as "Filter customers who have inquired in recent X day(s)" and "Filter customers who have consulted in the store after placing an order", as they significantly filter out potential recipients.
Filter customer who usually gives negative reviews: Within the past six months, among nearly 4 million Southeast Asian stores using ChatPlusAI, customers who have given two or more negative reviews are considered who usually give negative reviews (including cases where they later revised their review to positive). The system automatically identifies such customers. Logistics Care task allows for filtering out these customers and not sending them messages.
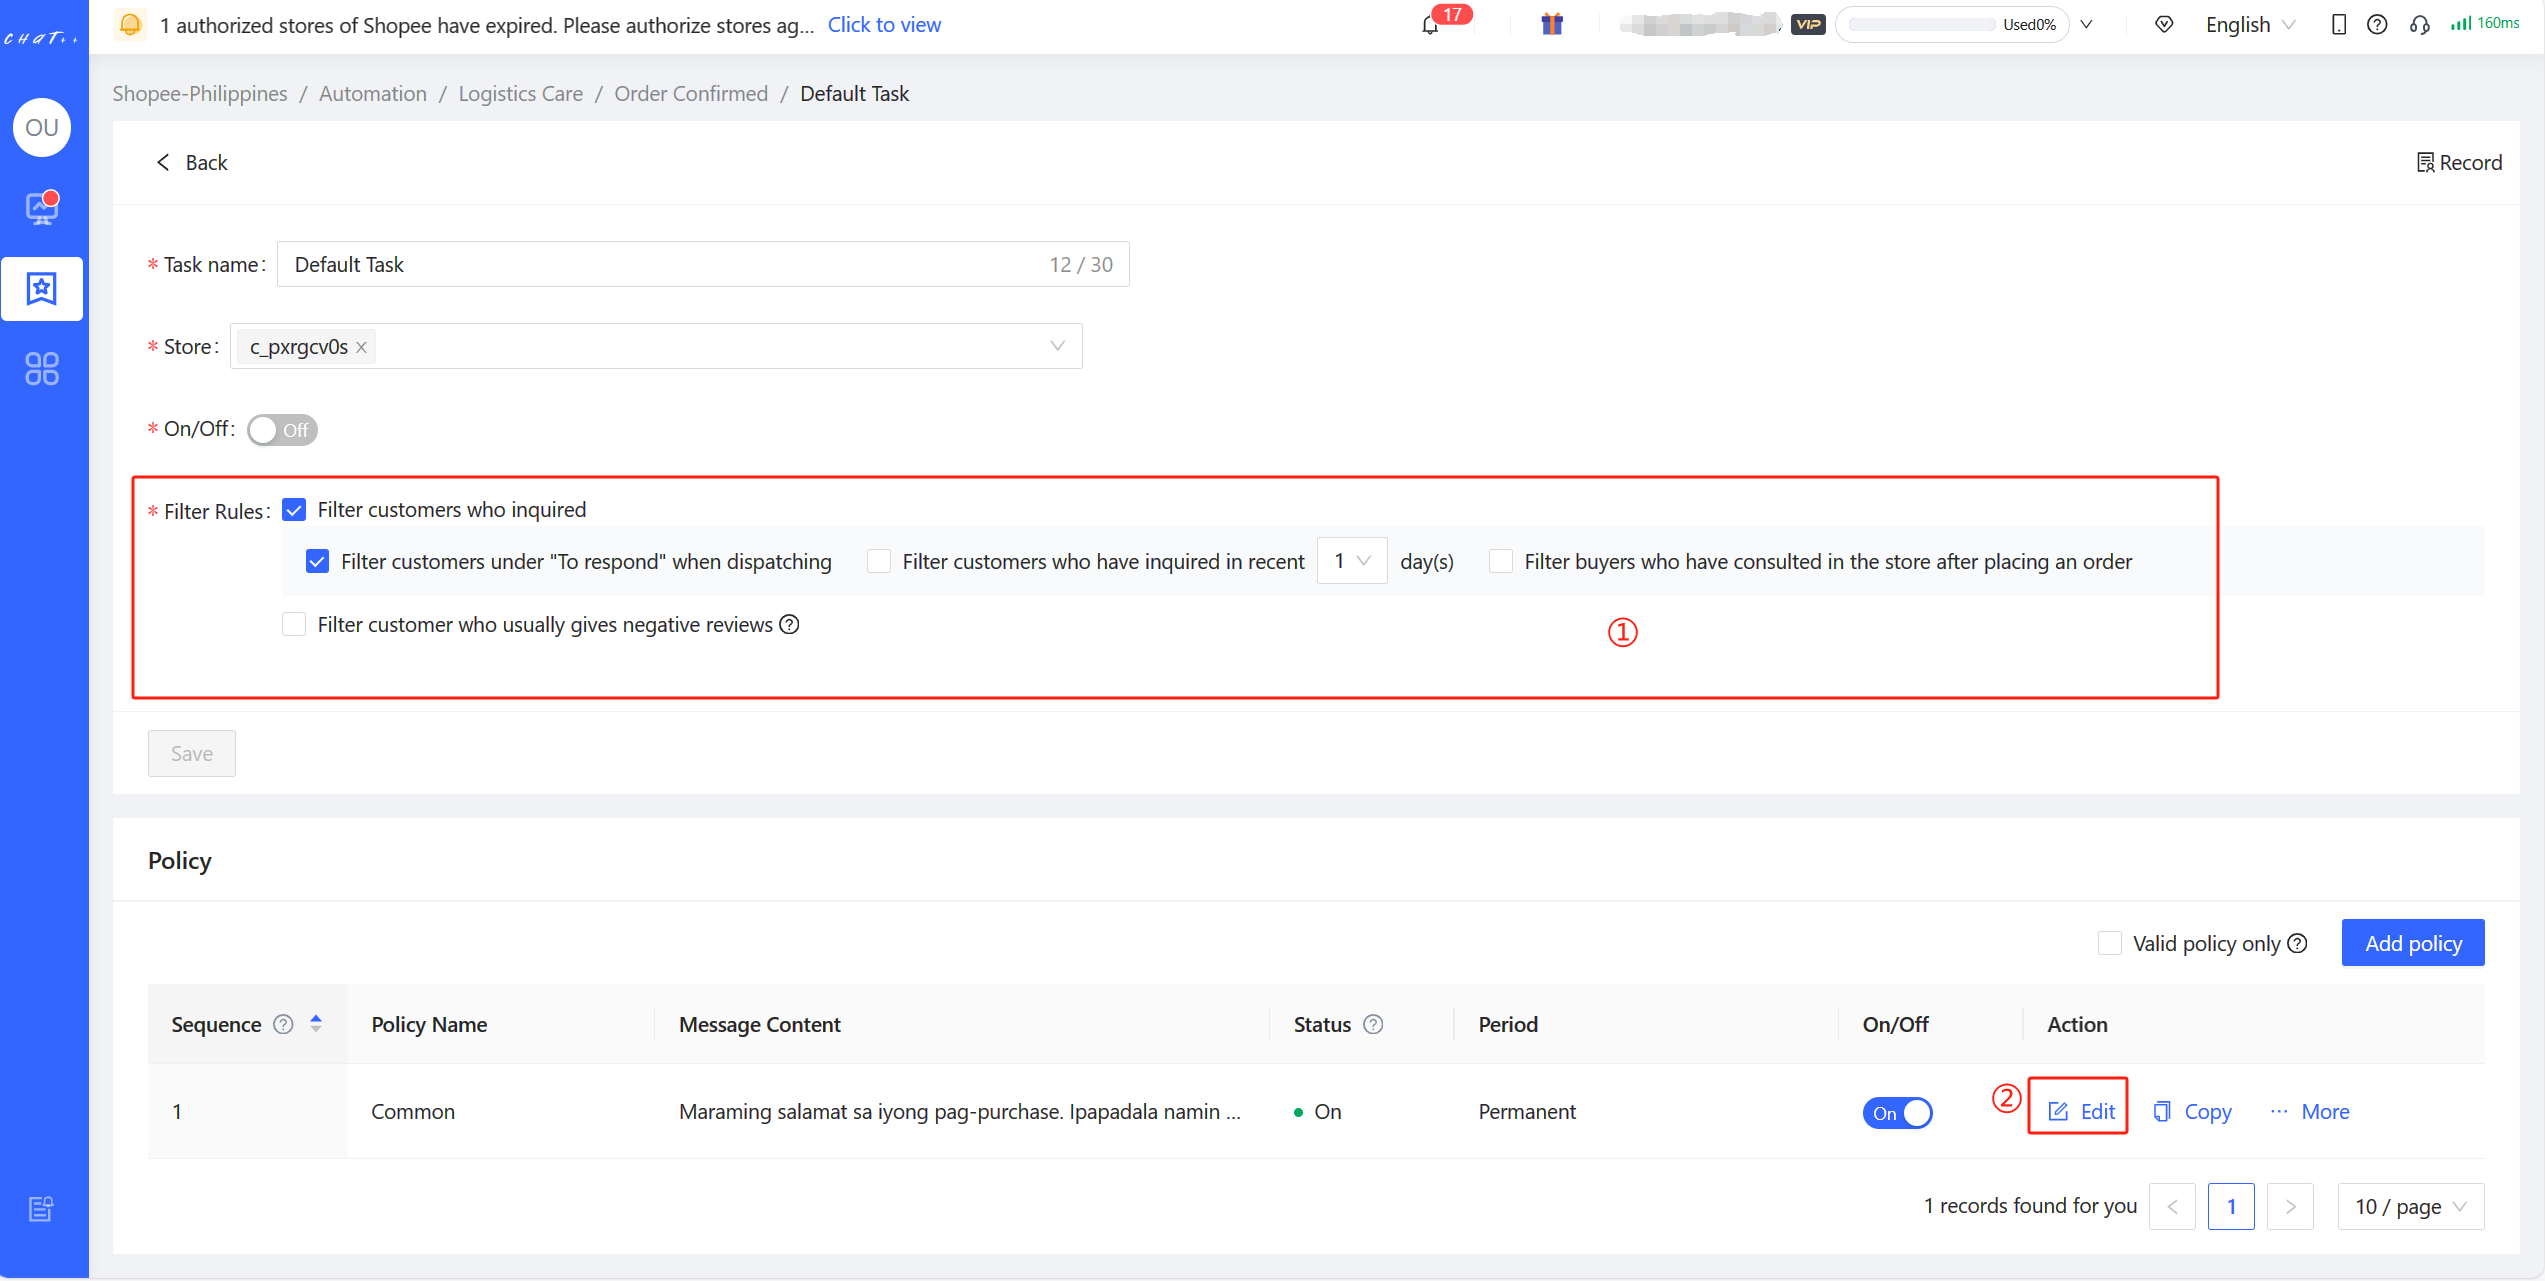
Figure 6
【Policy branch】Description
Policy branch consists of three key factors: period of validity, script and product scope.
Period of Validity: The policy branch take effects in this period. There are 3 options to configure: Valid forever, Period of days, Period in specific hours for days.
Product scope: The policy branch take effects when the customer ordered specific products. There are 4 options to configure: No limitations (the customer ordered any product in stores), Pick SKU, Pre-order or In-stock.
"Pick SKU" supports selecting specific products by searching the "Product Name", "Product ID", "Parent SKU" and "SKU ID", meanwhile input "Product ID" or "Parent SKU" (separate multiple items with Enter) and can quickly select various products.
Script: In the period of validity and when the customer order specific products(within the product scope), the corresponding message will be dispatched.
When multiple strategy branches are configured for each logistics care scenario, the system will execute the first strategy branch in order of priority that falls within its validity period.
Setting up diverse policy branches for tasks allows you to achieve the optimal care effect by sending different messages during various time periods and for different products.
As shown in the red box in figure 7 below, the period selected in the example is the whole month of February. That means this policy will only match buyers who placed orders in the month of February.
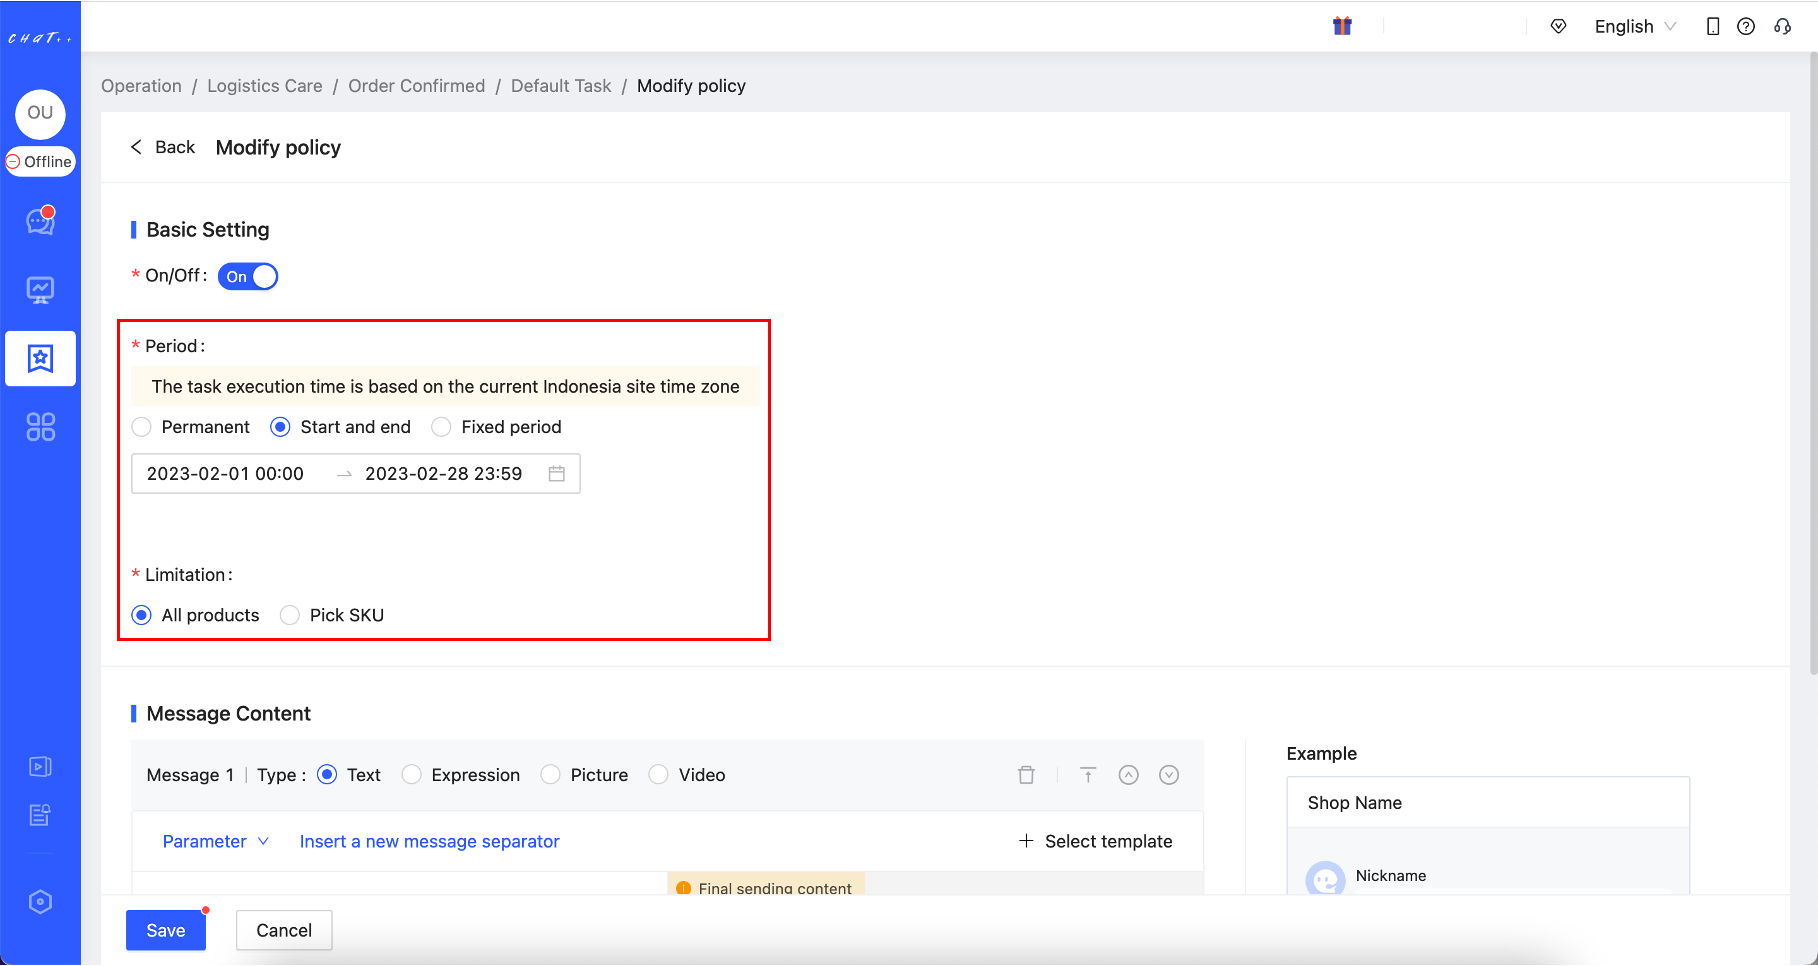
Figure 7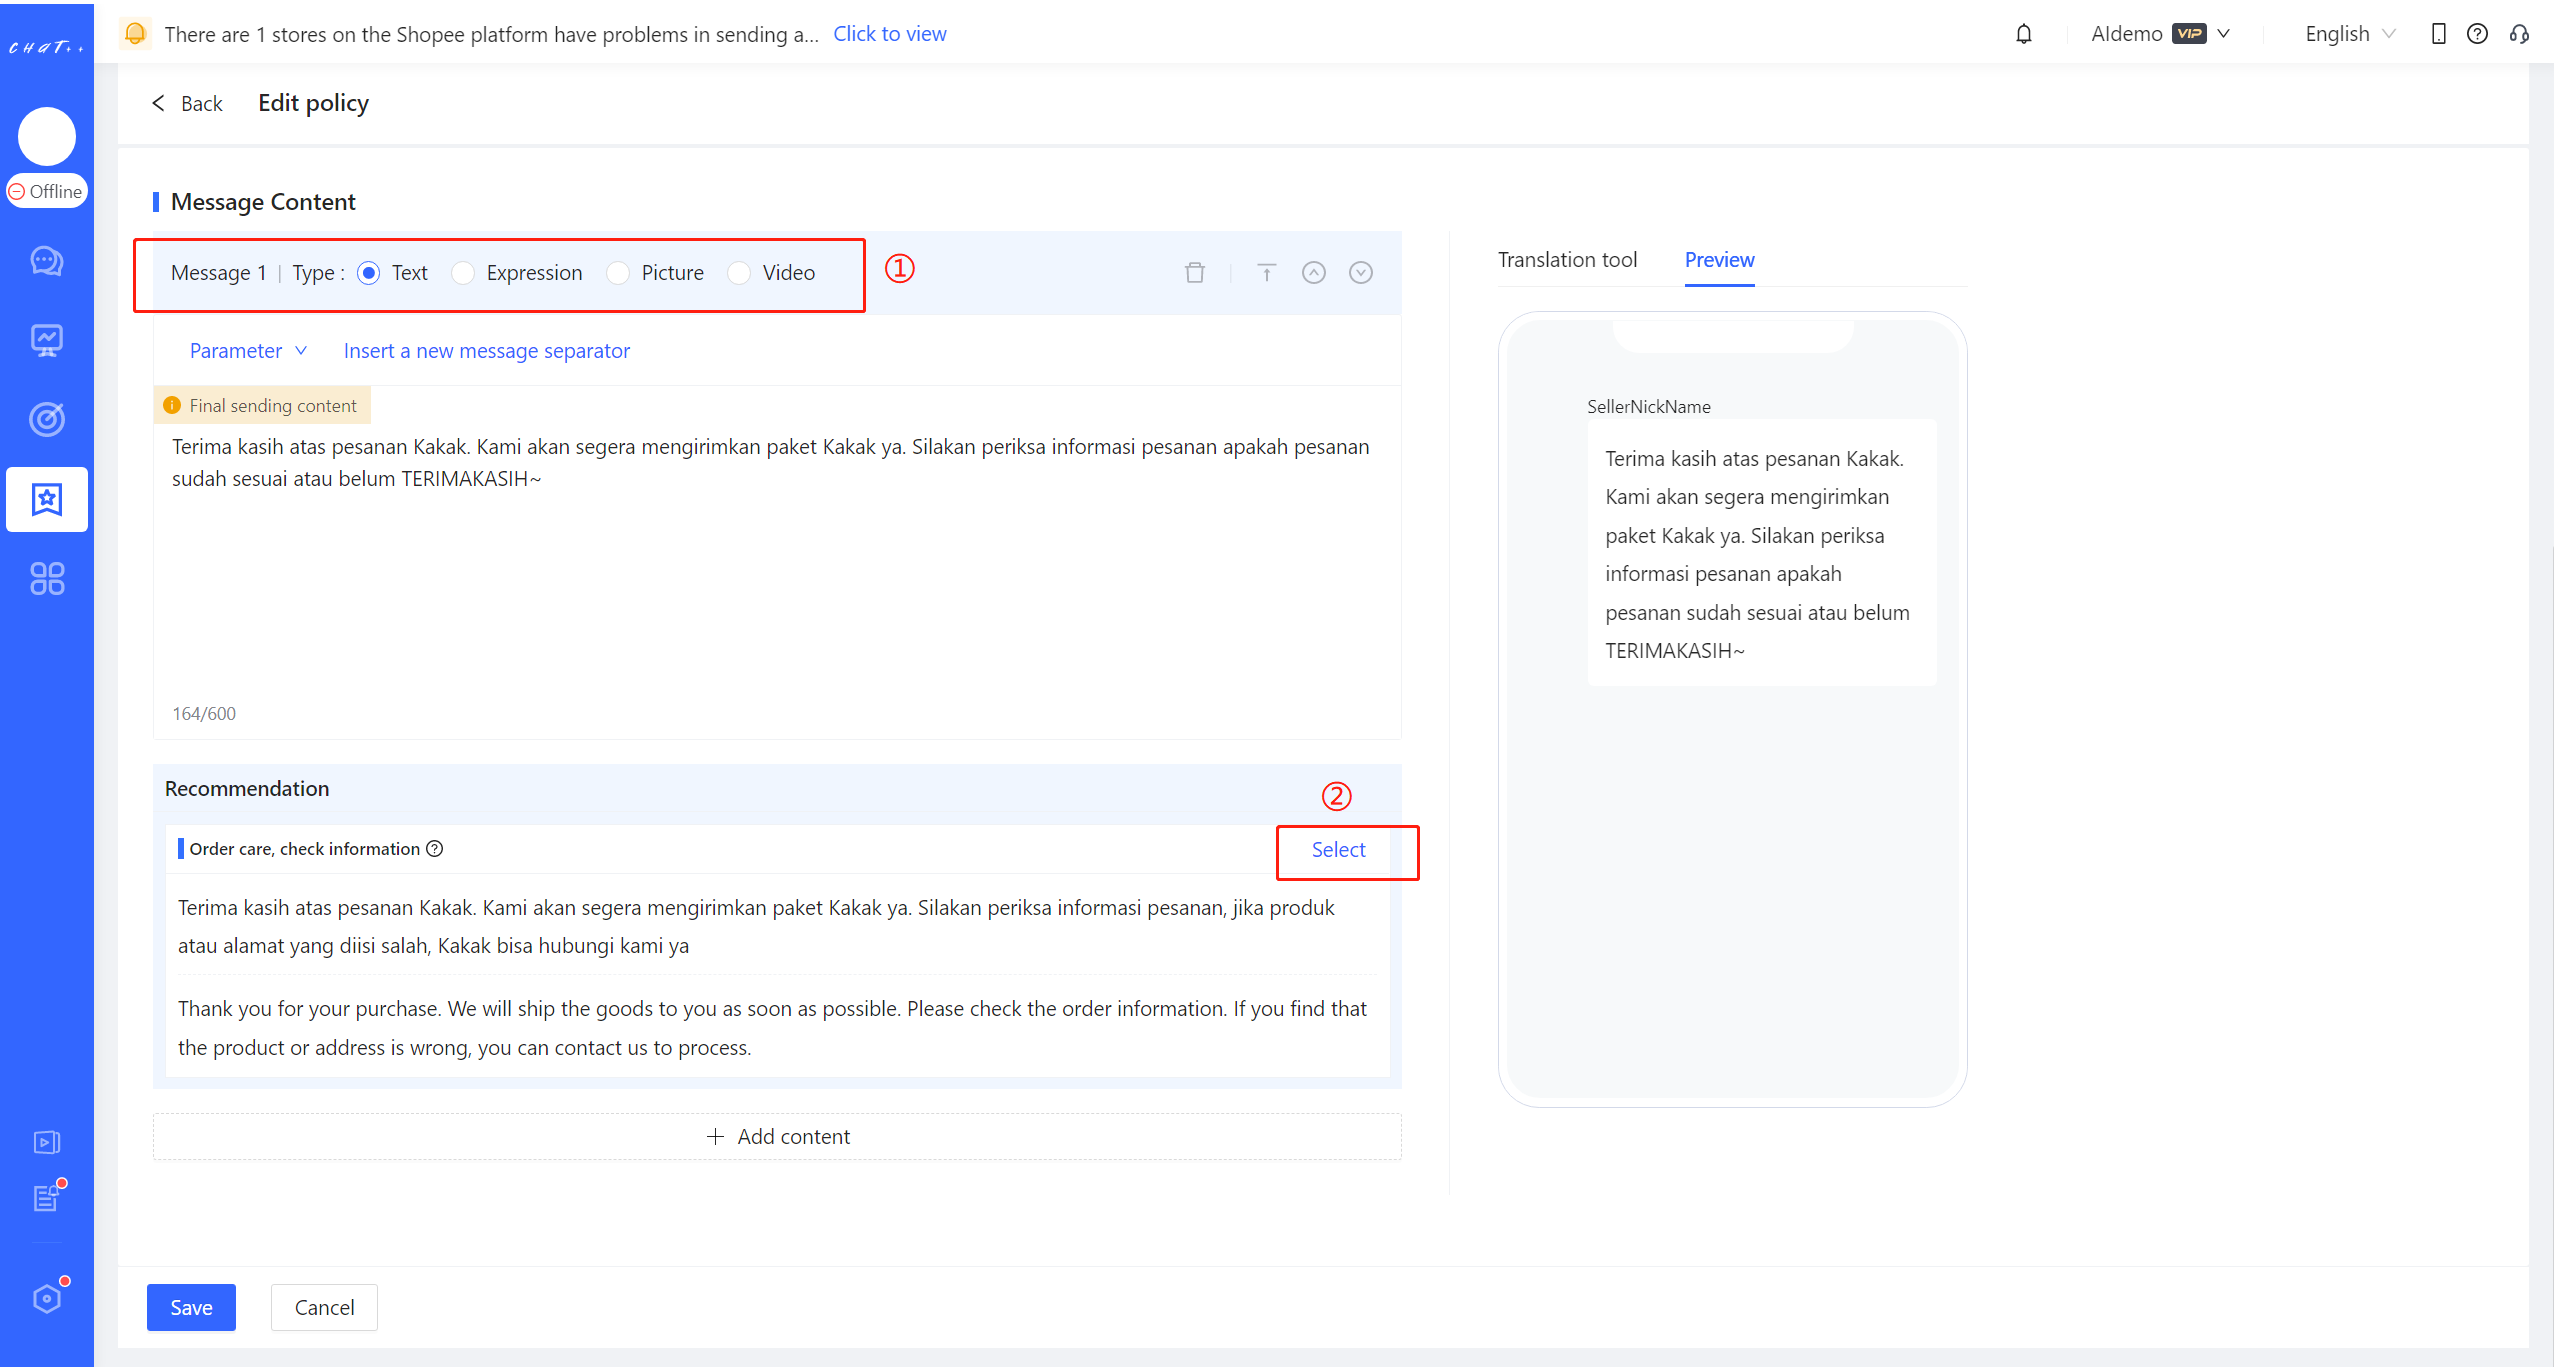
Figure 8
Various message types (text, image, sticker, video) are supported for the script
ChatPlusAI provides a message template for reference and use. (Shown as Figure 8 red box②)
Click “Add content” and you can add script with various message types. (Shown as Figure 9) . Different types of messages can be used to generate attractive content encouraging customer to enhance the effectiveness of logistics care.Due to marketplaces interface limitations, TikTok currently only supports text and image types.
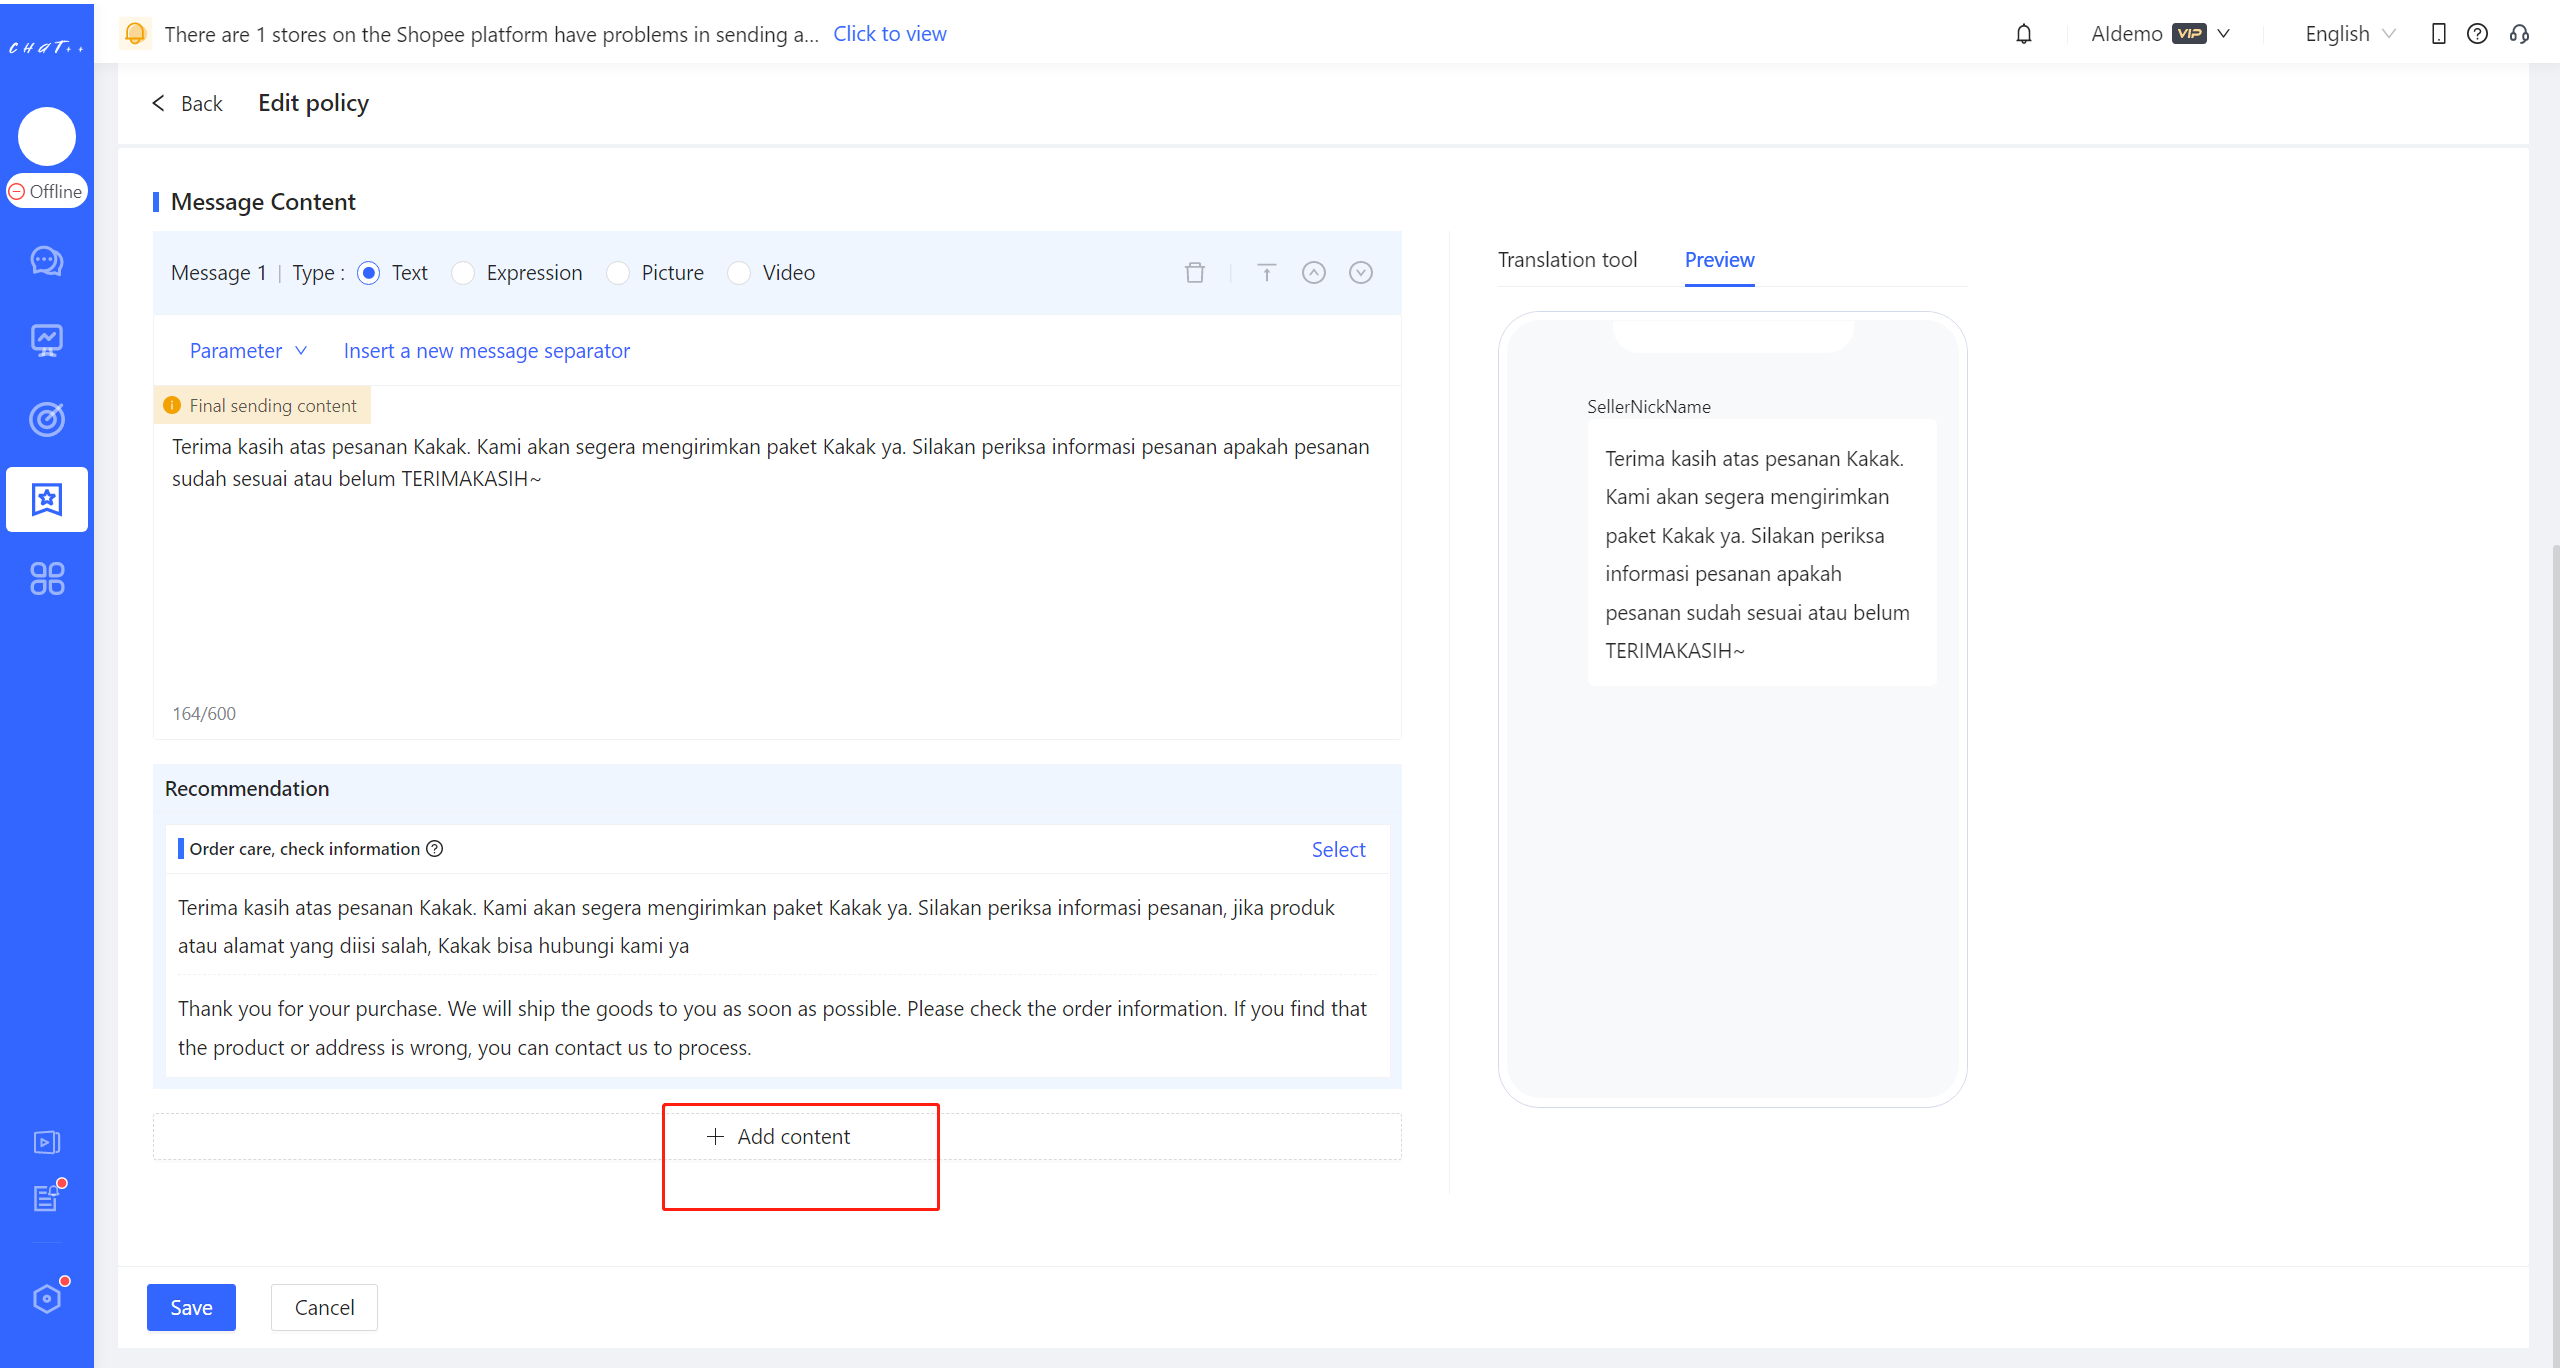
Figure 9
【Policy branch Execution Sequence】Description
If there are several policy branches under the task, system try to execute the branch from top to down(Shown as Figure 10). After one policy branch is executed, the following policy branch will no longer be executed. The policy branch execution order can be modified by clicking the button ”Top/ Up/Down/Bottom” (Shown as Figure 10 ) when you click「More」.
Note: If no policy branch is in period of validity or match the product that the customer ordered, this round of Payment Reminder will be skipped.
If none of the Policy branches match, the messaging for the current logistics care scenario will not be sent.
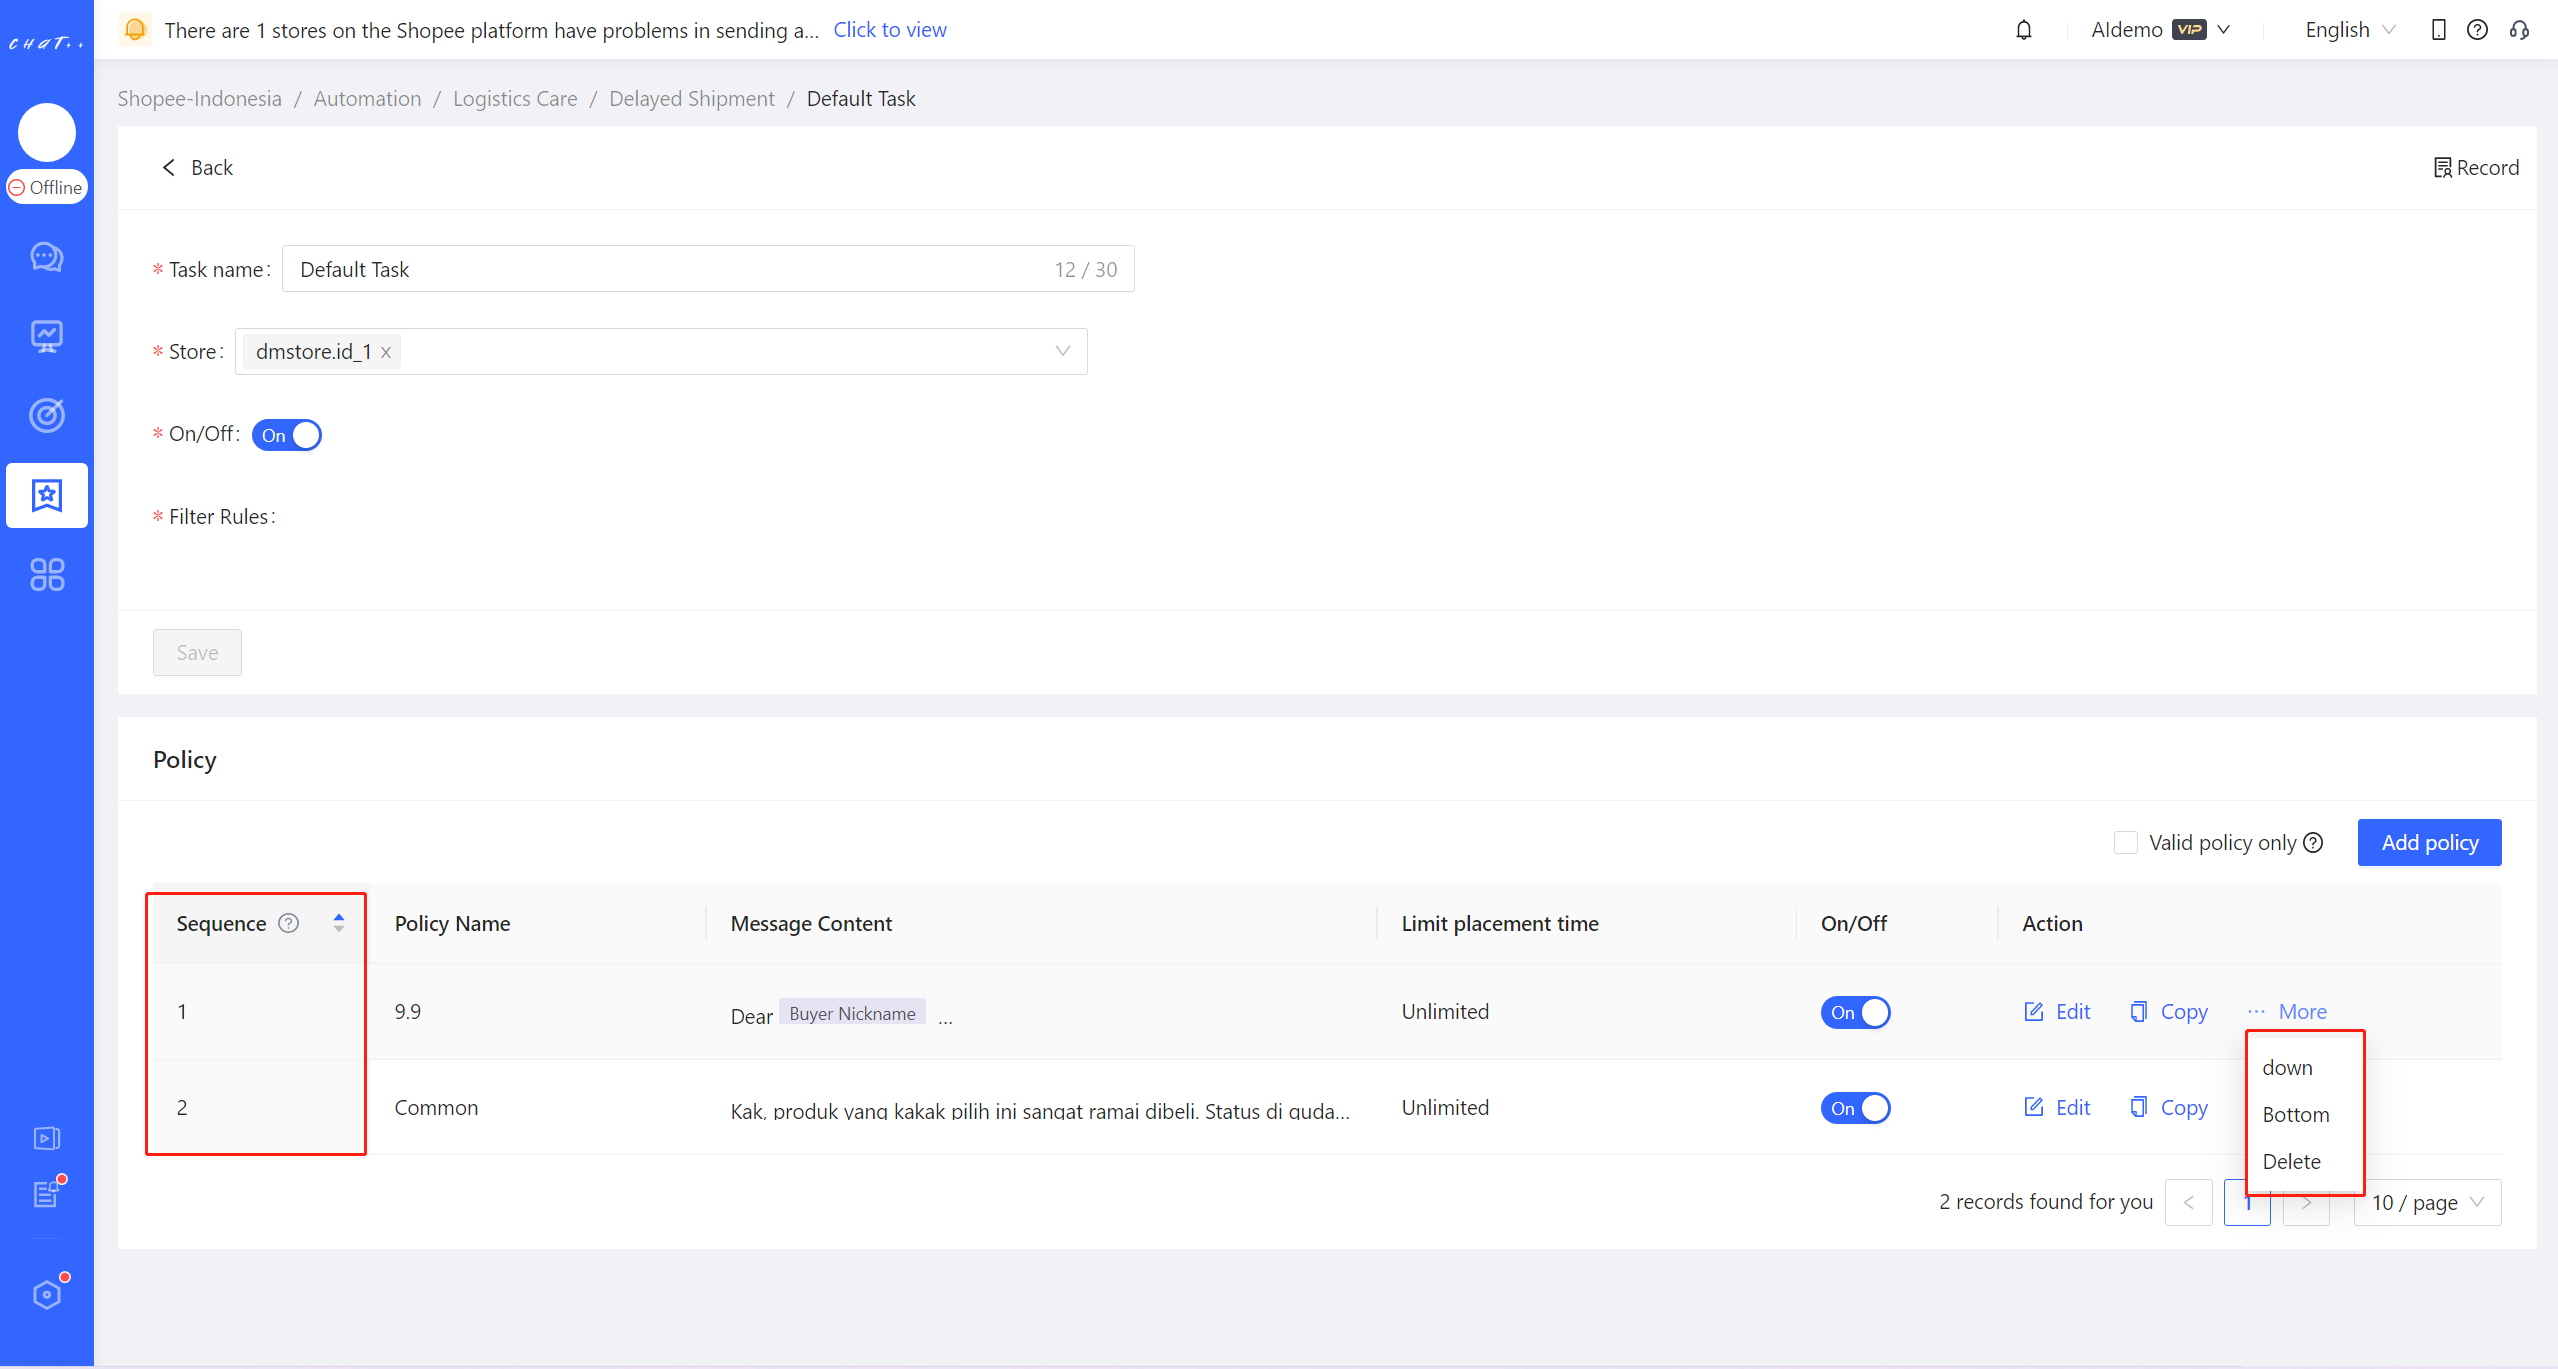
Figure 10
If you want to customize policy strategies for different stores, you can create different 【Task】for stores. (Shown as Figure 11 &12) In order to guarantee that one store is only included in one Logistics Care task, the store you added in the new task will be removed from the task the store previously belongs to.
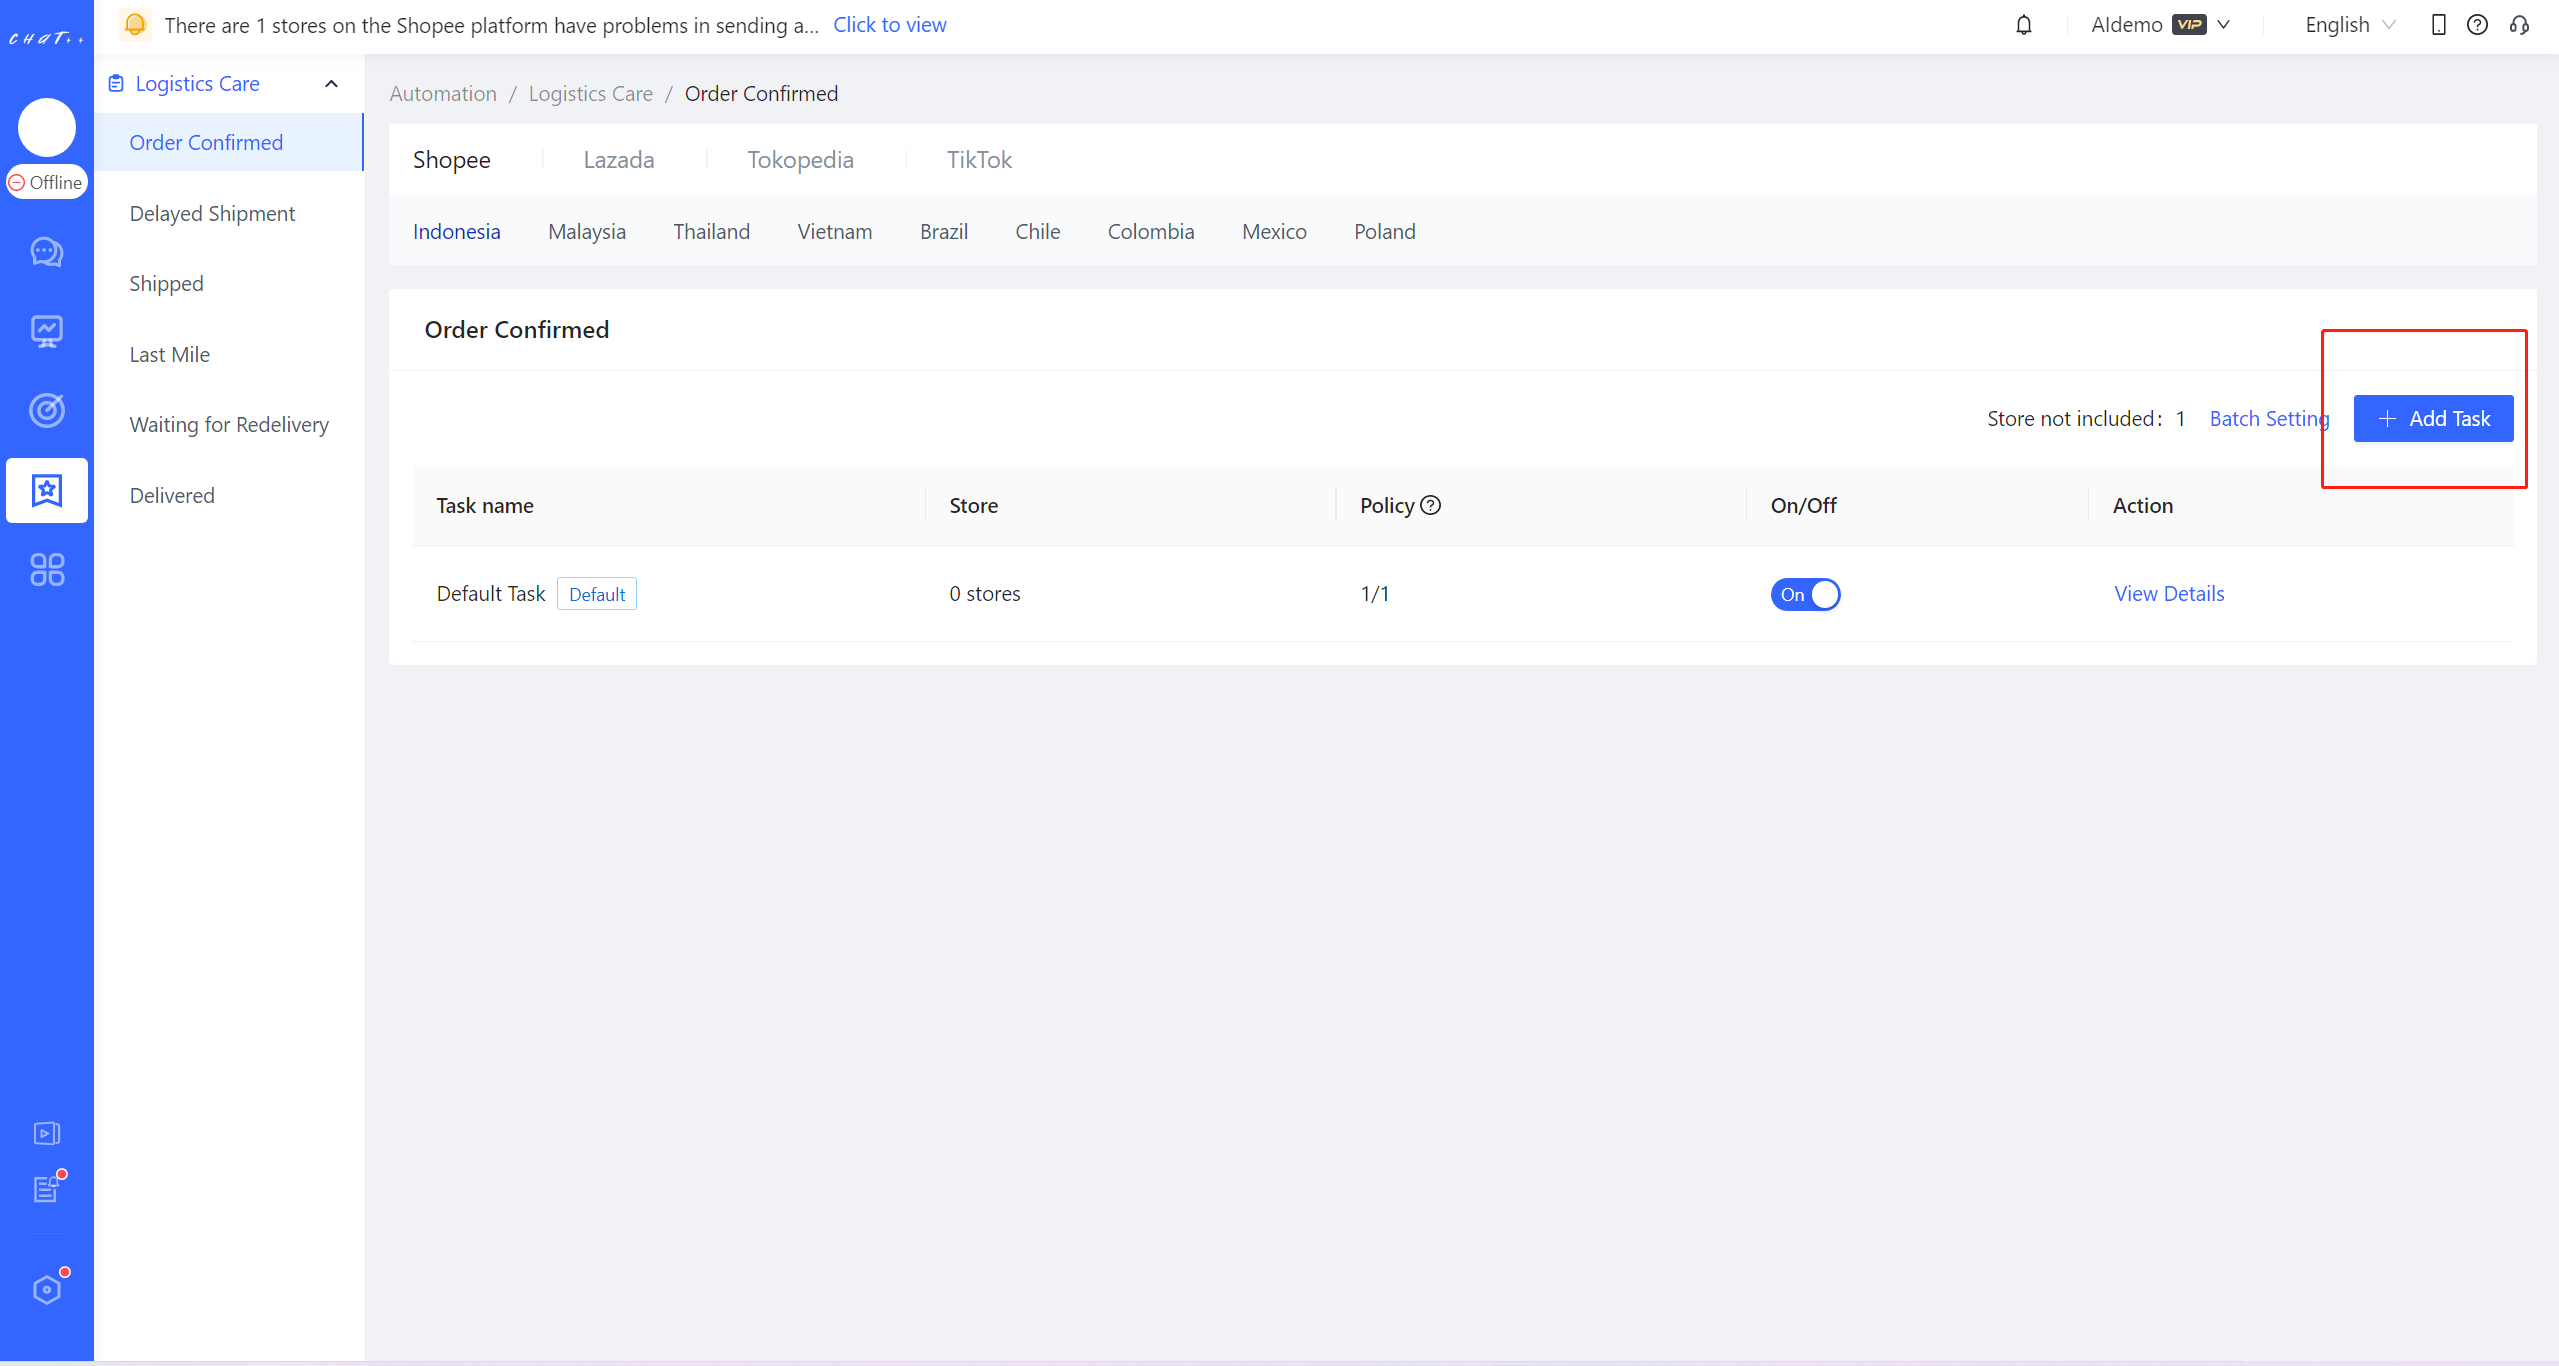
Figure 11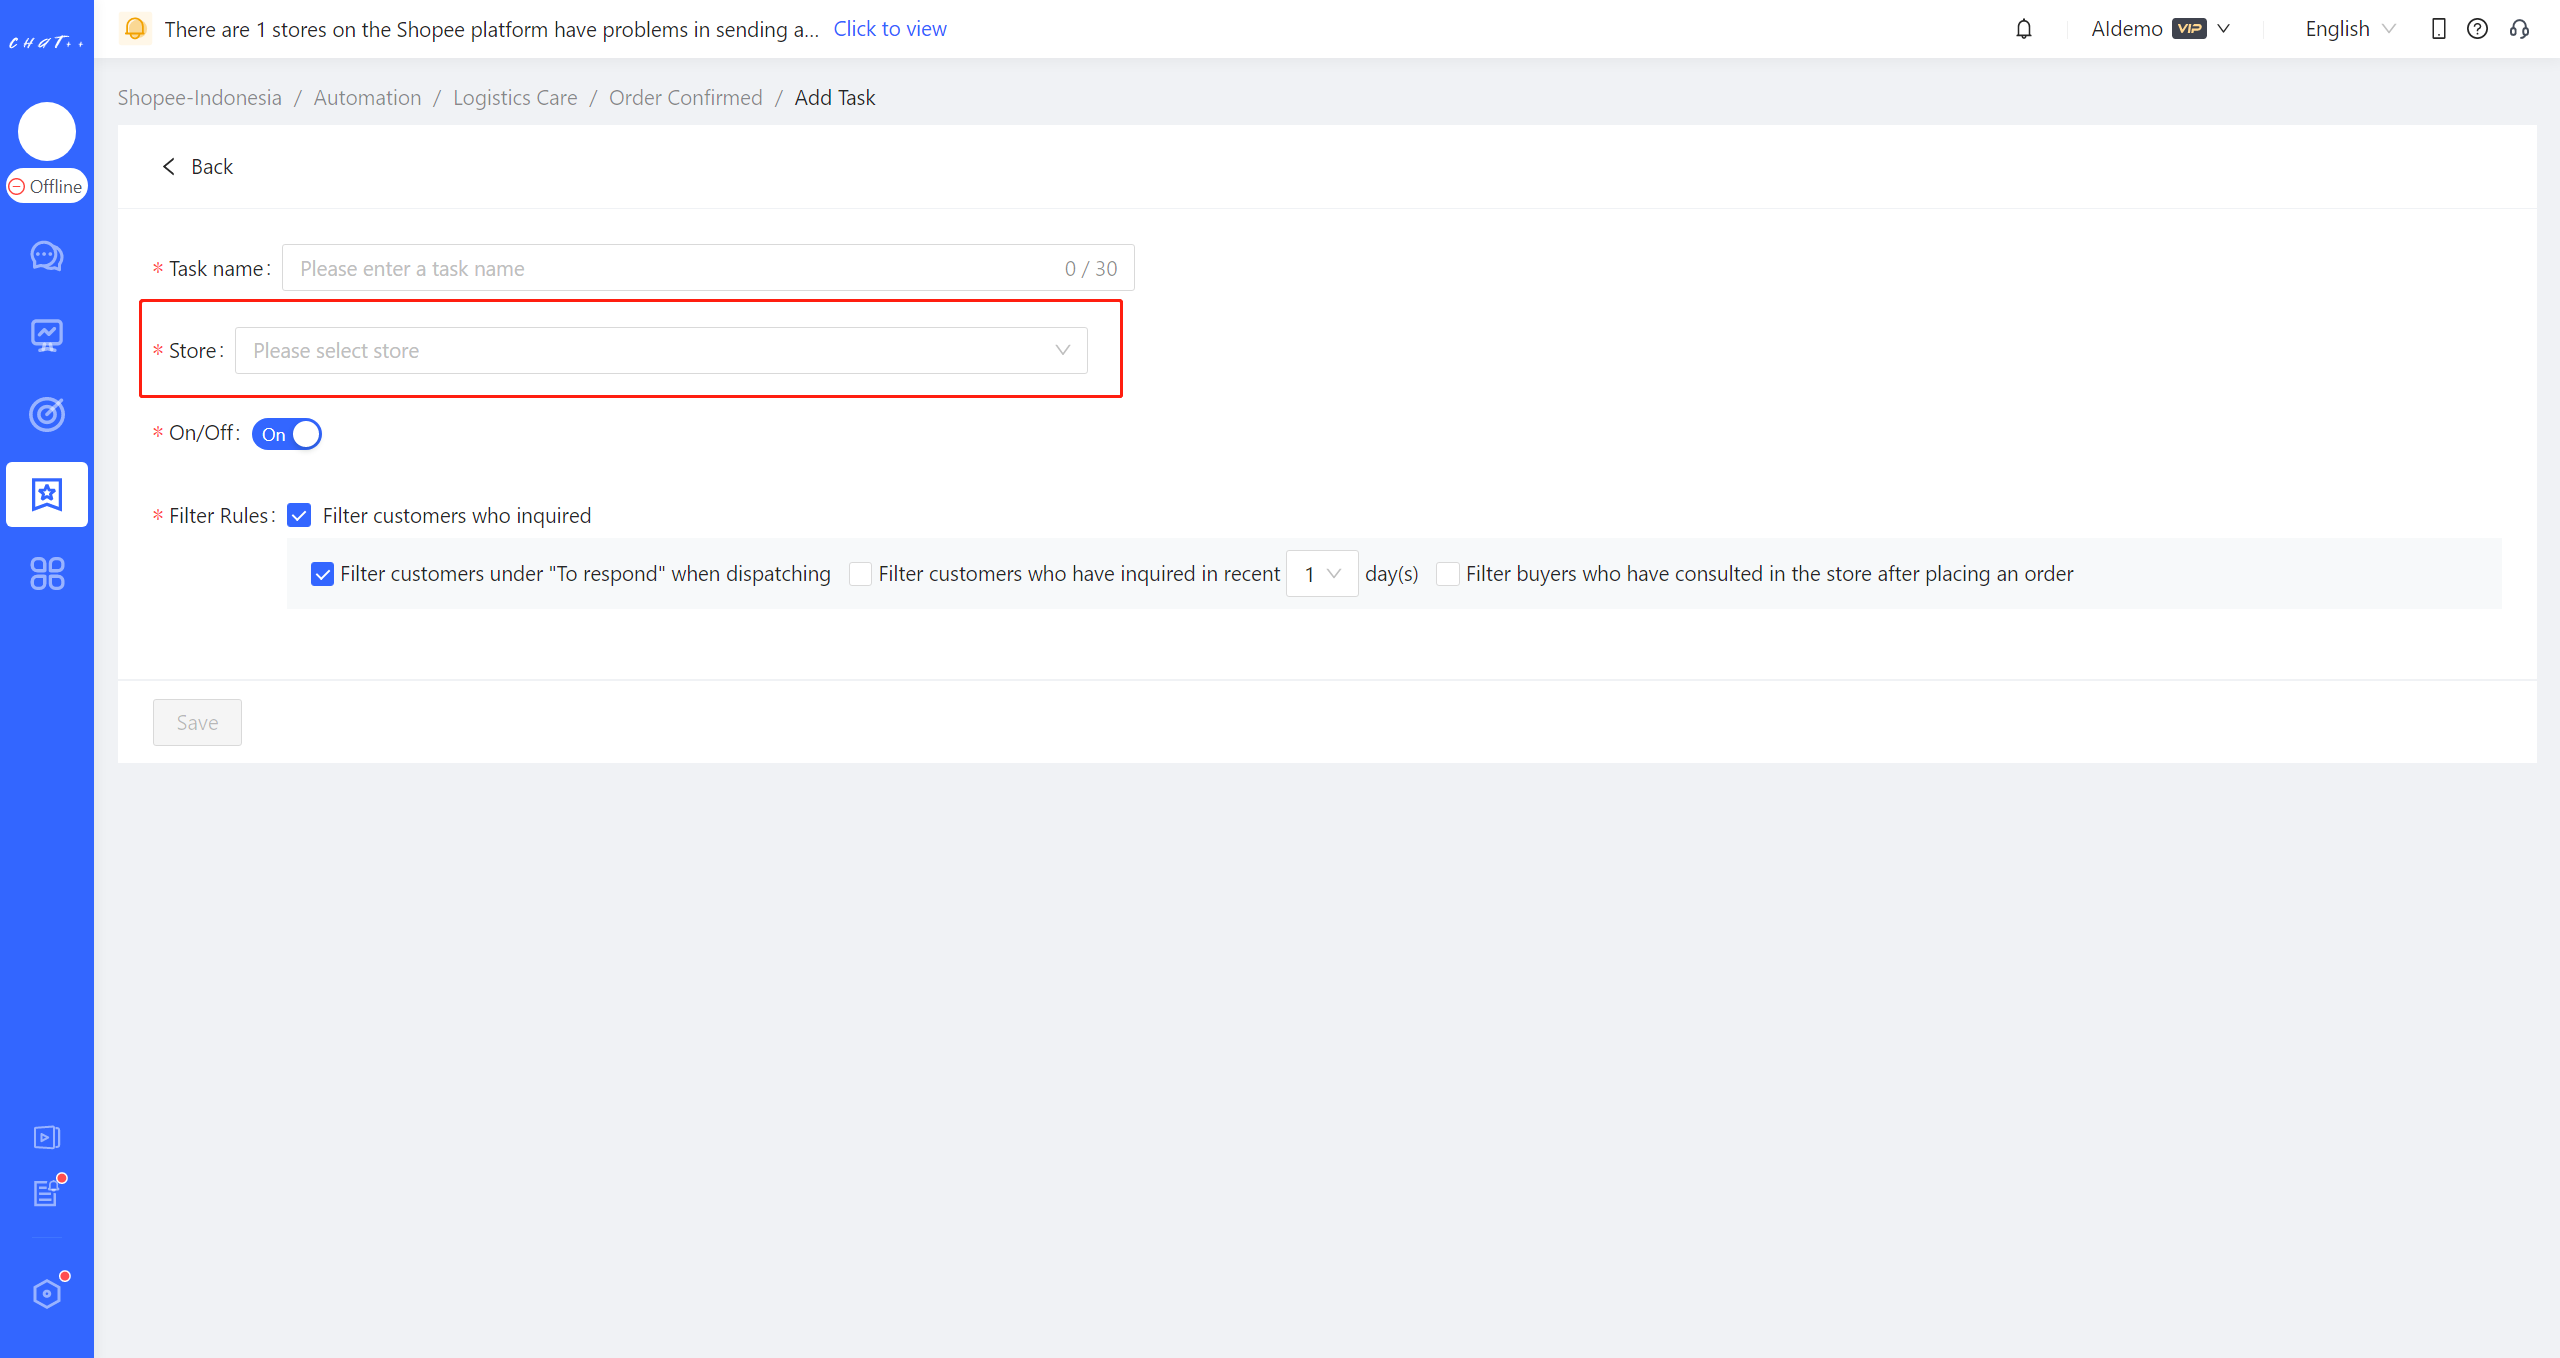
Figure 12
Attention
⚠️ 1. Logistics Care tasks can be customized differently for marketplaces. Currently, the following marketplaces are supported: Shopee, Lazada, and TikTok Southeast Asia, and TikTok US. The functionality for the Tokopedia marketplaces will be launching soon. Stay tuned for updates.
⚠️ 2. Due to restrictions in the Lazada official interface, ChatPlusAI is currently unable to reach buyers who haven't made inquiries in the past 5 days or placed orders in the last 7 days. As a result, messages for the 【 Last Mile 】 and 【 Delivered 】 scenarios cannot be sent to these buyers. ChatPlusAI is actively engaging with Lazada officials to lift these interface restrictions. Please stay tuned for updates.
⚠️ 3. For different sites within the same marketplaces, you need to configure logistics care tasks independently. Additionally, each scenario needs to be split and configured separately.
Cancellation/Refund Follow-up
💡Before an order is completed, buyers might consider canceling the purchase due to various reasons, leading to requests for order cancellation, partial refunds, or return and refunds. During this phase, ChatPlusAI supports automatic message prompts, providing timely engagement with buyers after they initiate these requests. Depending on the specific post-sale reasons, it guides buyers to either abandon their request or reorder, reducing losses caused by order cancellations.
💡When an order is automatically canceled due to failed delivery attempts, promptly notifying the buyer about the abnormal order and guiding them to reorder can effectively salvage potential losses.
👉Cancellation/Refund Follow-up tasks can be customized differently for marketplaces. Currently, the following marketplaces are supported: Shopee, Lazada, and TikTok Southeast Asia, and TikTok US. The functionality for the Tokopedia marketplaces will be launching soon. Stay tuned for updates.
Show Cases
- After a buyer initiates a return and refund request due to receiving a non-functional item, ChatPlusAI immediately sends a recovery message. This message inquires about the specific reasons why the buyer couldn't use the received item. The buyer responded to this inquiry the following day after being online.
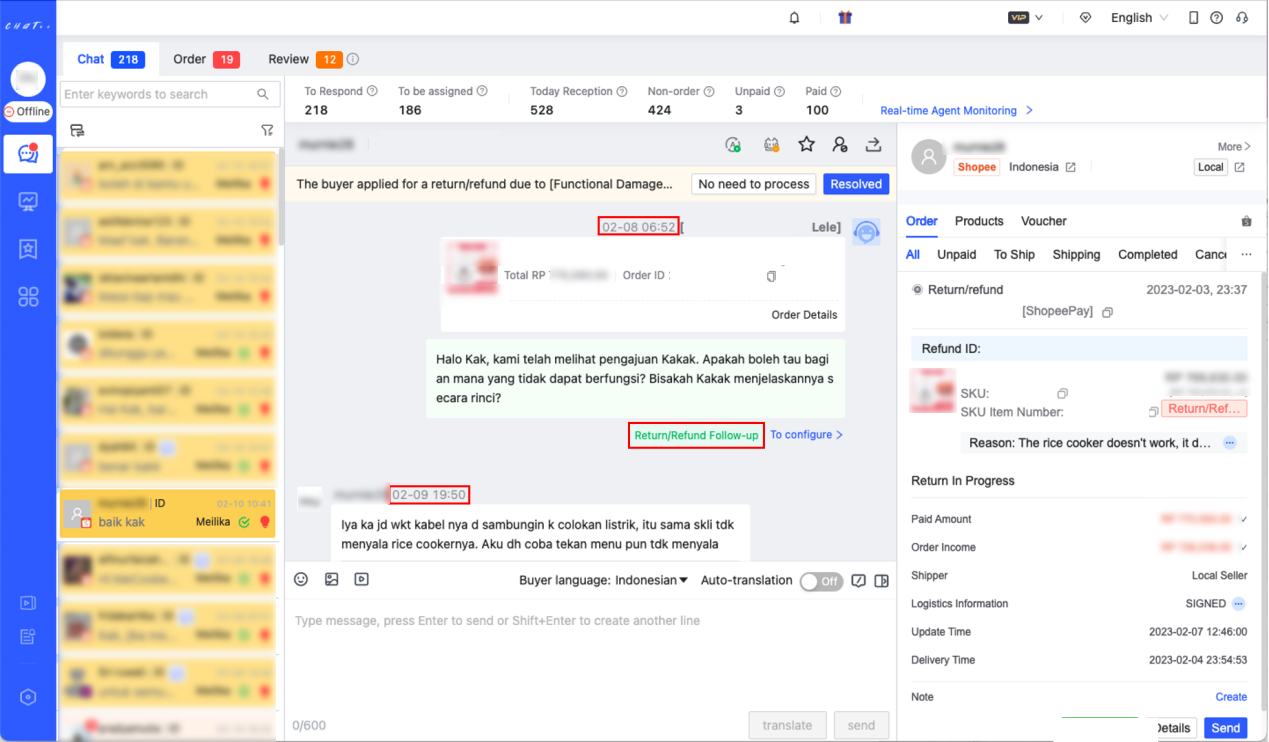
Figure 1
Privileges required for configuration
Configuring the 「 Cancellation/Refund Follow-up 」 requires enabling the "Cancellation/Refund Follow-up" permission for the employee account's assigned role. The super admin and admin roles have this permission by default.
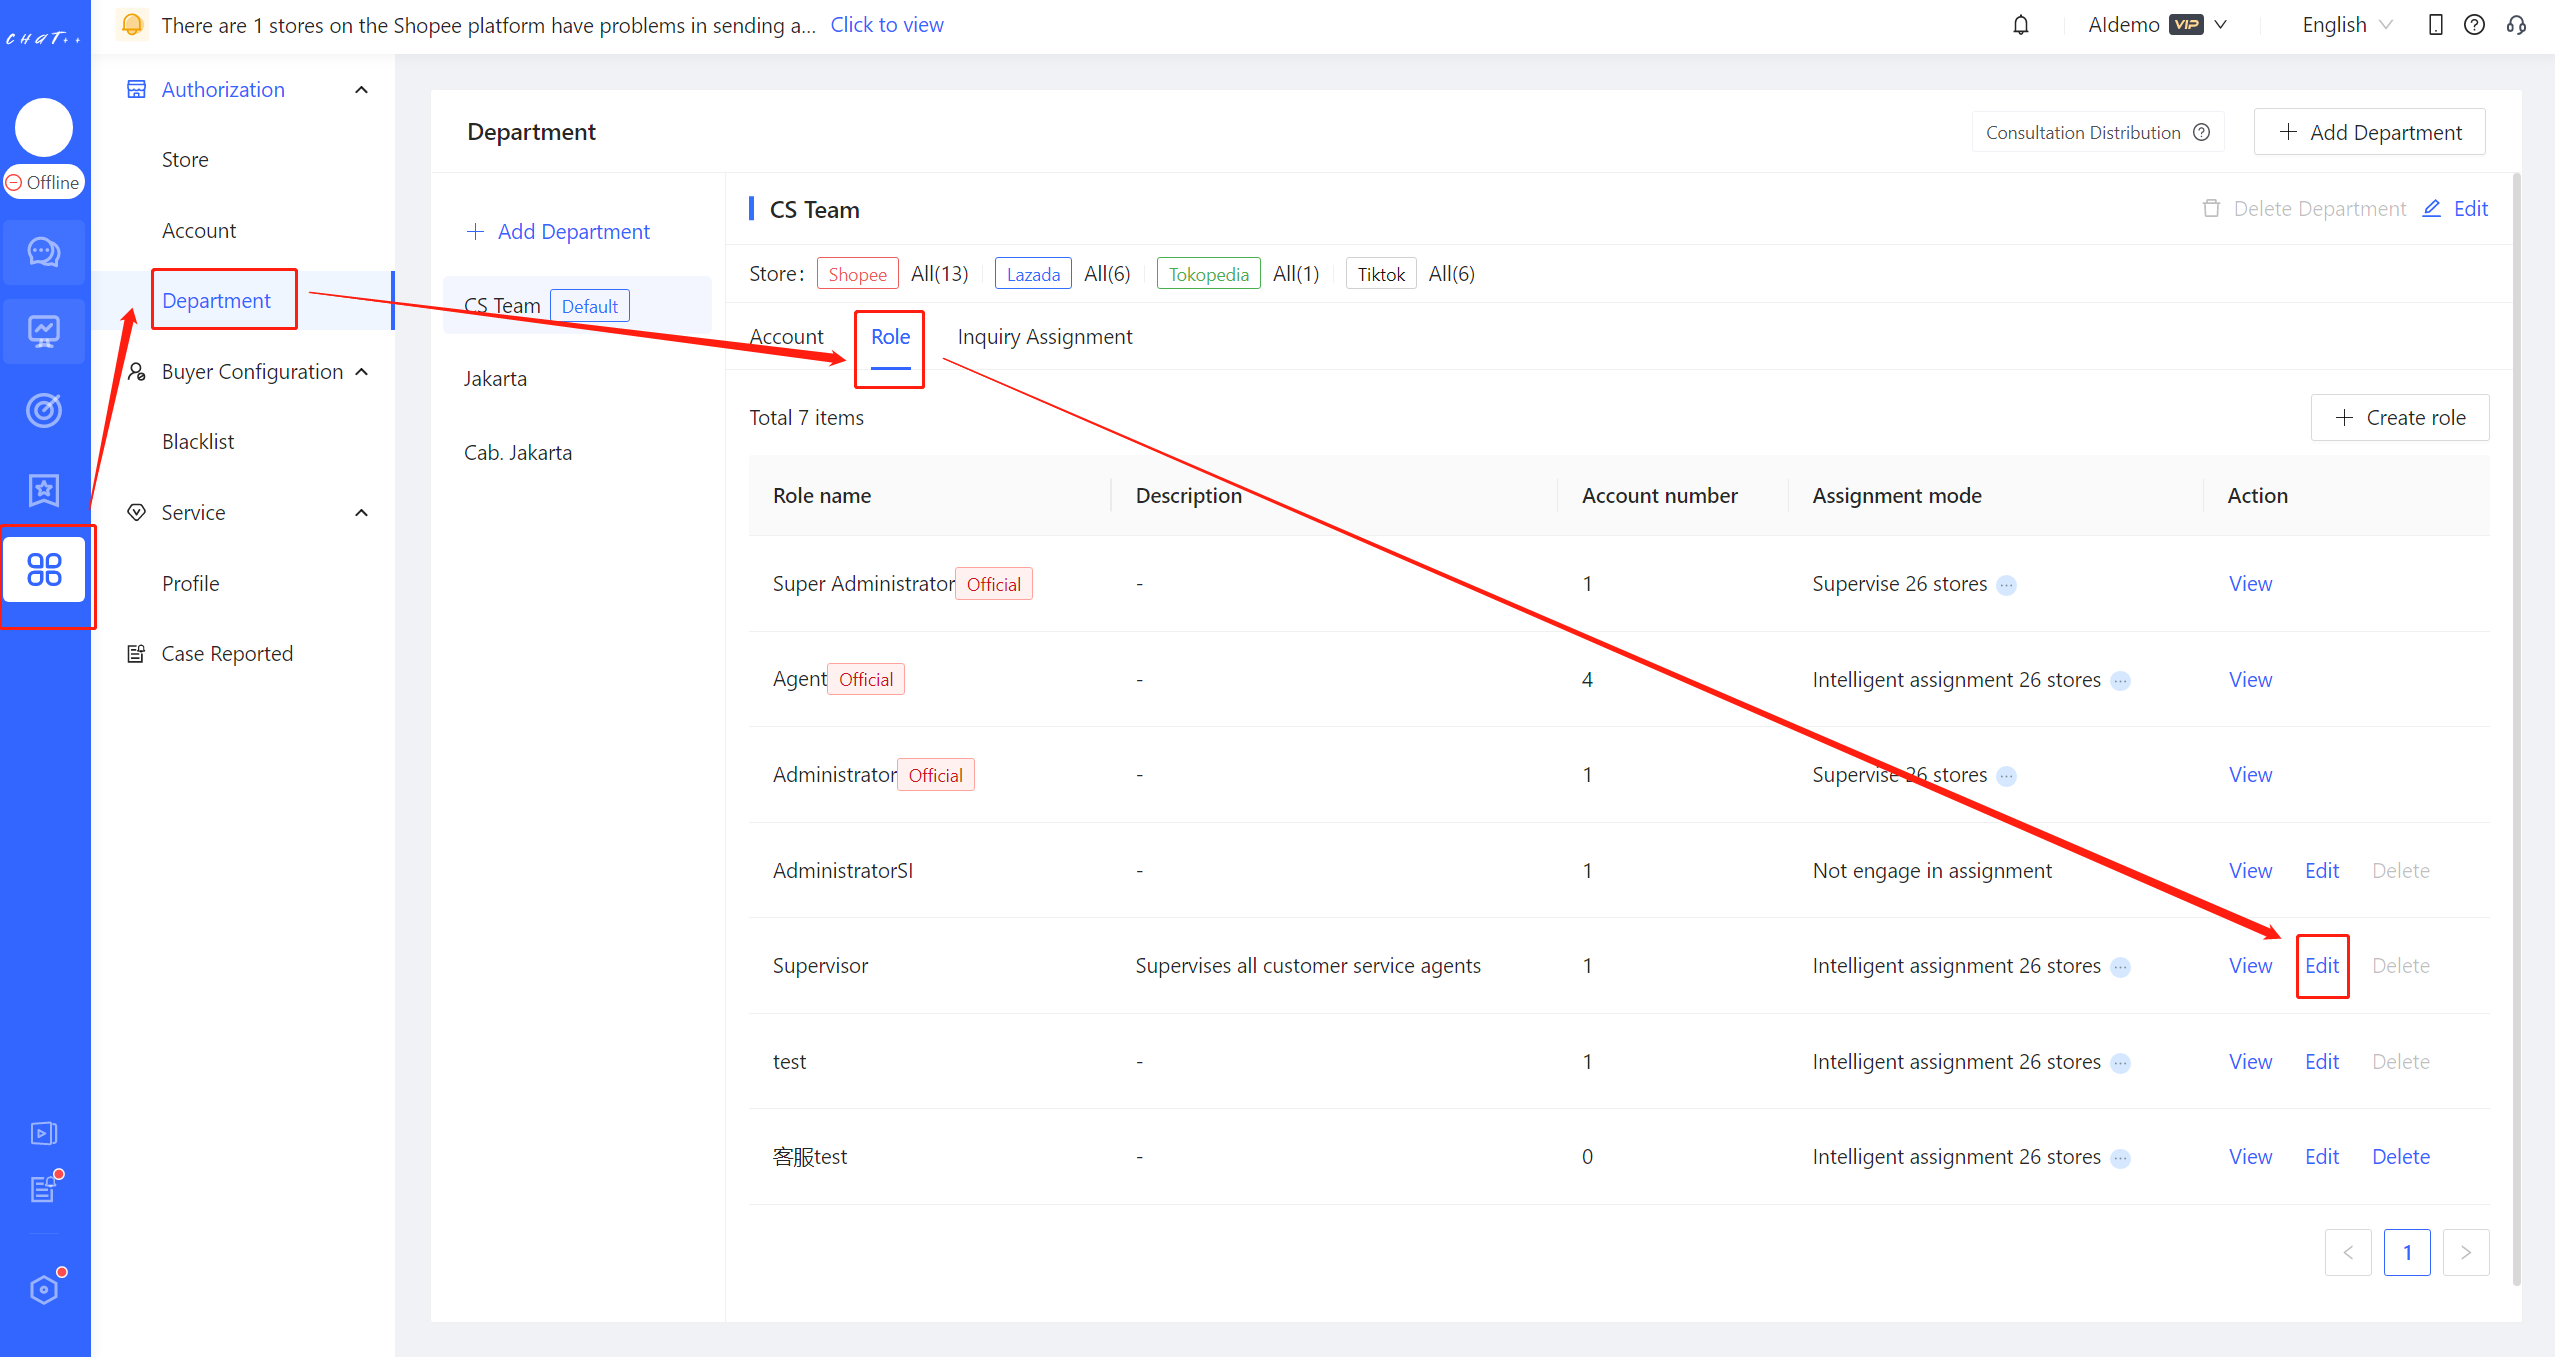
Figure 2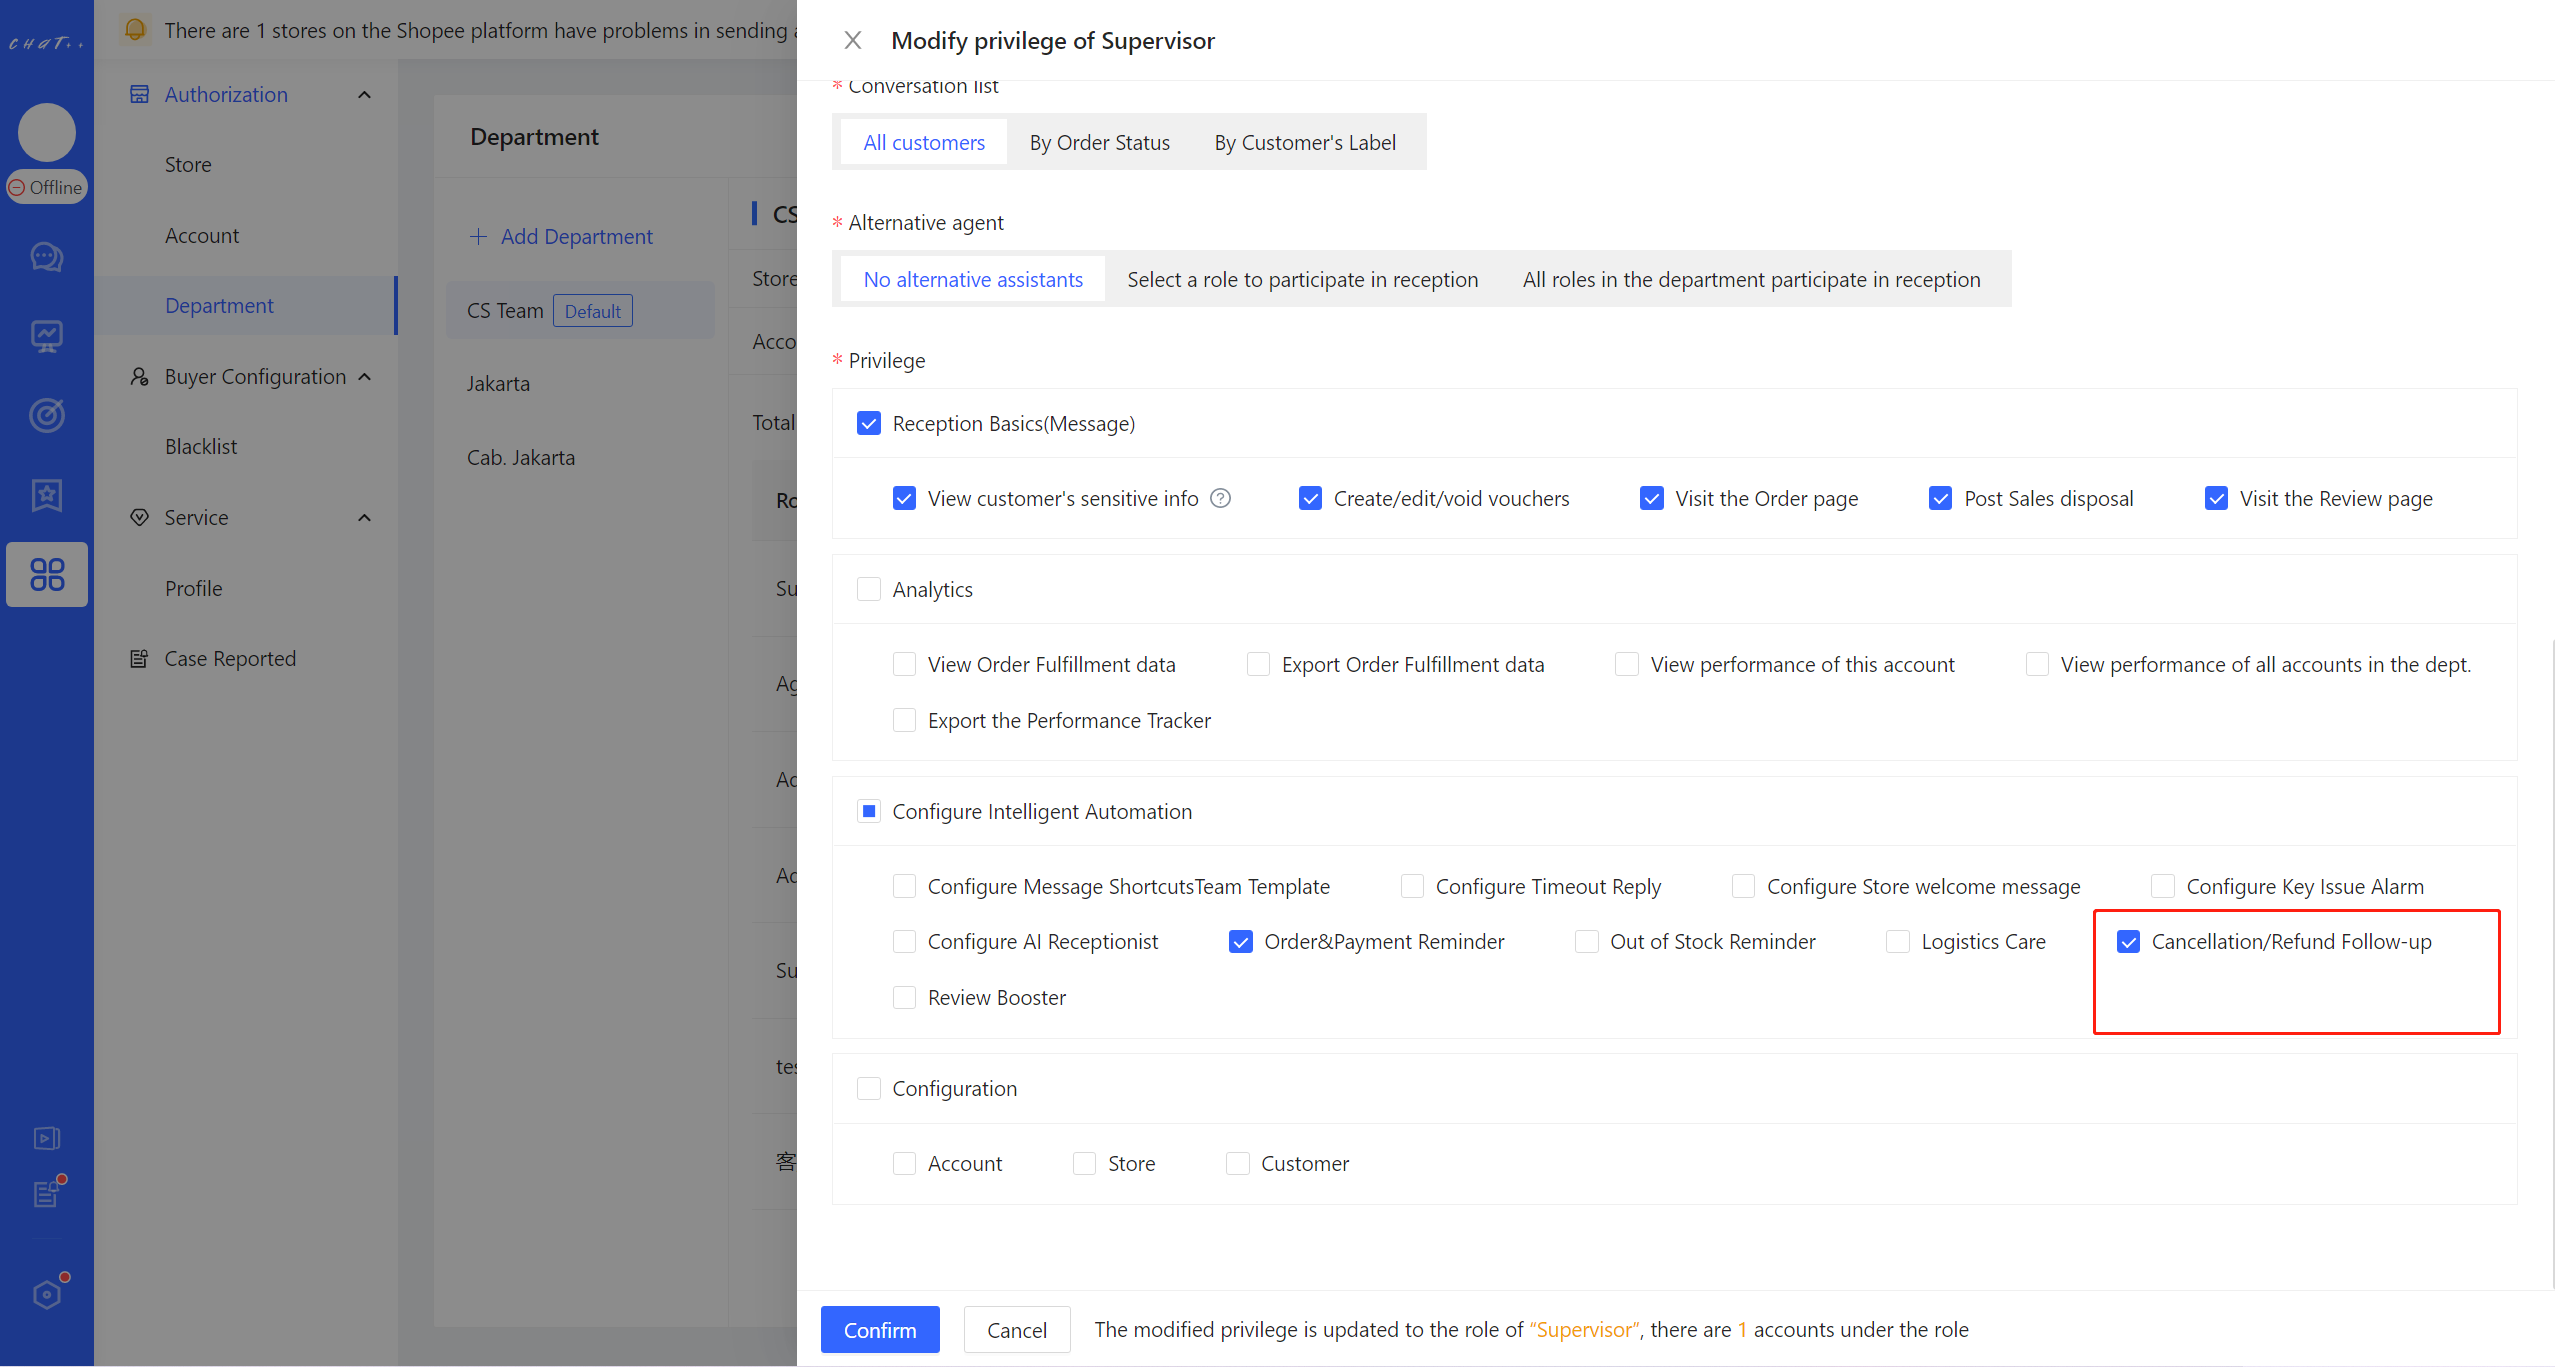
Figure 3
How to configure
Click 【「 Automation 」 in left menu(Shown as Figure 4 red box①)→「 Select the desired marketplace and site for configuration 」→「 Cancellation/Refund Follow-up 」(Shown as Figure 4 red box③)】,Access the configuration page.(Shown as Figure 5)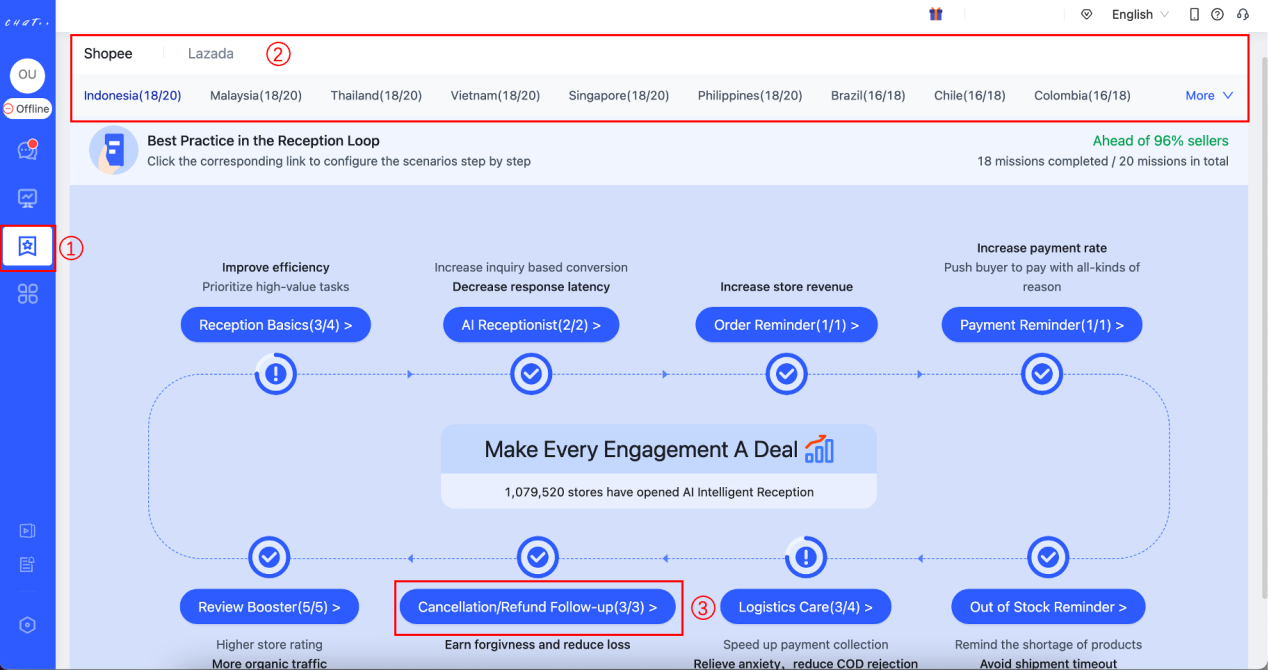
Figure 4
Due to restrictions in the Lazada official interface, ChatPlusAI is currently unable to reach buyers who haven't made inquiries in the past 5 days or placed orders in the last 7 days. As a result,【Cancellation/Refund Follow-up】 scenarios cannot be sent to these buyers. ChatPlusAI is actively engaging with Lazada officials to lift these interface restrictions. Please stay tuned for updates.
【Default Task】Description
(Shown as Figure 5 red box①) A default task has been created for each country site and marketplace, and all stores in the country have been included in the task. This makes the configuration much more convenient. All you have to do is click "View Details" button to edit the policy or directly enable the default task (shown as Figure 5 above).
Newly authorized stores will be automatically included to the 【Default task】. However, the store will not be automatically included again after they are removed from the default task or other tasks. It will be counted as "Store not included" (Shown as Figure 5 red box④). You can click "Batch Settings" button (Shown as Figure 5 red box④) to add massive stores into the certain task quickly.
Kindly make sure that all stores have been included to the right task (that means the "Store not included" shown as Figure 5 red box④is 0), in case the store is neglected from any Logistics Care task.
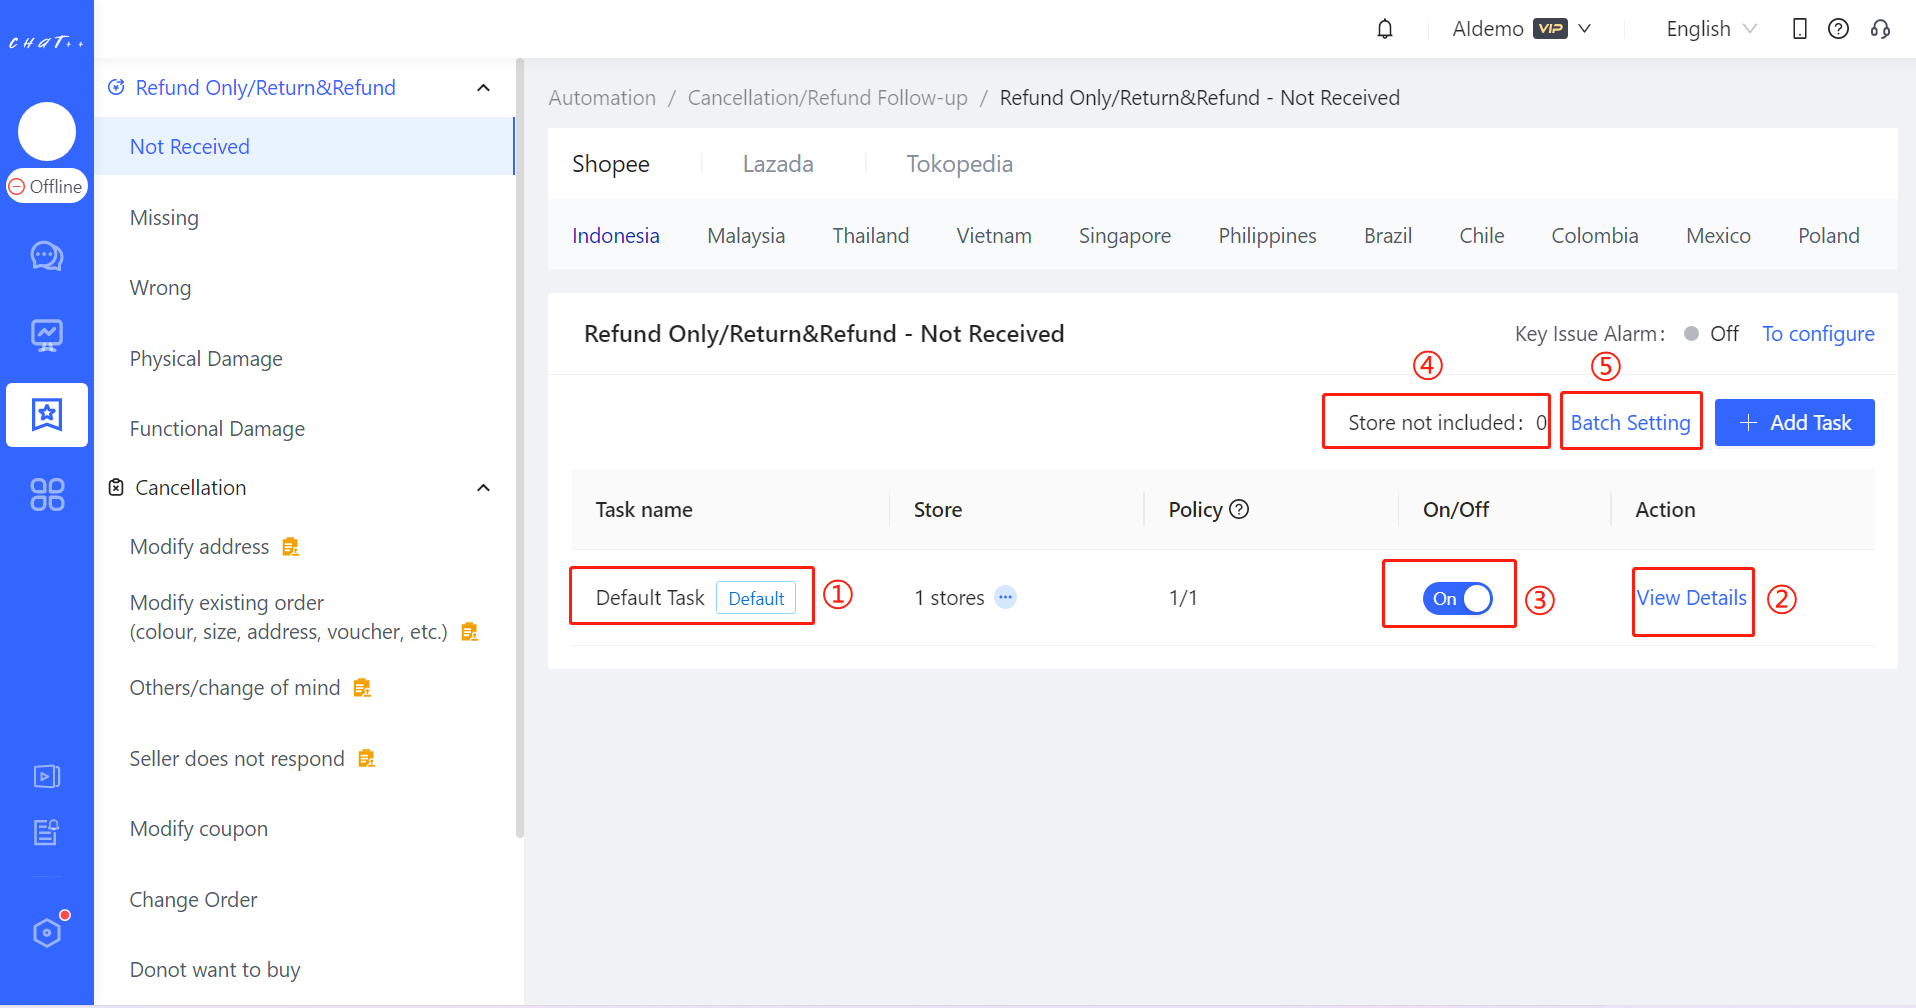
Figure 5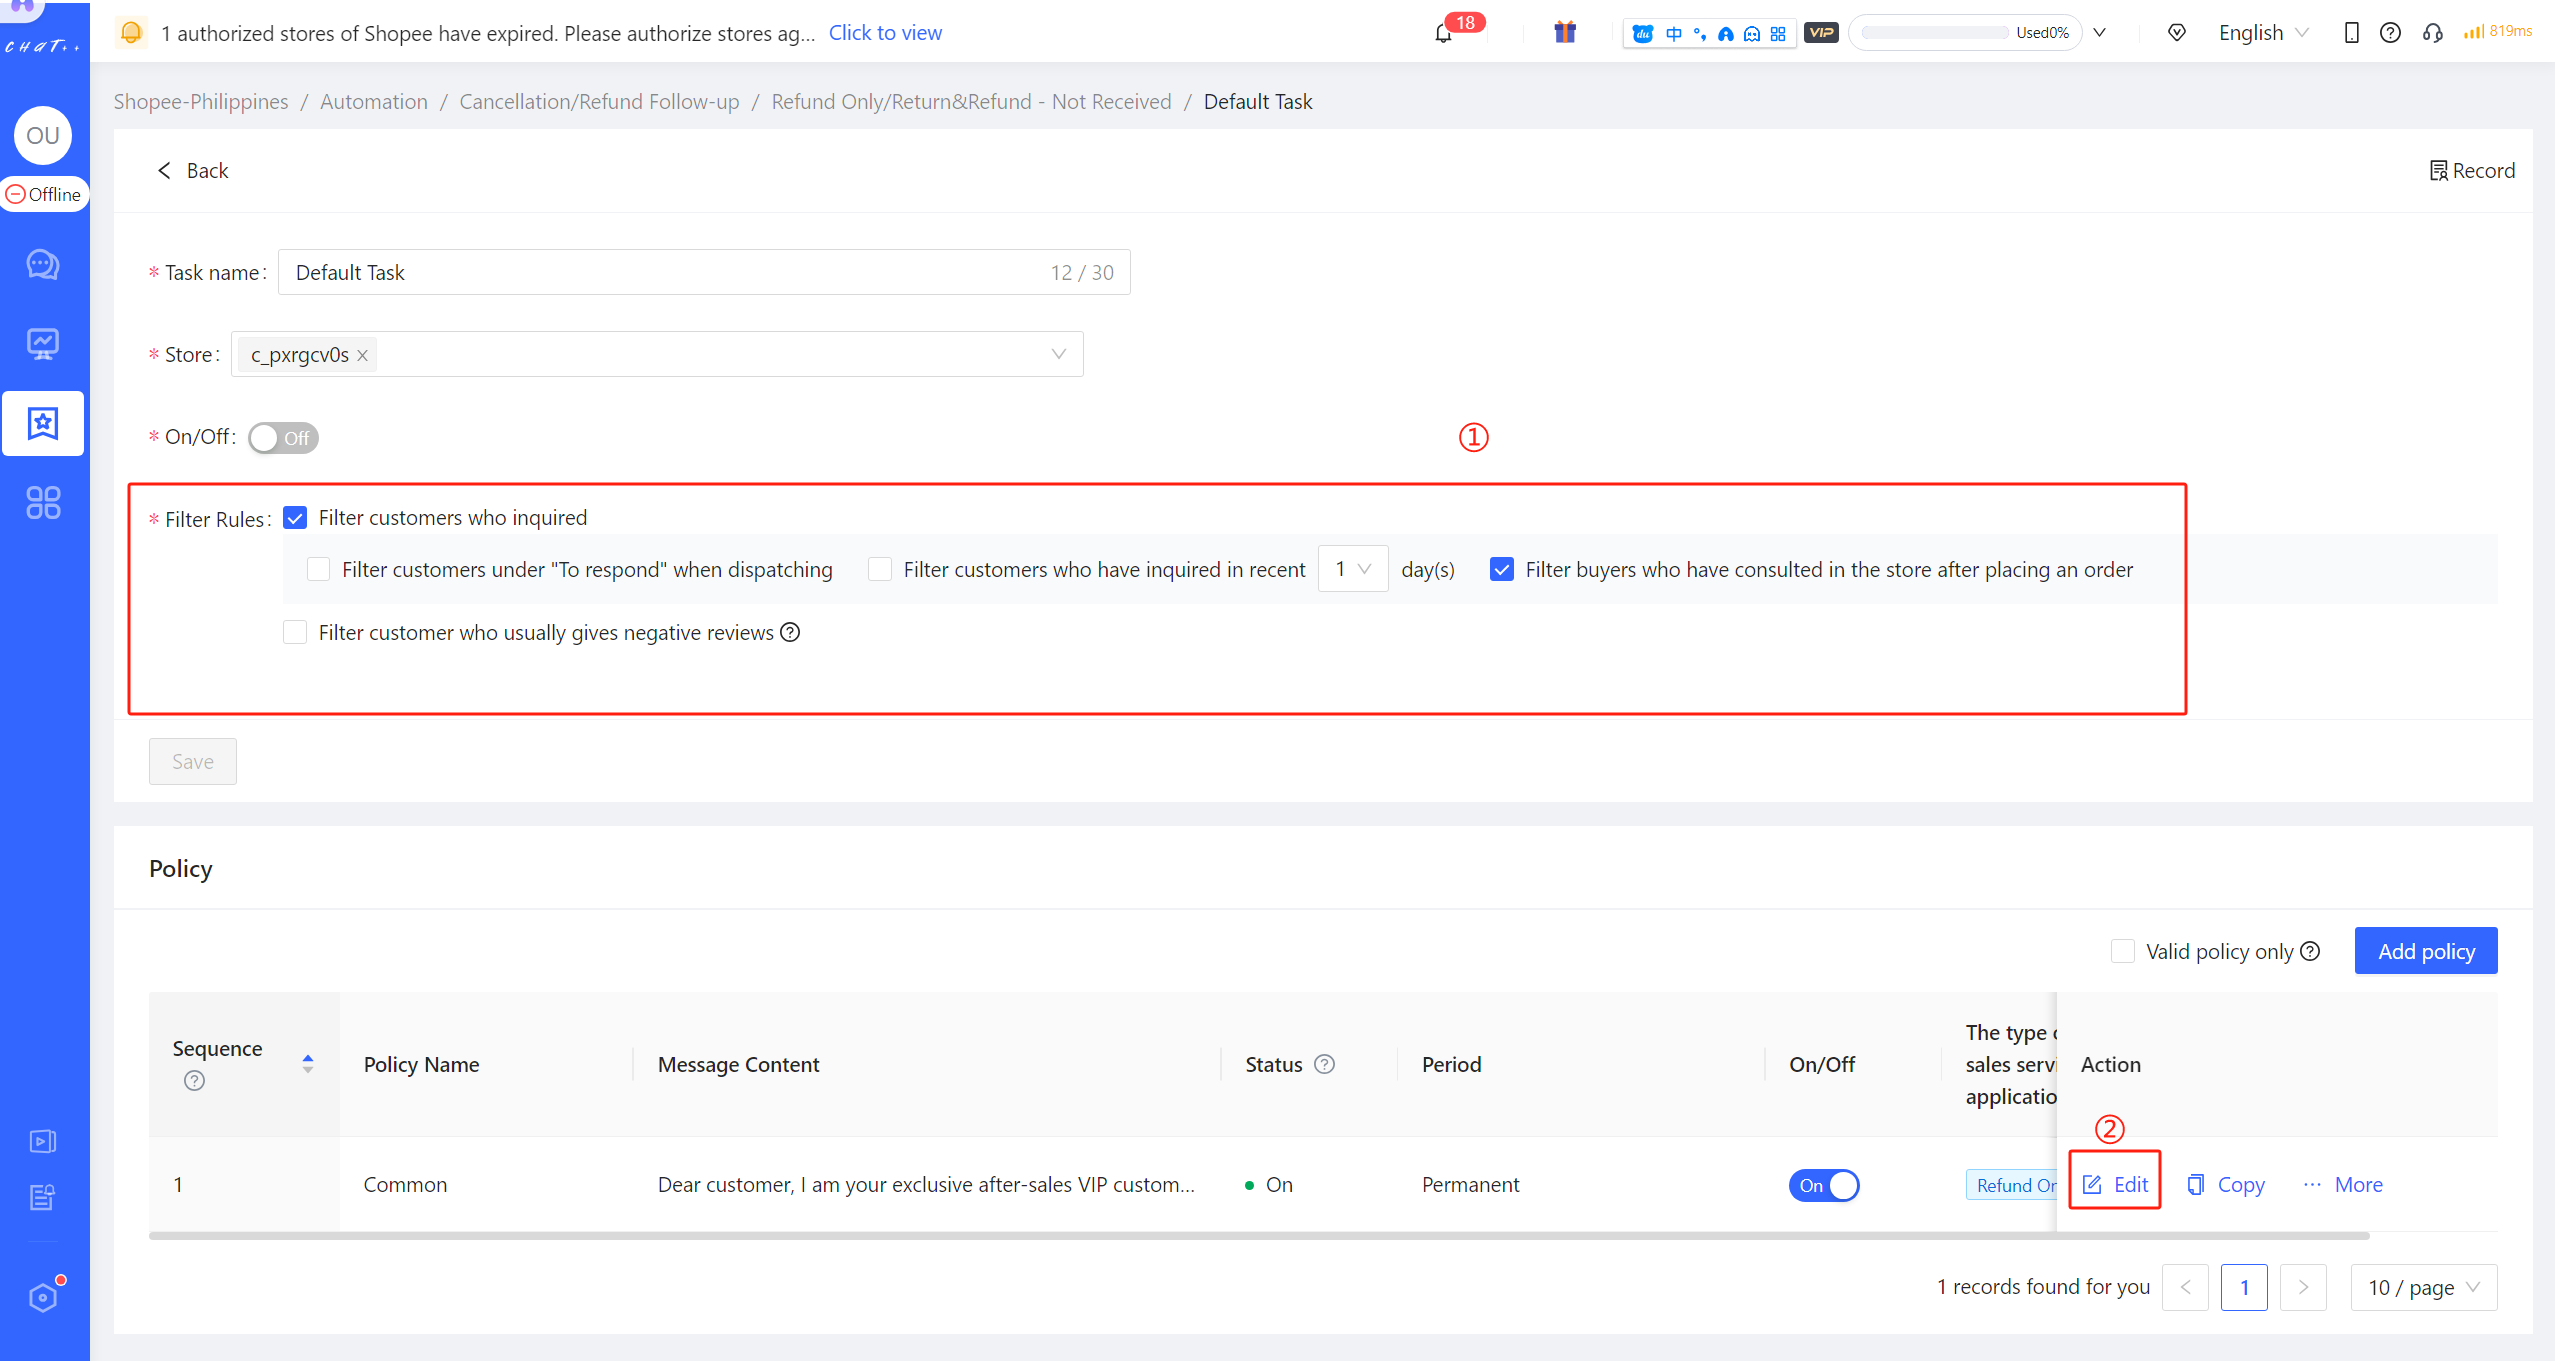
Figure 6
【Filter Rules】Description
Filter customers who inquired: To ensure the effectiveness of the Cancellation/Refund Follow-up, the default setting is to exclude customers who have inquired in the store after placing an order. This means that when the Cancellation/Refund Follow-up task is dispatched, customers who have engaged with the store's CS after making a purchase will be excluded. This precision design prevents the Cancellation/Refund Follow-up task from having a counterproductive effect. For instance, it avoids situations where both parties have agreed to cancel an order or proceed with a return/refund, and the customer still receives a Cancellation/Refund Follow-up message after taking action, leading to confusion.
Filter customer who usually gives negative reviews: Within the past six months, among nearly 4 million Southeast Asian stores using ChatPlusAI, customers who have given two or more negative reviews are considered who usually give negative reviews (including cases where they later revised their review to positive). The system automatically identifies such customers. Cancellation/Refund Follow-up task allows for filtering out these customers and not sending them messages.
【Policy branch】Description
Policy branch consists of four key factors: trigger conditions,period of Validity,product scope and script.
trigger conditions: Constructed from parameters like order status, product attributes, user labels, and time, trigger conditions involve conditional checks. When these conditions are met, the corresponding messaging of the current policy branch is deployed, or actions like transferring to human agents are executed.
Period of Validity: The policy branch take effects in this period. There are 3 options to configure: Valid forever, Period of days, Period in specific hours for days.
Product scope: The policy branch take effects when the customer ordered specific products. There are 4 options to configure: No limitations (the customer ordered any product in stores), Pick SKU, Pre-order or In-stock.
- "Pick SKU" supports selecting specific products by searching the "Product Name", "Product ID", "Parent SKU" and "SKU ID", meanwhile input "Product ID" or "Parent SKU" (separate multiple items with Enter) and can quickly select various products.
Script: When the trigger conditions are met, the corresponding messaging is dispatched, and the configured actions are executed.
When multiple strategy branches are configured for each Cancellation/Refund Follow-up scenario, the system will execute the first strategy branch in order of priority that falls within its validity period.
Setting up diverse strategy branches for tasks enables achieving the best task conversion effect by sending different abandoned order recovery messages to different users based on various marketing time frames, specific products, and user profiles.
As shown in the red box in figure 7 below, the period selected in the example is the whole month of February. That means this policy will only match buyers who placed orders in the month of February.
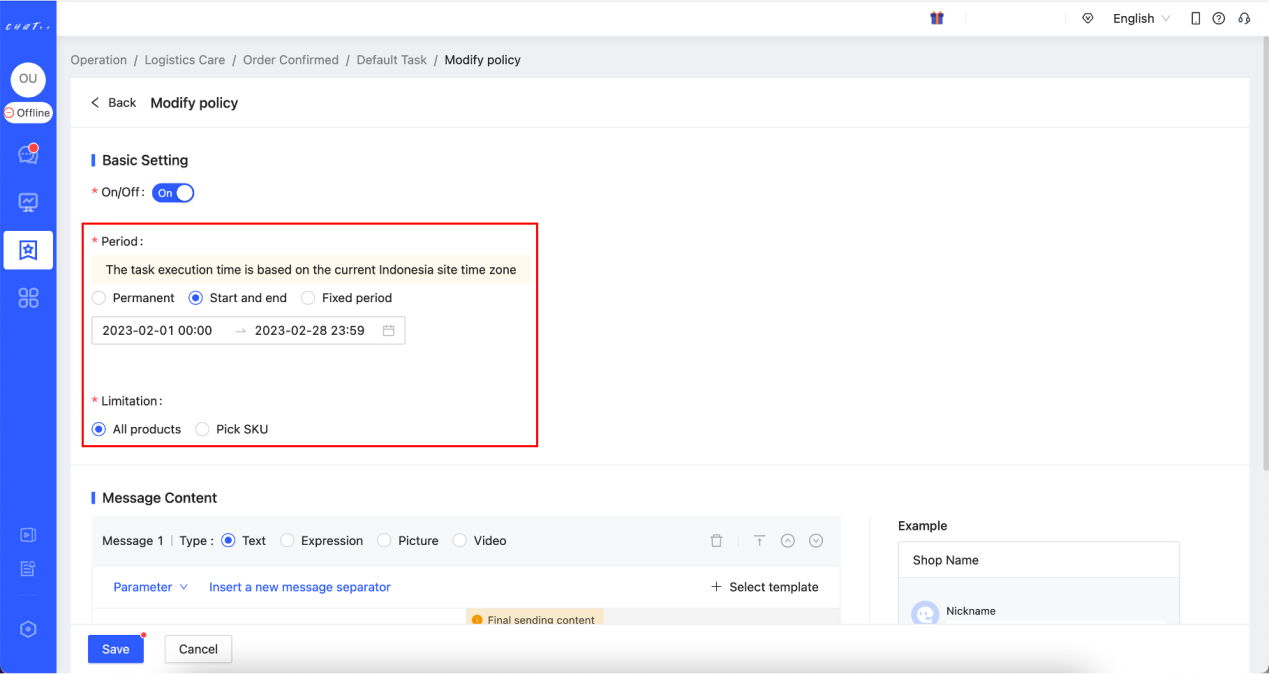
Figure 7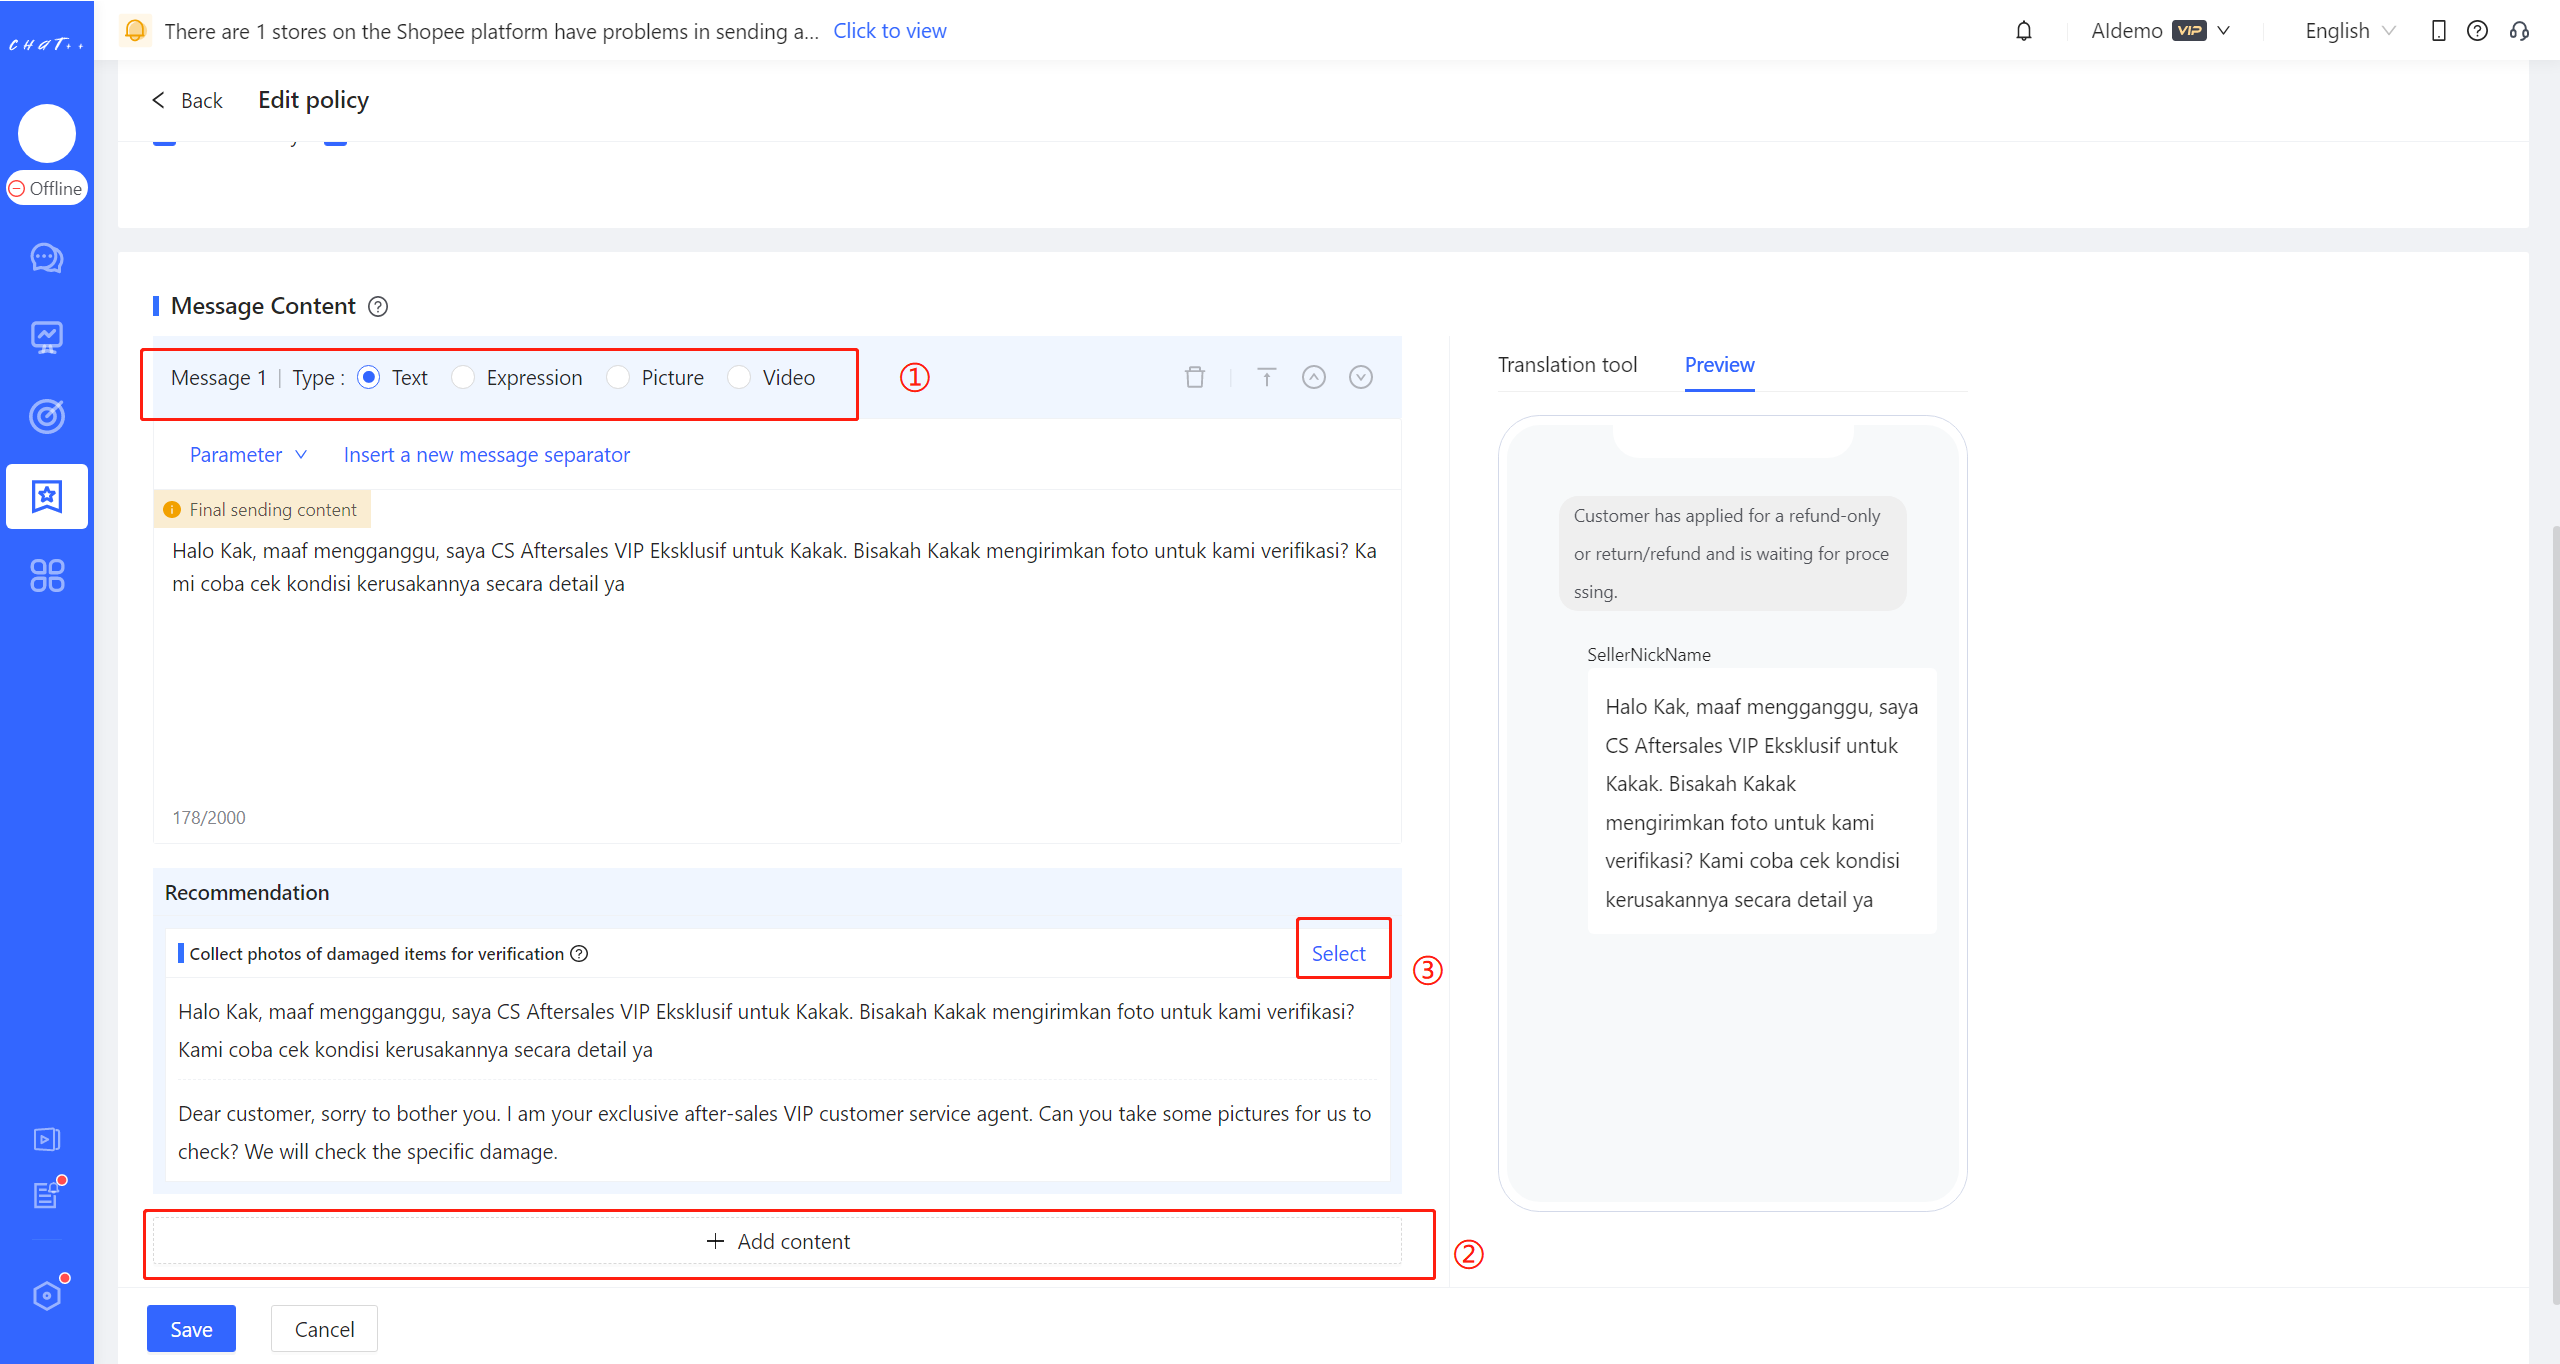
Figure 8
Various message types (text, image, sticker, video) are supported for the script
ChatPlusAI provides a message template for reference and use. (Shown as Figure 8 red box③)
Click “Add content” and you can add script with various message types. (Shown as Figure 8 red box②) .
A variety of message types support creating engaging content, thereby enhancing the effectiveness of Cancellation/Refund Follow-up.Due to marketplace interface limitations, TikTok currently only supports text and image types.
【Policy branch Execution Sequence】Description
If there are several policy branches under the task, system try to execute the branch from top to down(Shown as Figure 9). After one policy branch is executed, the following policy branch will no longer be executed. The policy branch execution order can be modified by clicking the button ”Top/ Up/Down/Bottom” (Shown as Figure 9 ) when you click「More」.
Note: If no policy branch is in period of validity or match the product that the customer ordered, this round of Payment Reminder will be skipped.
If none of the Policy branches match, the messaging for the current Cancellation/Refund Follow-up scenario will not be sent.
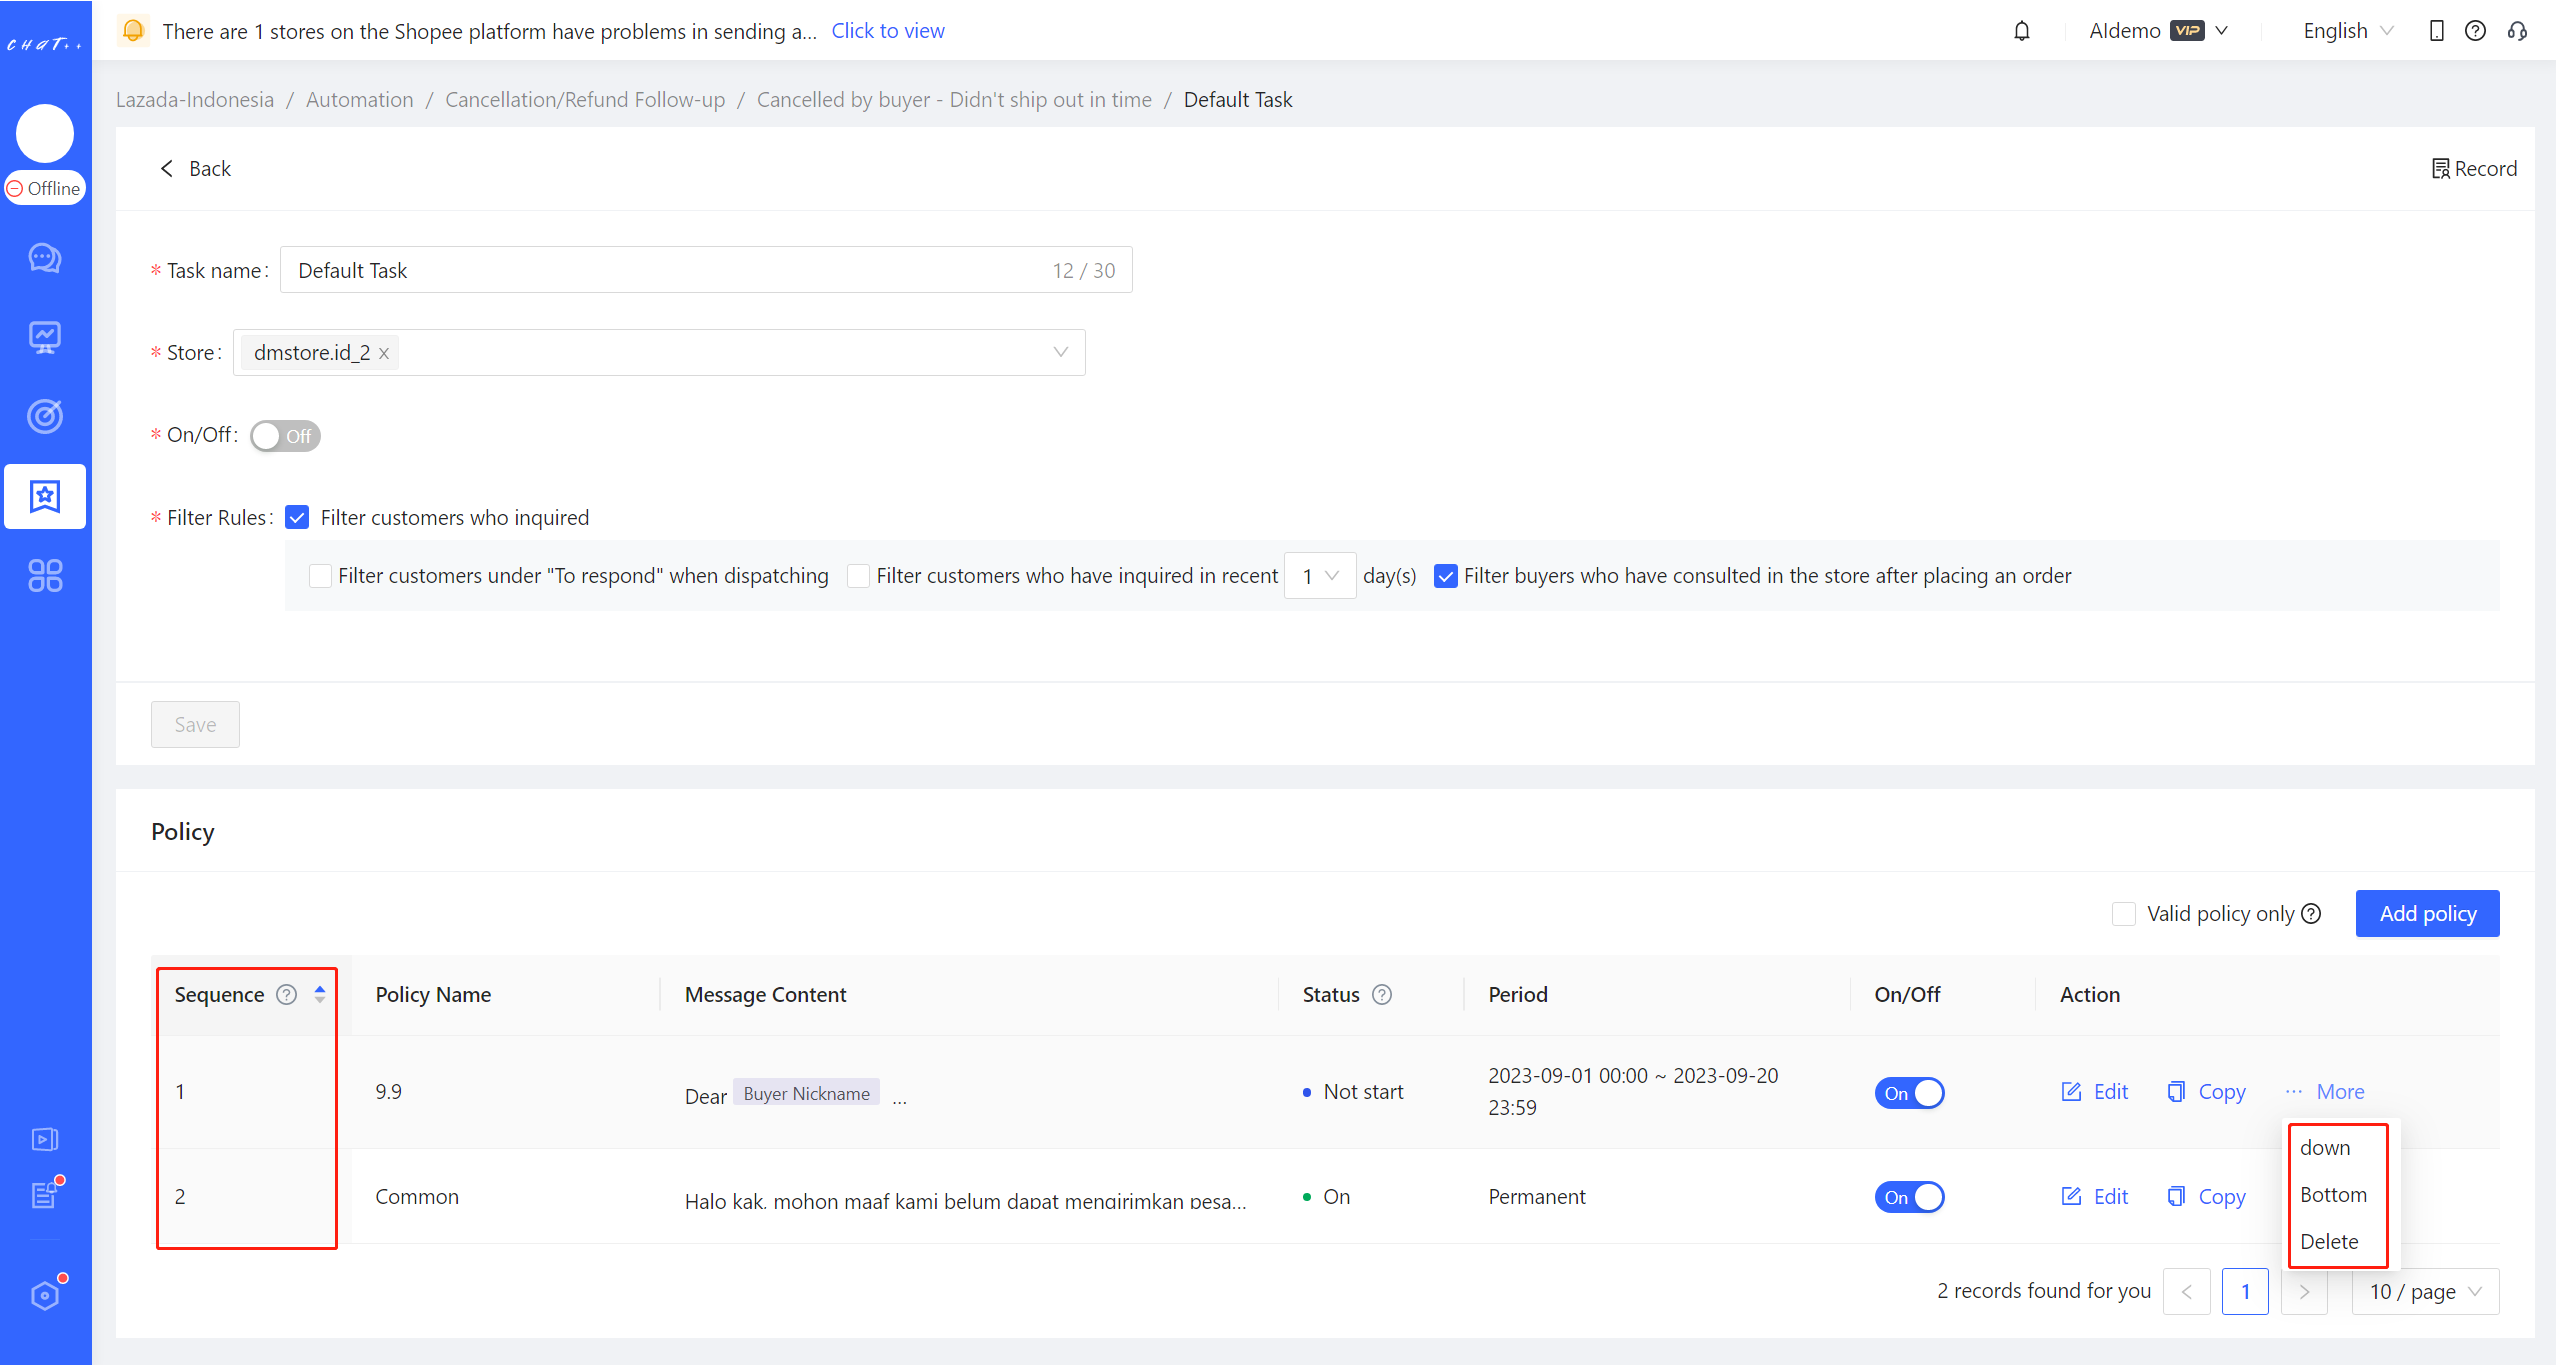
Figure 9
If you want to customize policy strategies for different stores, you can create different 【Task】for stores. (Shown as Figure 10 &11) In order to guarantee that one store is only included in one Cancellation/Refund Follow-up task, the store you added in the new task will be removed from the task the store previously belongs to.
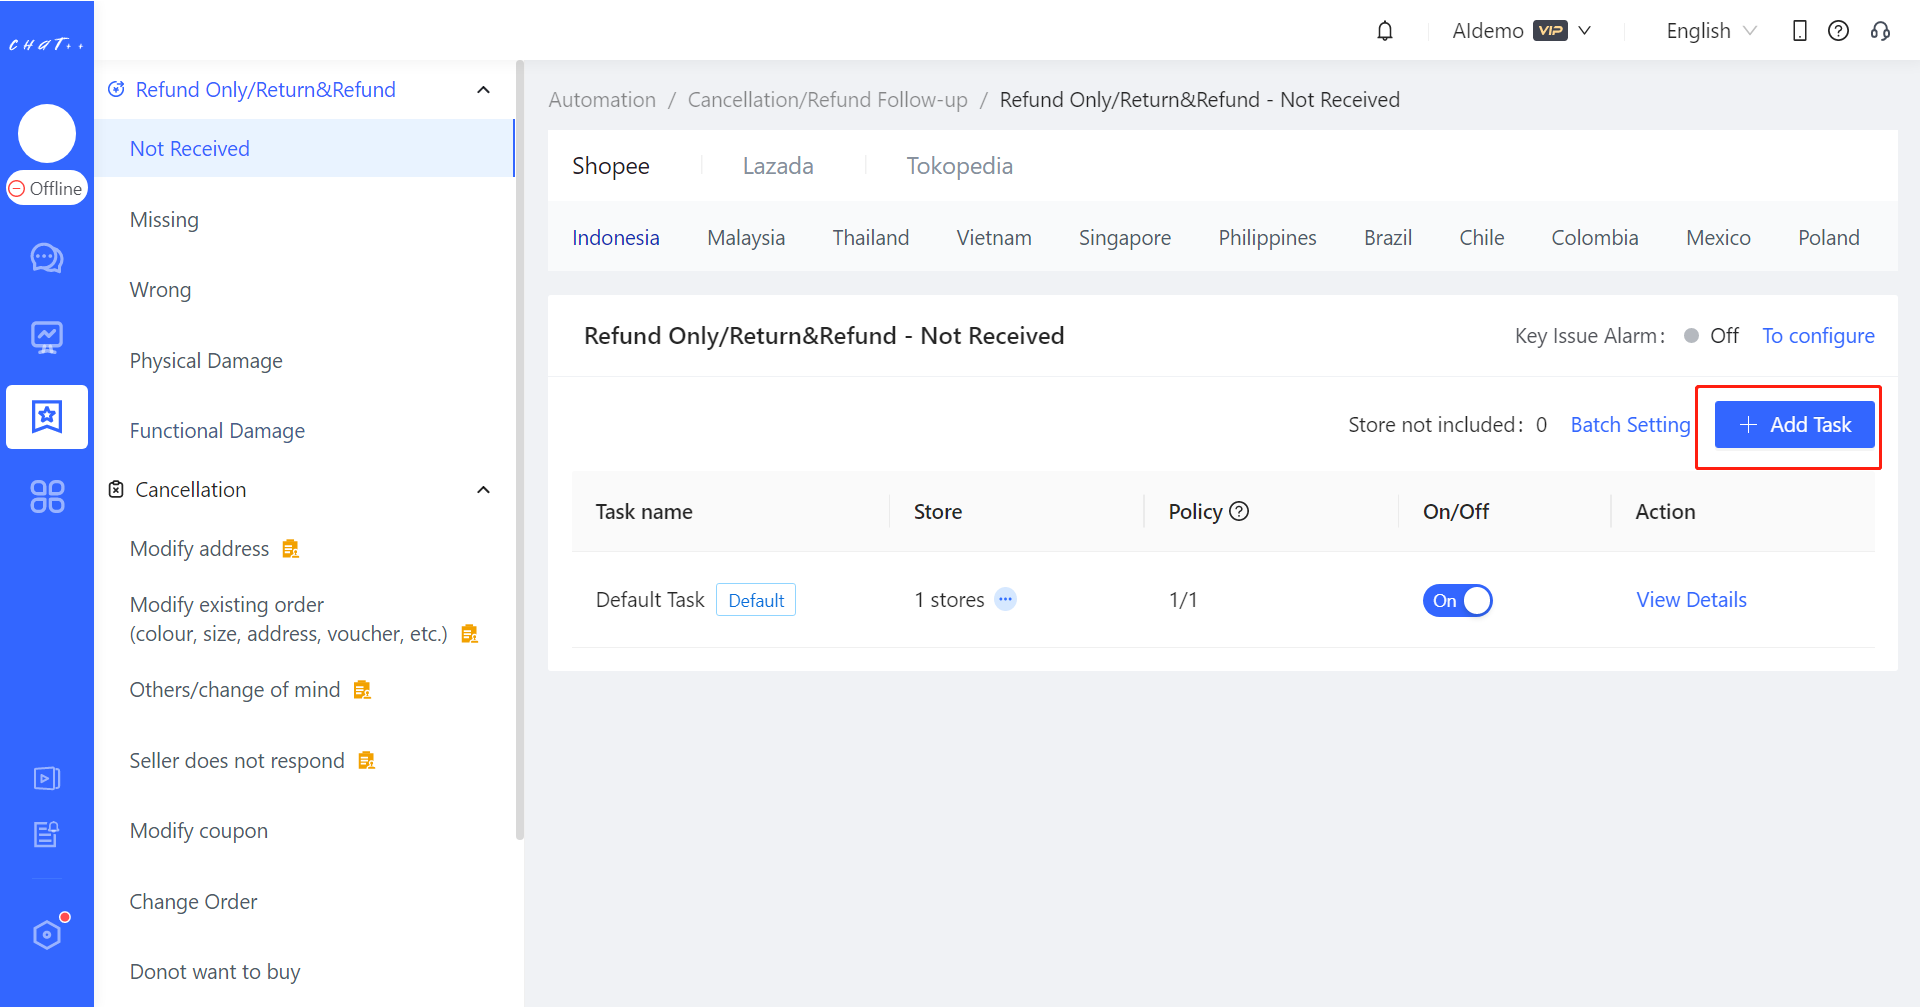
Figure 10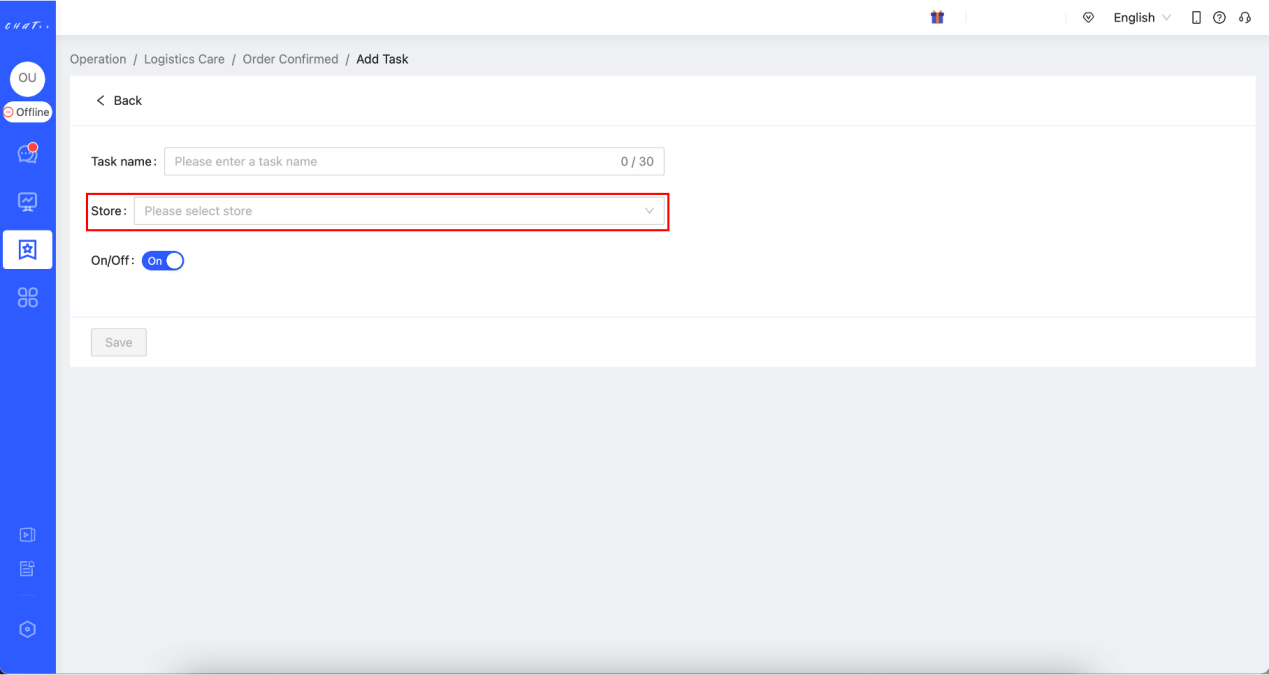
Figure 11
Attention
⚠️ 1. For Cancellation/Refund Follow-up, due to varying levels of interface openness across marketplaces, we currently support Shopee, Lazada, TikTok Southeast Asia, and TikTok US. The functionality of Tokopedia is coming soon, please stay tuned.
⚠️ 2. Due to restrictions in the Lazada official interface, ChatPlusAI is currently unable to reach buyers who haven't made inquiries in the past 5 days or placed orders in the last 7 days. As a result, Cancellation/Refund Follow-up scenarios cannot be sent to these buyers. ChatPlusAI is actively engaging with Lazada officials to lift these interface restrictions. Please stay tuned for updates.
⚠️ 3. For different sites within the same marketplace, you need to configure Cancellation/Refund Follow-up tasks independently. Additionally, each scenario needs to be split and configured separately.
Review Invitation
💡 After the buyer signs or completes the order, the system will automatically invite the buyer to give positive reviews on the purchased product, thereby improving the product rating.
⚠️ Review Invitation can be customized differently for marketplaces, currently supporting Shopee, Lazada, TikTok Southeast Asia, and TikTok US, with Tokopedia support coming soon.
Show cases
- Immediately send Review Invitation after the buyer confirms receipt.
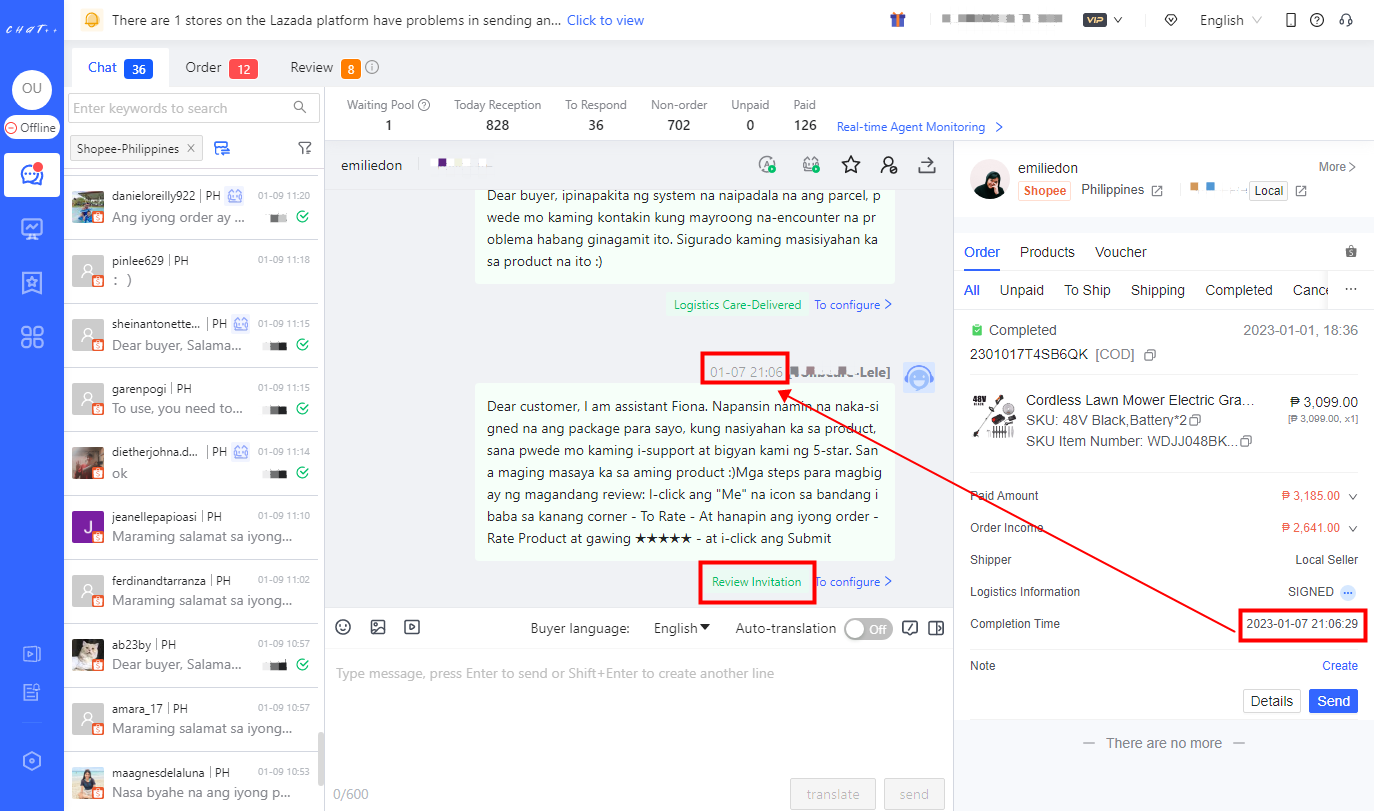
Figure 1
Permissions required for configuration
Configuring the "Review Invitation" requires the "Configure Review Booster" permission to be enabled for the role assigned to the employee account. Super admins and admins have this permission by default. 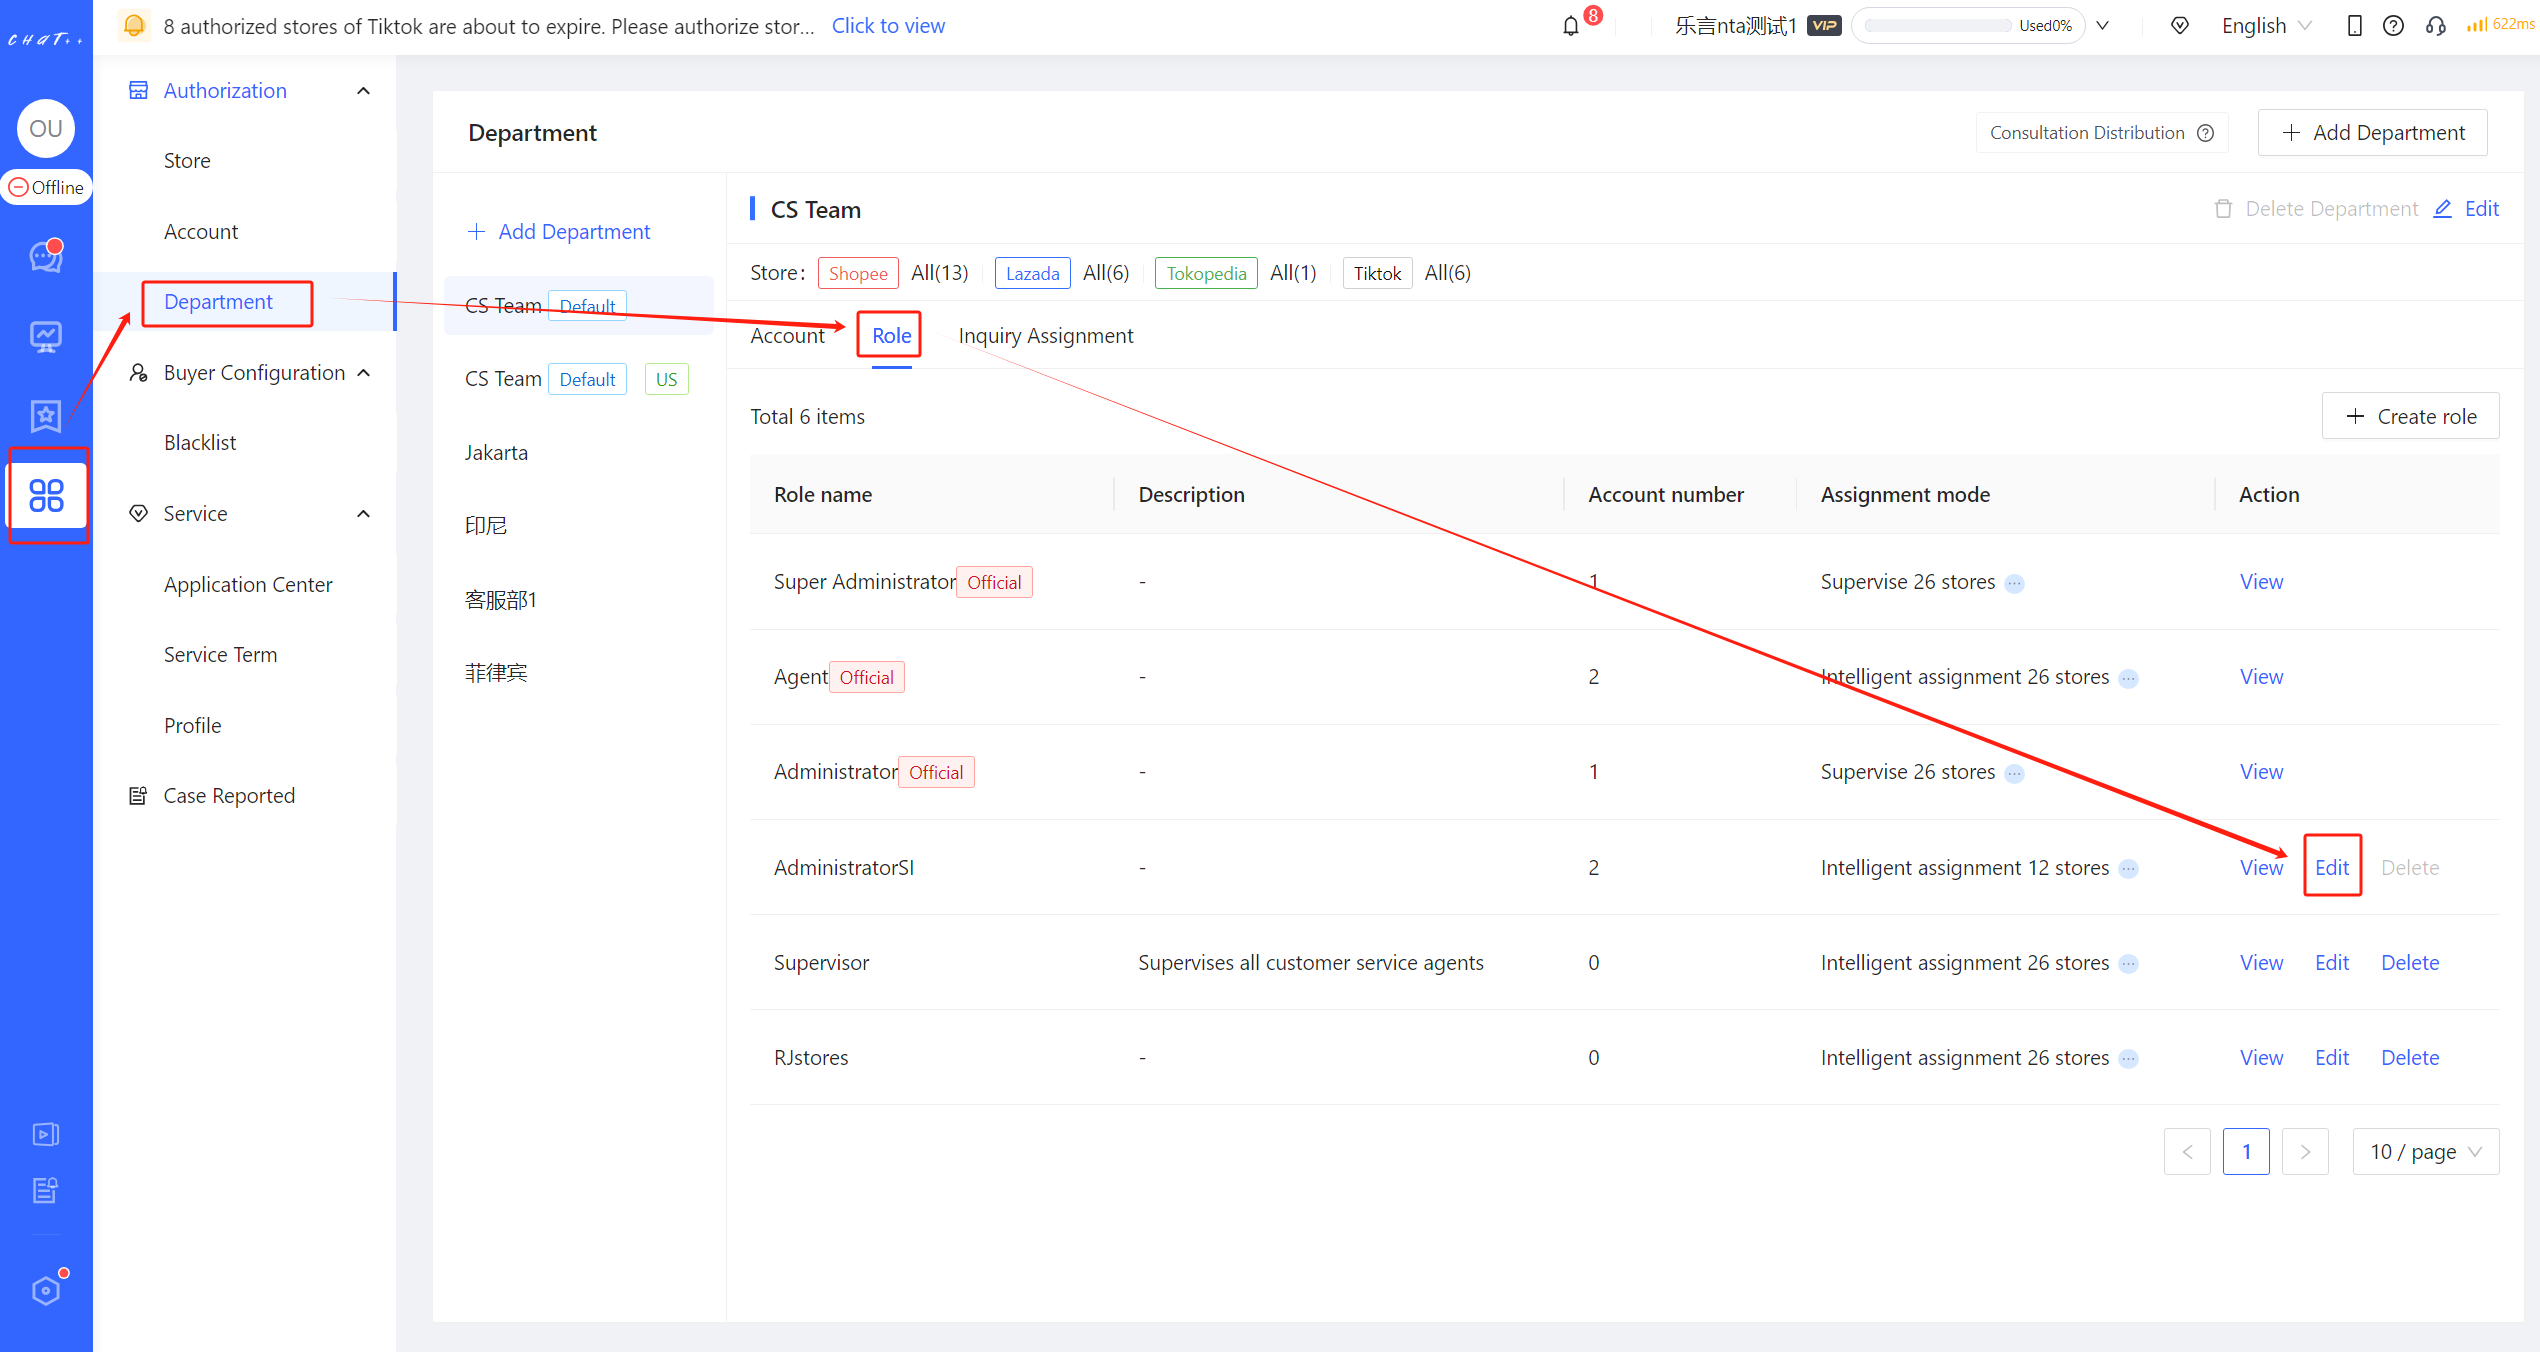
Figure 2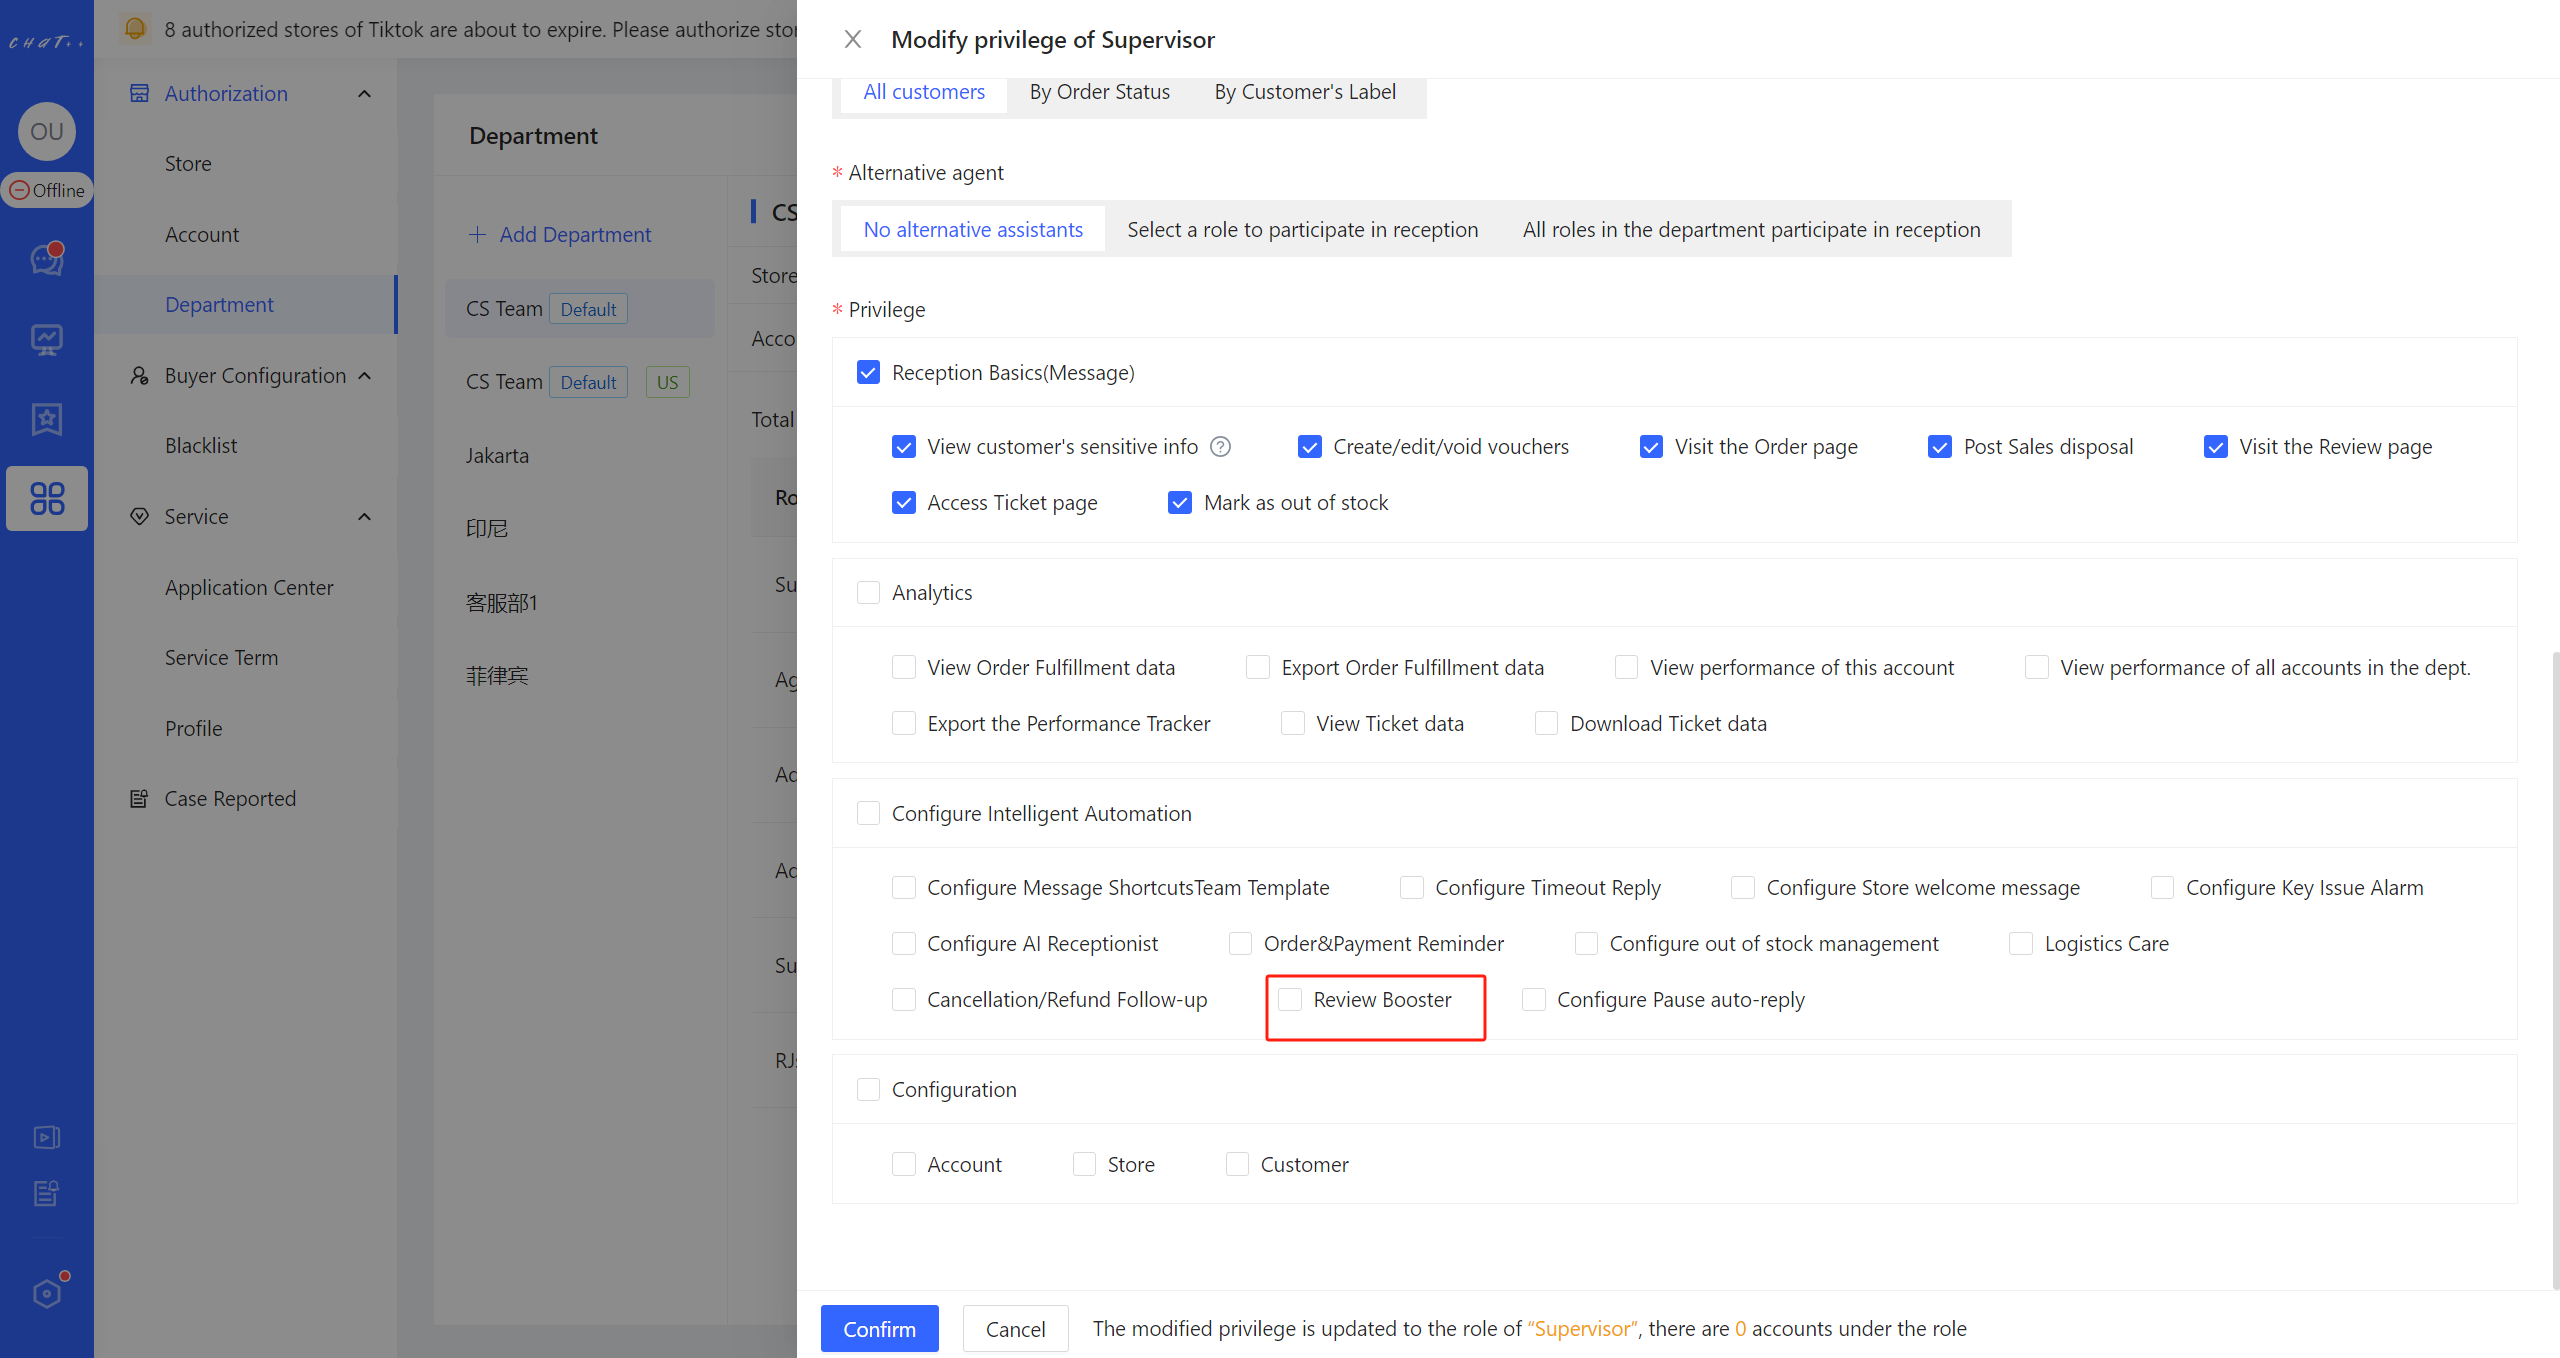
Figure 3
How to Configure Review Invitation
👆Click「 Automation 」 in left menu→「 Review Booster 」→「 Review Invitation 」,Access the configuration page.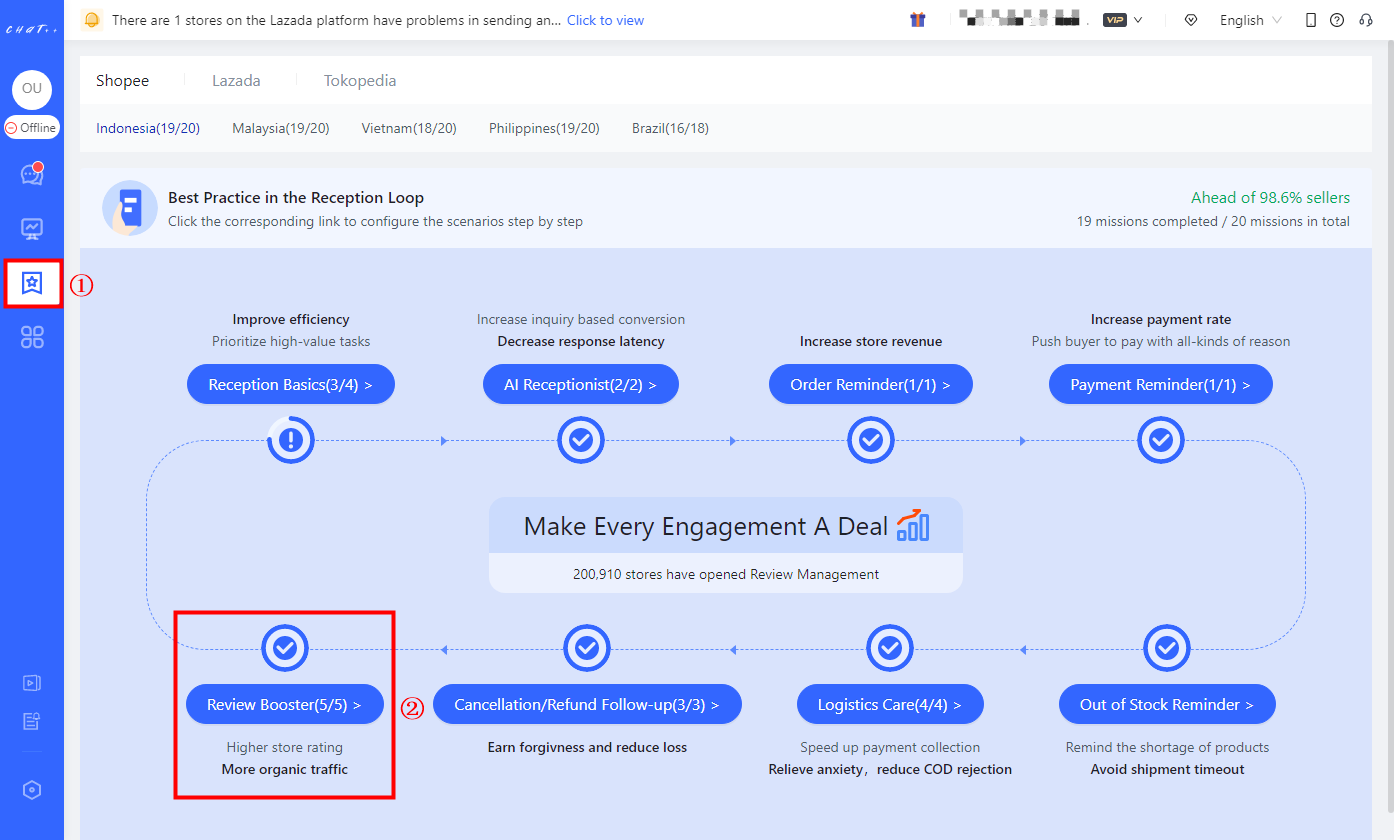
Figure 4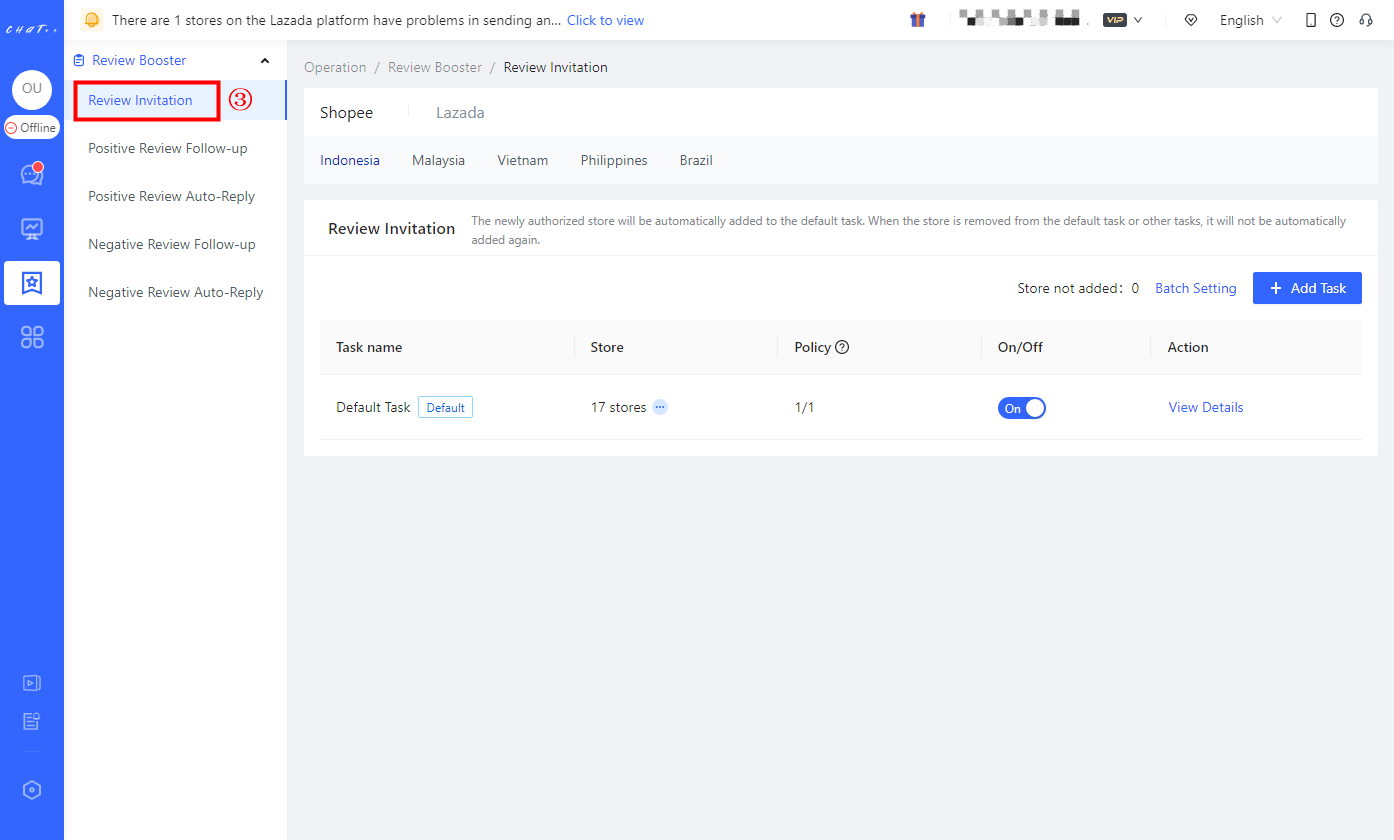
Figure 5
⚠️ For buyers who have not inquired in the last 5 days or have not placed an order in the last 7 days, due to Lazada's official interface limitations, ChatPlusAI temporarily cannot reach them, and Review Invitation cannot be sent to these buyers. ChatPlusAI is actively communicating with Lazada officials to lift interface restrictions, please stay tuned.
【 Default Task 】Description
- Shown as Figure 6 red box②
💡 A default task has been created for each country site and marketplace, and all stores in the country have been included in the task.(Shown as Figure 6 red box③)This makes the configuration much more convenient. All you have to do is to click "View Details" button(Figure 6 red box④)to edit the policy(Figure 7 red box①) or directly enable the default task (shown as Figure 7 above).
Note: The following will provide detailed description of policy branch If you want to view them now, please click the link.
💡 Newly authorized stores will be automatically included to the 【Default task】. However, the store will not be automatically included again after they are removed from other tasks. It will be counted as "Store not included" (Shown as left side of red box⑥ in Figure 6). You can click "Batch Setting" button (Shown as Figure 6 red box⑥) to add massive stores into the certain task quickly.
⚠️ Kindly make sure that all stores have been included to the right task (that means the "Store not included" shown as Figure 6 red box⑥is 0), in case the store is neglected from any Review Invitation task.
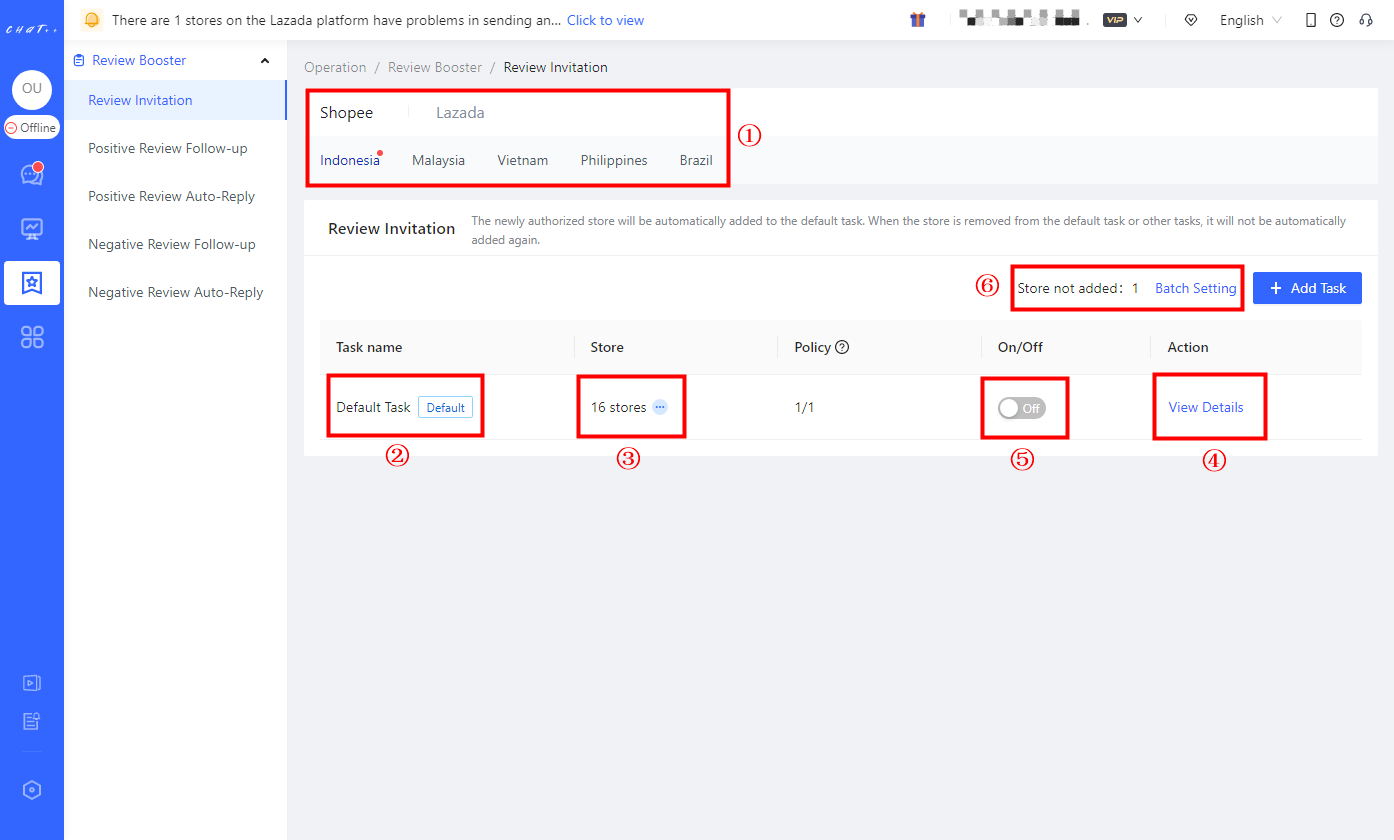
Figure 6
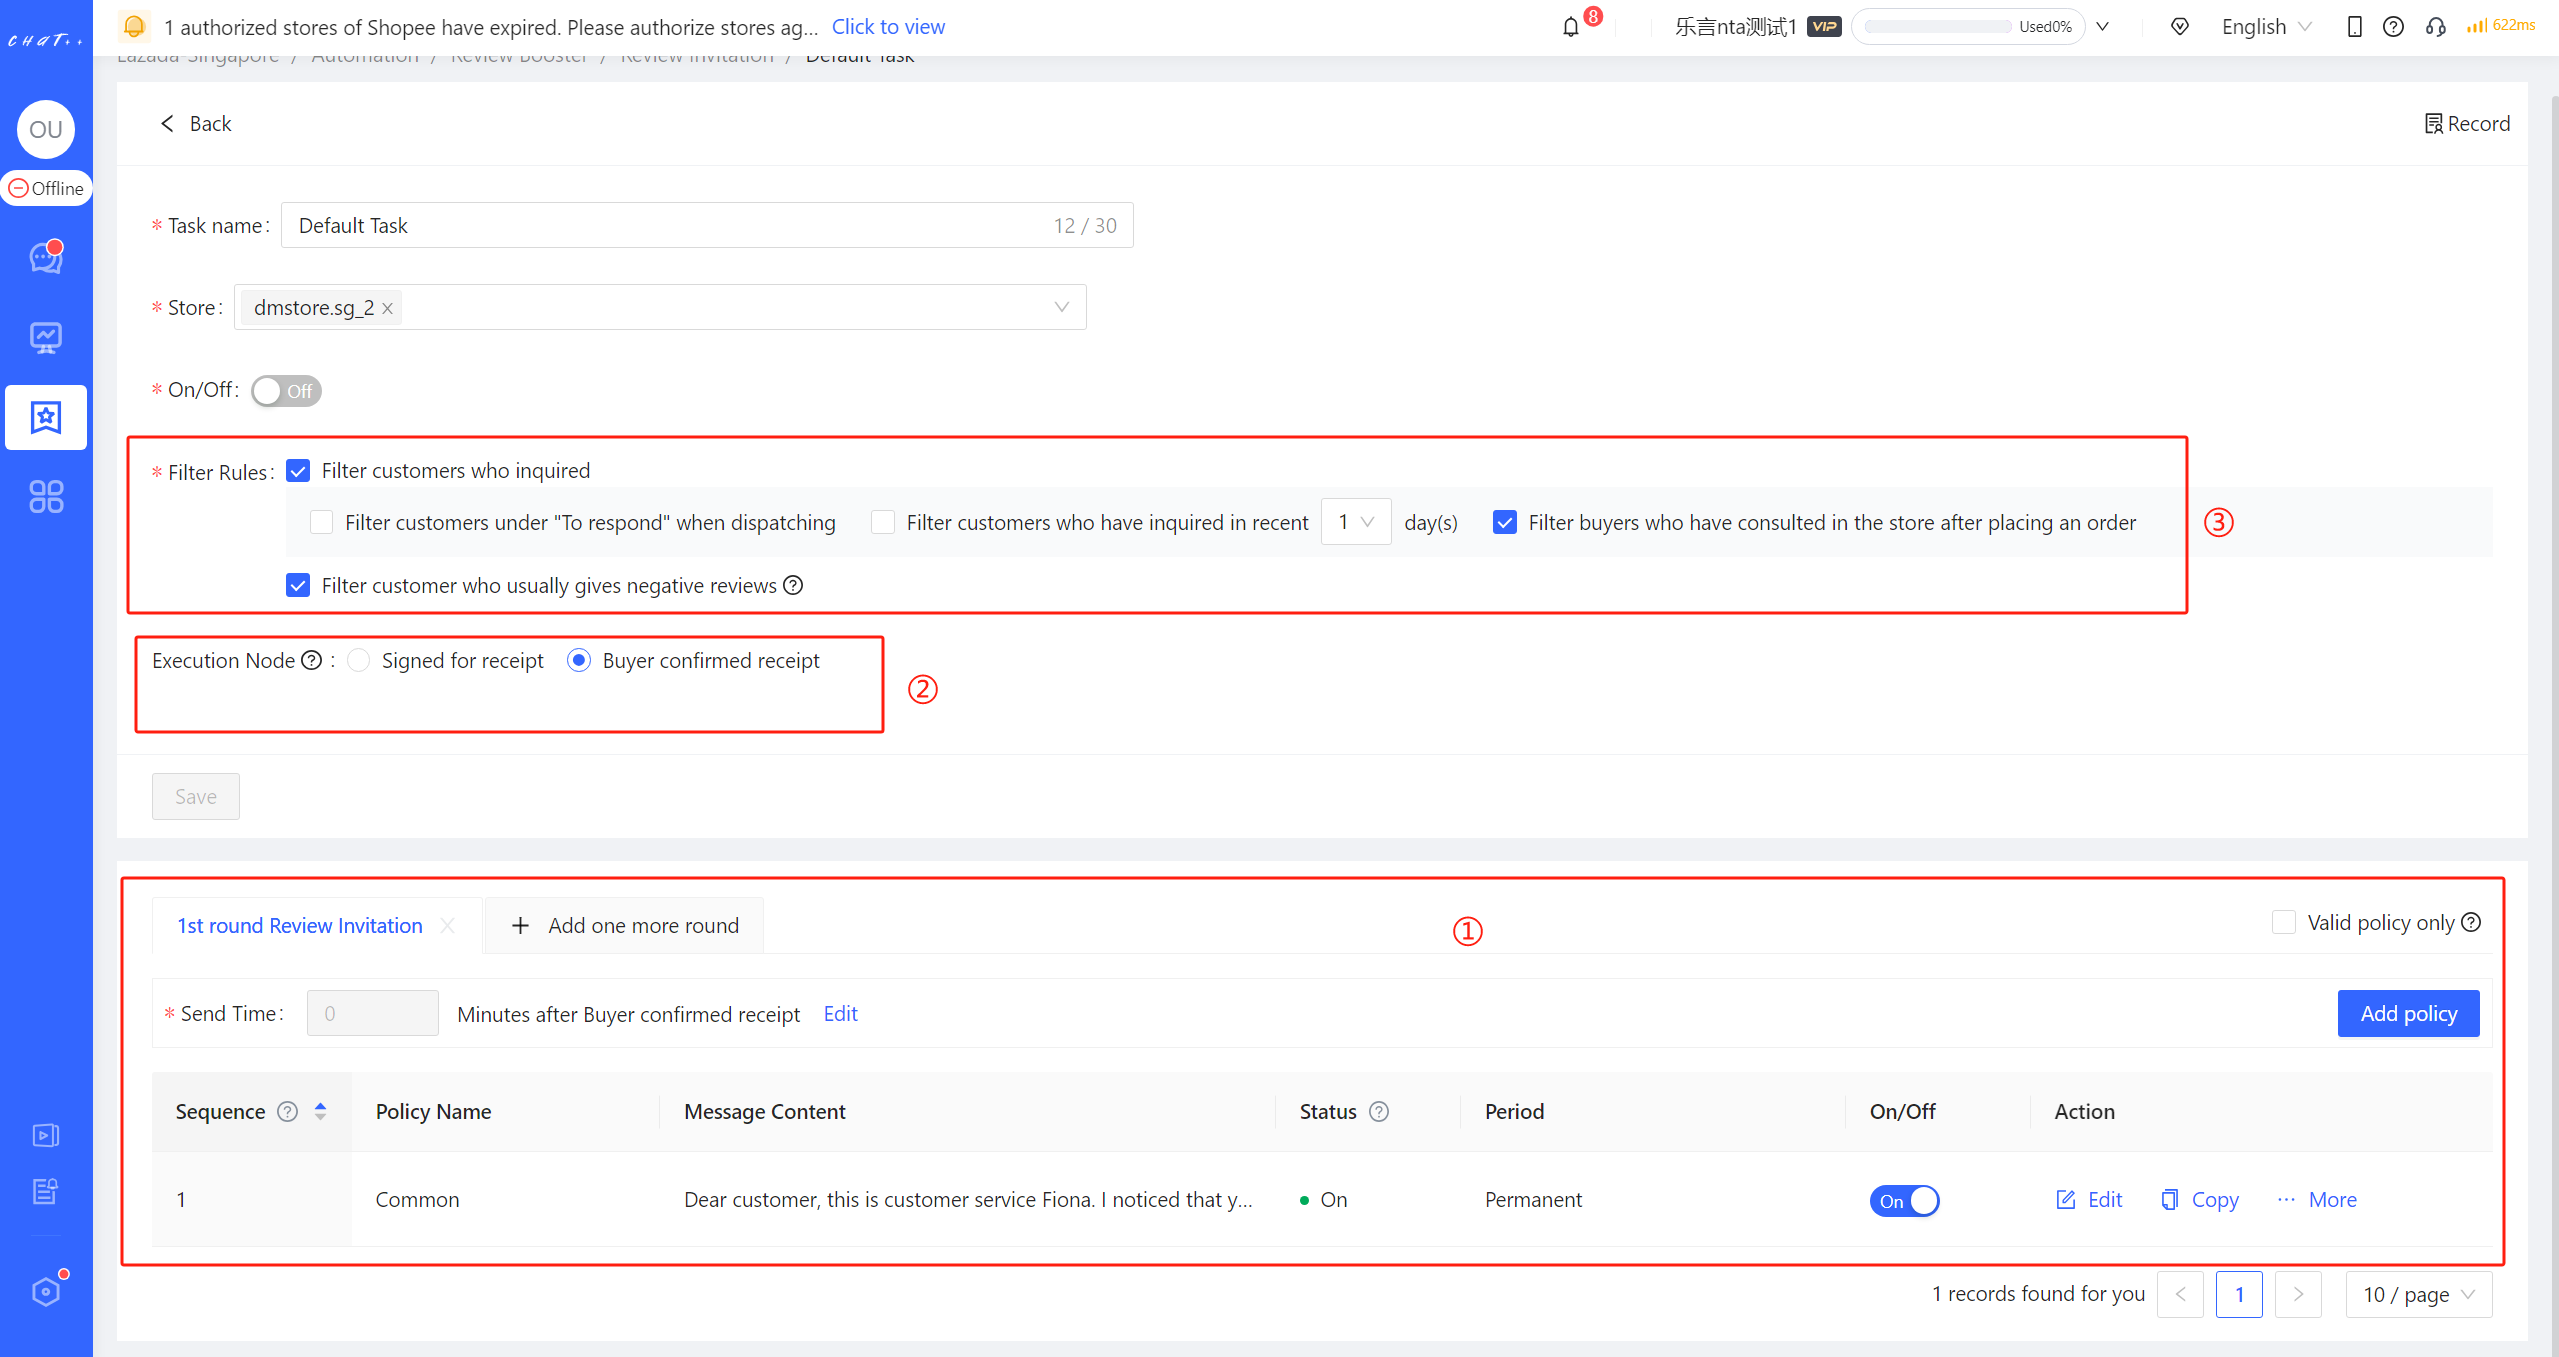
Figure 7
【 Filter Rules 】Description
- 👀 Shown as Figure 7 red box③ 👉Filter customers who inquired: By default, Review Invitation tasks are set to exclude buyers who inquired in the store to ensure the effectiveness of Review Invitation. This default behavior is to avoid Review Invitation task having a counterproductive effect. For example, if a buyer has inquired about an order issue after placing an order, if the system still invites the buyer to give a positive review after automatic confirmation of receipt, it may lead to buyer dissatisfaction and negative review.
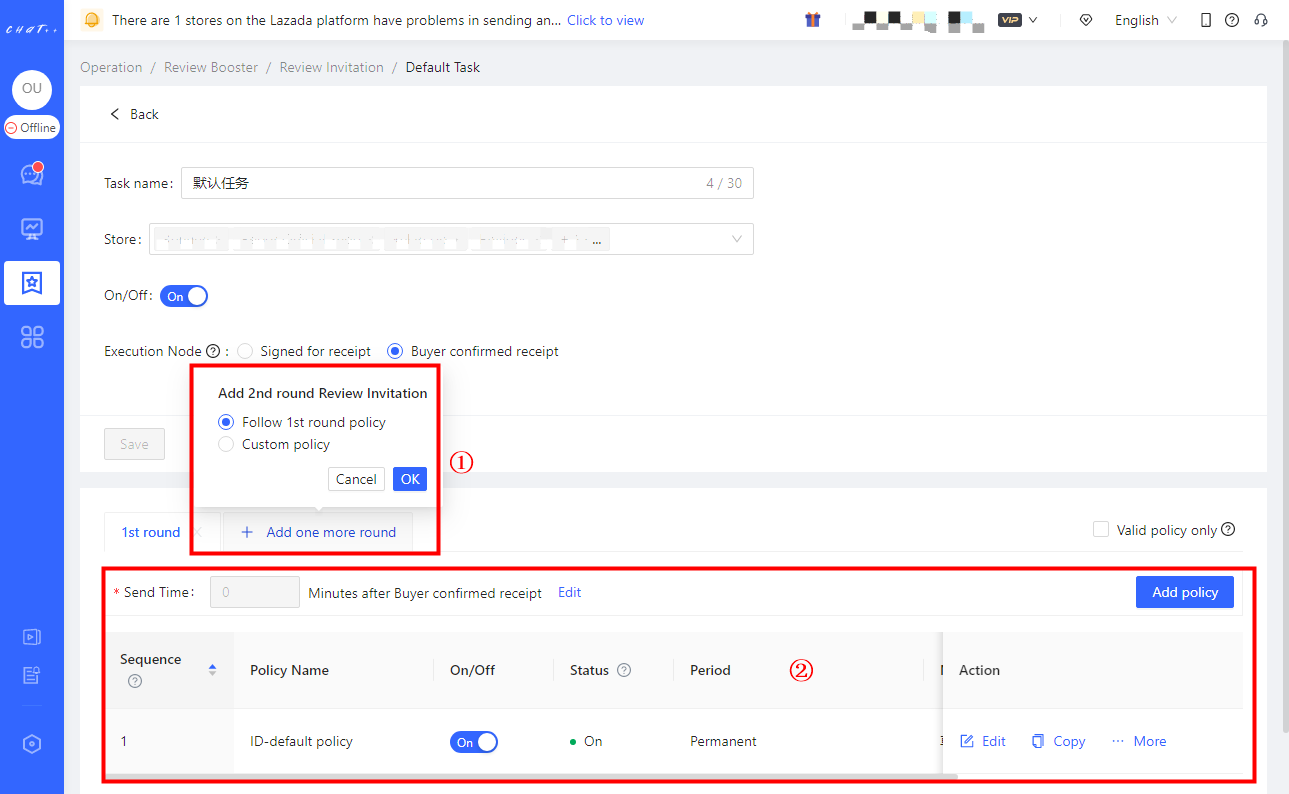
Figure 8
Supports setting multi-rounds Review Invitation to increase the success rate of positive reviews
- Shown as Figure 8 red box①
Only one round of Review Invitation is configured by default, but you can add more rounds depend on your needs. Any round of Review Invitation can be executed when buyers haven't given reviews. When you add one more round, you can choose to reuse the last round policy or customize a new policy (Shown as Figure 8 red box①).
You can modify the「Execution Time (trigger time)」and「 Policy Collection 」for every round (Shown as Figure 8 red box②)
⚠️ Note: Up to four rounds of Review Invitation are supported, but it is recommended to set equal to or less than two rounds, in case buyers complain about being disturbed frequently
【 Execution Time (trigger time) for Review Invitation】Description
- 👀 Shown as Figure 9 red box①
💡The「Execution Time (trigger time)」is different for each round of Review Invitation. For the first round, the trigger time of Review Invitation is after the pre-event (the execution node selected when creating the task, red box① in Figure 9) delayed by N minutes (default 0 minutes). The subsequent round is triggered N hours after the last round task or the buyer signs for the order. The trigger time can be changed (Shown as Figure 9 red box②).
Note: After any round of Review Invitation is triggered, the system will execute the first policy that meets the conditions under that round of Review Invitation. The description of policy branch and the execution sequence will be introduced in detail below, if you want to check it now, just click the link.
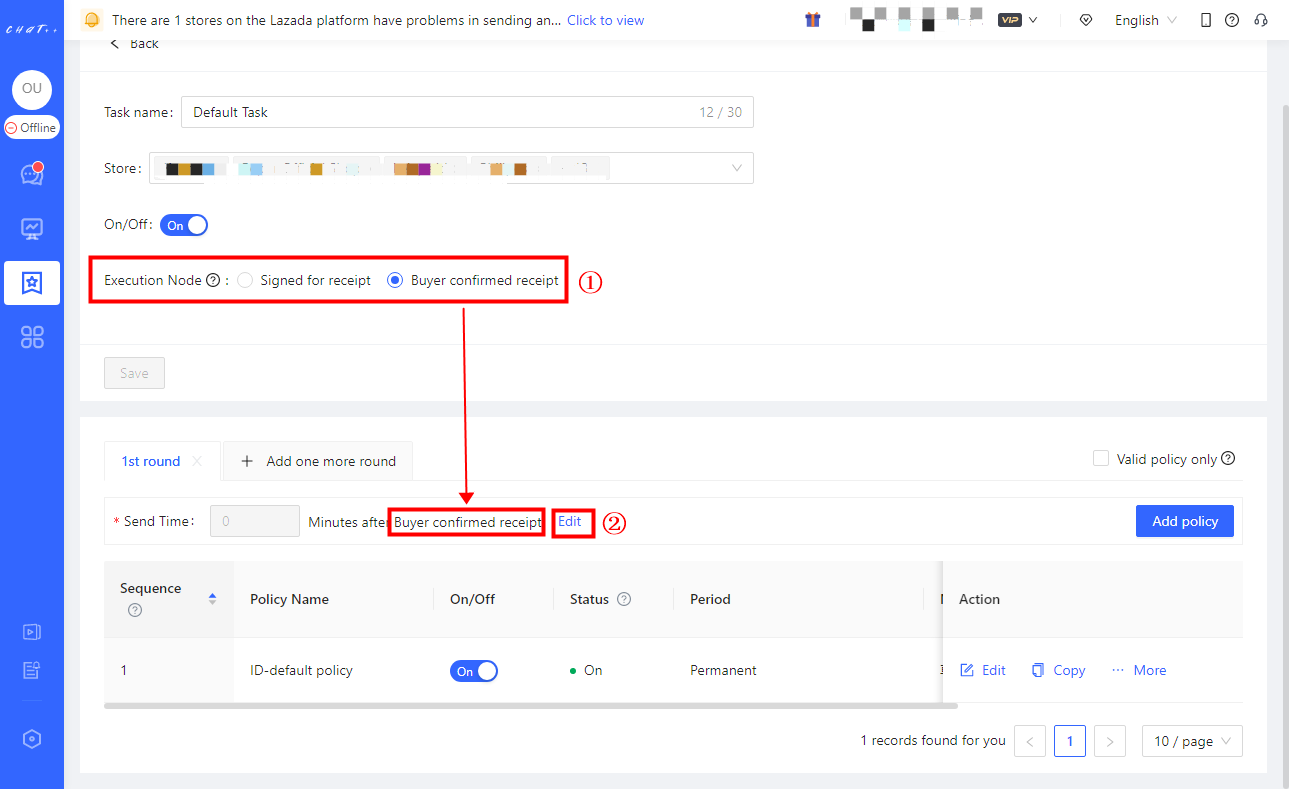
Figure 9
【 Policy branch】Description
- Policy branch consists of three key factors: period, message content and product scope.
- Period: The policy branch take effects in this period. There are 3 options to configure: Valid forever, Period of days, Period in specific hours for days
- Product scope: The policy branch take effects when the buyer ordered specific products. There are 4 options to configure: All products, Pick SKU, Pre-order or In-stock
- "Pick SKU" supports selecting specific products by searching the "Product Name", "Product ID", "SPU Article NO." and "SKU ID", meanwhile input "Product ID" or "SPU Article NO." (separate multiple items with Enter) and can quickly select various products.
- "Pick SKU" supports selecting specific products by searching the "Product Name", "Product ID", "SPU Article NO." and "SKU ID", meanwhile input "Product ID" or "SPU Article NO." (separate multiple items with Enter) and can quickly select various products.
- Filter customers who inquired: To ensure the effectiveness of the Review Invitation, the default setting is to exclude customers who have inquired in the store after placing an order. This means that when Review Invitation task is dispatched, customers who have engaged with the store's CS after making a purchase will be excluded. This precision design prevents Review Invitation task from having a counterproductive effect. If customers have previously inquired about order issues after placing an order, automatically prompting them to leave a positive review after the system confirms receipt may lead to resentment and result in negative review. Additionally, it supports receiving multiple selections to filter out customers under "To respond" when dispatching or customers who have inquired in recent X day(s)
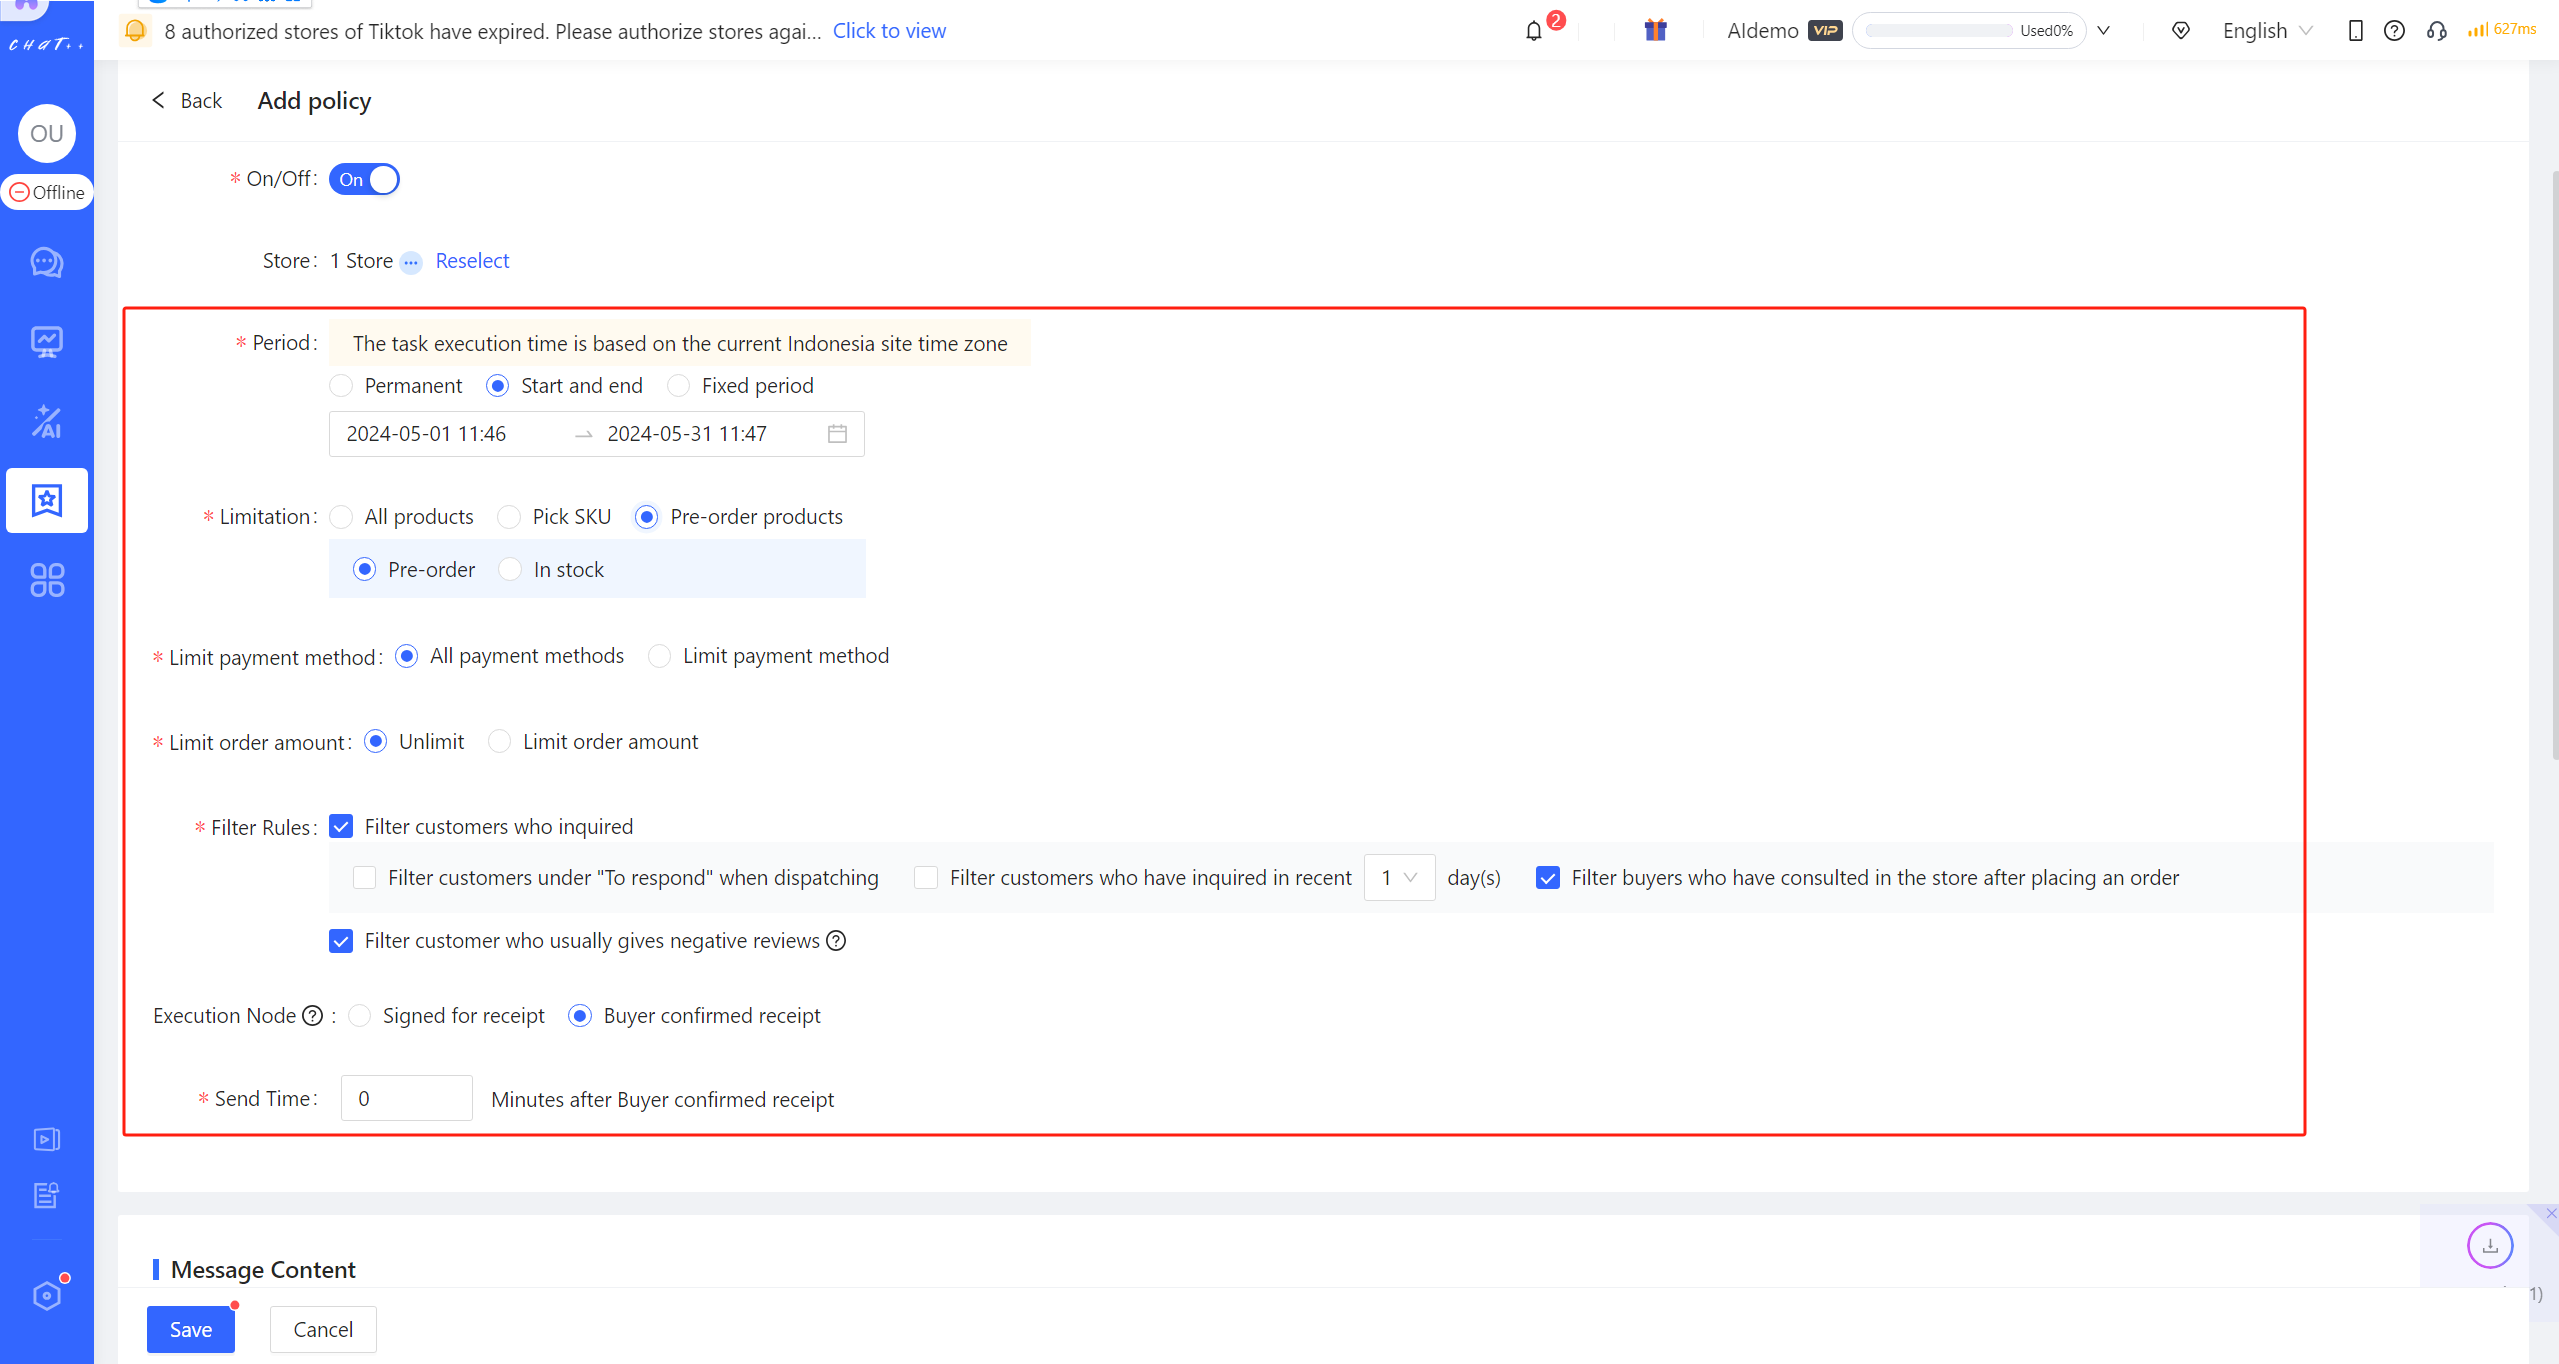
Figure 10
- Filter customer who usually gives negative reviews: Within the past six months, among nearly 4 million Southeast Asian stores using ChatPlusAI, customers who have given two or more negative reviews are considered who usually give negative reviews (including cases where they later revised their review to positive). The system automatically identifies such customers. To reduce the likelihood of customers who may leave negative reviews from being reminded to leave a review again, the default option for Review Invitation will be to filter out these customers.
- Execution Node: Review Invitation messages can be sent to customers based on order status, such as customer confirmed receipt or signed for receipt.
- Message Content: Within the valid period and limited products and if the customer does not meet the filtering rules, the corresponding message will be sent.
- When multiple policy branches is set under one round of Review Invitation, the first policy branch in its period of validity and match its product limitation is executed.
💡 Setting multiple policy branches for different sales promotion and products, it makes message content best match the promotion and product, achieving the best effect.
💡 For different rounds of Review Invitation, you can set different collections of policy branches.
- As shown in the red box in figure 11 below, this means that the policy will only match buyers who signed for or confirm receipt in May and purchased pre-order products.
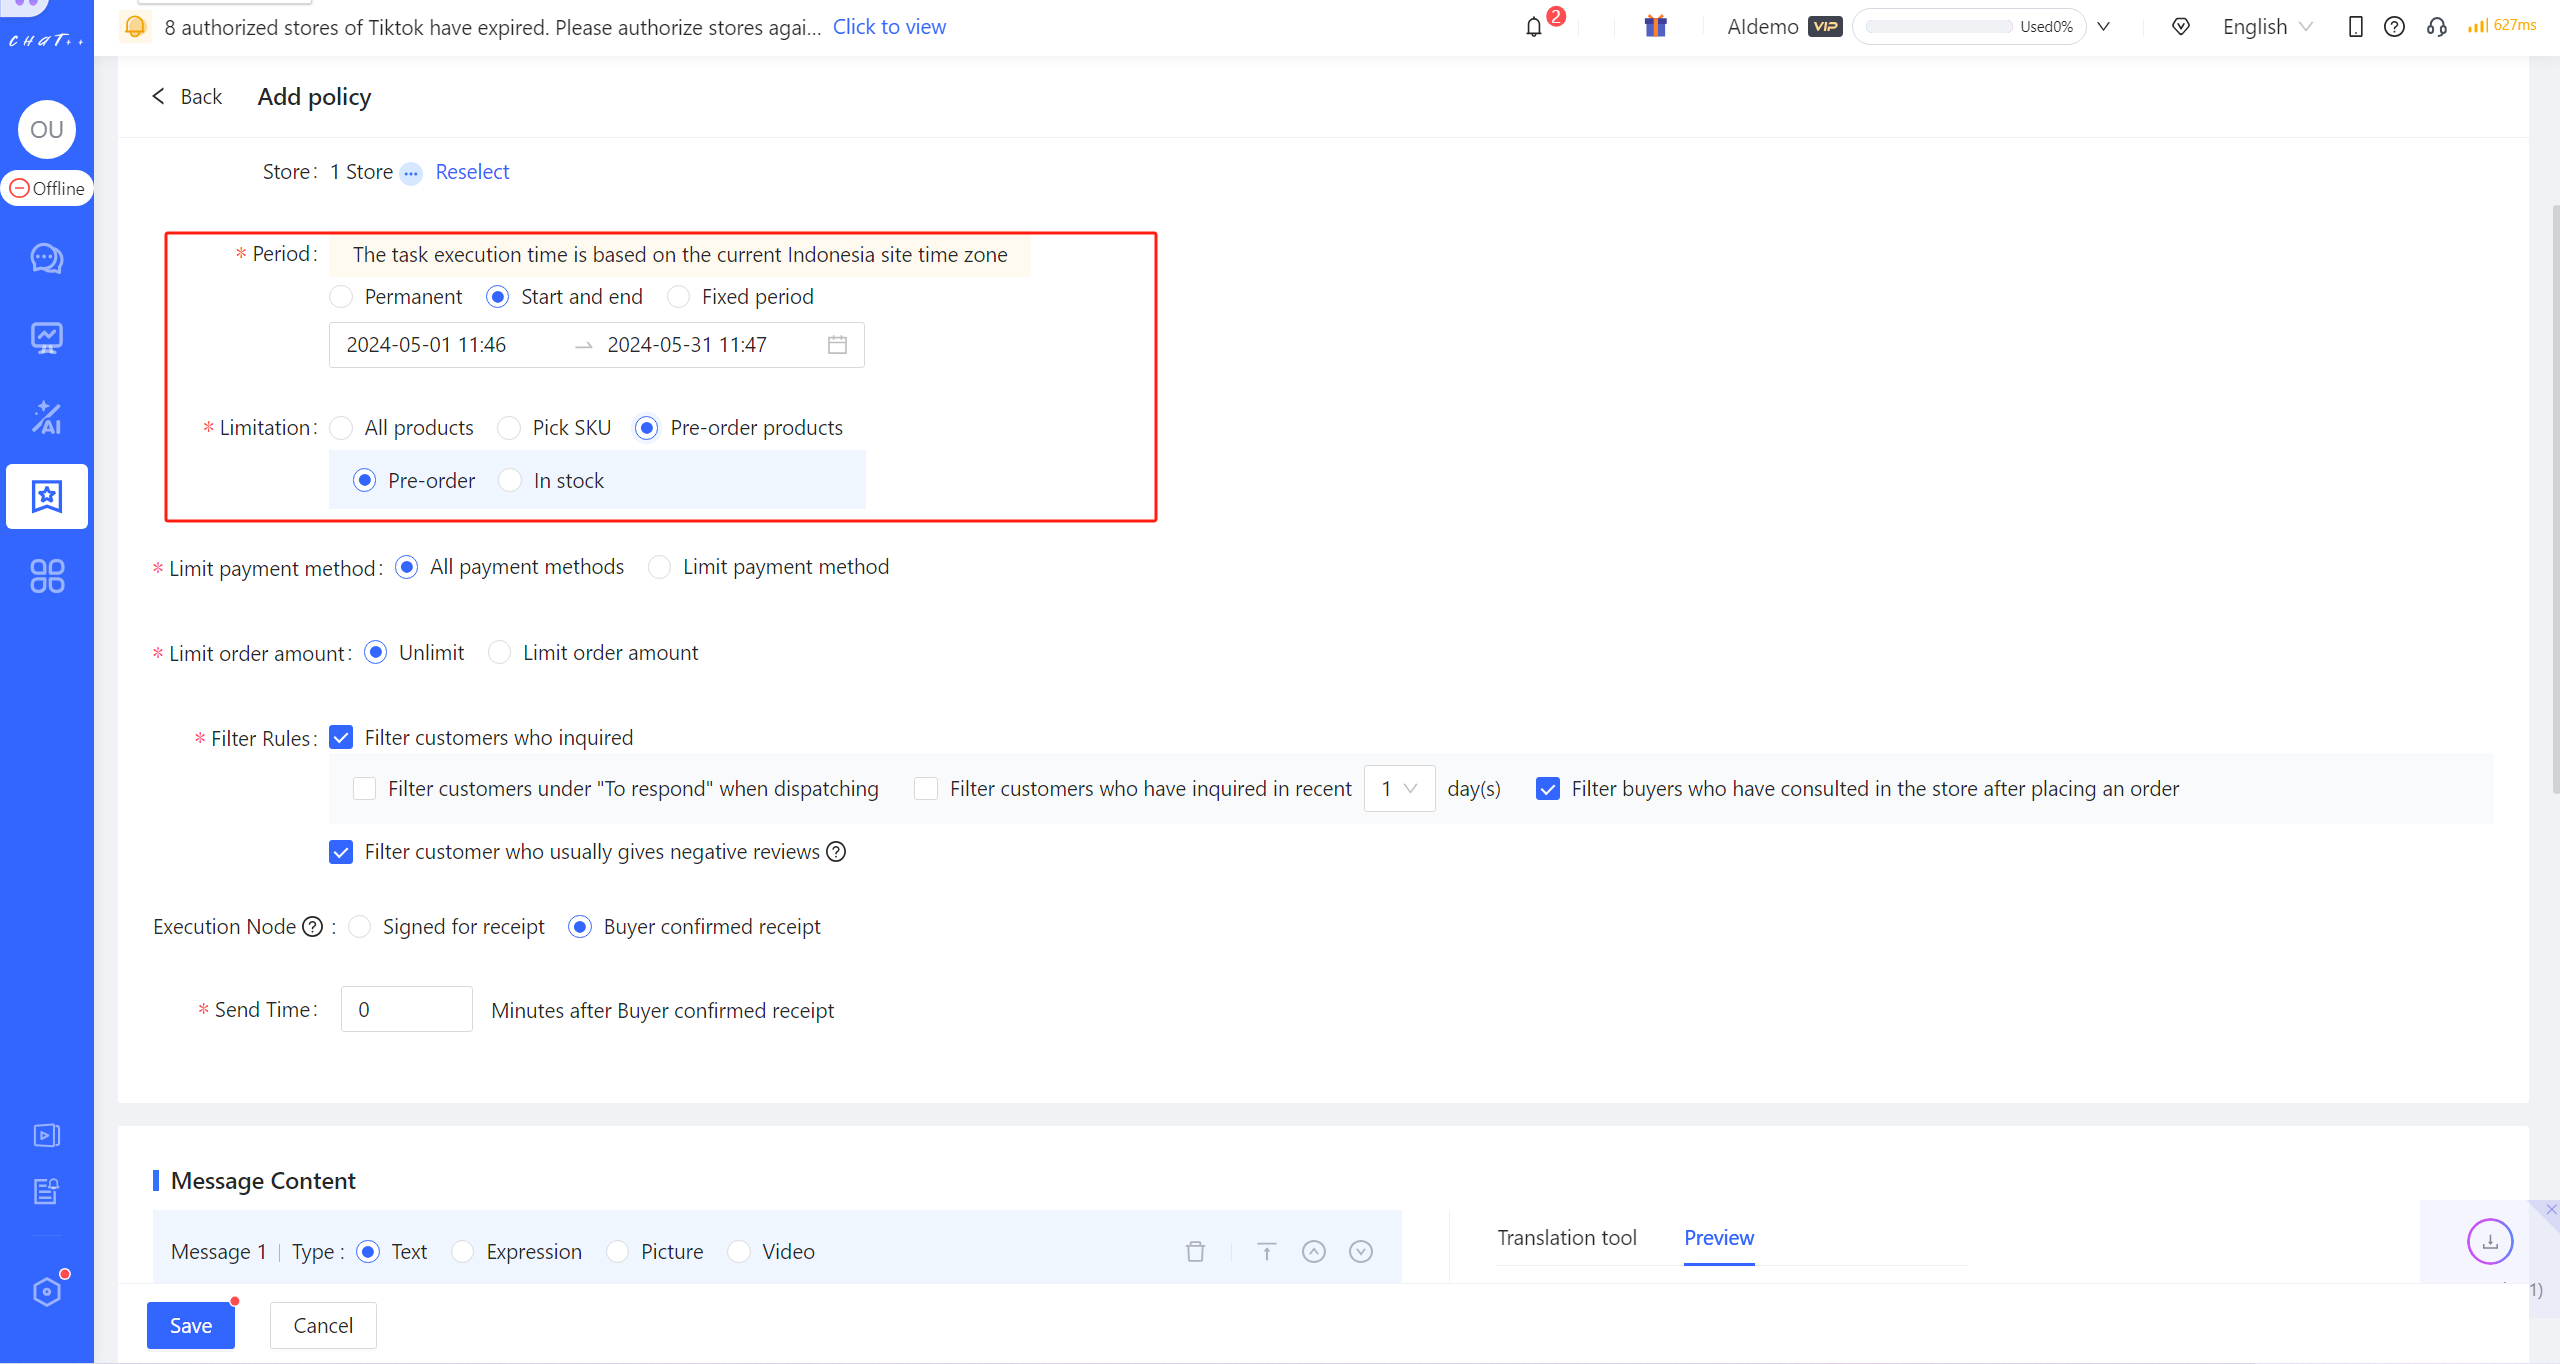
Figure 11
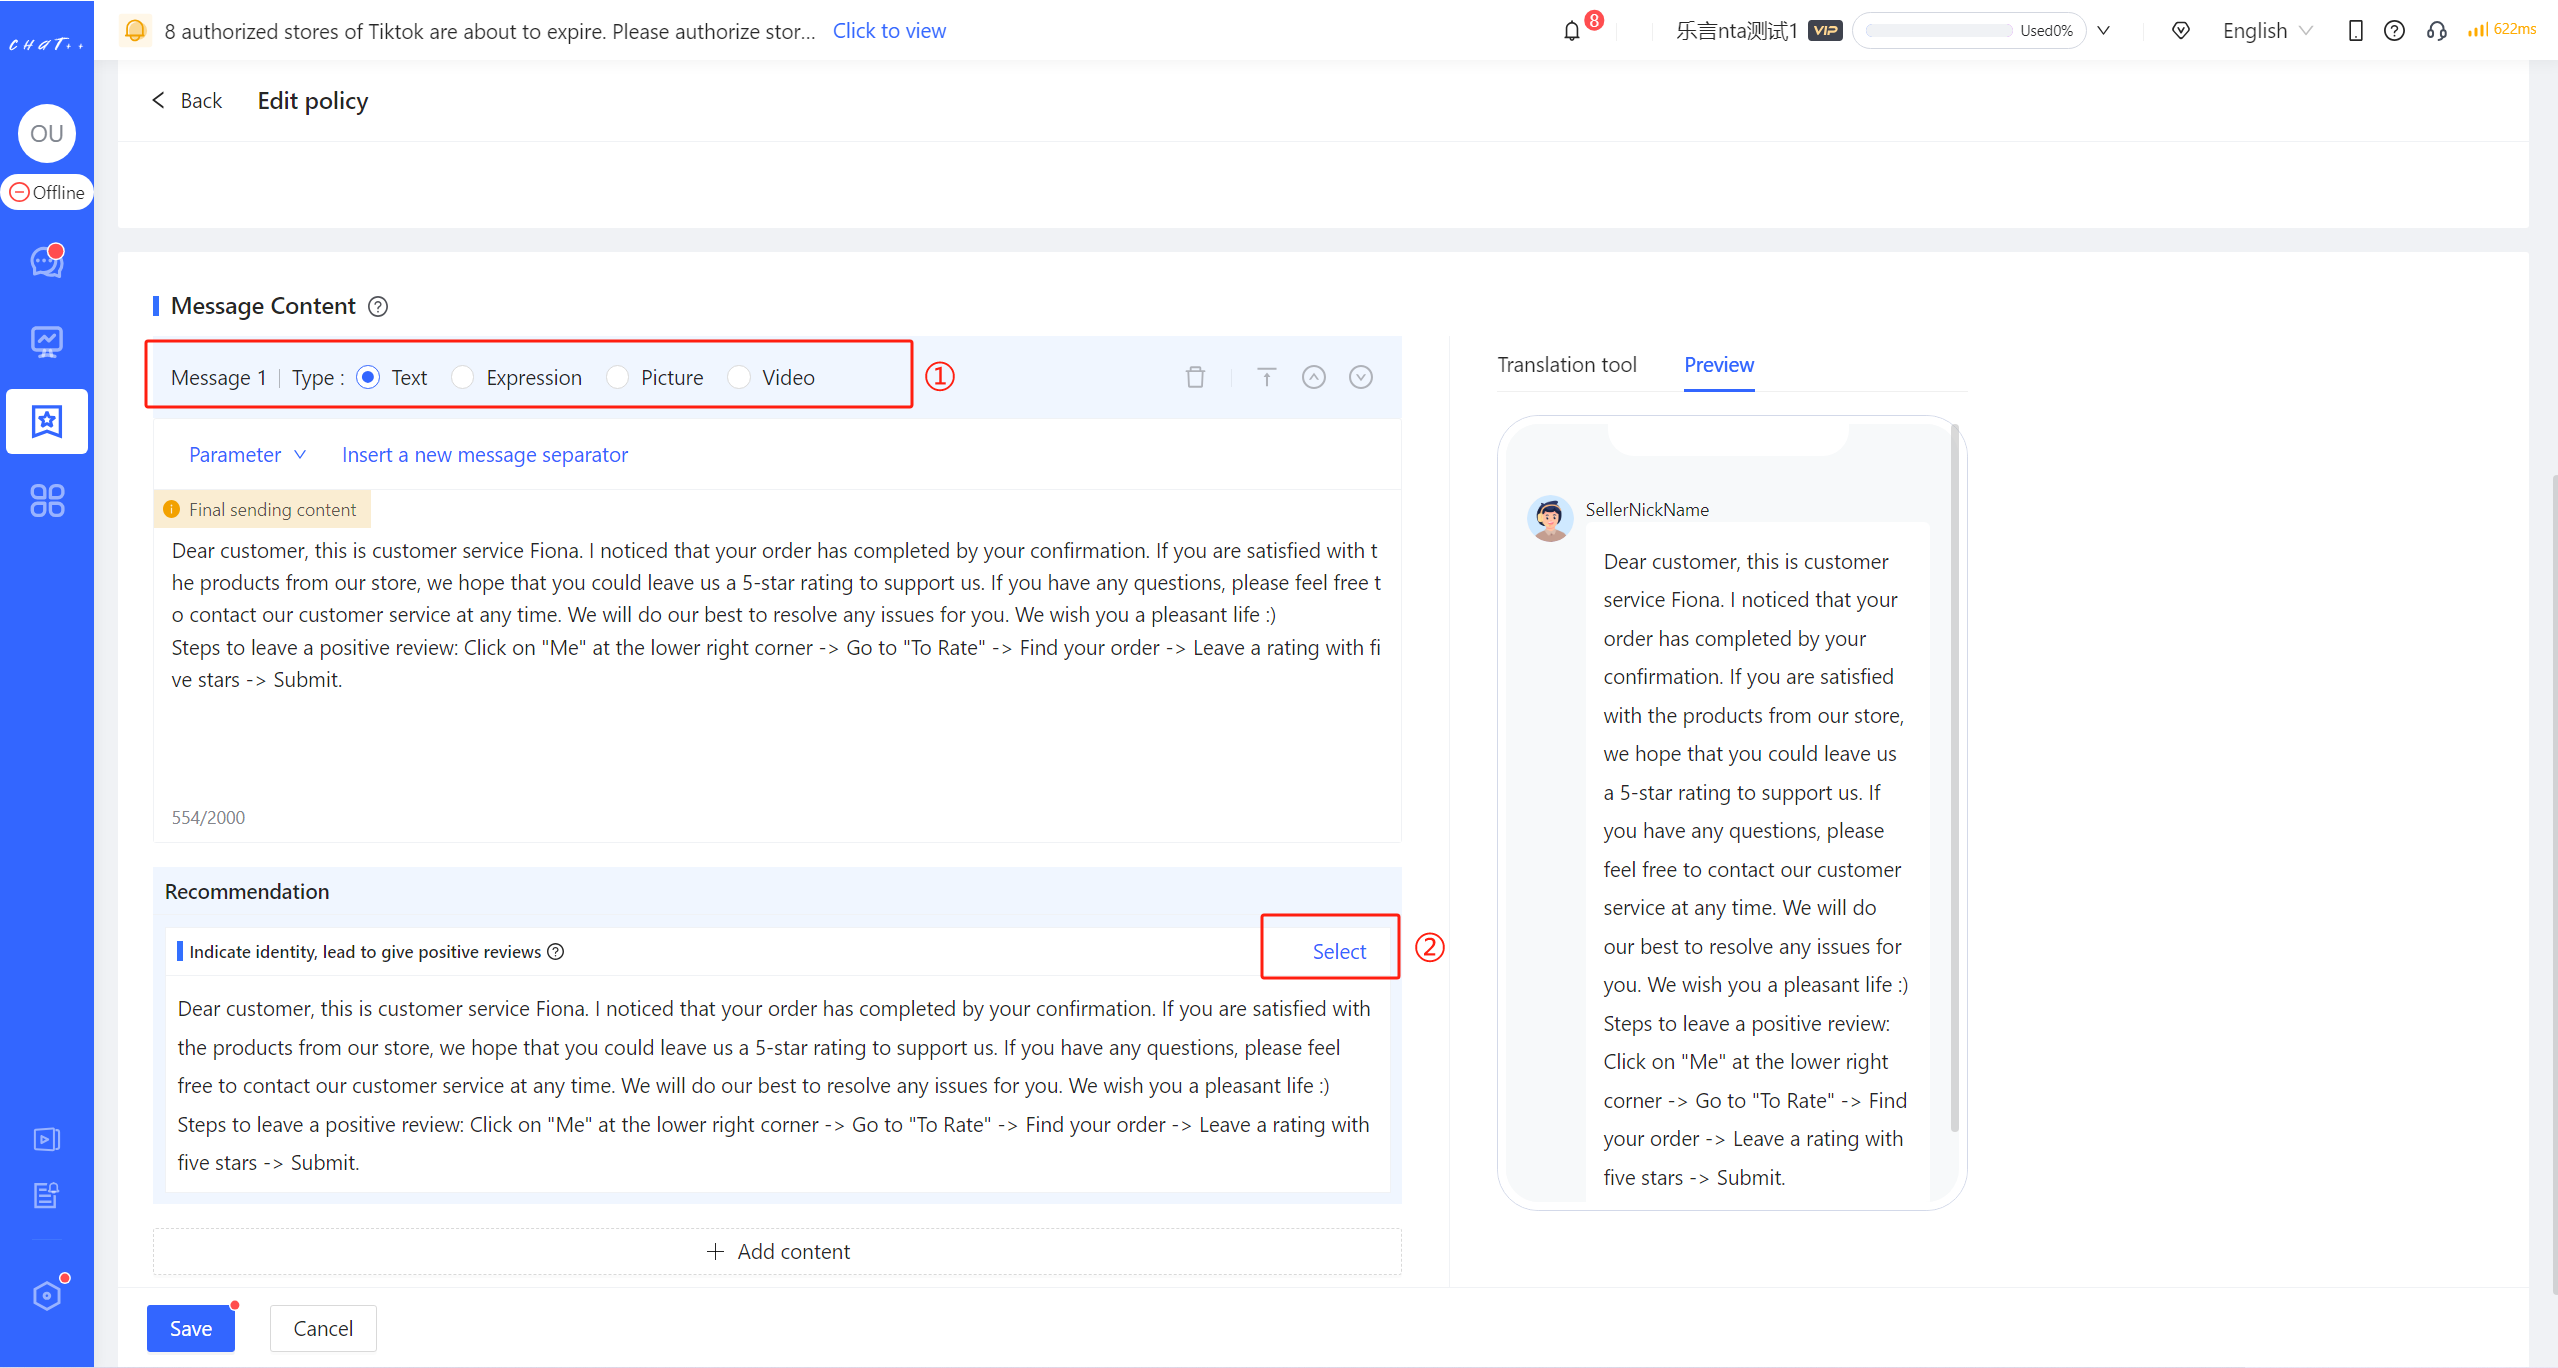
Figure 12
Various message types (Text, Expression, Picture, Video) are supported for Review Invitation
- 👀 Figure 12 red box①
✅ ChatPlusAI provides a message template for reference and use(Figure 12 red box②)。
👆 Click "Add content" (Shown as Figure below) and you can add script with various message types. Different types of messages can be used to create attractive content to enhance the effectiveness of Review Invitation
Figure 13
【 Policy Branch Execution Sequence】Description
💡 When there are multiple effective policy branches in the Policy Branch Collection, the system will execute the first policy that matches the conditions according to execution sequence (red box① in Figure 14), and subsequent policies will not be executed.
👆 Hover the cursor over the "More" position to change the execution order through "Top/Up/Down/Bottom" (red box② in Figure 14).
⚠️ Note: If none of the policy branches match, the message of Review Invitation will not be sent.
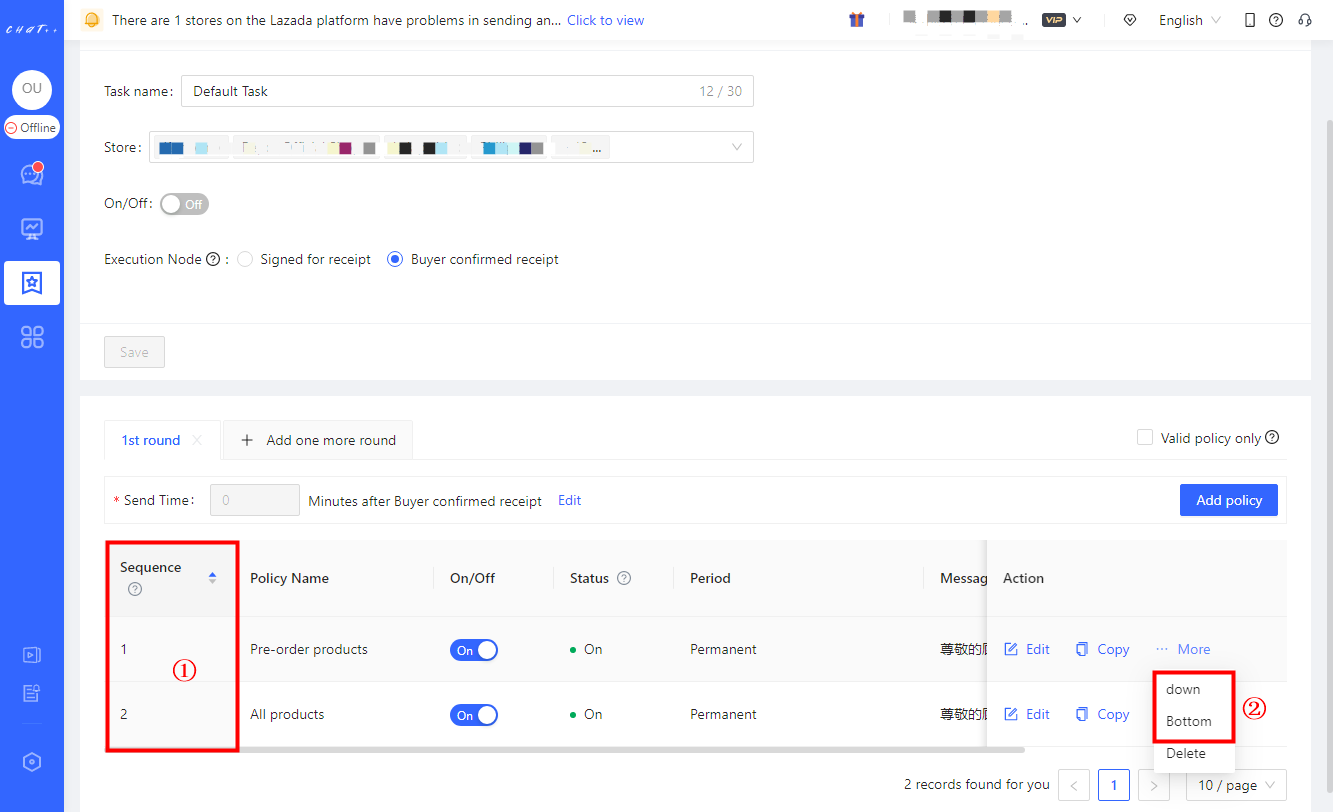
Figure 14
⚠️ If you want to customize policies for different stores, you can create different 【Task】for stores.
- 👀 As shown in Figure 15, Figure 16
- When adding a new task, the store you added will be removed from the configured stores of other tasks. This ensures that "one store is only included in one Review Invitation task," avoiding sending different Review Invitation messages to buyers multiple times.
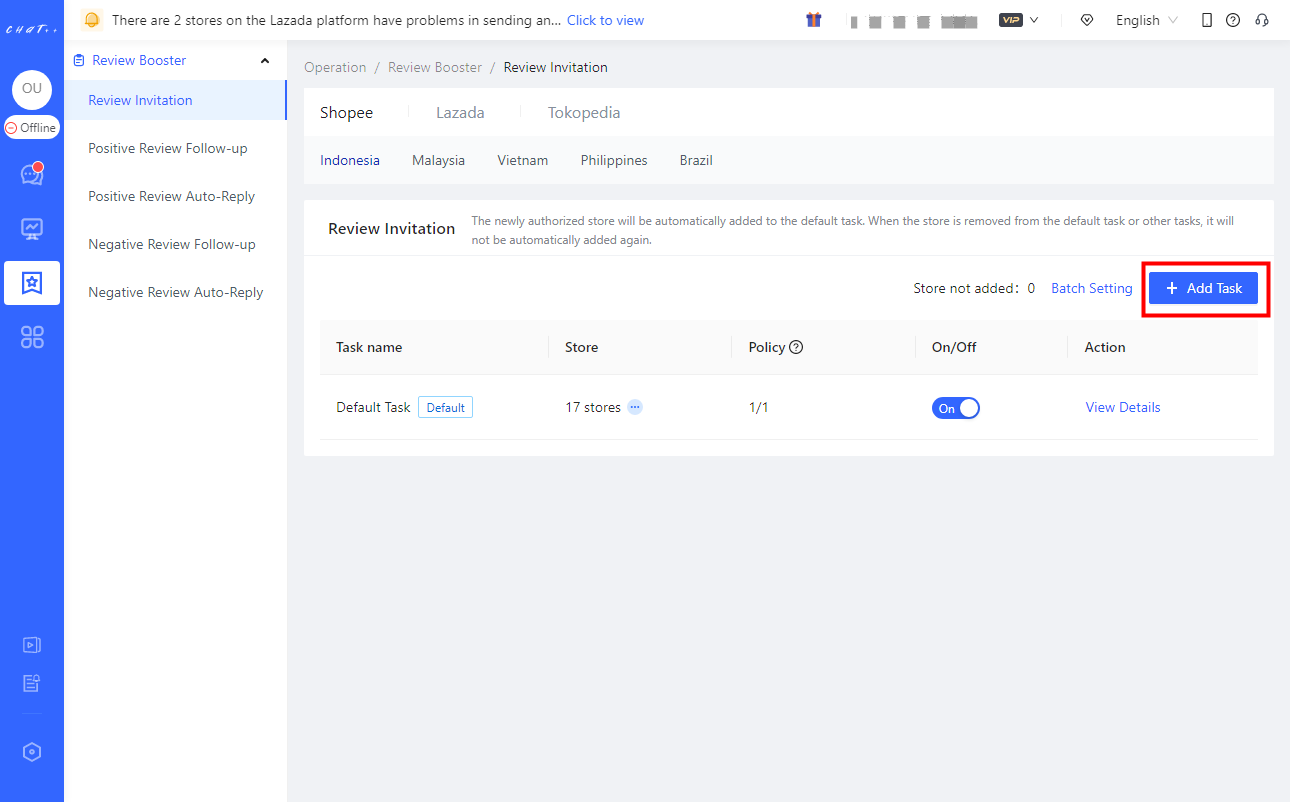
Figure 15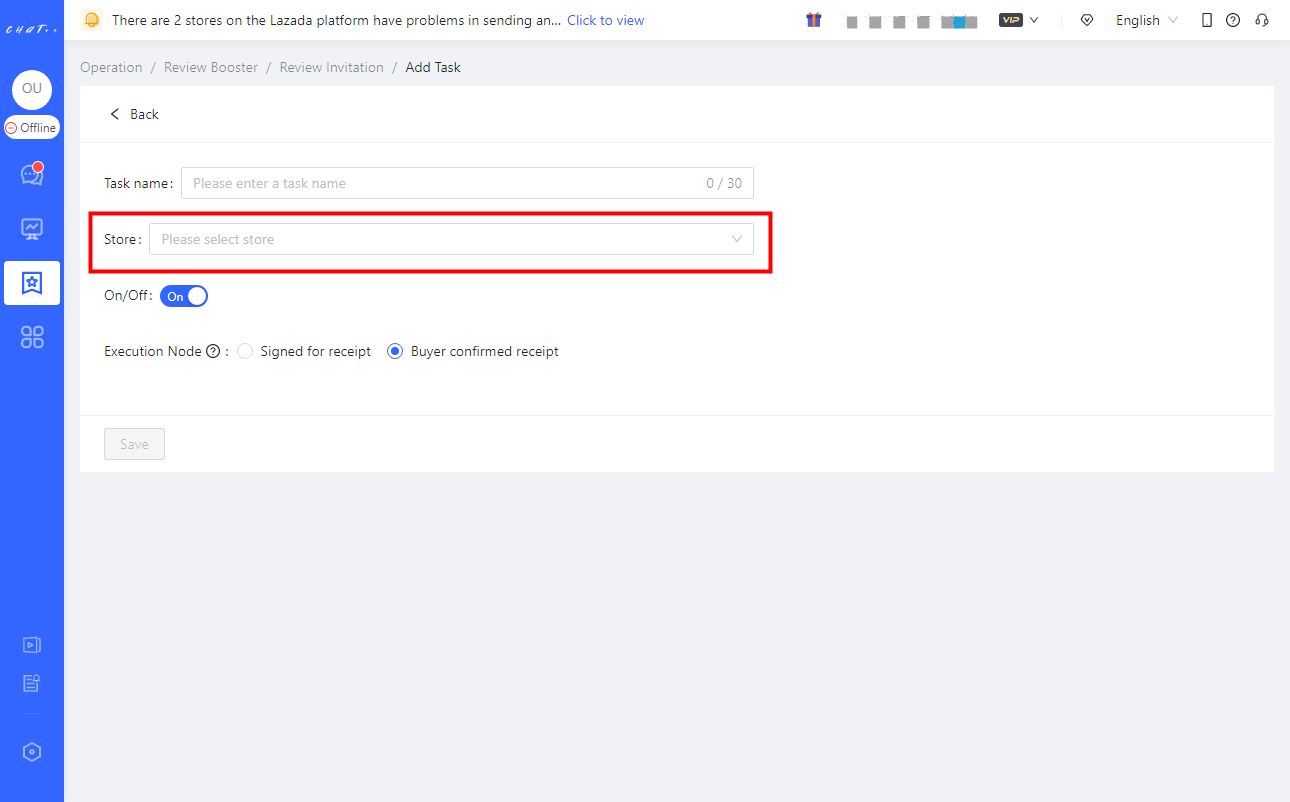
Figure 16
Attention
⚠️ 1. Review Invitation can be customized differently for marketplaces, currently supporting Shopee, Lazada, TikTok Southeast Asia, and TikTok US, with Tokopedia support coming soon.
⚠️ 2. For buyers who have not inquired in the last 5 days or have not placed an order in the last 7 days, due to Lazada's official interface limitations, ChatPlusAI temporarily cannot reach them, and Review Invitation cannot be sent to these buyers. ChatPlusAI is actively communicating with Lazada officials to lift interface restrictions, please stay tuned.
⚠️ 3. Each country site of the marketplace has its own Review Invitation task, you need to configure them respectively.
⚠️ 4. It is recommended to set one or two rounds of Review Invitation, too many rounds will disturb the customer.
Positive Review Follow-up
Buyers spend time giving positive reviews, indicating their approval of the product or service. If a buyer's positive review is ignored or only receives a simple, mechanized response, it undoubtedly will miss a marketing opportunity.
💡ChatPlusAI's Positive Review Follow-up feature can provide timely personalized replies to buyers, helping you establish a seller image of "quick response" and "sincere care", deepening positive impressions, increasing buyer trust and loyalty, and making it easy to guide attention and encourage another purchases.
Show cases
- Positive Review Follow-up is triggered, after a buyer gives a 5-star rating for the purchased product.
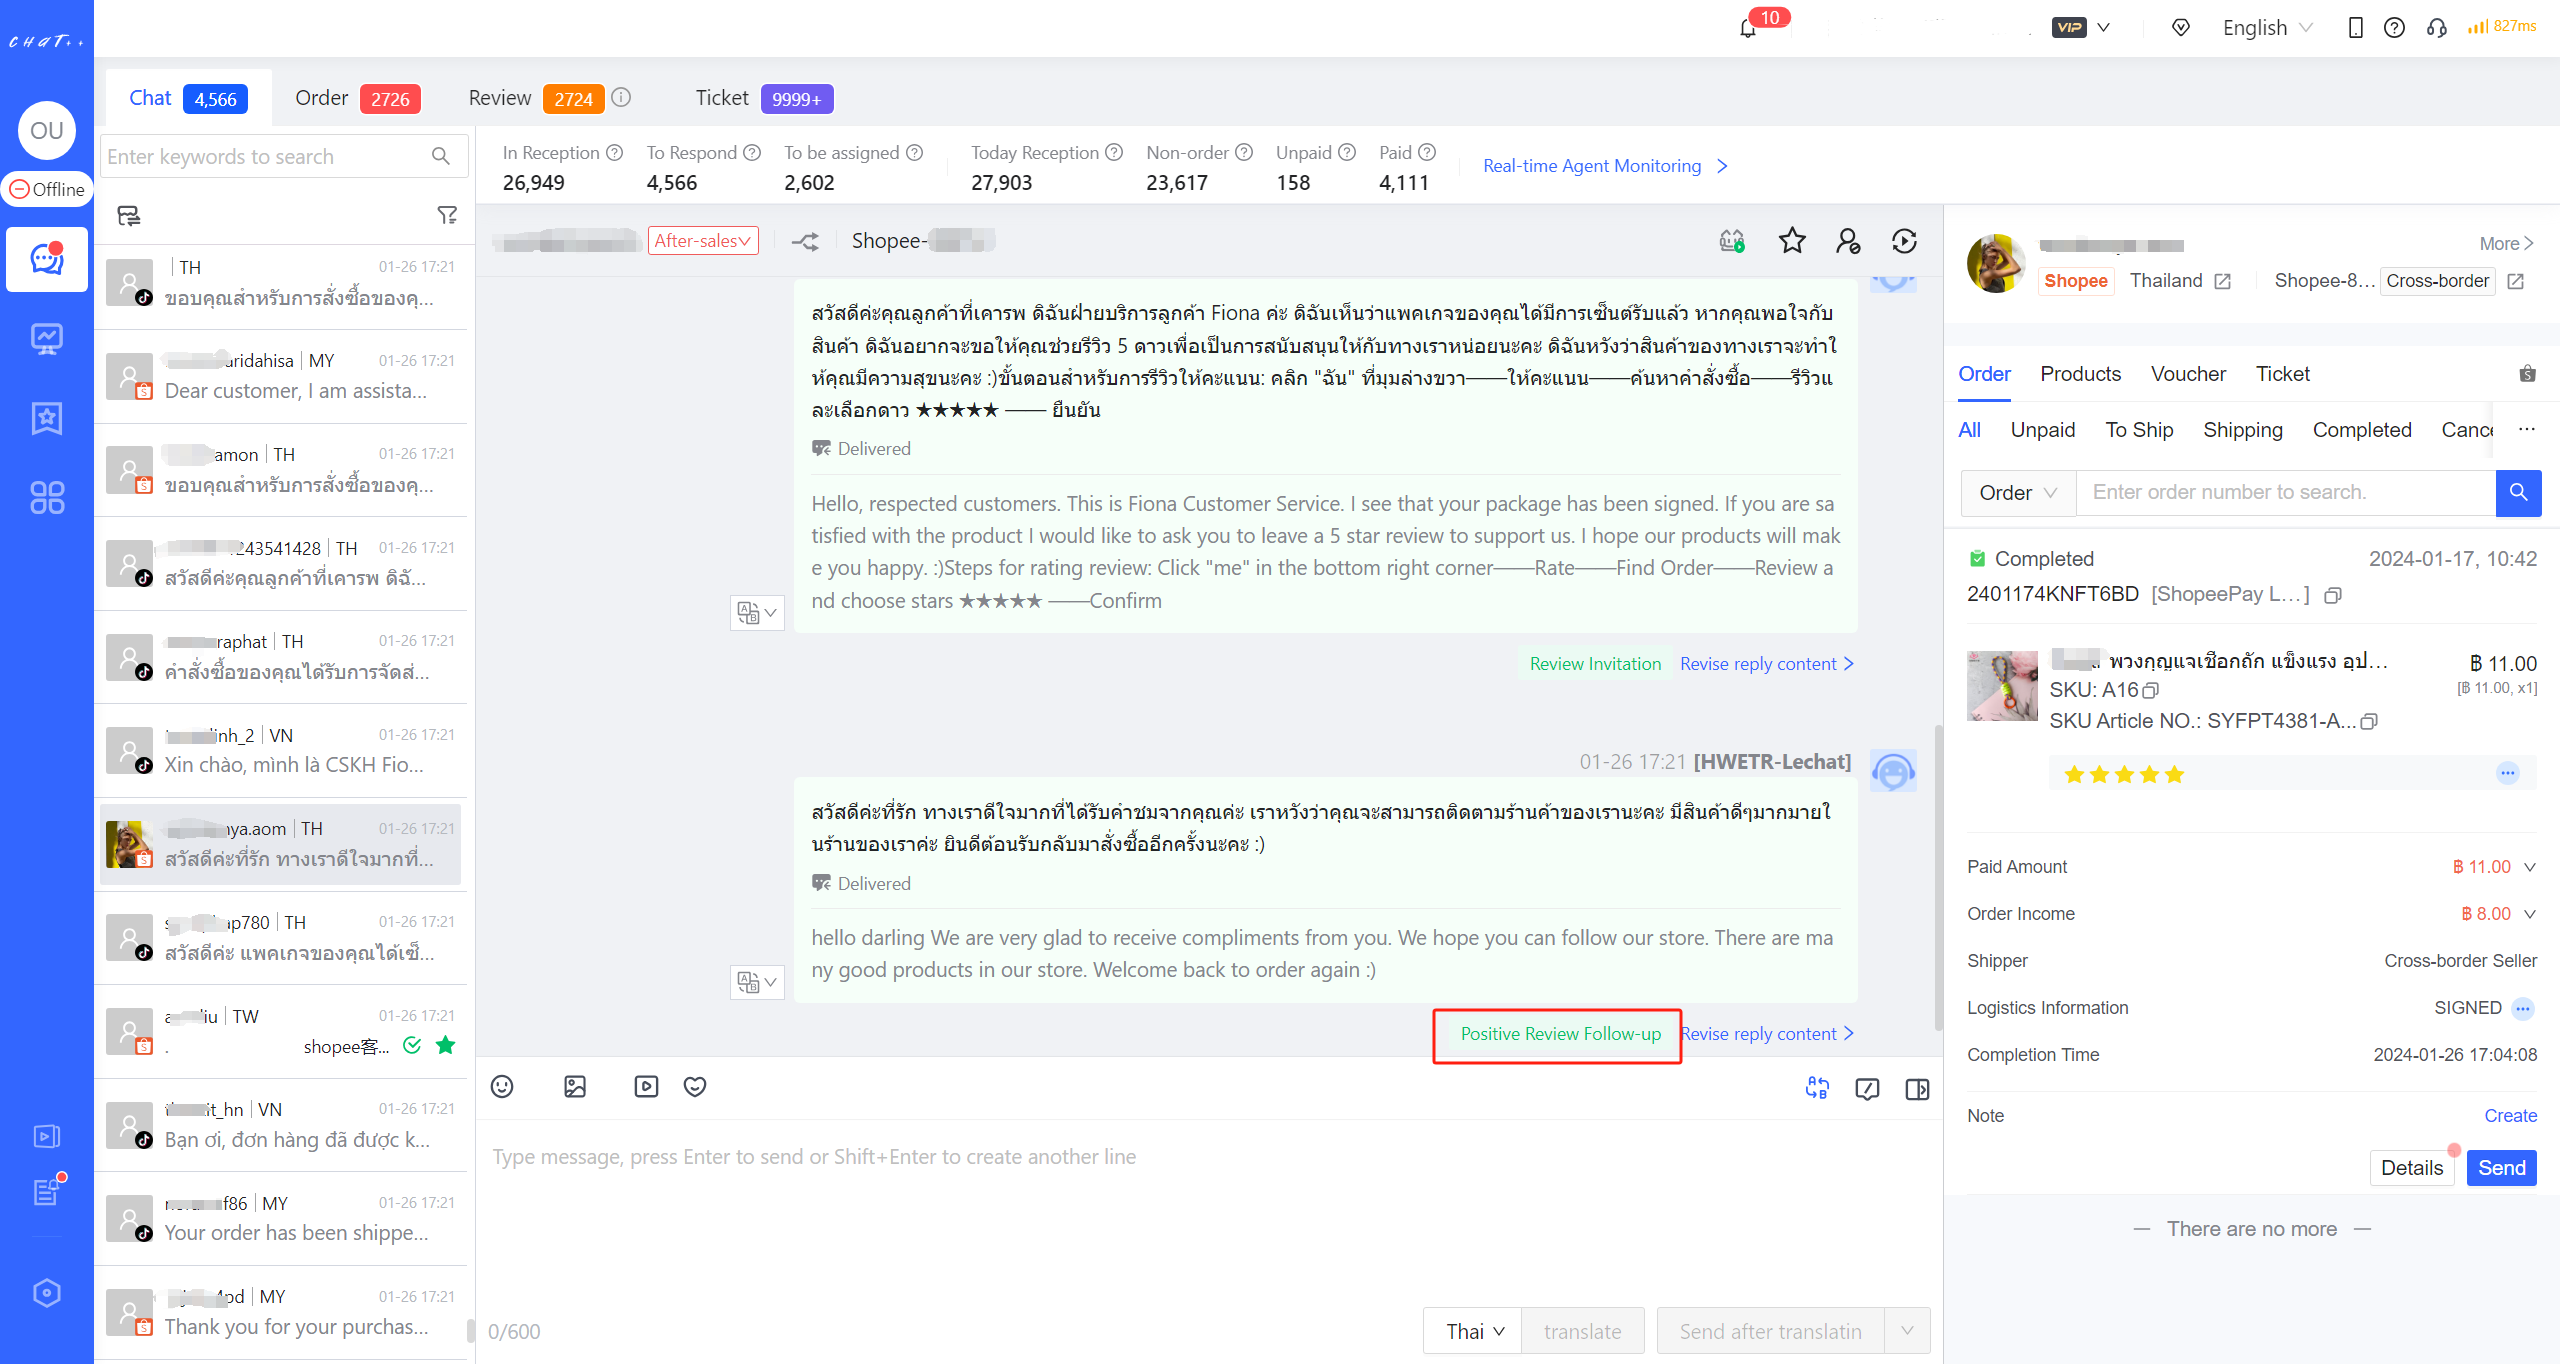
Figure 1
Permissions required for configuration
Configuring the "Positive Review Follow-up" requires the "Configure Review Booster"(red box in Figure below) permission to be enabled for the role assigned to the account. Super admins and admins have this permission by default.
Accounts without the "Configure Review Booster" permission cannot configure "Positive Review Follow-up".
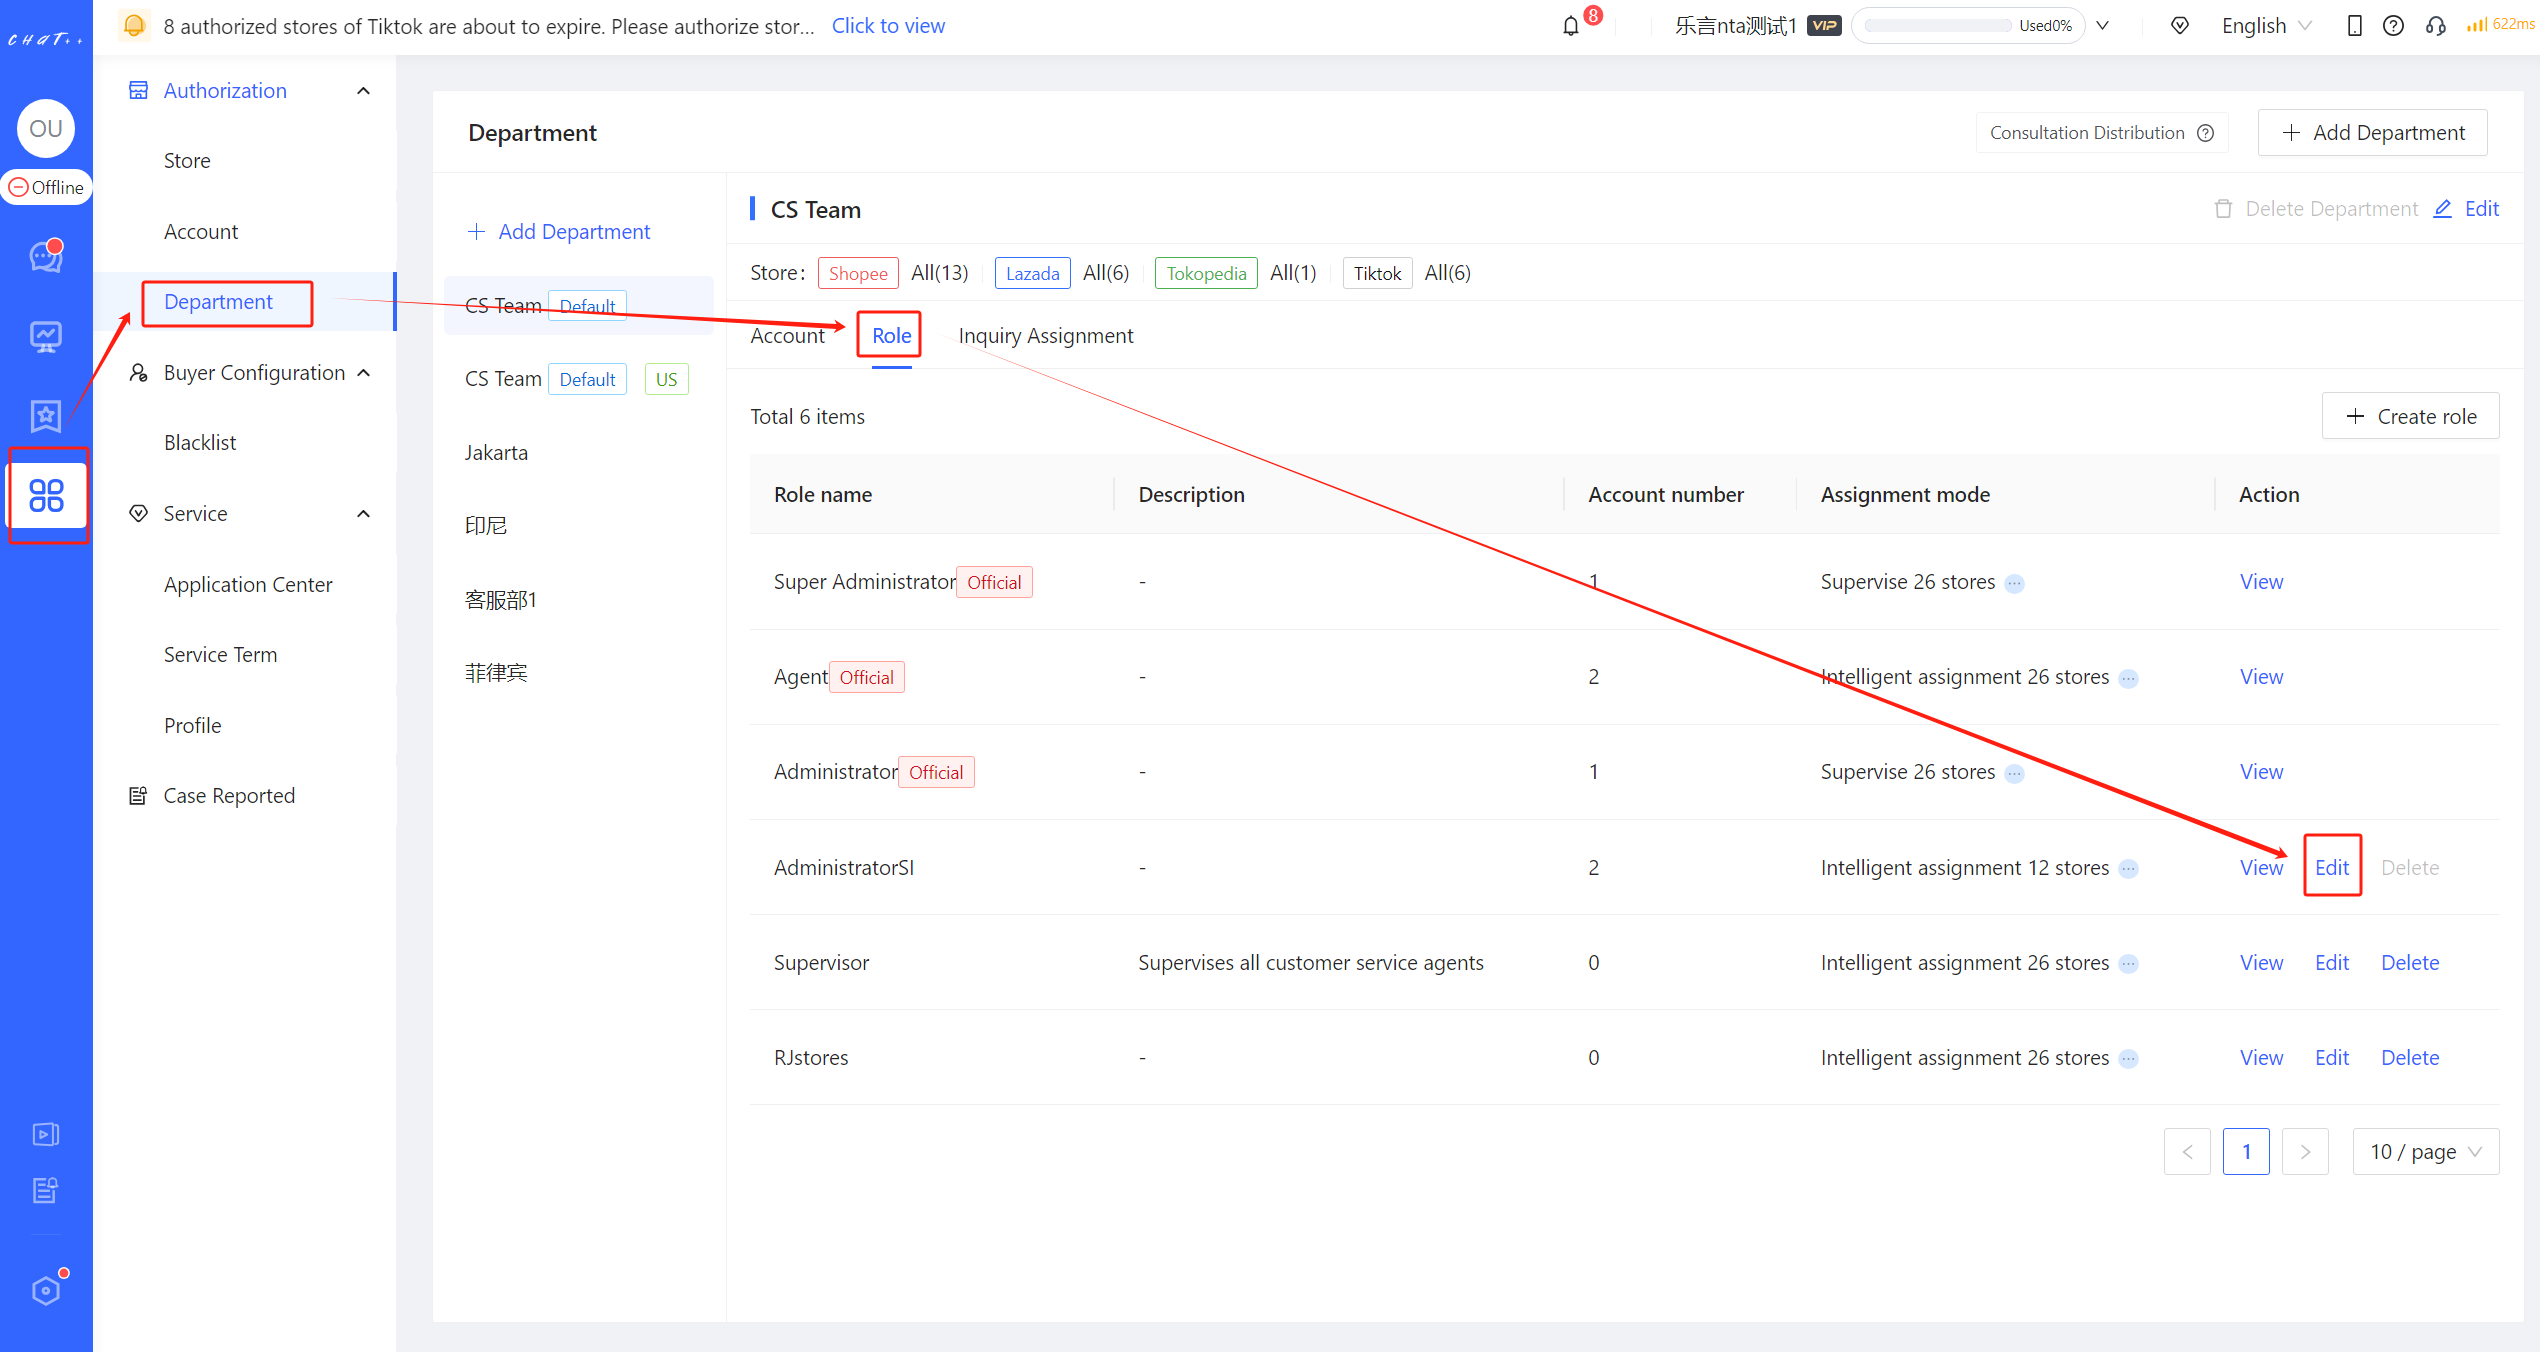
Figure 2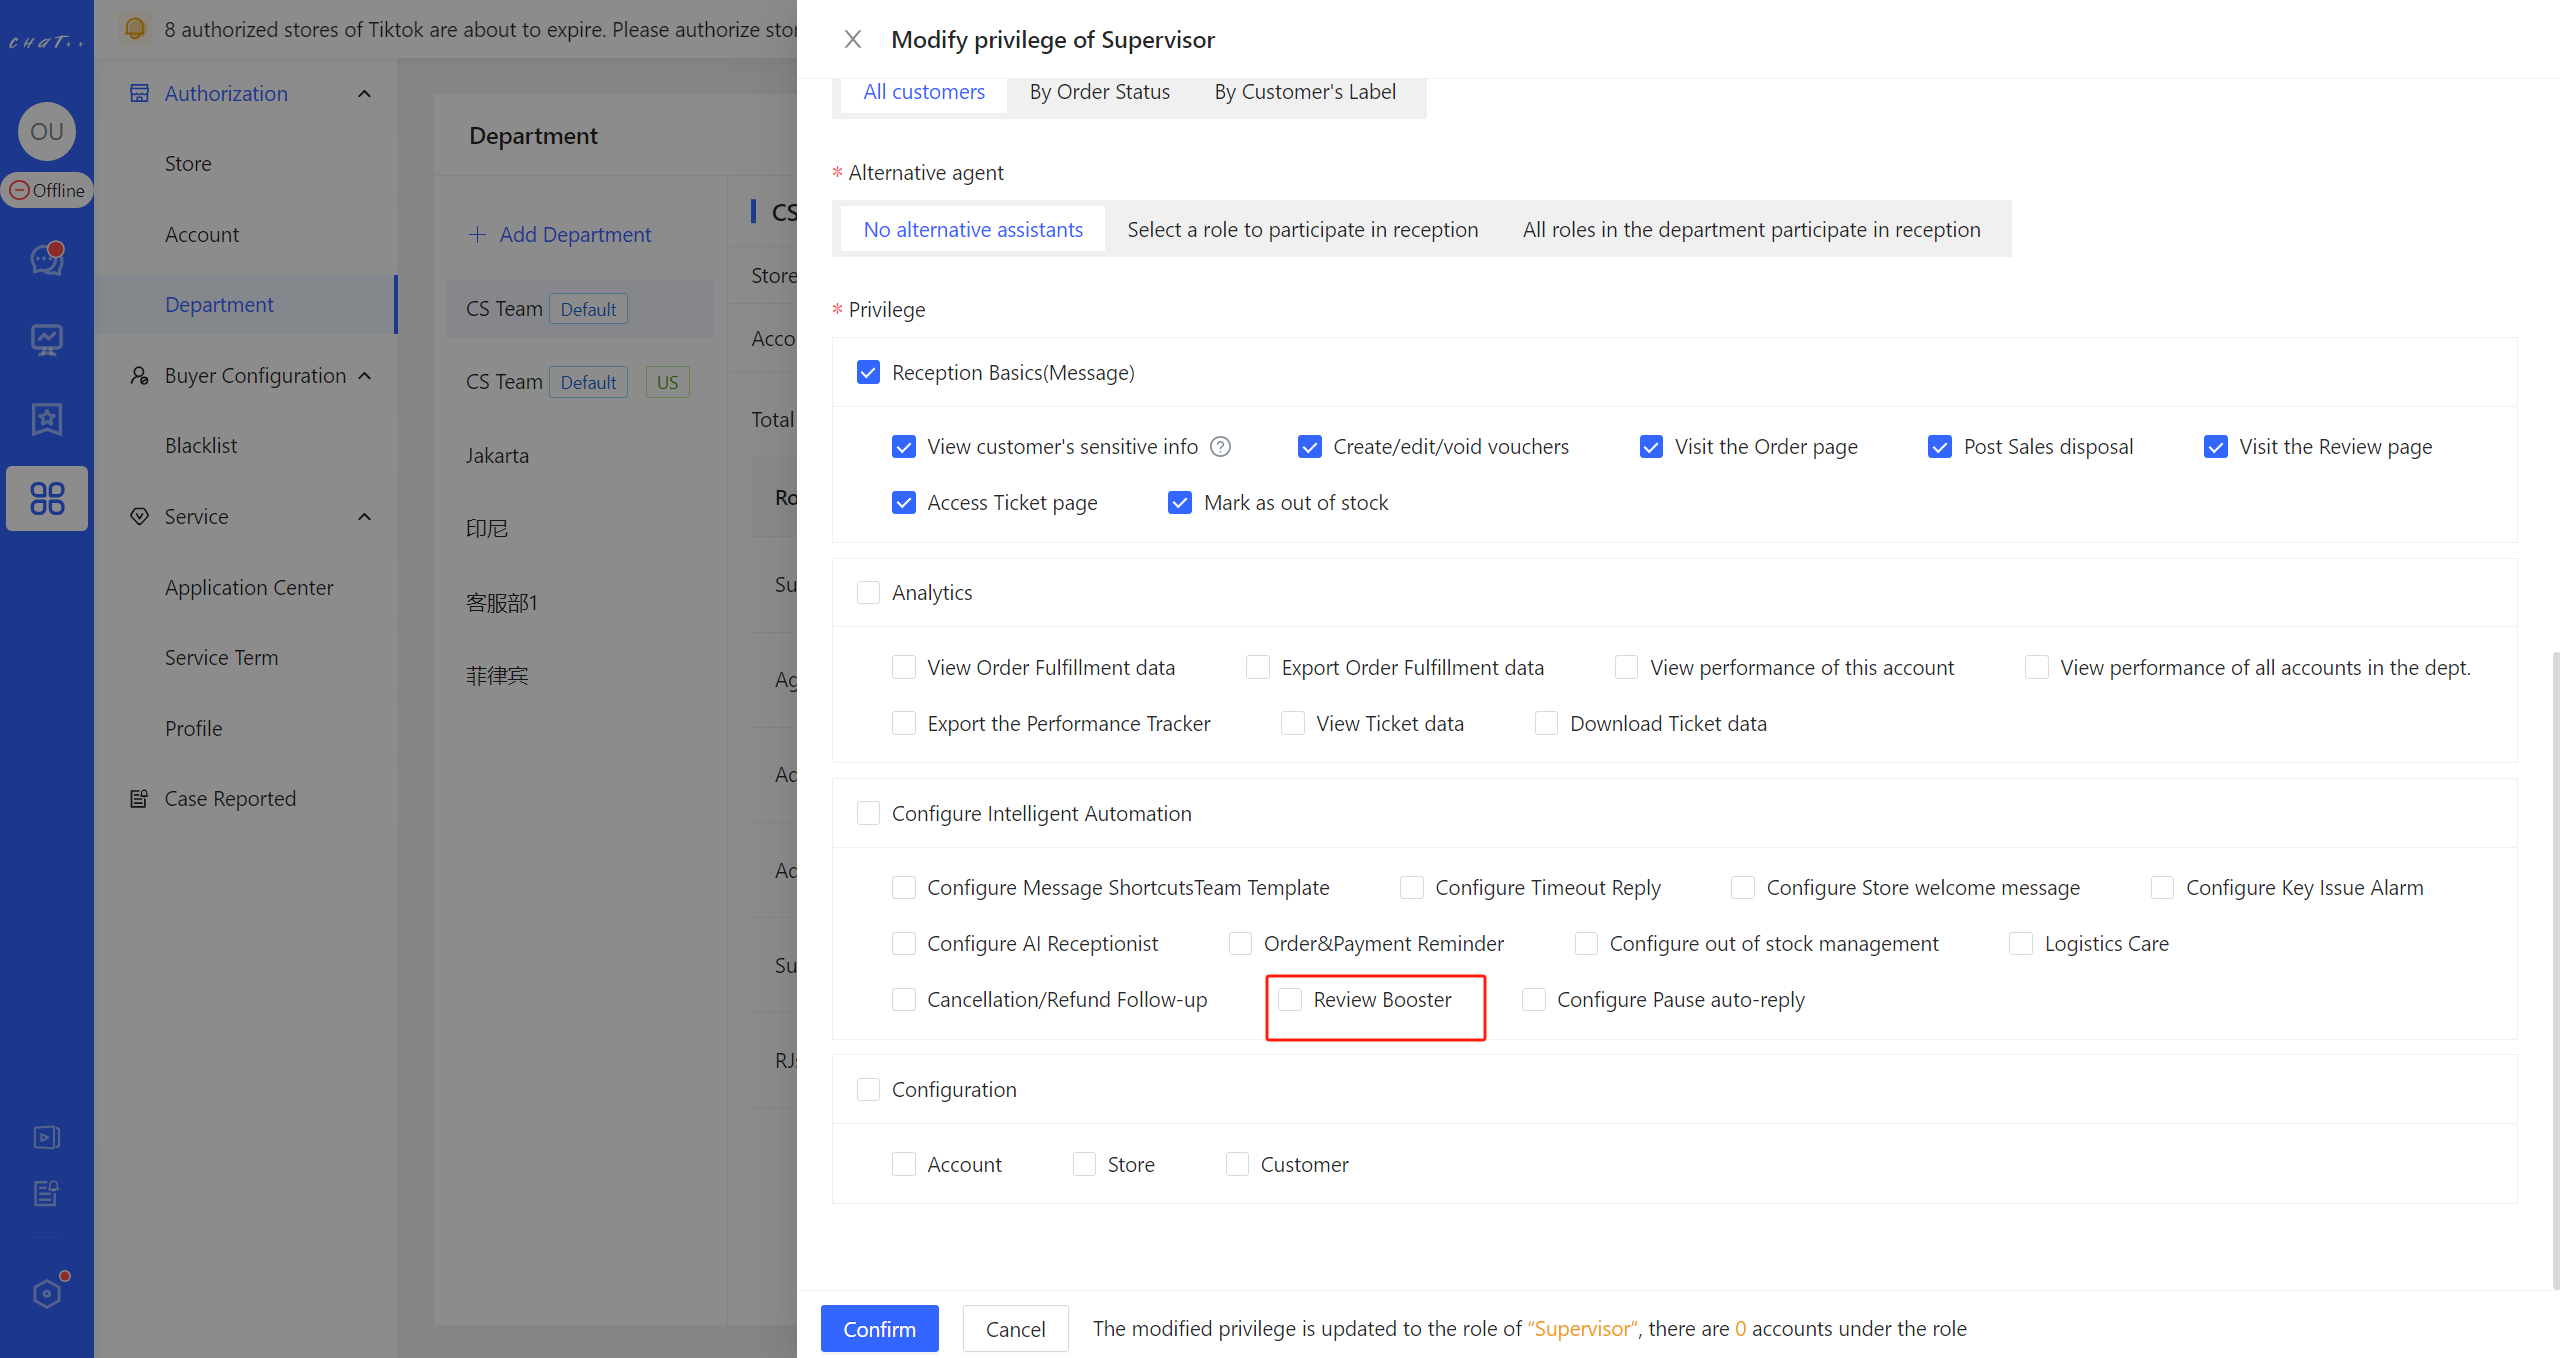
Figure 3
How to Configure Positive Review Follow-up
Access the configuration page
👆Click「 Automation 」 in left menu(Shown as red box① in Figure 4)→「 Review Booster 」(Shown as red box② in Figure 4)→「 Positive Review Follow-up 」(Shown as red box① in Figure 5),Access the configuration page.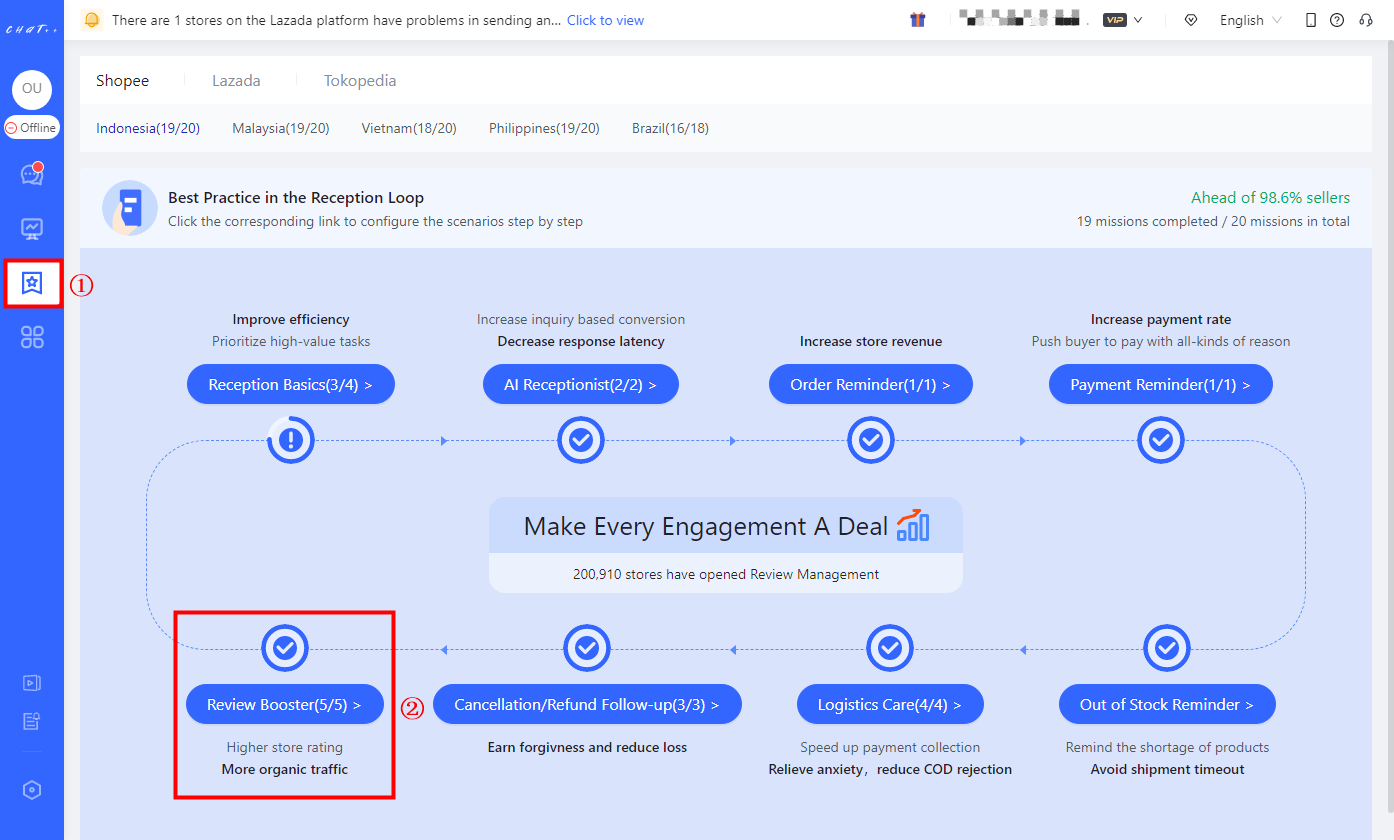
Figure 4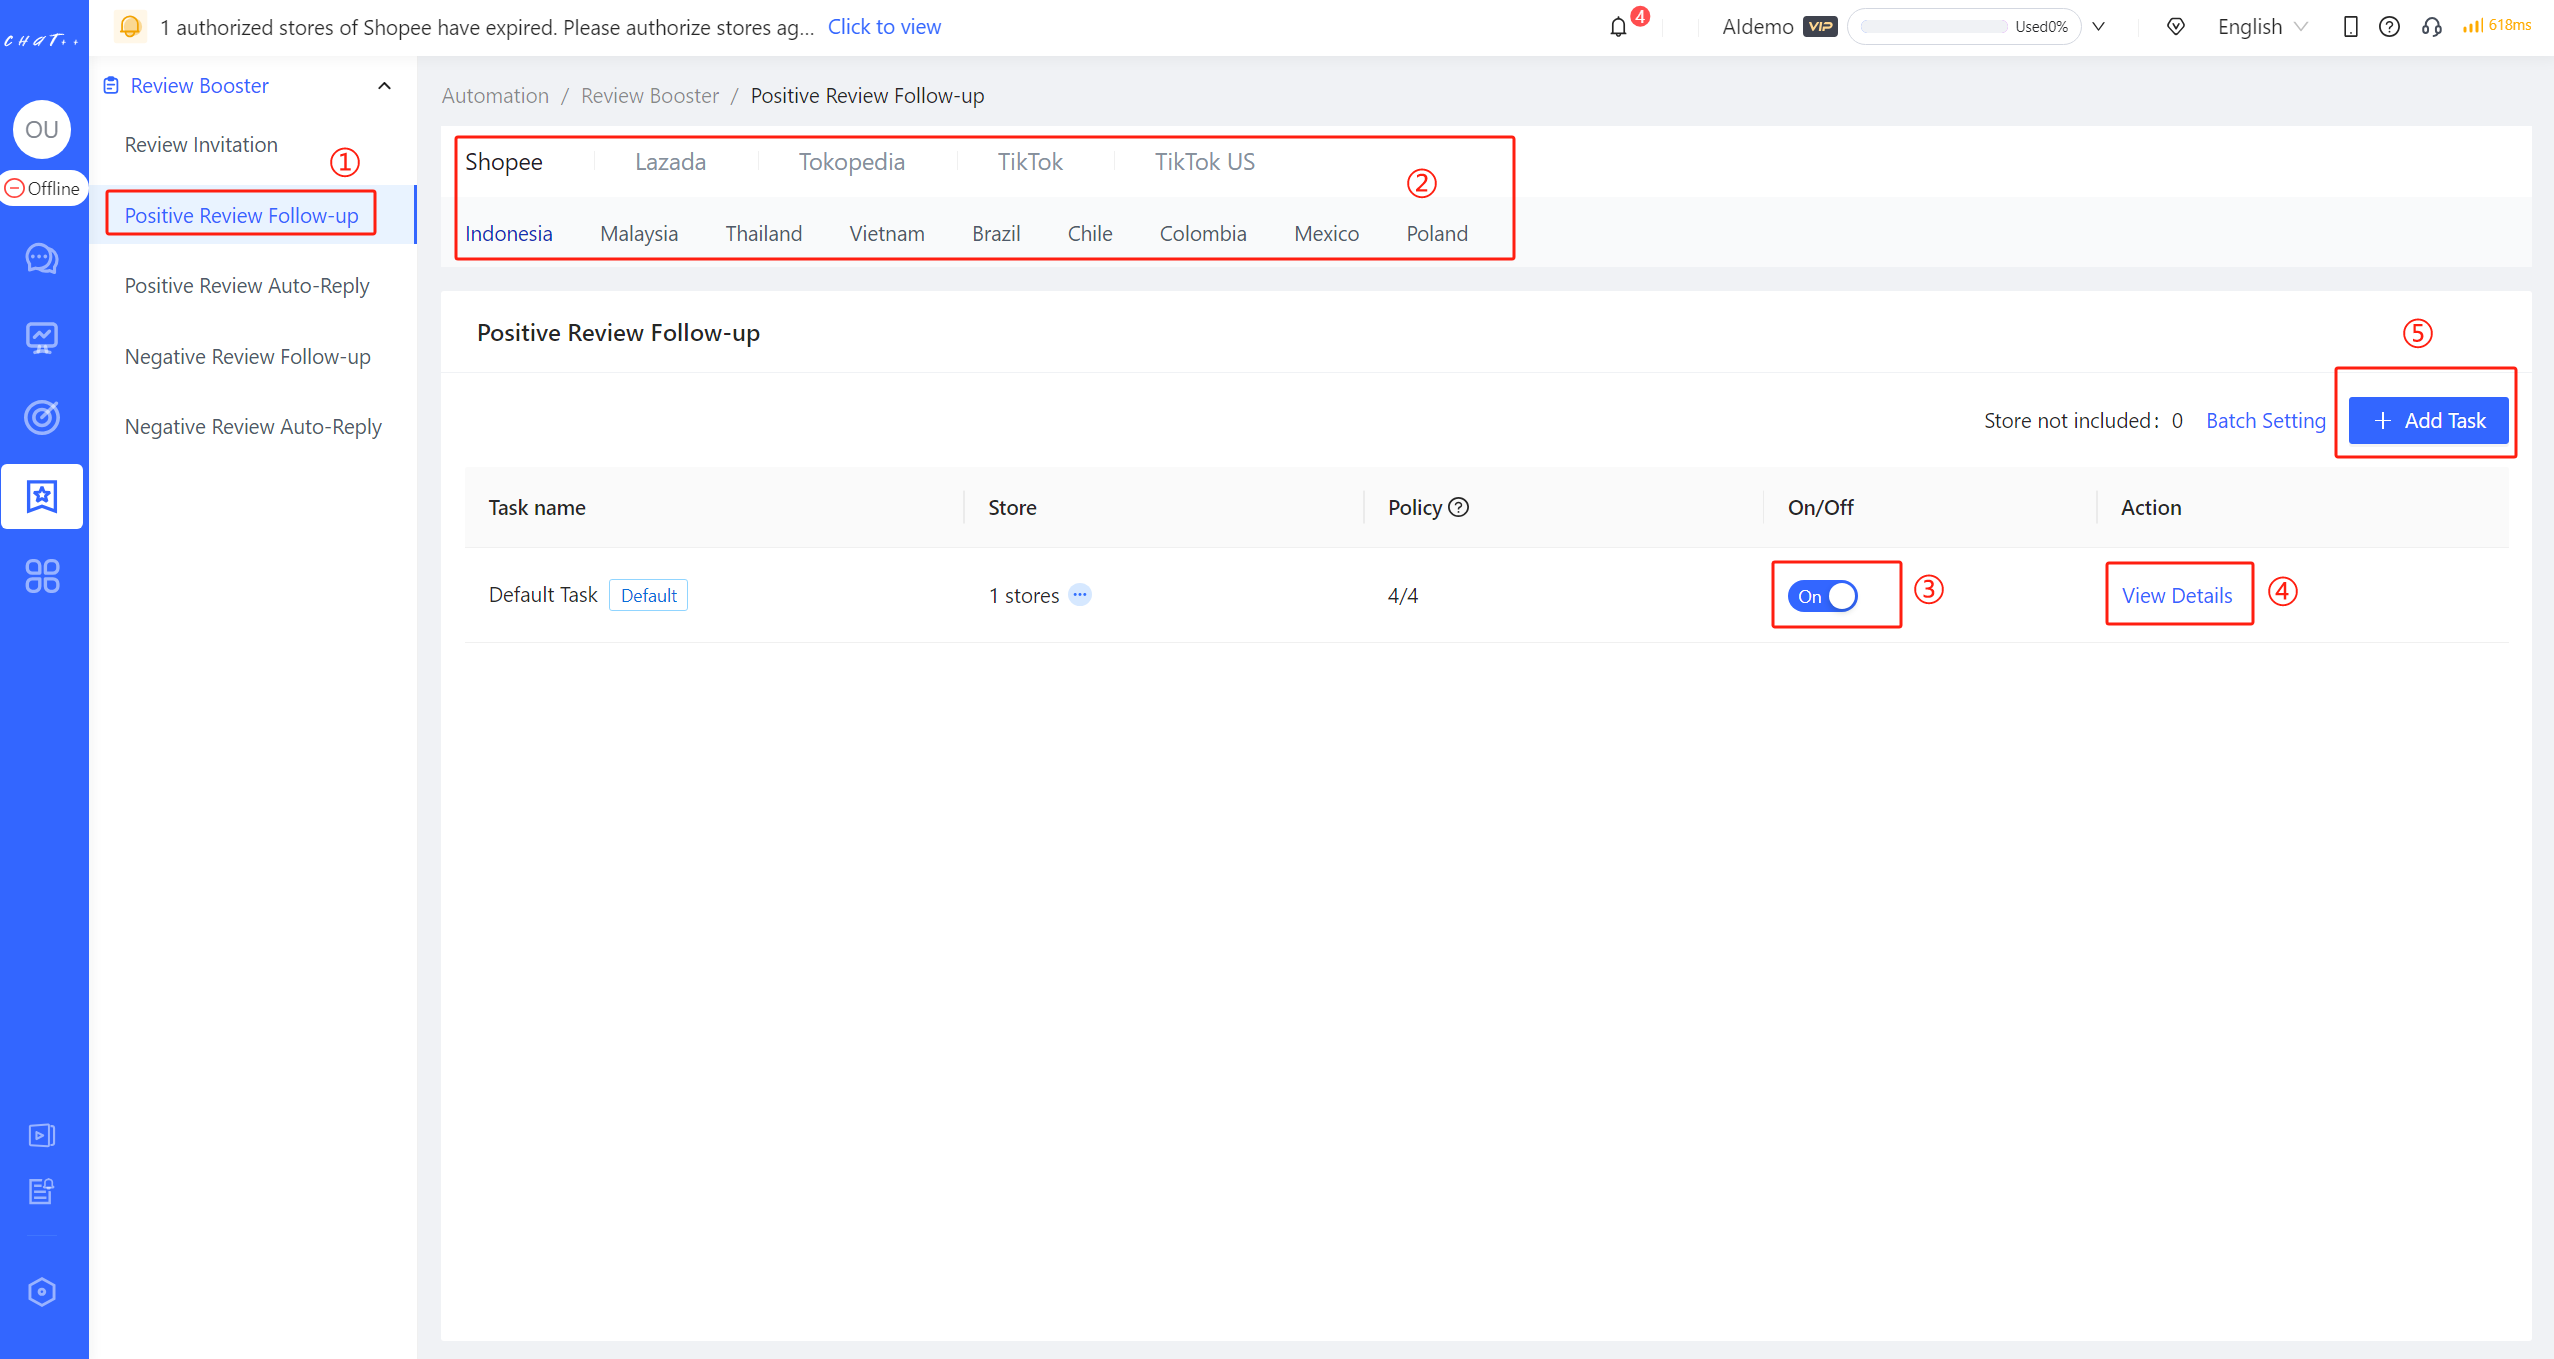
Figure 5
⚠️ Positive Review Follow-up can be customized differently for marketplaces, currently supporting Shopee, with Lazada, TikTok and Tokopedia support coming soon, please stay tuned.
⚠️ Each marketplace distinguishes different sites. You can click on different sites of the marketplace to switch (red box ② in Figure 5 above). Different sites on the same marketplace need independent configuration for Positive Review Follow-up tasks.
One-click Configuration→Enable【 Default Task 】
To make it convenient to configure it, ChatPlusAI has created a "Default Task" for each Positive Review Follow-up scenario on each marketplace, covering all stores of country sites by default.
For the first time you use it, to avoid the situation where the robot automatically replies without your knowledge, "Default Task" (red box ③ in Figure 5 above) is off by default and needs to be manually opened.
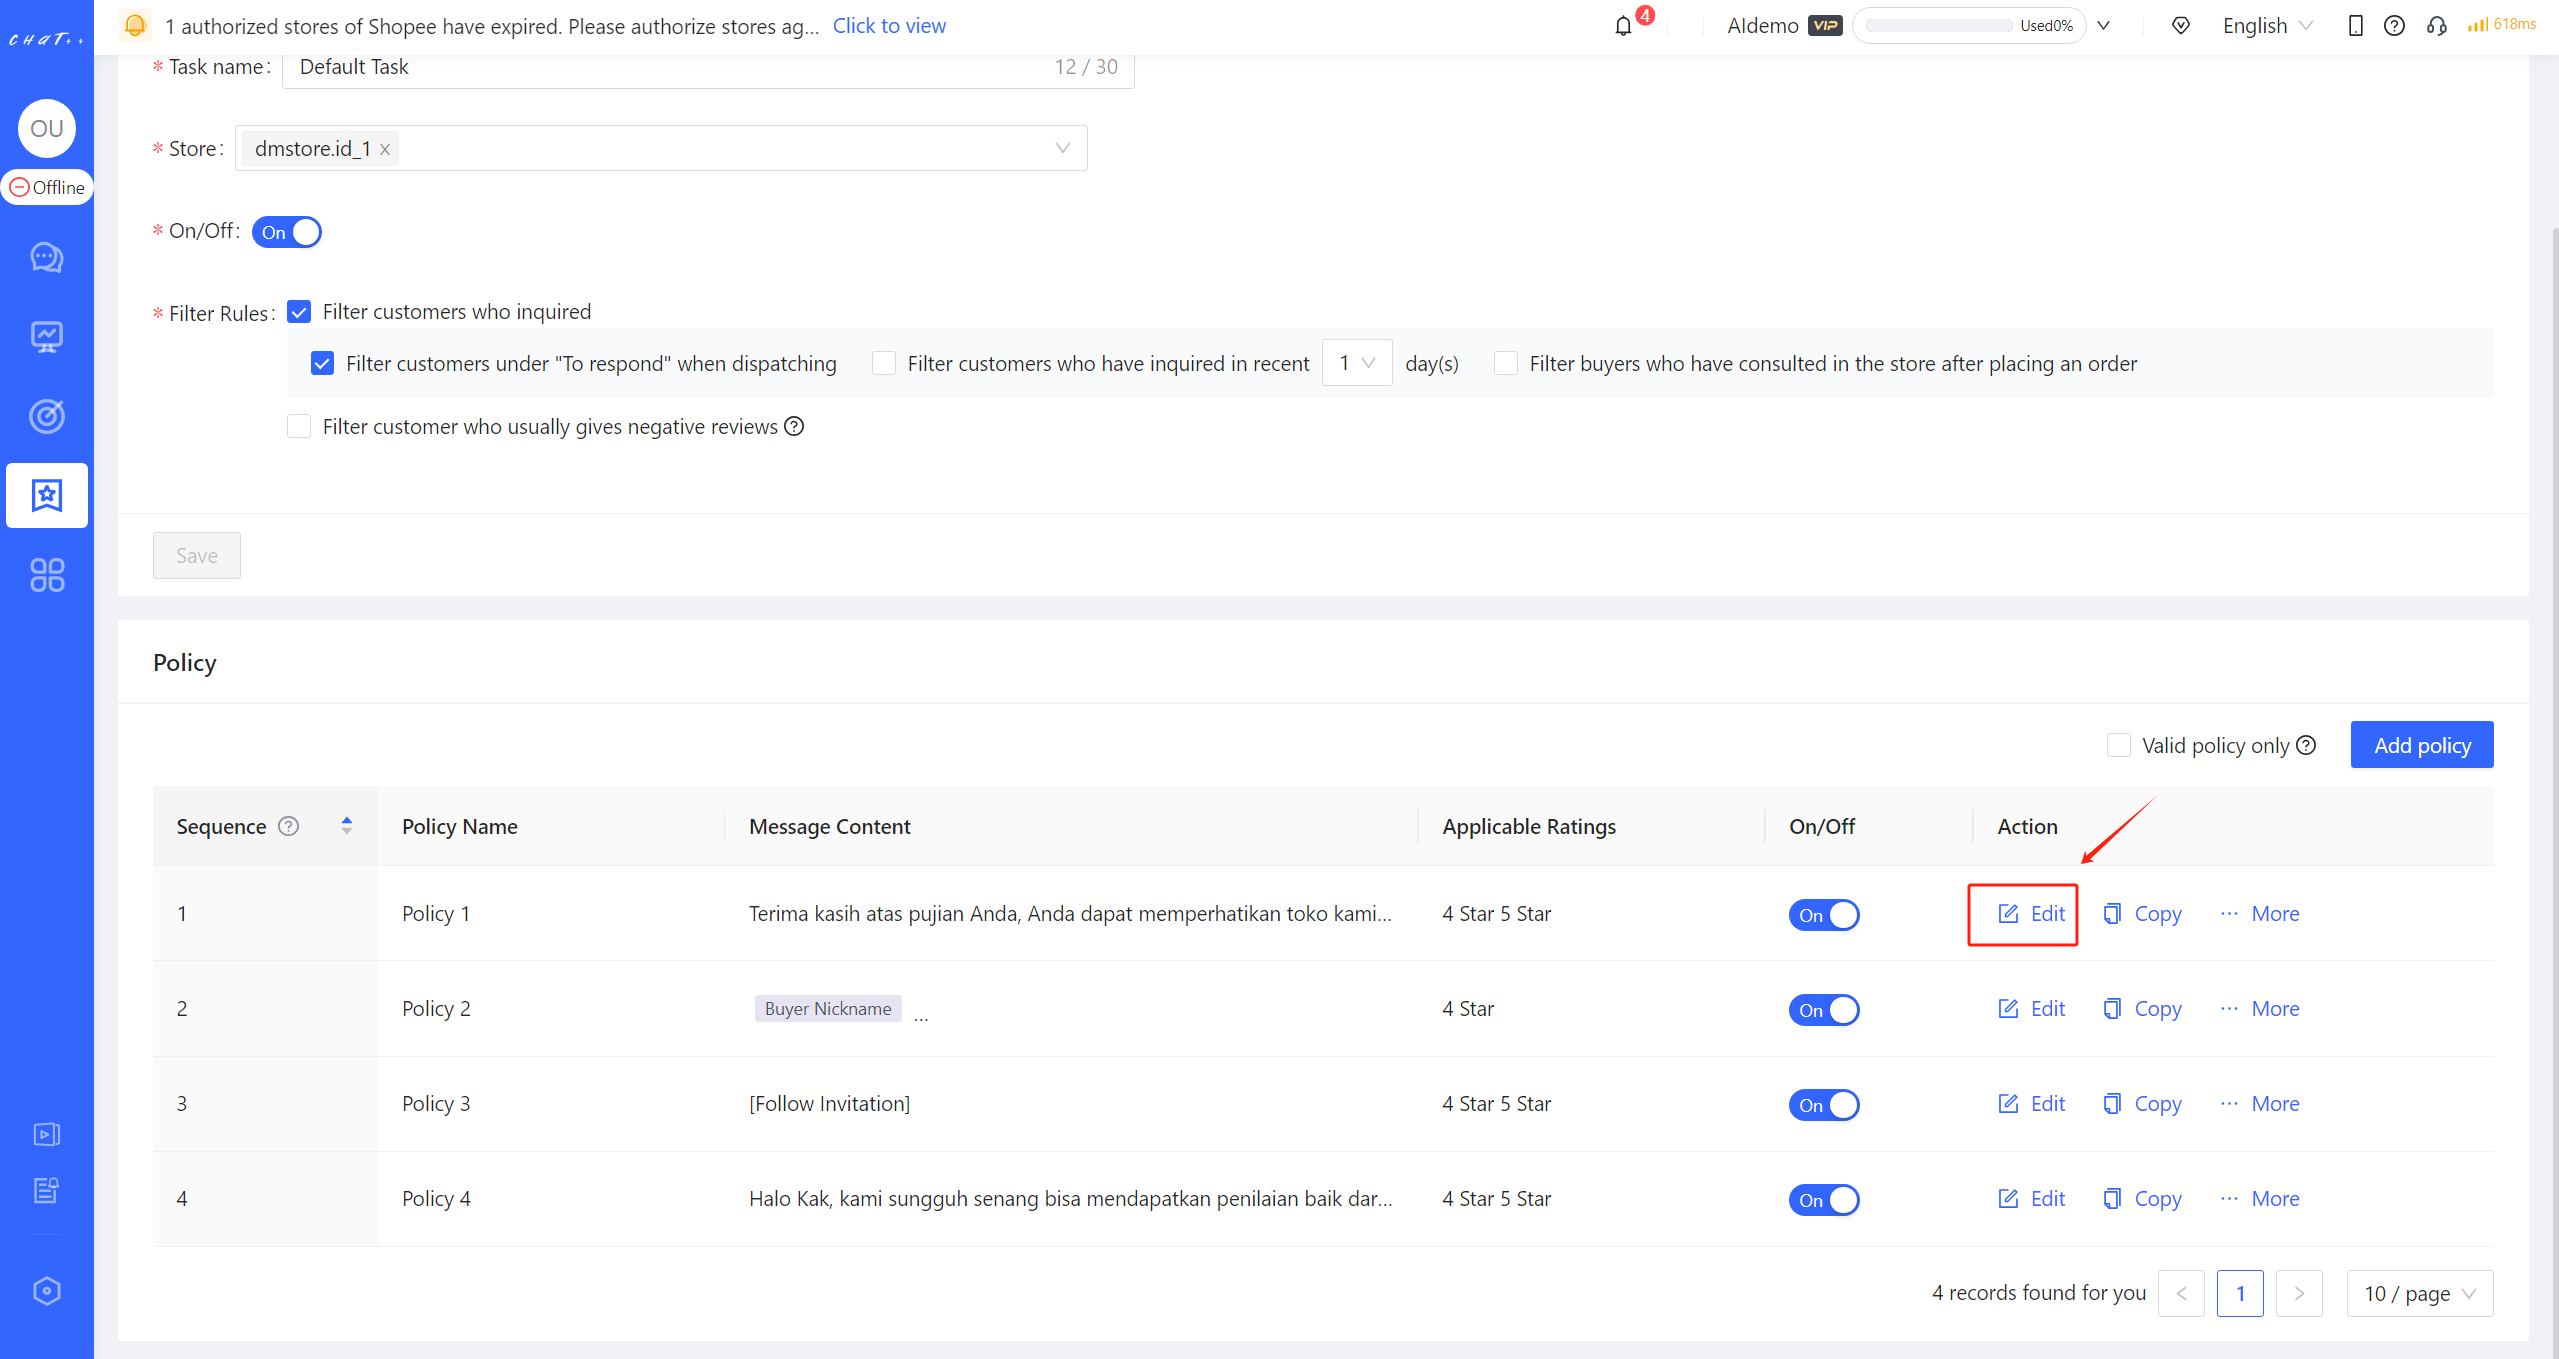
Figure 6
All you have to do is click "View Details" button(red box④ in Figure above) to edit the policy(red box in Figure 6 above) or directly enable the default task (red box③ in Figure 5 above)
The following will provide detailed description of policies branches. If you want to view them now, please click the blue words.
Newly authorized stores will be automatically included to the 【Default task】. However, the store will not be automatically included again after they are removed from other tasks. It will be counted as "Store not included" (Shown as red box④ in Figure 7). You can click "Batch Setting" button (Shown as red box⑤ in Figure 7) to add massive stores into the certain task quickly.
Note: Kindly make sure that all stores have been included to the right task (that means the number of "Store not included" is 0, shown as red box④ in Figure 7), in case the store is neglected from any Positive Review Follow-up task.
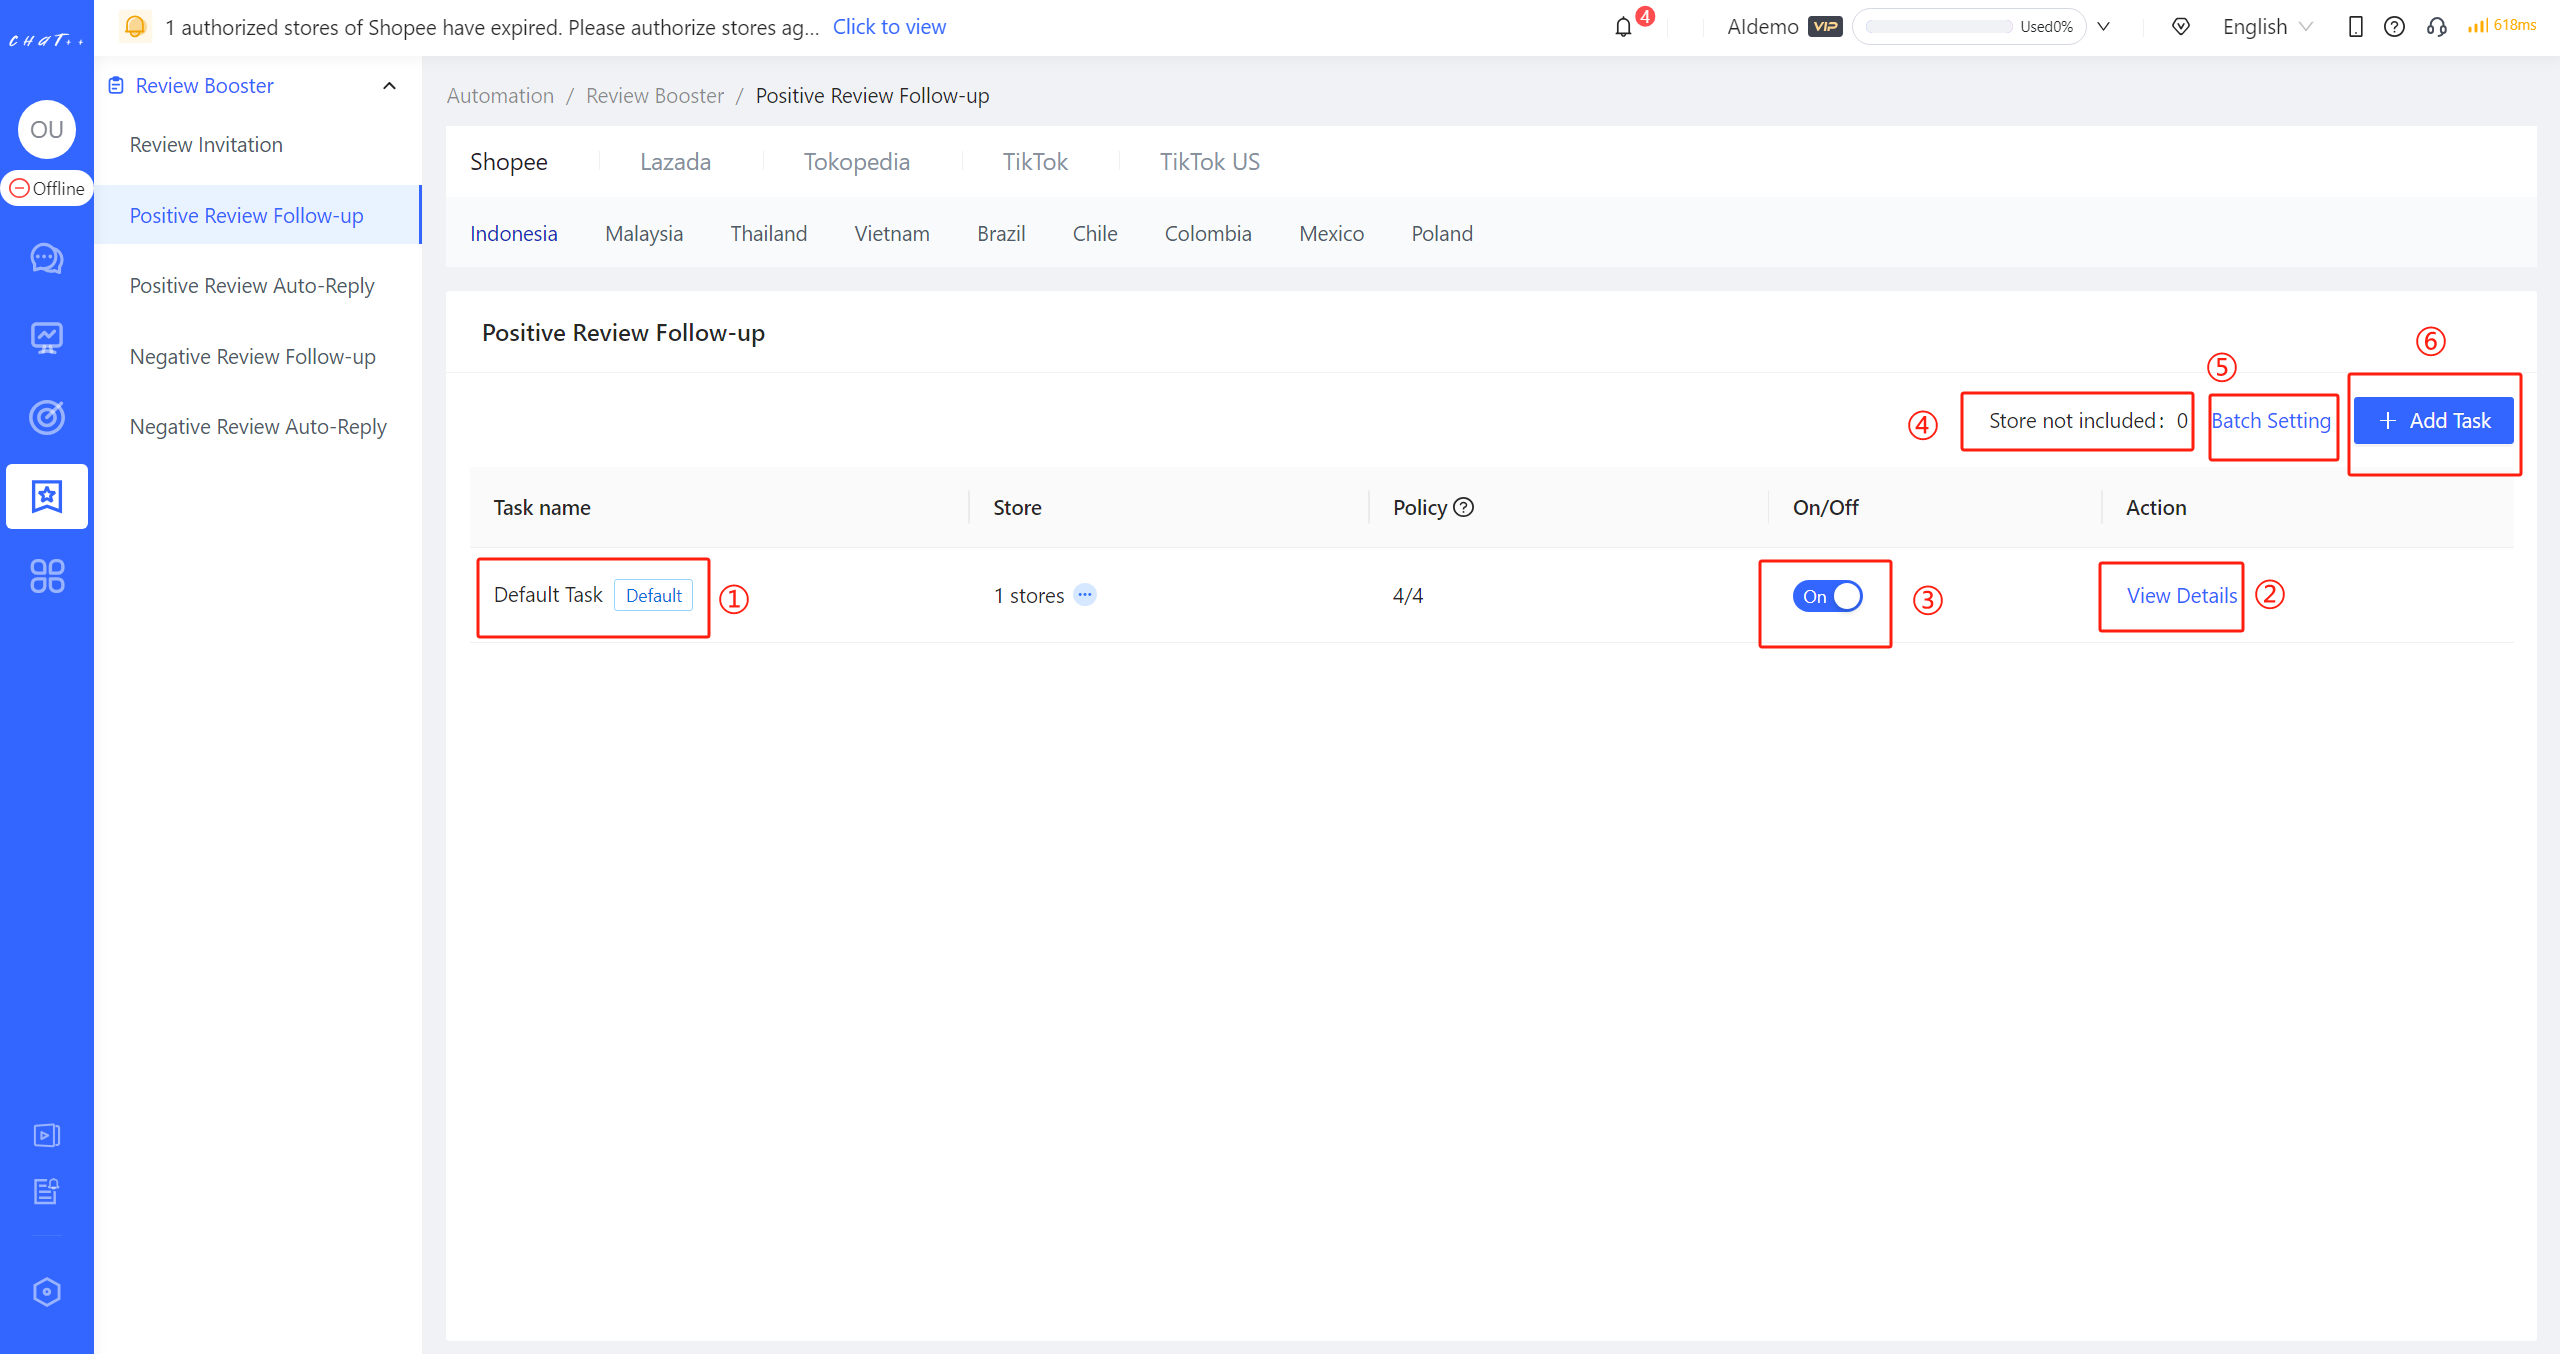
Figure 7
"Filter Rules" Description
Filter customers under "To respond" when dispatching:By default, Positive Review Follow-up tasks are set to exclude buyers who are in the "To respond" status when being dispatched. This means buyers whose conversations have been assigned to customer service and whose last message hasn't received a valid response yet. This default behavior prevents situations where a buyer is awaiting a response to their inquiry but receives a Positive Review Follow-up message. Positive Review Follow-up won't be dispatched to buyers who are in the "To respond" status by default.
"Filter customers who have inquired in recent X day(s)" and "Filter buyers who have consulted in the store after placing an order" options have a more extensive filtering effect. It's recommended not to select these options unless absolutely necessary.
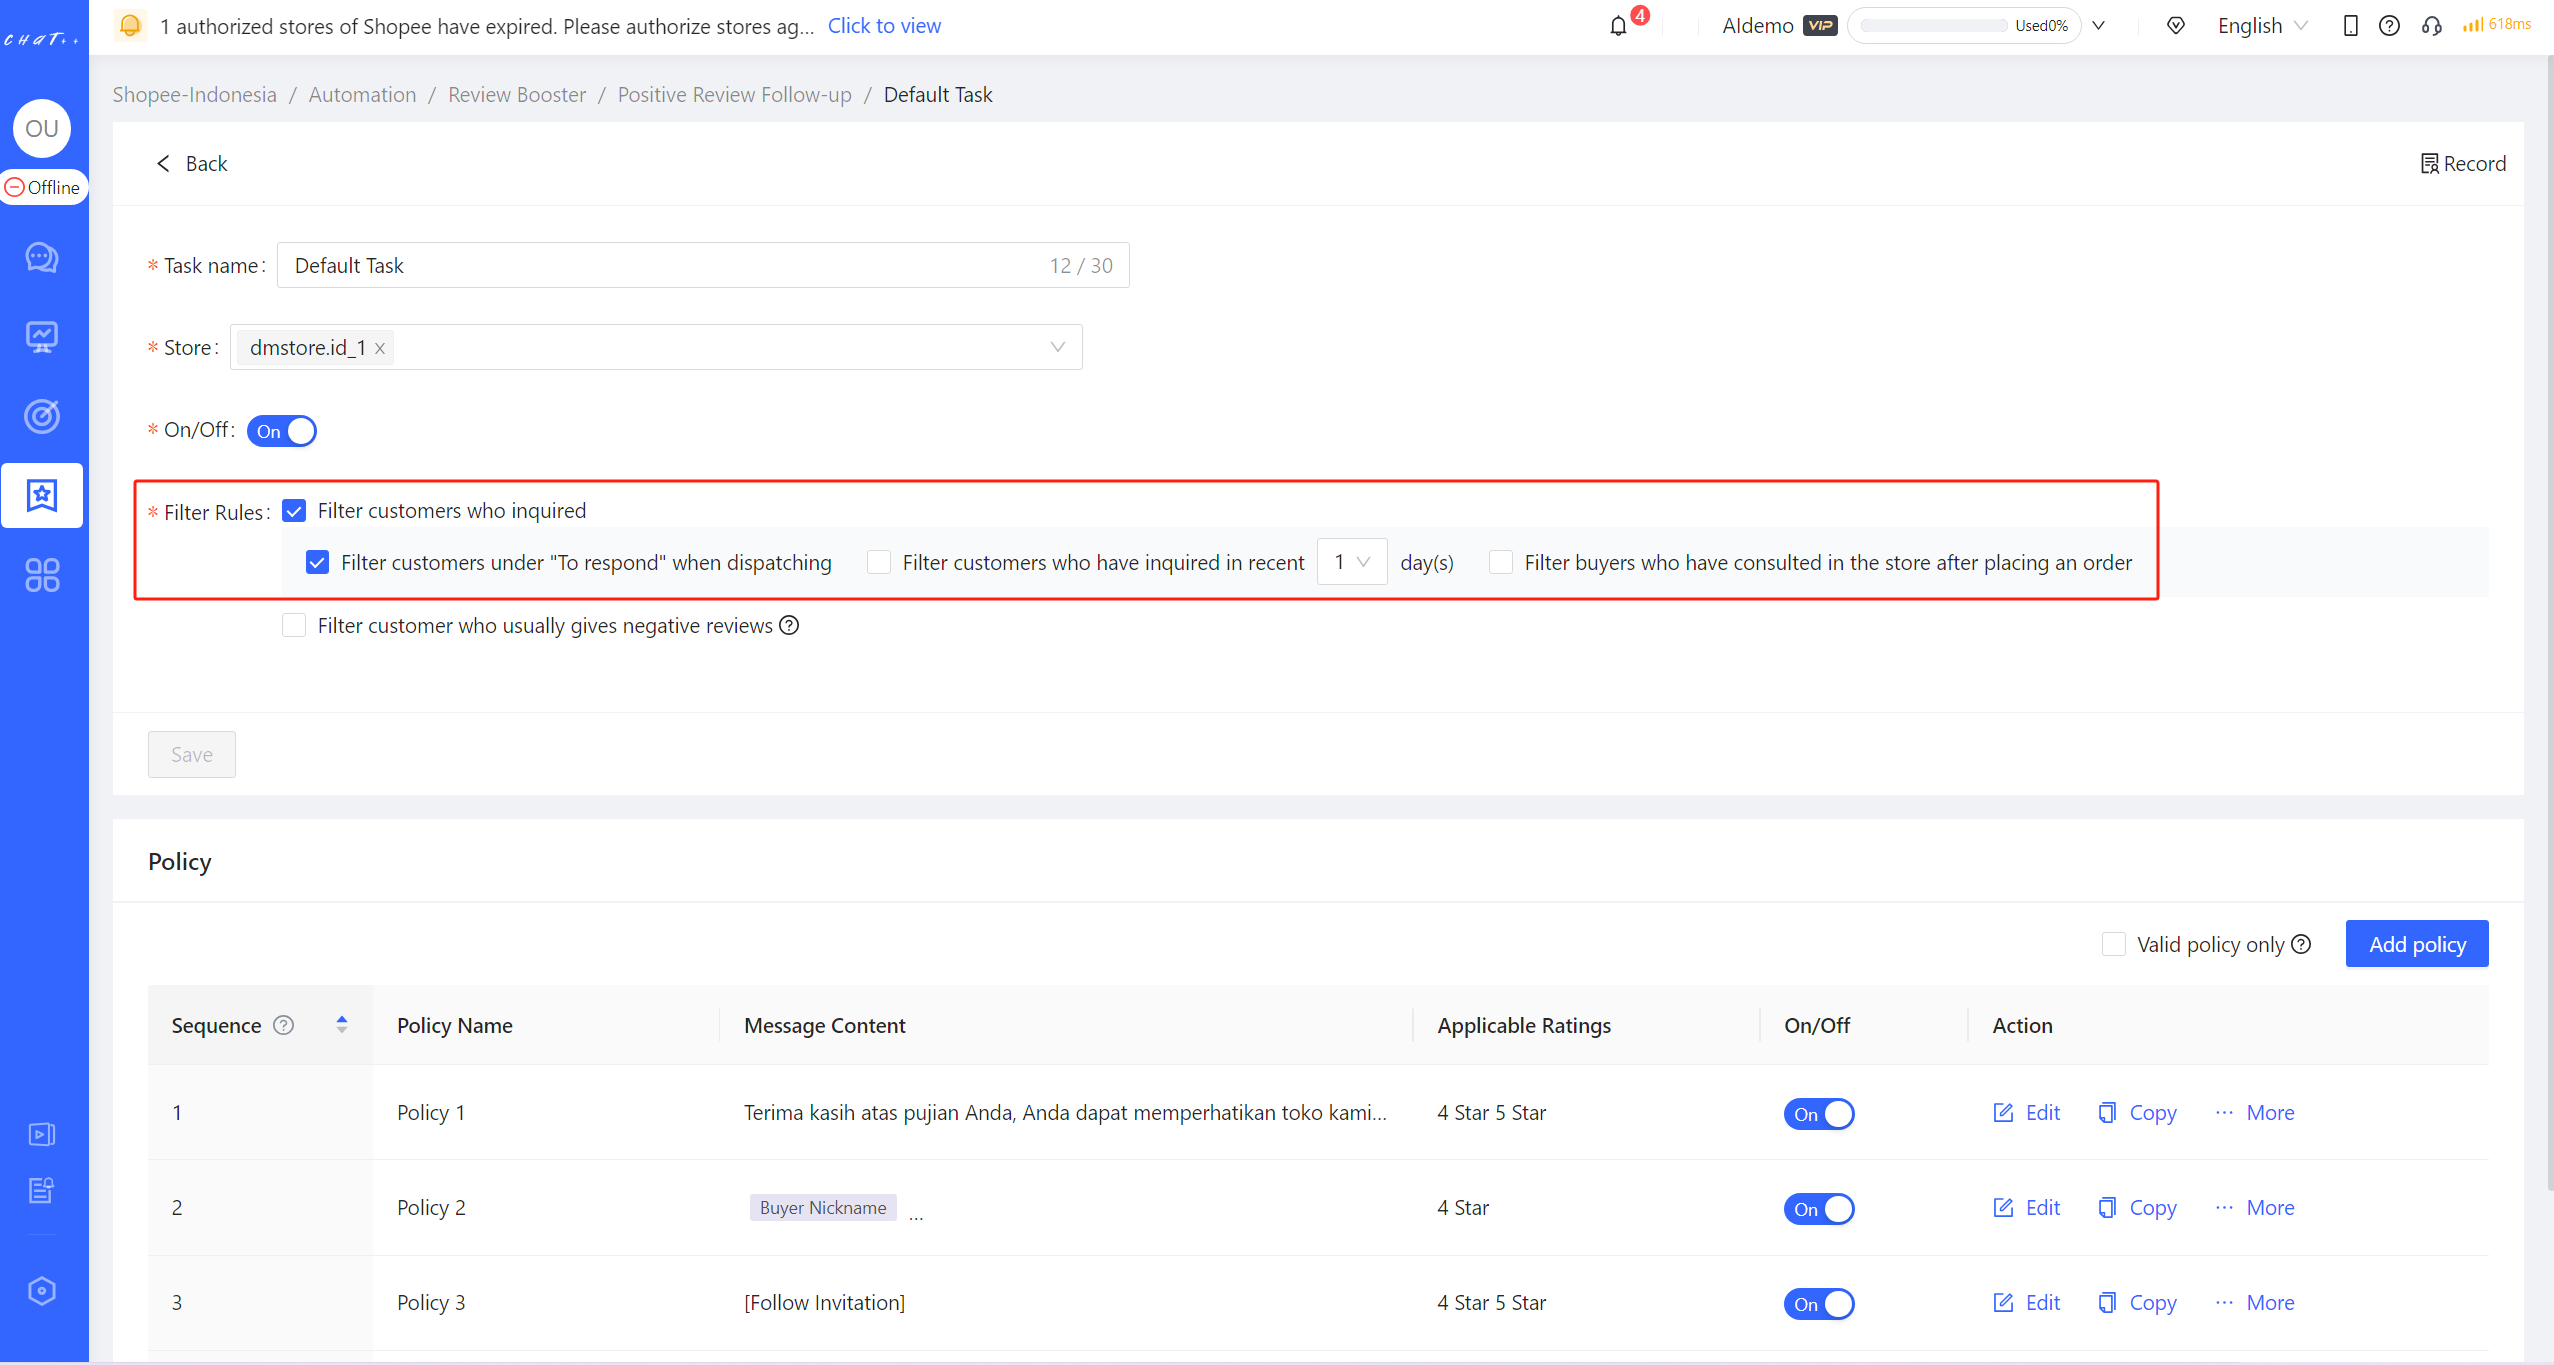
Figure 8
"Policy branch" Description
- Policy branch for Positive Review Follow-up consists of four key factors: product scope, applicable ratings, review type and message content.
- Product scope(red box① in Figure 9): The policy branch take effects when the buyer ordered specific products. There are 4 options to configure: All products, Pick SKU, Pre-order or In-stock
- "Pick SKU" supports selecting specific products by searching the "Product Name", "Product ID", "SPU Article NO." and "SKU ID"(red box② in Figure 10), meanwhile input "Product ID" or "SPU Article NO." (separate multiple items with Enter) and can quickly select various products(red box④ in Figure 10).
- Applicable Ratings(red box② in Figure 9): When a buyer gives a rating of 4 stars or 5 stars, it is applicable to the positive review follow-up task. It supports individually selecting 4 stars or 5 stars, or selecting both 4 stars and 5 stars.
- Review Type(red box③ in Figure 9): According to whether the buyer's review has content, it is divided into "Include text/image/video" and "No content" supporting individual selection or full selection.
- Message Content(red box④ in Figure 9): If above conditions are met, the corresponding message will be sent. The form of the message content is not limited, supporting video/text/pictures/expression/follow invitation, and various types can be flexibly combined.
- Matching Logic: If the buyer's purchased products, given ratings, and review type match the Product scope, applicable ratings, and review type in the policy branch, then the buyer matches this policy. When a buyer simultaneously matches multiple policy branches, the system will execute the first policy in order.
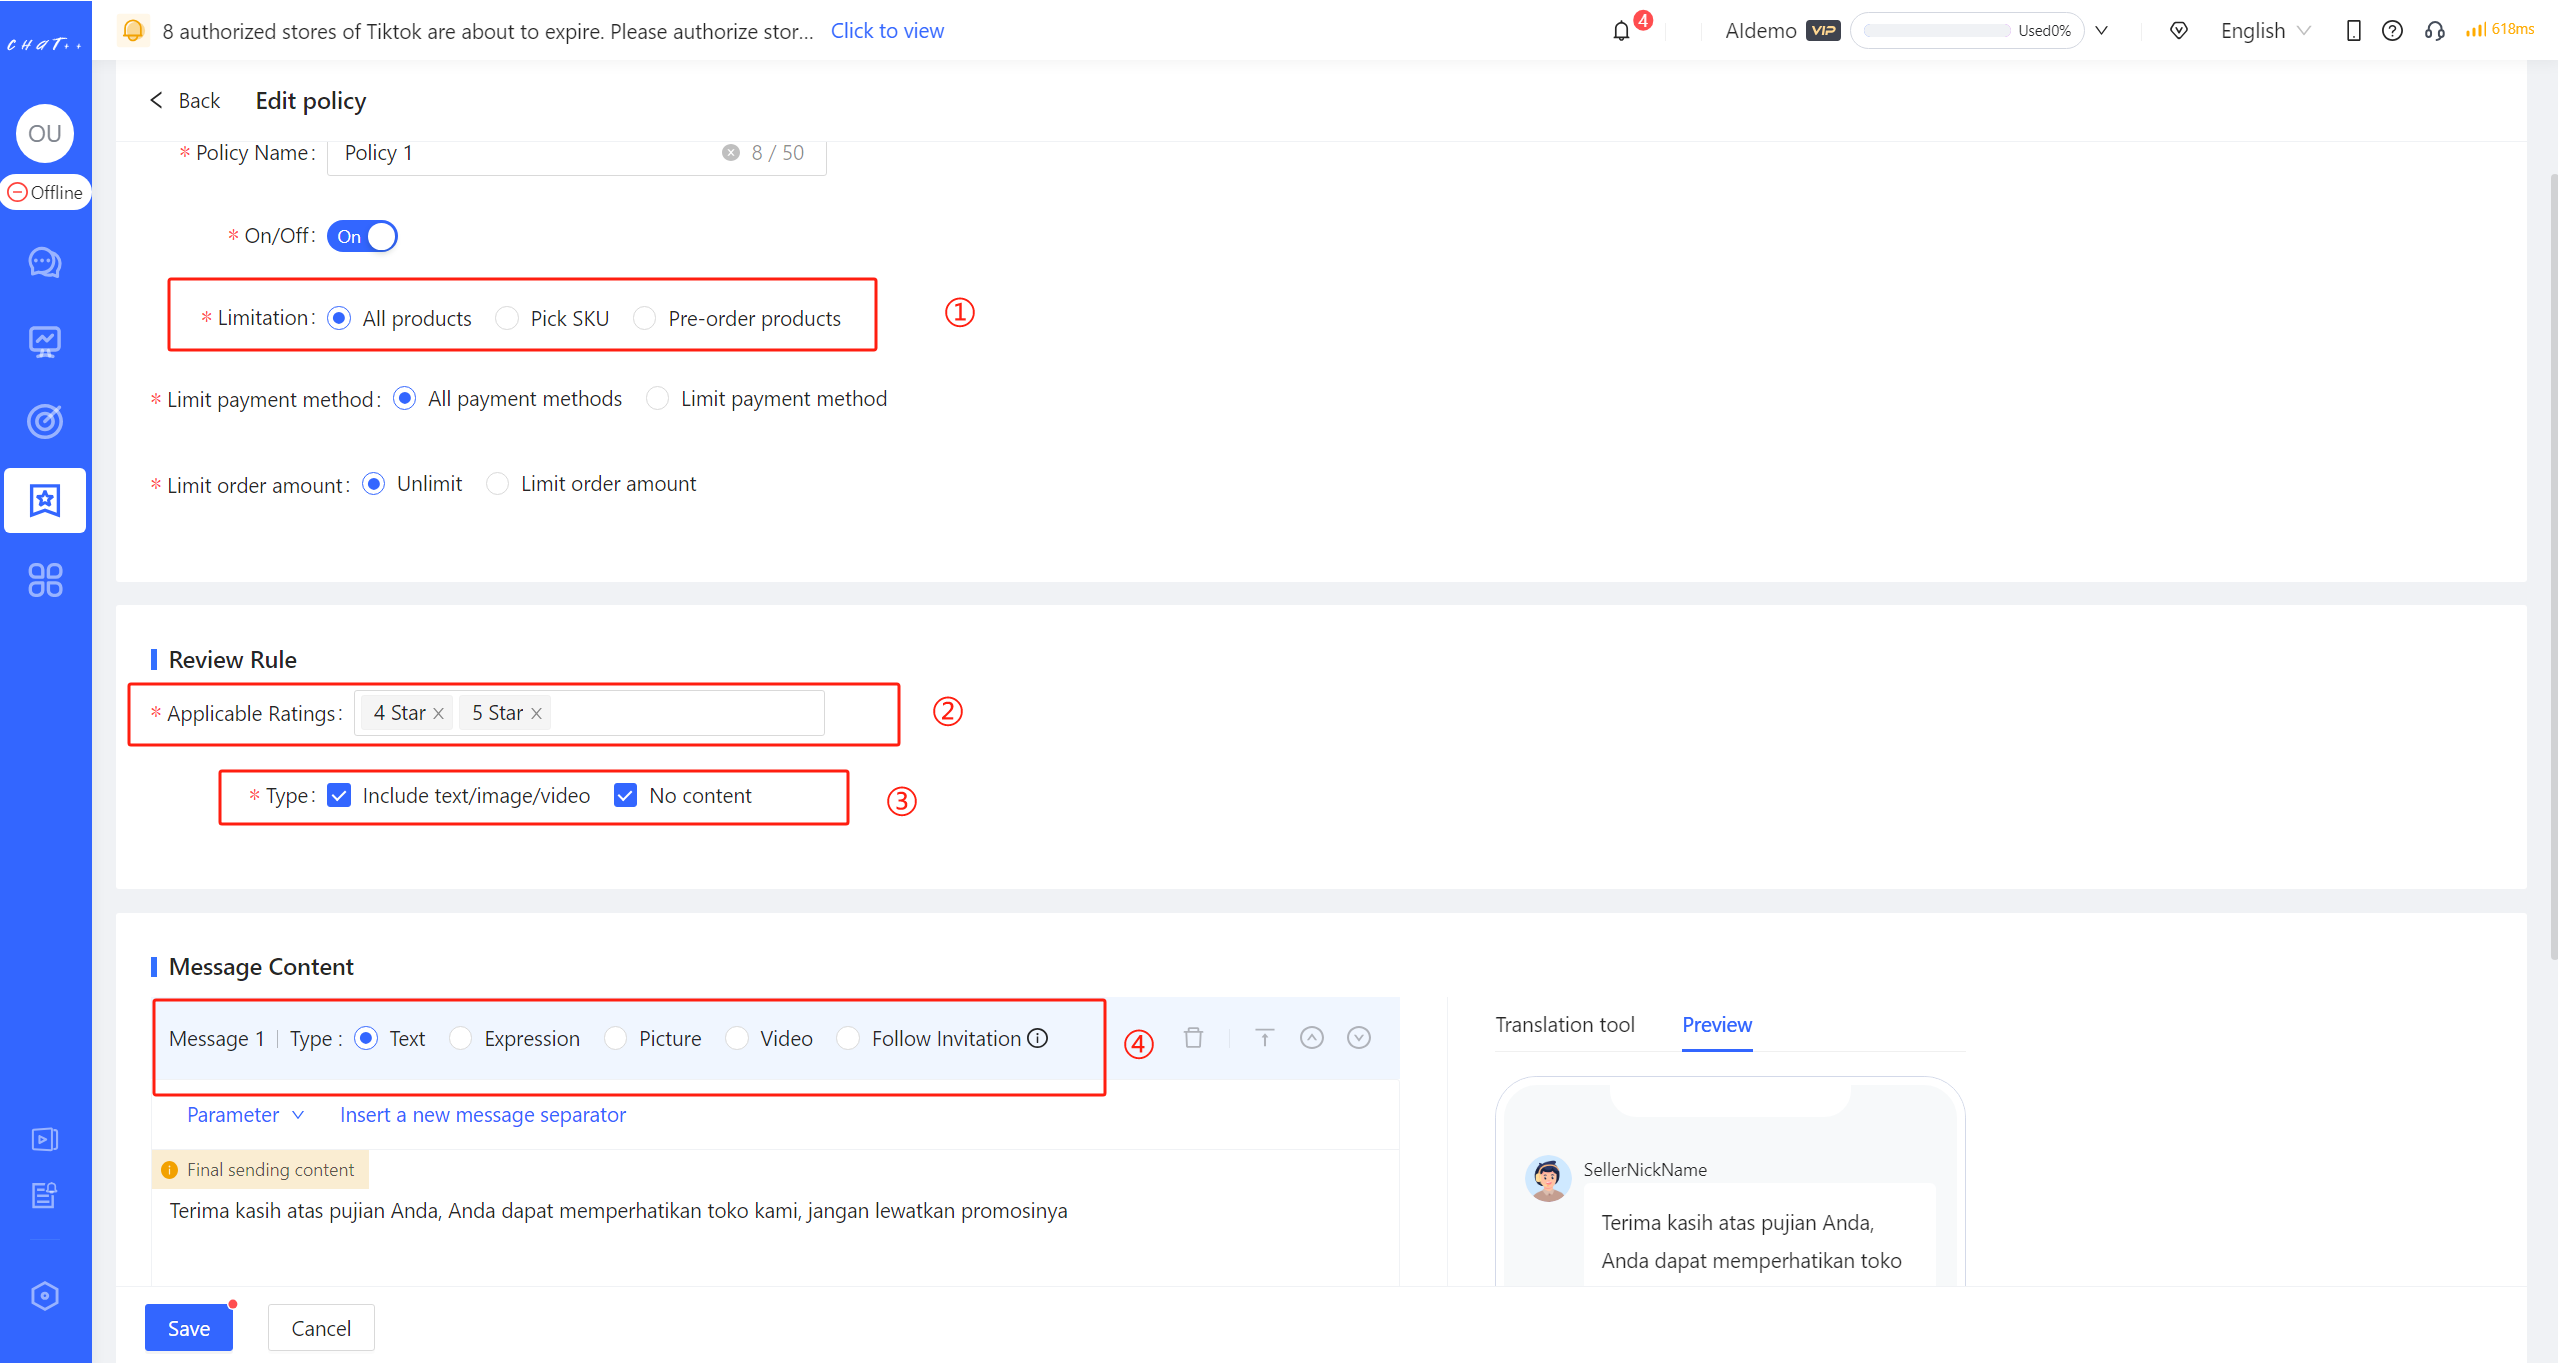
Figure 9
For example:In the example in Figure 10,
- Product scope selected are "Pick SKU": Men's Perfume and Sunscreen
- Applicable Ratings selected are "4 stars and 5 stars"
- Review Type selected includes "Include text/image/video" and "No content"
This means that this policy will match buyers who "purchase this men's perfume/sunscreen, give a 4-star, 5-star rating, regardless of whether they write a review."
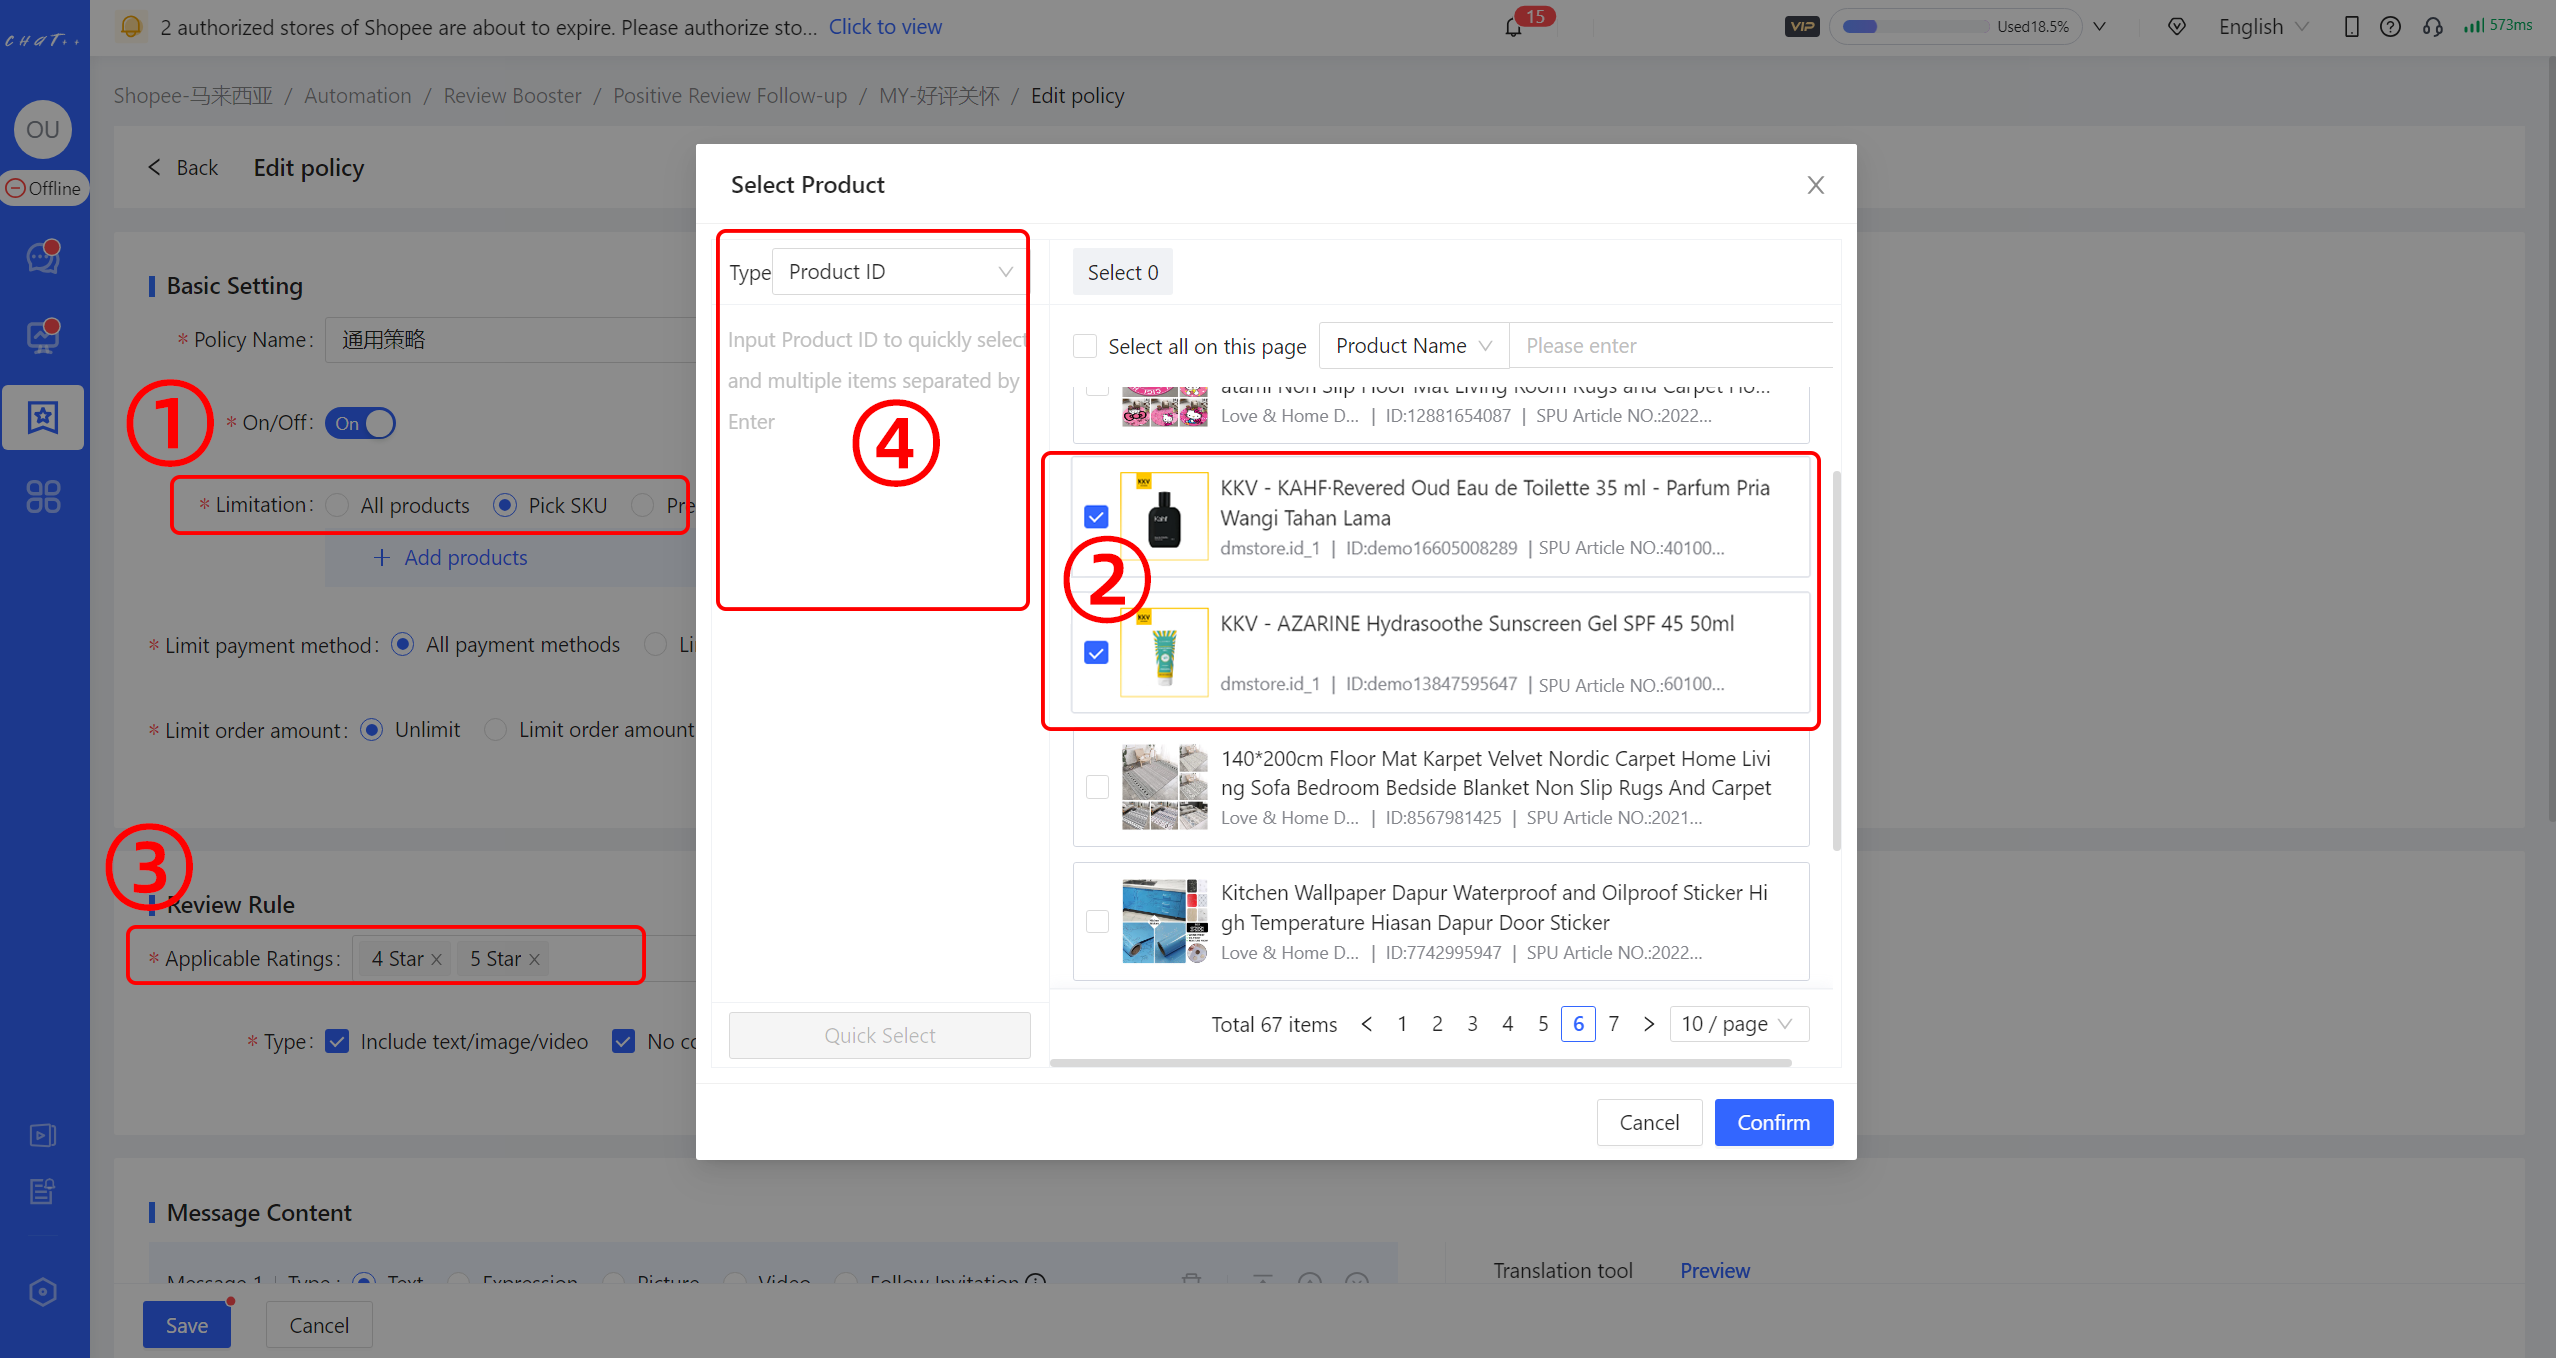
Figure 10
Configuration of Personalized RepliesRecommended Templates
To facilitate quick configuration, when the message content includes text messages, ChatPlusAI provides recommended templates for reference and selection. Select text messages, scroll down appropriately, and click the "Select" button (red box ② in Figure 11) to automatically fill in the content editing box. The preview of sending effect can be seen on the right side of the page.
Add Buyer Nickname
Each buyer's review is different. To make the reply content more targeted, you can mention the buyer's nickname in the text message.
Select "Buyer Nickname" after clicking "Parameter" button(red box ① in Figure 11), and the buyer's nickname will be automatically filled in.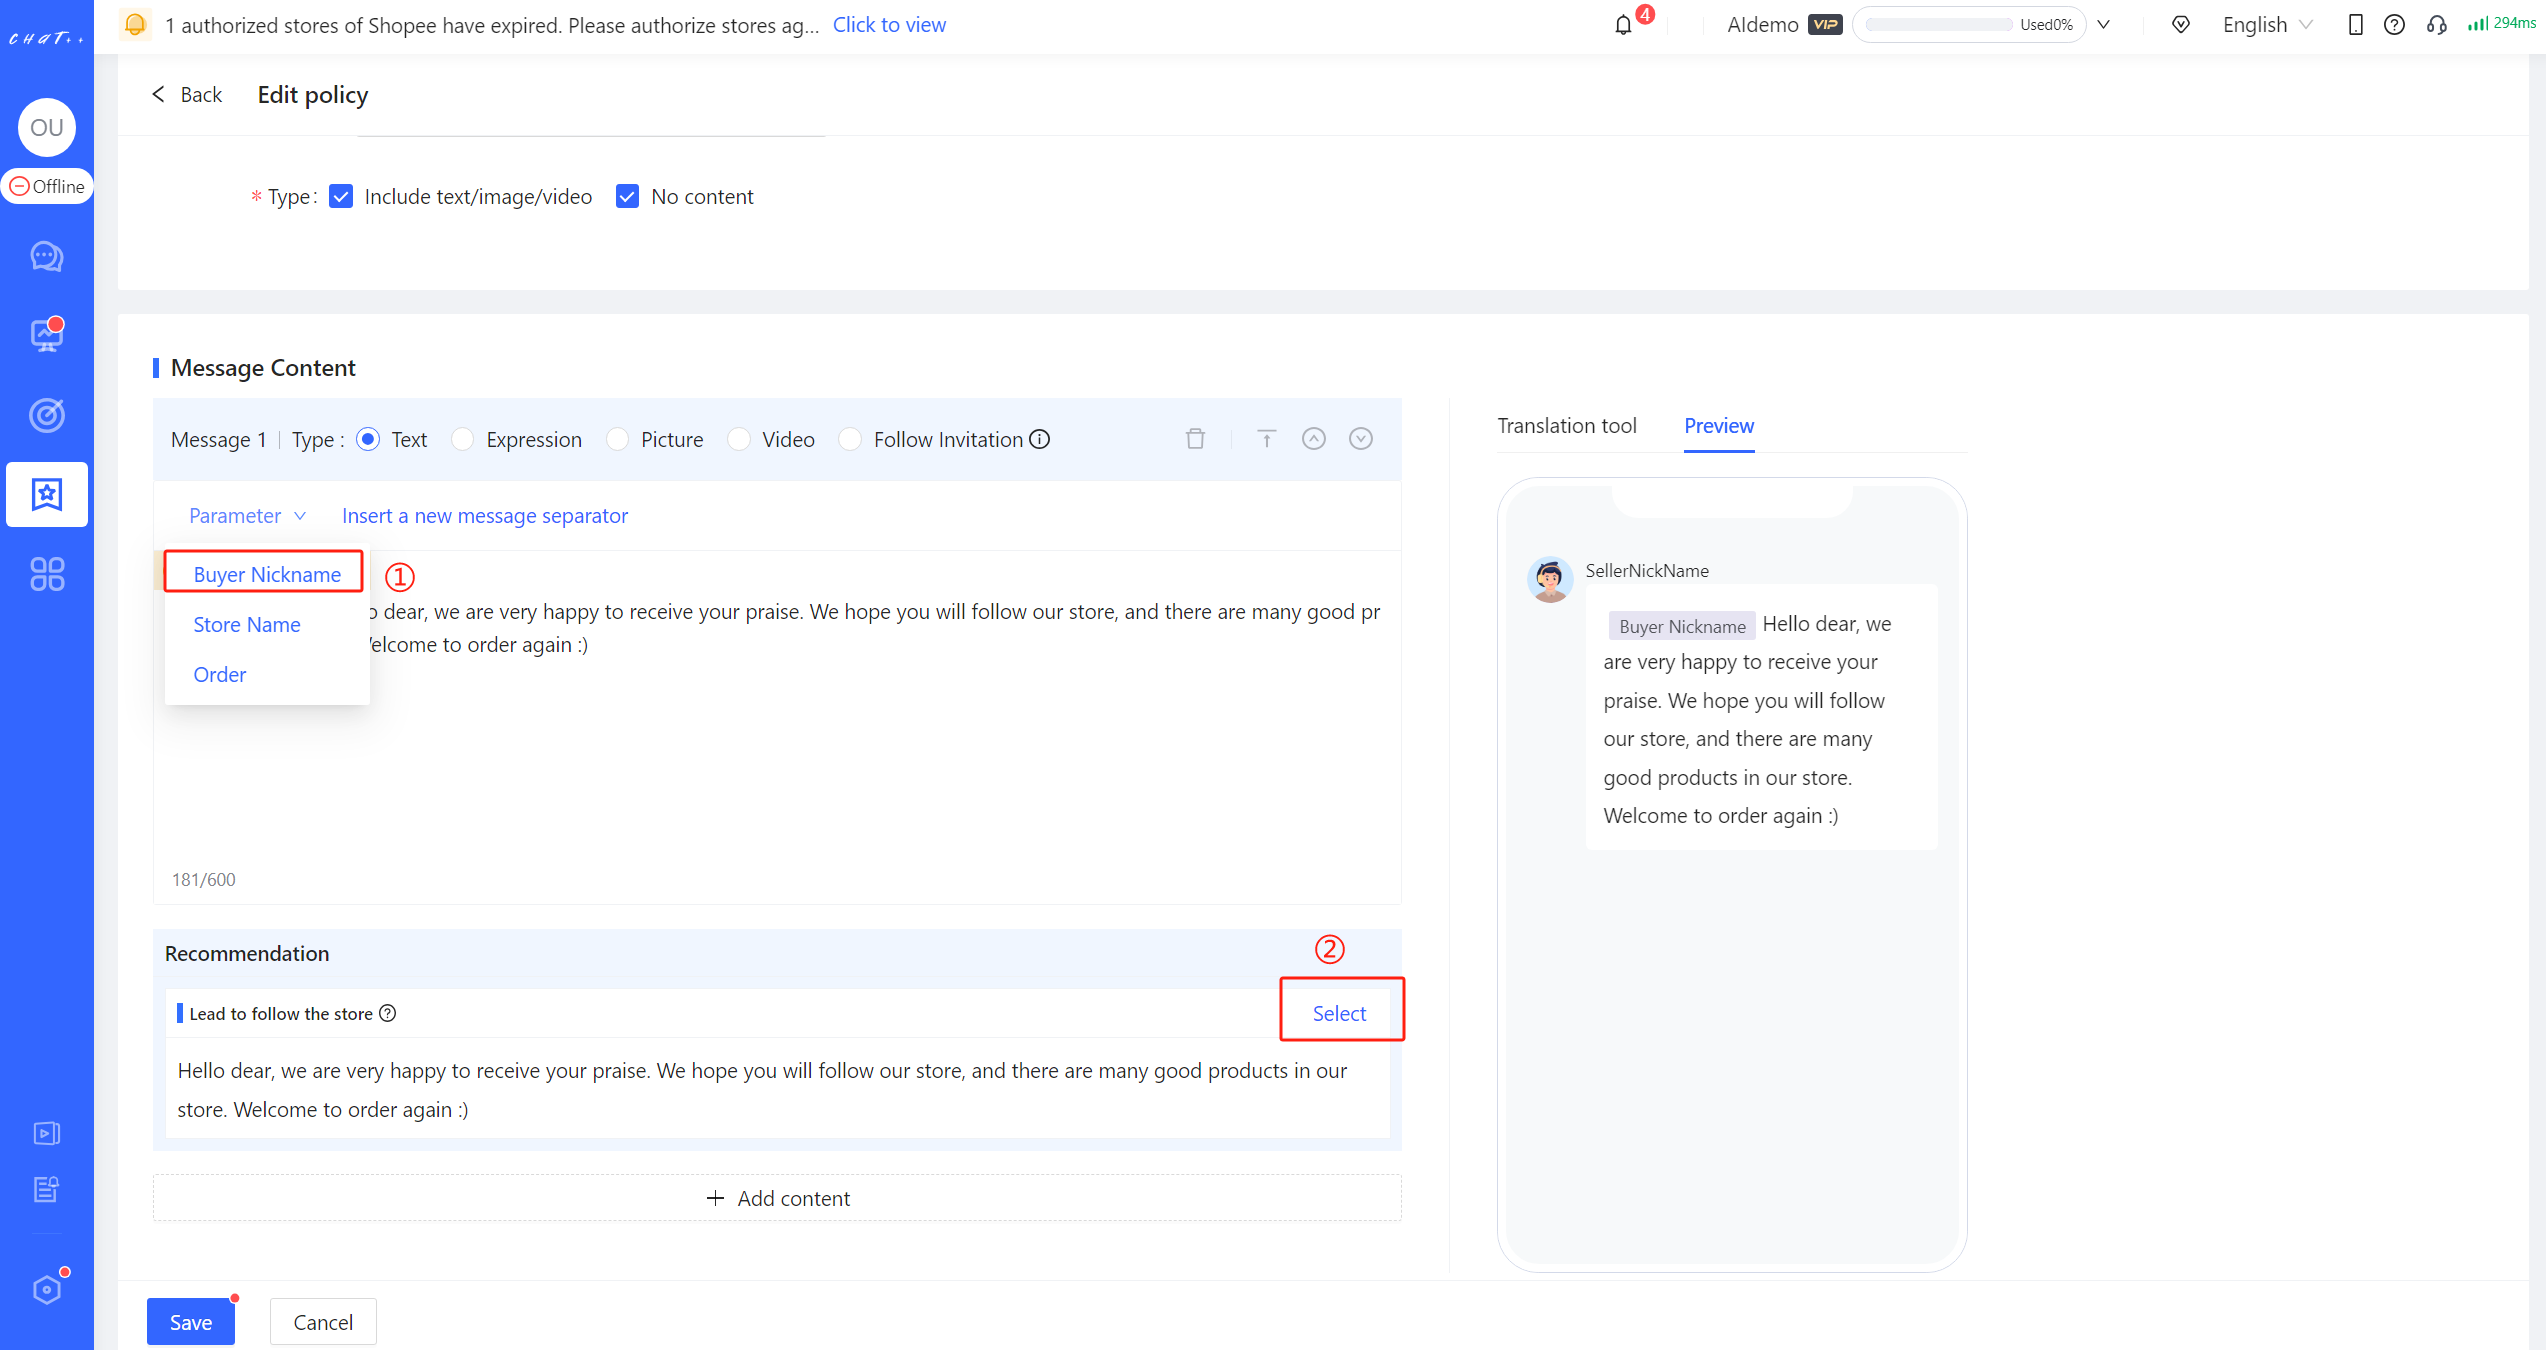
Figure 11
Diversified Message Type (Video/Text/Expression/Picture/Follow Invitation)
The message types in ChatPlusAI are diverse, including text, picture, expression, and video (shown as red box① in Figure below). Additionally, there's support for sending step-by-step guides for "Follow Invitations." The variety of message types allows the creation of eye-catching content to enhance the effectiveness of Positive Review Follow-up.
- When the store has set up rewards for followers, a step-by-step guide to follow the store and claim a discount voucher will be sent.
- If the store hasn't set up rewards for followers, a step-by-step guide to follow the store will be sent.
- You don't need to upload the step-by-step guide; the system will send a generic image marked with key steps and blurred-out irrelevant information.
On the right side of the page (red box② in in Figure below), you can preview the effect of sent content.
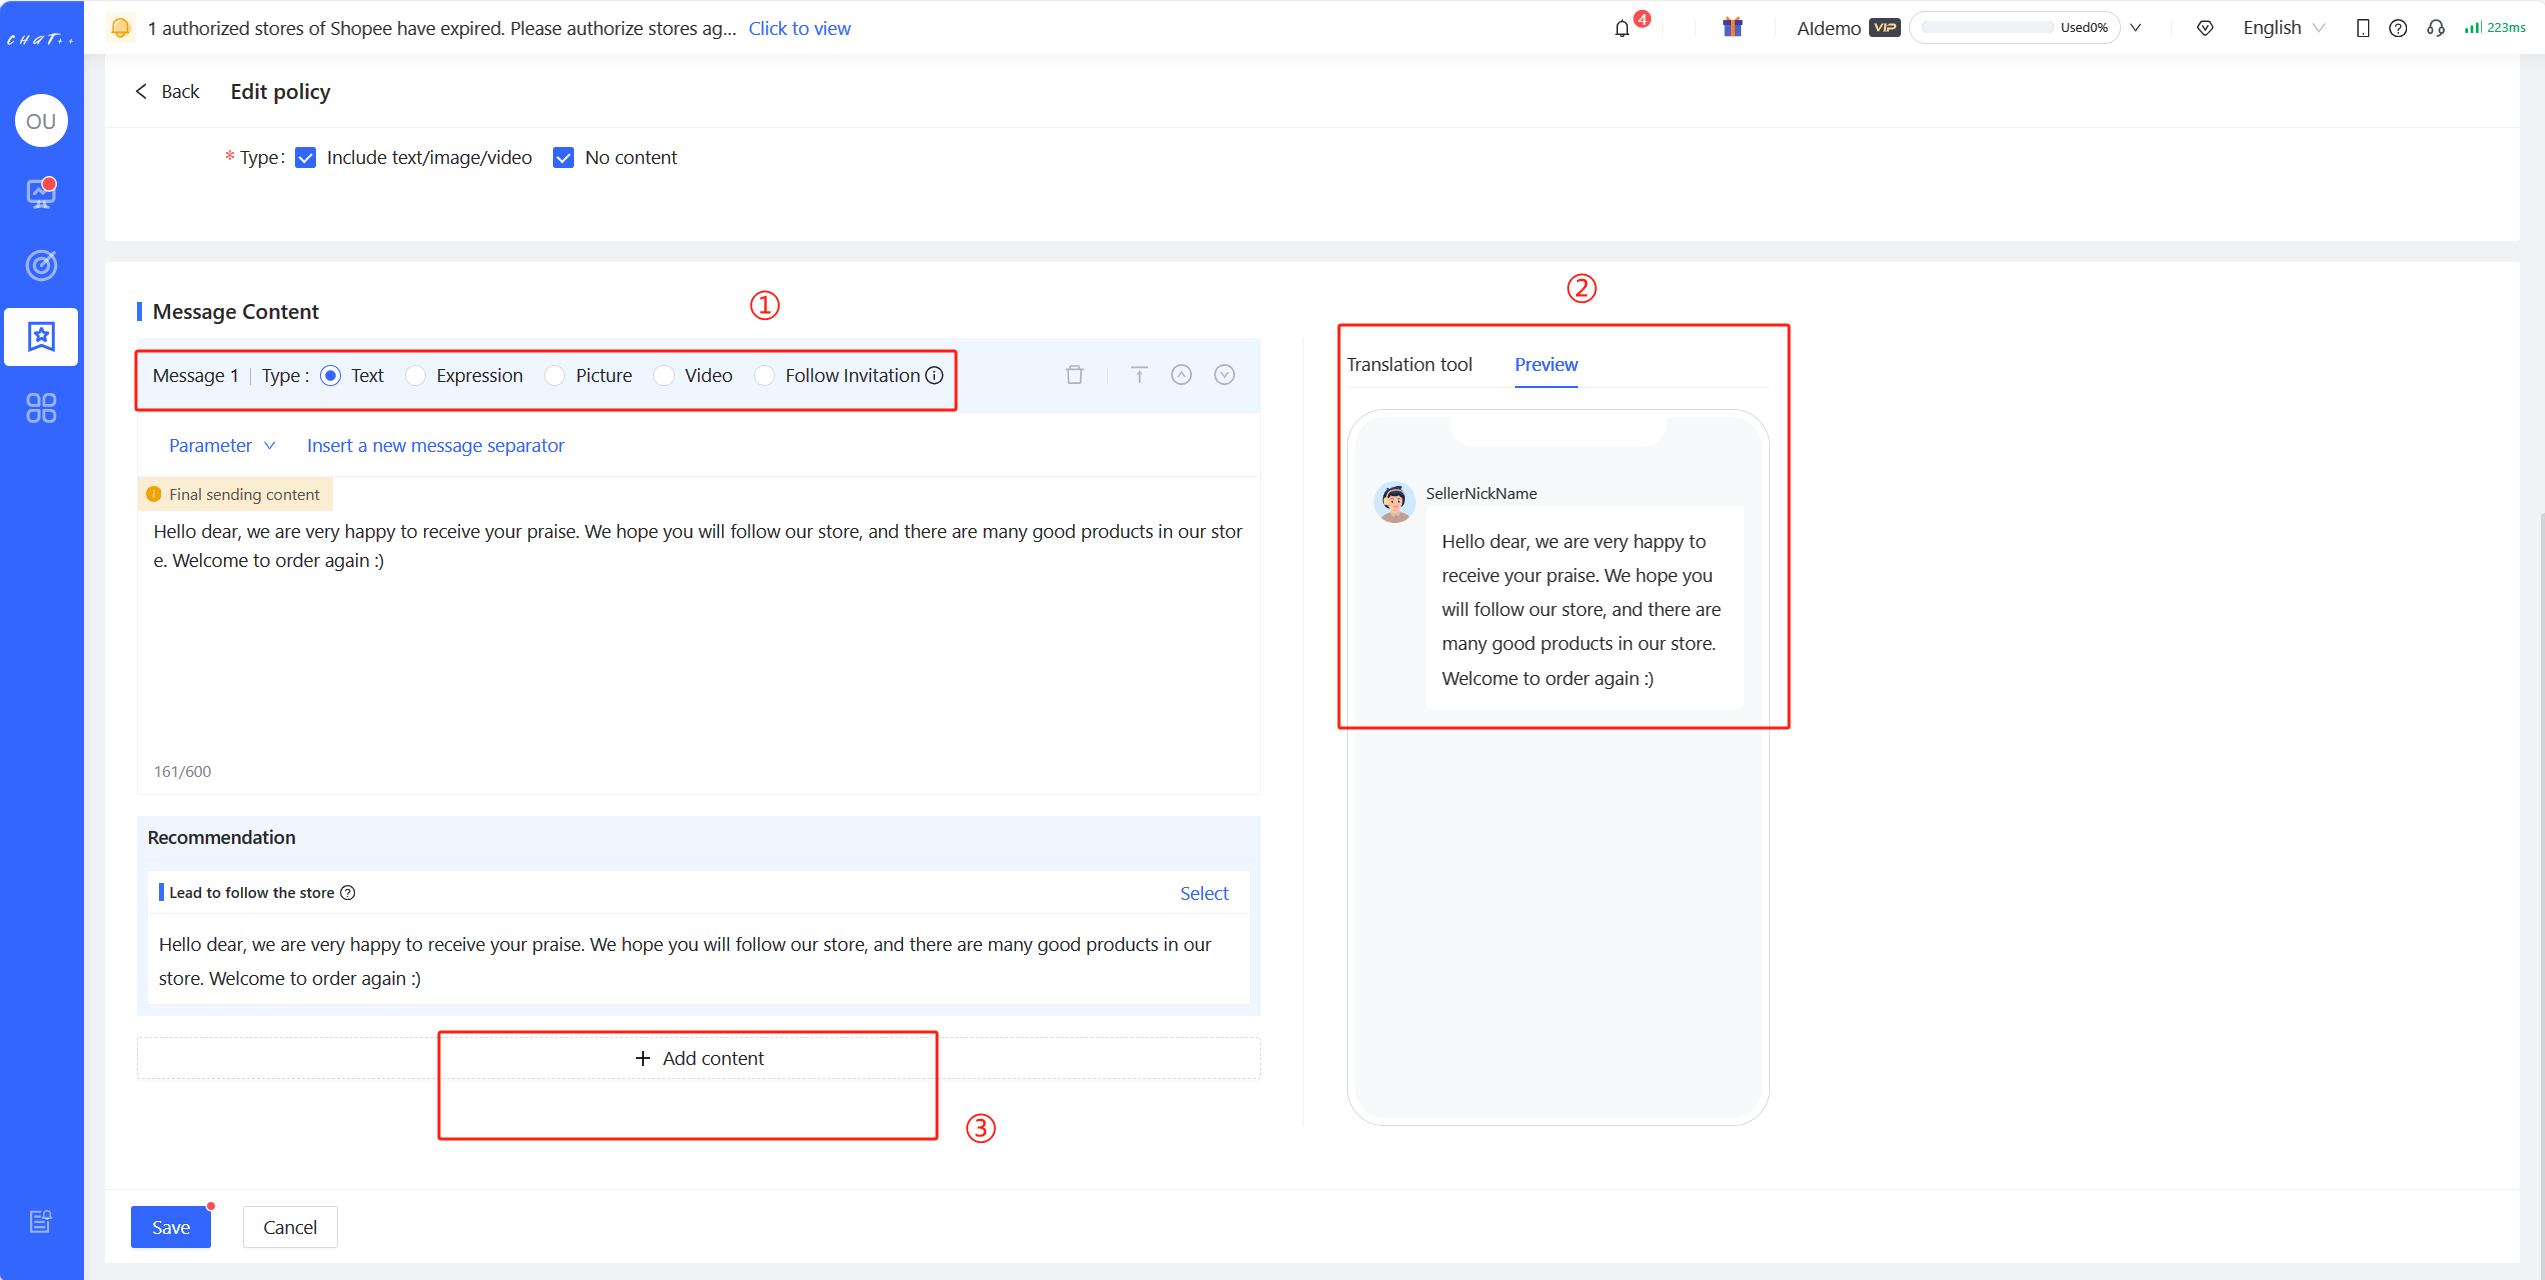
Figure 12
Quick Multilingual Translation
If message content includes text messages and you need to continuously adjust the content to find the optimal one, ChatPlusAI supports translating it into the current system language first. After modification, it can be translated back into site language. It facilitates quick adjustments to translated messages. When you want to adjust templates quickly, it allows you to translate the content already in site language back to system language with one click. After optimizing, you can then translate it back to the site language.
Click on "Translation tool," and after message content is automatically filled, click on "Translate content on the left" (red box① in Figure below). The final sending content on the left side (red box⑤ in Figure below) will be translated by default into current system language. If you need to translate it into other languages, you can switch the target language. The content translated into current system language is editable. When you edit the content in this area (red box② in Figure below), you can click "Translate content above" (red box③ in Figure below) to translate it into the site language. After translation, you can click "Copy to Final Sending Content" (red box④ in Figure below) to copy it. Click "Save" (red box⑥ in Figure below) to complete the configuration.
If message content doesn't need modification, ChatPlusAI supports translating the content directly into the site language.
Click on "Translation tool," and after message content is automatically filled, click on "Translate content above" (red box③ in Figure below). It will be directly translated into the site language. Click "Copy to Final Sending Content" (red box④ in Figure below), and the translated content will be automatically filled into the "Final sending content" area (red box⑤ in Figure below). Click "Save" (red box⑥ in Figure below) to complete the configuration.
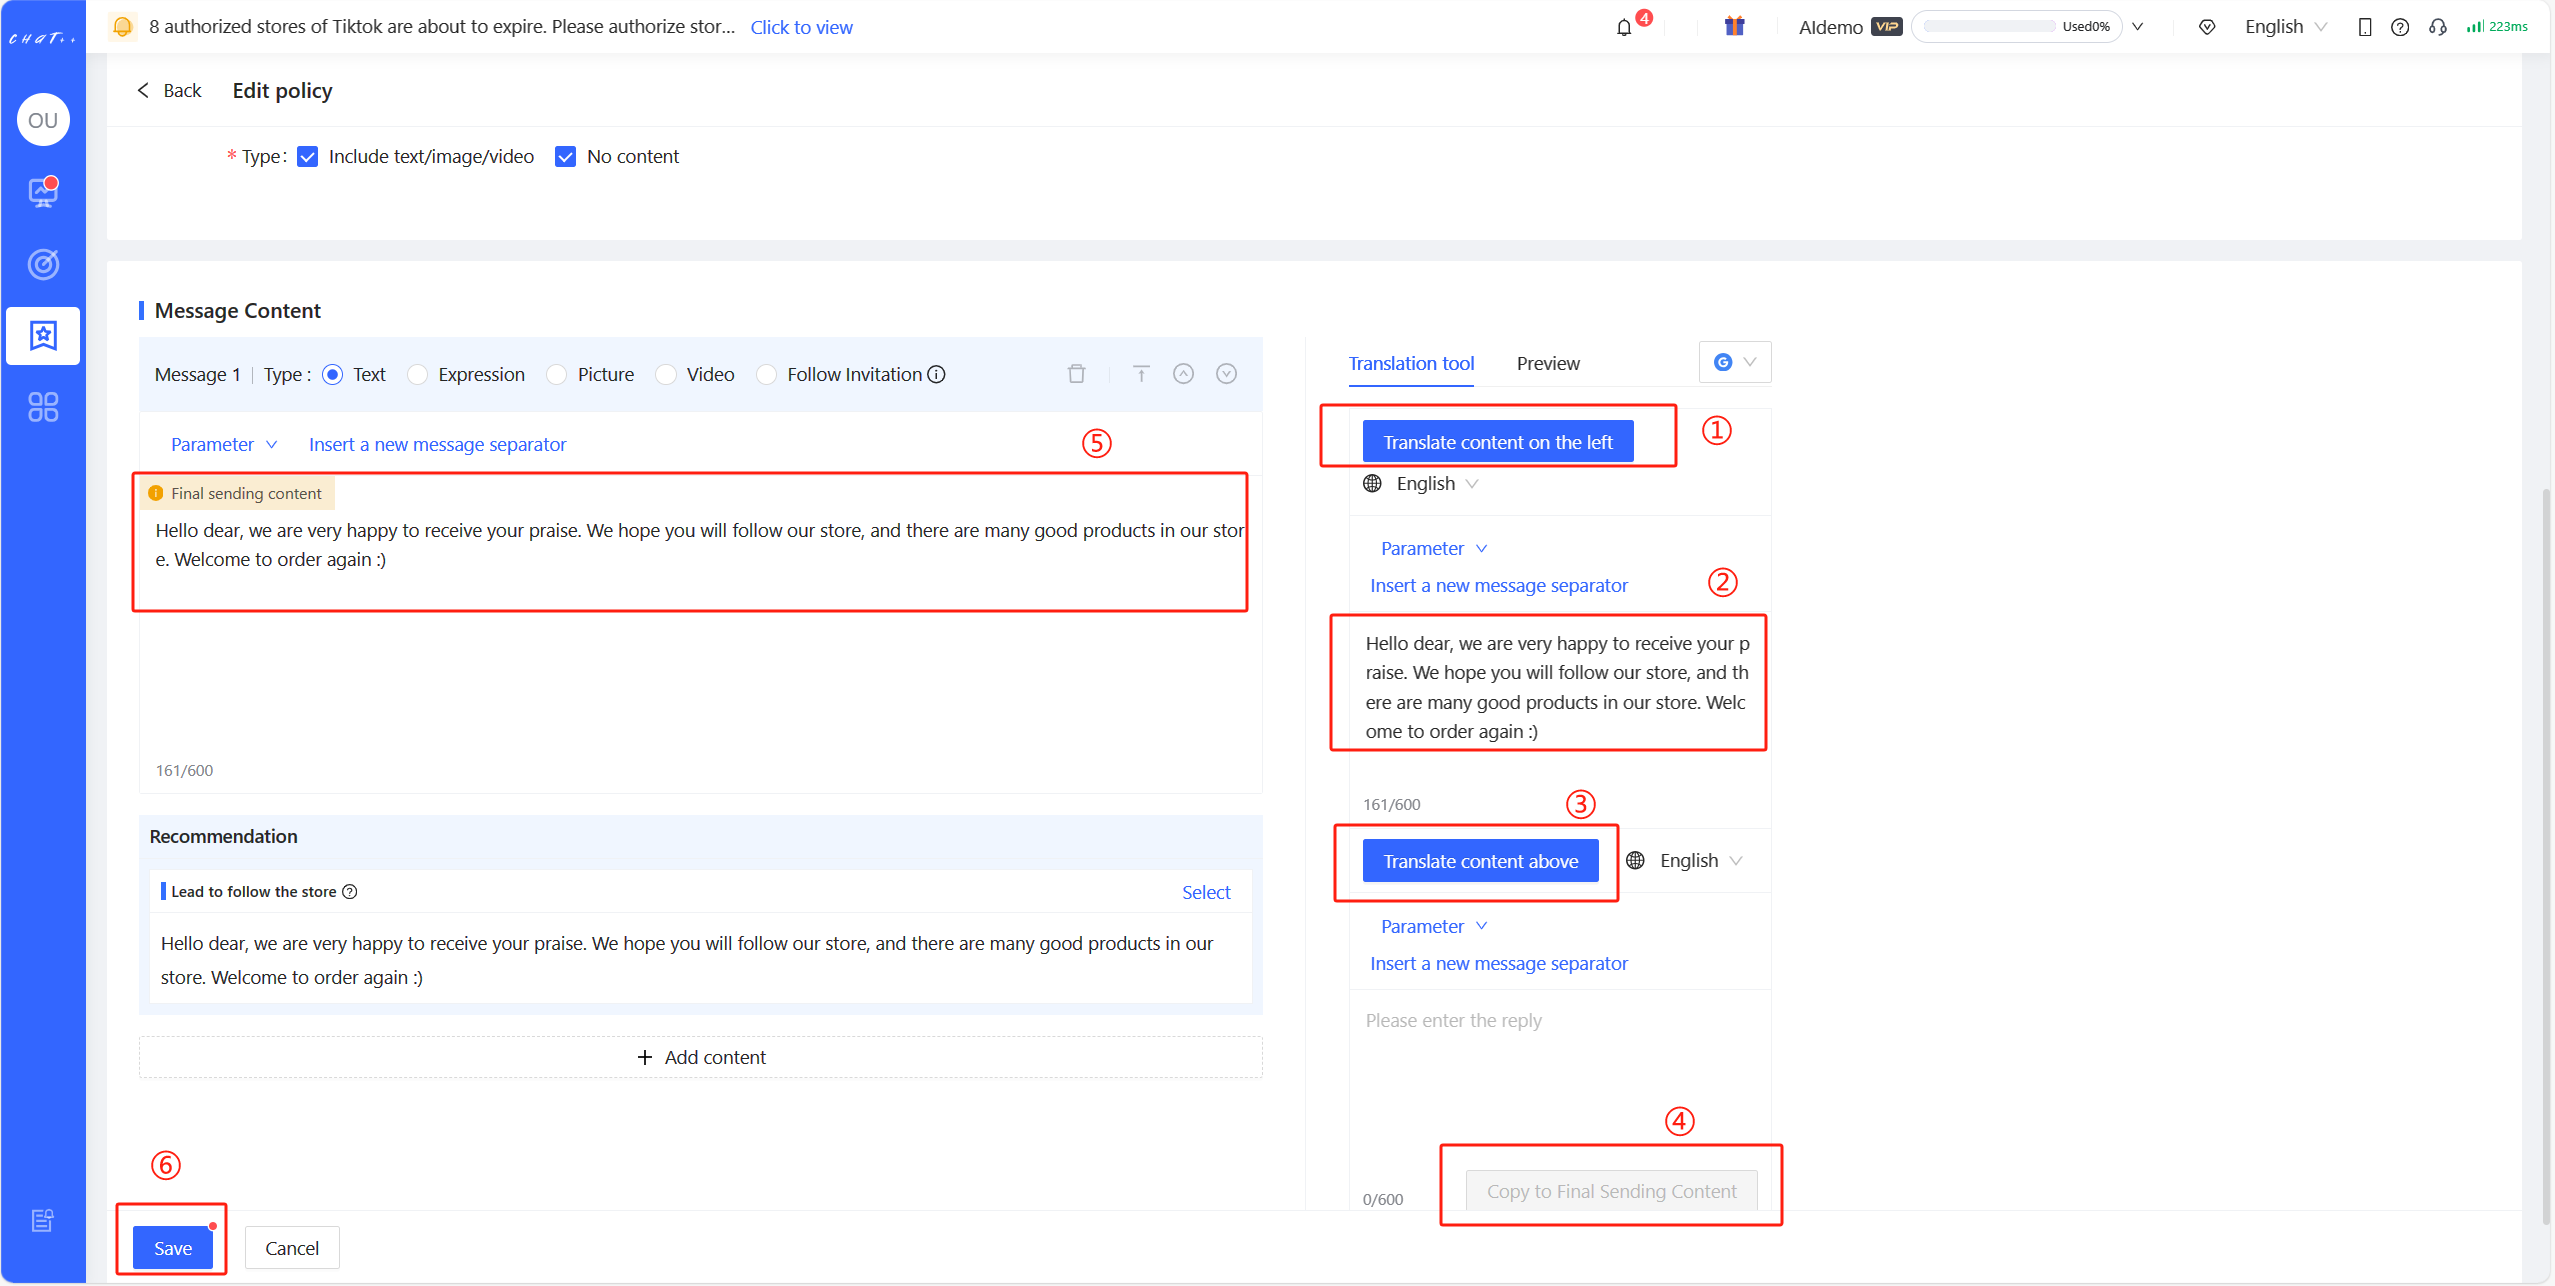
Figure 13
Flexible Reply Combination
ChatPlusAI supports the flexible combination of various Reply types to enhance the effectiveness of Positive Review Follow-up.
Click on "Add content" (red box③ in Figure 12) to add more replies.
In the same policy, each message type can only be selected once, i.e., "Add content" (red box③ in Figure 12) can be clicked up to 3 times at most. The types of Messages 1 (red box① in Figure 12) to Message 4 can only be selected once. If you want to send multiple messages of the same type, you can add them in the editing box of that message type. Please use the number of messages sent judiciously to avoid making buyers feel "disturbed" and ensure a good purchasing experience.
- Text: Send multiple messages through clicking "Insert a new message separator" (red box① in Figure 15);
- Expression: Support sending up to 3 at the same time;
- Picture: Support sending up to 10 at the same time, supporting jpg/png/jpeg formats, image size < 10M;
- Video: Support sending up to 10 at the same time, video length 10s~60s, supporting mp4 format, video size < 30M.
In the example below
- Product scope is the store's "Pick SKU": sunscreen
- Set the number of messages to 2: the 1st message is "Follow Invitation"; the 2nd message is a text message. In the message, buyer's nickname is added by clicking "Parameter" (red box③ in Figure 14). Due to limitations on the type of message, "Text" message type cannot be selected again. More text messages can be added by clicking "Insert a new message separator" (red box① in Figure 14).
On the right side of the page (red box③ in Figure 15), you can see the preview of sending content. The order of sending different messages can be adjusted.(red box④ in Figure 13)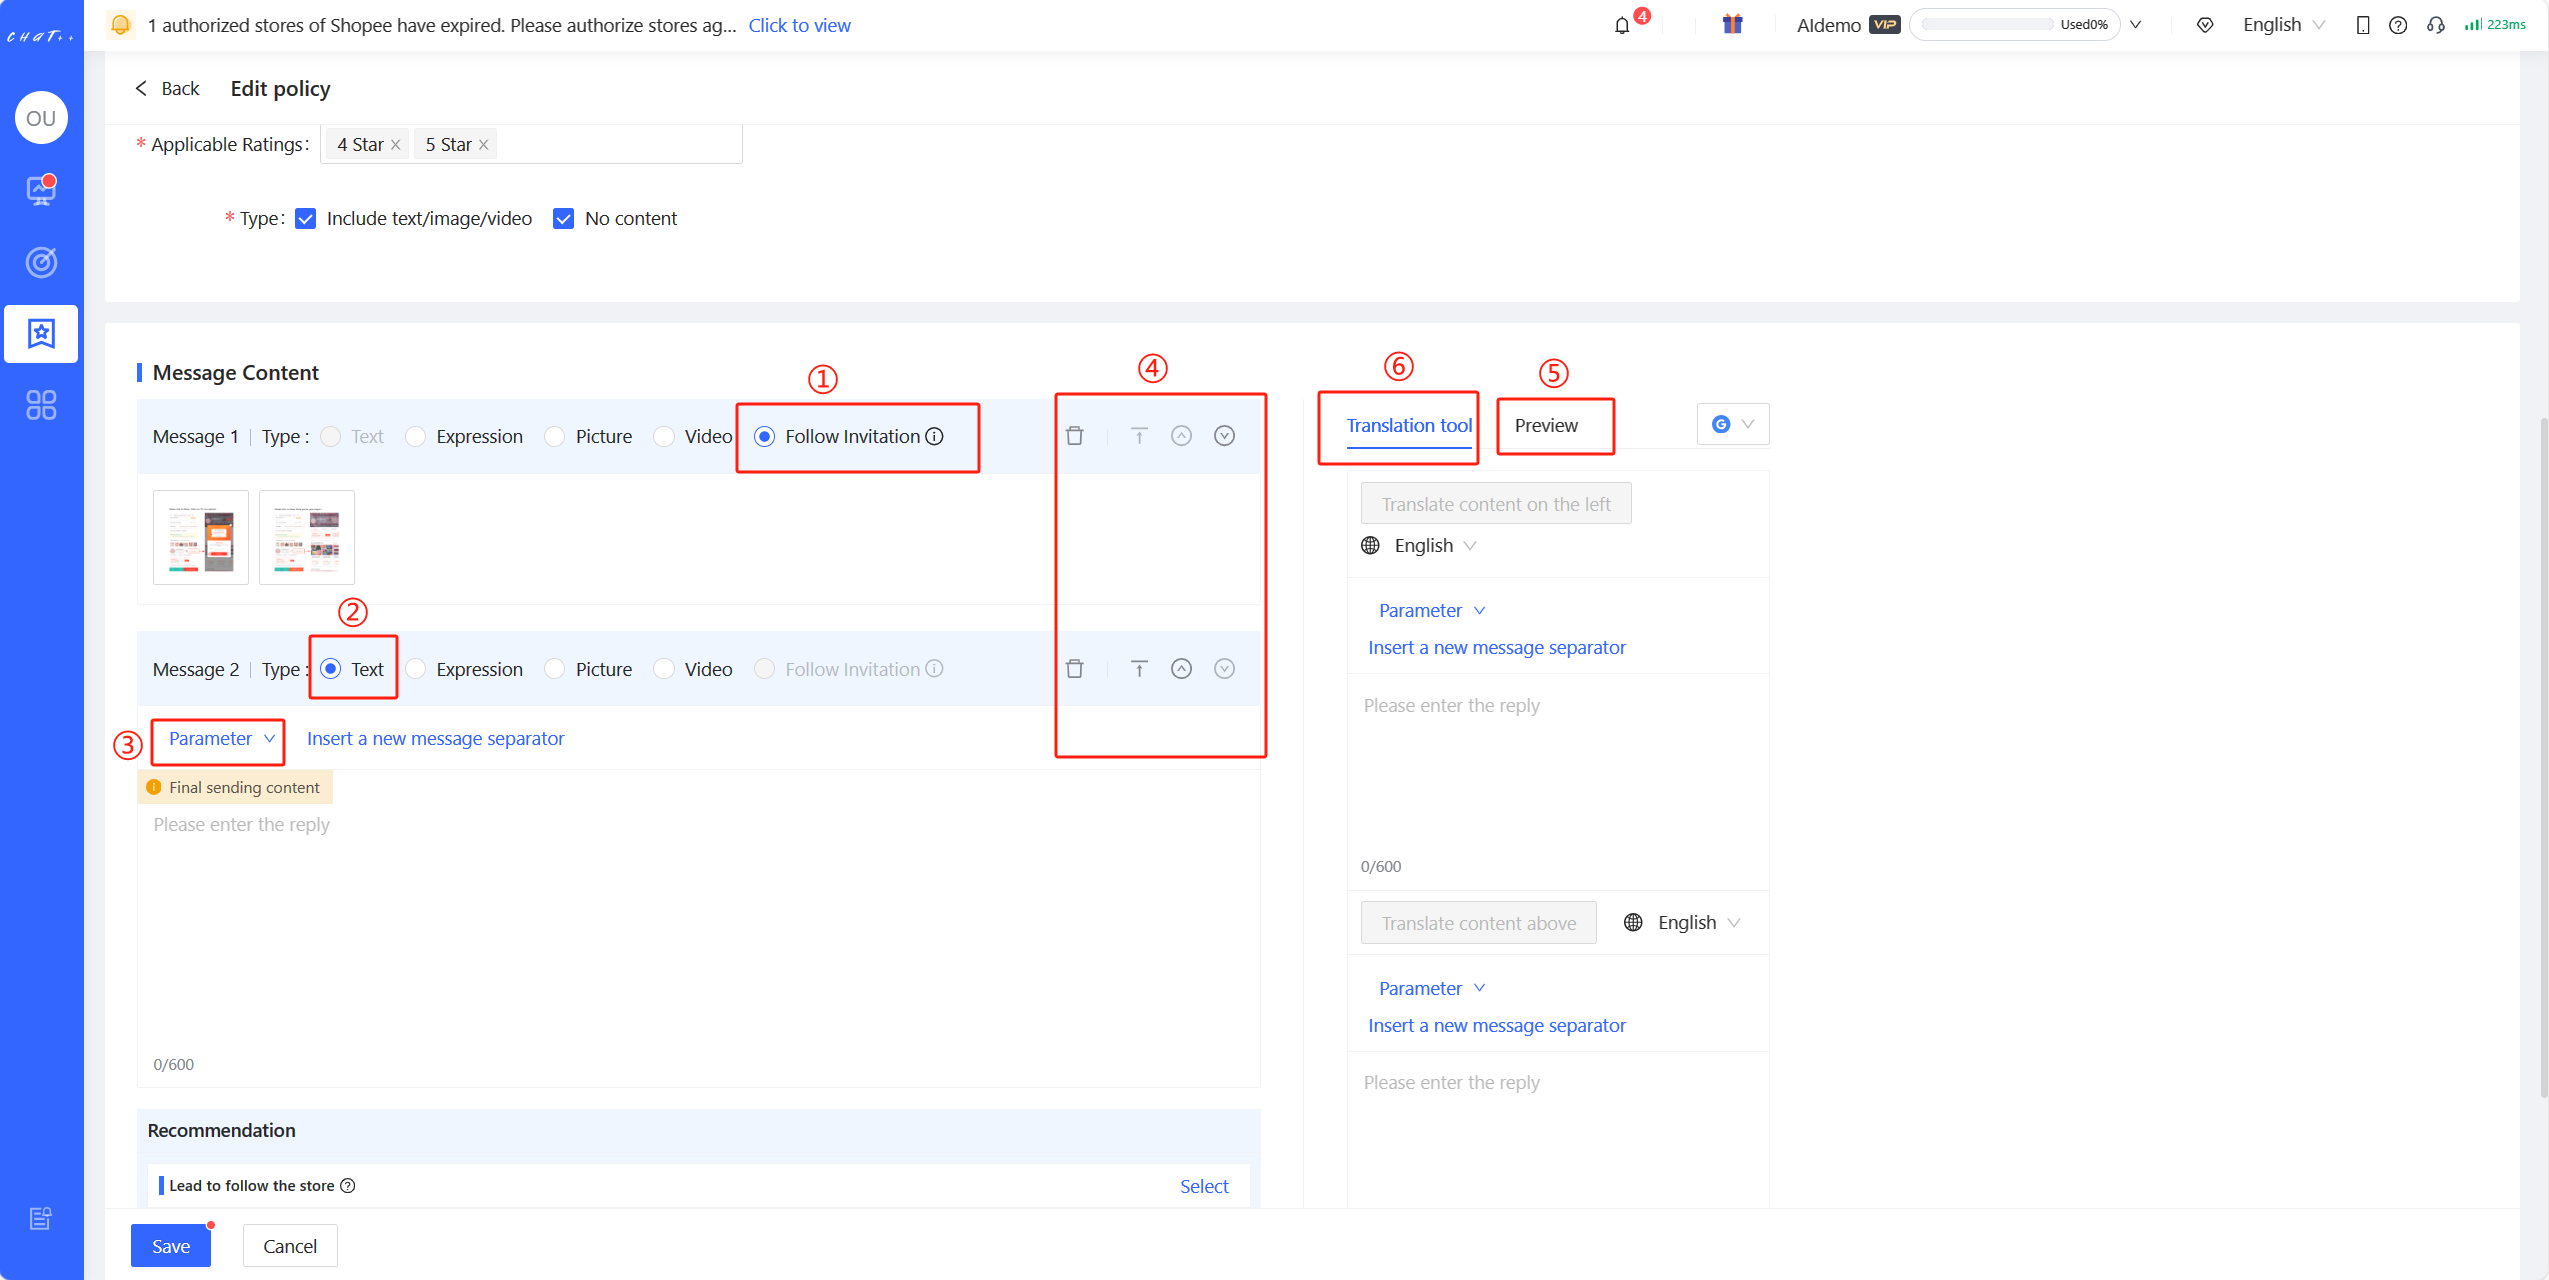
Figure 14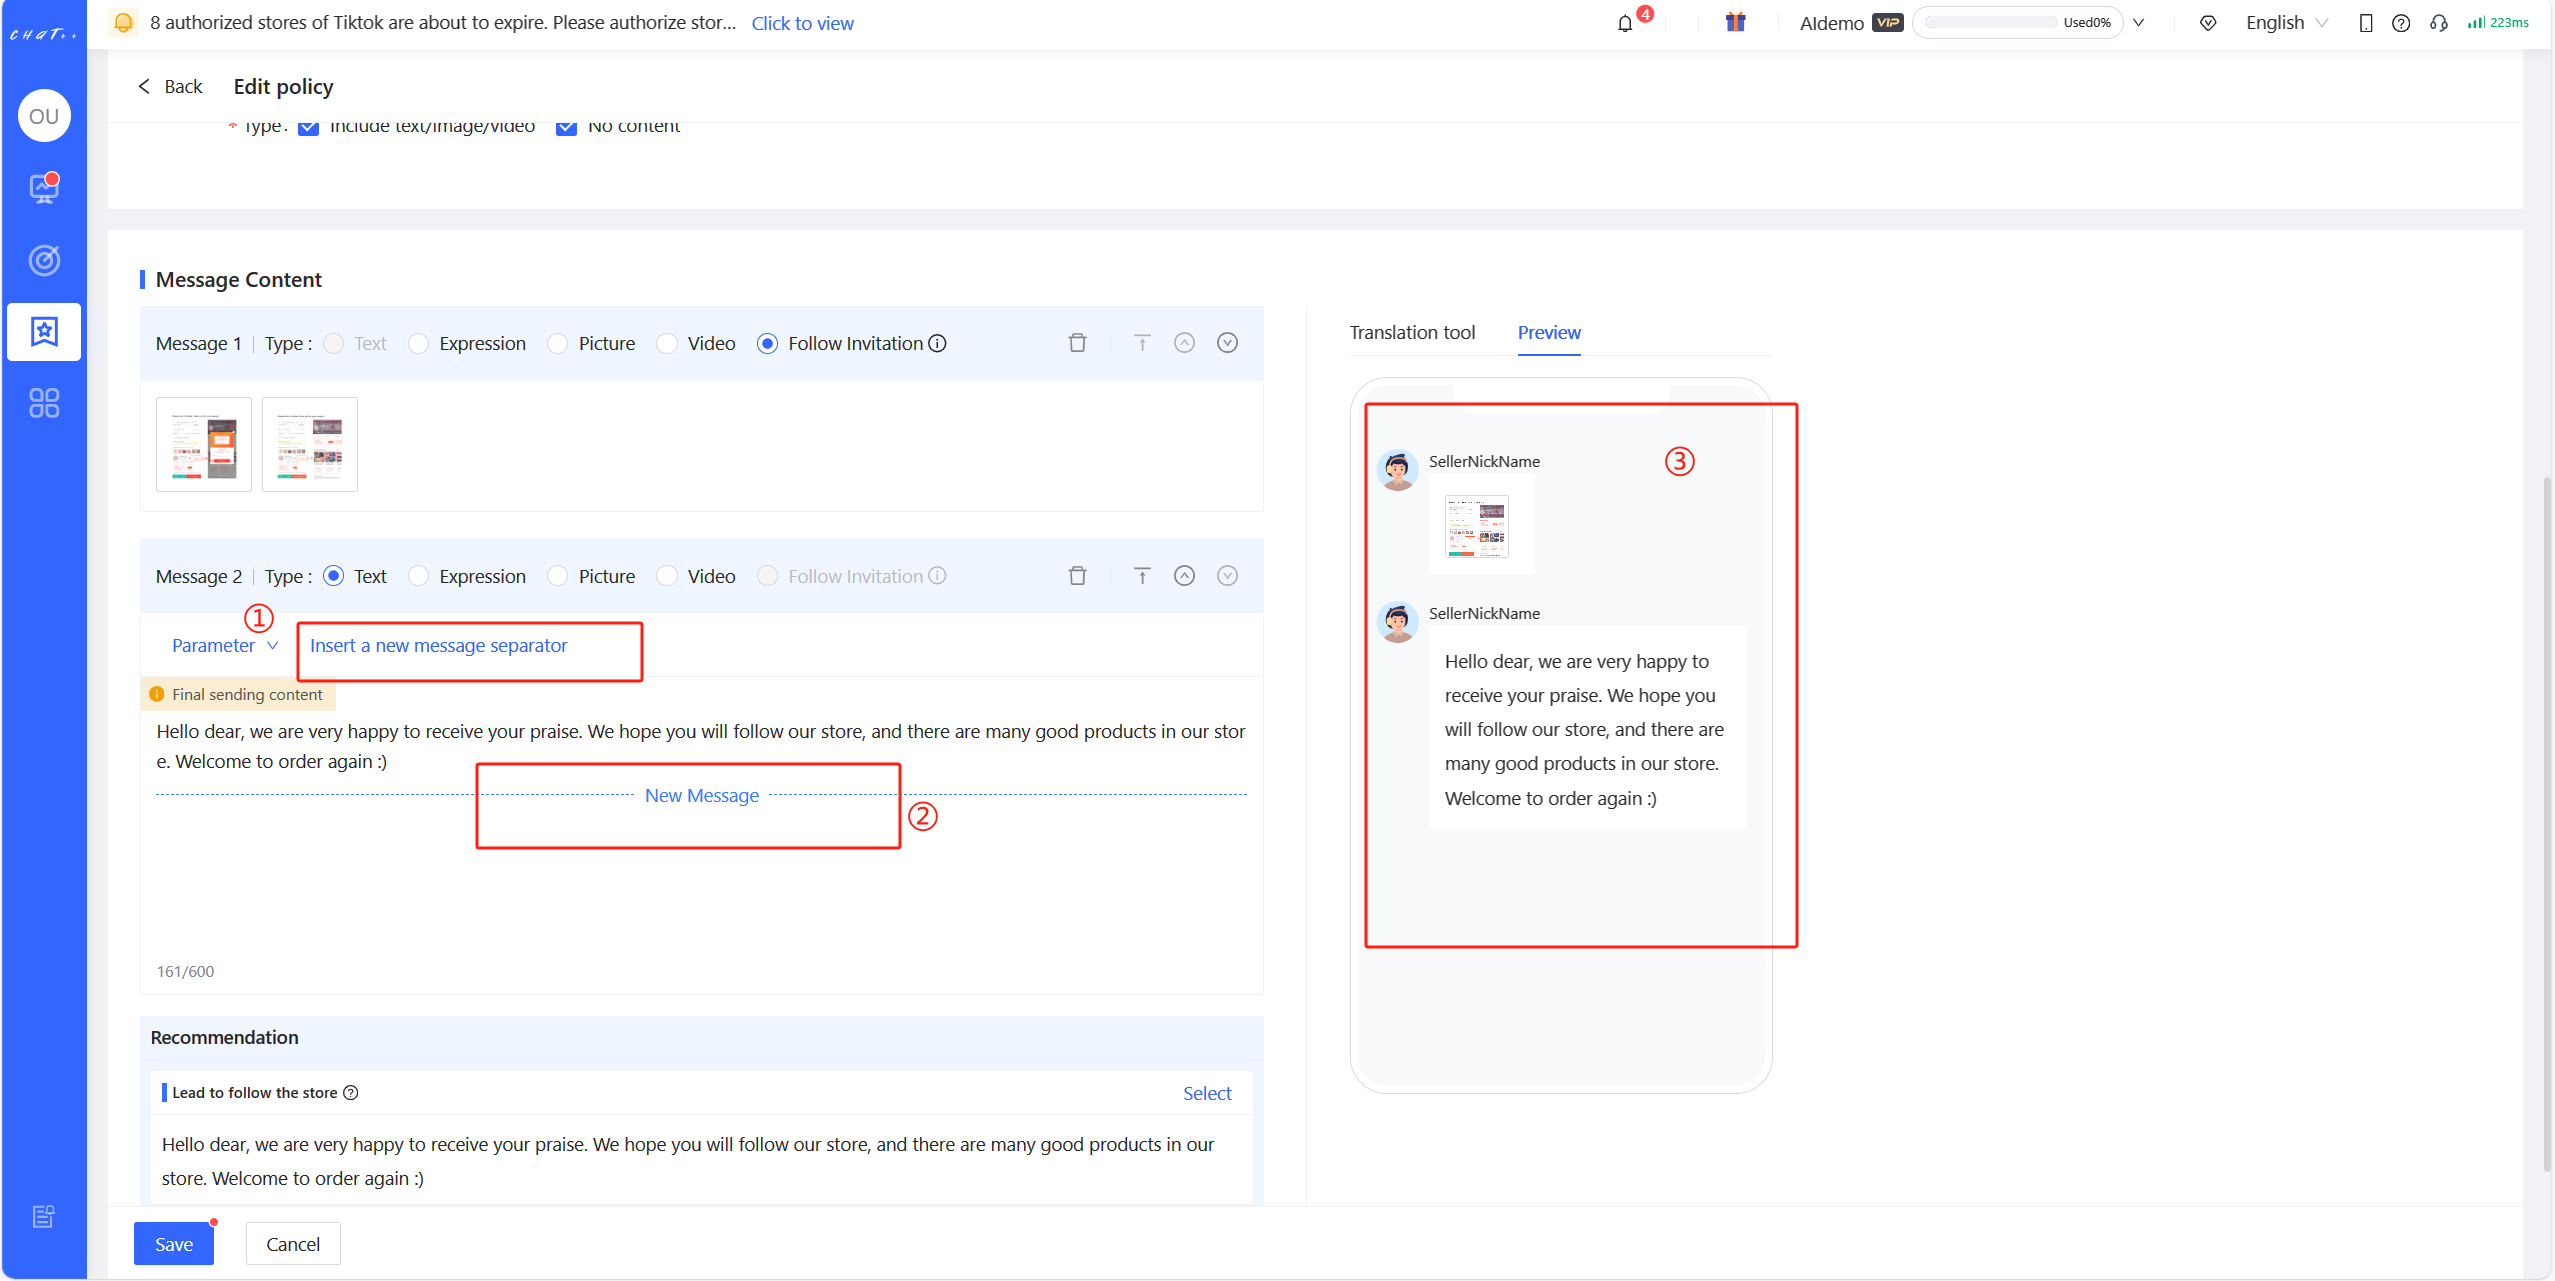
Figure 15
Diversified Reply Configuration
Add Policy
Click on "Add policy" (red box① in Figure 16) to set diverse policy branches for a task, achieving different replies for the same task between different products, for different positive reviews, and in different forms of content. It will ensure the best effect.
"Policy Branch Execution Sequence" Description
When there are multiple effective policies in the Policy Branch Collection, the system will execute the first policy that matches the conditions according to execution sequence (red box② in Figure 16), and subsequent policies will not be executed.
Hover the cursor over the "More" position to change the execution order through "Top/Up/Down/Bottom" (red box③ in Figure 16).
Note: If none of the policy match, the message of Positive Review Follow-up will not be sent.
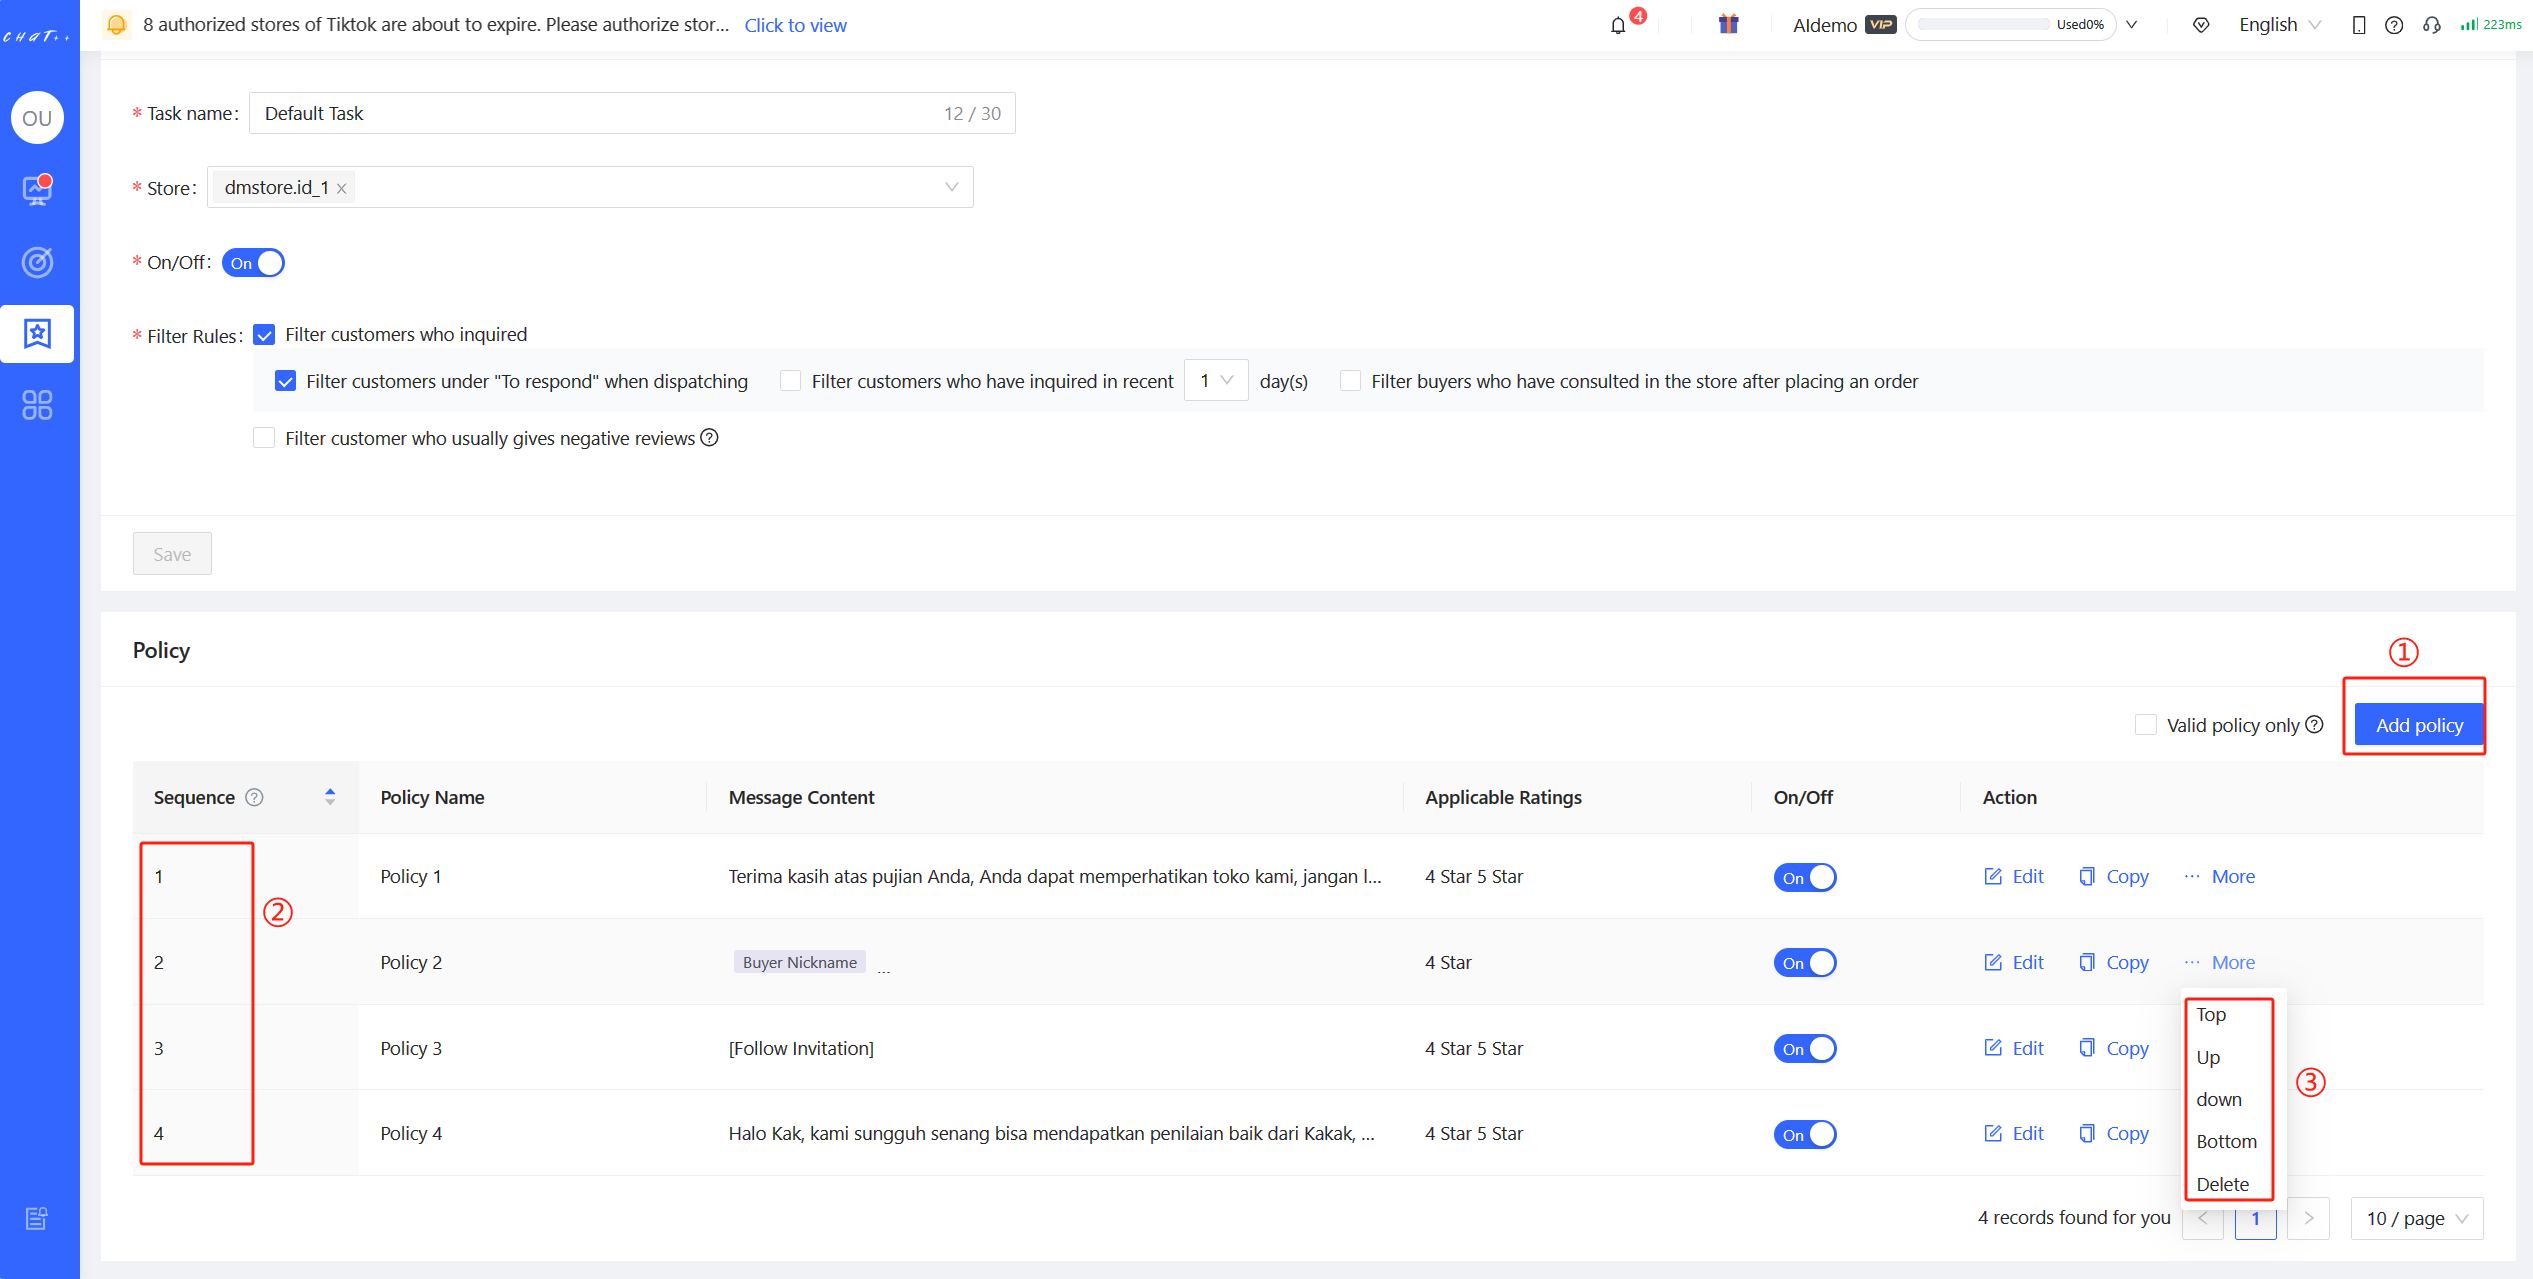
Figure 16
Add Task
Click on "Add Task" (red box in Figure 17) to set different tasks for different stores, achieving differentiated Positive Review Follow-up for different stores. In a new task, the added store will be removed from the applied stores of other tasks, ensuring that "one store will not exist in two tasks simultaneously" to avoid sending different Positive Review Follow-up messages to buyers multiple times.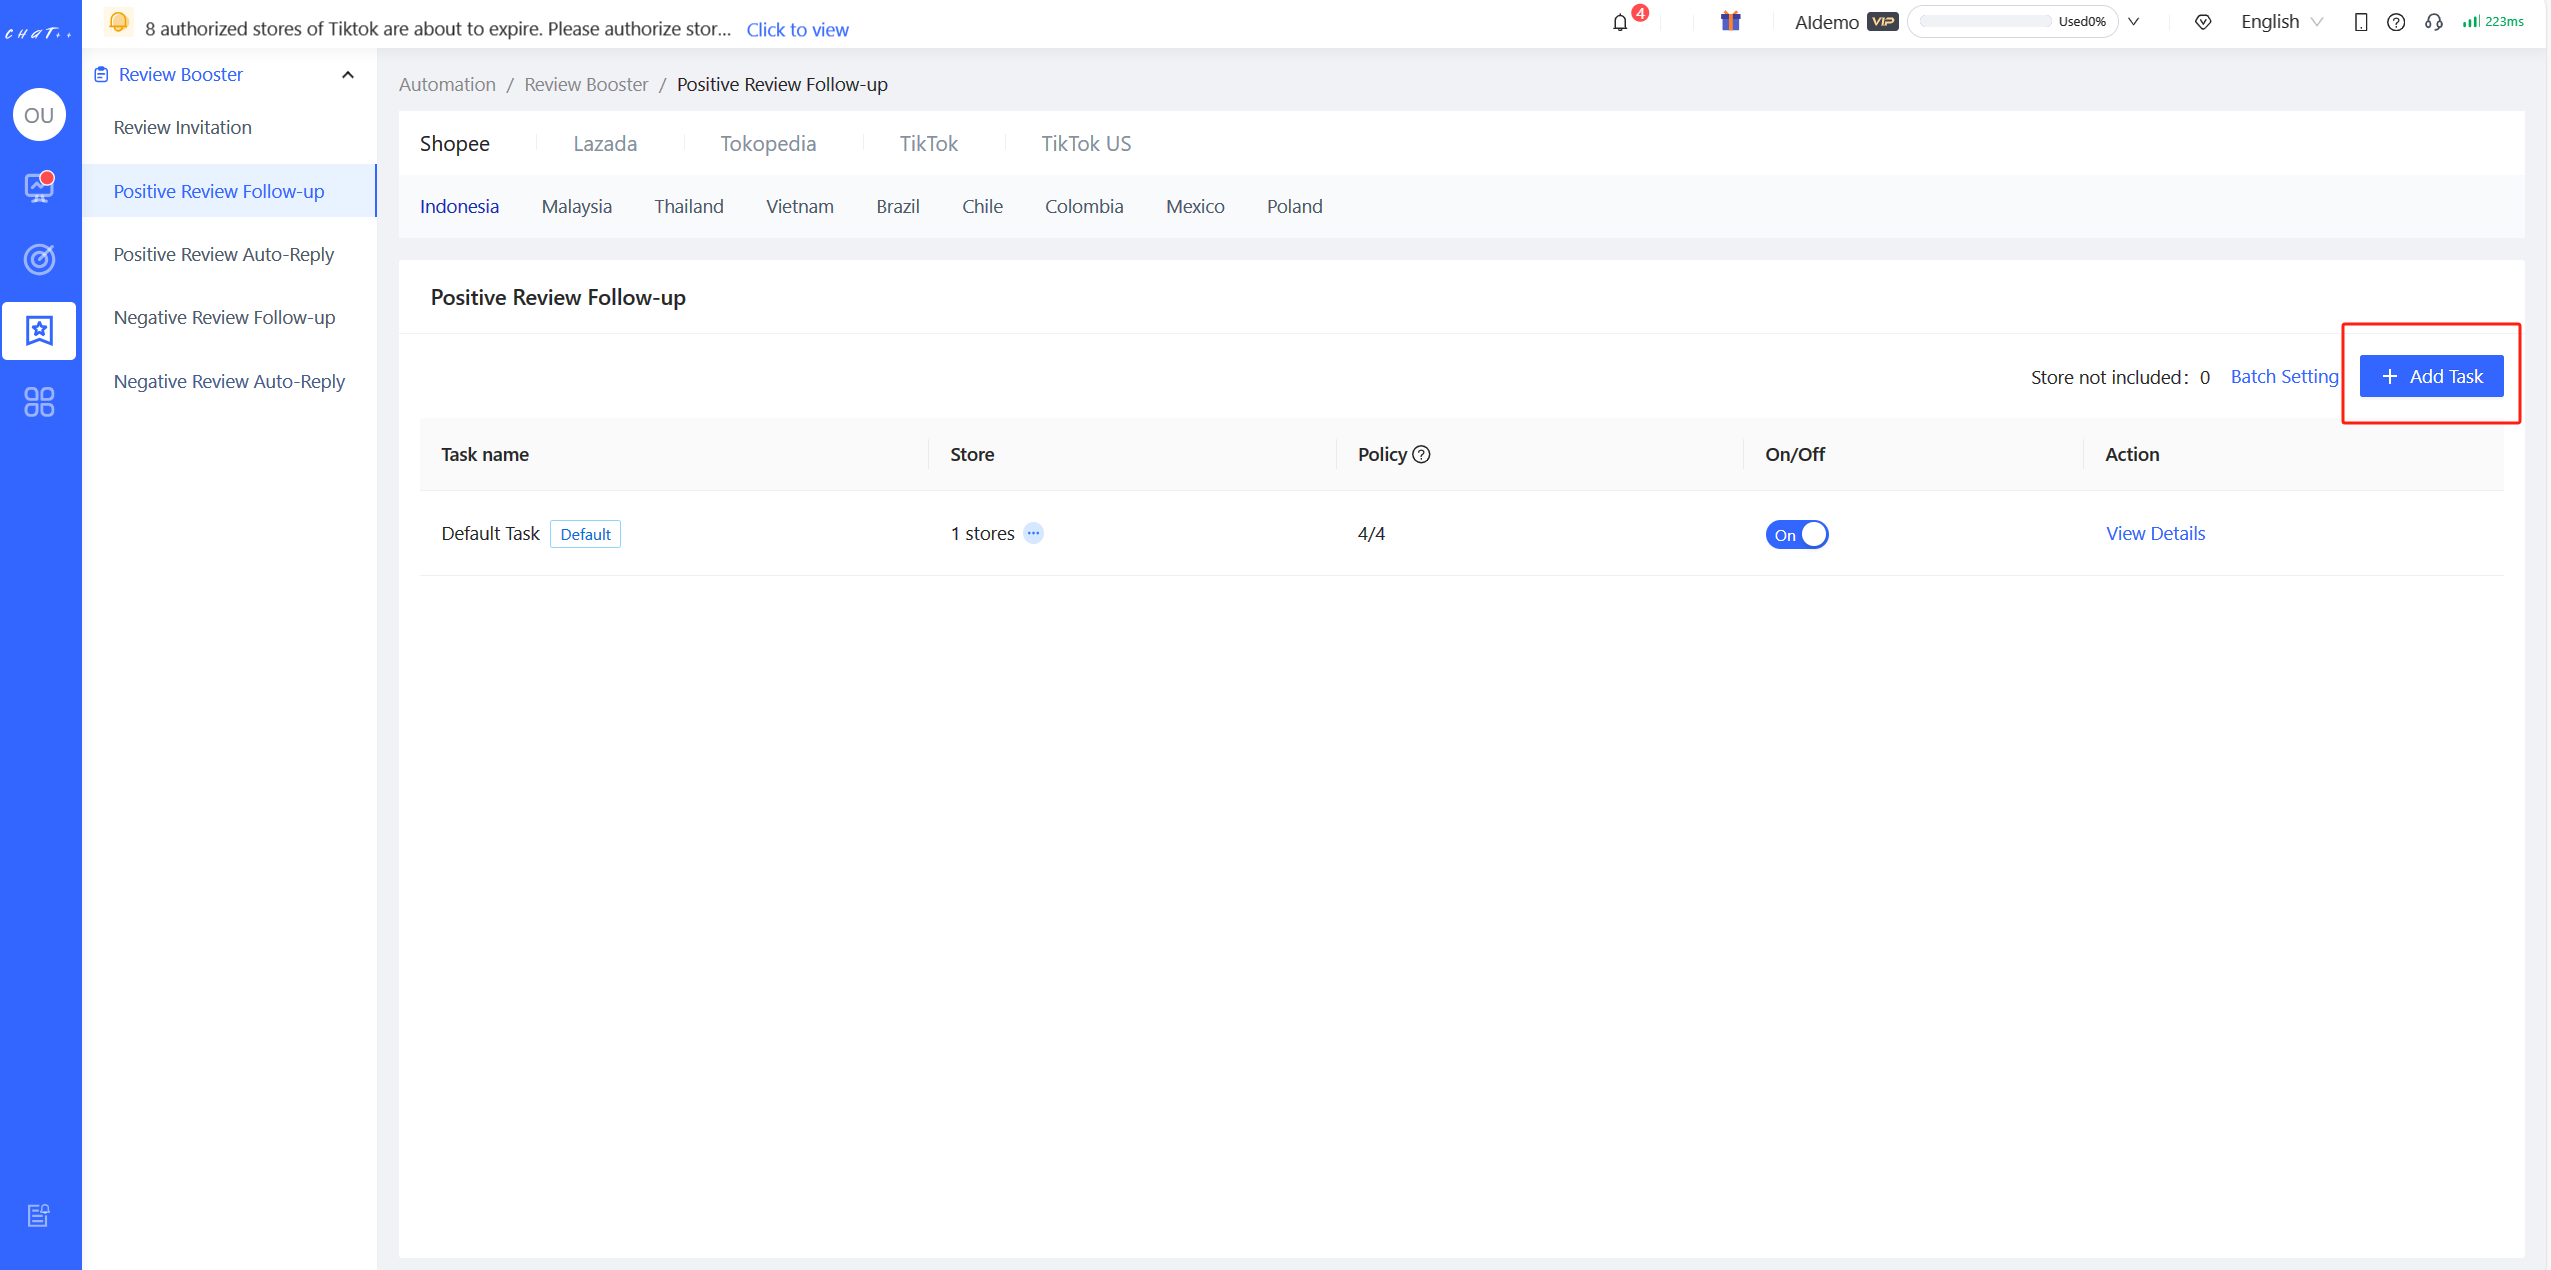
Figure 17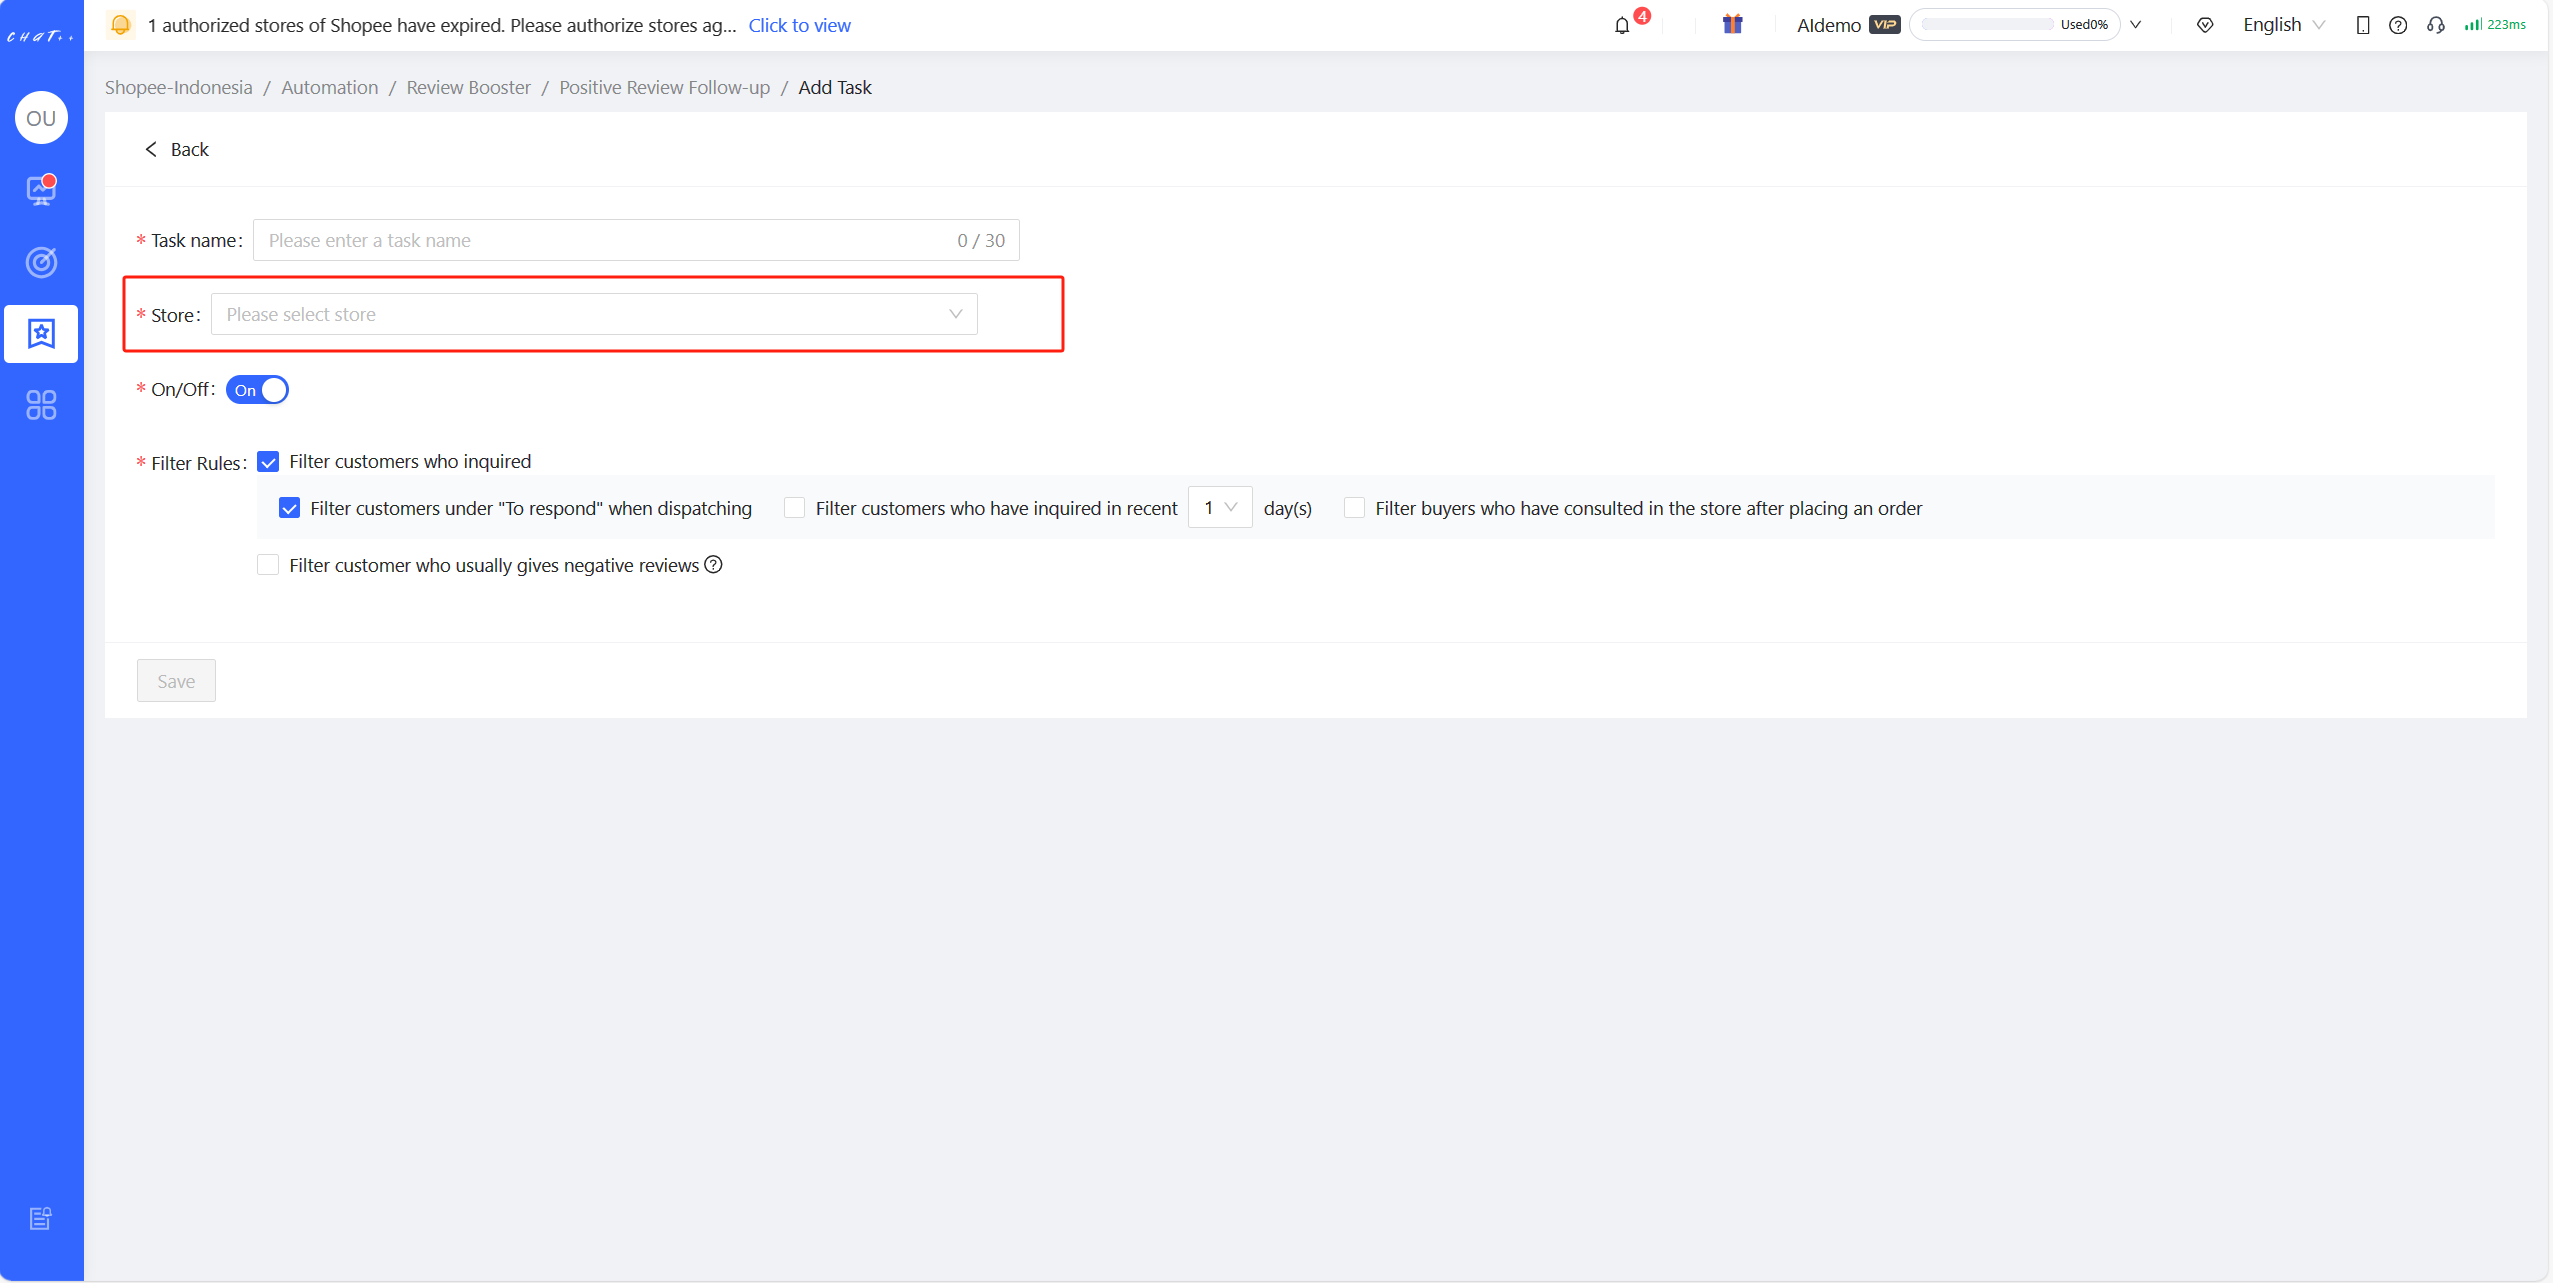
Figure 18
Attention
1、Positive Review Follow-up tasks can be customized differently for marketplaces, currently supporting Shopee only, Lazada, Tokopedia and TikTok support are coming soon, stay tuned.
2、Each country site of the marketplace has its own Positive Review Follow-up task, you need to configure them respectively.
FAQ
Q1:How to Quickly Adjust/View the Message Content?
A1:In the process of adjusting templates, you need to translate the content that has already been translated into the site language back into system language to view and adjust it. After adjustments, it can be translated back into the site language. In this process, continuous adjustments to templates may be needed to achieve optimal results. To simplify your operation steps, ChatPlusAI has added a translation tool to the configuration page.
- View the original message content (templates translated from site language to system language)
Go to the configuration page: click on "Automation" in the left menu bar, then select "Review Booster" and "Positive Review Follow-up". Choose the marketplace and site, find the Positive Review Follow-up task that needs to be viewed/adjusted, and click on the "View Details" button on the right side of the task. Find the policy that needs to be viewed/adjusted.
To view: click on 【「Edit 」→「 Translation tool** 」→「 Translate content on the left **」】to view the message translated from site language to system language. (By default, it is translated into the current system language. If you need to translate it into other languages, you can switch to the target language.)
- Adjust and translate the Message Content
Edit and adjust: After clicking on 「Translate content on the left」, the message in the site language will be translated into current system language and automatically filled in the area below (red box ② below). You can make edits and adjustments in that area.
Once the adjustments are completed, translate into site language: Click on【「Translate content above 」(red box ③ below) and then click on 「Copy to Final Sending Content」 ( red box ④ below). This will allow you to quickly fill in the content translated into site language in the final sending area (red box ⑤ below).
Configuration: Click on「Save」 (red box ⑥ below) to successfully configure.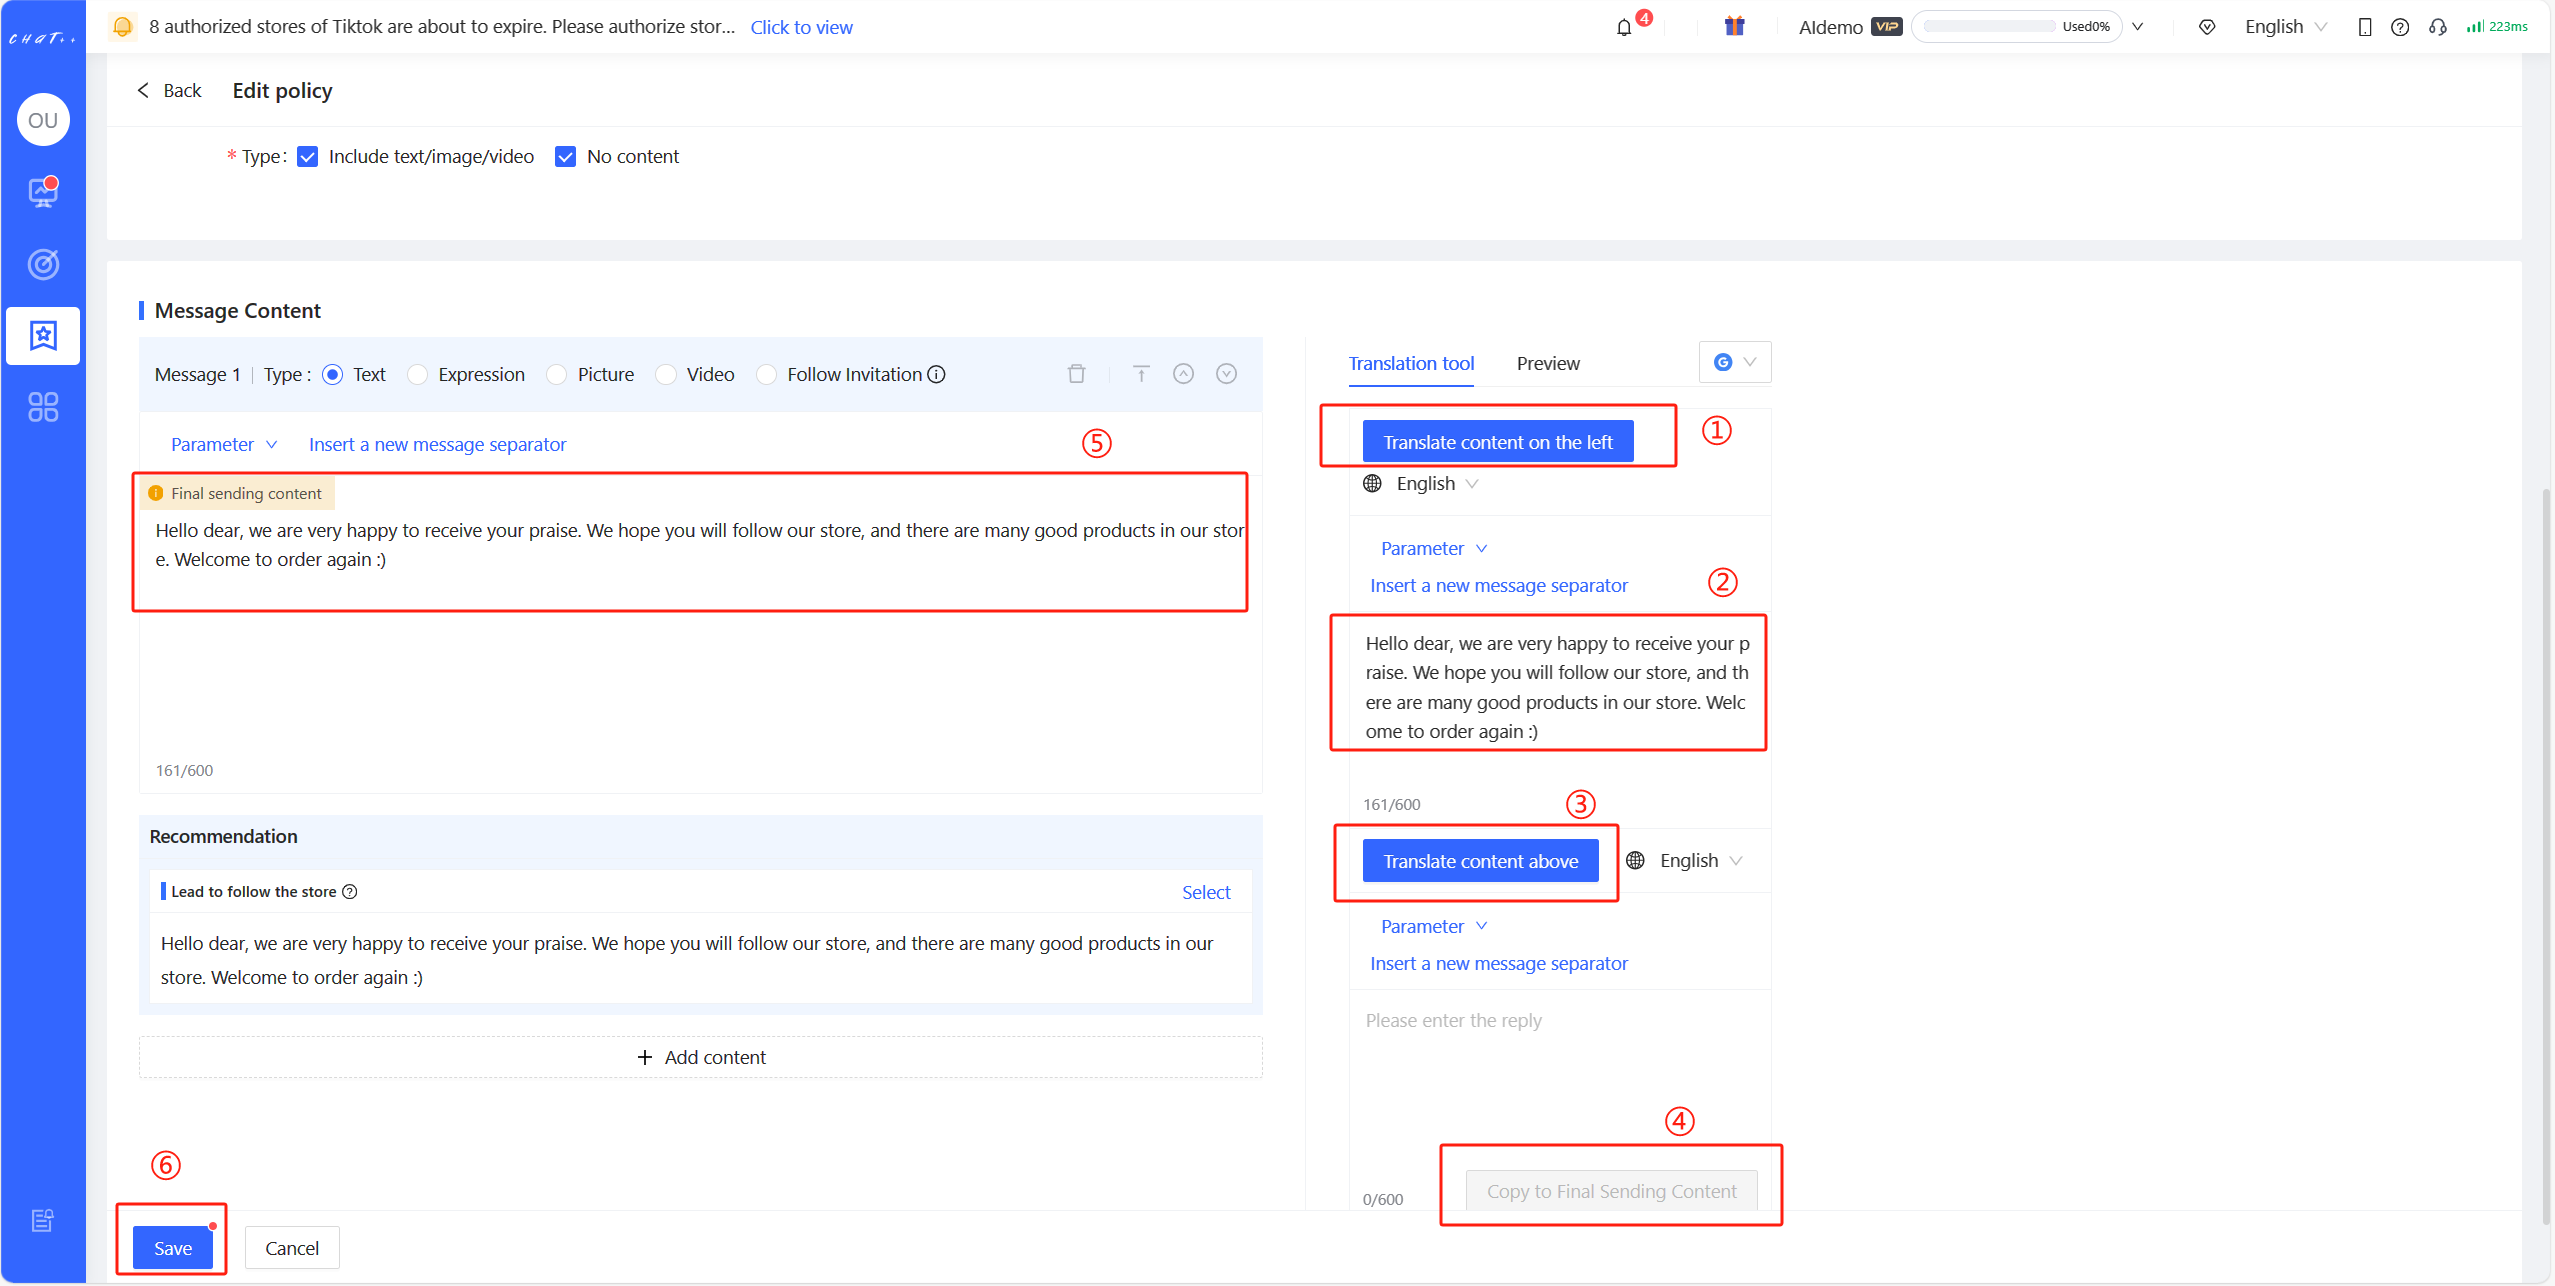
Figure 19
Positive Review Auto-Reply
💡After a buyer gives a positive review for a purchased product, the system will automatically reply to express gratitude to the buyer and attract more people to make purchases.
Show cases
- Positive Review Auto-Reply is triggered, after a buyer gives a 5-star rating for the purchased product.
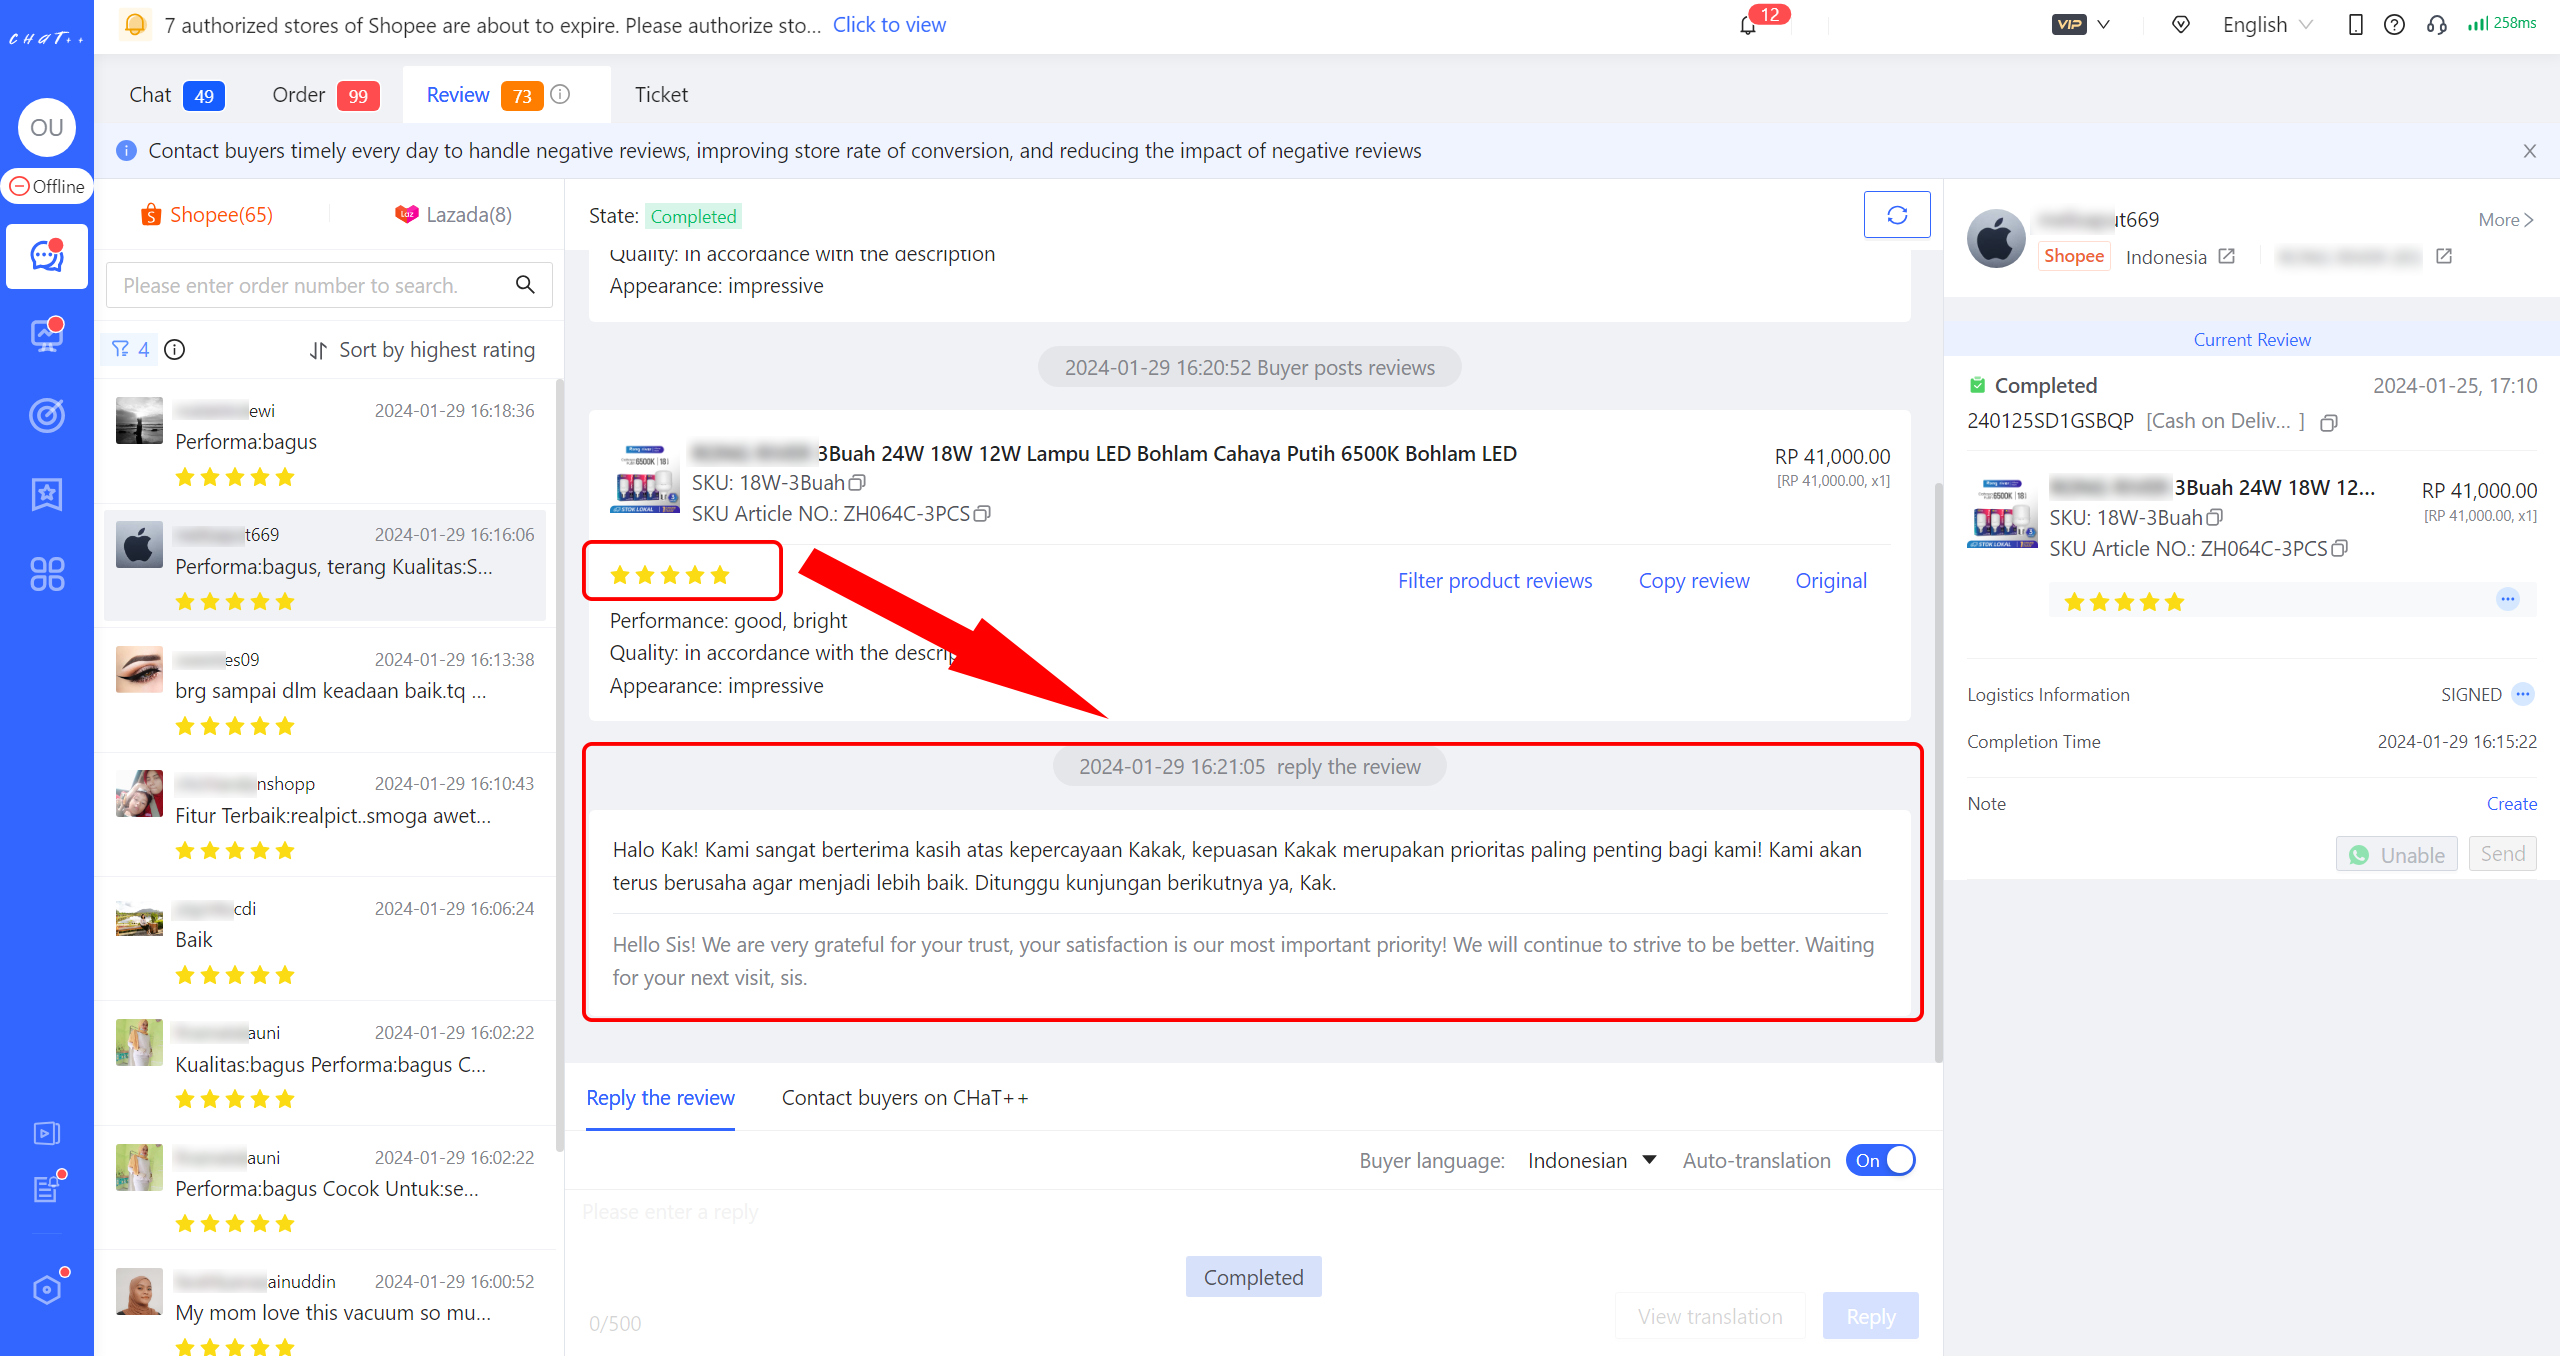
Figure 1
Permissions required for configuration
- Configuring the "Positive Review Auto-Reply" requires the "Configure Review Booster"(red box in Figure below) permission to be enabled for the role assigned to the account. Super admins and admins have this permission by default.
- Accounts without the "Configure Review Booster" permission cannot configure "Positive Review Auto-Reply".
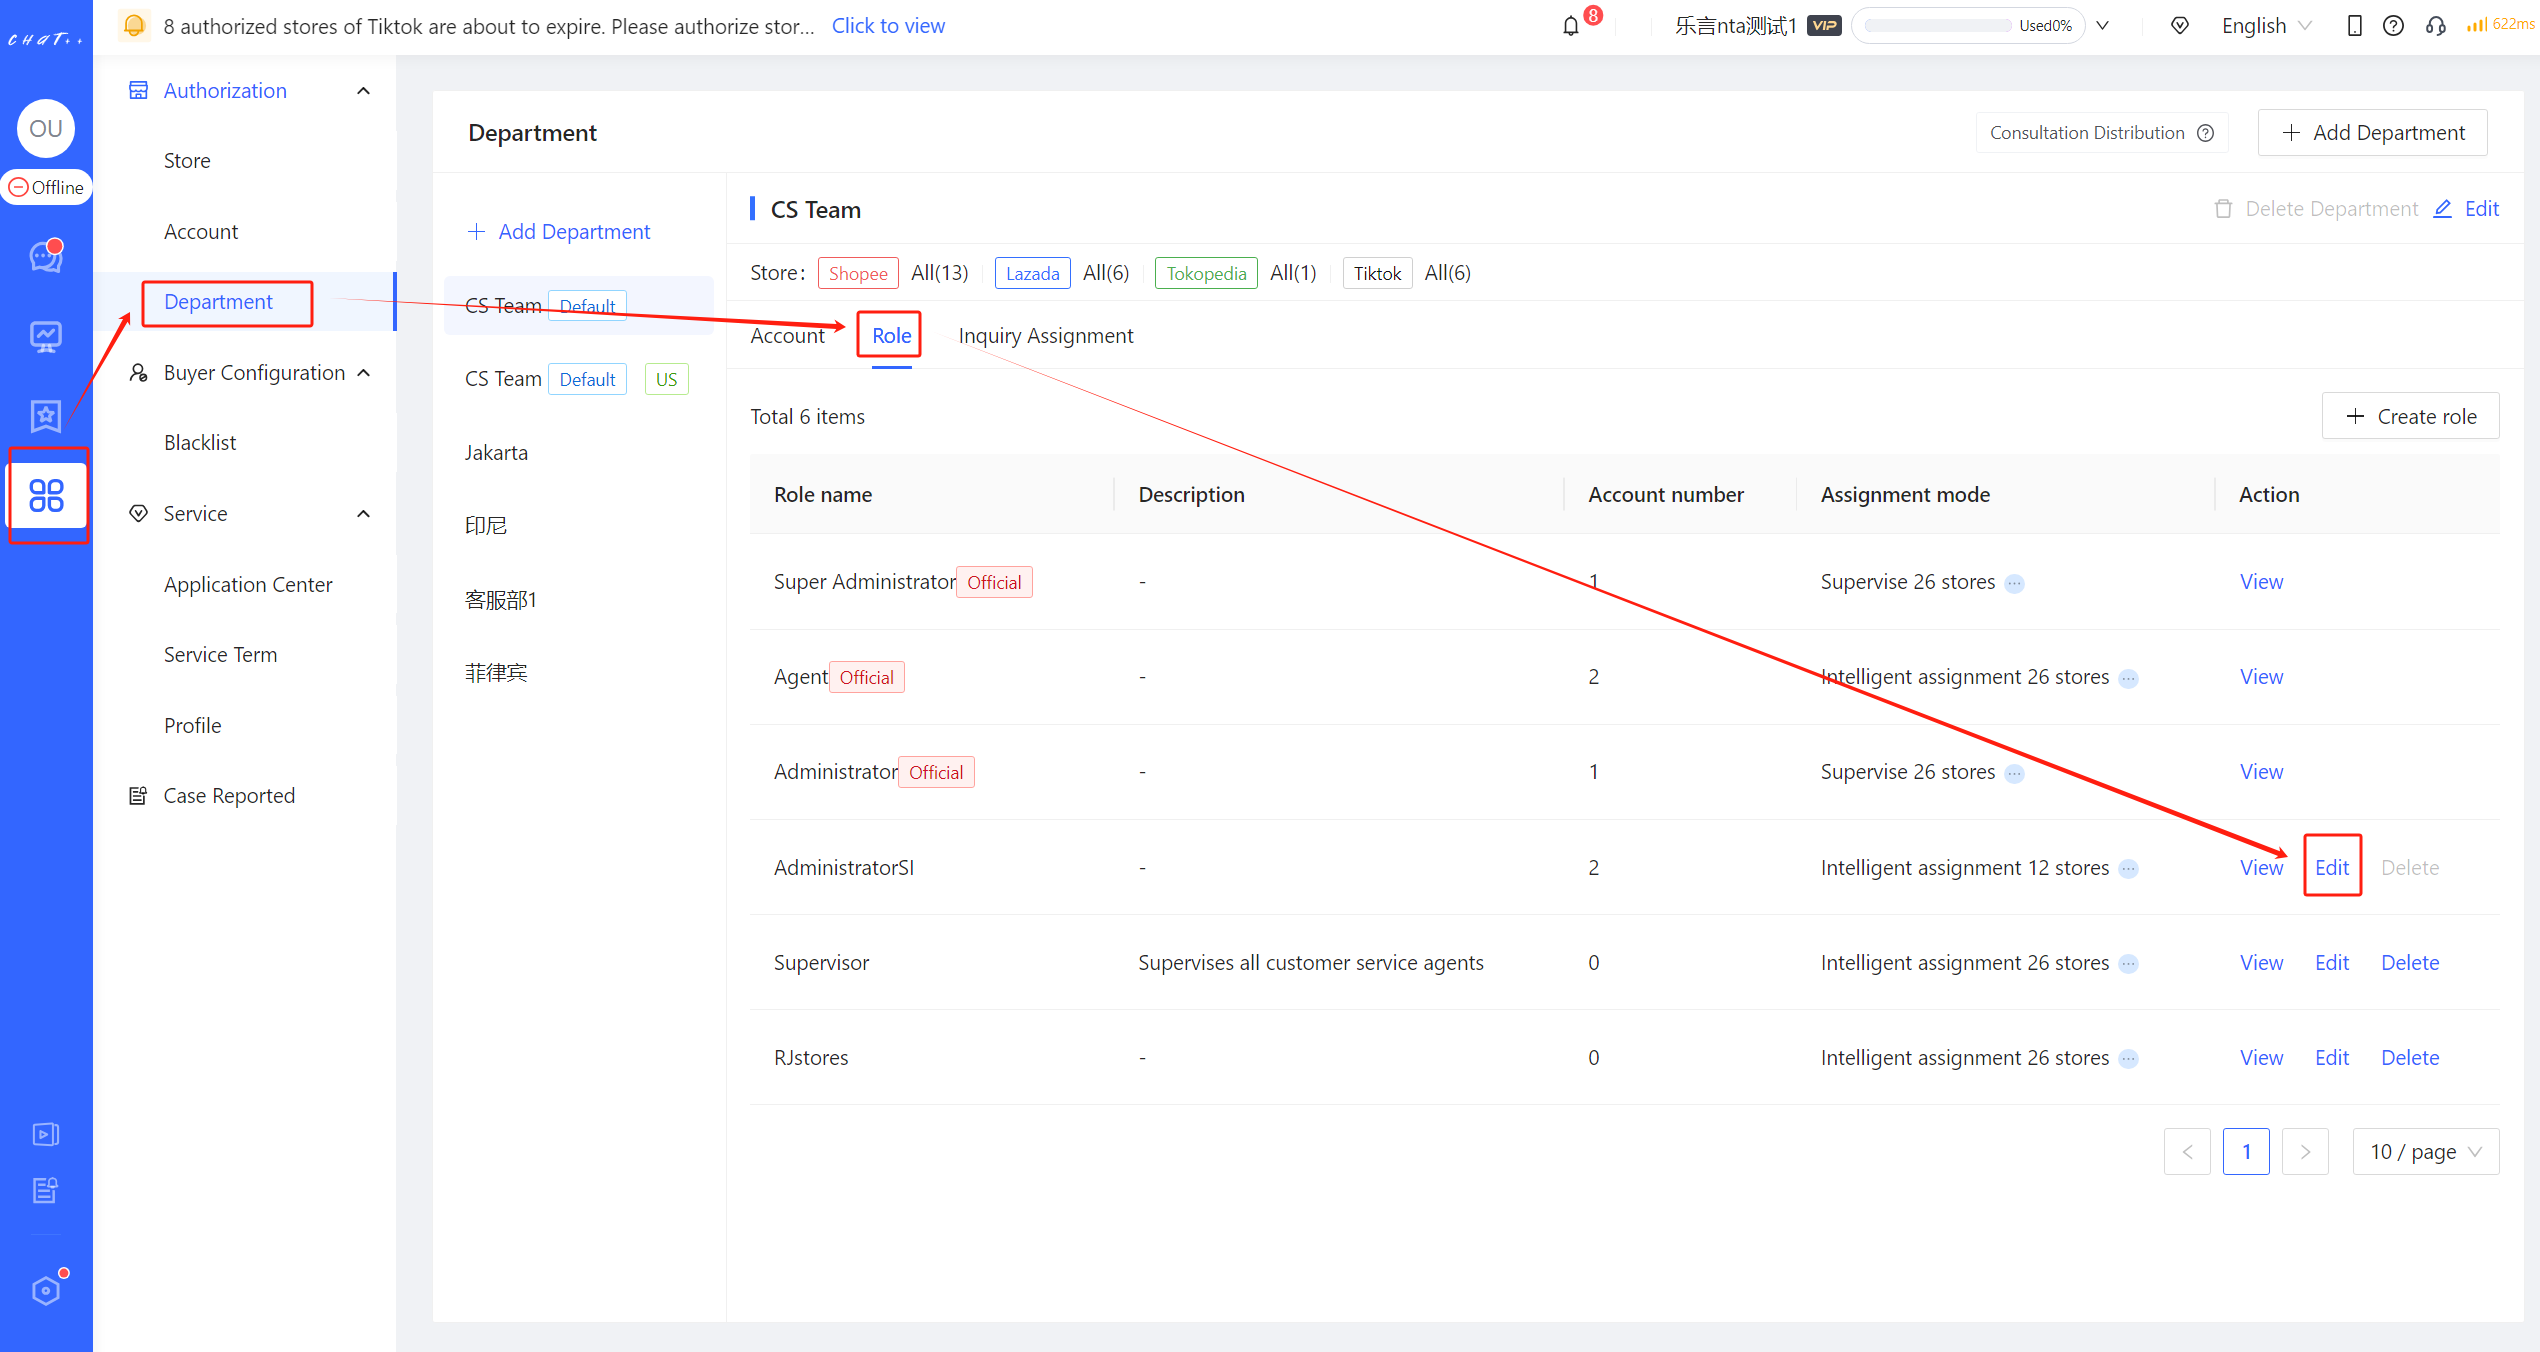
Figure 2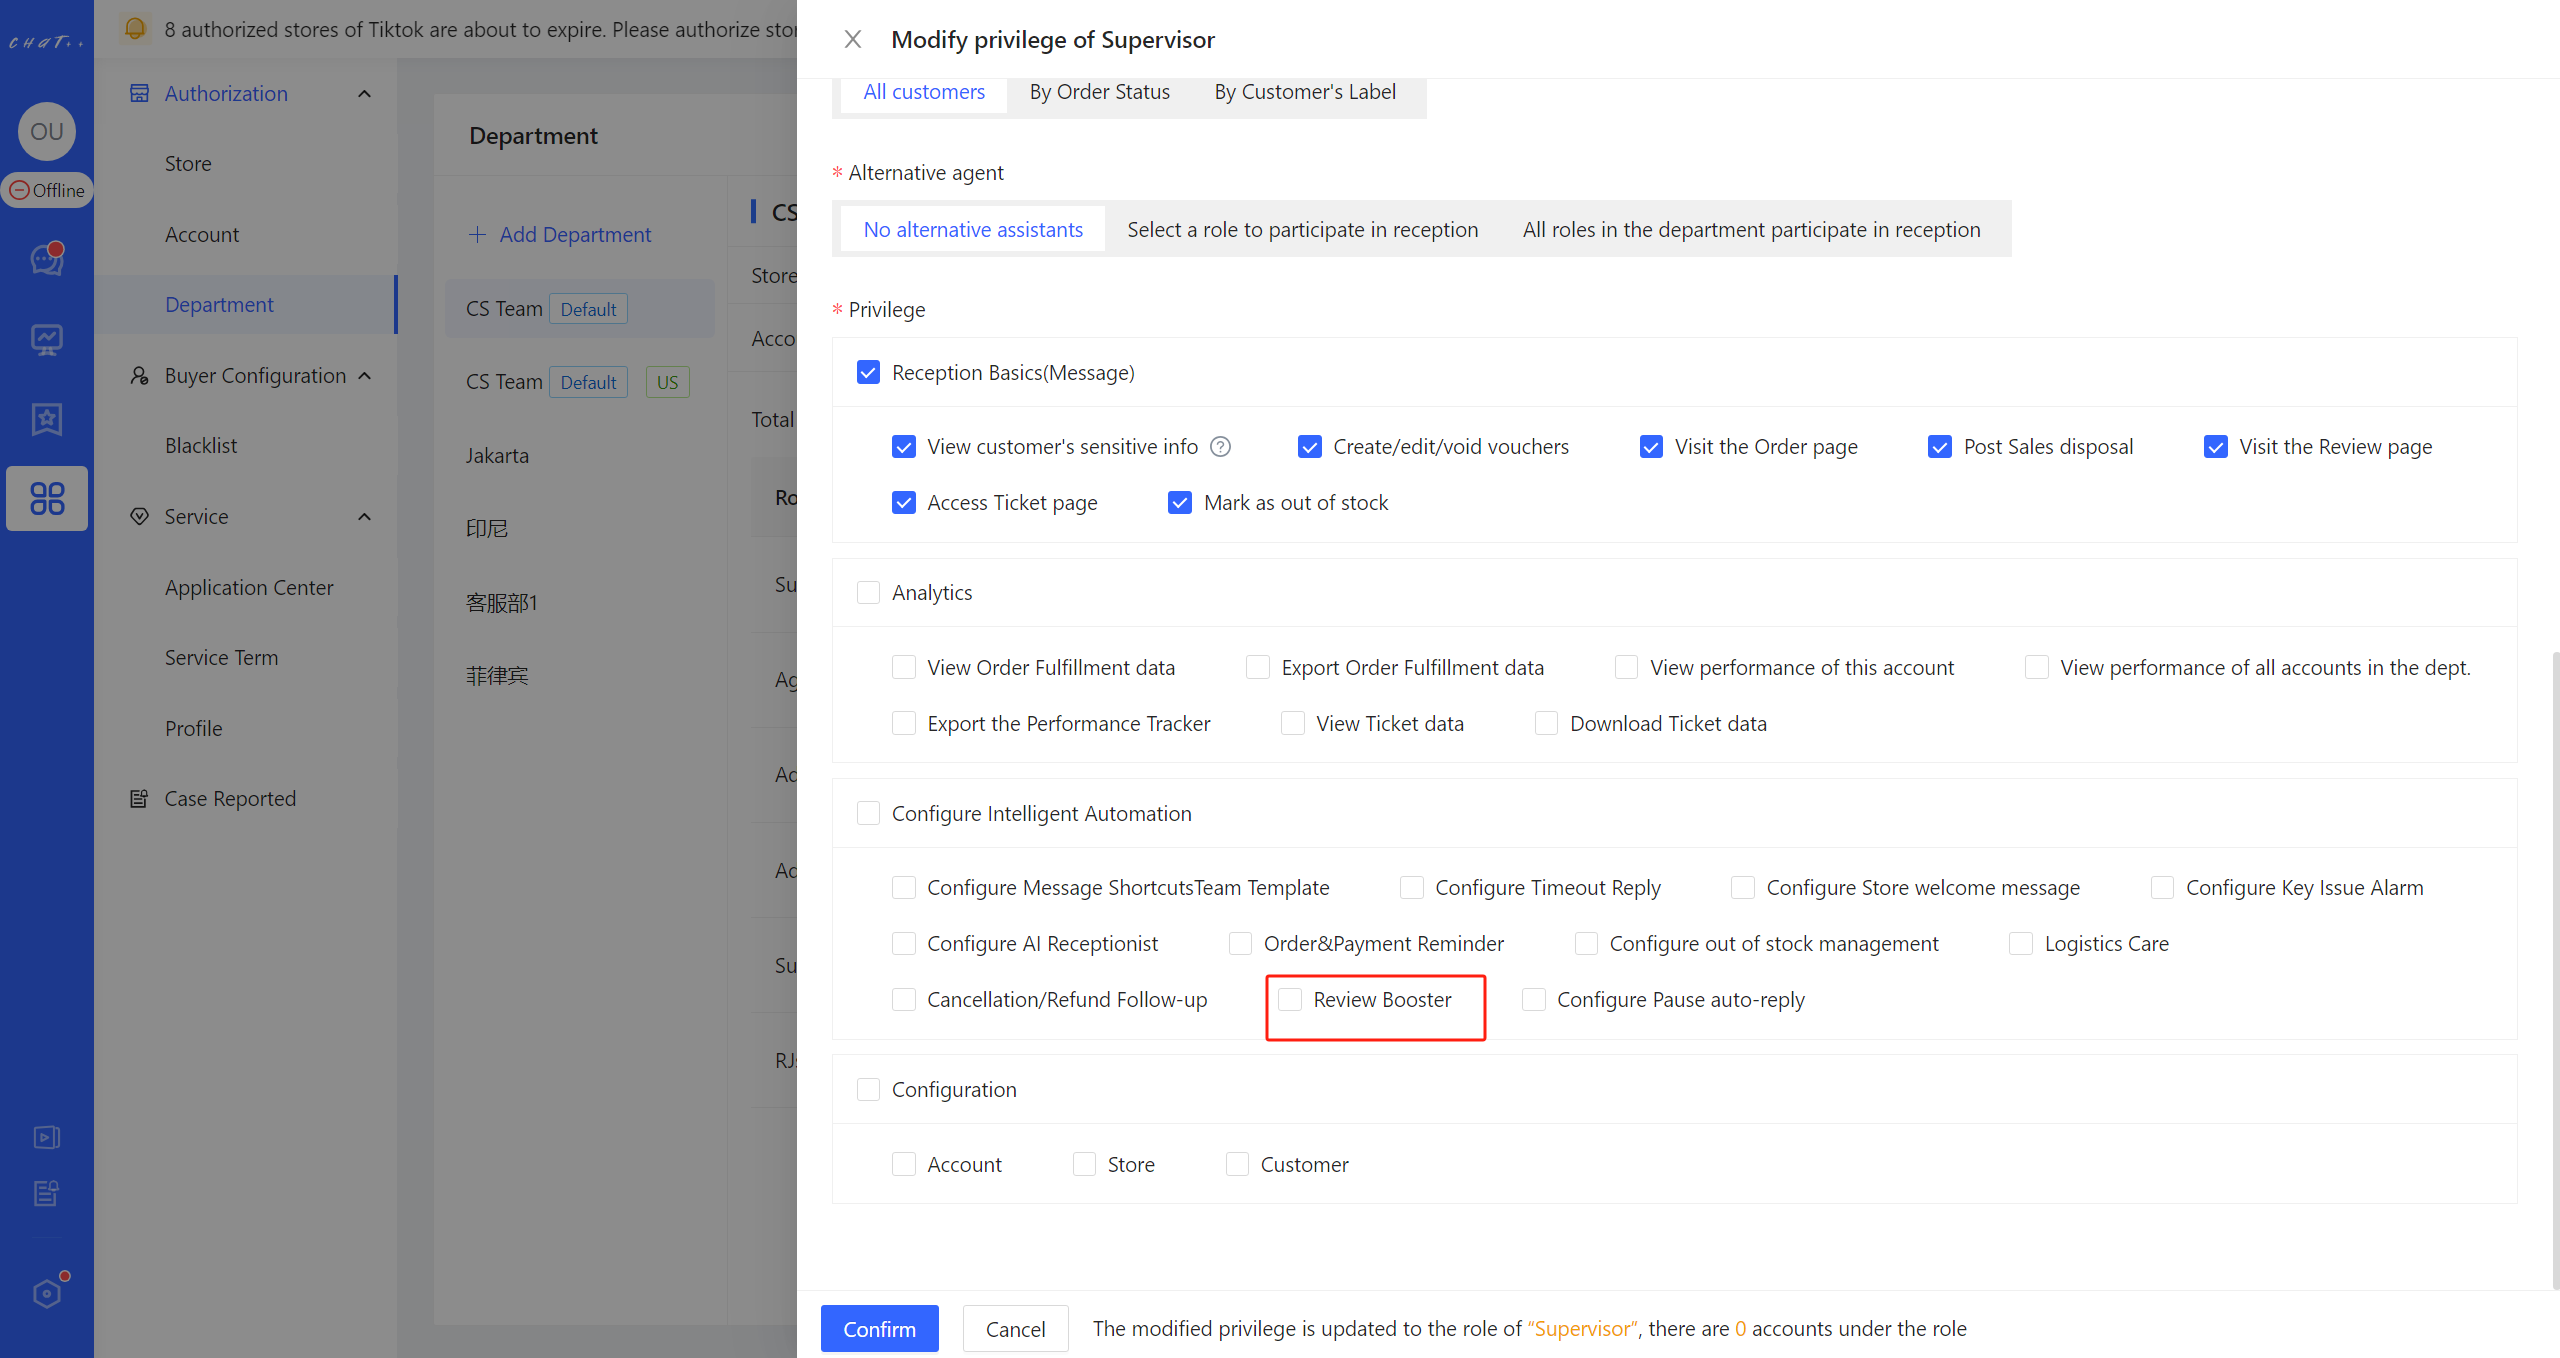
Figure 3
How to Configure Positive Review Auto-Reply
Access the configuration page
👆Click「 Automation 」 in left menu(Shown as red box① in Figure 4)→「 Review Booster 」(Shown as red box② in Figure 4)→「 Positive Review Auto-Reply 」(Shown as red box① in Figure 5),Access the configuration page.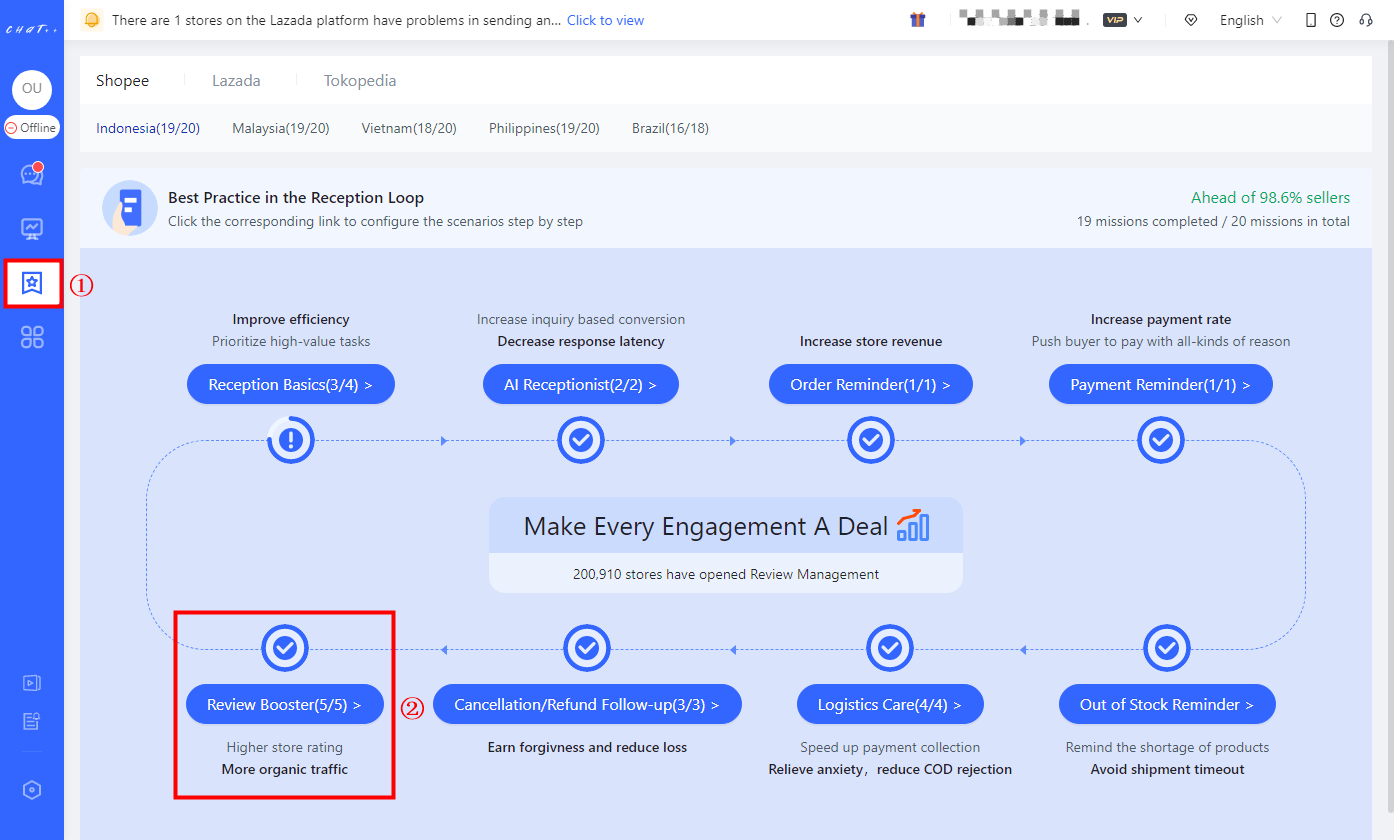
Figure 4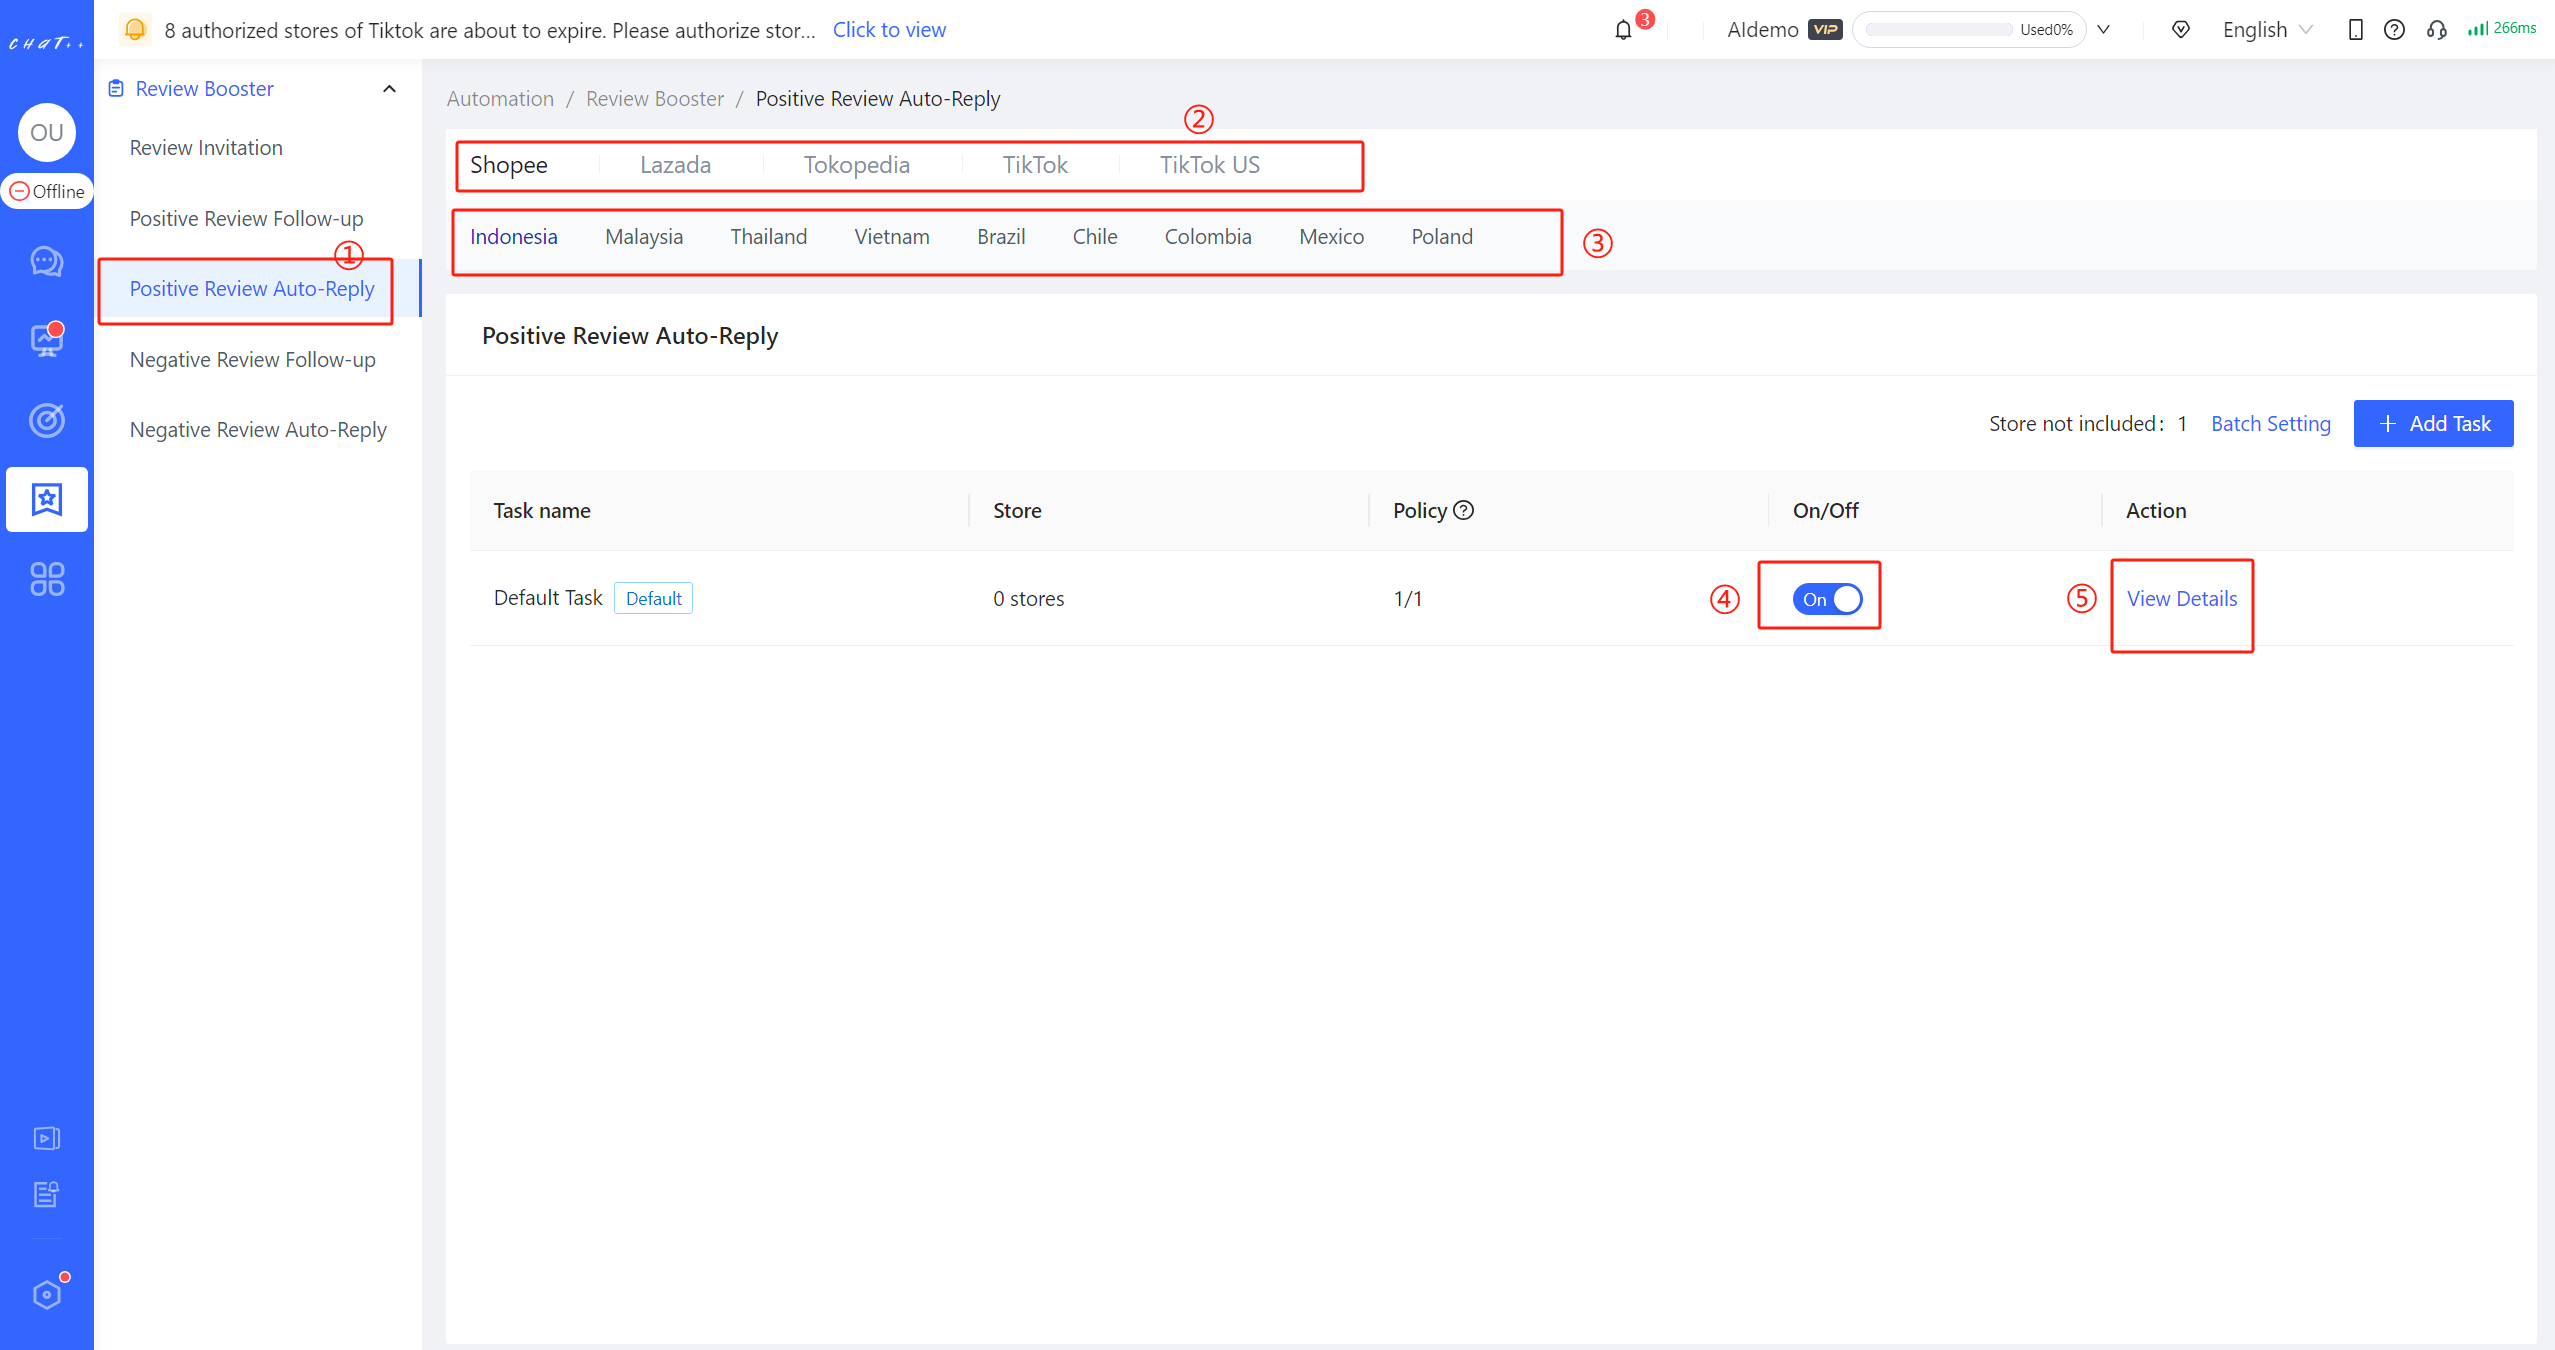
Figure 5
Note: Positive Review Auto-Reply is available for different marketplaces, currently supporting Shopee and Lazada. Tokopedia and TikTok will be launched soon. Stay tuned for updates. Note: Each marketplace distinguishes different sites, and you can click to switch between different marketplaces (red box ② in Figure 5 above) and different sites (red box ③ in Figure 5 above). For different sites on the same marketplace, Positive Review Auto-Reply tasks need to be configured independently.
One-click Configuration→Enable【 Default Task 】
💡To make it convenient to configure it, ChatPlusAI has created a "Default Task" for each Positive Review Auto-Reply scenario on each marketplace, covering all stores of country sites by default.
For the first time you use it, to avoid the situation where the robot automatically replies without your knowledge, "Default Task" (red box ④ in Figure 5 above) is off by default and needs to be manually 👆 opened.
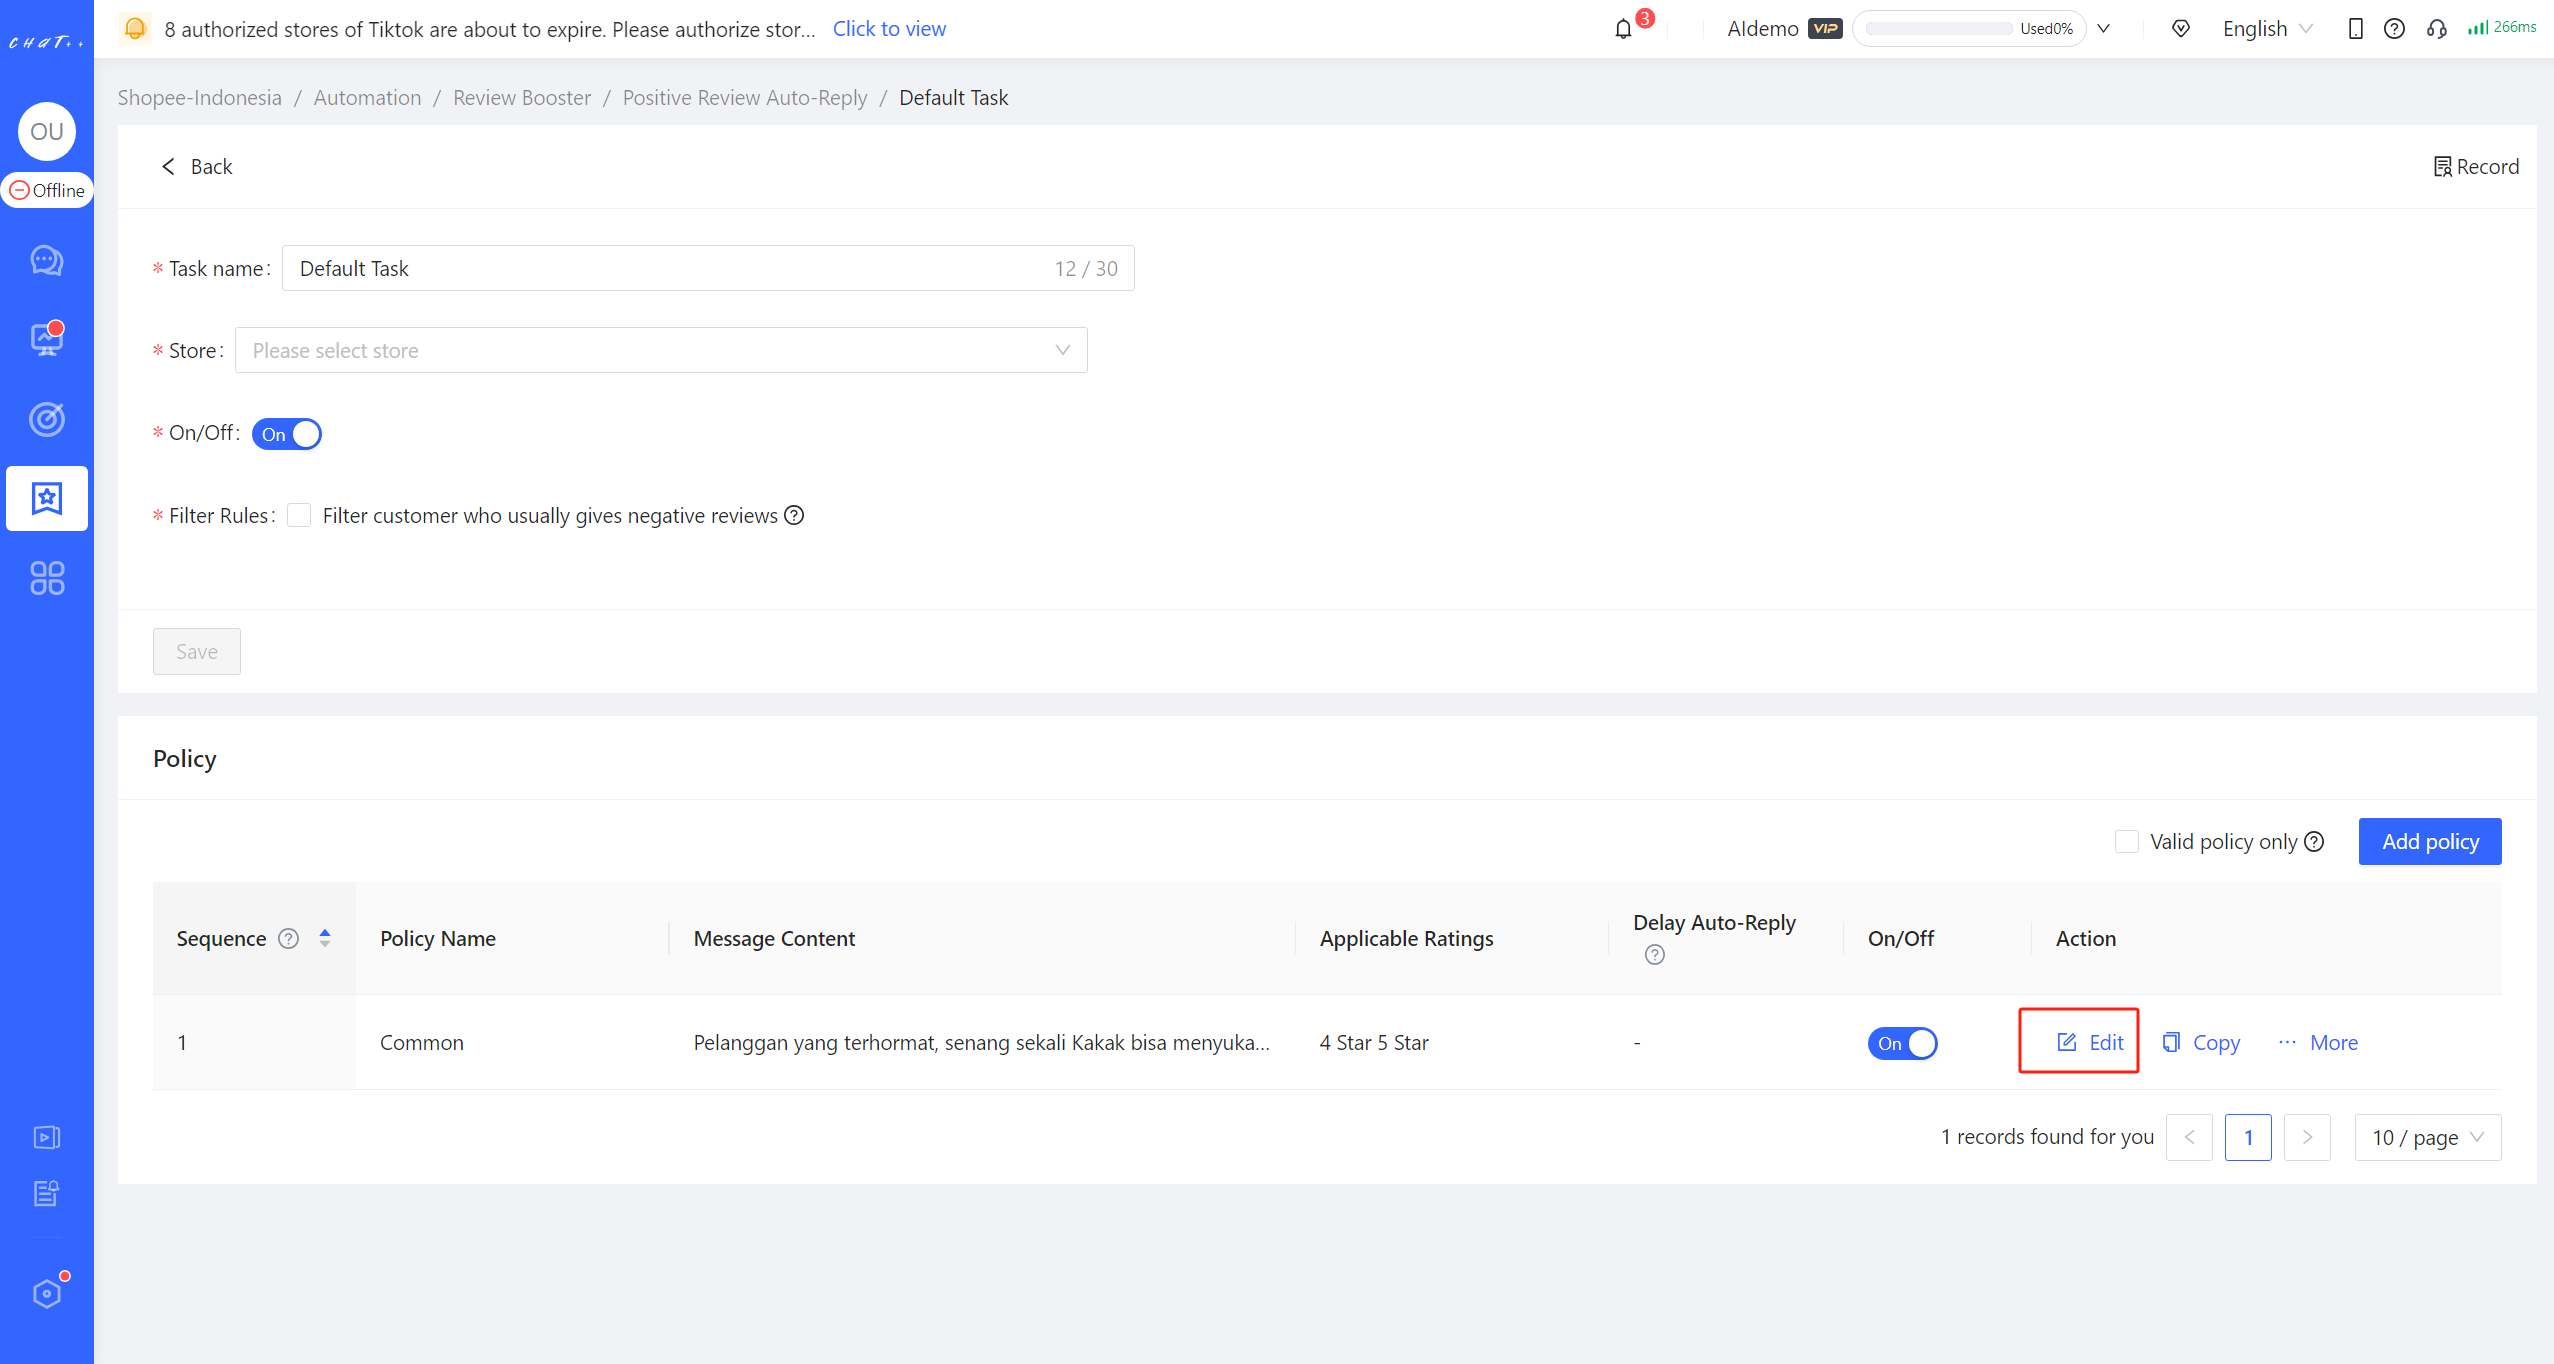
Figure 6
All you have to do is to click "View Details" button(red box ⑤ in Figure 5 above) to edit the policies (red box in Figure 6 above) to make sure everything is correct. Once confirmed, you can enable the default task (red box ④ in Figure 5 above).
Newly authorized stores will be automatically included to the 【Default task】. However, the store will not be automatically included again after they are removed from other tasks. It will be counted as "Store not included" (Shown as red box① in Figure 7). You can click "Batch Setting" button (Shown as red box② in Figure 7) to add massive stores into the certain task quickly.
Note: Kindly make sure that all stores have been included to the right task (that means the number of "Store not included" is 0, shown as red box① in Figure 7), in case the store is neglected from any Positive Review Auto-Reply task.
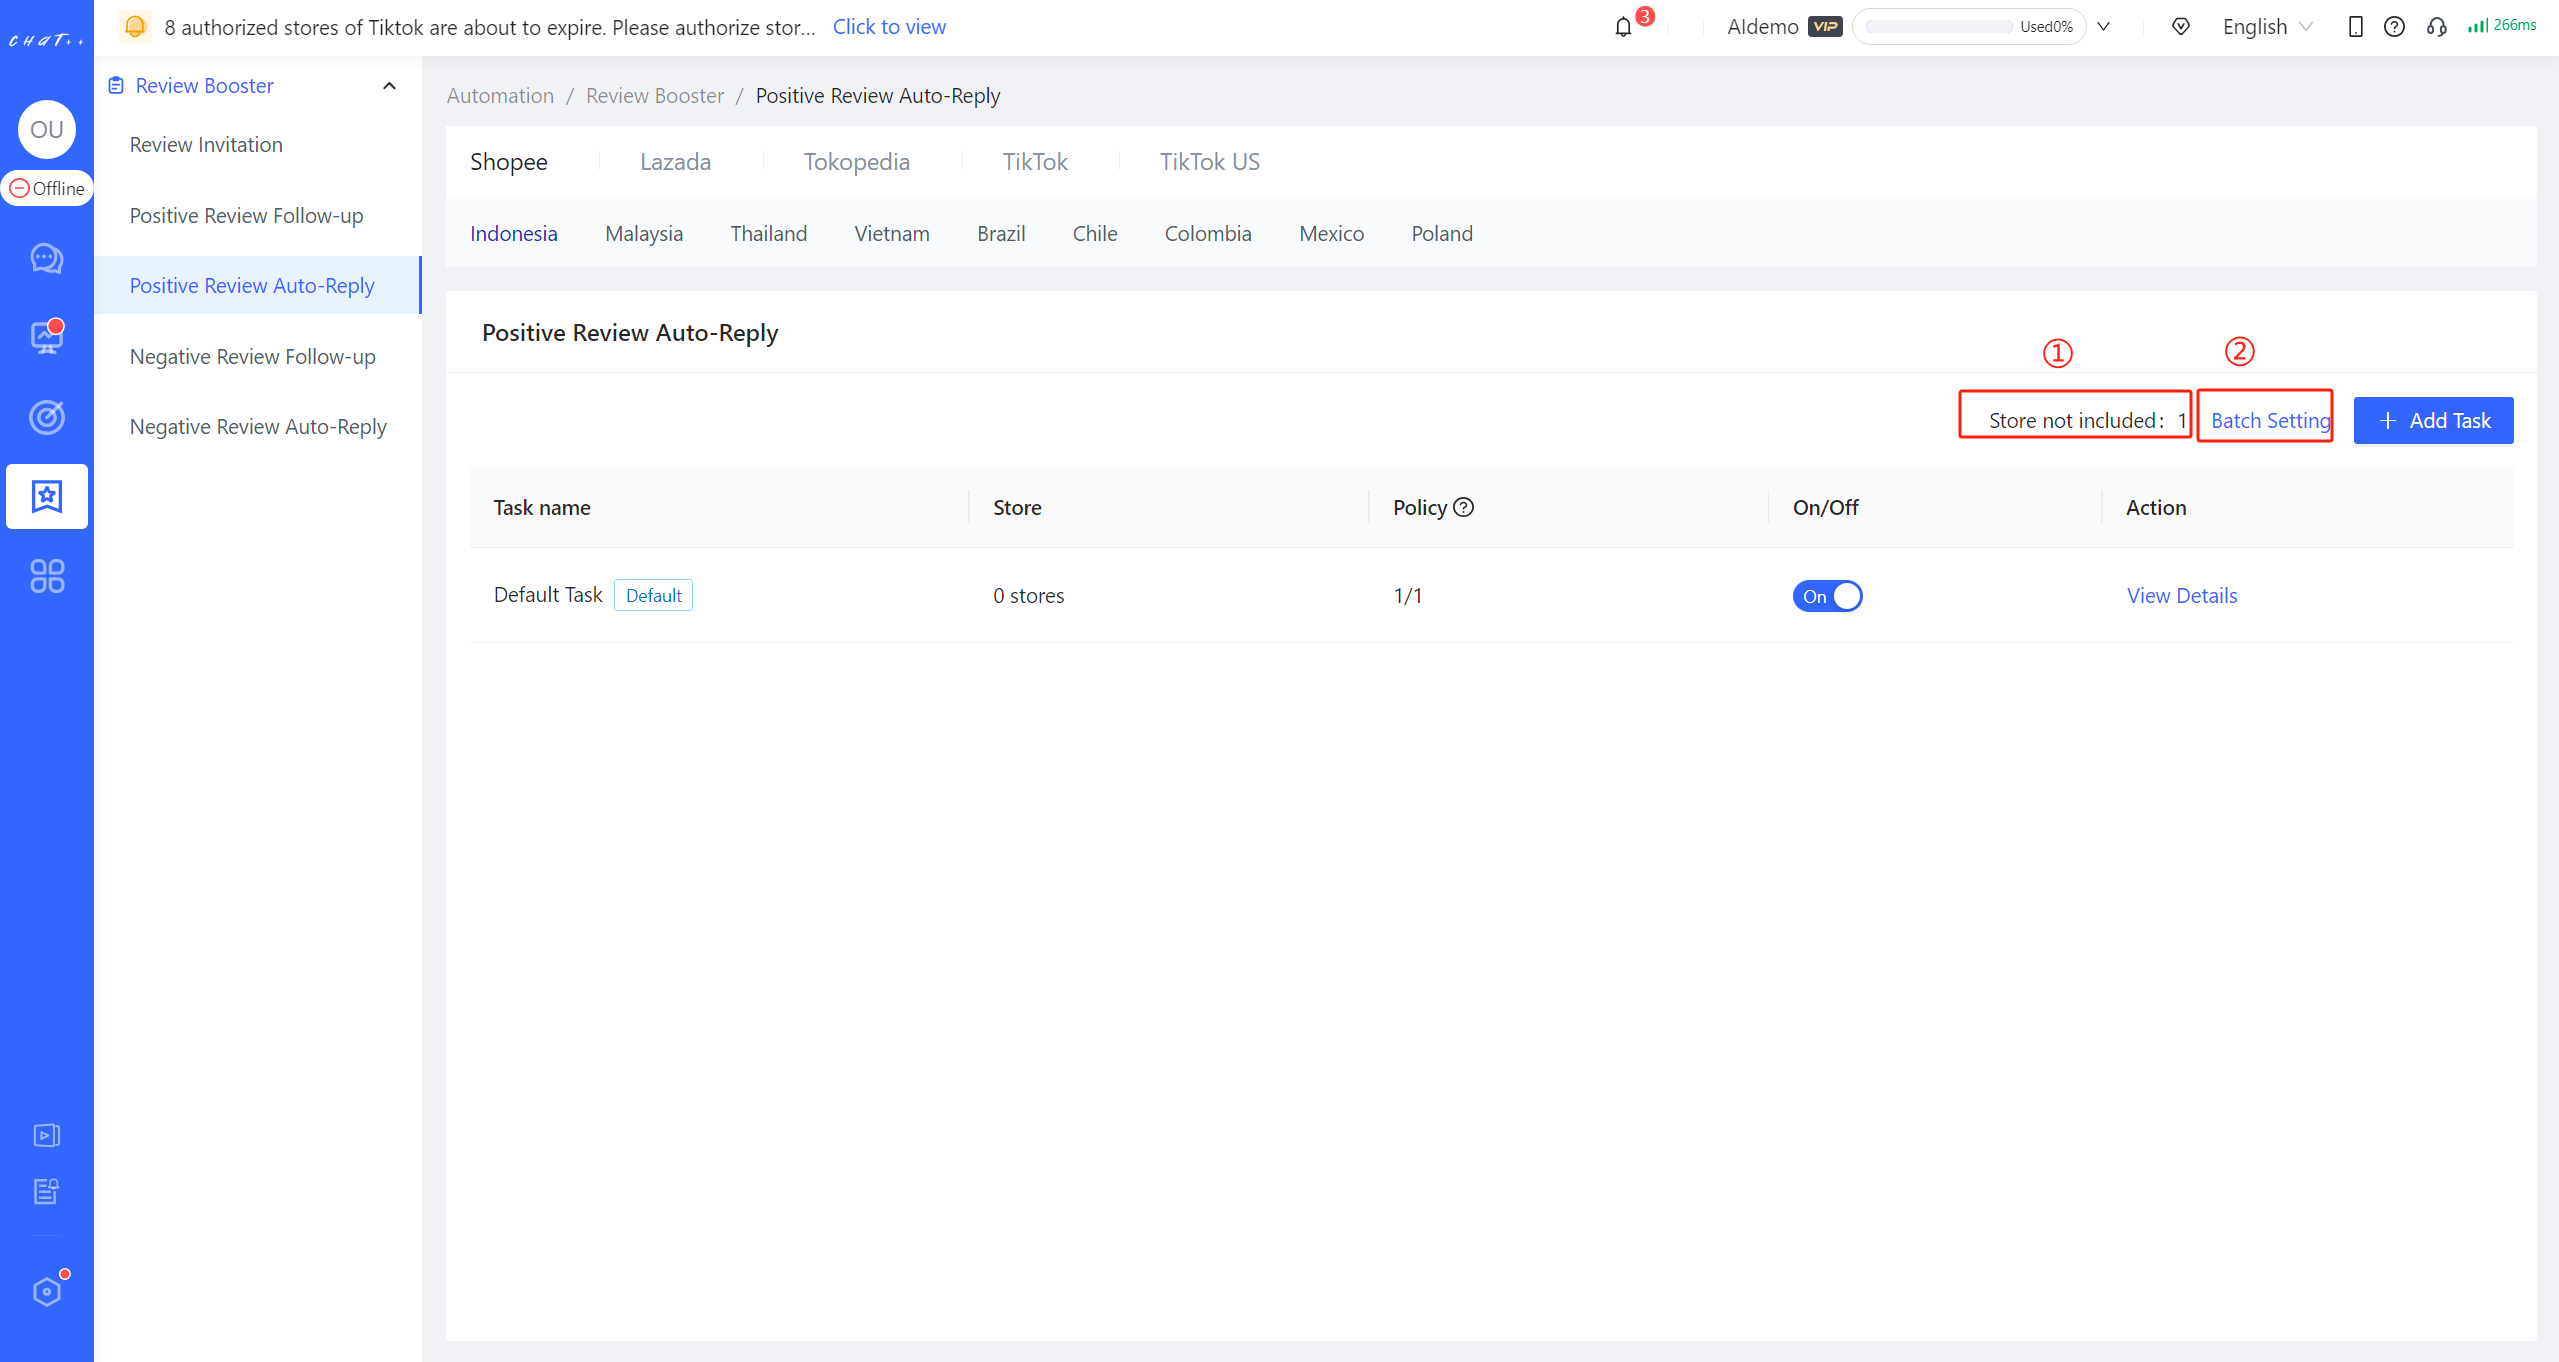
Figure 7
"Policy branch" Description
- Policy branch for Positive Review Auto-reply consists of six key factors: product scope, filter rules, applicable ratings, review type, delay auto-reply and message content.
- Product scope: The policy branch takes effect when the buyer ordered specific products. There are 4 options to configure: All products, Pick SKU, Pre-order or In-stock. For Lazada, options "All products" and "Pick SKU" can be checked out.
- "Pick SKU" supports selecting specific products by searching the "Product Name", "Product ID", "SPU Article NO." and "SKU ID", meanwhile input "Product ID" or "SPU Article NO." (separate multiple items with Enter) and can quickly select various products.
- "Pick SKU" supports selecting specific products by searching the "Product Name", "Product ID", "SPU Article NO." and "SKU ID", meanwhile input "Product ID" or "SPU Article NO." (separate multiple items with Enter) and can quickly select various products.
- Filter customer who usually gives negative reviews: Within the past six months, among nearly 4 million Southeast Asian stores using ChatPlusAI, customers who have given two or more negative reviews are considered who usually give negative reviews (including cases where they later revised their review to positive). The system automatically identifies such customers. Positive Review Follow-up allows for filtering out these customers and not sending them messages.
- Applicable Ratings: When a buyer gives a rating of 4 stars or 5 stars, it is applicable to the positive review follow-up task. It supports individually selecting 4 stars or 5 stars, or selecting both 4 stars and 5 stars.
- The applicable rating on Lazada is based on the overall rating score.
- The applicable rating on Lazada is based on the overall rating score.
- Review Type: According to whether the buyer's review has content, it is divided into "Include text/image/video" and "No content" supporting individual selection or full selection. Note: Lazada does not currently support automatic replies to reviews without content.
- Delay Auto-Reply: Occasionally, buyers may give a 4/5 star positive review, but the review description is negative. In general, sellers would proactively contact the buyer to modify the review content. However, on Lazada, once the seller replies to the review, the buyer cannot modify the review content anymore. In such cases, it is possible to enable delayed review replies to allow the buyer some time to modify the content.
- Message Content: If above conditions are met, the corresponding message will be sent.
- Matching Logic: If the buyer's purchased products, given ratings, and review type match the Product scope, applicable ratings, review type and delay auto-reply in the policy branch, then the buyer matches this policy. When a buyer simultaneously matches multiple policy branches, the system will execute the first policy in order.
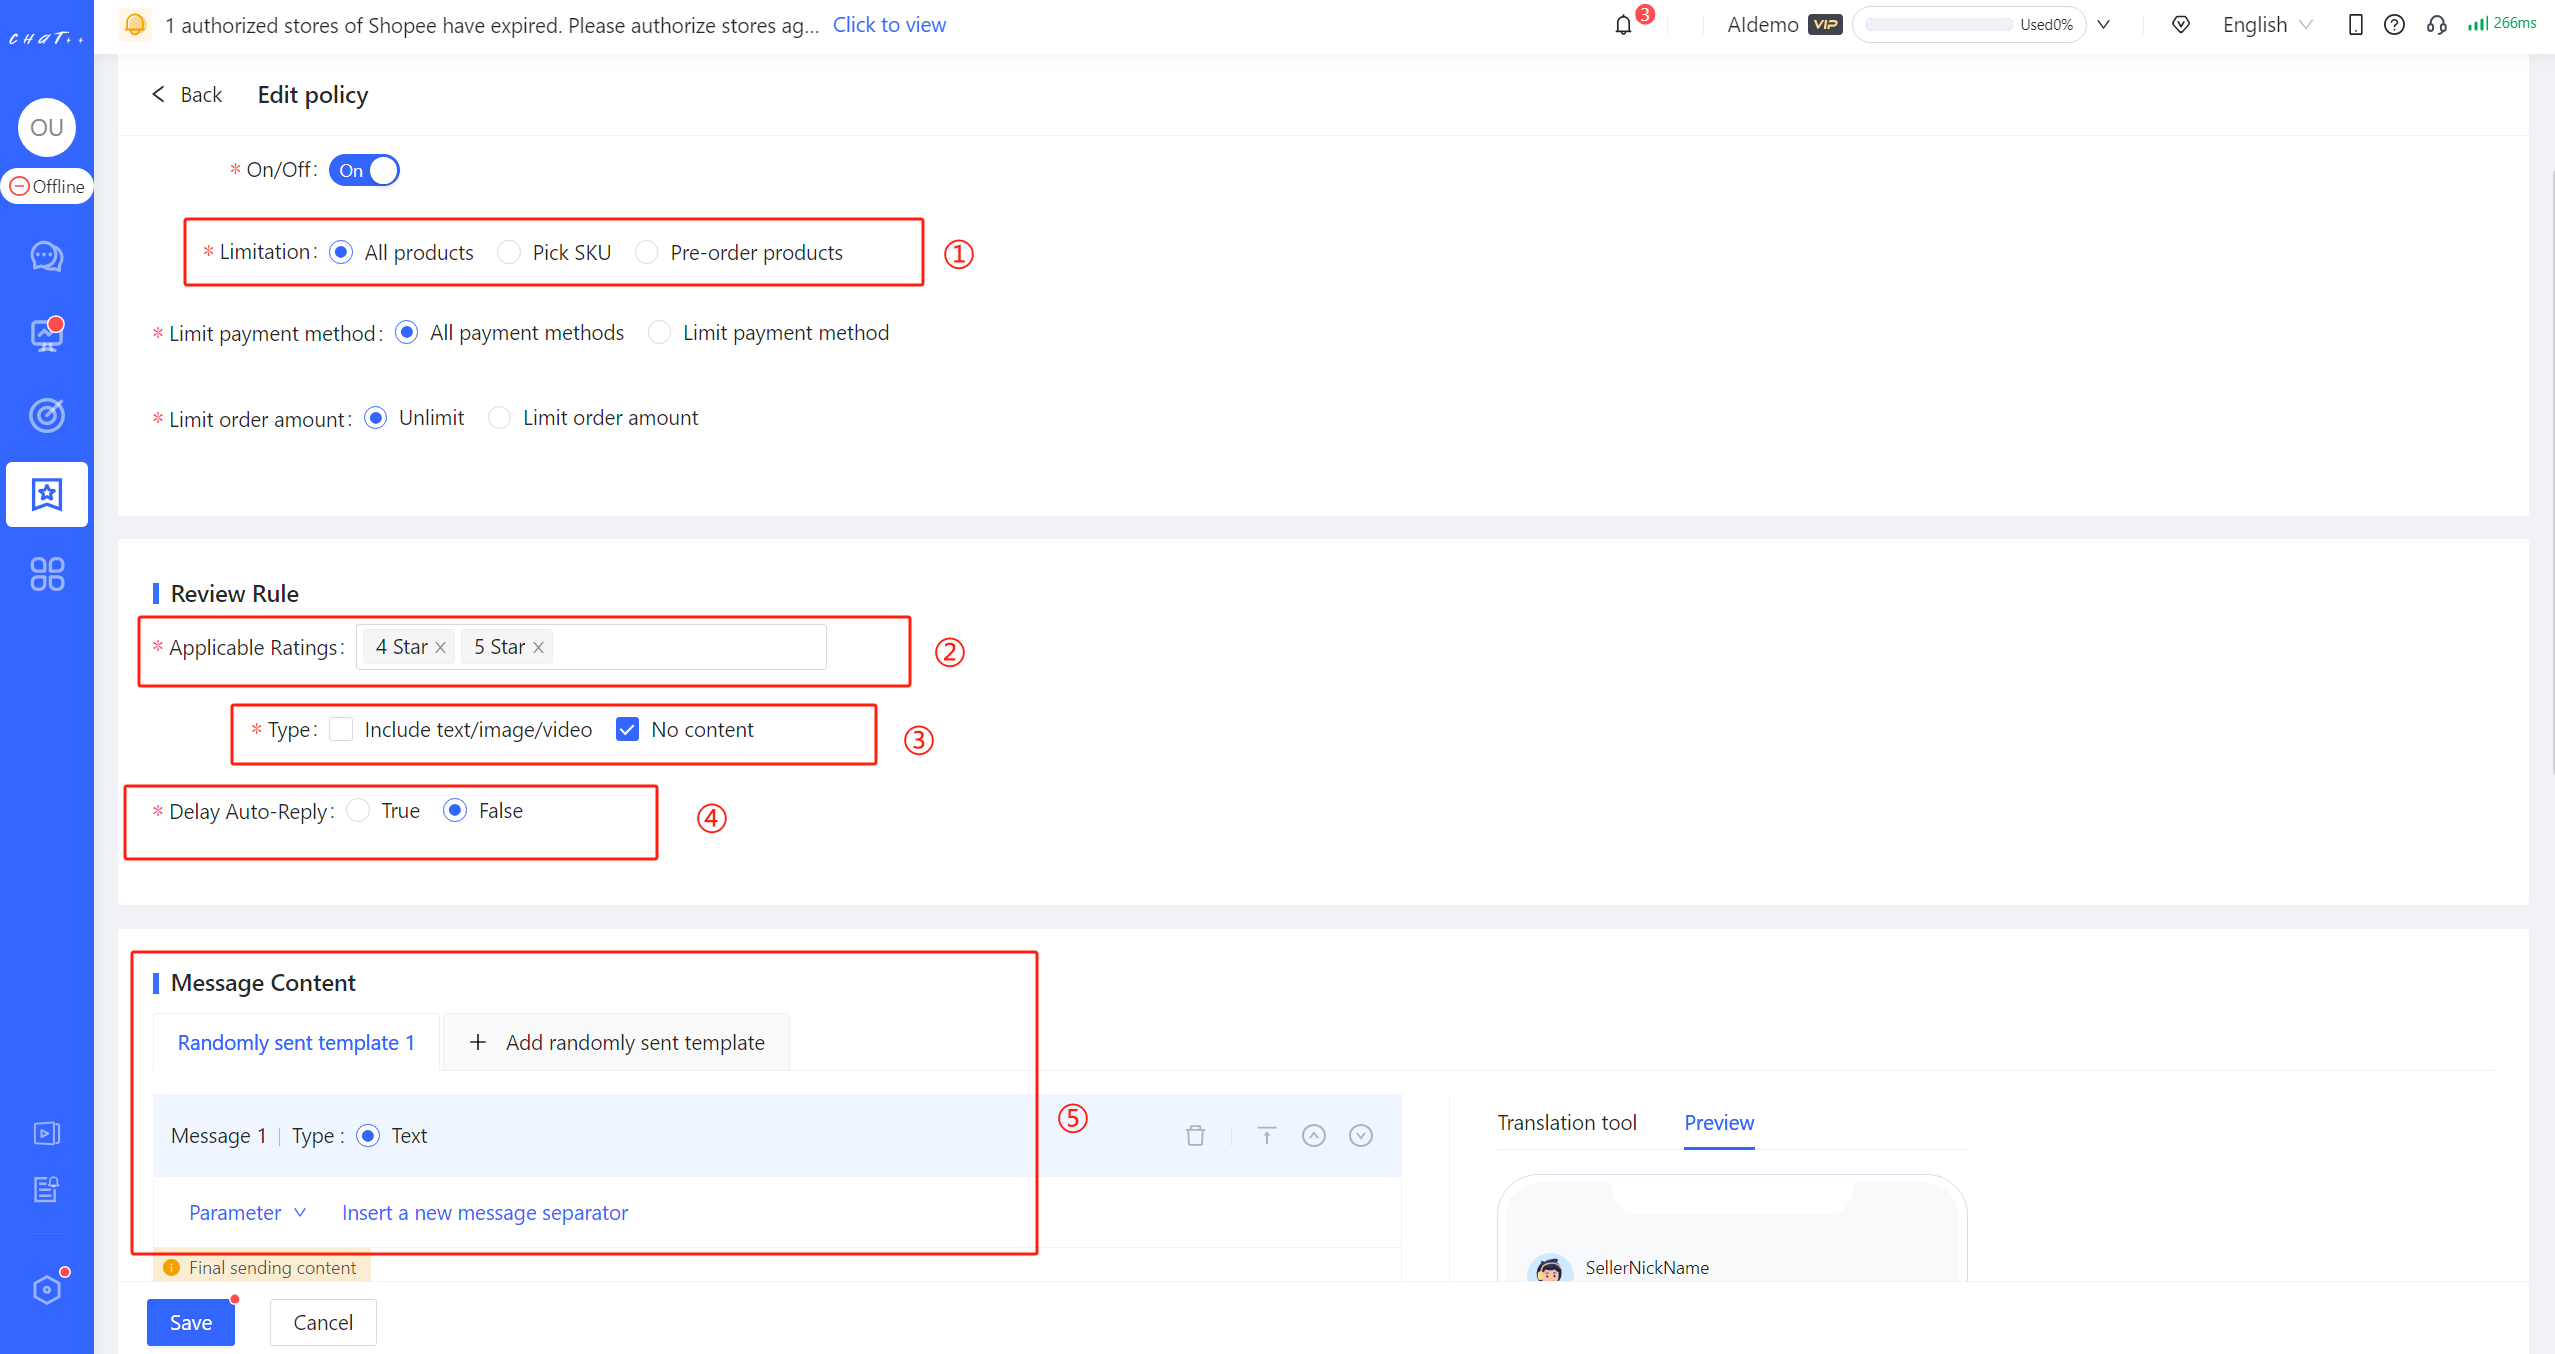
Figure 8
For example: In the example in Figure 9,
- Product scope selected are "Pick SKU": Sunscreen
- Applicable Rating selected are " 5 stars",
- Review Type selected includes "Include text/image/video"
This means that this policy will match buyers who "purchase this sunscreen, give a 5-star rating, along with providing review content.
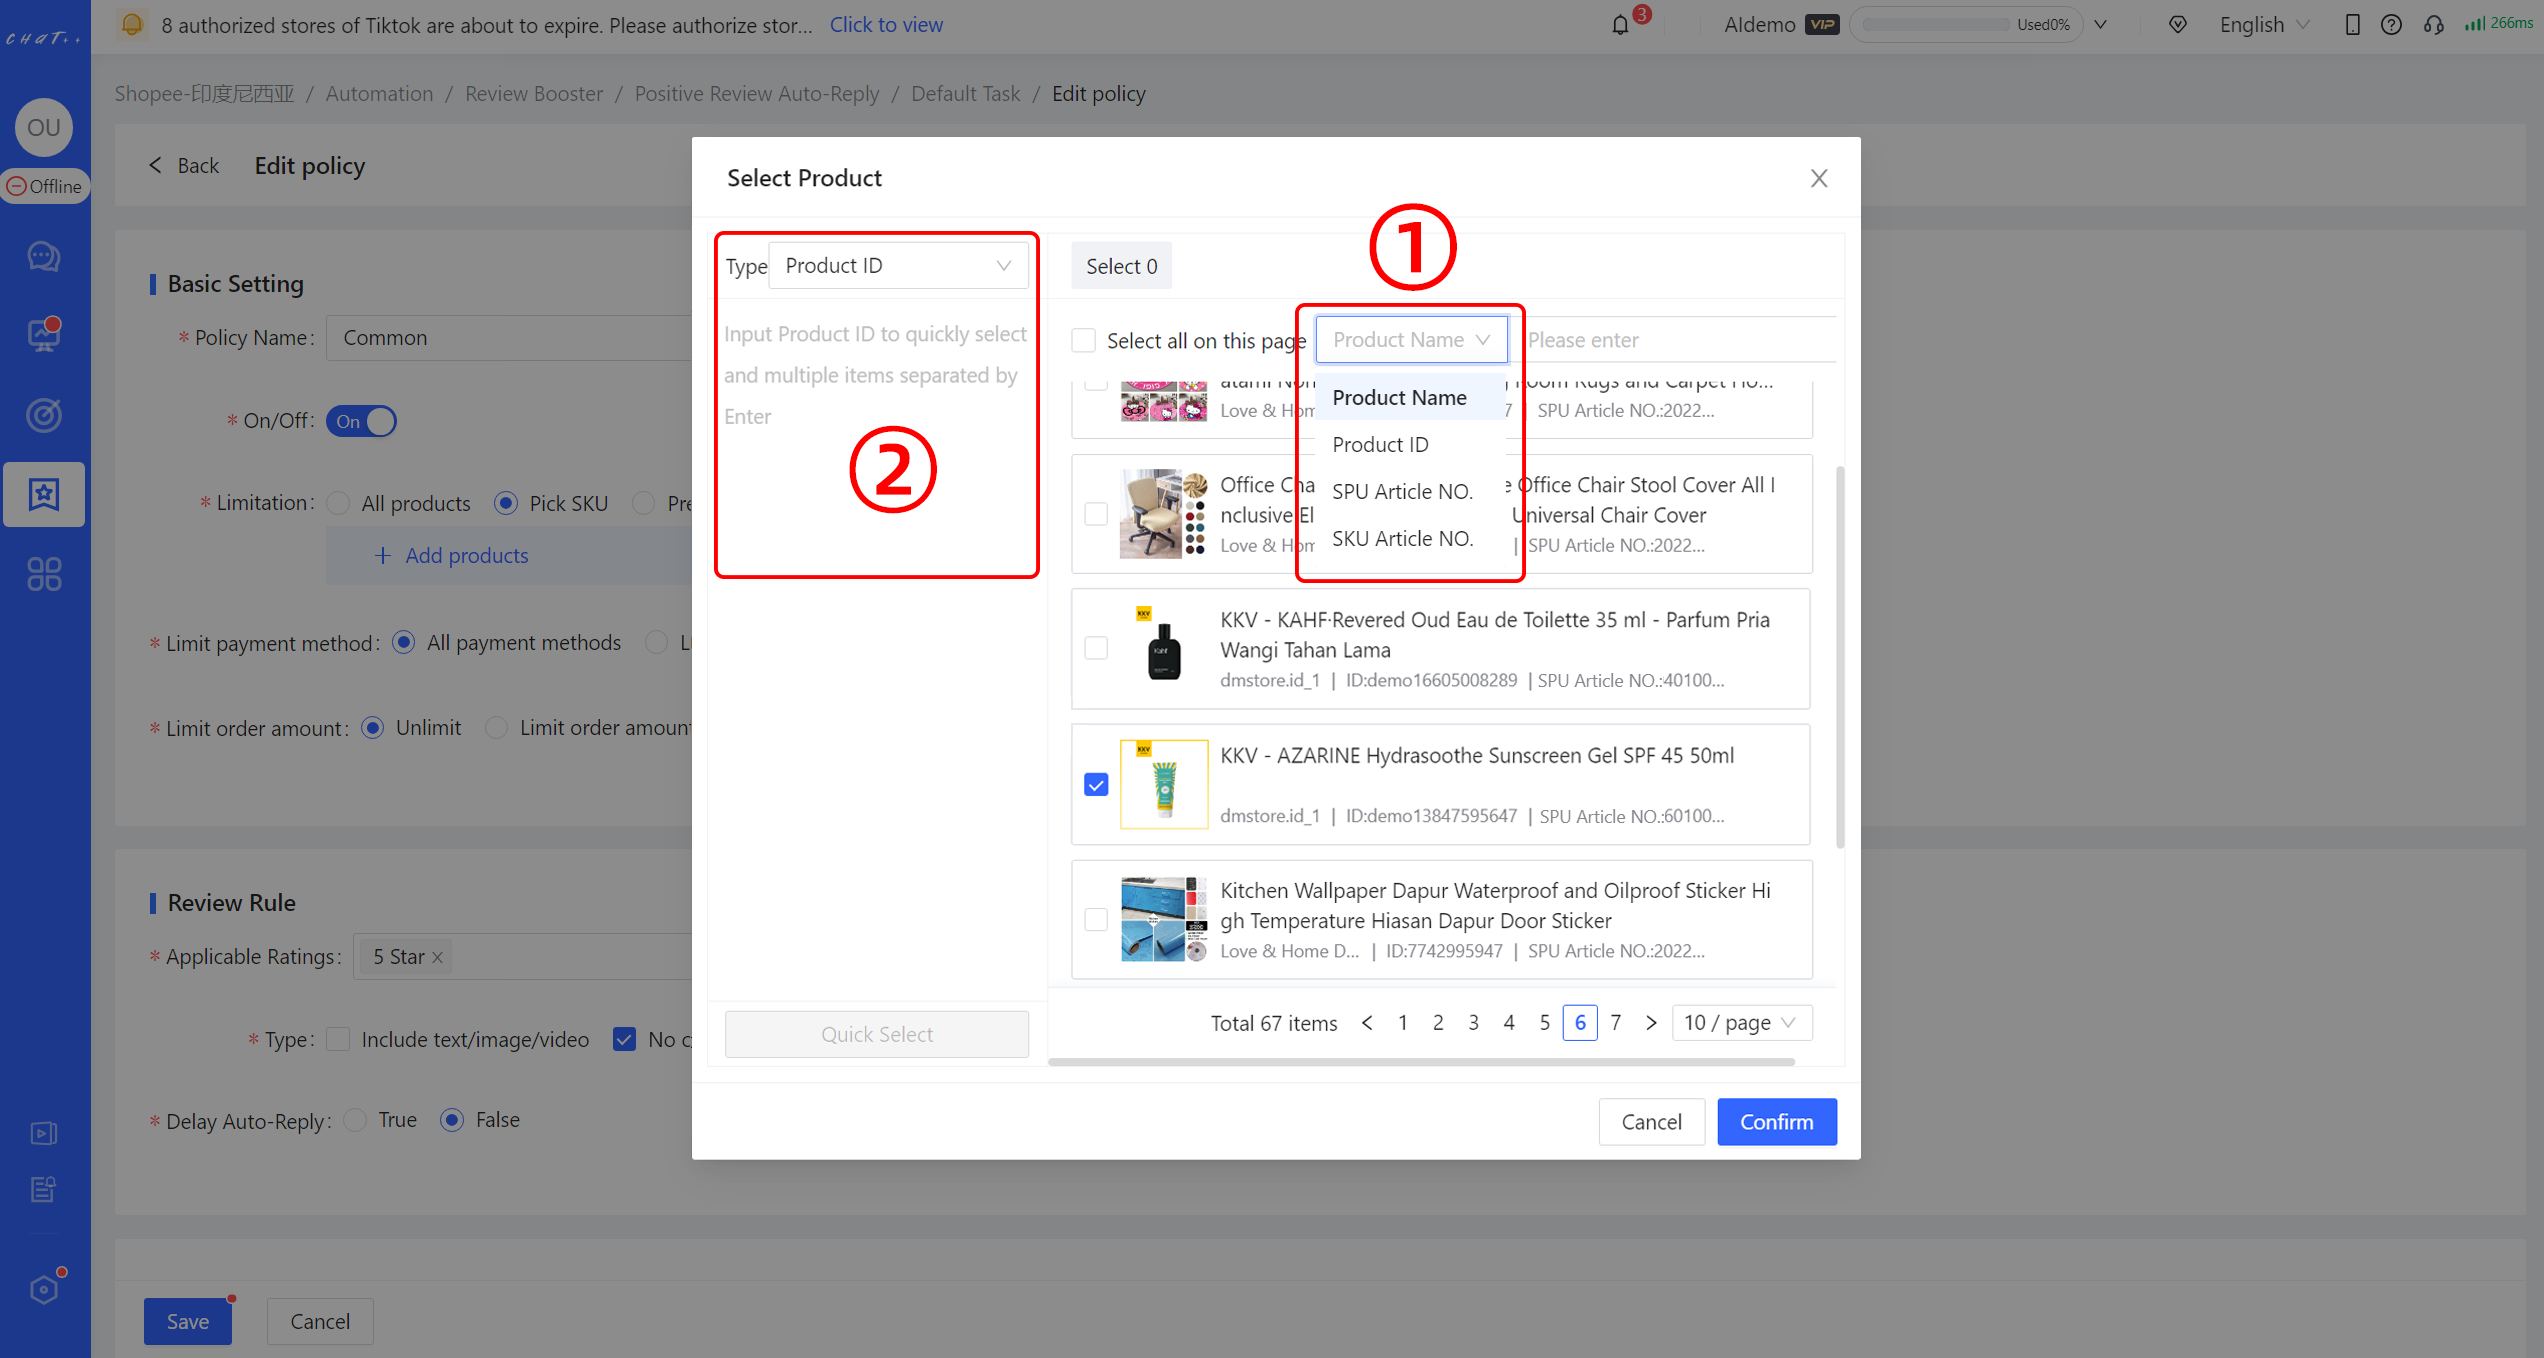
Figure 9
Configuration of Personalized Replies
Recommended Templates
To facilitate quick configuration, when the message content includes text messages, ChatPlusAI provides recommended templates for reference and selection. Select text messages, scroll down appropriately, and click the "Select" button (red box ① in Figure below) to automatically fill in the content editing box(red box ② in Figure below) . The preview of sending effect can be seen on the right side of the page (red box ③ in Figure below) .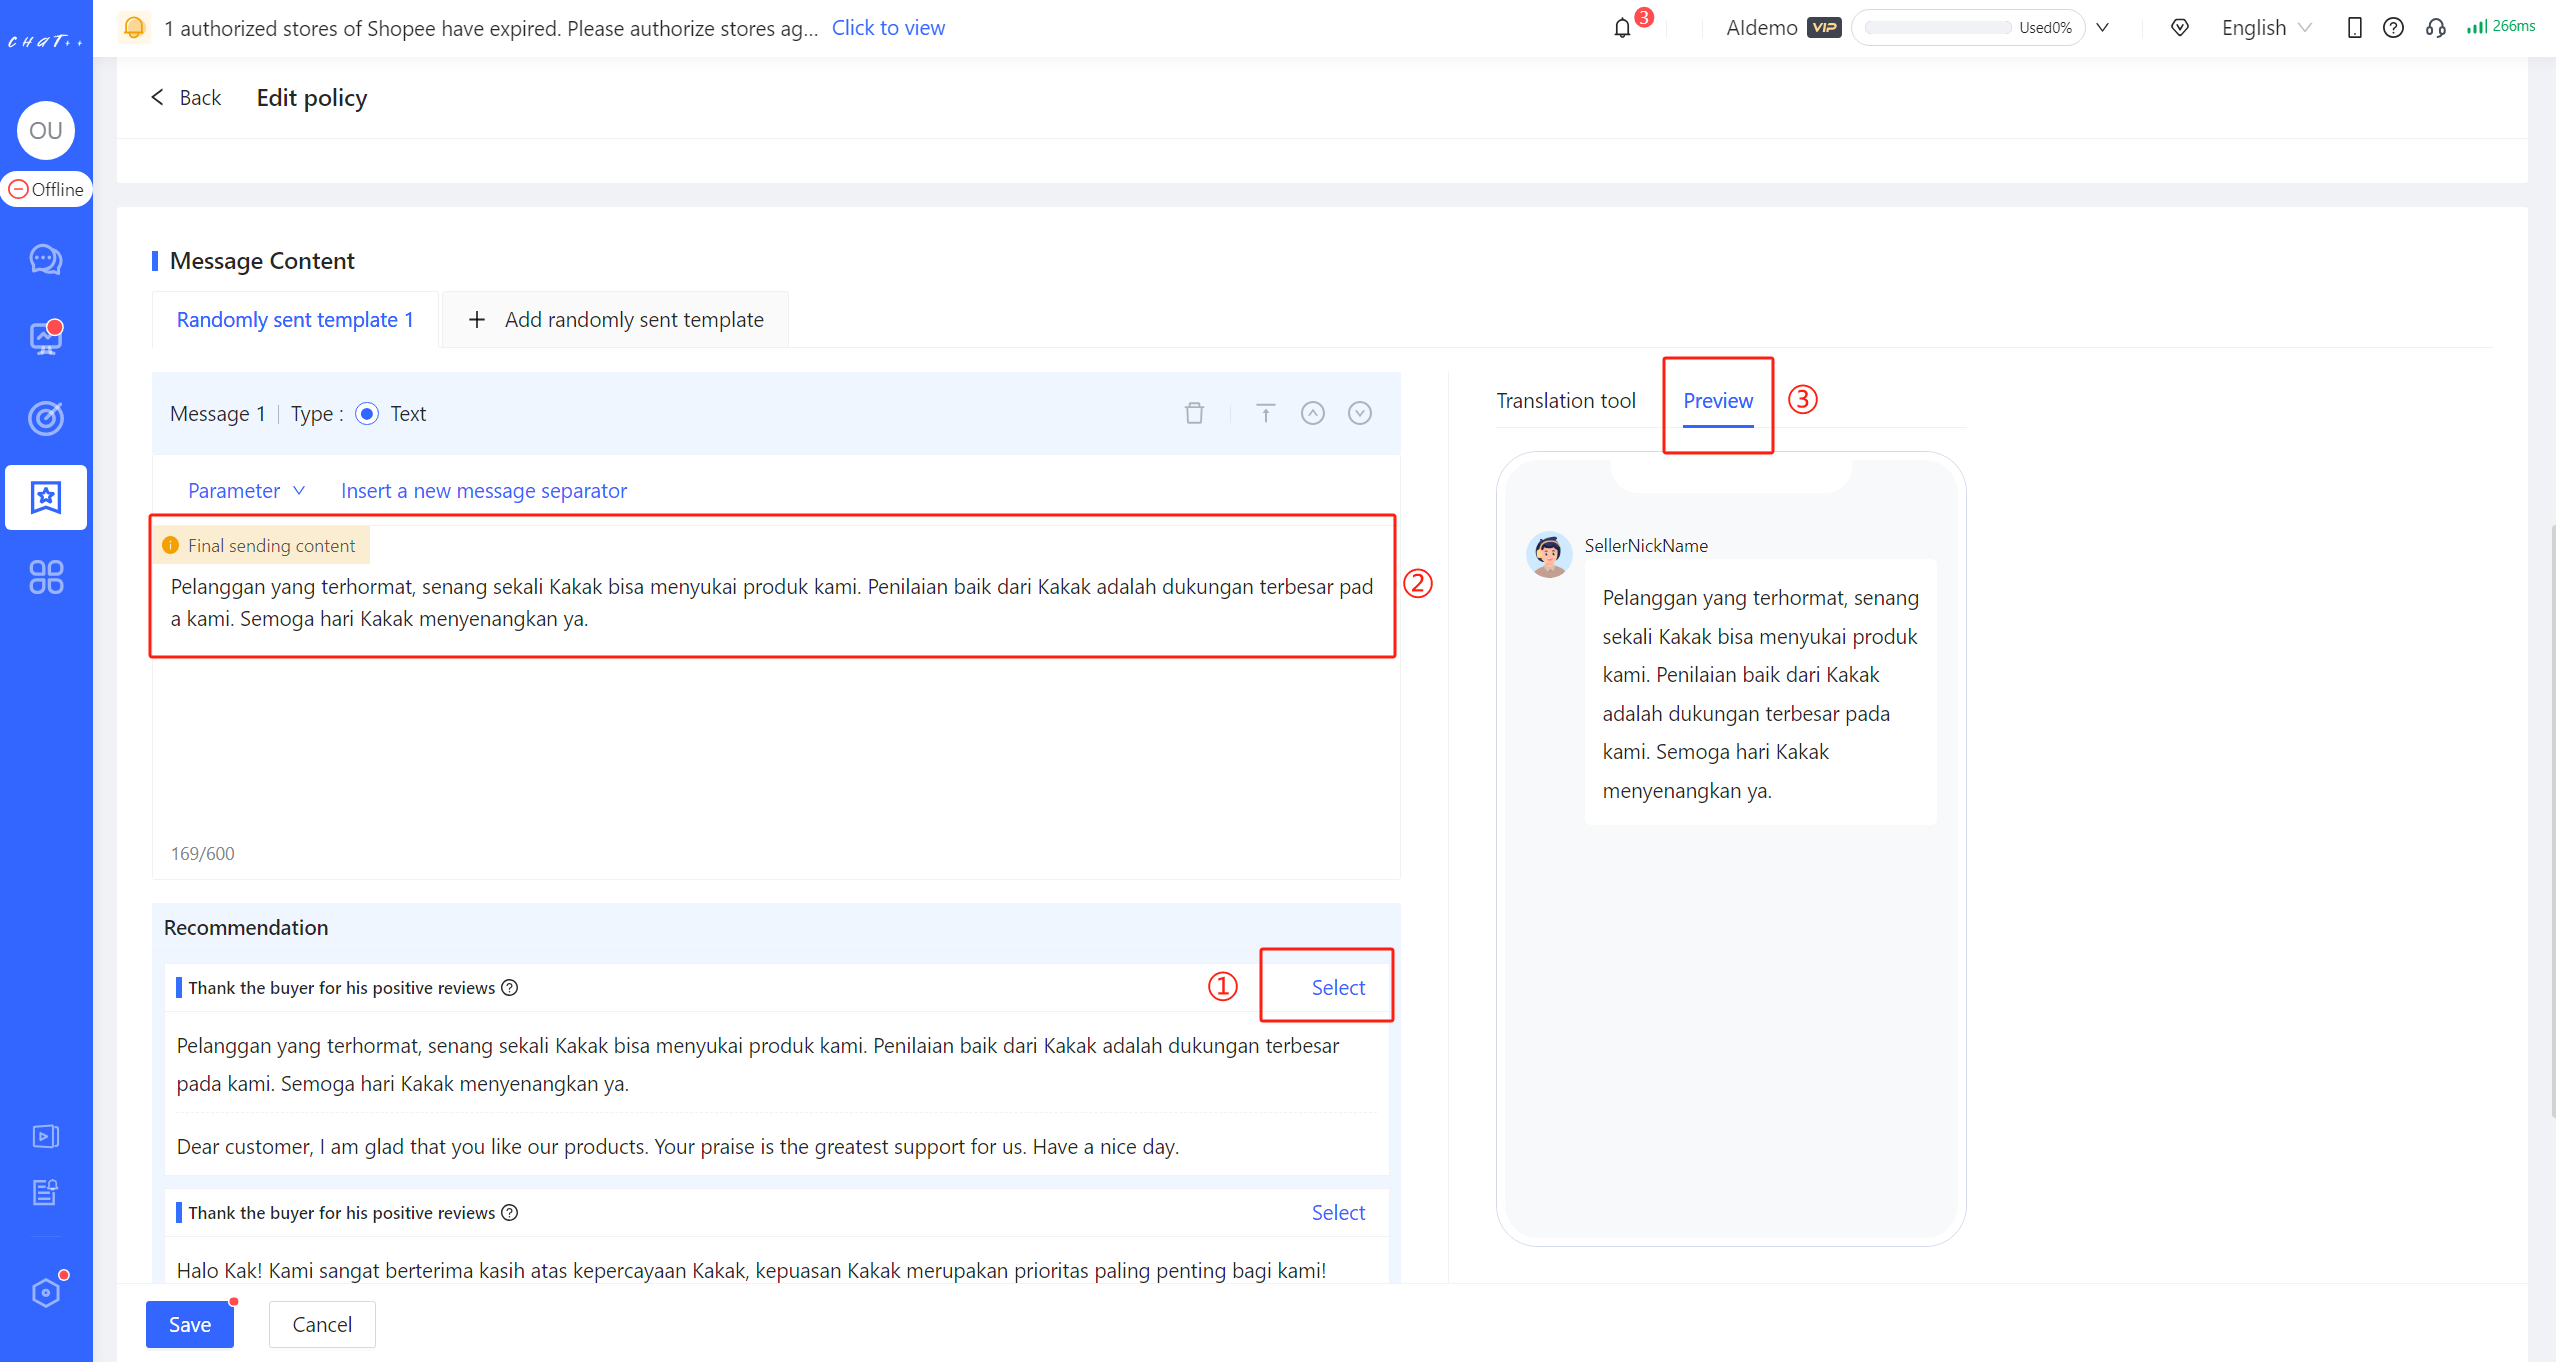
Figure 10
Add Buyer Nickname
Each buyer's review is different. To make the reply content more targeted, you can mention the buyer's nickname in the text message.
👆Select "Buyer Nickname" after clicking "Parameter" button (red box in Figure below), and the buyer's nickname will be automatically filled in.
Note: If you want to use templates along with buyer nickname, please follow these steps: Click "Select" (red box ① in Figure above) → Click on "Buyer Nickname" after selecting "Parameter" (red box below). If you click on the "Select" button for the template first, and buyer nickname in the content editing box will be replaced with the template content.
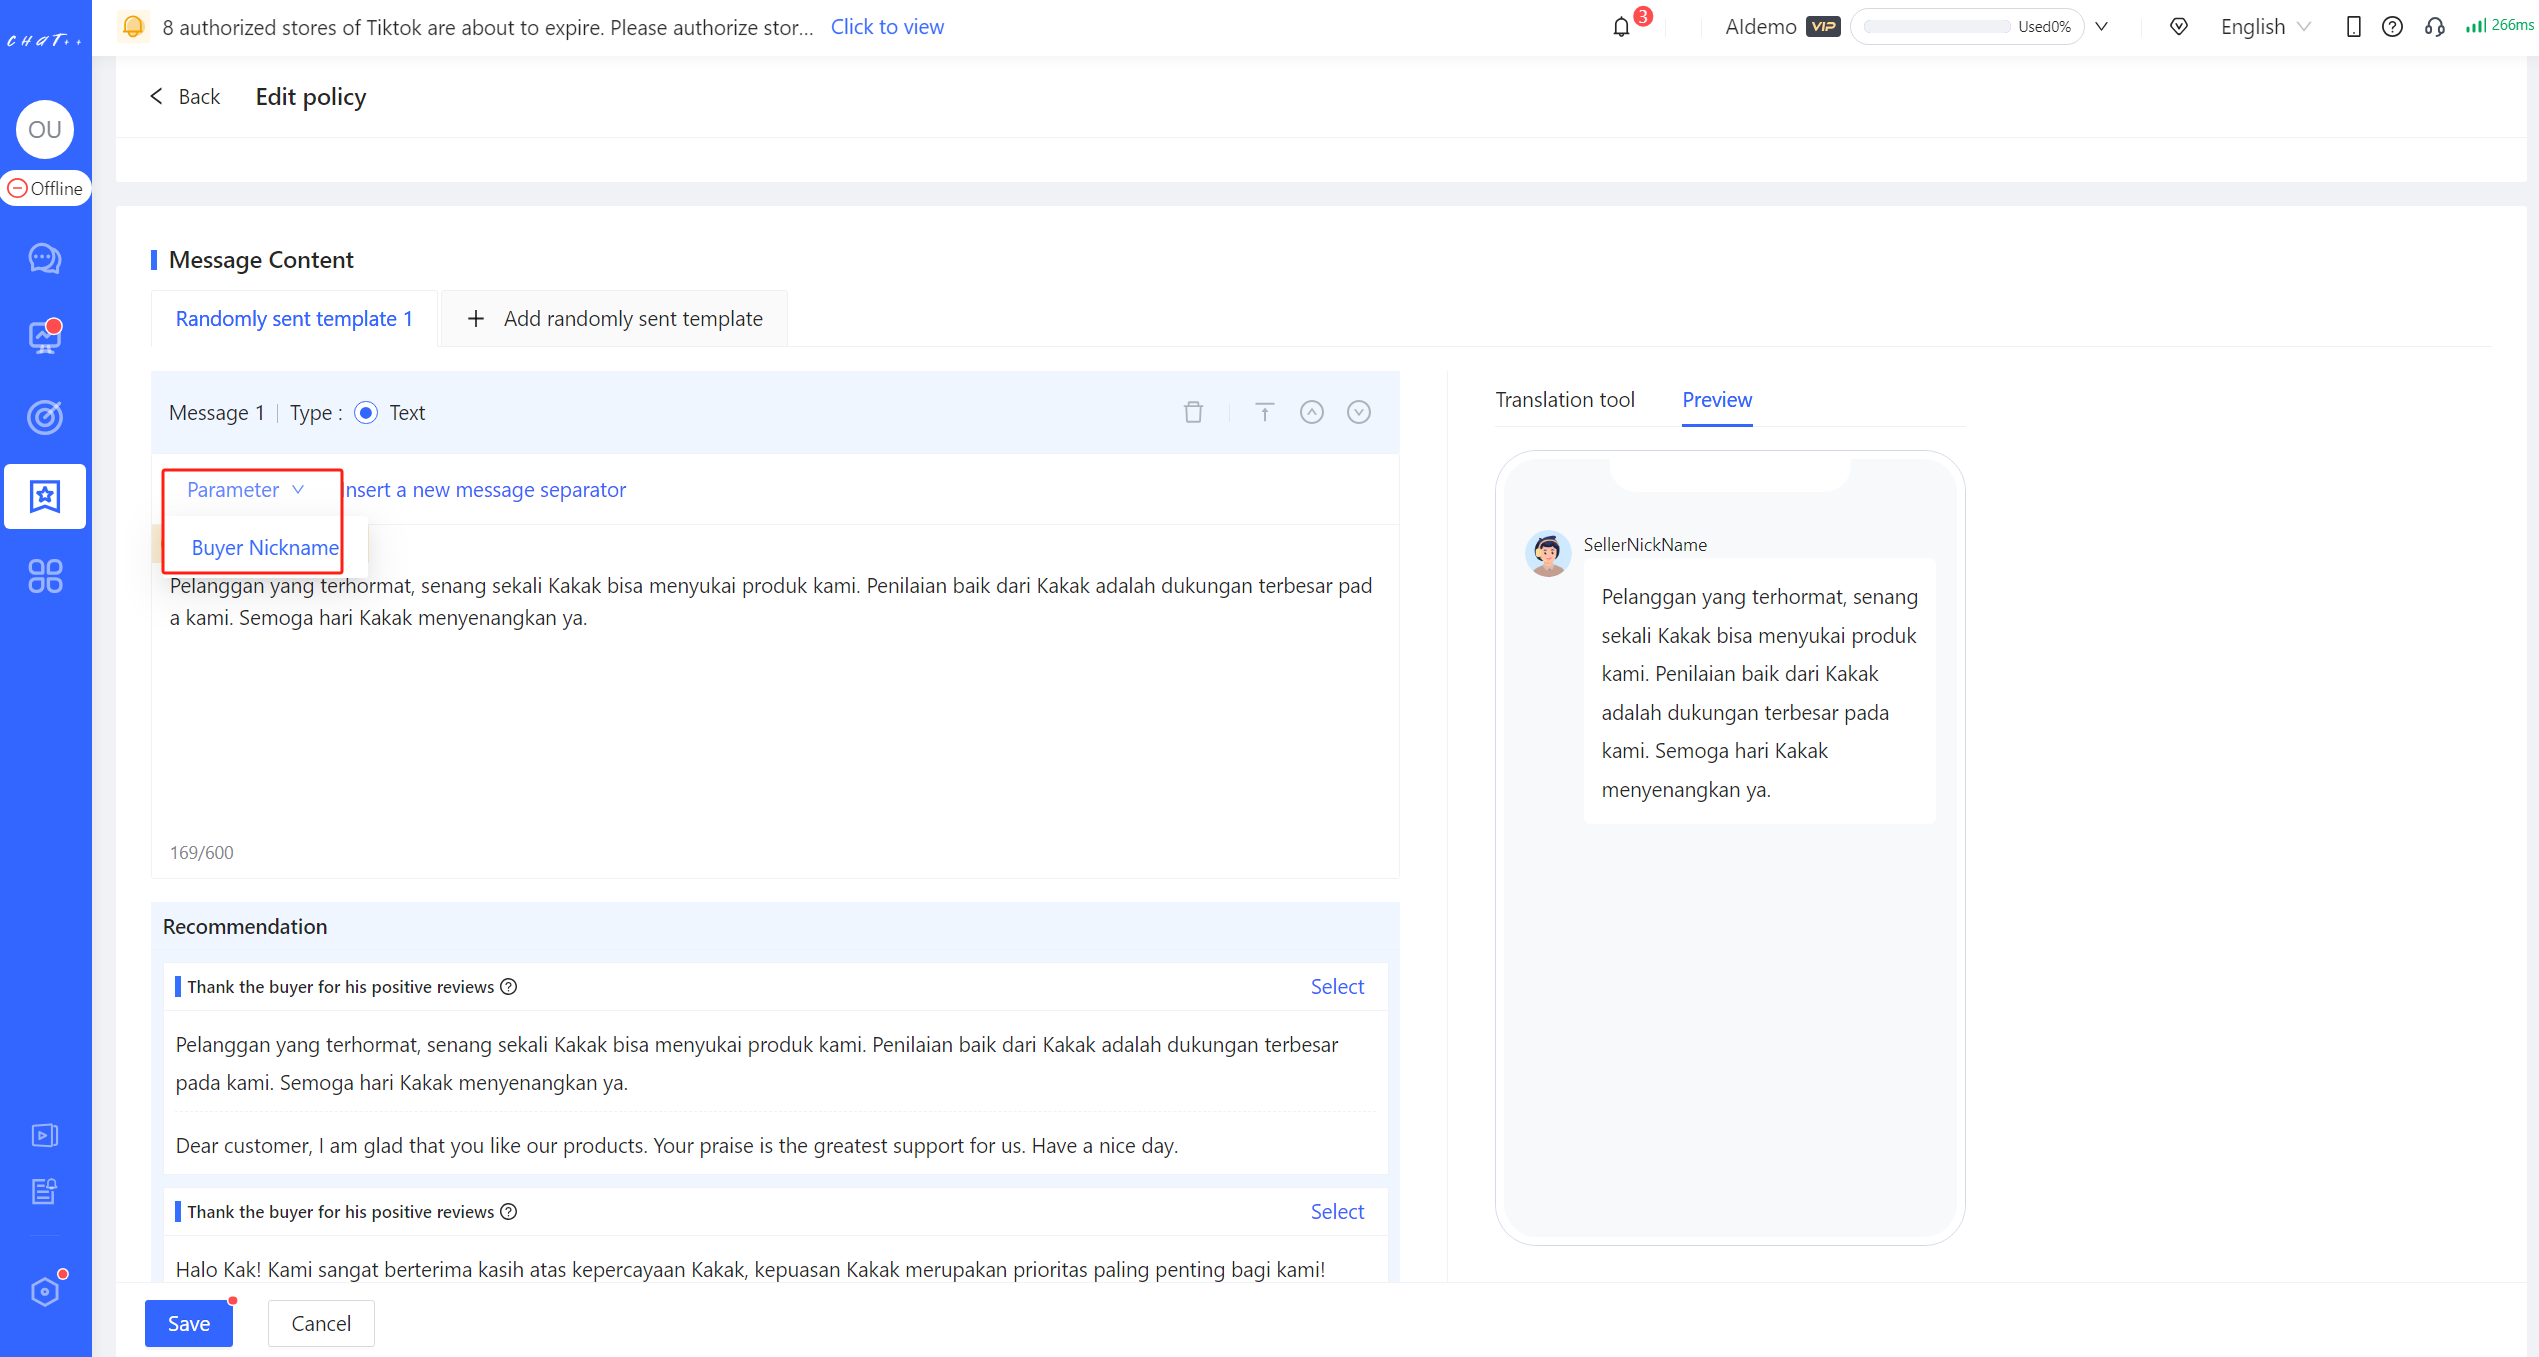
Figure 11
Randomly sent template
In order to improve the configuration efficiency of Positive Review Auto-reply, ChatPlusAI supports random sending. Click "Add randomly sent template" (red box ① in Figure 12 below), and up to 10 random templates can be added to one policy. One of them will be selected randomly to reply.
💡If you want to reply to one review multiple times simultaneously, you can click on "Insert a new message separator" format.
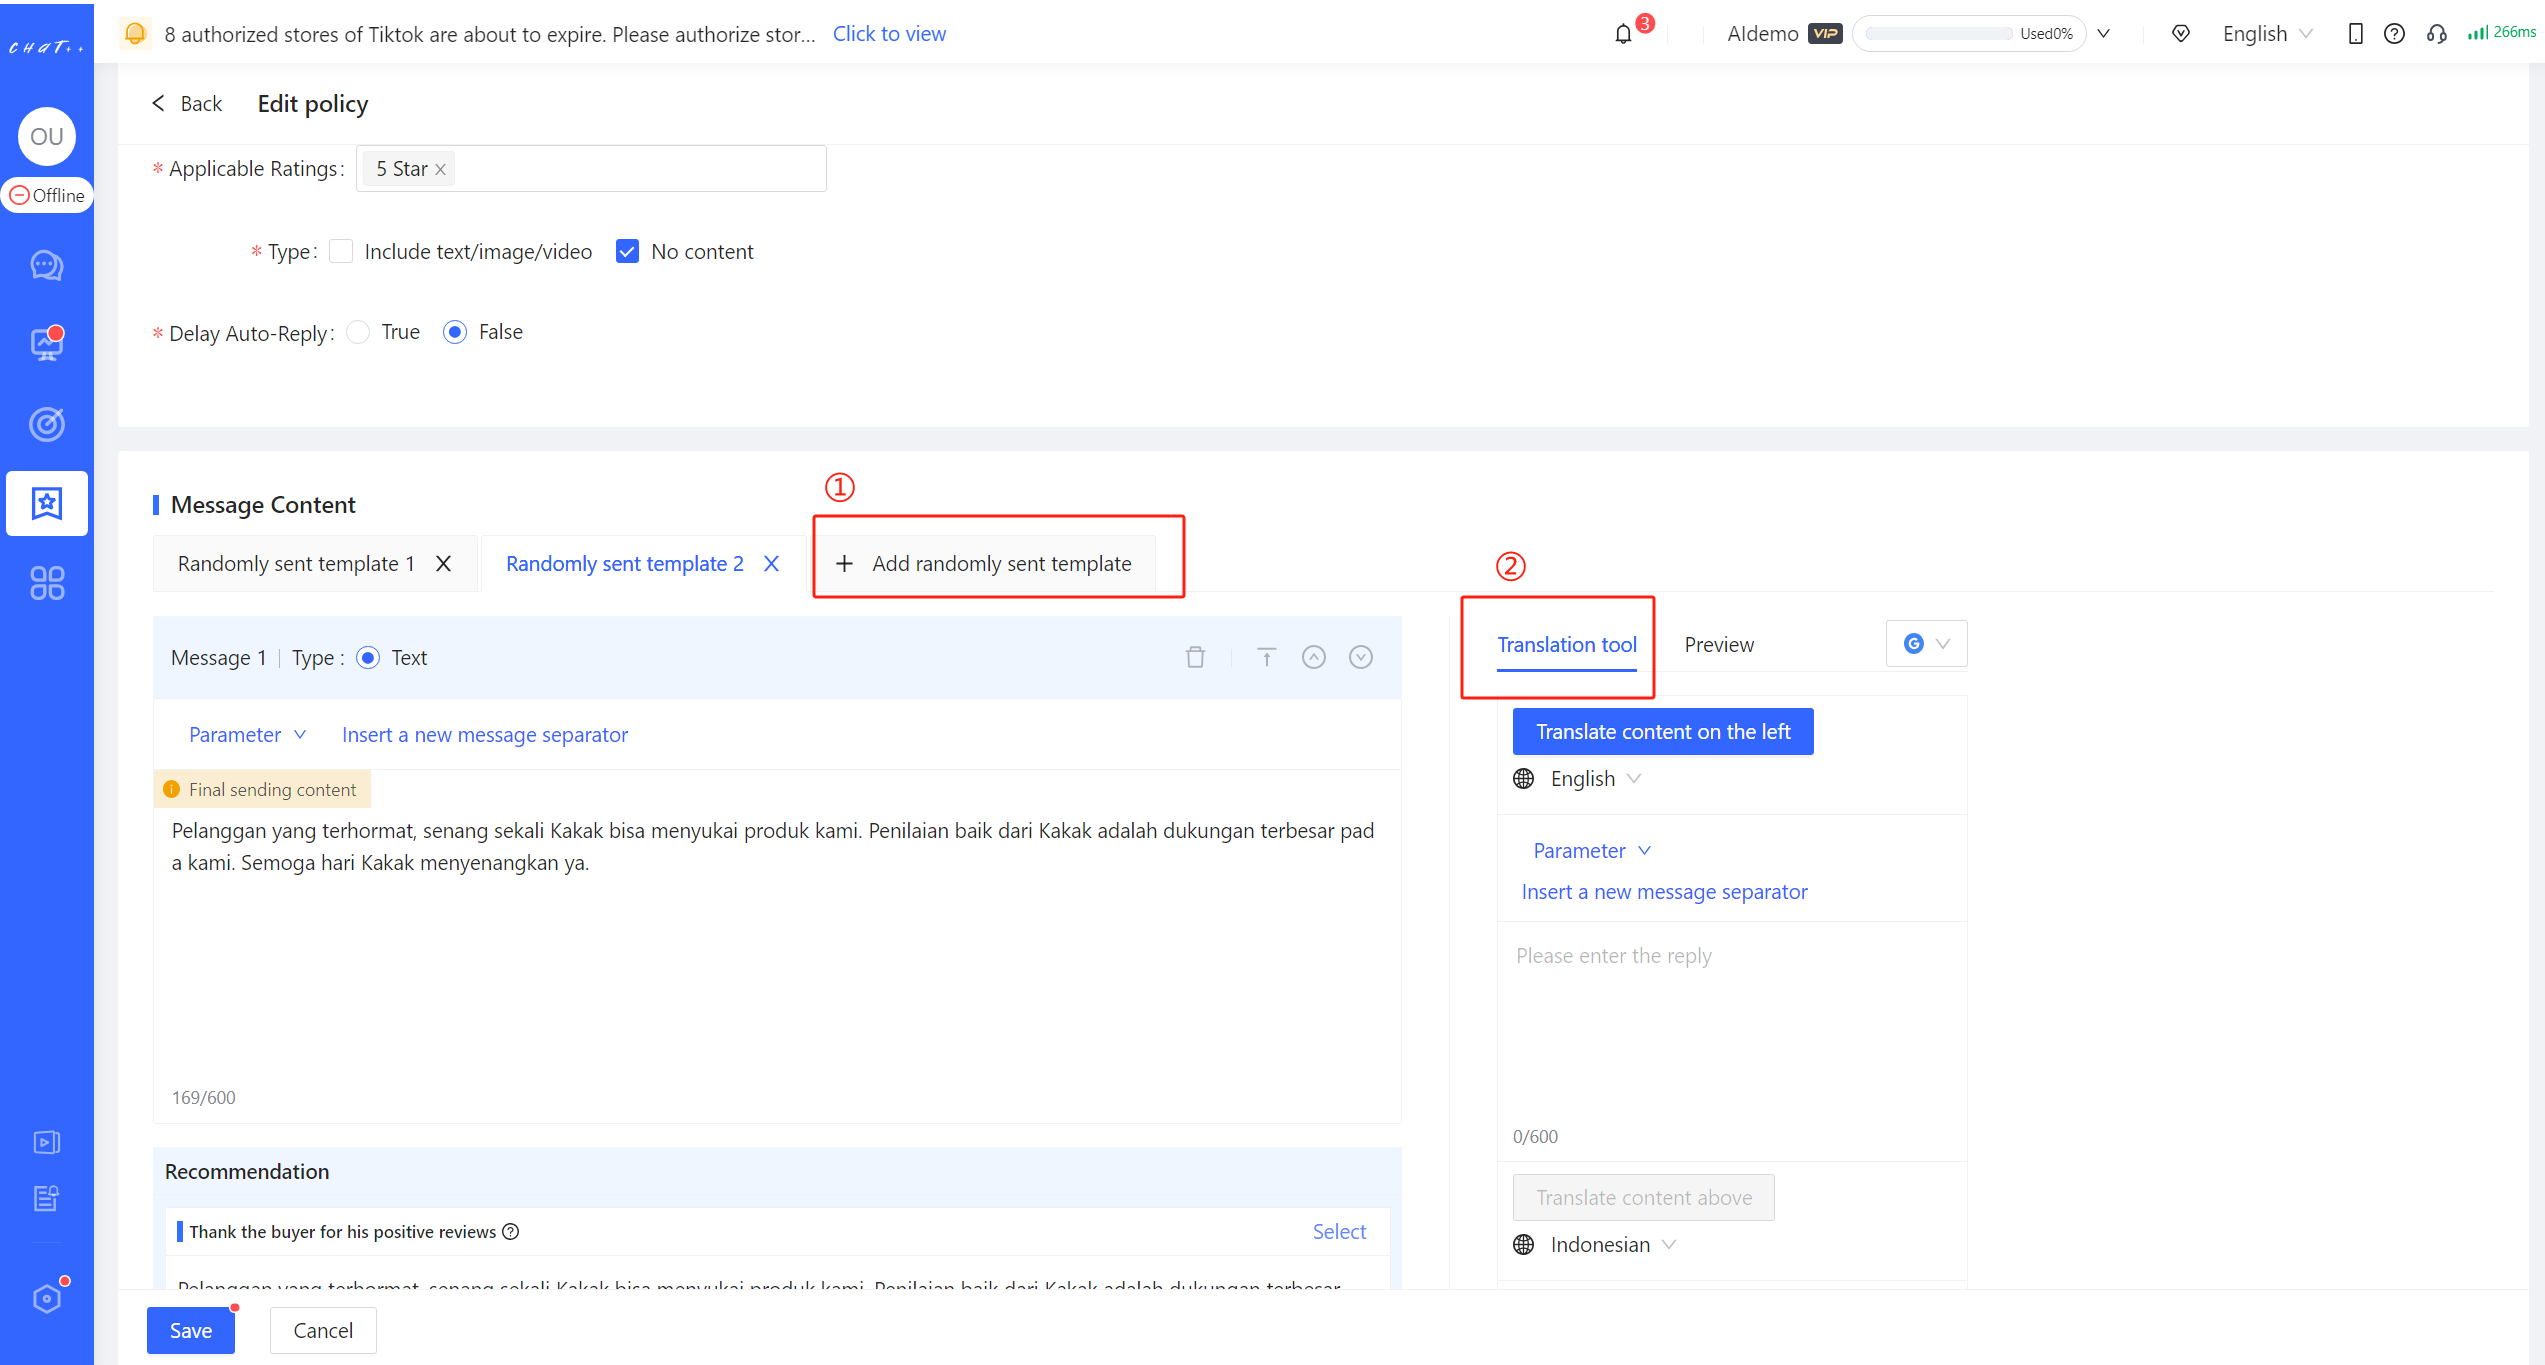
Figure 12
Quick Multilingual Translation
If message content includes text messages and you need to continuously adjust the content to find the optimal one, ChatPlusAI supports translating it into the current system language first. After modification, it can be translated back into site language. It facilitates quick adjustments to translated messages. When you want to adjust templates quickly, it allows you to translate the content already in site language back to system language with one click. After optimizing, you can then translate it back to the site language.
Click on "Translation too"(red box② above) and after message content is automatically filled, click on "Translate content on the left" (red box① in Figure below). The final sending content on the left side (red box⑤ in Figure below) will be translated by default into current system language. If you need to translate it into other languages, you can switch the target language. The content translated into current system language is editable. When you edit the content in this area (red box② in Figure below), you can click "Translate content above" (red box③ in Figure below) to translate it into the site language. After translation, you can click "Copy to Final Sending Content" (red box④ in Figure below) to copy it. Click "Save" (red box⑥ in Figure below) to complete the configuration.
If message content doesn't need modification, ChatPlusAI supports translating the content directly into the site language.
Click on "Translation tool"(red box ② above), and after message content is automatically filled, click on "Translate content above" (red box③ in Figure below). It will be directly translated into the site language. Click "Copy to Final Sending Content" (red box④ in Figure below), and the translated content will be automatically filled into the "Final sending content" area (red box⑤ in Figure below). Click "Save" (red box⑥ in Figure below) to complete the configuration.
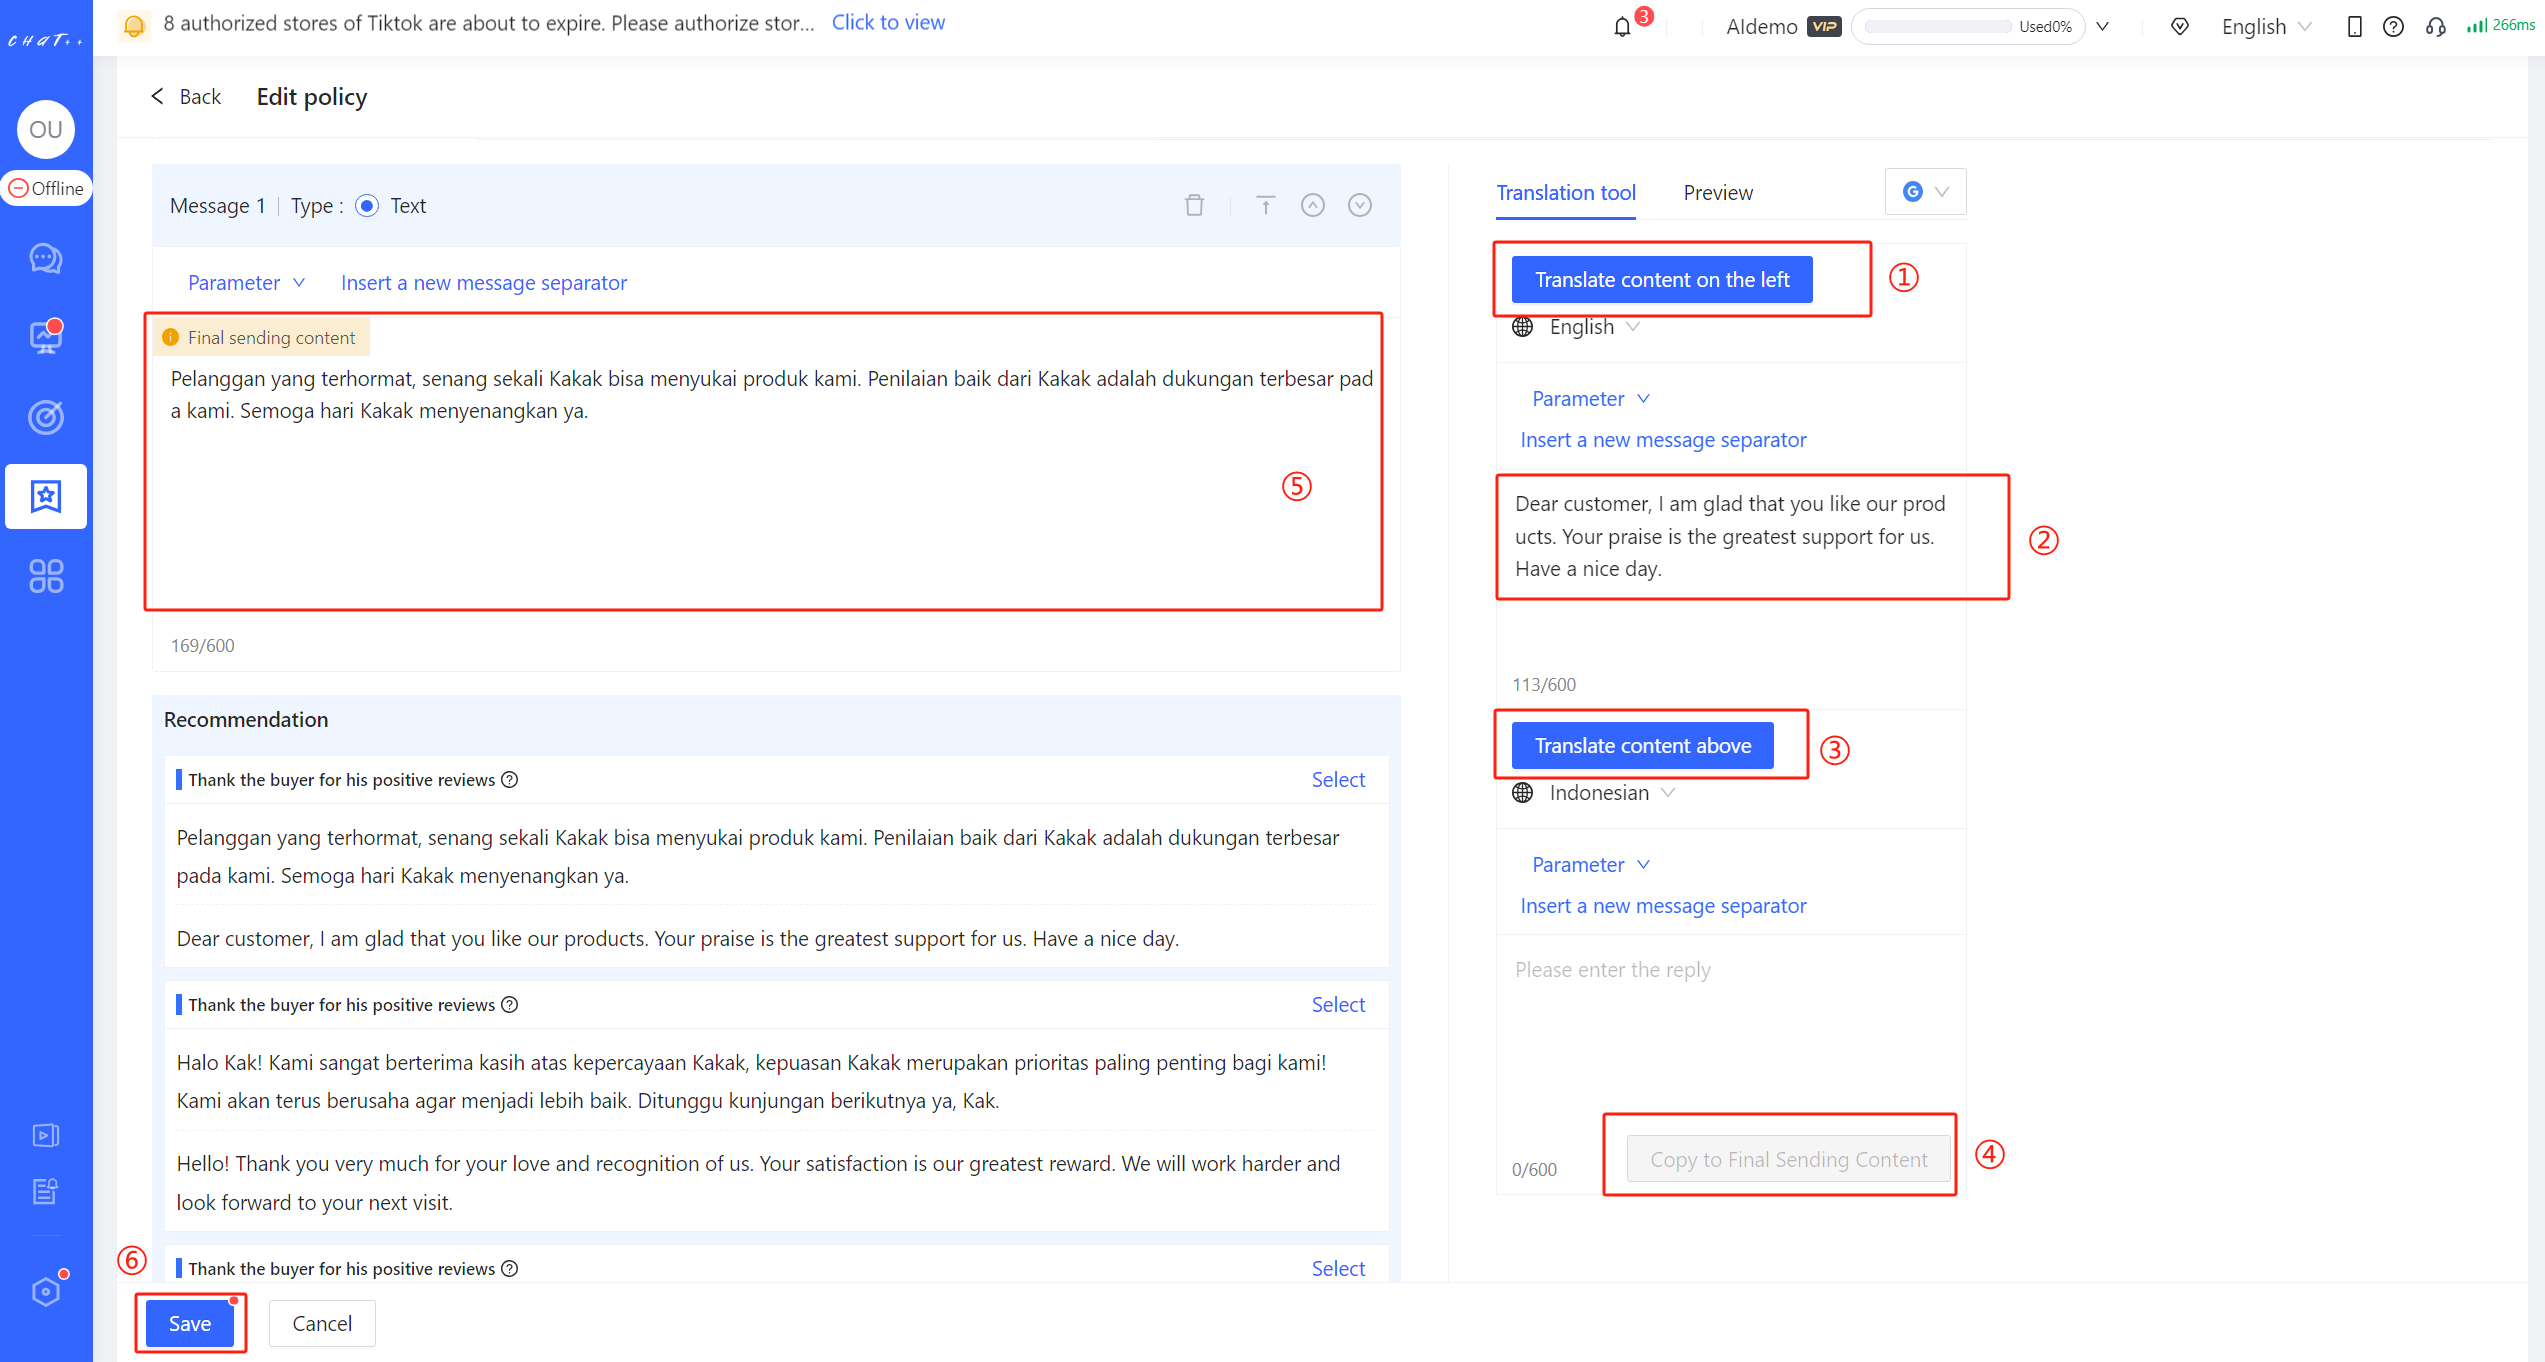
Figure 13
Diversified Reply Configuration
Add Policy
👆Click on "Add policy" (red box① below) to set diverse policy branches for a task, achieving different replies for the same task between different products, for different positive reviews, and in different forms of content. It will ensure the best effect.
Policy Branch Execution Sequence" Description
When there are multiple effective policy branches in the Policy Branch Collection, the system will execute the first policy that matches the conditions according to execution sequence, and subsequent policies will not be executed.
👆Hover the cursor over the "More" position to change the execution order through "Top/Up/Down/Bottom" (red box ② below).
Note: If none of the policy branches match, the message content for Positive Review Auto-reply will not be sent.
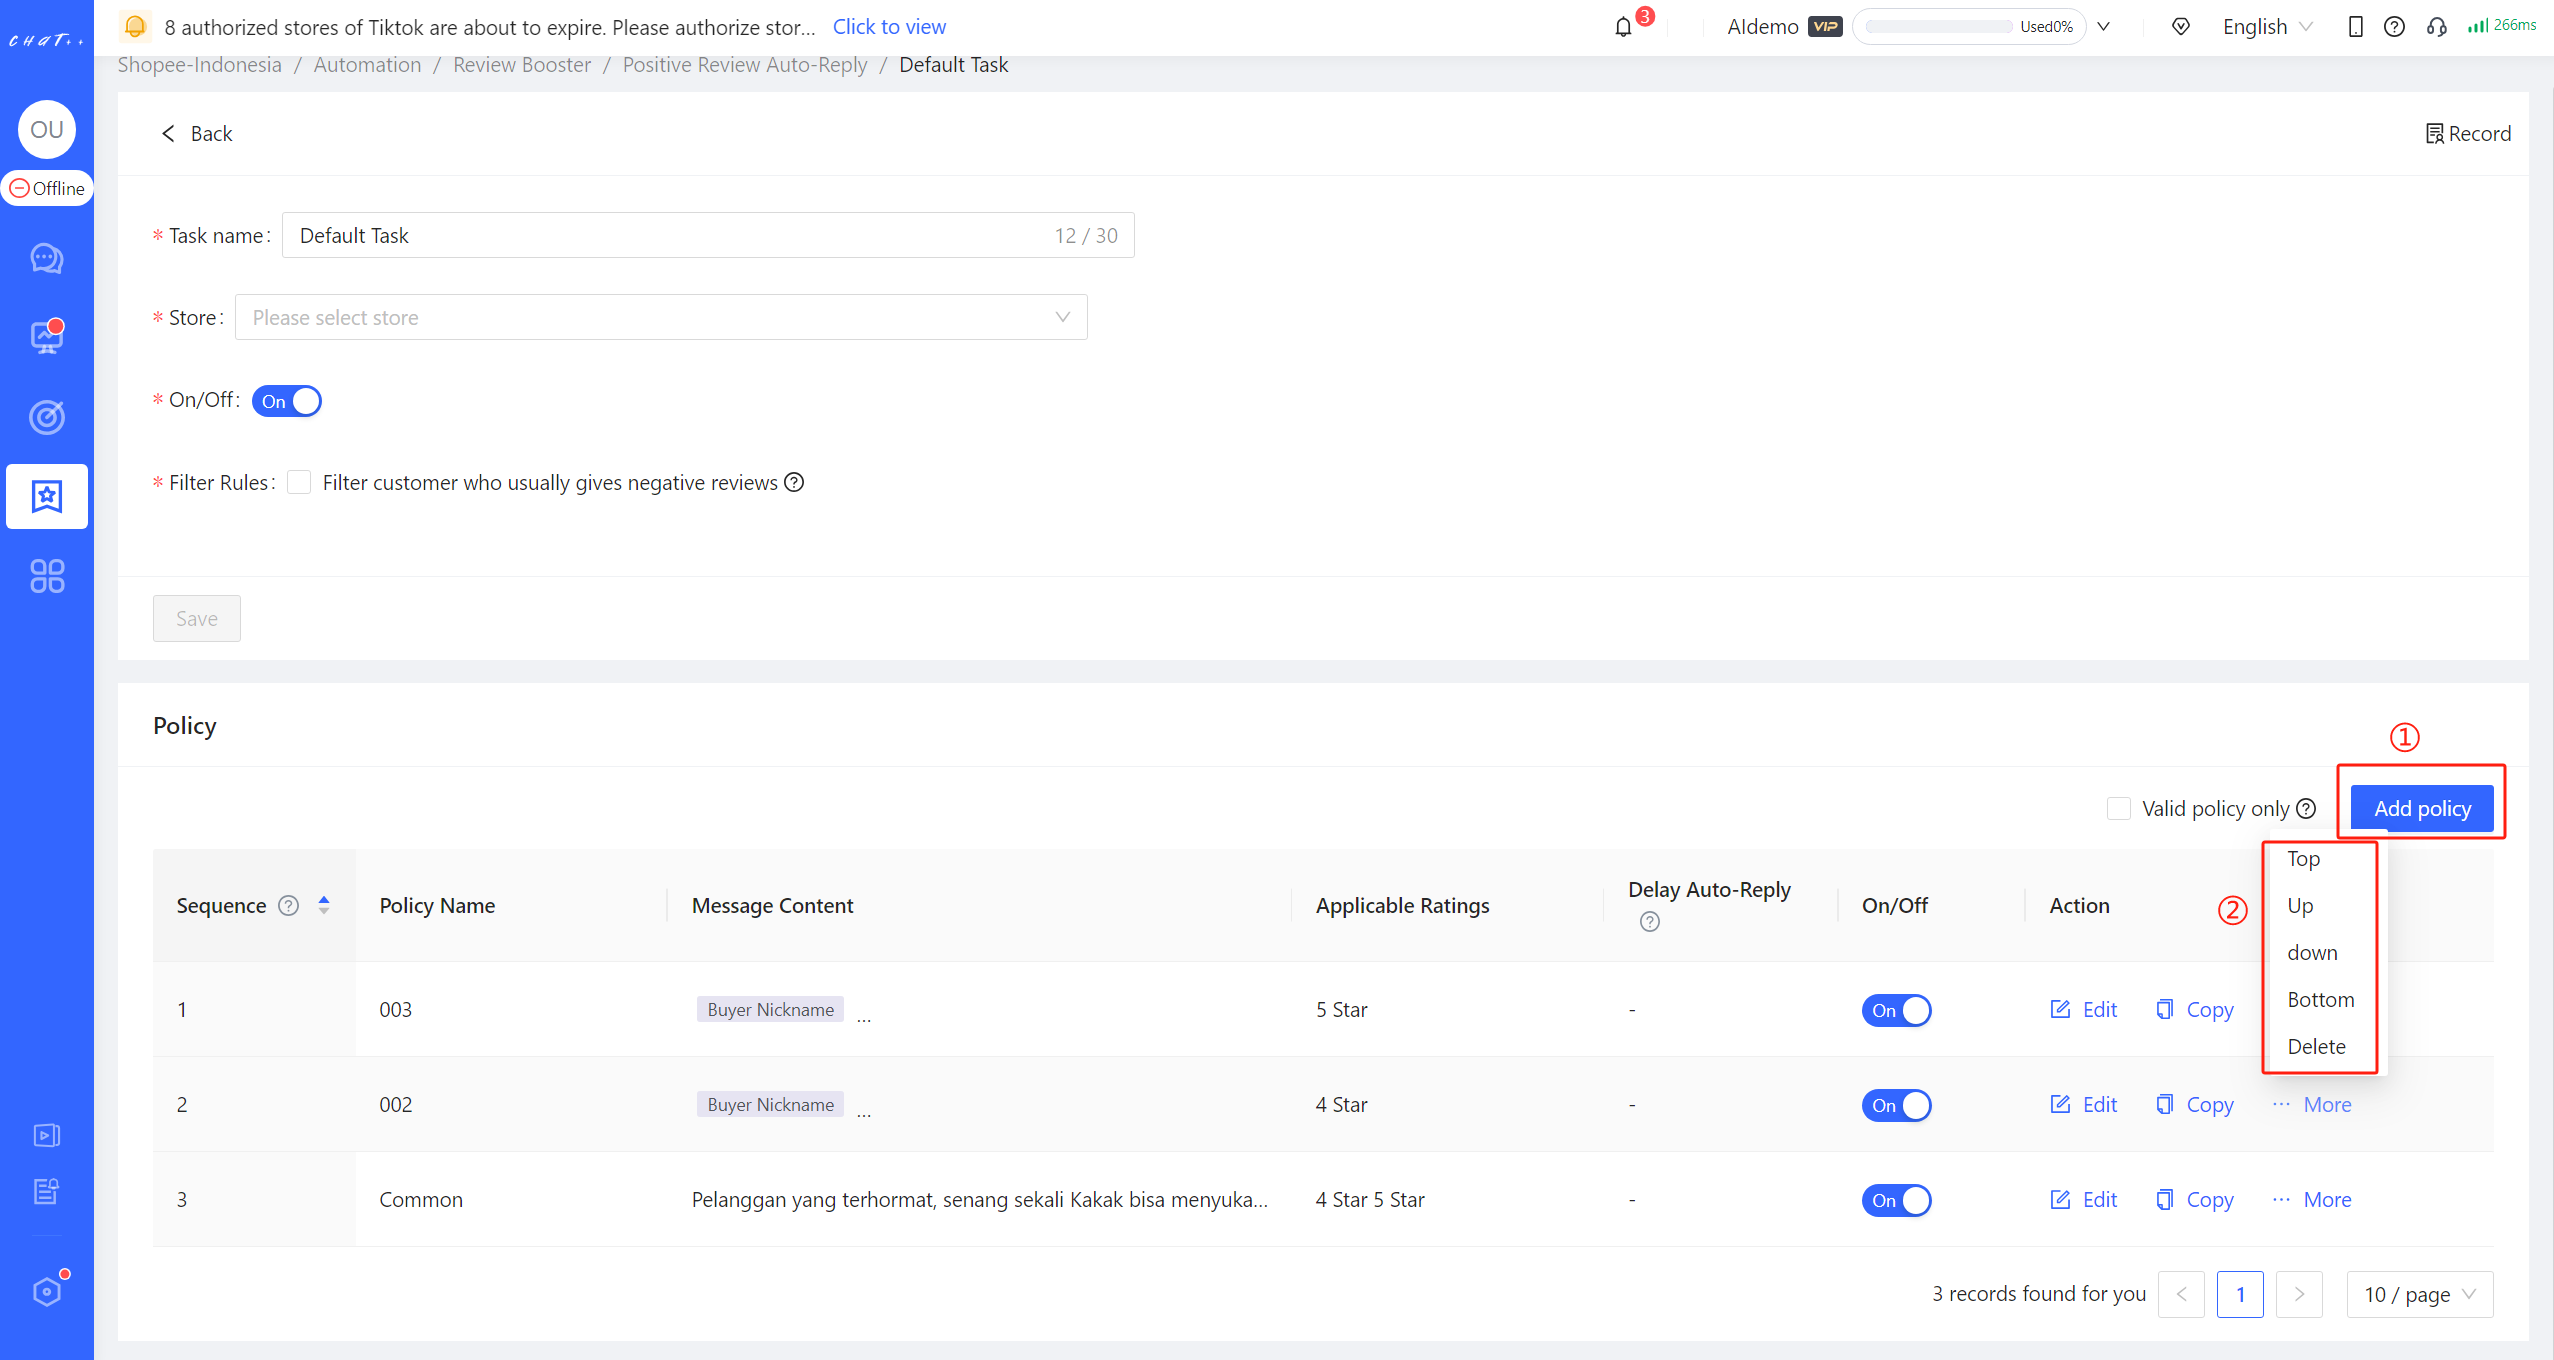
Figure 14
Add Task
👆Click on "Add Task" (red box 14 below) to set different tasks for different stores, achieving differentiated Positive Review Auto-reply for different stores.
In a new task, the added store will be removed from the applied stores of other tasks, ensuring that "one store will not exist in two tasks simultaneously" to avoid sending different Positive Review Auto-reply scripts to buyers multiple times.
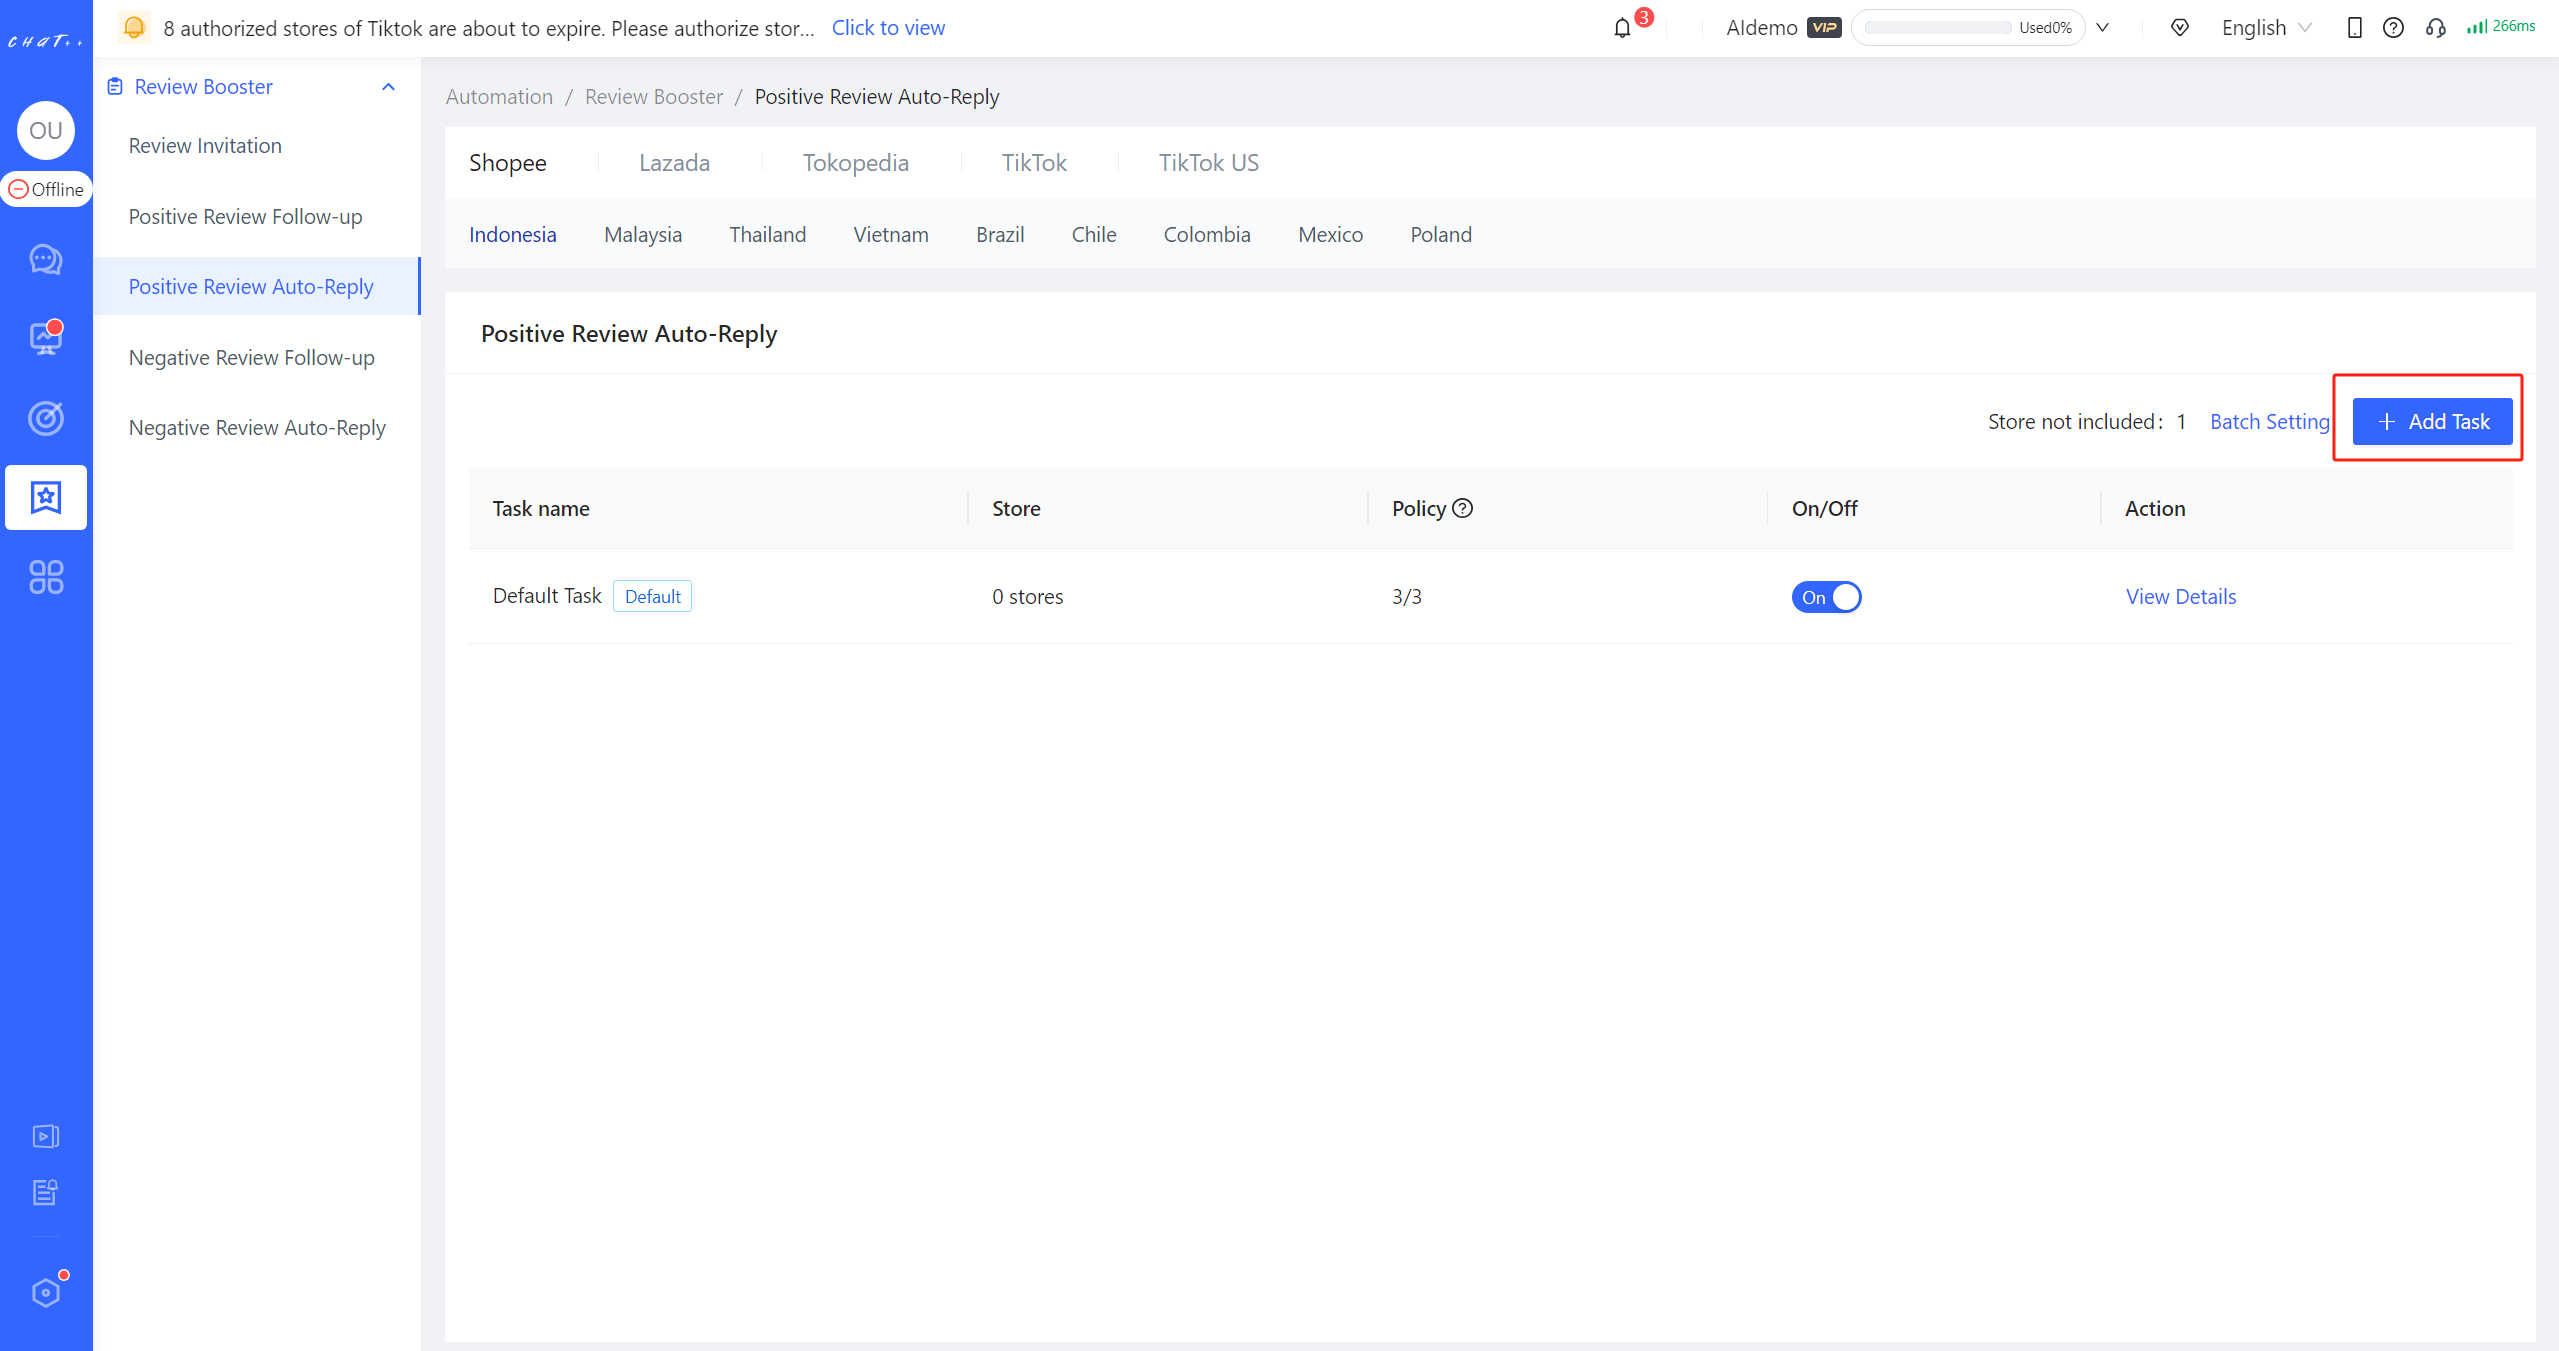
Figure 15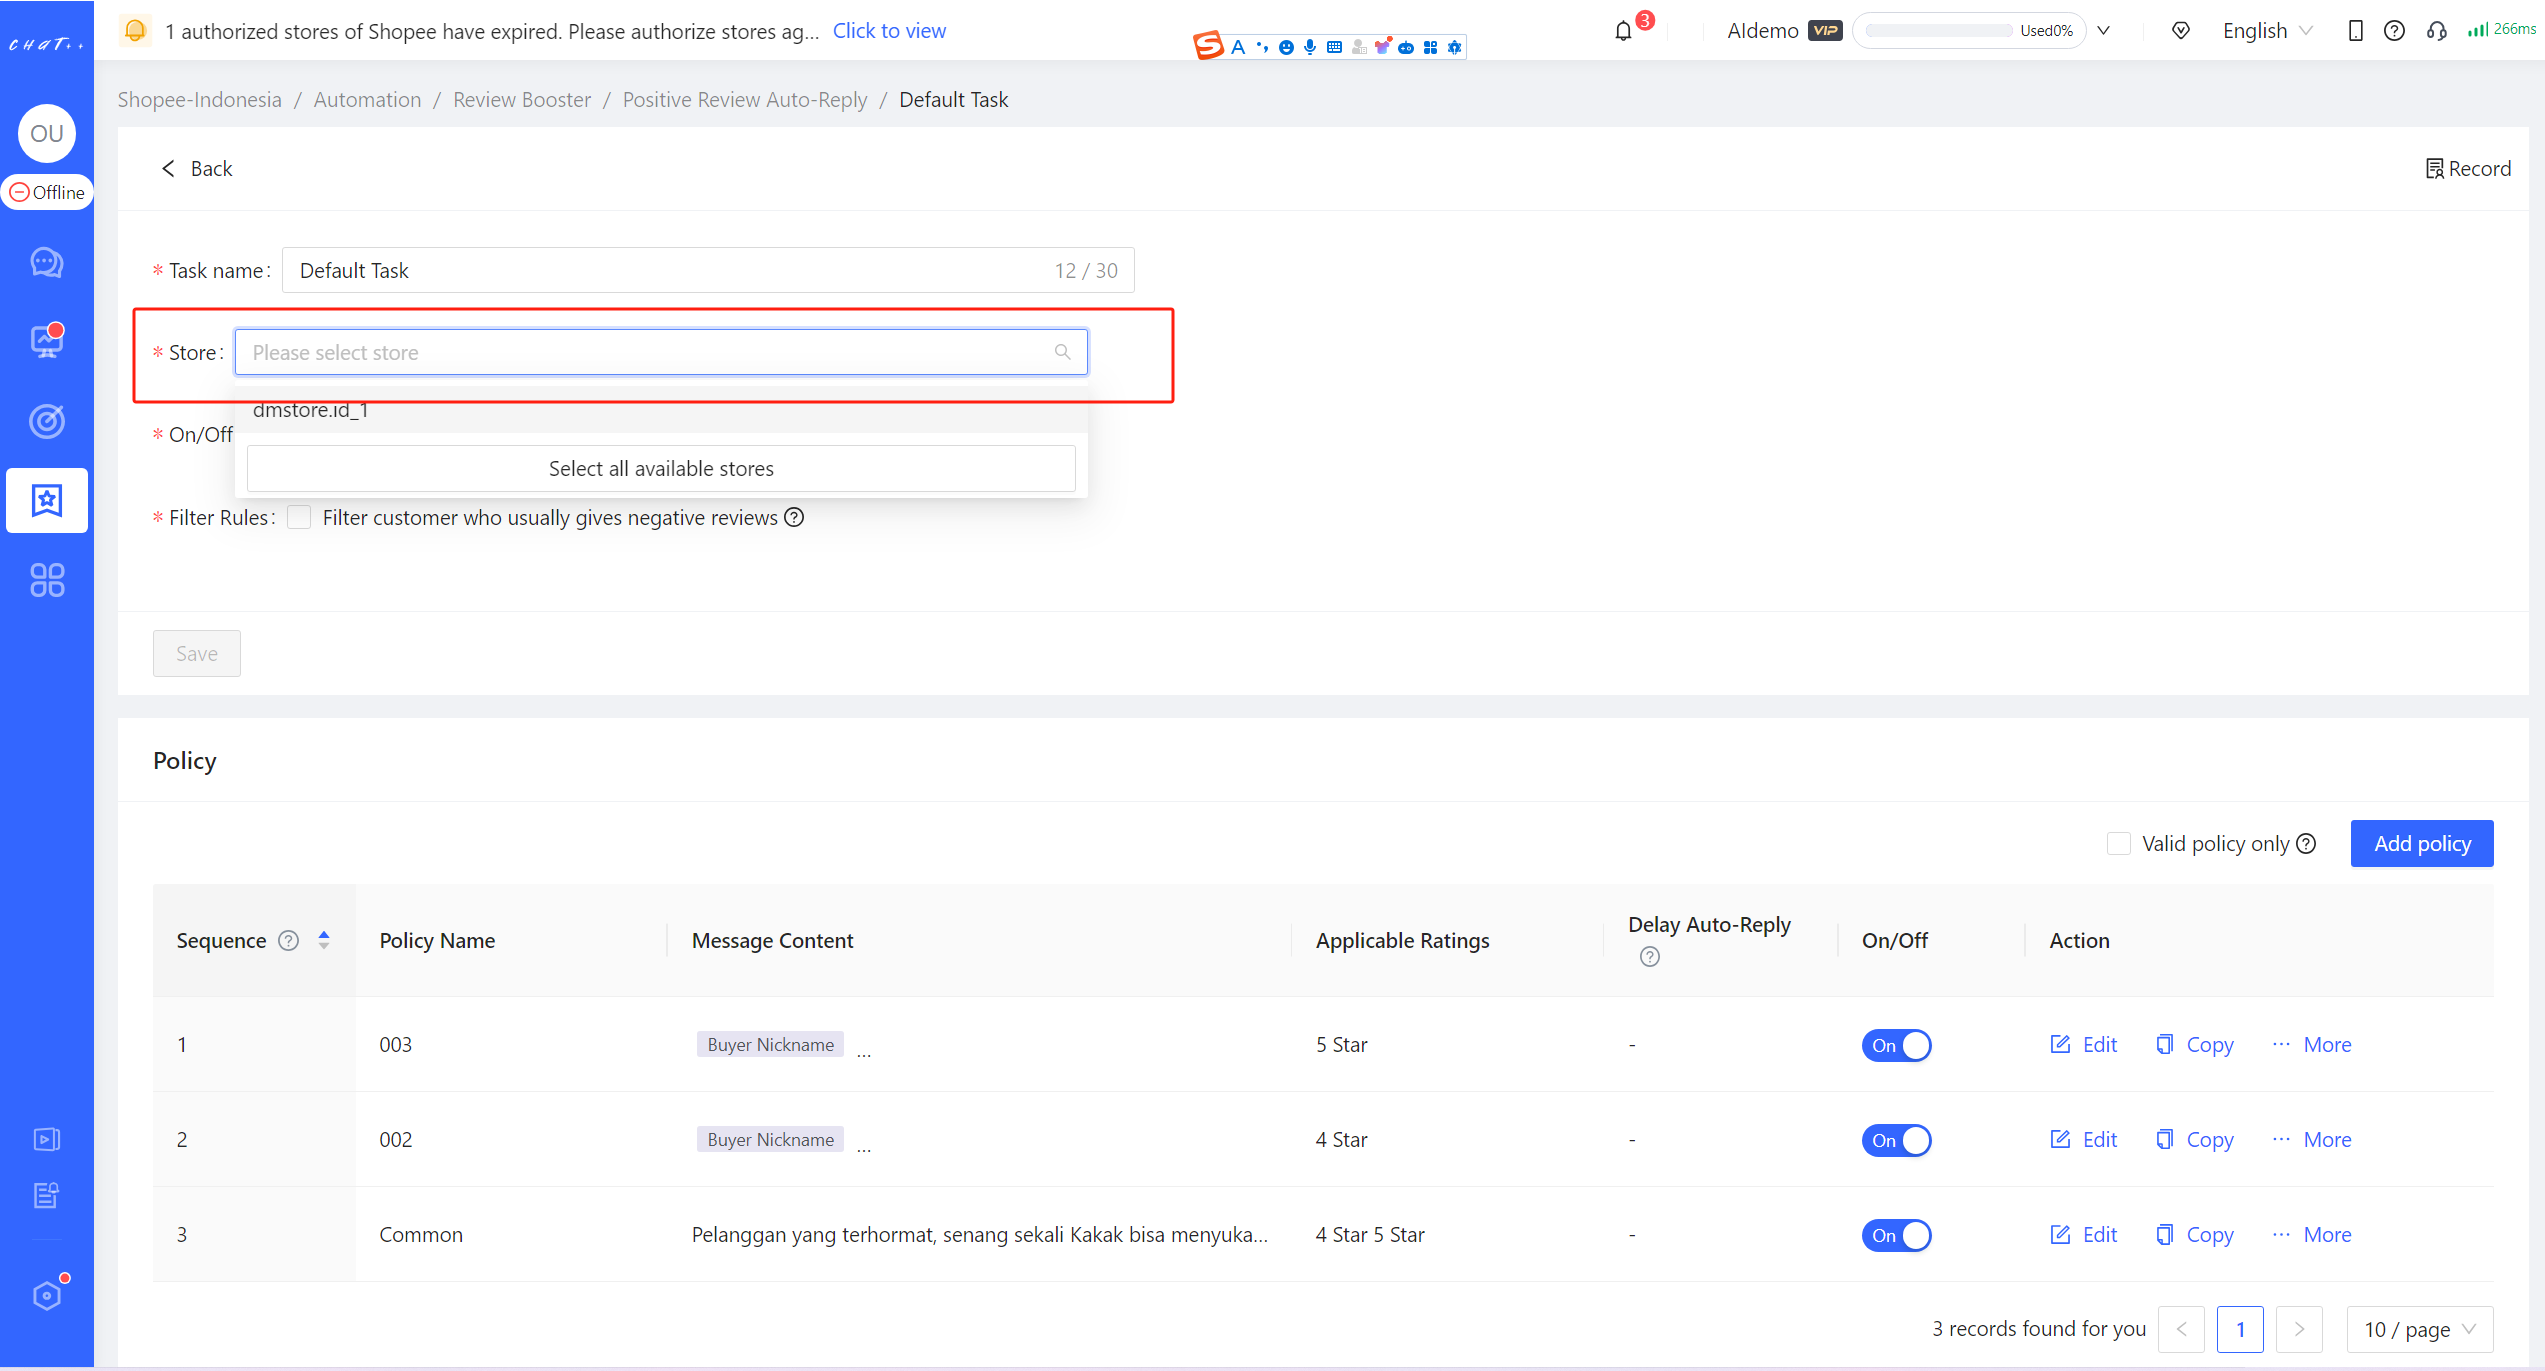
Figure 16
Attention
1、Positive Review Auto-reply tasks can be customized differently for marketplaces, currently supporting Shopee and Lazada. Tokopedia and TikTok support are coming soon, stay tuned.
2、Different sites of the same marketplace has its own Positive Review Auto-Reply task, you need to configure them respectively.
3、Lazada does not support automatic review replies for reviews without content.
FAQ
Q1:How to Quickly Adjust/View the Message Content?
A1:In the process of adjusting scripts, you need to translate the content that has already been translated into the site language back into system language to view and adjust it. After adjustments, it can be translated back into the site language. In this process, continuous adjustments to scripts may be needed to achieve optimal results. To simplify your operation steps, ChatPlusAI has added a translation tool to the configuration page.
- View the original message content (templates translated from site language to system language)
Go to the configuration page: click on "Automation" in the left menu bar, then select "Review Booster" and "Positive Review Auto-Reply". Choose the marketplace and site, find the positive review auto-reply task that needs to be viewed/adjusted, and click on the "View Details" button on the right side of the task. Find the policy branches that need to be viewed/adjusted.
To view: click on 【「Edit 」→「 Translation tool** 」→「 Translate content on the left **」】to view the message translated from site language to system language. (By default, it is translated into the current system language. If you need to translate it into other languages, you can switch to the target language.)
- Adjust and translate the Message Content
Edit and adjust: After clicking on 「Translate content on the left」, the message in the site language will be translated into current system language and automatically filled in the area below (red box ② below). You can make edits and adjustments in that area.
Once the adjustments are completed, translate into site language: Click on【「Translate content above 」(red box ③ below) and then click on 「Copy to Final Sending Content」 ( red box ④ below). This will allow you to quickly fill in the content translated into site language in the final sending area (red box ⑤ below).
Configuration: Click on「Save」 (red box ⑥ below) to successfully configure.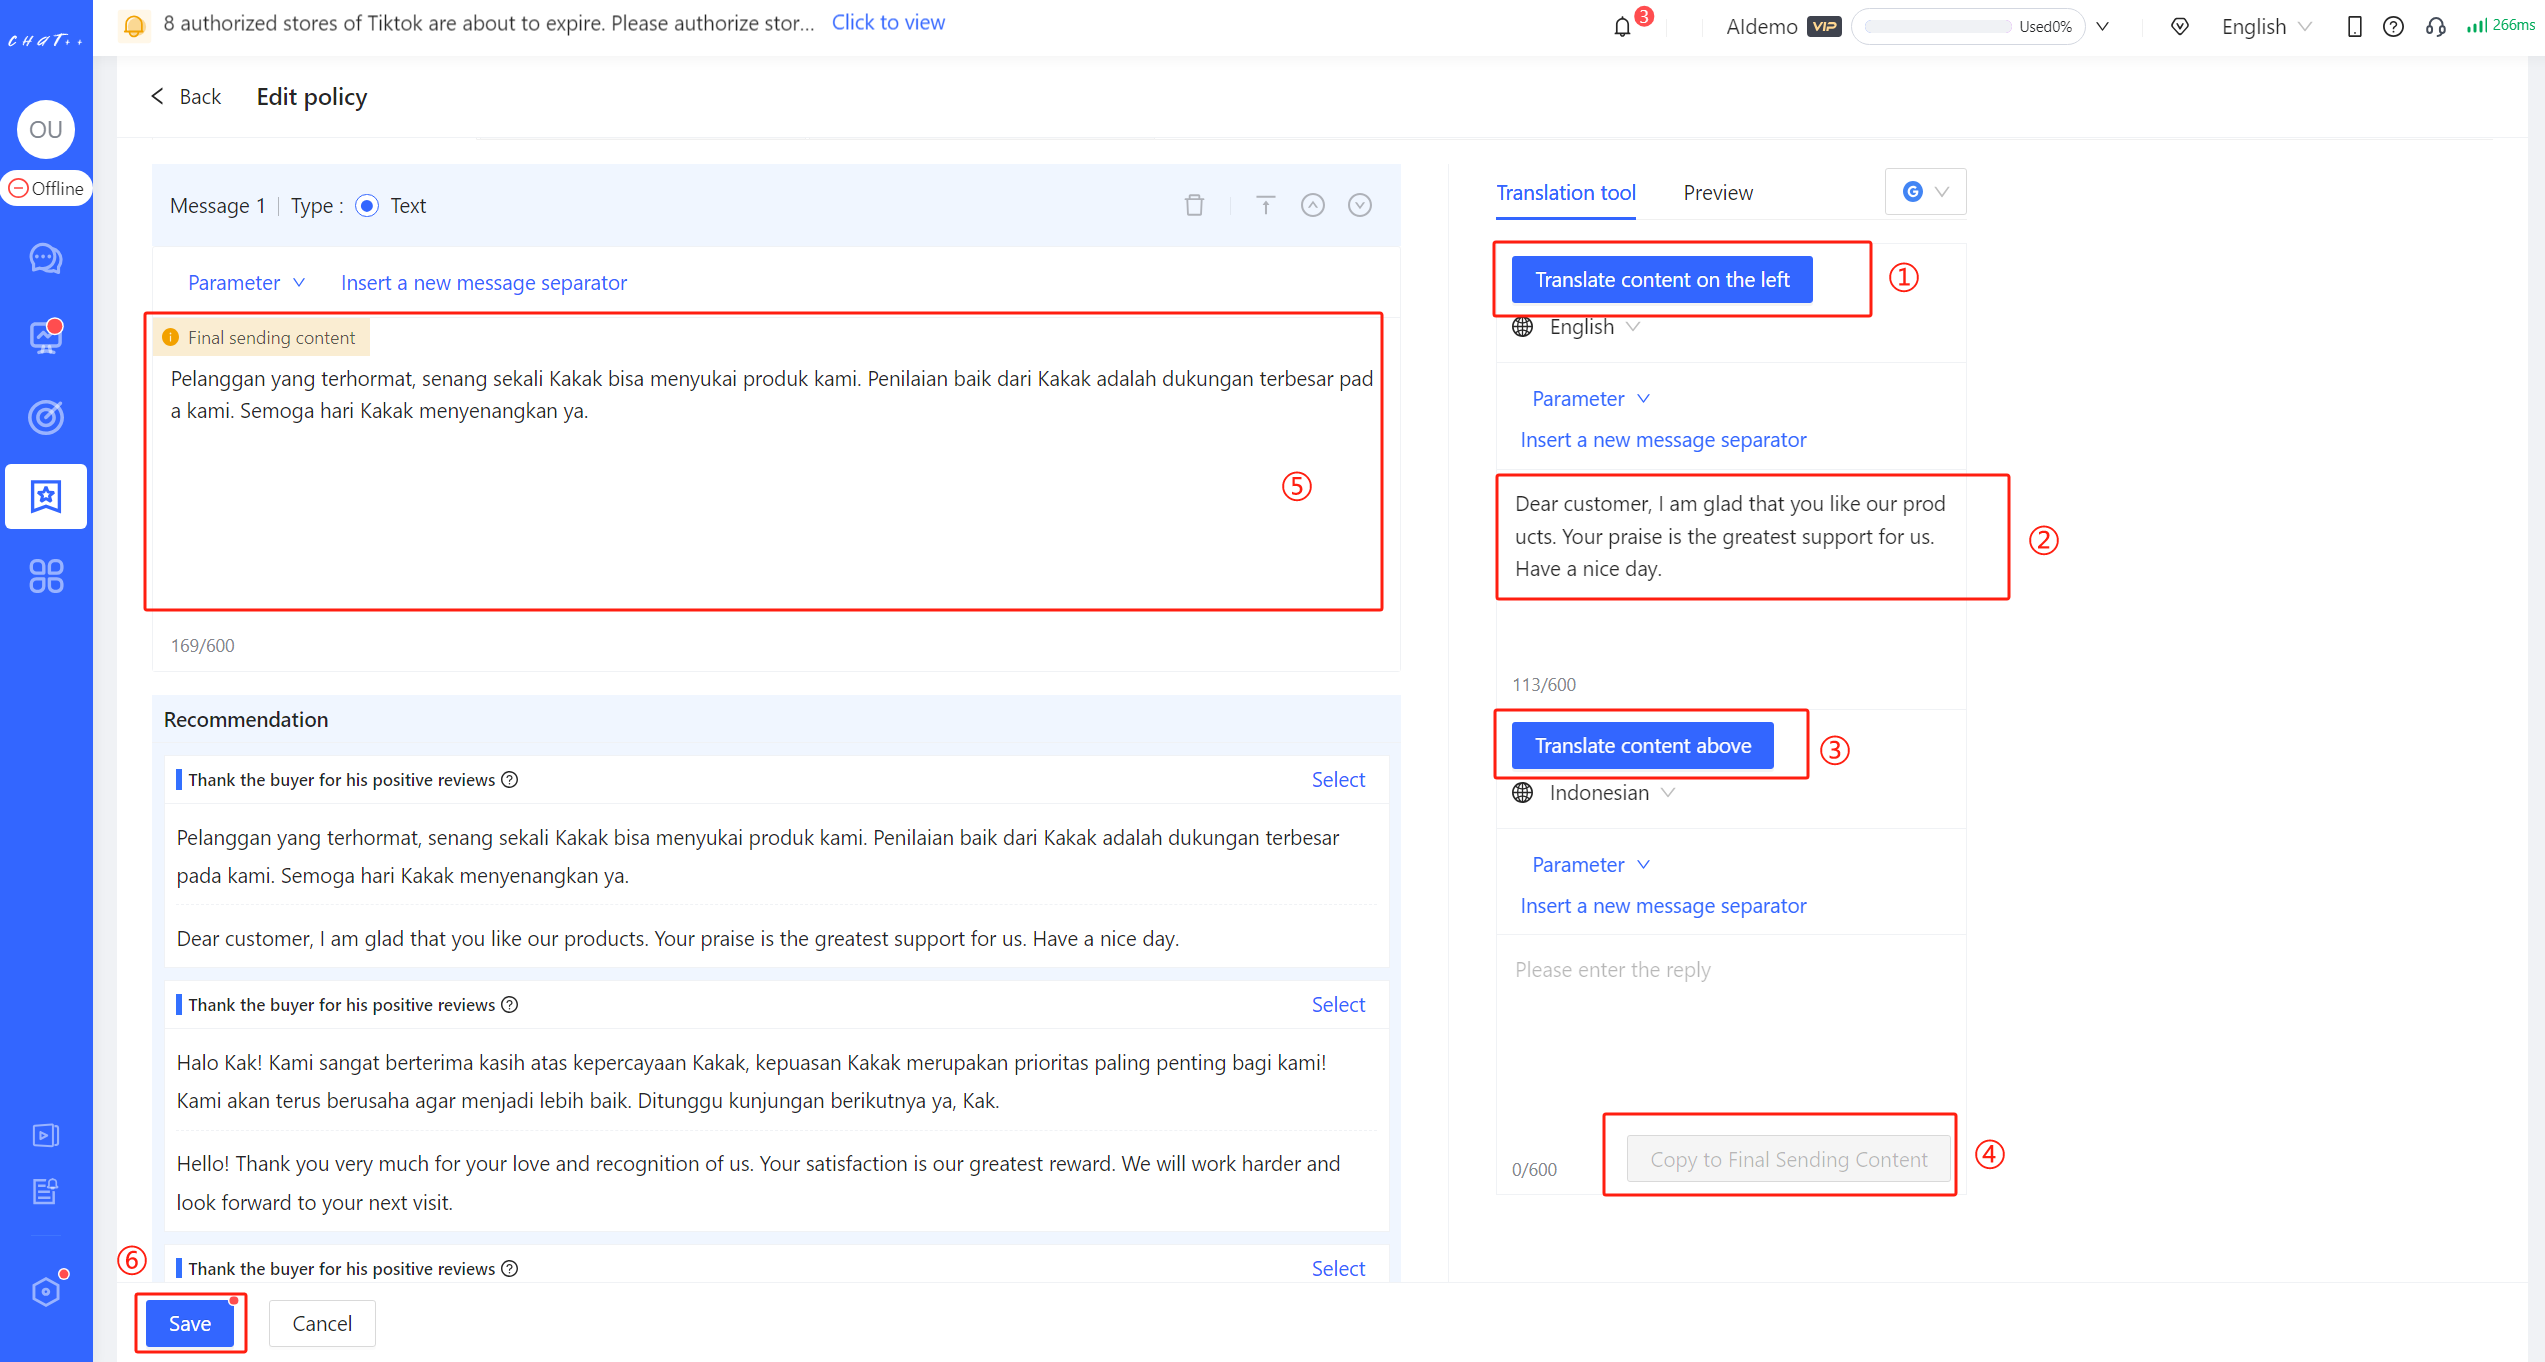
Figure 17
Negative Review Follow-up
💡After a buyer gives a product a negative review (4 stars or below), the system will automatically send a message to the buyer for recovery. It aims to communicate and negotiate with the buyer to resolve the issue, guiding them to change the negative review to a positive one. If the buyer does not respond or refuses to modify it, it will be accompanied by Negative Review Auto-Reply task for negative review to ensure your maximum benefit.
Show cases
- When a buyer left a 2-star review for the purchased product, the system sent a recovery message for that negative review.
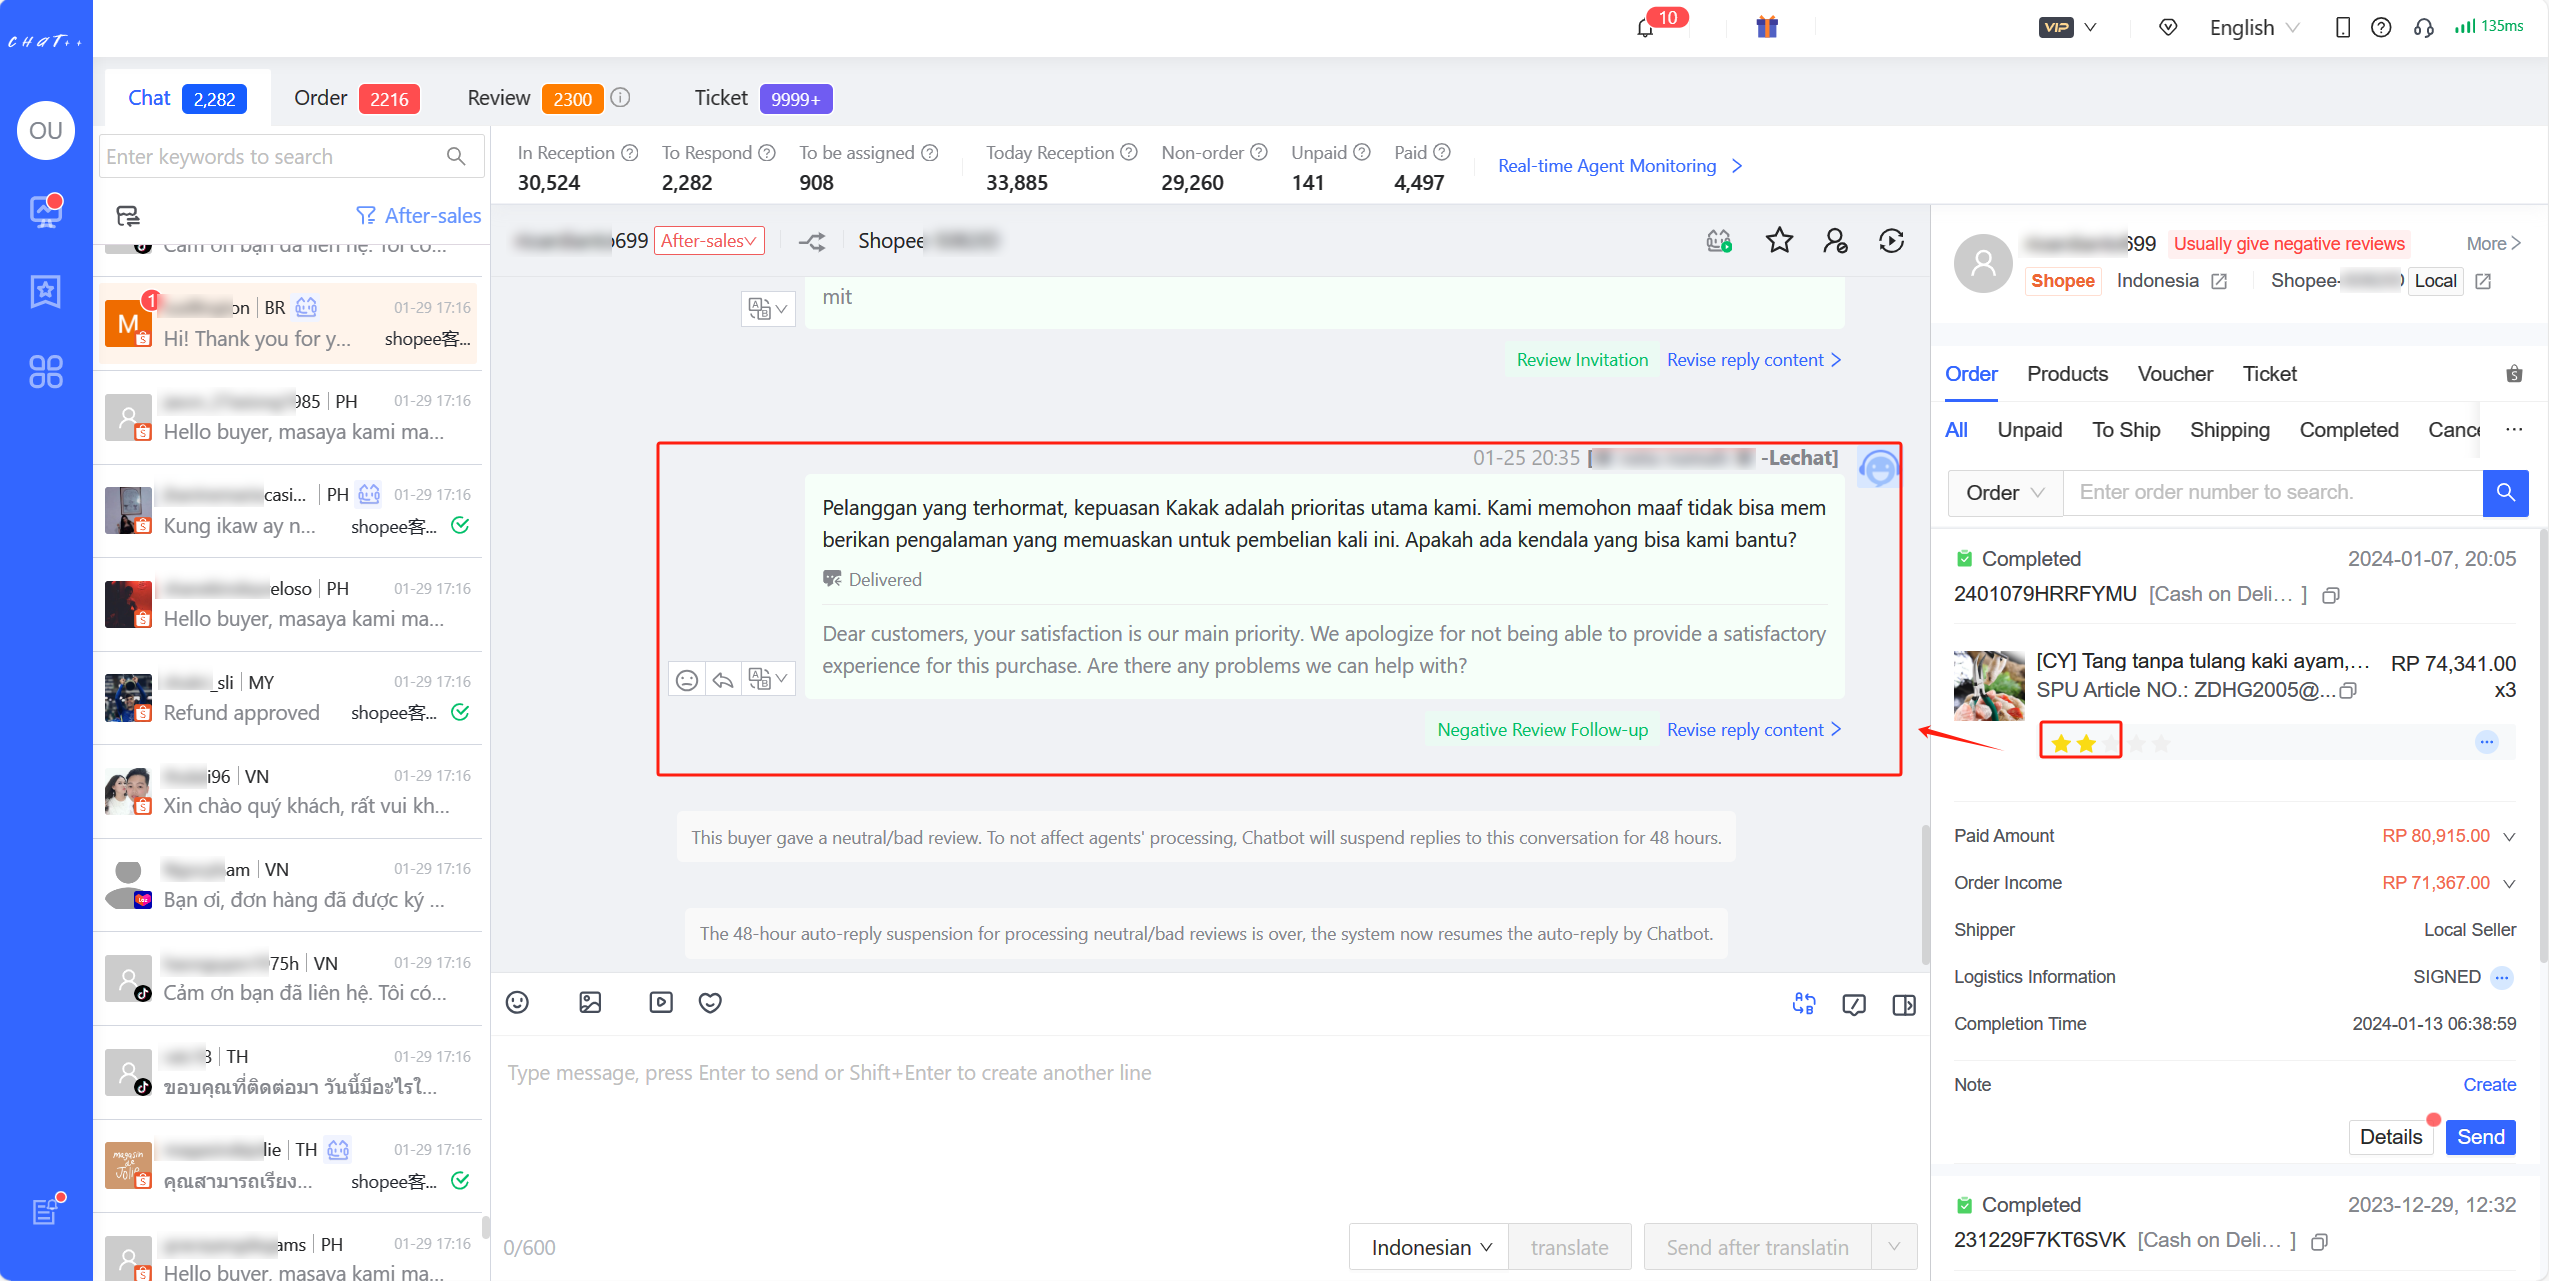
Figure 1
Permissions required for configuration
- Configuring the "Negative Review Follow-up" requires the "Configure Review Booster"(red box in Figure below) permission to be enabled for the role assigned to the account. Super admins and admins have this permission by default.
- Accounts without the "Configure Review Booster" permission cannot configure "Negative Review Follow-up".
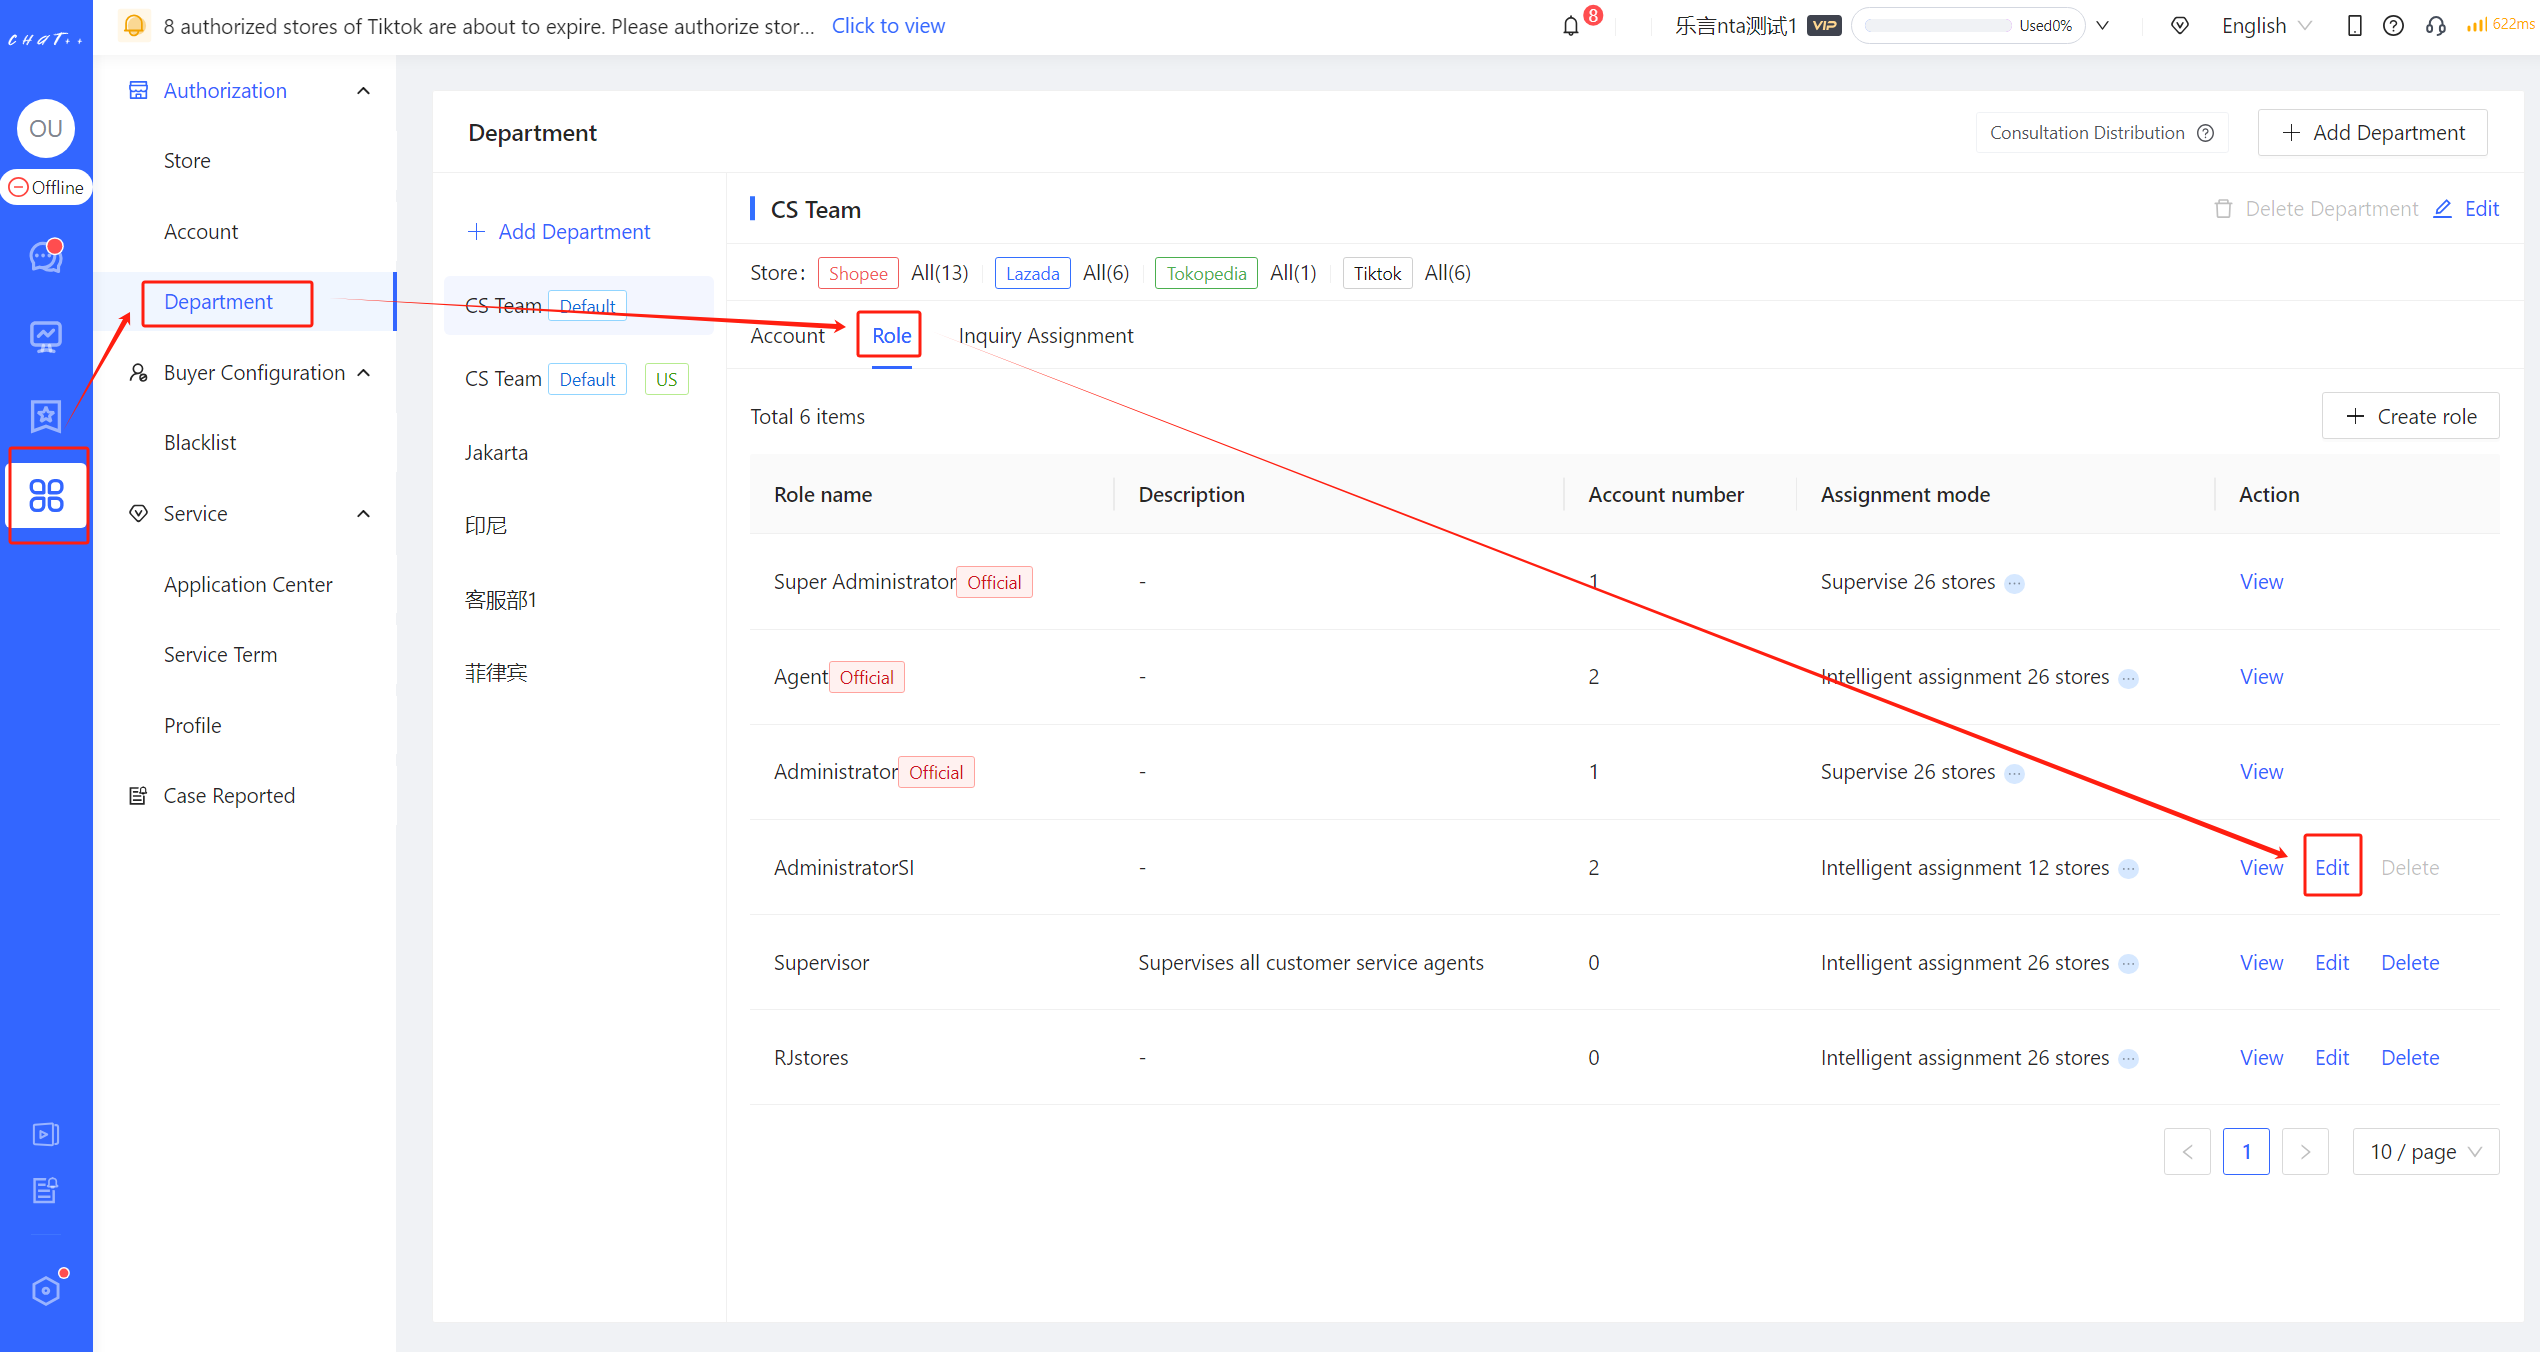
Figure 2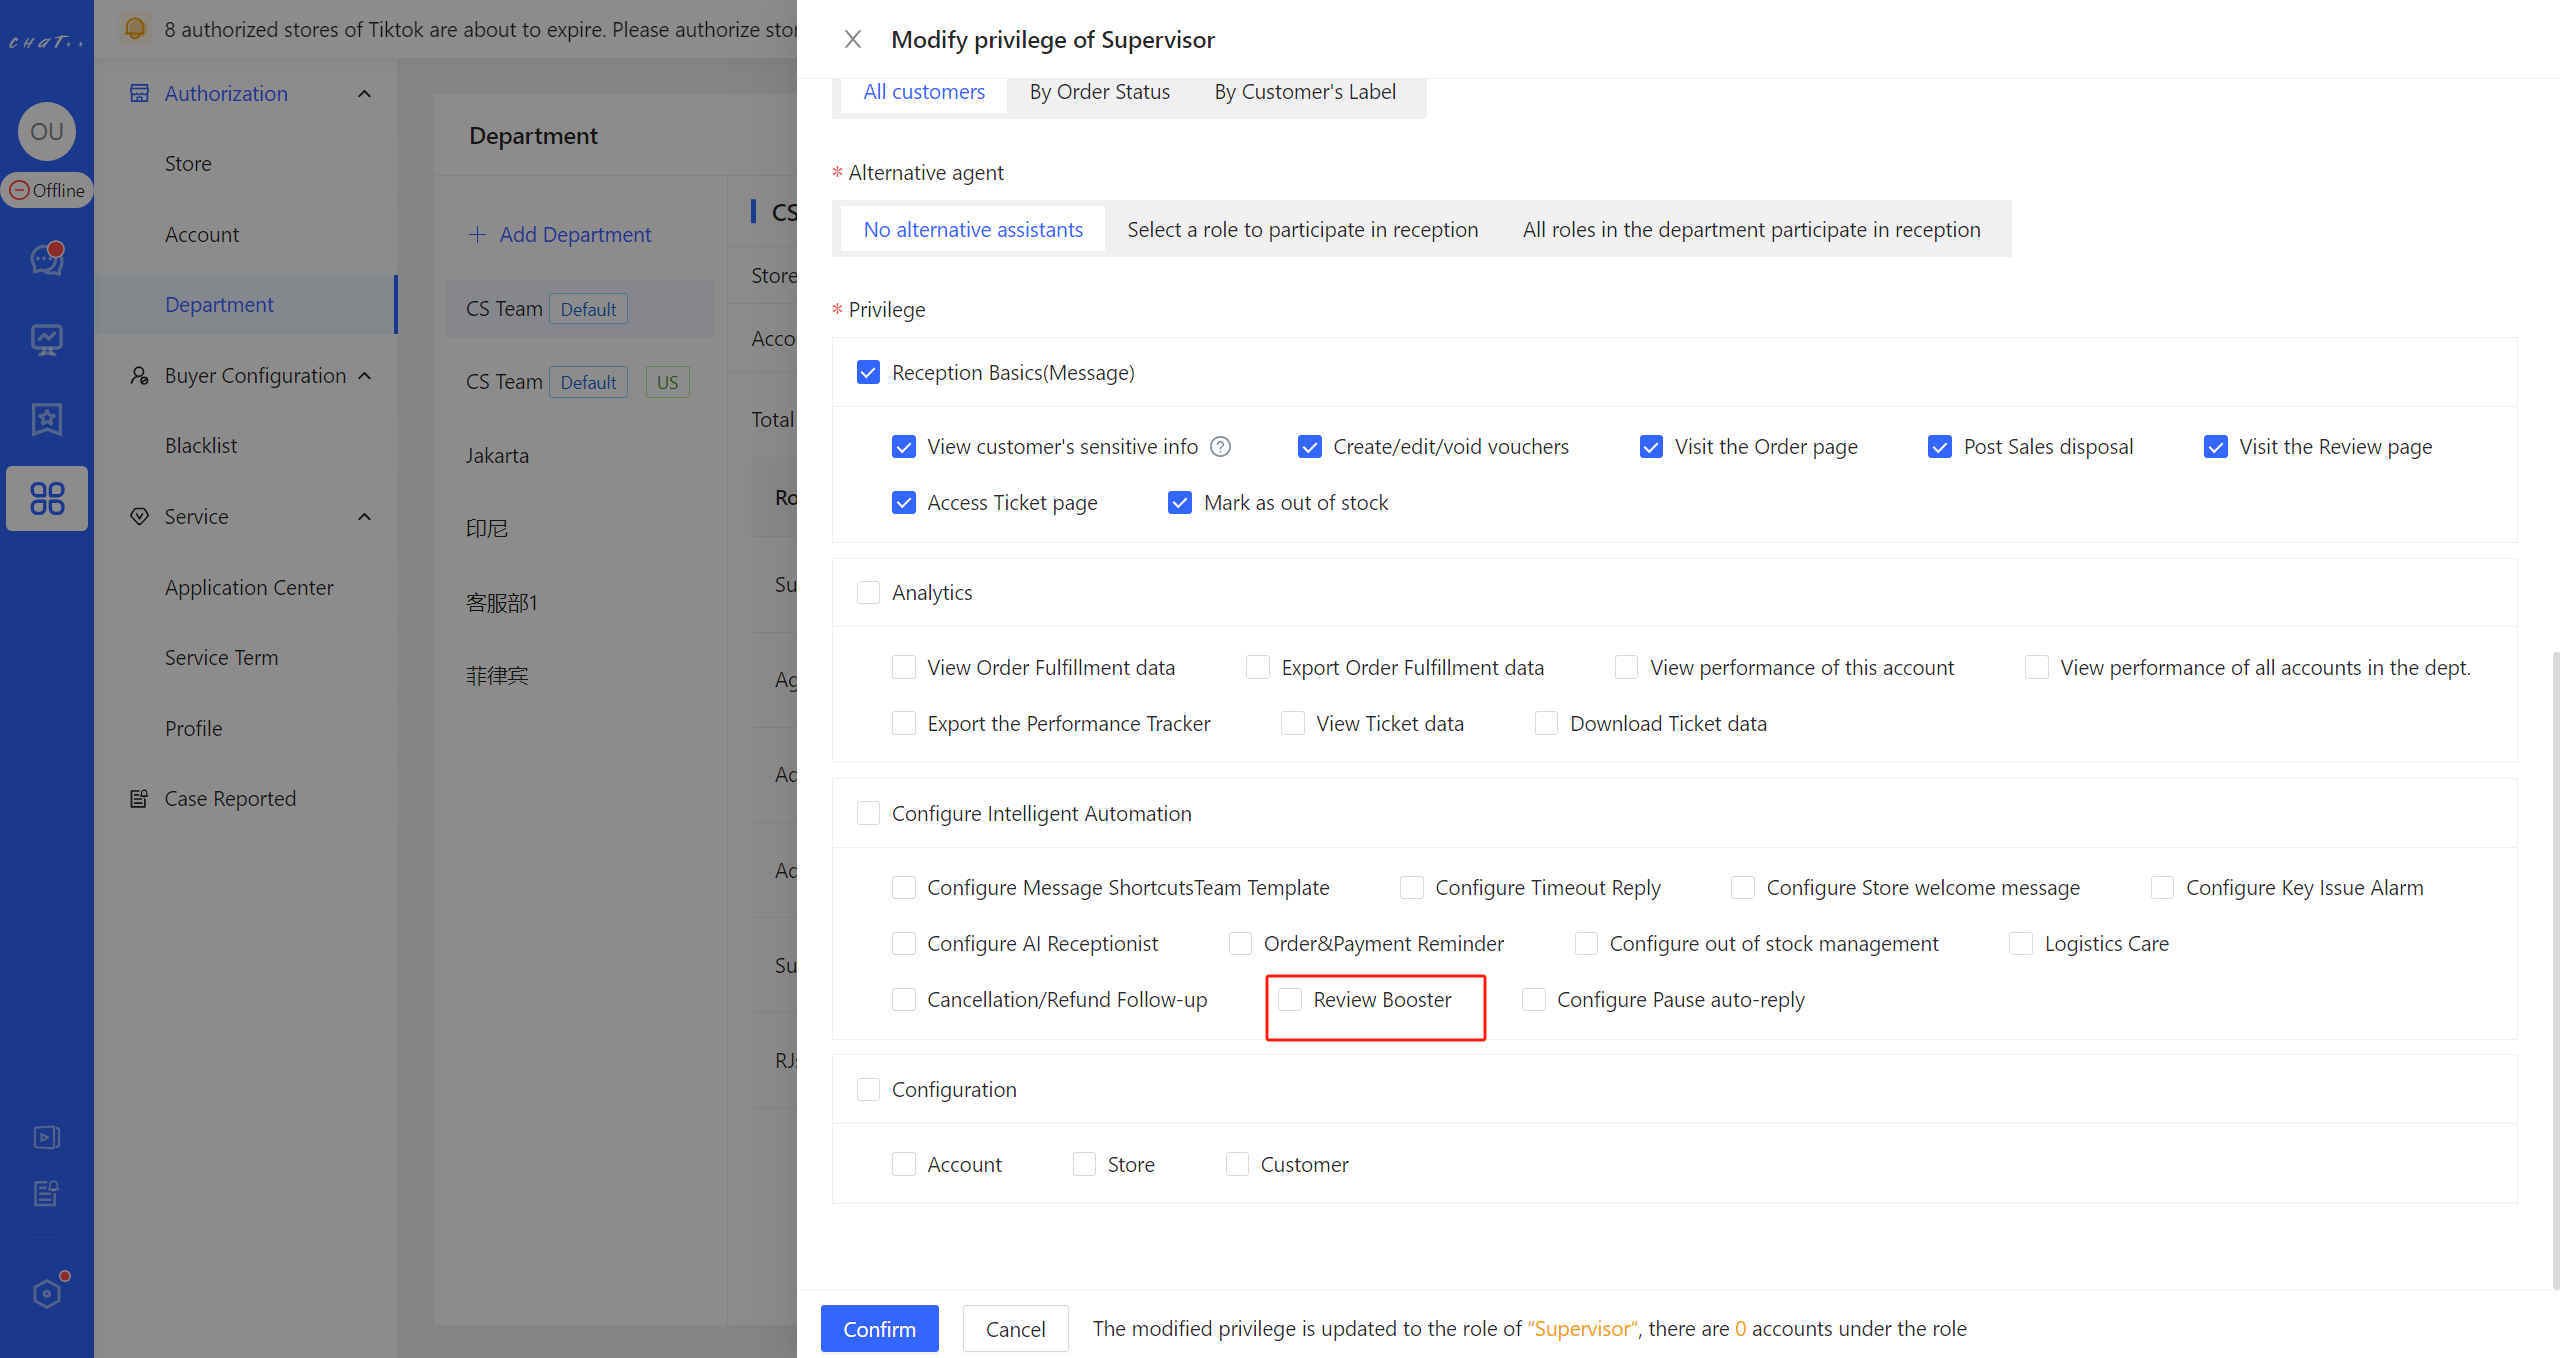
Figure 3
How to Configure Negative Review Follow-up
Access the configuration page Click「 Automation 」 in left menu(Shown as red box① in Figure 4)→「 Review Booster 」(Shown as red box② in Figure 4)→「 Negative Review Follow-up 」(Shown as red box① in Figure 5),Access the configuration page.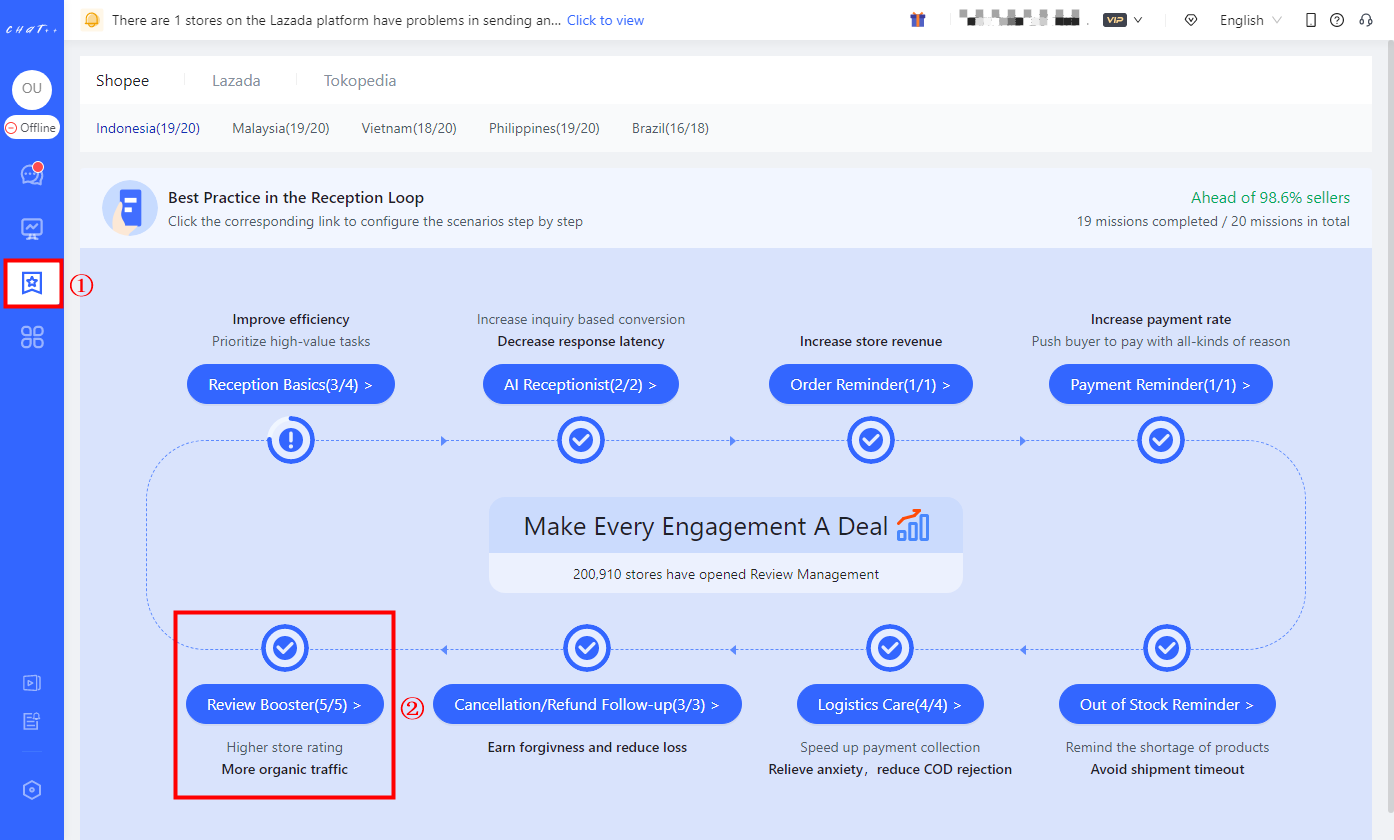
Figure 4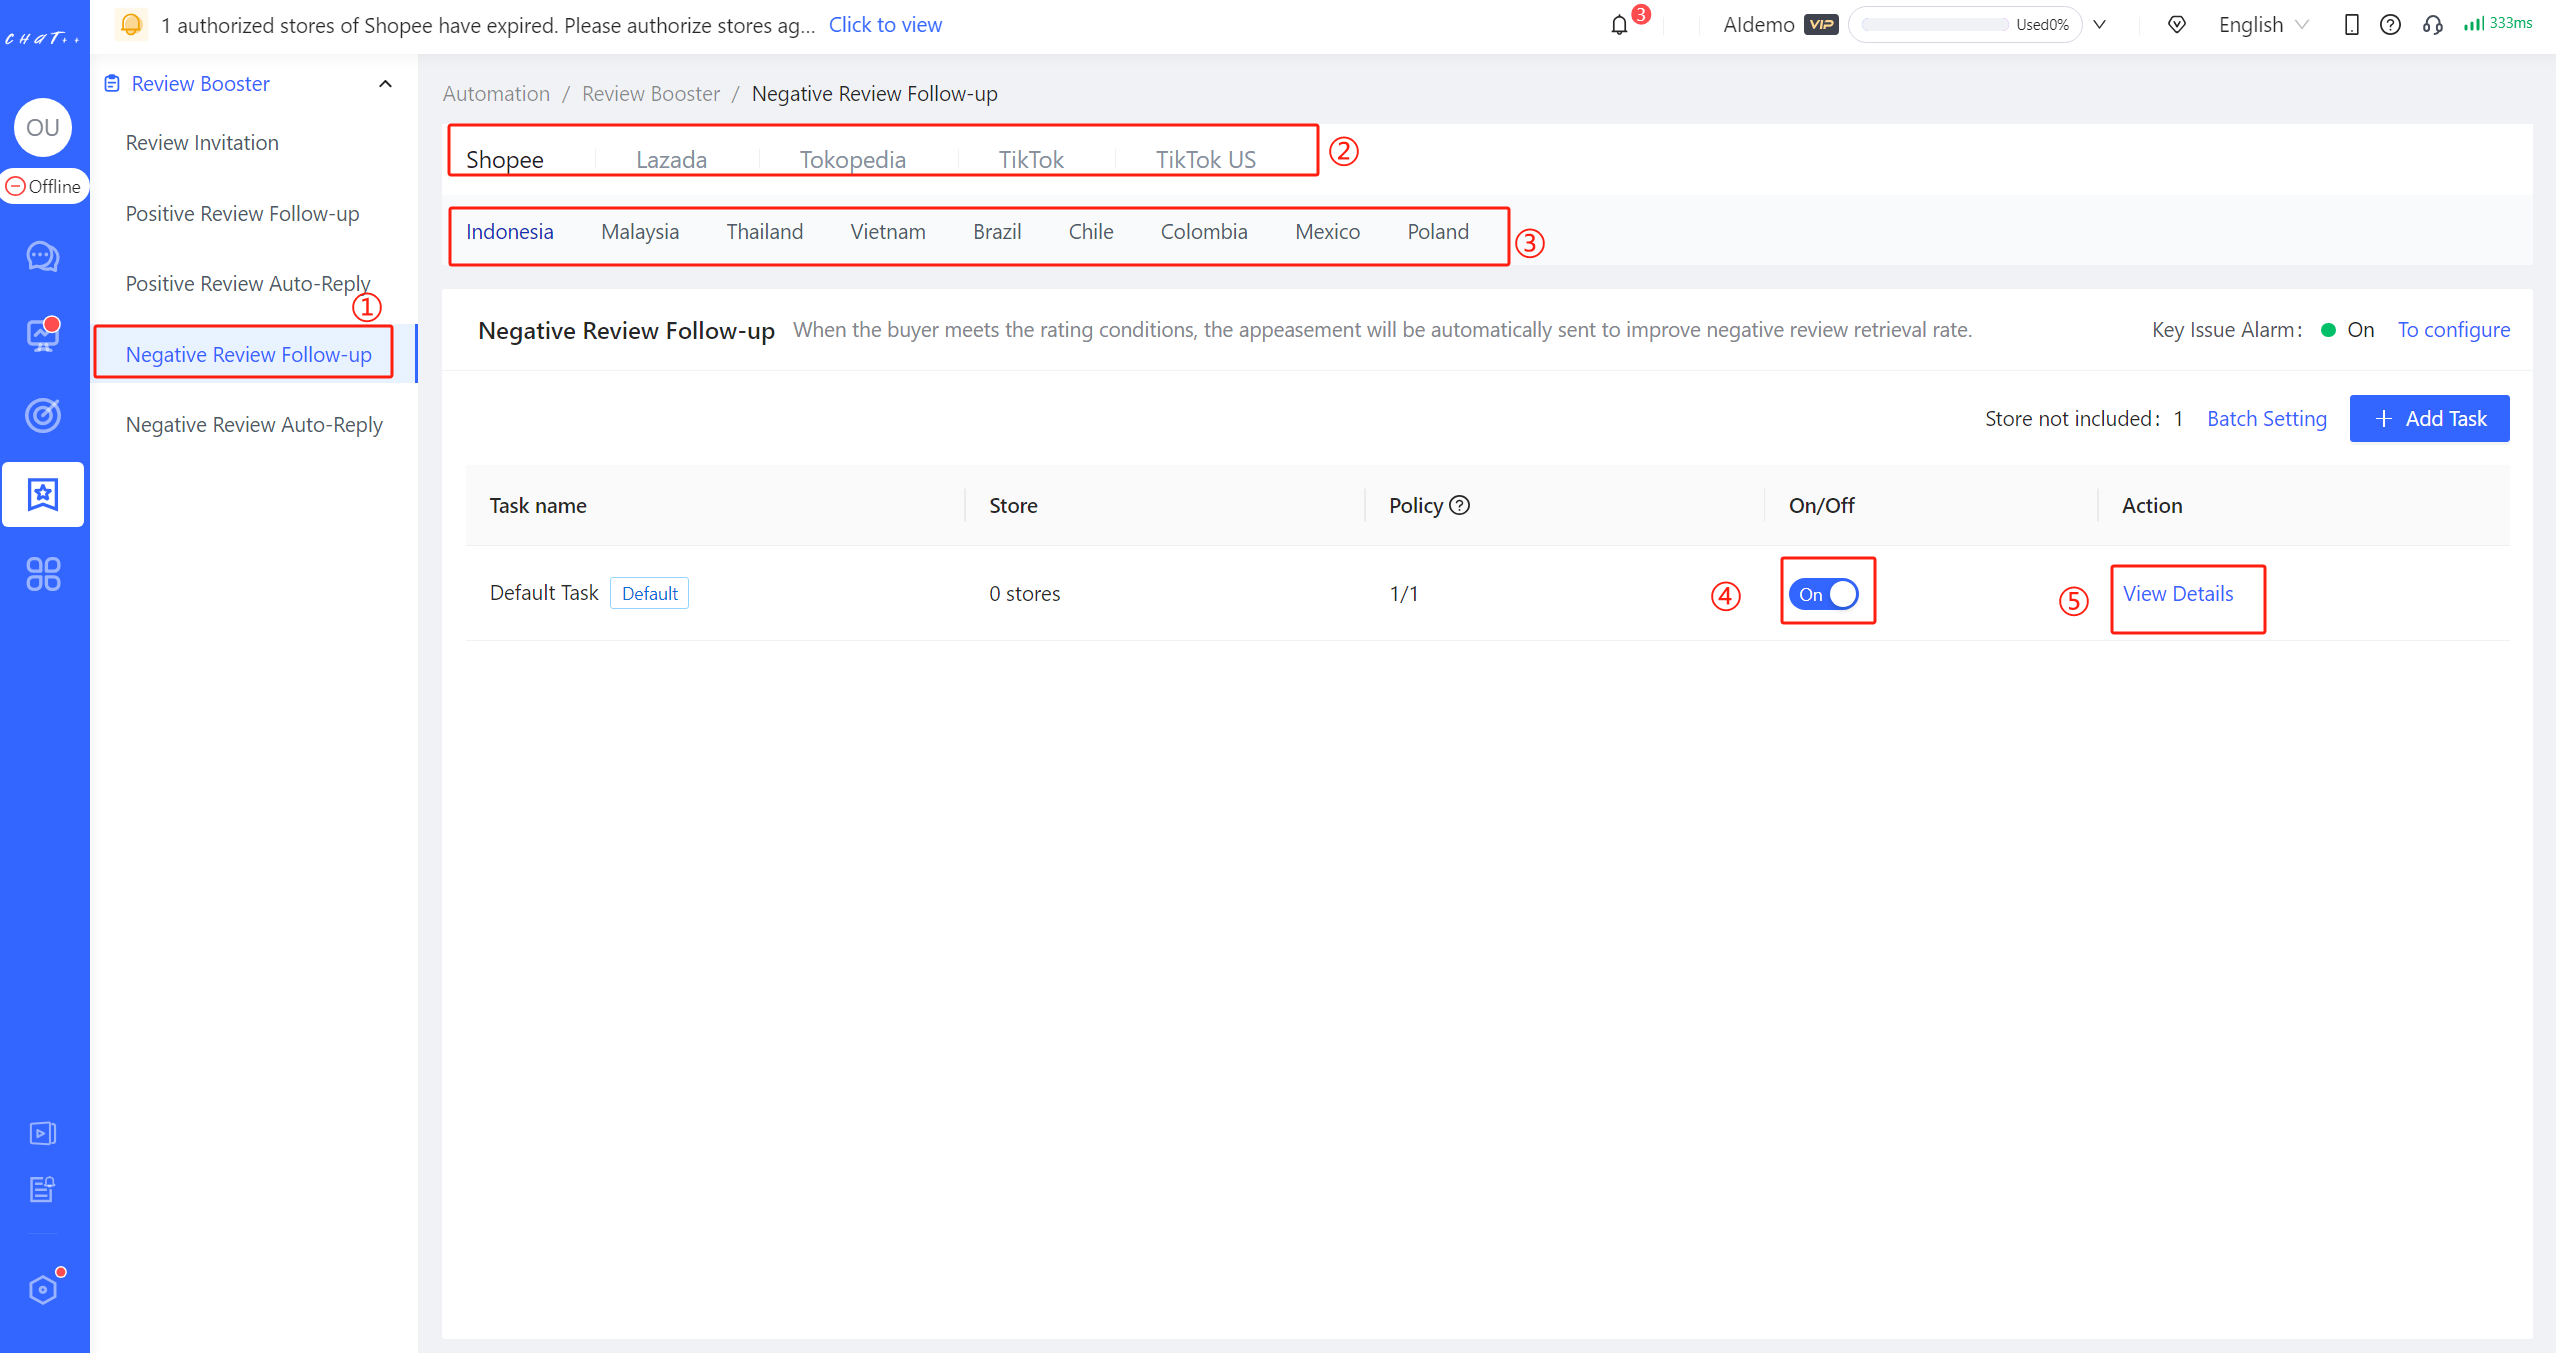
Figure 5
Note:Negative Review Follow-up can be customized differently for marketplaces, currently supporting Shopee, with Lazada, TikTok and Tokopedia support coming soon, please stay tuned. Note:Each marketplace distinguishes different sites. You can click on different sites of the marketplace to switch (red box ③ in Figure 5 above). Different sites on the same marketplace need independent configuration for Negative Review Follow-up. Note:To ensure your maximum benefit, it is recommended to simultaneously enable Negative Review Auto-Reply. Note:After sending follow-up messages, to ensure effectiveness, the robot will pause responses for 48 hours in the current conversation, transferring to CS for processing.
One-click Configuration→Enable【 Default Task 】
💡 To make it convenient to configure it, ChatPlusAI has created a "Default Task" for each Negative Review Follow-up scenario on each marketplace, covering all stores of country sites by default.
For the first time you use it, to avoid the situation where the robot automatically replies without your knowledge, "Default Task" (red box ④ in Figure above) is off by default and needs to be manually opened.
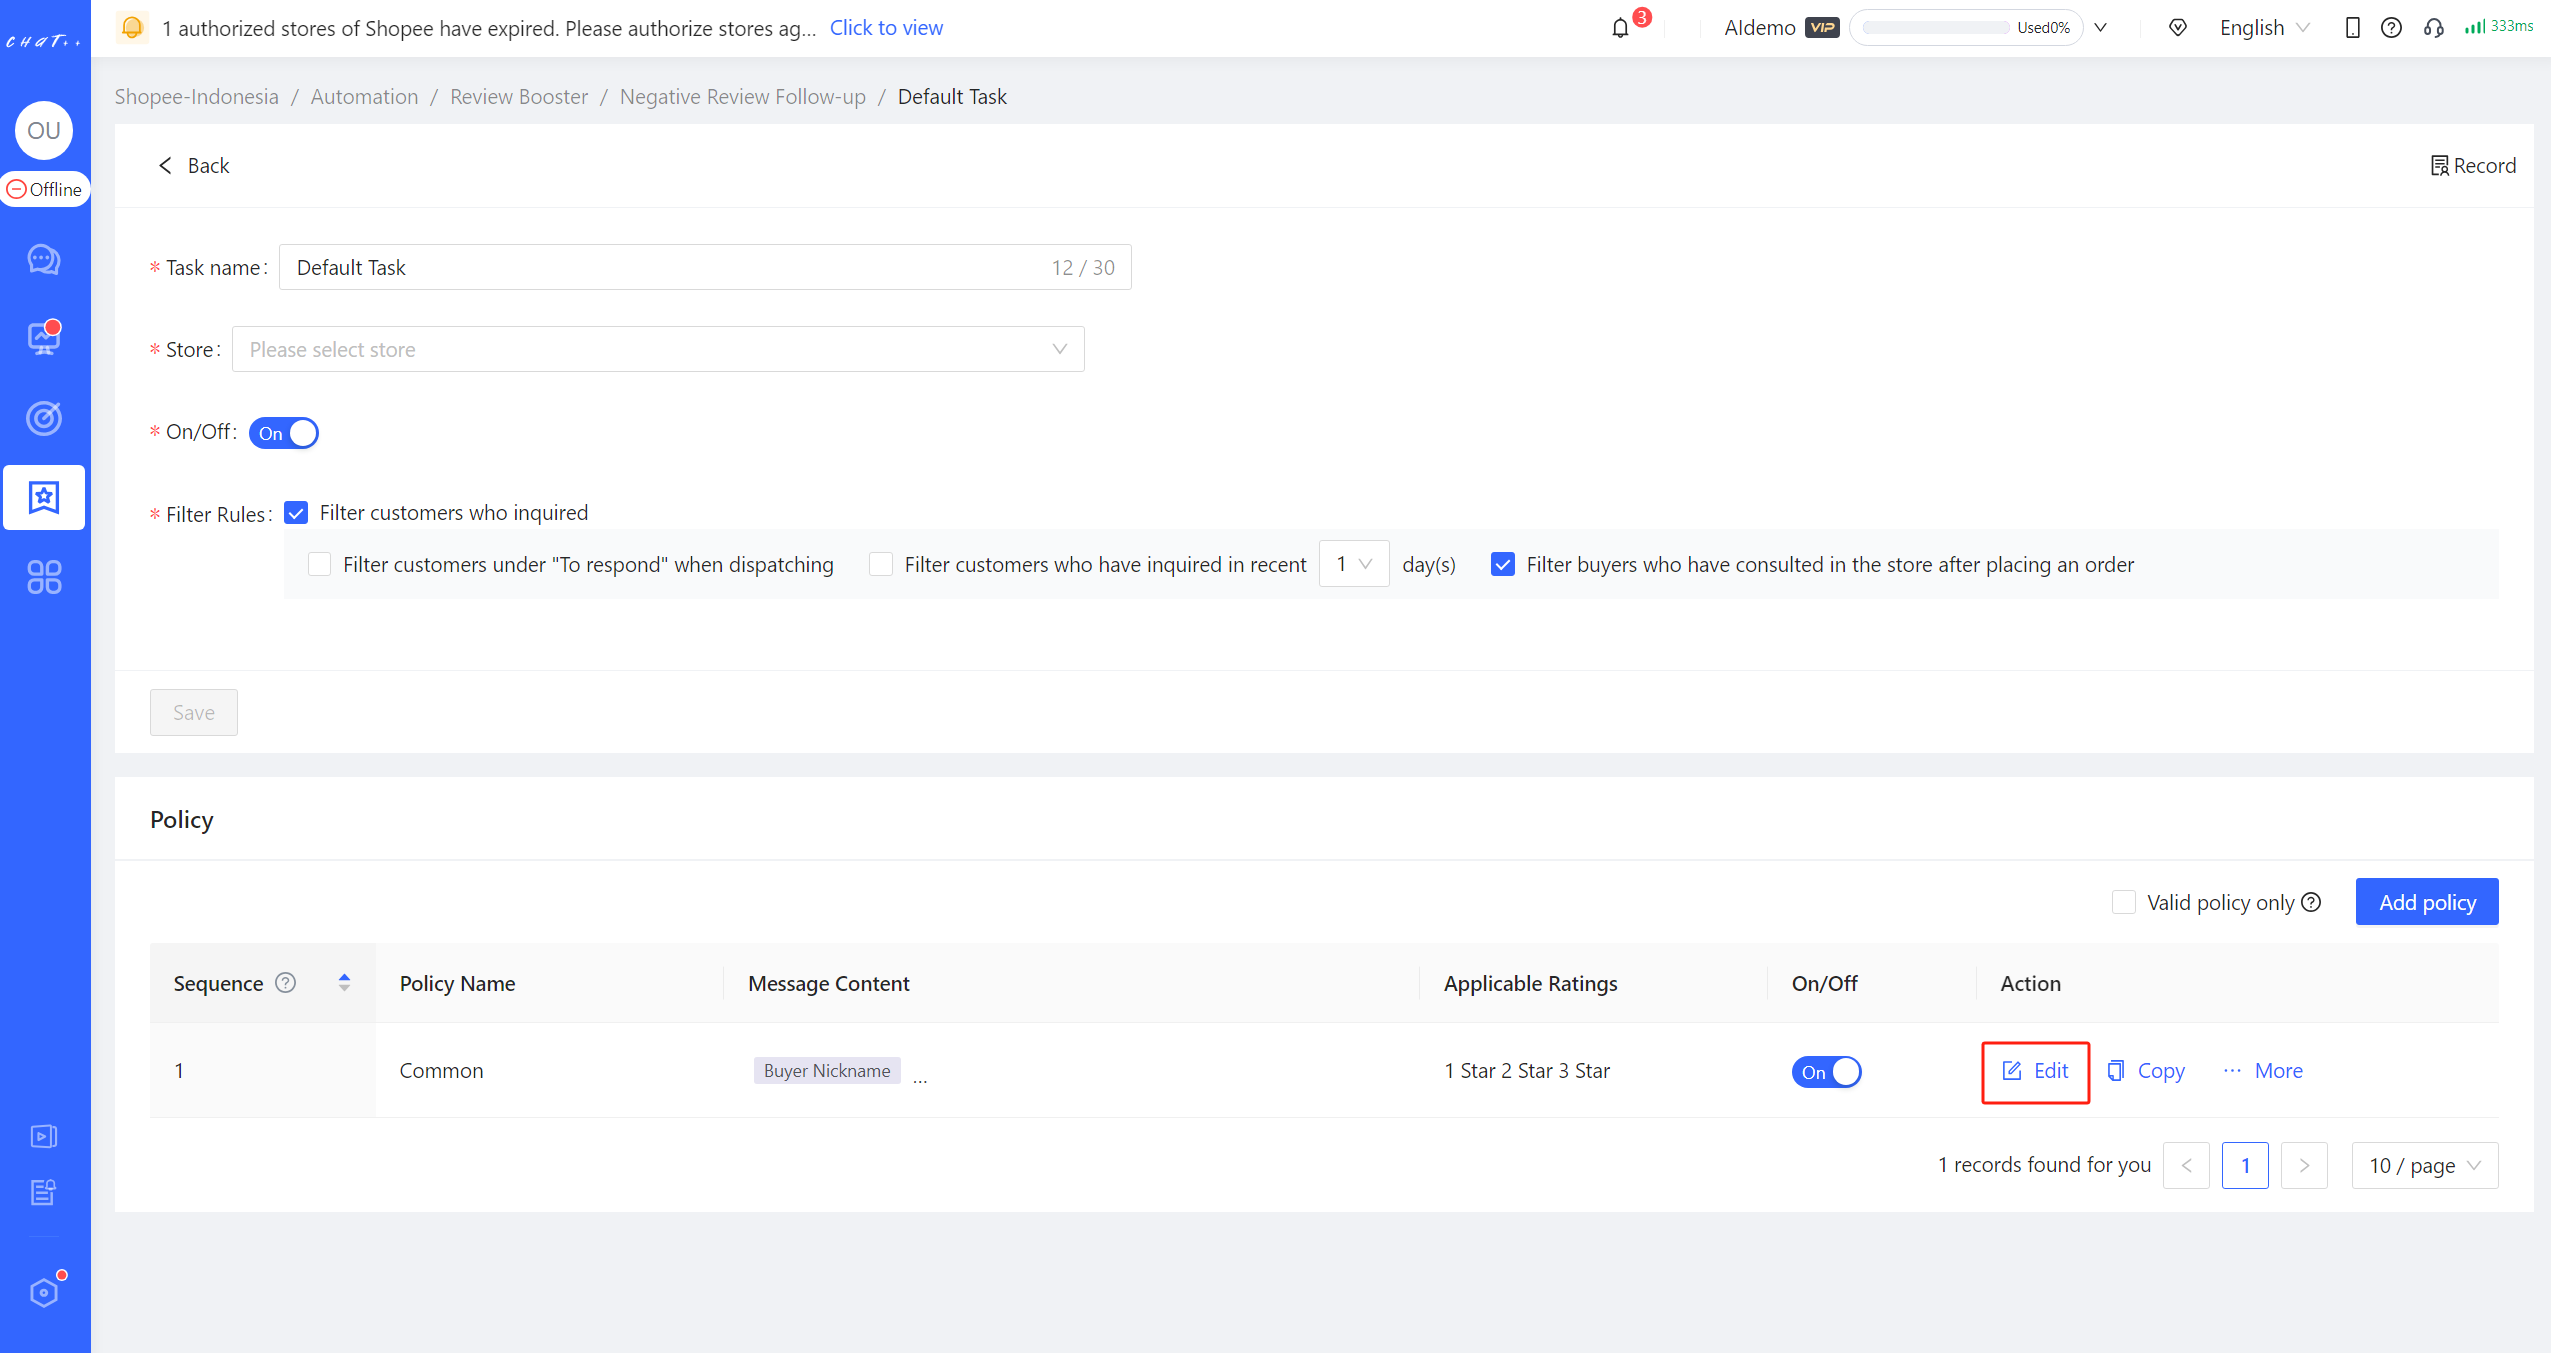
Figure 6
All you have to do is click "View Details" button(red box④ in Figure 5) to edit the policy(red box in Figure 6 above) or directly enable the default task (red box④ in Figure 5 above)
Newly authorized stores will be automatically included to the 【Default task】. However, the store will not be automatically included again after they are removed from other tasks. It will be counted as "Store not included" (Shown as red box① in Figure 7). You can click "Batch Setting" button (Shown as red box② in Figure 7) to add massive stores into the certain task quickly.
Note:Kindly make sure that all stores have been included to the right task (that means the number of "Store not included" is 0, shown as red box① in Figure 7), in case the store is neglected from any Negative Review Follow-up task.
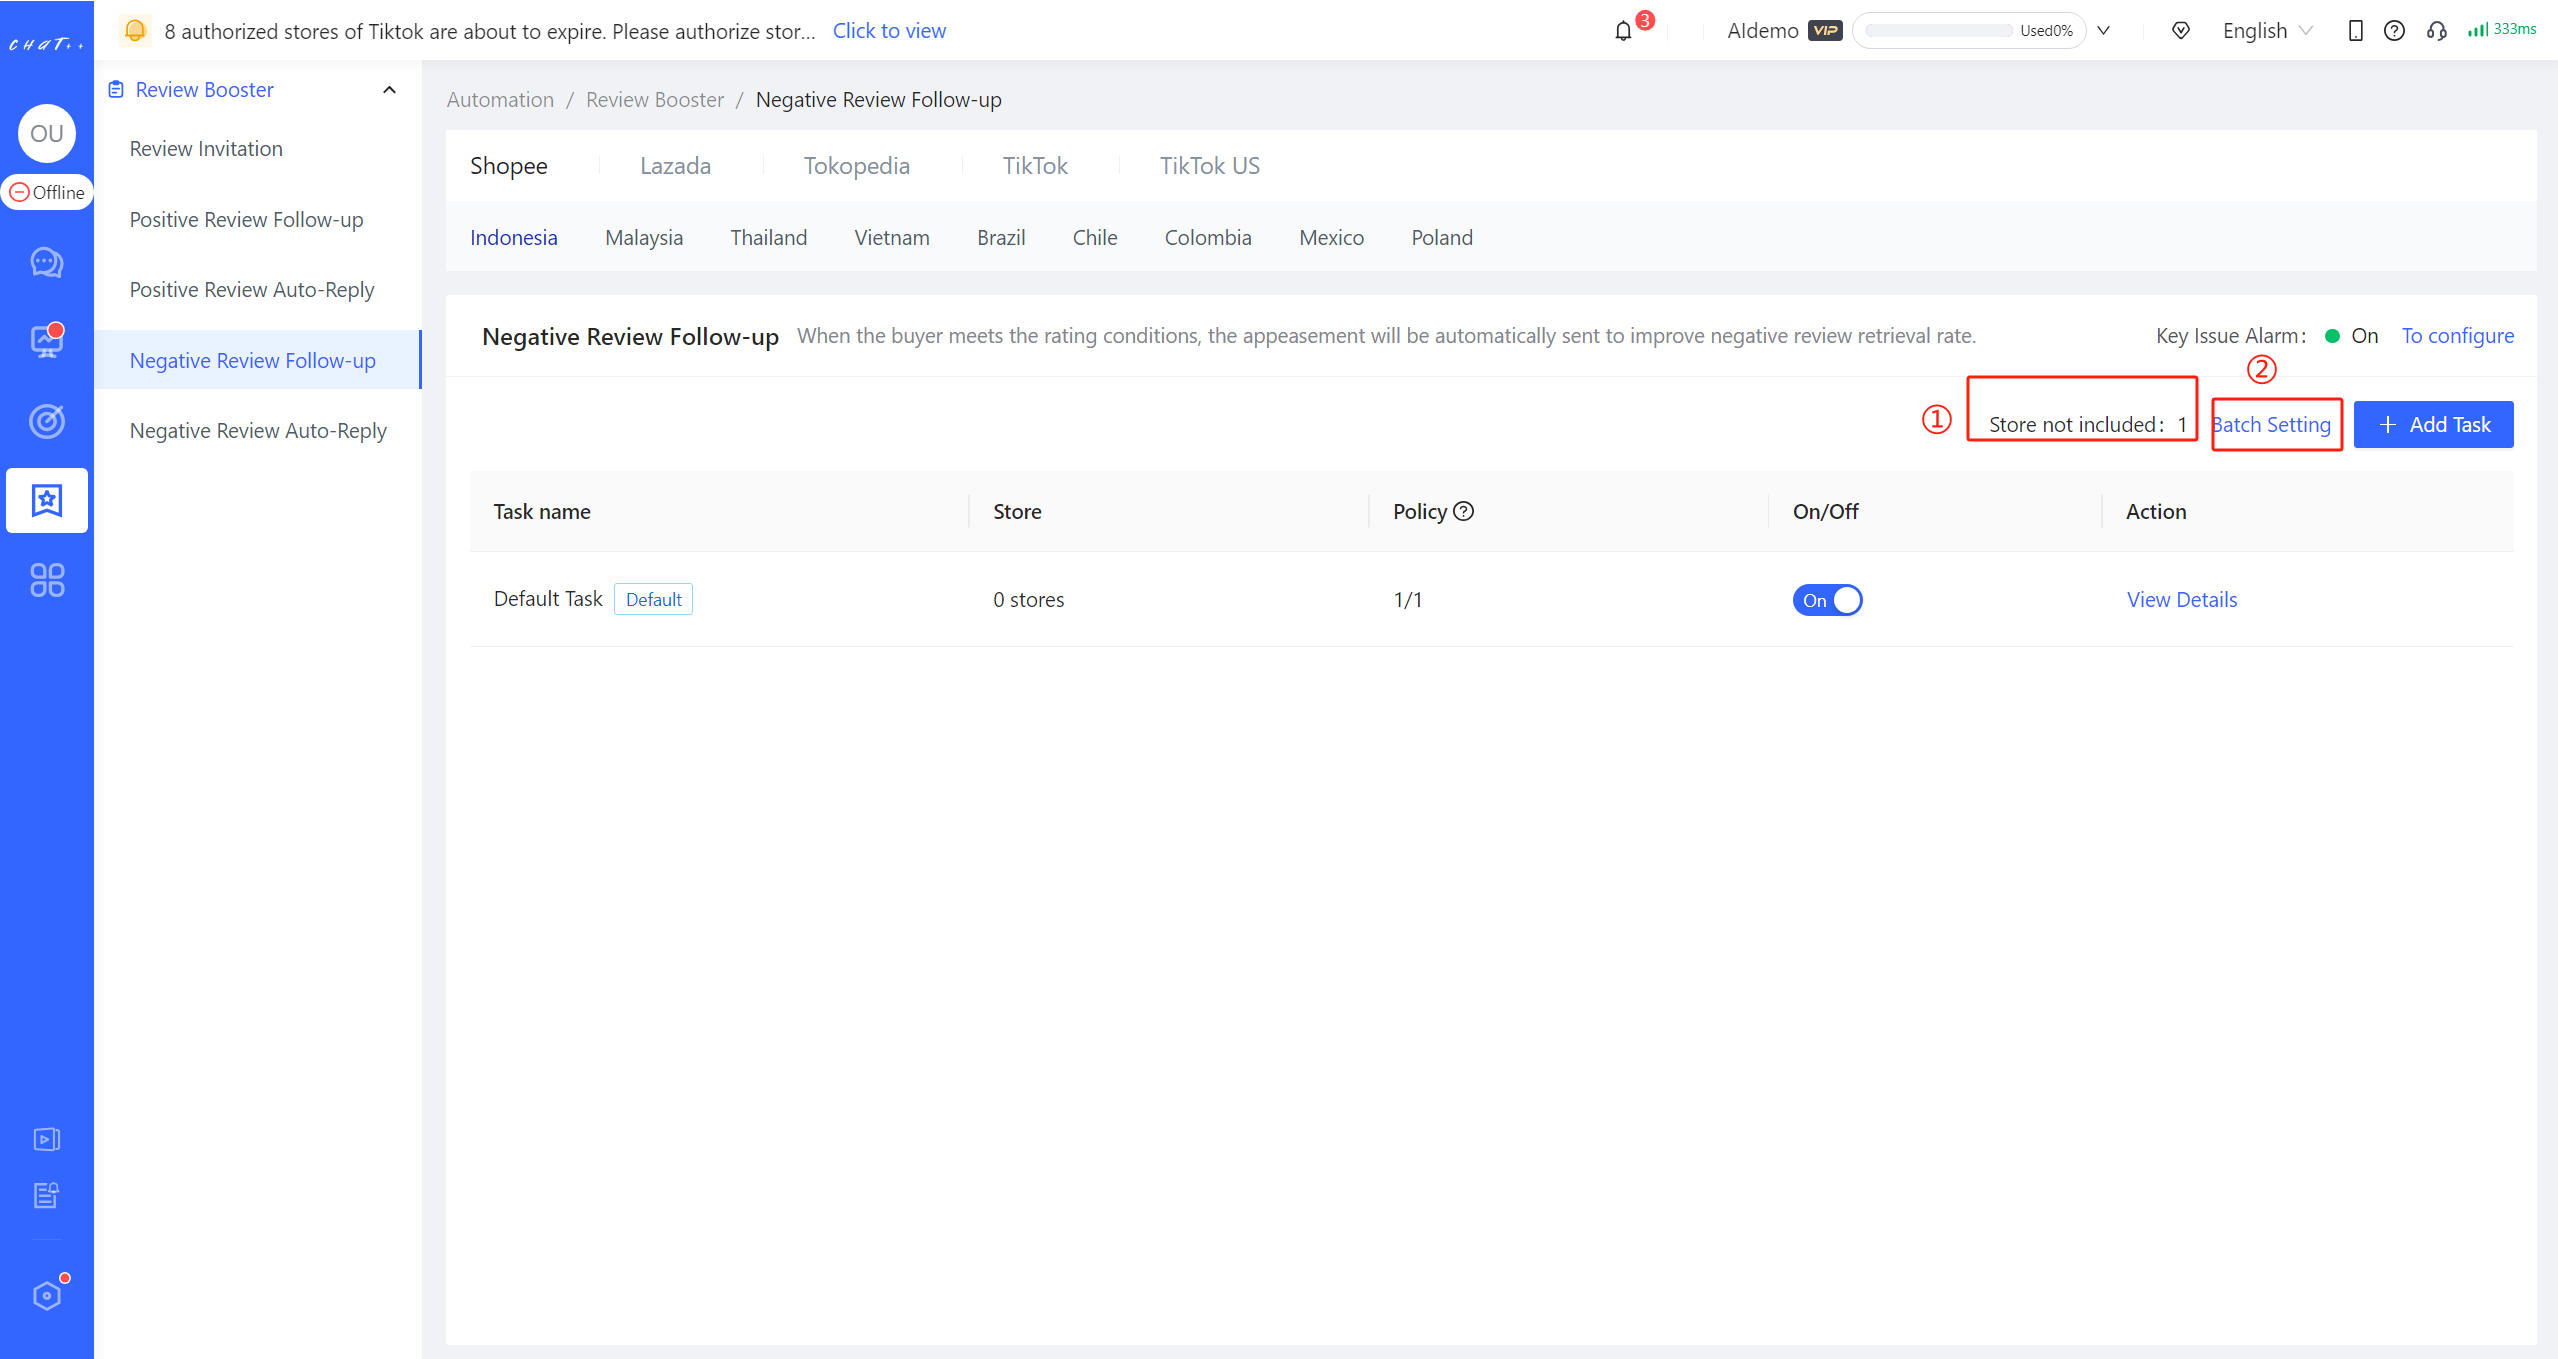
Figure 7
"Filter Rules" Description
Filter buyers who have consulted in the store after placing an order: By default, Negative Review Follow-up tasks are set to exclude buyers who have consulted after placing an order. It aims to avoid the counterproductive effects of follow-up tasks. For example, if a buyer provides feedback on order issues and still gives a neutral or negative review after placing an order, it indicates that the resolution cannot completely appease their dissatisfaction. Continuing to send Negative Review Follow-up messages in such cases would only intensify buyer's dissatisfaction.
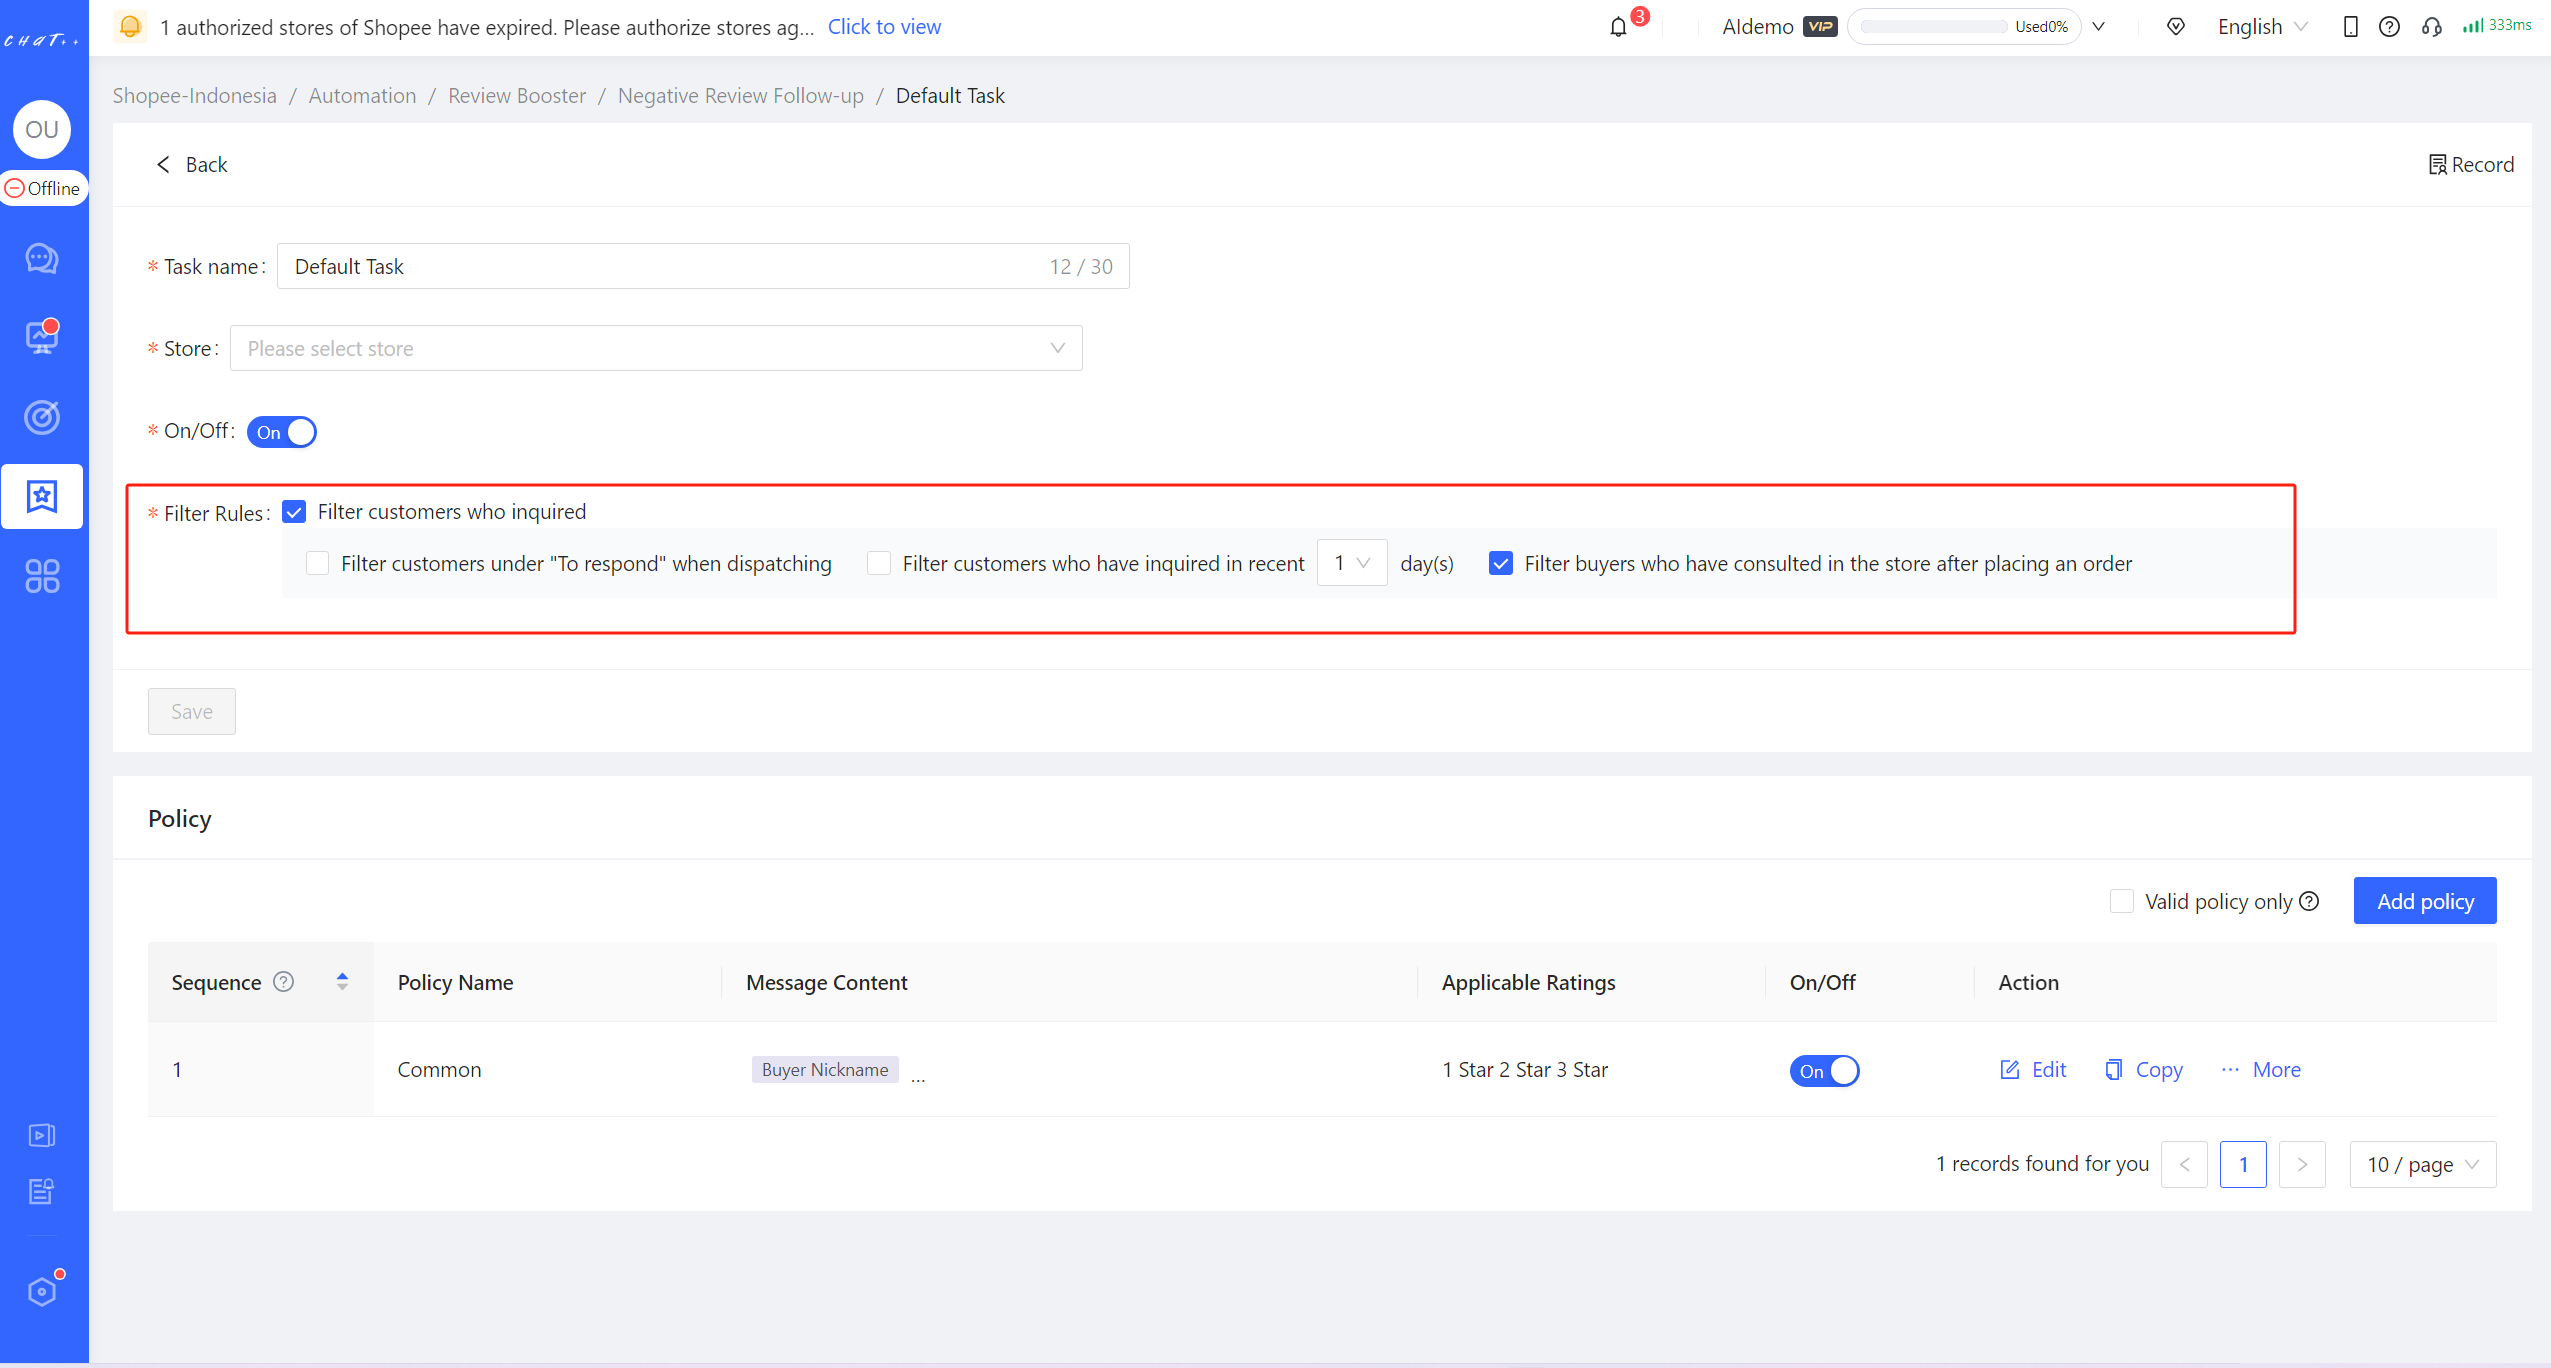
Figure 8
"Policy branch" Description
- Policy branch for Negative Review Follow-up consists of four key factors: product scope, applicable ratings, review type and message content.
- Product scope(red box① in Figure 9): The policy branch take effects when the buyer ordered specific products. There are 4 options to configure: All products, Pick SKU, Pre-order or In-stock.
- "Pick SKU" supports selecting specific products by searching the "Product Name", "Product ID", "SPU Article NO." and "SKU ID"(red box① in Figure 10), meanwhile input "Product ID" or "SPU Article NO." (separate multiple items with Enter) and can quickly select various products(red box② in Figure 10).
- Applicable Ratings(red box② in Figure 9): When a buyer gives a rating of 1 star or 2 stars or 3 stars or 4 stars, it is applicable to Negative Review Follow-up task. It supports individually selecting one option or multiple options. When adding other policies, the default state for applicable ratings is all selected. If you have already selected 4 stars in Positive Review Follow-up task, this policy will conflict, and you need to unselect 4 stars before saving.
- Review Type(red box③ in Figure 9): According to whether the buyer's review has content, it is divided into "Include text/image/video" and "No content" supporting individual selection or full selection.
- Message Content(red box④ in Figure 9): If above conditions are met, the corresponding message will be sent.
- Matching Logic: If the buyer's purchased products, given ratings, and review type match the Product scope, applicable ratings, and review type in the policy branch, then the buyer matches this policy. When a buyer simultaneously matches multiple policy branches, the system will execute the first policy in order.
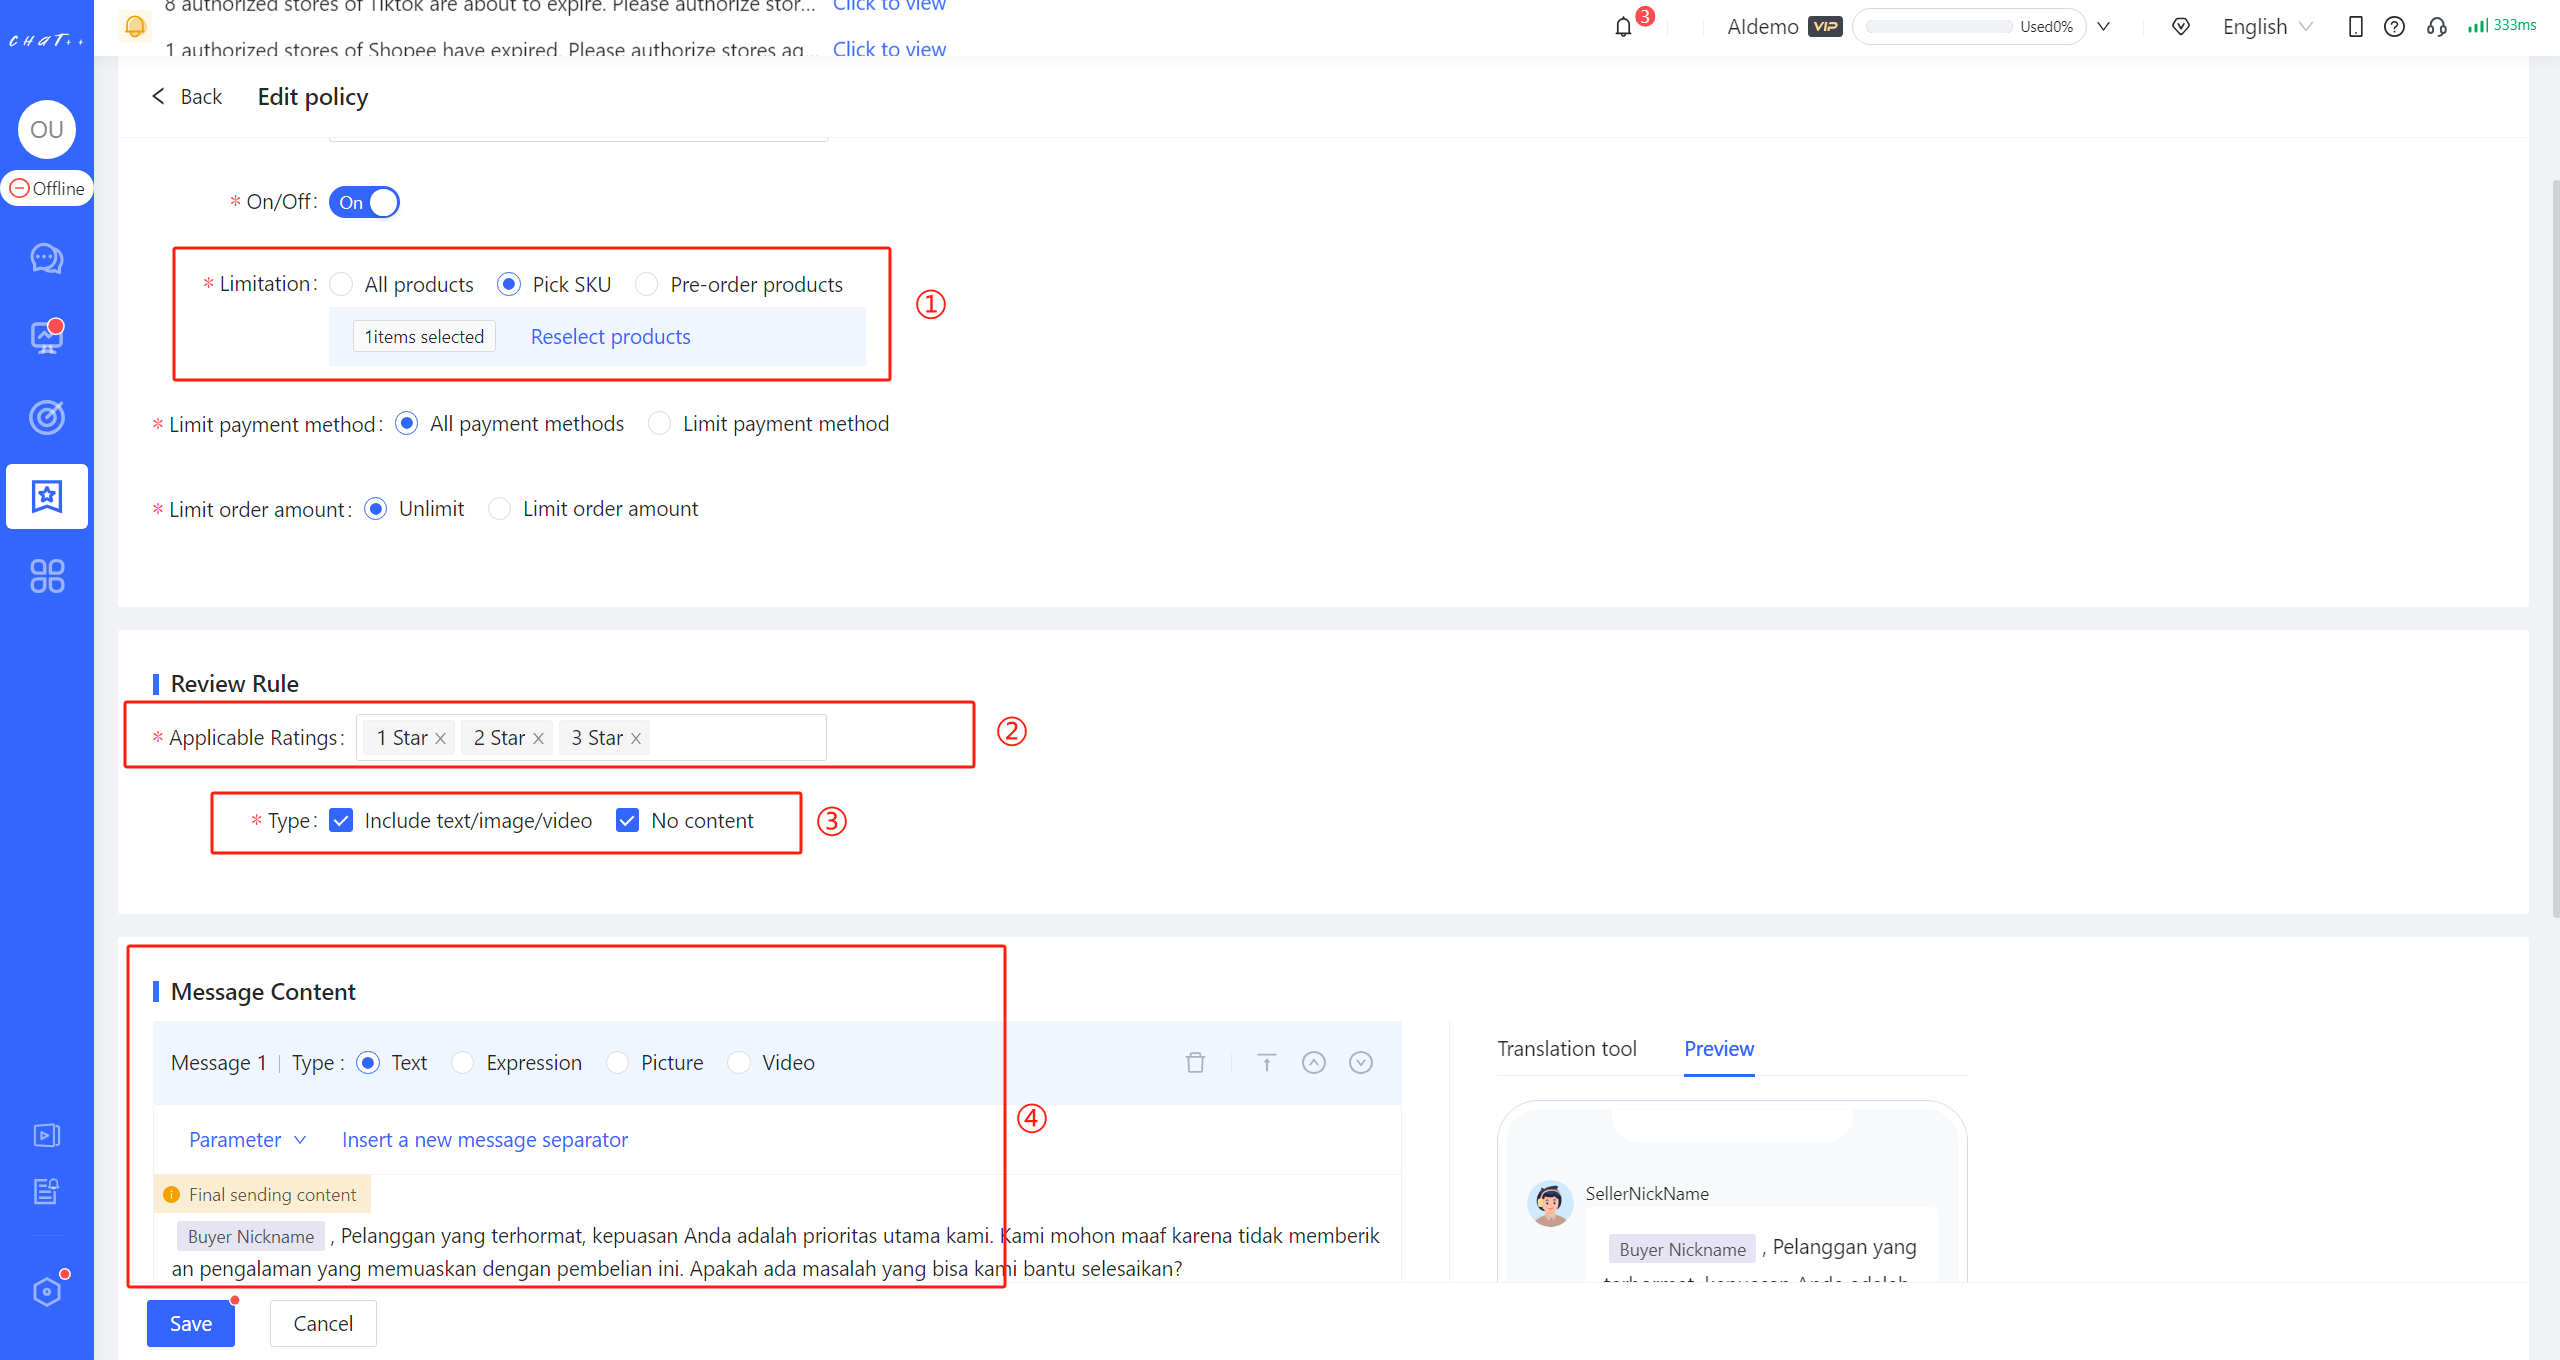
Figure 9
For example:In the example in Figure 10,
- Product scope selected are "Pick SKU": Sunscreen
- Applicable Ratings selected are "1 star and 2 stars and 3 stars",
- Review Type selected includes "Include text/image/video" and "No content",
This means that this policy will match buyers who "purchase this sunscreen, give 1 star or 2 stars or 3 stars, regardless of whether they write a review."
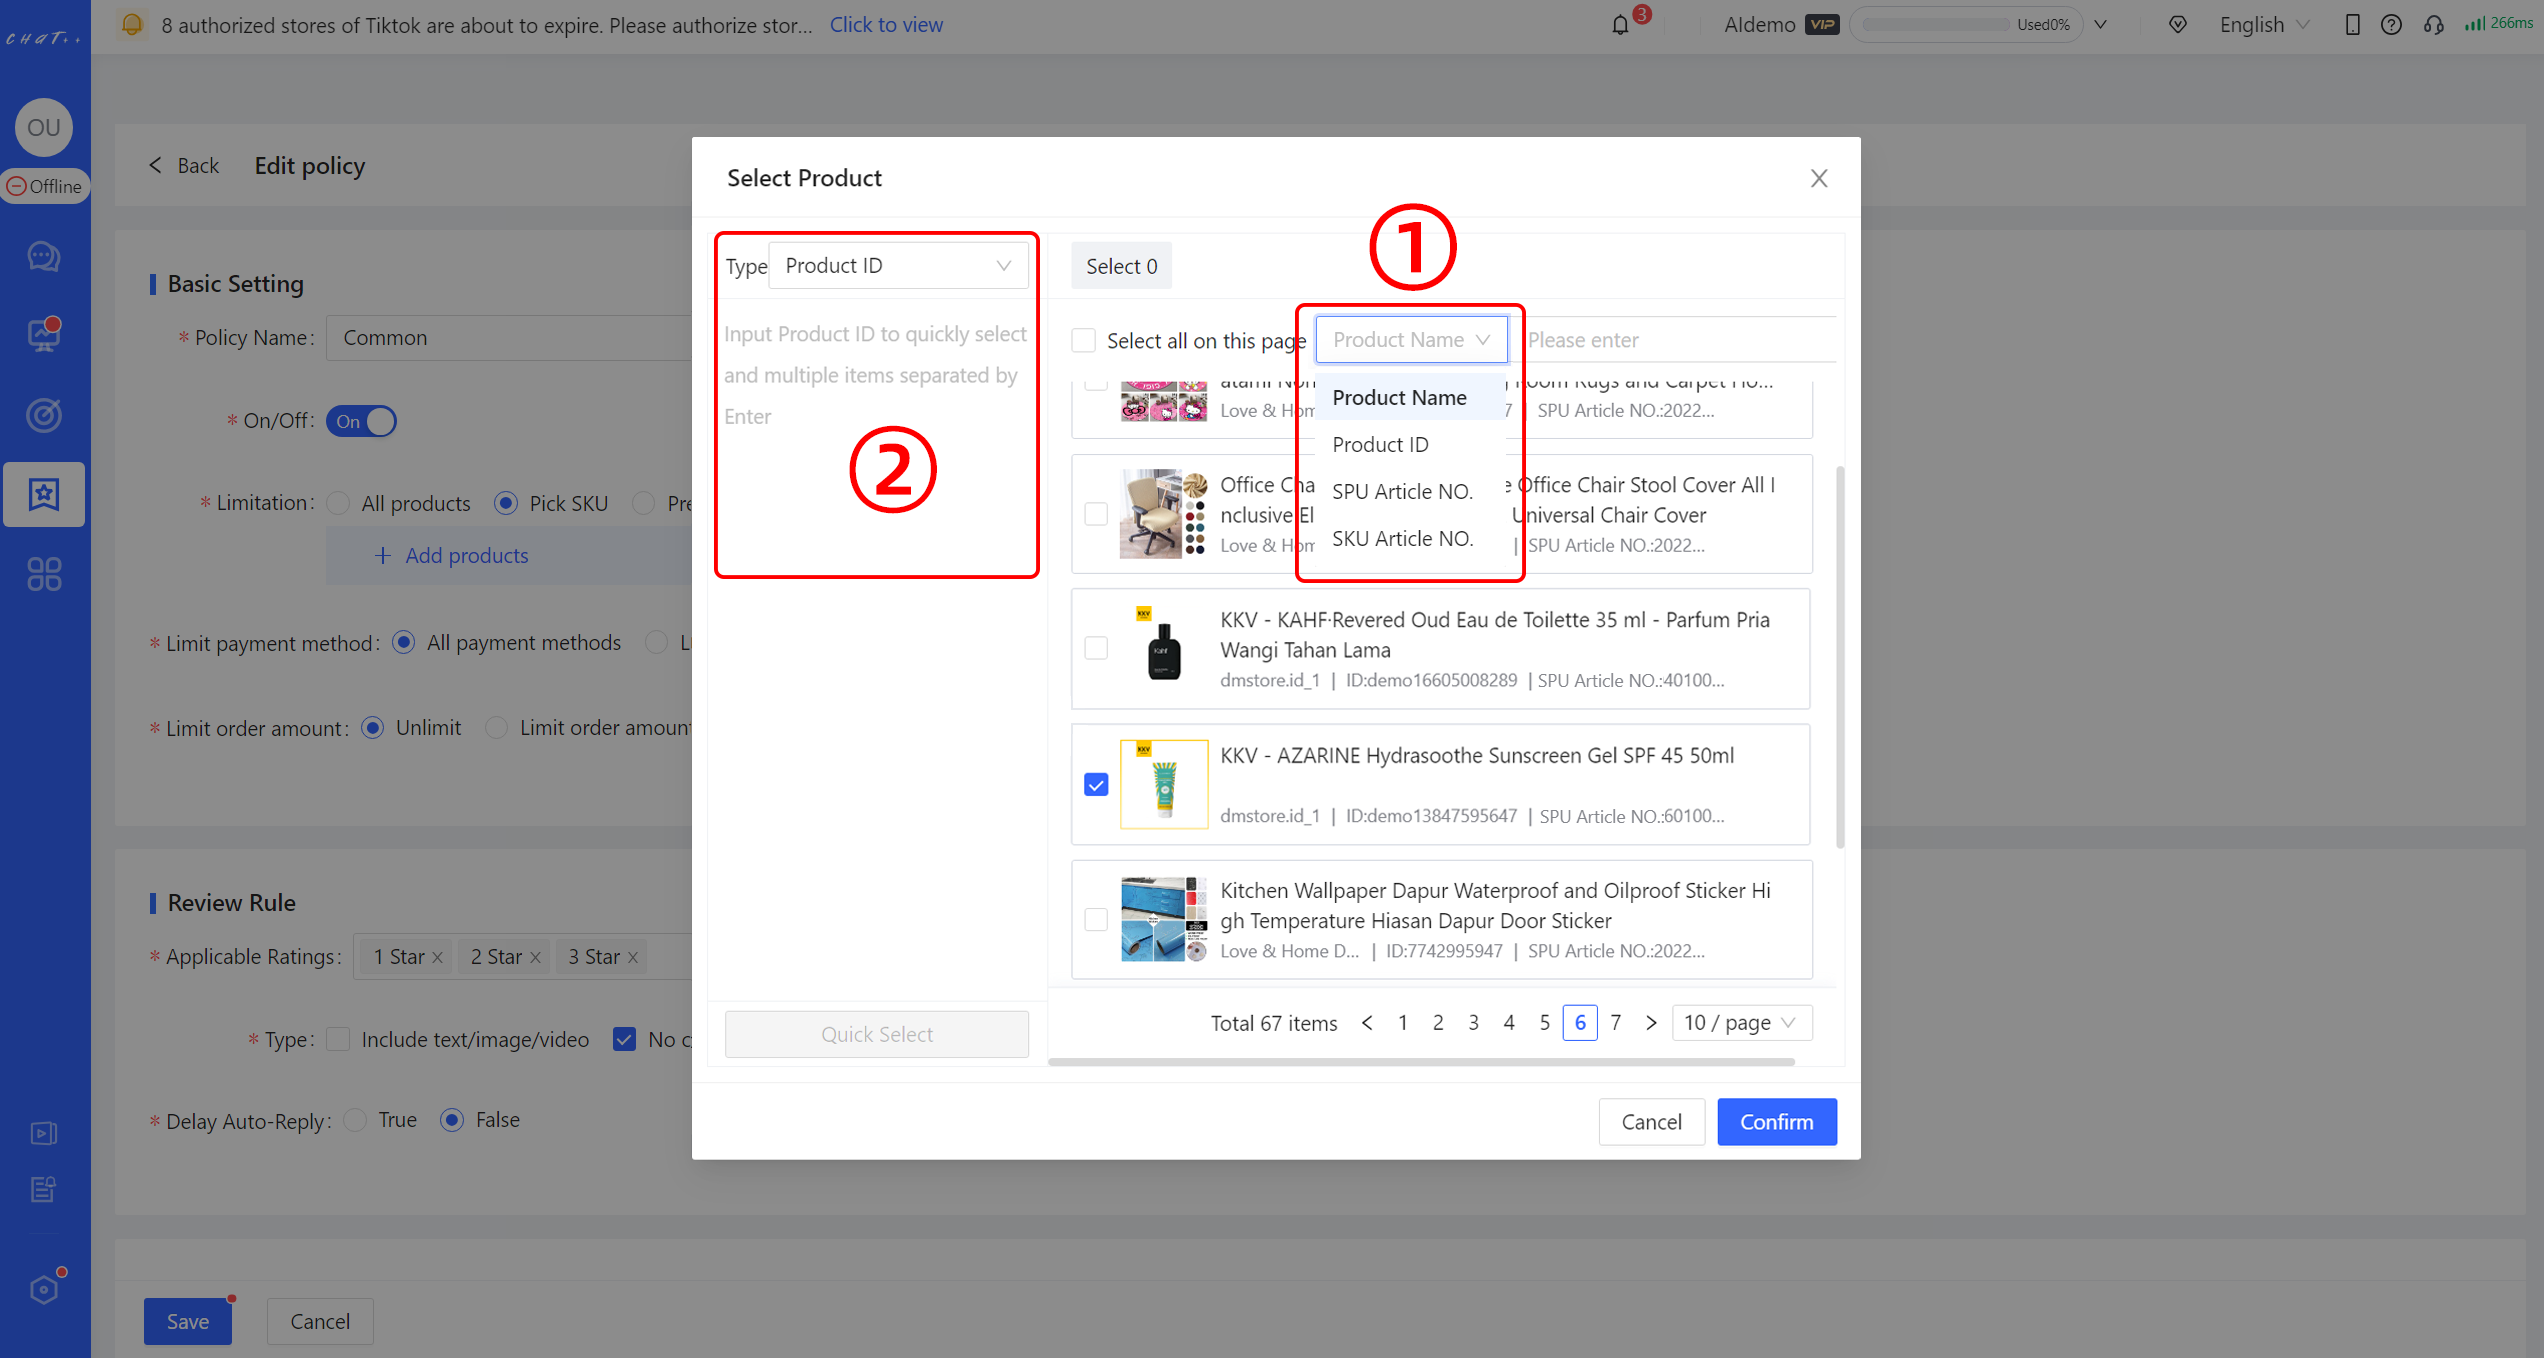
Figure 10
Configuration of Personalized Replies
Recommended Templates To facilitate quick configuration, when the message content includes text messages, ChatPlusAI provides recommended templates for reference and selection. Select text messages, scroll down appropriately, and click the "Select" button (red box ① in Figure below) to automatically fill in the content editing box(red box ③ in Figure below). The preview of sending effect can be seen on the right side of the page(red box ④ in Figure below).
Add Buyer Nickname To make the reply content more targeted, you can mention the buyer's nickname in the text message.
Select "Buyer Nickname" after clicking "Parameter" button(red box ② in Figure below), and the buyer's nickname will be automatically filled in.
Note:If you want to use templates along with buyer nickname, please follow these steps: Click "Select" (red box ① in Figure below) → Click on "Buyer Nickname" after selecting "Parameter" (red box ② below). If you click on the "Select" button for the template first, and buyer nickname in the content editing box(red box ③ below) will be replaced with the template content.
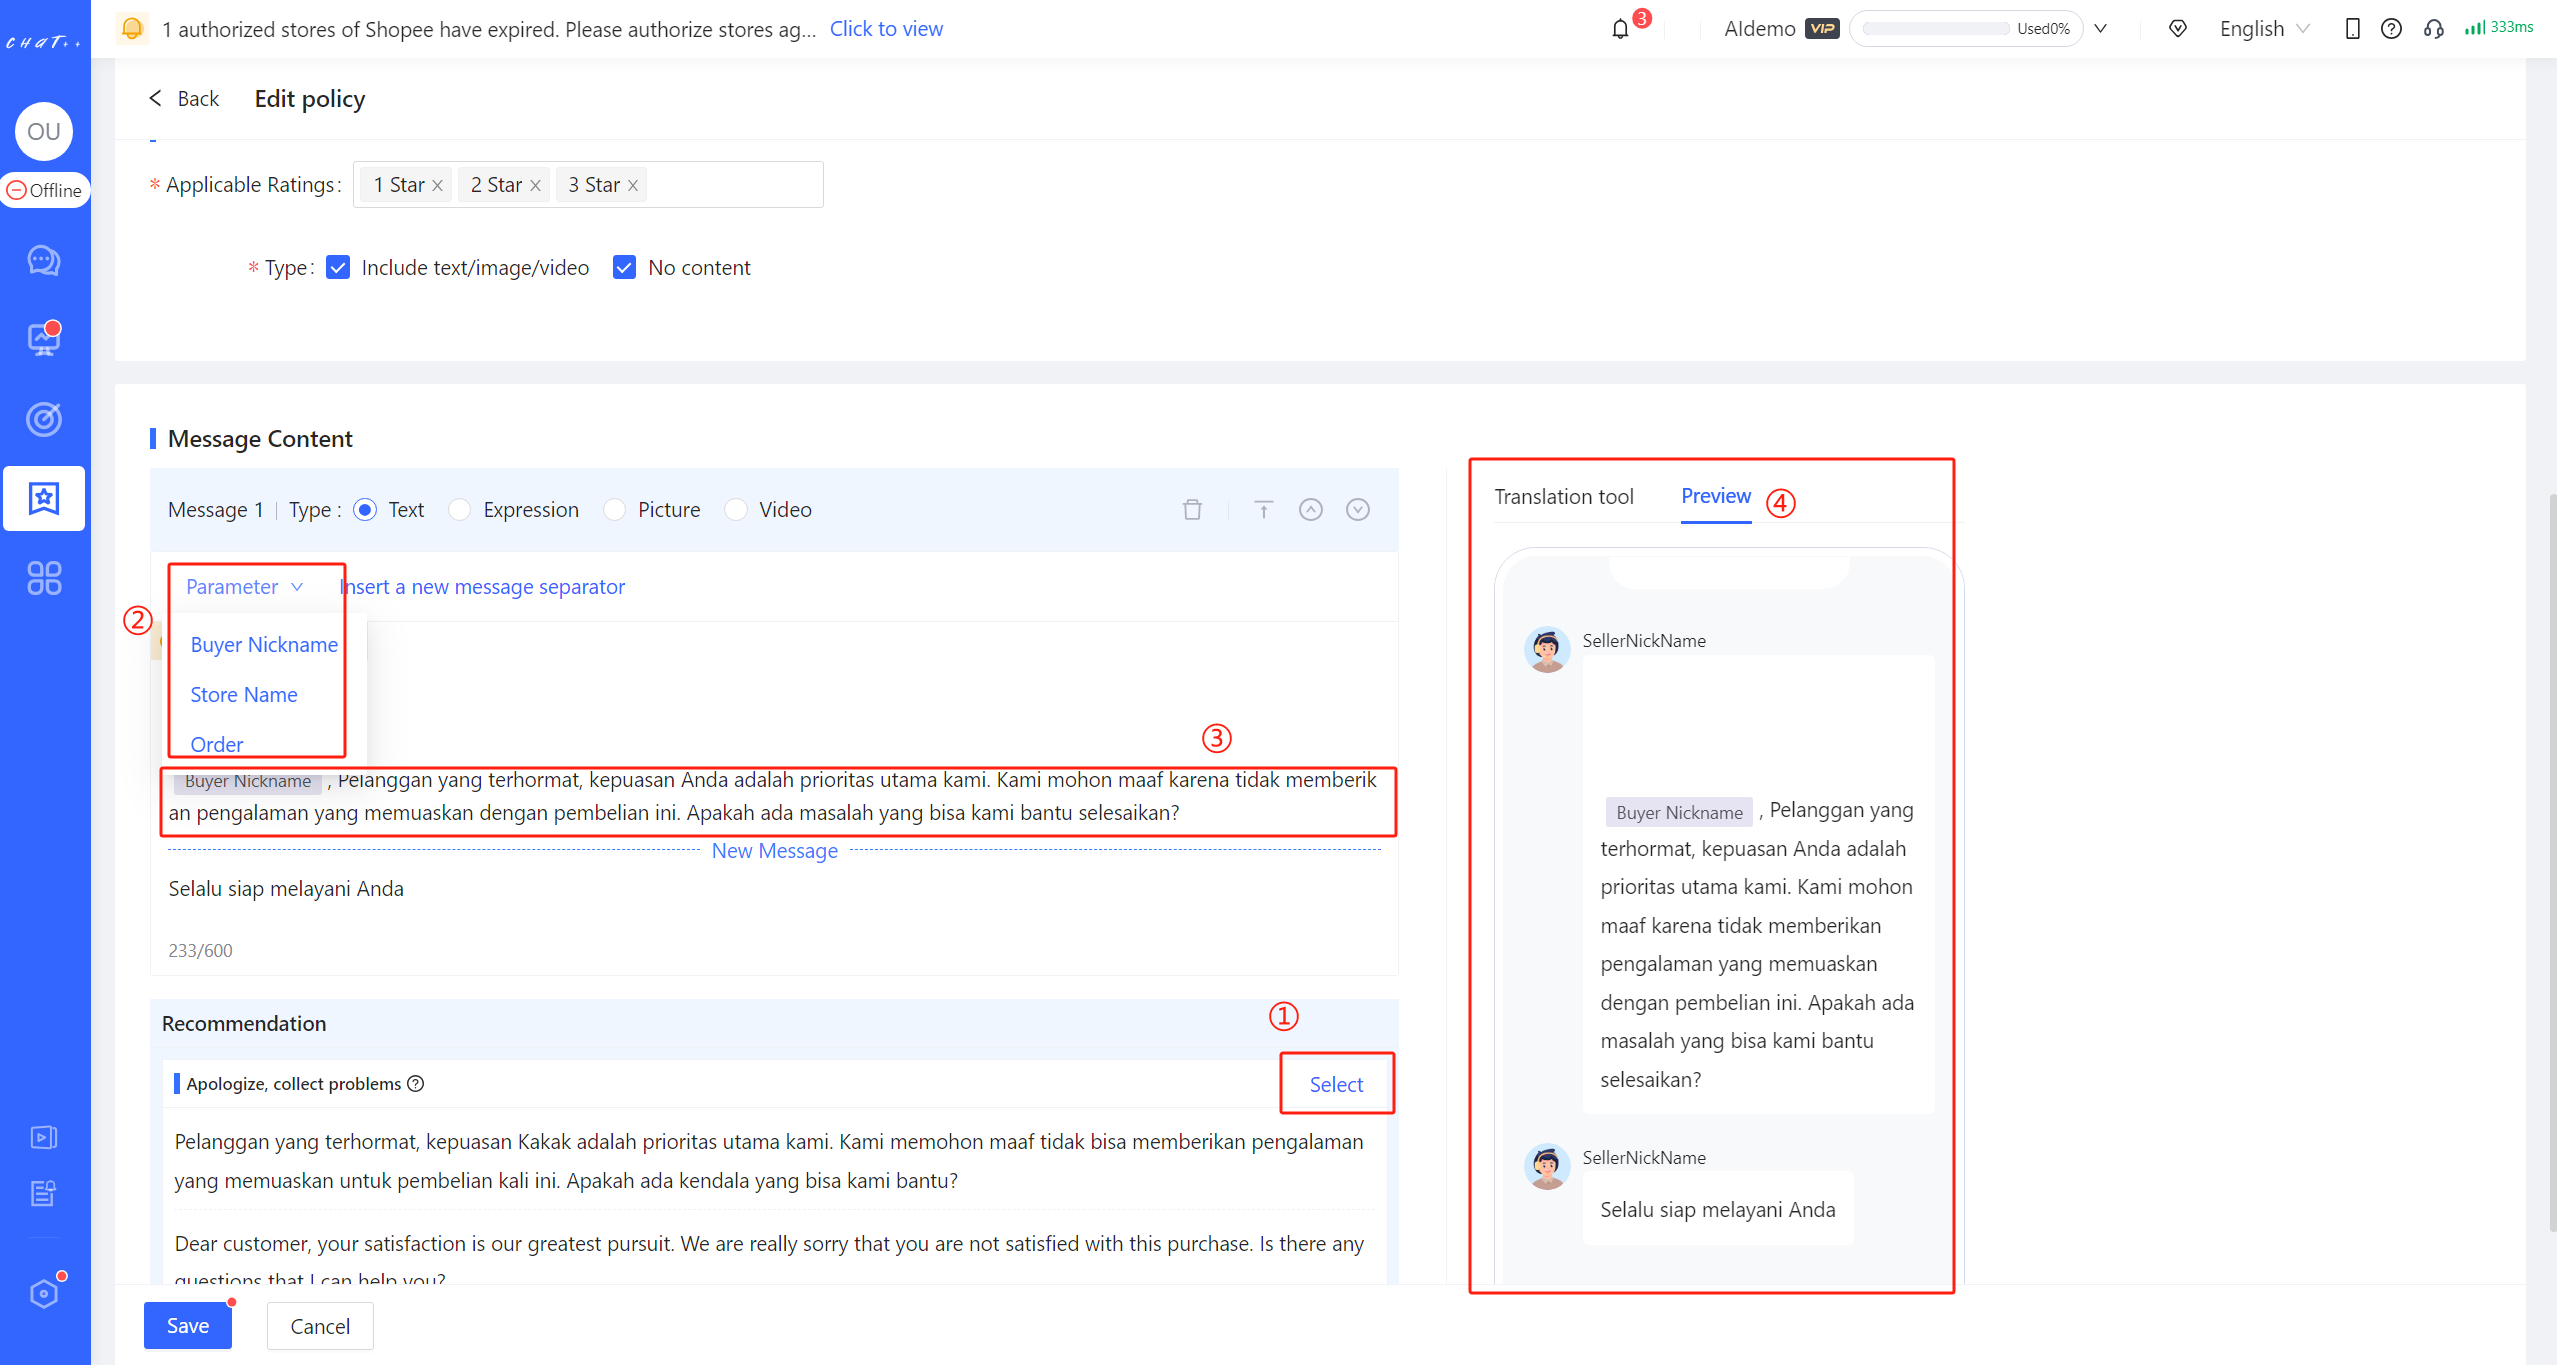
Figure 11
Diversified Message Type (Text/Expression/Picture/Video) The message types in ChatPlusAI are diverse, including text, picture, expression, and video (shown as red box① below). The variety of message types allows the creation of eye-catching content to enhance the effectiveness of Negative Review Follow-up.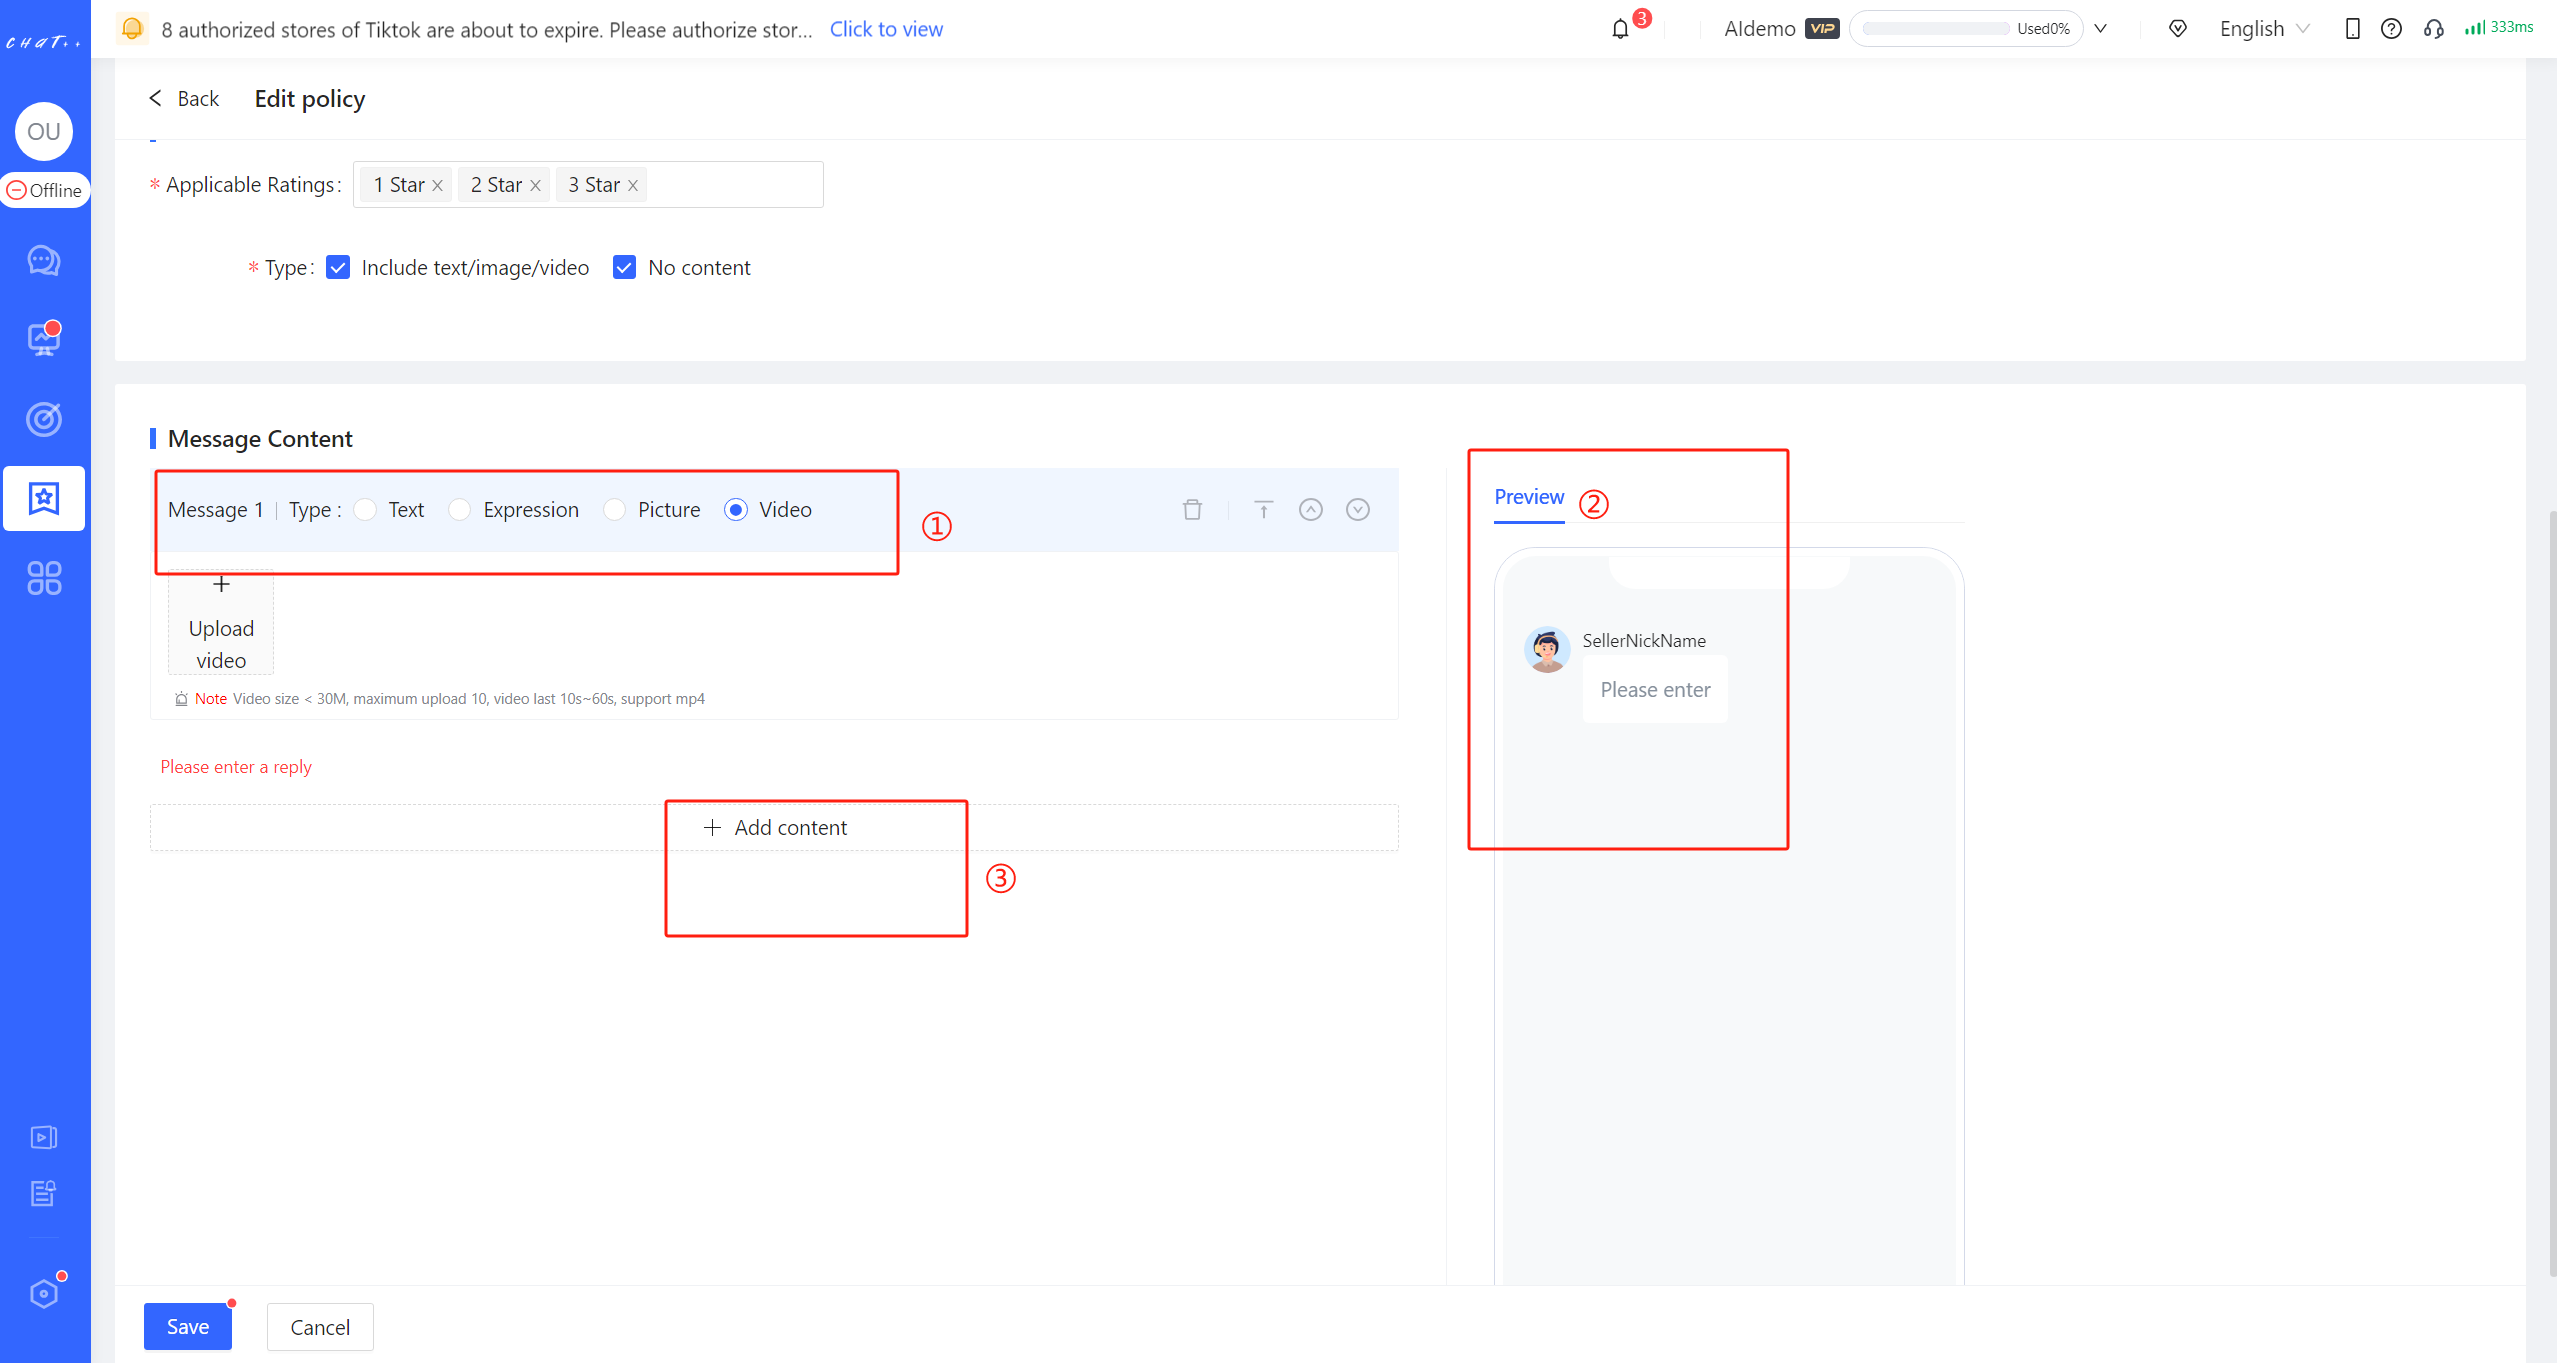
Figure 12
Quick Multilingual Translation
If message content includes text messages and you need to continuously adjust the content to find the optimal one, ChatPlusAI supports translating it into the current system language first. After modification, it can be translated back into site language. It facilitates quick adjustments to translated messages. When you want to adjust templates quickly, it allows you to translate the content already in site language back to system language with one click. After optimizing, you can then translate it back to the site language.
Click on "Translation tool" on the right side of page and after message content is automatically filled, click on "Translate content on the left" (red box① in Figure below). The final sending content on the left side (red box⑤ in Figure below) will be translated by default into current system language. If you need to translate it into other languages, you can switch the target language. The content translated into current system language is editable. When you edit the content in this area (red box② in Figure below), you can click "Translate content above" (red box③ in Figure below) to translate it into the site language. After translation, you can click "Copy to Final Sending Content" (red box④ in Figure below) to copy it. Click "Save" (red box⑥ in Figure below) to complete the configuration.
If message content doesn't need modification, ChatPlusAI supports translating the content directly into the site language.
Click on "Translation tool," and after message content is automatically filled, click on "Translate content above" (red box③ in Figure below). It will be directly translated into the site language. Click "Copy to Final Sending Content" (red box④ in Figure below), and the translated content will be automatically filled into the "Final sending content" area (red box⑤ in Figure below). Click "Save" (red box⑥ in Figure below) to complete the configuration.
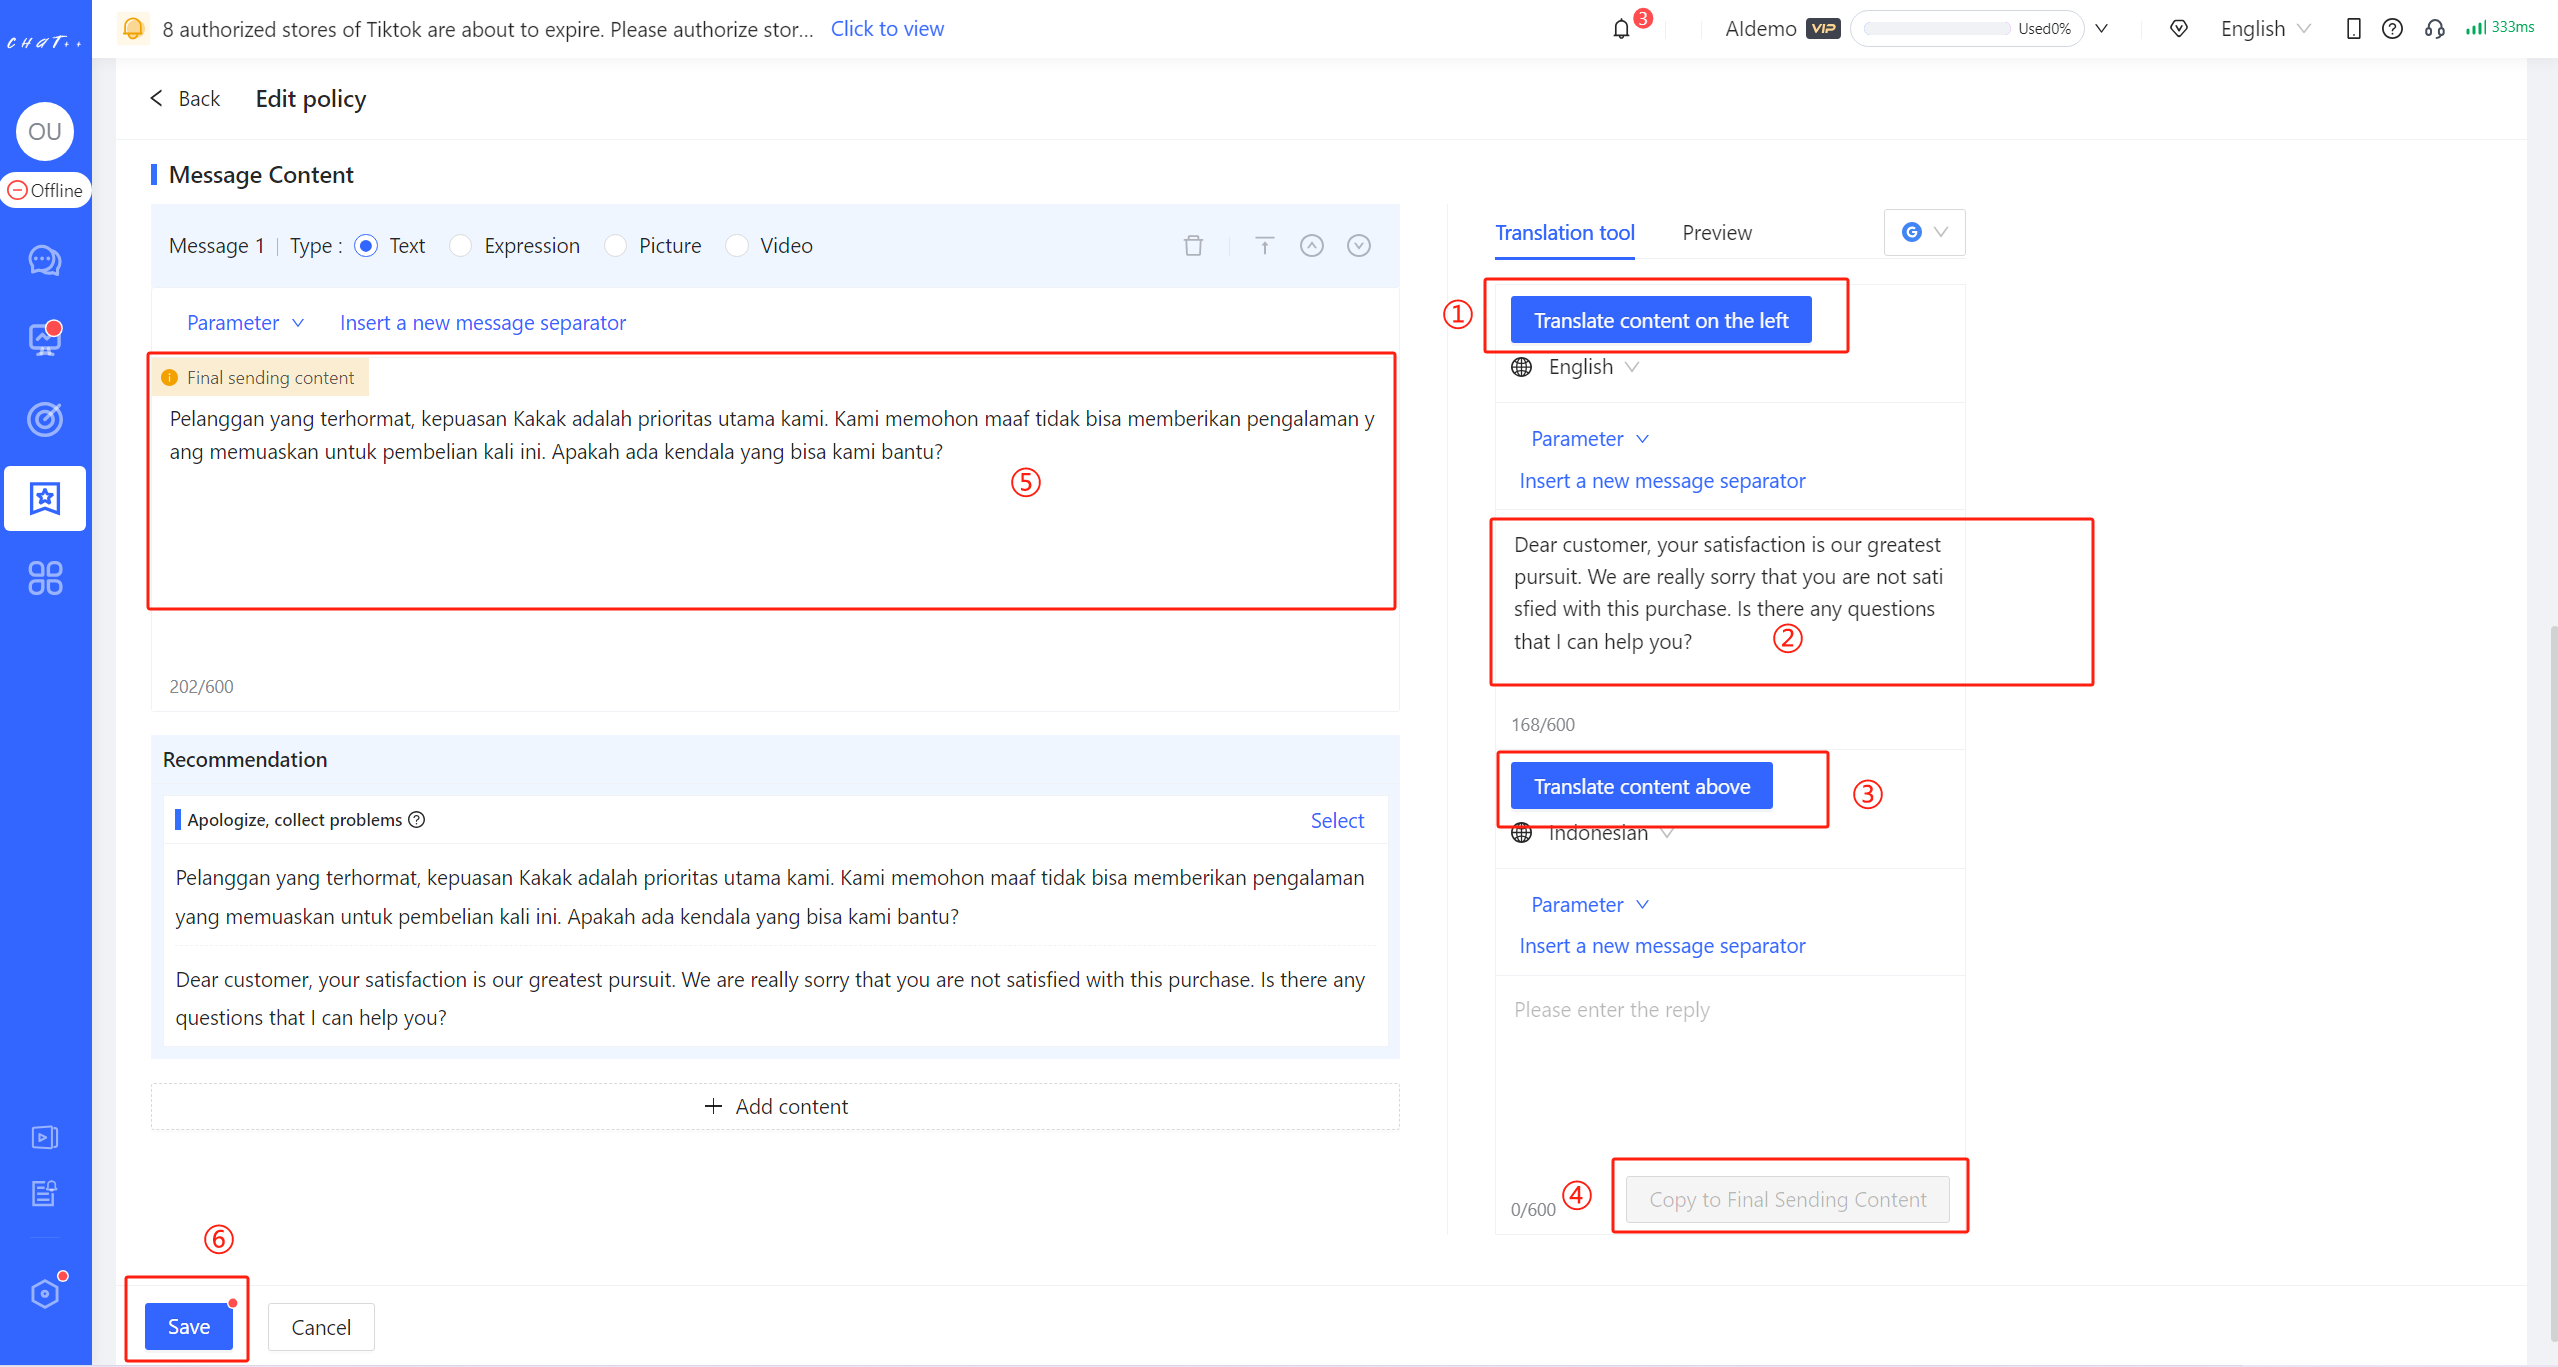
Figure 13
Flexible Reply Combination ChatPlusAI supports the flexible combination of various Reply types to enhance the effectiveness of Negative Review Follow-up.
Click on "Add content" (red box③ in Figure 12) to add more replies.
Note:In the same policy, each message type can only be selected once, i.e., "Add content" (red box③ in Figure 12) can be clicked up to 3 times at most. The types of Messages 1 (red box① in Figure 12) to Message 4 can only be selected once.
Note:If you want to send multiple messages of the same type, you can add them in the editing box of that message type. Please use the number of messages sent judiciously to avoid making buyers feel "disturbed" and ensure a good purchasing experience.
- Text: Send multiple messages through clicking "Insert a new message separator" (red box① in Figure 14);
- Expression: Support sending up to 3 at the same time;
- Picture: Support sending up to 10 at the same time, supporting jpg/png/jpeg formats, image size < 10M;
- Video: Support sending up to 10 at the same time, video length 10s~60s, supporting mp4 format, video size < 30M.
For example:In the example below
- Set the number of messages to 2: the 1st message is "Expression"; the 2nd message is a text message. In the message, buyer's nickname is added by clicking "Parameter". Due to limitations on the type of message, "Text" message type cannot be selected again. More text messages can be added by clicking "Insert a new message separator" (red box① in Figure 14).
On the right side of the page (red box② in Figure 14), you can see the preview of sending content. The order of sending different messages can be adjusted.(red box③ in Figure 13)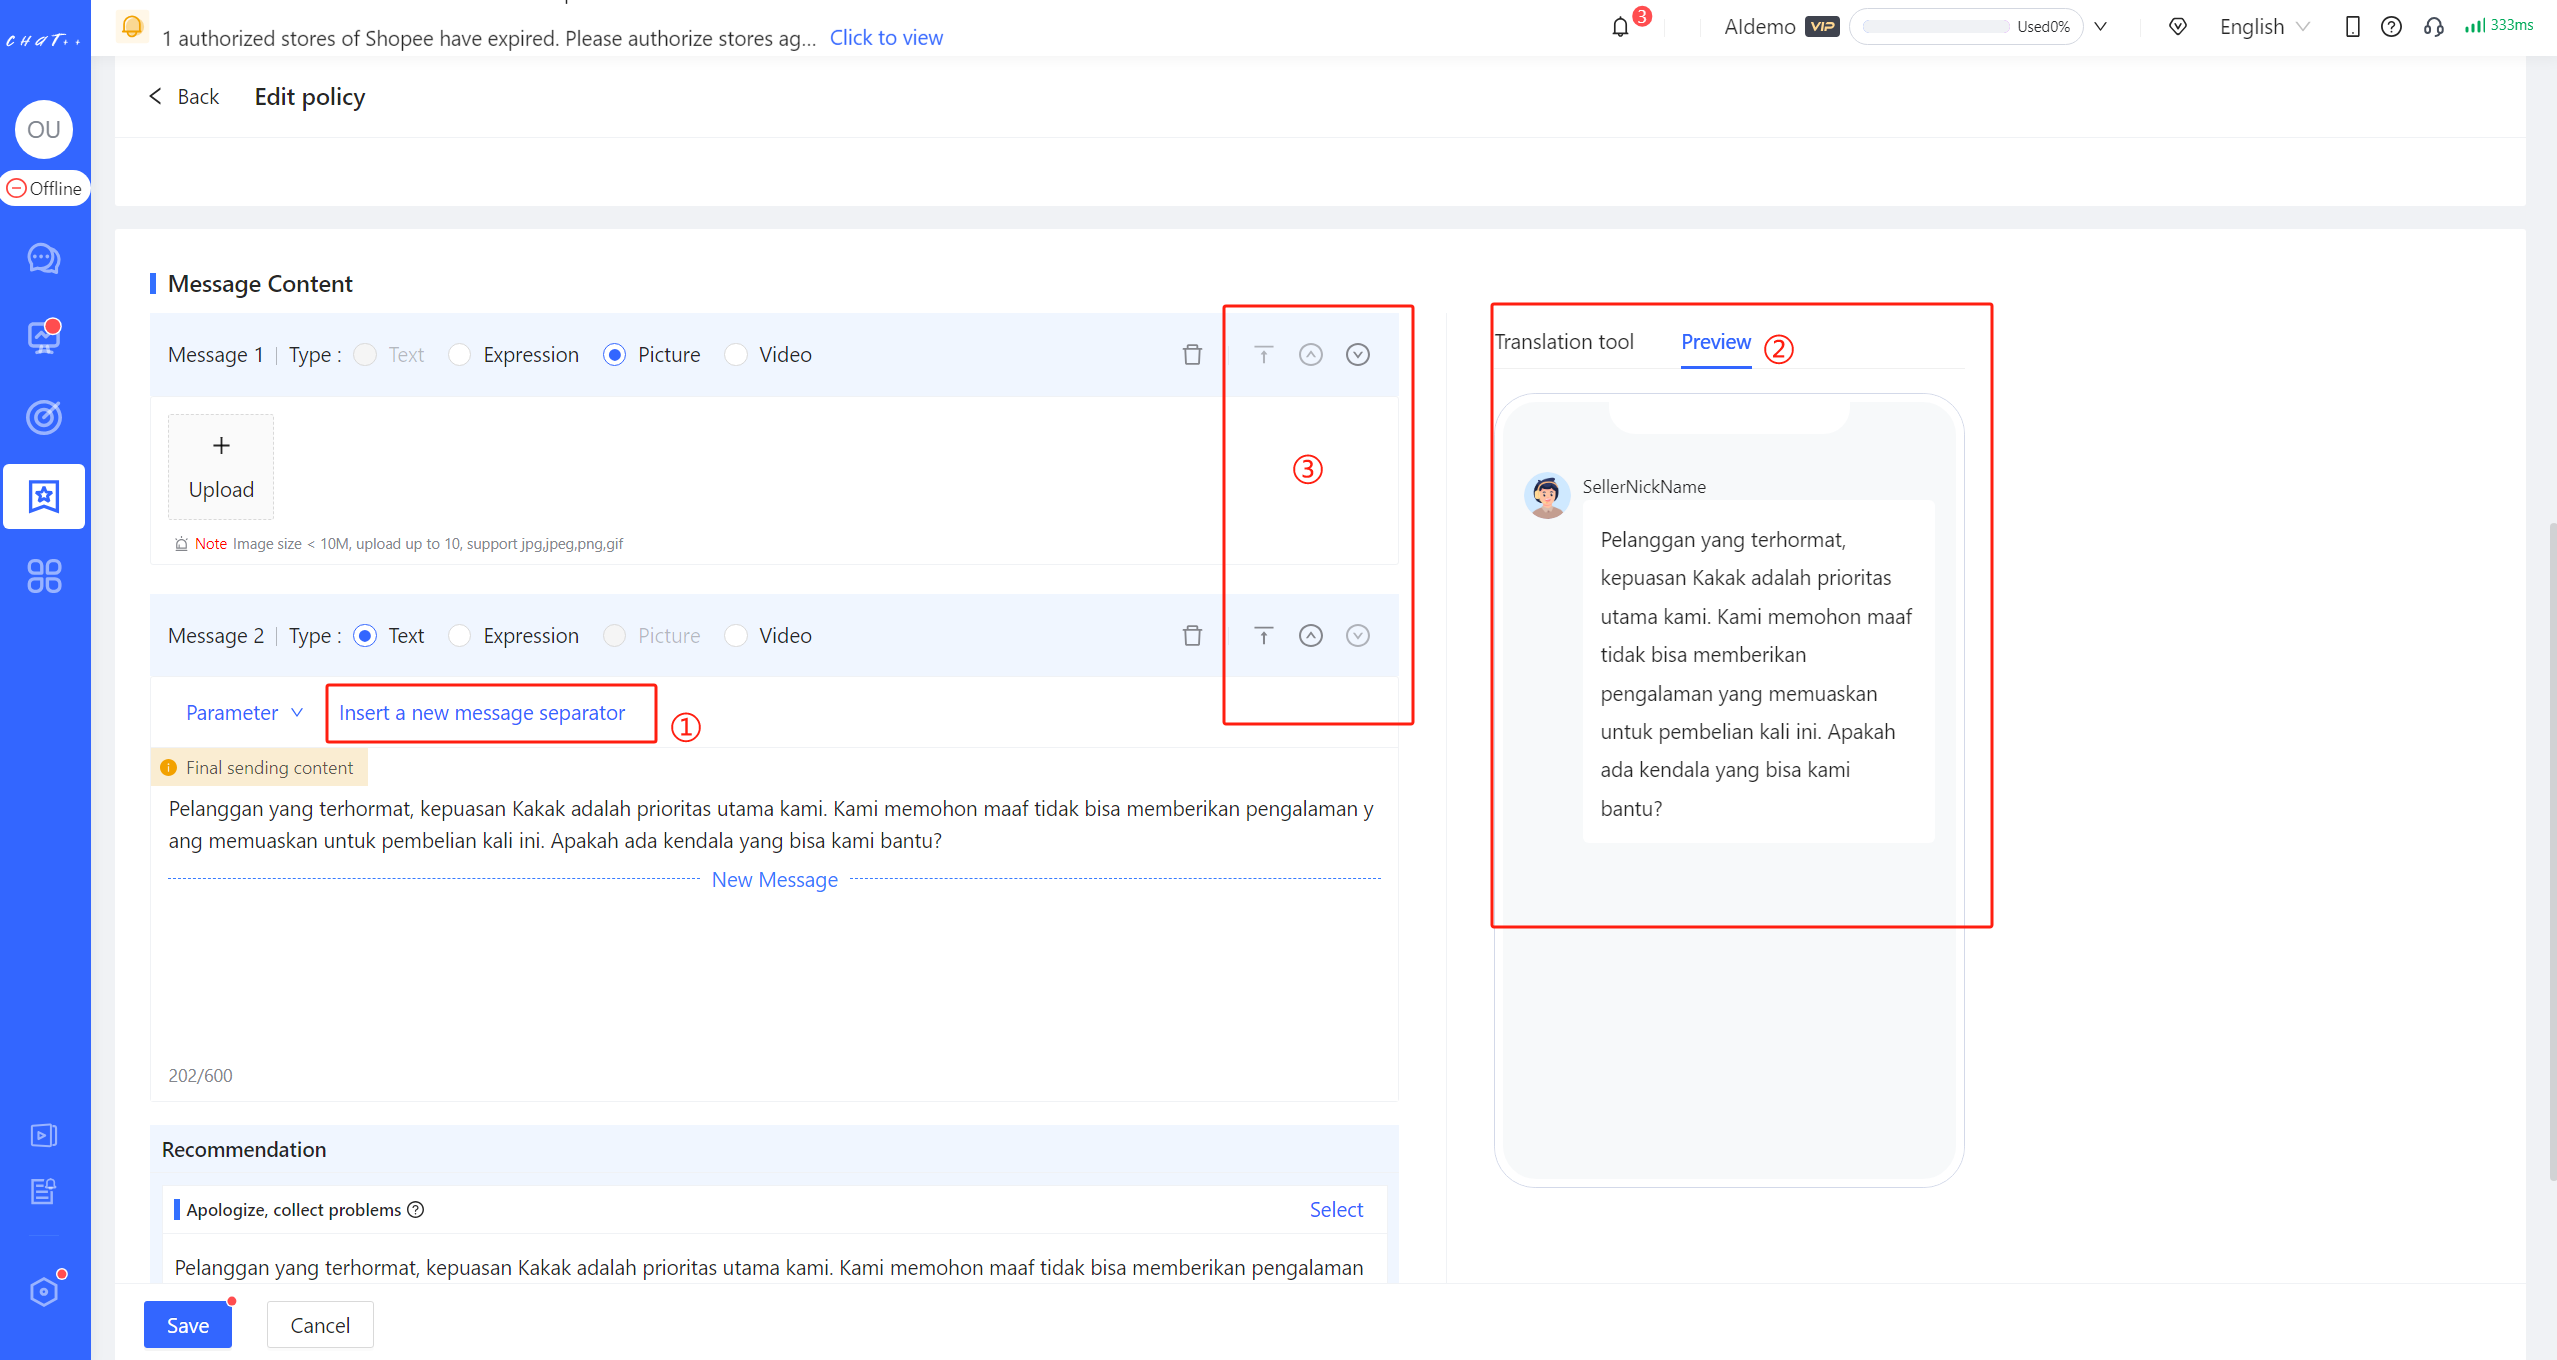
Figure 14
Diversified Reply Configuration
Add Policy Click on "Add policy" (red box① below) to set diverse policy branches for a task, achieving different replies for the same task between different products, for different reviews, and in different forms of content. It will ensure the best effect.
"Policy Branch Execution Sequence" Description
When there are multiple effective policies in the Policy Branch Collection, the system will execute the first policy that matches the conditions according to execution sequence (red box② in Figure below), and subsequent policies will not be executed.
Hover the cursor over the "More" position to change the execution order through "Top/Up/Down/Bottom" (red box③ in Figure below).
Note: If none of the policy match, the message of Negative Review Follow-up will not be sent.
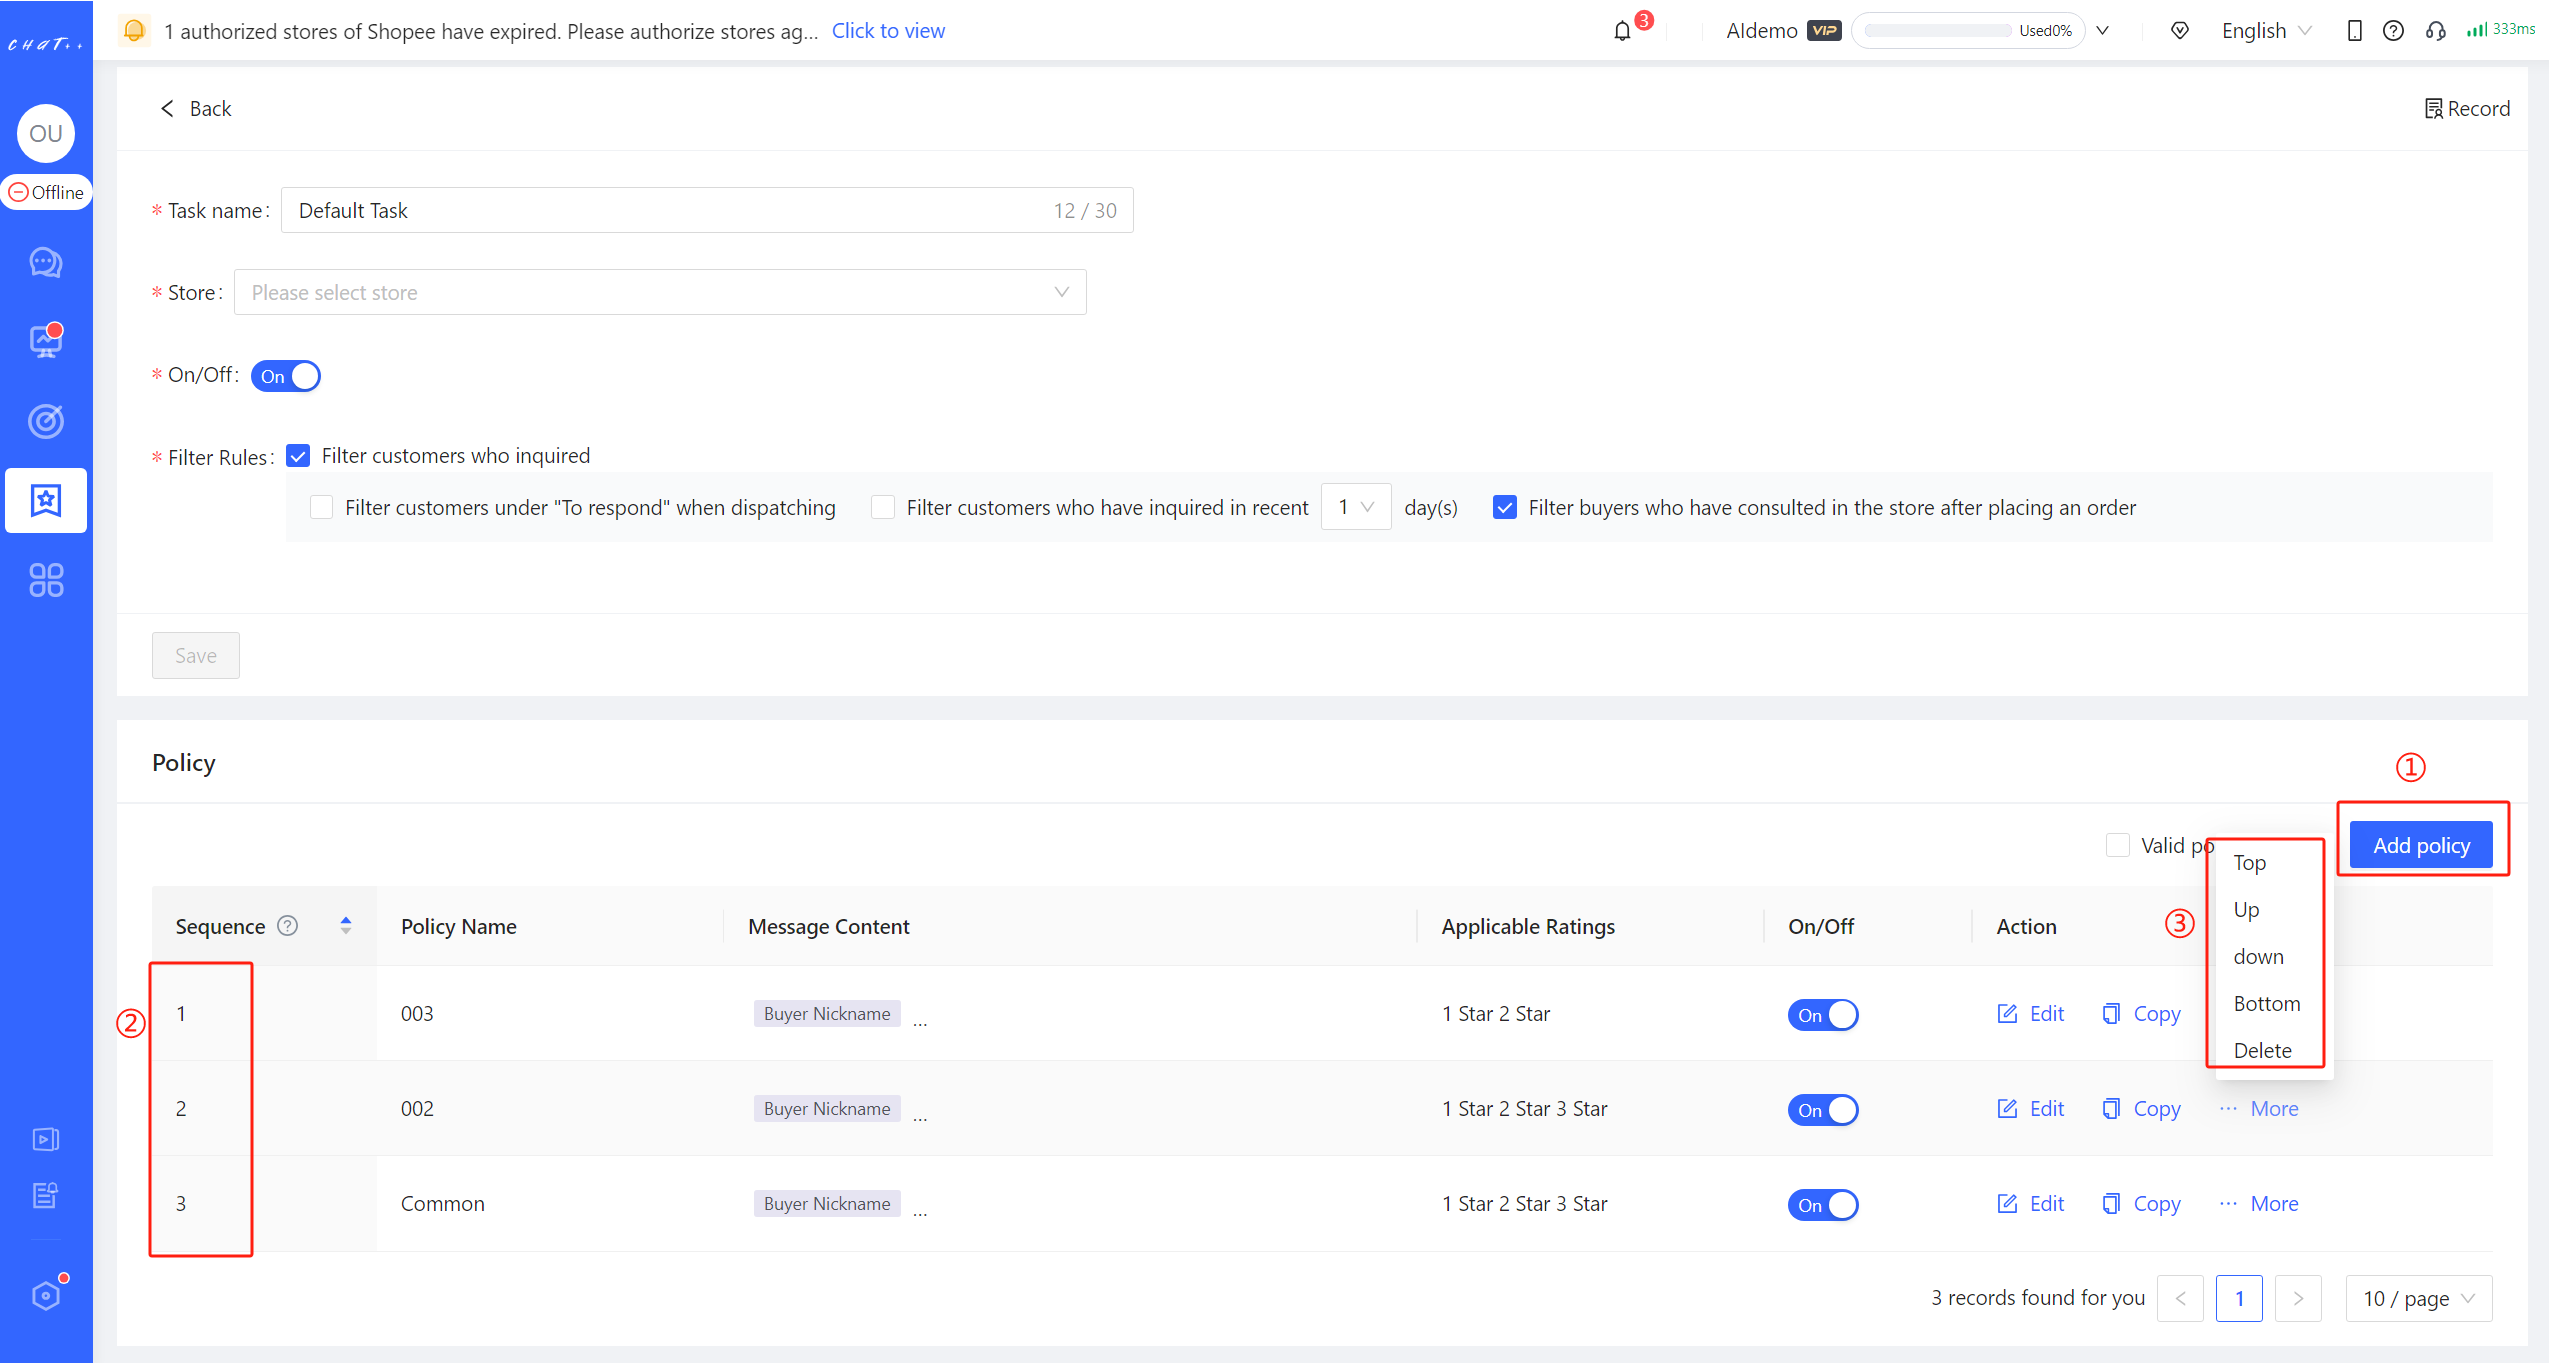
Figure 15
Add Task Click on "Add Task" (red box in Figure 16) to set different tasks for different stores, achieving differentiated Negative Review Follow-up for different stores. In a new task, the added store will be removed from the applied stores of other tasks, ensuring that "one store will not exist in two tasks simultaneously" to avoid sending different Negative Review Follow-up messages to buyers multiple times.
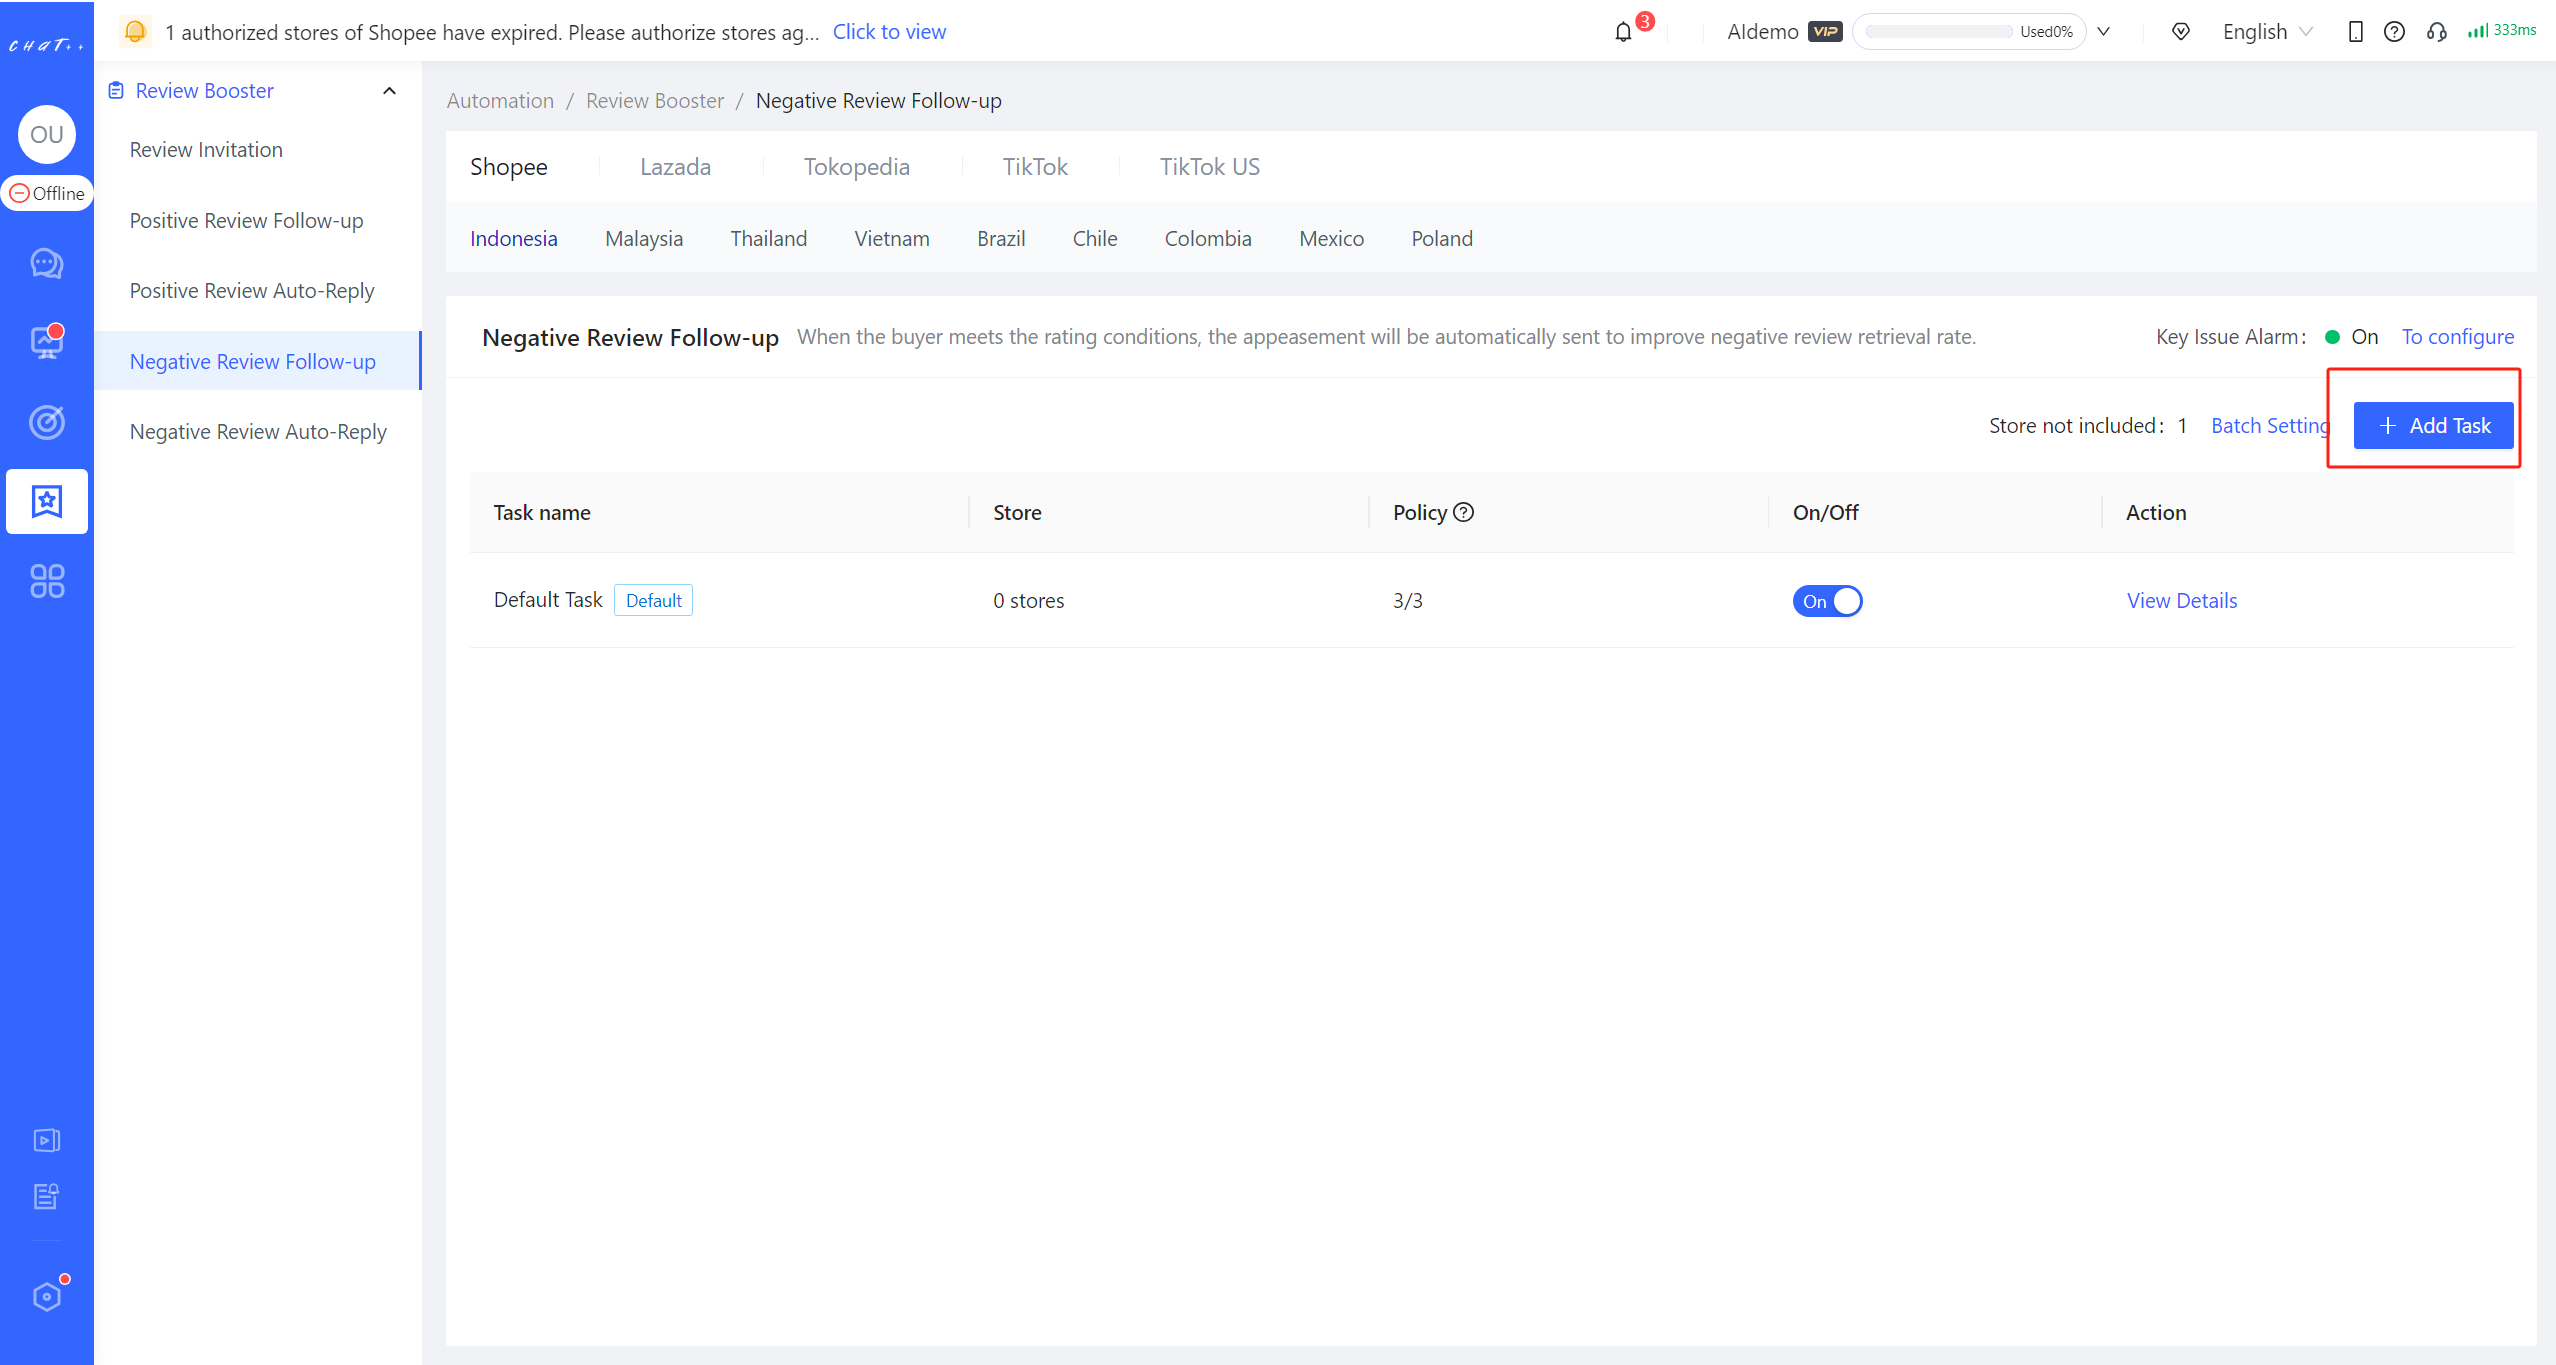
Figure 16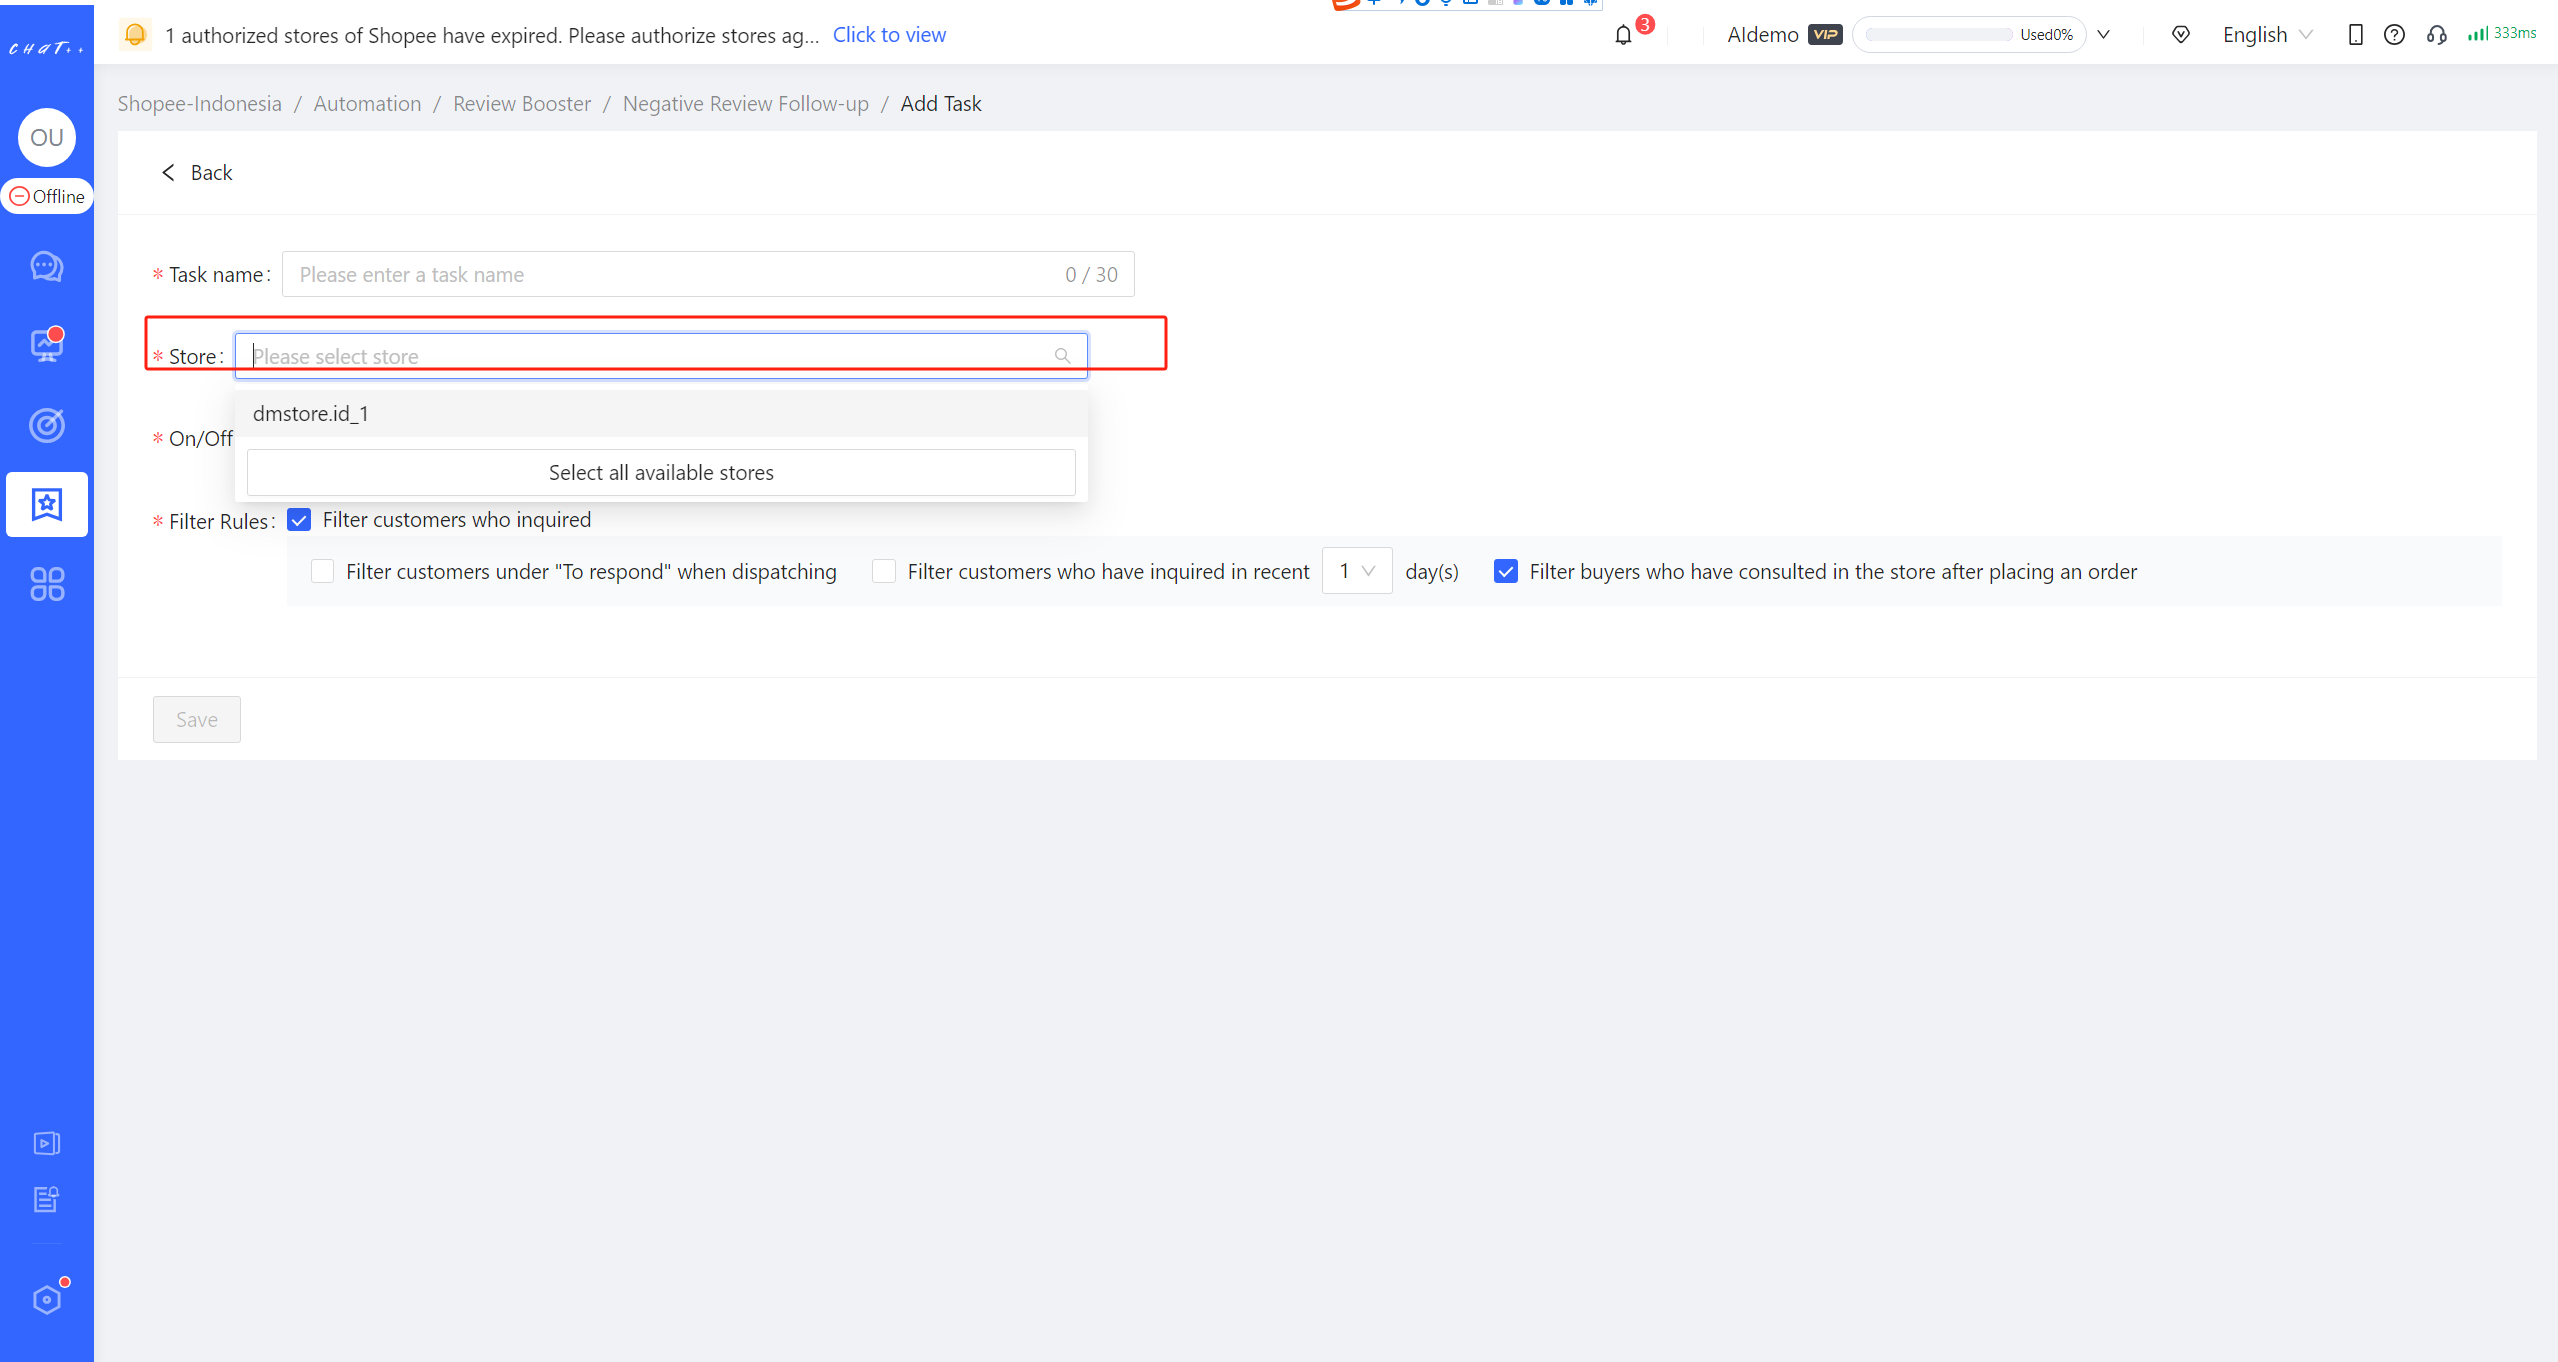
Figure 17
Attention
1、 Negative Review Follow-up tasks can be customized differently for marketplaces, currently supporting Shopee only, Lazada, Tokopedia and TikTok support are coming soon, stay tuned.
2、Each country site of the marketplace has its own Negative Review Follow-up task, you need to configure them respectively.
3、It is recommended to enable Negative Review Auto-reply to ensure your maximum benefit.
4、After sending follow-up messages, to ensure effectiveness, the robot will pause responses for 48 hours in the current conversation, transferring to CS for processing.
5、In the configuration of Negative Review Follow-up, applicable ratings support checking 1 star to 4 stars. When adding other policies, the default state for applicable ratings is all selected. If you have already selected 4 stars in Positive Review Follow-up task, this policy will conflict, and you need to unselect 4 stars before saving.
FAQ
Q1:Why can't I save the configuration?A1:Please scroll up the page to see the system red text prompt if you encounter issues saving. It may be due to:
- Conflicts with Positive Review Auto-Reply 4 stars, please remove and save: In the configuration of Negative Review Follow-up, applicable ratings support checking 1 star to 4 stars. When adding other policies, the default state for applicable ratings is all selected. If you have already selected 4 stars in Positive Review Follow-up task, this policy will conflict, and you need to unselect 4 stars before saving.
- Some messages are not filled with reply content or not uploaded.
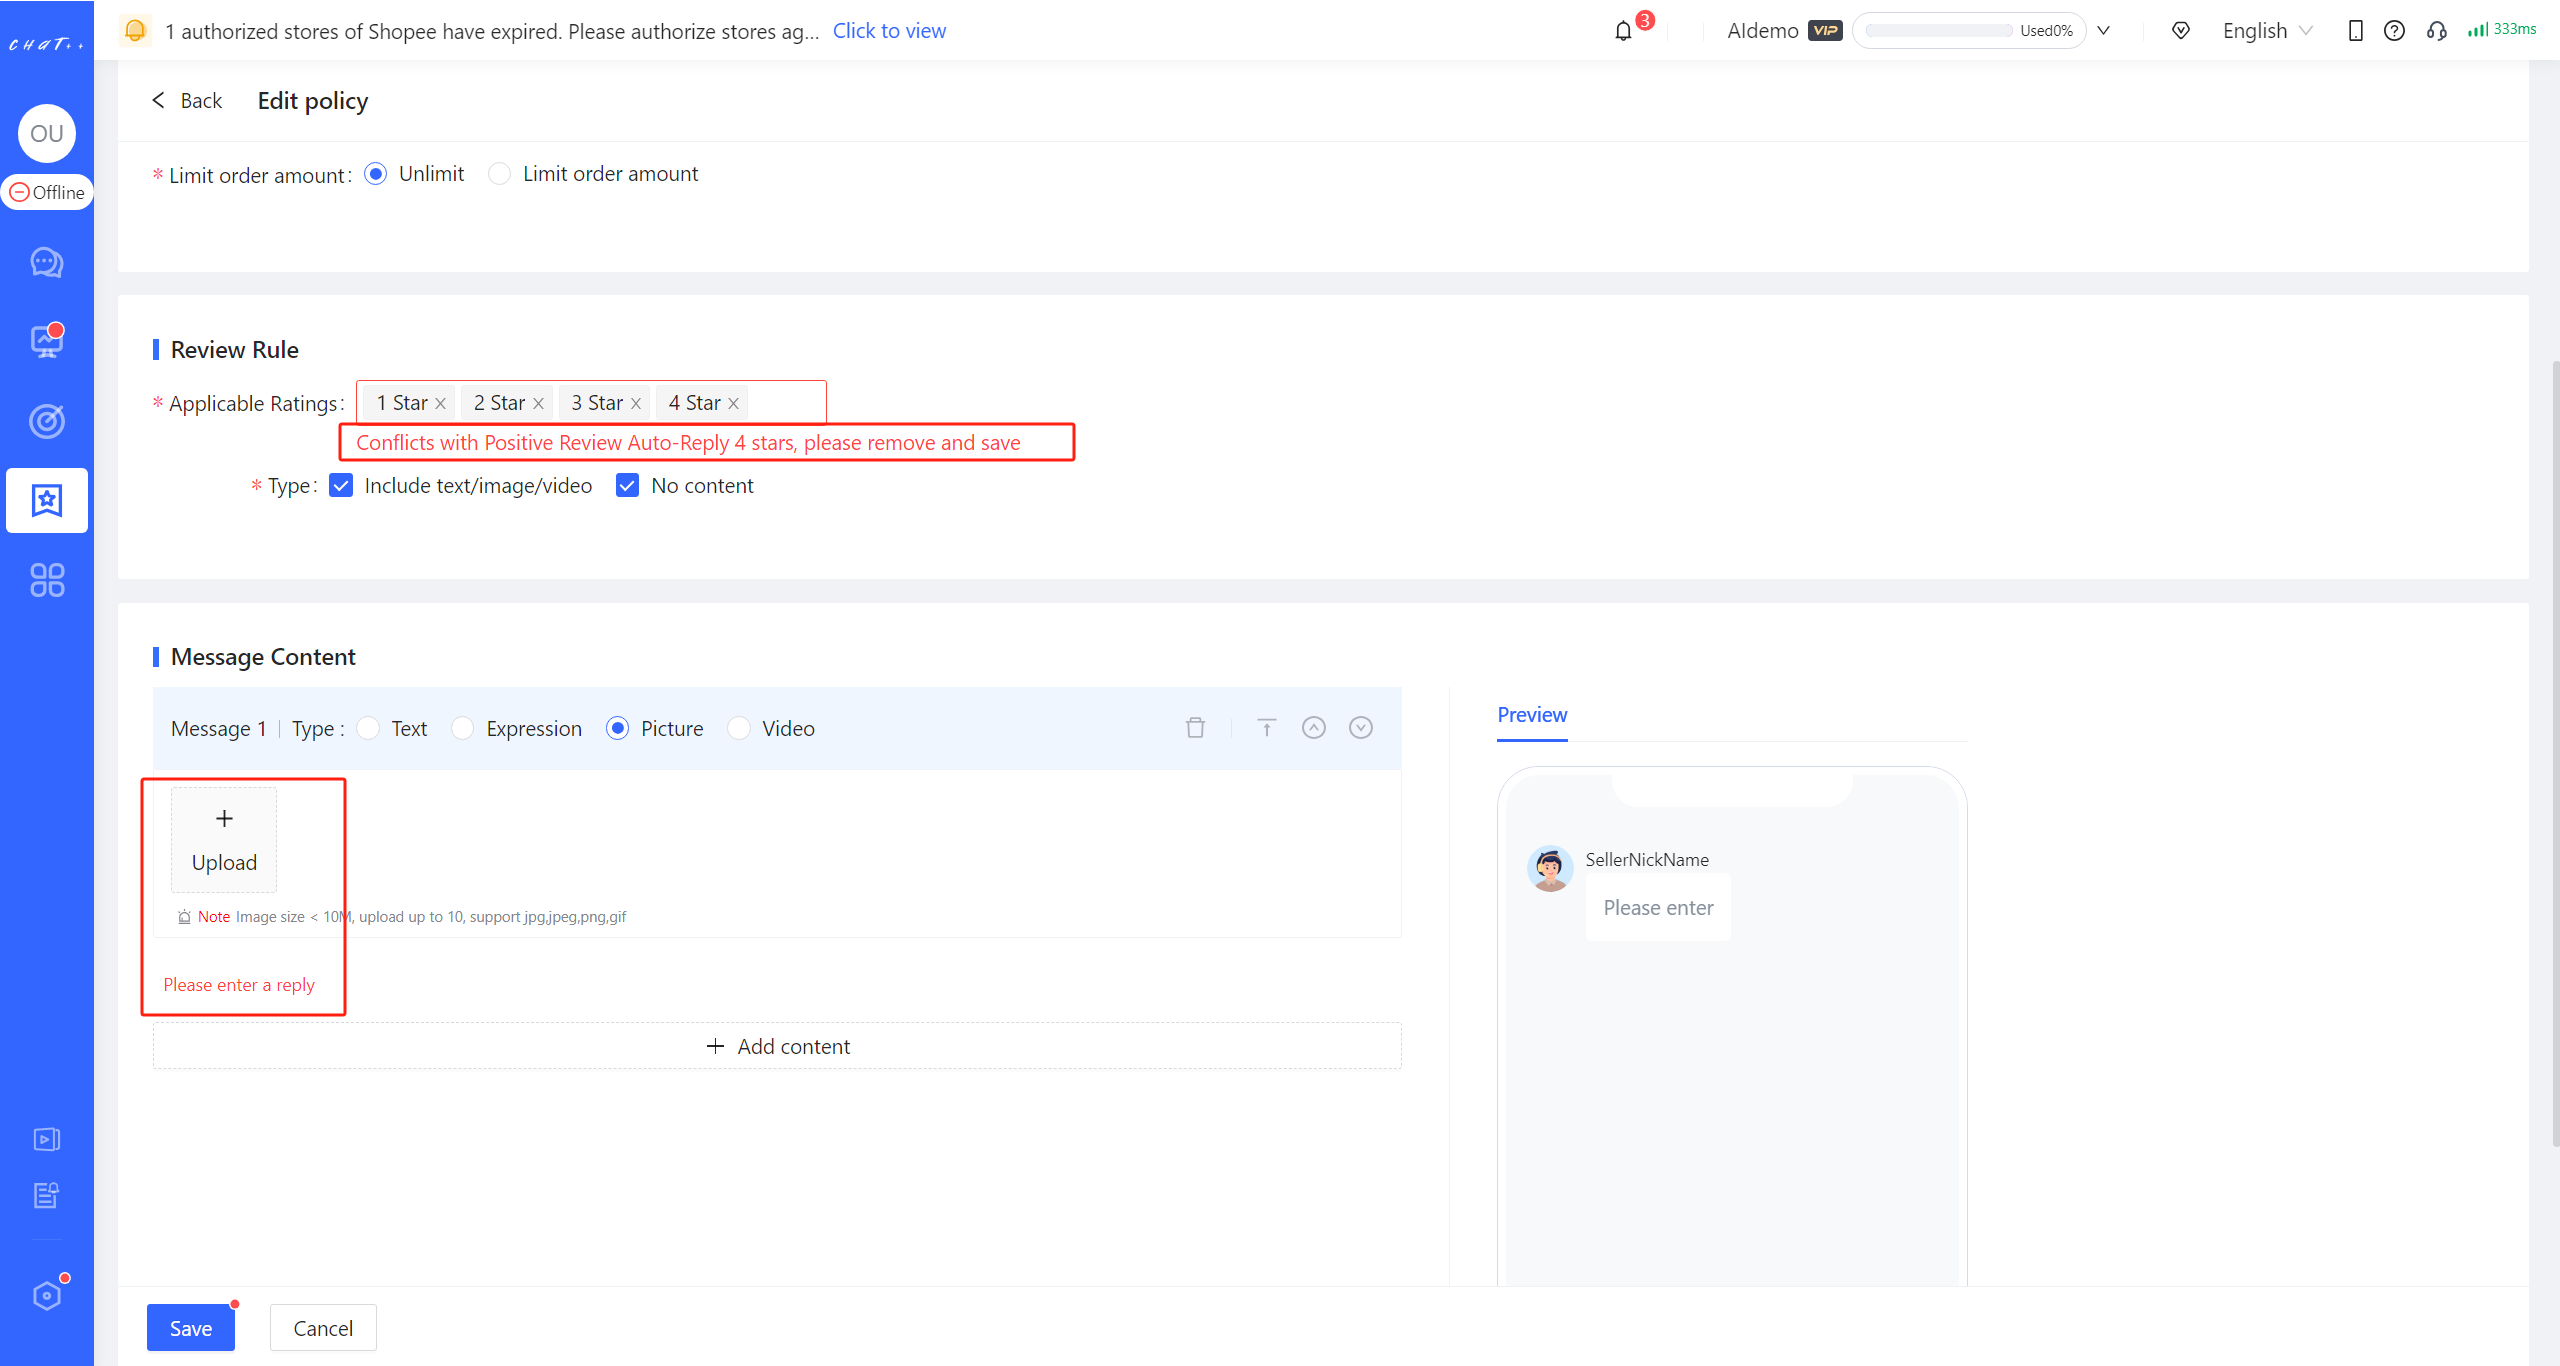
Figure 18
Q2:How to Quickly Adjust/View the Message Content?A2:In the process of adjusting scripts, you need to translate the content that has already been translated into the site language back into system language to view and adjust it. After adjustments, it can be translated back into the site language. In this process, continuous adjustments to scripts may be needed to achieve optimal results. To simplify your operation steps, ChatPlusAI has added a translation tool to the configuration page.
- View the original message content(templates translated from site language to system language)
Go to the configuration page: click on "Automation" in the left menu bar, then select "Review Booster" and "Negative Review Auto-Reply". Choose the marketplace and site, find the Negative Review Auto-Reply task that needs to be viewed/adjusted, and click on the "View Details" button on the right side of the task. Find the policy branches that need to be viewed/adjusted.
To view: click on 【「Edit 」→「 Translation tool** 」→「 Translate content on the left **」】to view the message translated from site language to system language. (By default, it is translated into the current system language. If you need to translate it into other languages, you can switch to the target language.)
- Adjust and translate the Message Content
Edit and adjust: After clicking on 「Translate content on the left」, the message in the site language will be translated into current system language and automatically filled in the area below (red box ② below). You can make edits and adjustments in that area.
Once the adjustments are completed, translate into site language: Click on【「Translate content above 」(red box ③ below) and then click on 「Copy to Final Sending Content」 ( red box ④ below). This will allow you to quickly fill in the content translated into site language in the final sending area (red box ⑤ below).
Configuration: Click on「Save」 (red box ⑥ below) to successfully configure.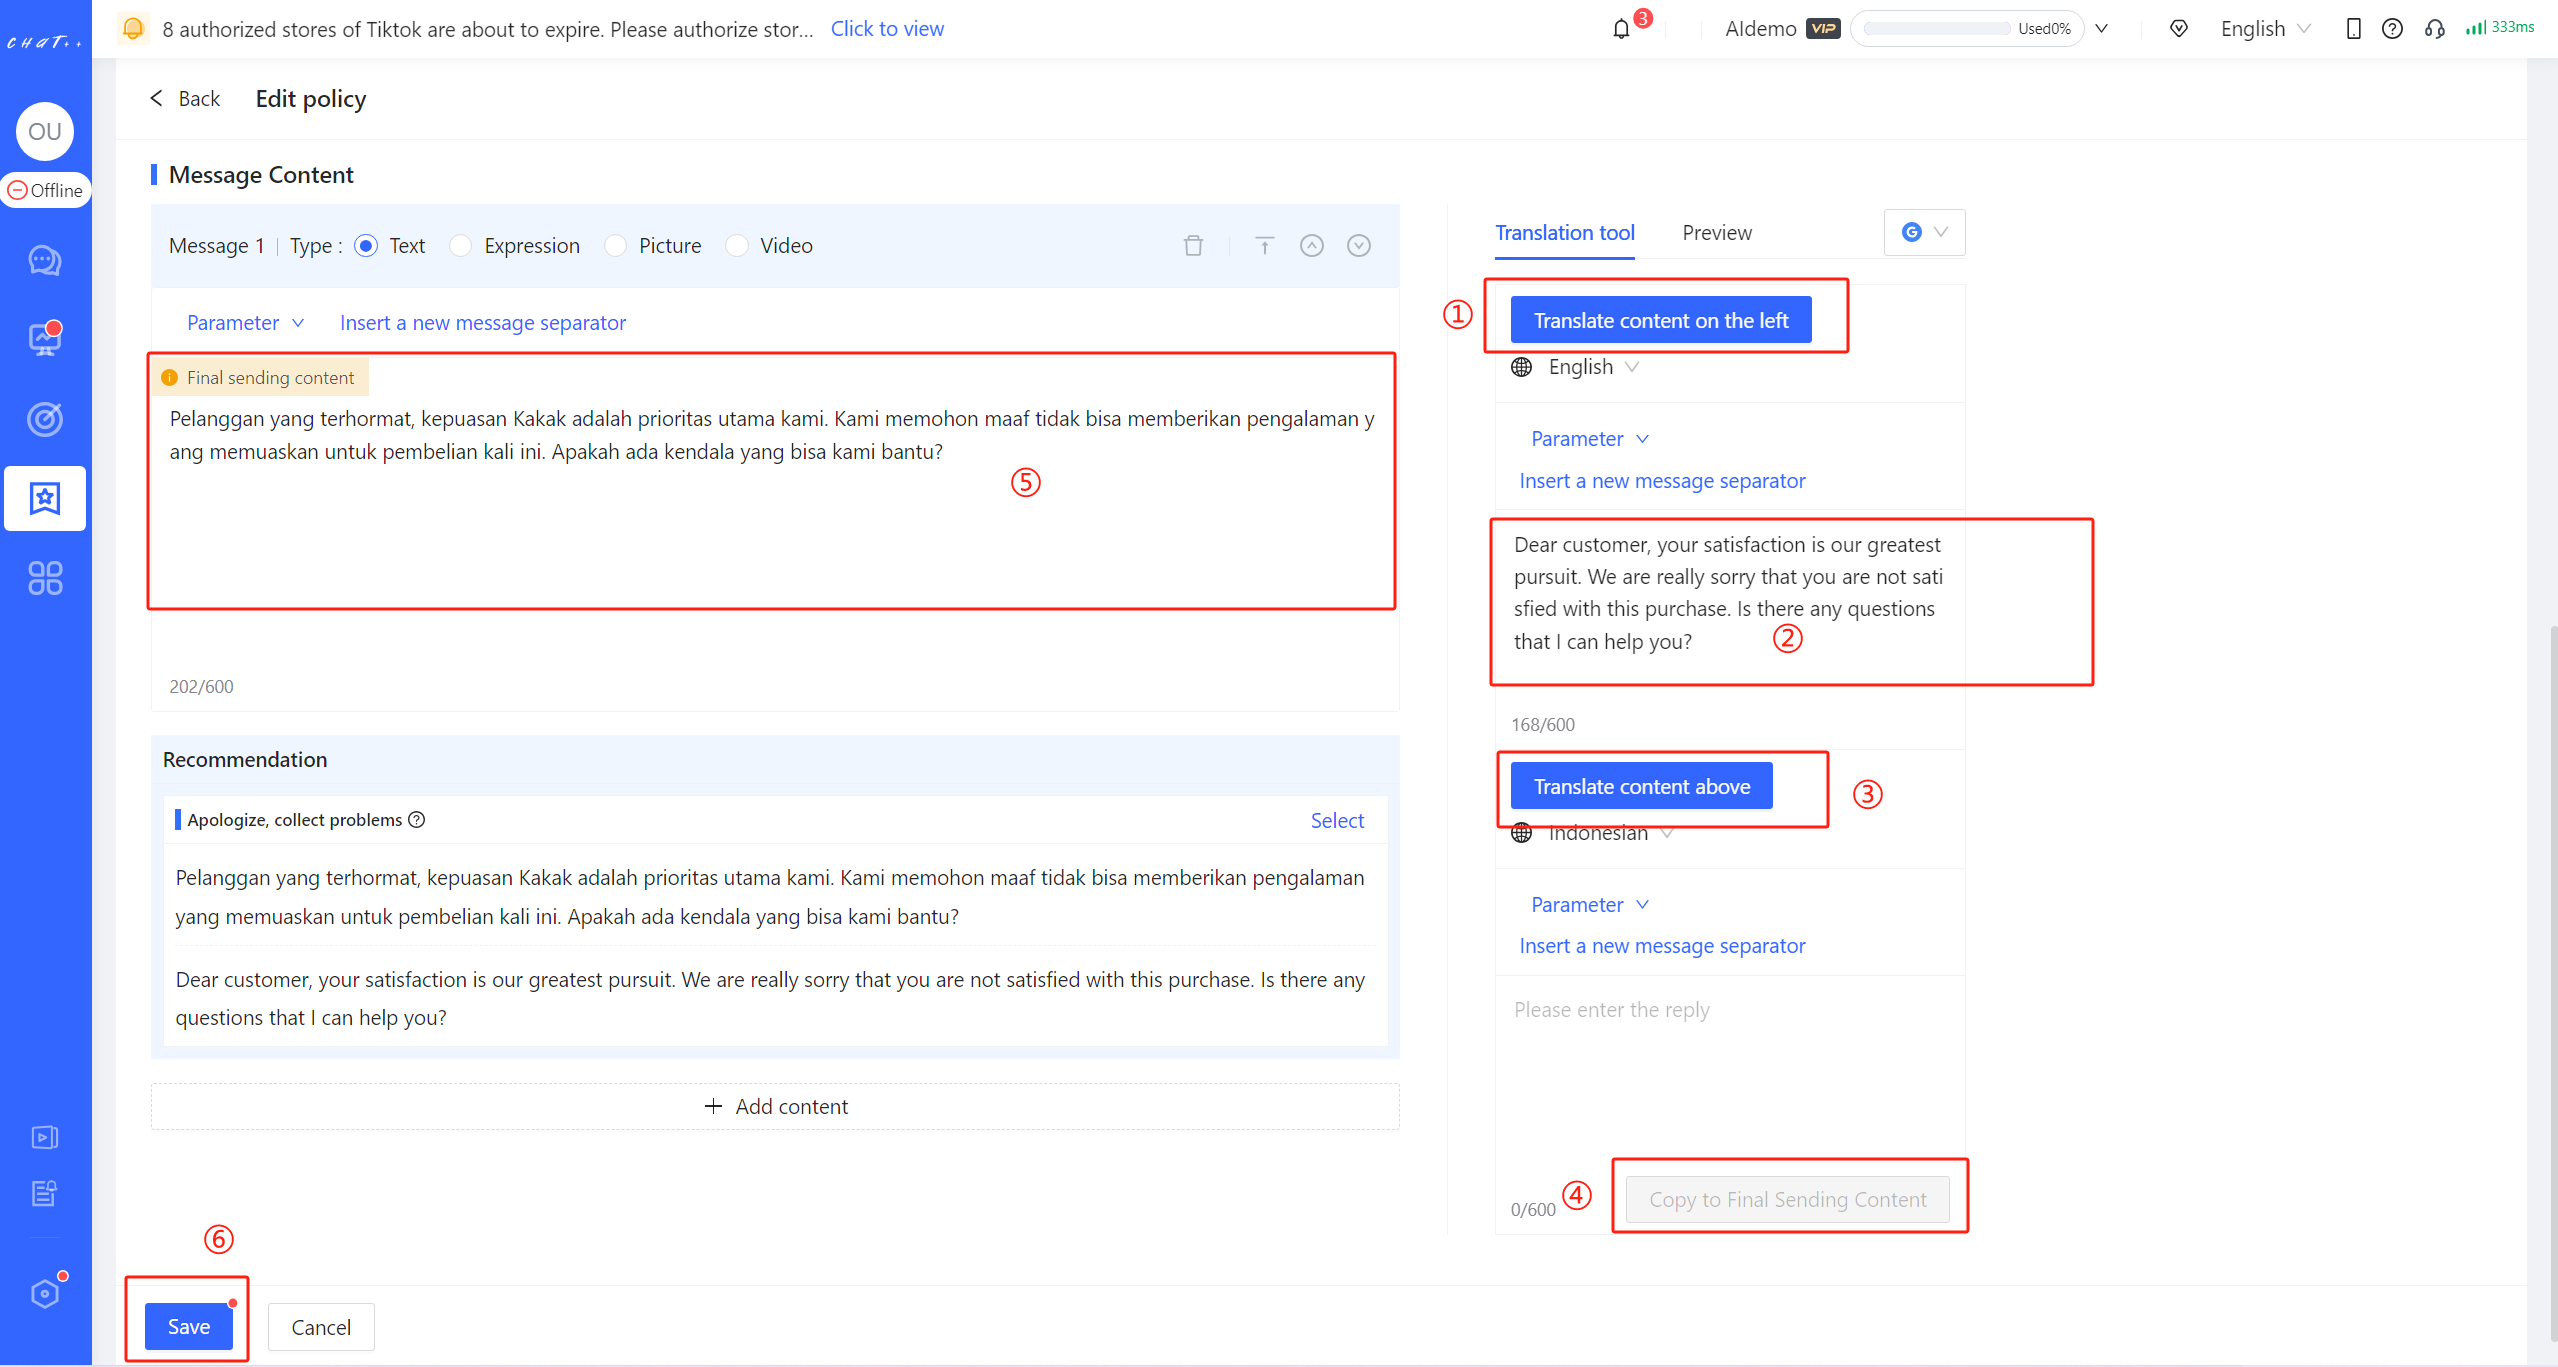
Figure 19
Negative Review Auto-Reply
Even if the buyer gives a negative review, it still has value in providing a sincere response. Displaying a sincere attitude towards after-sales handling in the Review section can effectively reduce the concerns of other buyers before making a purchase. By enabling Negative Review Auto-Reply task, the system can automatically reply to negative reviews when buyers leave them for the purchased products.。
It is recommended to simultaneously enable Negative Review Follow-up and Negative Review Auto-Reply. Once enabled, the system will automatically send a message to buyer for Negative Review Follow-up, communicate to resolve the issue, and guide buyer to revise the negative review into a positive one. If the buyer does not respond or is unwilling to revise the negative review, the system will send Negative Review Auto-Reply.
Show cases
- Negative Review Auto-Reply is triggered, after a buyer gives a 1-star rating for the purchased product.

Figure 1
Permissions required for configuration
- Configuring the "Negative Review Auto-Reply" requires the "Configure Review Booster"(red box in Figure below) permission to be enabled for the role assigned to the account. Super admins and admins have this permission by default.
- Accounts without the "Configure Review Booster" permission cannot configure "Negative Review Auto-Reply".
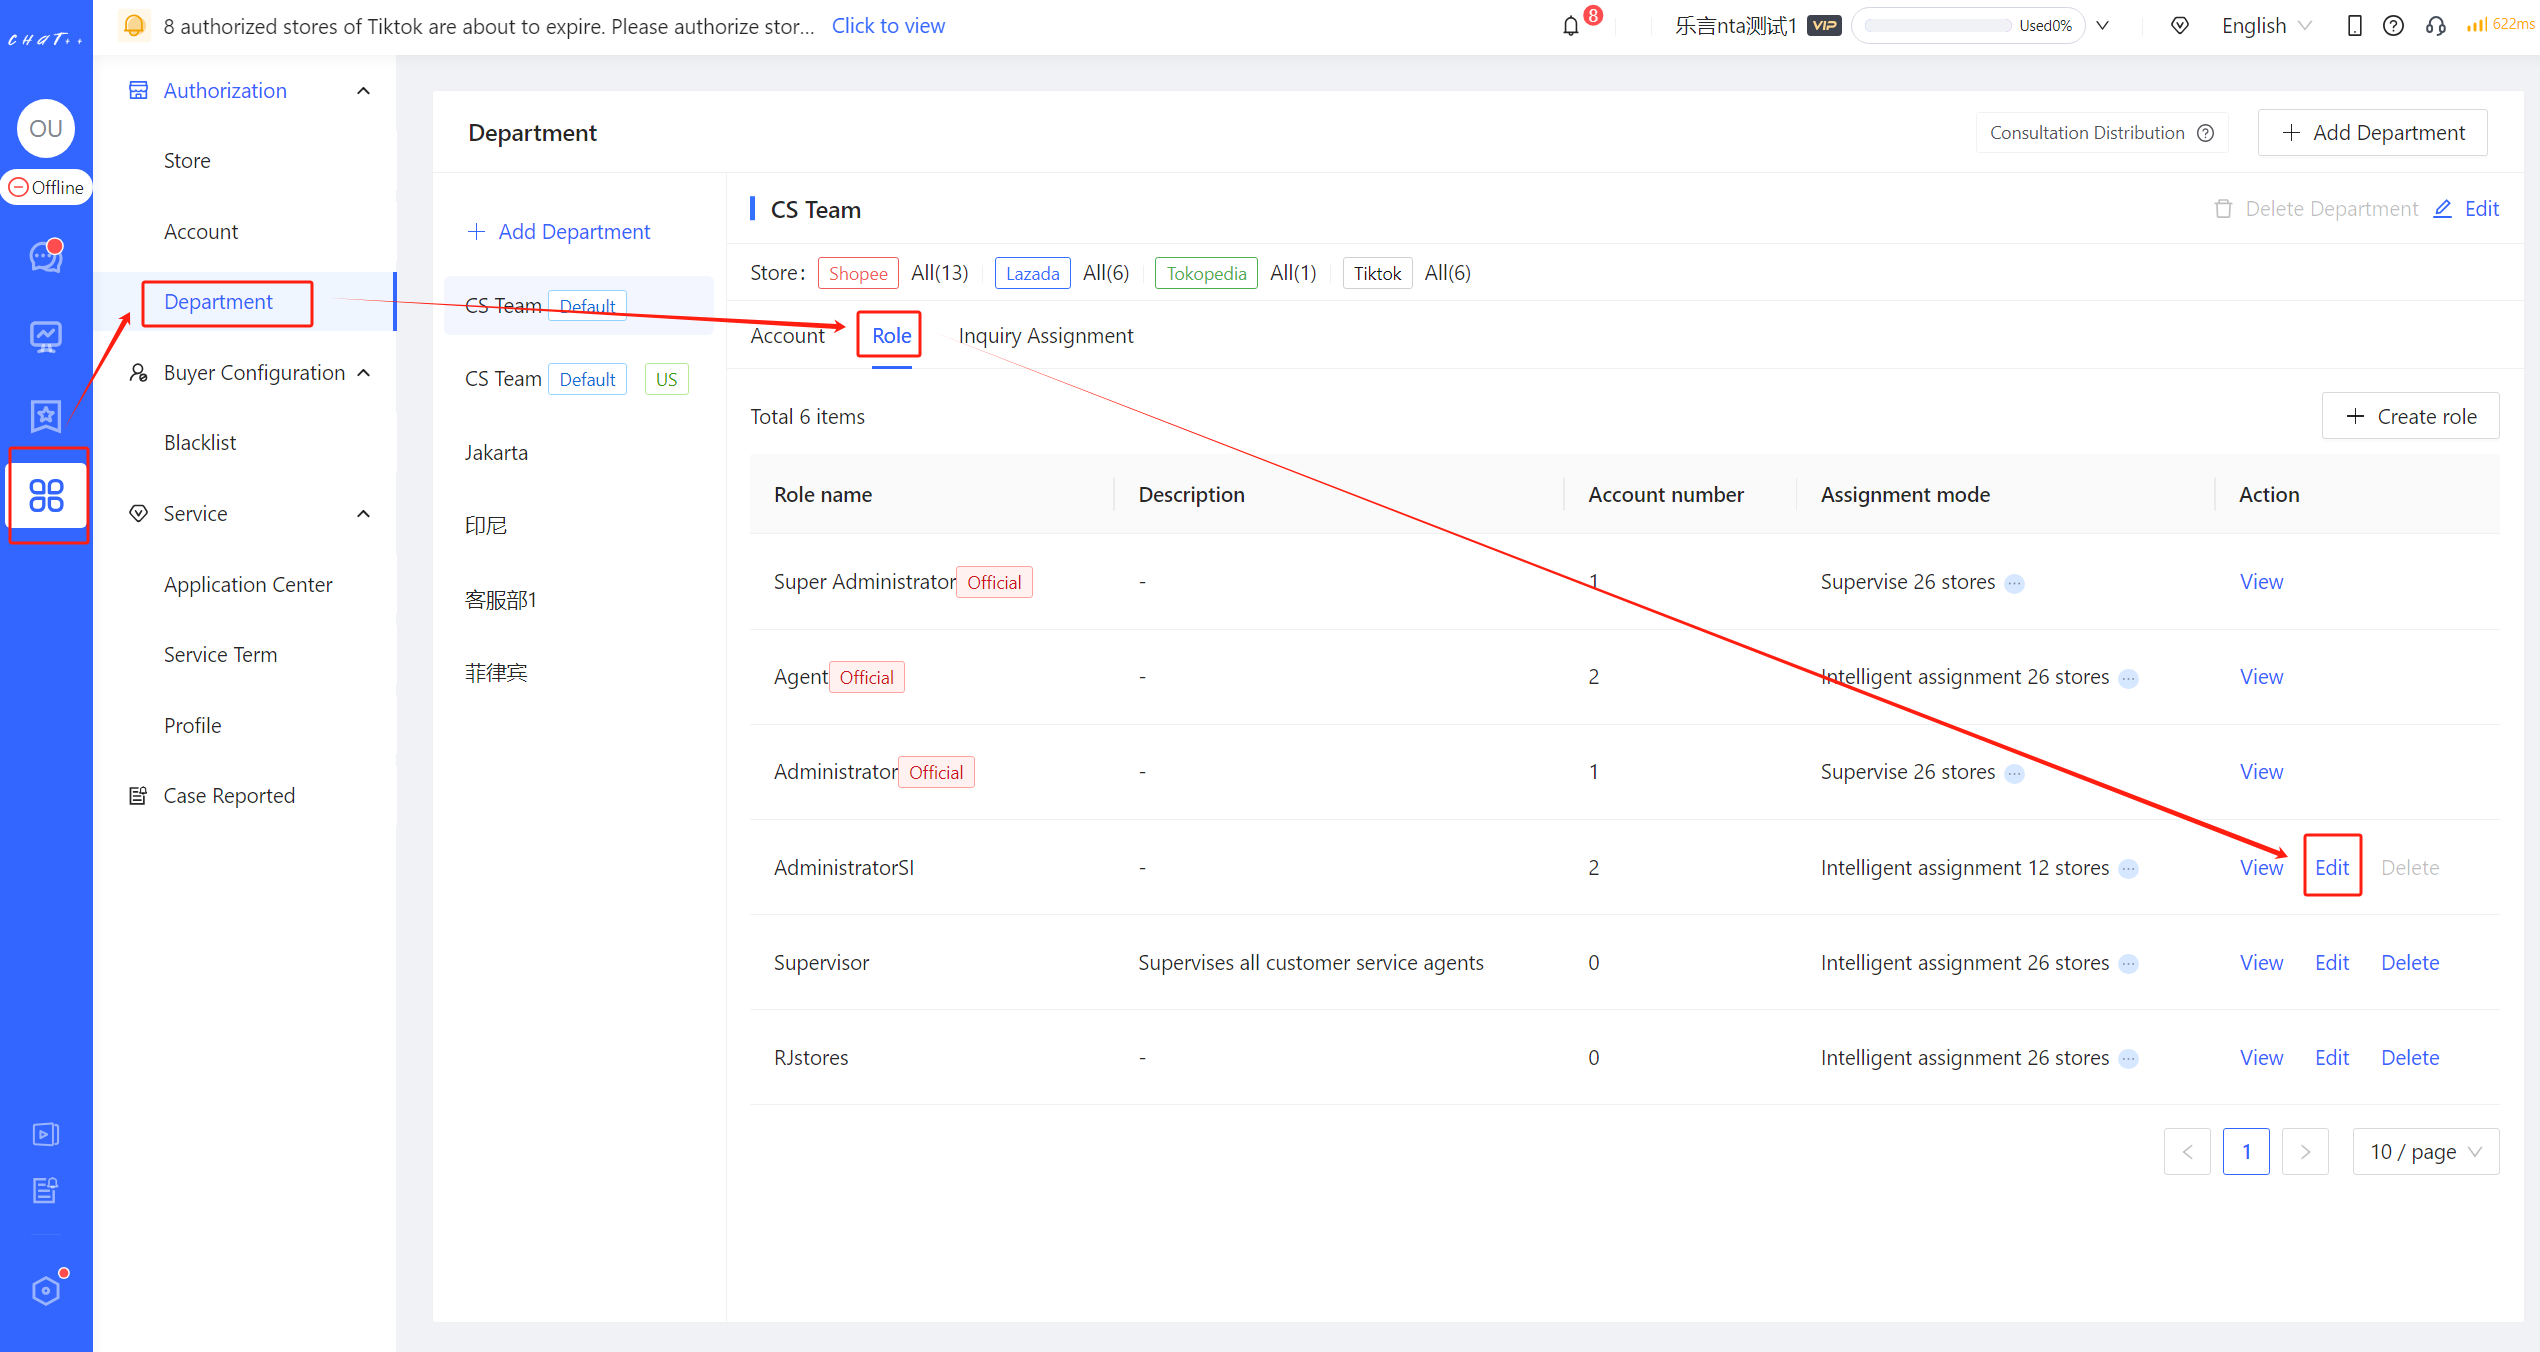
Figure 2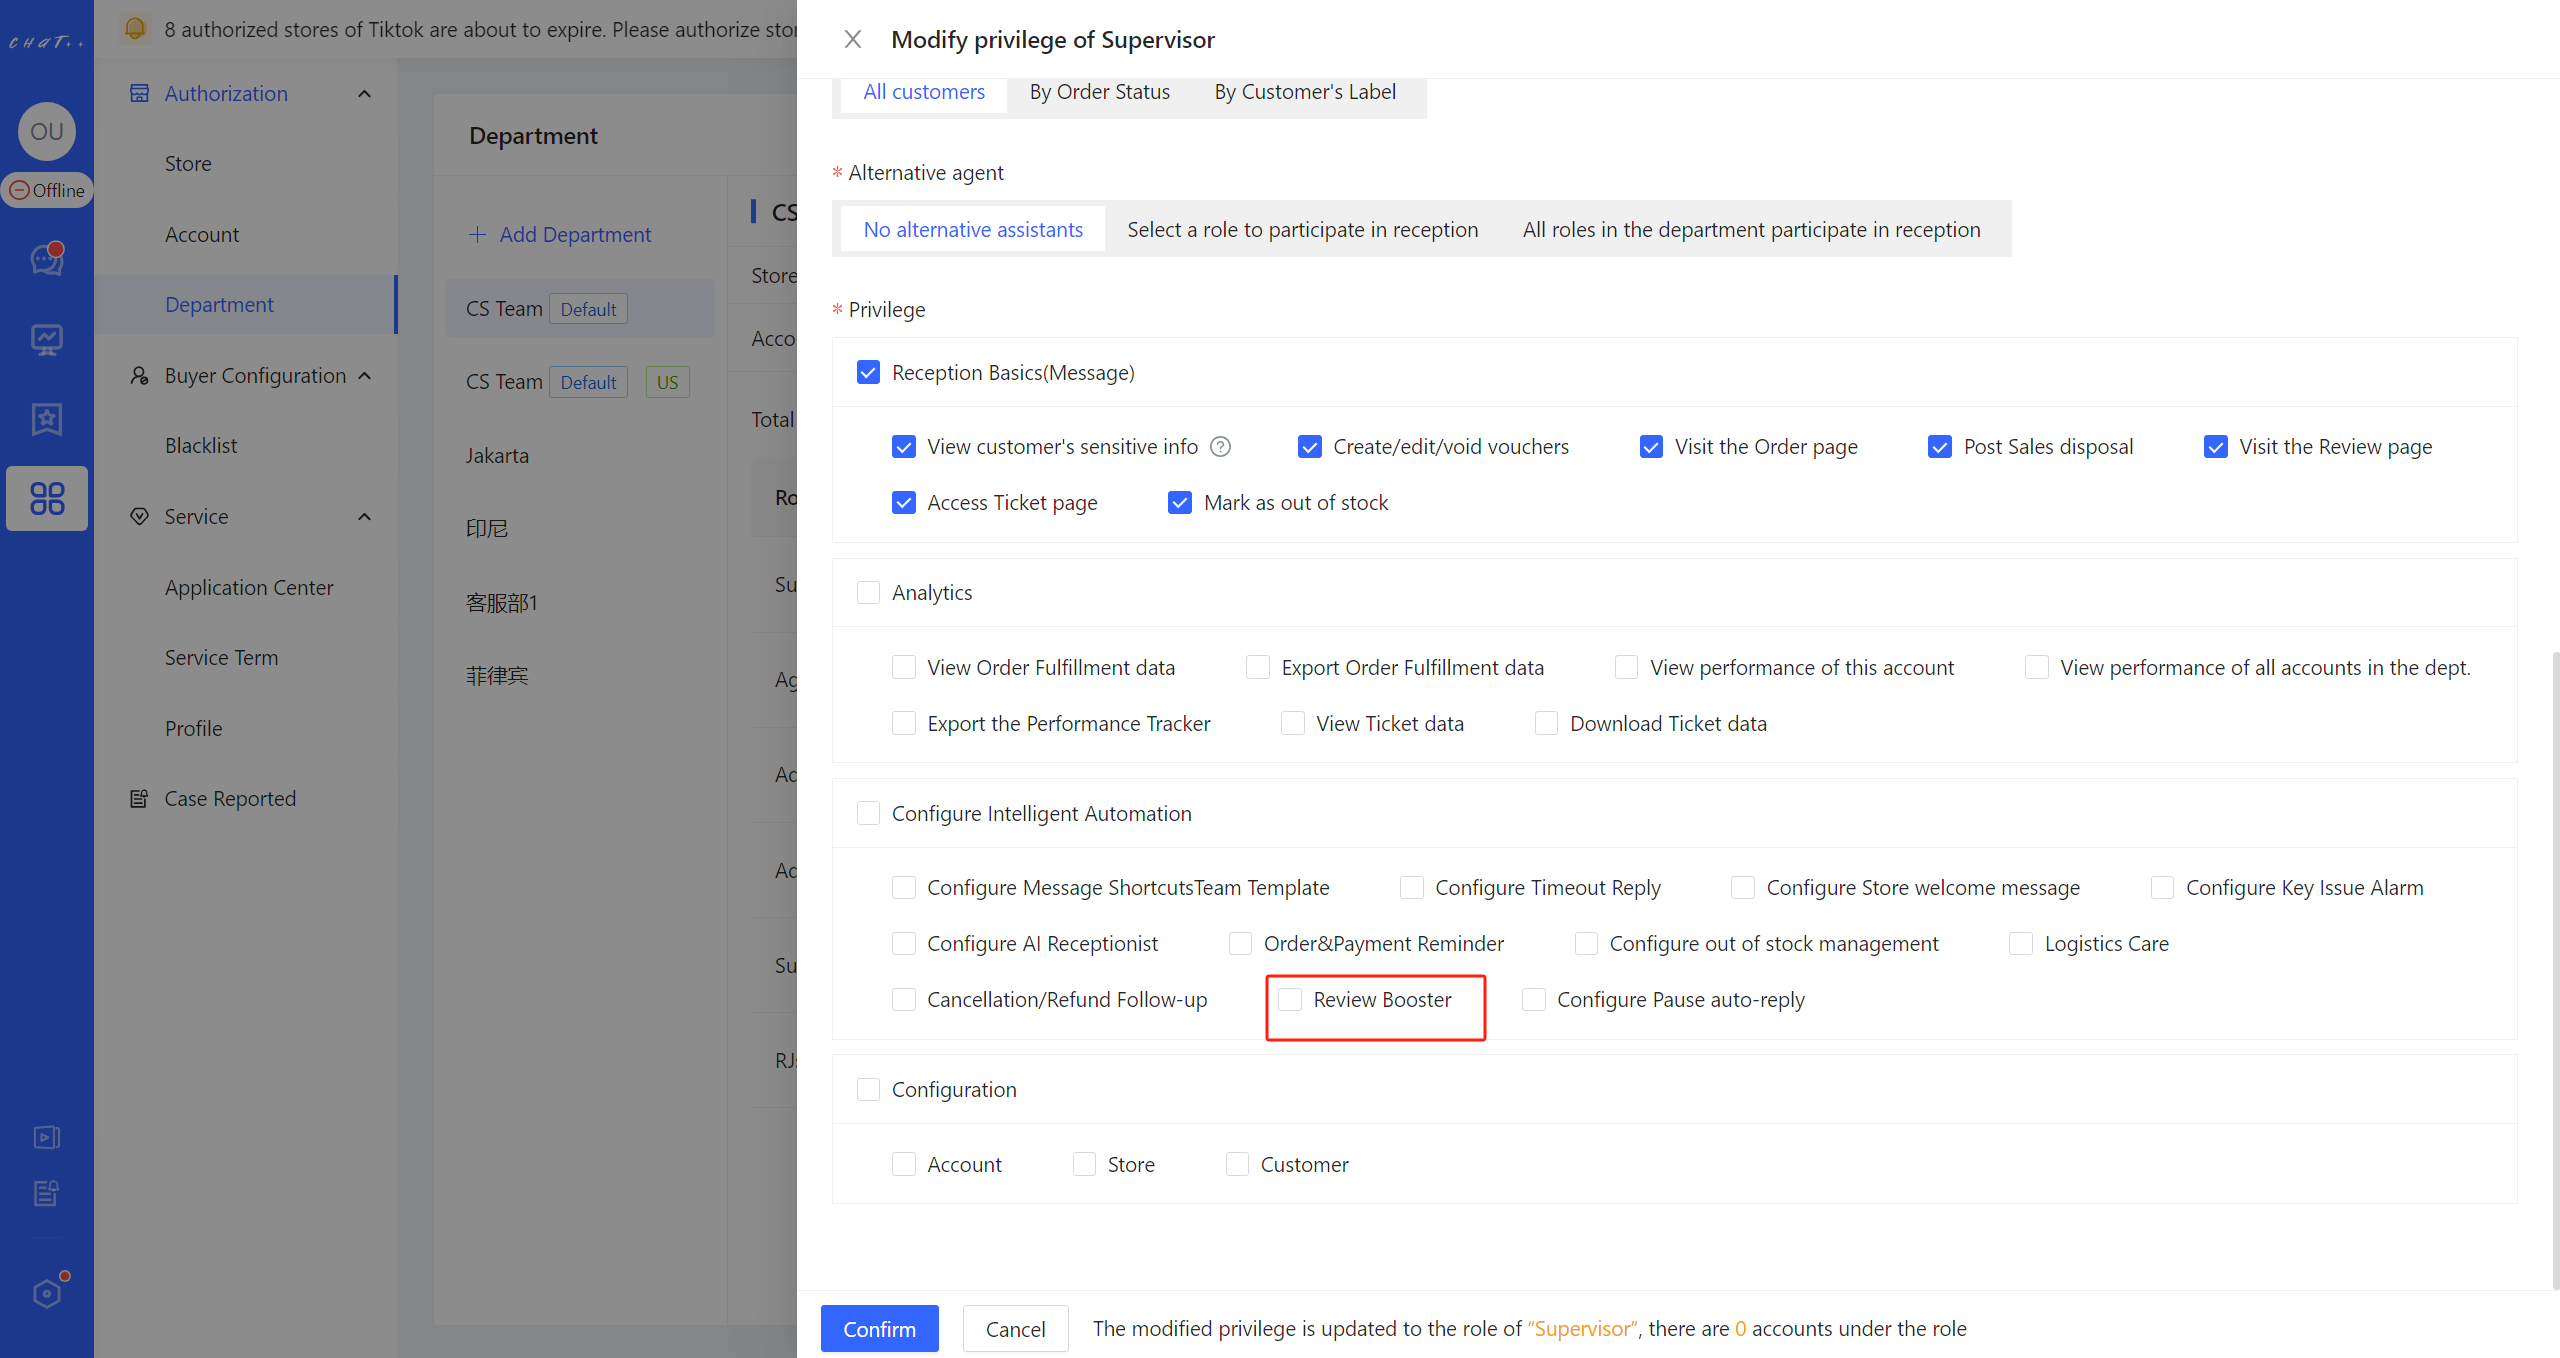
Figure 3
How to Configure Negative Review Auto-Reply
Access the configuration page
Click「 Automation 」 in left menu(Shown as red box① in Figure 4)→「 Review Booster 」(Shown as red box② in Figure 4)→「 Negative Review Auto-Reply 」(Shown as red box① in Figure 5),Access the configuration page.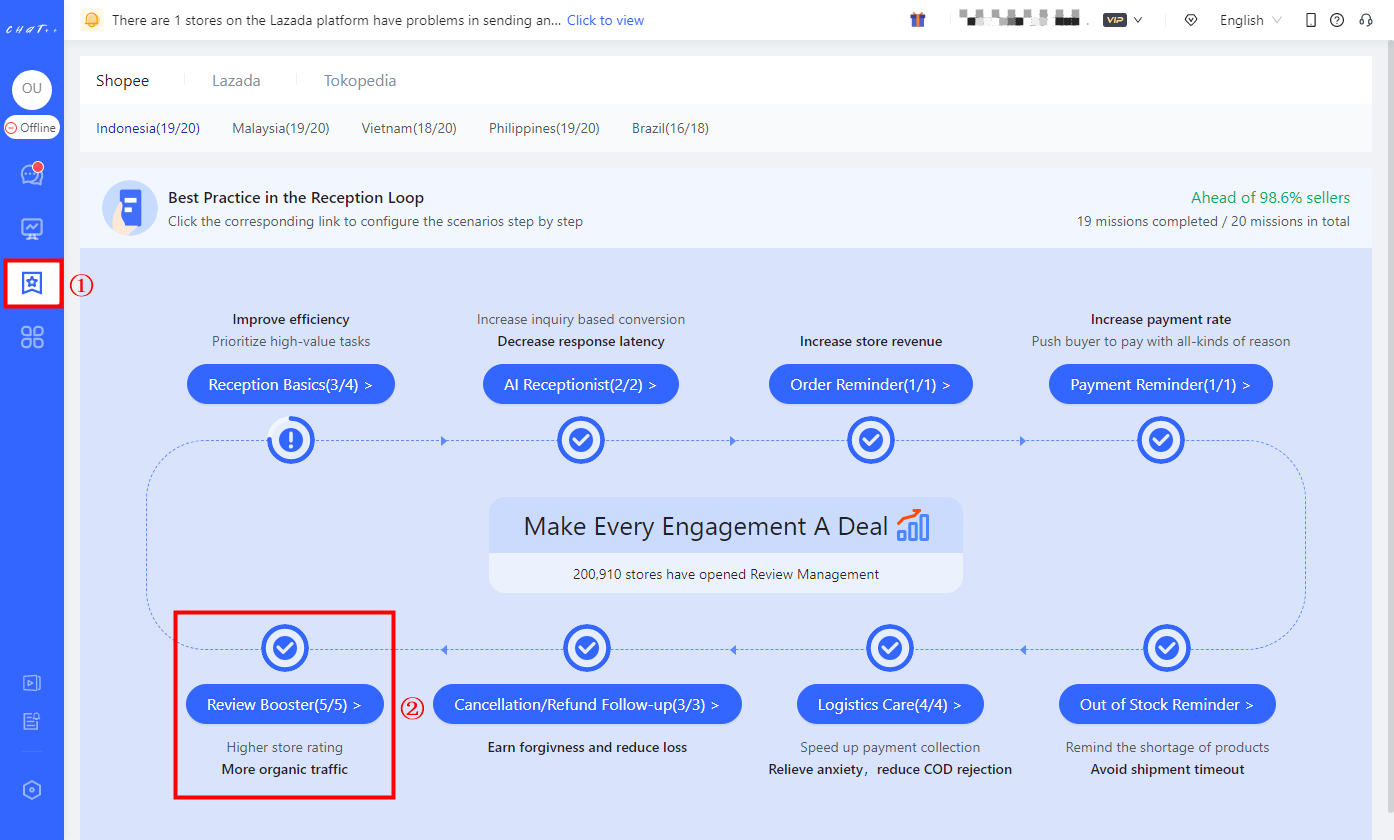
Figure 4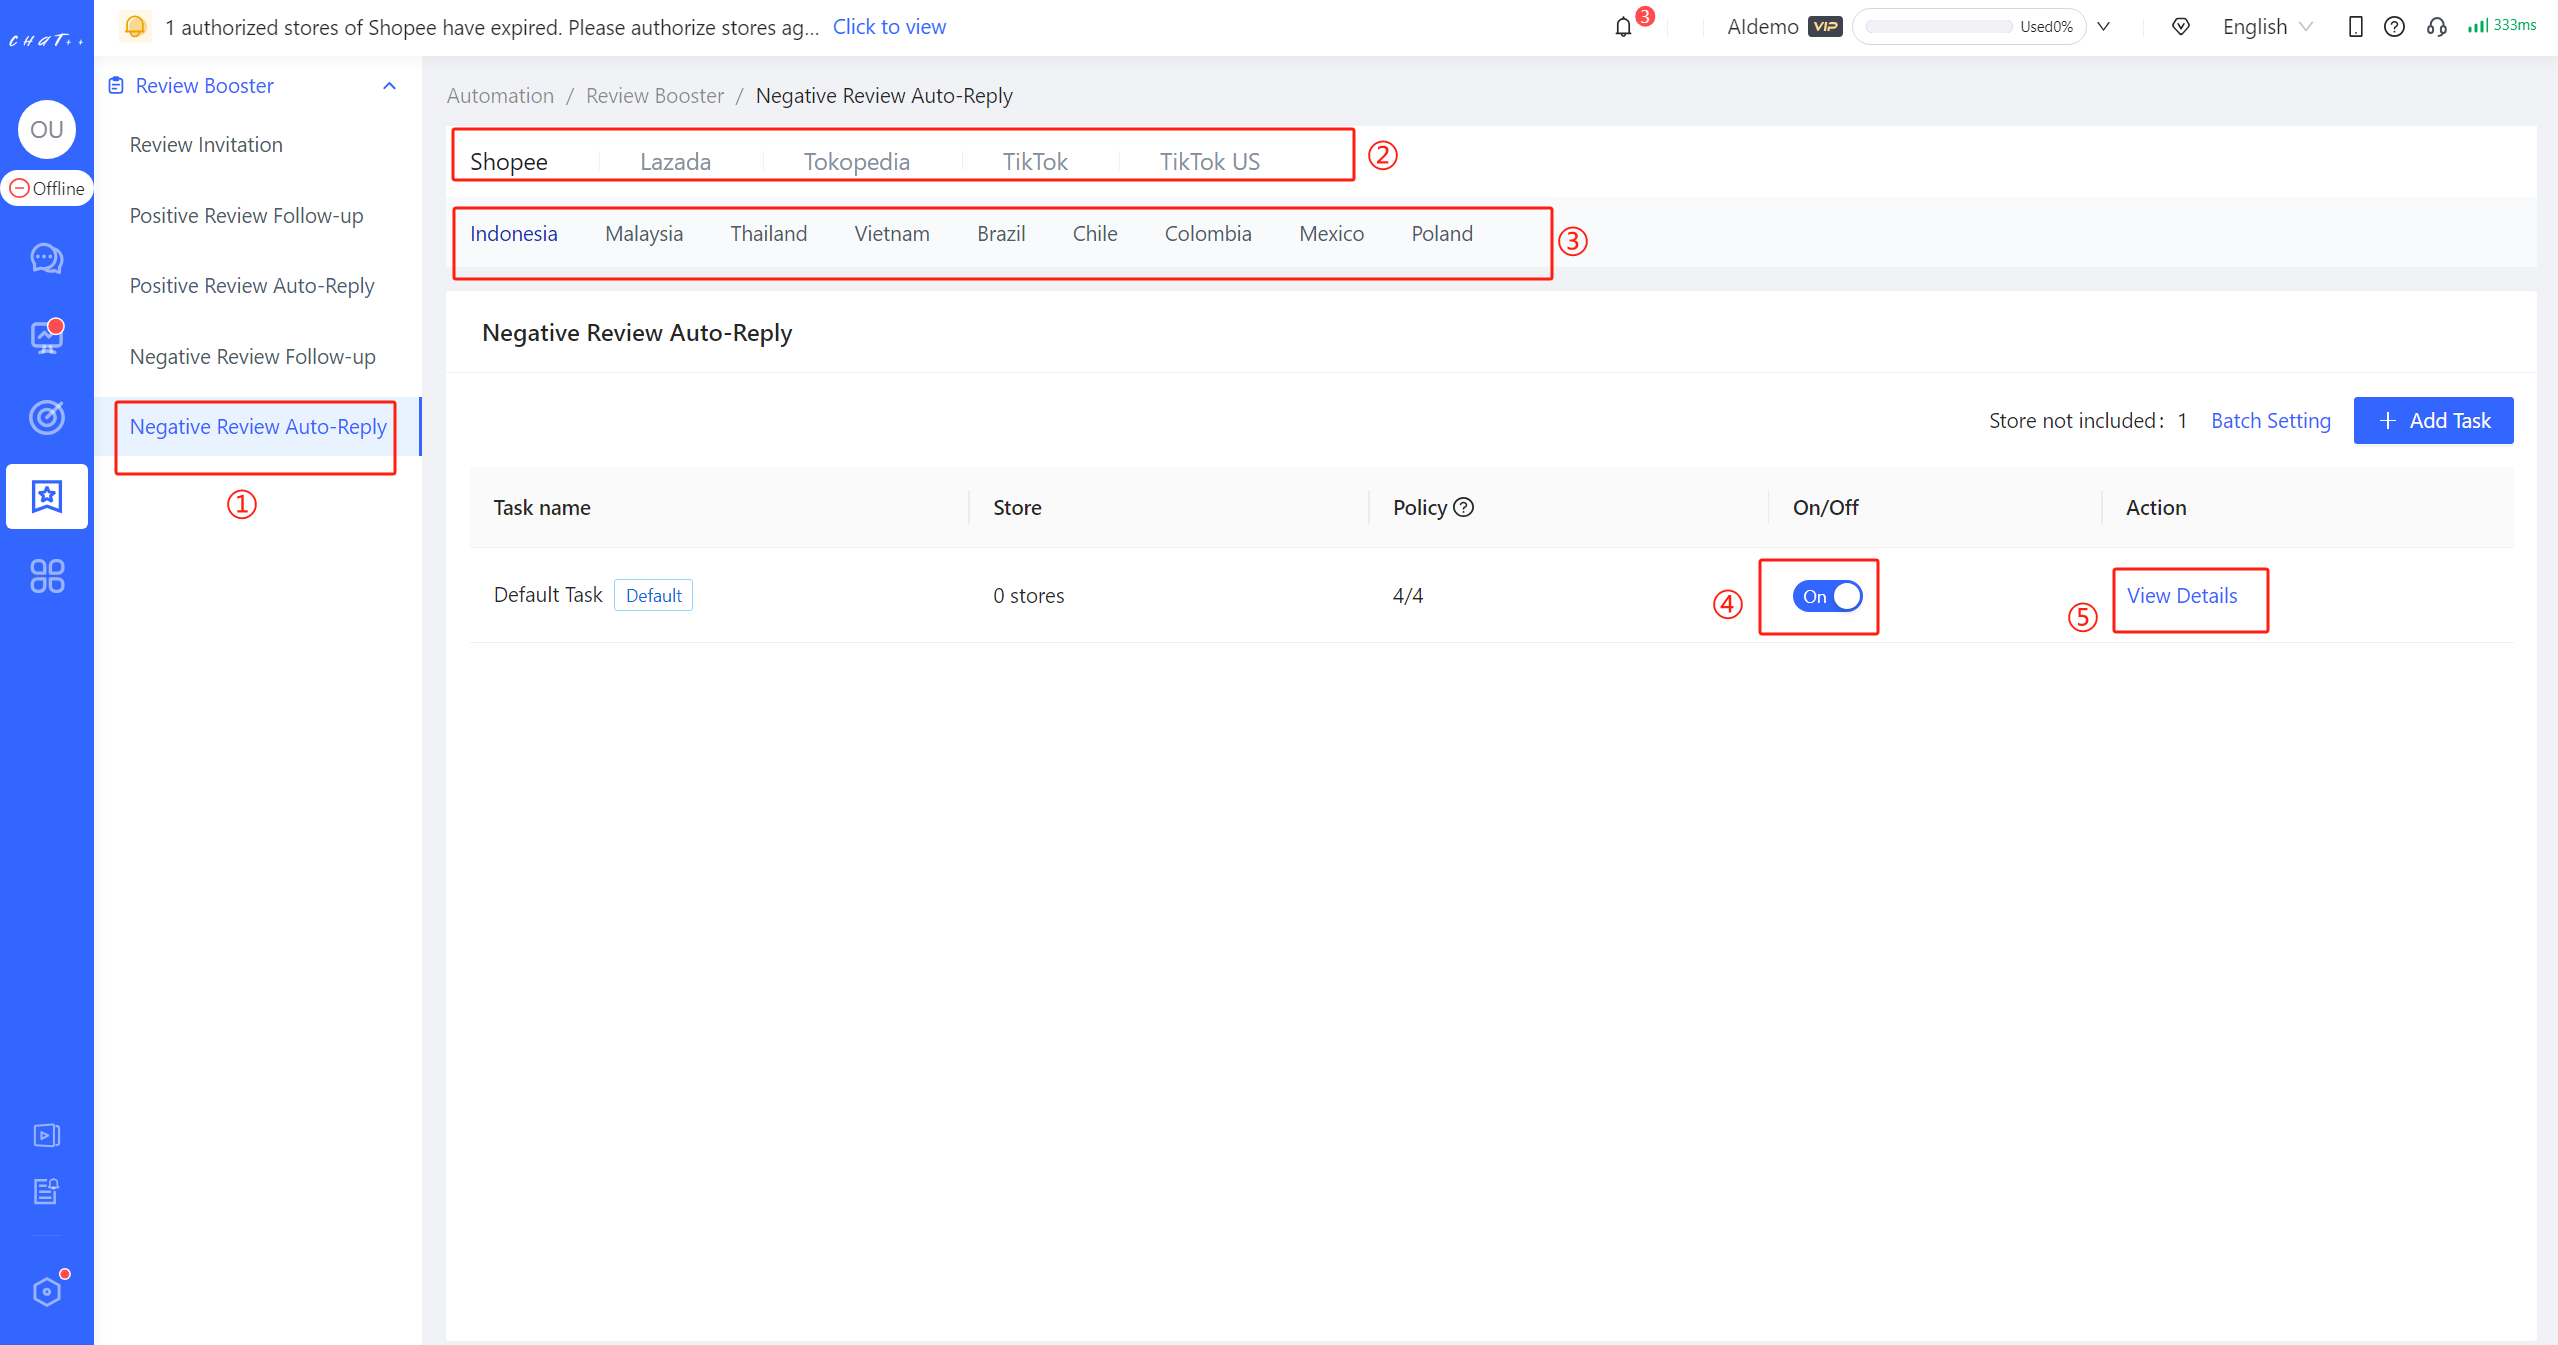
Figure 5
Note:Negative Review Auto-Reply can be customized differently for marketplaces, currently supporting Shopee and Lazada, with TikTok and Tokopedia support coming soon, please stay tuned.
Note: Each marketplace distinguishes different sites, and you can click to switch between different marketplace (red box ② in Figure 5 above) and different sites (red box ③ in Figure 5 above). For different sites within the same marketplace, Negative Review Auto-Reply tasks need to be configured independently.
Note: To maximize your benefits, it is recommended to enable the Negative Review Follow-up task and Negative Review Auto-Reply simultaneously.
One-click Configuration→Enable【 Default Task 】
💡To make it convenient to configure it, ChatPlusAI has created a "Default Task" for each Negative Review Auto-Reply scenario on each marketplace, covering all stores of country sites by default.
For the first time you use it, to avoid the situation where the robot automatically replies without your knowledge, "Default Task" (red box ④ in Figure 5 above) is off by default and needs to be manually opened.
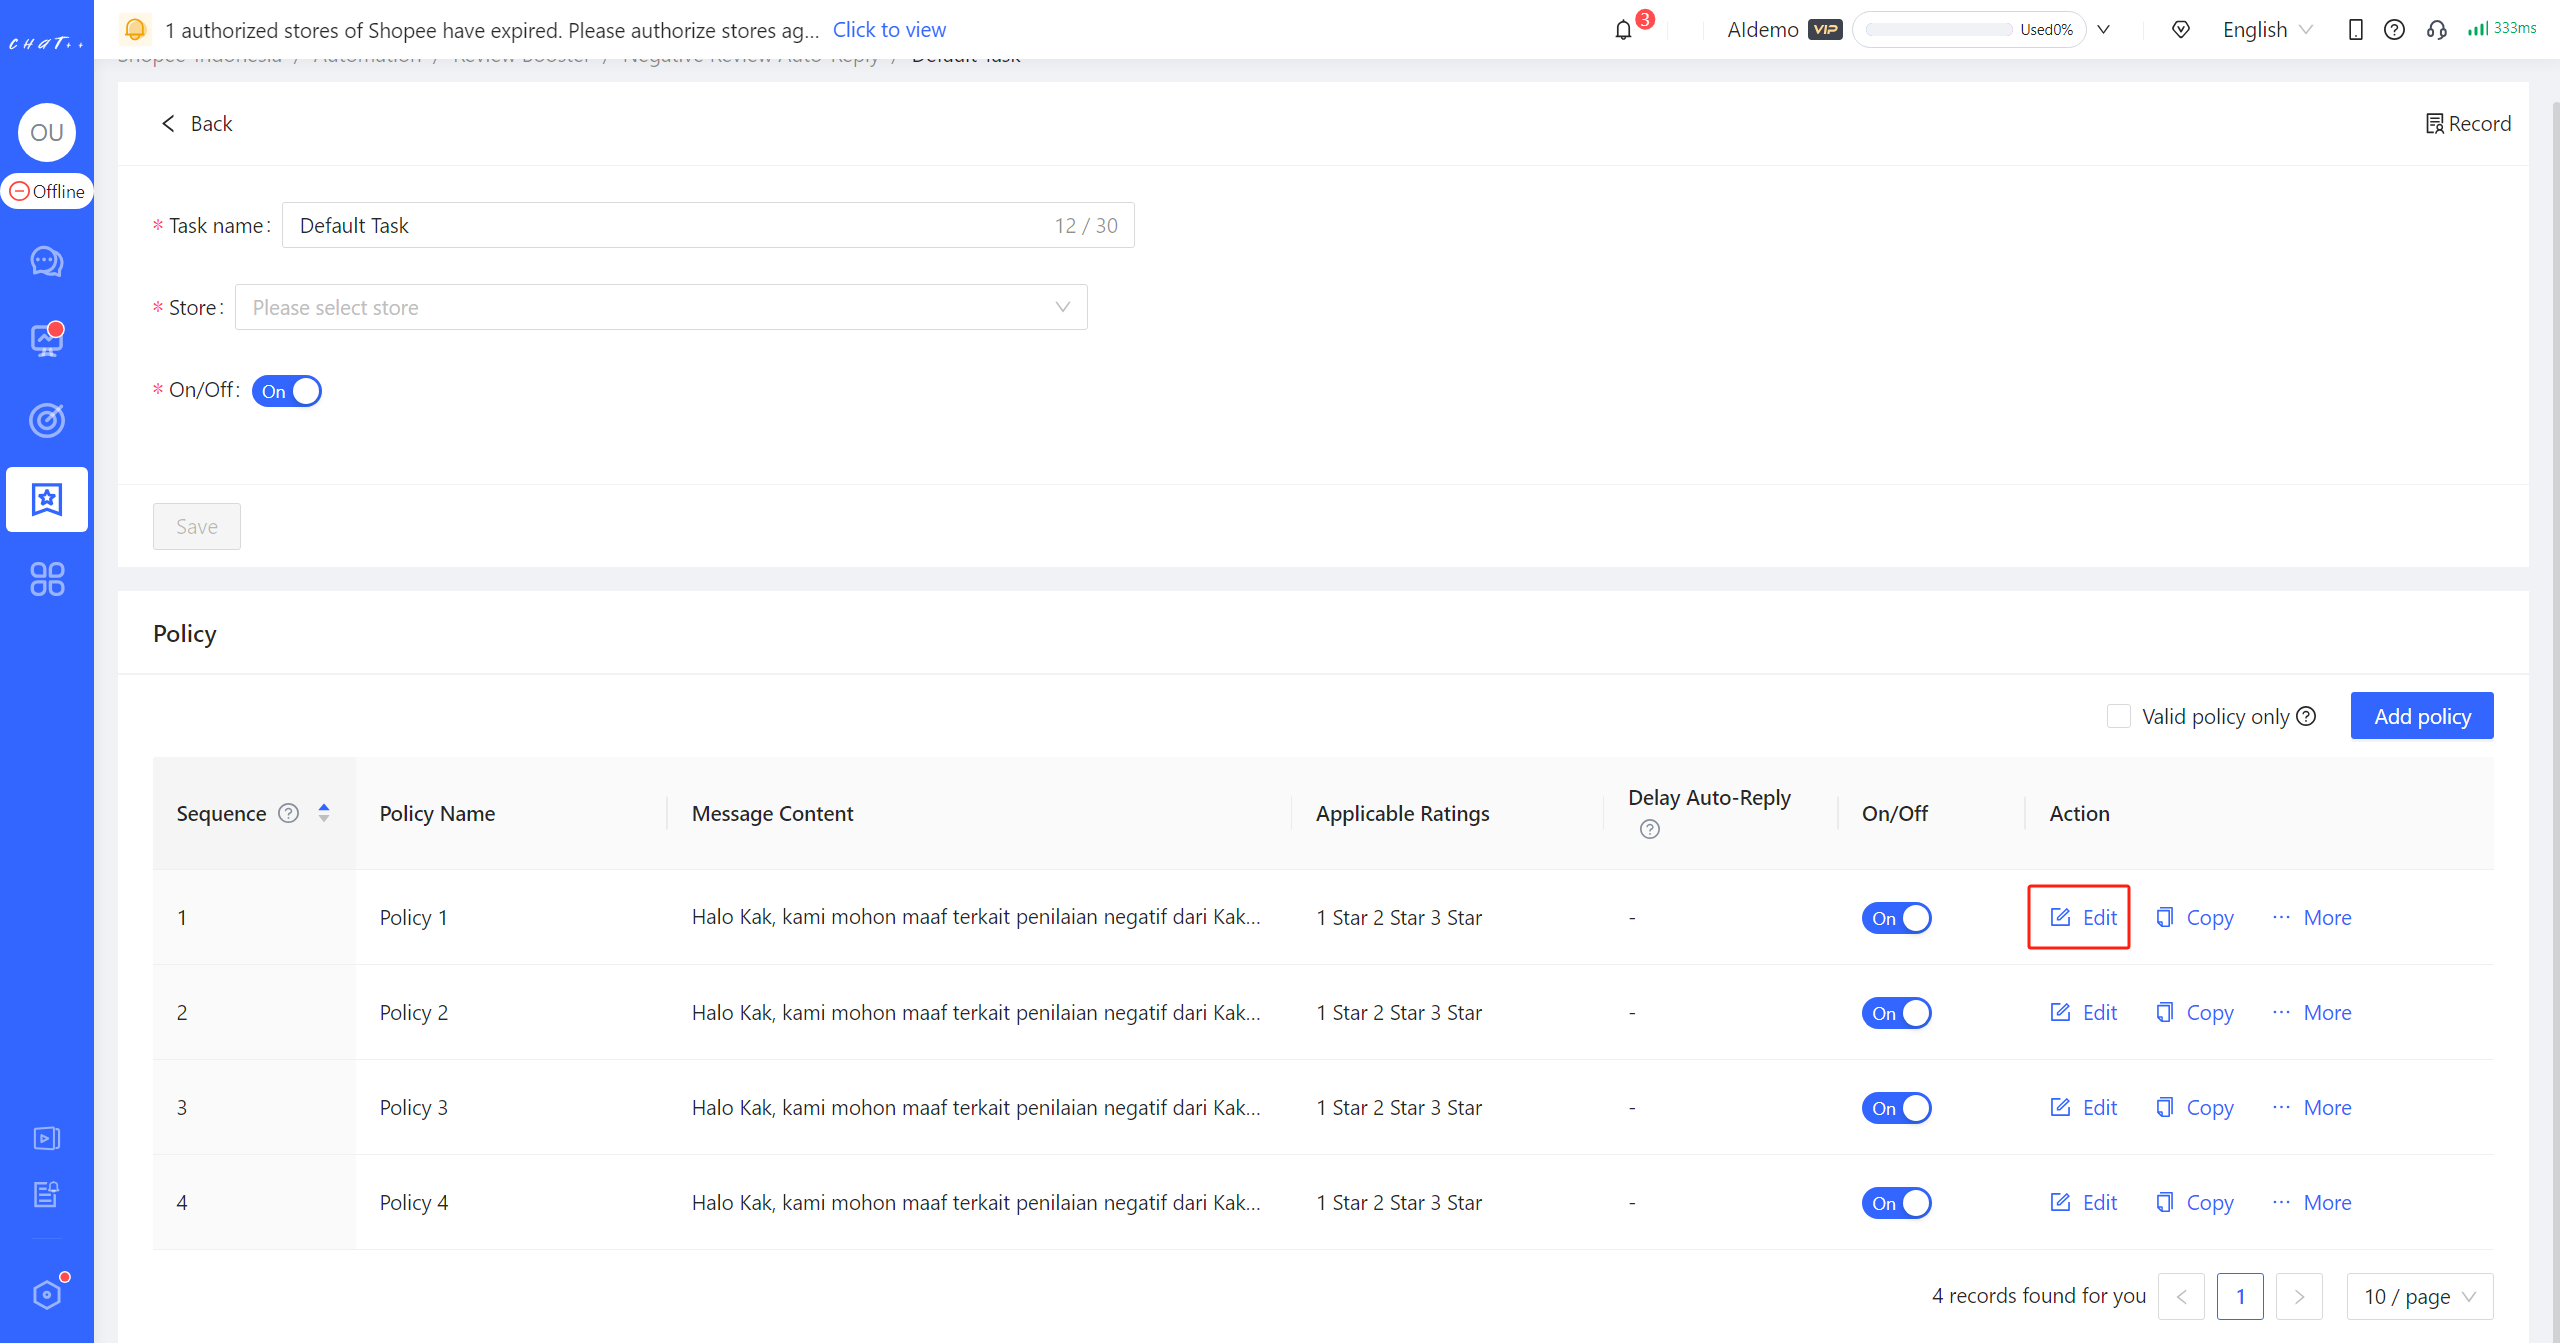
Figure 6
All you have to do is click "View Details" button(red box ⑤ in Figure 5 above) to edit the policies (red box in Figure 6 above) to make sure everything is correct. Once confirmed, you can enable the default task (red box ④ in Figure 5 above).
Newly authorized stores will be automatically included to【Default task】. However, the store will not be automatically included again after they are removed from other tasks. It will be counted as "Store not included" (Shown as red box① in Figure 7). You can click "Batch Setting" button (Shown as red box② in Figure 7) to add massive stores into the certain task quickly.
Note: Kindly make sure that all stores have been included to the right task (that means the number of "Store not included" is 0, shown as red box① in Figure 7), in case the store is neglected from any Negative Review Auto-Reply task.
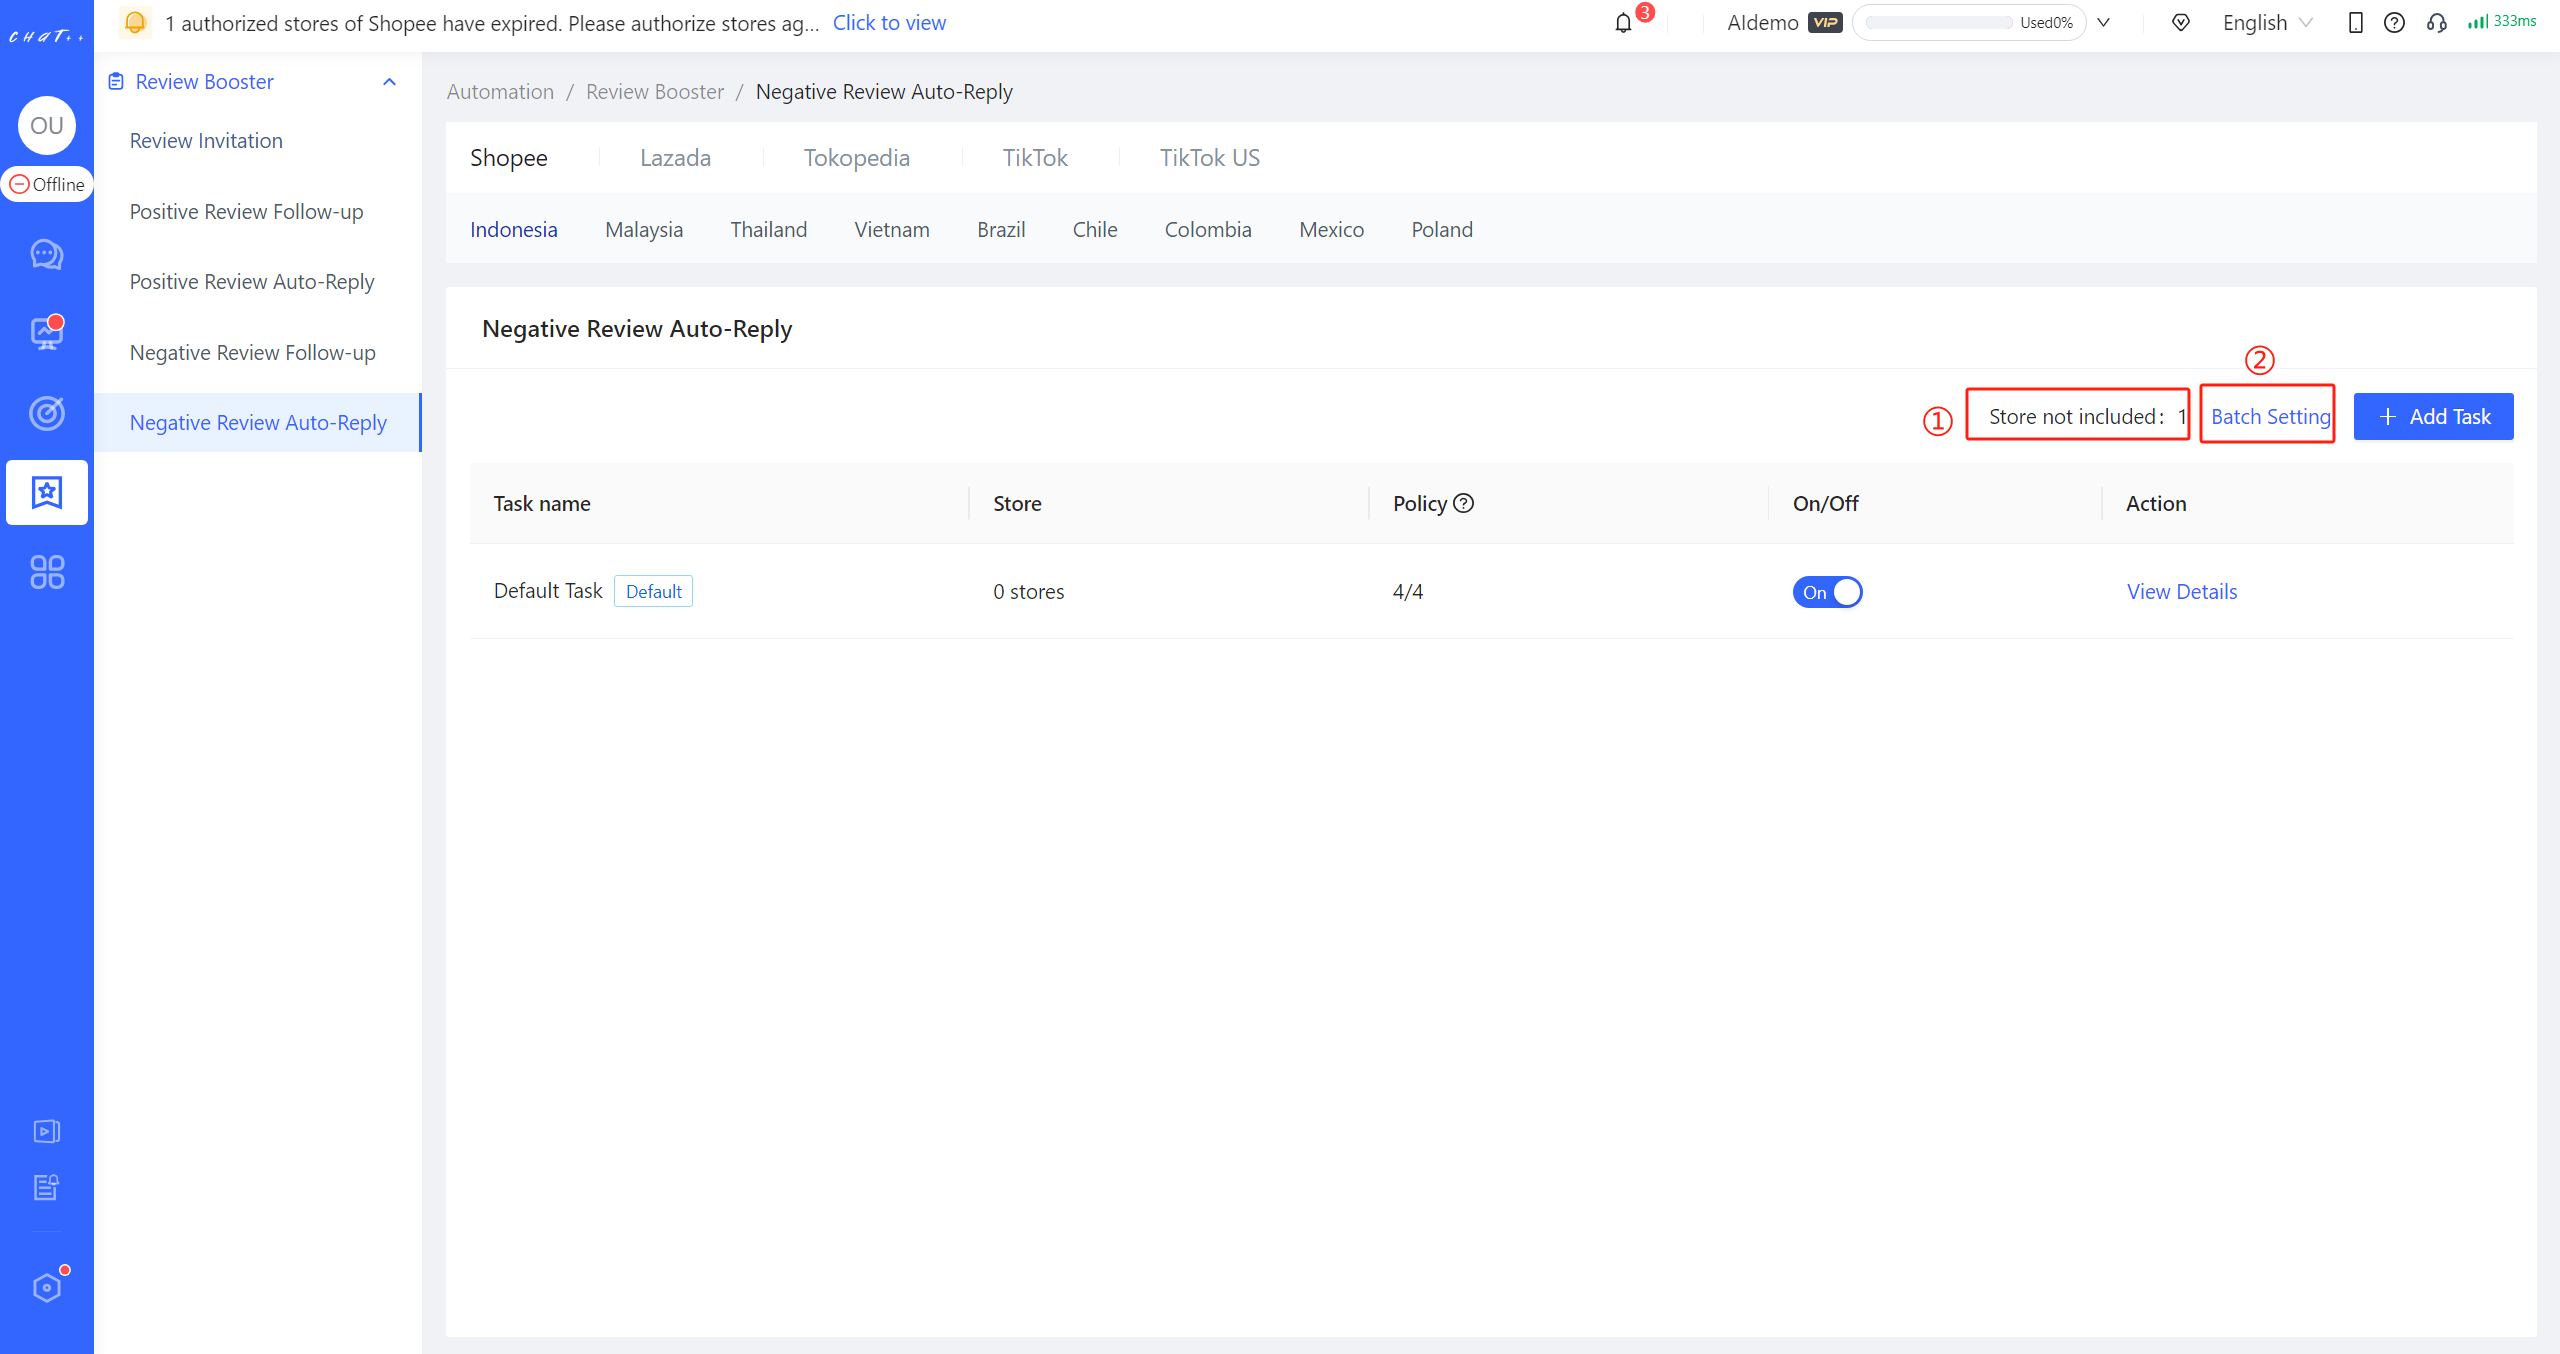
Figure 7
"Policy Branch" Description
- Policy branch for Negative Review Auto-Reply task consists of five key factors: product scope, applicable ratings, review type, delay auto-reply and message content.
Product scope(red box① in Figure 8): The policy branch take effects when buyer ordered specific products. On Shopee, product scope can be selected as All products, Pick SKU, Pre-order or In-stock. On Lazada, product scope can be selected as All products and Pick SKU.
- "Pick SKU" supports selecting specific products by searching the "Product Name", "Product ID", "SPU Article NO." and "SKU ID"(red box① in Figure 9), meanwhile inputting "Product ID" or "SPU Article NO." and can quickly select various products and multiple products will separated with Enter) (red box② in Figure 9).
Applicable Ratings(red box② in Figure 9): When a buyer gives a rating of 1 to 4 stars, it is applicable to Negative Review Auto-Reply. It supports selecting a single option or multiple options. By default, all applicable ratings are selected when creating a new policy. However, if you have already selected 4 stars in Positive Review Auto-Reply task, this policy will conflict with the Positive Review Auto-Reply 4 stars. In that case, you need to deselect 4 stars before saving.
- The applicable rating on the Lazada is based on the overall rating
Review Type(red box③ in Figure 8): According to whether the buyer's review has content, it is divided into "Include text/image/video" and "No content" supporting individual selection or full selection.
- Note: Lazada does not currently support auto-reply to reviews without content.
Delay Auto-Reply (red box④ in Figure 8): If a buyer leaves a negative review with content, and both Delay Auto-Reply and Negative Review Follow-up are enabled, the system will proactively contact the buyer to modify the review content. If the negative review cannot be successfully salvaged within Delay Auto-Repl period, the system will send an auto-reply.
- When selecting to enable Delay Auto-Reply, its trigger condition is as follows:
- Trigger: If the same product has both Negative Review Auto-Reply and Negative Review Follow-up enabled for the same-star-level in the one store, Delay Auto-Reply will be triggered. Auto-Reply will be sent to the buyer within the set time (range of 5-30 days).
- Not Trigger: If there are no effective Negative Review Follow-up messages (not configured or not enabled), Delay Auto-Reply will not be triggered, and Negative Review Auto-Reply will be sent to the buyer immediately.
- When selecting to enable Delay Auto-Reply, its trigger condition is as follows:
Message Content(red box⑤ in Figure 8): If above conditions are met, the corresponding message will be sent.
- Matching Logic: If the buyer's purchased products, given ratings, and review type match the Product scope, applicable ratings, review type and Delay Auto-Reply in the policy branch, then the buyer matches this policy. When a buyer simultaneously matches multiple policy branches, the system will execute the first policy in order.
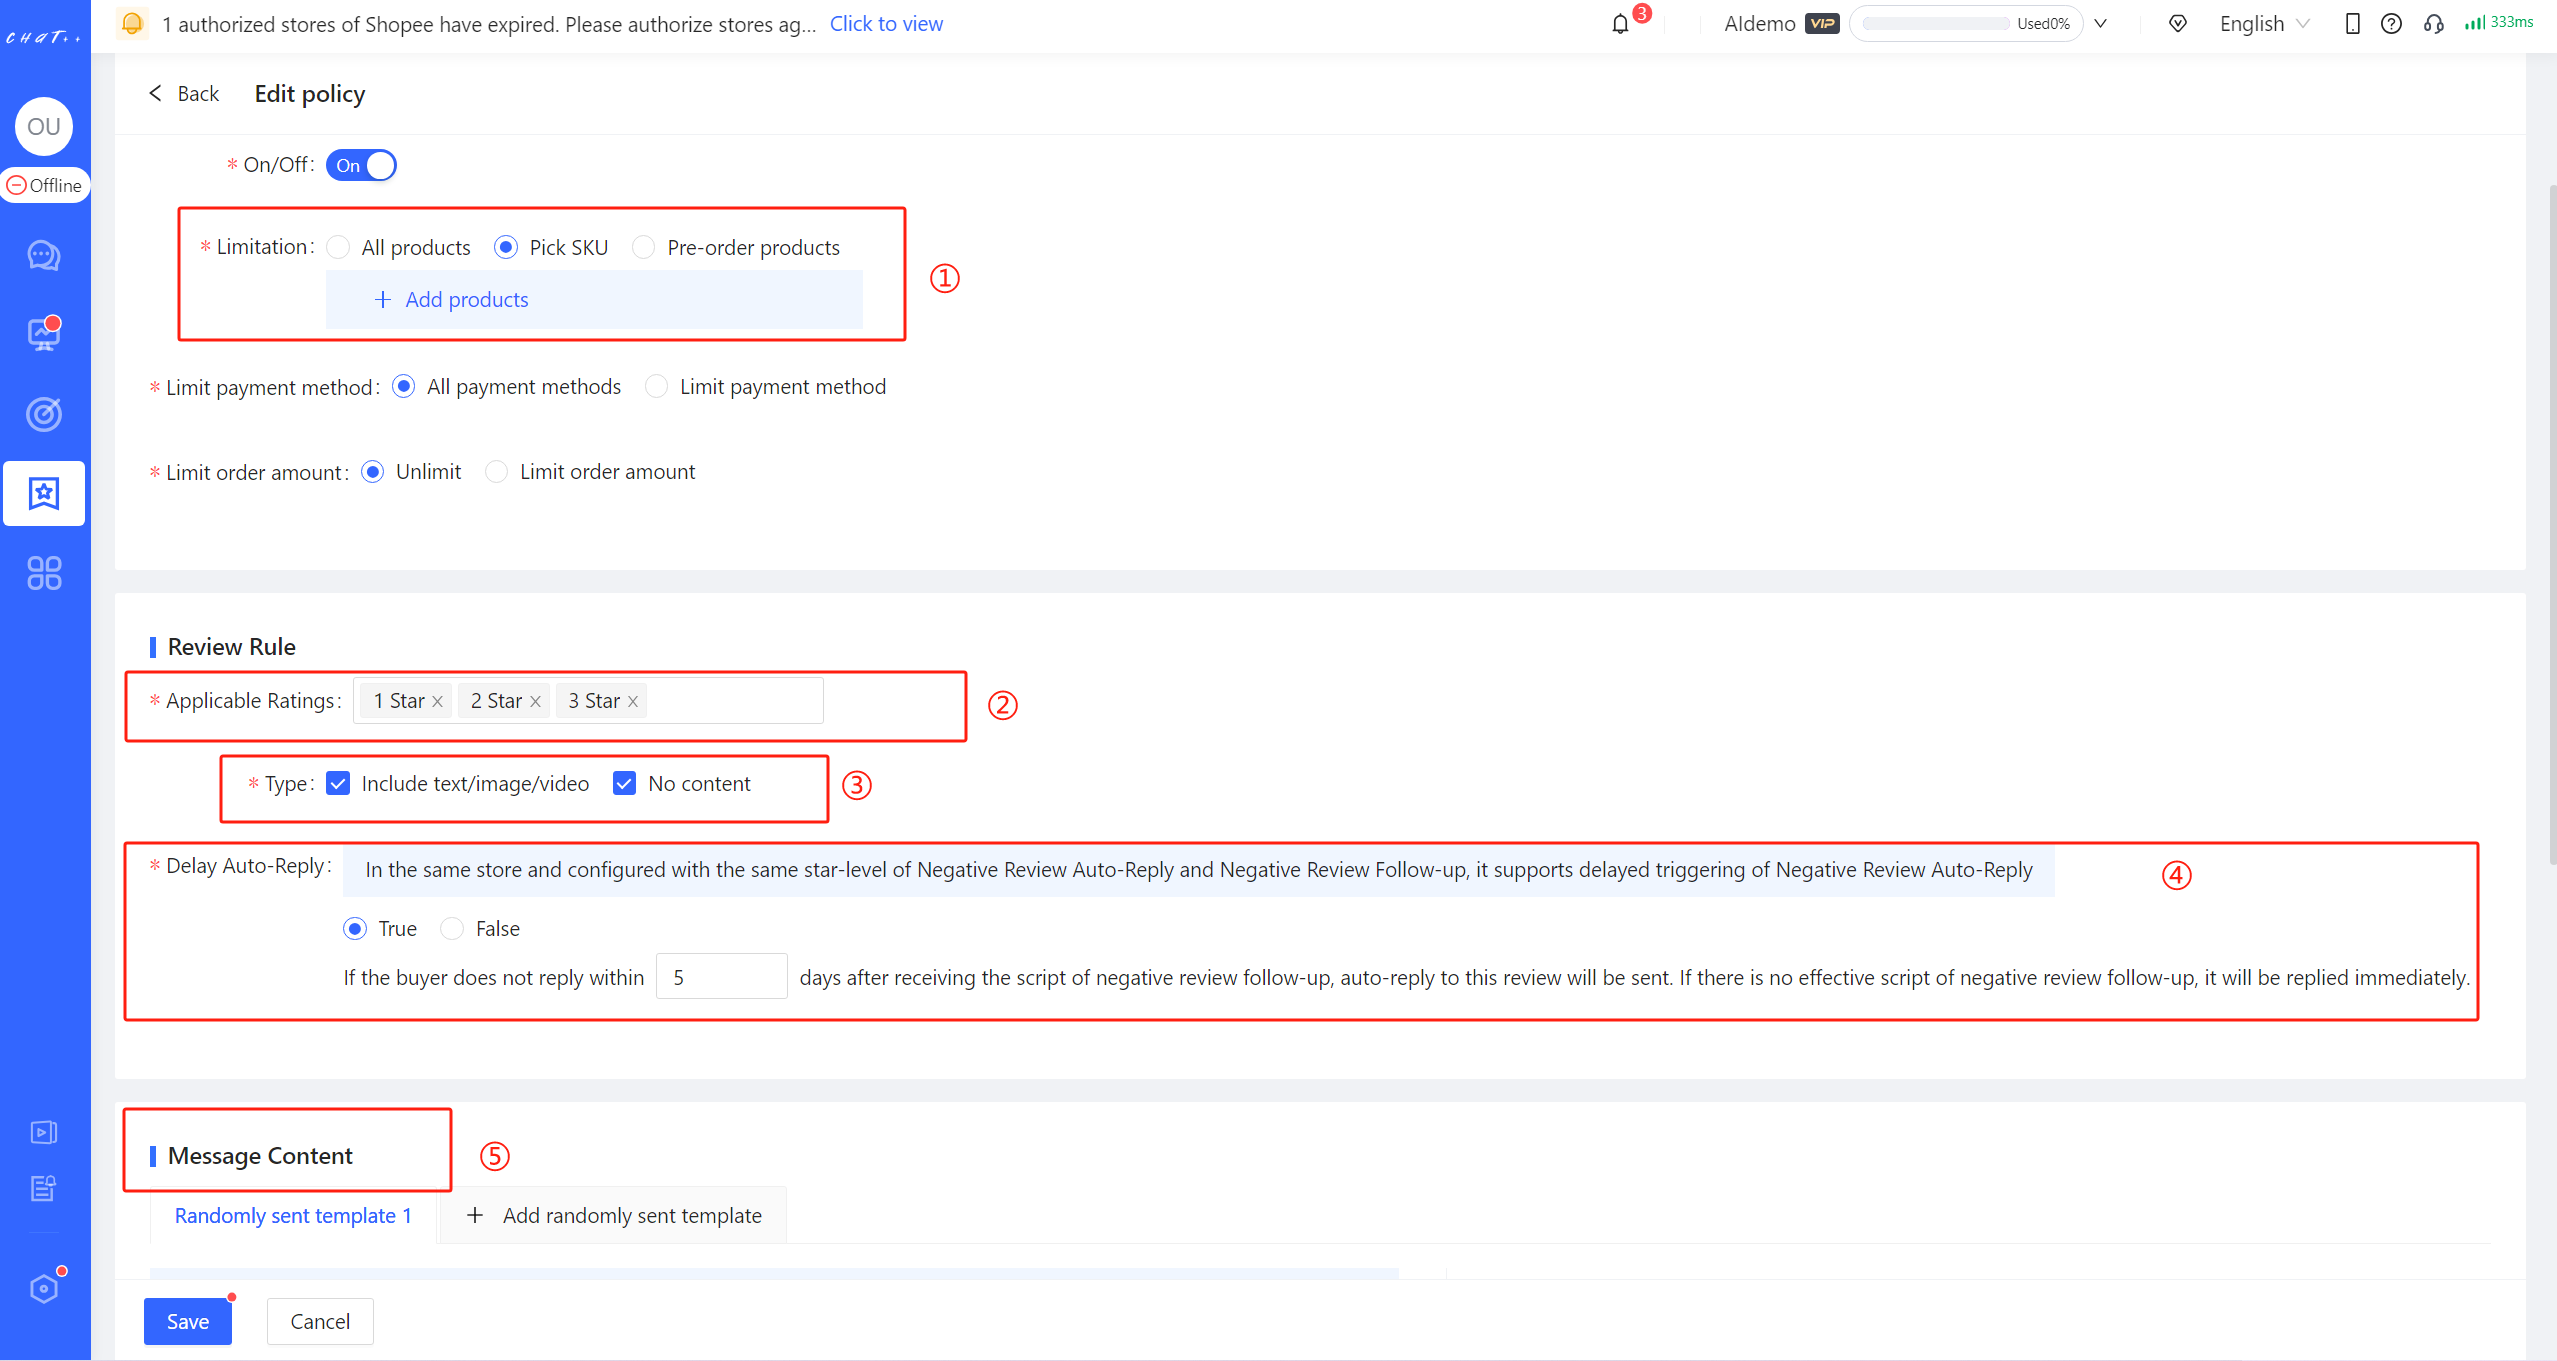
Figure 8
In the example in Figure 9 and Figure 10,
- Product scope selected are "Pick SKU": Sunscreen
- Applicable Rating selected are "1 star", "2 stars", and "3 stars".
- Review Type selected includes "Include text/image/video"
- Delay Auto-Reply is selected with a trigger time set to 30 days.
In other words, for buyers who purchase the "Sunscreen" from the store and give a 1-star, 2-star, or 3-star review with any content:
- If there is an effective Negative Review Follow-up policy, and the buyer does not respond to follow-up within 30 days, the system will automatically leave a reply to buyer's negative review.
- If there are no effective Negative Review Follow-up policy, the system will immediately send auto-reply to buyer's negative review.
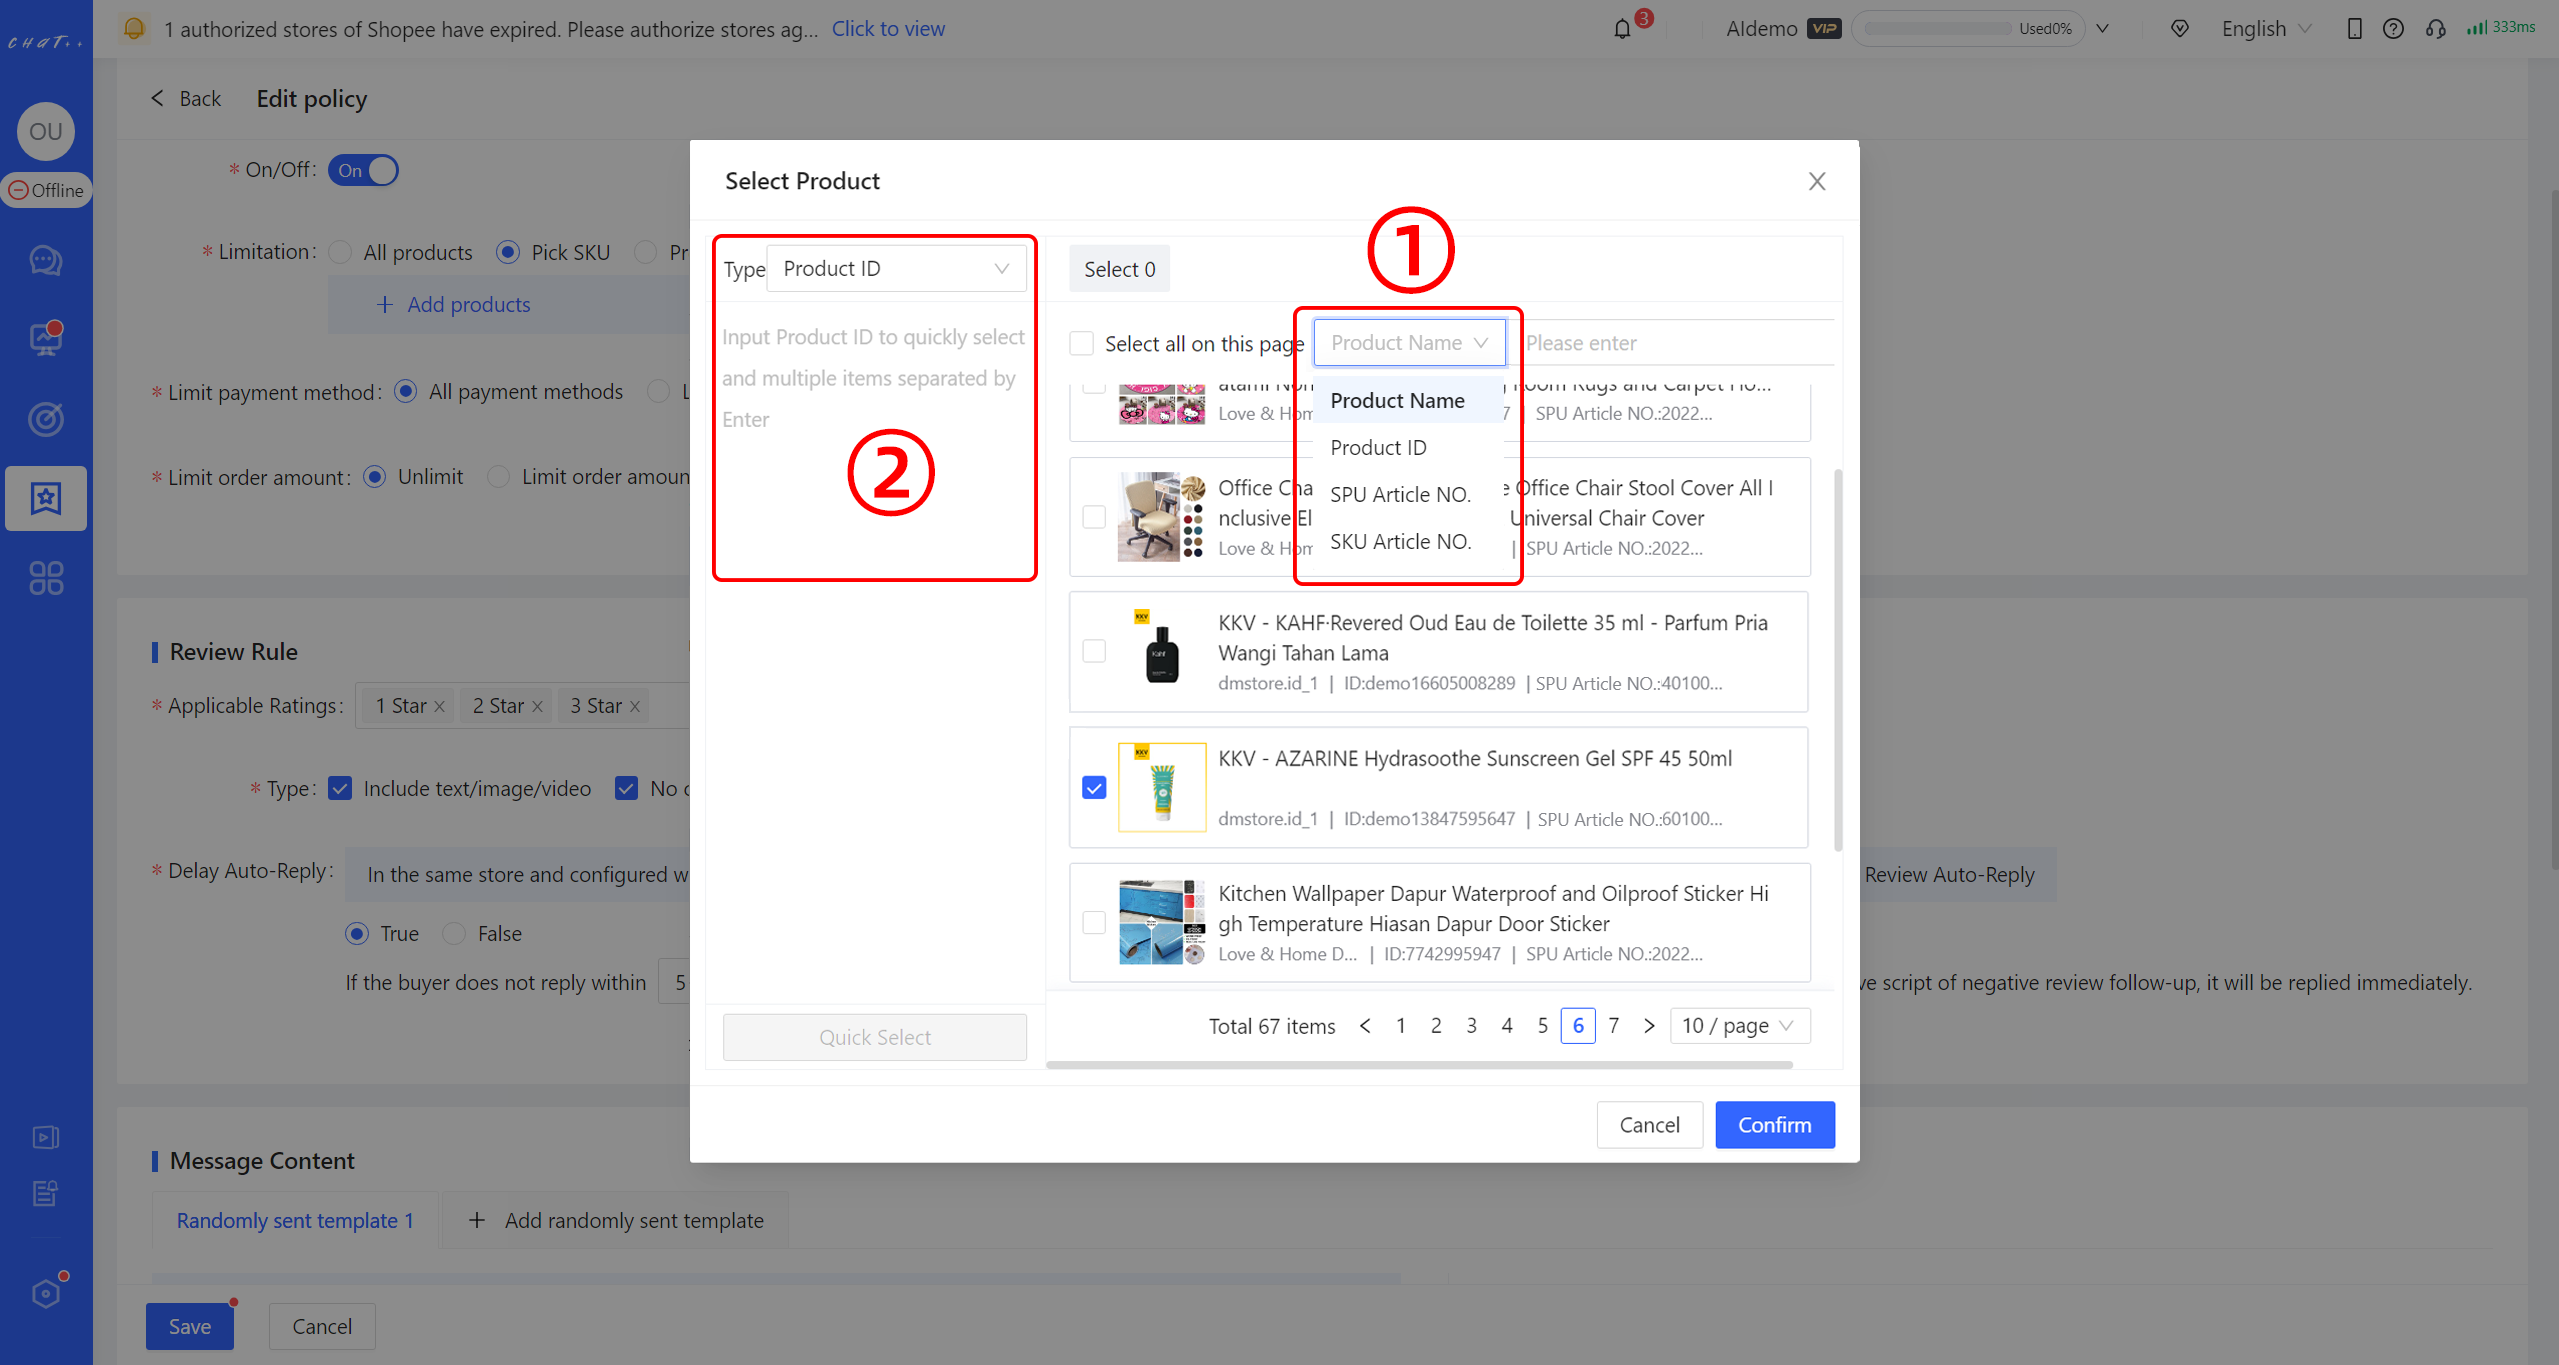
Figure 9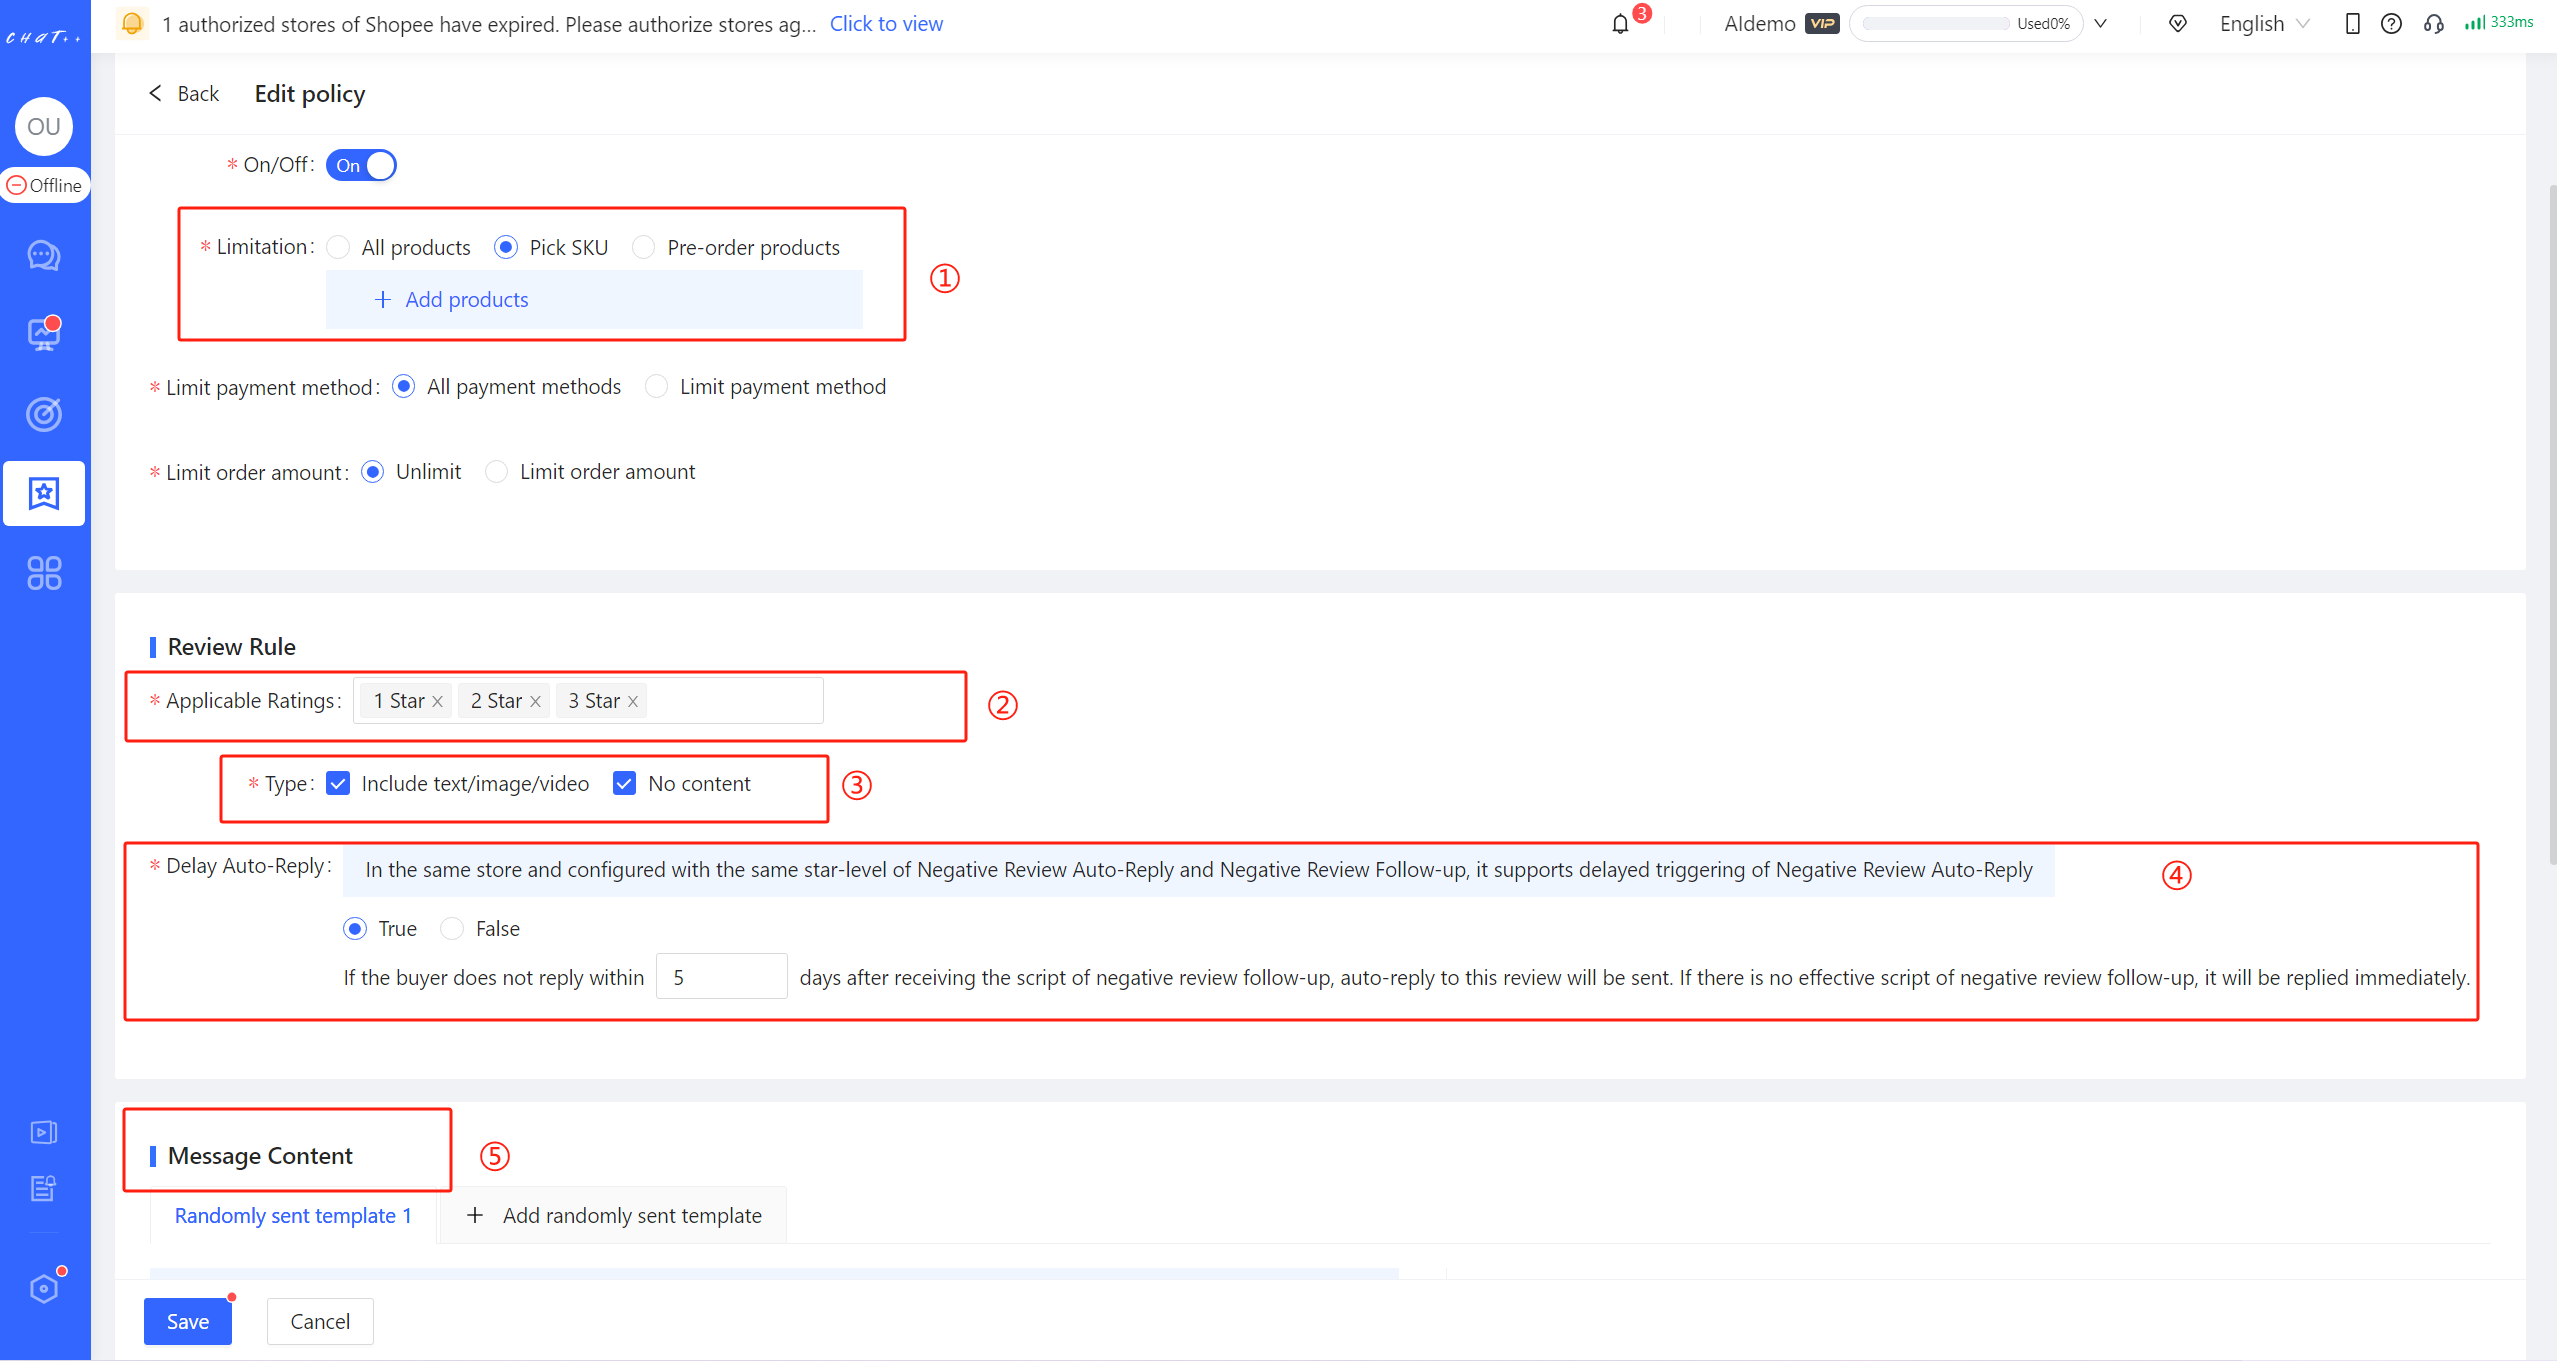
Figure 10
Configuration of Personalized Replies
Recommended Templates To facilitate quick configuration, when the message content includes text messages, ChatPlusAI provides recommended templates for reference and selection. Click the "Select" button (red box ① in Figure below) to automatically fill in the content editing box(red box ② below) . The preview of sending effect can be seen on the right side of the page (red box ③ below) .
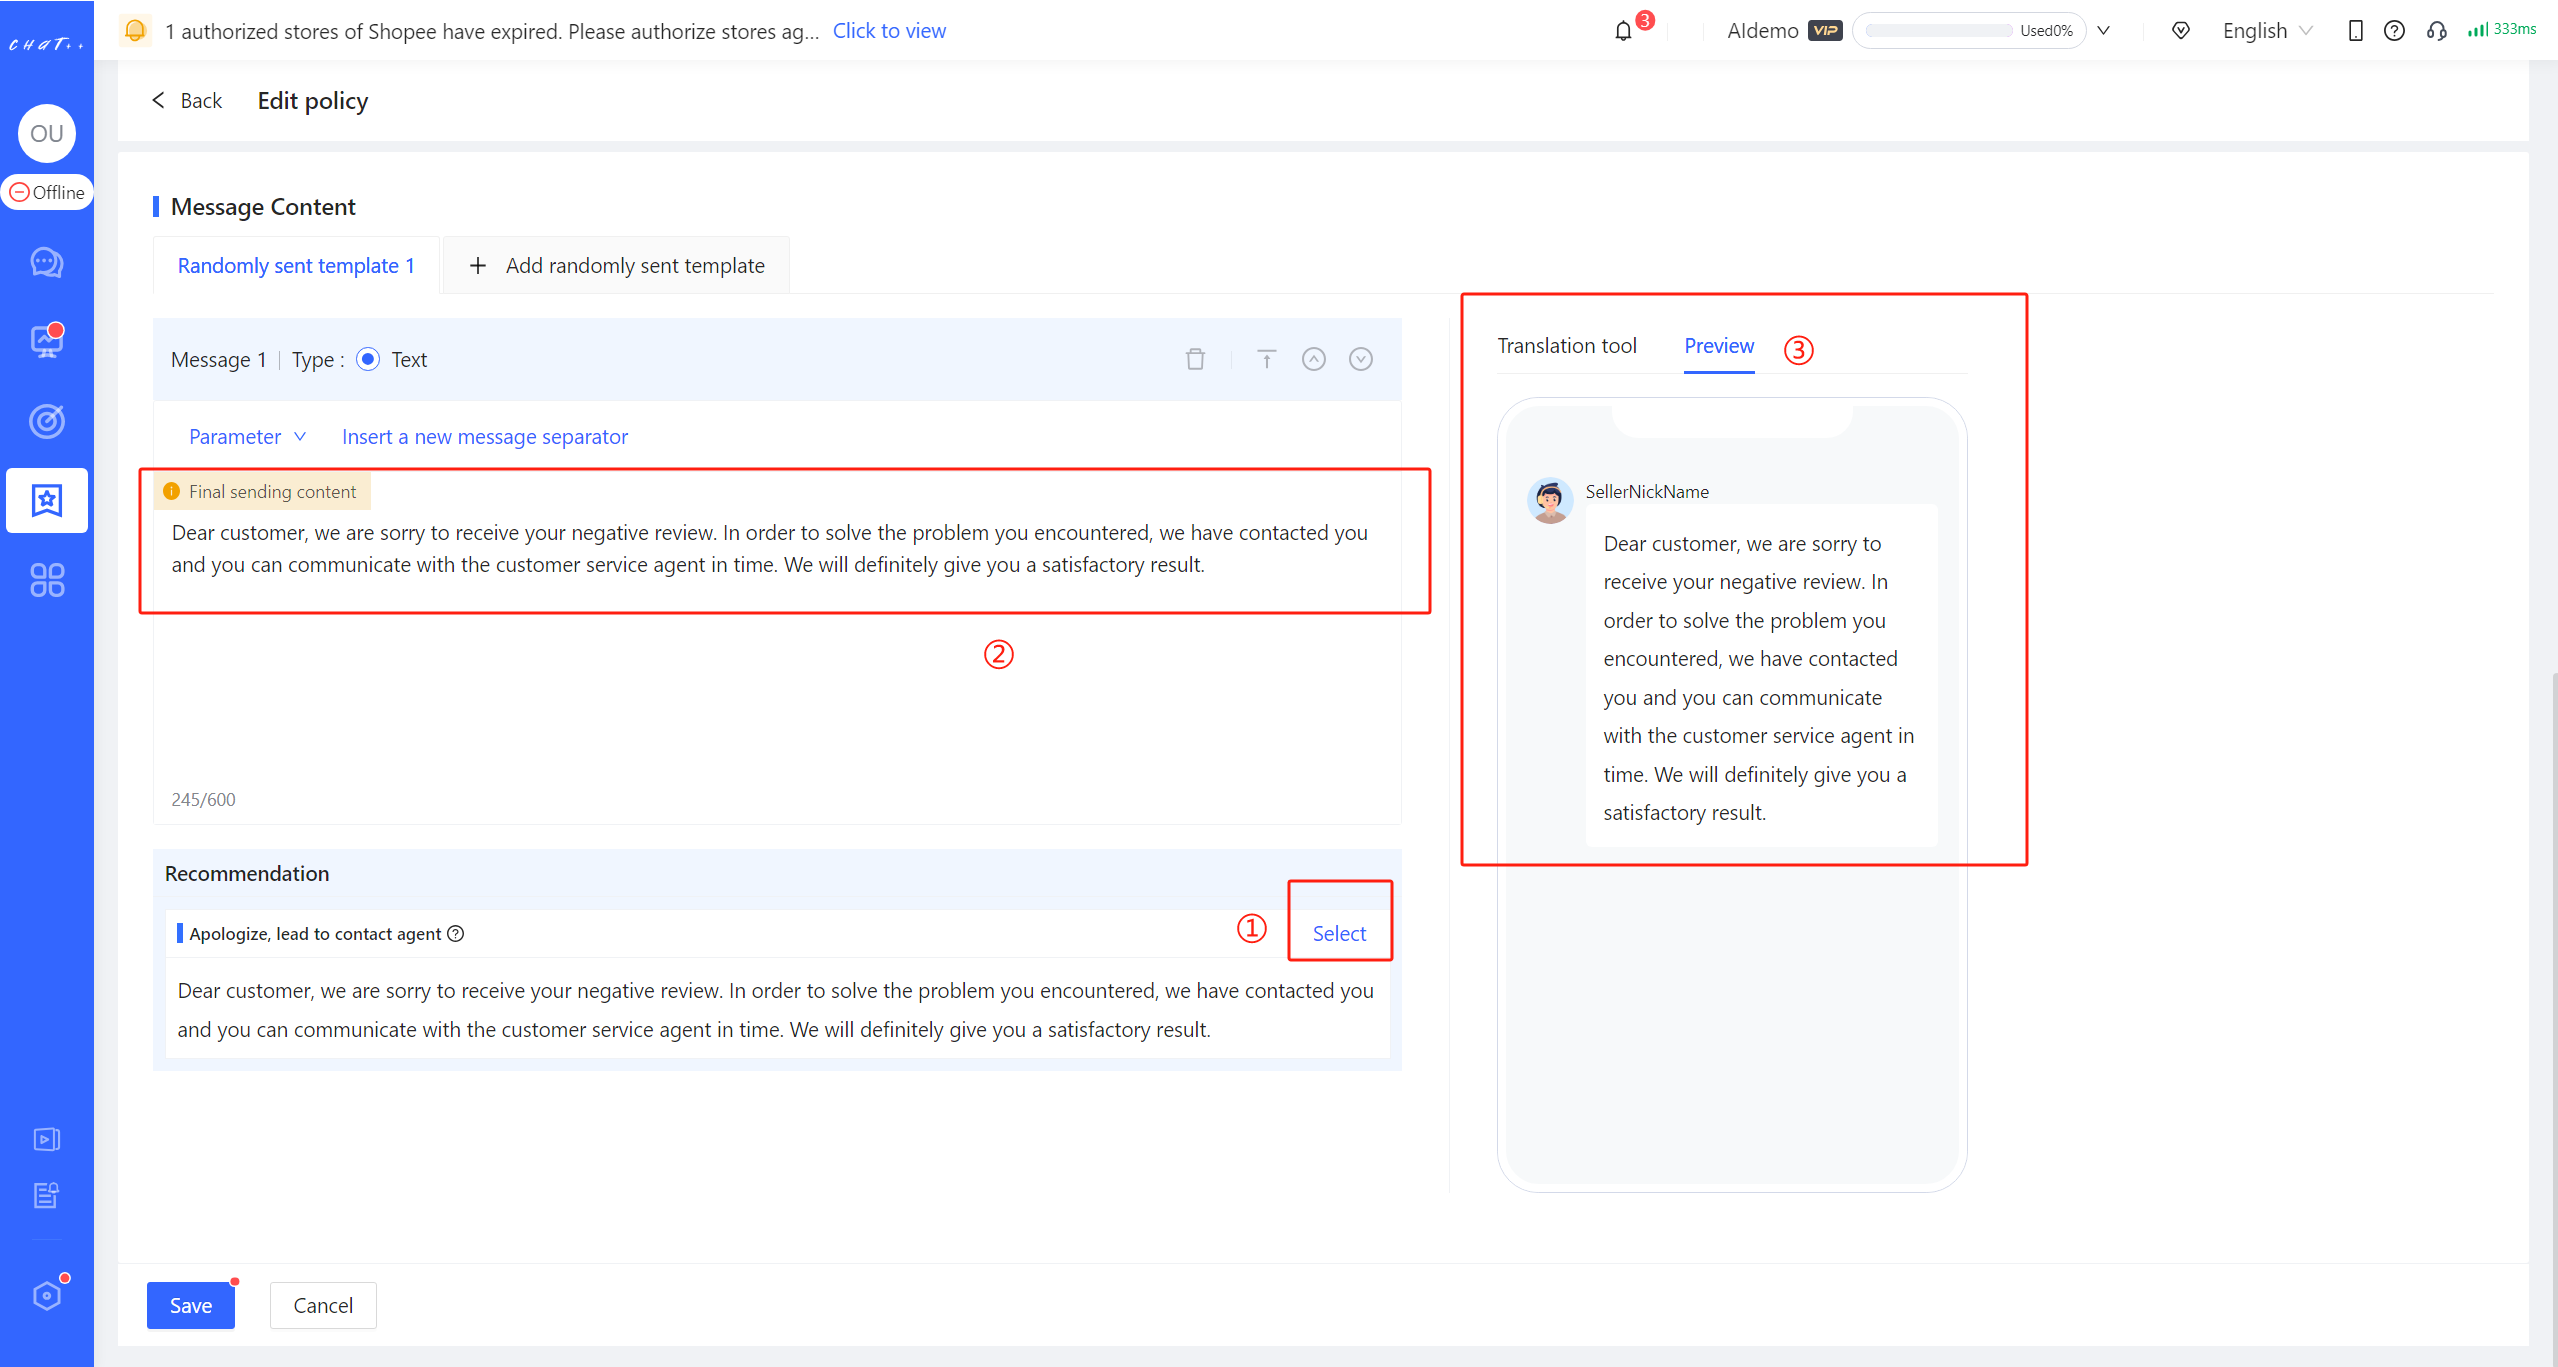
Figure 11
Add Buyer Nickname Each buyer's review is different. To make the reply content more targeted, you can mention the buyer's nickname in the text message.
Select "Buyer Nickname" after clicking "Parameter" button (red box below), and the buyer's nickname will be automatically filled in.
Note: If you want to use templates along with buyer nickname, please follow these steps: Click "Select" (red box ① in Figure above) → Click on "Buyer Nickname" after selecting "Parameter" (red box below). If you click on the "Select" button for the template first, and buyer nickname in the content editing box will be replaced with the template content.
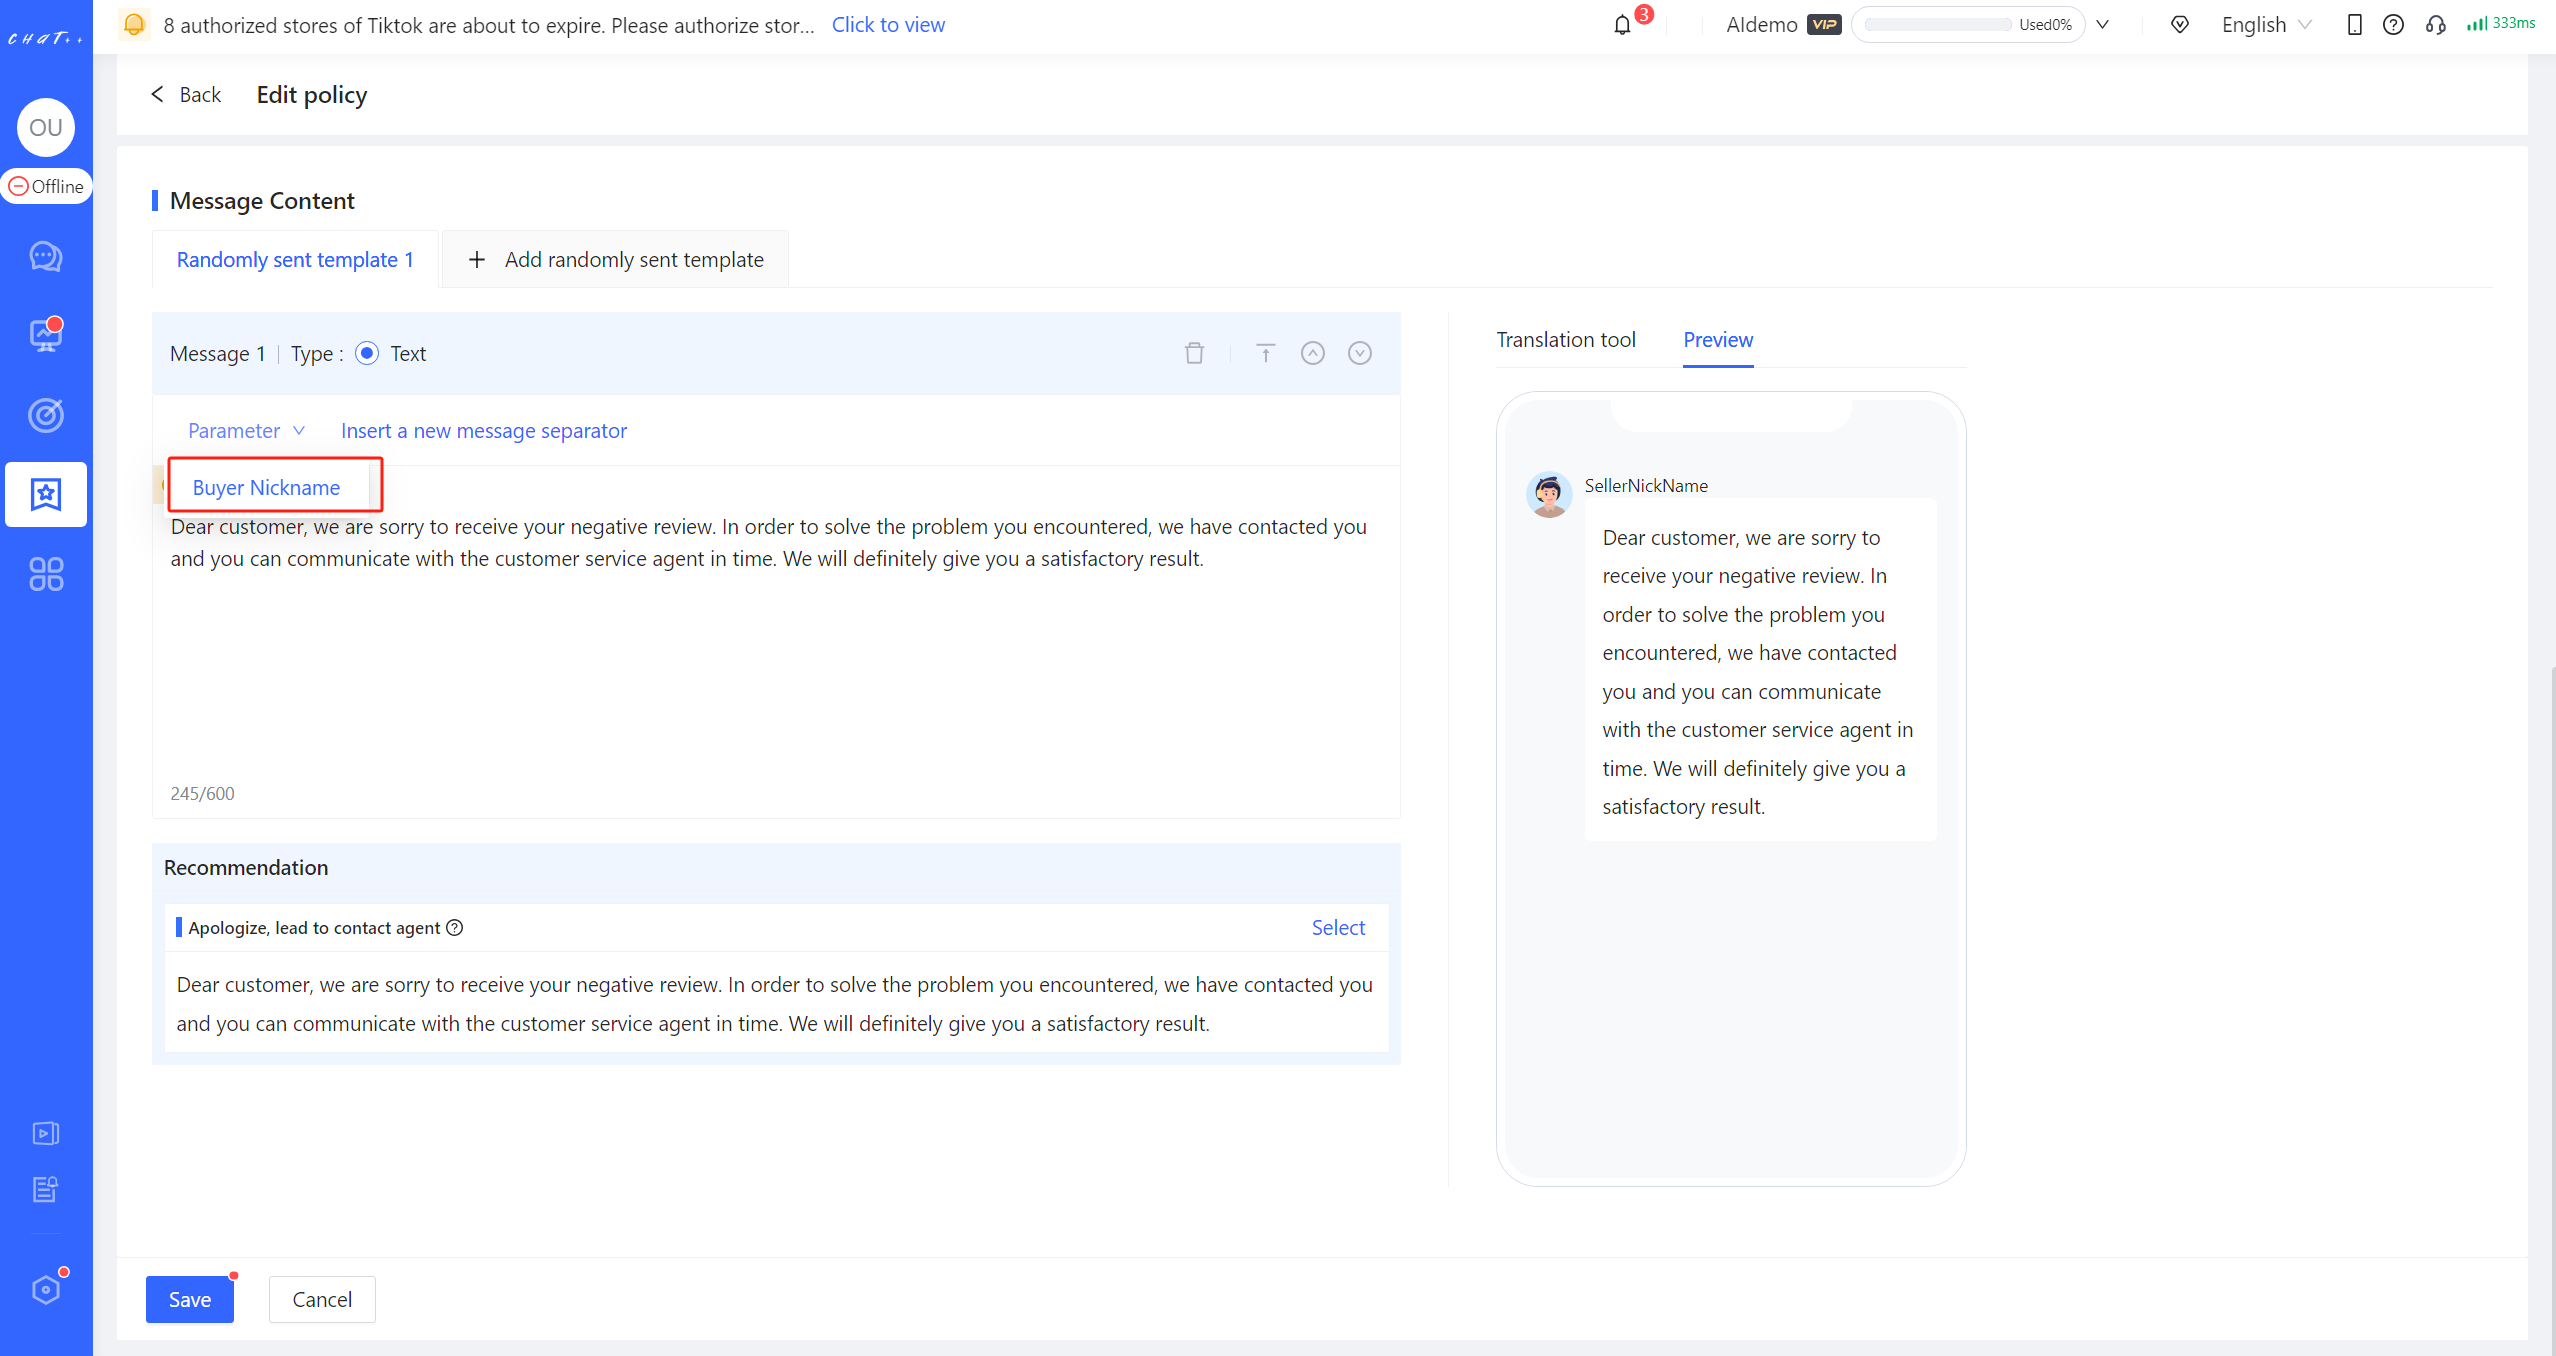
Figure 12
Randomly sent template In order to improve the configuration efficiency of Negative Review Auto-Reply, ChatPlusAI supports random sending. Click "Add randomly sent template" (red box ① in Figure 13 below), and up to 10 random content can be added to a policy. One of them will be selected randomly to reply.
If you want to reply to multiple reviews simultaneously, you can click on "Insert a new message separator" format.
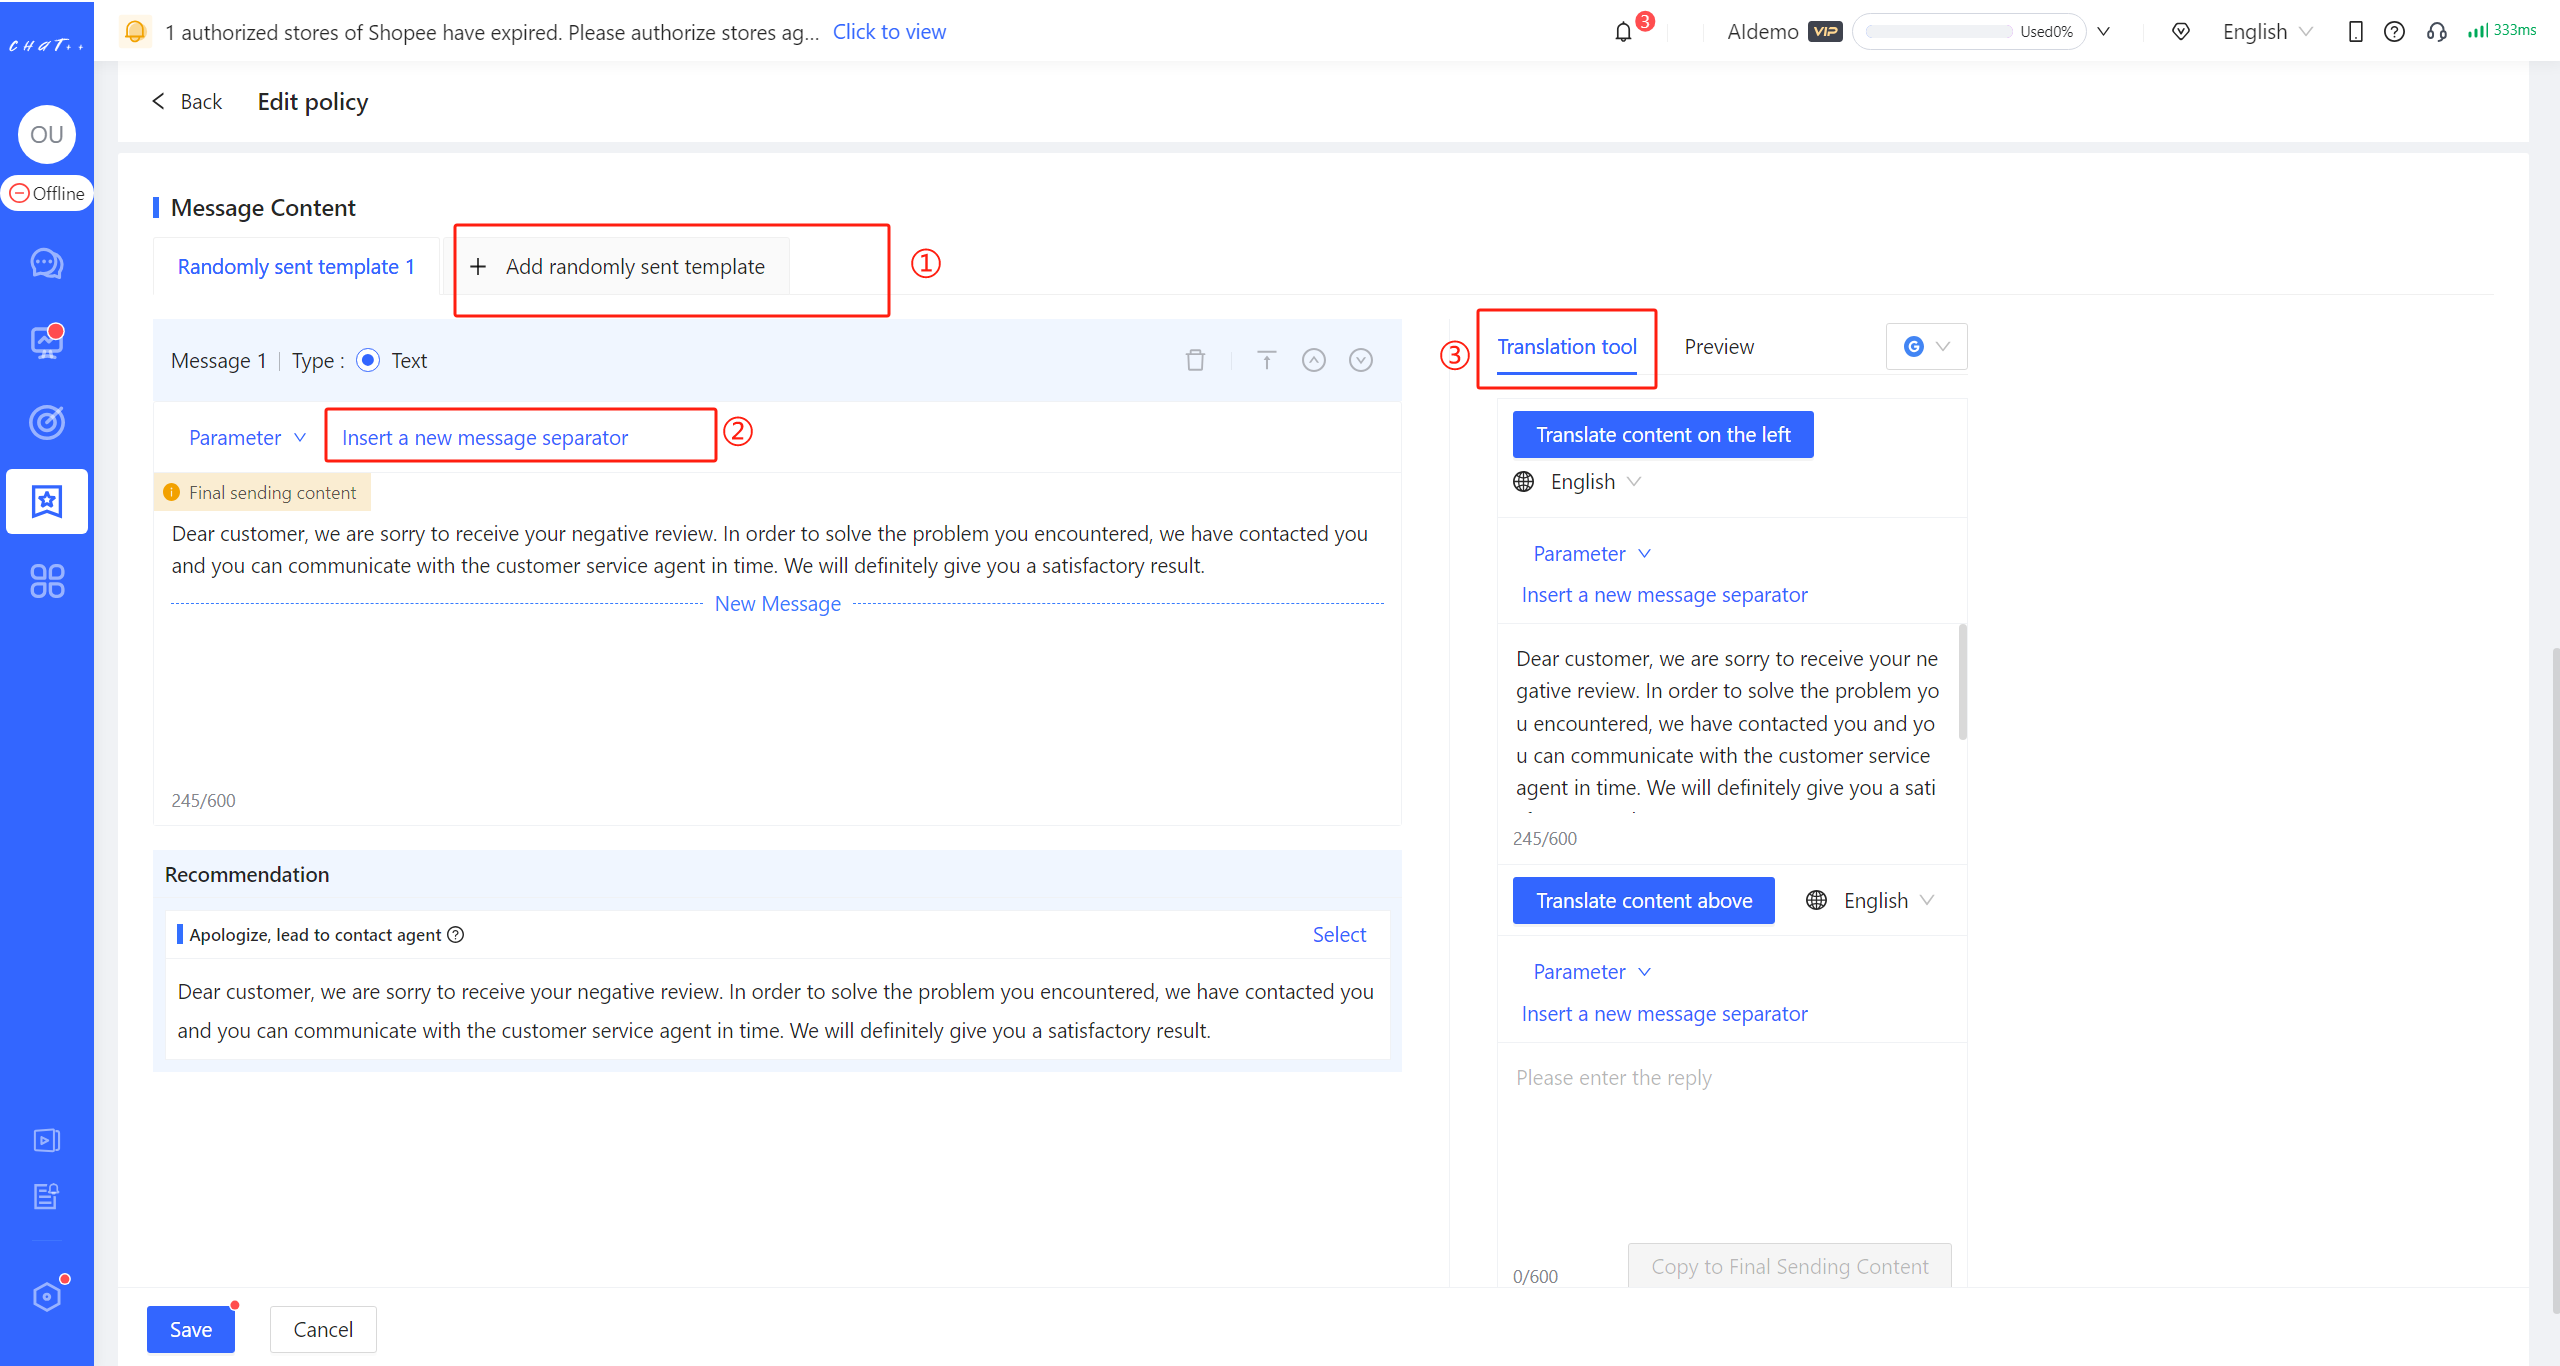
Figure 13
Quick Multilingual Translation
If message content includes text messages and you need to continuously adjust the content to find the optimal one, ChatPlusAI supports translating it into the current system language first. After modification, it can be translated back into site language. It facilitates quick adjustments to translated messages. When you want to adjust templates quickly, it allows you to translate the content already in site language back to system language with one click. After optimizing, you can then translate it back to the site language.
Click on "Translation too"(red box② above) and after message content is automatically filled, click on "Translate content on the left" (red box① in Figure below). The final sending content on the left side (red box⑤ in Figure below) will be translated by default into current system language. If you need to translate it into other languages, you can switch the target language. The content translated into current system language is editable. When you edit the content in this area (red box② in Figure below), you can click "Translate content above" (red box③ in Figure below) to translate it into the site language. After translation, you can click "Copy to Final Sending Content" (red box④ in Figure below) to copy it. Click "Save" (red box⑥ in Figure below) to complete the configuration.
If message content doesn't need modification, ChatPlusAI supports translating the content directly into the site language.
Click on "Translation tool"(red box ② above), and after message content is automatically filled, click on "Translate content above" (red box③ in Figure below). It will be directly translated into the site language. Click "Copy to Final Sending Content" (red box④ in Figure below), and the translated content will be automatically filled into the "Final sending content" area (red box⑤ in Figure below). Click "Save" (red box⑥ in Figure below) to complete the configuration.
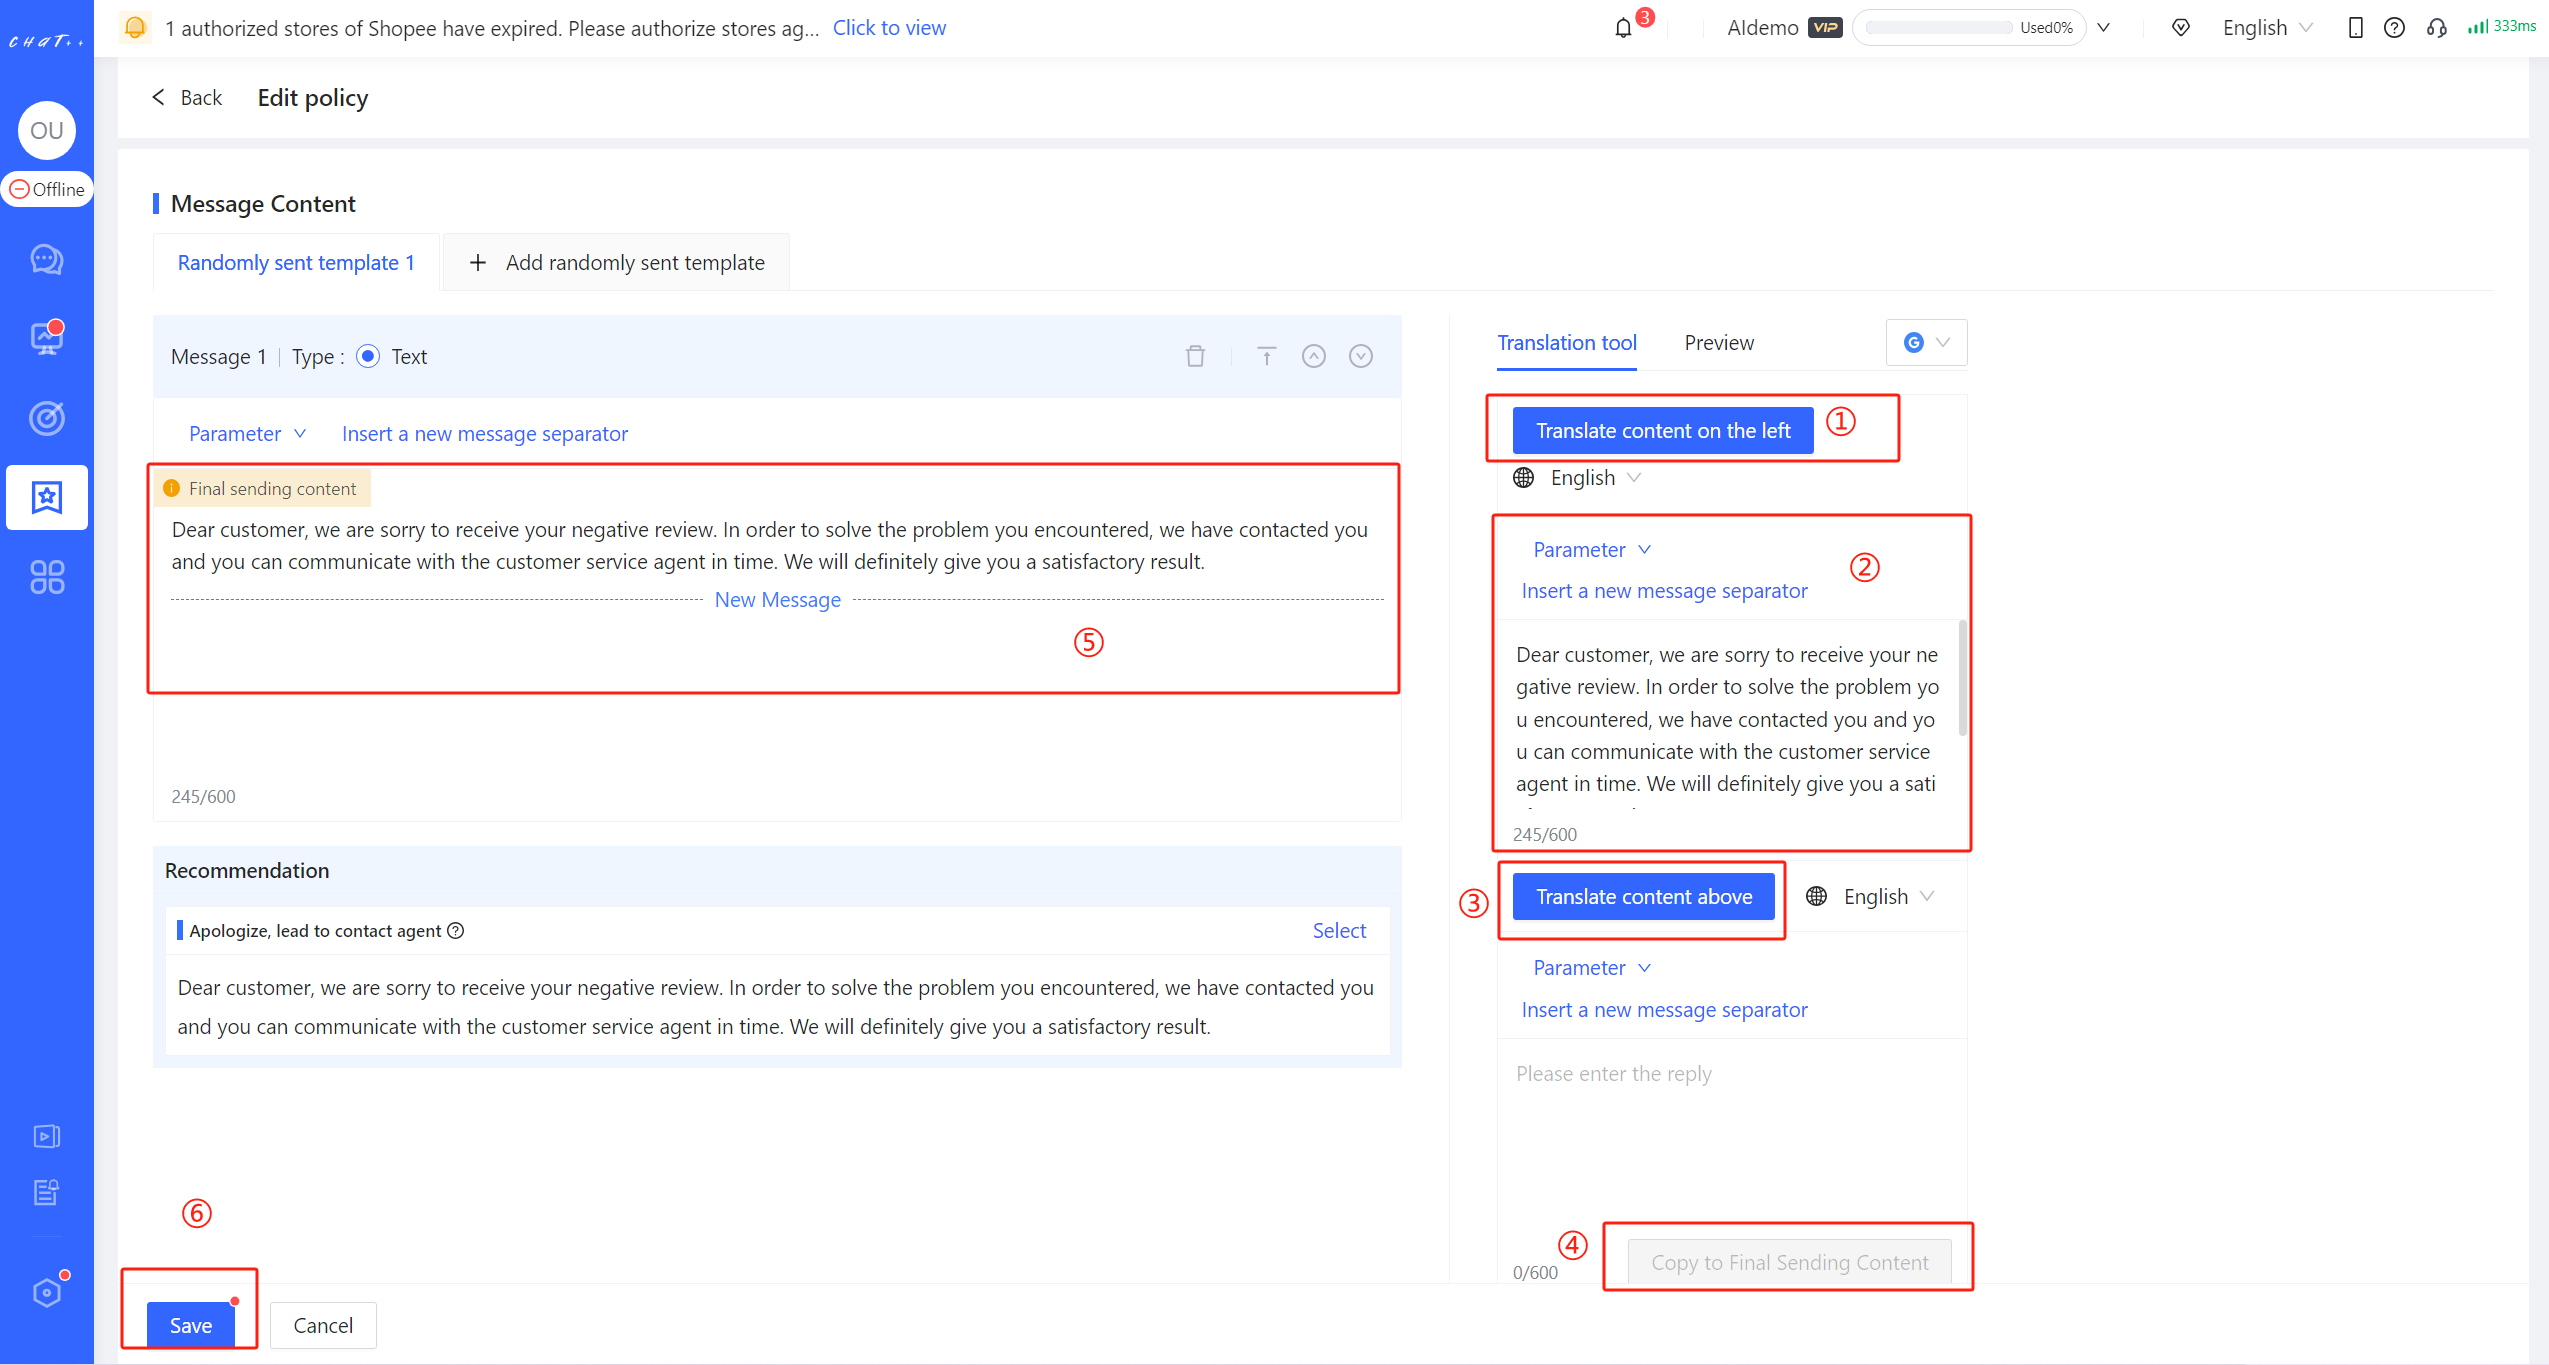
Figure 14
Diversified Reply Configuration
Add Policy Click on "Add policy" (red box① below) to set diverse policy branches for a task, achieving different replies for the same task between different products, for different reviews, and in different forms of content. It will ensure the best effect.
"Policy Branch Execution Sequence" Description
When there are multiple effective policy branches in the Policy Branch Collection, the system will execute the first policy that matches the conditions according to execution sequence (red box② in Figure below), and subsequent policies will not be executed.
Hover the cursor over the "More" position to change the execution order through "Top/Up/Down/Bottom" (red box ③ in Figure 15 below).
Note: If none of the policy branches match, the message contents for Negative Review Auto-Reply will not be sent.
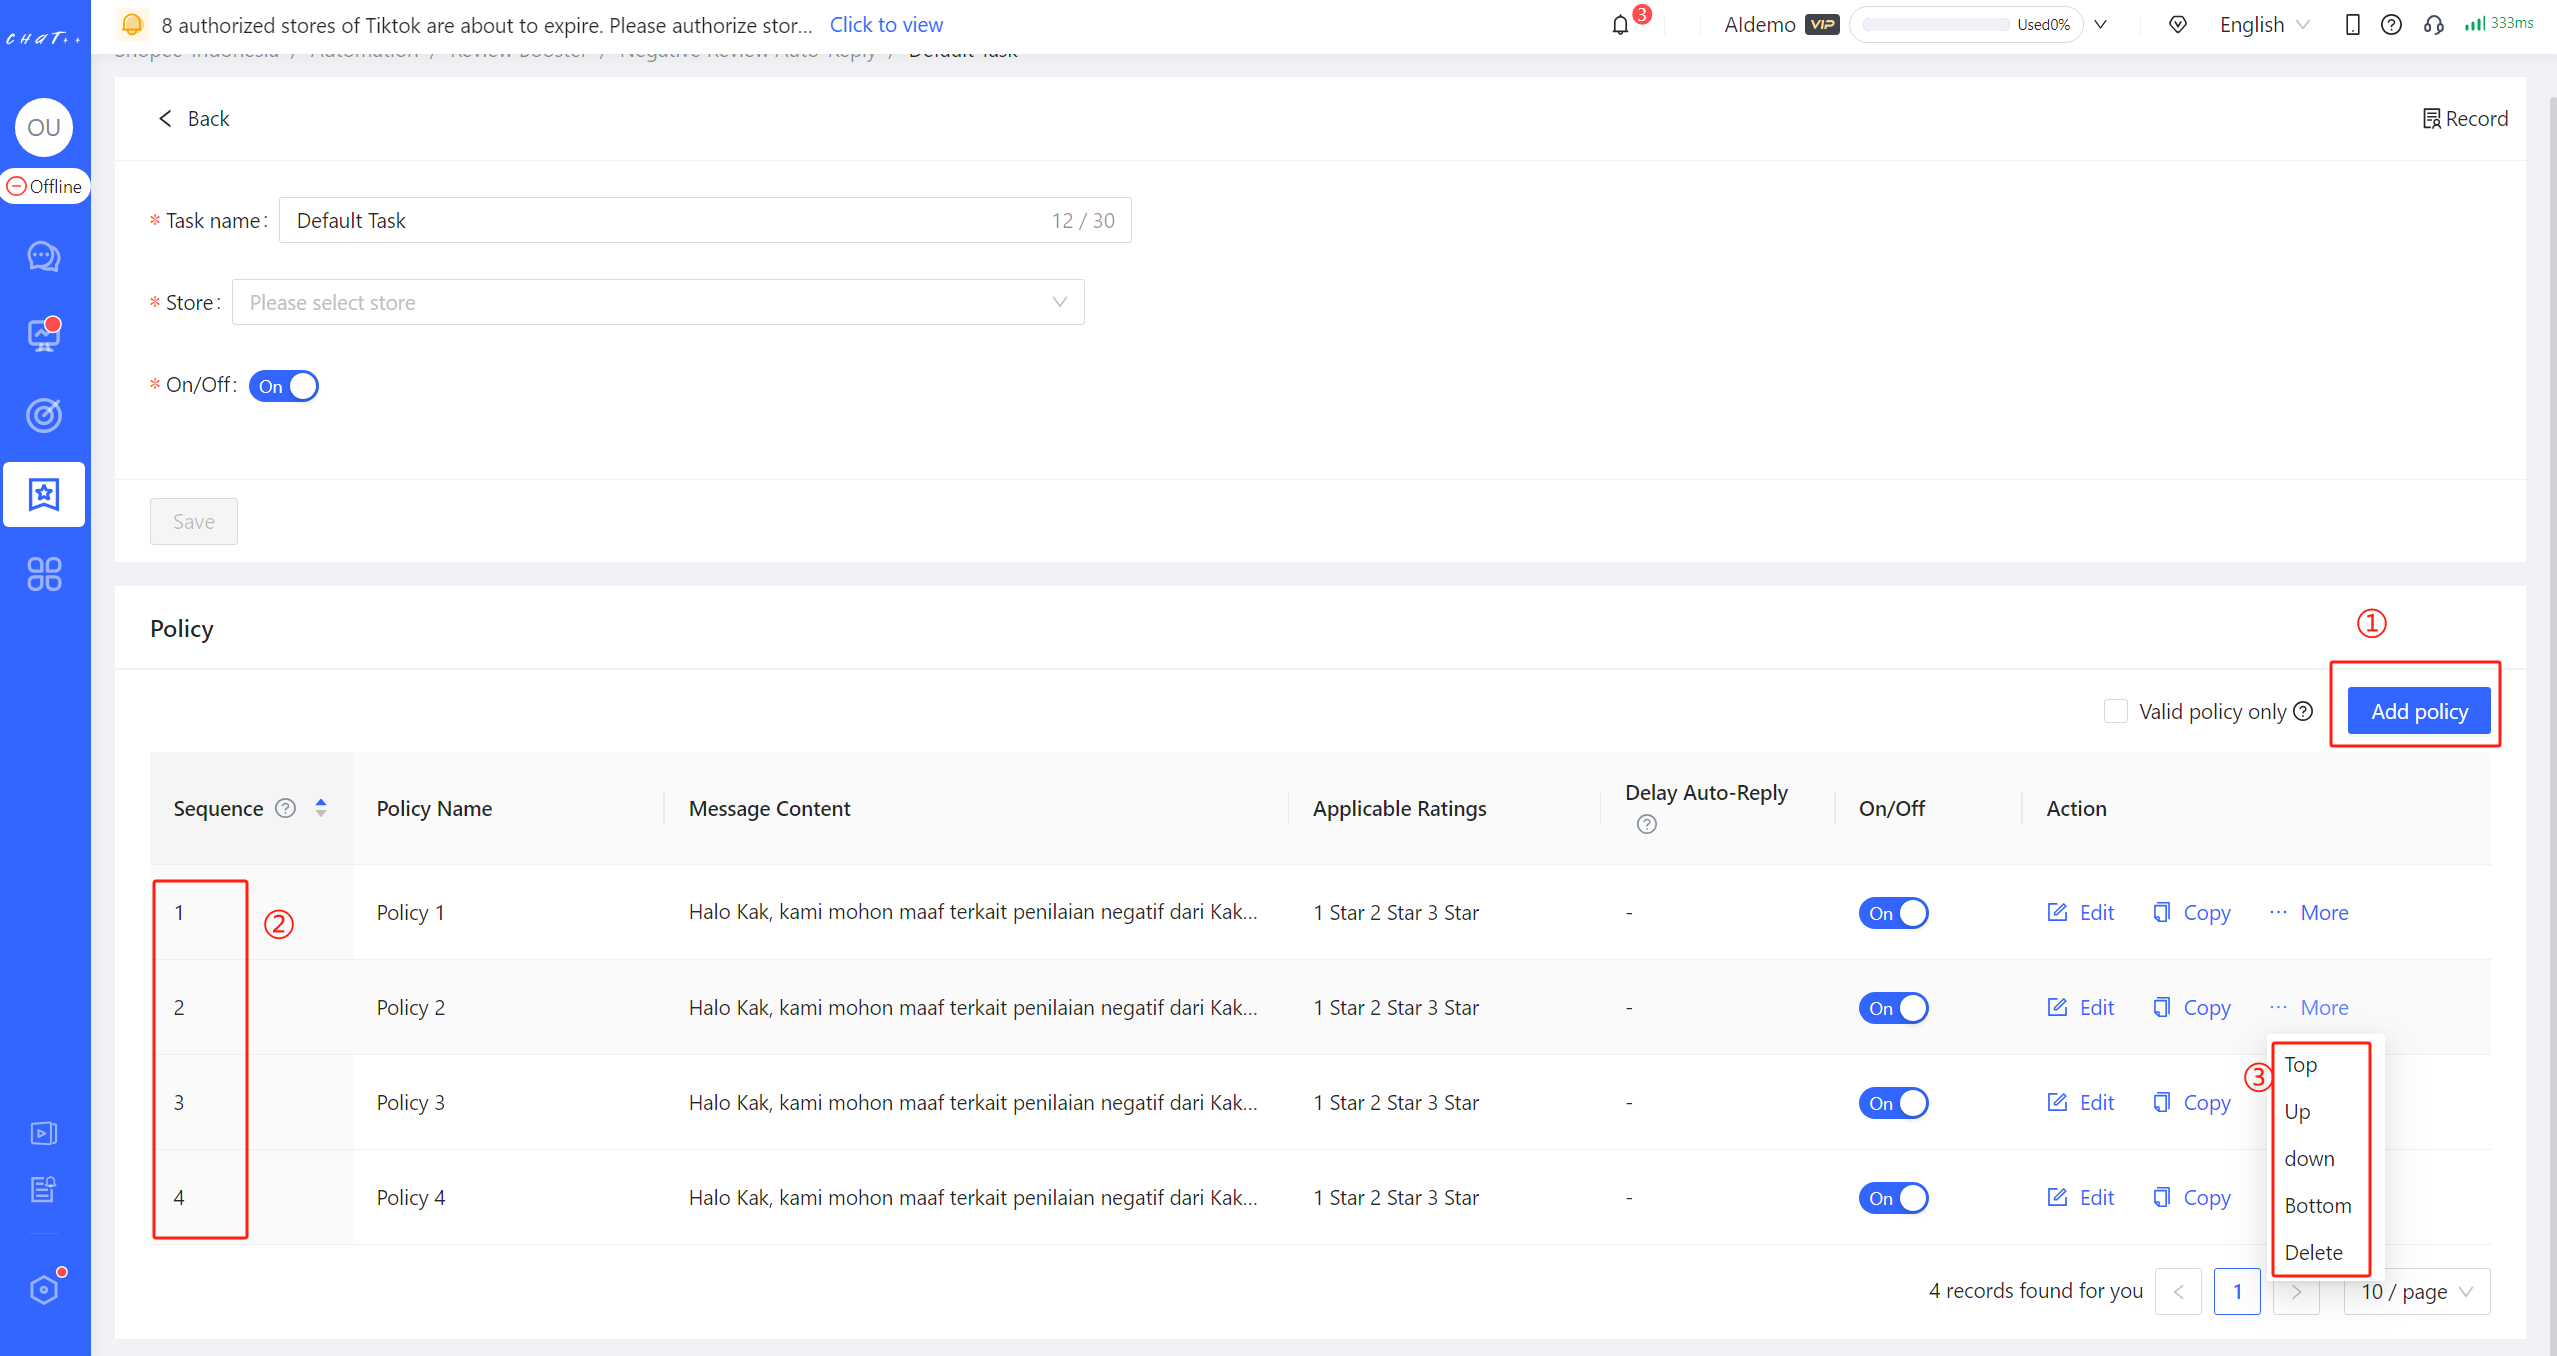
Figure 15
Add Task Click "Add Task" (red box in Figure 15 below) to set different tasks for different stores, achieving differentiated Negative Review Auto-reply for different stores.
In the newly created task, the added store will be removed from the configured stores of other tasks, ensuring that "a store will not exist in two tasks at the same time," to avoid sending different Negative Review Auto-reply scripts to buyers multiple times.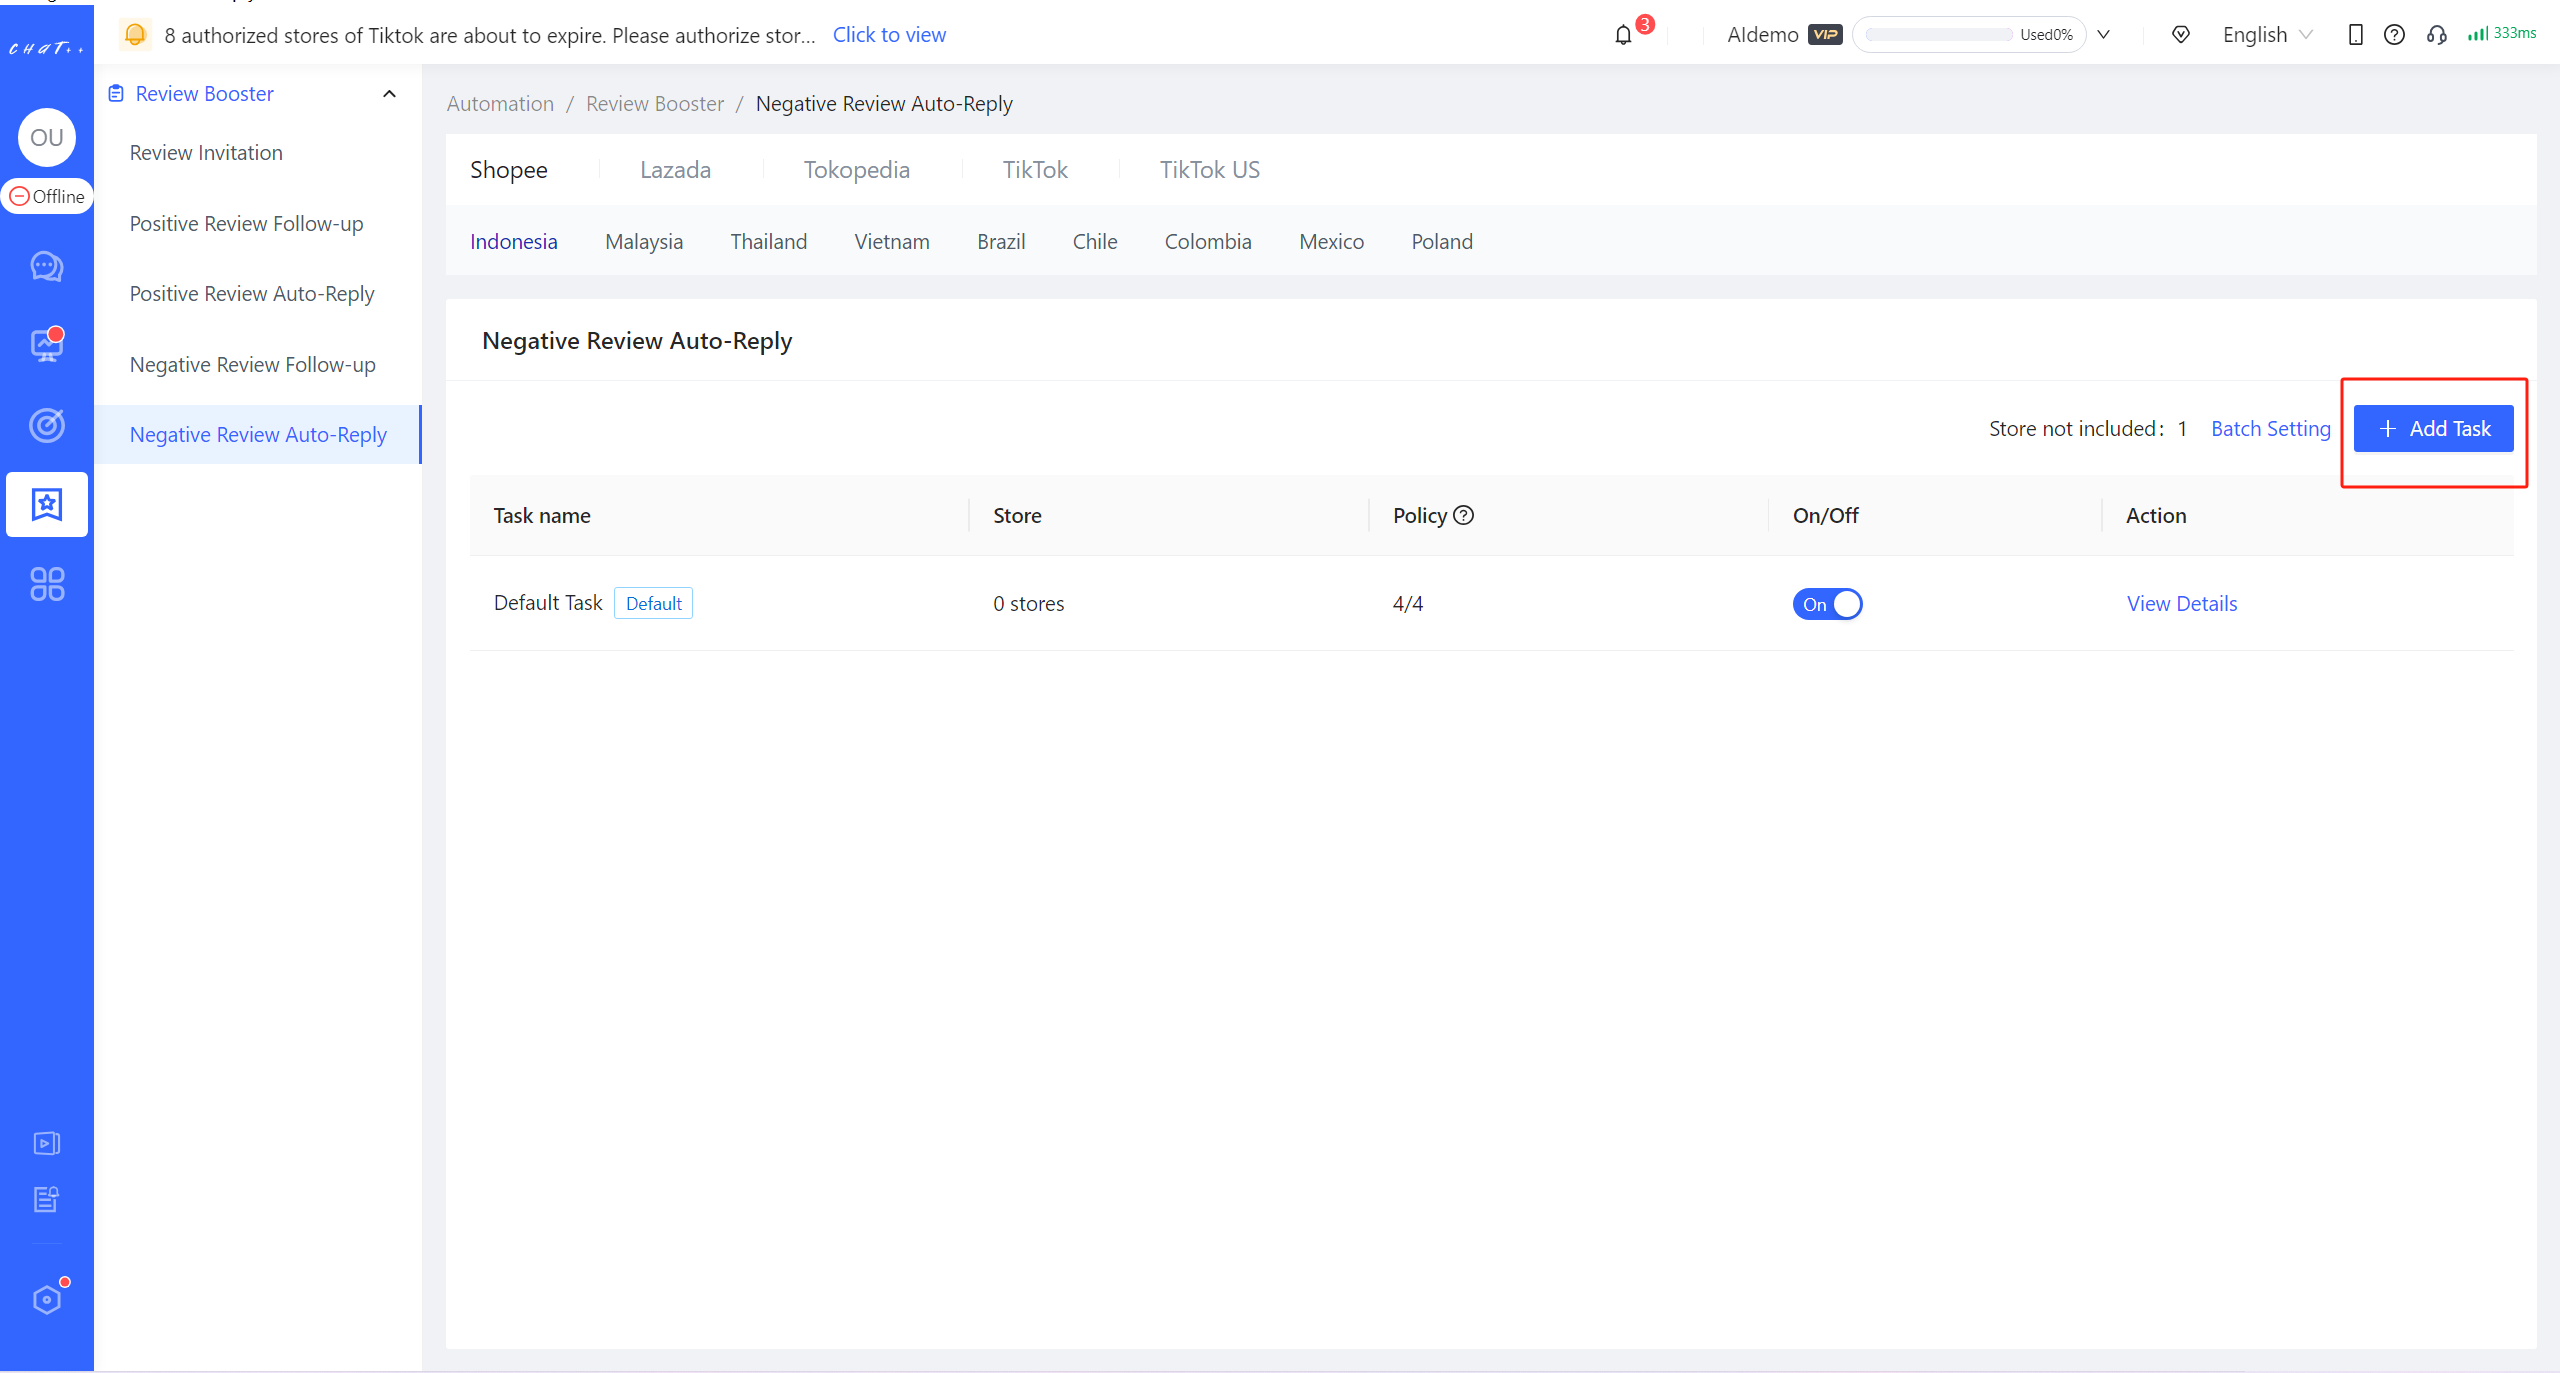
Figure 16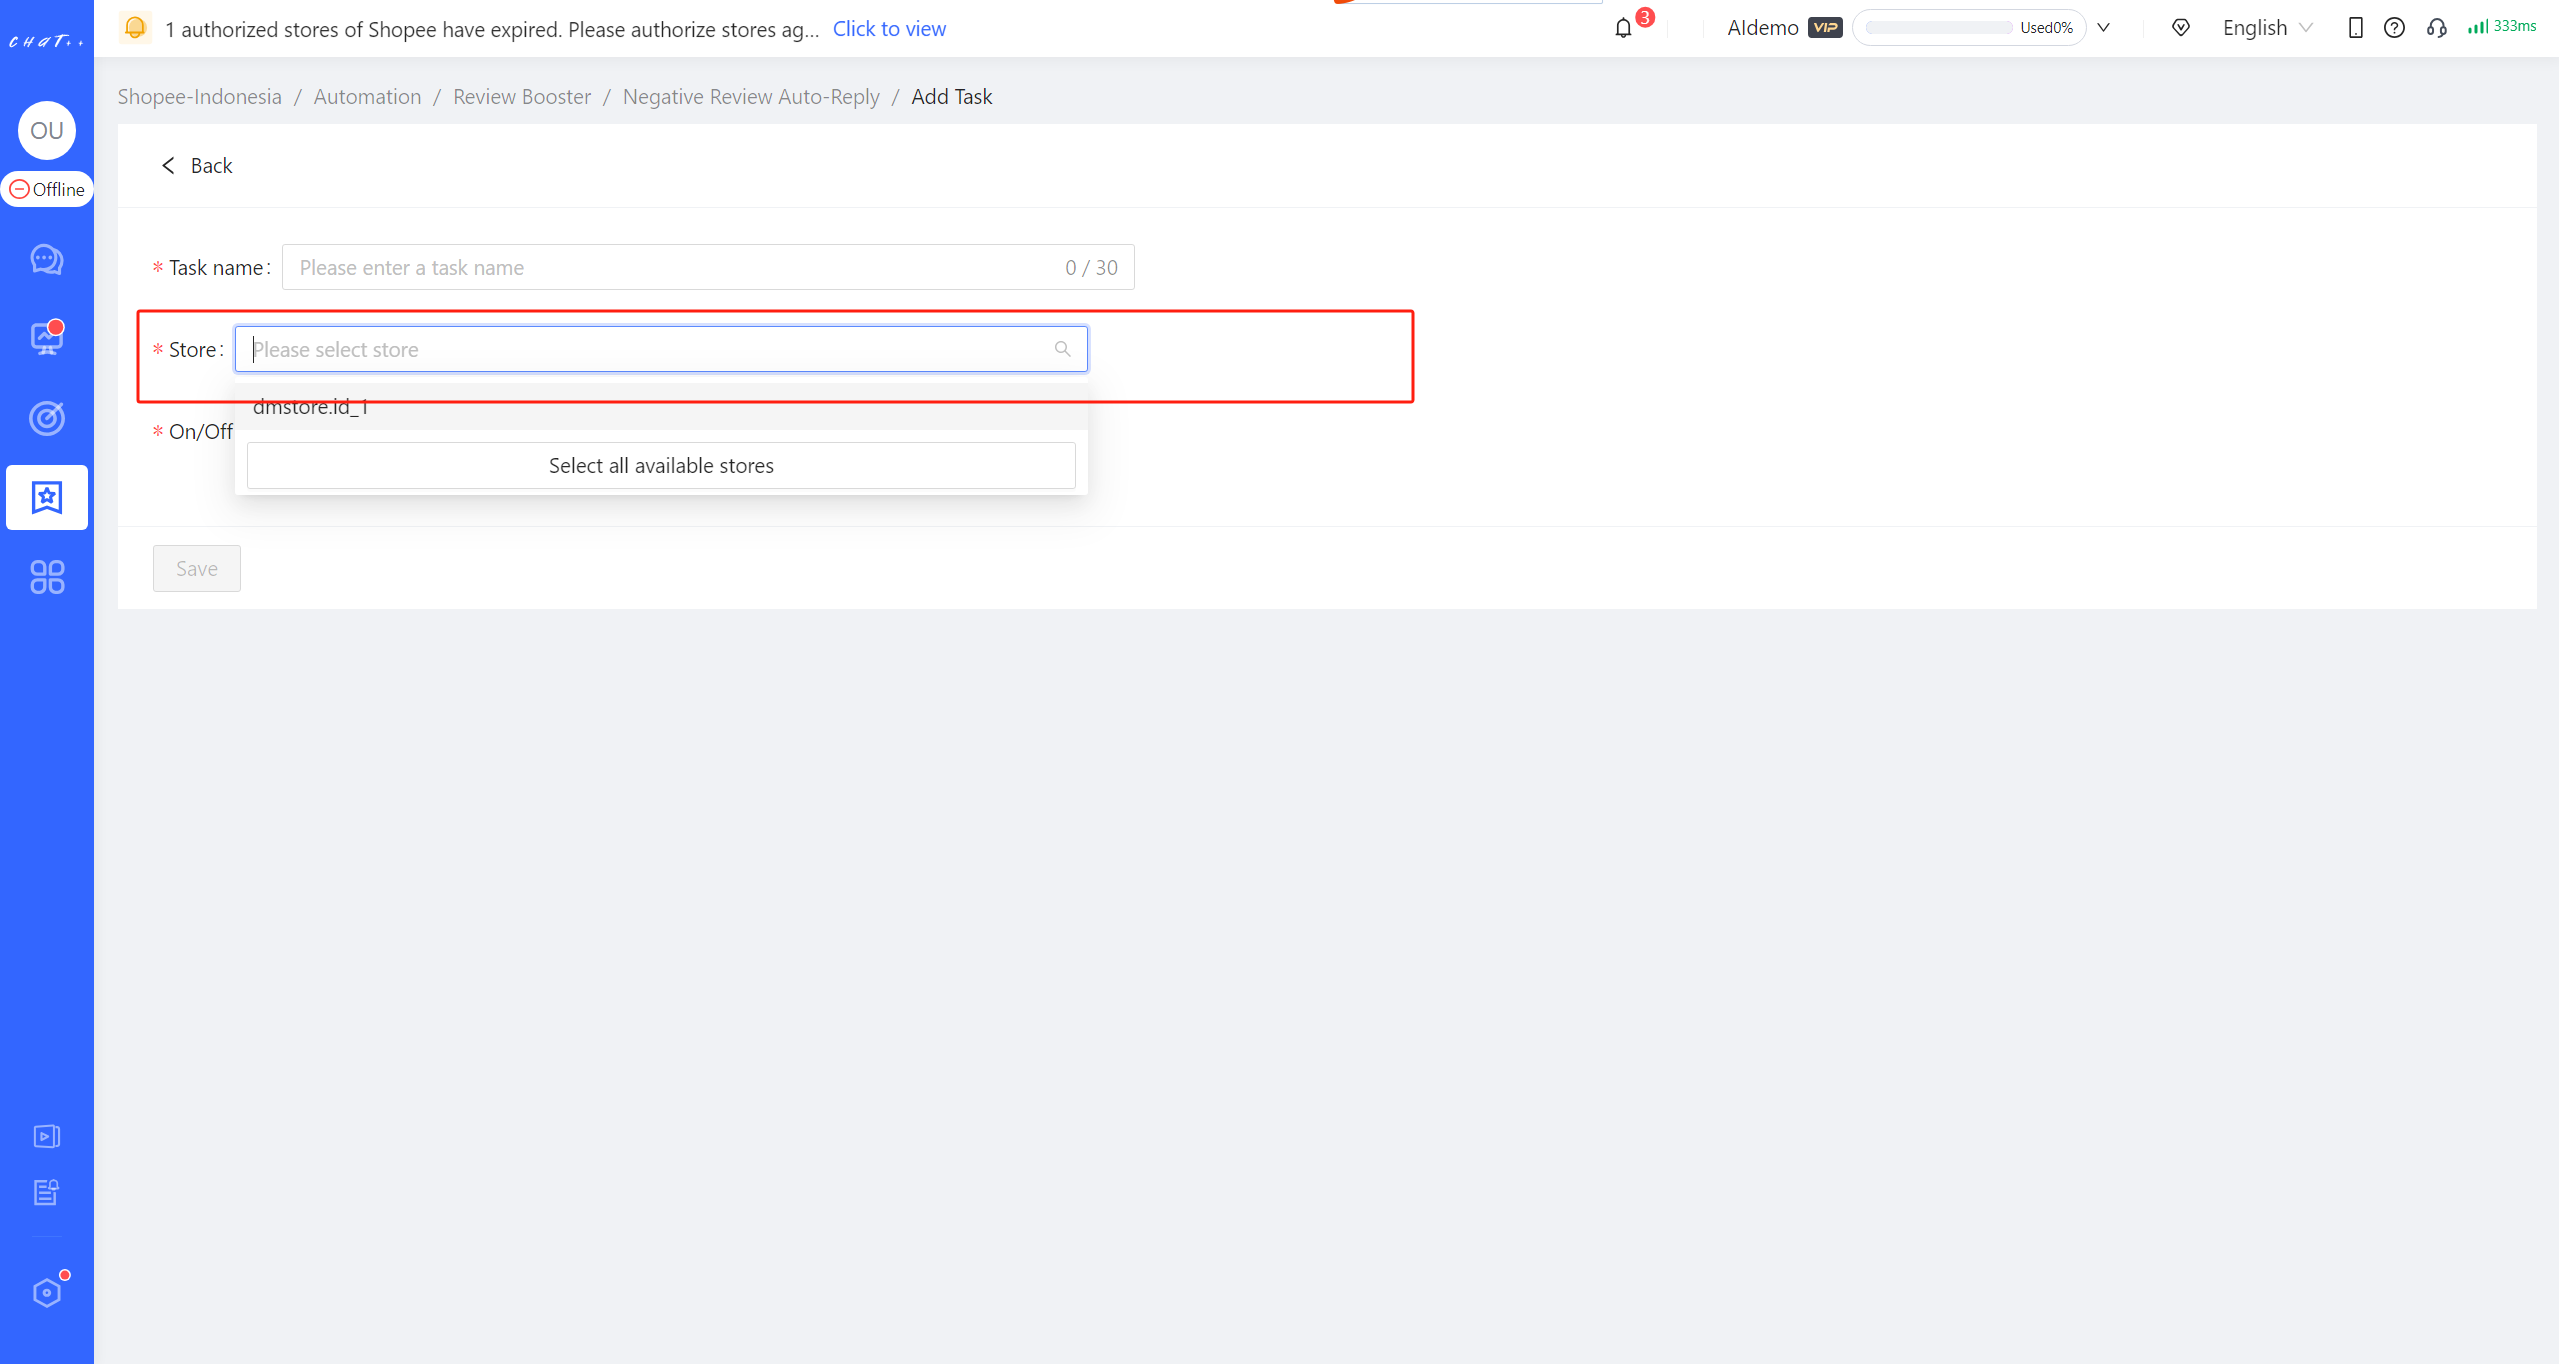
Figure 17
Attention
1、 Negative Review Auto-reply can be customized differently for marketplaces, currently supporting Shopee, Lazada. Tokopedia and TikTok support are coming soon, stay tuned.
2、Different sites of the same marketplace has its own Negative Review Auto-Reply task, you need to configure them respectively.
3、Lazada does not support automatic review replies for reviews without content.
4、To maximize your benefits, it is recommended to enable both Negative Review Follow-up and Negative Review Auto-Reply.
5、In the configuration of Negative Review Follow-up, applicable ratings support checking 1 star to 4 stars. When adding other policies, the default state for applicable ratings is all selected. If you have already selected 4 stars in Positive Review Follow-up task, this policy will conflict, and you need to unselect 4 stars before saving.
FAQ
Q1:Why can't I save the configuration?
A1:Please scroll up the page to see the system red text prompt if you encounter issues saving. It may be due to:
- Conflict with Positive Review Auto-Reply 4-star selection: In the configuration of the Negative Review Auto-Reply task, the applicable ratings allow for the selection of 1-4 stars. When creating a new policy branch, the applicable ratings are selected by default. If you have already selected 4 stars in the Positive Review Auto-Reply task, this policy branch will conflict with the 4-star selection in the Positive Review Auto-Reply task and will need to be unselected before saving.
- One or more messages have not been filled with reply content.
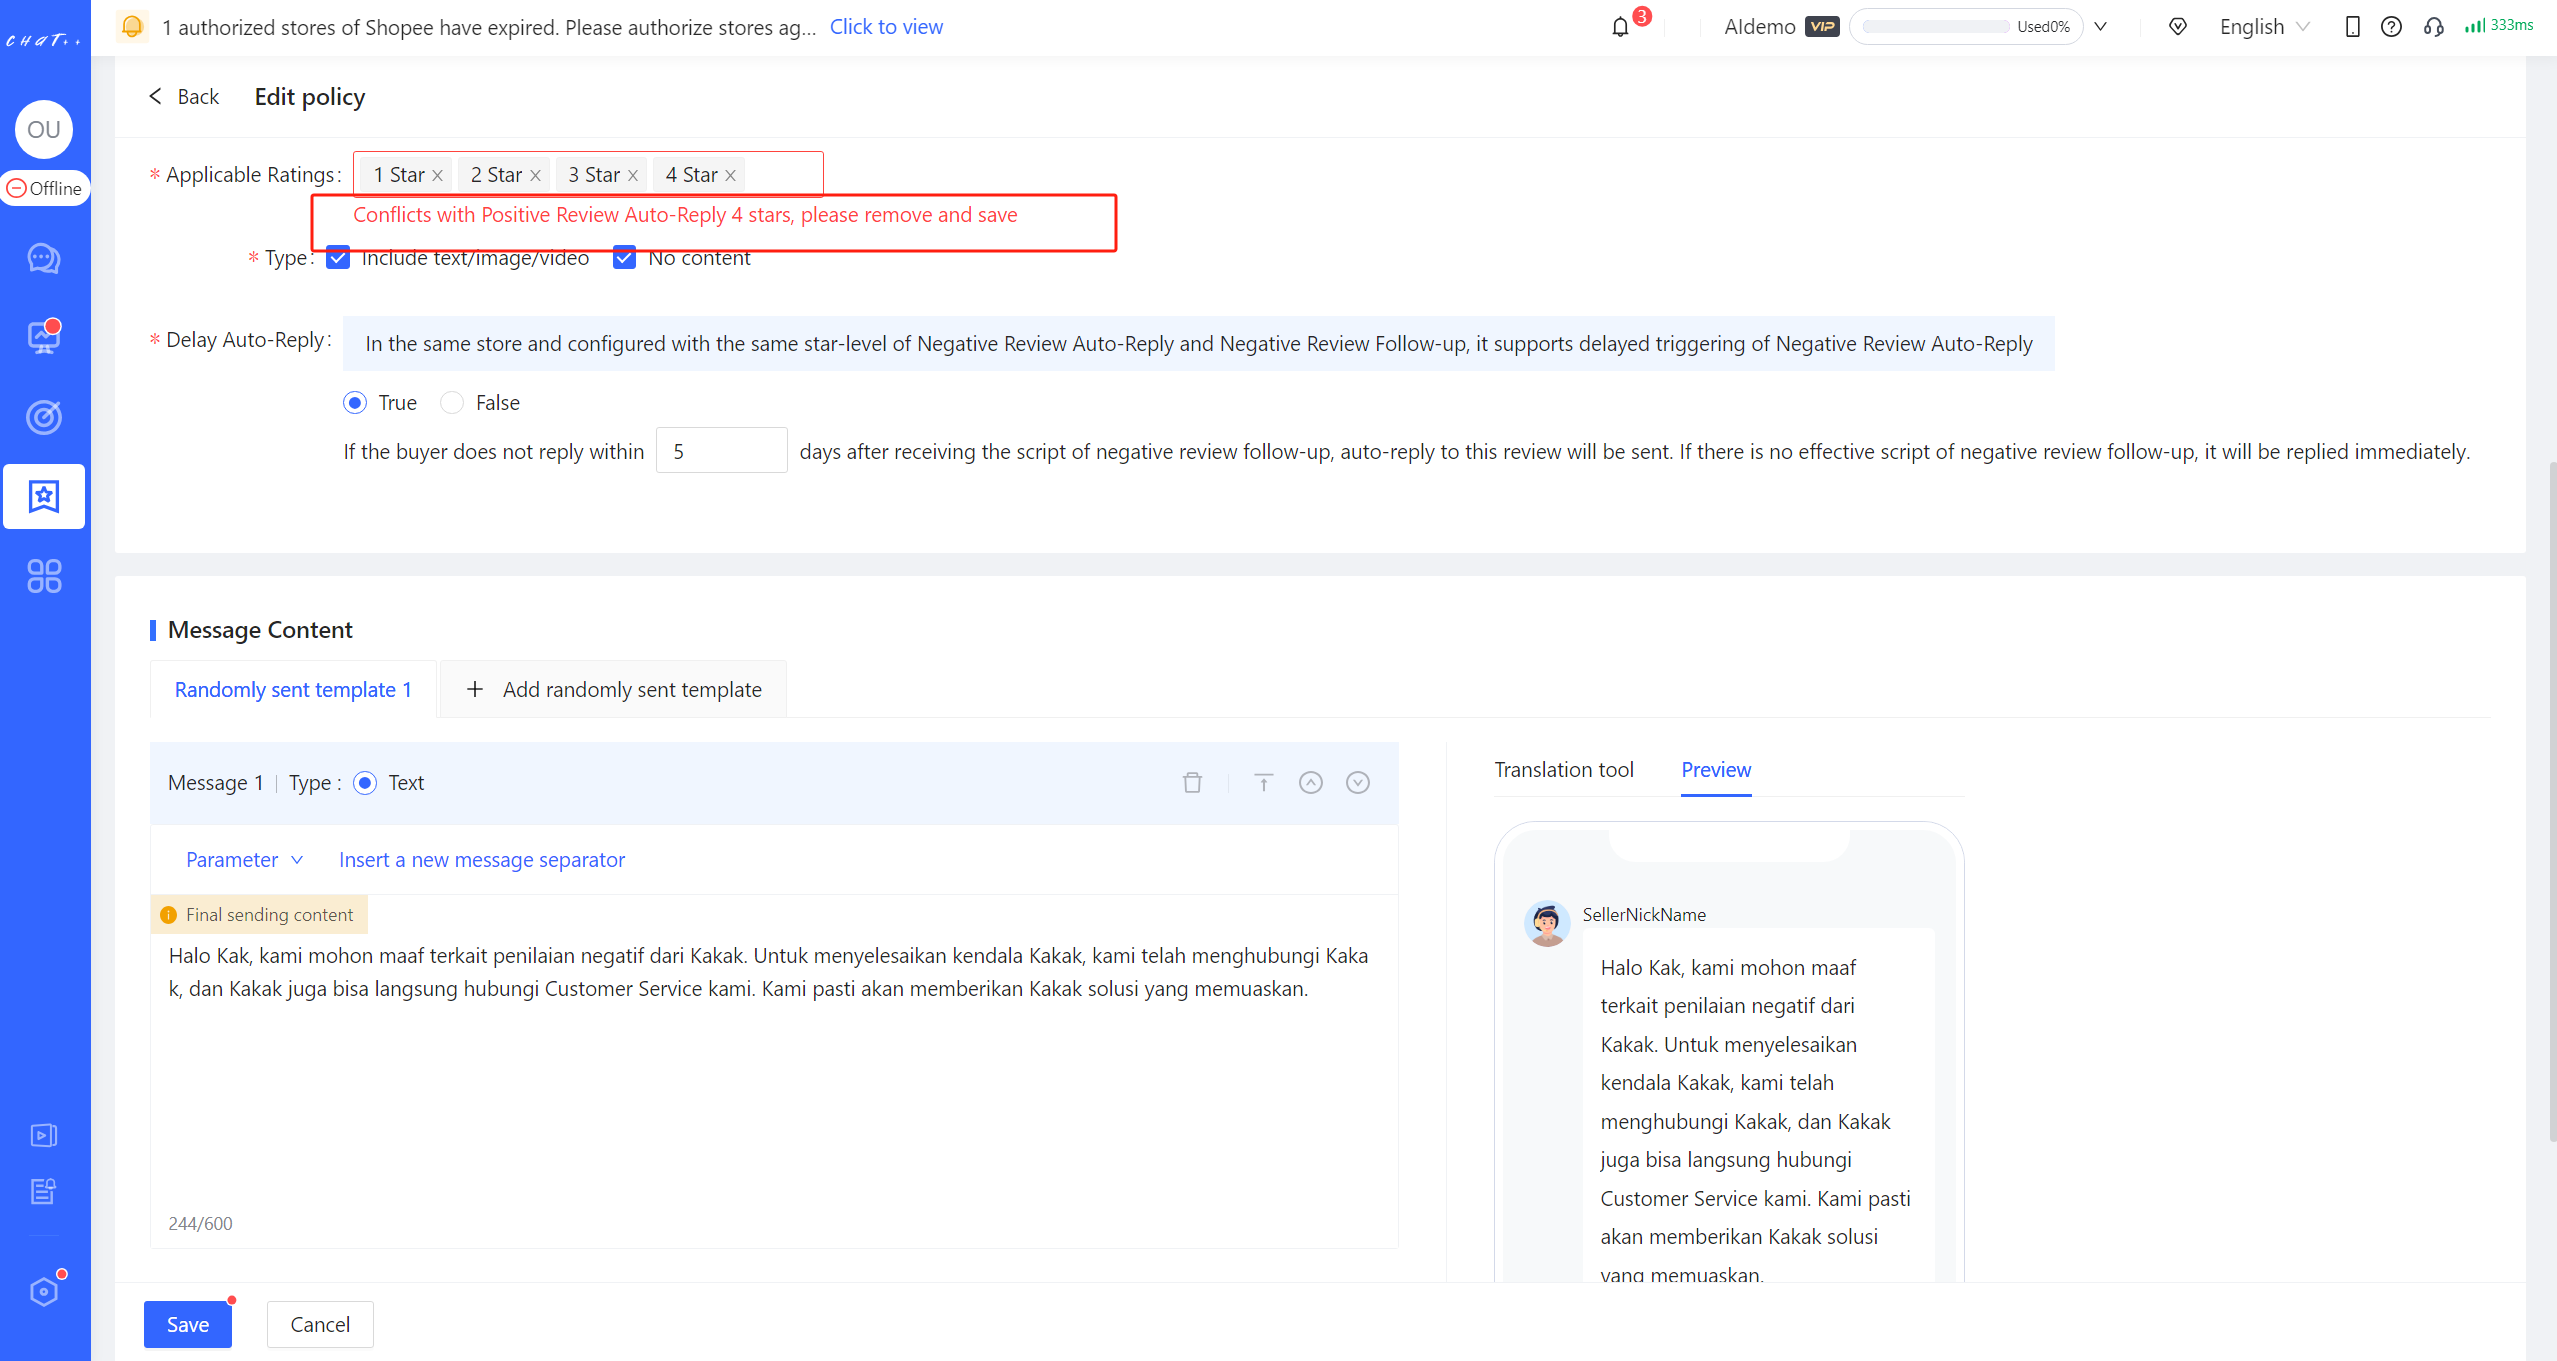
Figure18
Q2:How to Quickly Adjust/View the Message Content?
A2:In the process of adjusting scripts, you need to translate the content that has already been translated into the site language back into system language to view and adjust it. After adjustments, it can be translated back into the site language. In this process, continuous adjustments to scripts may be needed to achieve optimal results. To simplify your operation steps, ChatPlusAI has added a translation tool to the configuration page.
- View the original message content (templates translated from site language to system language)
Go to the configuration page: click on "Automation" in the left menu bar, then select "Review Booster" and "Negative Review Auto-Reply". Choose the marketplace and site, find the negative review auto-reply task that needs to be viewed/adjusted, and click on the "View Details" button on the right side of the task. Find the policy branches that need to be viewed/adjusted.
To view: click on 【「Edit 」→「 Translation tool 」→「 Translate content on the left 」】to view the message translated from site language to system language. (By default, it is translated into the current system language. If you need to translate it into other languages, you can switch to the target language.)
- Adjust and translate the Message Content
Edit and adjust: After clicking on 「Translate content on the left」, the message in the site language will be translated into current system language and automatically filled in the area below (red box ② below). You can make edits and adjustments in that area.
Once the adjustments are completed, translate into site language: Click on【「Translate content above 」(red box ③ below) and then click on 「Copy to Final Sending Content」 ( red box ④ below). This will allow you to quickly fill in the content translated into site language in the final sending area (red box ⑤ below).
Configuration: Click on「Save」 (red box ⑥ below) to successfully configure.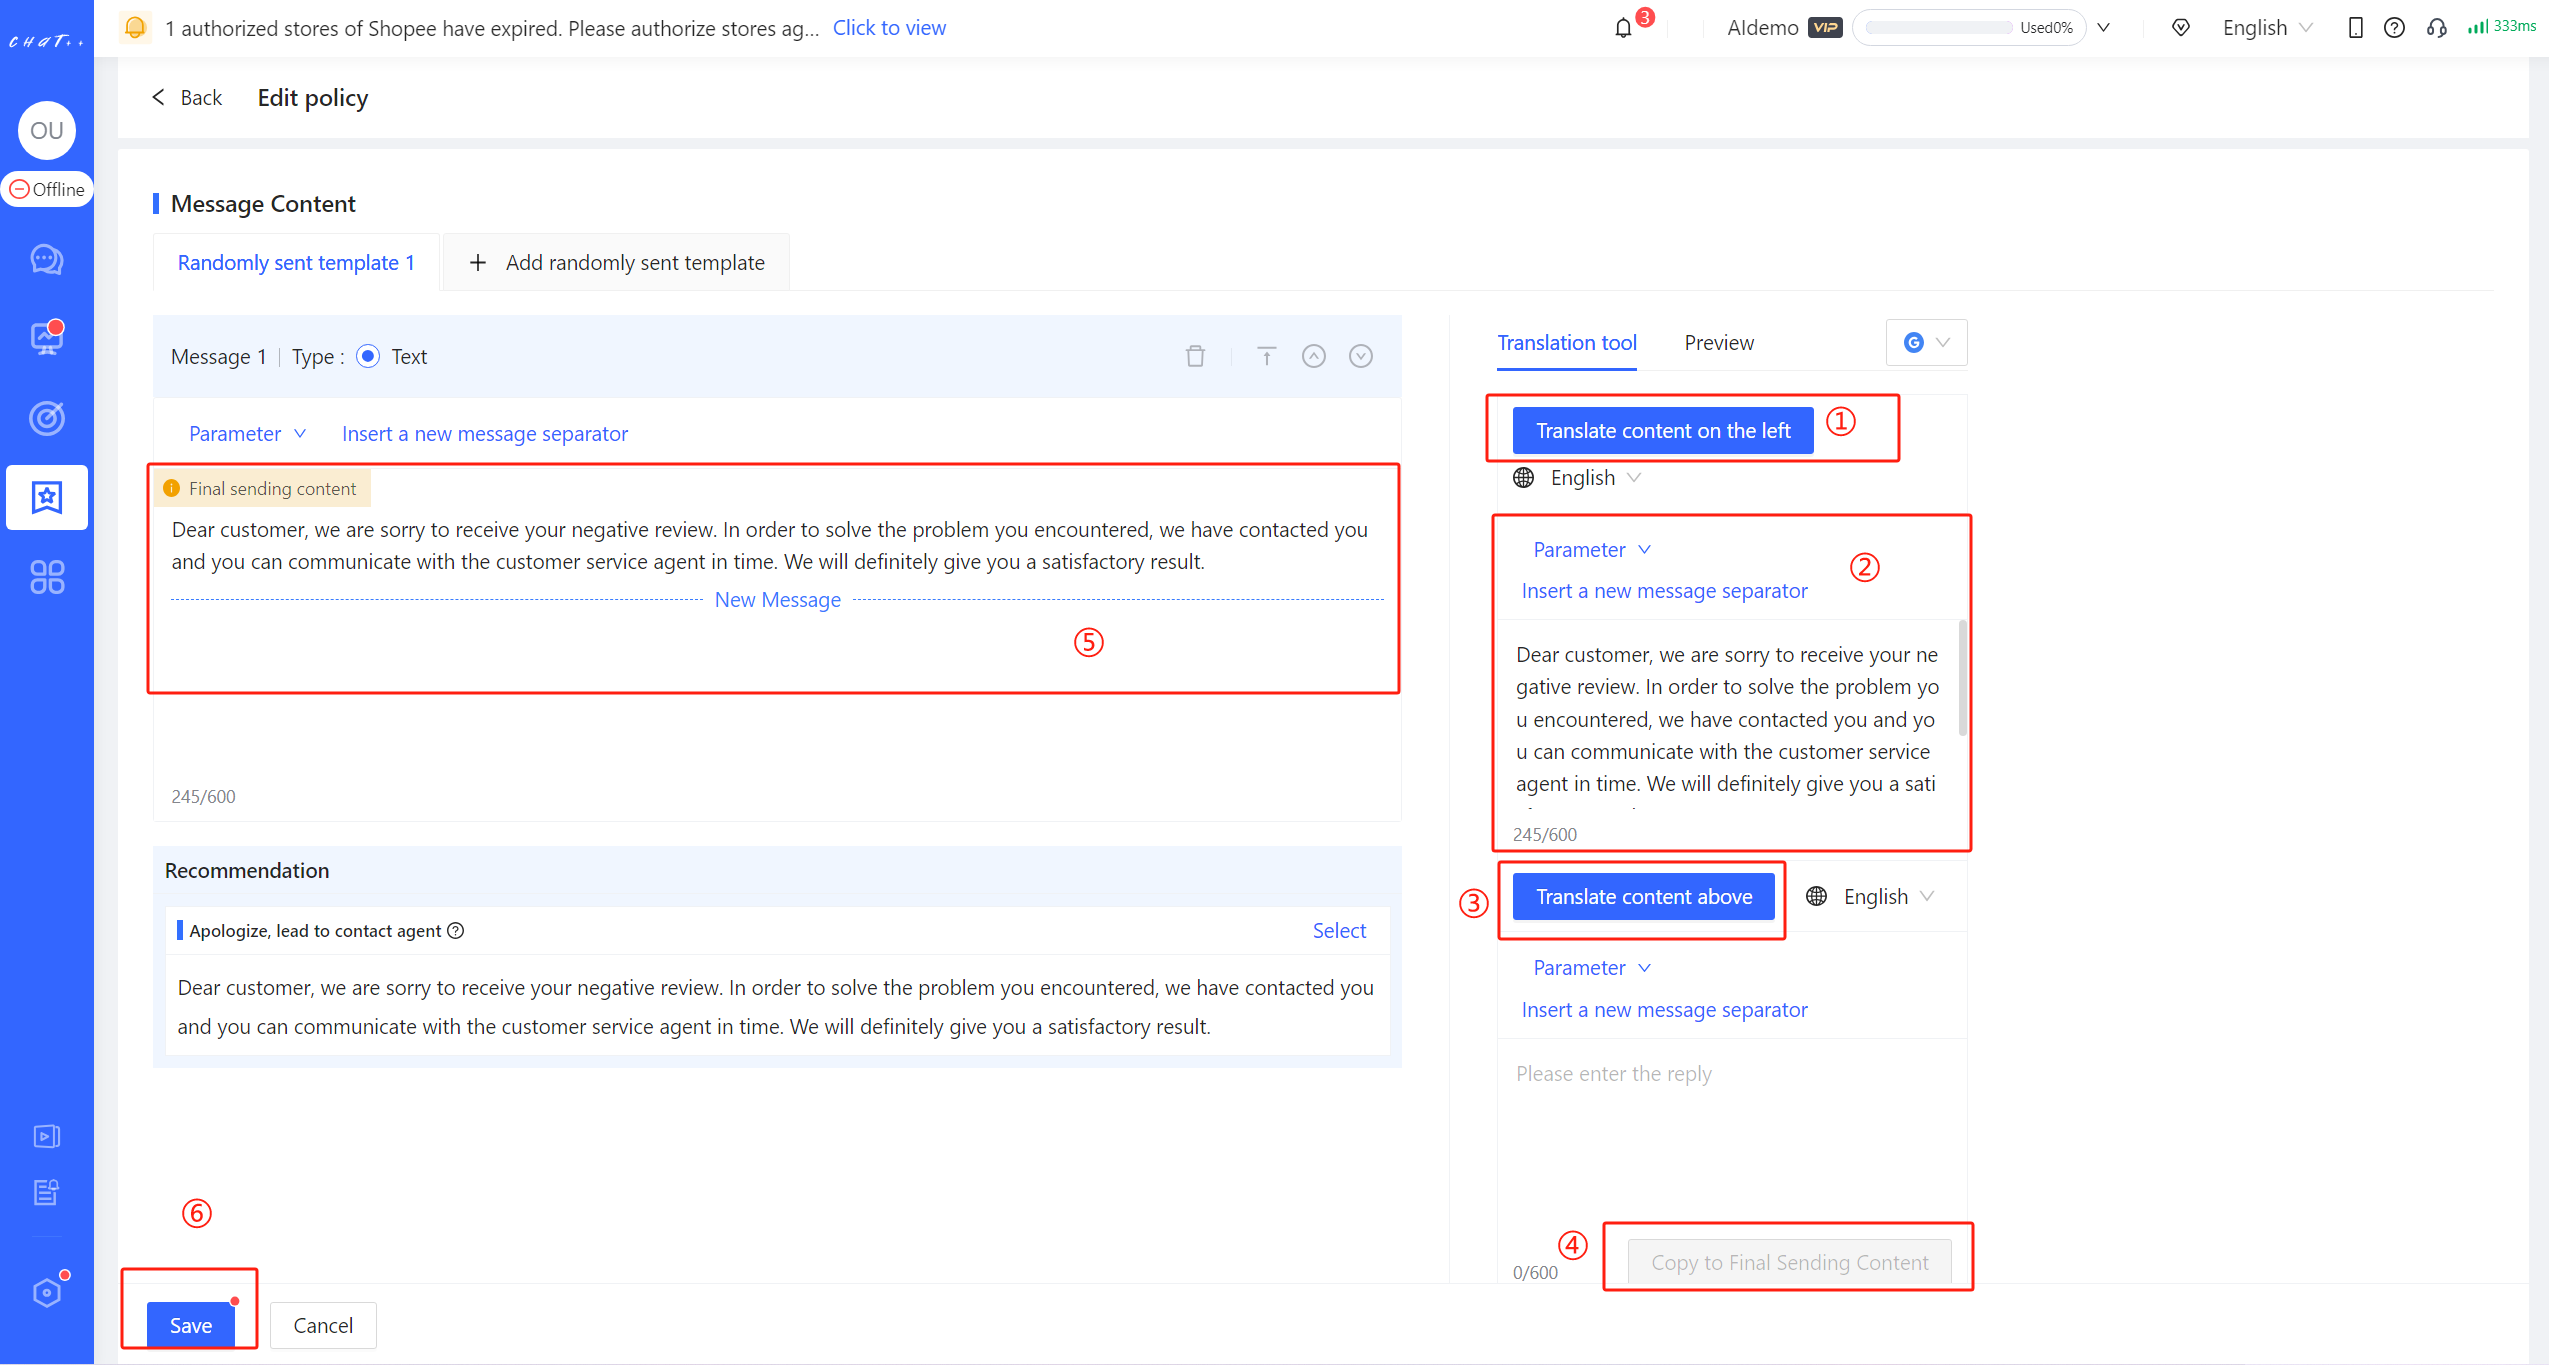
Figure 19
Human in the loop(Key Issue Alarm)
❓Why Recommend Using Key Issue Alarm?
Have you encountered these issues in your daily work?
- Continuous influx of buyer conversations: Without the ability to automatically classify conversations, agents can only receive buyers in the order they come in, making it difficult to quickly identify important conversations (such as after-sales conversations that require urgent attention). This may result in buyer complaints or negative reviews due to delayed response and resolution of issues, affecting the store's rating.
- Multiple tasks for agents: Due to being temporarily away from the computer, important conversations might be missed, leading to the loss of high-value buyers or complaints, bringing negative impacts to the store.
In this case, Key Issue Alarm in ChatPlusAIcan effectively help you solve above problems. It can automatically detect the priority of conversations and send alarms in both ChatPlusAI Conversation page and DingTalk group for buyer conversations that are of high urgency, allowing you to quickly identify and handle important conversations and reduce the impact of delayed response or handling on the store's performance. Human in the loop is more efficient, liberating agents from a large volume of repetitive tasks, allowing them to focus on matters that require decision-making and judgment
How to✔️Use "Key Issue Alarm"
Permissions required for configuration
You need to add permissions for Key Issue Alarm first in the page 「 Configuration → Department → Role 」, and then you can view and modify configurations of Key Issue Alarm in the page 「 Automation → Reception Basics → Key Issue Alarm 」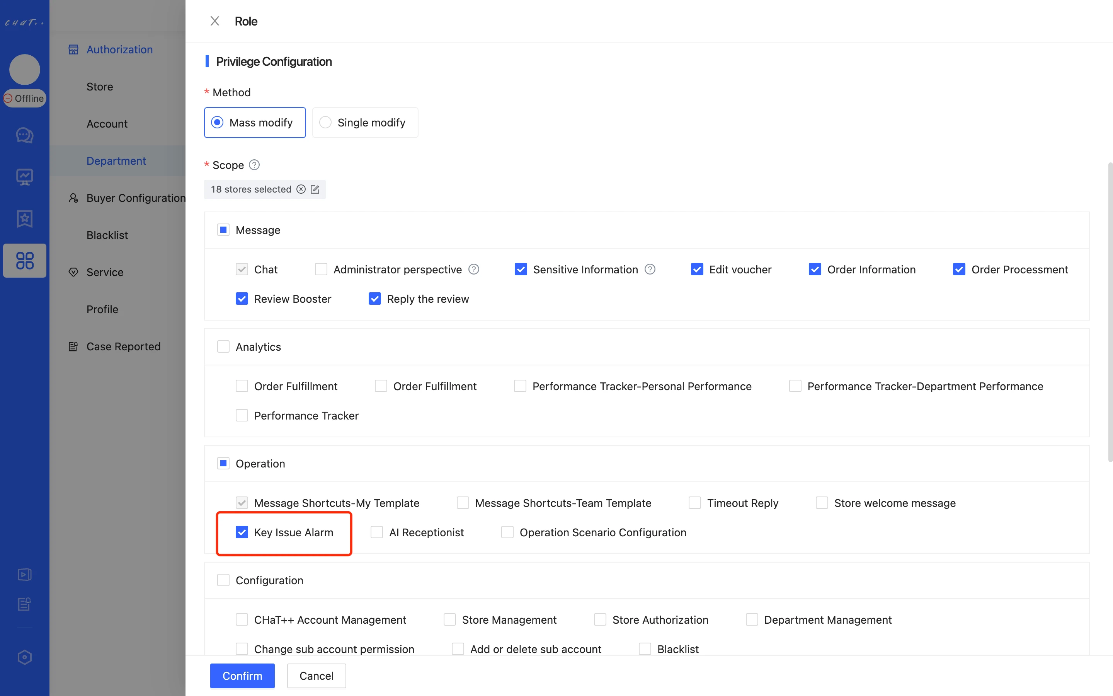
Access the configuration page
Entrance for Key Issue Alarm is 「 Automation → Reception Basics → Key Issue Alarm 」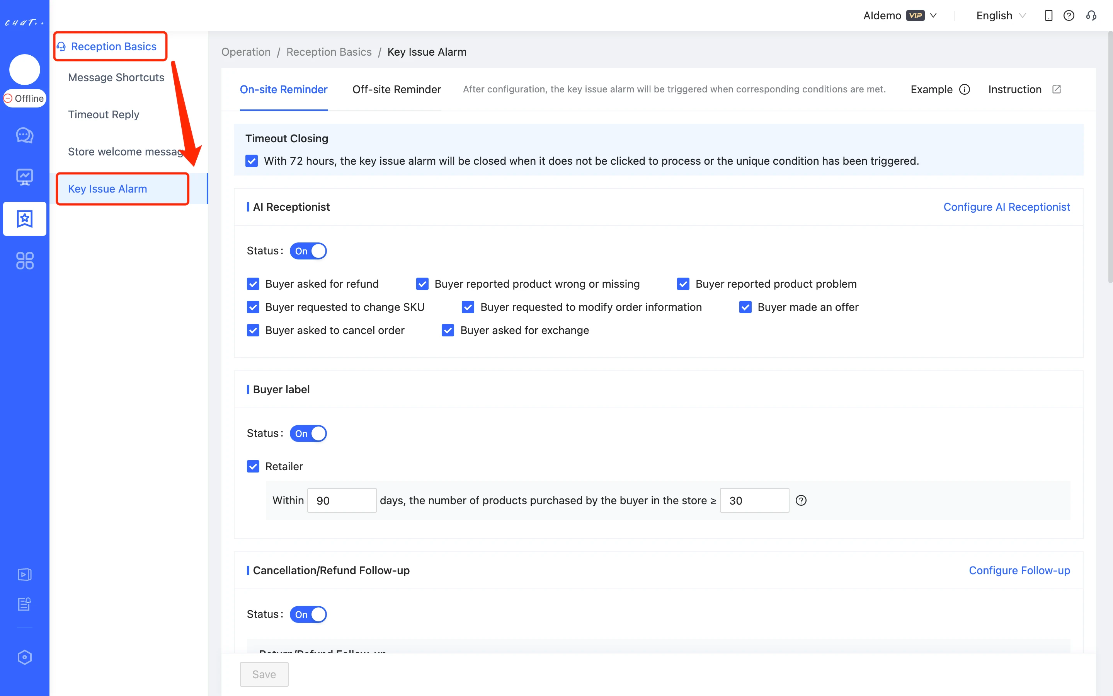
How to Configure it?
Key Issue Alarm can automatically detect high-priority buyer conversations, categorize them prominently, and support various methods to remind agents to follow up and handle them. On the other hand, it ensures that key messages can be quickly captured by agents, further enhancing agents efficiency and maintaining service of the store.
Effect of Key Issue Alarm
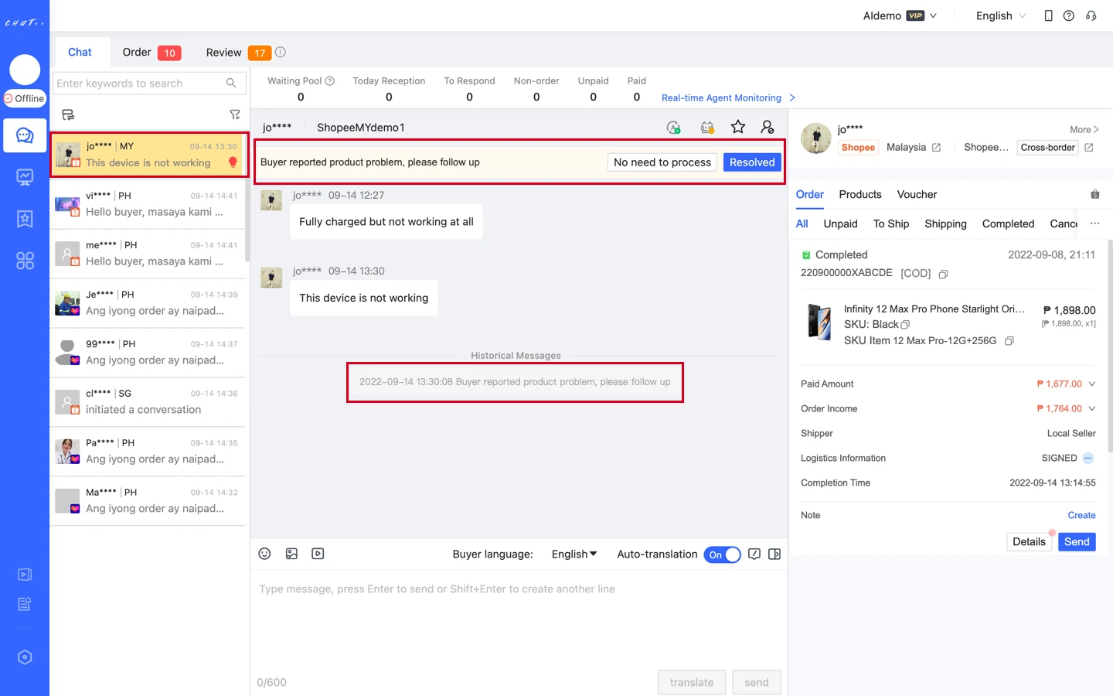
A "Key Issue Alarm" scenario corresponds to one kind of "High-priority conversation". Based on the main functional modules of ChatPlusAI, Key Issue Alarm scenarios can be subdivided into the following four types:
AI Receptionist
Description of Scenario
After detection by AI Chatbot, conversations that may lead to store order losses or buyer complaints are identified as high-risk conversations;
💡 Such conversations need stricter and more complex handling, requiring agents to timely follow-up. Therefore, after AI Chatbot identifies a conversation as high-risk, the system initiates a key issue alarm for it, guiding agents to handle them promptly.
According to the content of buyer inquiries in aforementioned high-risk conversations, scenarios for AI Receptionist can be categorized into the following types:
- Buyer asked for refund
- Buyer reported product wrong or missing
- Buyer reported product problem
- Buyer requested to change SKU
- Buyer requested to modify order information
- Buyer made an offer
- Buyer asked to cancel order
- Buyer asked for exchange
Configuration Steps
You can configure Key Issue Alarm for AI Receptionist on the page as follows, shown as ① below:
- Turn on the master switch at position ②, which enables Key Issue Alarm for AI Receptionist with one click.
- When the scenario is enabled, and AI Chatbot detects situations corresponding to the scenario occurring multiple times during the buyer's inquiries, it will initiate a Key Issue Alarm in the corresponding conversation.
- When the scenario is disabled, even if AI Chatbot detects situations corresponding to the scenario occurring multiple times during the buyer's inquiries, it won't initiate a Key Issue Alarm in the corresponding conversation.
- If you want to prevent Key Issue Alarm from being initiated in the corresponding conversation even when situations corresponding to a specific scenario occur multiple times during buyer's inquiries, you can individually disable this situation at position ③
- Note: After adjusting the configuration, it is essential to click 'Save' button at position ④. The above configurations will only take effect after saving.
- Note: If you want to quickly adjust Chatbot reply content for AI Receptionist while modifying Key Issue Alarm configuration, you can click on position ⑤ to swiftly navigate to 'Configure AI Receptionist' page for configuration.
Buyer label
Description of Scenario
Retailer: Some buyers may make bulk purchases of items within the store in a relatively short period. Based on their purchasing behavior, ChatPlusAI may categorize them as Retailer.
This kind of buyers exhibit a high willingness to purchase and show loyalty to the store. Their single purchases may generate higher value than those of ordinary buyers. Therefore, when the system detects conversations involving such buyers, it immediately initiates Key Issue Alarm for the conversation, prompting agents' attention. It enables the agent team to choose more targeted methods (such as offering high-value vouchers to attract buyers), ultimately creating greater business revenue for the store.
- Within 90 days prior to the current inquiry date, if the number of products purchased by the buyer in the store ≥ 30, the system will classify him as a retailer.
- Number of products purchased: The number of products in placed COD orders or paid non-COD orders
- You can adjust the above time range and purchased products quantity range based on the actual situation of different site stores:
- Time Range:7~90 days
- Purchased Products Quantity Range:2~500 items
Usually give negative reviews: Within the past six months, among nearly 4 million Southeast Asian stores using ChatPlusAI, customers who have given two or more negative reviews are considered who usually give negative reviews (including cases where they later revised their review to positive). The system automatically identifies such customers.
Compared to general buyers, these types of buyers may have higher expectations in terms of product quality, shipment speed, and seller service. Therefore, when the system identifies a potentially negative-review-prone buyer with an order status of 'In-sales/Post-sales', it will immediately initiate a key issue alarm, prompting CS to pay attention and reduce the likelihood of giving a negative review again.
Configuration Steps
You can configure Key Issue Alarm for Buyer label on the page as follows, shown as ① below:
- You can turn on the scenario switch at position ② to enable Key Issue Alarm for Retailer Buyer.
- When the scenario is enabled, and ChatPlusAI detects Retailers conversation, it will initiate a Key Issue Alarm in the corresponding conversation.
- When the scenario is disabled, even if ChatPlusAI detects Retailers conversation, it won't initiate a Key Issue Alarm in the corresponding conversation.
- You can adjust time range and purchased products quantity range based on the actual situation of different site stores:
- Position ③:Time range can be adjustable
- Position ④: Purchased products quantity range can be adjustable
- Note: After adjusting the configuration, it is essential to click 'Save' button at position ⑤. The above configurations will only take effect after saving.
Cancellation/Refund Follow-up
Description of Scenario
👉After analyzing data in ChatPlusAI, it was found that when buyers request Cancellation/Refund (including order cancellations, refund-only requests, and return/refund requests), timely intervention and resolution by agents with a sincere service attitude can effectively reduce the buyers' Cancellation/Refund rate and minimize store losses. To address this, ChatPlusAI has introduced a series of Cancellation/Refund Follow-up scenarios to assist agents in identifying crucial reasons for Cancellation/Refund and automatically attempting recovery. However, after Chatbot sends recovery messages, if agents does not follow up promptly, there is a risk of losing the valuable opportunity to recover the order.
💡Therefore, ChatPlusAI has introduced Key Issue Alarm for Cancellation/Refund Follow-up. In situations mentioned above, when encountering such cases, it will initiate Key Issue Alarm to the buyer's conversation. It provides agents with the highest-level prompt effect, guiding them to promptly follow up and handle it, thereby minimizing store losses.
Configuration Steps
You can configure Key Issue Alarm for Cancellation/Refund Follow-up on the page as follows, shown as ① below:
- Step1:Turn on the master switch at position ②, which enables Key Issue Alarm for Cancellation/Refund Follow-up with one click.
- Step2:At position ③, you can choose scenarios that need to be enabled
- When the ✔️ button at position ③ is blue, the scenario is enabled. At this time:
- When conditions for initiating Key Issue Alarm are met, Key issue alarm will be triggered in the corresponding buyer's conversation.
- When the conditions for automatically clearing Key Issue Alarm in the current conversation are met, the relevant key issue alarm in the buyer's conversation will be cleared.
- When the ✔️ button at position ③ is gray, key issue alarm for this scenario is closed, and it will no longer be initiated.
- Step3:At position ④, please choose when key issue alarm will be triggered (We recommend selecting the option 'When Chatbot sent messages and buyer respond within 48 hours'. It can further reduce agents waiting time and improving efficiency)
- Step4:At position ④, please choose when key issue alarm will be cleared (We recommend not selecting the option 'Marketplace rejected return/refund', as these are results of marketplace operations and may require agents confirmation for further follow-up.
- Step5:After adjusting the configuration, it is essential to click 'Save' button at position ⑥. The above configurations will only take effect after saving.
- Note: If you want to adjust Chatbot reply content in Cancellation/Refund Follow-up while adjusting Key Issue Alarm configuration, you can click on position ⑦ to quickly navigate to 'Configure Follow-up' page for configuration.
Review Booster
Description of Scenario
👉After analyzing data in ChatPlusAI, it was found that when buyers give neutral or negative reviews, timely intervention by agents can effectively resolve buyer issues, guide them to modify the review to a positive one, and improve the store's review rating. To address this, ChatPlusAI has introduced Negative Review Follow-up, assisting in guiding communication with buyers who leave negative reviews. However, if agents does not follow up promptly after Chatbot sends recovery messages, there is a risk of losing the valuable opportunity to recover negative reviews.
💡Therefore, ChatPlusAI has introduced Key Issue Alarm for Negative Review Follow-up. In situations mentioned above, when encountering such cases, it will initiate Key Issue Alarm to the buyer's conversation. It provides agents with the highest-level prompt effect, guiding them to promptly follow up and handle it, thereby reducing the occurrence of negative impacts on the store due to buyer's negative reviews.
Configuration Steps
You can configure Key Issue Alarm for Negative Review Follow-up on the page as follows, shown as ① below:
- Step1:Turn on the master switch at position ②, which will enable Key Issue Alarm for Negative Review Follow-up. At this time:
- When conditions for initiating Key Issue Alarm are met, Key issue alarm will be triggered in the corresponding buyer's conversation.
- When the conditions for automatically clearing Key Issue Alarm in the current conversation are met, the relevant key issue alarm in the buyer's conversation will be cleared.
- Step2:At position ③, please choose when key issue alarm will be triggered (We recommend selecting the option 'When Chatbot sent messages and buyer respond within 48 hours'. It can further reduce agents waiting time and improving efficiency)
- Step3:At position ④, please choose whether key issue alarm will be cleared (We recommend selecting the option, as it can exclude the conversations that have been recovered for agents)
- Step4:After adjusting the configuration, it is essential to click 'Save' button at position ⑤. The above configurations will only take effect after saving.
- Note: If you want to adjust Chatbot reply content in Negative Review Follow-up while adjusting Key Issue Alarm configuration, you can click on position ⑥ to quickly navigate to 'Configure Review Booster' page for configuration.
Timeout Closing
👉 Due to the time sensitivity of conversations triggering key issue alarms, missing the processing deadline may render follow-up efforts ineffective. For instance, if the marketplace automatically approves the buyer's cancellation request due to timeout. At this point, continuing to prompt agents for timely follow-up would have lost its significance. 💡 Therefore, in addition to the unique automatic closing time set in Key Issue Alarm for Cancellation/Refund Follow-up and Negative Review Follow-up, ChatPlusAI has also implemented a 72-hour effectiveness duration for Key Issue Alarm. If a key issue alarm remains in an active state beyond this duration (where agents has not marked Key Issue Alarm in the conversation as 'Resolved' or 'No need to process'), the system will automatically close the key issue alarm, which is Timeout Closing.
Configuration Steps
- When the ✔️ button at position ① is blue, the aforementioned 72-hour effectiveness duration and the automatic closing for Key Issue Alarm are enabled.
- When the ✔️ button at position ① is gray, the aforementioned 72-hour effectiveness duration and the automatic closing for Key Issue Alarm are disabled. If a key issue alarm remains in an active state beyond this duration, the key issue alarm will not be closed automatically. It can only be closed by agents marking Key Issue Alarm in the conversation as 'Resolved' or 'No need to process' (This configuration is not recommended).
Methods of Key Issue Alarm
Based on the display location of Key Issue Alarm, it can be categorized into two notification methods: On-site Reminder and Off-site Reminder.
On-site Reminder
On-site Reminder refers to Key Issue Alarm displayed within ChatPlusAI interface. It helps agents currently on duty to promptly identify high-priority buyer conversations and respond more quickly to such interactions.
Effectiveness of On-site Reminder
Red markers ①, ② : The conversation highlighted in orange with a lightbulb icon, indicates that the conversation triggers Key Issue Alarm. (If conversations triggering Key Issue Alarm are initiated in the conversation list, yellow background highlight effect will be added. It will display a red lightbulb icon on the right side of the conversation to emphasize Key Issue Alarm.)
Red marker③ : Above the current conversation window, it will display the specific reasons for triggering Key Issue Alarm, and operation buttons. Based on the actual situation, agents can click on any of the following buttons to record the handling result for this conversation:
- No need to process:After inspection and confirmation by agents, it is determined that no further action is required for this conversation, they can click 'No need to process' button to clear key issue alarm in this conversation manually.
- Resolved:After inspection and confirmation by agents, it is verified that the issue in this conversation has been properly resolved, they can click 'Resolved' button. After clicking this button, it will update the status of this key issue alarm to 'Resolved' and record it in Agent Performance.
Red marker④: In the conversation, record changes to key issue alarm in the form of system messages, including:
- Time and reason for initiating Key Issue Alarm
- Time and reason for clearing Key Issue Alarm, reasons are categorized into the following two types:
- System automatically closes Key Issue Alarm
- Agent clicks 'No need to process' or 'Resolved' button to manually close the Key Issue Alarm.
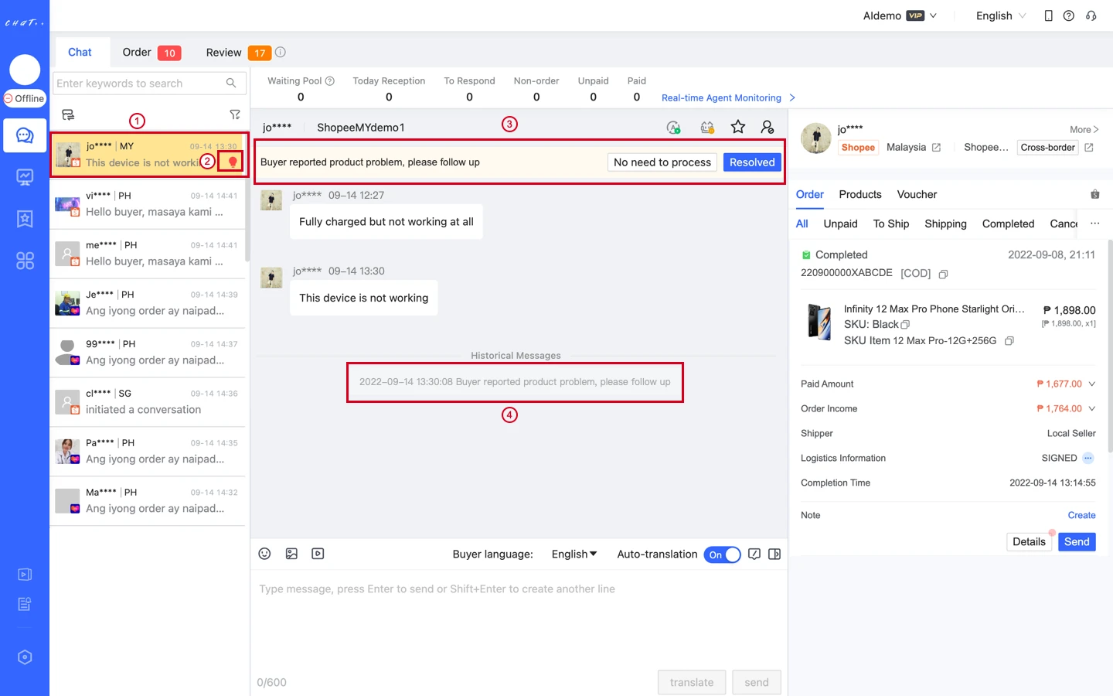
Configuration Steps
In the 'Automation > Reception Basics > Key Issue Alarm > On-site Reminder' page, you can enable or disable key issue alarm scenarios according to the configuration instructions for the four types of Key Issue Alarm mentioned above.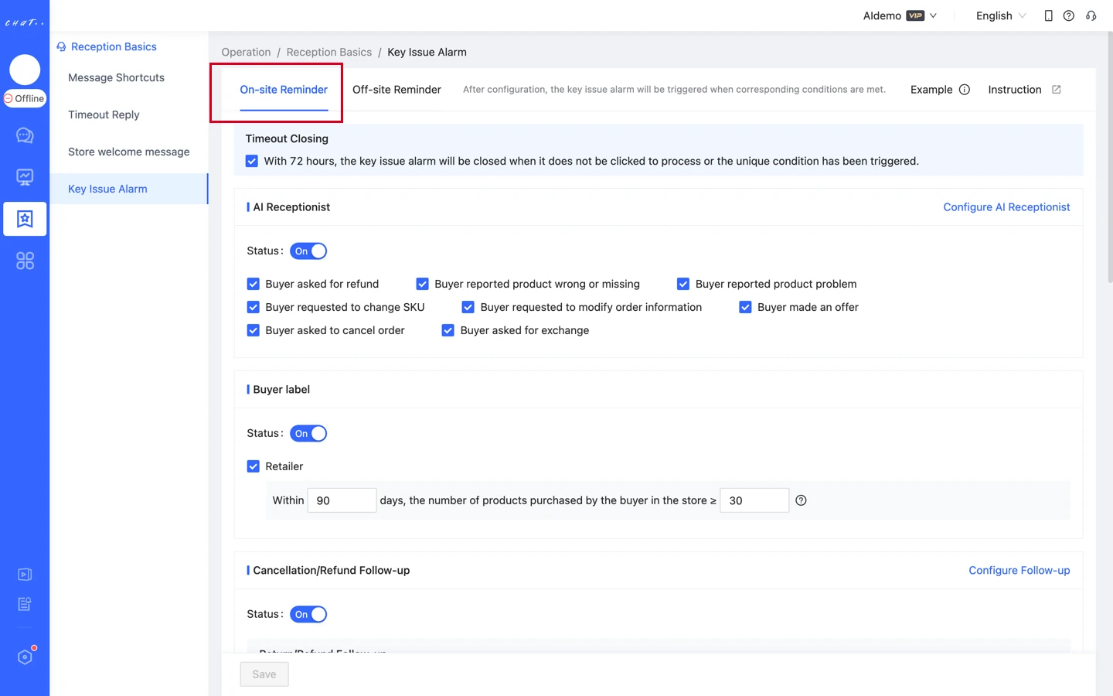
Off-site Reminder
Off-site reminder refers to Key Issue Alarm displayed outside ChatPlusAI interface, currently supporting sending off-site reminders in DingTalk groups.
When a conversation assigned to the agent triggers Key Issue Alarm and the agent hasn't checked the conversation or resolved it within 30 minutes, to ensure timely handling of high-priority buyer conversations, the system will automatically post a prompt message and guide the agent to follow up in the bound DingTalk group.
Off-site reminder serves as a powerful complement to on-site reminder, effectively preventing the risk of missing high-priority buyers who have triggered key issue alarm due to leaving ChatPlusAI conversation interface. The combination of on-site and off-site reminder contributes to the improvement of service quality for the store.
Effectiveness of Off-site Reminder
In DingTalk groups, off-site reminders are sent as follows: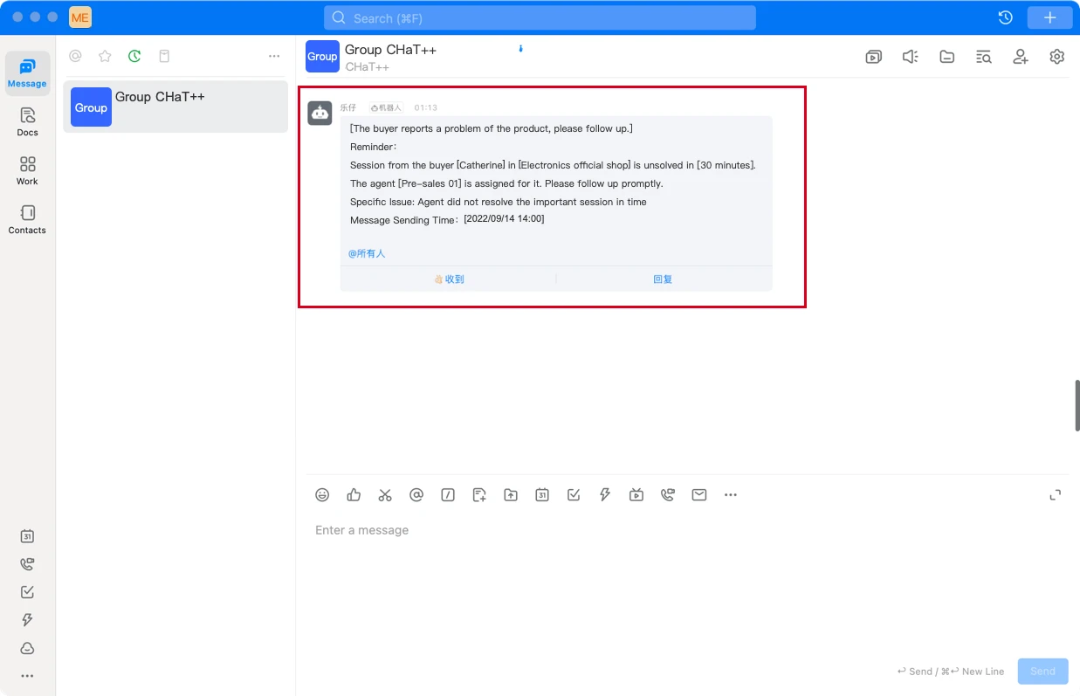
Configuration Steps
After configuring off-site reminder, the system detects that Key Issue Alarm is triggered but agent hasn't checked the conversation or resolved it within 30 minutes, the system will automatically post a prompt message and guide the agent to follow up in the bound DingTalk group. Configuration steps for off-site reminder as following:
Step1:Enter the DingTalk group where you want to receive key issue alarms, click on group settings, and select Smart Group Assistant.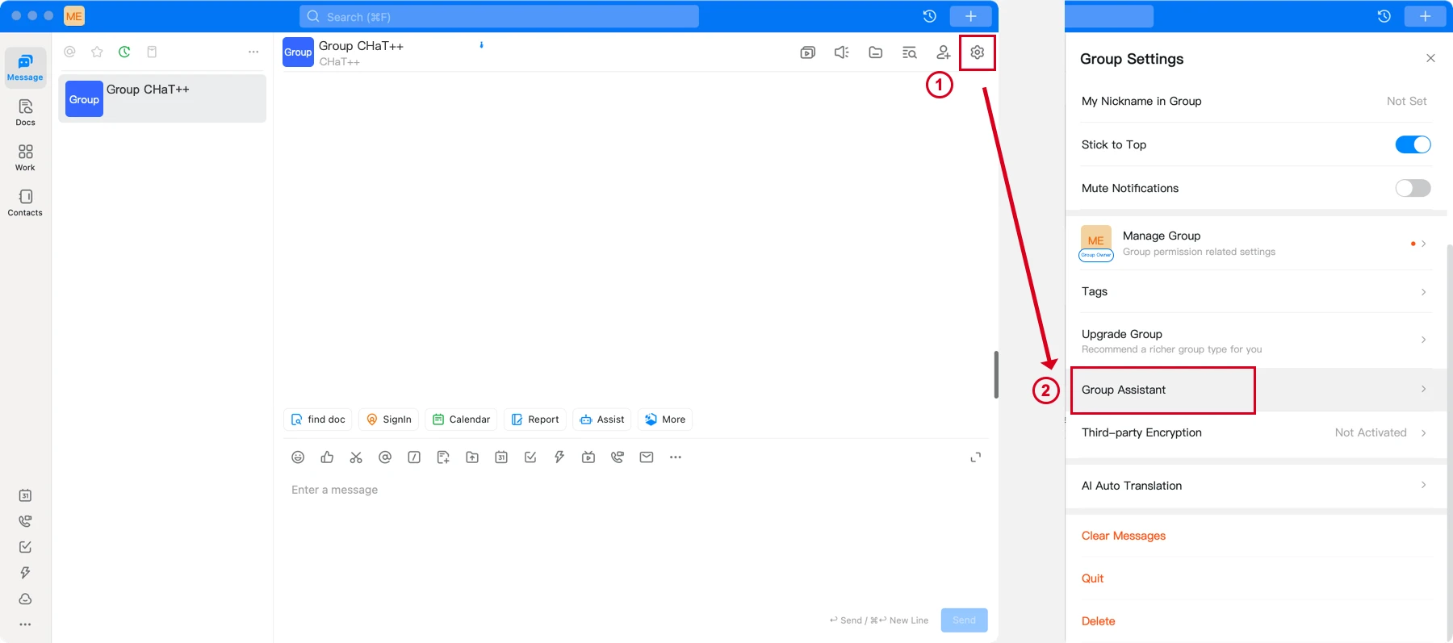
Step2: Search for 'Webhook' to find the custom robot, then click on 'Add' to create a new custom robot.
Step3: Set up the robot information to complete the configuration.
- Set robot's name
- Add custom keywords: Kind Reminder, Reminder
- Check the 'sign' option, and copy the signing key to a local file.

Step4: And copy the Webhook to a local file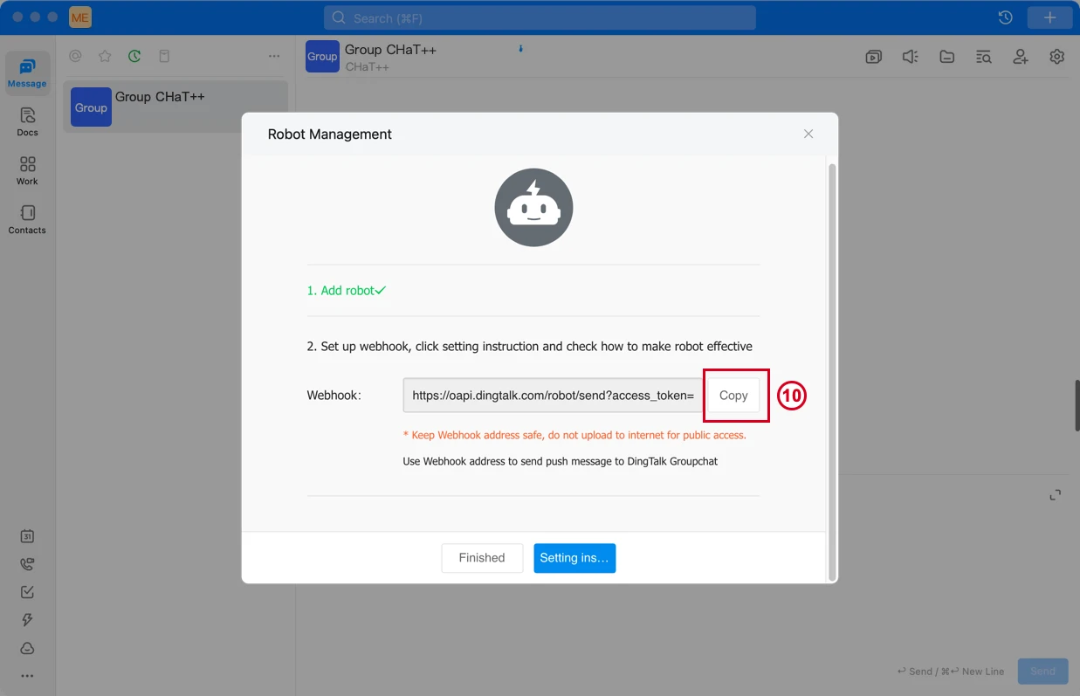
Step5: Go to ChatPlusAI, enter Key Issue Alarm > Off-site Reminder, click on Bind DingTalk, follow the instructions to fill in the binding information, and complete the off-site reminder binding. After successful binding, key issue alarms triggered in enabled scenarios in ChatPlusAI will be sent as reminders both in ChatPlusAI interface and the DingTalk group.
- Paste the signing content copied from DingTalk in step 3 into the Key
- Paste the Webhook content copied from DingTalk in step 4 into Webhook.
- Click Save to complete the DingTalk off-site reminder binding

FAQ
Q1:How can we determine whether the agent has followed conversations that trigger key issue alarm?
A1:You can view the data on agents resolving key issue alarms in the 'Analytics > Performance Tracker > Agent Performance' page
- Select the metrics 'Key issue resolved' and 'Key issue processing time' at position ① in the red box.
- View the data corresponding to the above metrics at position ② in the red box. It is recommended to handle buyer conversations triggering key issue alarms as quickly as possible (e.g., within 60 minutes) to minimize the negative impact on the store.
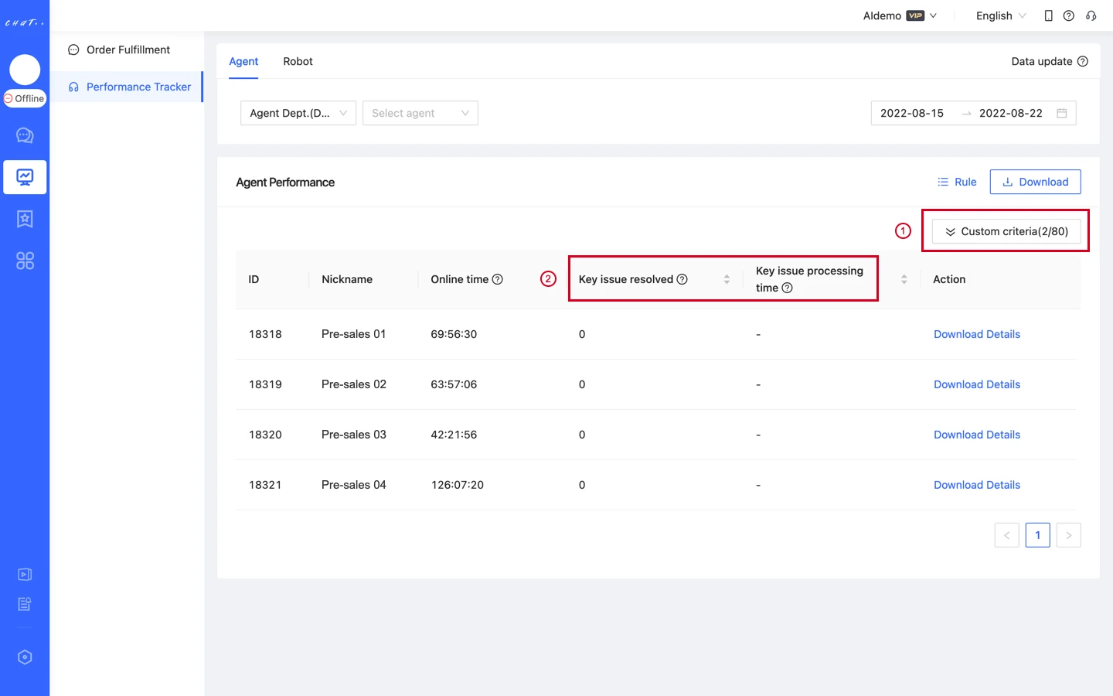
Q2:Can Key Issue Alarm function be used on Taiwan Shopee?
A2:Due to the restrictions imposed by Shopee on sending messages to buyers on this site, Key Issue Alarm is currently not supported on Taiwan Shopee.
PromotionBot
💡Exclusive Function of ChatPlusAI: PromotionBot is an intelligent robot designed specifically for store promos by ChatPlusAI, powered by GPT's large language model services. After understanding the details of stores' marketing promos and product selling points, PromotionBot can automatically generate marketing scripts and integrate them into various compatible scenarios, facilitating precise interaction with buyers. It boasts unparalleled advanced capabilities compared to human efforts! This bot can significantly streamline the workload for store marketing preparations and effectively enhance marketing conversions.
Show cases
Taking Payment Reminder scenario as an example,
- For products not participating in the store's promotion, Payment Reminder after the conversation ends: If a buyer places an order but does not complete the payment, the system will remind him to make the payment 5 minutes after the end of the conversation (the execution time set by the seller is 5 minutes). The system will inform him that the product quantity is limited and urge them to make the payment as soon as possible.
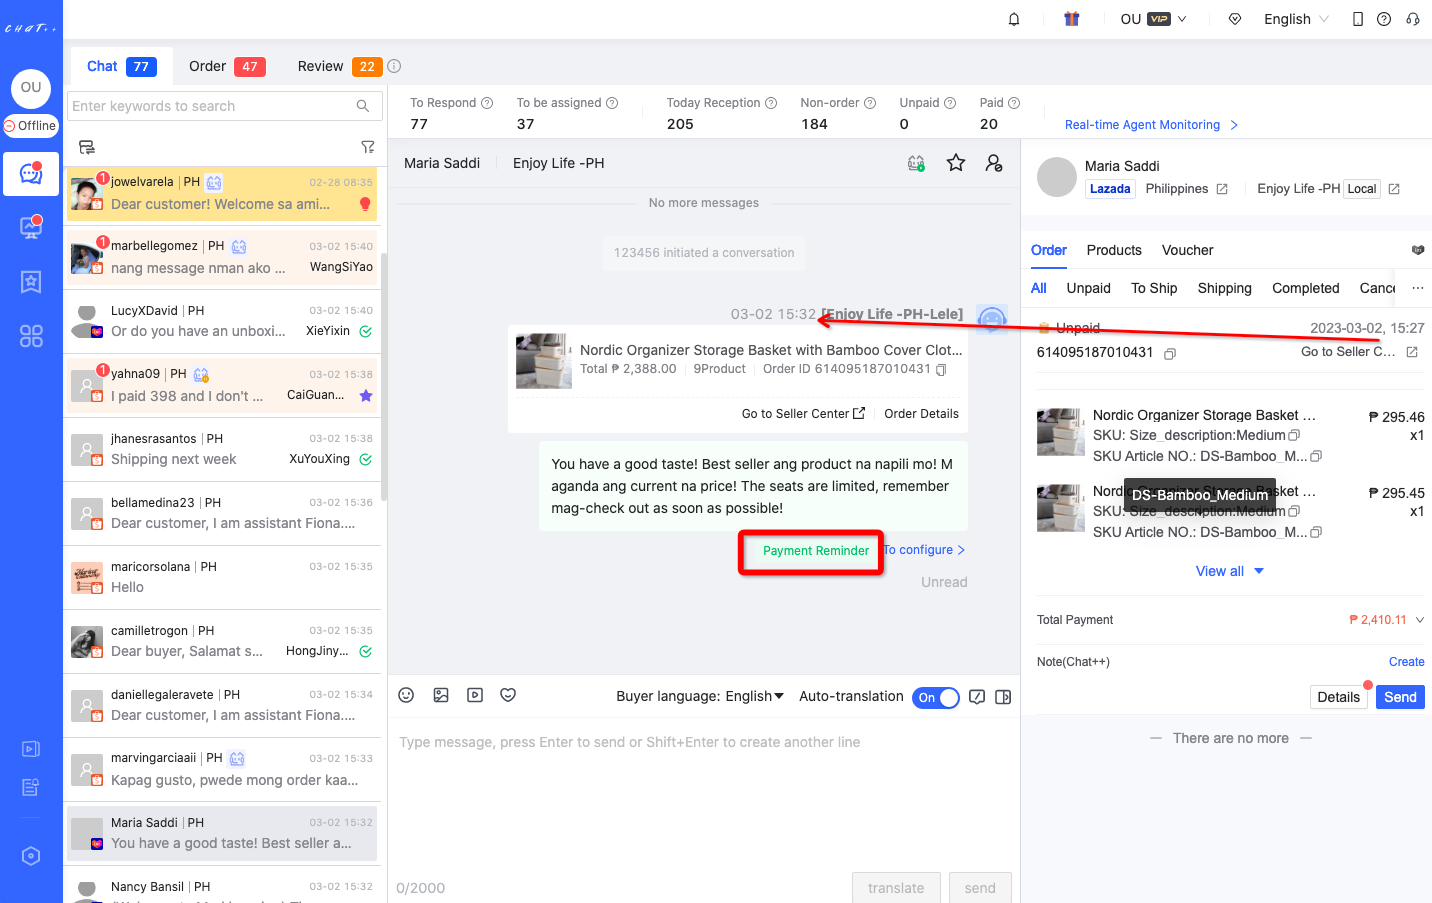
Figure 1
- For products participating in the store's promotion, Payment Reminder during the promotion period: If a buyer places an order but does not complete the payment, the system will remind him to make the payment. The system will also inform him that the product is currently discounted, urging them to pay as soon as possible to not miss the opportunity.
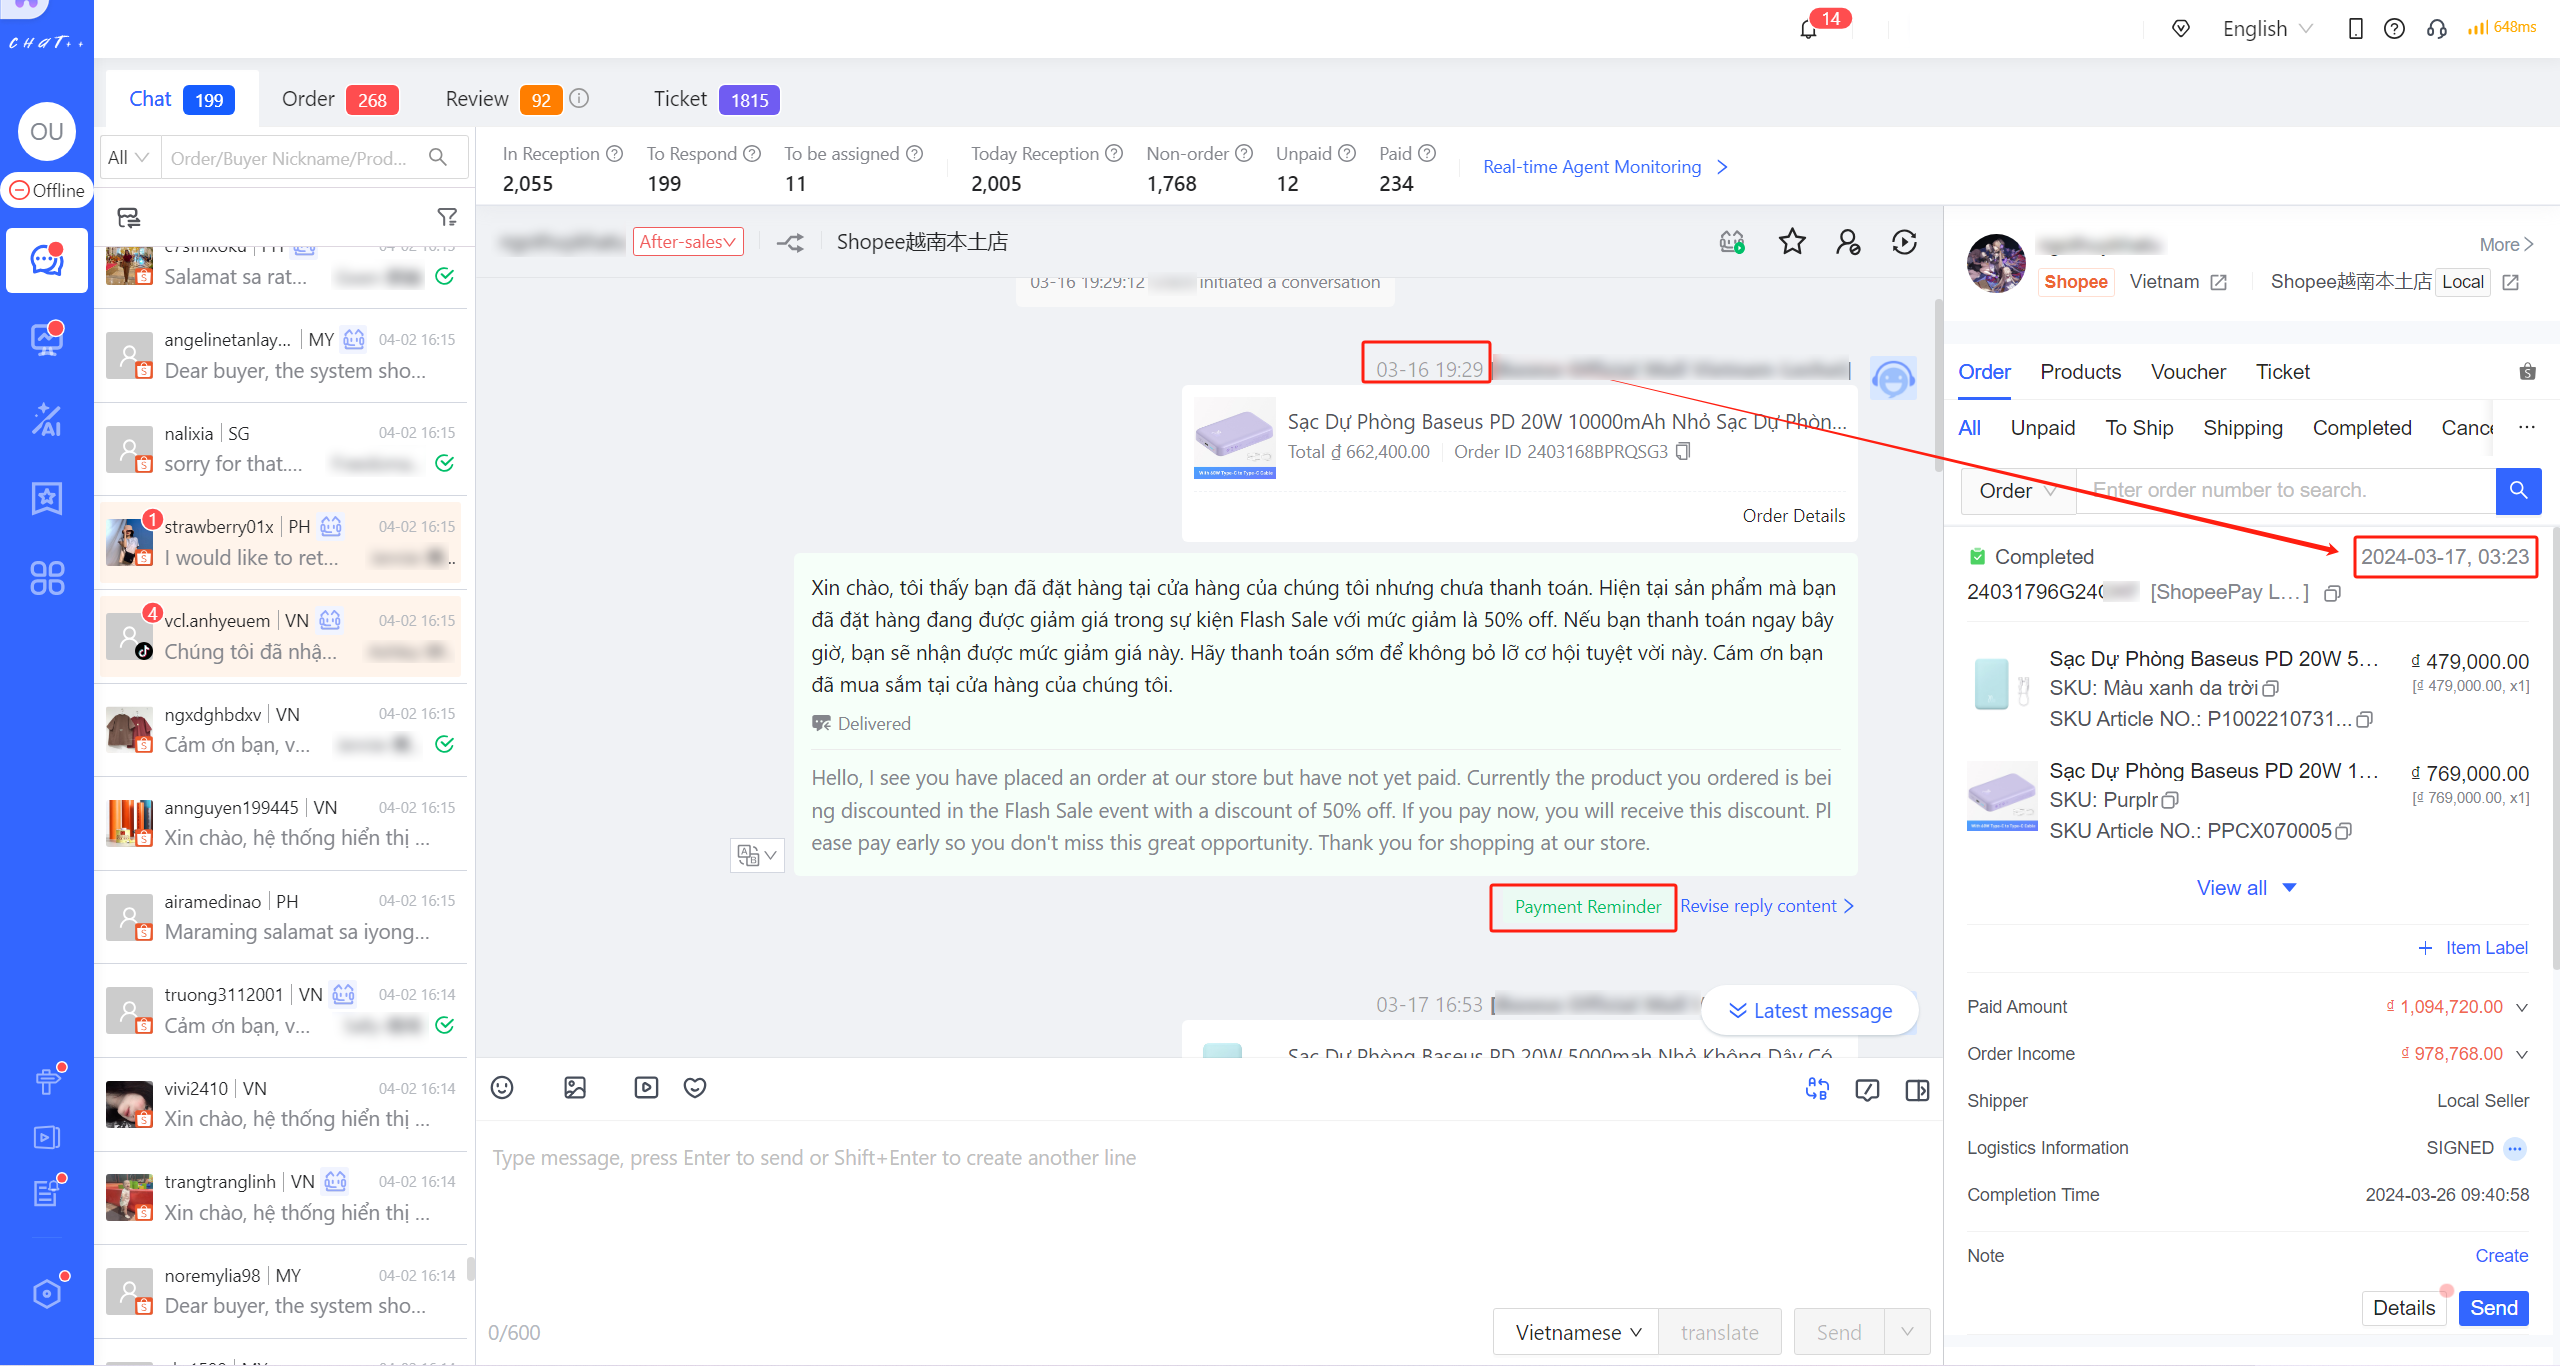
Figure 2
Configure Promotions
Enter configuration page
Click on the 'AI Operation' in the system's left sidebar → 'PromotionBot' to enter the promos info configuration page.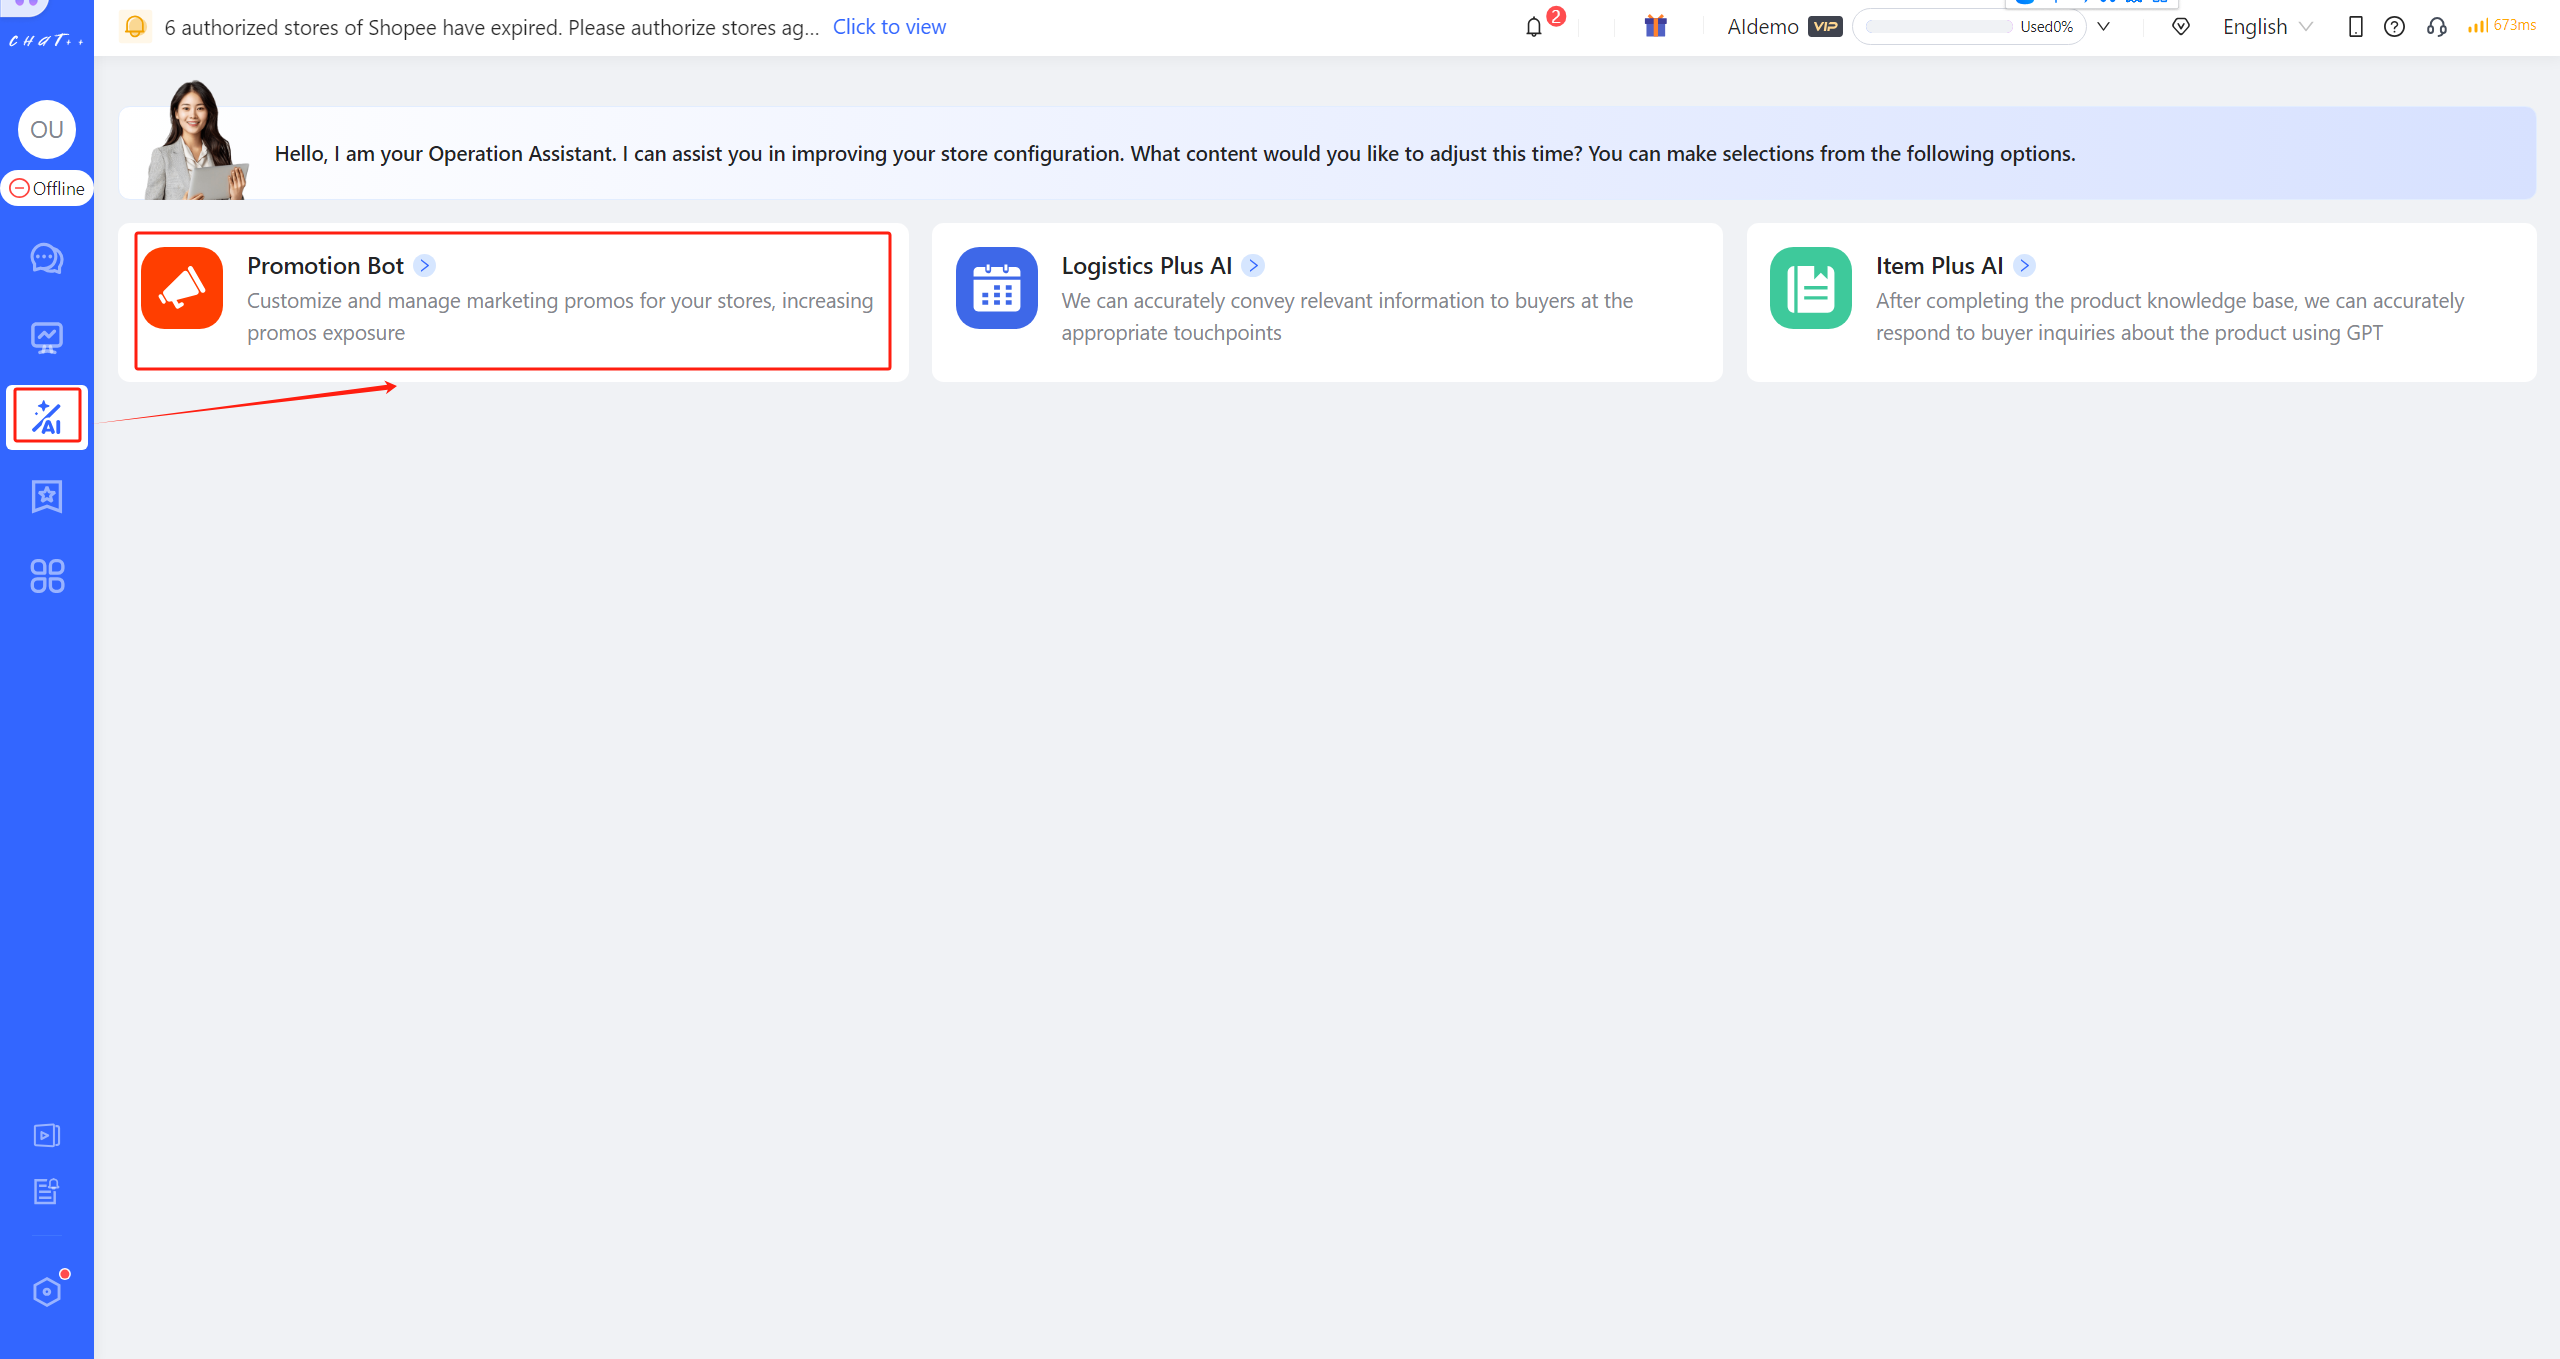
Figure 3
Promo Type
Currently supporting flash sale, vouchers, and others. New types are constantly being added, stay tuned! 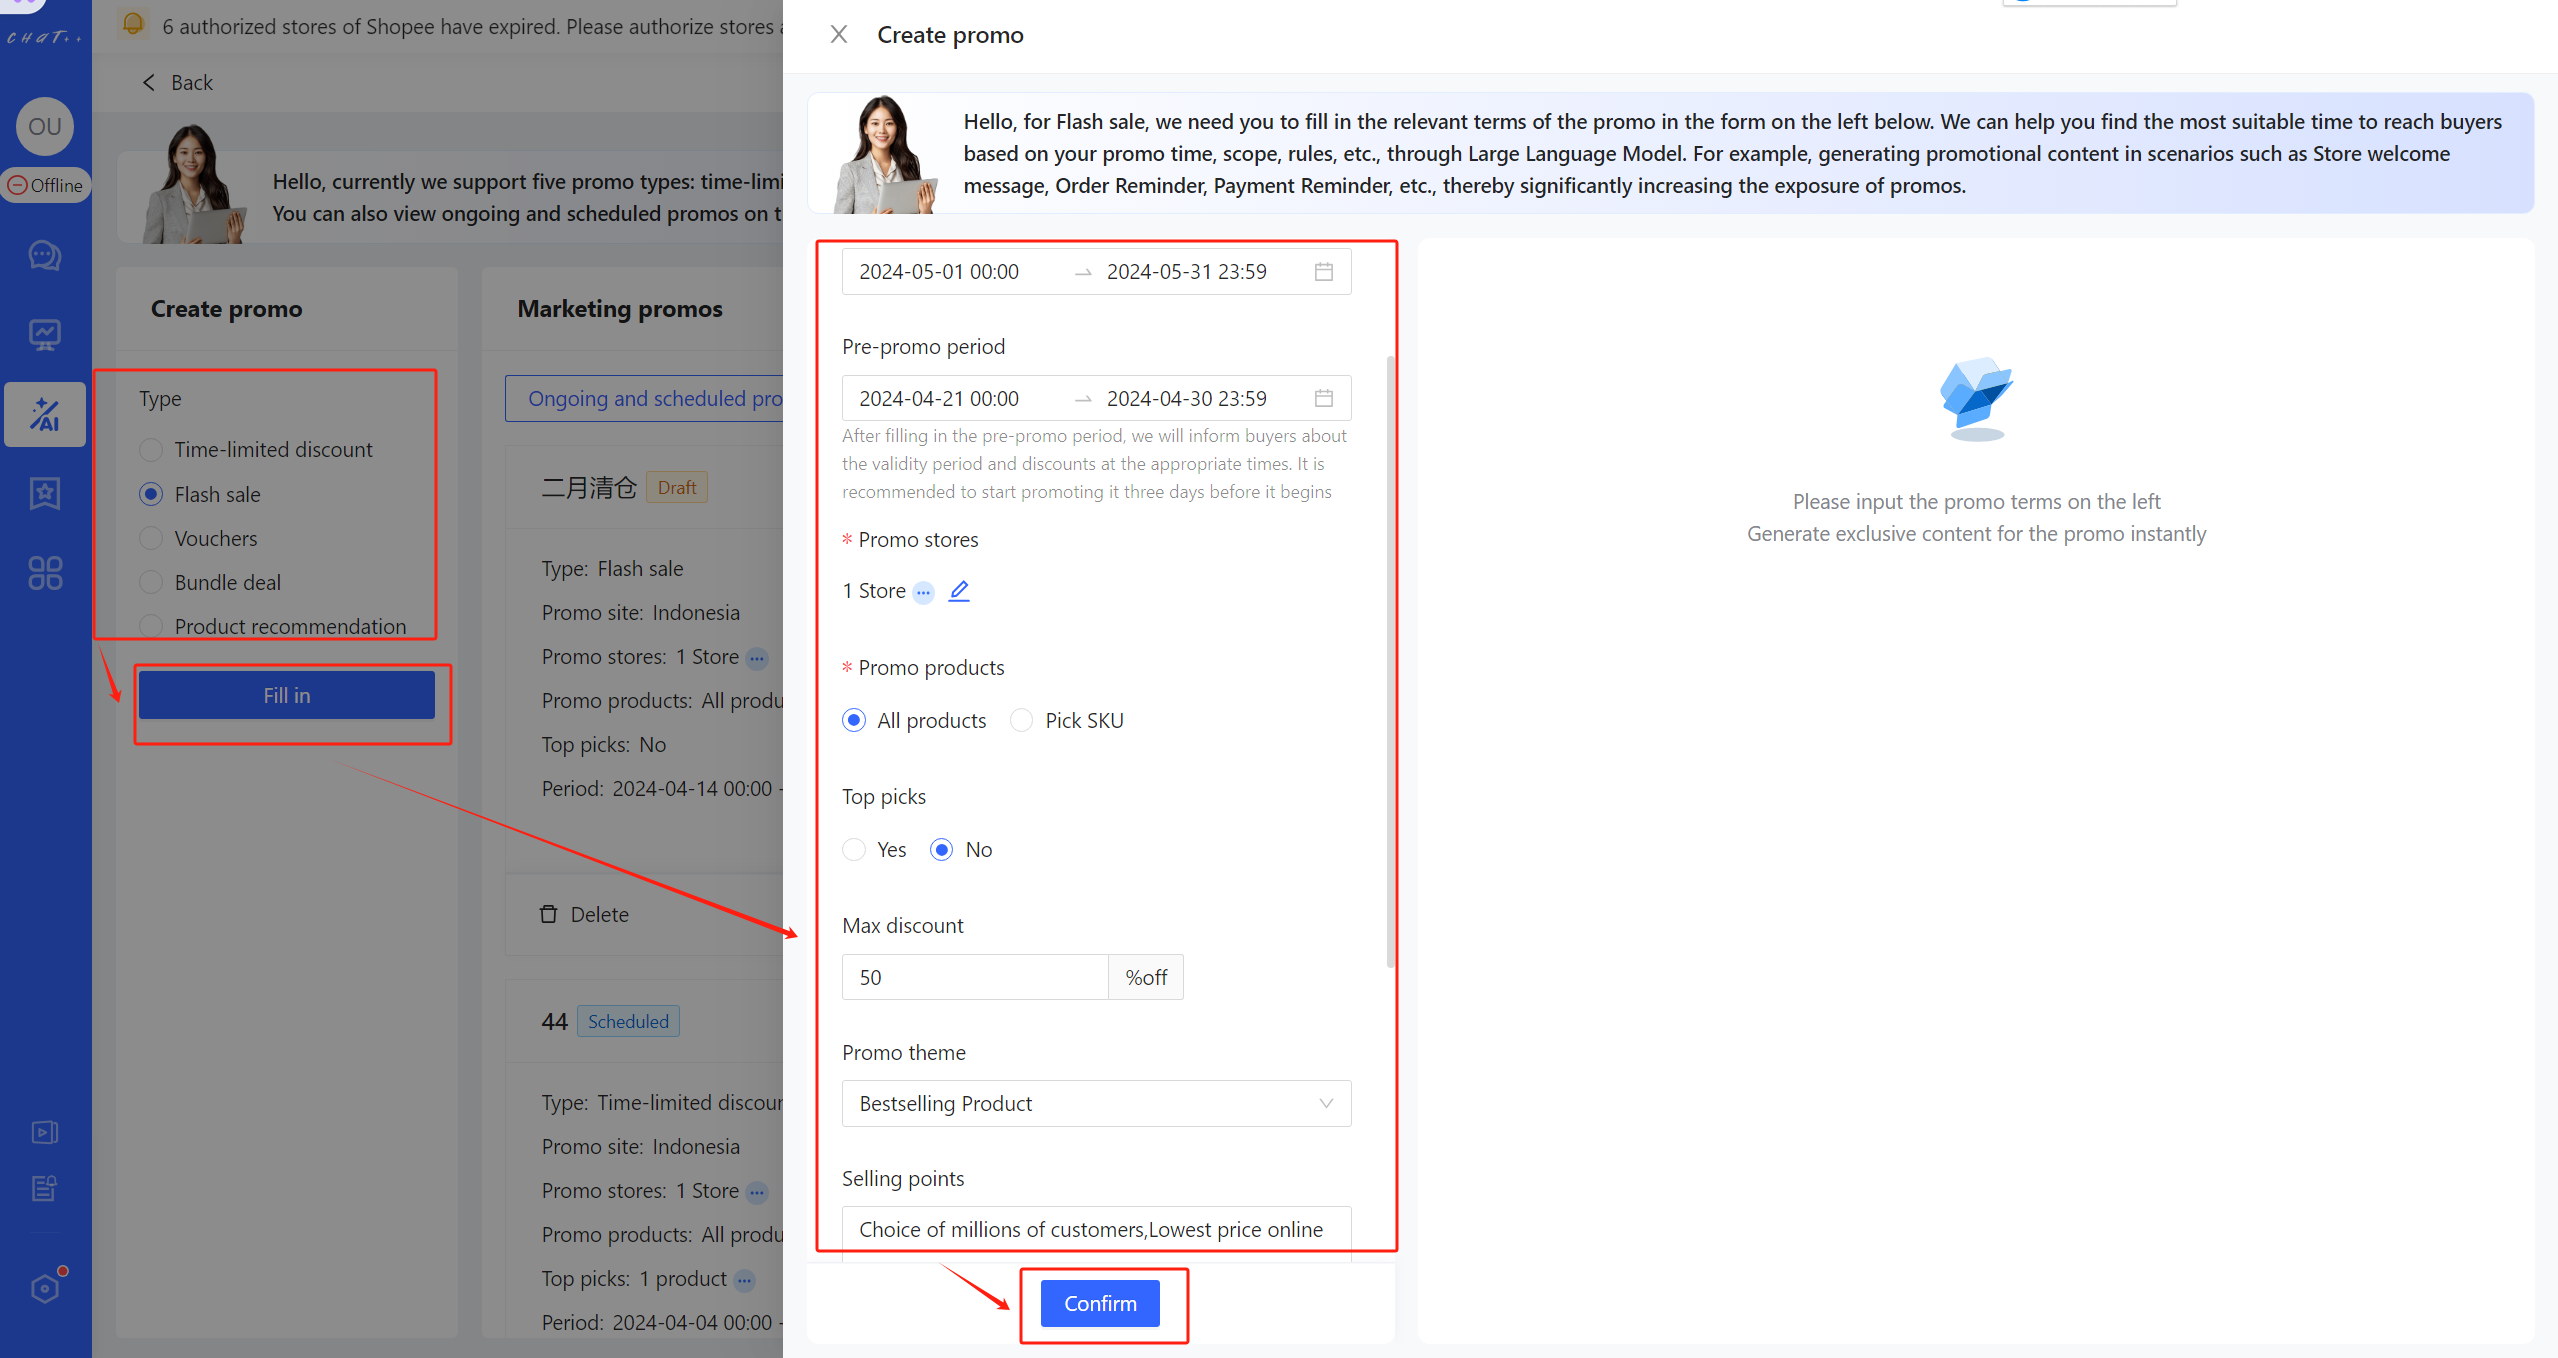
Figure 4
Fill in Promos Terms
| Terms | Description | Example |
|---|---|---|
| Promo name(required) | To facilitate the management of all your marketing promos, please create an easily understandable name for each promo | Clearance sale, March flash sale, Double 6 promo, New arrivals...... |
| Validity period(required) | The validity period for the promo allows selection down to specific hours and minutes | 2024-04-01 00:00~2024-04-07 23:59 |
| Pre-promo period | A period of time before the promo takes effect. During this time, the system will automatically generate marketing warm-up scripts and insert them into various compatible scenarios | 2024-03-29 00:00~2024-03-31 23:59 |
| Promo stores(required) | Select stores participating in the promo | —— |
| Promo products(required) | Select products participating in the promo. All products are selected by default. | —— |
| Top picks | If a specific product is selected, buyers will also receive a product link along with promotional marketing messages | —— |
| Max discount | The maximum discount percentage or amount for the promo | —— |
| 💡Selling points(Important) | You can list all the attractive selling points of the promo | Payday Promo, Lowest price of the month,Promo for new products, Limited to 3 Days...... |
Confirm Script Inserted in the Scenarios
After confirming the terms of the promotion, PromotionBot will automatically find suitable moments to reach out to buyers and generate promotional scripts. The dispatch timing is enabled by default. If a specific trigger timing doesn't require promotional marketing, it can be turned off. 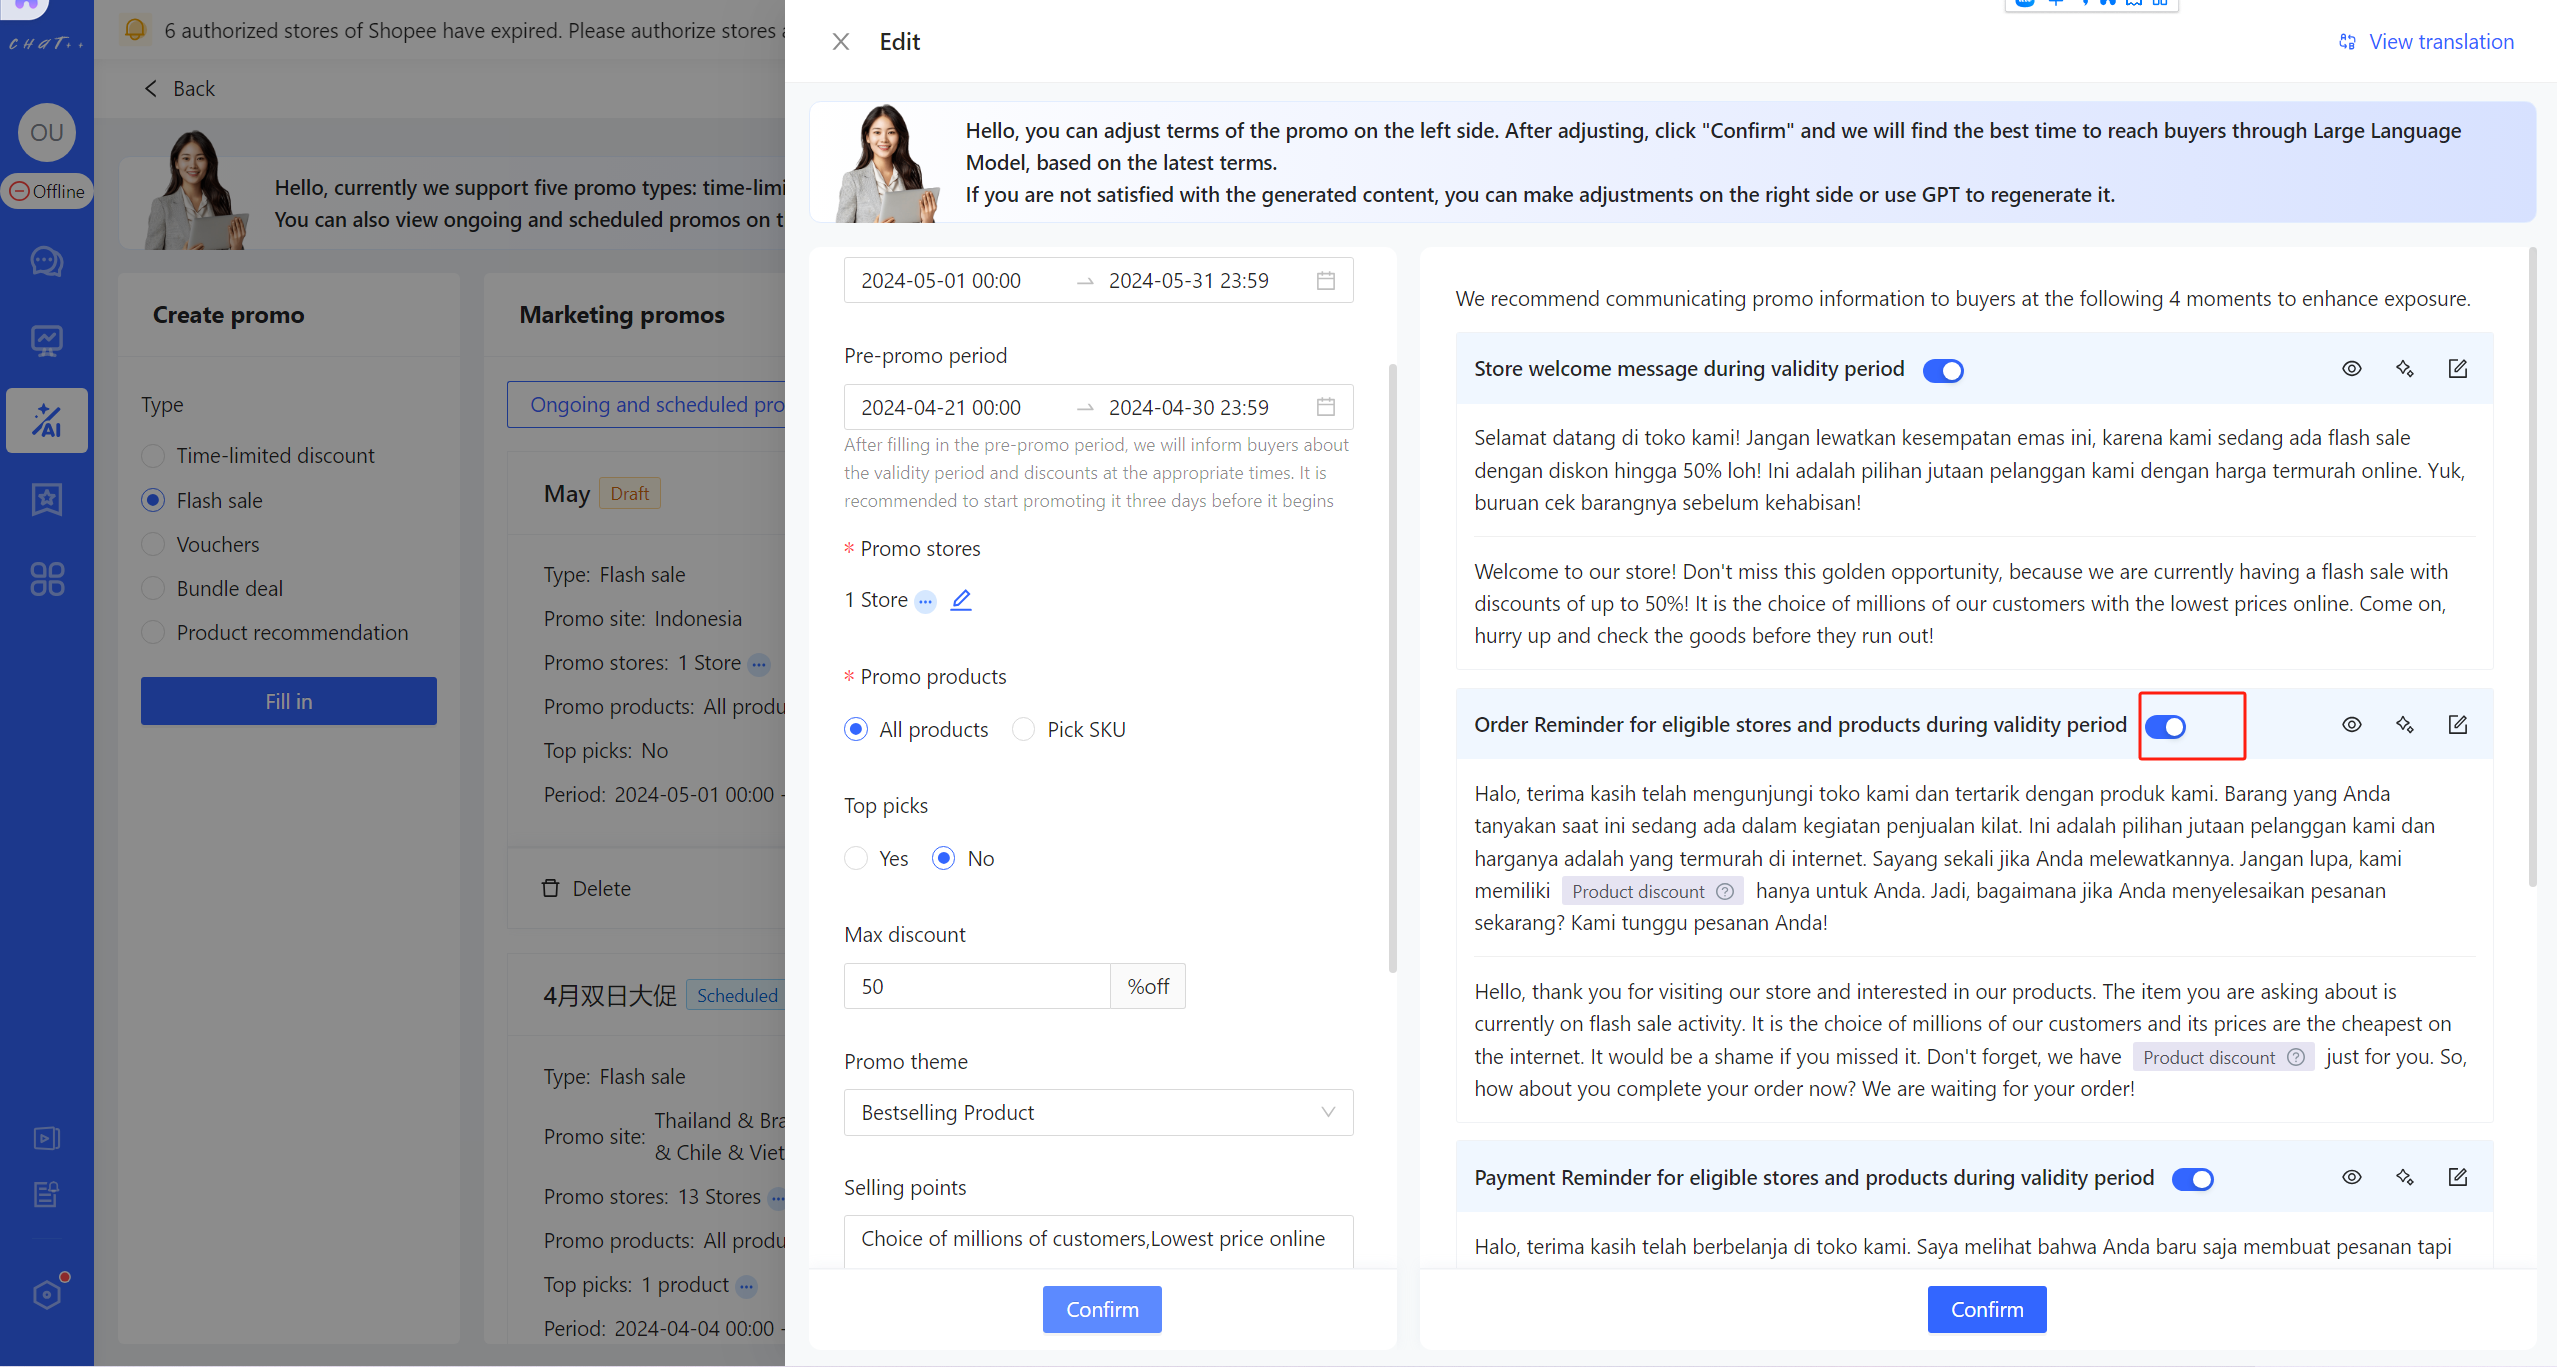
Figure 5
Review Auto-generated Marketing Scripts
You can review generated promotional scripts. If you are not satisfied with the script for a particular touchpoint, you can click on the icon on the right (highlighted in the red box below) to regenerate it using GPT. 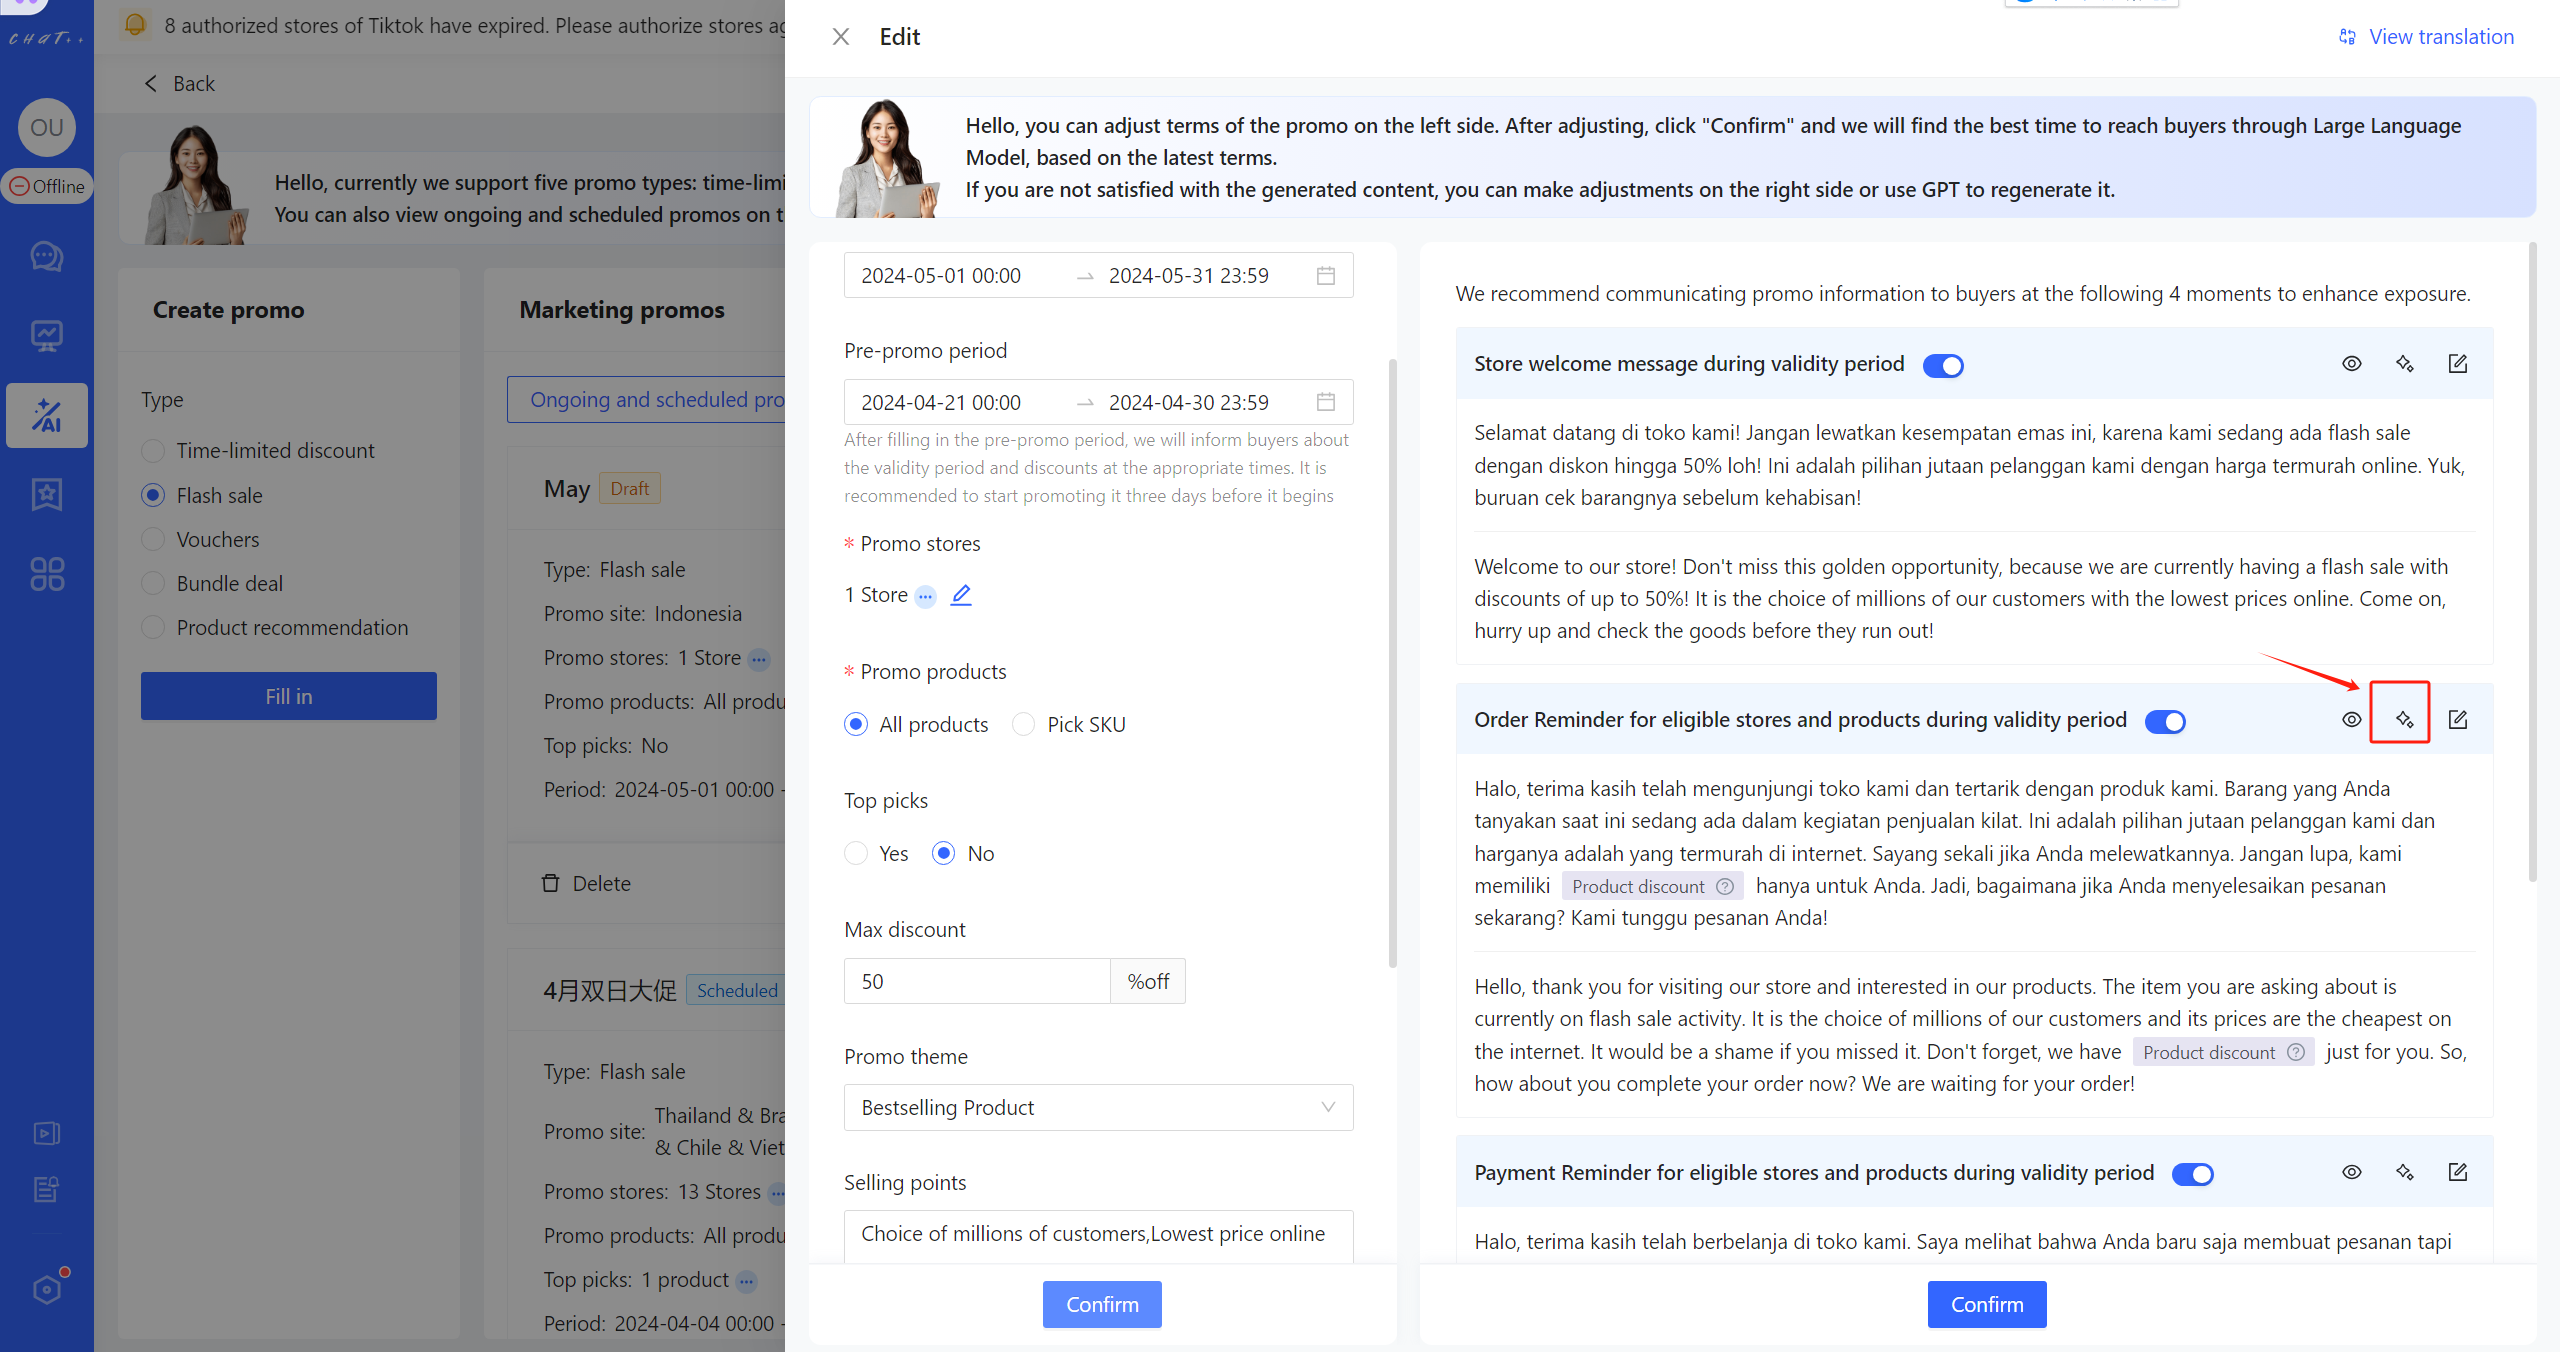
You can also click on the edit button on the right to manually modify the script or add multiple new scripts. 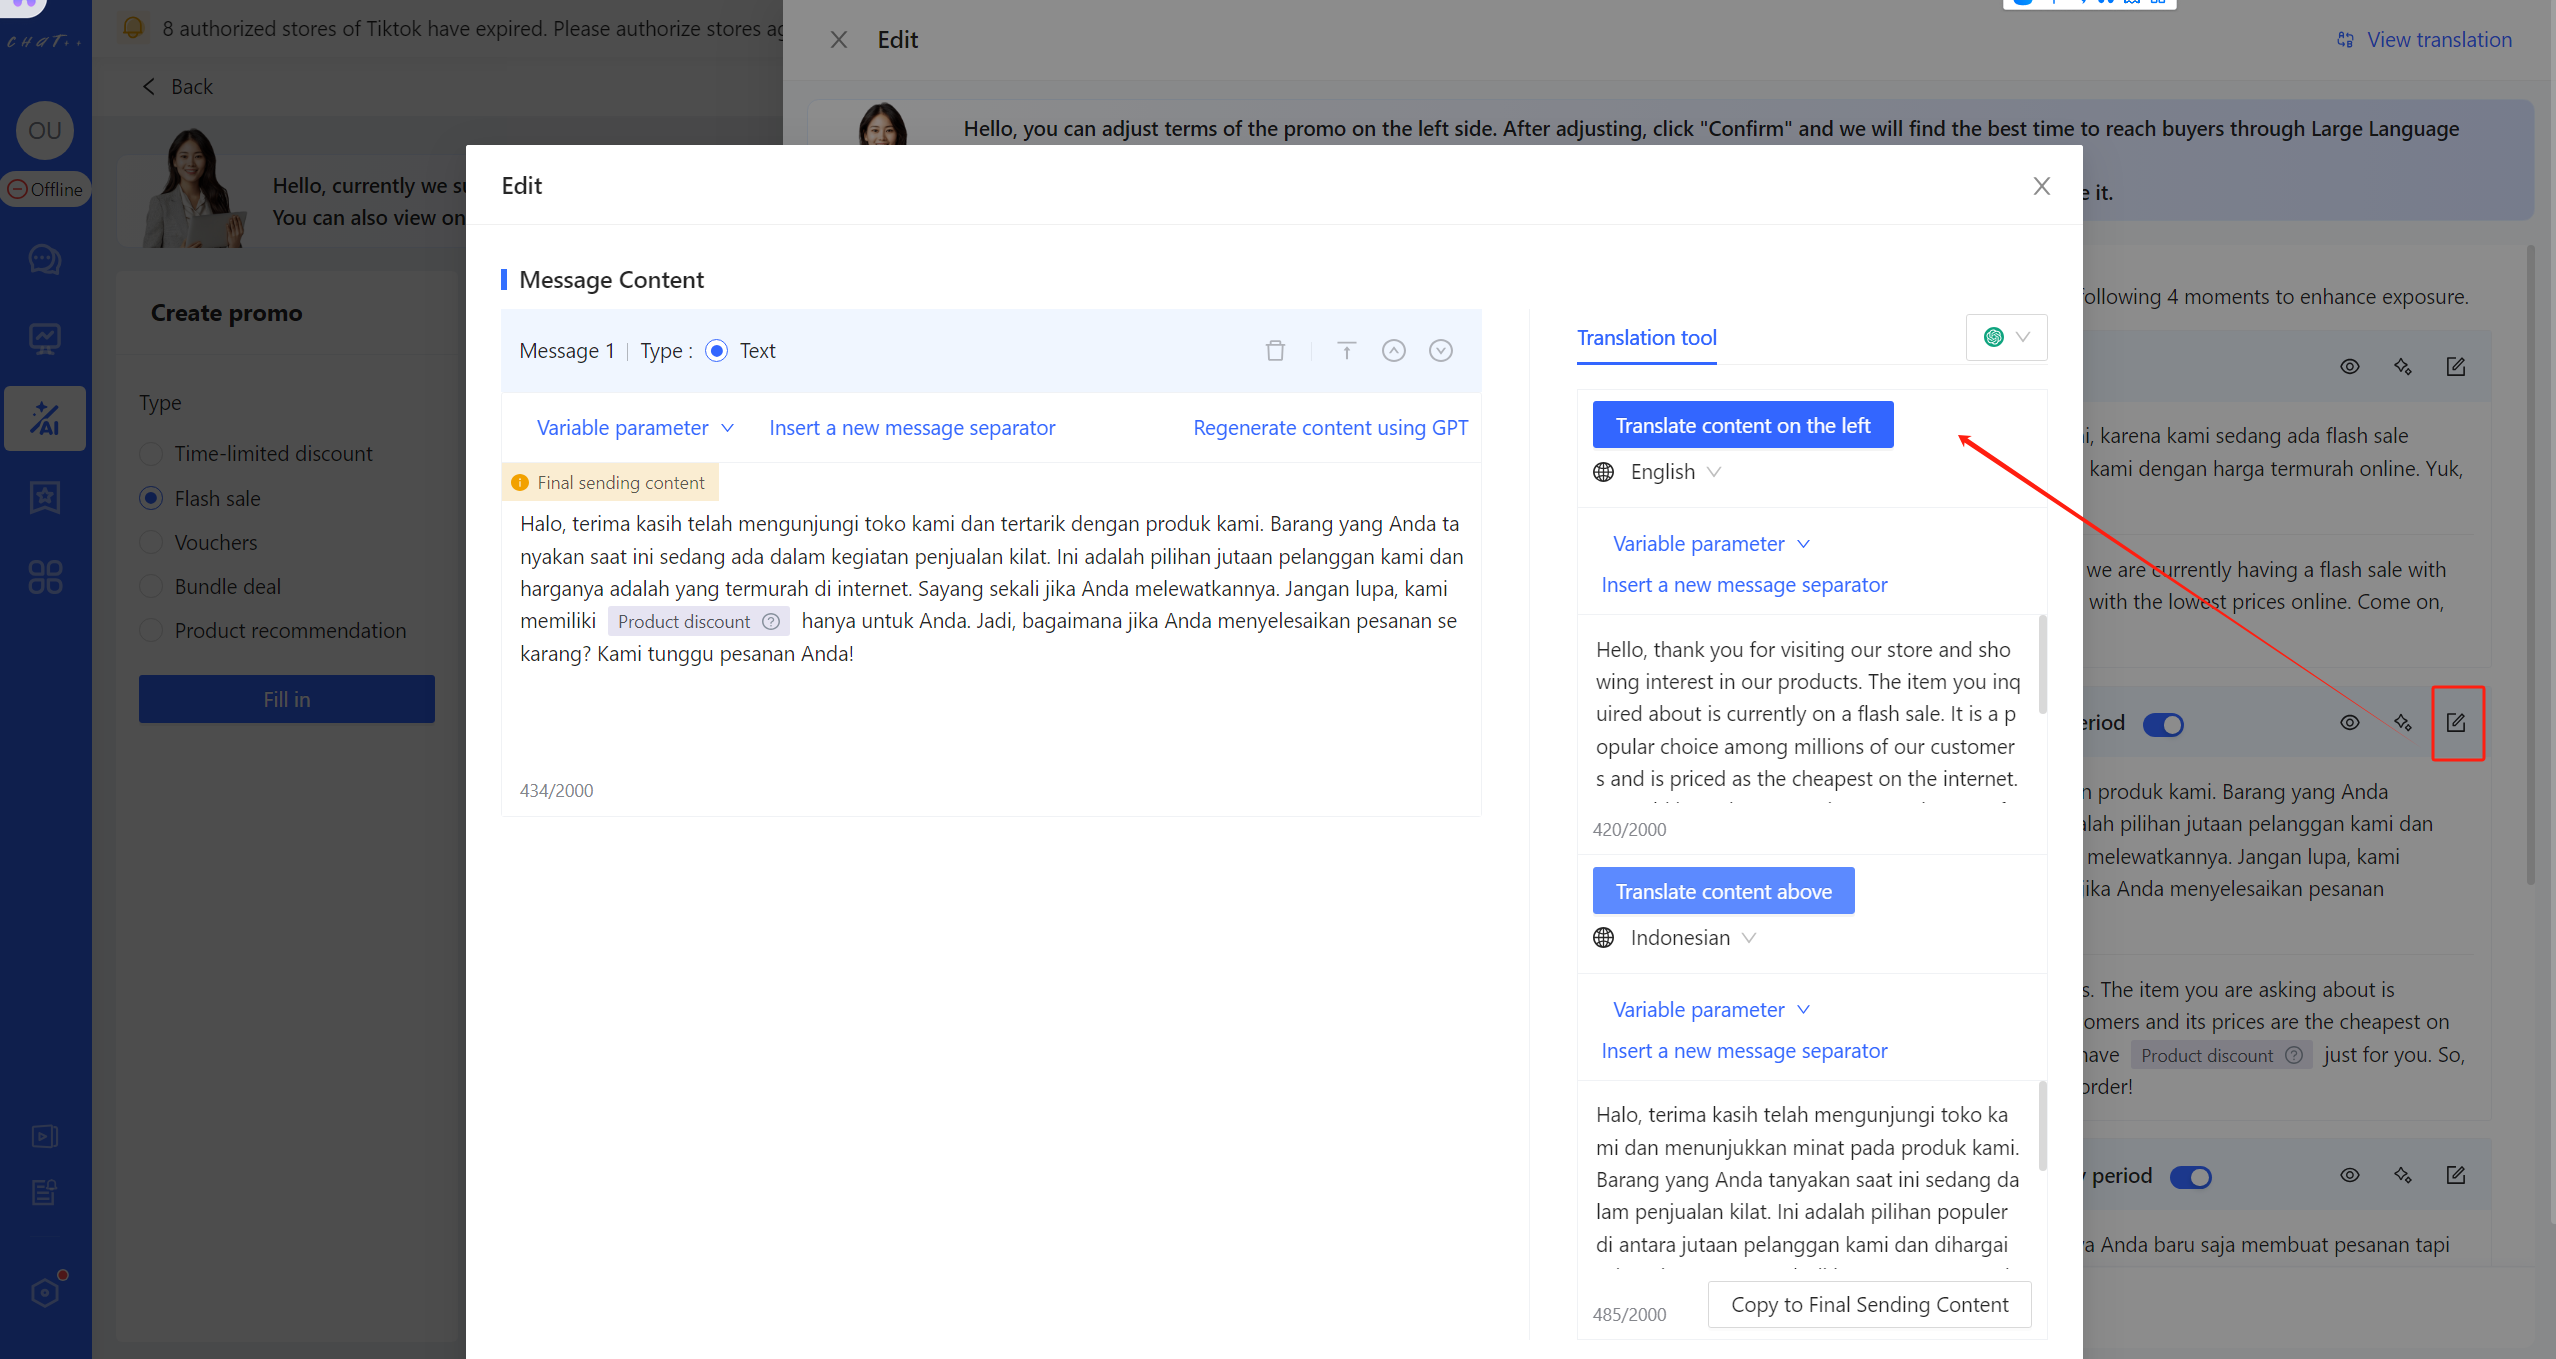
Figure 6
⚠️ Don't forget to click on the 'OK' button in the bottom right corner to activate the promotional content for the promo.
Manage Marketing Promos
Click on the 'AI Operation' on the left sidebar of the system → 'PromotionBot'. In addition to adding new promos, you can also view or manage historical and ongoing and scheduled promos.
- Scheduled: Promos that haven't started yet
- Ongoing: Promos within the validity period
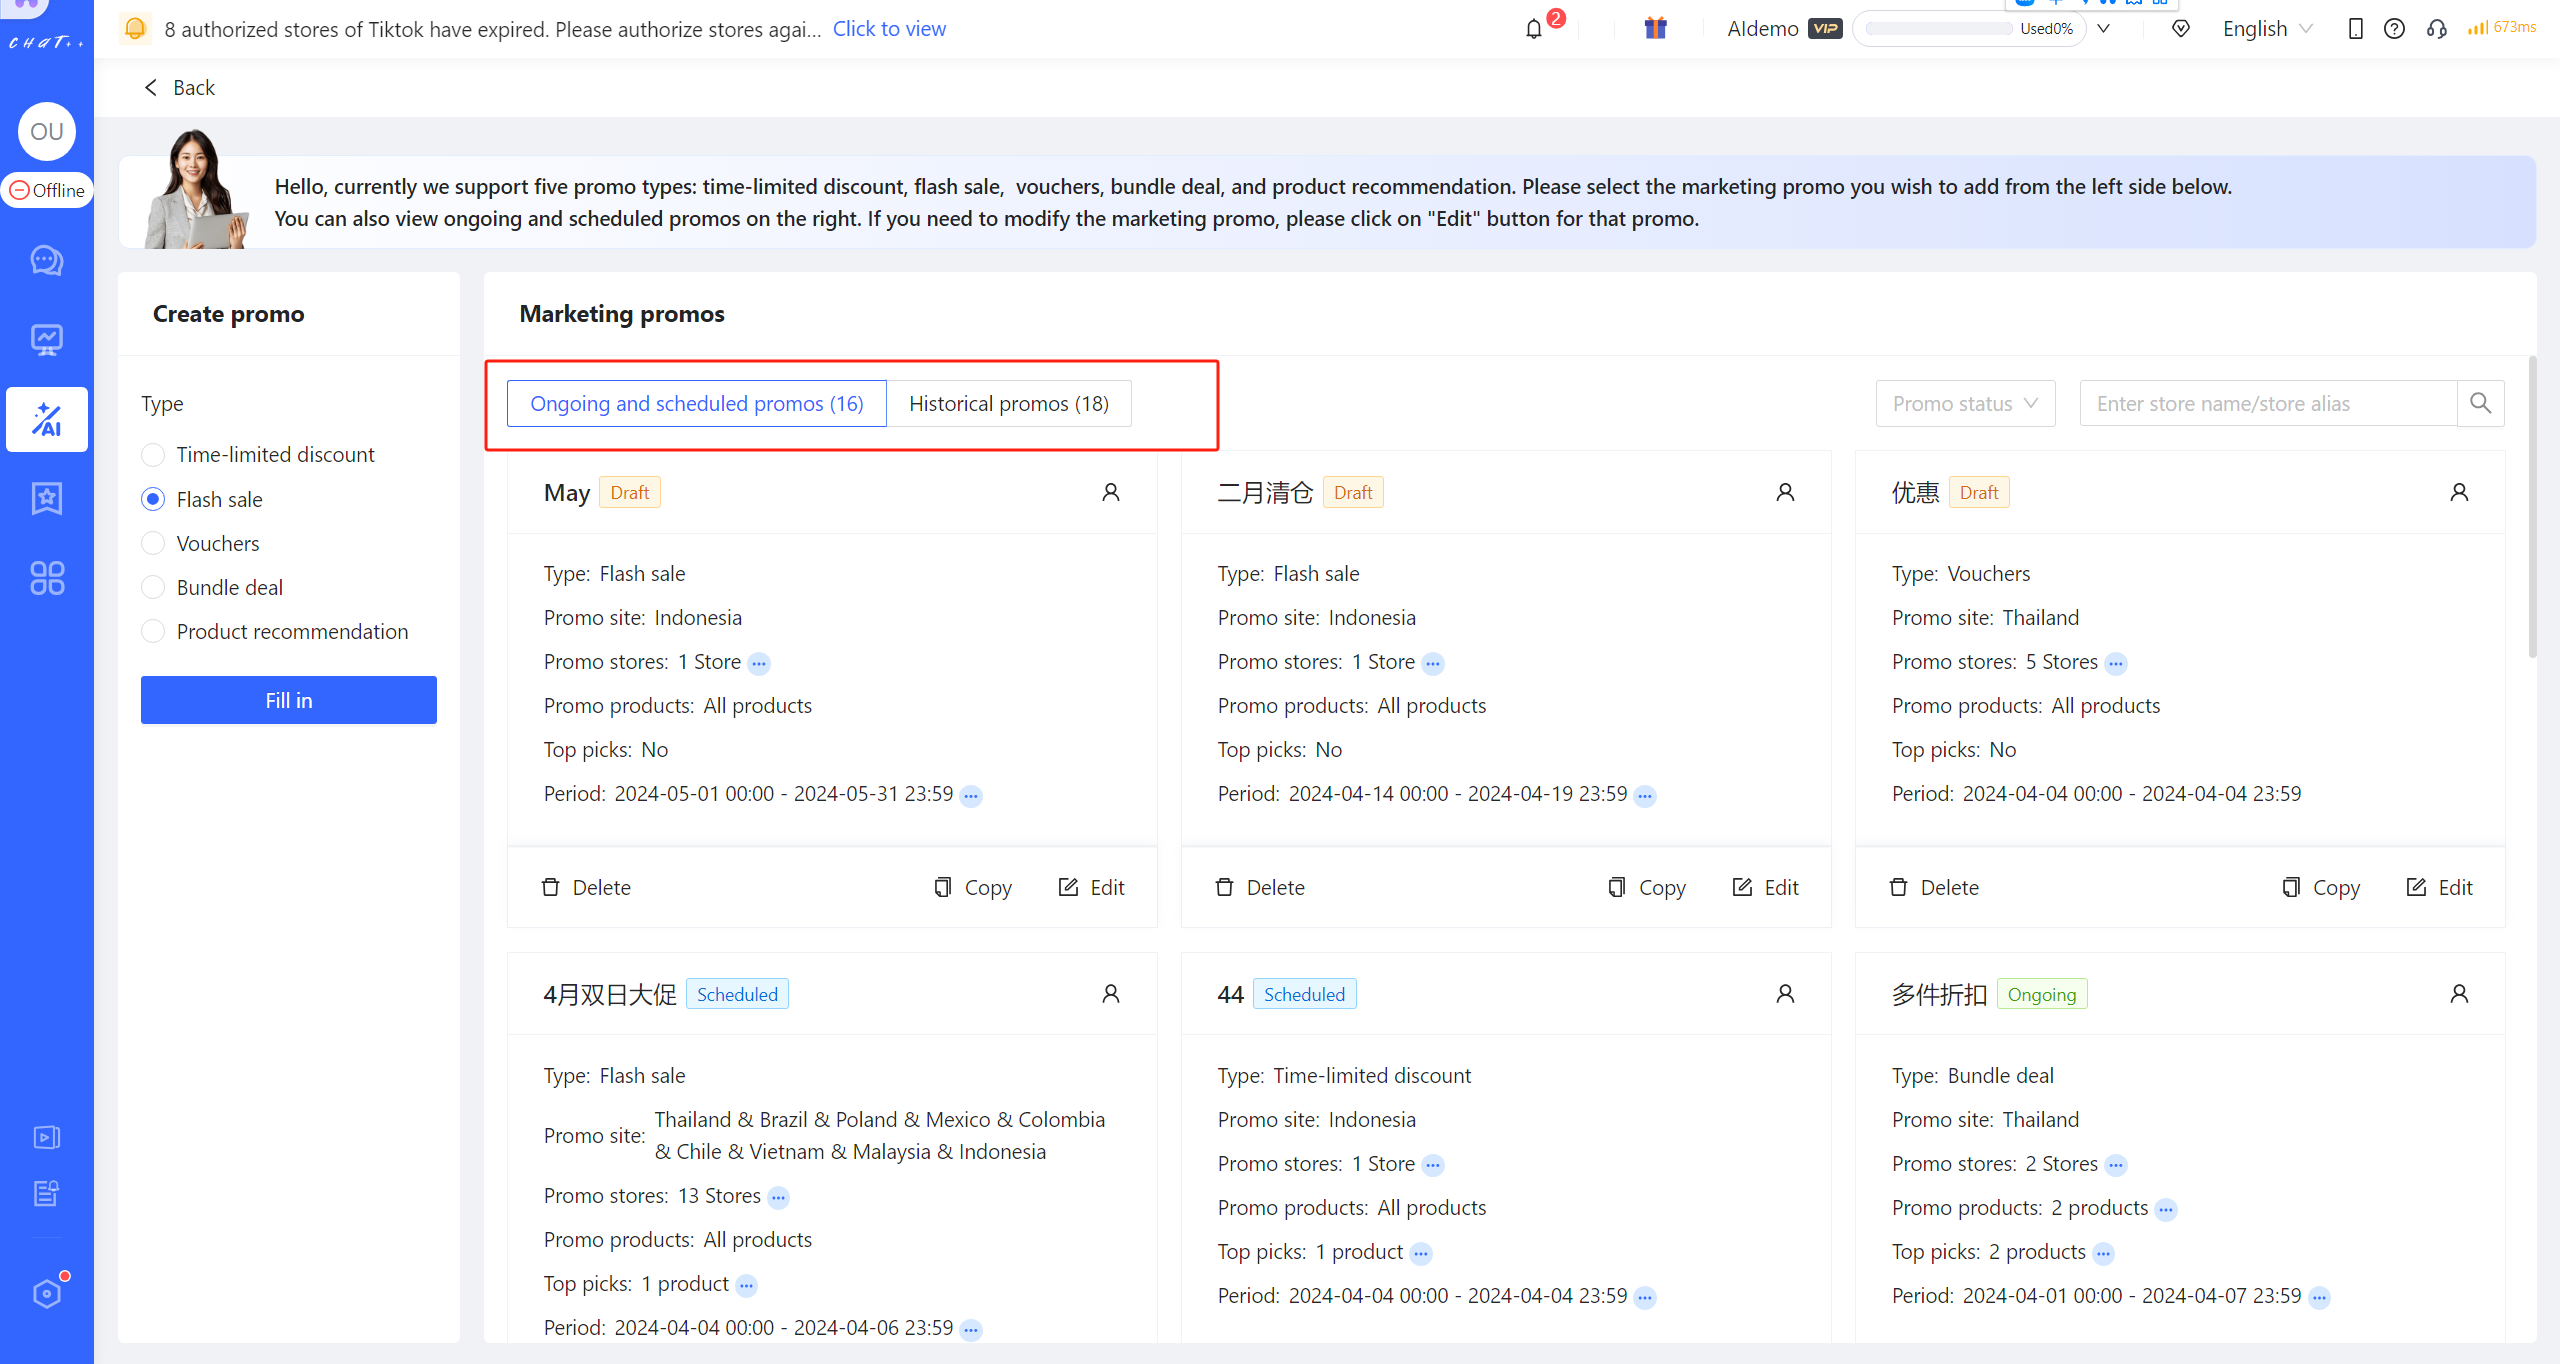
Figure 7
Note:
- Click on "Edit" below the promo card to view details. If you adjust certain terms of the promo, the promotional script will also be regenerated.
- Click on "Delete" below the promo card to immediately delete the promo, and it cannot be recovered. Please delete with caution.
Intelligent Assignment
Drawbacks of Traditional Traffic Assignment Methods
Buyer inquiry assignment refers to how a store (or multiple stores) efficiently and reasonably assigns inquiries when receiving a large number of buyer inquiries. During visits to sellers, it was observed that a significant number of sellers are still using some traditional CS reception traffic assignment methods, severely impacting the efficiency of their teams.
This section describes two traditional traffic assignment methods and highlights their shortcomings, allowing you to assess whether your assignment methods also suffer from these issues.
Traffic Assignment at the Store Level:
This method is currently the most commonly used for sellers. Each agent is responsible for different stores, with one agent clearly assigned to handle inquiries for a specific store or multiple stores. This assignment method has the advantage of clear responsibilities and performance management. But it has evident drawbacks as following:
❌ Firstly, there is an issue of uneven workload assignment. The dynamics of e-commerce traffic change rapidly, and the occurrence of high-order volumes is unpredictable. Even if the estimated store traffic is assigned roughly evenly among different agents, the reality is that when a store experiences a sudden surge in orders, other agent may be unable to cope. In everyday work situations, significant variations in the volume of inquiries among different agents, resulting from the rigid reception relationships, lead to longer waiting times for buyers, which is a common phenomenon.
❌ Secondly, due to factors such as an agent leaves or shifts, there are instances where a store corresponding to a specific agent may be left unattended during certain time periods. Although remedies such as account transfers can be employed, this solution not only adds complexity to management but also proves inconvenient for accurate performance management.
Each agent receives all buyers for the store
❌ When a single store has a large reception volume, a single person is not sufficient to receive all buyers for that store. Some early CS systems allow multiple agent to have reception permissions for the same store, and each agent account could see and respond to all buyer conversations in the store. A high proportion of interactions between a buyer and agent involve multiple rounds of conversation to achieve the communication goal. When multiple online agents can see a buyer waiting for reception and have the permission to receive that buyer, it often leads to frequent occurrences where the same buyer's different rounds of questions in a short period receive responses from different agents. It requires the agent to understand the context of buyer's interactions with other agent, significantly reducing the efficiency of agents' work.
Advantages of ChatPlusAI Intelligent Assignment✔️
💡 ChatPlusAI adopts an intelligent assignment that fully incorporates the experience of major domestic e-commerce marketplaces, excelling in various aspects such as conversation reception efficiency, minimal buyer waiting time, workload balance, and convenient performance management.
For example,
- To maintain the continuity of conversation reception, the rule is to prioritize assignment to the agent who last responded this conversation. It means that within a short period, the buyer will be scheduled to be received by the same agent(provided that the agent is online).
- To achieve the shortest buyer waiting time, buyer traffic is to prioritize assignment to the agent currently handling the fewest "To Respond" conversations.
- Addressing the issue of evenly assigned buyers who accumulated during the night when the agent is offline and need to be handled during the day;
Based on different order status, these rules significantly enhance the efficiency.
To meet the needs of supervising agents' work, by default, administrators are given the capability to view and participate in replies to buyer inquiries across all stores within their scope of permission. However, administrator's involvement in responding is supplementary and does not affect the agent's reception assignment. For example, if Buyer 1 is assigned to Agent A for reception, and during this period, Administrator S participates in responding to Buyer 1's inquiry, it does not alter the fact that Buyer 1 remains assigned to Agent A for reception.
How to Configure Intelligent Assignment in ChatPlusAI
Any account in ChatPlusAI has a corresponding role, and in the role's permission management, you can easily see the current role's adopted assignment mode. You can also adjust the role's assignment mode using the following steps:
[① Click "Configuration" → ② Choose "Department" → ③ Select the department where the role is located → ④ Click "Role" → ⑤ Click on "Edit" button for the role to be adjusted]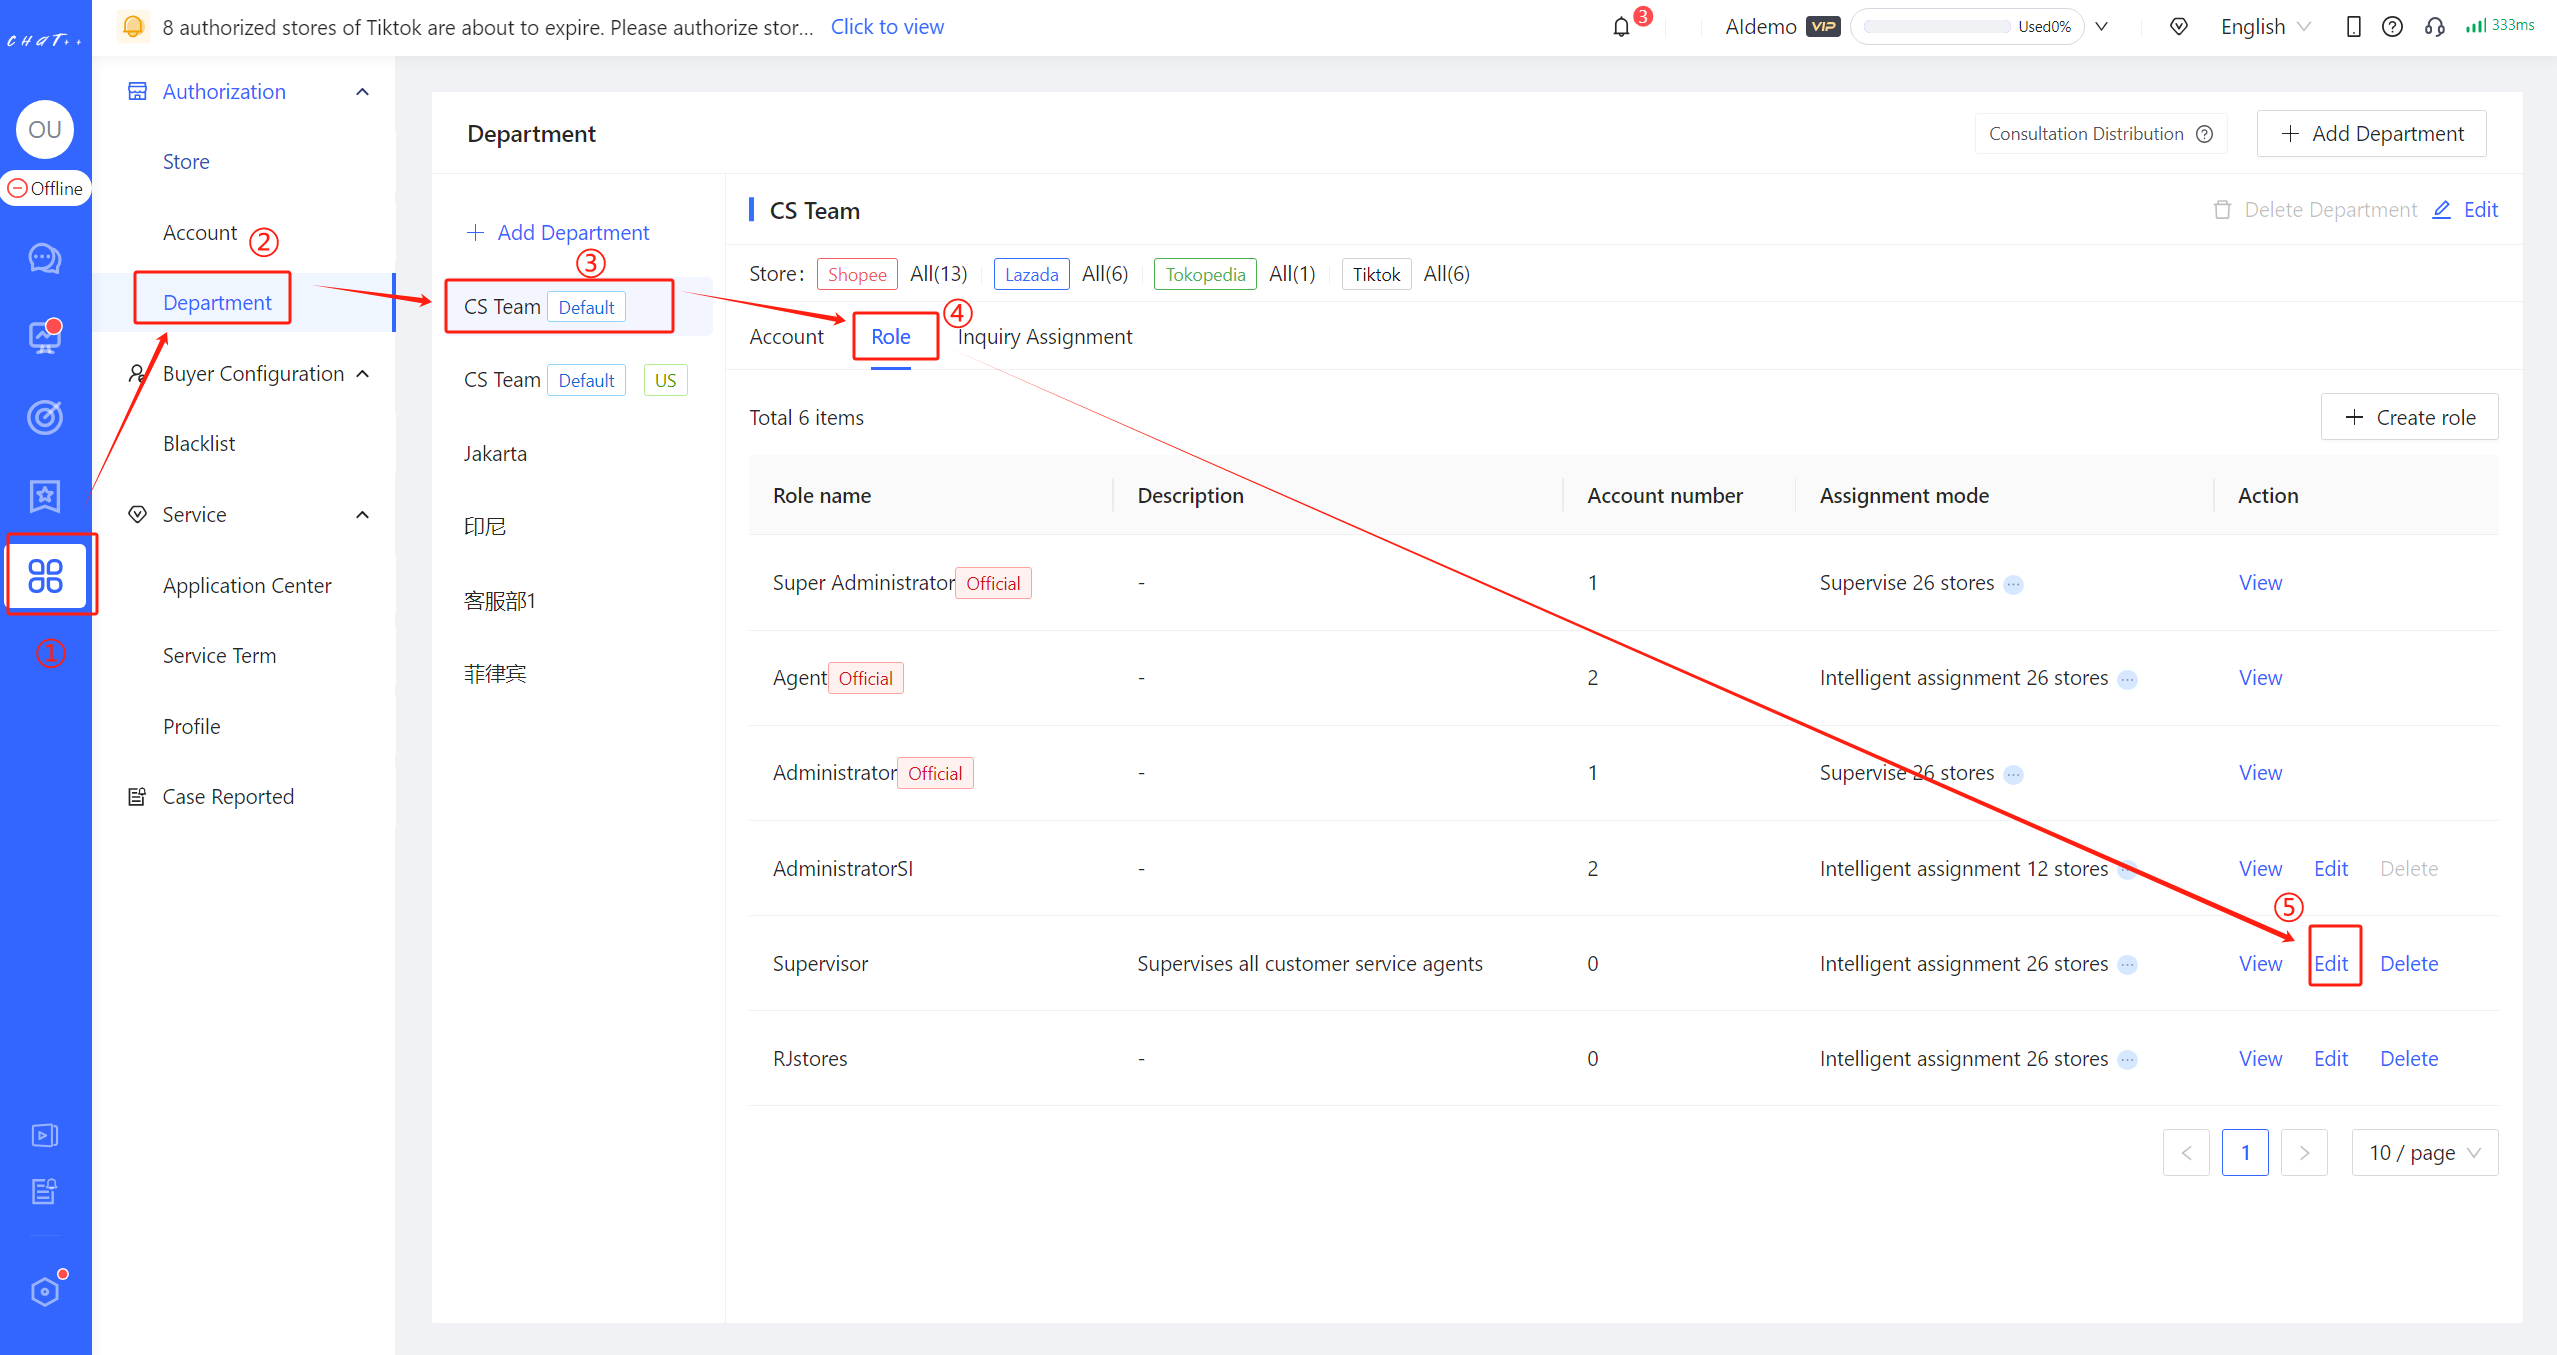
Figure 1
After entering the role permission settings page as shown in Figure 2, there are three options in "Conversation assignment mode":
- Intelligent assignment
- Supervise all
- Not engage in assignment
Intelligent assignment(for Agents)
For Agent roles, we recommend using "Intelligent assignment" (red mark ① below). "Advantages of ChatPlusAI Intelligent Assignment" encompass various capabilities that significantly enhance agents reception efficiency, reduce expected buyer waiting time, and achieve reasonable conversation assignment.
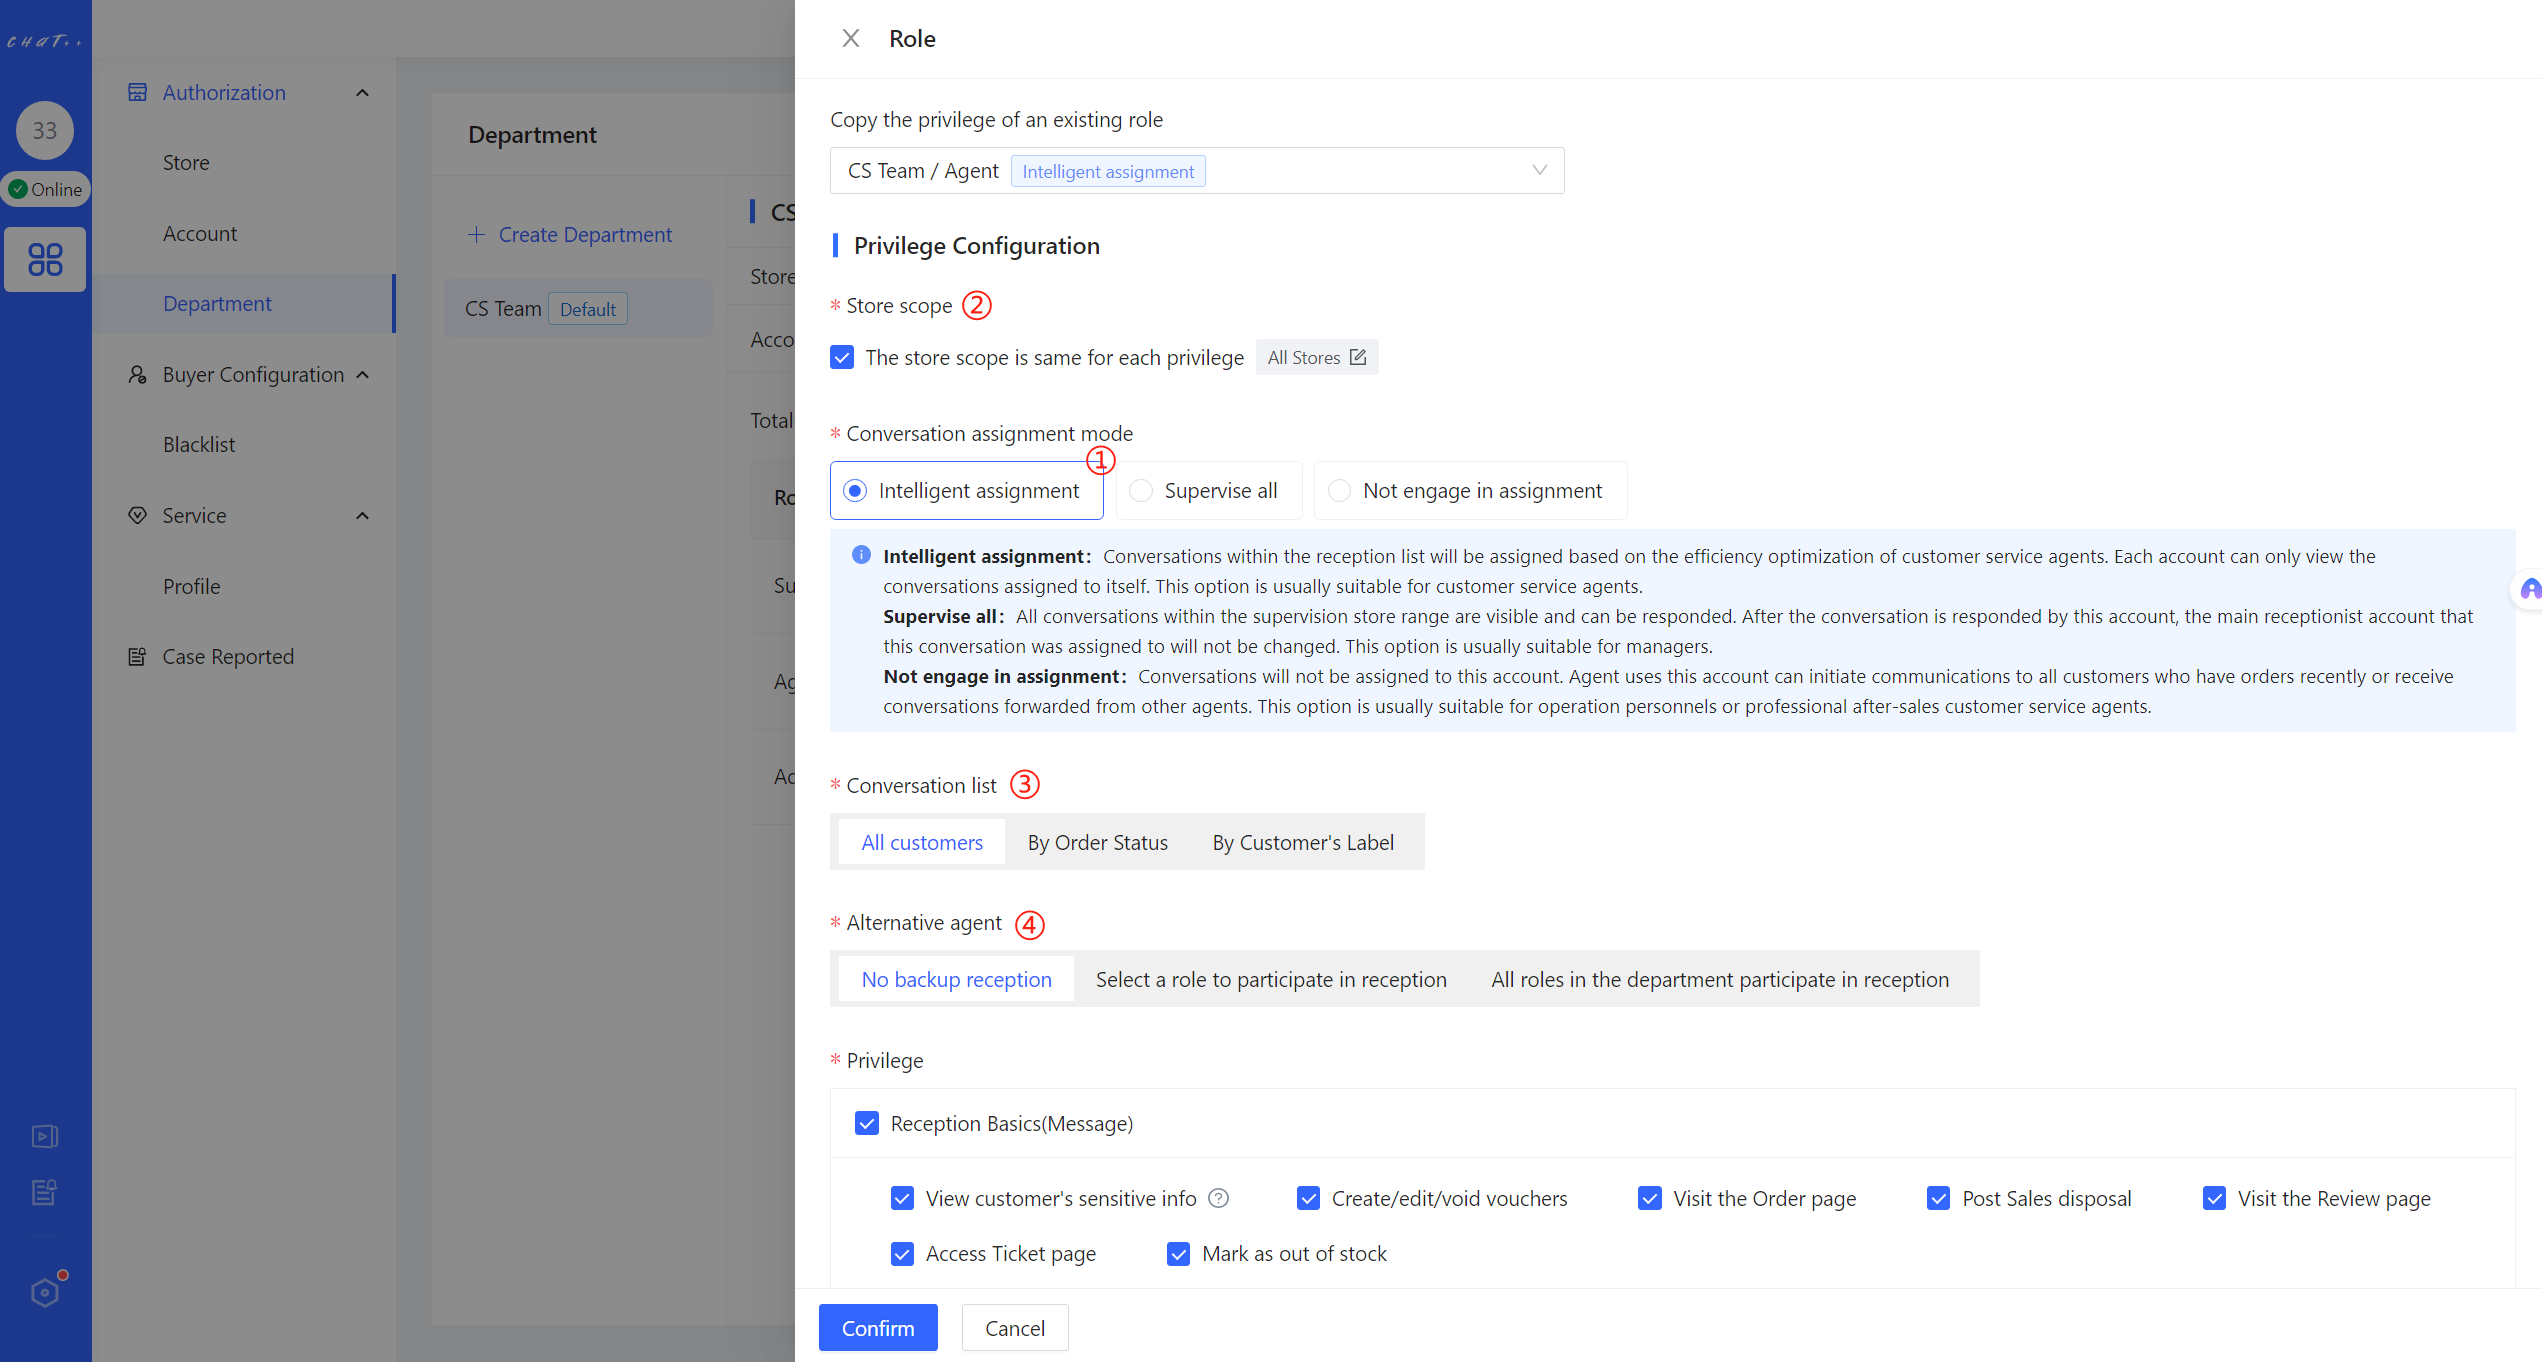
Figure 2
Store scope
In Intelligent Assignment mode, you can choose the scope of stores that the agent receives. The default selection includes all stores belonging to the department. Click on "All Stores" (red mark ② above) to adjust the store scope.
Conversation list
The reception scope for buyers can also be set in Intelligent Assignment mode (red mark ③ above).
- By Order Status:The reception scope for buyers, as shown below, can be set based on the order status of buyer's most recent orders.
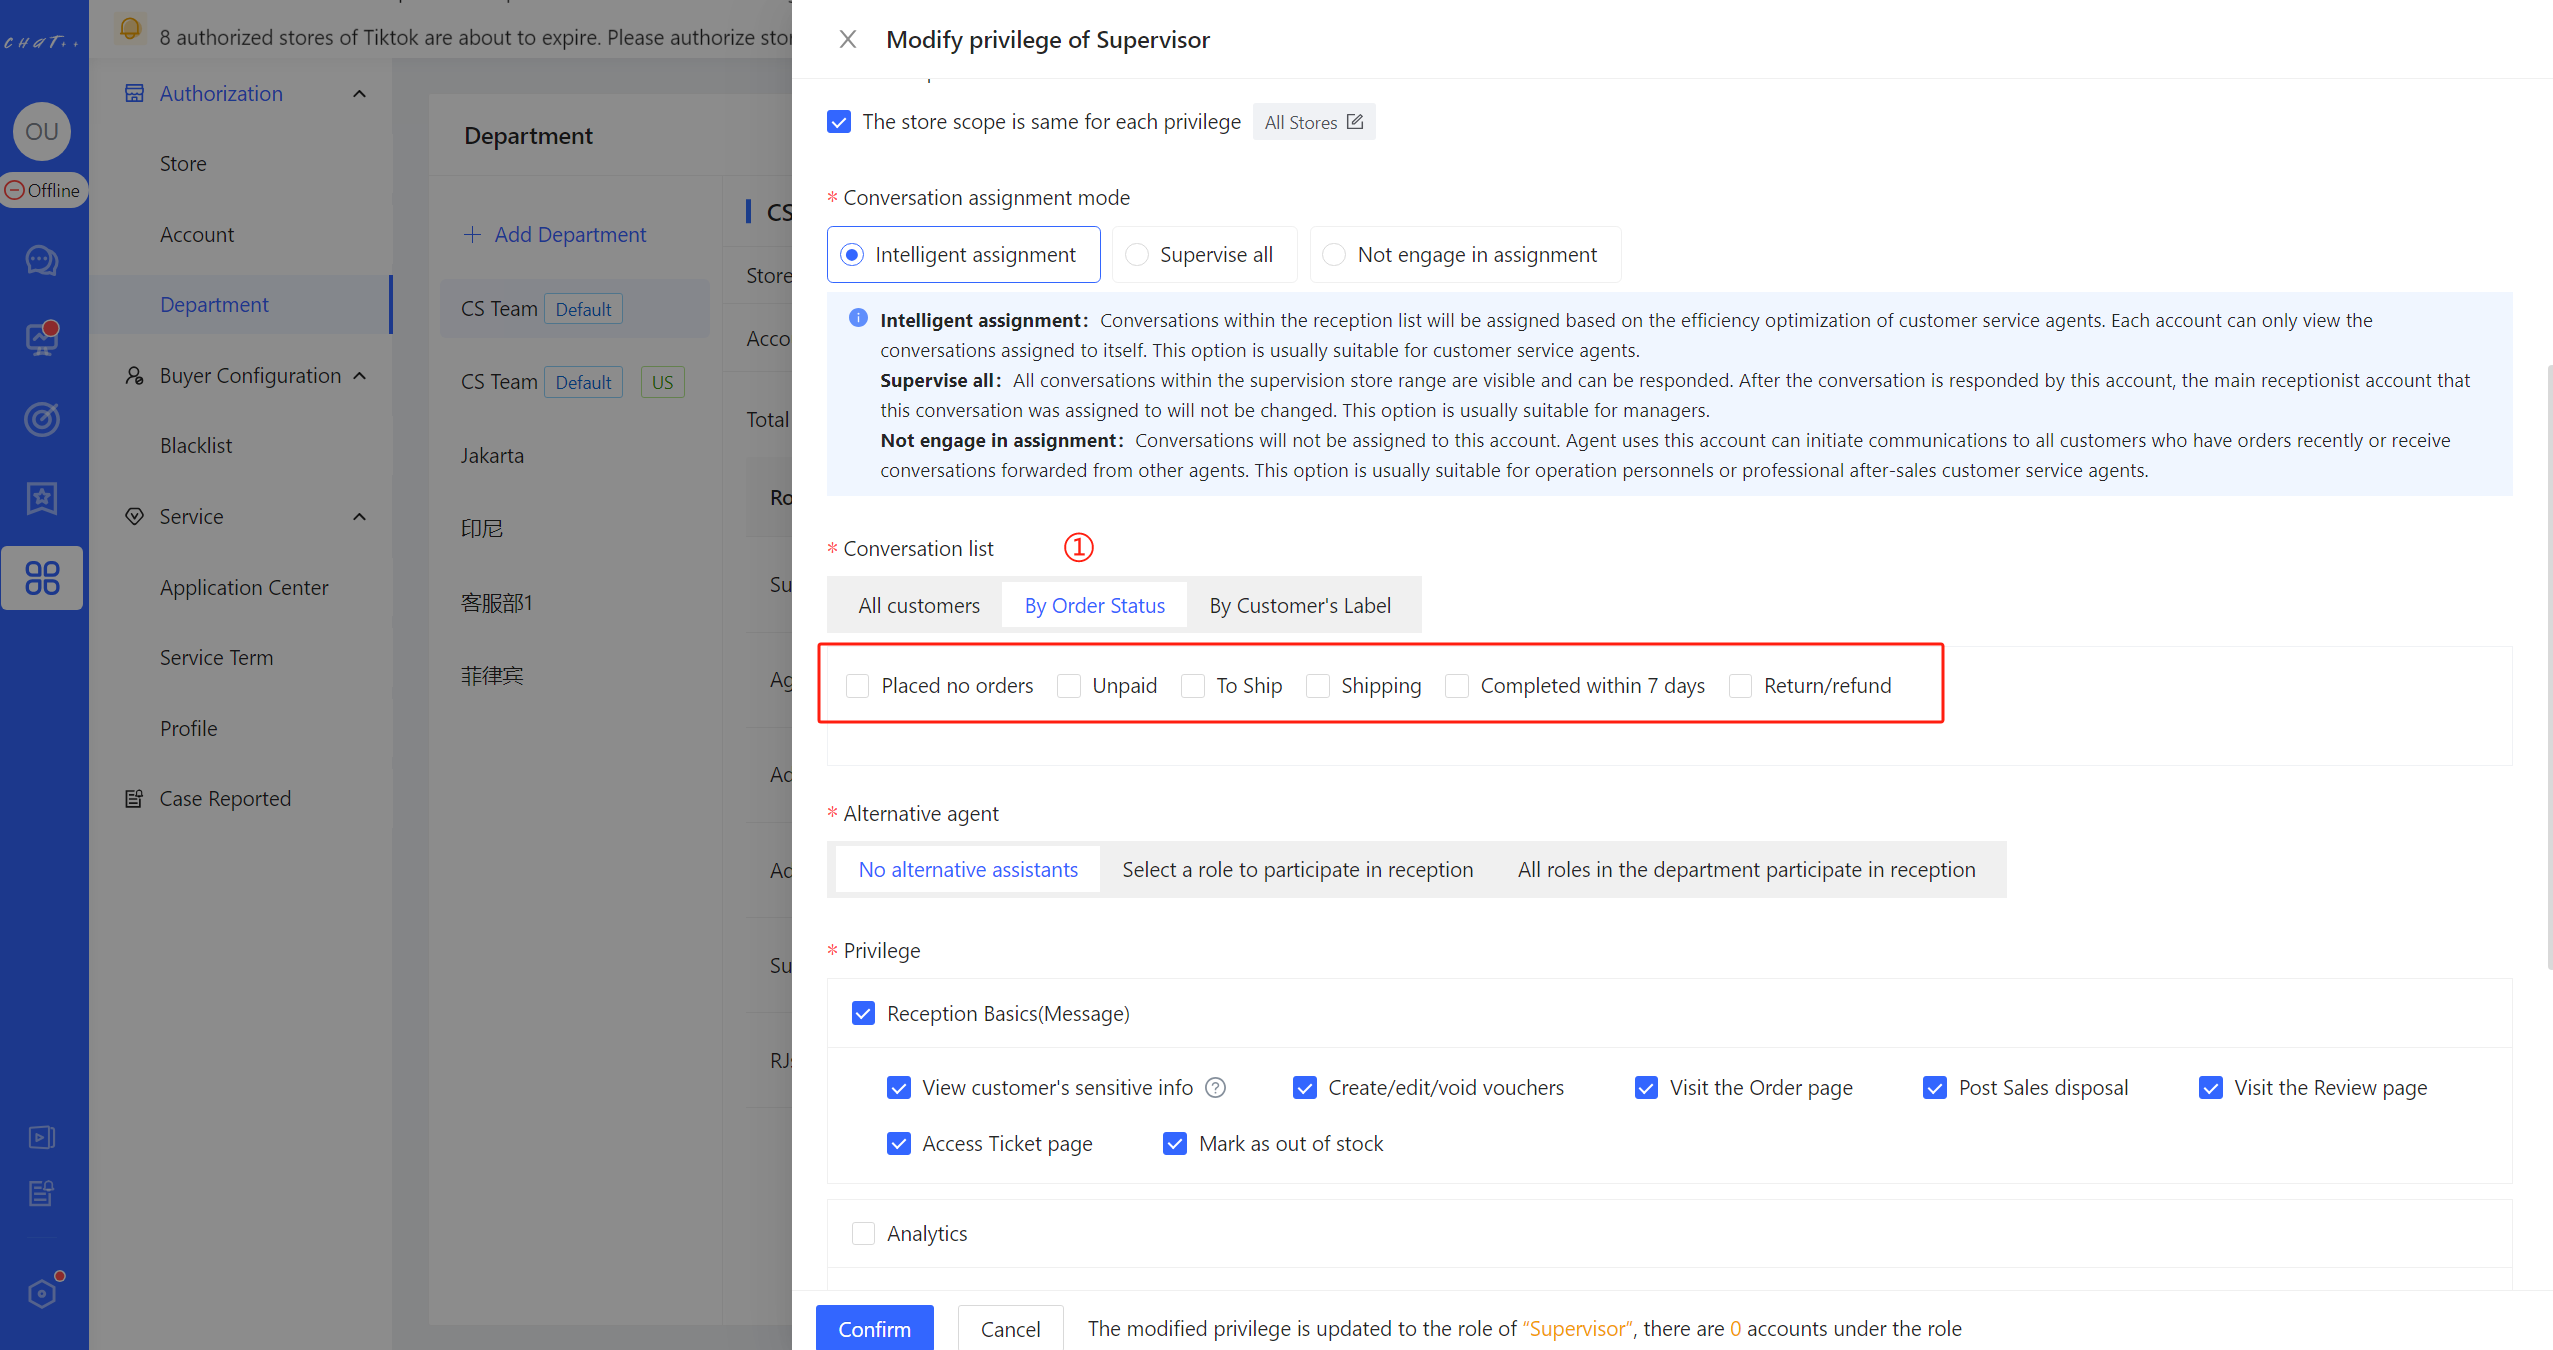
Figure 3
- By Customer's Label: The reception scope for buyers, as shown below, can be set based on customers' label. "New Customer" here refers to buyers who have not made any previous orders in the current consulting store, while "Regular Customer" refers to buyers who have placed orders in the current consulting store.
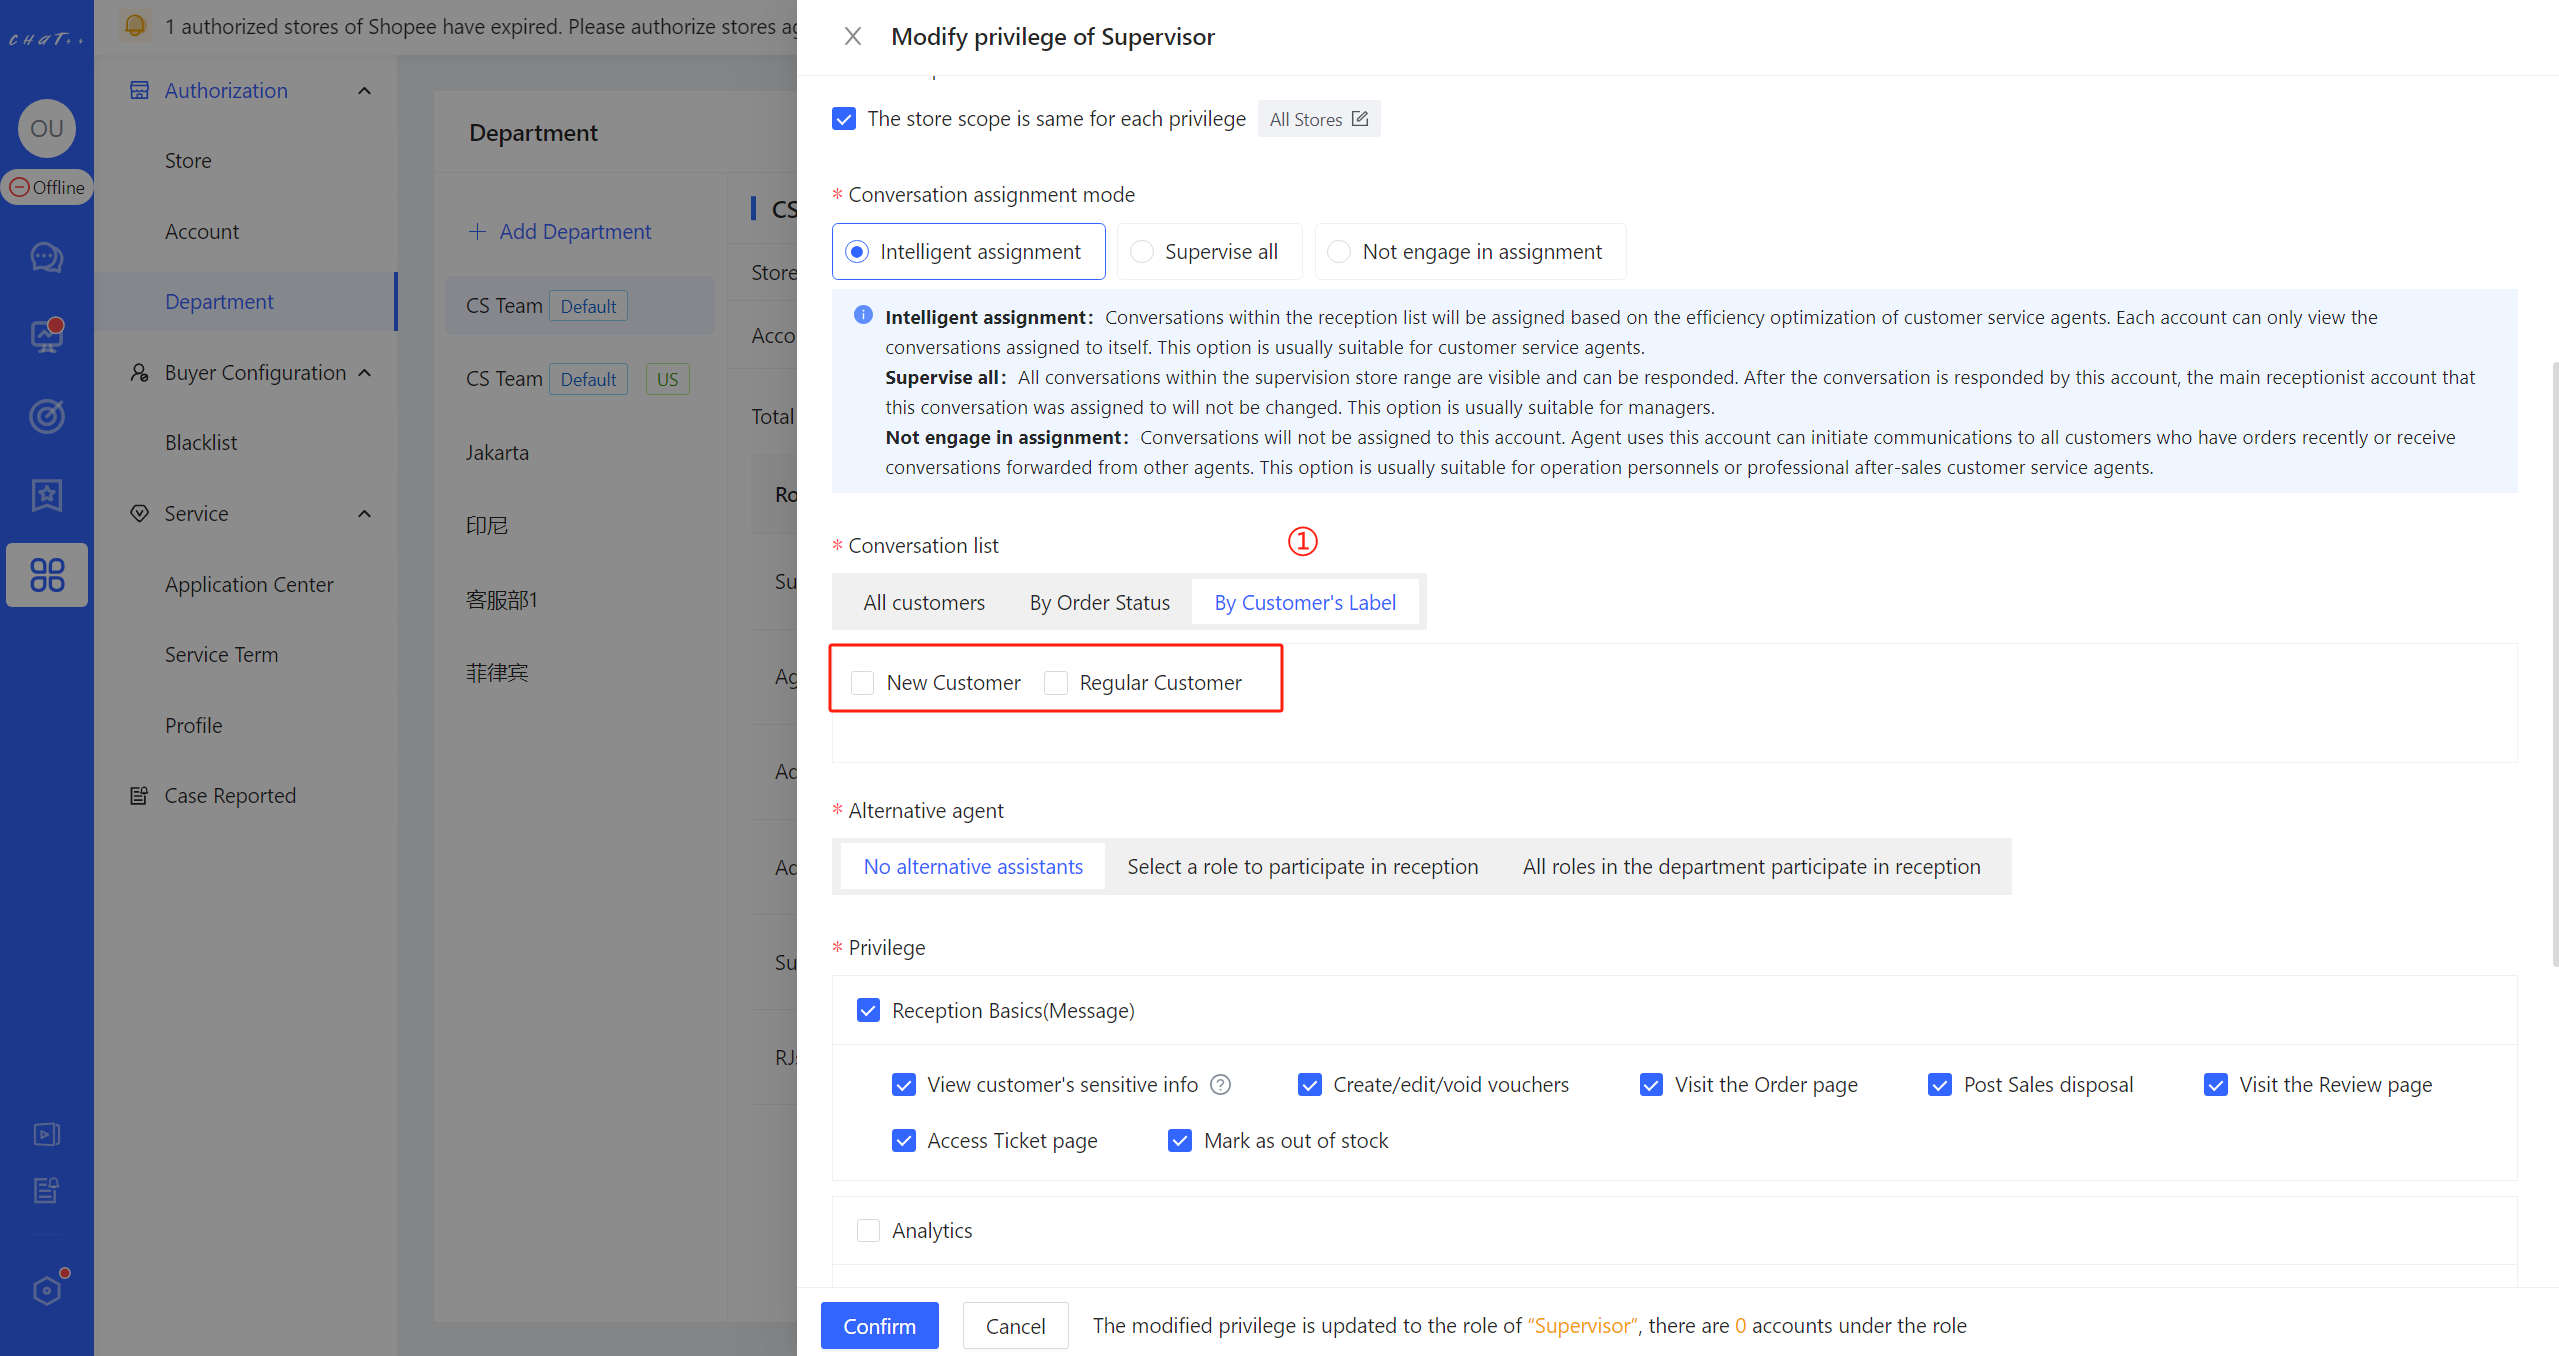
Figure 4
Alternative agent
When all accounts associated with the role being configured are offline or excessively busy, ChatPlusAI provides alternative reception capabilities. It allows online accounts belonging to other roles to substitute and handle buyers' inquiries for the current role, thereby relieving reception pressure and reducing buyer wait times. There are three configuration options available:
- No alternative assistants- No need for other online accounts to substitute
- Select a role to participate in reception- Select online accounts from specified roles to substitute
- All roles in the department participate in reception- All roles in the department with the "Intelligent assignment" mode participate in substitution
Supervise all (for Administrators)
For CS supervisors or store operations, we recommend using the "Supervise all" mode in the conversation assignment.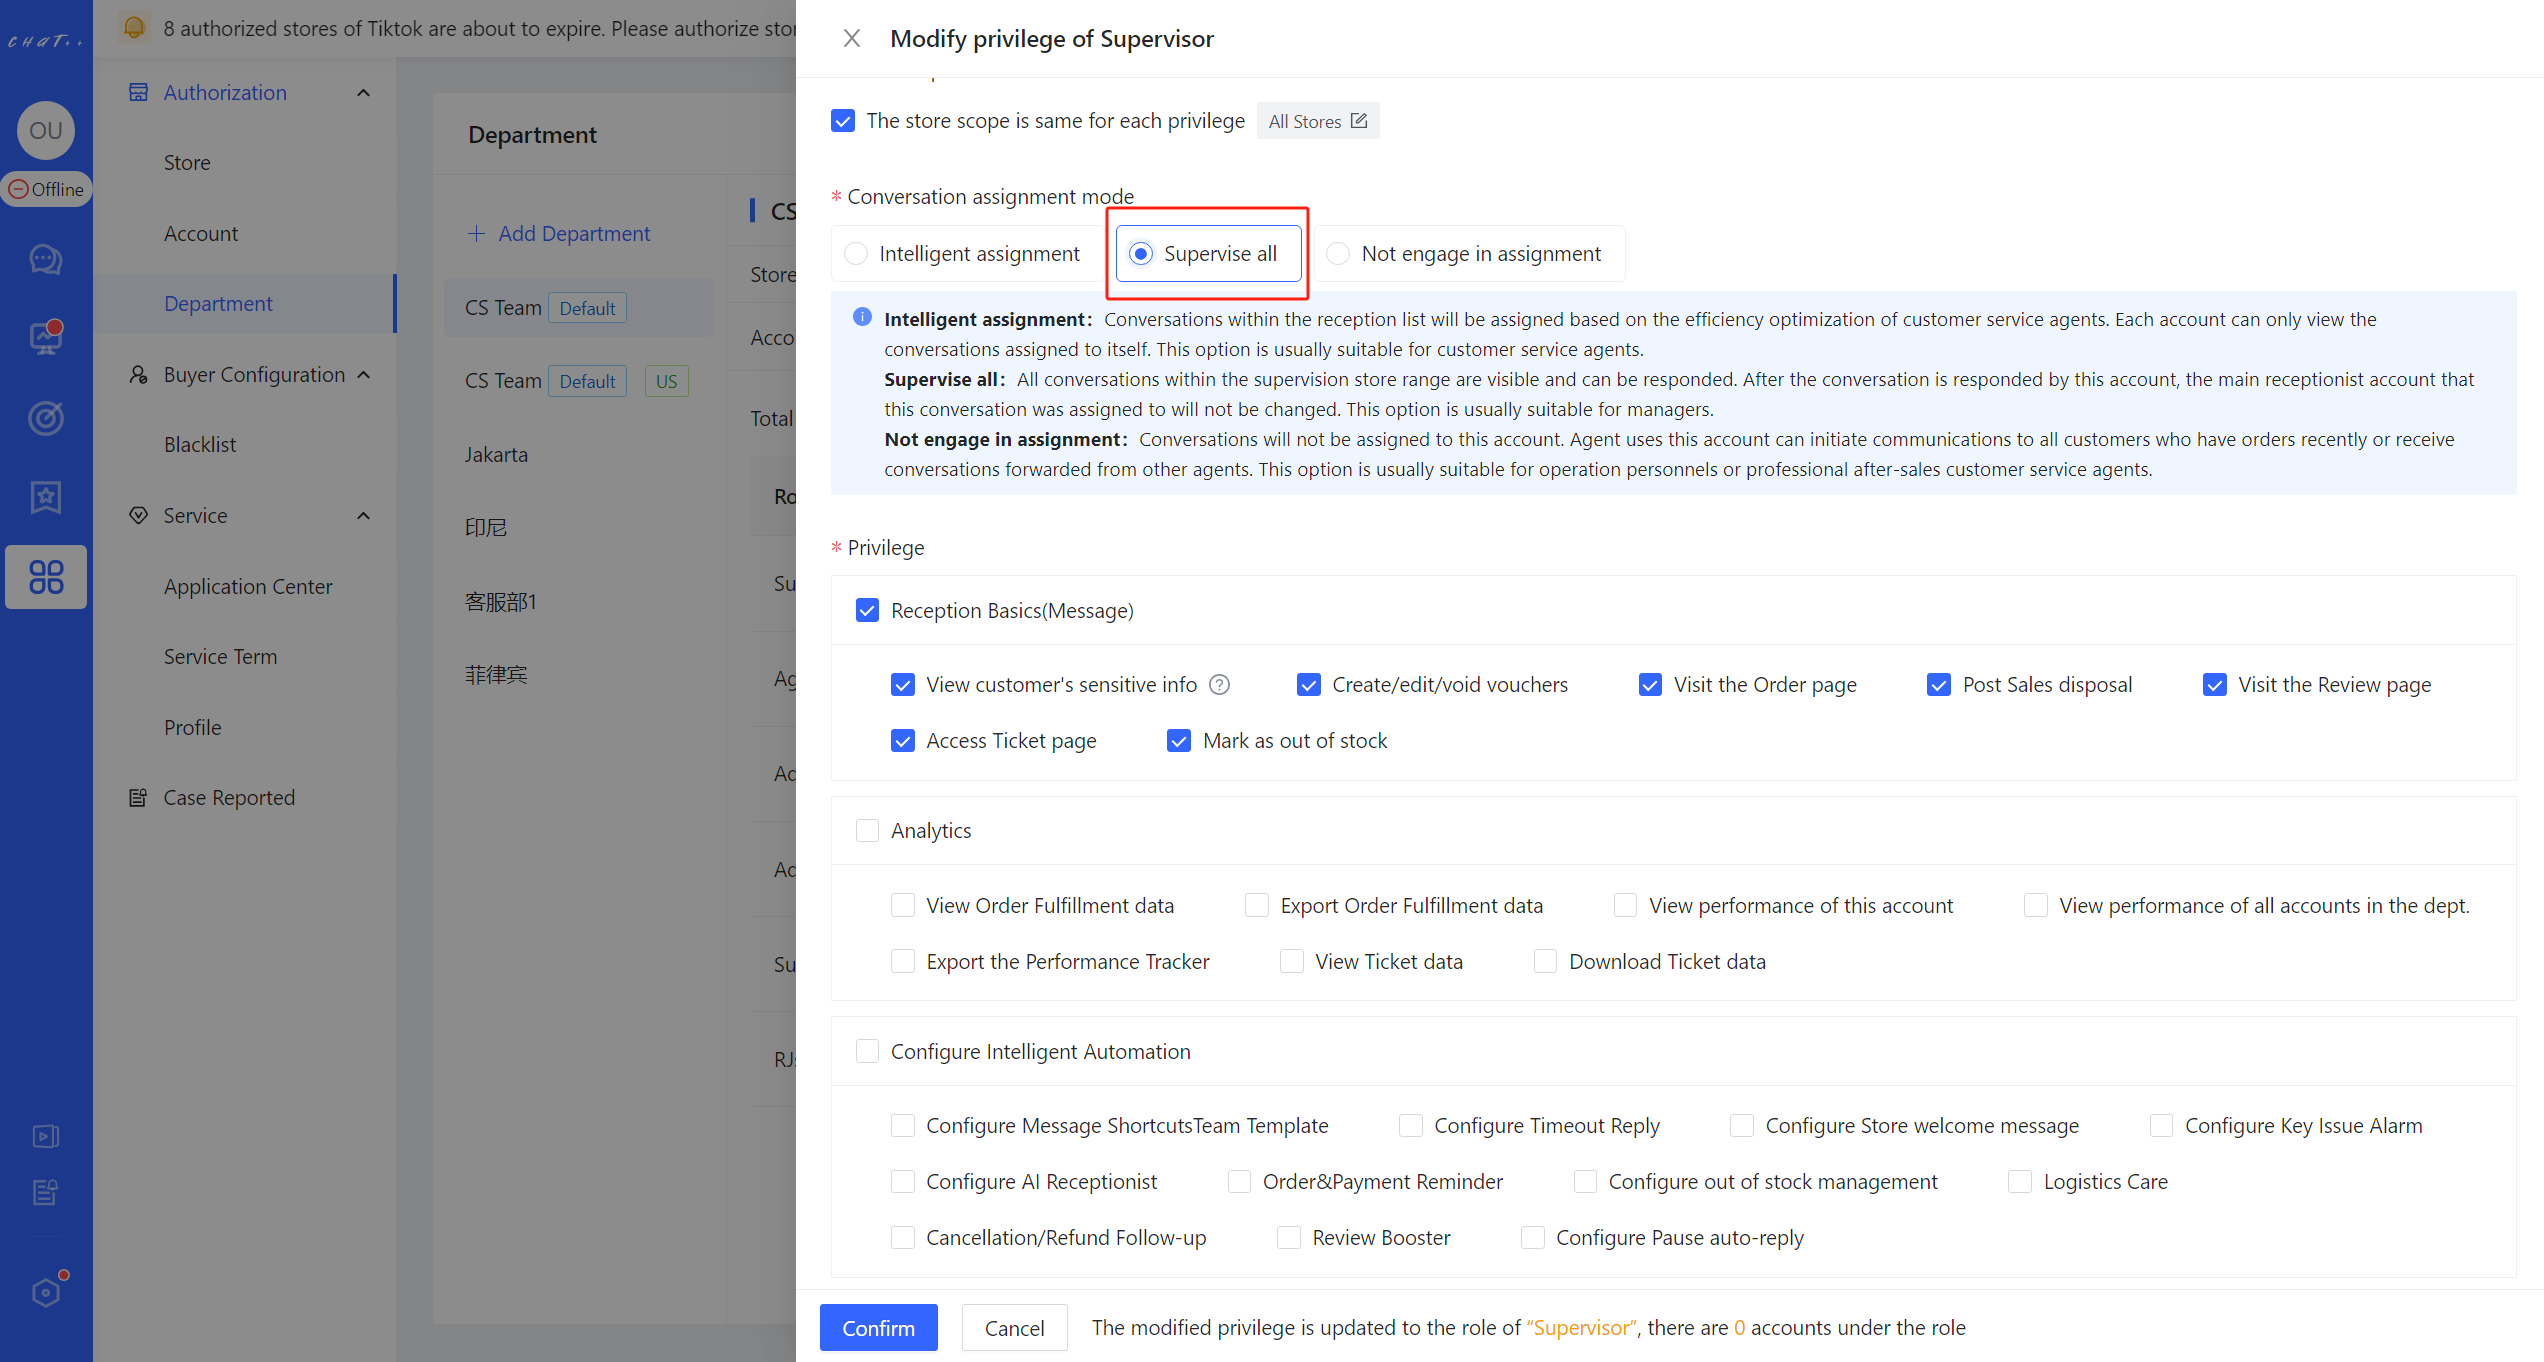
Figure 5
Accounts set in this mode can receive all buyer messages from the selected stores and can respond. It allows for constant supervision of the primary agents' reception and intervention when needed. At the same time, these buyer messages will still be assigned to the primary agents' account for the store (i.e., the account with the reception permissions for these stores and the mode set to "Intelligent Assignment").
Accounts set as "Supervise all" can receive all messages from the store, making it convenient to compare these messages with those in Seller Center to verify that no messages are missing.
These accounts are designed to supervise all buyer messages for the store, so there is no option for "Conversation list".
Since "Supervise all" accounts only have supervision permissions for buyer message and not reception permissions for buyers, there is no need to introduce the substitution.
Not engage in assignment (For Operations /Dedicated After-Sales Agents)
The last option is "Not engage in assignment"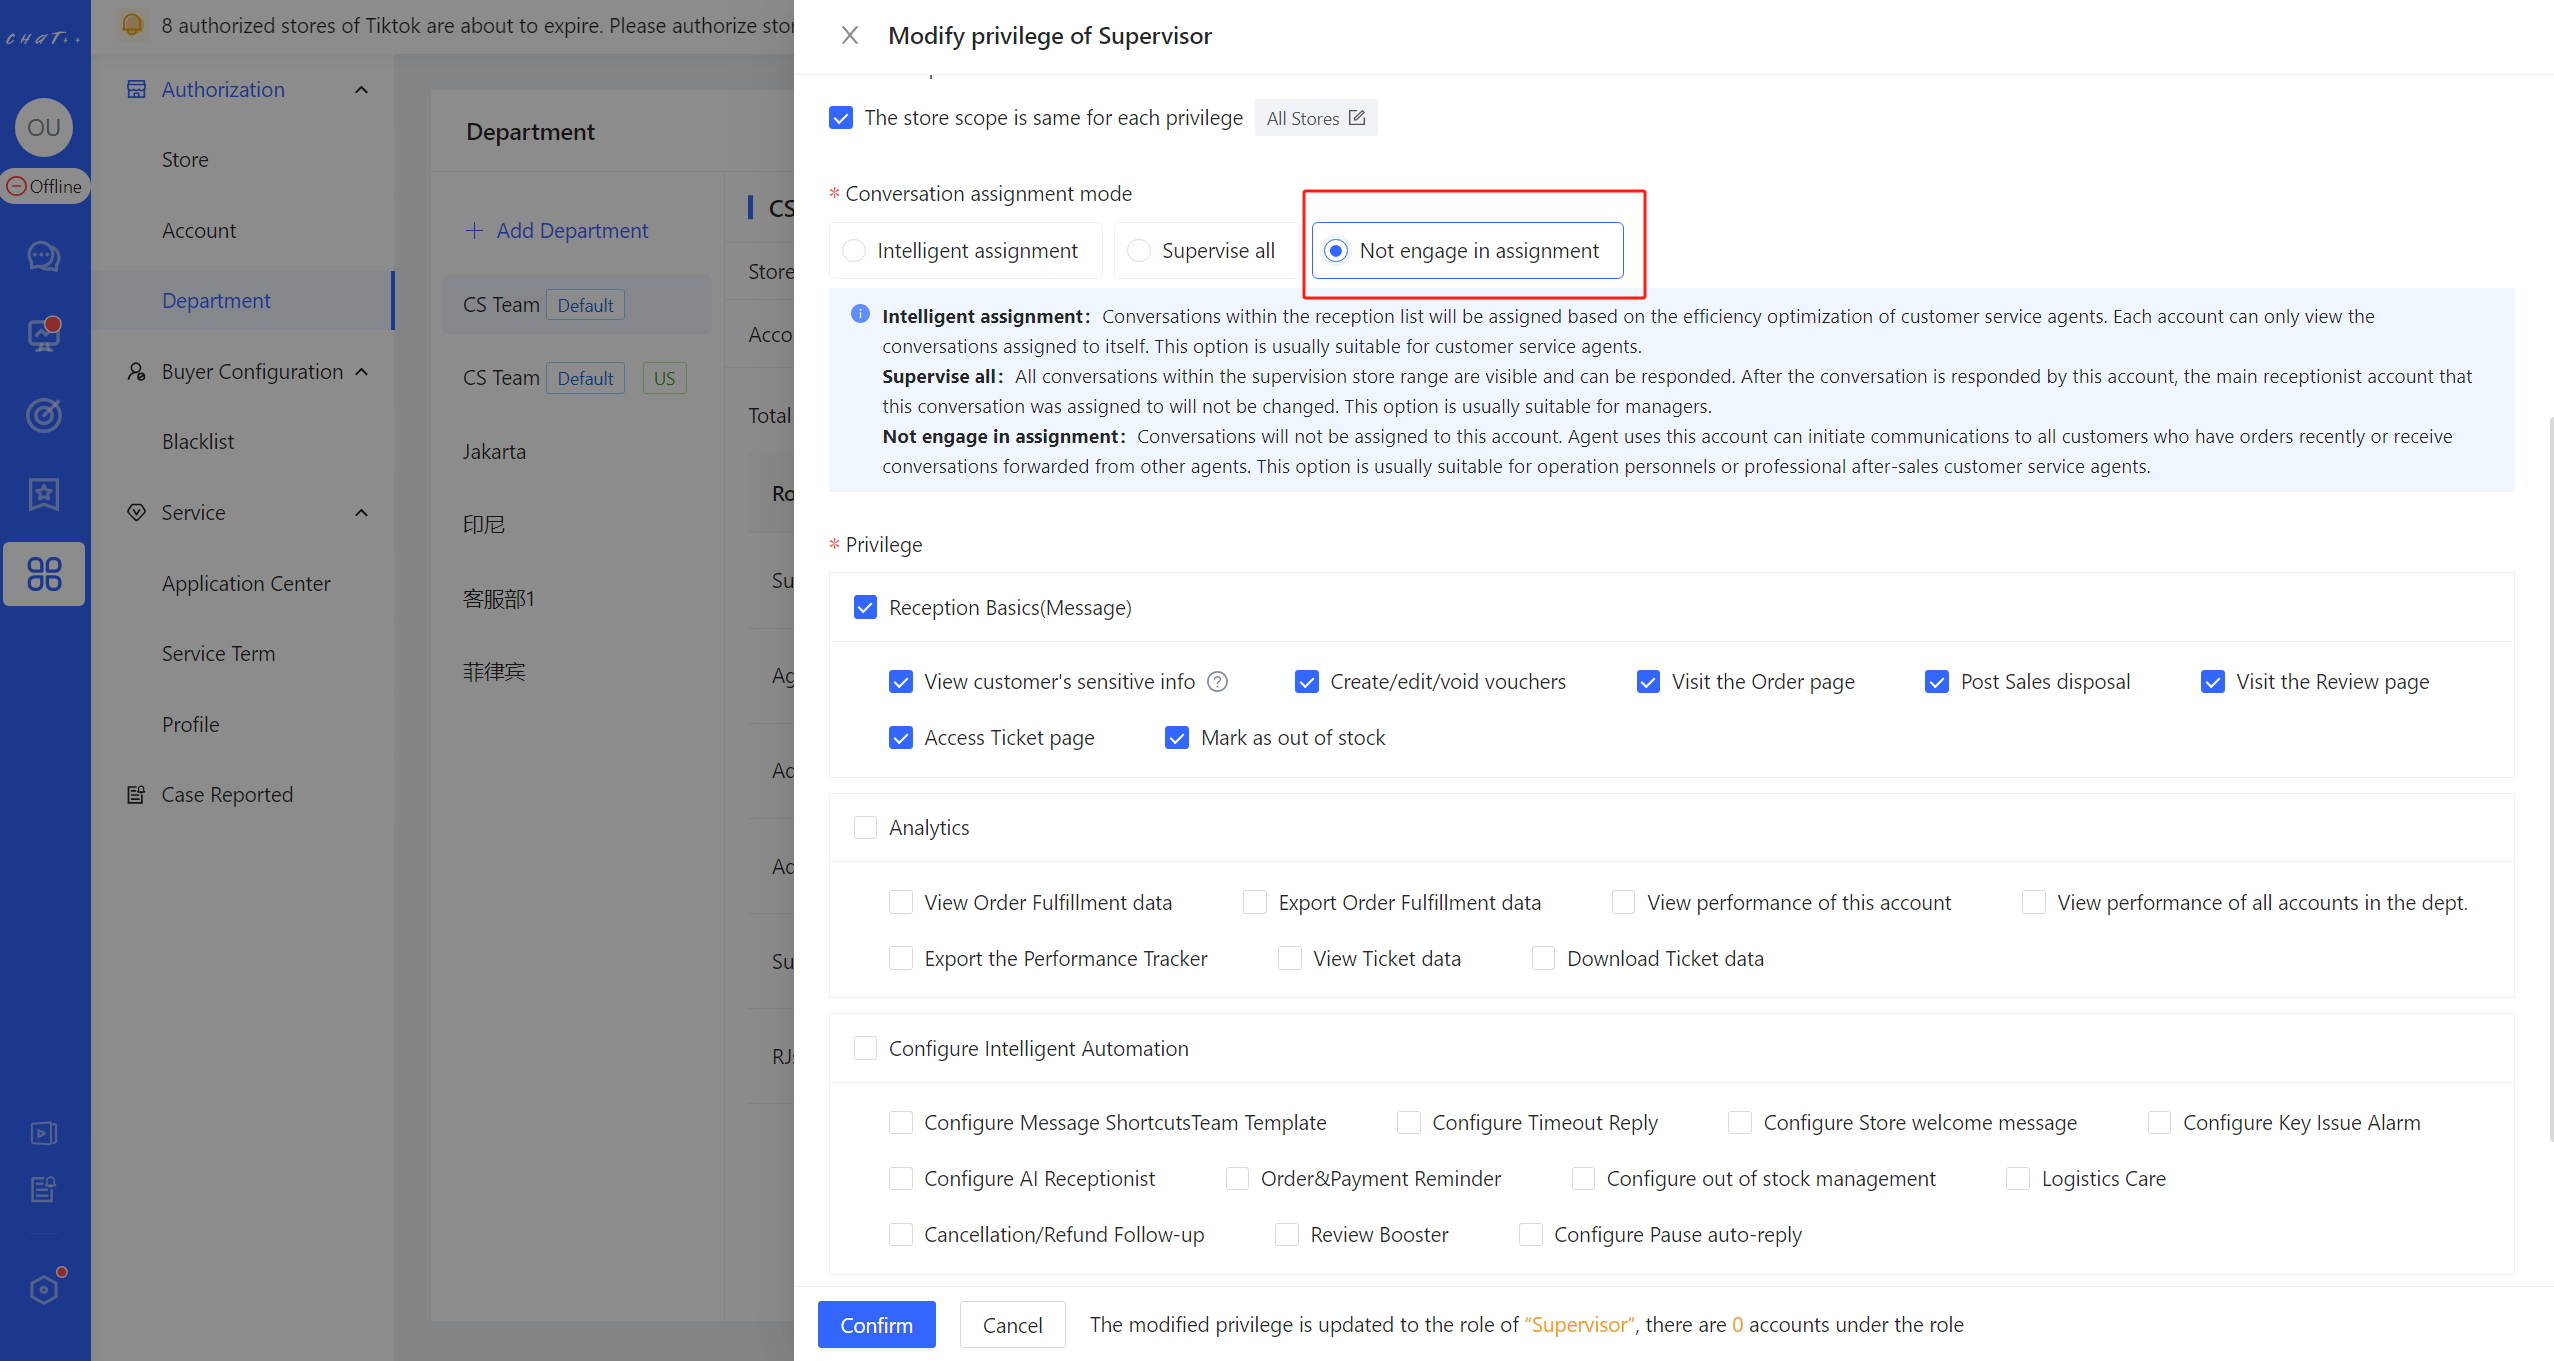
Figure 6
"Not engage in assignment" refers to that conversations will not be assigned to this account. The role uses this account can initiate communications to all customers who have orders recently.
These roles are suitable for certain CS teams specialized in handling issues in sales and after sales. They initiate consultations with buyers based on problematic orders. Even after the buyer responds, following the rule of prioritizing assignment to the agent who last responded this conversation, the conversation will still be assigned to the role account with assignment mode set to "Not engage in assignment"
✔️ A common usage for such agents accounts is to proactively initiate conversations by selecting buyers who need follow-up on the Order or Review pages in ChatPlusAI. It is done to address issues in sales and after sales process.
Agent Performance
❓Why Was Agent Performance Designed?
In your daily work, have you encountered these issues? As an admin:
- Despite the same working hours, some agents are extremely busy while others are idle. How can you maximize workforce efficiency?
- The lack of agent management tools makes it difficult to analyze agents issues effectively. Want to improve the quality of store service but don't know where to start?
- Every month, a significant amount of time and effort is spent calculating agent performance, leaving you exhausted?
As an agent:
- I can handle more buyers faster than others, but why is my performance bonus lower than theirs?
ChatPlusAI is well aware that these issues are troubling many e-commerce professionals in Southeast Asia. Therefore, ChatPlusAI has designed Agent Performance feature. This feature helps management quickly identify issues in agents, adjust and allocate team resources more reasonably, allowing outstanding agents to receive rewards matching their efforts. It achieves employee motivation, completes the management cycle, making performance management clearer and simpler, ultimately achieving a win-win for both agents and the store.
How to Configure Agent Performance
Permissions required for configuration
As long as you add relevant permissions for "Performance Tracker" on the page of "Configuration > Department Management > Role", you can view "Agent Performance" data statistics on the page of "Analytics > Performance Tracker". It will assist admins in achieving employee motivation and completing the management cycle.
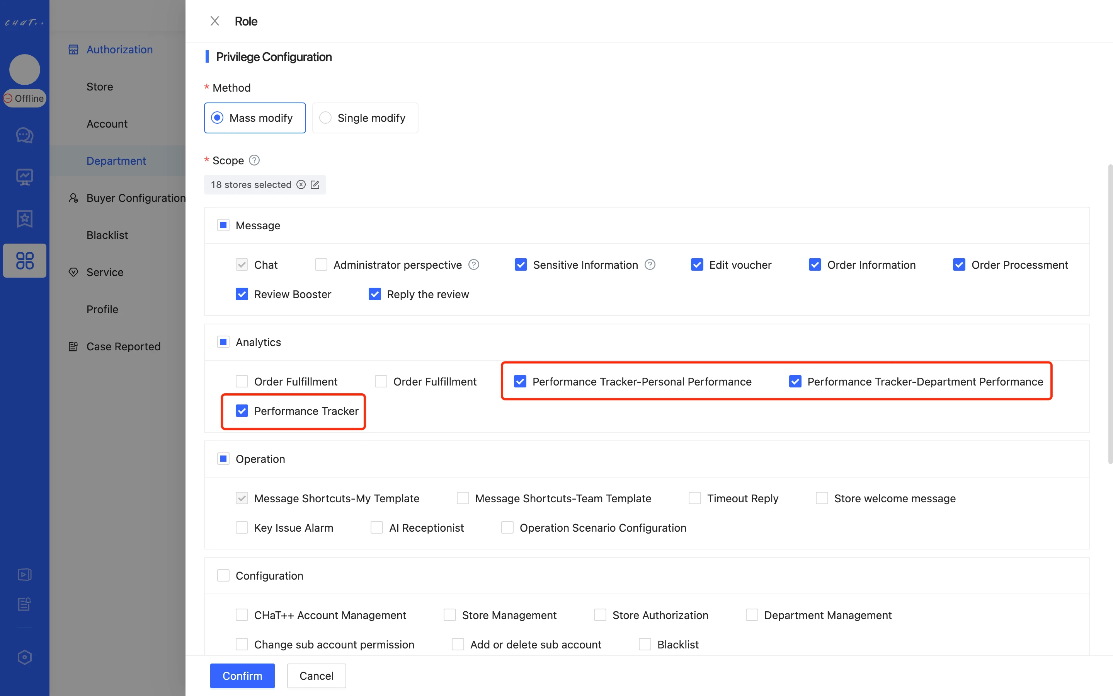
View and Manage Agent Performance
Access Agent Performance Dashboard
- Access Point: You can view agent performance data by navigating to the page of "Analytics > Performance Tracker > Agent Performance".
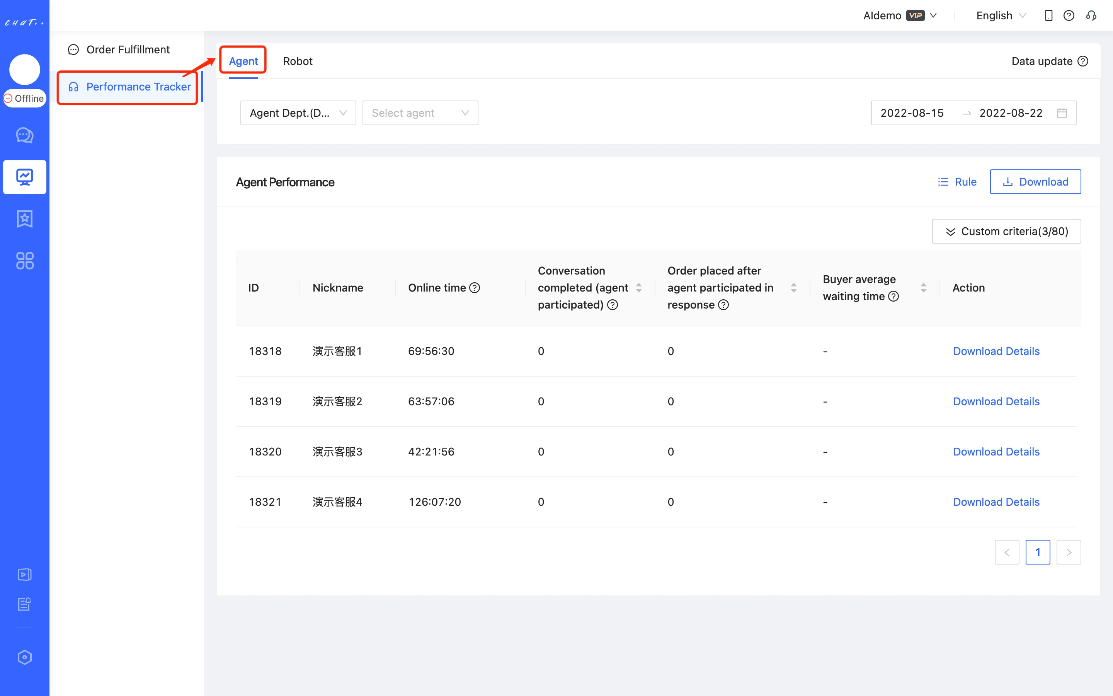
Functions Overview In the Agent Performance page, it mainly includes the following functions:
①Select specific accounts to display performance data (conveniently filter accounts by department for quick operation).
② Choose specific start and end dates for calculating agent performance data.
③ Set globally applicable performance assessment calculation rules
④ Download performance form containing all data of all indicators
⑤ Choose specific custom criteria to be displayed on Agent Performance page.
⑥ Dashboard for specific agent performance data.
⑦ Download Details corresponding to custom criteria within the selected date range (e.g., if Agent A had 5 buyers not received on August 1st, you can view the specific 5 buyers in the** Download Details**).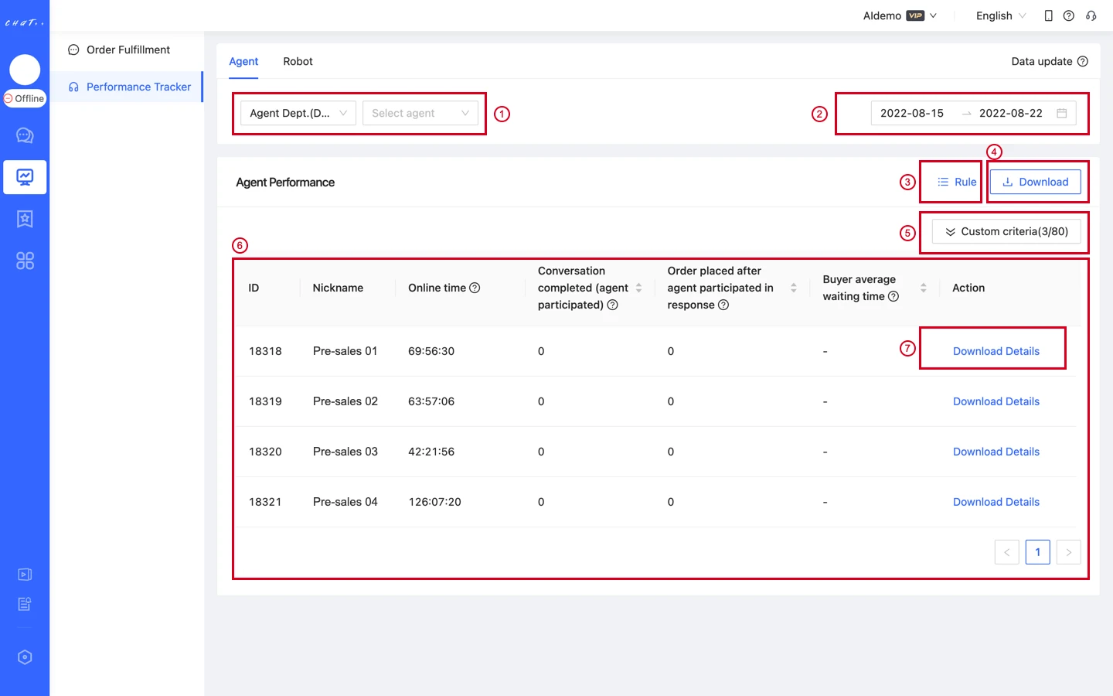
Steps for Performance Dashboard Operation Step One: Choose the performance accessment scope in sections labeled with ① and ② on the aforementioned page.
Step Two: After selecting specific custom criteria in section labeled with ⑤ on the aforementioned page, view the corresponding performance data.
Specific explanations for these two steps are as follows:
Select performance assessment scope
It includes:
Assessed Personnel: Choose which individuals' performance data to display.
You can opt to view performance data for all individuals in a specified department.
You can also select specific individuals within the department to view their performance data.
Assessment Period:** **Choose specific start and end dates for calculating agent performance data.
Select custom criteria
ChatPlusAI has conducted an in-depth analysis of the workflow of agents in Southeast Asia and has designed a comprehensive set of custom criteria for you to choose from in Step Two. You can directly use ChatPlusAI recommended 16 commonly used custom criteria to evaluate store agents, or you can select custom criteria based on the actual needs of the store and design a customized performance assessment plan.
(1) Introduction to ChatPlusAI custom criteria
ChatPlusAI has designed 80 custom criteria from three perspectives: Labor, Achievement, and Quality. These three perspectives are relatively independent yet complementary, helping you gradually and comprehensively understand the performance of agents.
Labor: It refers to the amount of effort agents put into specific work processes, providing insights into the basic work situation.
Achievement: It refers to the business benefits obtained by agents after putting in the effort, allowing a quantitative assessment of outcomes of agents' work.
Quality: The data from the two sections above can help understand the specific workload and benefits of agents. However, since some work outcome values may be high due to a large input base, relying solely on the quantity values of work outcomes may be biased. In this case, it is necessary to use the data based on agents input and achievements. Finally, calculate and reflect on service level-related indicators to understand how agents perform overall in different stages of reception and what benefits it brings to the store.
Building upon criteria from the three perspectives mentioned, ChatPlusAI also provides you with some objective statistical data on conversation receptions and reviews follow-up. These can be used as reference data for calculating agent performance:
(2) Commonly used custom criteria recommended
To facilitate your swift utilization of Agent Performance, ChatPlusAI, drawing from its experience in the Southeast Asian market, has selected 16 commonly used custom criteria with a focus on pre-sales reception, pre-sales conversion level, and after-sales return follow-up. These are recommended for your close attention.
They can assist you in rapidly gaining an overall understanding of work situation and performance of store agents, aiding you in better adjusting the workload distribution.
| Module | Stage | Custom criteria | Description | Example |
|---|---|---|---|---|
| Labor | Reception | Conversation completed (agent participated) | During the statistical period, the number of buyers assigned to this agent and whose inquiries are all responded by this agent and Chatbot or administrator. Noted this agent participated in response. | On January 1st, 100 buyers were assigned to agent account. Among them, 20 buyers were independently received by either Chatbot or admin (all inquiries from these buyers were answered by Chatbot or admin). The remaining 80 buyers required agent intervention, with 50 conversations completed with the participation of agents (Note: Conversations completed means that inquiries from buyers were replied to by agents, Chatbot, or admin). At this point, the number of conversation completed(agent participated) is 50. |
| Achievement | Place Order | Order placed after agent participated in response | The number of orders placed within 48 hours after the agent responded the buyer on ChatPlusAI | At 09:00 on January 1st, Buyer ① inquired about issue 1. At 09:05 on January 1st, Agent A replied to issue 1 in ChatPlusAI. If Buyer ① places an order in the store before 09:05 on January 3rd, at this point, the number of order placed after agent participated in response on January 1st is 1. |
| Order placed after agent participated in response(pre-sale) | The number of orders placed within 48 hours after the agent responded the pre-sale buyer on ChatPlusAI. (Pre-sale buyer refers to buyers who have not placed an order within 21 days before consultation) | At 09:00 on January 1st, Buyer ① inquired about issue 1 and and Buyer ① has not placed an order in the store in the past 21 days. At 09:05 on January 1st, Agent A replied to issue 1 in ChatPlusAI. If Buyer ① places an order in the store before 09:05 on January 3rd, at this point, the number of Order placed after agent participated in response(pre-sale) is 1. | ||
| Cancellation | Cancellation retrieved after proactive communication | The number of cancellation requests withdrawn and the number of cancelled orders that new orders placed after cancellation within 72 hours after the agent positively communicated with the buyer on ChatPlusAI. | At 09:00 on January 1st, Buyer ① requested cancellation X. At 09:30 on January 1st, Agent A proactively communicated with Buyer ① in ChatPlusAI. If Buyer ① withdrew cancellation request X before January 4th at 09:00, it is considered as the count of cancellation retrieved after proactive communication by Agent A is incremented by 1. At 09:00 on January 1st, Buyer ② requested cancellation Y. At 09:30 on January 1st, Agent A proactively communicated with Buyer ② in ChatPlusAI. Before 09:30 on January 4th, if Buyer ② places a new order in the same store after cancellation request Y is approved, it is considered as the count of cancellation retrieved after proactive communication by Agent A is incremented by 1. At this point, the number of cancellation retrieved after proactive communication by Agent A on January 1st is 2. | |
| Refund-only | Refund-only retrieved after proactive communication | The number of refund-only requests withdrawn by buyers and the number of refund-only requests that new orders placed within 72 hours after the agent positively communicated with the buyer on ChatPlusAI | At 09:00 on January 1st, Buyer ① requested refund-only X. At 09:30 on January 1st, Agent A proactively communicated with Buyer ① in ChatPlusAI. If Buyer ① withdrew refund-only request X before January 4th at 09:30, it is considered as the count of refund-only retrieved after proactive communication by Agent A is incremented by 1. At 09:00 on January 1st, Buyer ② requested refund-only Y. At 09:30 on January 1st, Agent A proactively communicated with Buyer ② in ChatPlusAI. Before 09:30 on January 4th, if Buyer ② places a new order in the same store after refund-only request Y is approved, it is considered as the count of refund-only retrieved after proactive communication by Agent A is incremented by 1. At this point, the number of refund-only retrieved after proactive communication by Agent A on January 1st is 2. | |
| Return/Refund | Return/Refund retrieved after proactive communication | The number of return/refund requests withdrawn by buyers and the number of return/refund requests that new orders placed within 72 hours after the agent positively communicated with the buyer on ChatPlusAI | At 09:00 on January 1st, Buyer ① requested Return/Refund X. At 09:30 on January 1st, Agent A proactively communicated with Buyer ① in ChatPlusAI. If Buyer ① withdrew Return/Refund request X before January 4th at 09:30, it is considered as the count of Return/Refund retrieved after proactive communication by Agent A is incremented by 1. At 09:00 on January 1st, Buyer ② requested Return/Refund Y. At 09:30 on January 1st, Agent A proactively communicated with Buyer ② in ChatPlusAI. Before 09:30 on January 4th, if Buyer ② places a new order in the same store after Return/Refund request Y is approved, it is considered as count of Return/Refund retrieved after proactive communication by Agent A is incremented by 1. At this point, the number of Return/Refund retrieved after proactive communication by Agent A on January 1st is 2. | |
| Review | Positive review after proactive communication Data related to rating stars on Lazada is taken from "Overall Rating" dimension. | The number of reviews that buyers changed from negative(1-3 stars) to positive(4-5 stars) within 72 hours after the agent positively communicated with the buyer on ChatPlusAI | At 09:00 on January 1st, Buyer ③ posted a 3-star review P. At 09:30 on January 1st, Agent A proactively communicated with Buyer ③ in ChatPlusAI. Before 09:30 on January 4th, if Buyer ③ modified the 3-star review P to a 5-star review, it is considered as count of positive review after proactive communication by Agent A is incremented by 1. At this point, the number of positive review after proactive communication by Agent A on January 1st is 1. | |
| Quality | Reception | Agent response rate in 5 mins | During the statistical period, the number of responded buyers is used as the denominator ( If all first responses to the buyer's inquiries are not from this agent, the buyer will not be counted), while the number of buyers responded by the agent on average within 5 mins is used as the numerator. | At 09:00 on January 1st, Buyer ① inquired about issue 1. At 09:30 on January 1st, Buyer ① was assigned to Agent A. Before 09:35 on January 1st, Agent A responded to issue 1 in ChatPlusAI. At this point, Agent A response rate in 5 mins on January 1st is 100%. At 09:00 on January 1st, Buyer ② inquired about issue 1. At 09:30 on January 1st, Buyer ② was assigned to Agent B. At 09:31 on January 1st, Chatbot responded to issue 1. At 09:34 on January 1st, Agent B responded to issue 1 in ChatPlusAI. At this point, it wasn't counted in data statistics of response rate for Agent B in 5 mins. |
| Agent response rate in 30 mins | During the statistical period, the number of responded buyers is used as the denominator ( If all first responses to the buyer's inquiries are not from this agent, the buyer will not be counted), while the number of buyers responded by the agent on average within 30 mins is used as the numerator. | At 09:00 on January 1st, Buyer ① inquired about issue 1. At 09:30 on January 1st, Buyer ① was assigned to Agent A. Before 10:00 on January 1st, Agent A responded to issue 1 in ChatPlusAI. At this point, Agent A response rate in 30 mins on January 1st is 100%. At 09:00 on January 1st, Buyer ② inquired about issue 1. At 09:30 on January 1st, Buyer ② was assigned to Agent B. At 09:31 on January 1st, Chatbot responded to issue 1. At 10:59 on January 1st, Agent B responded to issue 1 in ChatPlusAI. At this point, it wasn't counted in data statistics of Agent B response rate in 30 mins. | ||
| Conversation responded rate in 5 mins | During the statistical period, the number of responded buyers is used as the denominator ( If all first responses to the buyer's inquiries are not from this agent, the buyer will not be counted), while the number of buyers waiting to be responded on average within 5 mins is used as the numerator. | At 09:00 on January 1st, Buyer ① inquired about issue 1. At 09:30 on January 1st, Buyer ① was assigned to Agent A. Before 09:35 on January 1st, Agent A responded to issue 1 in ChatPlusAI. At this point, Agent A conversation responded rate in 5 mins = 0/1 = 0% At 09:00 on January 1st, Buyer ② inquired about issue 1. At 09:30 on January 1st, Buyer ② was assigned to Agent B. At 09:31 on January 1st, Chatbot responded to issue 1. At 09:34 on January 1st, Agent B responded to issue 1 in ChatPlusAI. At this point, it wasn't counted in data statistics of conversation responded rate for Agent B in 5 mins | ||
| Conversation responded rate in 30 mins | During the statistical period, the number of responded buyers is used as the denominator ( If all first responses to the buyer's inquiries are not from this agent, the buyer will not be counted), while the number of buyers waiting to be responded on average within 30 mins is used as the numerator. | At 09:00 on January 1st, Buyer ① inquired about issue 1. At 09:30 on January 1st, Buyer ① was assigned to Agent A. Before 09:35 on January 1st, Agent A responded to issue 1 in ChatPlusAI. At this point, Agent A conversation responded rate in 5 mins = 0/1 = 0% At 09:00 on January 1st, Buyer ② inquired about issue 1. At 09:30 on January 1st, Buyer ② was assigned to Agent B. At 09:31 on January 1st, Chatbot responded to issue 1. At 09:34 on January 1st, Agent B responded to issue 1 in ChatPlusAI. At this point, it wasn't counted in data statistics of Agent B conversation responded rate in 5 mins | ||
| Agent average response time | The interval between the first inquiry from the buyer assigned to the agent and the first reply from the agent on ChatPlusAI (If the first reply is not from this agent, it will not be counted in the response time. When the buyer send a new inquiry after being responded this data will be calculated again). It is the average of the agent response time in one day. | At 09:00 on January 1st, Buyer ⑤ inquired about issue 1. At 09:30 on January 1st, Buyer ⑤ was assigned to Agent C. At 09:36 on January 1st, Agent C responded to issue 1 in ChatPlusAI. At 09:37 on January 1st, Buyer ⑤ was transferred to Agent D by Agent C. At 09:40 on January 1st, Agent D responded to issue 1 in ChatPlusAI. At 13:00 on January 1st, Buyer ⑤ inquired about issue 2. At 13:05 on January 1st, Buyer ⑤ was assigned to Agent C. At 13:09 on January 1st, Agent C responded to issue 2 in ChatPlusAI. At this point, average response time for Agent C is 5 mins((09:36-09:30) + (13:09-13:05))/2 ) It wasn't counted in data statistics of average response time for Agent D. | ||
| Buyer average waiting time | The interval between the first inquiry from the buyer and the first reply from the agent on ChatPlusAI (If the first reply is not from this agent, it will not be counted in the waiting time. When the buyer send a new inquiry after being responded this data will be calculated again). It is the average time of buyers waiting to be responded in one day. | At 09:00 on January 1st, Buyer ⑤ inquired about issue 1. At 09:30 on January 1st, Buyer ⑤ was assigned to Agent C. At 09:36 on January 1st, Agent C responded to issue 1 in ChatPlusAI. At 09:37 on January 1st, Buyer ⑤ was transferred to Agent D by Agent C. At 09:40 on January 1st, Agent D responded to issue 1 in ChatPlusAI. At 13:00 on January 1st, Buyer ⑤ inquired about issue 2. At 13:05 on January 1st, Buyer ⑤ was assigned to Agent C. At 13:09 on January 1st, Agent C responded to issue 2 in ChatPlusAI. At this point, buyer average waiting time for Agent C is 22.5 mins((09:36-09:00) + (13:09-13:00))/2 ) It wasn't counted in data statistics of buyer average waiting time for Agent D. | ||
| Response completion rate(agent participation required) | Conversation completed(agent participated)/Conversation assigned(agent participation required) | On January 1st, 100 buyers were assigned to agent account. Among them, 20 buyers were independently received by either Chatbot or admin (all inquiries from these buyers were answered by Chatbot or admin). The remaining 80 buyers required agent intervention, with 50 conversations completed with the participation of agents. At this point, the number of conversation assigned(agent participation required) is 80, and the number of conversation completed(agent participated) is 50. Response completion rate(agent participation required) = 50 / 80 = 62.5% | ||
| Place Order | Order rate after agent participated in response(pre-sale) | Buyer ordered after agent participated in response(pre-sale)/Conversation responded(agent participated,pre-sale) | On January 1st, 10 buyers were assigned to Agent A. Among them, 2 buyers were independently received by either Chatbot or admin (all inquiries from these buyers were answered by Chatbot or admin). The remaining 8 buyers required agent intervention, with 6 buyers received by Agent A(Reception may be not completed). At this point, the number of conversation responded by Agent A is 6. At 09:00 on January 1st, Buyer ① inquired about issue 1 and and Buyer ① has not placed an order in the store in the past 21 days. At 09:05 on January 1st, Agent A replied to issue 1 in ChatPlusAI. If Buyer ① places an order in the store before 09:00 on January 3rd, at this point, the number of Order placed after agent participated in response(pre-sale) is 1. Order rate after agent participated in response(pre-sale) for Agent A on January 1st = 1/6 = 16.7% | |
| Merchant Common | Reception | Conversation assigned (agent participation required) | During the statistical period, among the buyers allocated to agent, the number of buyers who need to be responded, excludes the number of buyers already responded by Chatbot or administrator. That is: Conversation completed by agent + Conversation uncompleted(assigned) | On January 1st, 100 buyers were assigned to agent account. Among them, 20 buyers were independently received by either Chatbot or admin (all inquiries from these buyers were answered by Chatbot or admin). The remaining 80 buyers required agent intervention, with 50 conversations completed with the participation of agents (Note: Conversations completed means that inquiries from buyers were replied to by agents, Chatbot, or admin). At this point, the number of conversation assigned (agent participation required) is 80. |
More ActionsDownload
Data of Agent Performance in ChatPlusAI supports one-click to download. Simply click the "Download" button, and ChatPlusAI will automatically generate and download a spreadsheet containing complete data of custom criteria to your computer. You can view or continue managing performance data in the downloaded sheet. With just a few simple steps, you can quickly calculate agents' performance bonuses, eliminating the need to spend a lot of time and effort manually calculating agent performance.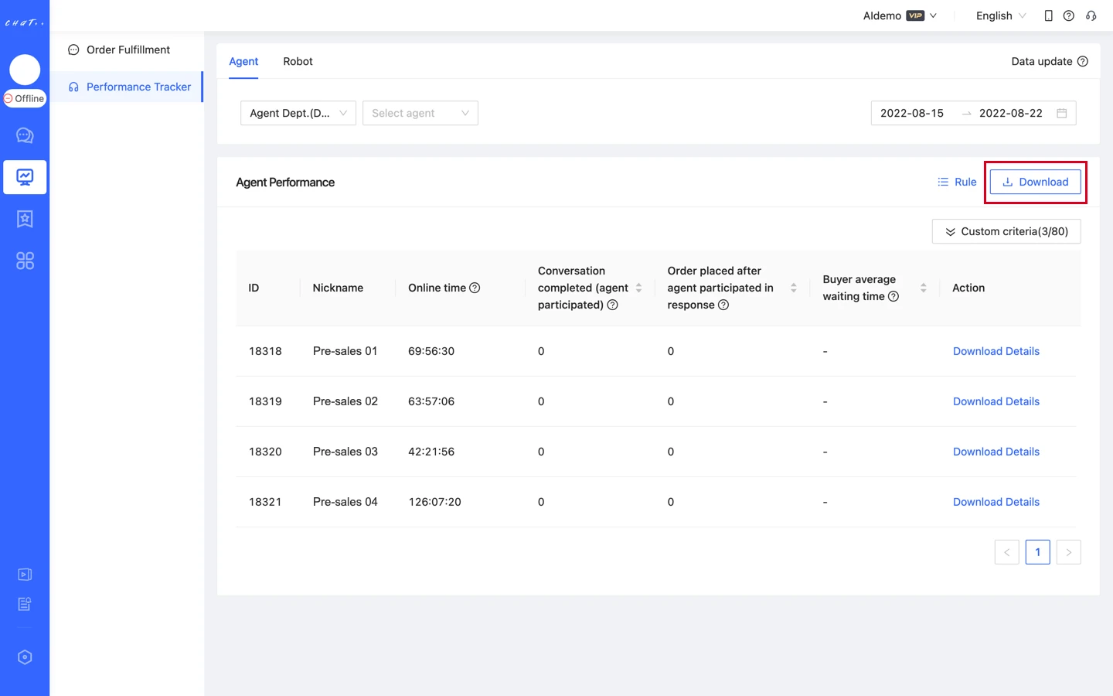
Usage recommendations:
- If you only need to quickly view Agent Performance data, you can directly check the data results within the ChatPlusAI interface.
- If you need to perform further in-depth calculations based on custom criteria provided by ChatPlusAI (such as calculating performance bonuses), it is recommended to "Download" and continue operations in the downloaded file.
Download Details
In the process of managing agent performance, if you have questions about data of a specific agent account, you can also find the account in the Agent Performance page. Click the "Download Details" button to download and view the specific details corresponding to the custom criteria of that agent account.
- Example
Performance dashboard : Agent A had 5 buyers to respond on August 1st. After selecting the date, you can click the "Download Details" button on the right side of agent performance statistics list for this account in the Agennt Performance page. You can check which 5 buyers were not responded by Agent A in the downloaded spreadsheet.
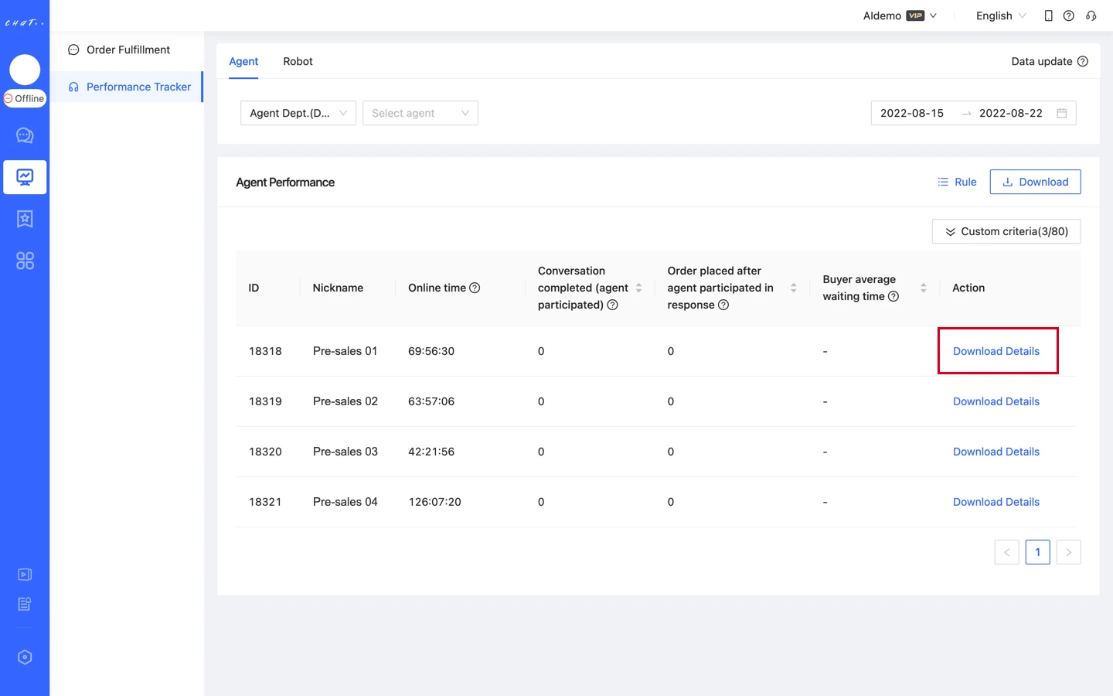
Select Rules
Rules refer to metrics in sections of Place Order & Pay & Review
Rules are divided into the following 2 types:
- Rule 1: Calculate for "Every agent who served the buyer"
- Rule 2: Calculate for "The latest agent who served the buyer"
- Rule 1 is selected by default, you can also select according to the actual needs of your store.
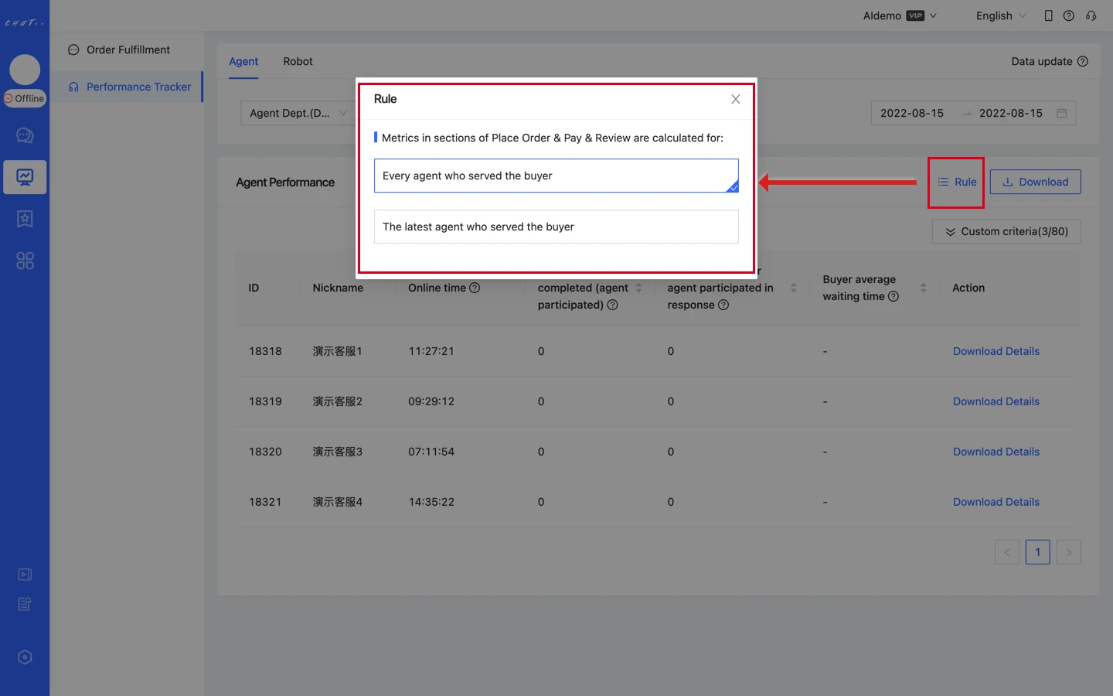
Show cases
Case 1: Uneven Workload Assignment
Agent A and Agent B, responsible for Philippines site, have the same working hours every weekday (9:00-18:00). The specific data is as follows:
| Custom criteria | Agent A | Agent B |
|---|---|---|
| Total online time | 5:55:00 | 5:58:00 |
| Conversation assigned | 300 | 150 |
| Conversation assigned (agent participation required) | 100 | 50 |
| Conversation completed (agent participated) | 98 | 45 |
- From the performance assessment data, it was found that despite AI Chatbot responding most buyers for agents during the same working hours, the workload of Agent A still remained significantly higher than that of Agent B (no wonder Agent A always complains about being too busy and has negative emotions);
- Further investigation revealed that Philippine site has a total of 6 stores, with Agent A responsible for responding buyers for 4 of them, and Agent B responding buyers for remaining 2 stores, resulting in an uneven workload assignment;
- After thorough analysis, the reception assignment for Agent A and Agent B was readjusted. Each was assigned to respond to buyers for 3 stores, effectively balancing the workload and optimizing team resources.
Case 2: Insufficient Reception Efficiency
The store receives a considerable number of pre-sales inquiries from buyers every day. However, the conversion rate from pre-sales inquiries to orders has consistently remained around 5% (Industry average is approximately 15%), indicating poor performance.
Upon reviewing the performance data for the store's agents, the specifics are as follows:
| Custom criteria | Average for Agents |
|---|---|
| Conversation responded rate in 5 mins | 0% |
| Conversation responded rate in 30 mins | 0% |
| Agent average response time | 1:09:10 |
| Buyer average waiting time | 9:12:10 |
- According to performance assessment data, the probability of being responded within 30 minutes after a buyer enters the store for inquiries is 0. After the buyer's conversation is assigned to the agent, the average response time of agents is around 1 hour, resulting in an overall prolonged wait time for buyers inquiring in the store.
- Further investigation using the "Download Details" table reveals that a significant portion of pre-sale buyers have a strong intention to make a purchase. However, due to the long wait for reception and delayed responses from agents, these potential buyers lose interest in shopping, leading to their eventual loss, and it is regrettable.
- The objective situation in the store is that agents are responsible for various daily tasks, making it challenging to respond to buyer inquiries within 5 minutes, or even 30 minutes. Additionally, during rest times (such as off-duty hours or lunch breaks), there is no one available to respond to buyer inquiries. It has resulted in the loss of potential buyers and the persistent challenge of improving the inquiry conversion rate.
- Following discussions with ChatPlusAI operational experts, the store decided to activate ChatPlusAI AI Receptionist. This effectively addressed the issue of excessively long response times from agents. The average waiting time for buyer inquiries was significantly reduced to around 30 minutes, leading to a twofold increase in the conversion rate of pre-sale inquiries, bringing substantial and continuous revenue to the store.
FAQ
Q1: Why is the performance data displayed by ChatPlusAI different from the marketplace's?
A1:
- ChatPlusAI performance data only includes actions taken by agent accounts during the use of ChatPlusAI (such as receiving buyers, handling returns, etc.). If the agent does not use ChatPlusAI or alternates between using ChatPlusAI and the marketplace's chat tools to assist buyers, it may affect the completeness of data. Therefore, it is recommended to arrange for agents to use ChatPlusAI as much as possible to assist buyers, ensuring the completeness of performance data.
- The marketplace may incorporate weighting coefficients when calculating performance data, while ChatPlusAI performs pure calculations without additional weighting coefficients. This difference may result in minor variations in the data.
Q2: Why is the performance data from the day before yesterday different when viewed yesterday compared to viewing it today?
A2: Some data indicators are subject to delayed calculation logic, such as the custom criteria 'Order placed after agent participated in response'. The calculation method is 'the number of orders placed within 48 hours after the agent uses ChatPlusAI for reception.' It requires a delay of 48 hours before its calculation is complete. The 48-hour delay may span 2-3 natural days. Therefore, viewing this indicator on different dates within the 48-hour delay period may result in different data due to the possibility of buyers placing orders. After the delay calculation period ends (48 hours later), viewing this indicator will show fixed data that will not change.
- Example
January 1st, 09:00 - Buyer ⑦ entered the store and inquired.
January 1st, 09:10 - Agent A responded the buyer's question.
January 3rd, 07:00 - Buyer ⑦ placed an order in the store (Order 1), Order count = 1
January 3rd, 10:00 - Buyer ⑦ placed another order in the store (Order 2), Order count = 1
At this point, Order placed after Agent A participated in response on January 1st is 1 (Within 48 hours starting from January 1st, 09:10, Order 1 placed by Buyer ⑦ is counted in 'Order placed after agent participated in response' for Agent A on January 1st).
Q3: Why are some dates not selectable when choosing the date?
A3:
- Currently, ChatPlusAI only supports viewing agent performance data for the last 90 days, and dates beyond this range cannot be selected.
- Dates that are still in the process of being settled are not available for selection; you can choose them once the data settlement is complete.
Q4: Why can't I see the performance data of an agent account after deleting it?
A4: After deleting the agent account, ChatPlusAI will synchronize and delete the historical performance data of that account. It is recommended not to delete actively used agent accounts. In cases where there is a change in personnel using the account and a transfer is needed, you can handle it by adjusting the phone number or password associated with the corresponding account.
Q5: Lazada has several dimensions of reviews. Which dimension is used to calculate agent performance?
A5: The "Overall Rating" dimension.
Real-time Agent Monitoring
💡 Real-time agent monitoring displays the overall work progress and performance of agent, playing a crucial role in assisting admins to monitor service quality. It also facilitates real-time data access for different role accounts, enabling timely adjustments to enhance agent efficiency.
Click【「Message 」in the left menu→「 Real-time Agent Monitoring 」(shown as red box below)】 Access Real-time Agent Monitoring page to view work progress and performance of agent timely.
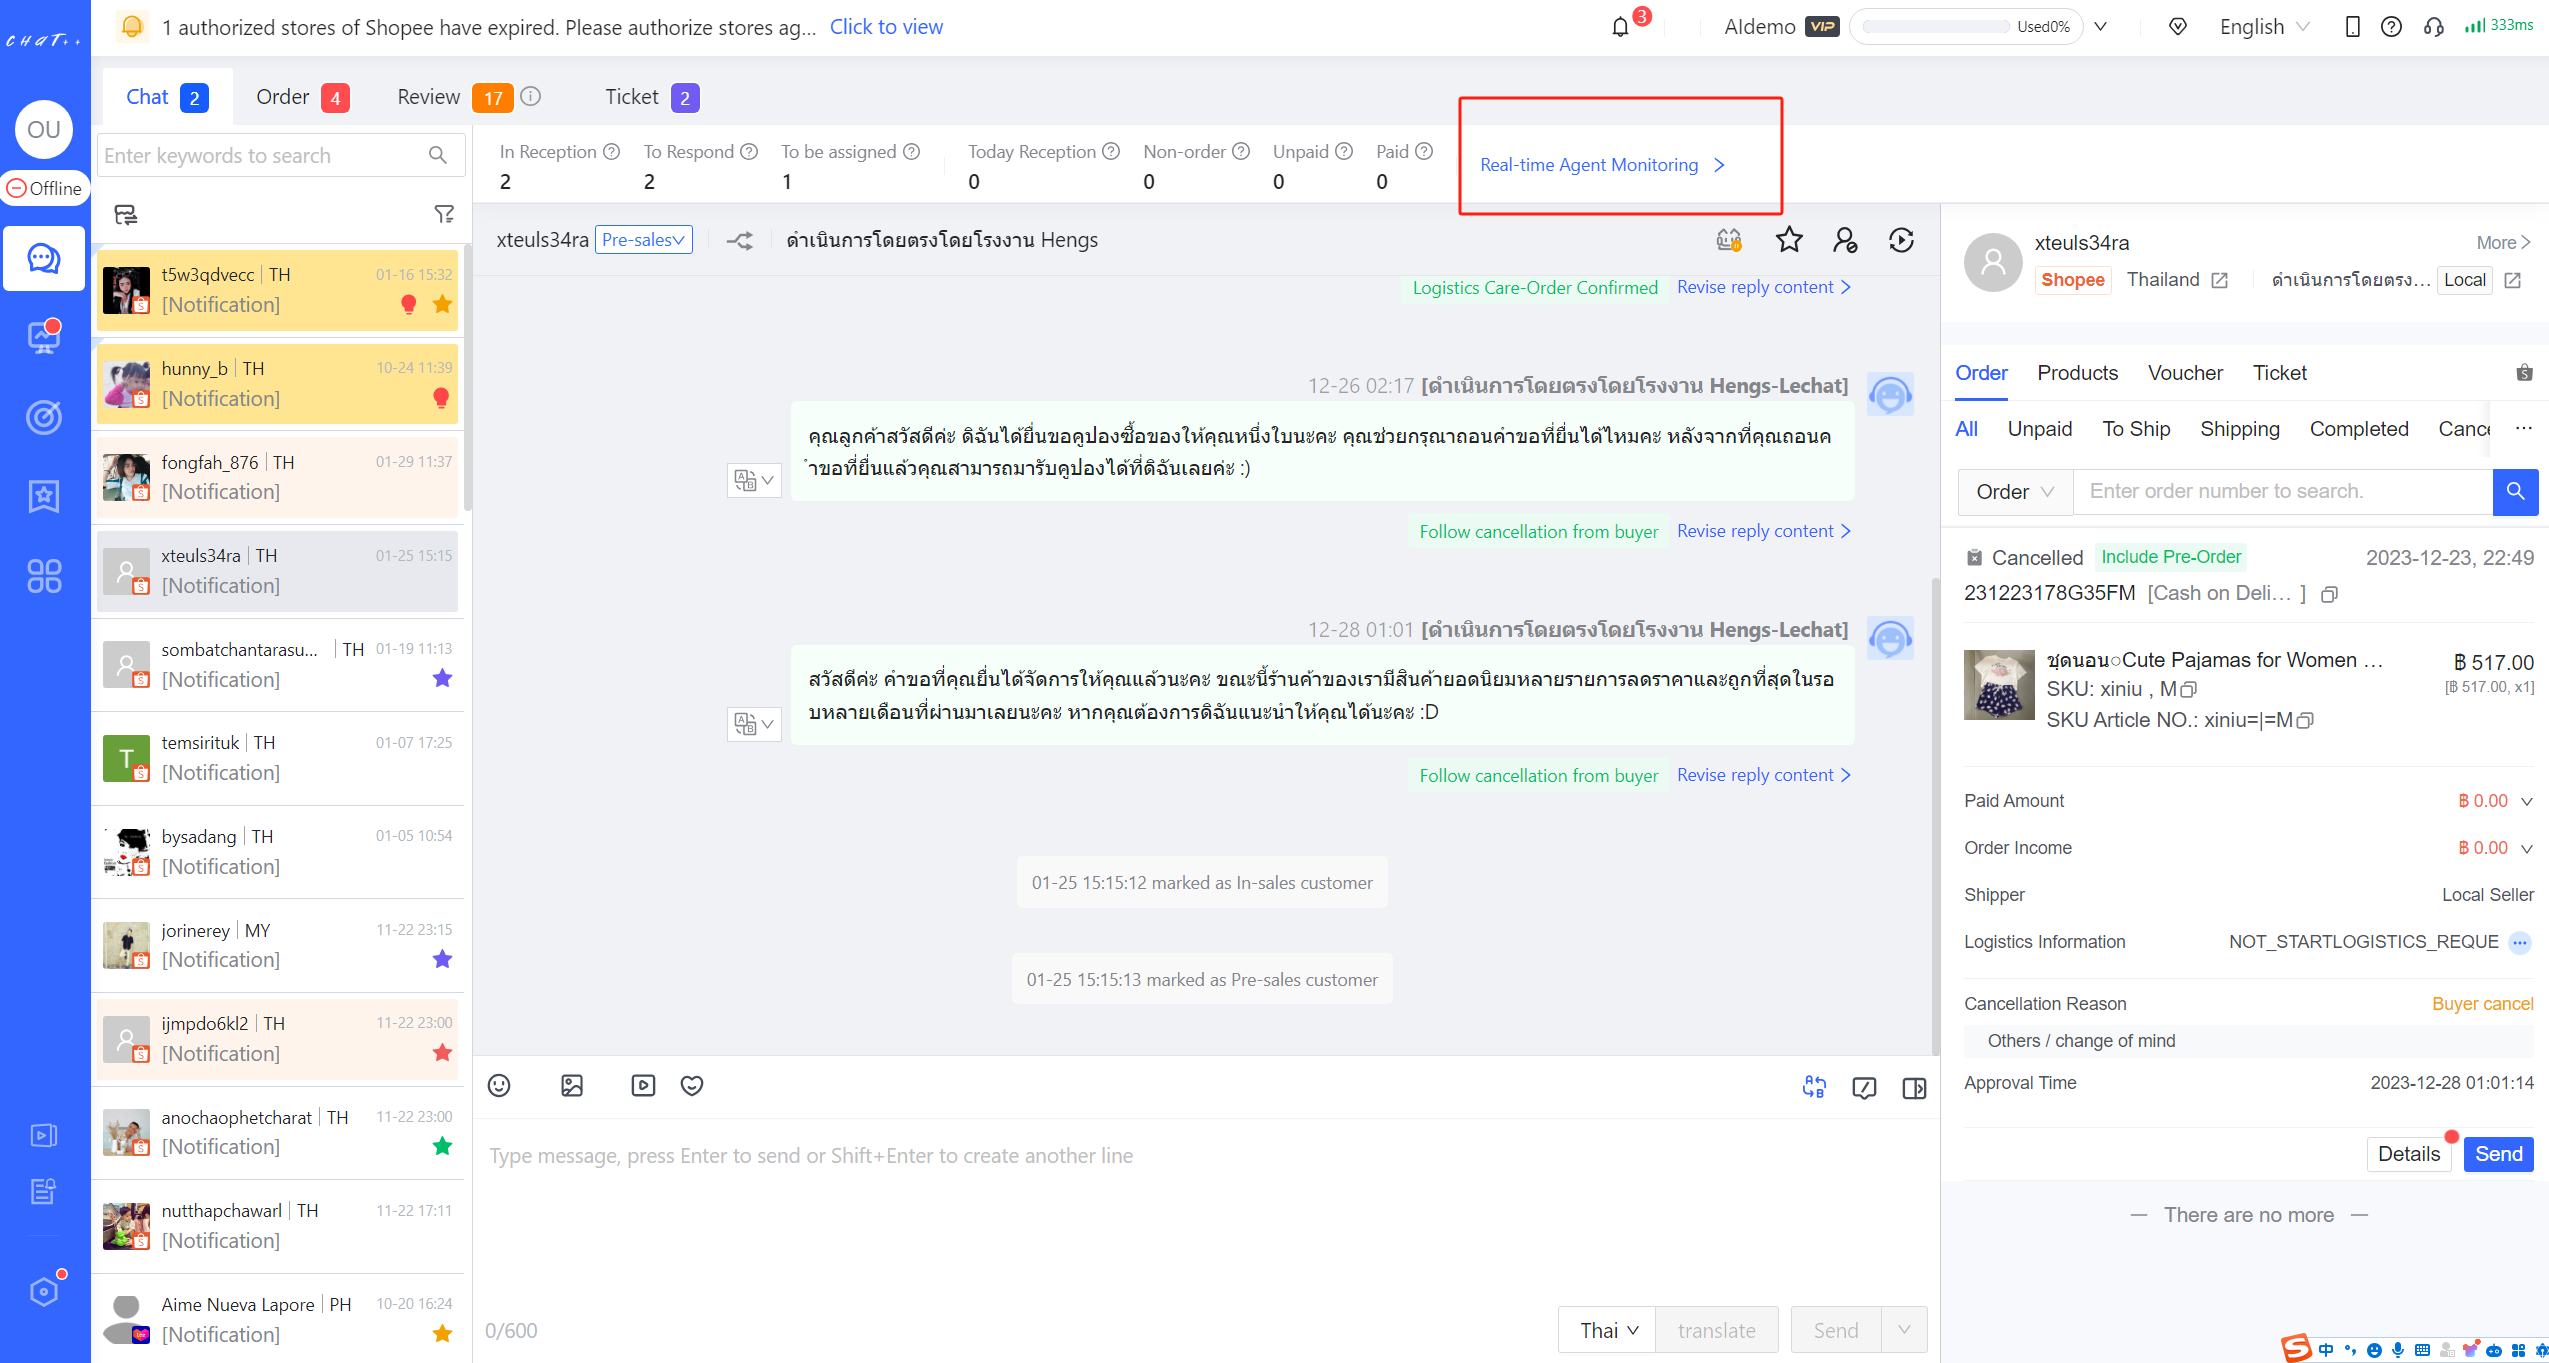
Figure 1
Permissions required for configuration
Accounts with the departmental permission "Supervise All" (Red box in the figure) can view the corresponding data of all agents in that department.
Accounts without the departmental permission "Supervise All" can only see their own data, ensuring** data security management.**
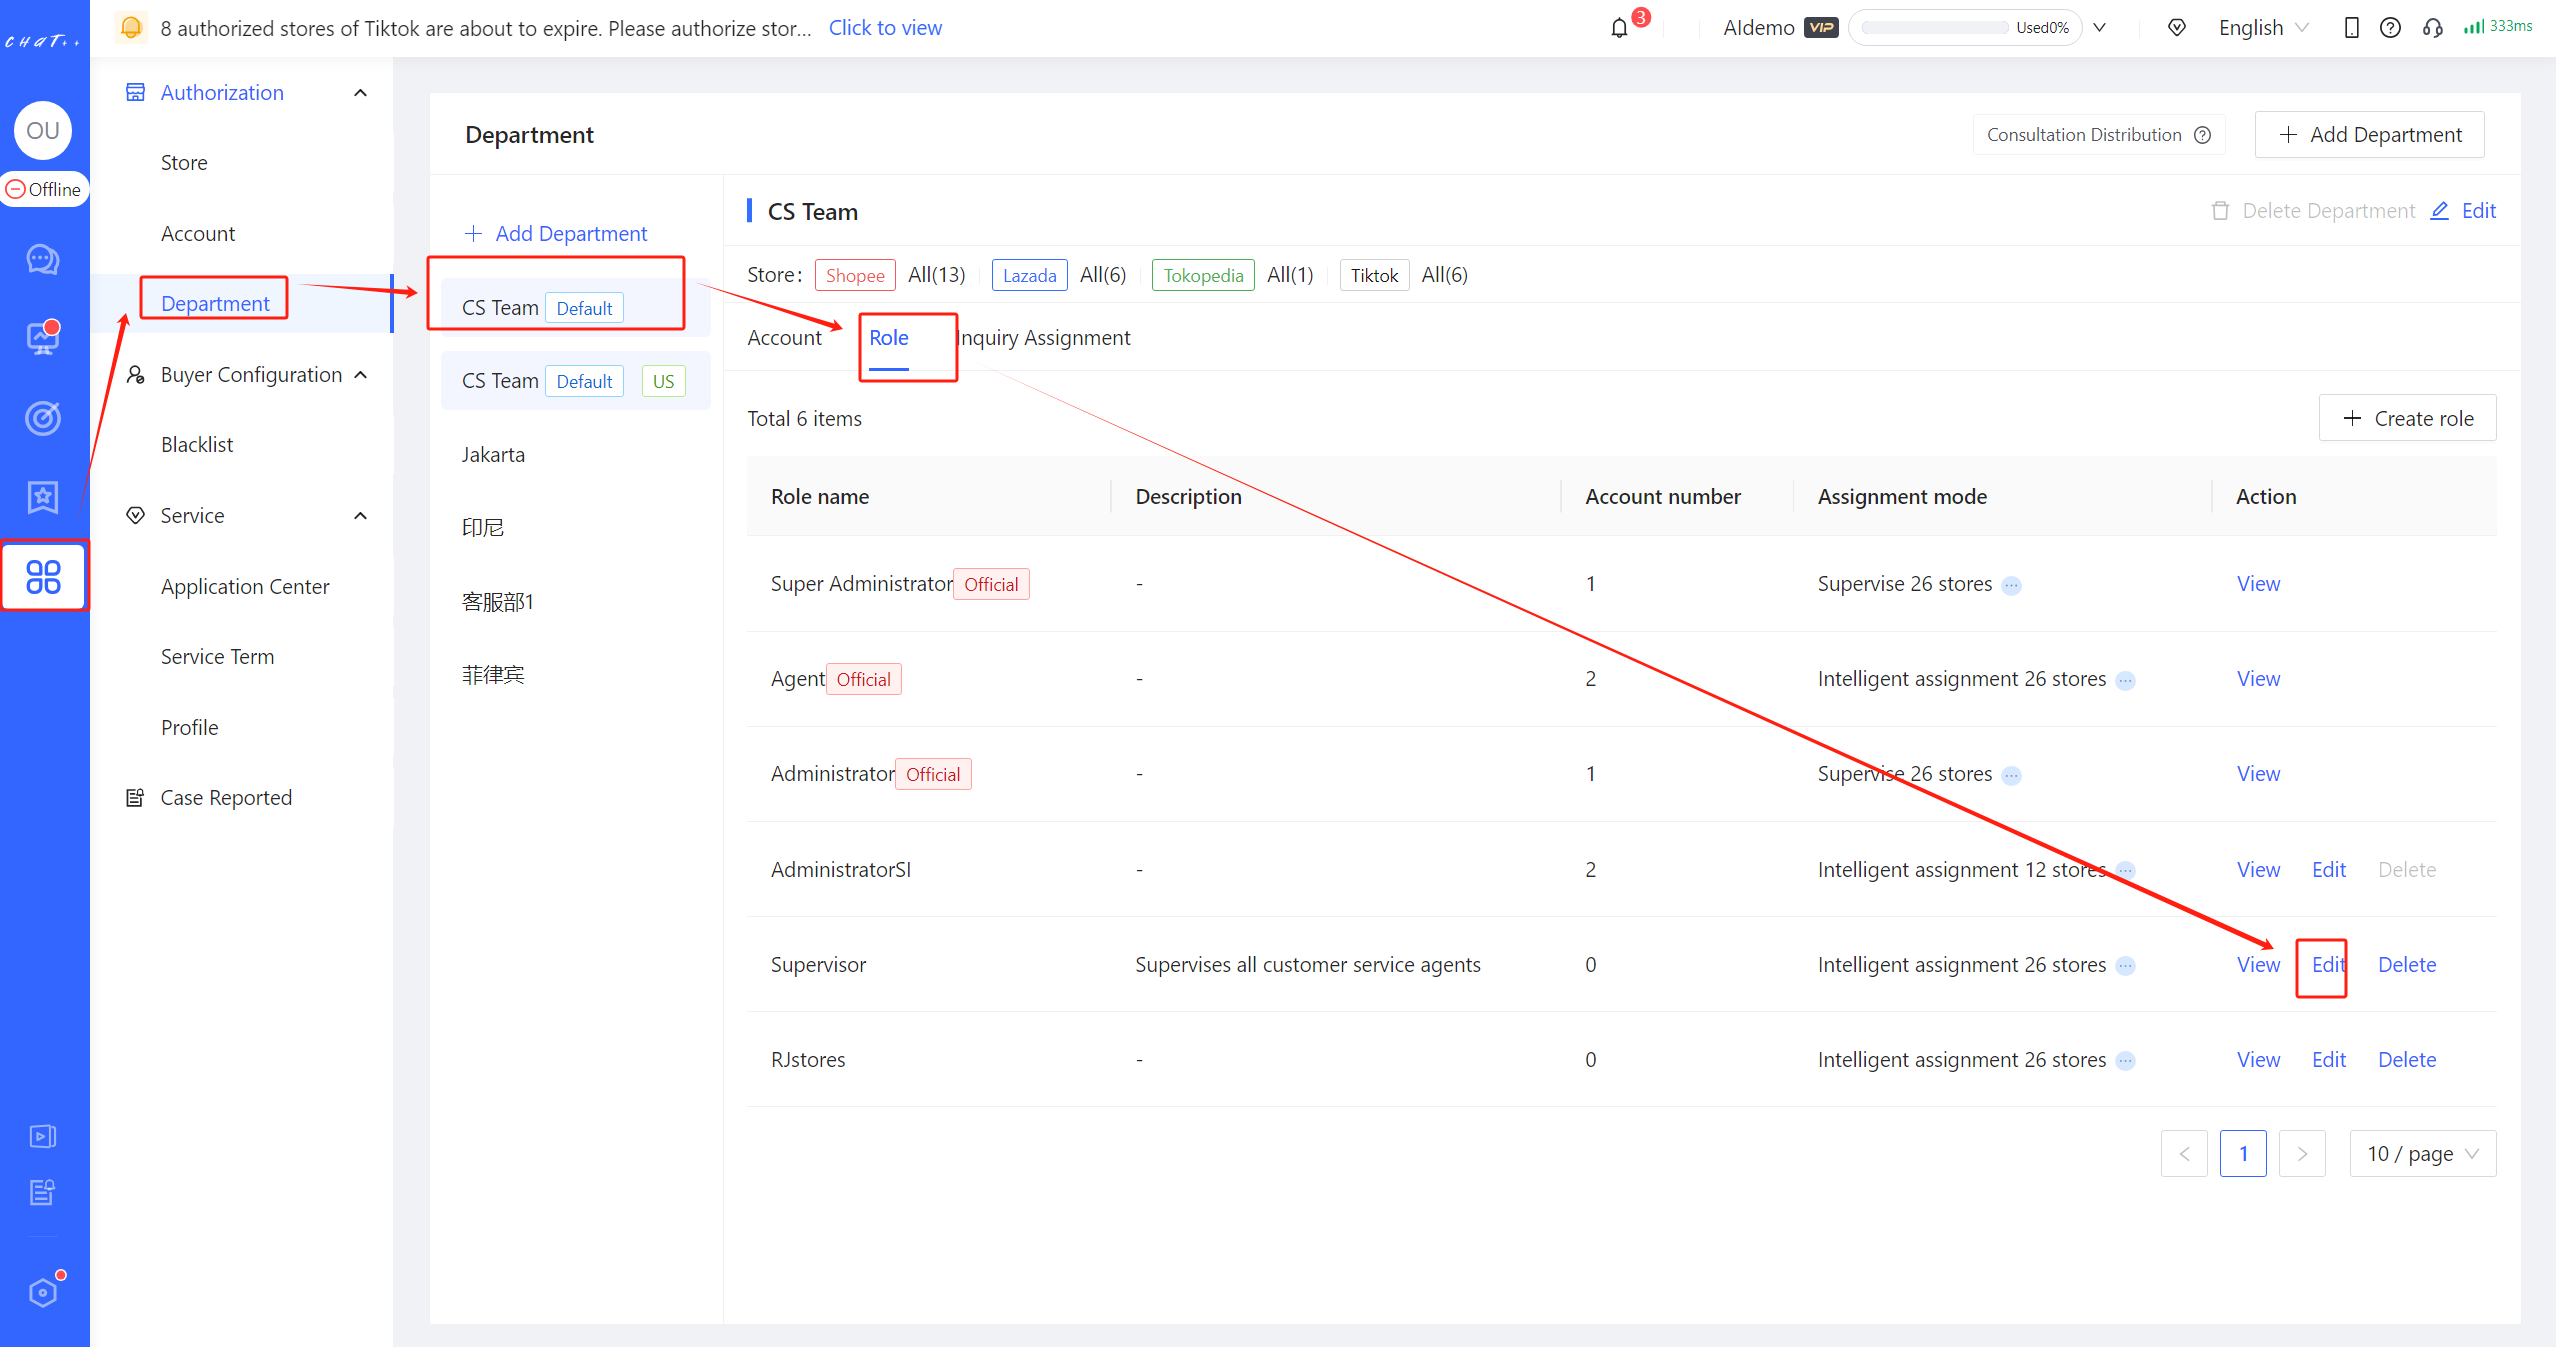
Figure 2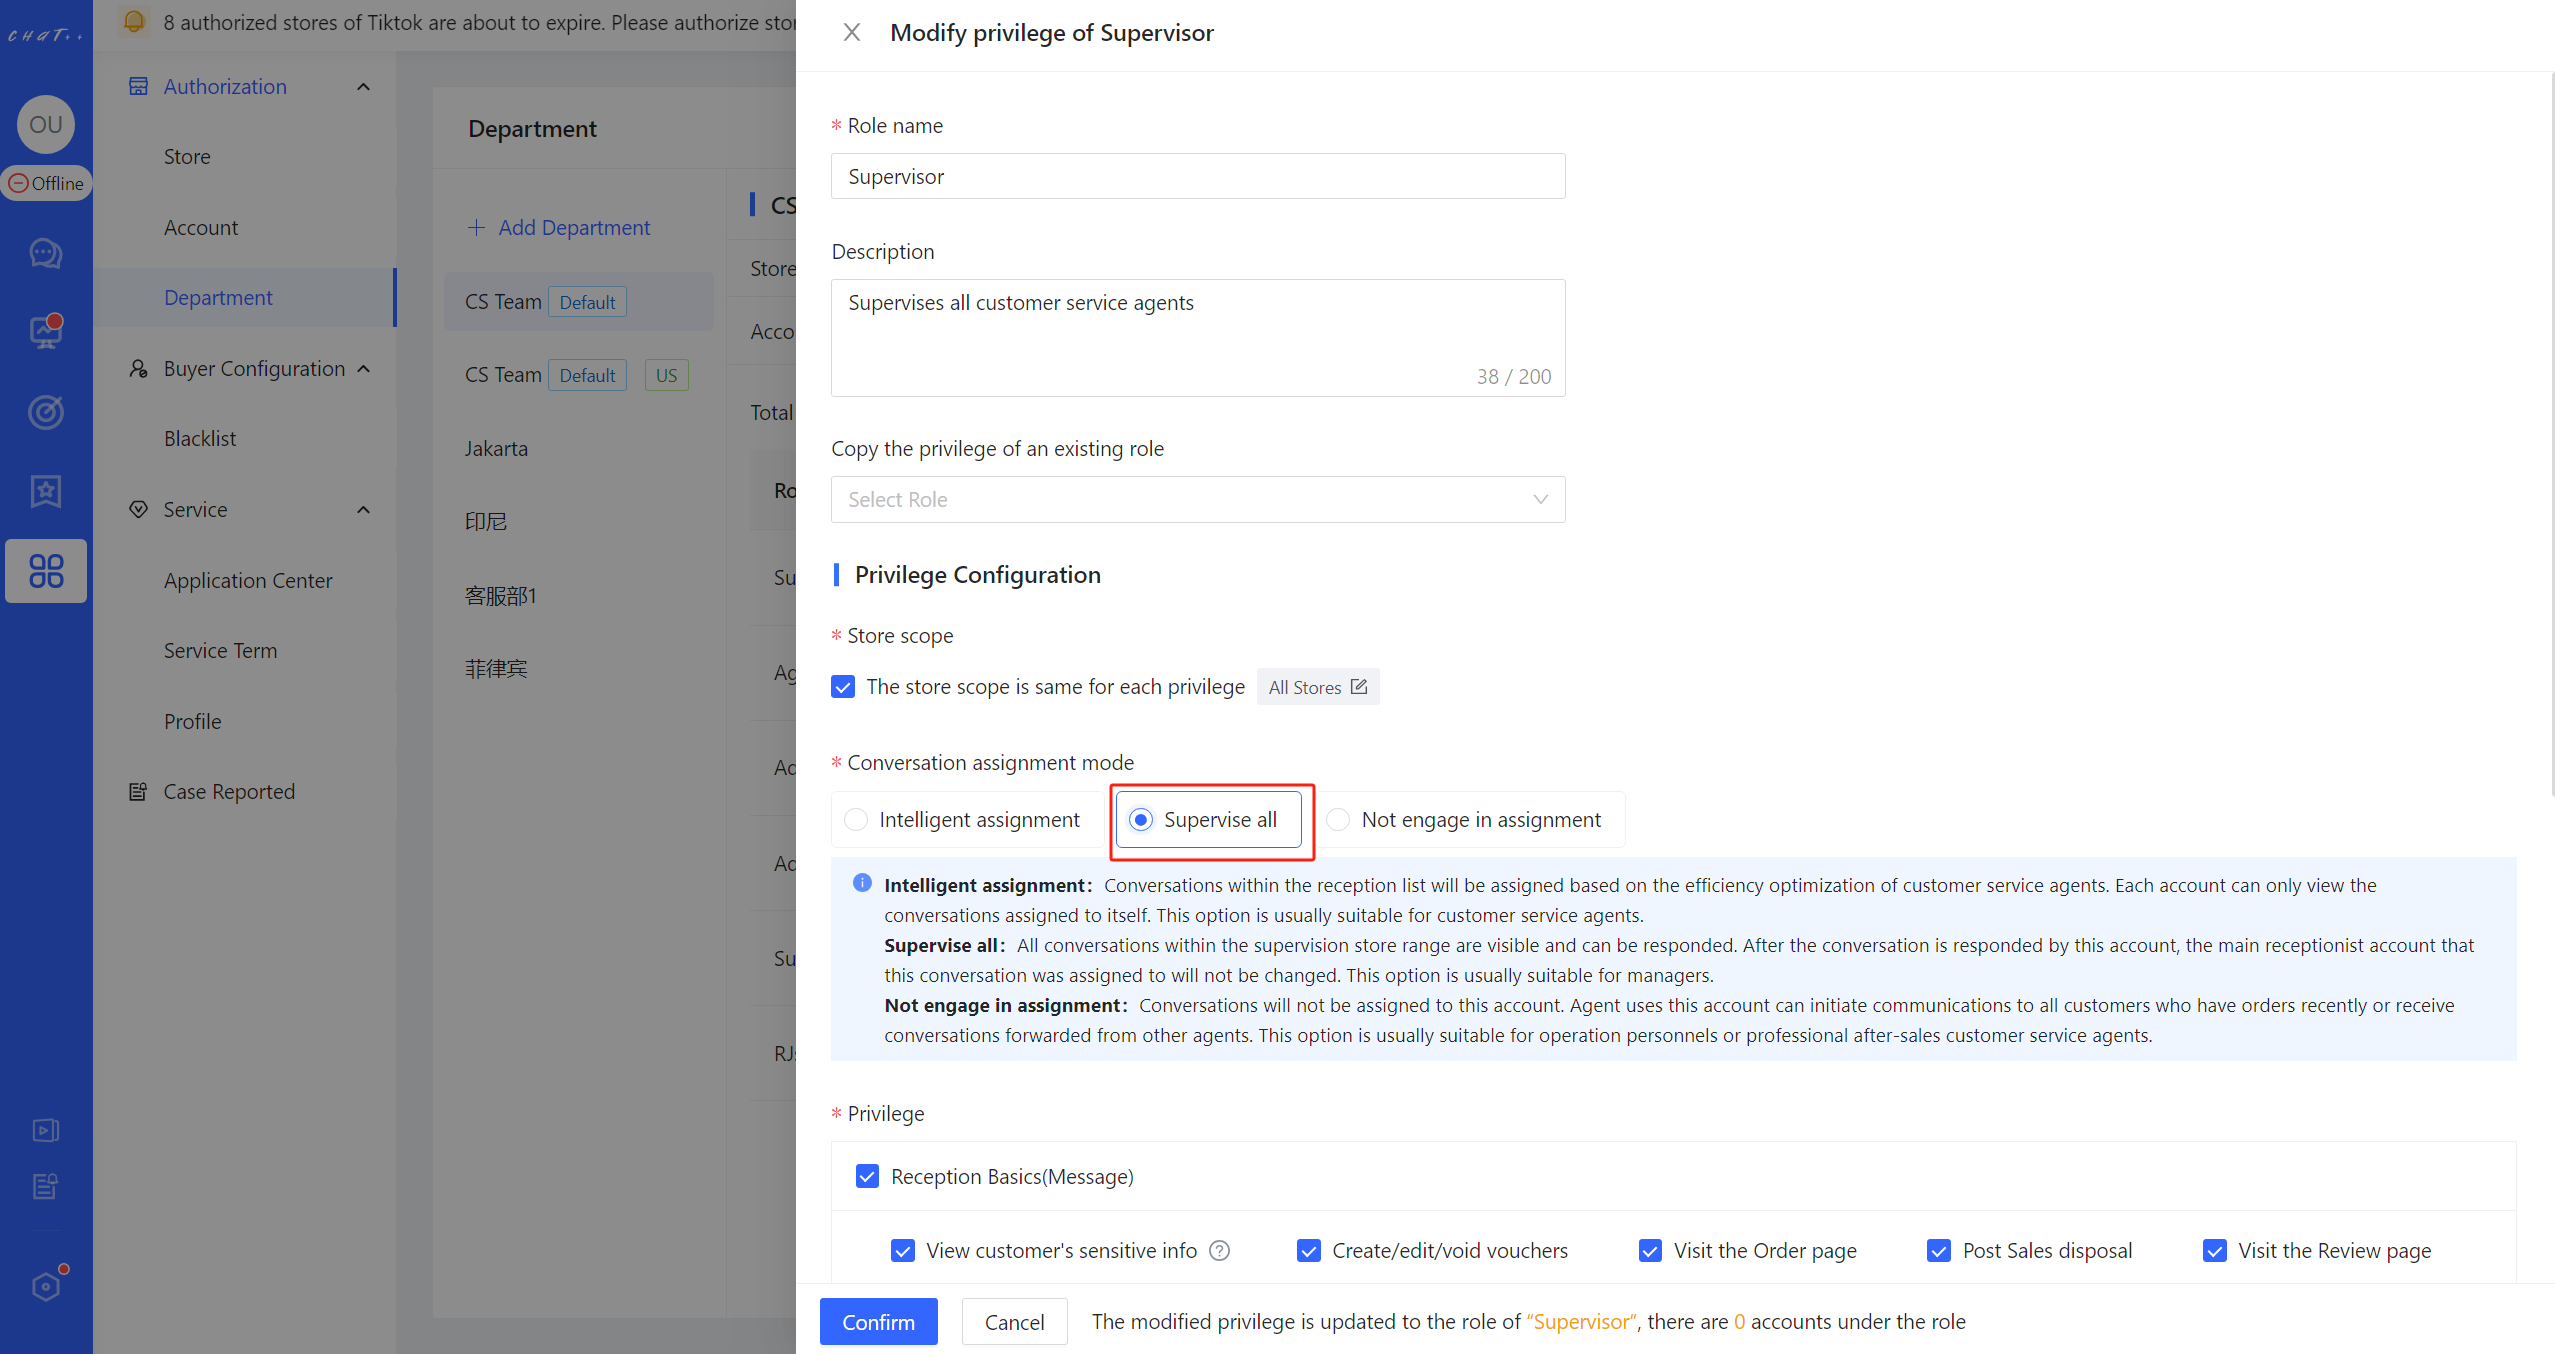
Figure 3
Interface Usage Instructions:
- Filter (Red① in the figure): Supports switching departments/specified agents, filtering data by department/agents;
- Data Display Area (Red② in the figure): See details in the following "Data Explanation";
- Update Time (Red box③ in the figure):
➡️ When opening the "Real-time Agent Monitoring" section, the data is calculated until the current time when viewing the data today.
➡️ You can👆 click "Refresh" (Red box③ in the figure) for an update. After clicking, the data calculation time (Beijing time) is until the time you clicked to refresh the data today.
🏷️ Today refers to 00:00-24:00 [UTC/GMT+8 (GMT+8)]
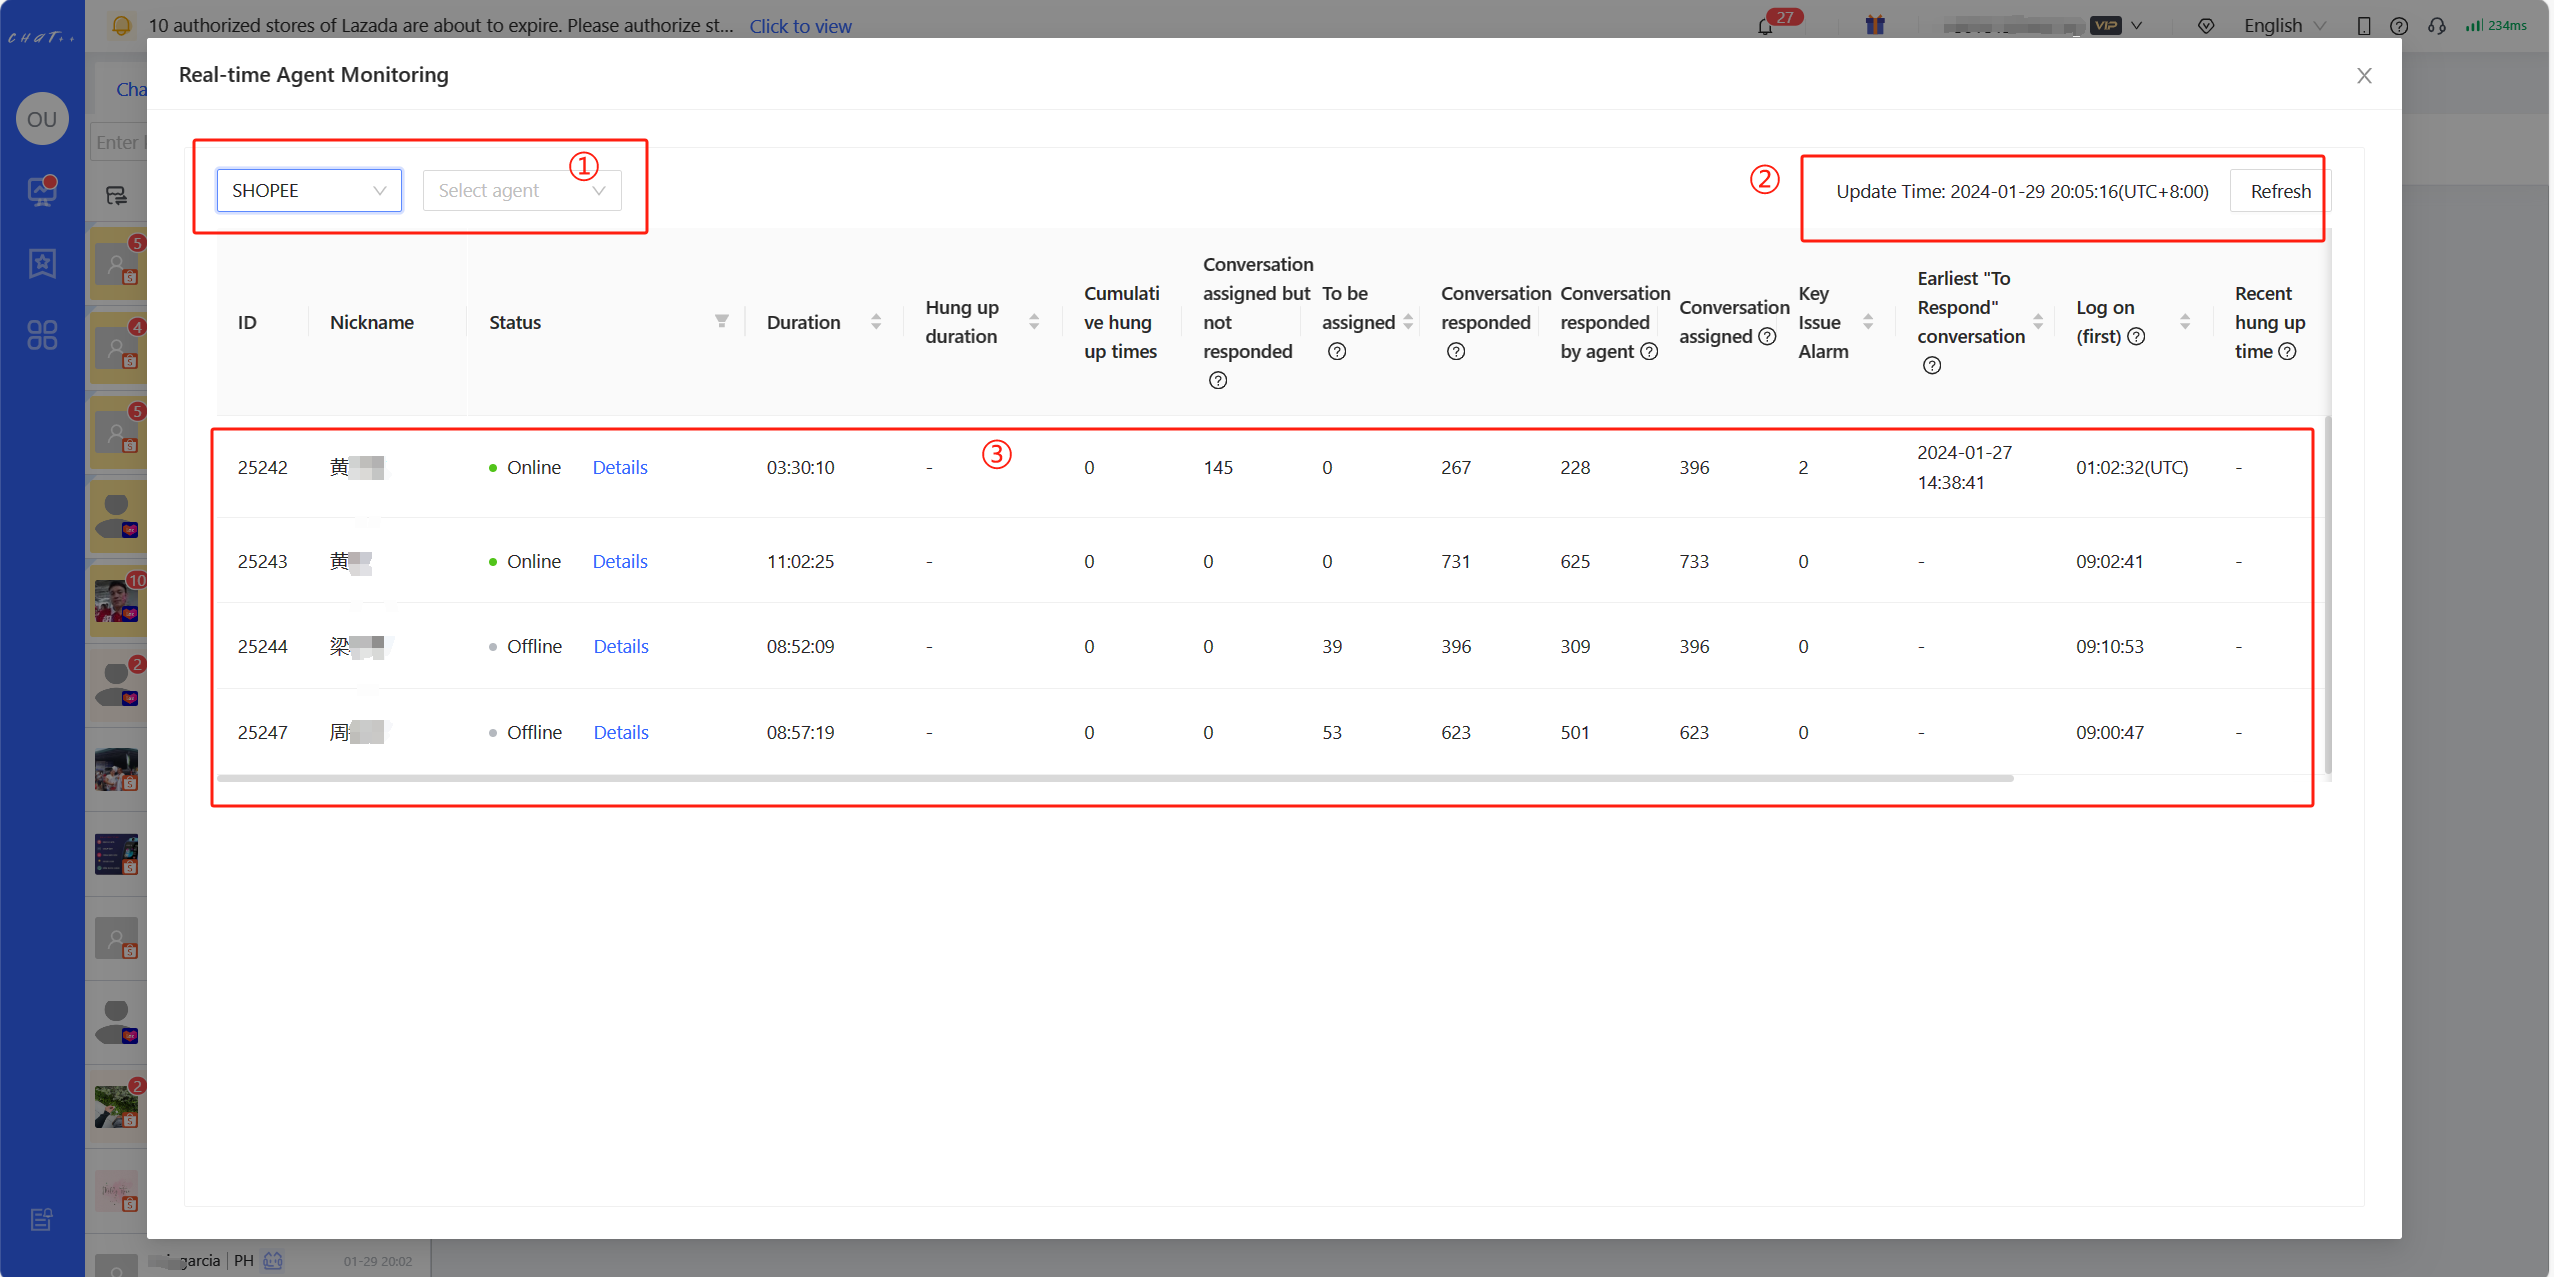
Figure 4
Data Explanation
| Data Items | Definition | Note |
|---|---|---|
| Duration | The cumulative online duration of this agent account today. | When logged in simultaneously on both computer and mobile devices, the online duration is calculated after deduplication. |
| Conversation assigned but not responded | If online, it displays the number of buyers currently assigned to the agent to respond, with the last message from the buyer yet to receive a valid response. If offline, the pending conversations will be reassigned, and only the number of pending buyers when offline is displayed here. | When the last message from the buyer in a converstaion is responded to by Timeout Reply, we consider that the buyer's message has not been effectively answered, and the conversation is still in pending state. Replies from agents and meaningful business-related responses from Chatbot are considered effective responses. |
| To be assigned | The sum of buyers who are waiting for assist of each account may be bigger than the total number of waiting buyers displayed on the conversation page. Accounts with the same reception list will assist the same group of buyers who are waiting. | |
| Conversation responded | The number of buyers who are replied in those conversations allocated to agent and the status was pending when distribution on the day | |
| Conversation responded by agent | The number of buyers who are replied by agent in the total number of buyer replied | For transferred buyers, they are counted for the last serving agent. Conversations initiated by agent are not counted in the conversation responded |
| Conversation assigned | The number of buyers allocated to agent and the status was pending when distribution on the day | / |
| Key Issue Alarm | Number of Key Issue Alarm triggered during the online period of agent account. | / |
| Log on (first) | The first log on time on the day. | / |
| Log off (last) | The last log off time on the day. | / |
FAQ
Q1: Which day does the real-time agent monitoring data calculate?
A1:The data is calculated until the current time when viewing the data today. If you need to view historical data, check in [Anlytics >> Performance Tracker >> Agent Performance]. ** ***Today refers to 00:00-24:00 [UTC/GMT+8 (GMT+8)]
Q2: Admin handling receptions, will their data be visible in real-time ?data
A2: No, if the account has the [Supervise All] permission, the data for that account will not be displayed in real-time monitoring data.
Q3: Why can't my account see the data of other agents?
A3: If you encounter such an issue, please check whether your account in 'My Account' has the [Supervise All] permission for the department where the account belongs to.
Q4: Why is Duration of the agent account greater than (Time of Log off(last) minus time of Log on(first))
A4: Duration is calculated from 00:00 to 24:00 today [UTC/GMT+8 (GMT+8)], for example: On January 1st: Agent was online at 23:00
On January 2nd: Agent was offline at 02:00
On January 2nd: Agent was online at 09:00(Log on(first) on January 2nd)
On January 2nd: Agent was offline at 12:00(Log off(last) on January 2nd)
Real-time agent monitoring data on January 2nd shows that
*Duration = 5 hours (2 hours + 3 hours)
*Time of Log off(last) minus time of Log on(first) = 3 hours
Store welcome message
💡 When buyers enter the store for inquiries, ChatPlusAI will automatically send a store welcome message. The content of the store welcome message can be store introduction (shipping address, shipping time, CS online time, etc.), as well as daily promotional information, major promotion information, recommended popular products, guiding buyers to pay attention to the store, special situation instructions, and more. It can be applied in many ways, and you can flexibly configure it based on your own operating conditions.
Show cases
- When a buyer enters the store for inquiries, the store welcome message will be sent.
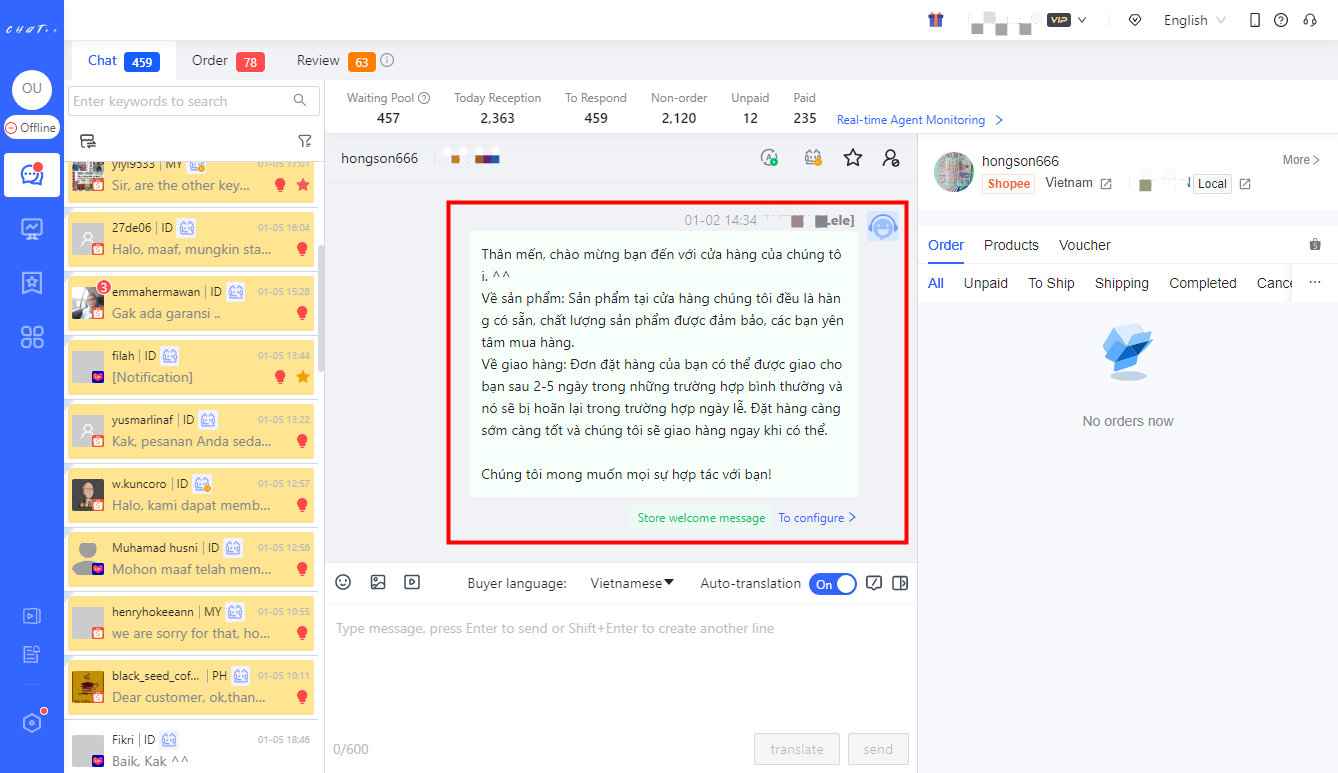
Figure 1
Permissions required for configuration
Configuring "Store Welcome Message" requires permission to be enabled for the role assigned to the account. Super admins and admins have this permission by default.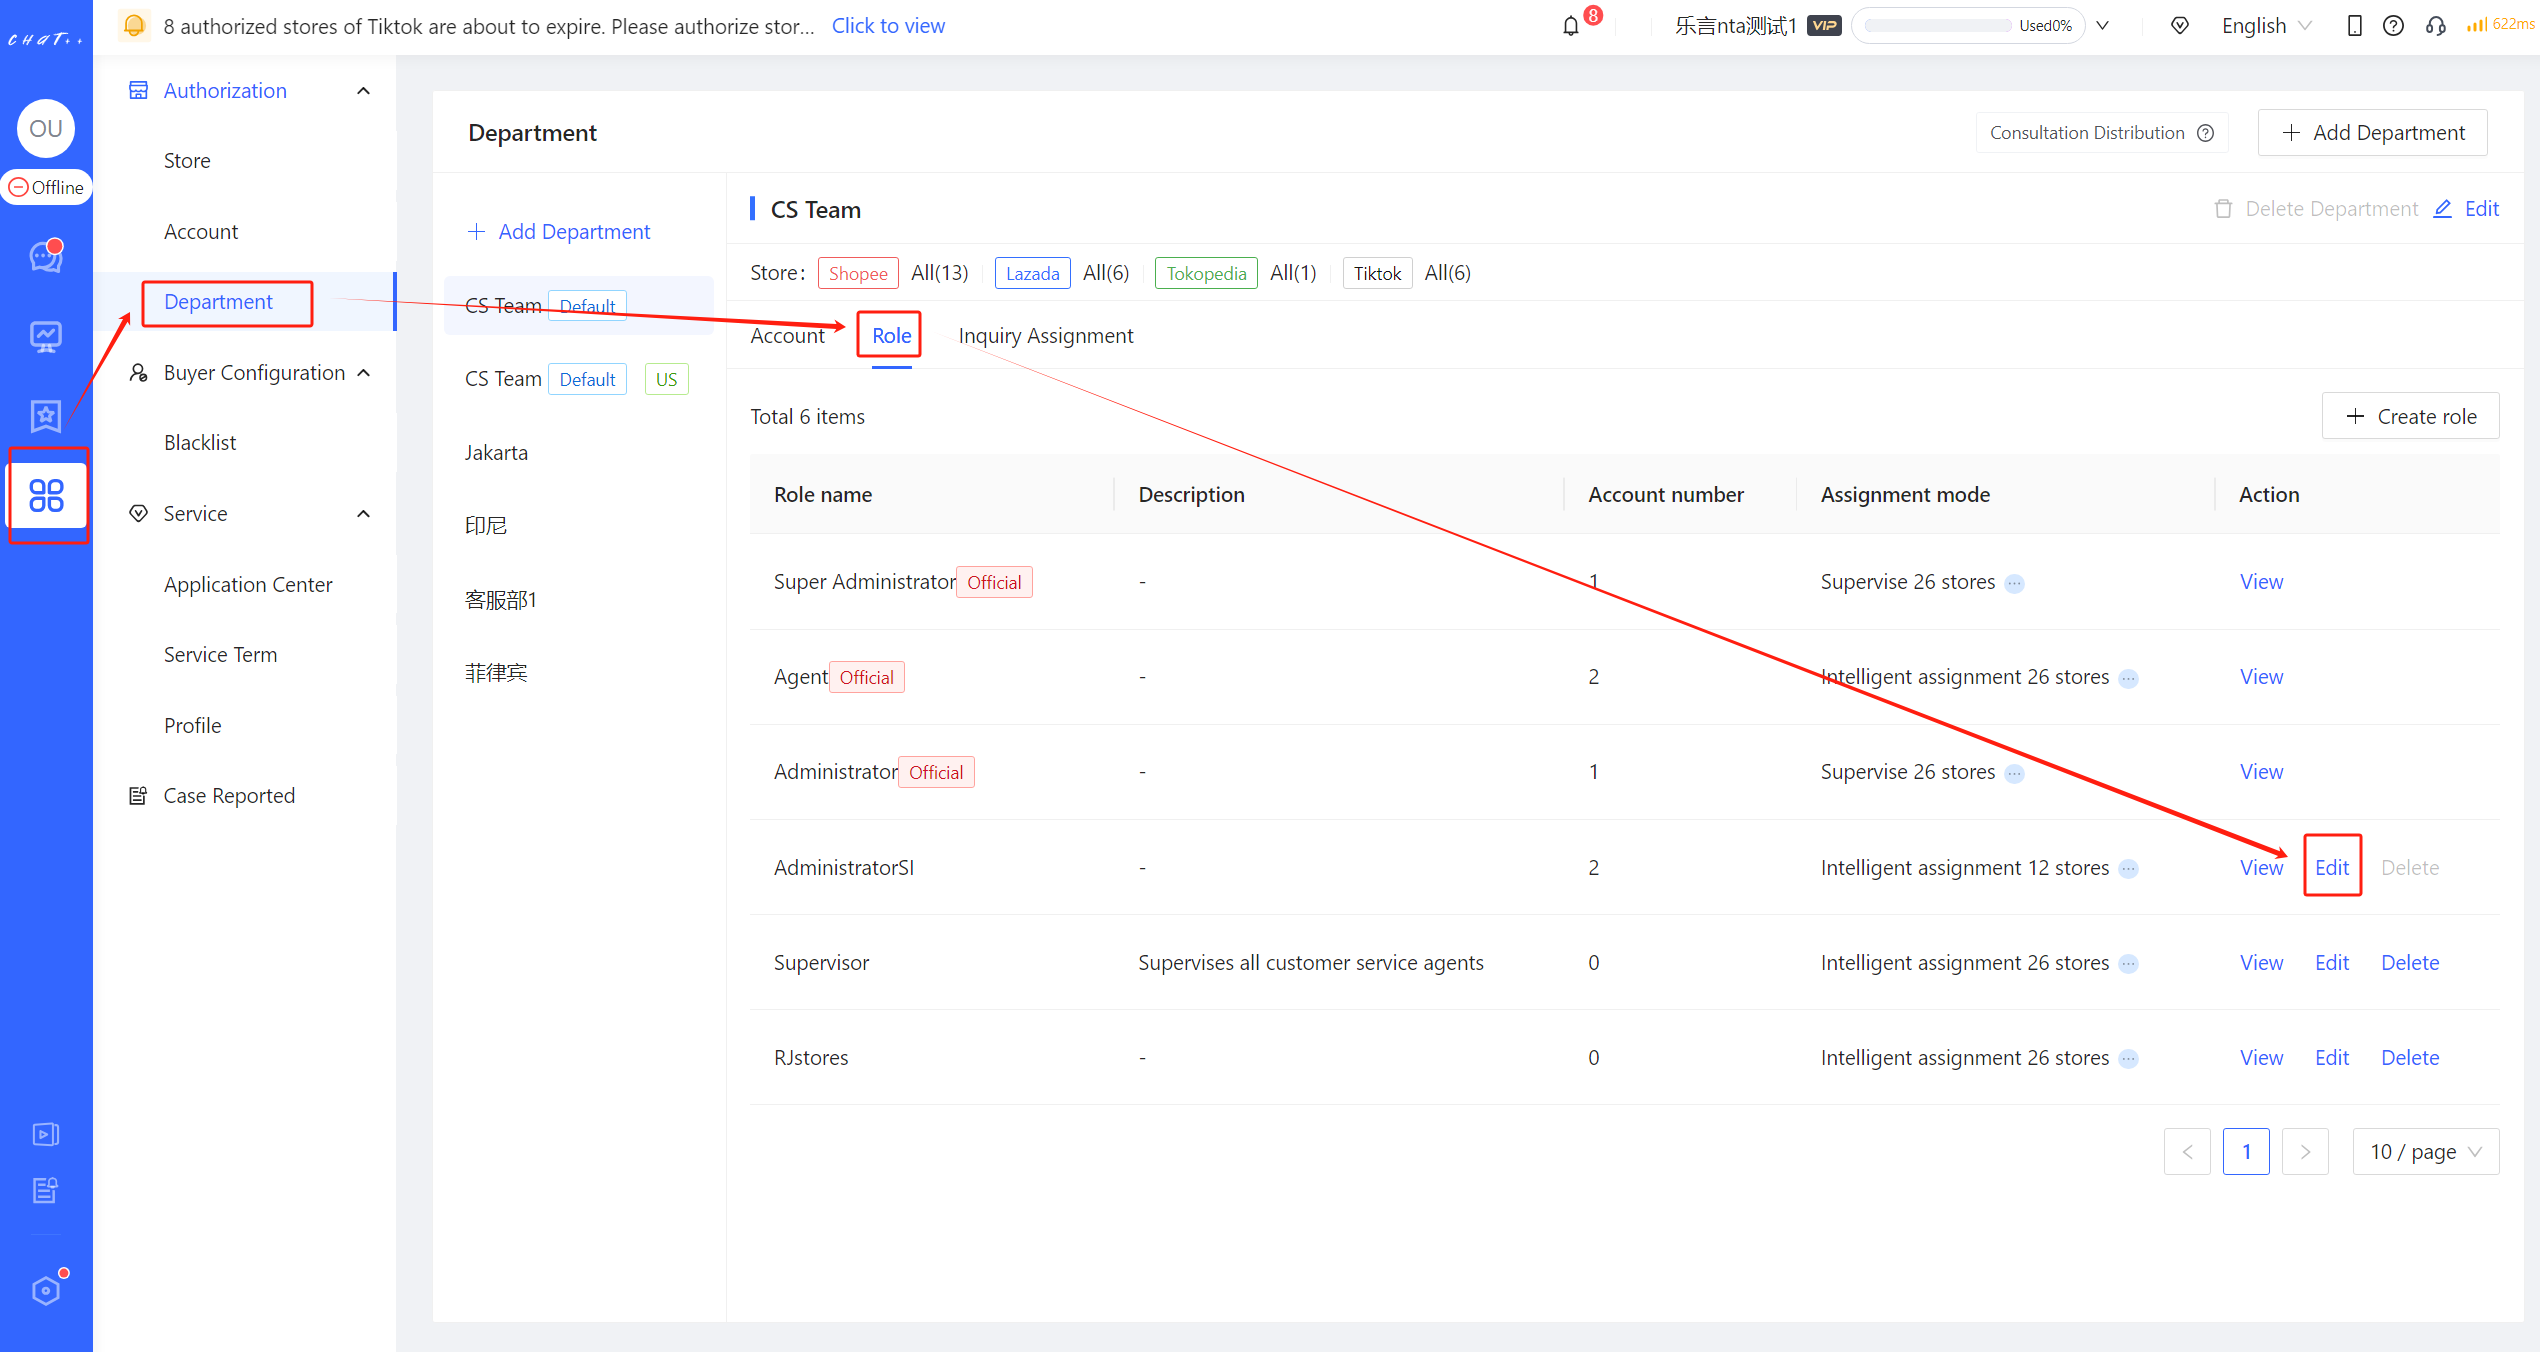
Figure 2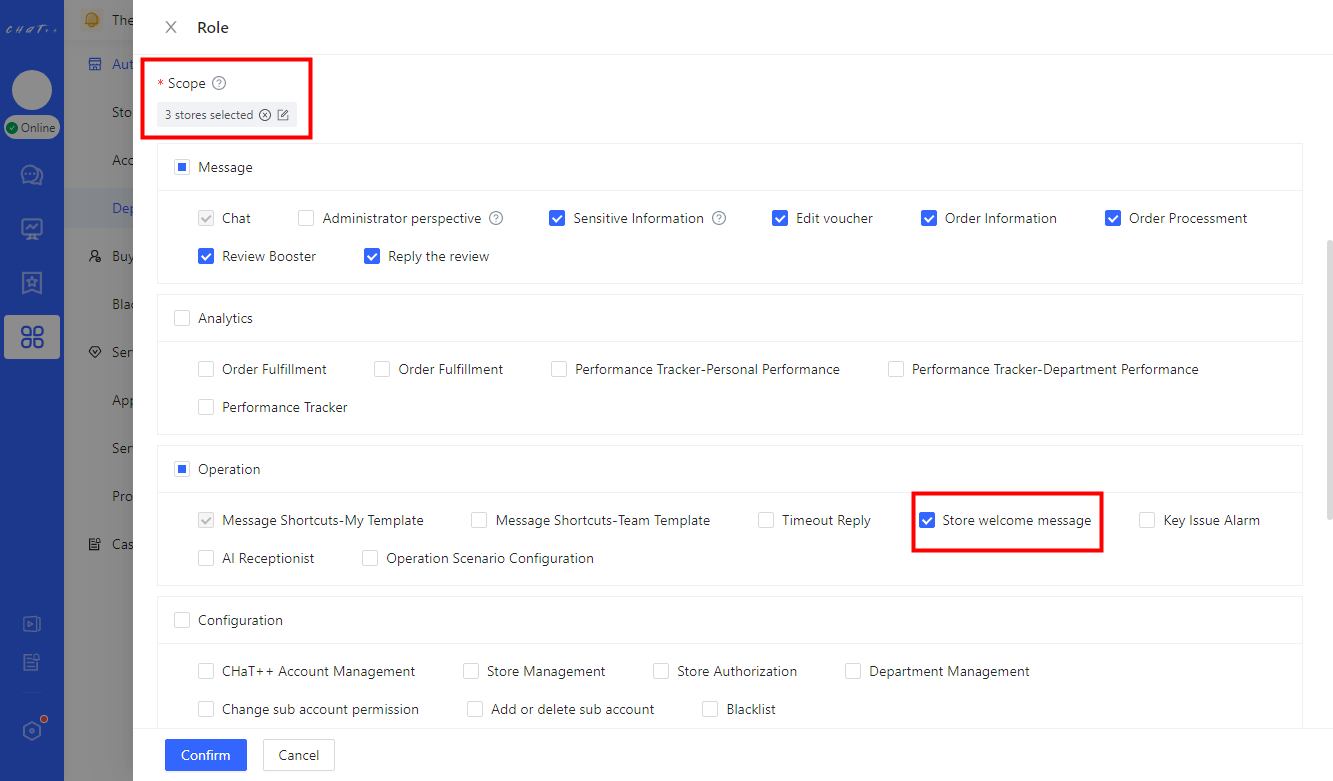
Figure 3
How to Configure Store Welcome Message
👆Click「 Automation 」 in left menu(Shown as red box① in Figure 4)→「Reception Basics 」(Shown as red box② in Figure 4)→「 Store welcome message 」(Shown as red box③ in Figure 5),Access the configuration page(Shown as in Figure 5).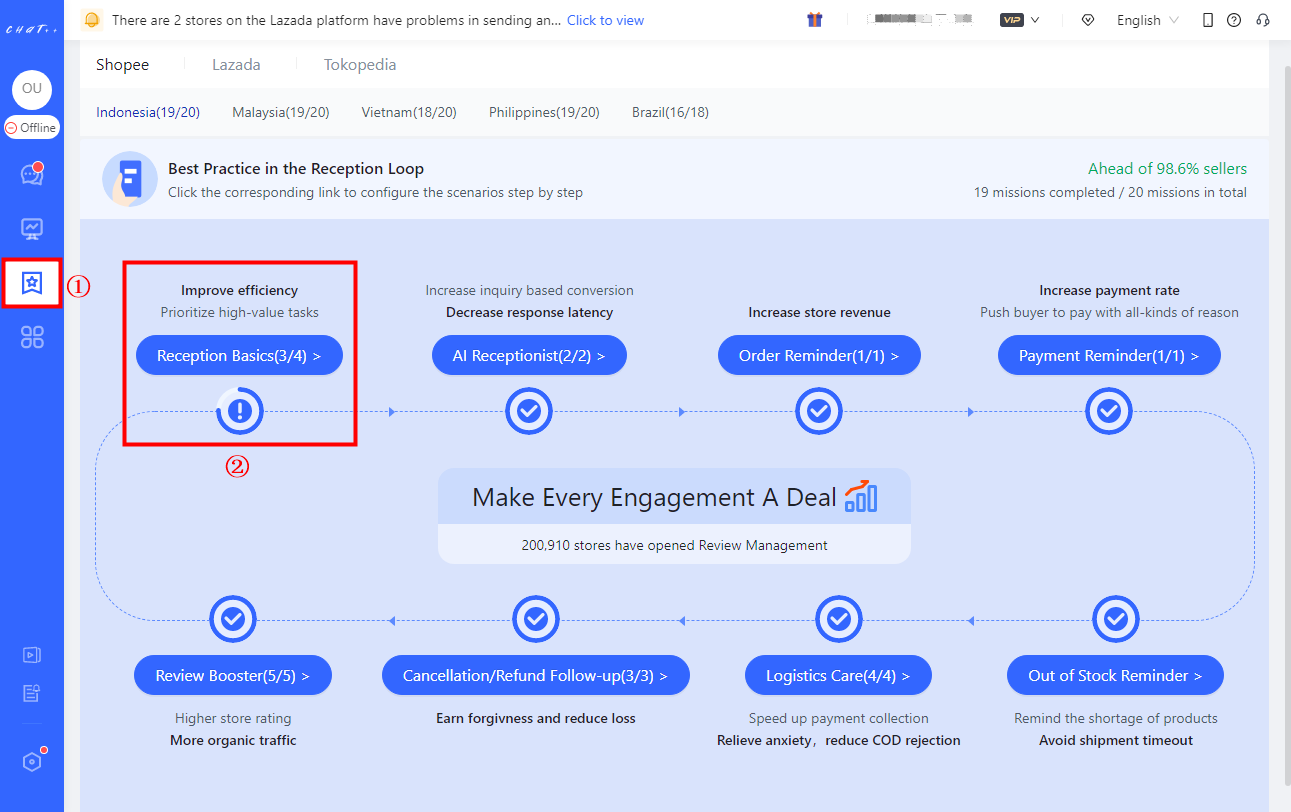
Figure 4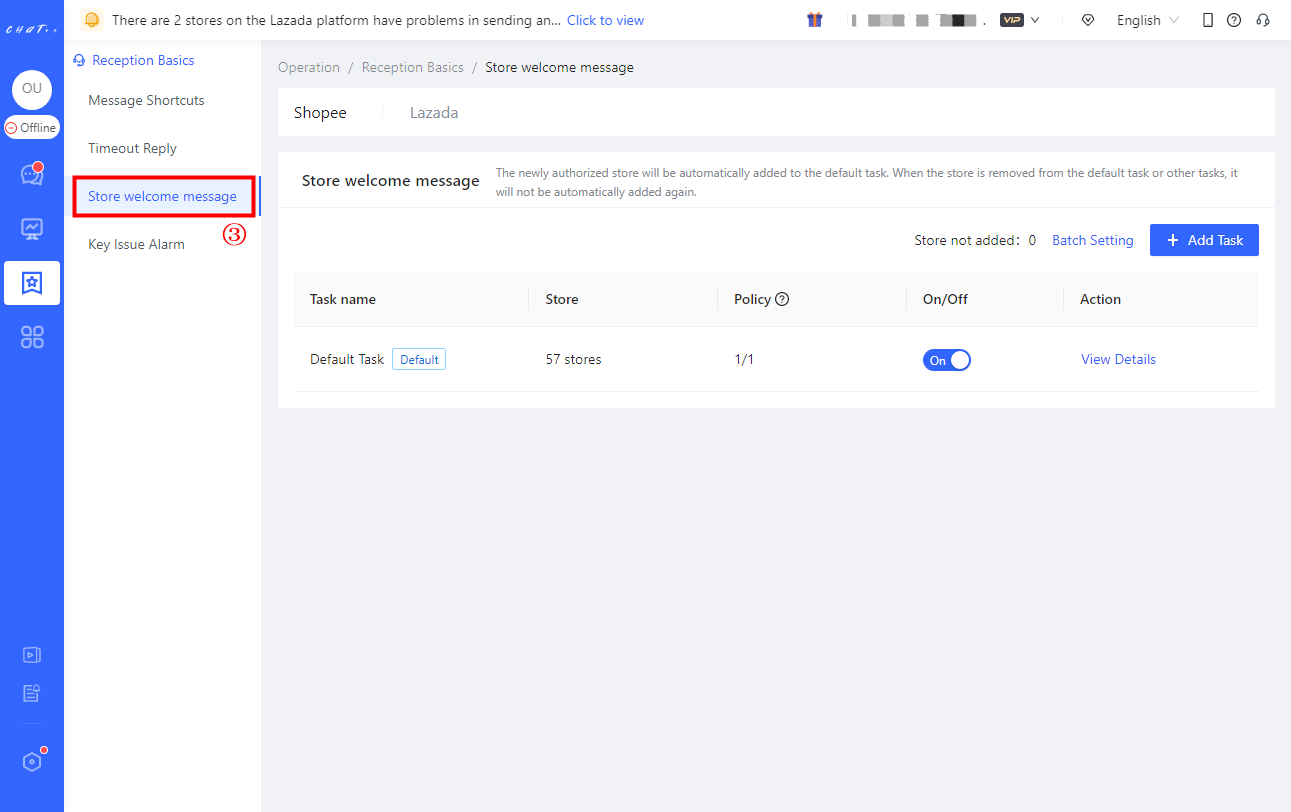
Figure 5
How to Add/Modify the "Store Welcome Message"
⚠️ Store welcome message can be customized differently for Shopee, Lazada, Tokopedia, TikTok Southeast Asia, and TikTok US.
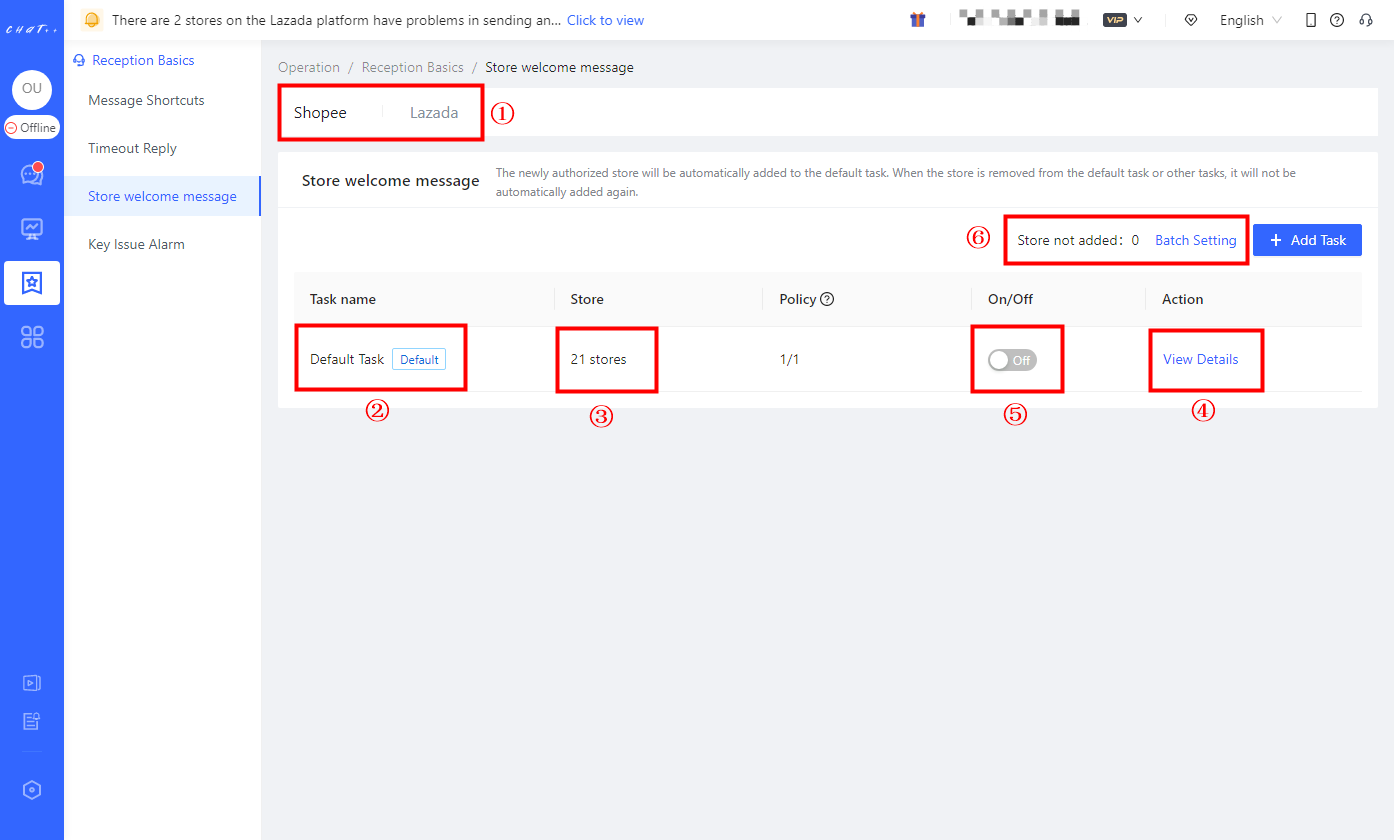
Figure 6
【 Default Task 】Description
- (red box ② in Figure 6 above)
💡 To make it convenient to configure it, ChatPlusAI has created a "Default Task" for each store welcome message on each marketplace, covering all stores of country sites by default(red box③ in Figure 6 ). All you have to do is click "View Details" button(red box ⑤ in Figure 5 above) to edit the policy branches (red box① in Figure 7 below) to make sure everything is correct. Once confirmed, you can enable the default task (red box ⑤ in Figure 6 above).
💡 Newly authorized stores will be automatically included to【Default task】. However, the store will not be automatically included again after they are removed from other tasks. It will be counted as "Store not included" (left side of the red box⑥ in Figure 6). You can click "Batch Setting" button (right side of the red box⑥ in Figure 6) to add massive stores into the certain task quickly.
Note: Kindly make sure that all stores have been included to the right task (that means the number of "Store not included" is 0, shown as red box⑥ in Figure 6), in case the store is neglected from any Store Welcome Message task.
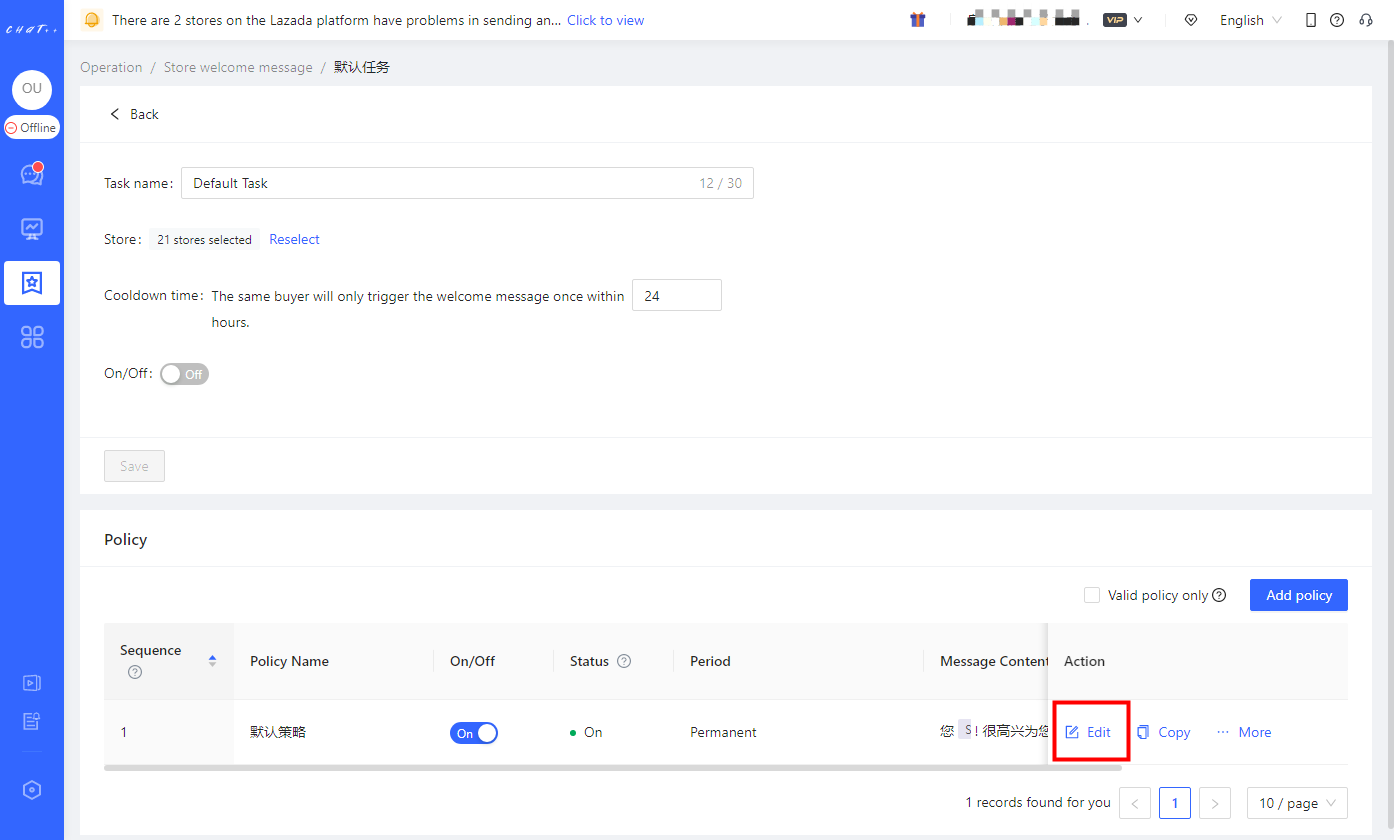
Figure 7
【 Policy Branch 】Description
- The policy branch consists of these factors: country site, period, limit order status, filter rules and message content.
- Period: the policy is only effective within the period.
- Limit order status: Support sending messages to customers based on orders with multiple selected different statuses, for example, sending messages to customers whose order statuses are "Pre-sales" and "In-sales".
- Filter customer who usually gives negative reviews: Within the past six months, among nearly 4 million Southeast Asian stores using ChatPlusAI, customers who have given two or more negative reviews are considered who usually give negative reviews (including cases where they later revised their review to positive). The system automatically identifies such customers. Store Welcome Message allows for filtering out these customers and not sending them messages.
- Country site: there are different country sites, supporting single or multiple selections.
- Message Content: The corresponding message will be sent within the specified time period, under the selected site, and limited order status, provided that the buyer does not meet the filtering conditions.
- When there are multiple policies configured for Store welcome message task, the system will execute the first policy which matches the condition successfully and within the set period, according to sequence.
💡 Setting diverse policy branches for tasks allows for sending different store welcome messages targeting different sites during different marketing periods, to achieve optimal conversion effects.
Each task must have at least one effective policy. The default task has automatically created a default policy, but newly created tasks need to "Add Policy".
"Policy Branch Execution Sequence" Description
💡 When there are multiple effective policies in the "Policy Branch Collection"(red box② below ), the system will execute the first policy that matches the conditions according to execution sequence, and subsequent policies will not be executed.
Hover the cursor over the "More" position to change the execution order through "Top/Up/Down/Bottom" (red box ③ below).
⚠️ If none of the policy match, the message content for store welcome message will not be sent.
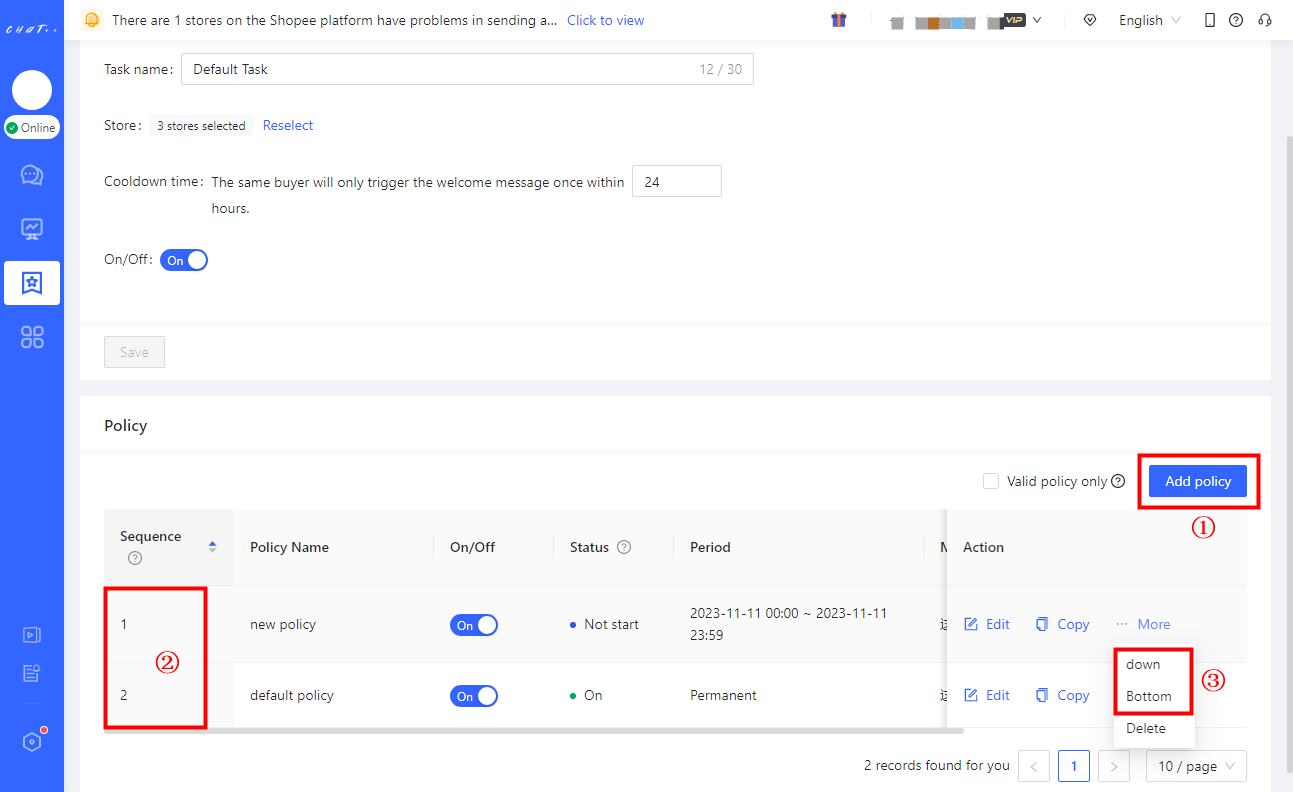
Figure 8
For example:If you want "Store welcome message on Double 11" to be different from "Store welcome message on regular days", you can create a "Double 11 policy" that only takes effect on Double 11 and a "Regular policy" that takes effect on regular days at the same time (red box① below). Note: Because effective periods of these two policies overlap, please ensure that the "Double 11 policy" has a upper execution order than "Regular policy" (red box② below), so that "Double 11 policy" will be executed first on Double 11 shopping festivaly.
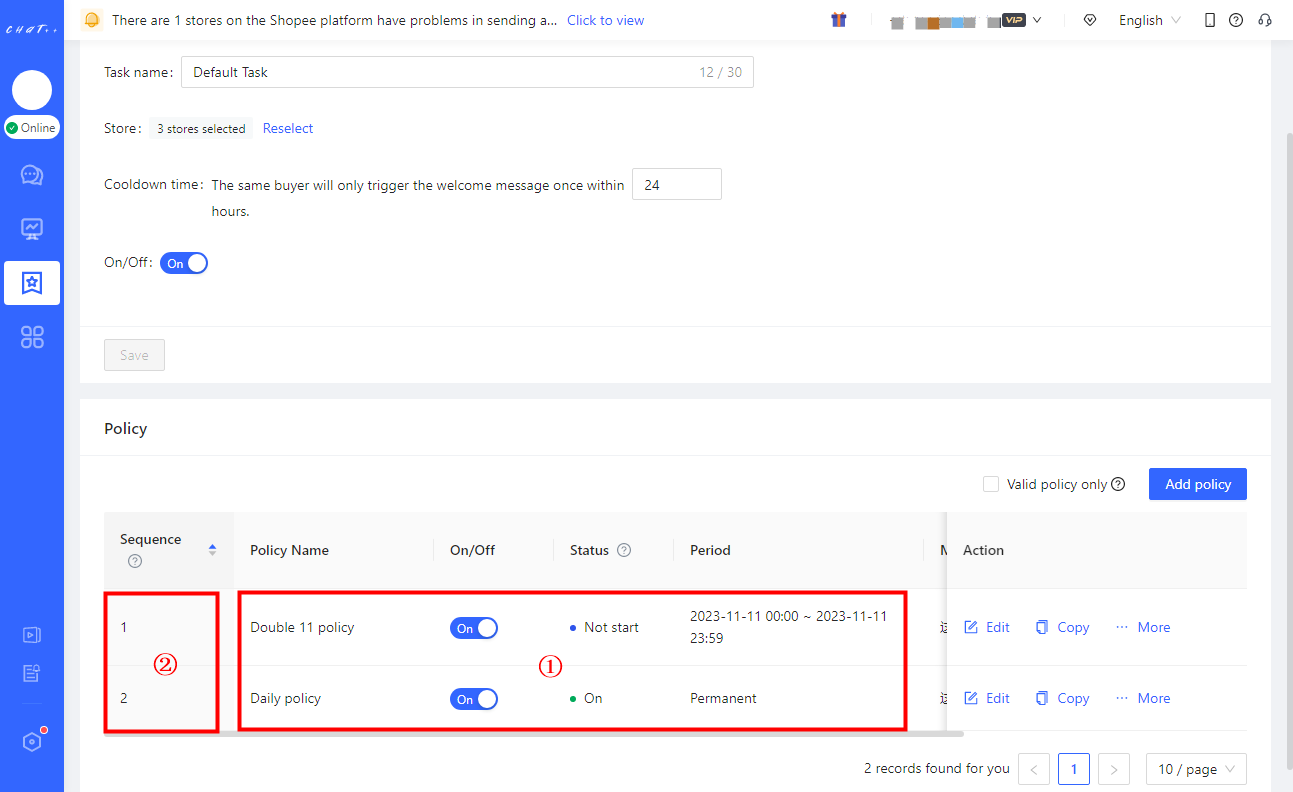
Figure 9
The corresponding language of different sites in the policies can be configured based on the "country site", and all sites will be selected by default (red box ① below).
Scrolling down the page will display "editing box for selected country sites" (as marked in red box ② below), and you can also quickly locate "editing box for selected country sites" through the navigation bar (red box ③ below).
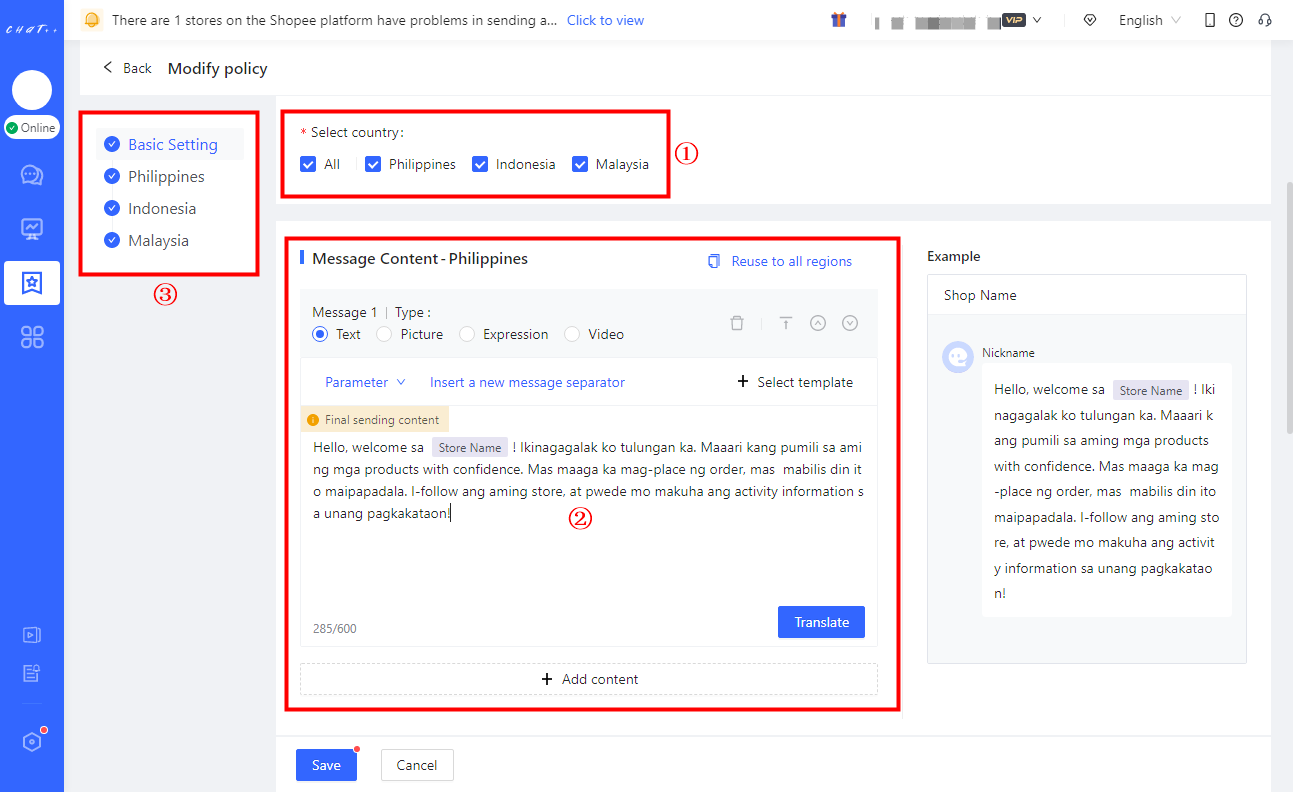
Figure 10
The store welcome message supports sending multiple message types (text, expression, picture, video) (red box ① in Figure 11 below). Due to interface limitations of TikTok, it currently only supports text and picture types.
To facilitate quick configuration, when the message content includes text messages, ChatPlusAI provides recommended templates for reference and selection. Select text messages, scroll down appropriately, and click the "Select" button (red box ① in Figure 12 below) to automatically fill in the content editing box. The preview of sending effect can be seen on the right side of the page.
Click "Add content" (red box ② in figure 12 below) to add multiple messages types, up to 4 messages in one round. The support for various message types helps create eye-catching content, thereby improving the conversion effectiveness of Store welcome message.
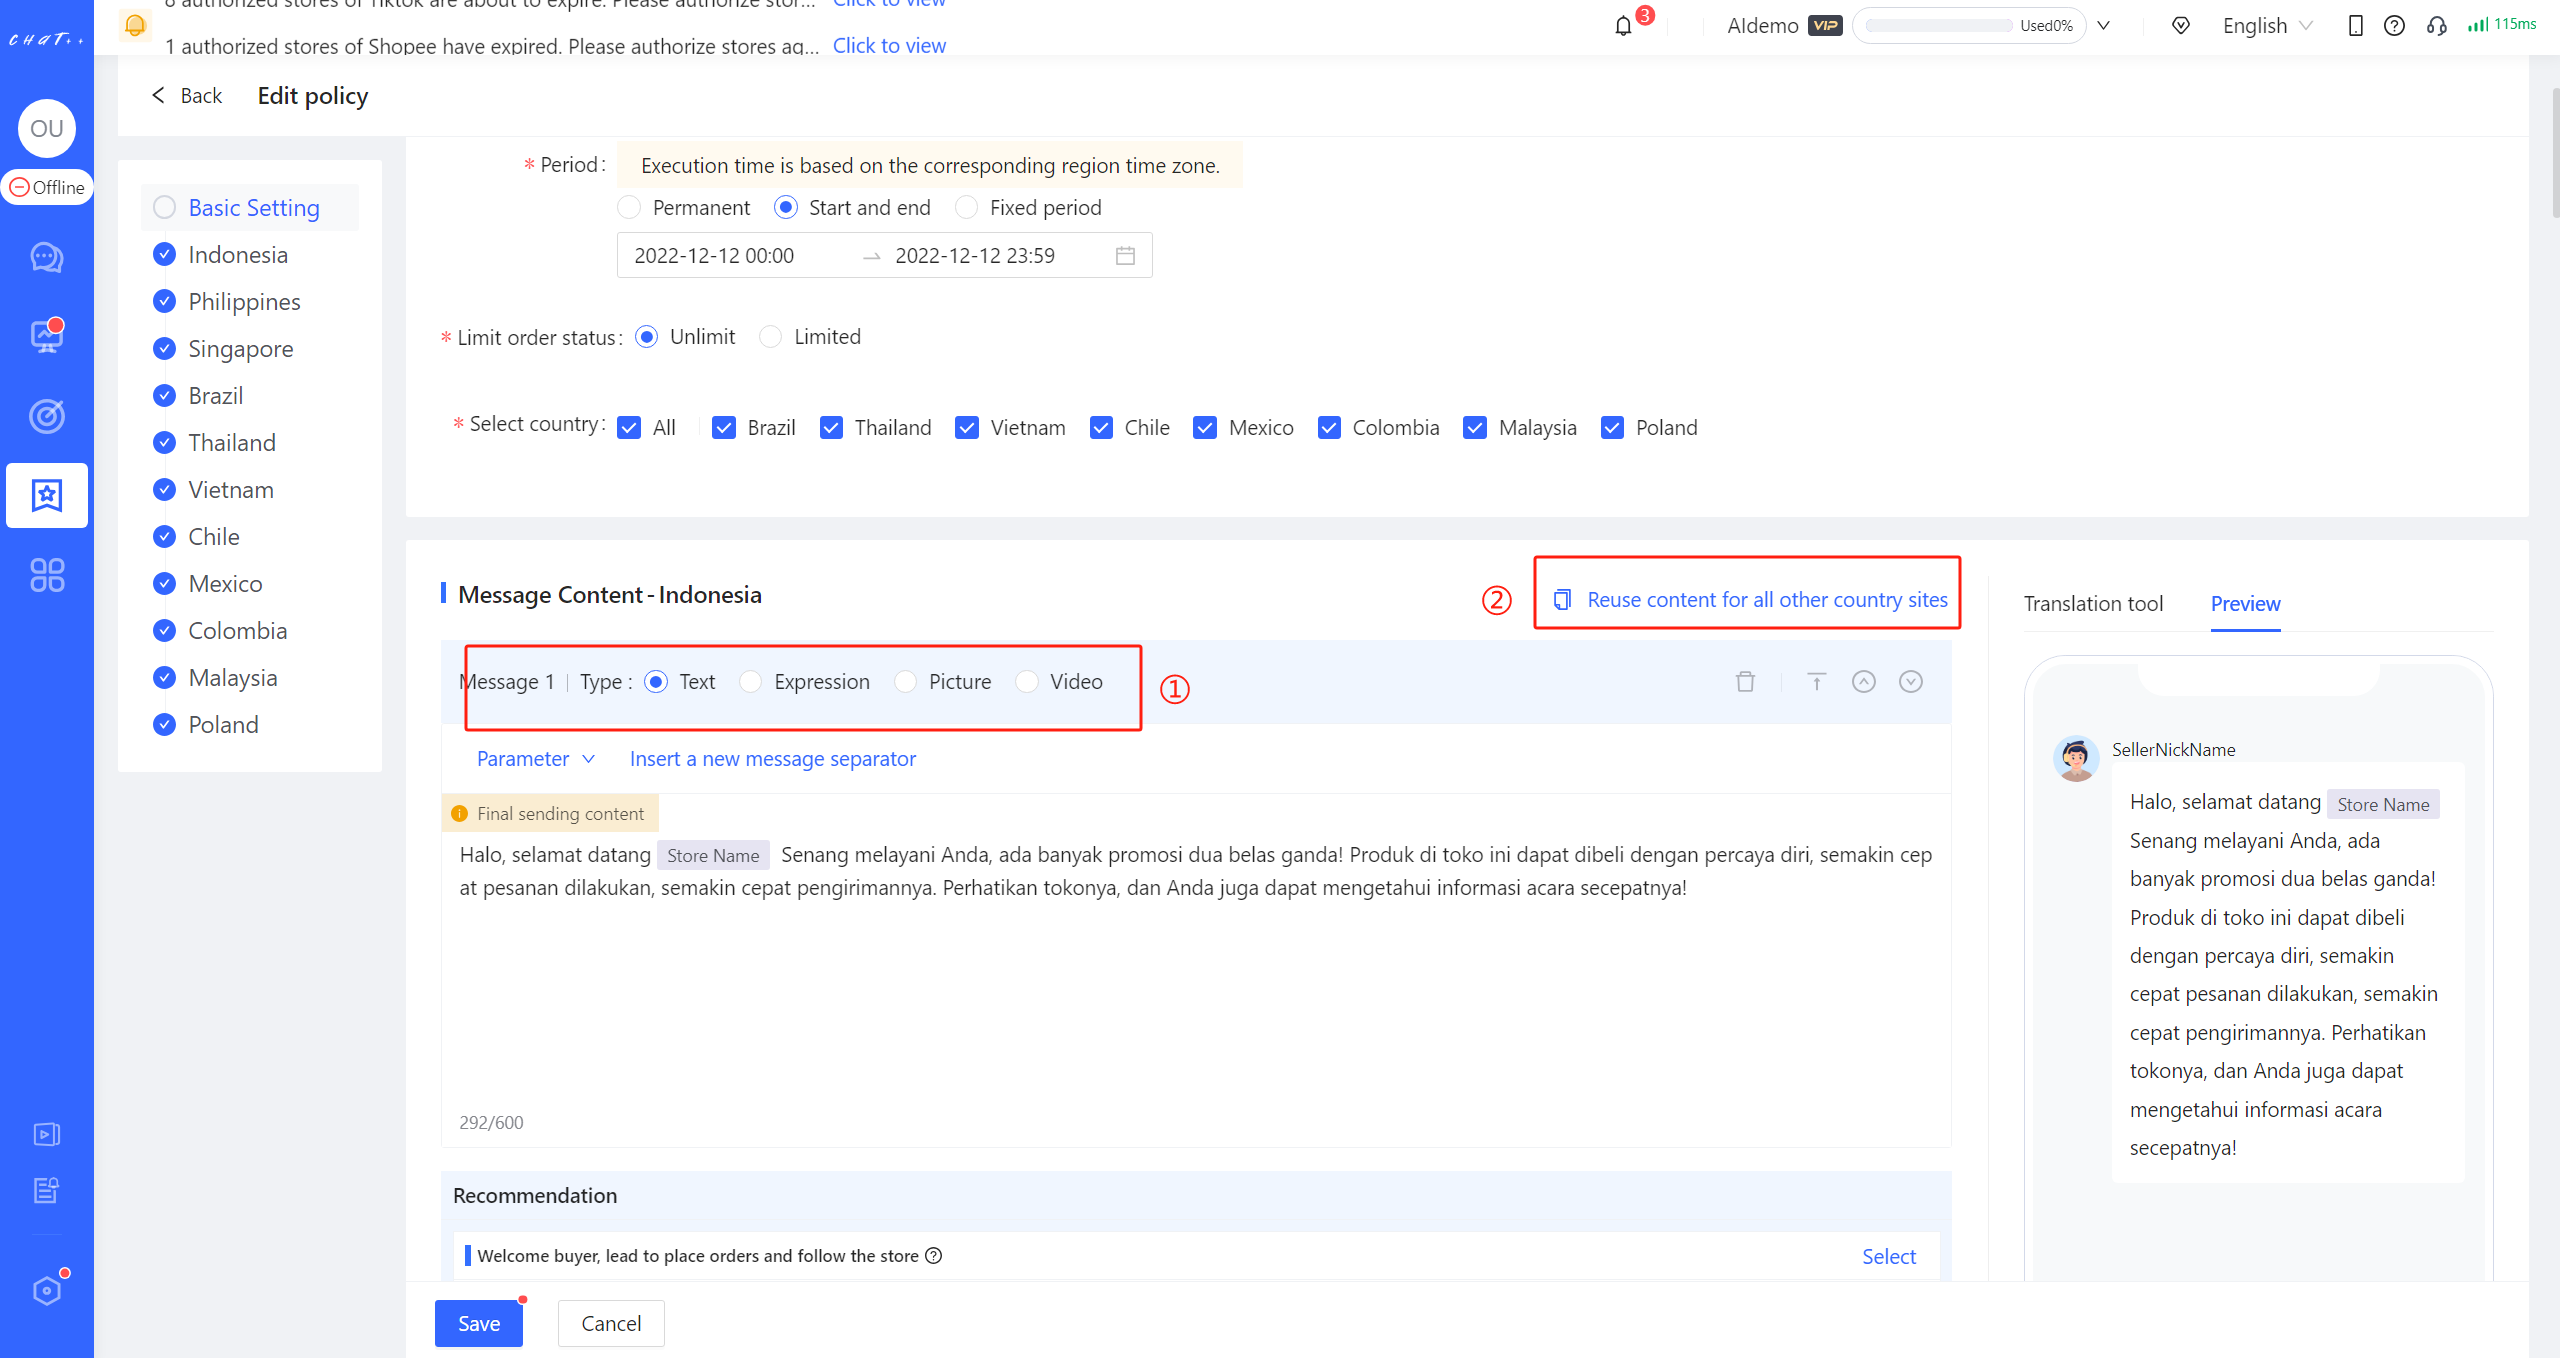
Figure 11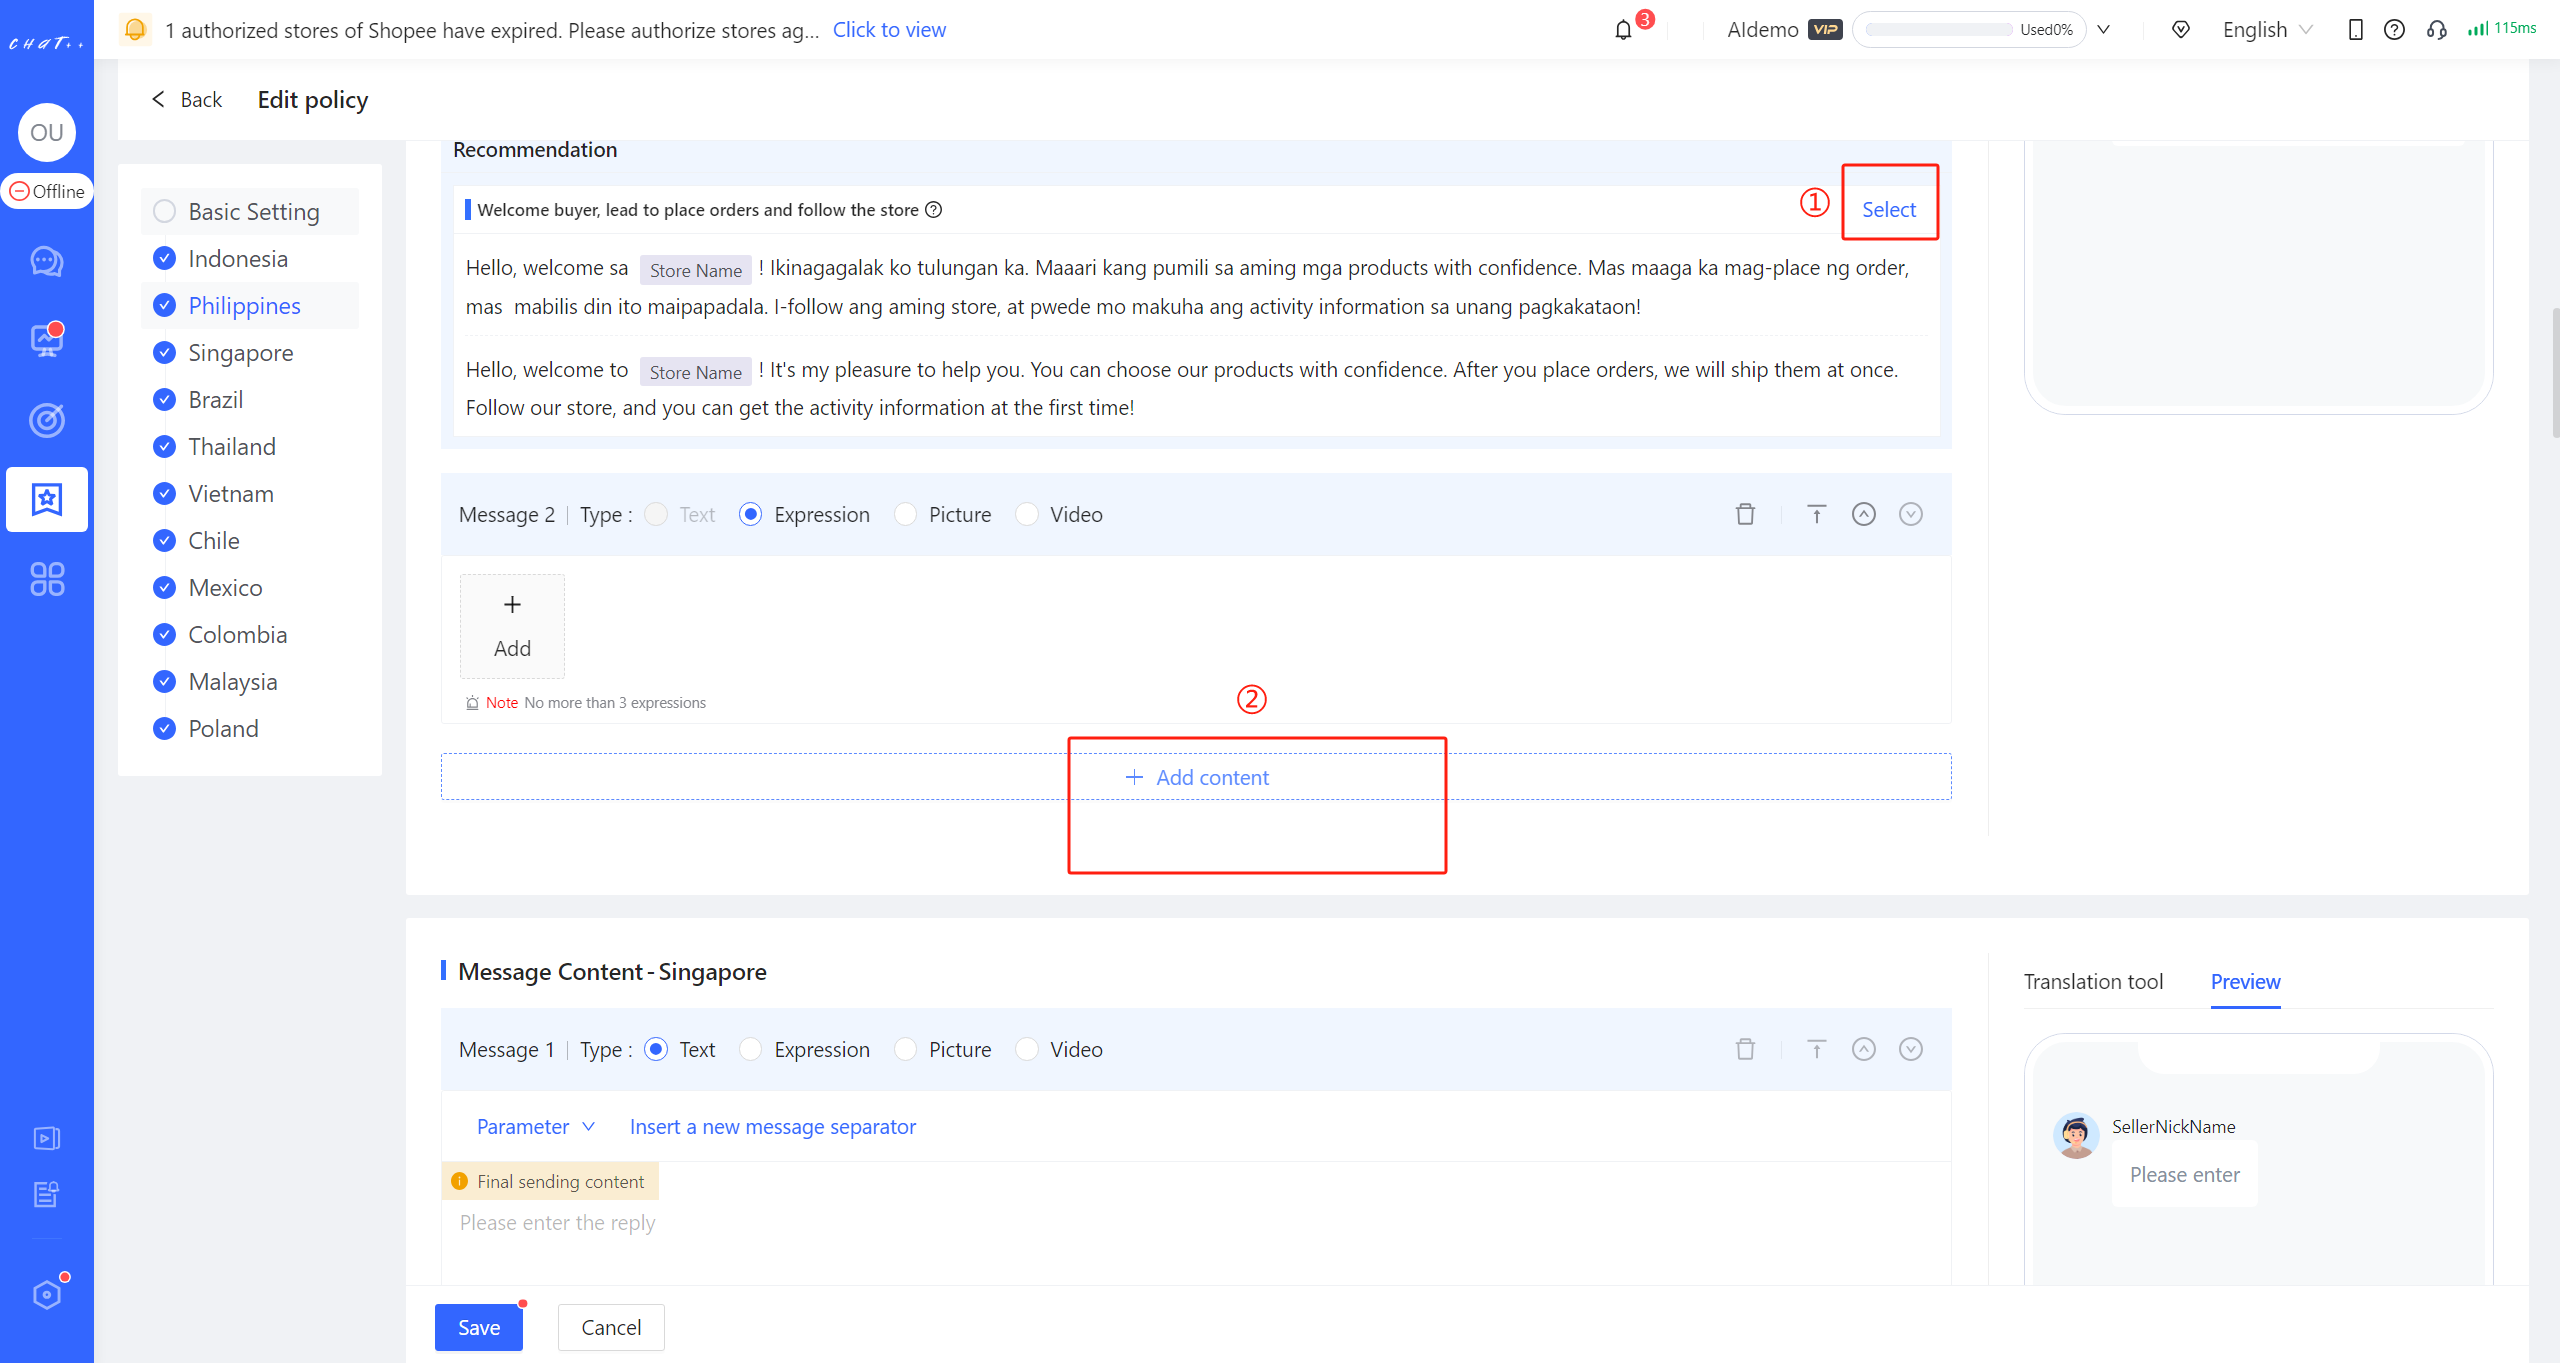
Figure 12
To facilitate the quick creation process, you can copy templates of the first site to all other sites with just one click (red box ② in figure 12 above). When copying, you can choose whether to translate it into the language of corresponding site (red box in figure 13 below).
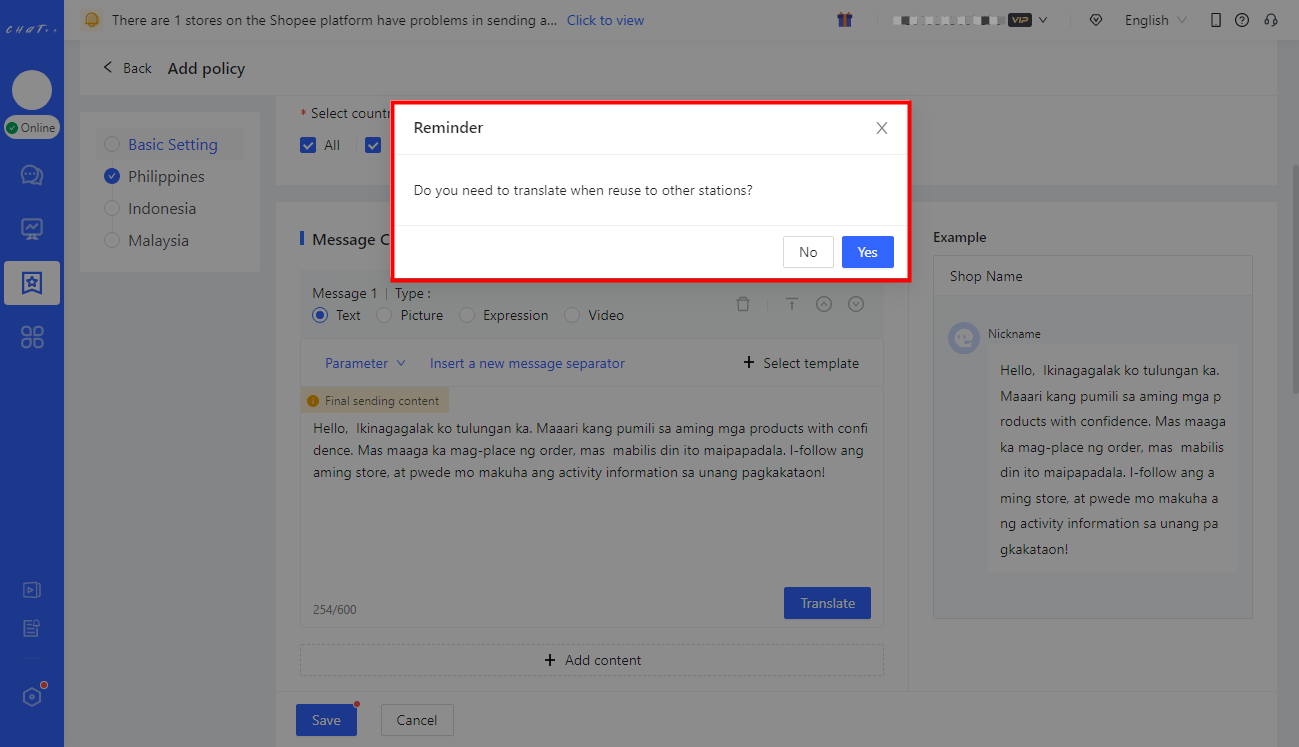
Figure 13
Note: If there are differences in Store welcome message for different stores, you can click "Add Task" to add suitable tasks for different stores.
- Figures 14 and 15 below.
In the newly created task, added stores will be removed from applied stores of other tasks, ensuring that "a store will not exist in two tasks at the same time," to avoid sending different store welcome messages to buyers multiple times.
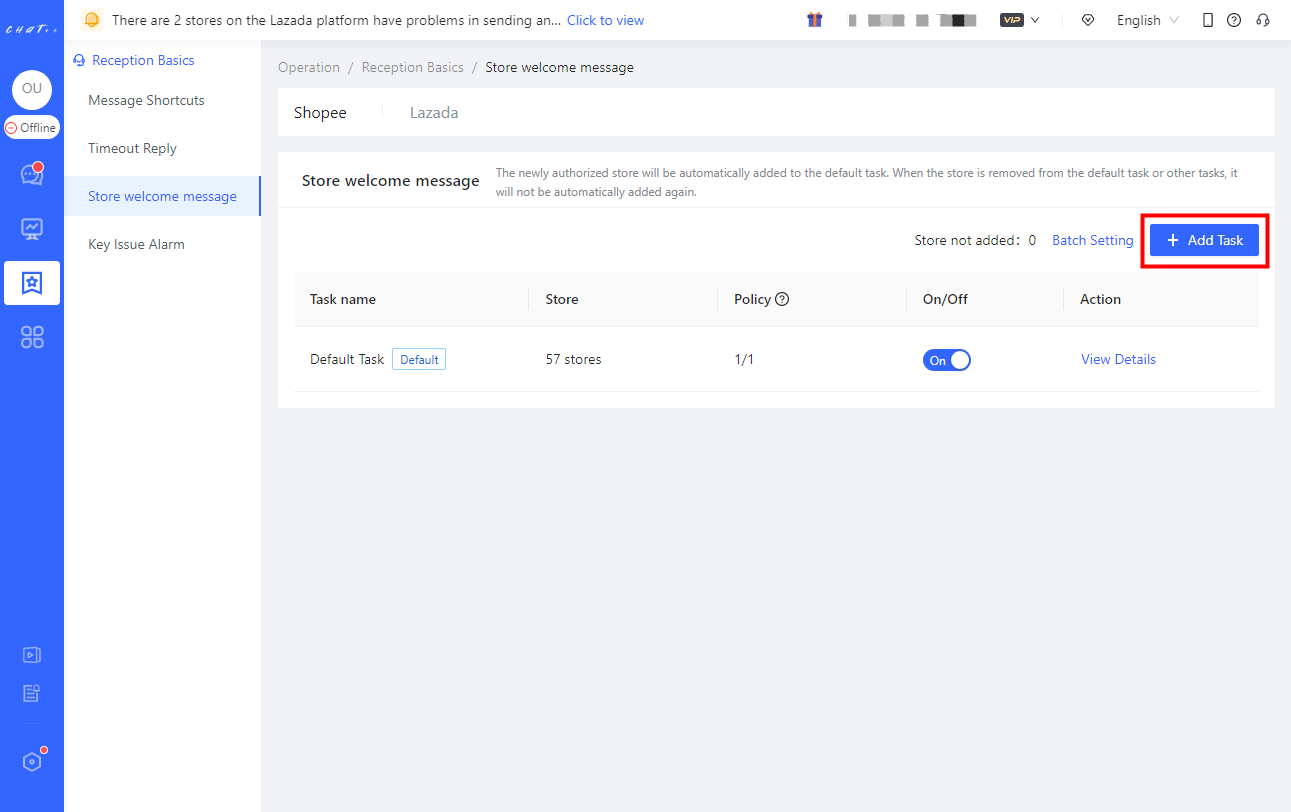
Figure 14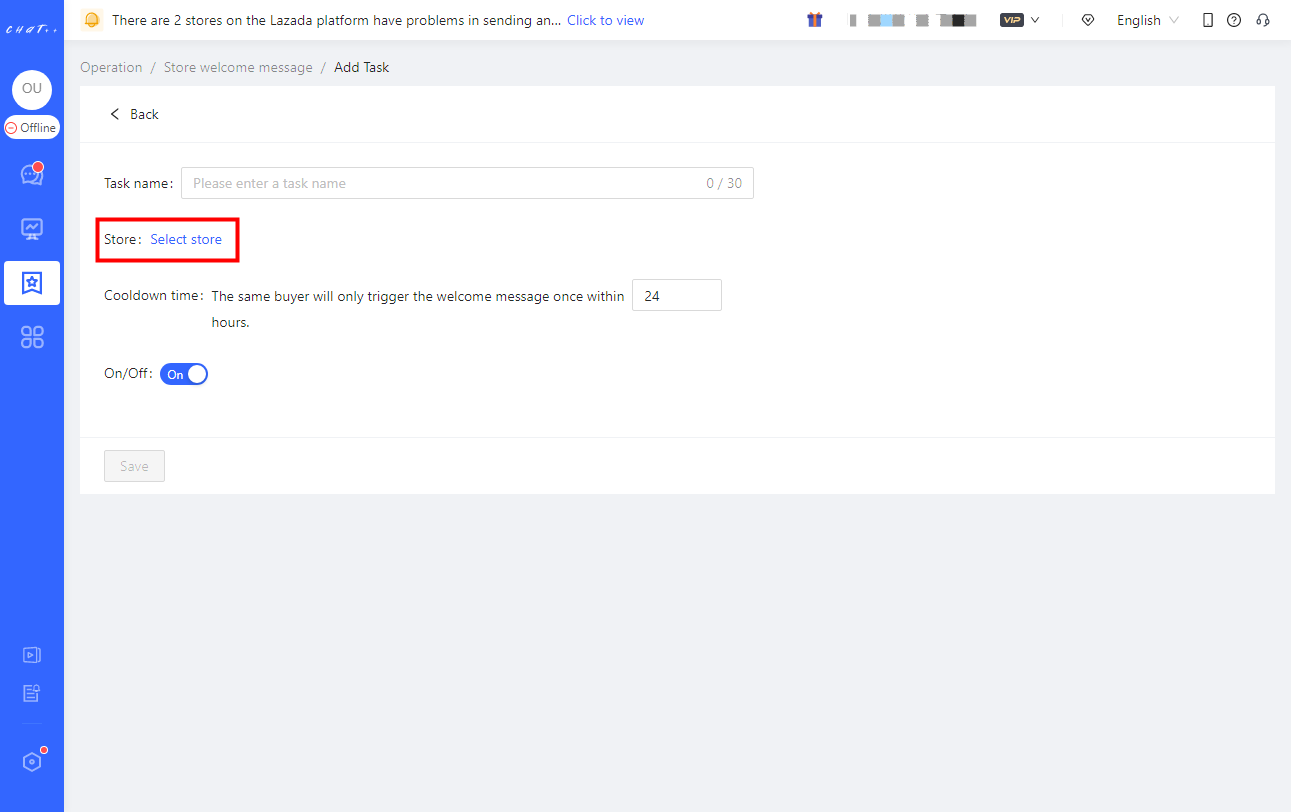
Figure 15
Attention
⚠️ 1. Store welcome message can be customized differently for Shopee, Lazada, Tokopedia, TikTok Southeast Asia, and TikTok US.
Invite to follow automatically
💡 During the daily customer consultation process, ChatPlusAI will proactively invite customers to follow the store to receive information about major promotions, daily events of the store, etc., enhancing the positive interaction between customers and the store.
Marketplaces: Shopee, Lazada
Show Cases
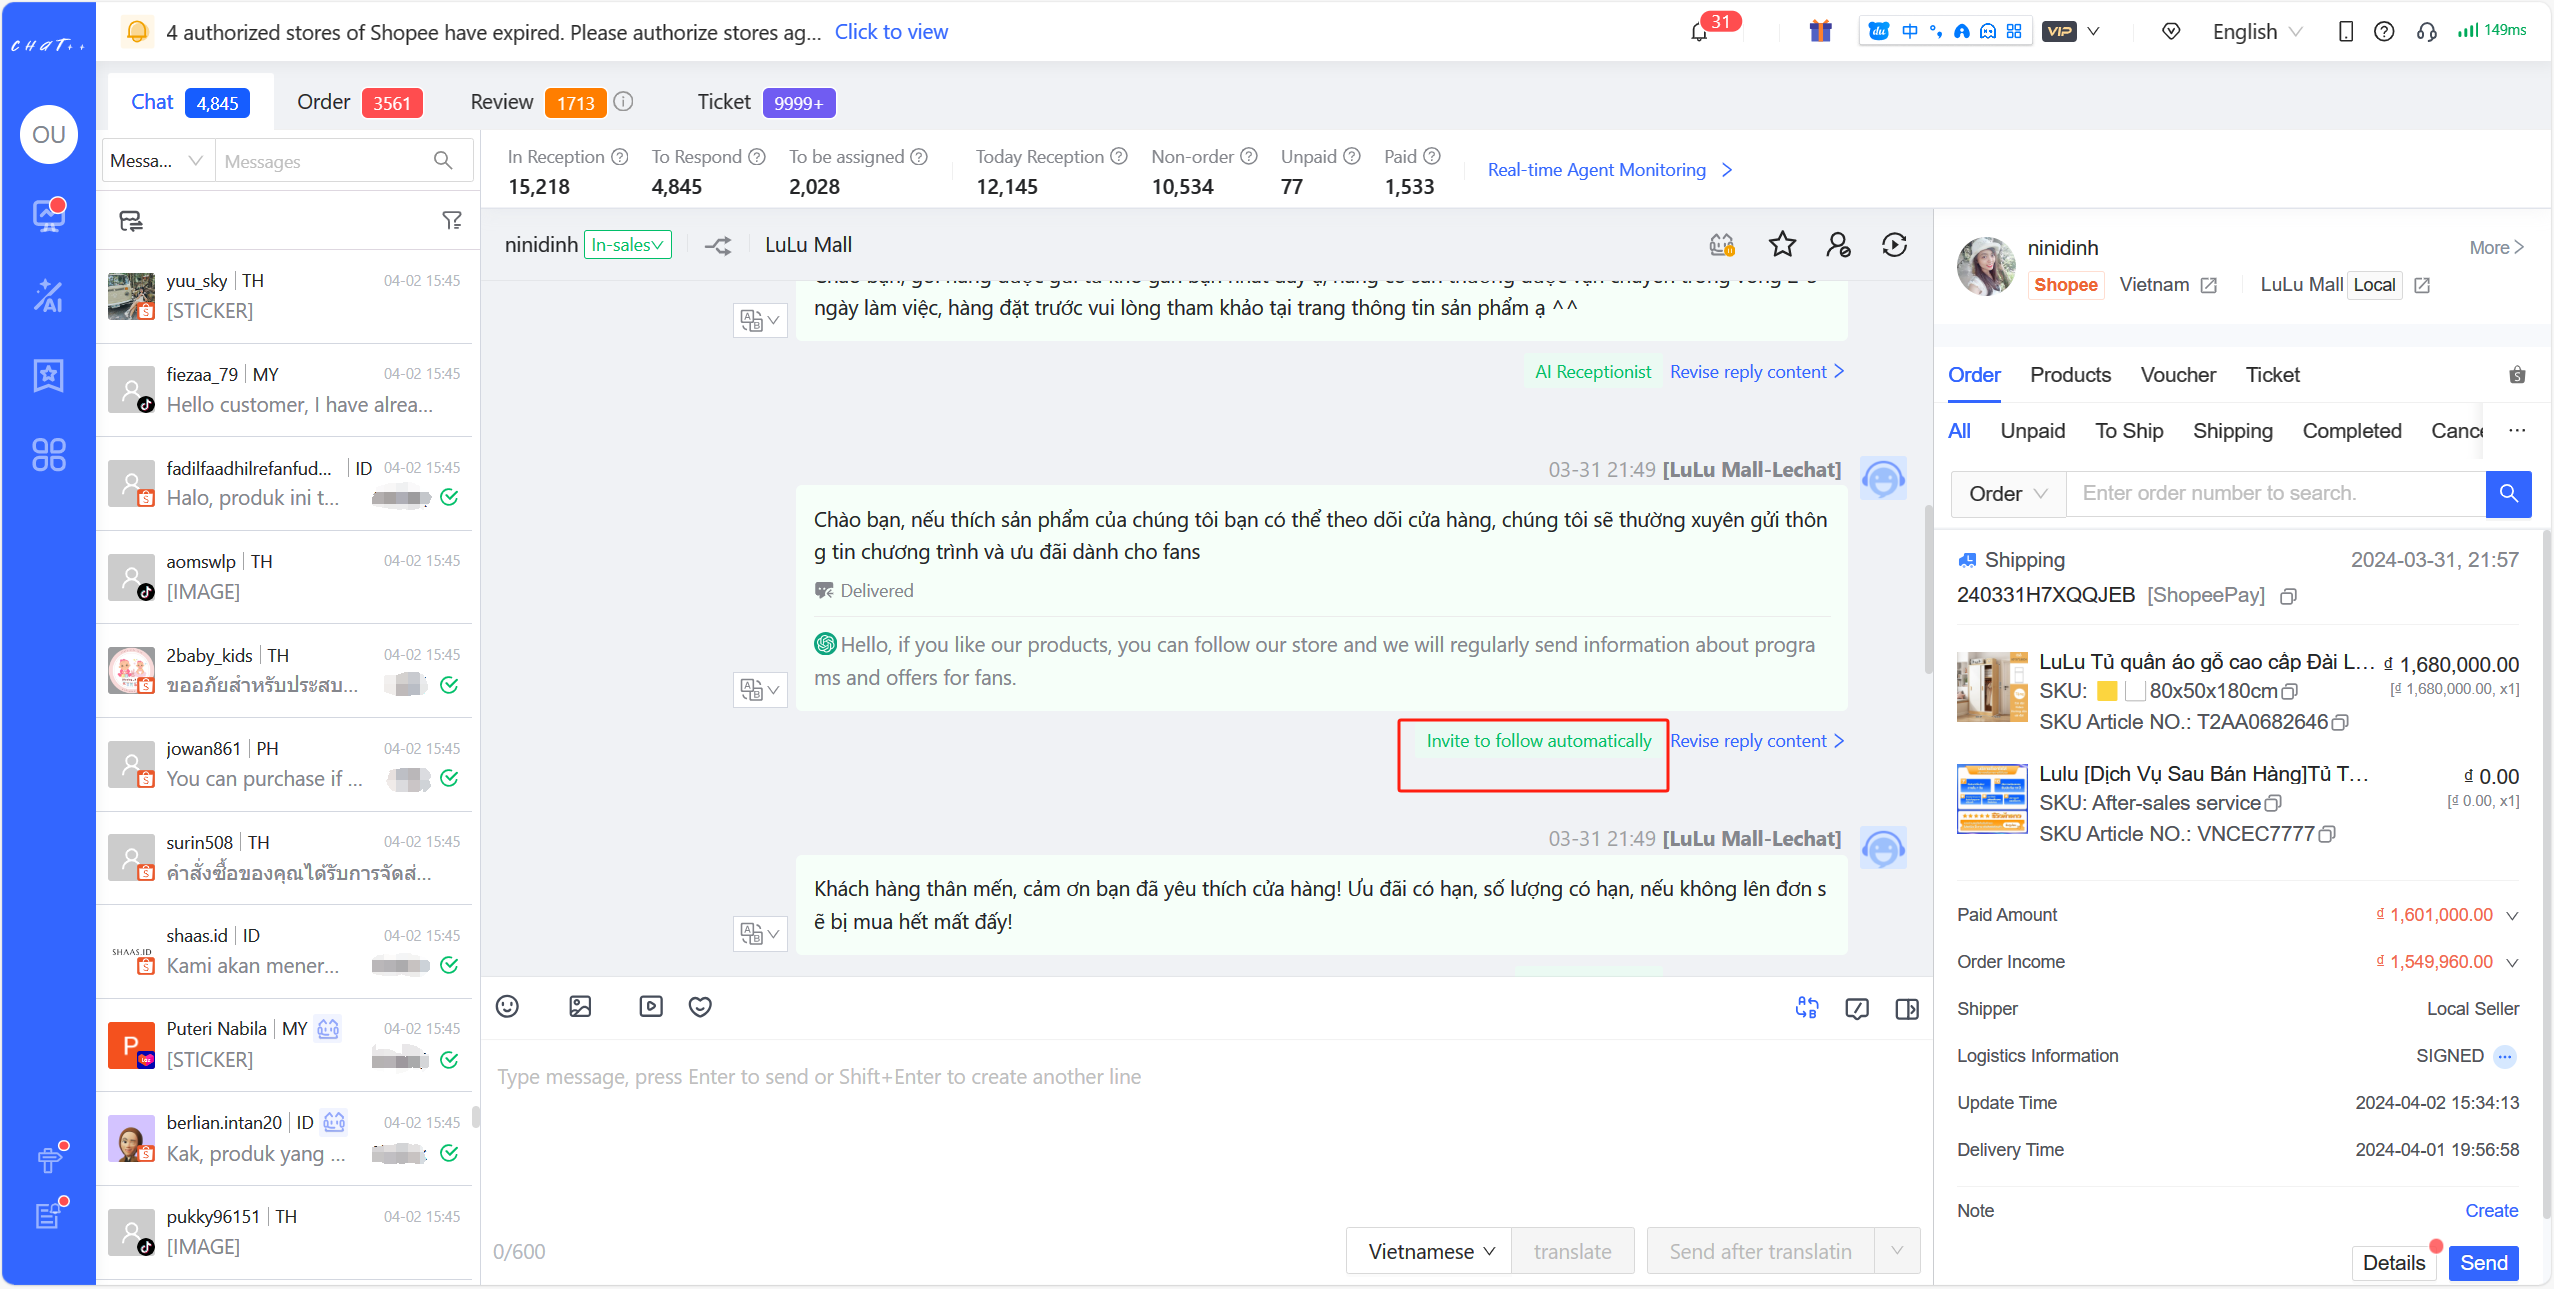 Figure 1
How to Configure 「 Invite to follow automatically 」
👆Click [ 「 Automation 」→「 Reception Basics 」→「 Invite to follow automatically」], and enter the configuration page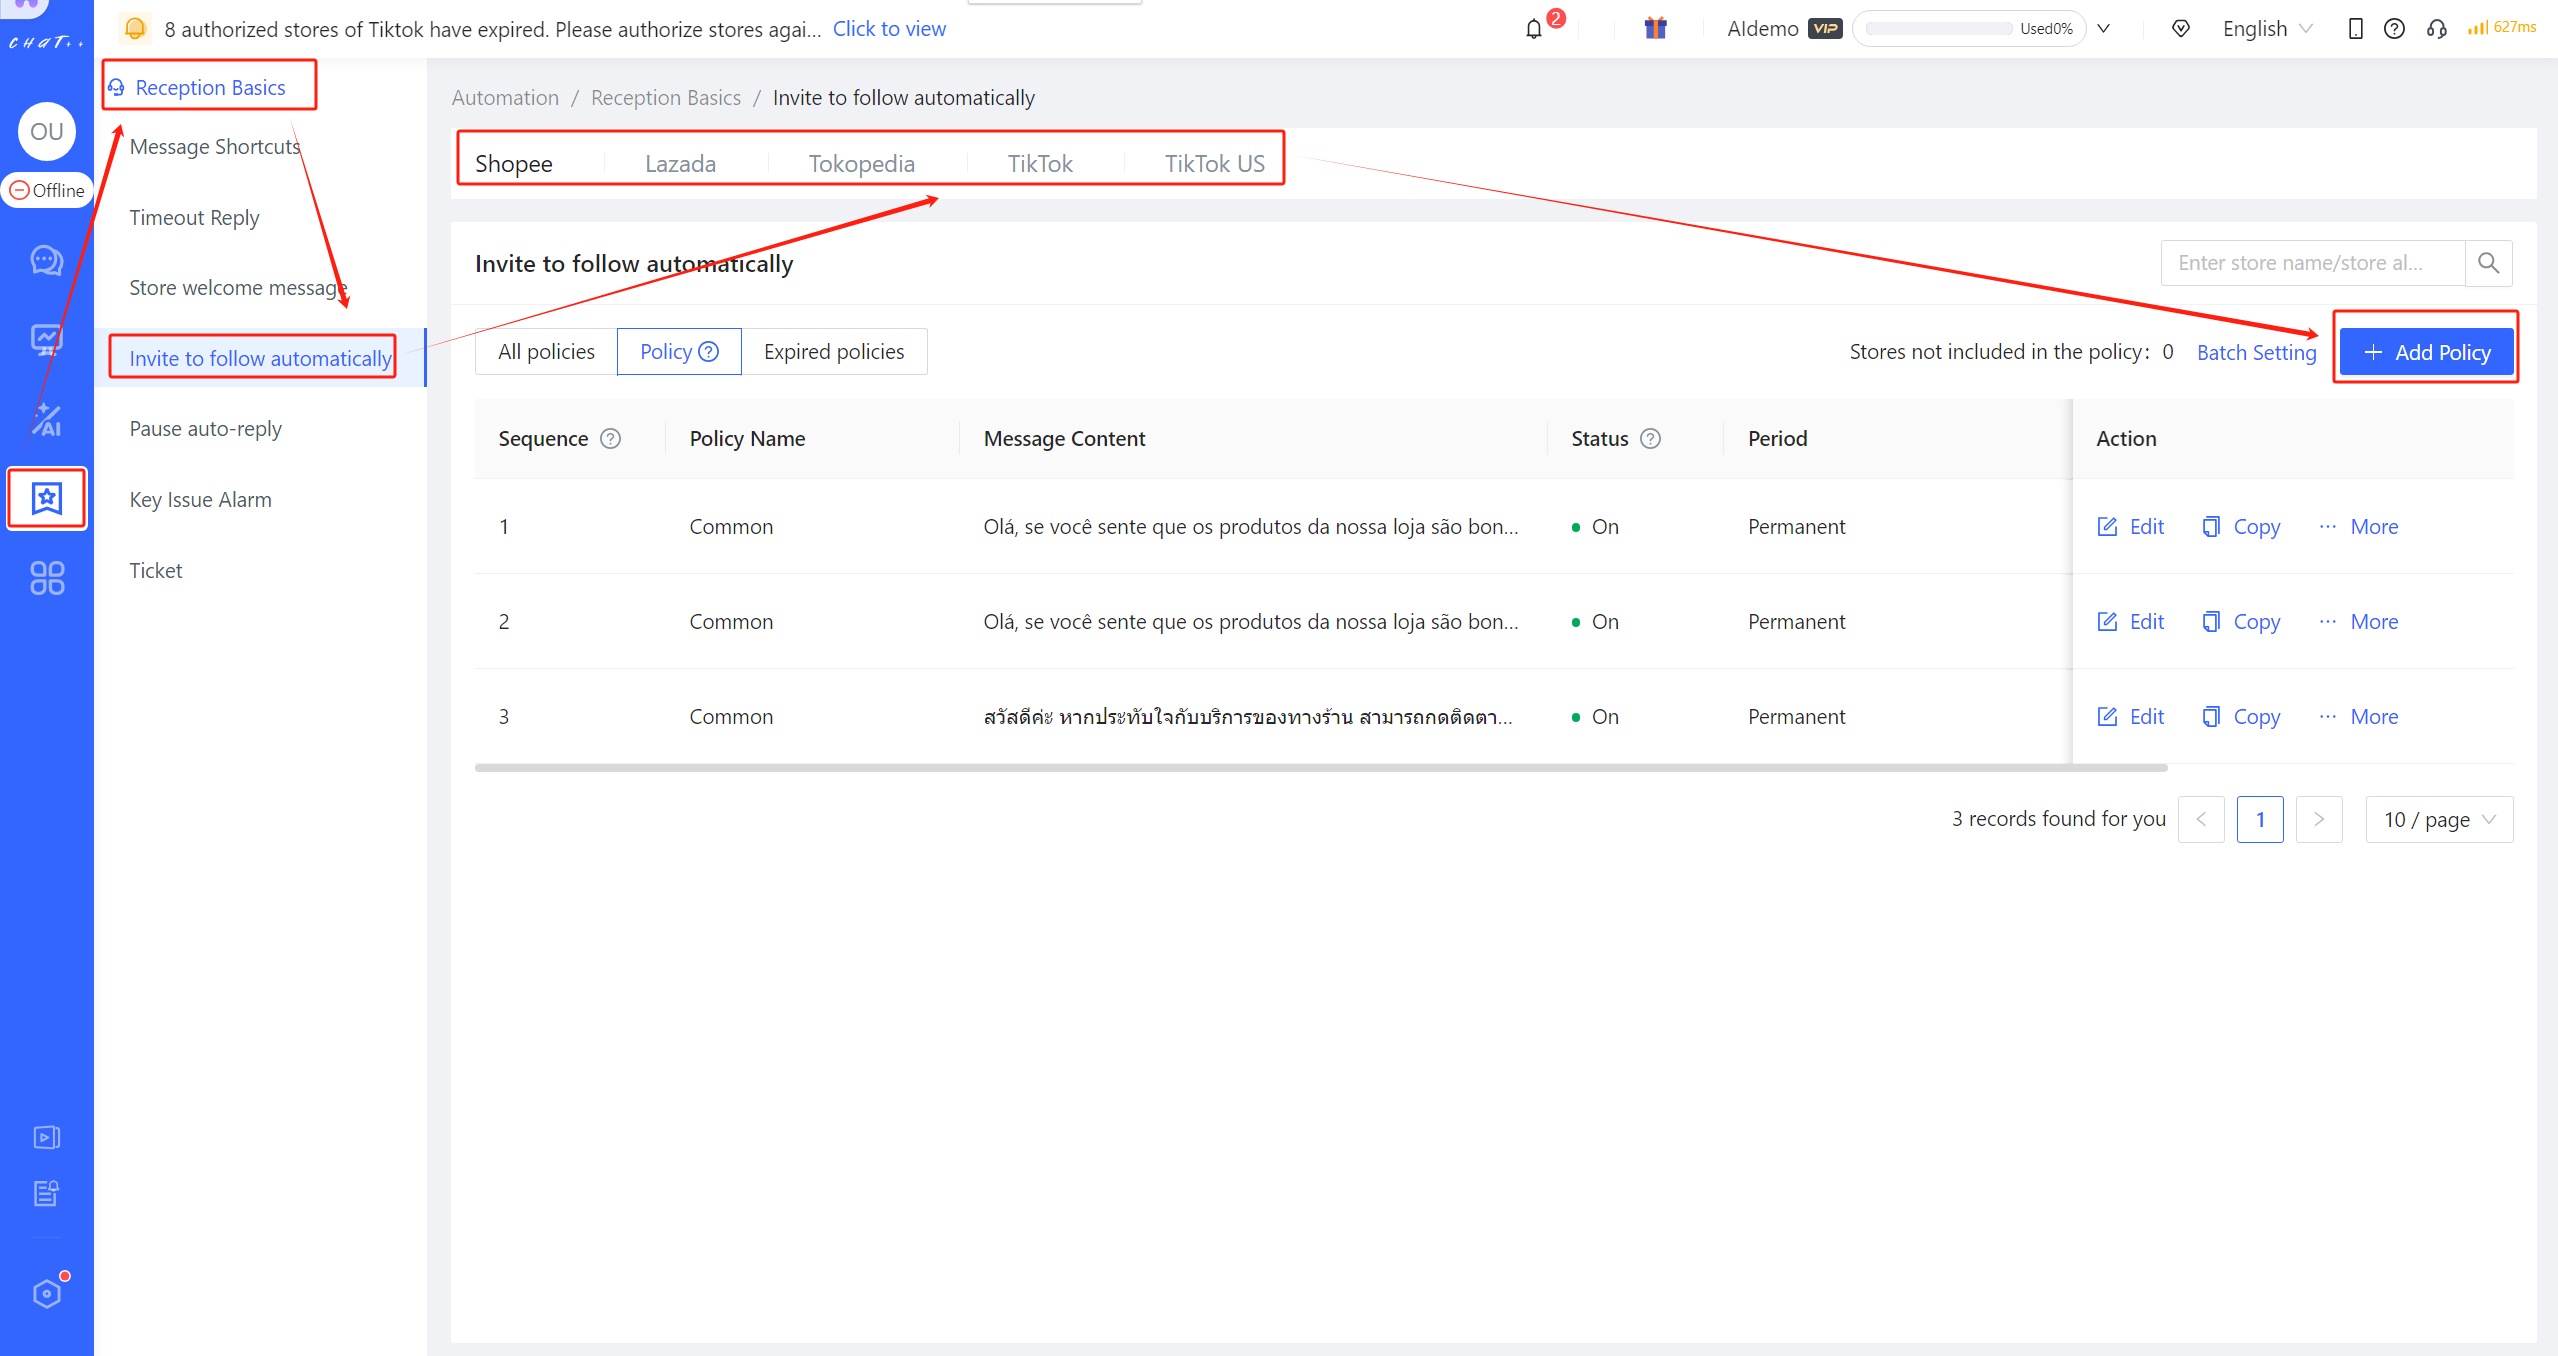
Figure 2
How to Add/Edit 「 Invite to follow automatically 」
⚠️ Inviting to follow automatically can be customized differently for marketplaces, currently supporting Shopee, Lazada, with Tokopedia, TikTok Southeast Asia, and TikTok US support coming soon.
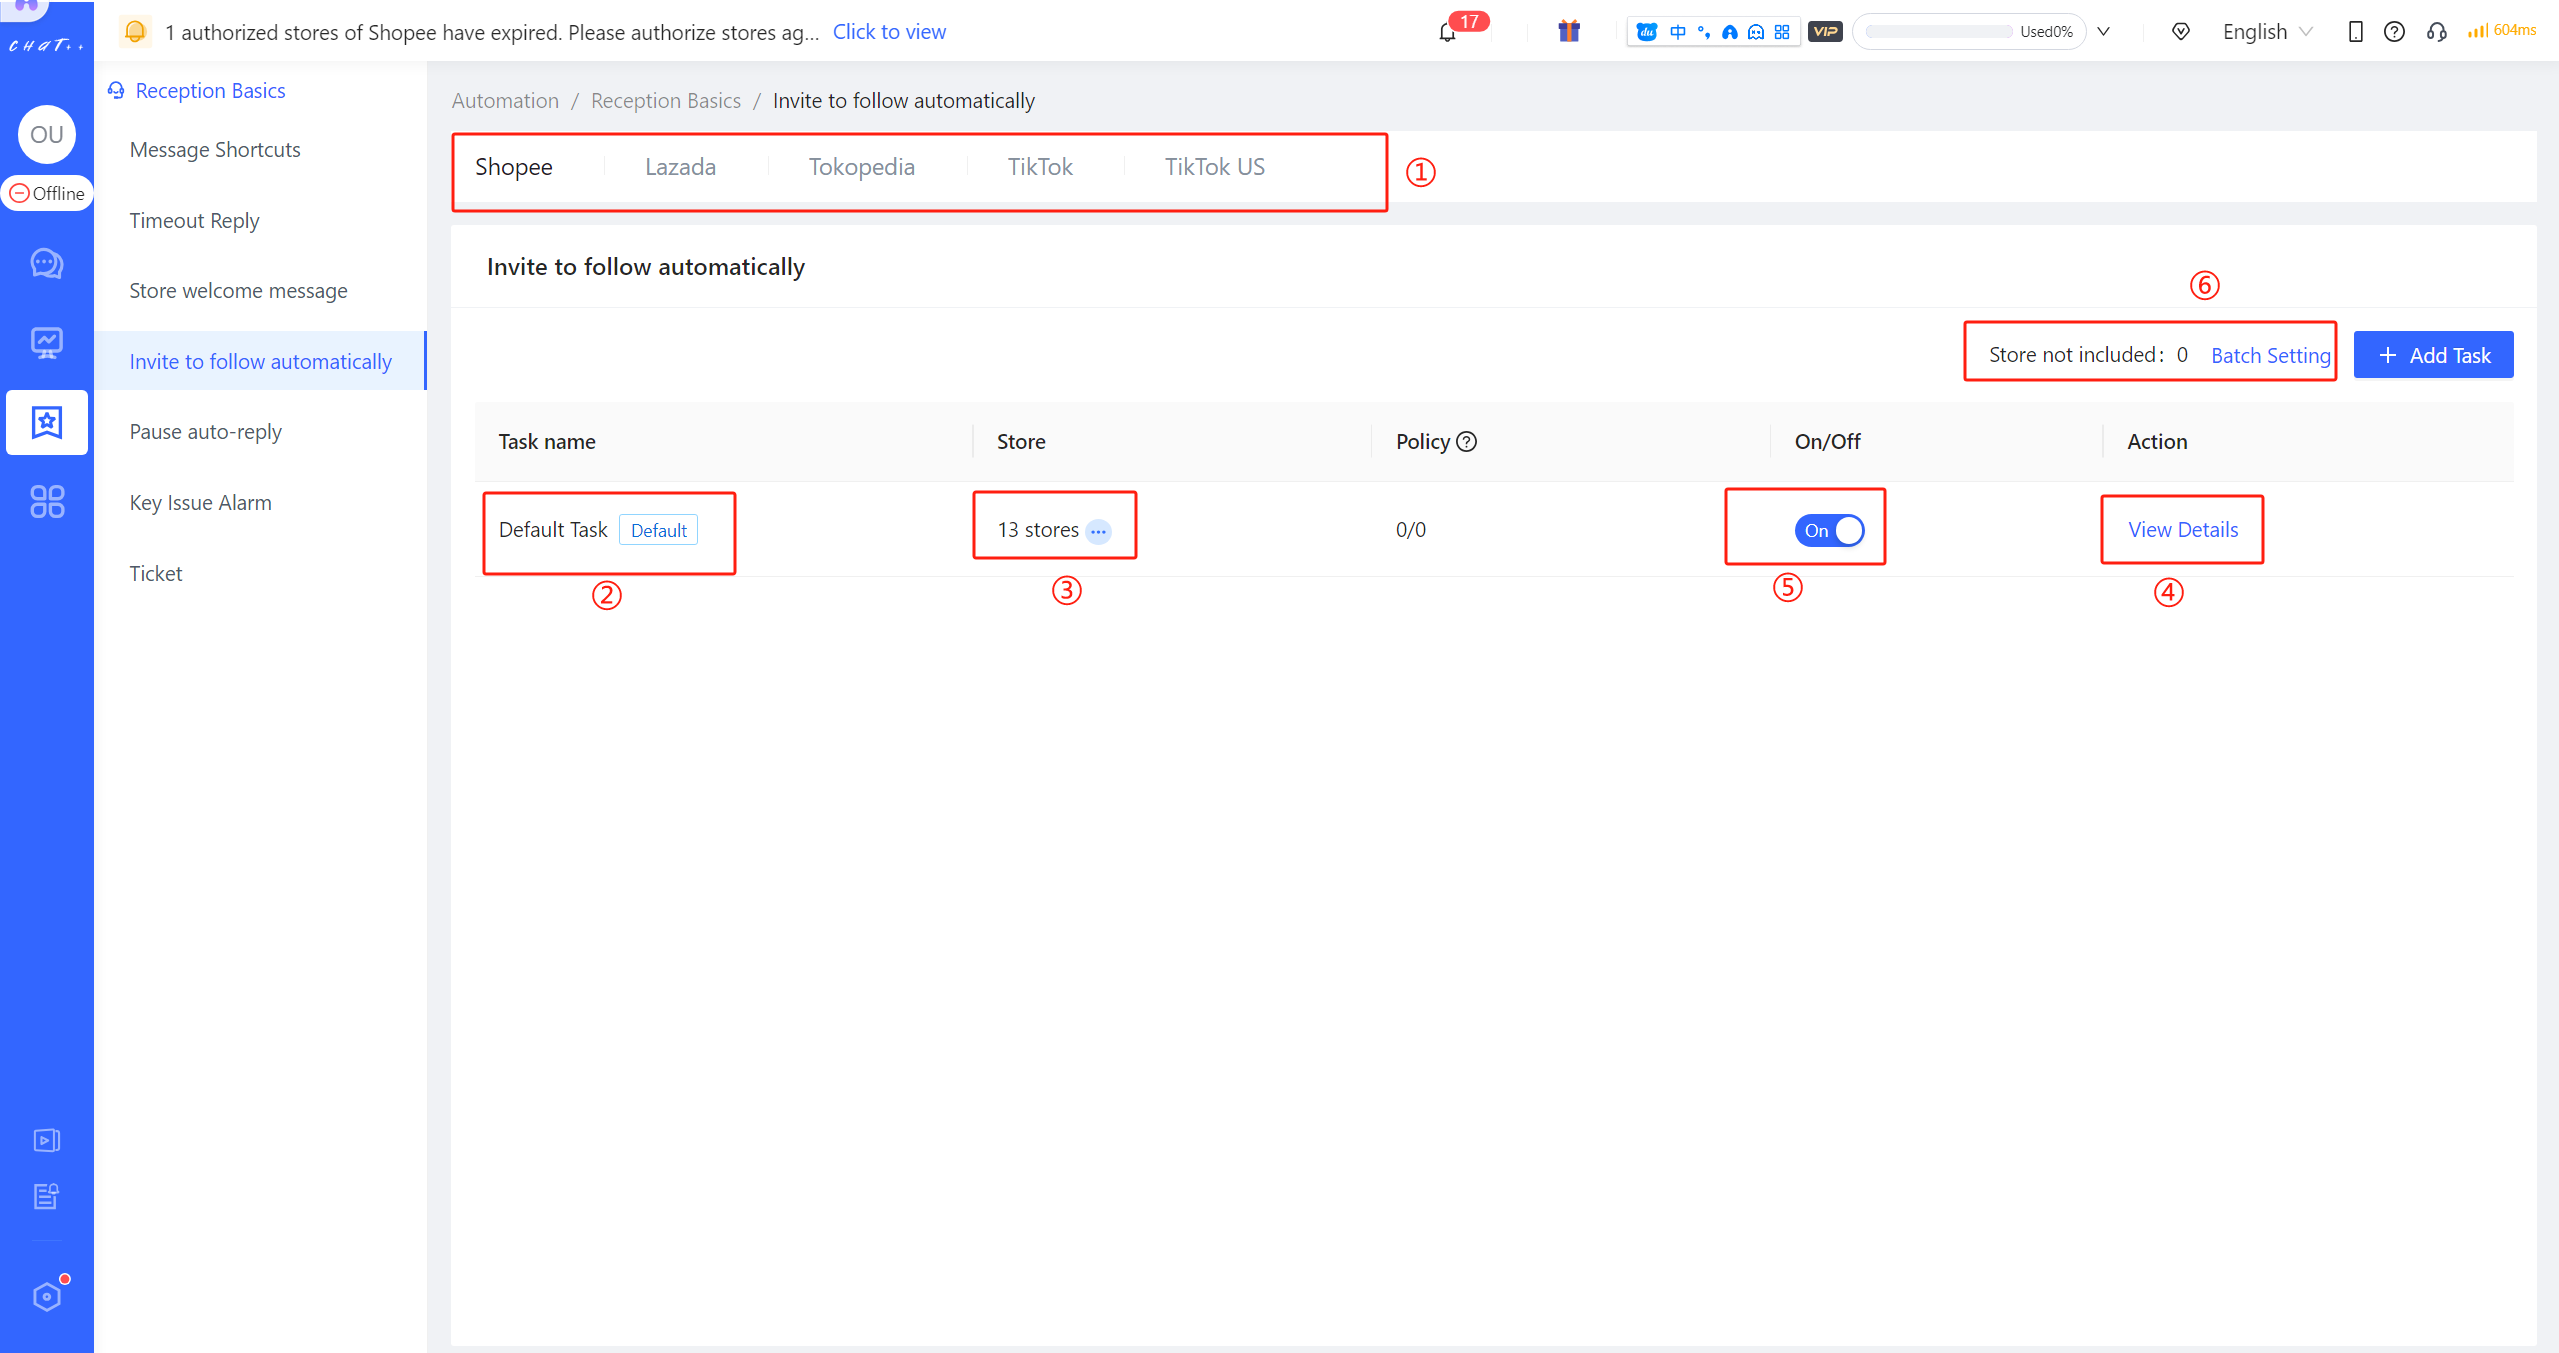
Figure 3
【Default Task】Description
💡 A default task has been created for each country site and marketplace, and all stores in the country have been included in the task. This makes the configuration much more convenient. All you have to do is click "View Details" button to edit or modify the policy. After confirmation, the default task can be enabled directly.
💡 Newly authorized stores will be automatically included to the 【Default task】. However, the store will not be automatically included again after they are removed from the default task or other tasks. It will be counted as "Store not included". You can click "Batch Settings" button to add massive stores into the certain task quickly.
⚠️ Kindly make sure that all stores have been included to the right task (that means the "Store not included" is 0), in case the store is neglected from any tasks.
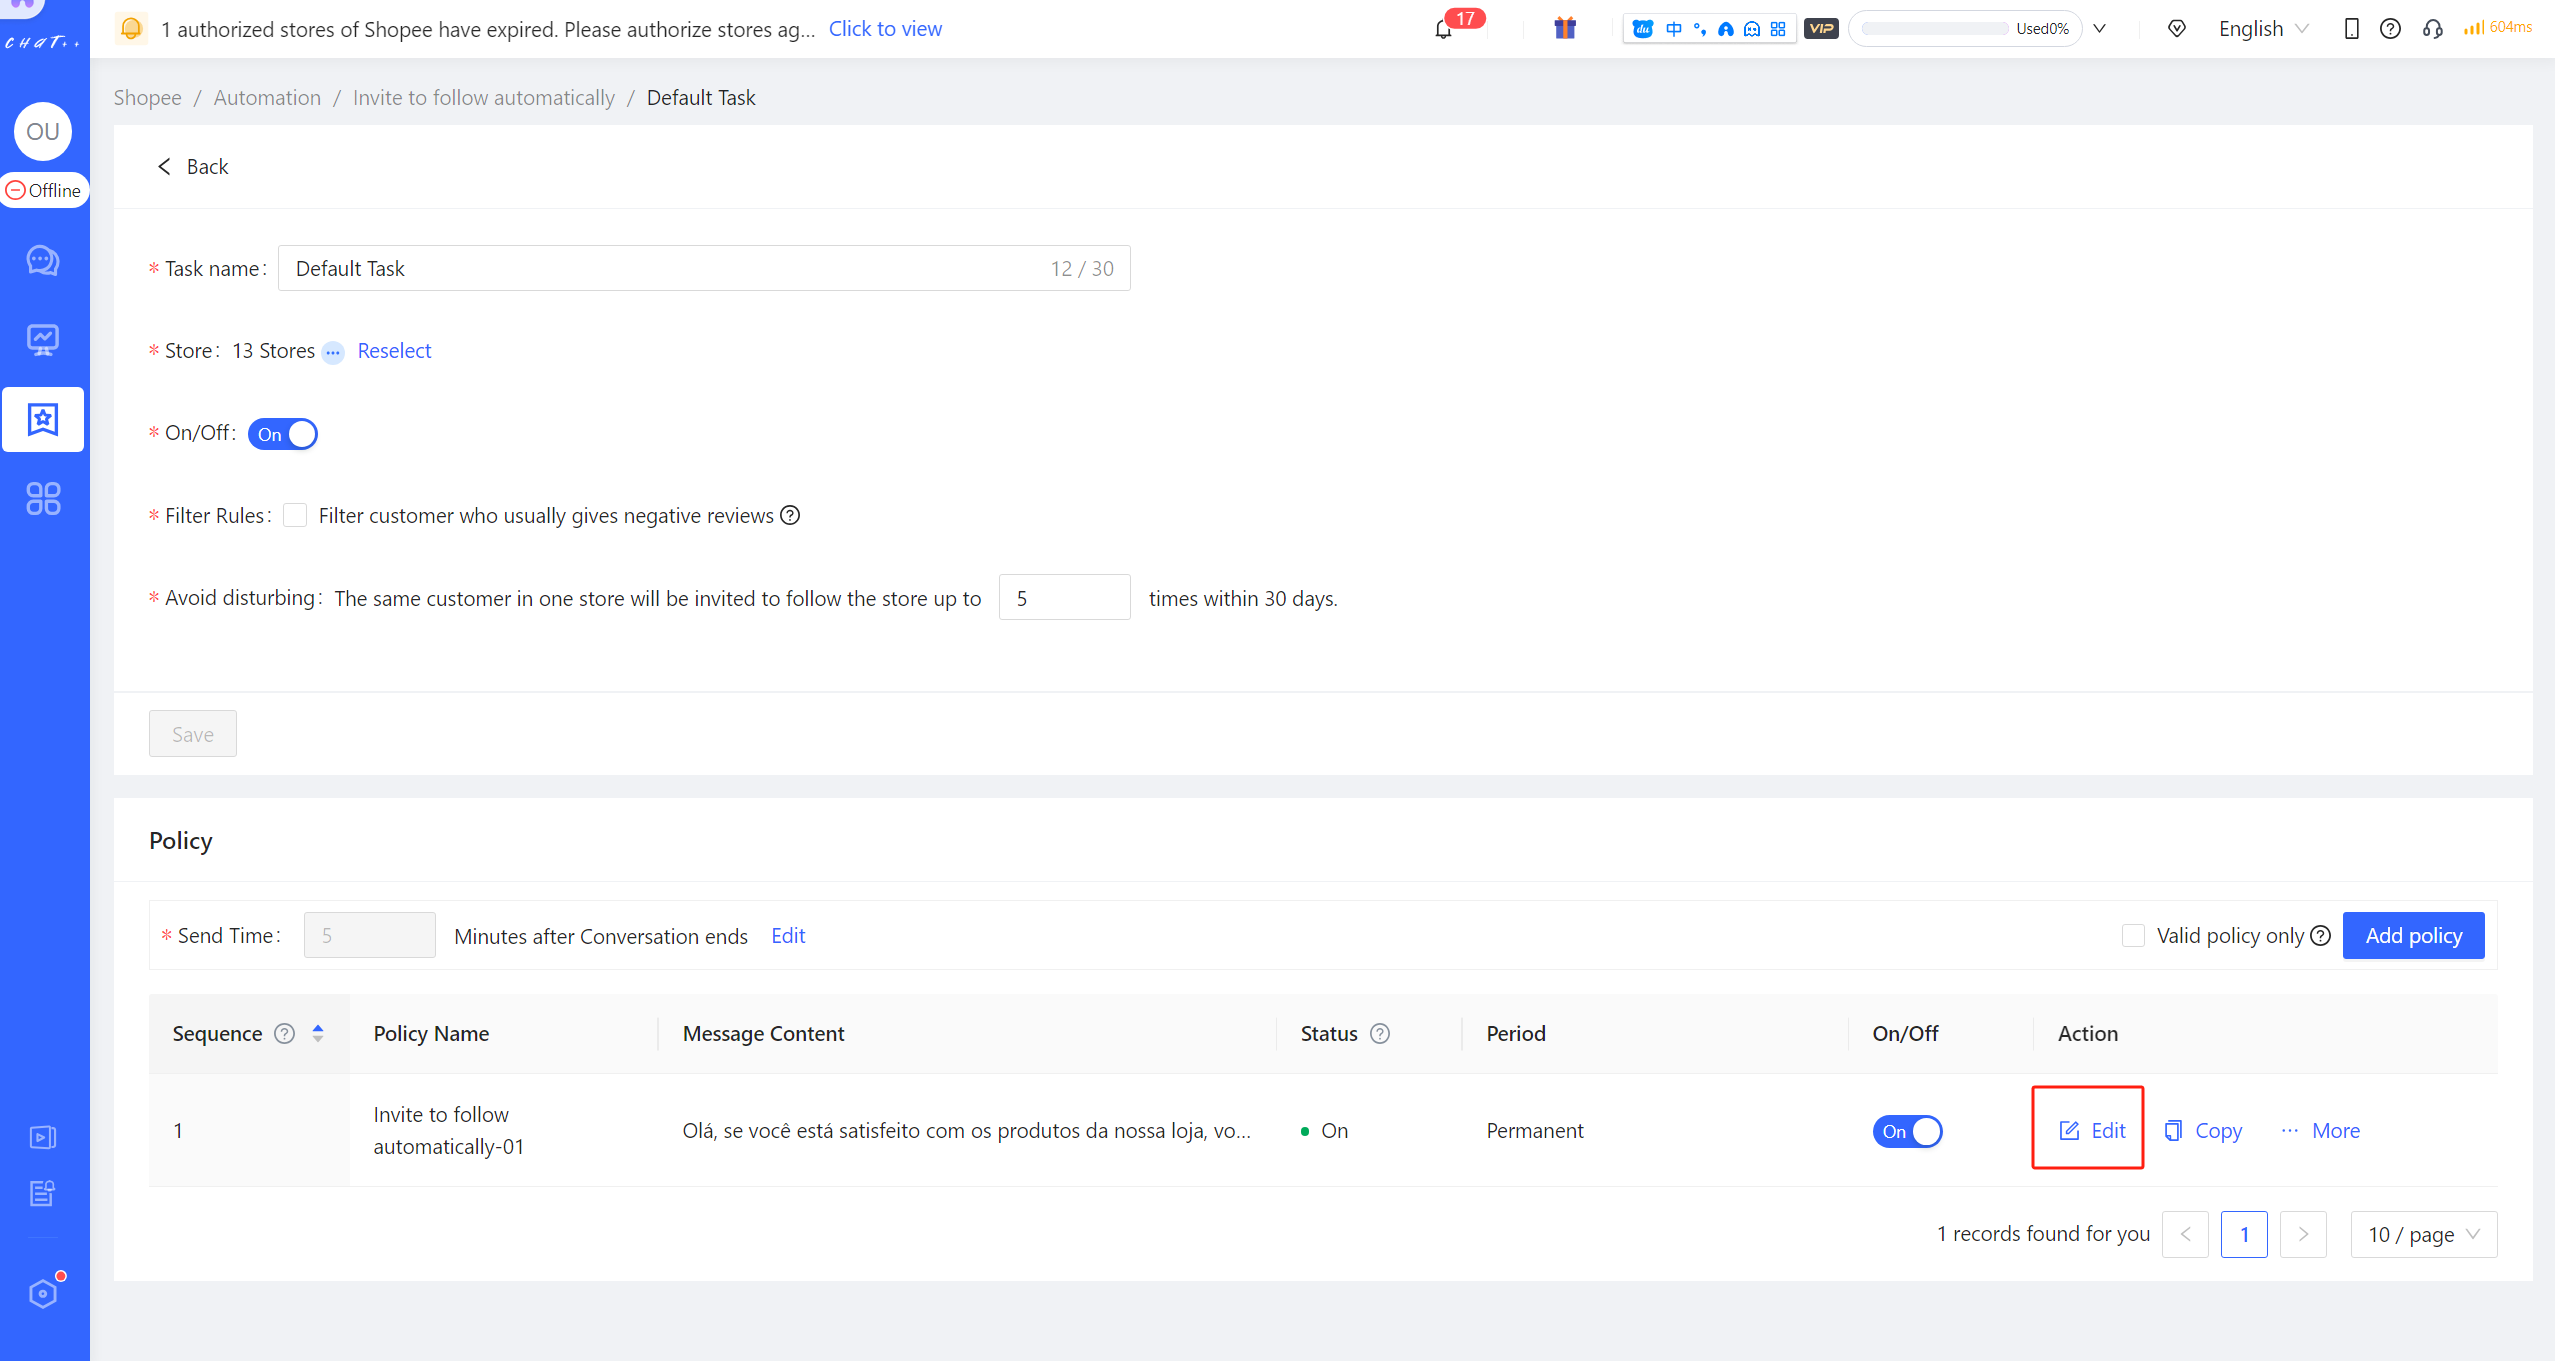
Figure 4
【Policy branch】Description
- Policy branch consists of four key factors: Country sites, Period, Limit order status and Message Content.
- Period: The policy branch take effects in this period.
- Limit order status: Support sending messages to customers based on orders with multiple selected different statuses, for example, sending inviting messages to cutomers whose order statuses are "Pre-sales" and "In-sales".
- Country sites: Different country sites support single or multiple selections.
- Message Content: Within the valid time period and the selected site, when a specific order status is chosen, the corresponding message will be sent.
- When multiple policy branches are configured for inviting to follow automatically, the system will execute the first branch in order of priority that matches the trigger condition and falls within its validity period.
💡Set up diversified policy branches for tasks, enabling sending different automatic invitation messages to customers based on various time periods, different sites, and different order statuses, aiming to achieve better interaction results.
- [x] Each task must have at least one valid policy branch. The default task has automatically created a default policy branch, but for newly created tasks, 'Adding Policy' is required.
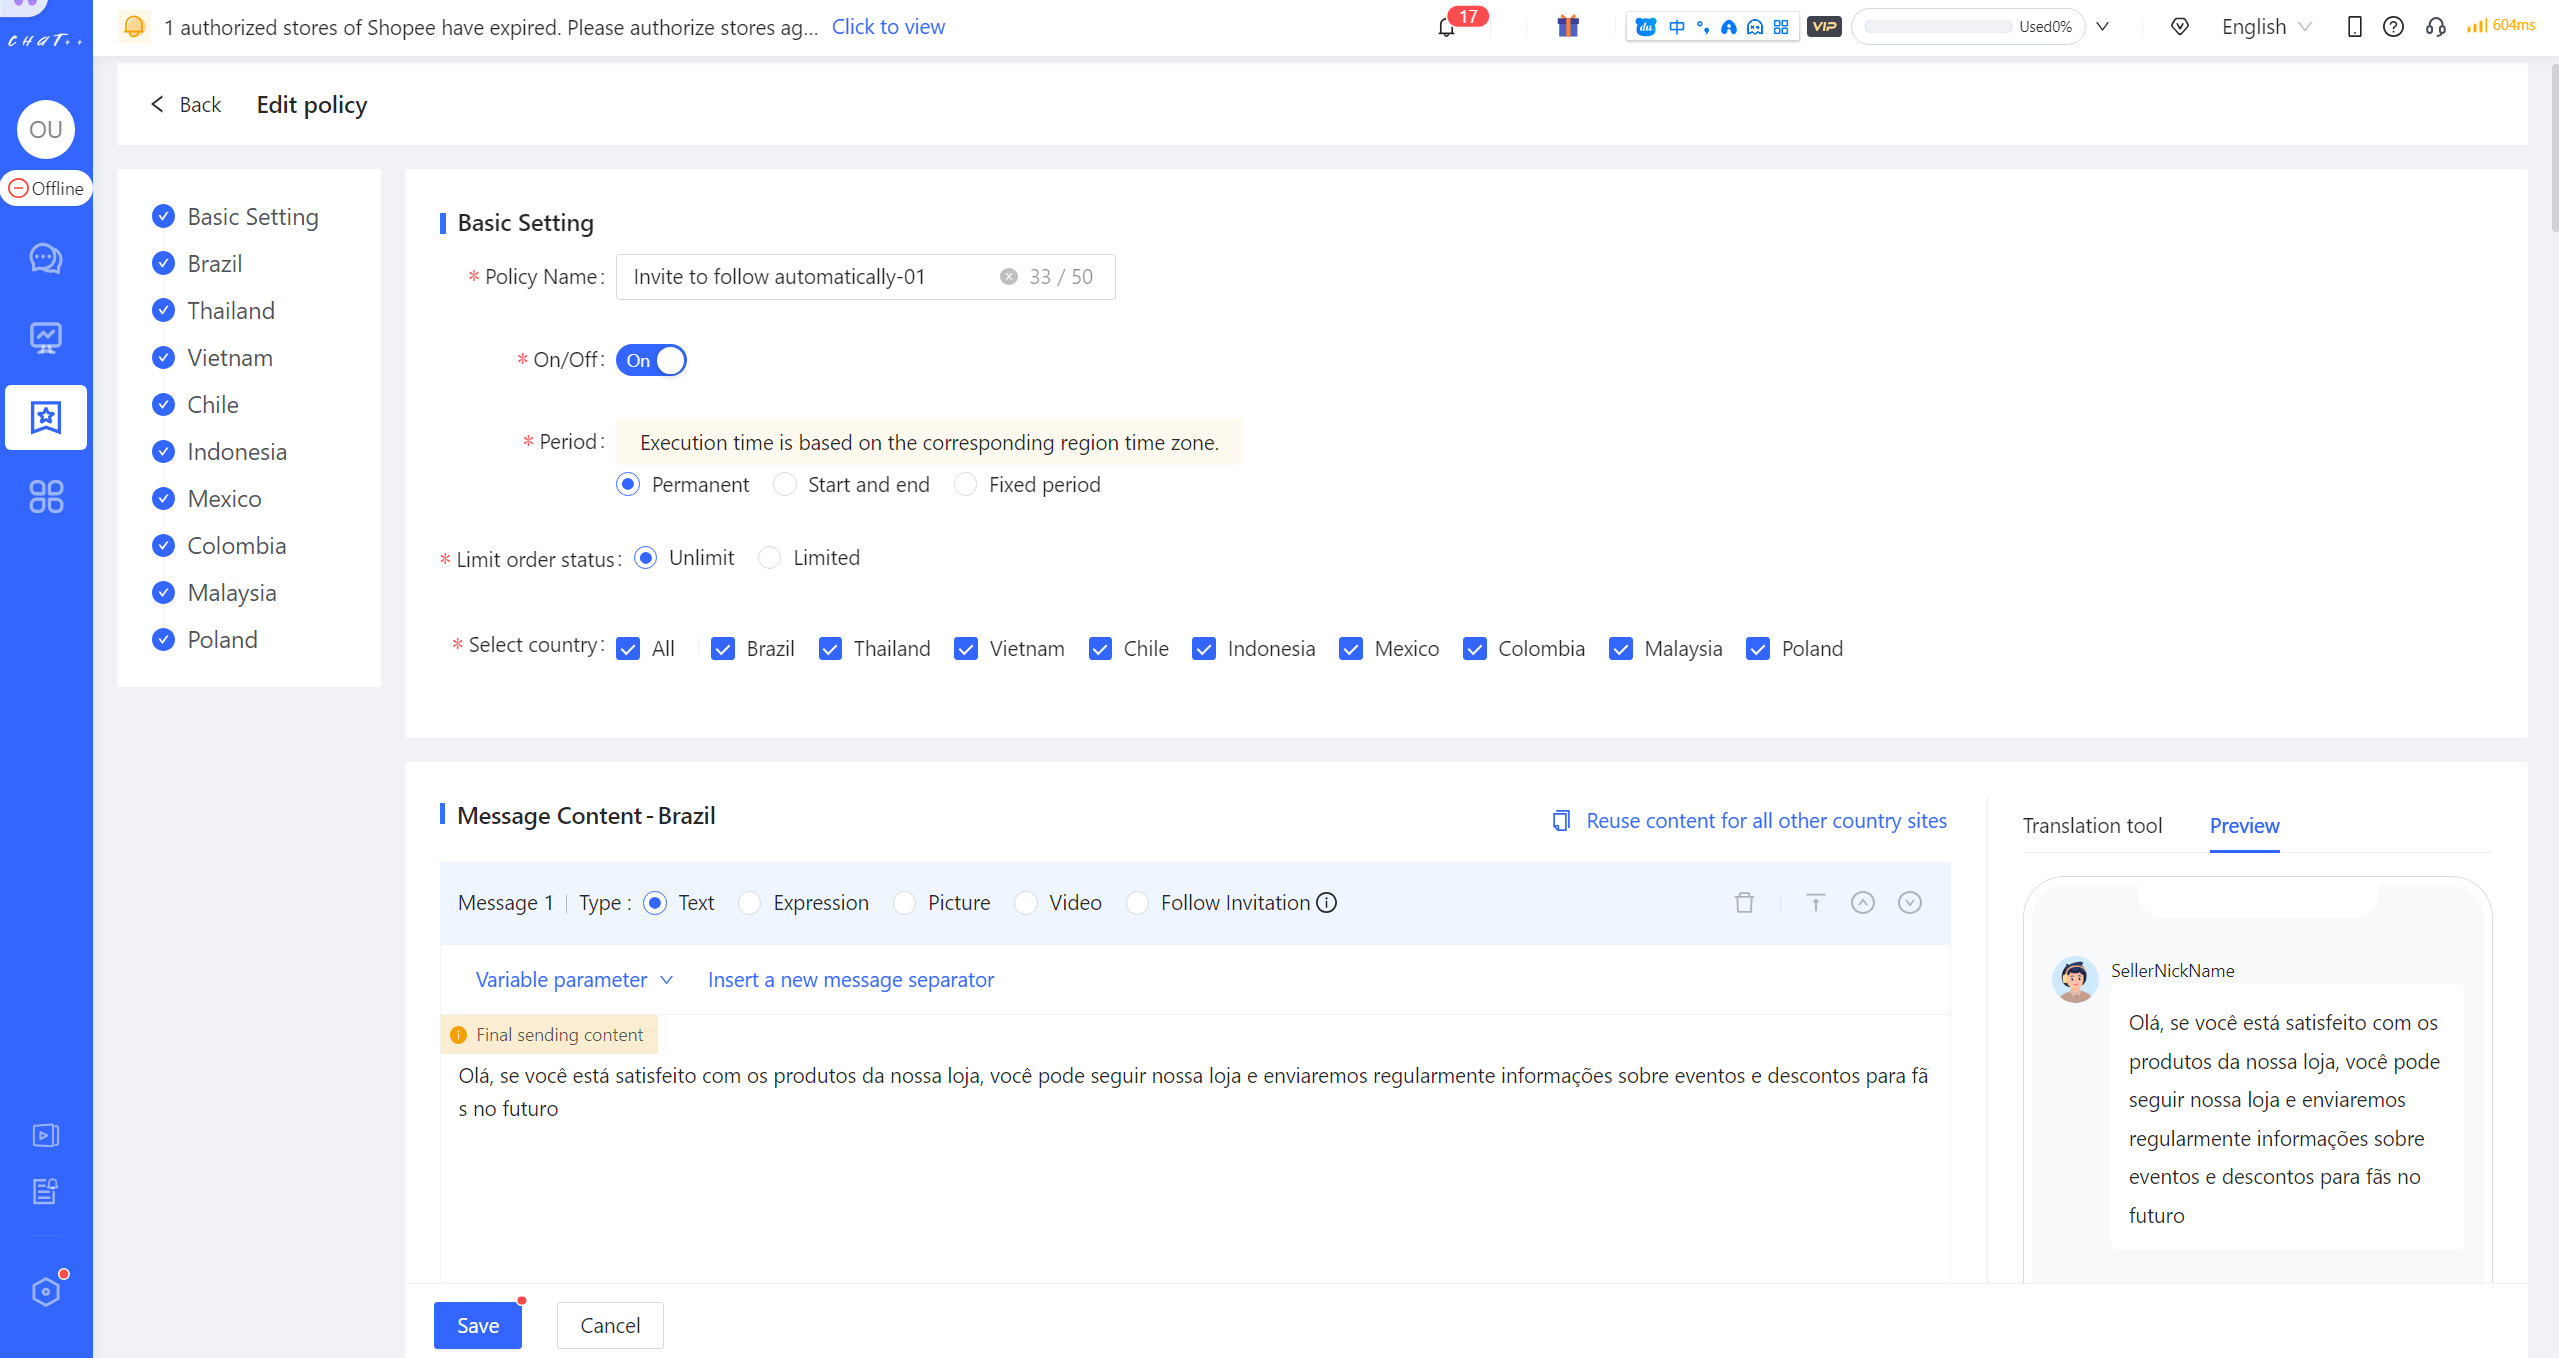
Figure 5
"Filter Rules" Description
- Filter customer who usually gives negative reviews: Within the past six months, among nearly 4 million Southeast Asian stores using ChatPlusAI, customers who have given two or more negative reviews are considered who usually give negative reviews (including cases where they later revised their review to positive). The system automatically identifies such customers. It allows for filtering out these customers and not sending them messages.
- Avoid disturbing: For the same customer from the same store, the system can invite to follow at most once within 24 hours, and by default, can invite to follow at most 5 times within 30 days, to avoid excessively disturbing customers in the short term.
【Policy branch Execution Sequence】Description
💡 If there are several policy branches under the task, system will try to execute the branch from top to down. After one policy branch is executed, the following policy branch will no longer be executed.
👆 The policy branch execution order can be modified by clicking the button "Top/ Up/Down/Bottom" when you click「More」.
⚠️ If none of the Policy branches match, the message will not be sent.
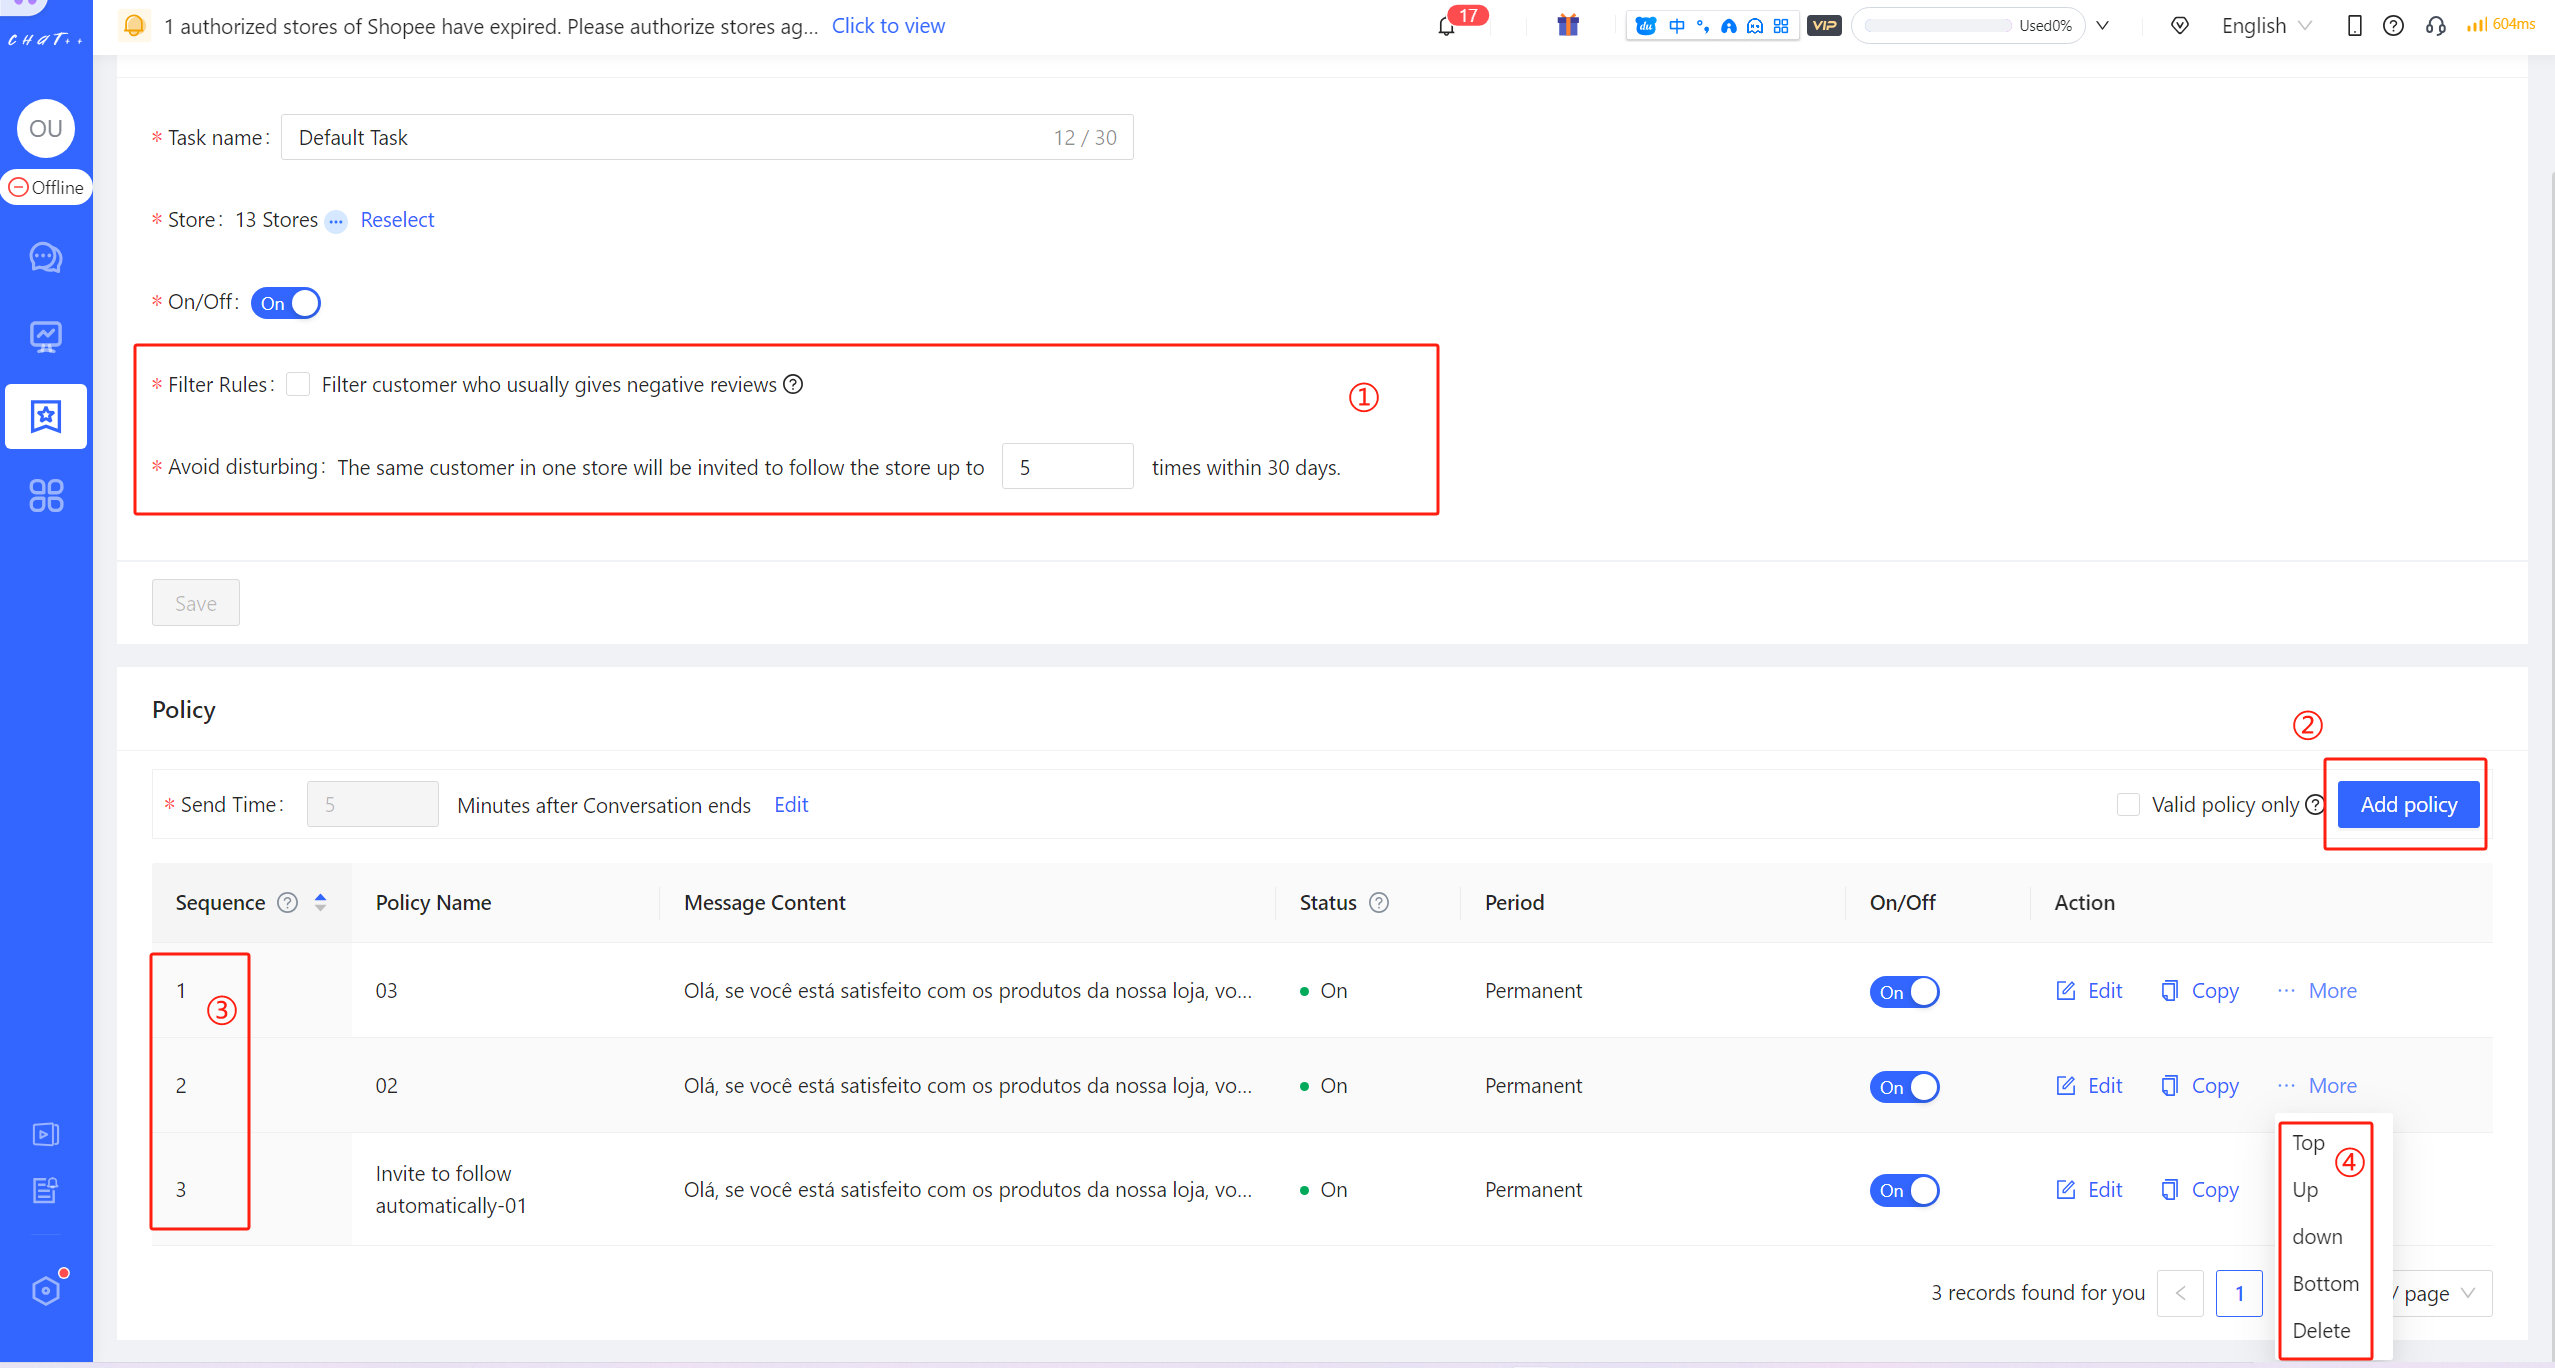
Figure 6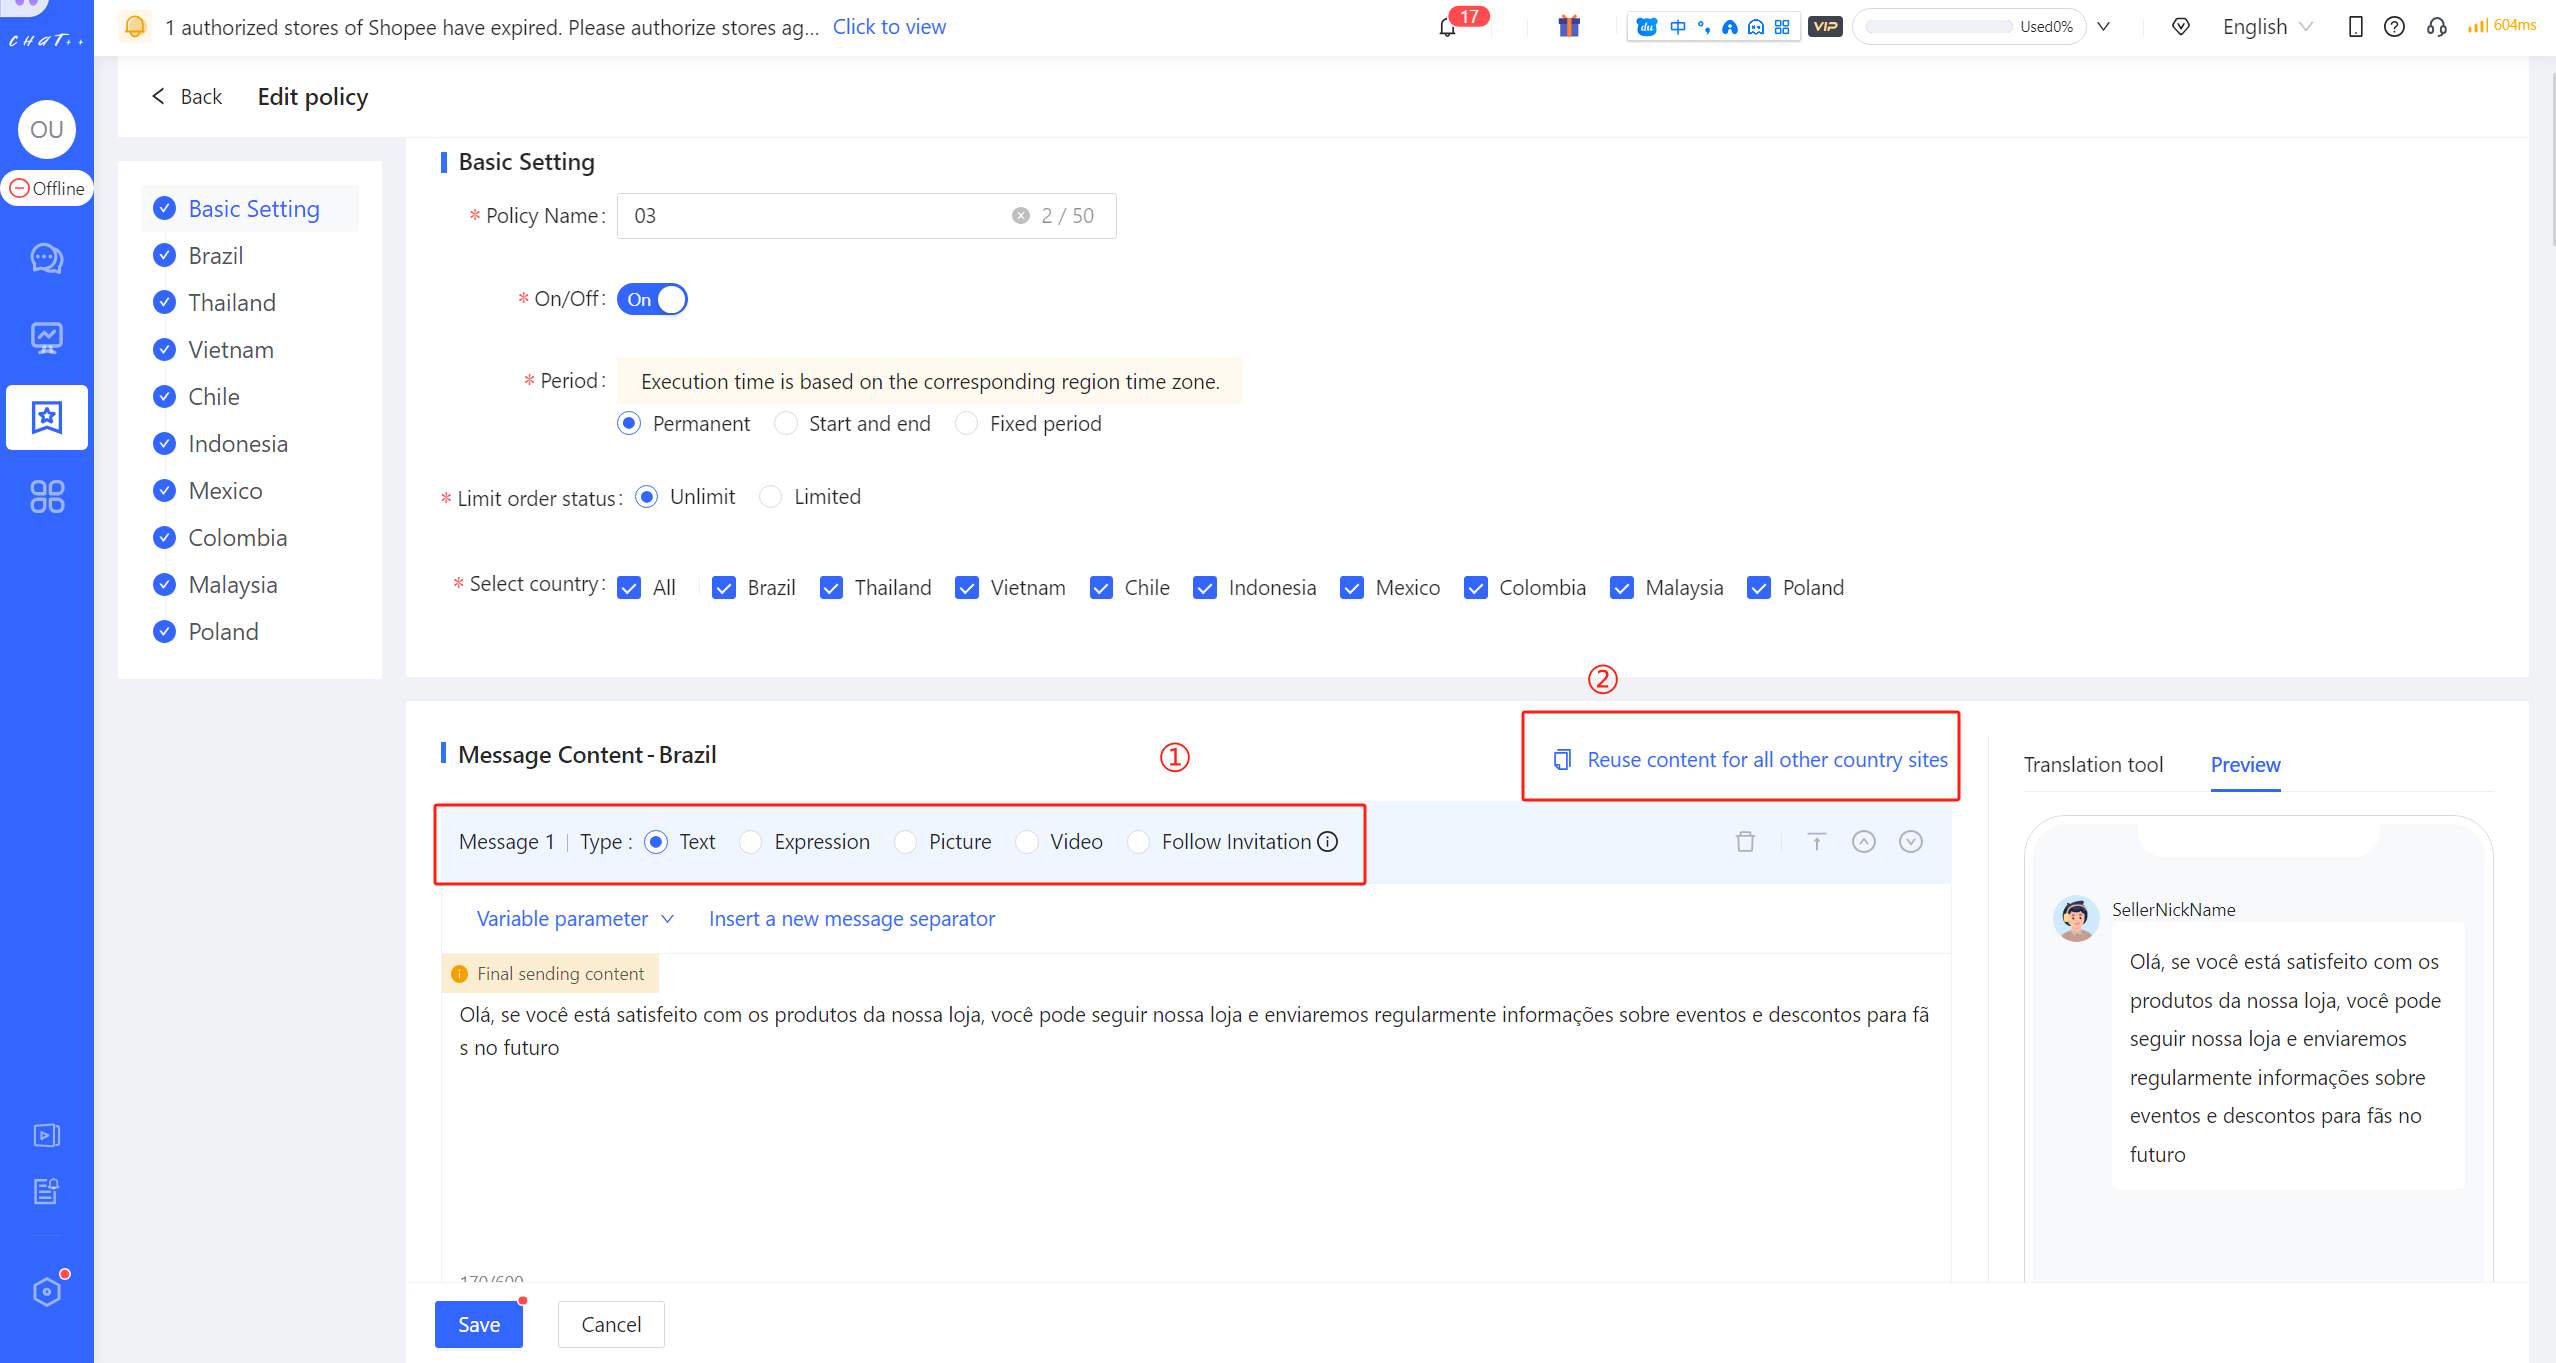
Figure 7
- [x] Various message types (text, expression, picture, video, follow invitation) are supported for inviting to follow automatically
- [x] To facilitate quick configuration, when the message content includes text messages, ChatPlusAI provides recommended templates for reference and selection. Select text messages, scroll down appropriately, and click the "Select" button to automatically fill in the content editing box. The preview of sending effect can be seen on the right side of the page.
👆Click "Add content" to add multiple messages types, up to 4 messages in one round. The support for various message types helps create eye-catching content, thereby improving the conversion effectiveness of inviting.
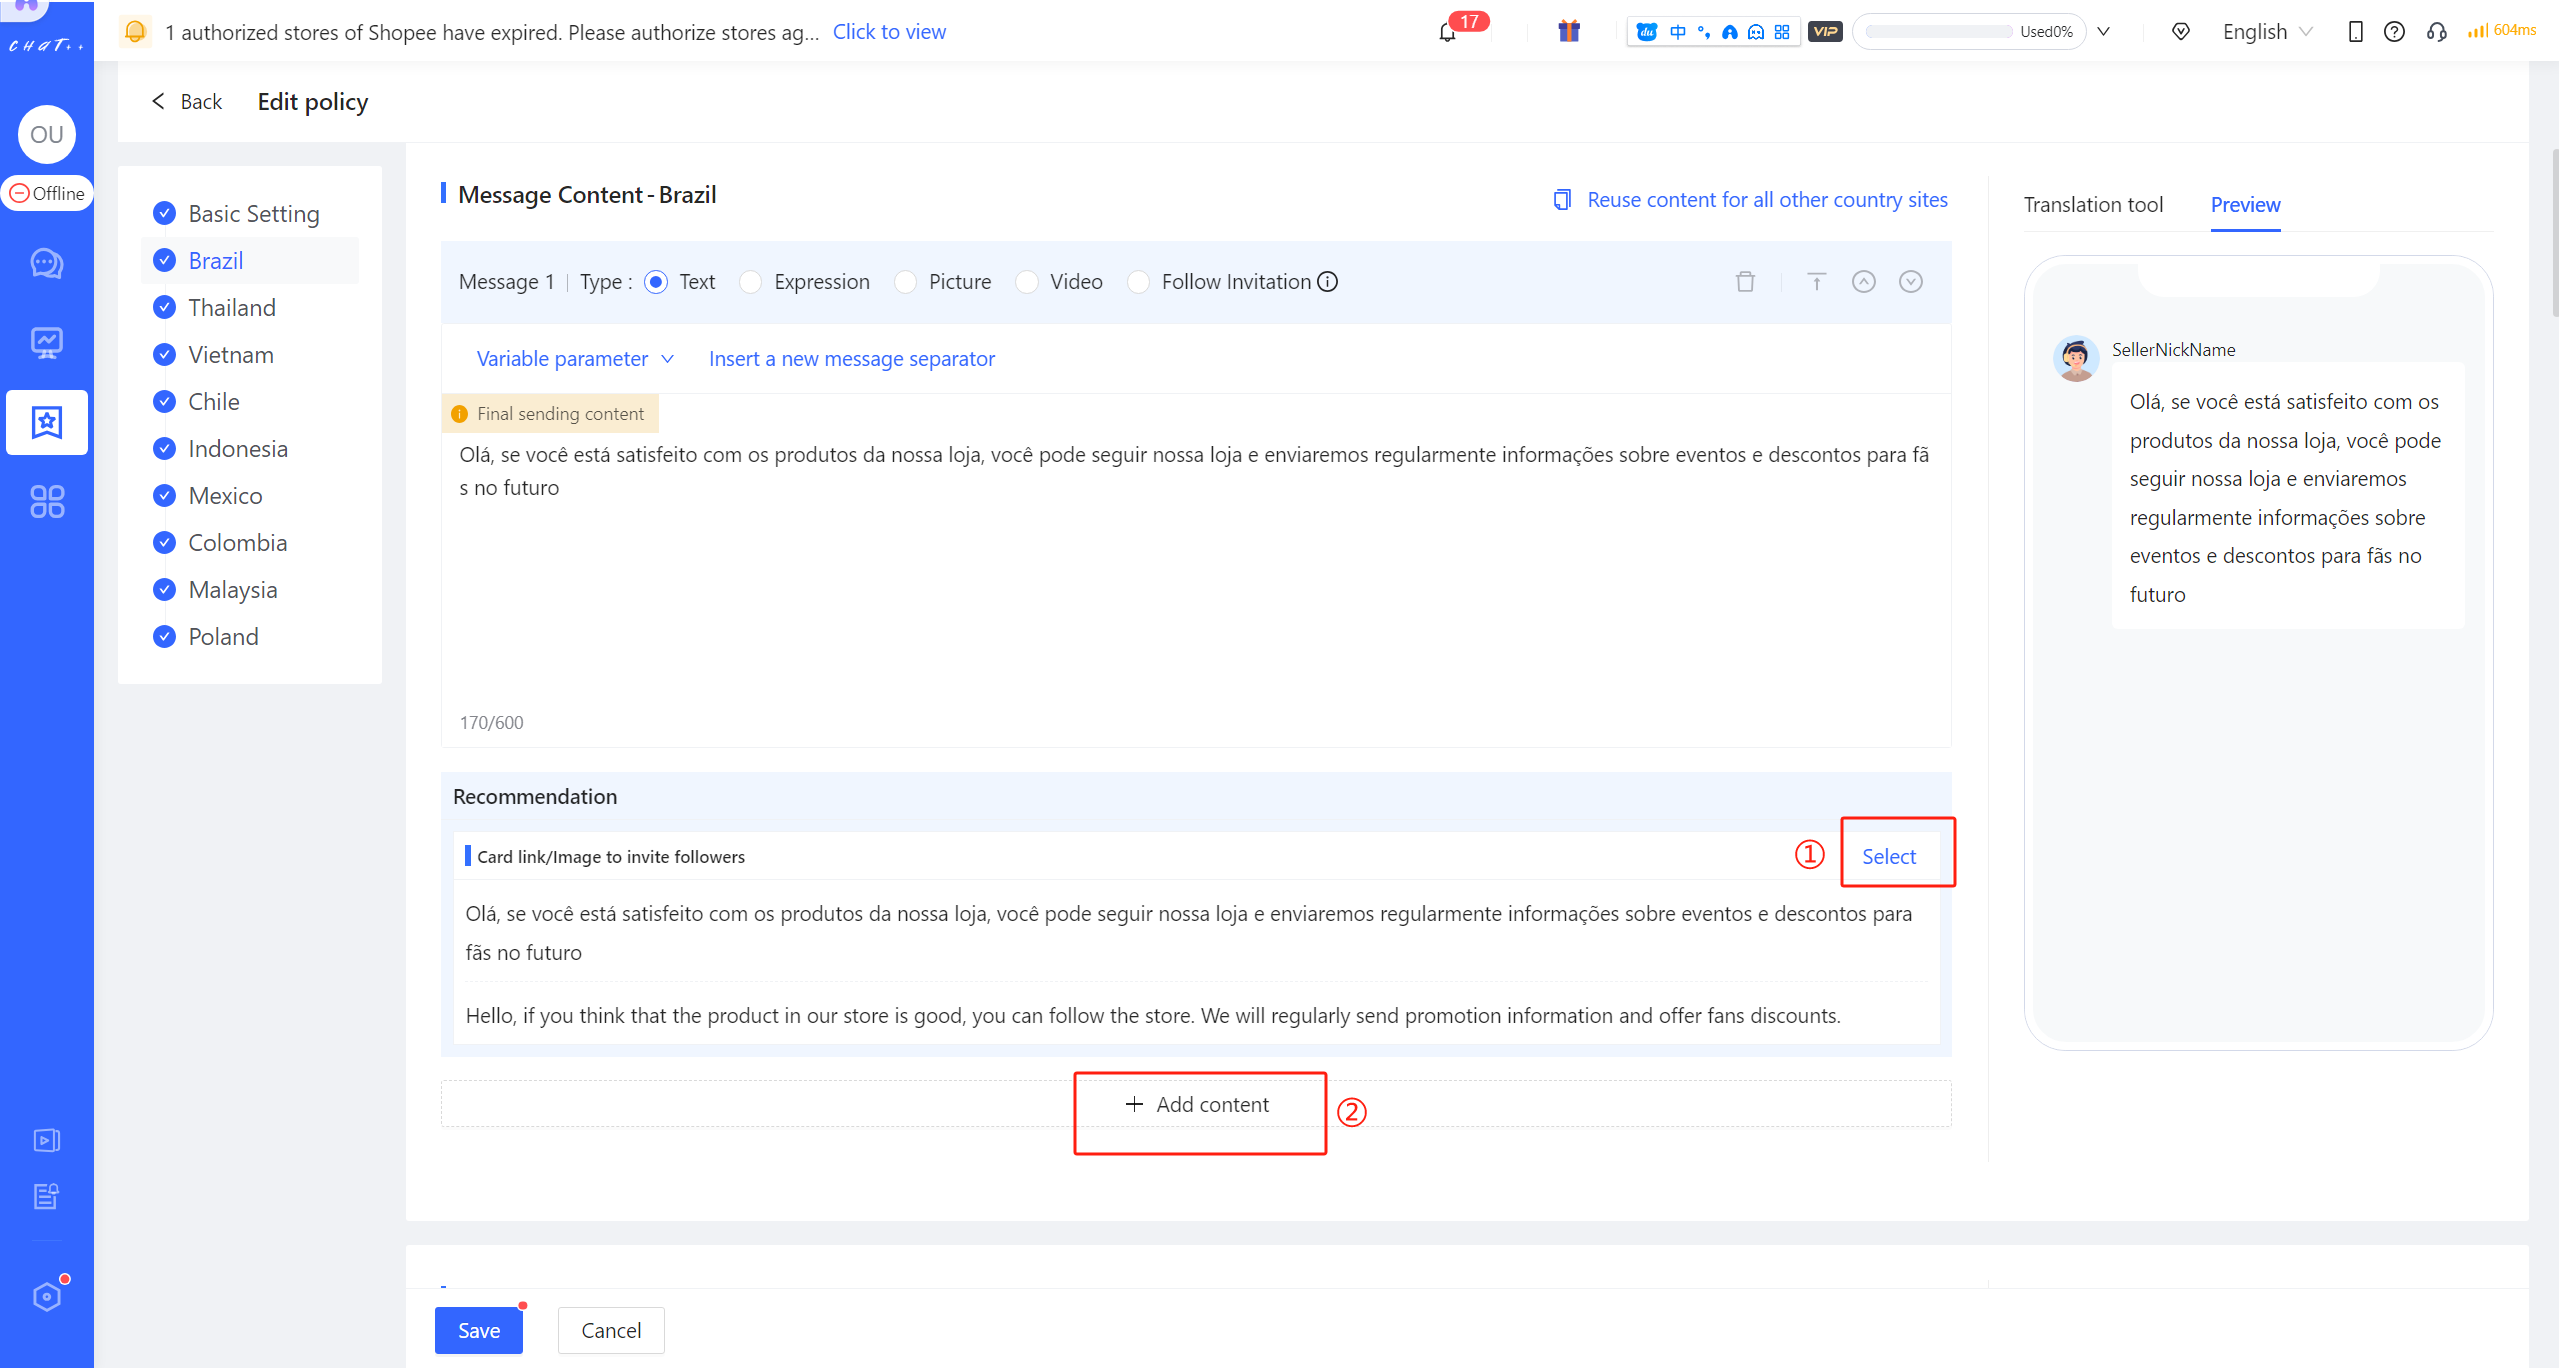
Figure 8
✅ For convenient and quick creation, you can reuse content for all other country sites with one click. When copying, you can choose whether to translate it into the language of the corresponding site.
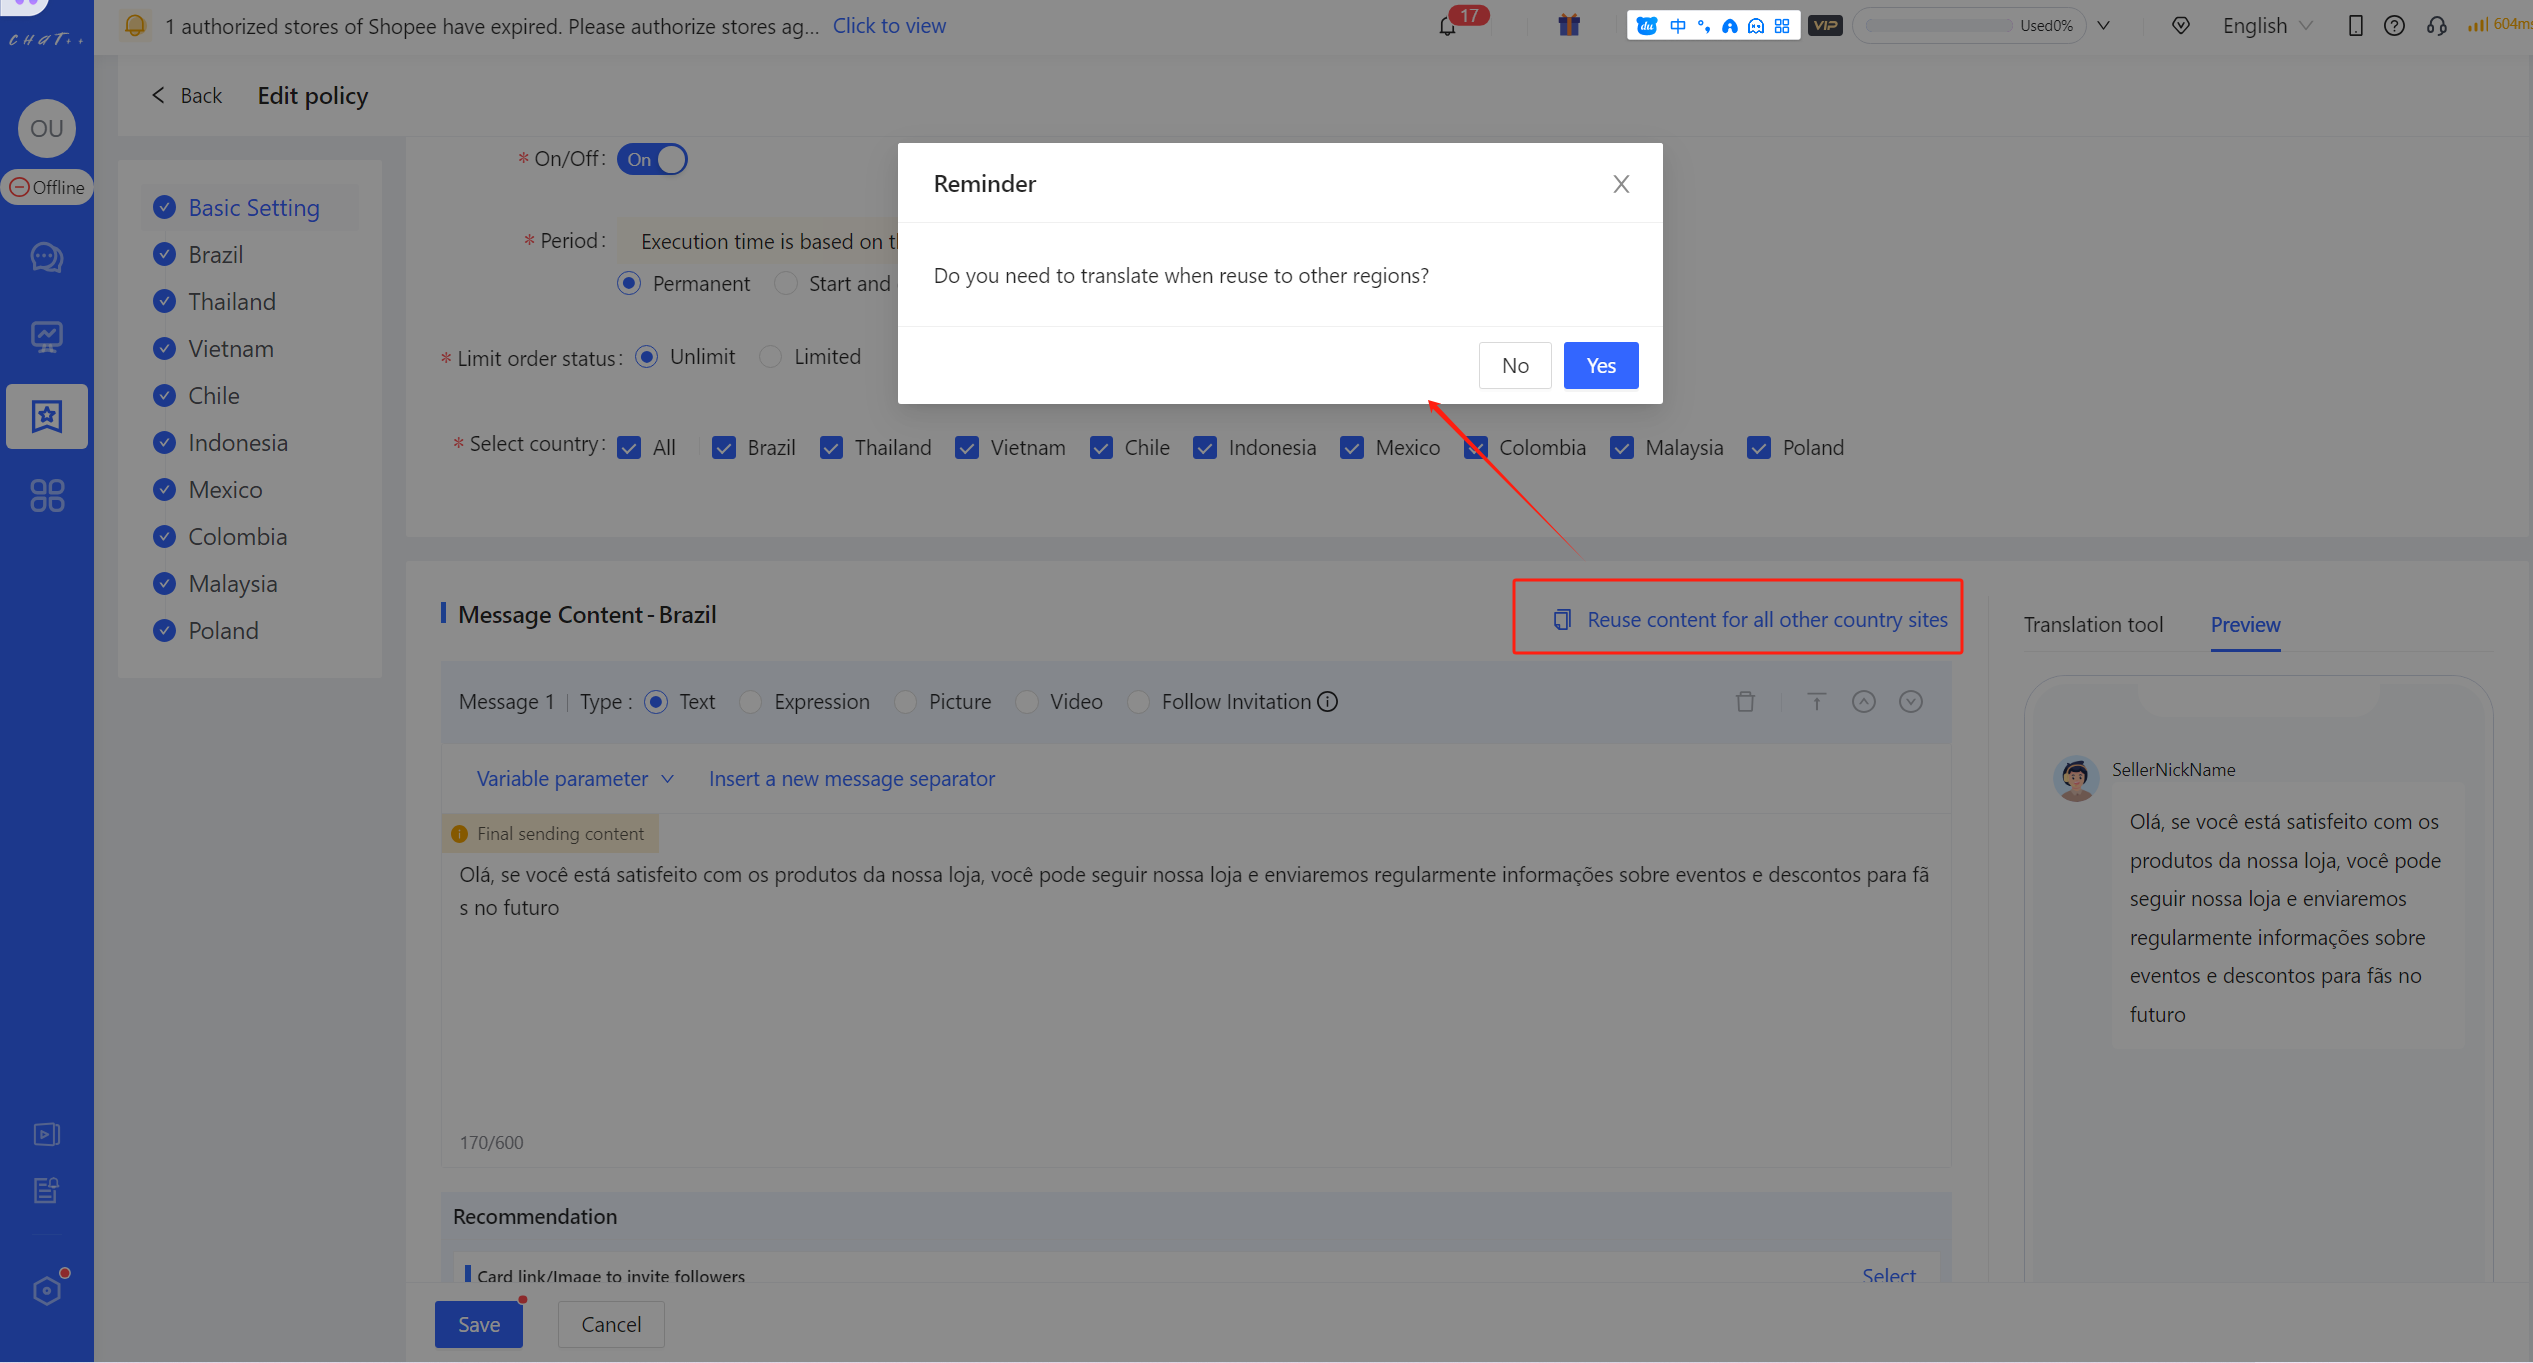
Figure 9
⚠️ If there are differences in inviting messages between different stores, you can add multiple 'tasks' to apply to different stores.
- [x] In a new task, the added store will be removed from the applied stores of other tasks, ensuring that 'a store will not simultaneously exist in two tasks', thereby avoiding sending customers different automatic invitation messages from multiple tasks
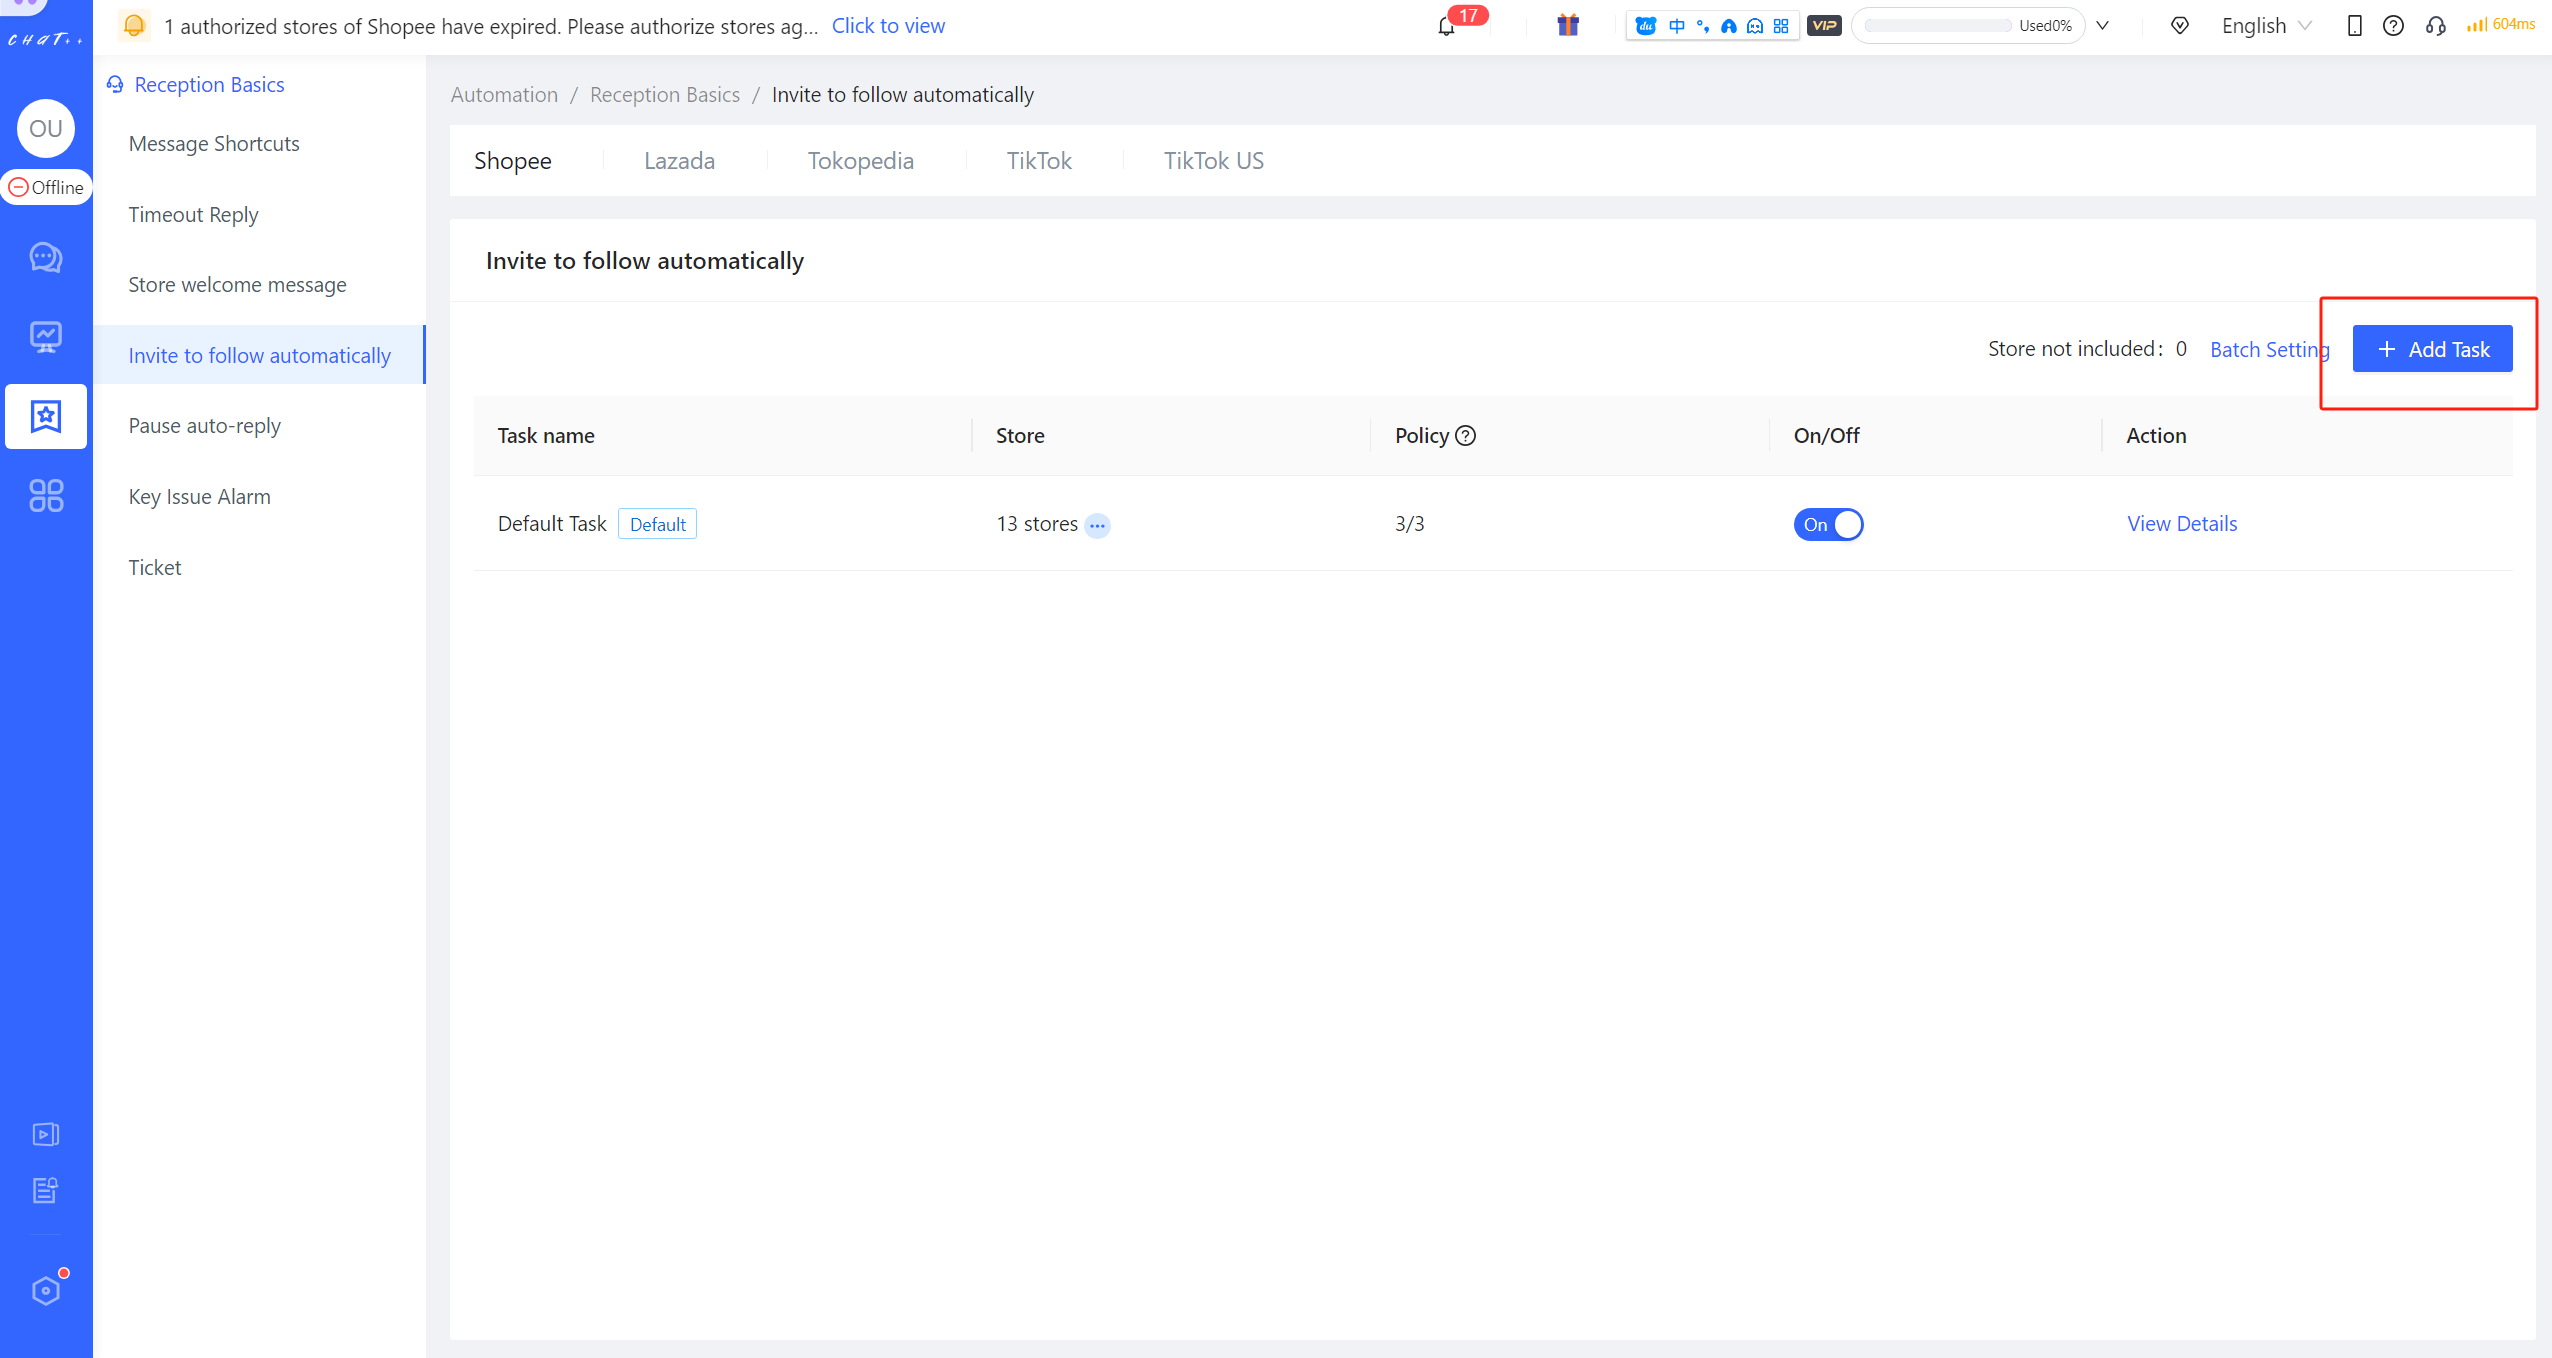
Figure 10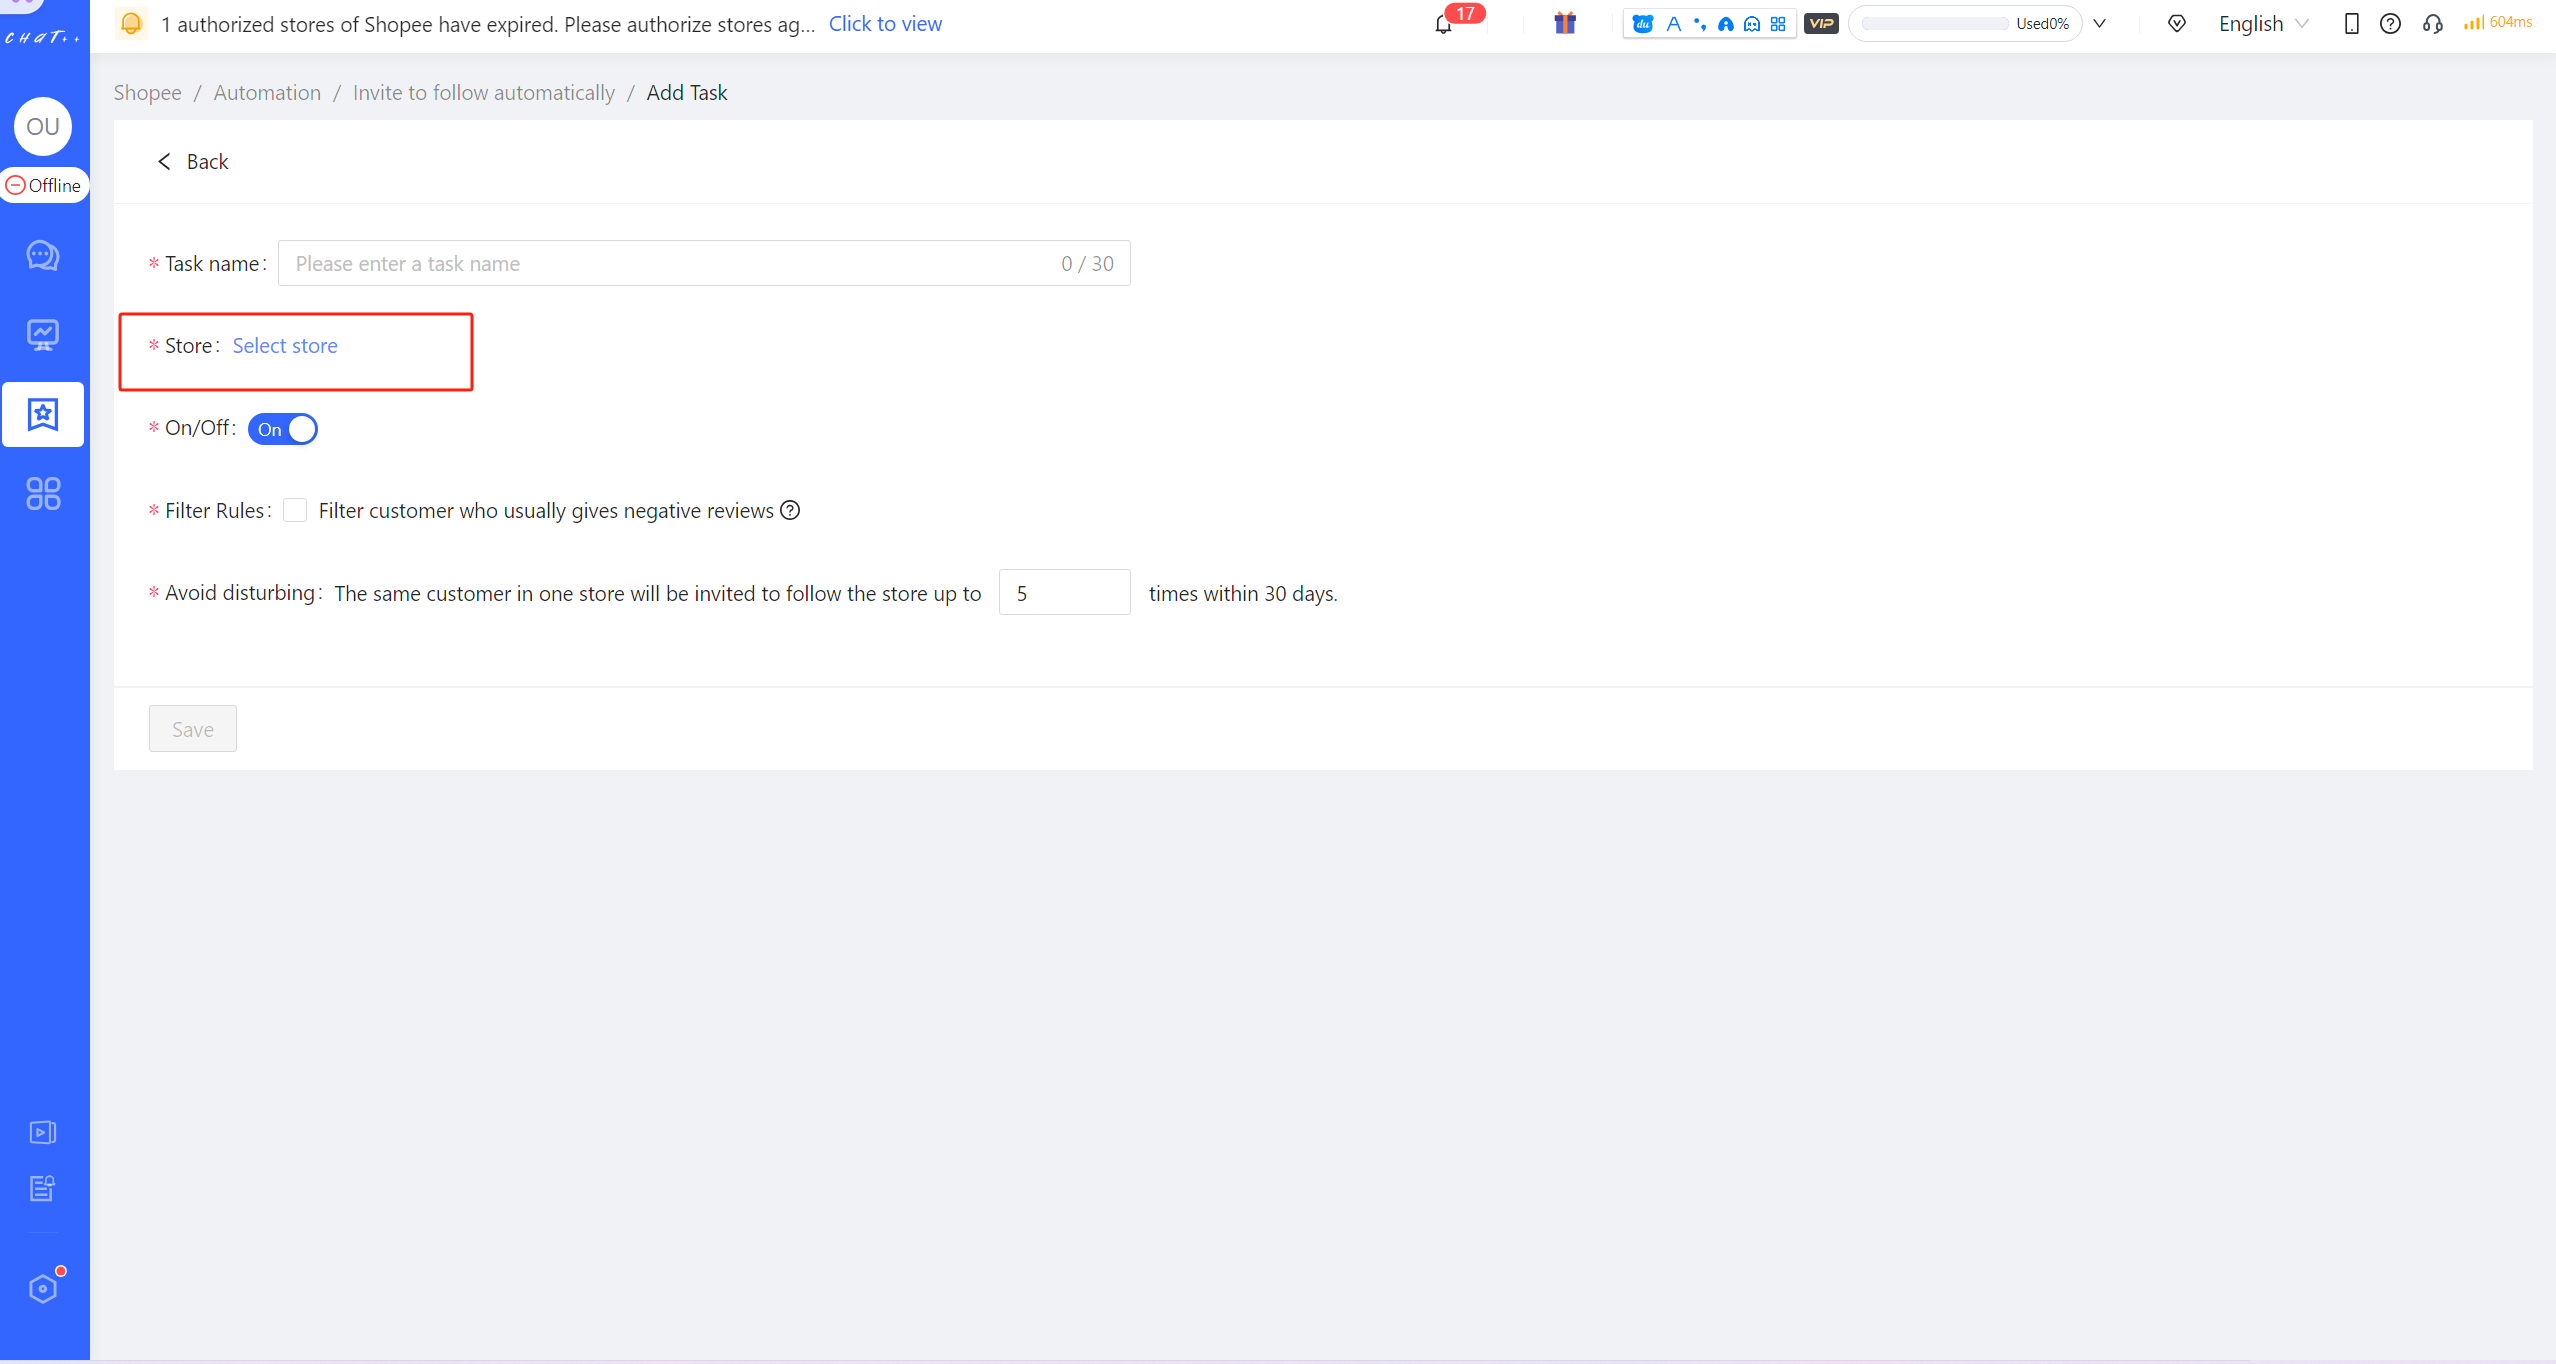
Figure 11
Attention
⚠️ 1. Inviting to follow automatically currently supports Shopee and Lazada, and different marketplaces need to be configured separately. Tokopedia, TikTok Southeast Asia, and TikTok US will come soon, please stay tuned.
Timeout Reply
💡 After the buyer makes an inquiry, if the agent does not reply timely within the specified time, ChatPlusAI will automatically reply with a pre-set message to calm the buyer.
Show cases
- If the agent does not reply to buyer's message within 1 hour, Timeout Reply will be sent to appease the buyer. (Execution time set by the seller is 1 hour for this case.)
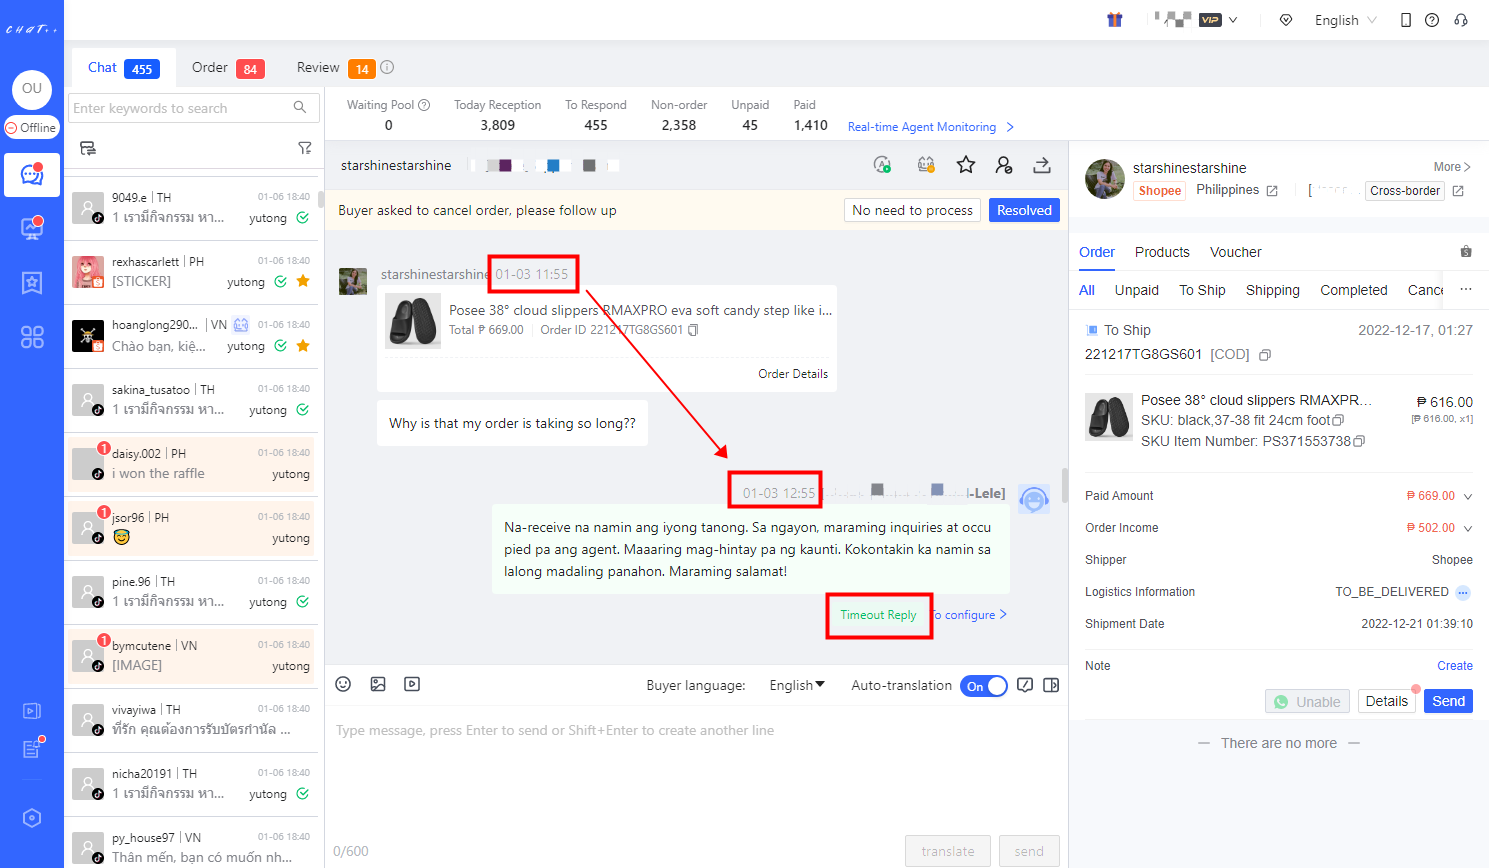
Figure 1
Permissions required for configuration
Configuring "Timeout Reply" requires permission to be enabled for the role assigned to the account. Super admins and admins have this permission by default. 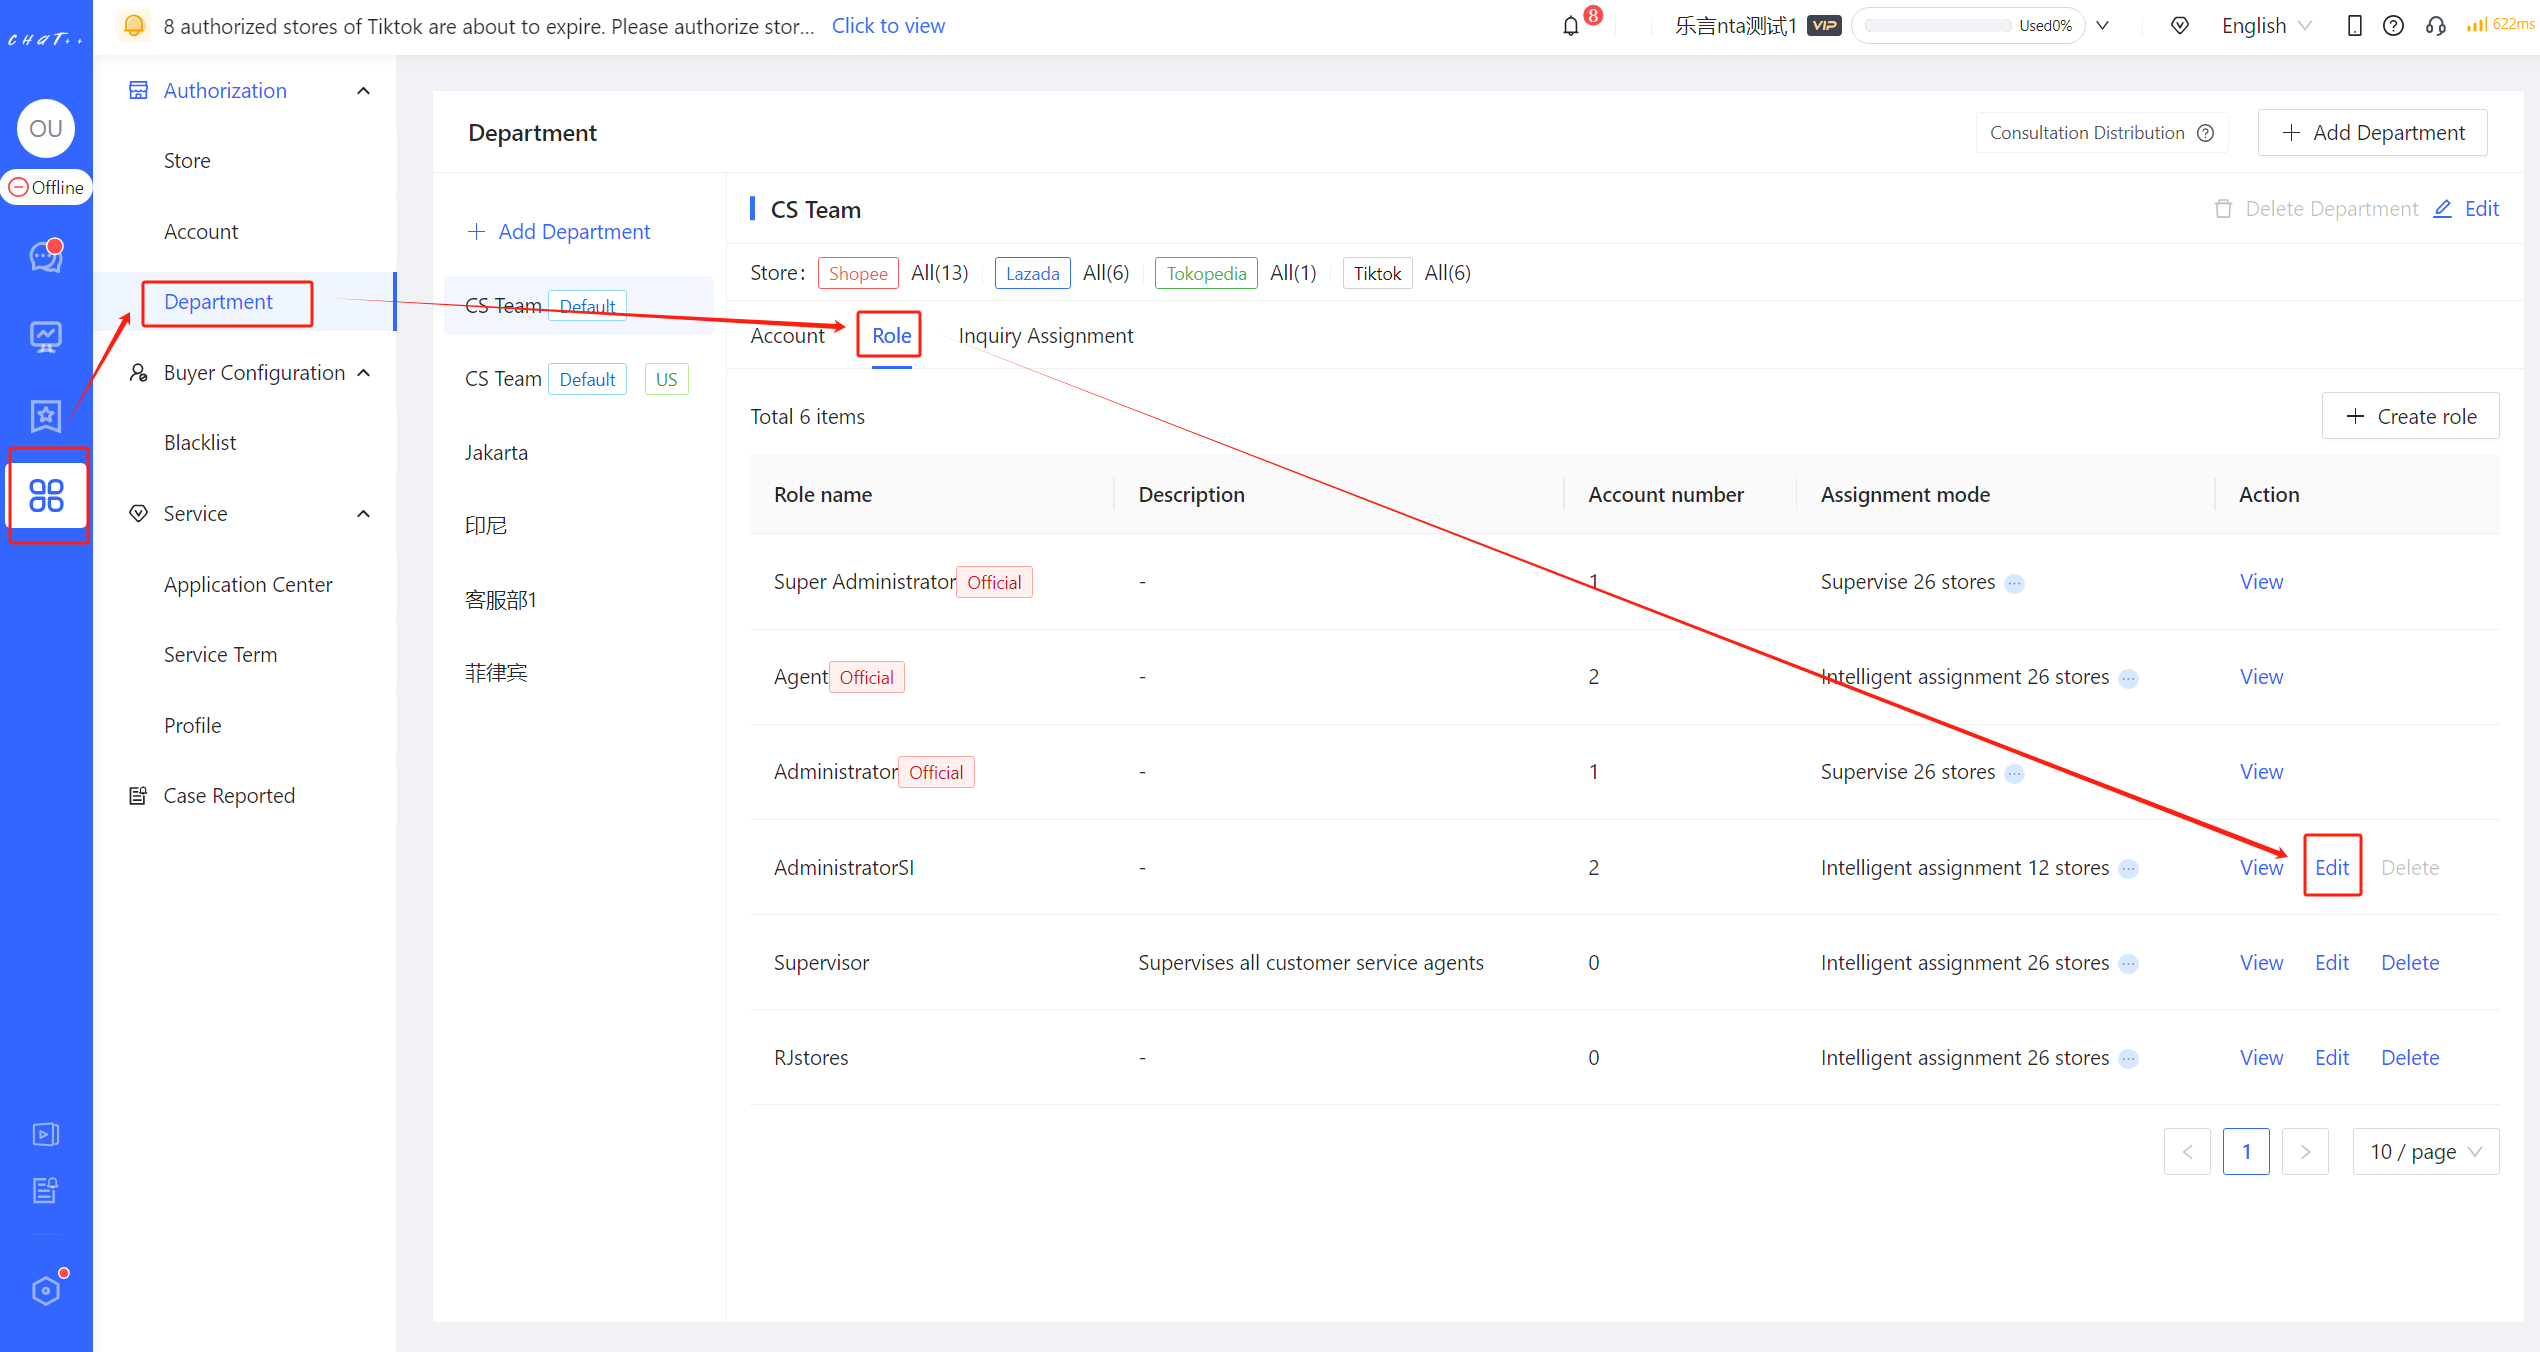
Figure 2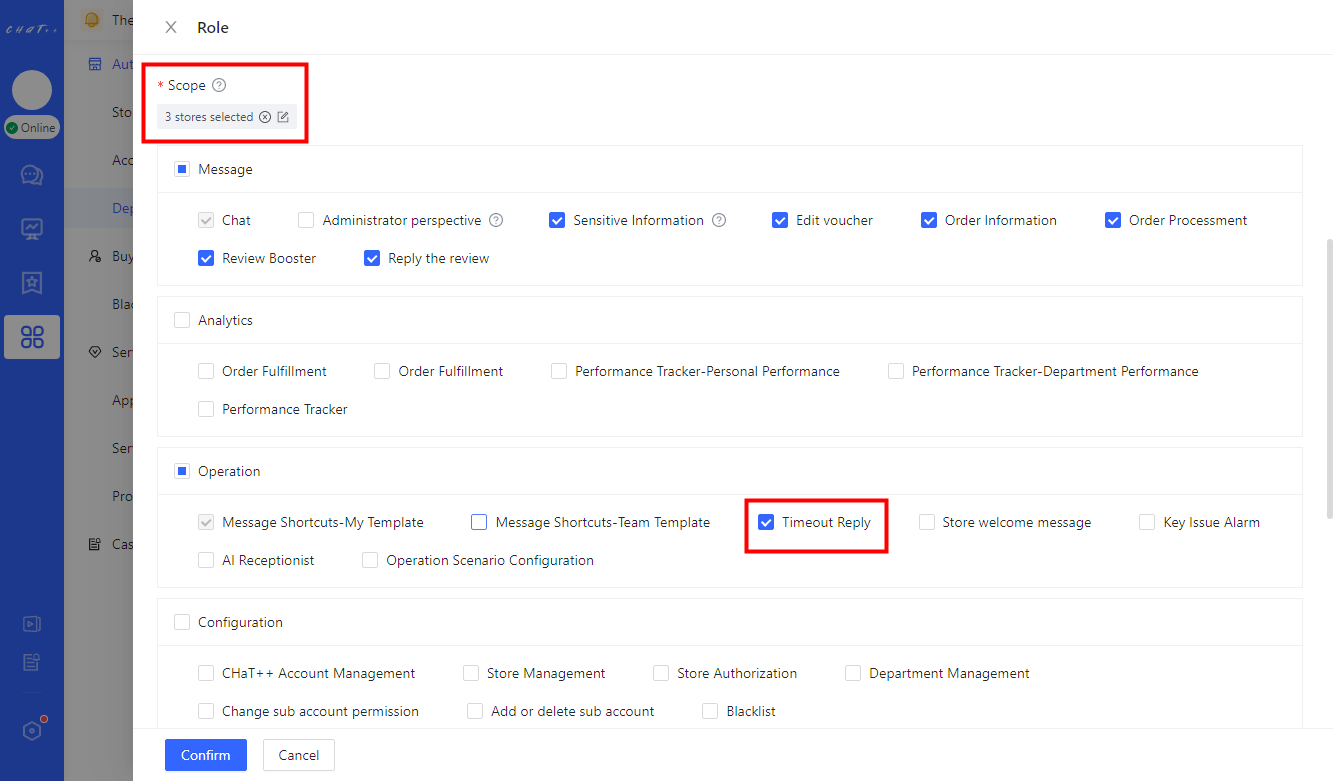
Figure 3
How to Configure Timeout Reply
Click「 Automation 」 in left menu(Shown as red box① in Figure 4)→「Reception Basics 」(Shown as red box② in Figure 4)→「 Timeout Reply 」(Shown as red box③ in Figure 5), Access the configuration page(Shown as in Figure 5)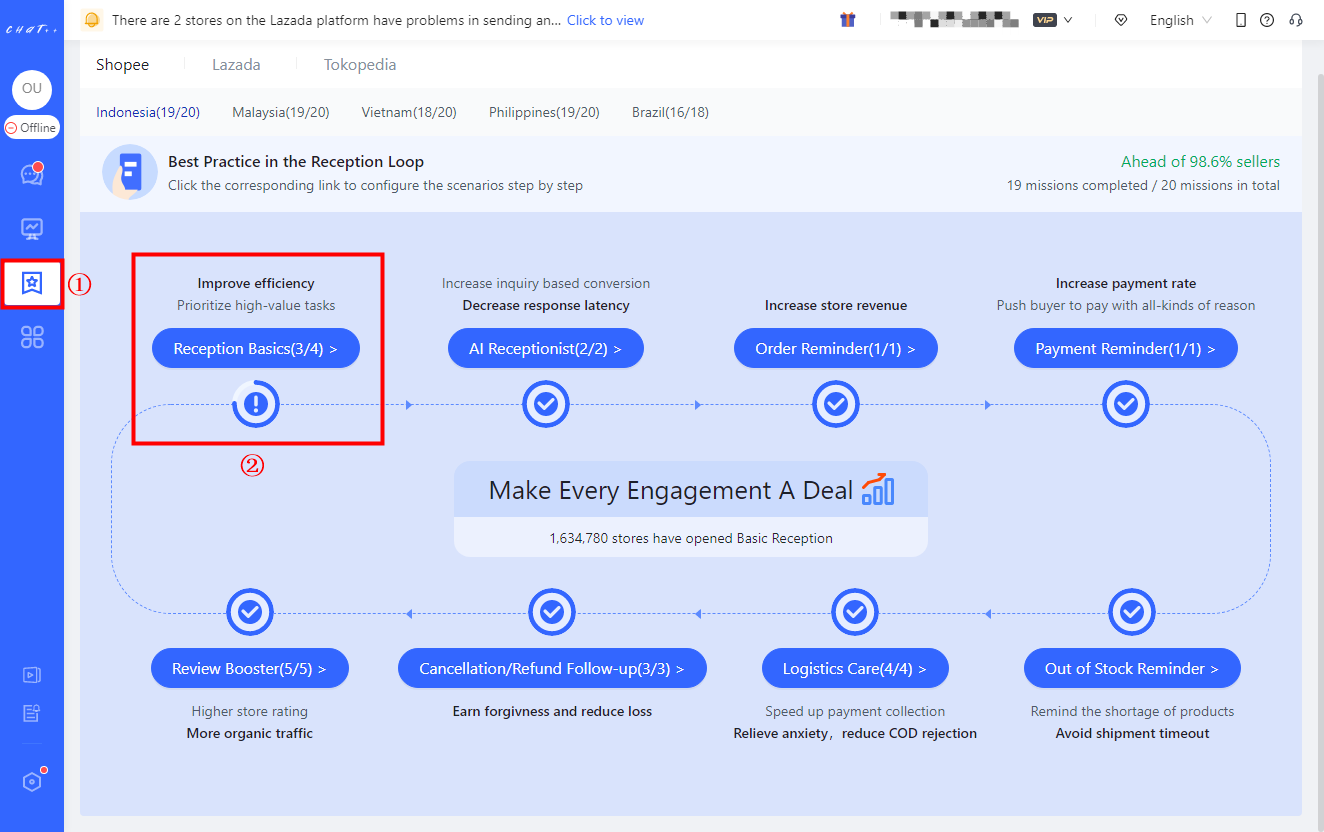
Figure 4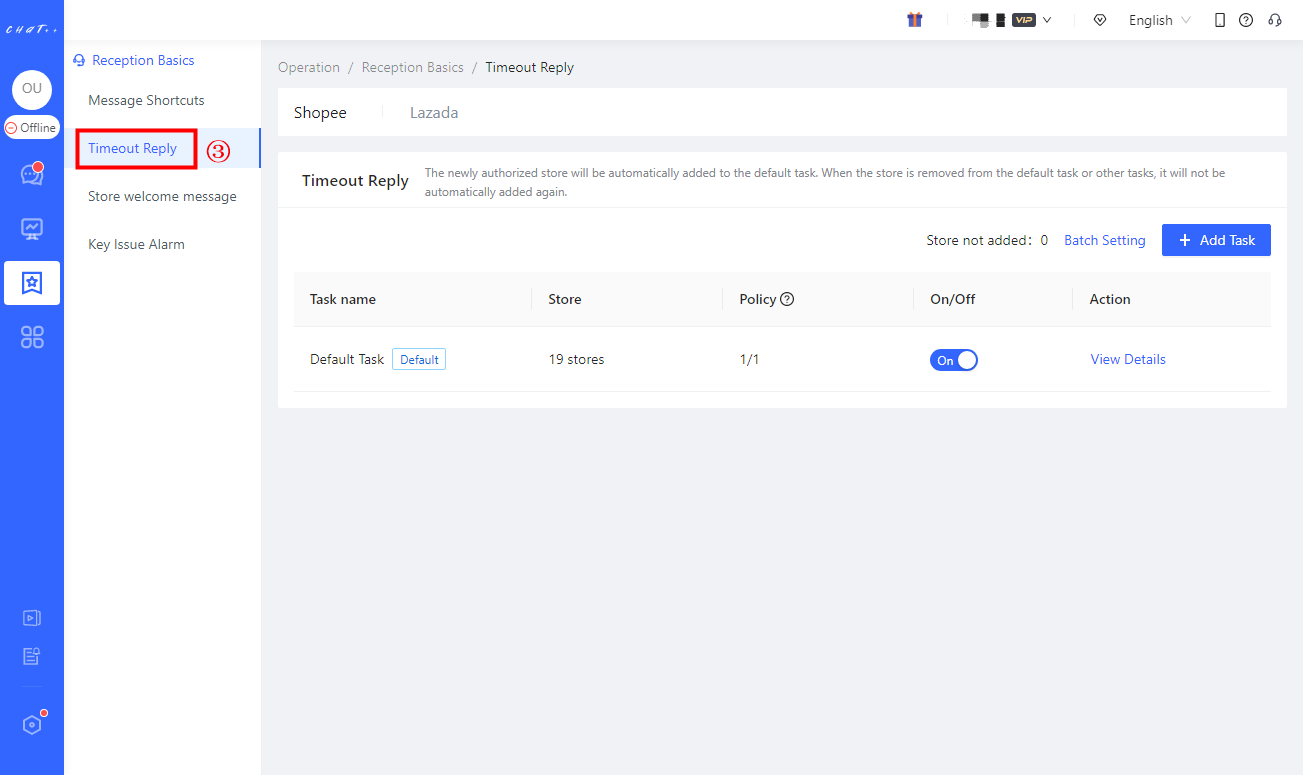
Figure 5
How to Add/Modify "Timeout Reply"
⚠️ Timeout Reply can be customized differently for Shopee, Lazada, Tokopedia, TikTok Southeast Asia, and TikTok US.
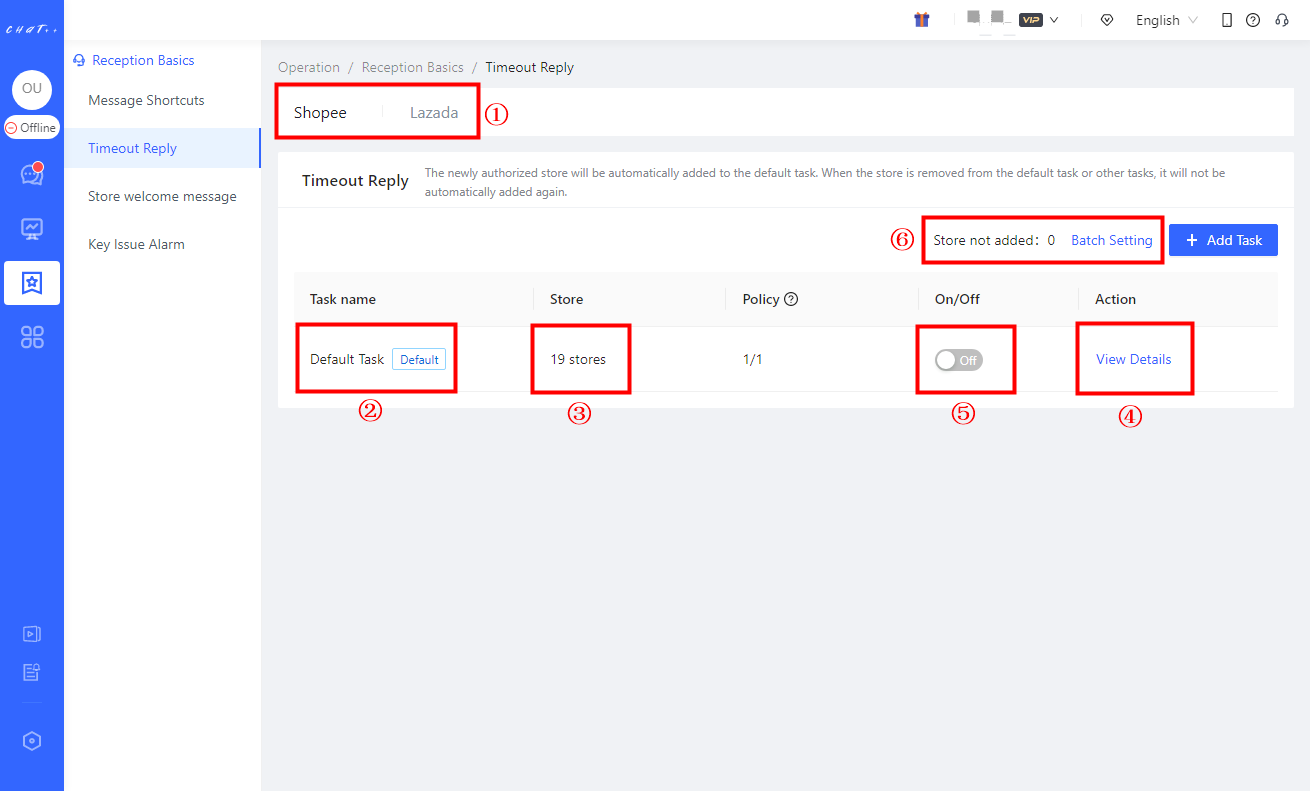
Figure 6
【 Default Task 】Description
- (red box ② in Figure 6 above)
💡 To make it convenient to configure it, ChatPlusAI has created a "Default Task" for each Timeout Reply task on each marketplace, covering all stores of country sites by default(red box③ in Figure 6 ). All you have to do is click "View Details" button(red box ④ in Figure 6 above) to edit policy branches (red box① in Figure 7 below) to make sure everything is correct. Once confirmed, you can enable the default task (red box ⑤ in Figure 6 above).
💡 Newly authorized stores will be automatically included to【Default task】. However, the store will not be automatically included again after they are removed from other tasks. It will be counted as "Store not included" (left side of red box⑥ in Figure 6). You can click "Batch Setting" button (right side of red box⑥ in Figure 6) to add massive stores into the certain task quickly.
warning Note: Kindly make sure that all stores have been included to the right task (that means the number of "Store not included" is 0, shown as red box⑥ in Figure 6), in case the store is neglected from any Timeout Reply task.
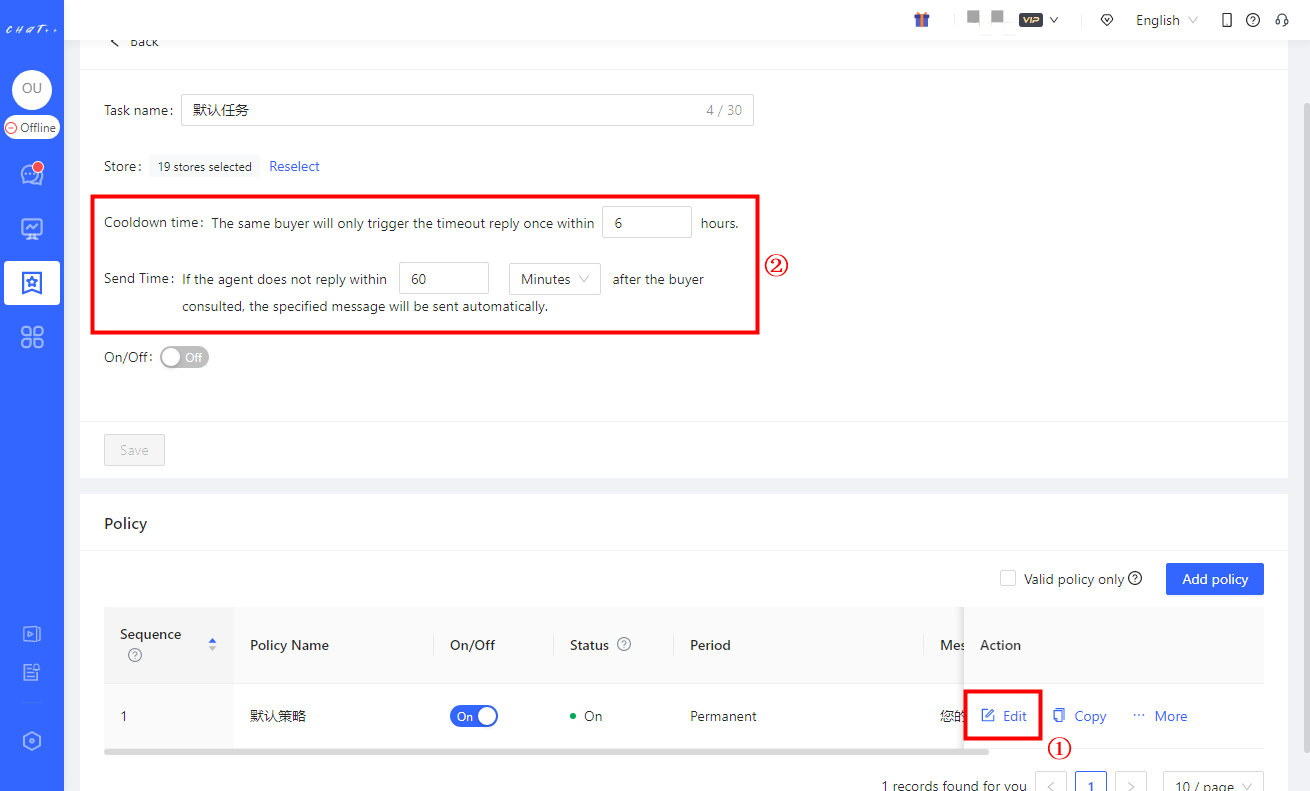
Figure 7
【 Cooldown time and Send Time 】Description
- red box② in Figure 7 above Cooldown time:It is not advisable to set this time too short (default time is 60 minutes) in order to ensure that "Timeout Reply" does not compete with the agent in replying to buyers, but allows the agent to provide an effective response first. If the agent does not reply to buyers within the specified time, then "Timeout Reply" will be dispatched to provide a fallback response and appease buyers.
Send Time:In the case of multiple inquiries from a buyer, repeatedly replying with the same preset message may make the buyer feel that the seller is being "perfunctory". To avoid this situation, within the set time period (default time is 6 hours), "Timeout Reply" will only be triggered once for the same buyer.
【 Policy Branch 】Description
- The policy branch consists of these factors: country site, period, limit order status, filter rules and message content.
- Period: the policy is only effective within the period.
- Limit order status: Support sending messages to customers based on orders with multiple selected different statuses, for example, sending messages to customers whose order statuses are "Pre-sales" and "In-sales".
- Filter customer who usually gives negative reviews: Within the past six months, among nearly 4 million Southeast Asian stores using ChatPlusAI, customers who have given two or more negative reviews are considered to usually give negative reviews (including cases where they later revised their review to positive). The system automatically identifies such customers. Timeout Reply allows for filtering out these customers and not sending them messages.
- Country site: there are different country sites, supporting single or multiple selections.
- Message Content: The corresponding message will be sent within the specified time period, under the selected site, and limited order status, provided that the buyer does not meet the filtering conditions.
- When there are multiple policies configured for Timeout Reply task, the system will execute the first policy which matches the condition successfully and within the set period, according to sequence.
💡 Setting diverse policy branches for tasks allows for sending different timeout reply messages targeting different sites during different marketing periods, to achieve optimal conversion effects.
Each task must have at least one effective policy. The default task has automatically created a default policy, but newly created tasks need to "Add Policy"(red box① in Figure 8 )
"Policy Branch Execution Sequence" Description
💡 When there are multiple valid policies in "Policy Branch Collection"(red box② in Figure 8), the system will execute the first policy that matches the conditions according to execution sequence, and subsequent policies will not be executed.
Hover the cursor over the "More" position to change the execution order through "Top/Up/Down/Bottom" (red box ③ in Figure 8).
⚠️ If none of the policy branches match, the message content for Timeout Reply will not be sent.
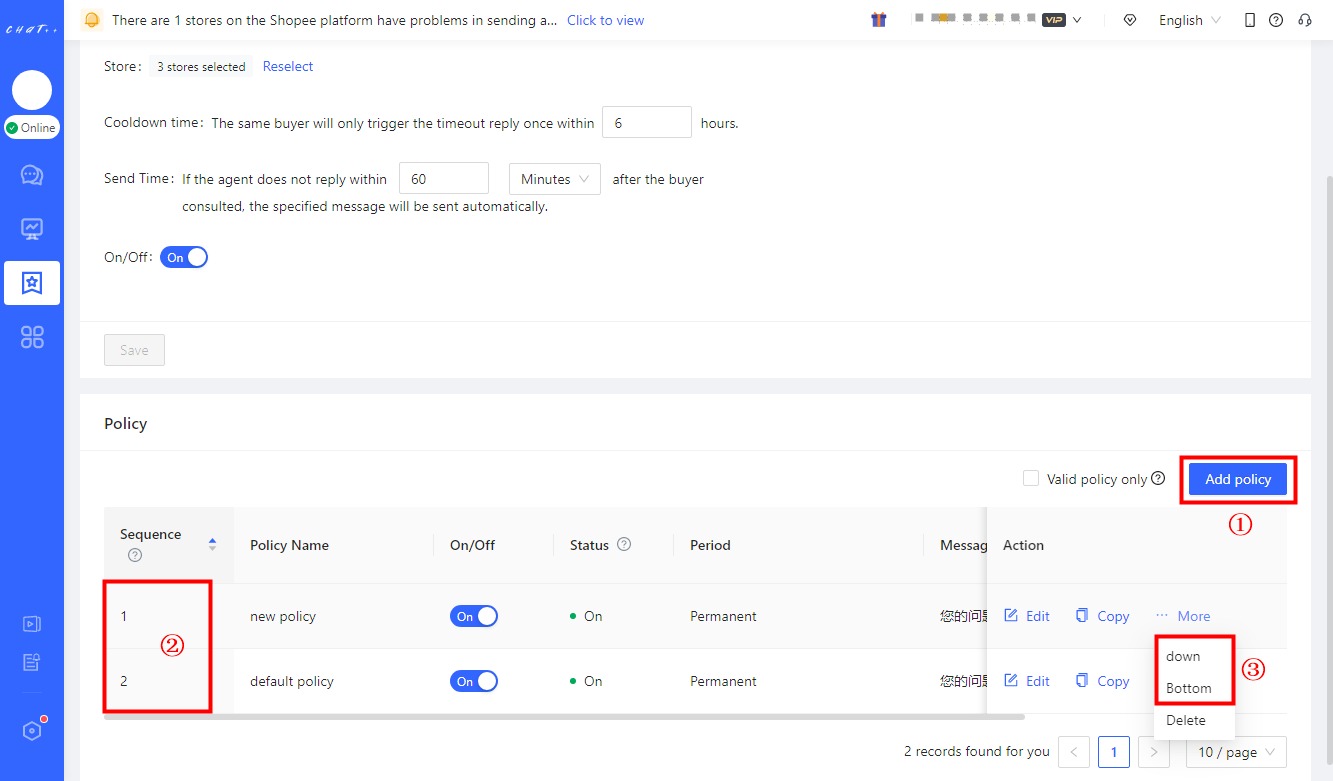
Figure 8
The corresponding language of different sites in the policies can be configured based on the "country site", and all sites will be selected by default (red box ① below).
Scrolling down the page will display "editing box for selected country sites" (as marked in red box ② Figure 9 below), and you can also quickly locate "editing box for selected country sites" through the navigation bar (red box ③ below).
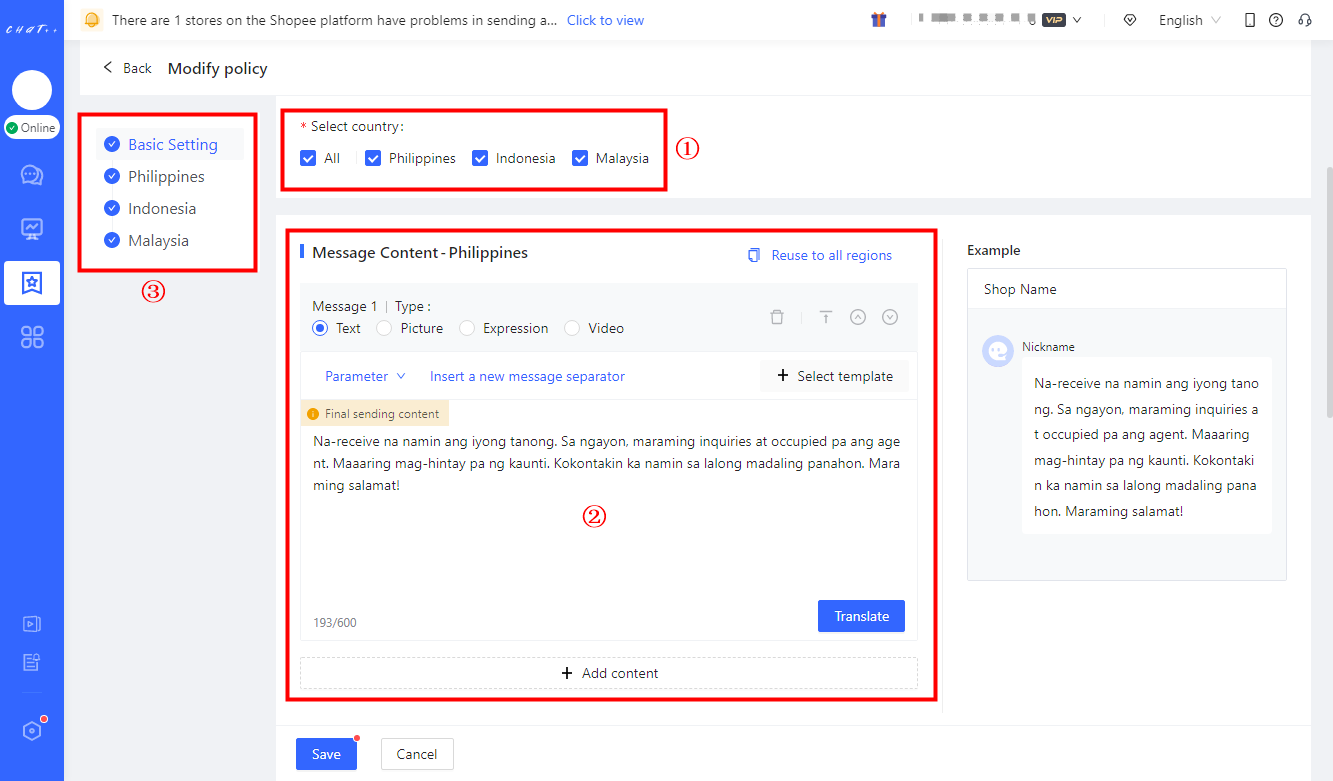
Figure 9
The timeout reply supports sending multiple message types (text, expression, picture, video) (red box ① in Figure 10 below). Due to interface limitations of TikTok, it currently only supports text and picture types.
To facilitate quick configuration, when the message content includes text messages, ChatPlusAI provides recommended templates for reference and selection. Select text messages, scroll down appropriately, and click the "Select" button (red box ① in Figure 11 below) to automatically fill in the content editing box. The preview of sending effect can be seen on the right side of the page.
Click "Add content" (red box ② in figure 11 below) to add multiple messages types. The flexible combination of different message types can enhance the calming effect of the Timeout Reply.
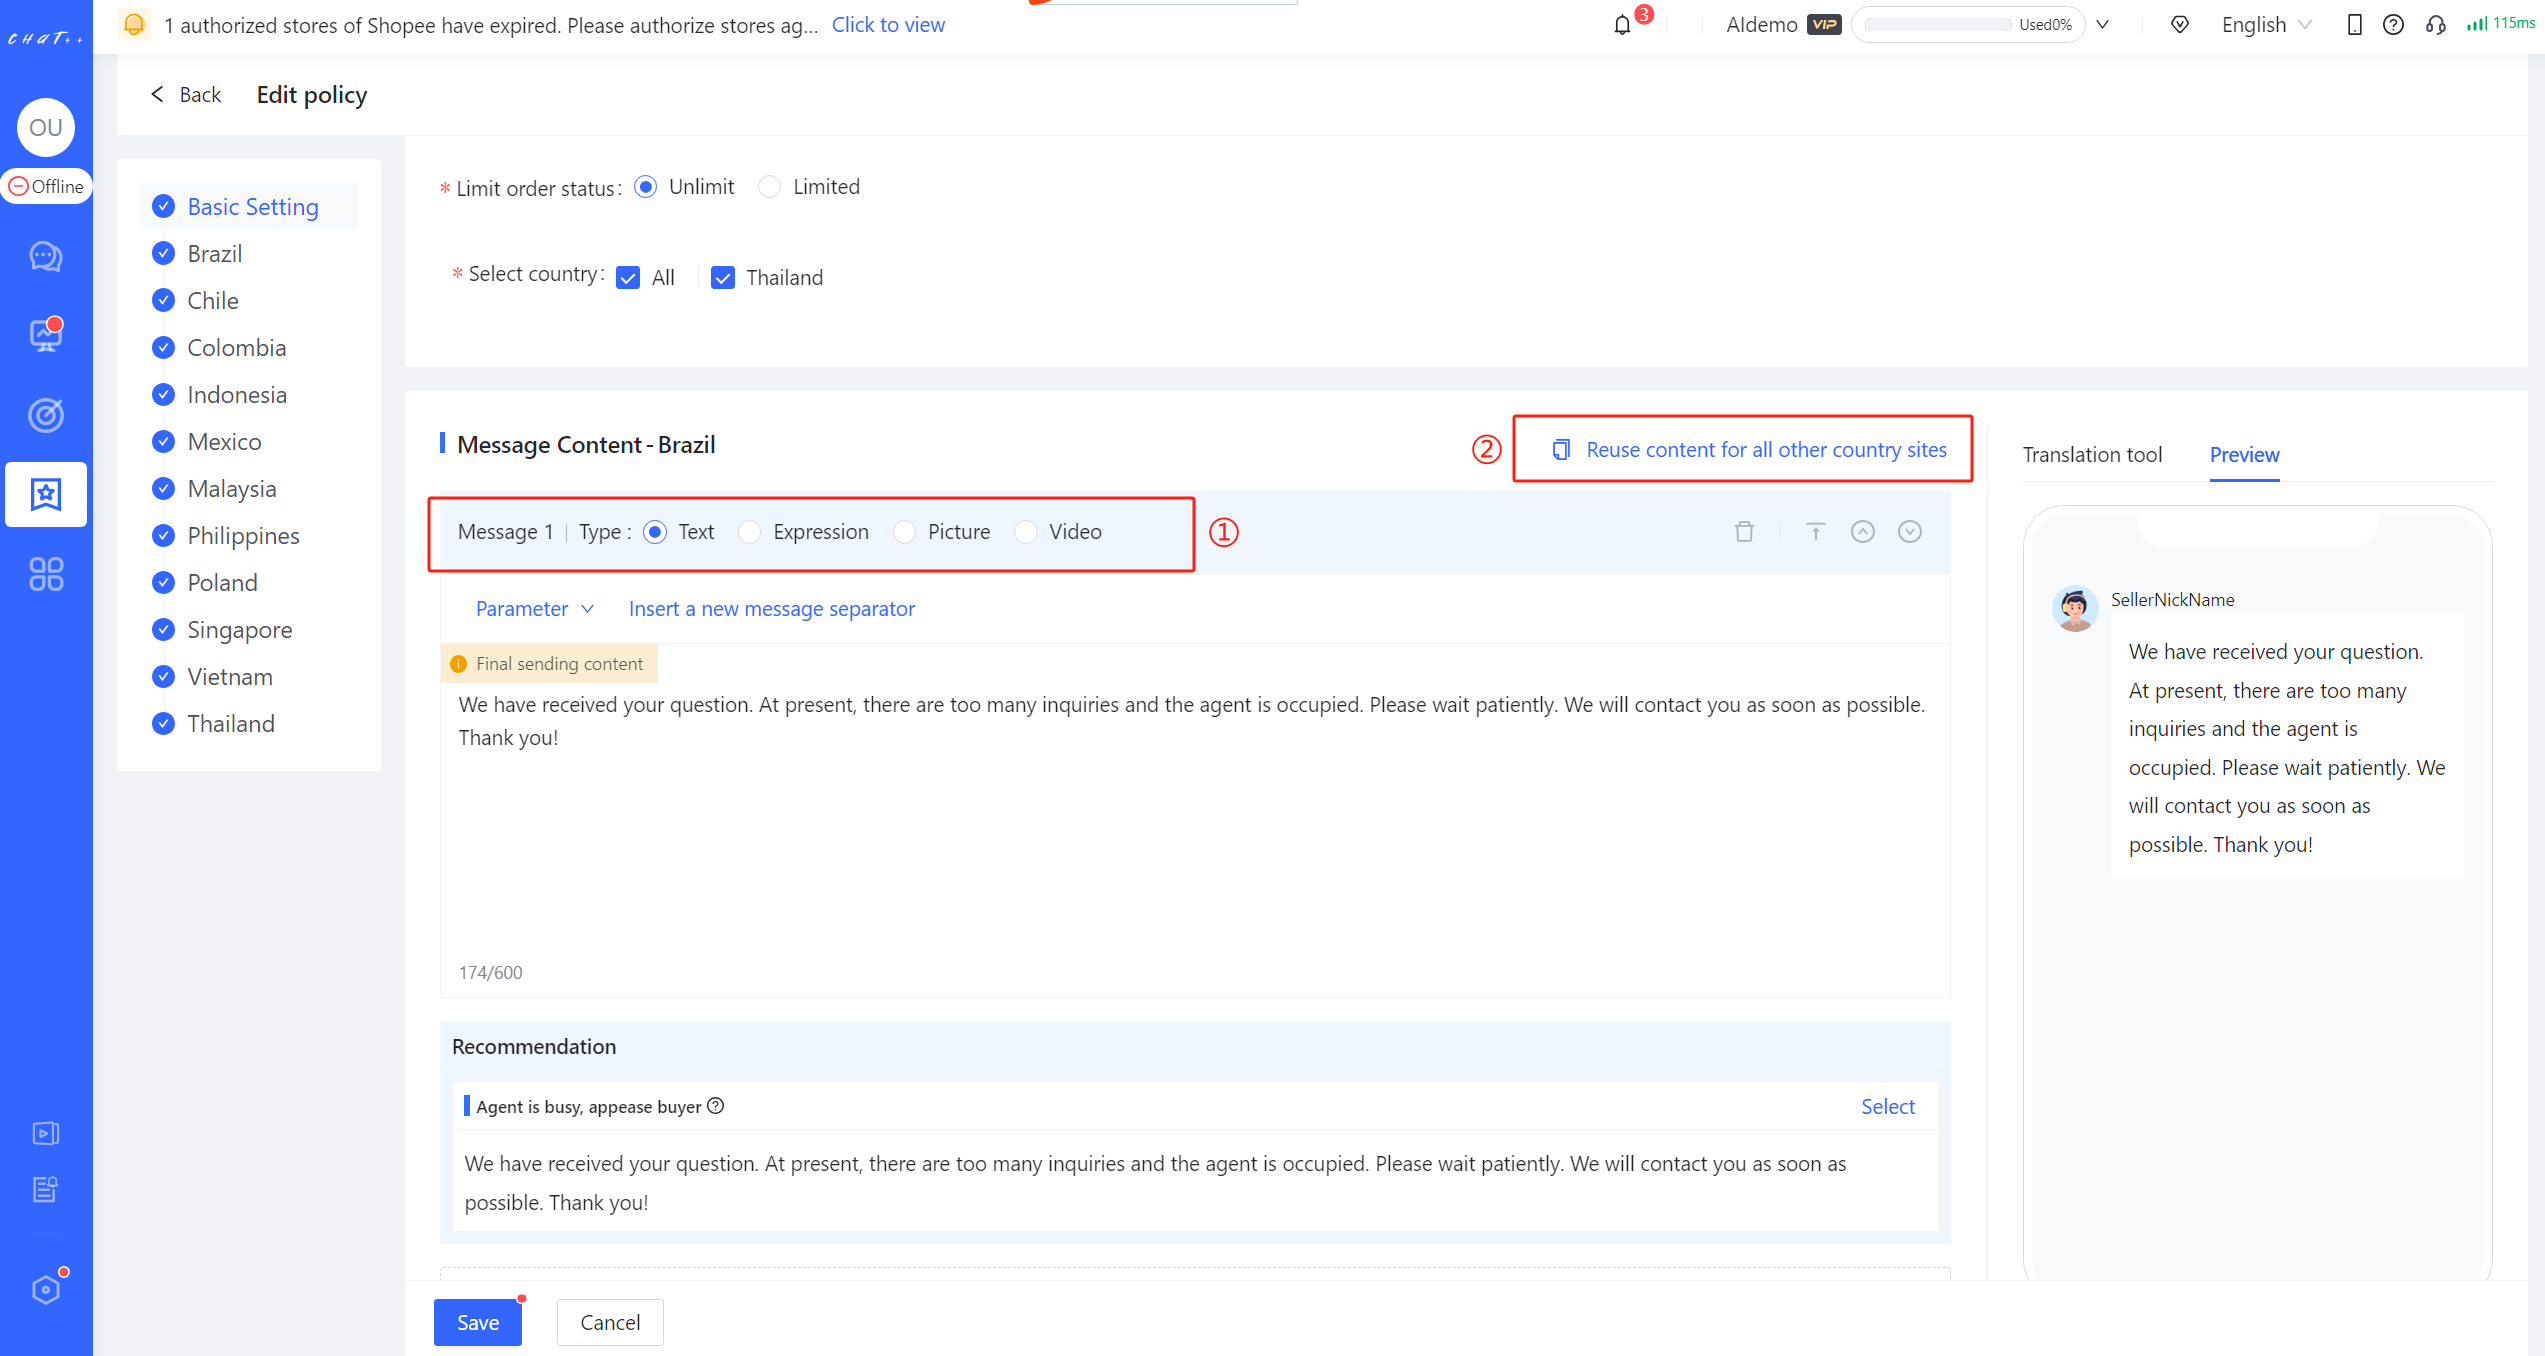
Figure 10
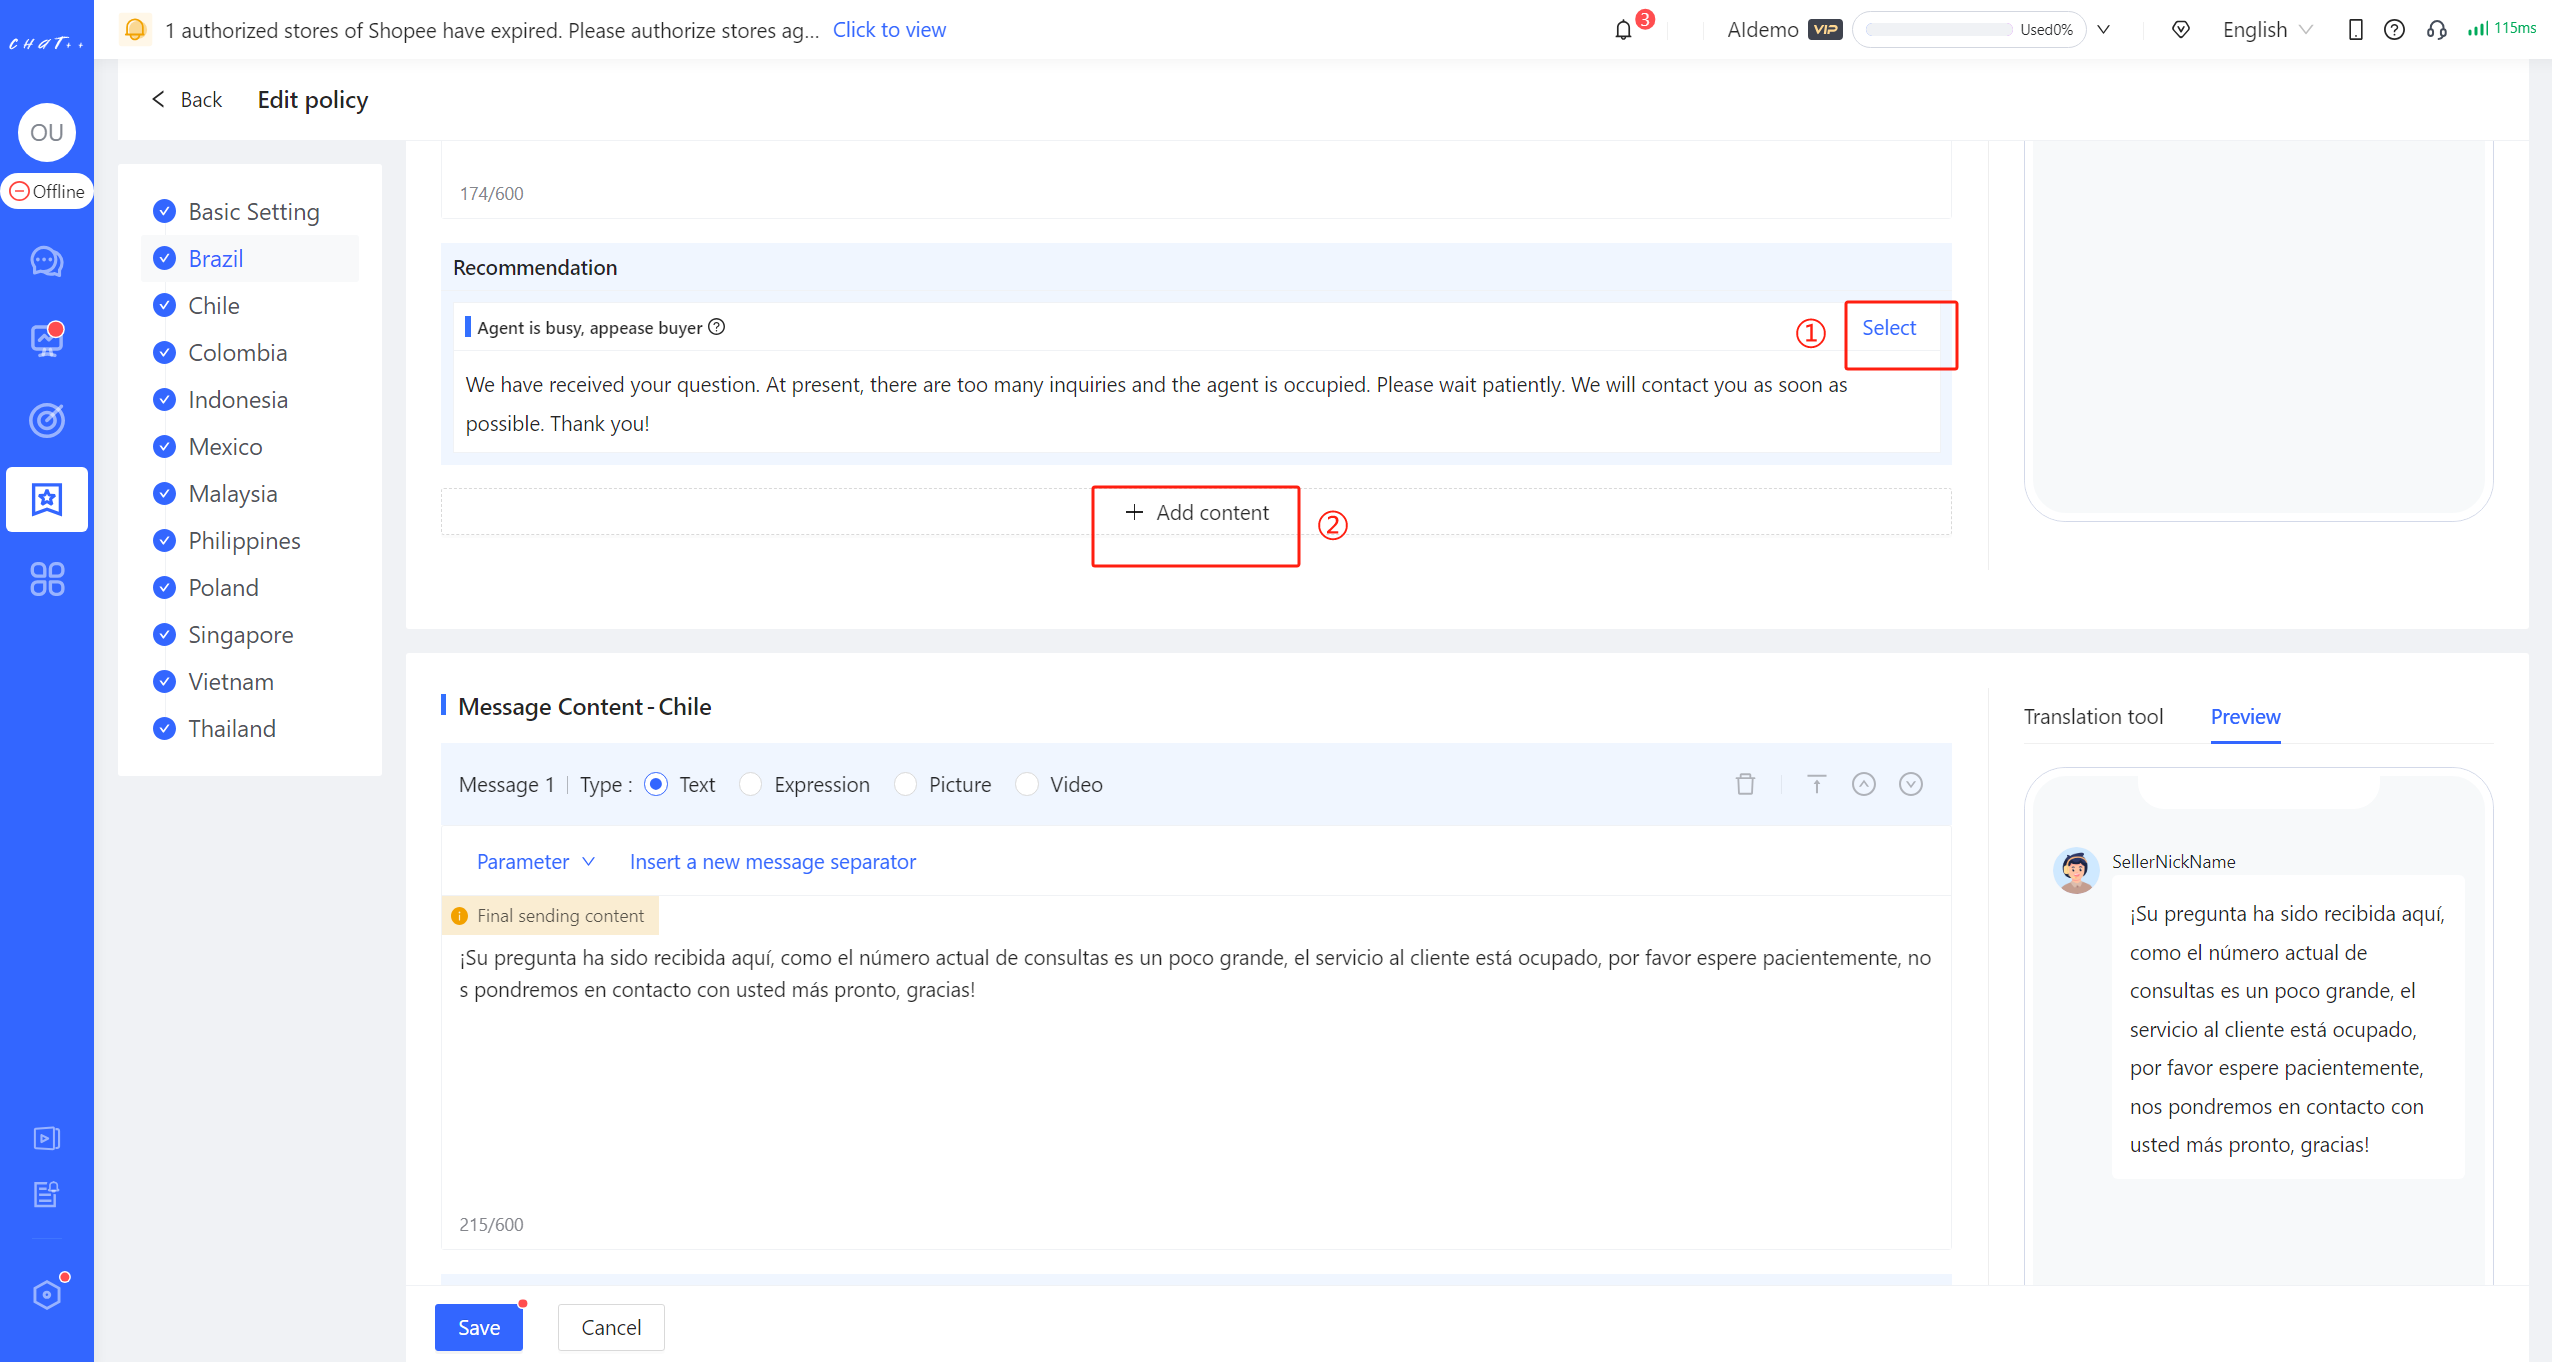
Figure 11
To facilitate the quick creation process, you can copy the templates of the first site to all other sites with just one click (click the red box ② in figure 10 above). When copying, you can choose whether to translate it into the language of the corresponding site (red box in figure 12 below).
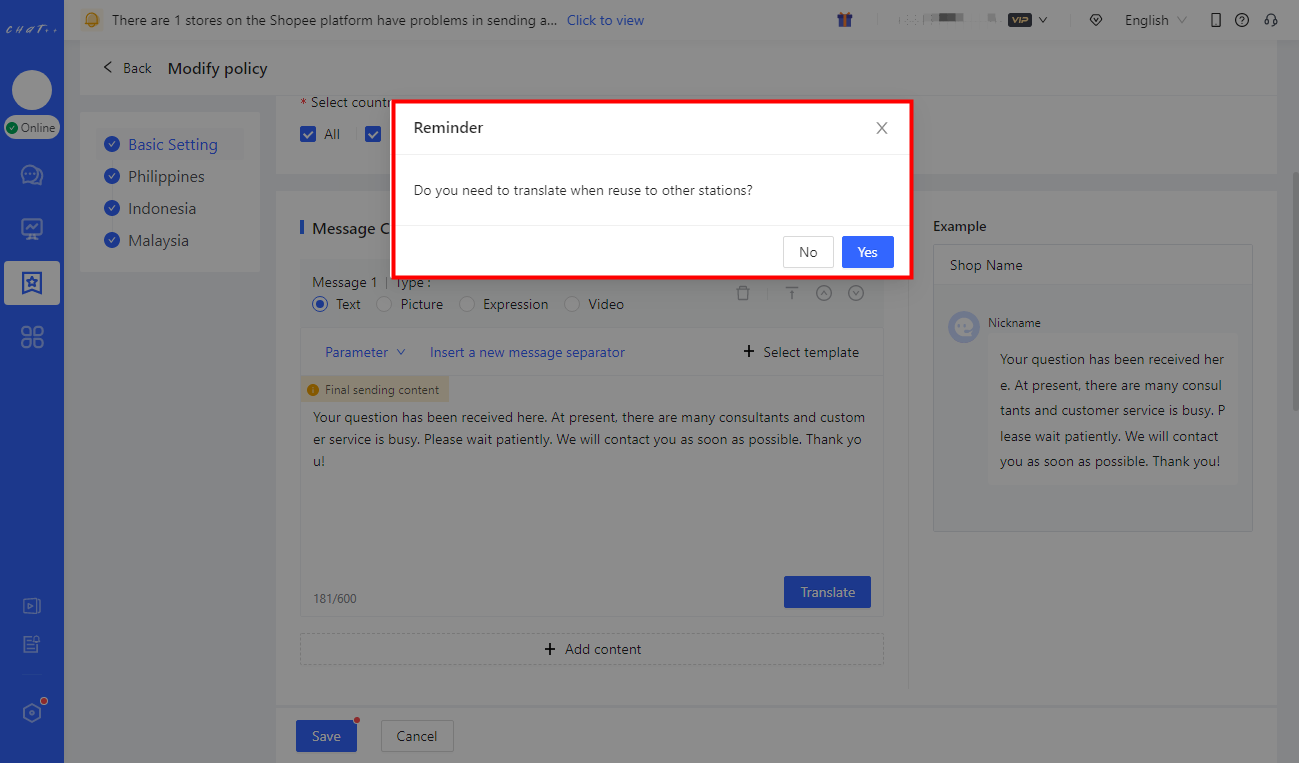
Figure 12
Note: If there are differences in Timeout Reply tasks for different stores, you can click "Add Task" to add suitable tasks for different stores.
- As shown in figure 13 and 14 below.
In the newly created task, added stores will be removed from applied stores of other tasks, ensuring that "a store will not exist in two tasks at the same time," to avoid sending different Timeout Reply messages to buyers multiple times.
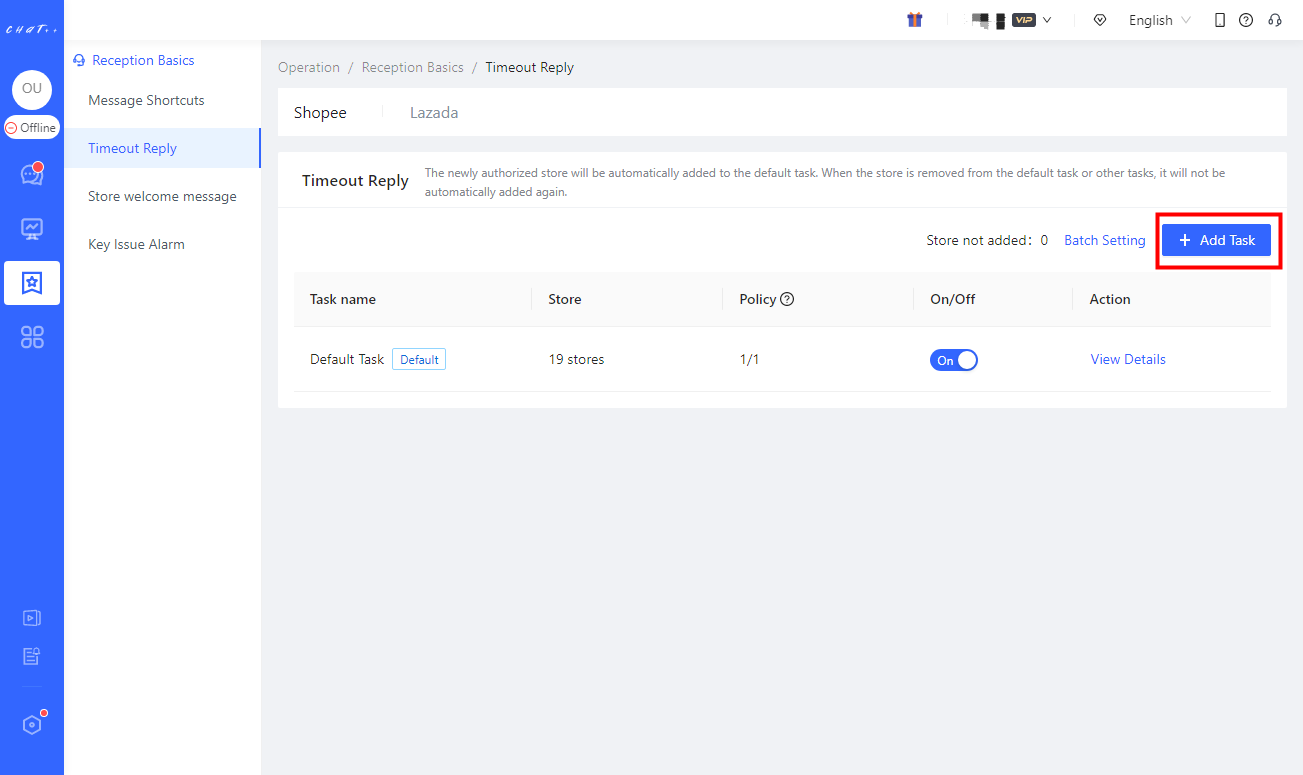
Figure 13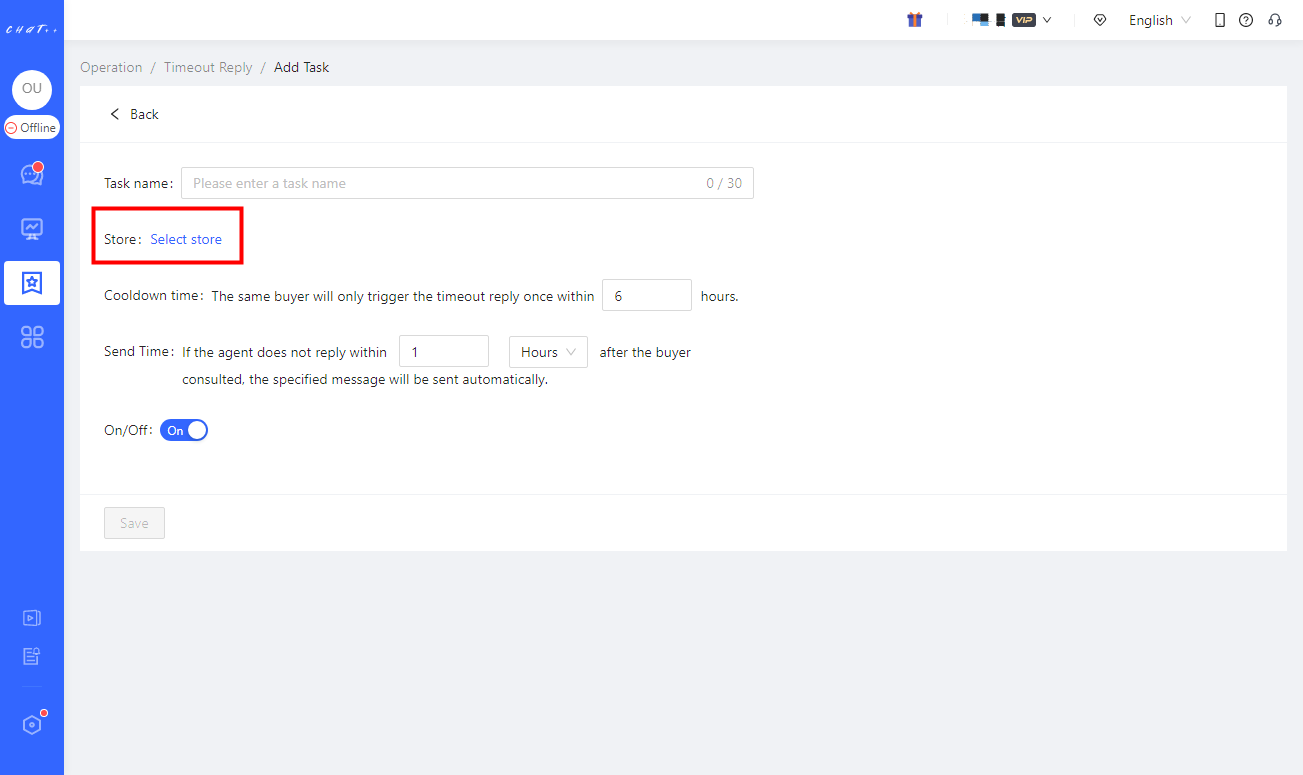
Figure 14
Attention
⚠️ 1. Timeout Reply can be customized differently for Shopee, Lazada, Tokopedia, TikTok Southeast Asia, and TikTok US.
⚠️ 2. Timeout Reply is only a remedial measure when the agent is busy or not online. It is recommended to ensure the timeliness of receiving buyers by properly scheduling agents.
Message Shortcuts
💡 Frequently used templates (text/expression/picture/video) can be added to "Message Shortcuts", and it supports multiple convenient sending methods. By reducing typing and improving response speed, reception efficiency can be greatly increased.
Show cases
- Click the "Shortcuts" button (red box in Figure below), select the template that has been added in advance, and click "Send" .
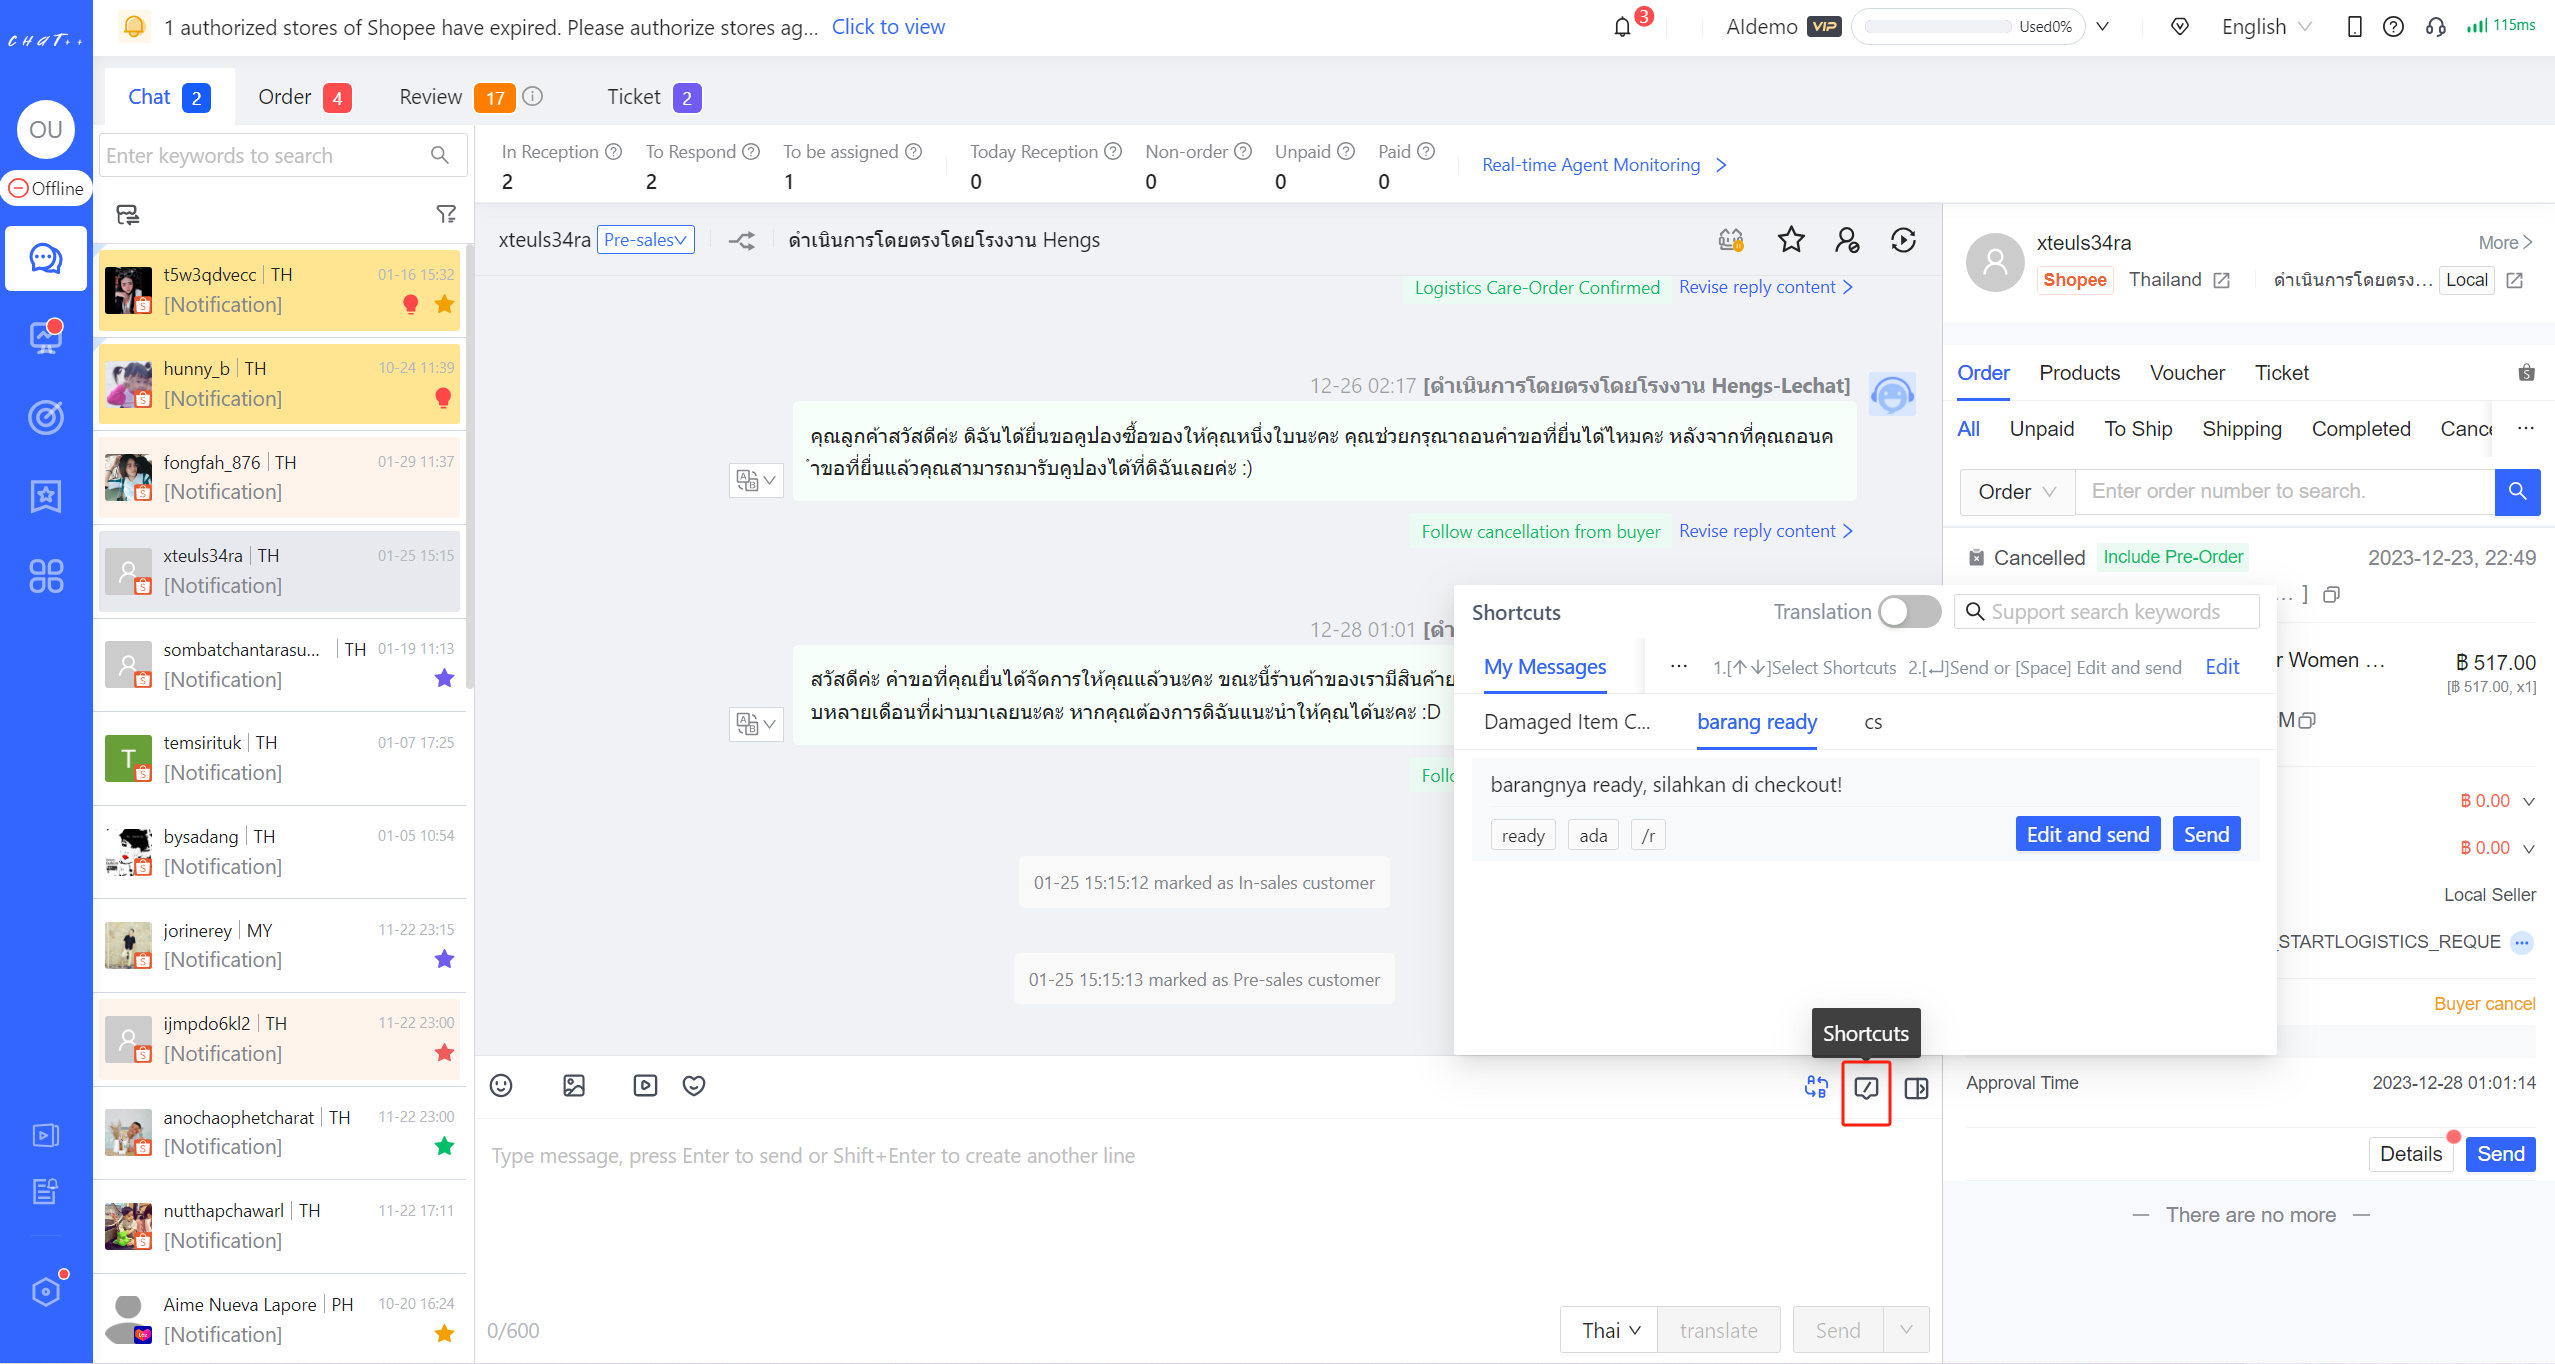
Figure 1
Permissions required for configuration
By default, employee accounts have editing permissions for "Message Shortcuts - My Messages". If needing to edit "Message Shortcuts - Team Templates", accounts need to be enabled the corresponding permissions for the role. Super admins and admins have this permission by default.
- **My Messages:**Message Shortcuts created within 'My Messages' can only be viewed and used by the creator.
- **Team Templates:**Message Shortcuts created within team templates can be viewed and used by everyone. Only accounts with editing permissions for "Message Shortcuts - Team Templates" can add or modify them.
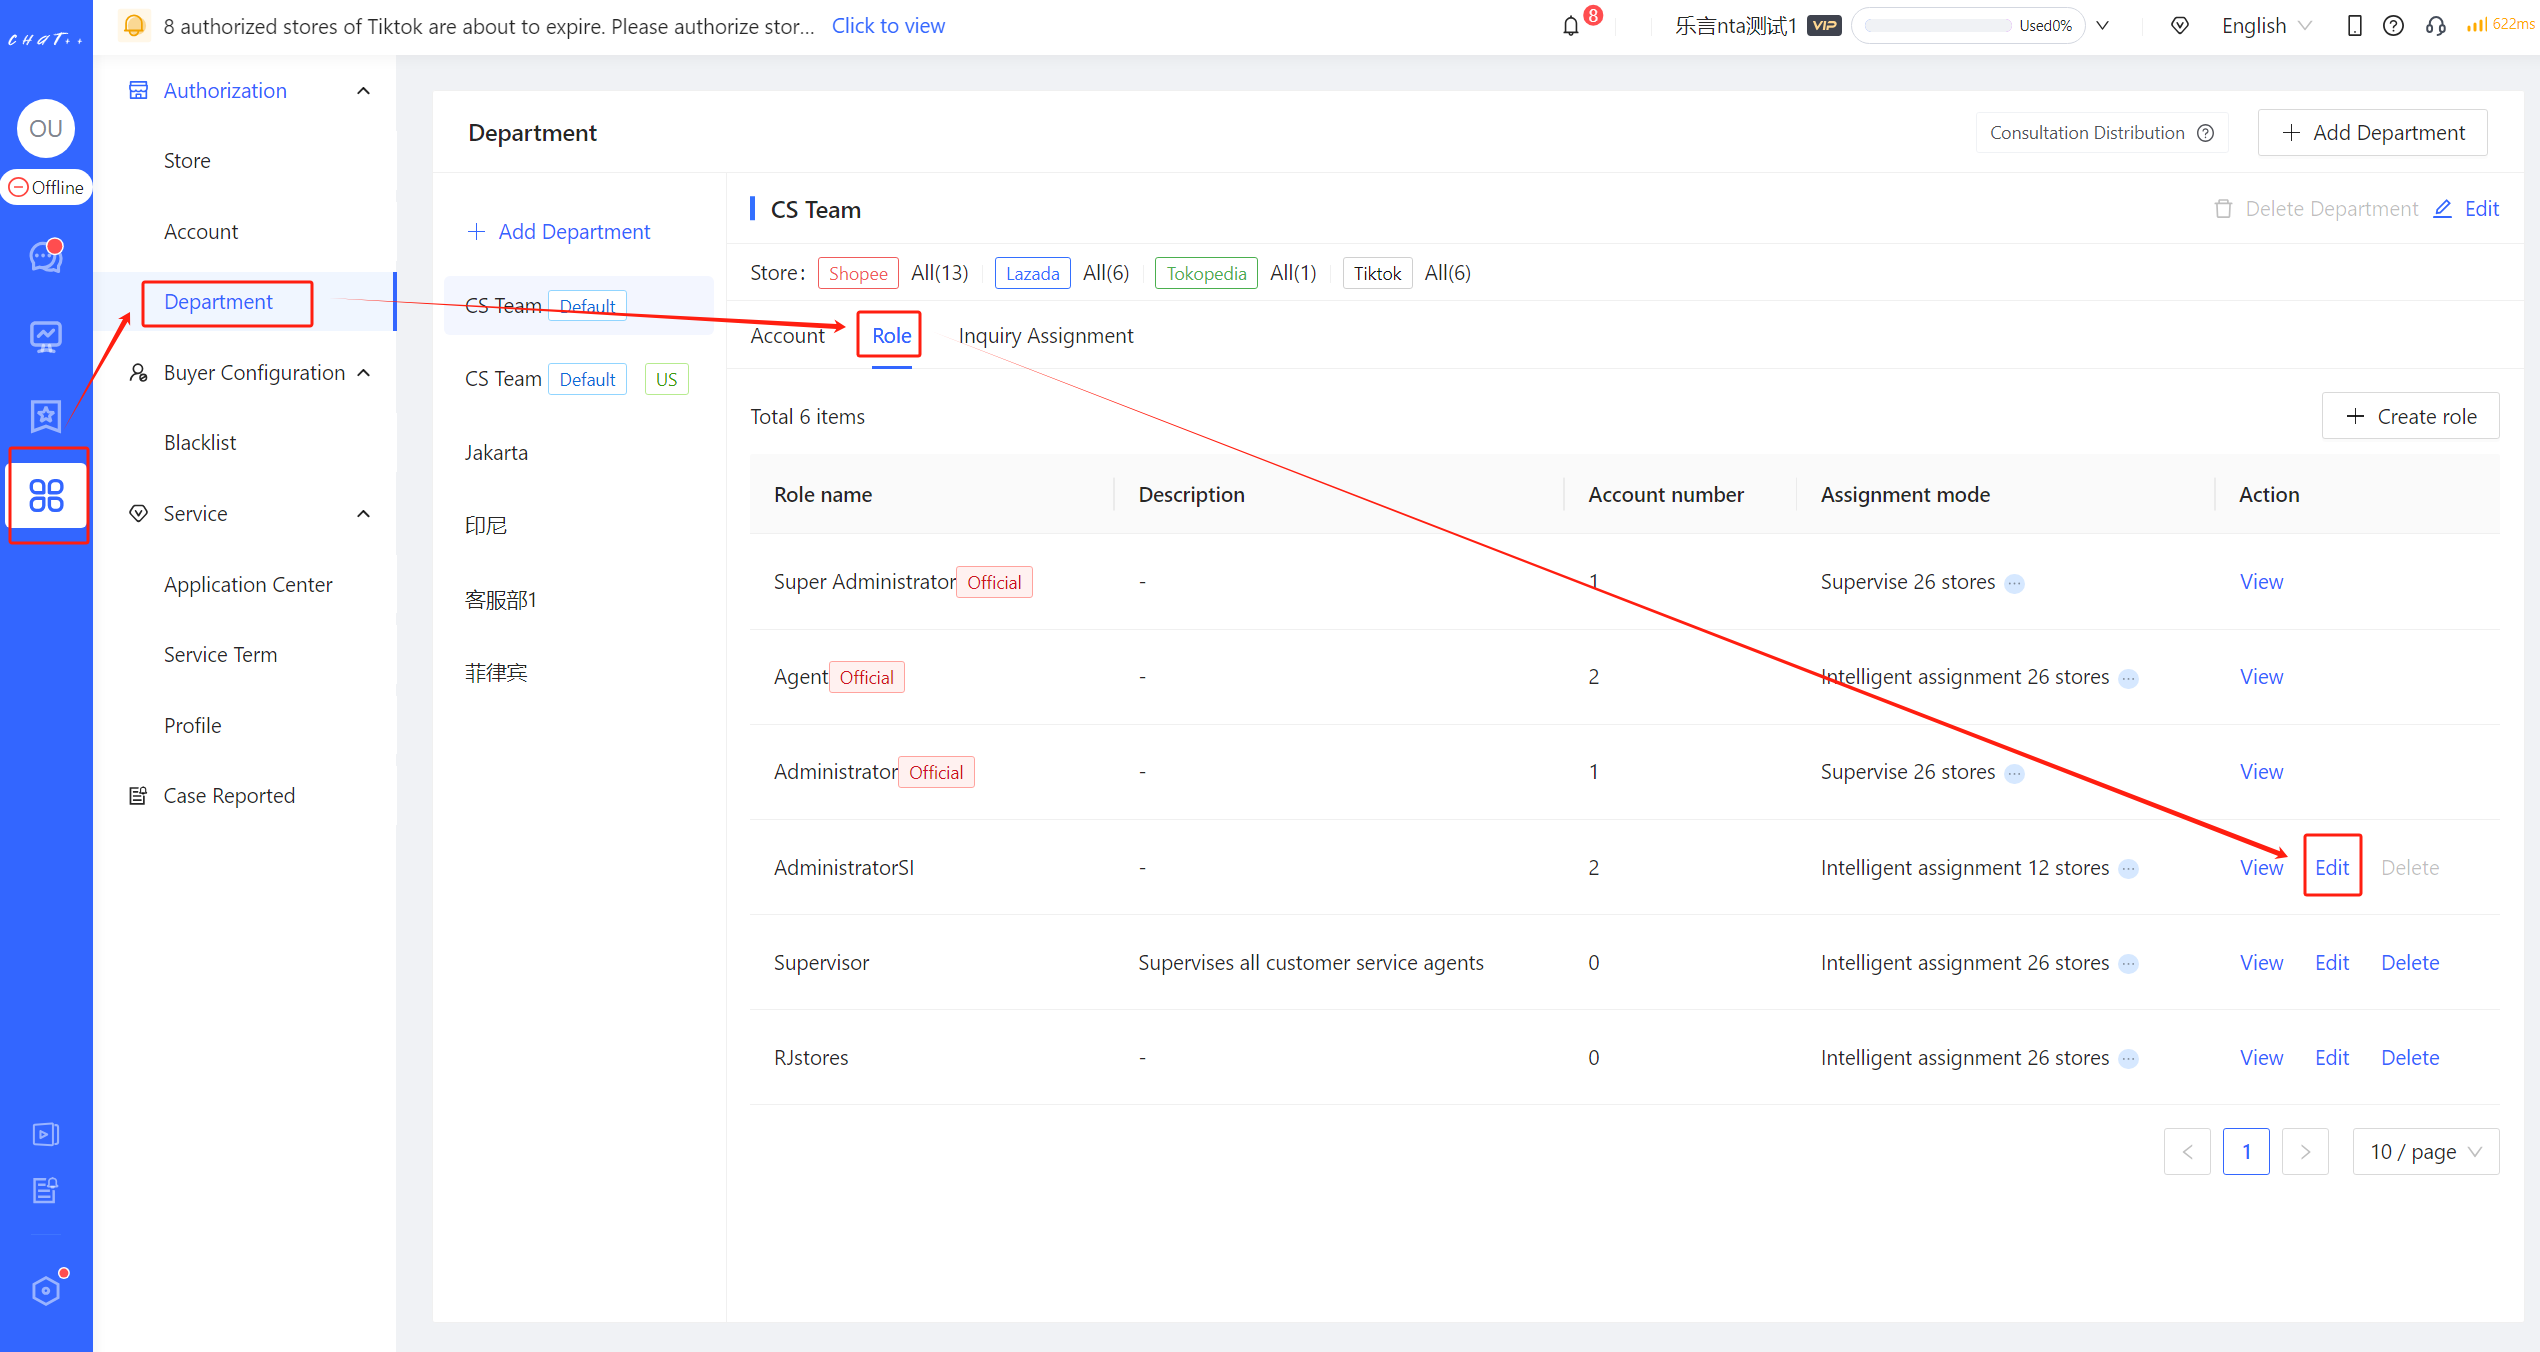
Figure 2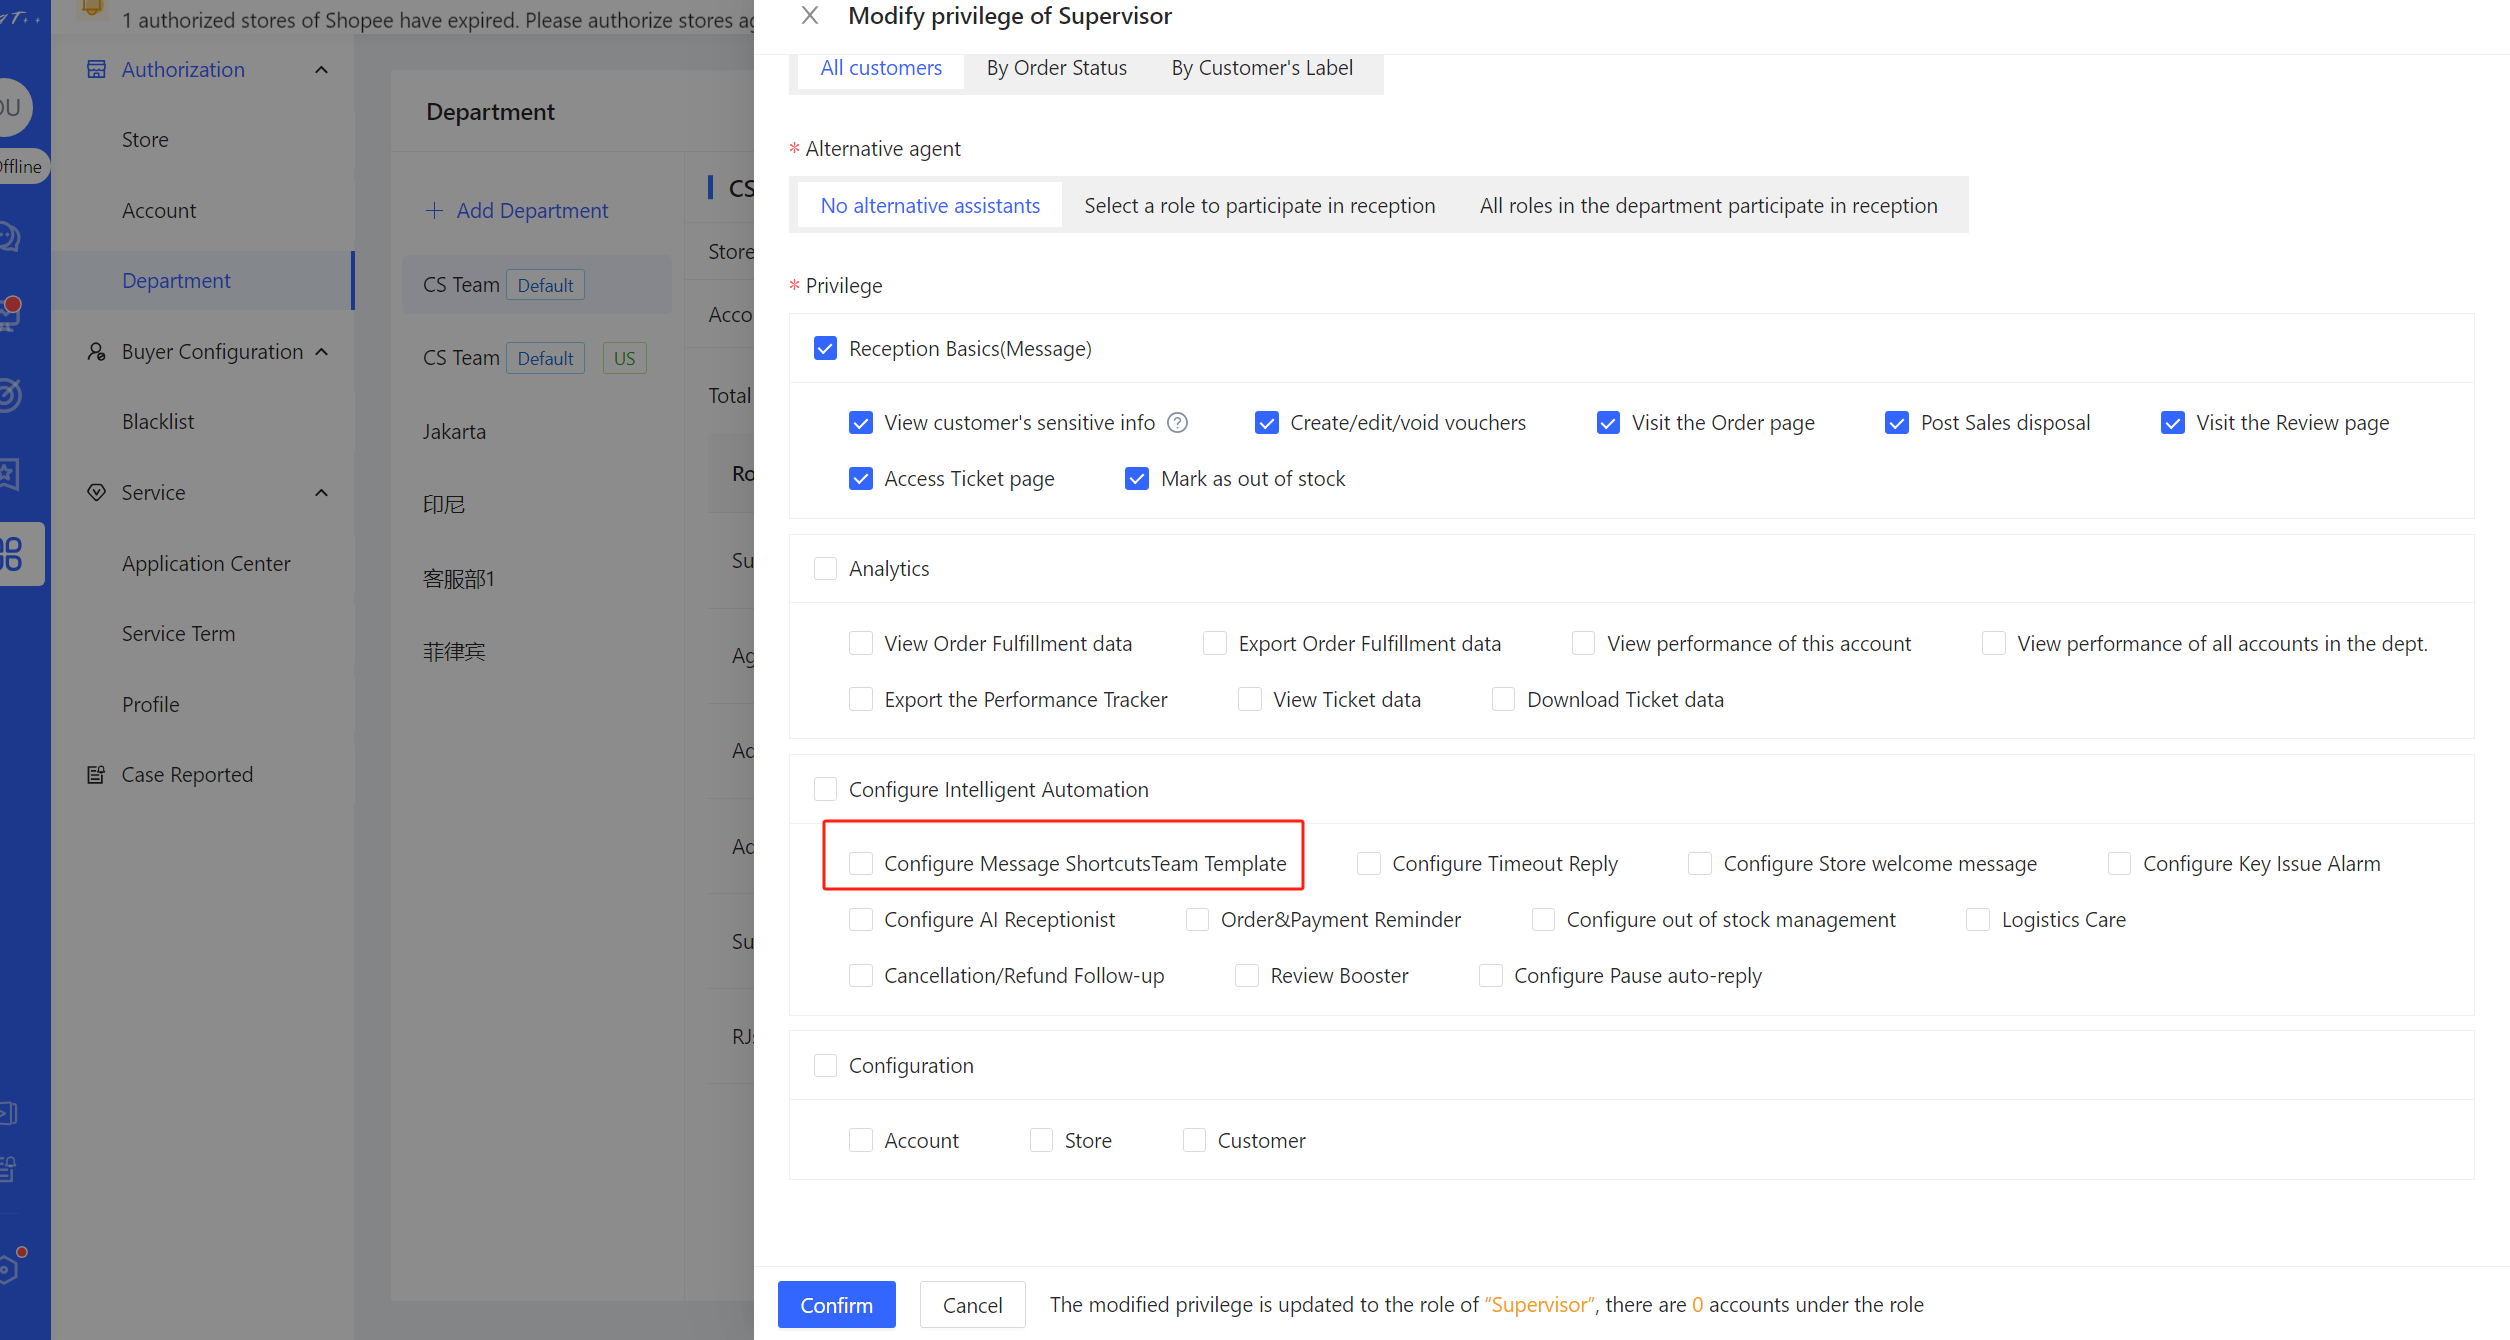
Figure 3
Access and Configure Message Shortcuts
- Entrance 1: Click「 Automation 」 in left menu(Shown as red box① in Figure 4)→「Reception Basics 」(Shown as red box② in Figure 4)→「 Message Shortcuts 」(Shown as red box③ in Figure 5),Access the configuration page(Shown as in Figure 5).
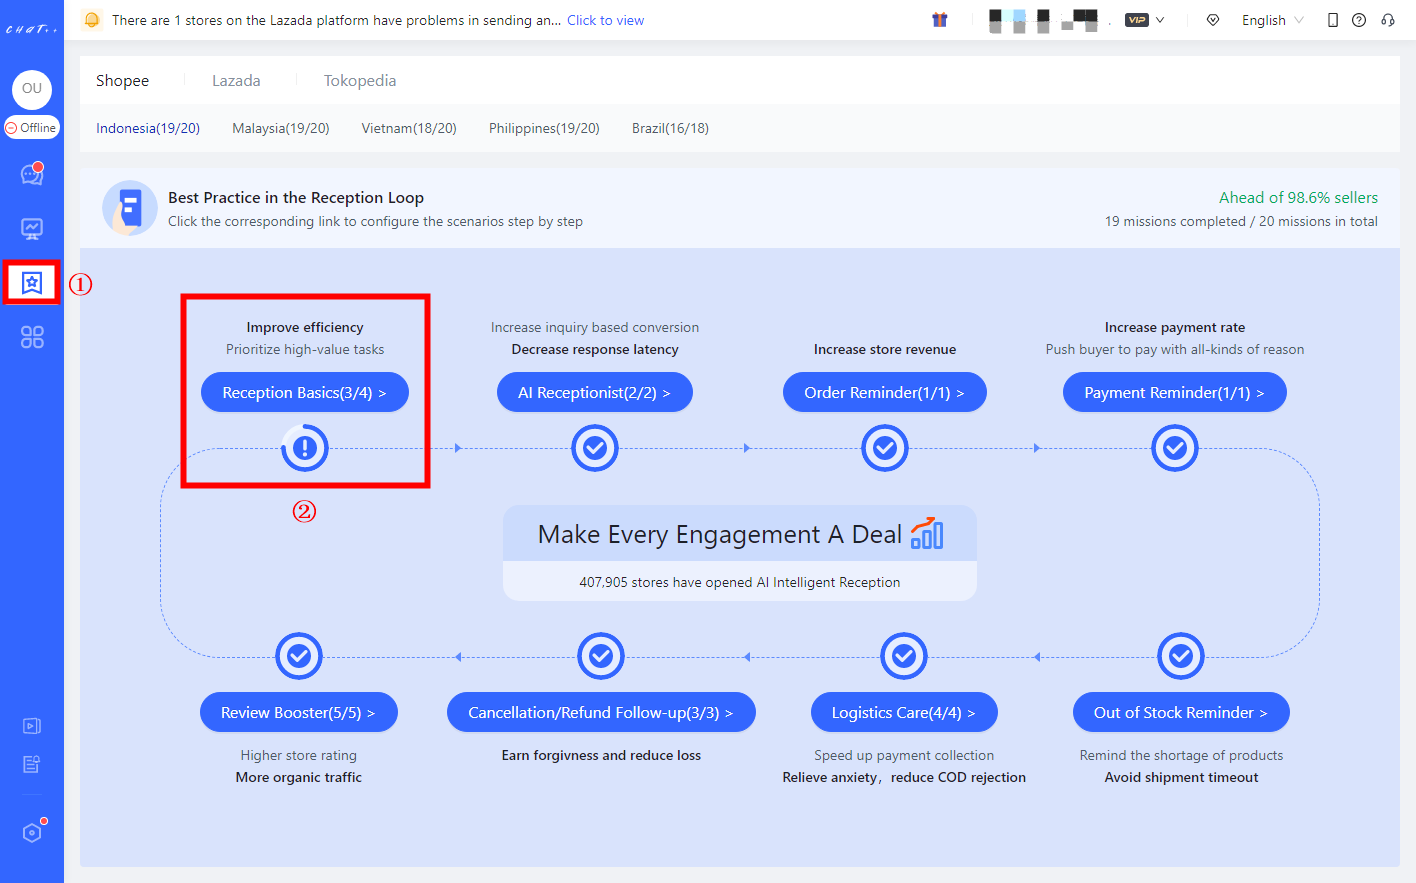
Figure 4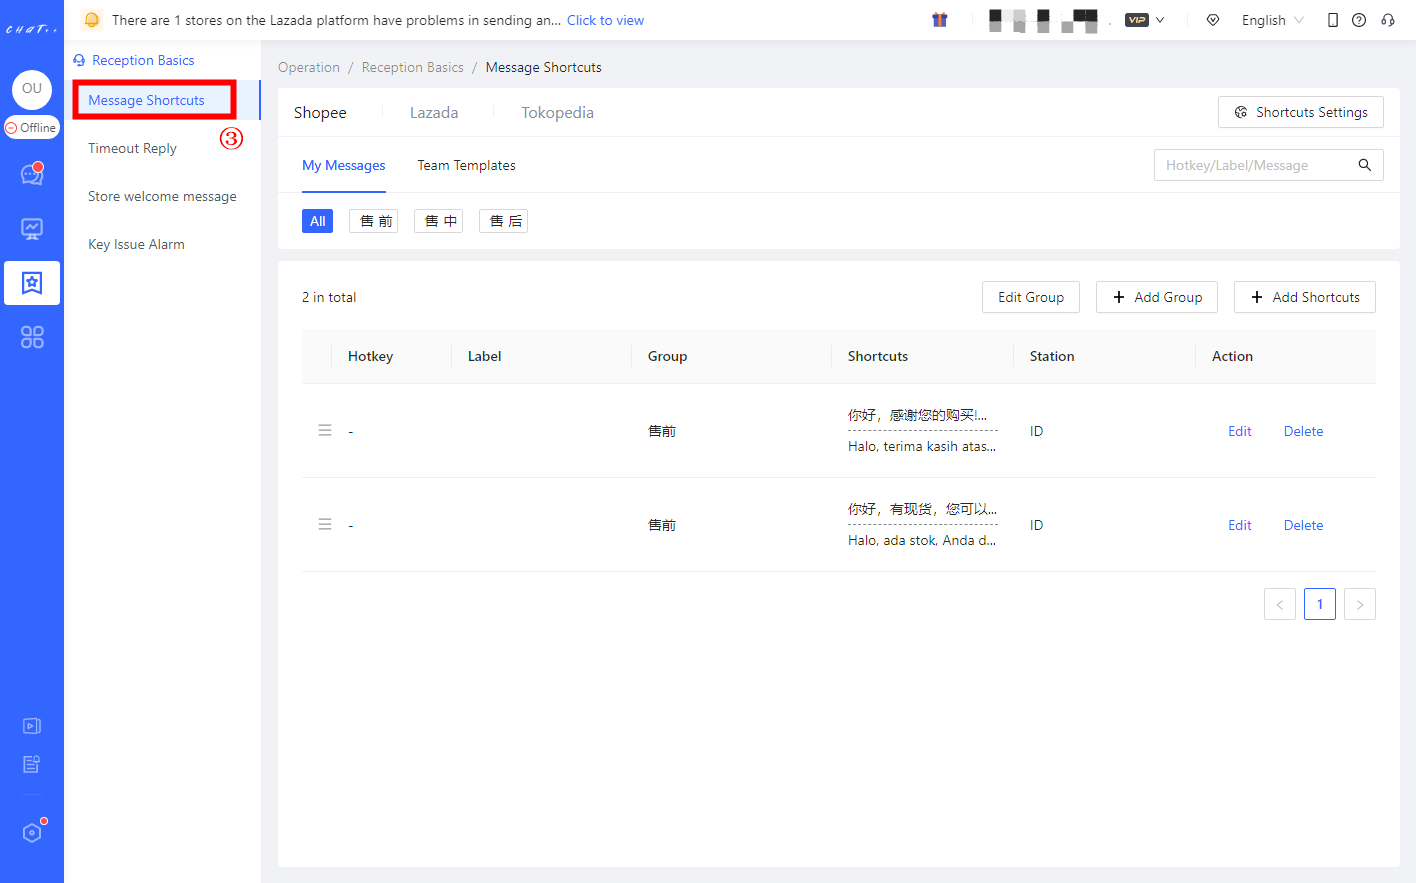
Figure 5
- 👆Entrance 2: 👆Click "Message Shortcuts" (red box① in Figure 6) in the conversation editing box → "Edit" (red box② in Figure 6) to access the configuration page (Figure 5).
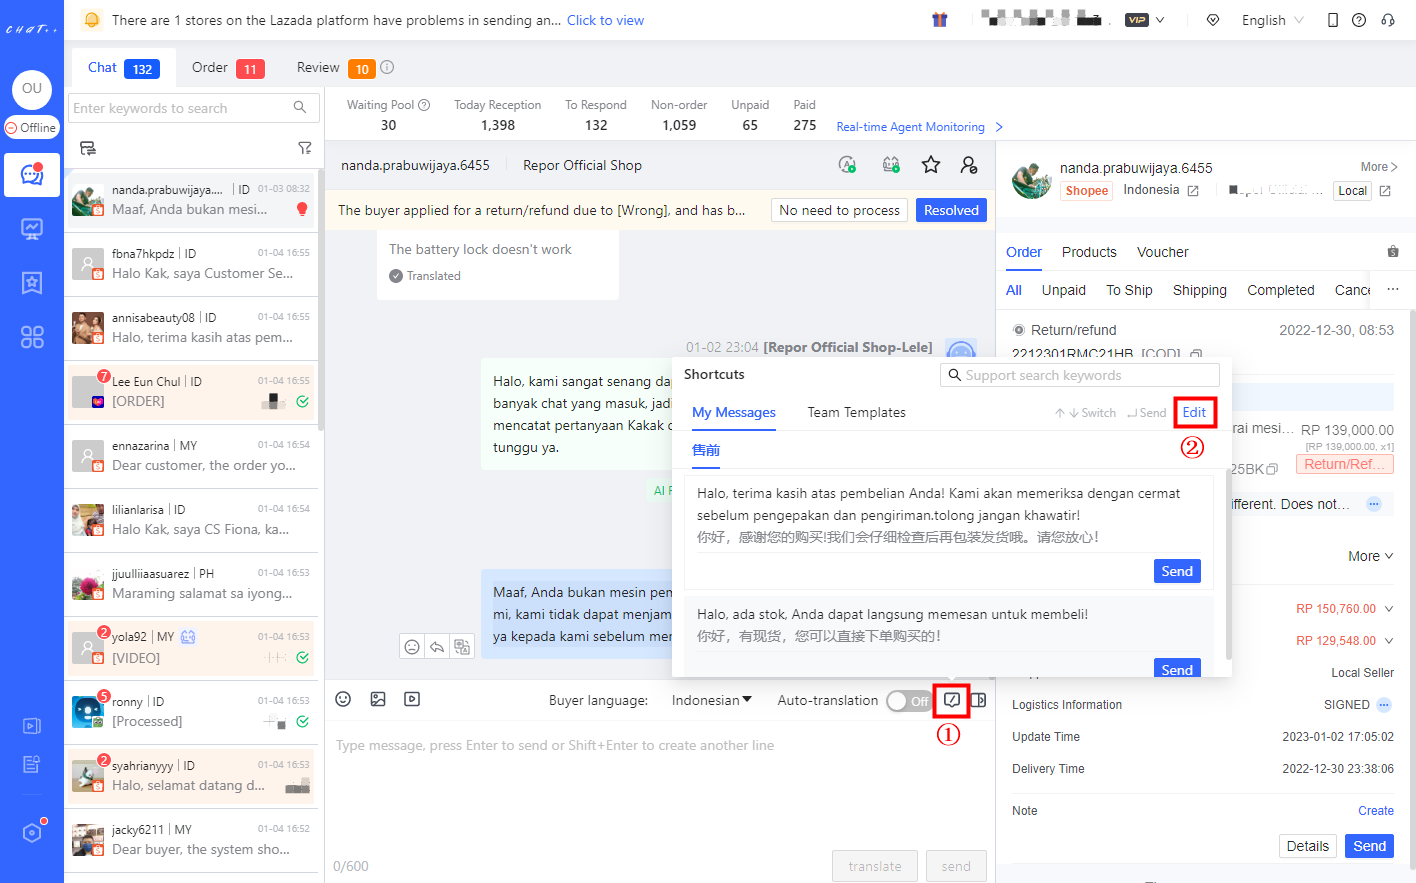
Figure 6
How to Add/Modify "Message Shortcuts"
Note:The message shortcuts can be customized differently for marketplaces, currently supporting Shopee, Lazada, Tokopedia, and TikTok. (red box ① in Figure 7 below)
Note: Message Shortcuts are categorized into "My Messages" and "Team Templates" (red box② in Figure 7). Only accounts with editing permissions for "Message Shortcuts - Team Templates" can add or modify shortcuts within team templates (please refer to the required permissions mentioned above on configuration).
To facilitate the management of message shortcuts, they can be added to different groups (red box③ in Figure 7).
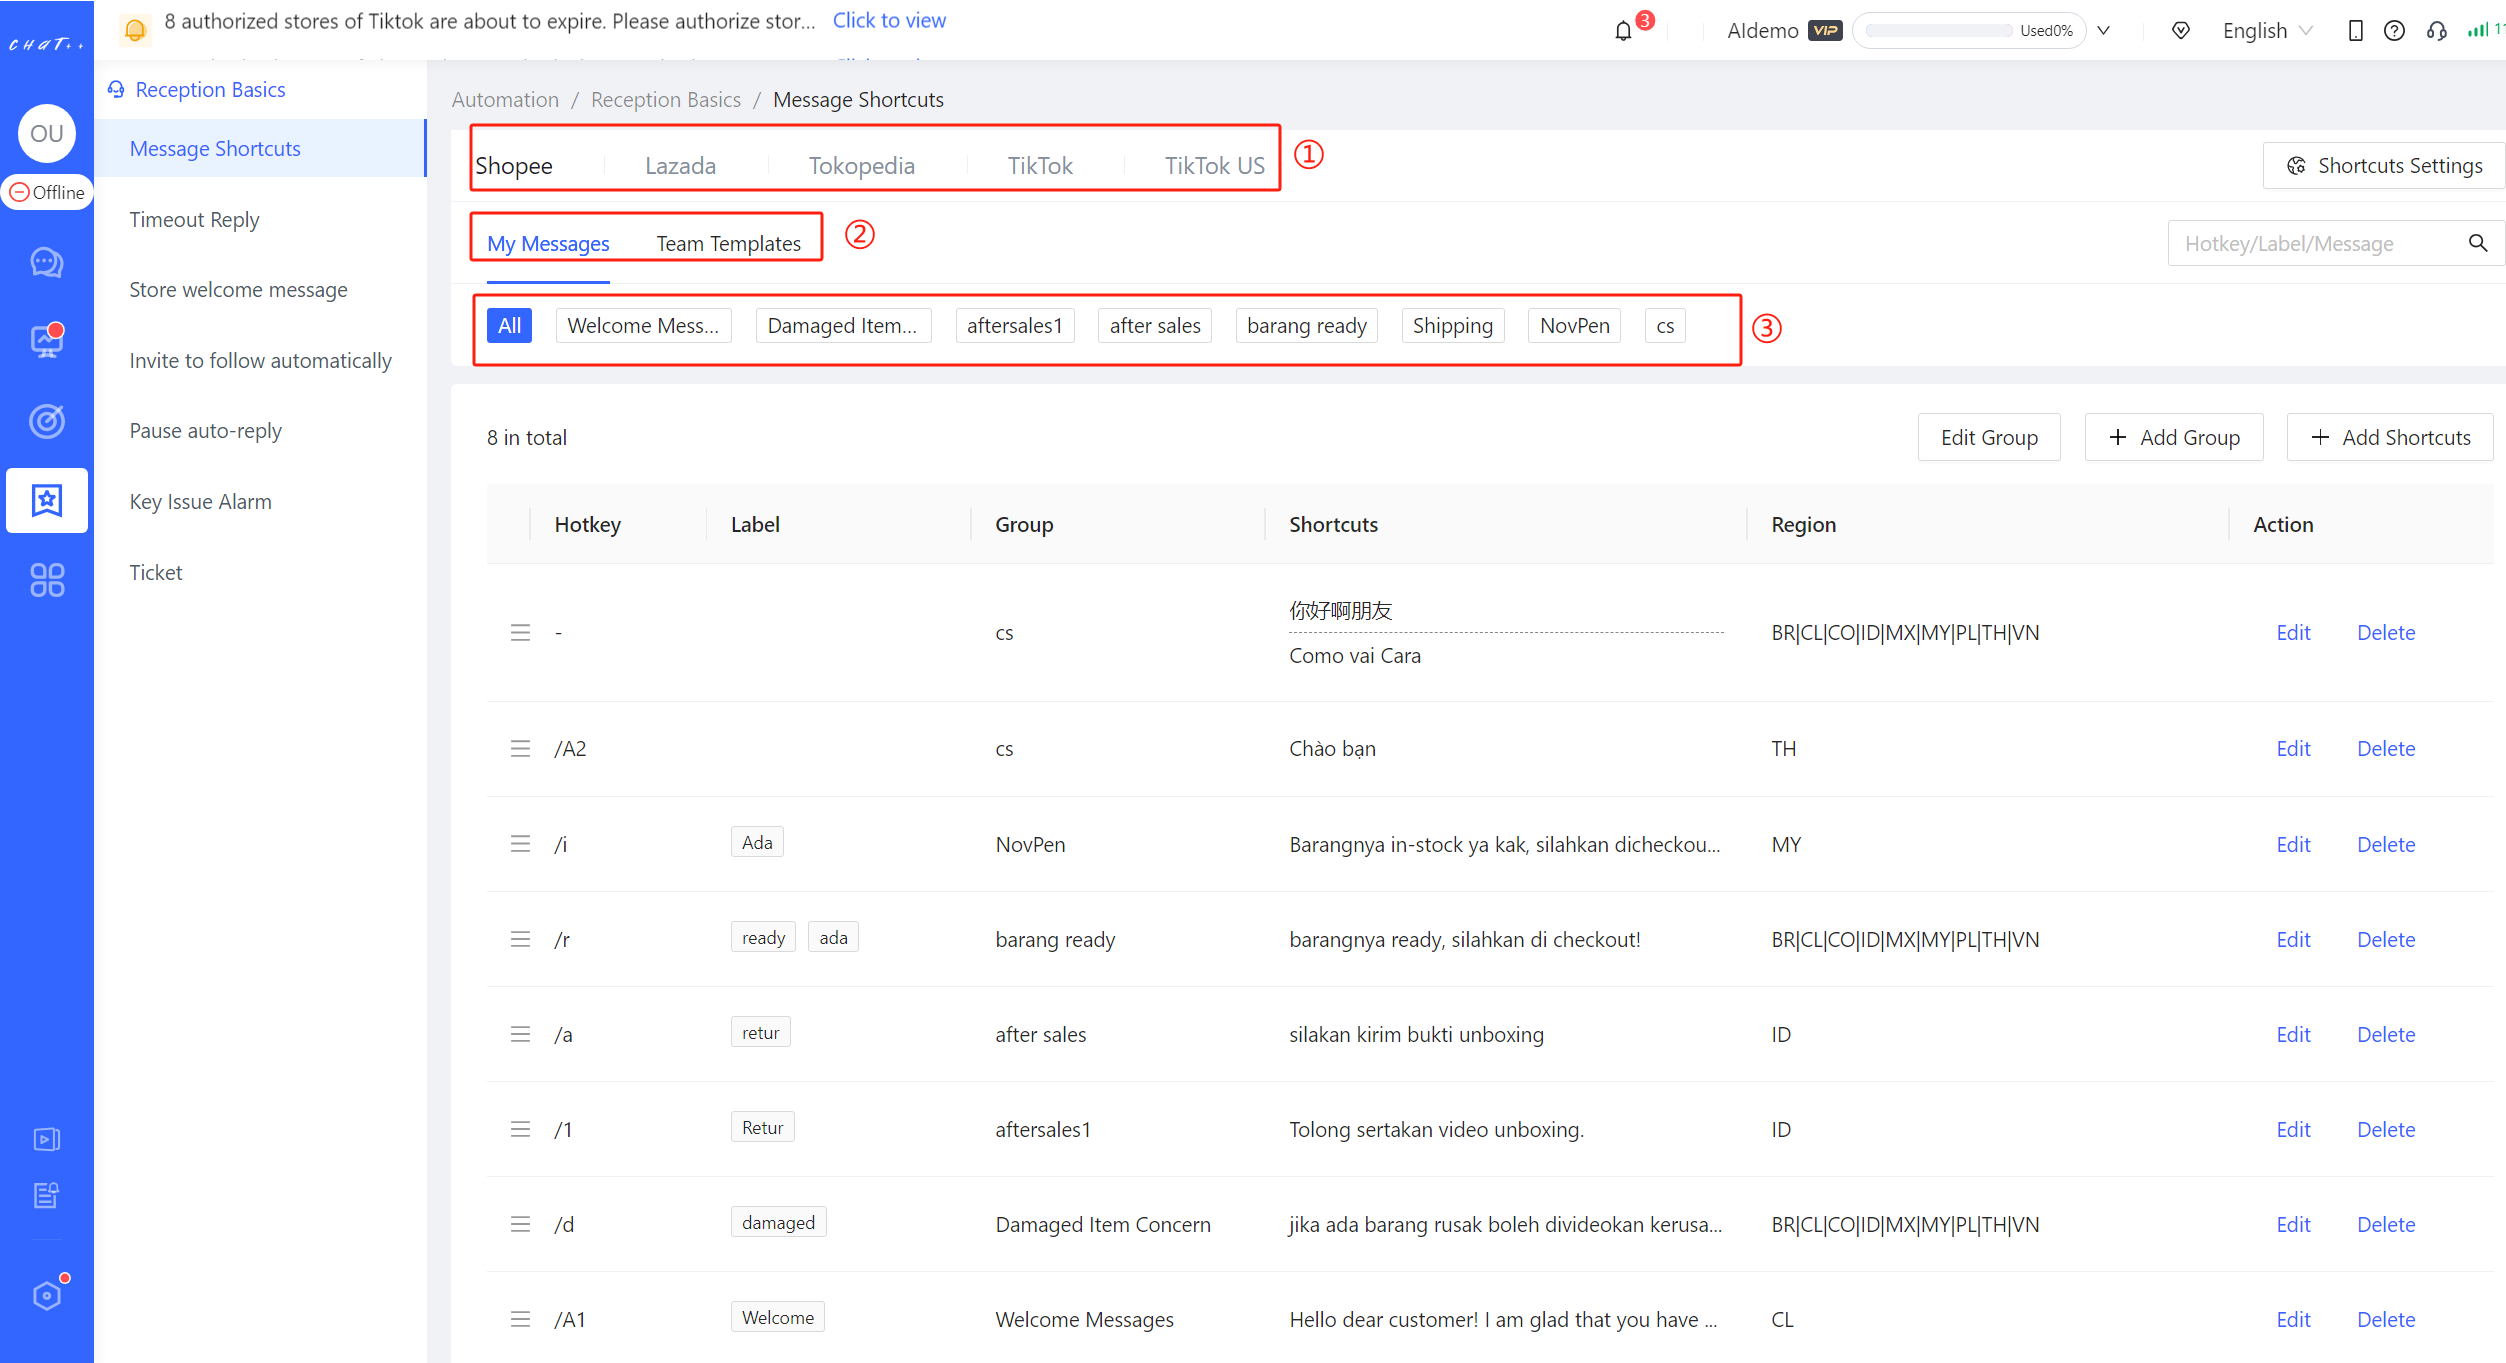
Figure 7
Click "Add Shortcuts" (red box in Figure 8) to enter the configuration page.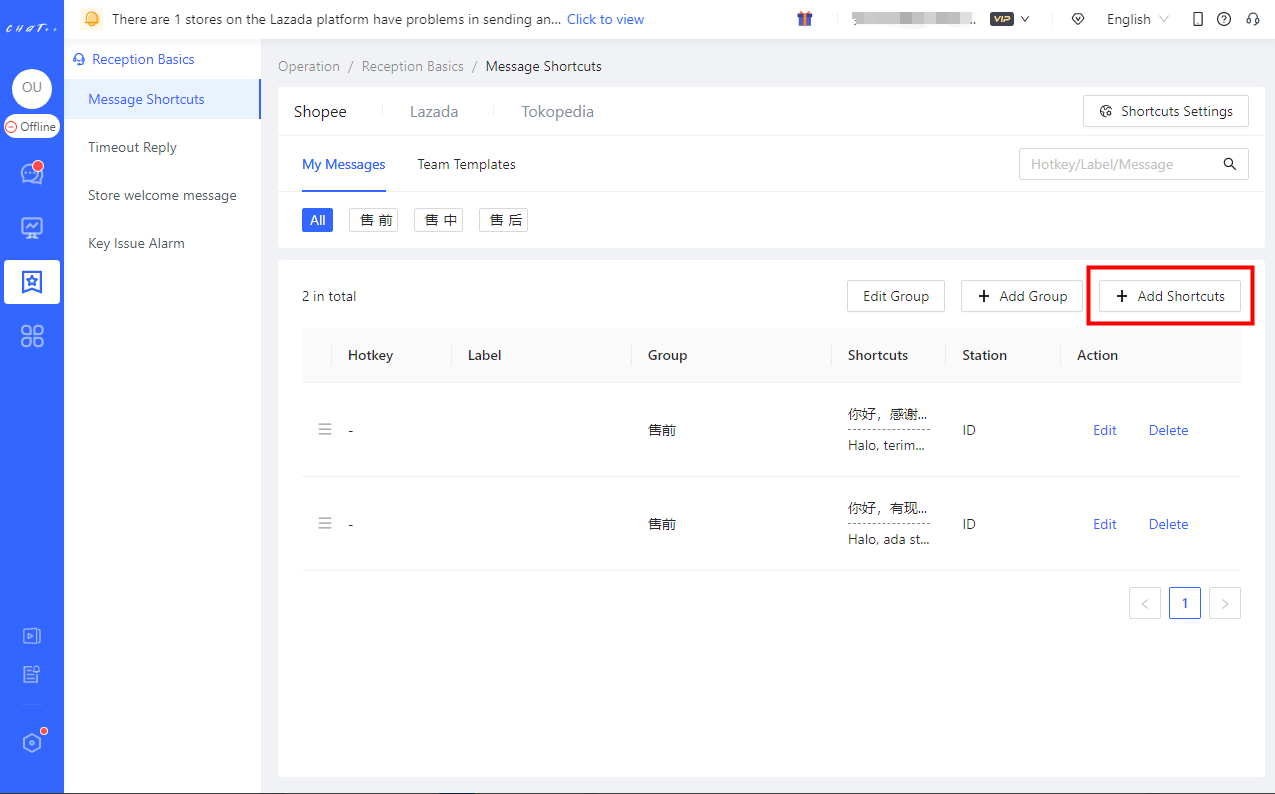
Figure 8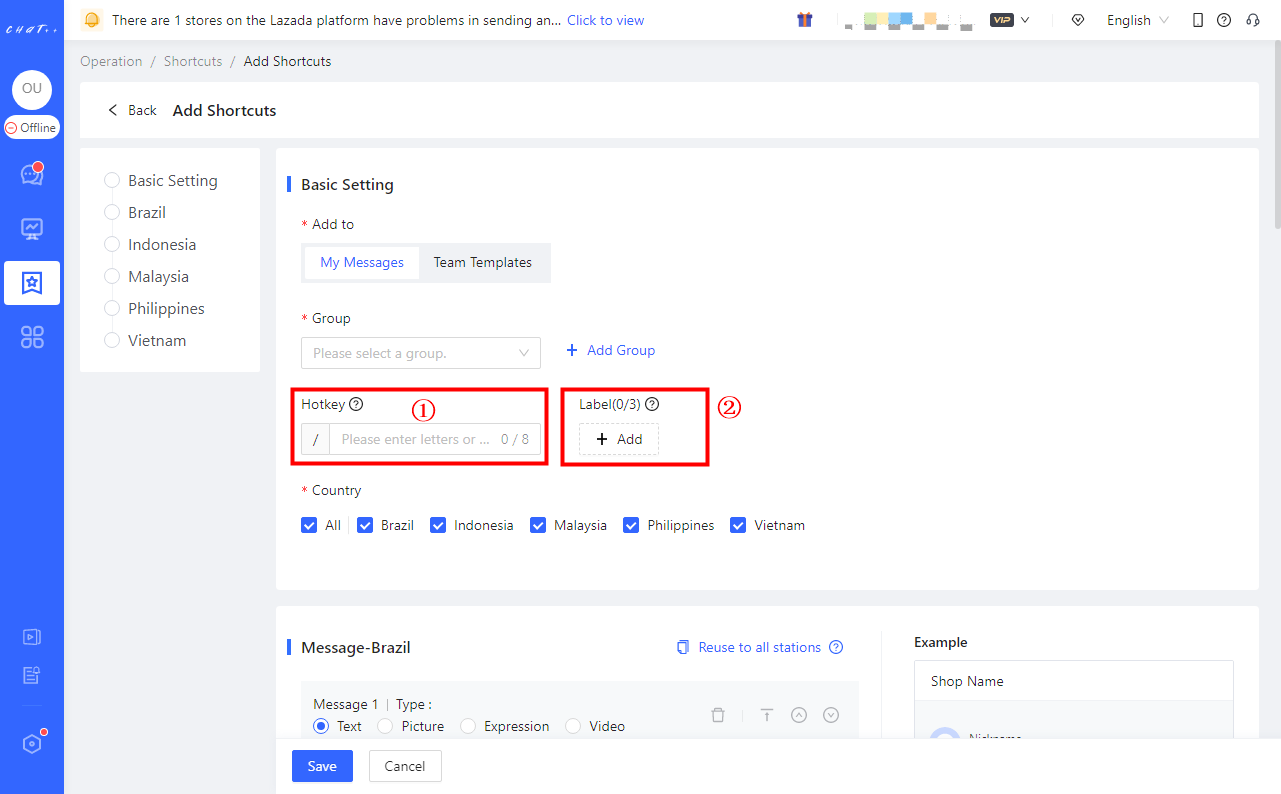
Figure 9
Hotkey: Shortcuts support the setting of hotkeys (optional) (red box① in Figure 9), which can be used to quickly find the corresponding shortcut. Note:You can set hotkey for frequently used shortcuts. Note: Hotkey consists of a prefix and a suffix. The prefix is "/" and cannot be modified. The suffix can be composed of letters and numbers, with a maximum of 8 characters. Hotkey cannot be duplicated. For example, the hotkey for the shortcut "Welcome to my shop" is "/aa". By entering "/aa" in the conversation editing box, you can quickly find and send that shortcut (Figure 10).
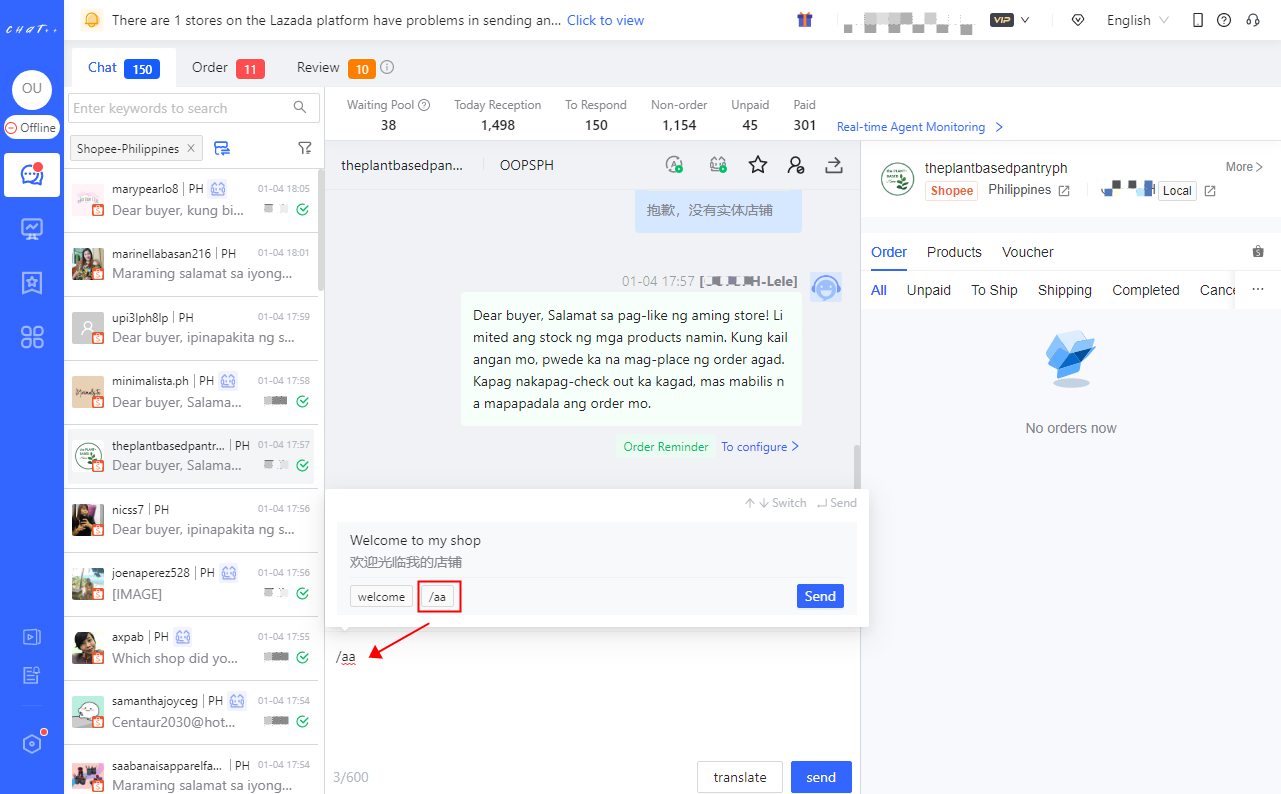
Figure 10
Label: Shortcuts also support the setting of label (optional) (red box② in Figure 9), which can be used to quickly find all shortcuts with the same label. Note: A shortcut can have up to 3 labels, and different shortcuts can have the same labels. For example, multiple labels have the tag "welcome". By entering "welcome" in the conversation editing box, you can quickly find all shortcuts with that label. Select the target shortcut and click send (Figure 11).
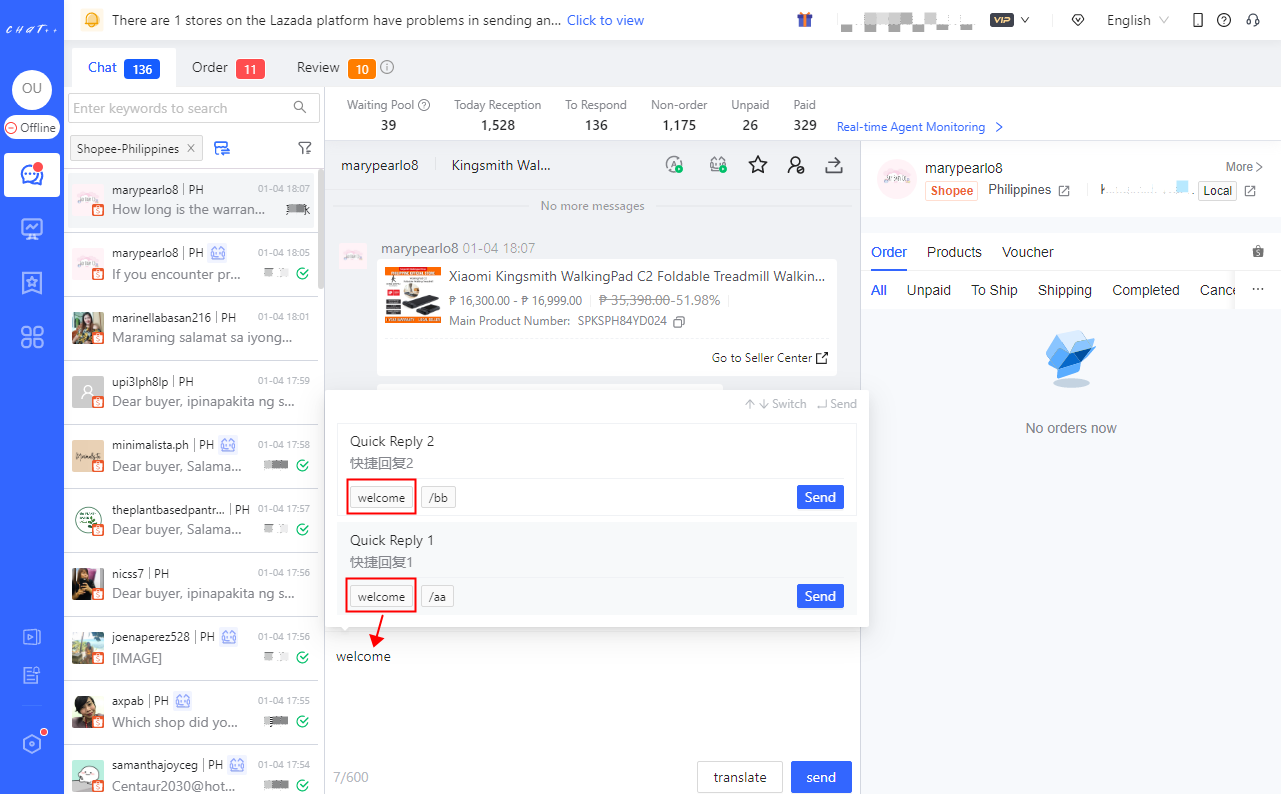
Figure 11
Shortcuts can be configured in corresponding language based on the "country site", and all sites will be selected by default (red box① in Figure 12).
Scrolling down the page will display "editing box for selected country sites" (as marked in red box ② in Figure 12 below), and you can also quickly locate "editing box for selected country sites"(red box ③ in Figure 12 below) through the navigation bar (red box ③ in Figure 12 below)
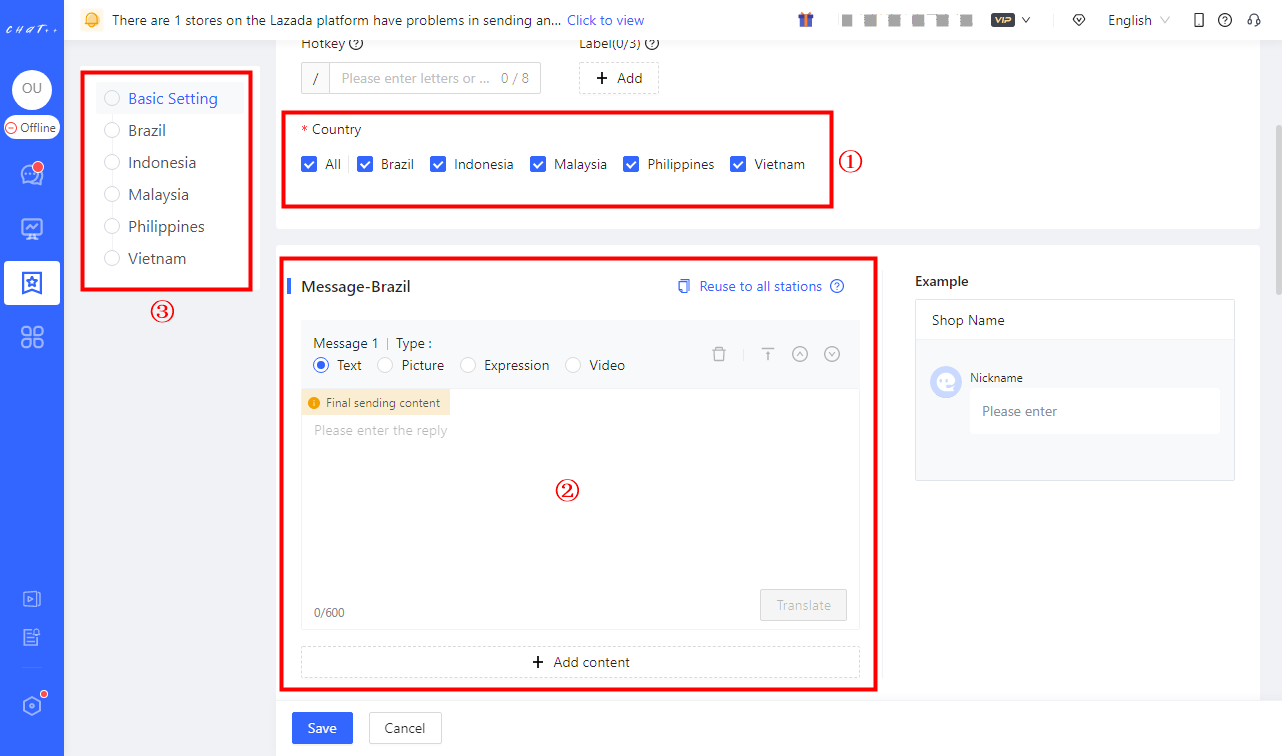
Figure 12
The shortcuts support sending multiple types messages (text/expression/picture/video) (red box ① in Figure 13 below).
Click "Add content" (red box ② in figure 13 below) to add multiple messages of different types, up to 4 messages in one round.
To facilitate the quick creation process, you can copy the templates of the first site to all other sites with just one click (click the red box ③ in figure 13). When copying, you can choose whether to translate it into the language of the corresponding site (red box in figure 14 below).
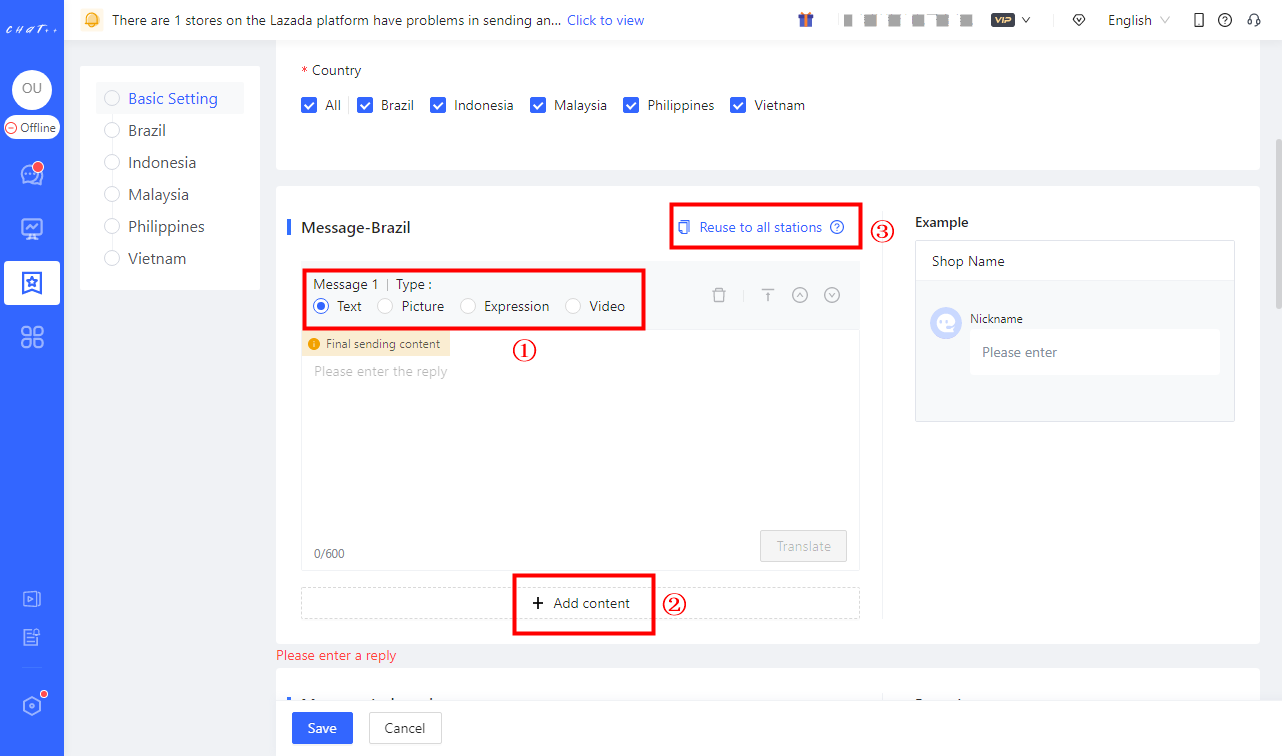
Figure 13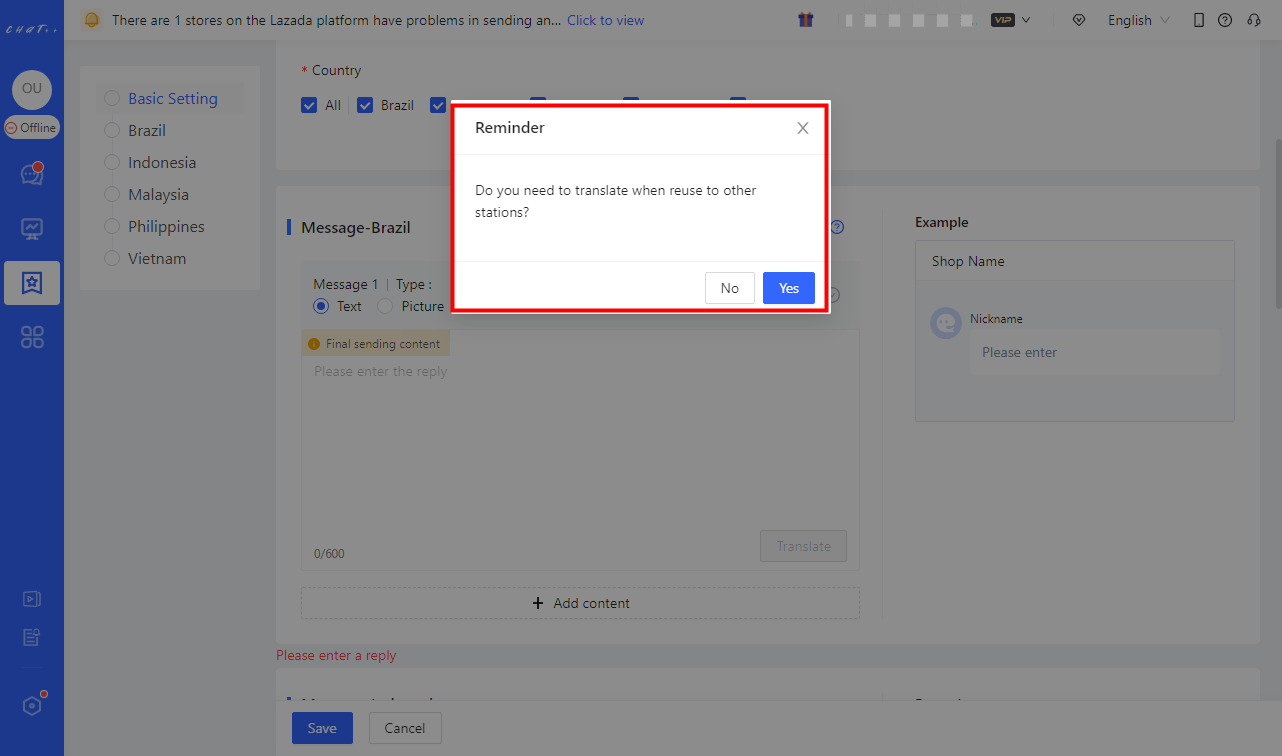
Figure 14
Long press on "≡" (red box in Figure 15) and drag it to adjust the order of shortcuts. It can move commonly used shortcuts to the front, making it easier to find and use them quickly.
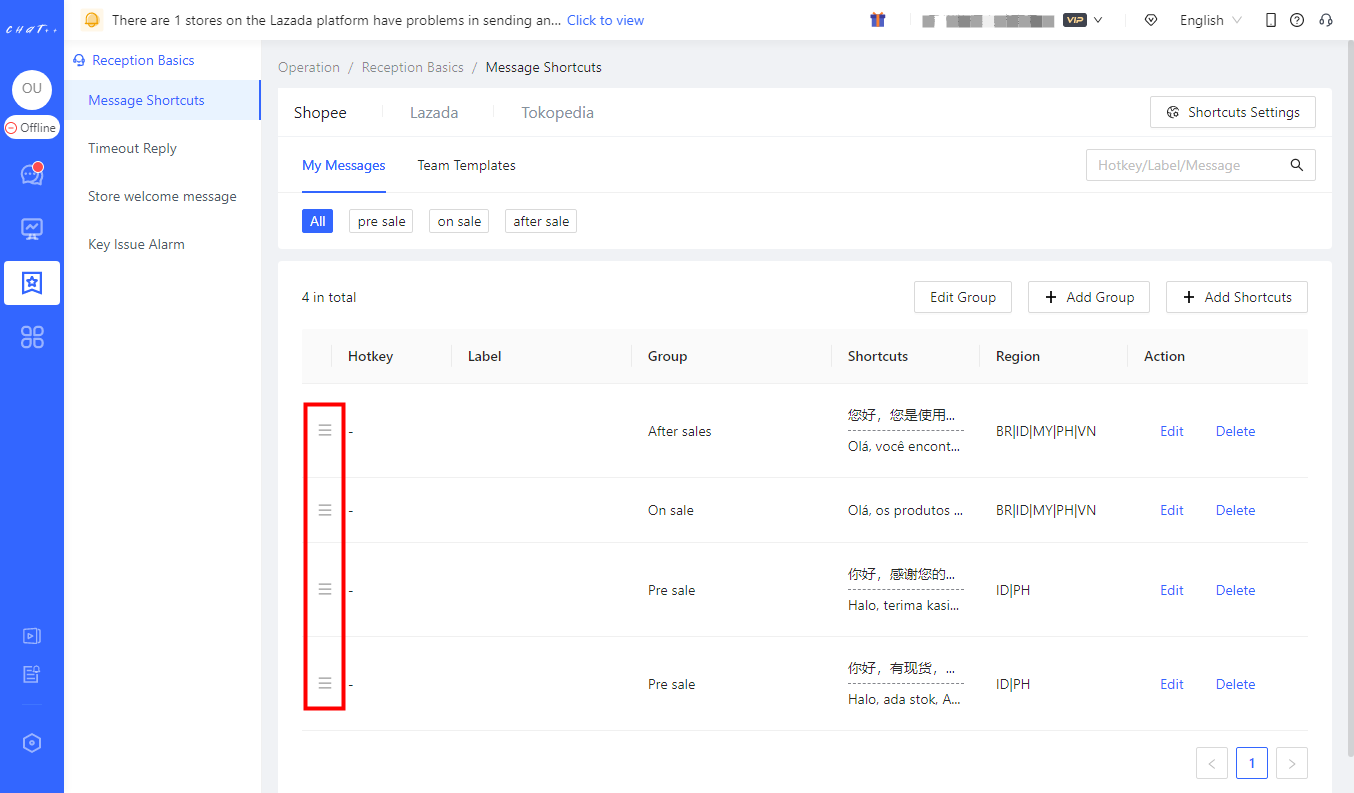
Figure 15
How to Use "Message Shortcuts"
There are four ways to use message shortcuts:
- Click the "Shortcuts" button (red box① in Figure 16) in the conversation editing box, and quickly find and send shortcuts with templates/groups (red box② in Figure 16) or using the search function (red box③ in Figure 16).
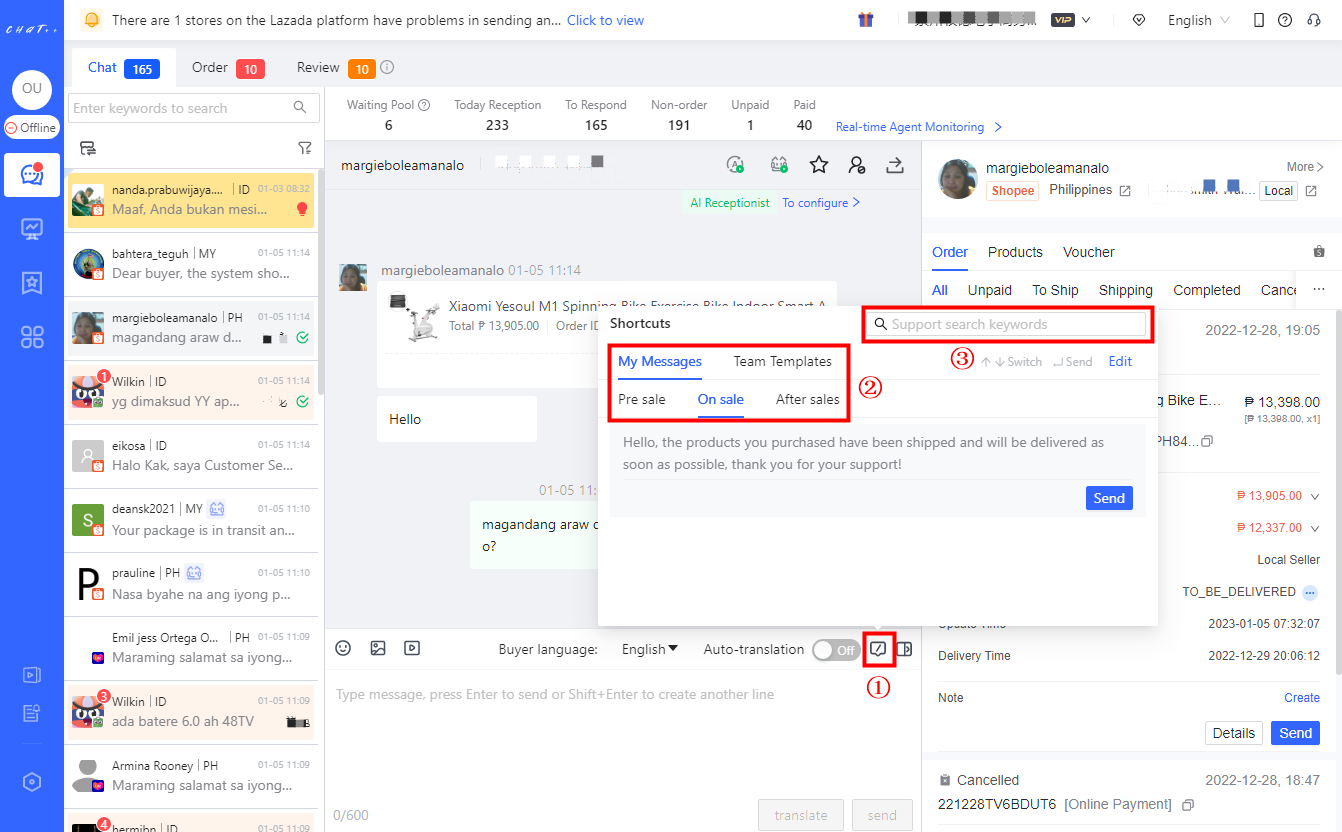
Figure 16
- Enter "Hotkey" in the conversation editing box to quickly find the specified shortcut and send it.
- Enter "Label" in the conversation editing box to quickly find all shortcuts with that label, select the desired shortcut, and send it.
- Enter "Keyword" in the conversation editing box, and all shortcuts containing that keyword will be automatically displayed. Select the desired shortcut and send it (Figure 17). This feature can be enabled/disabled in the "Shortcuts Settings" (red box in Figure 18).
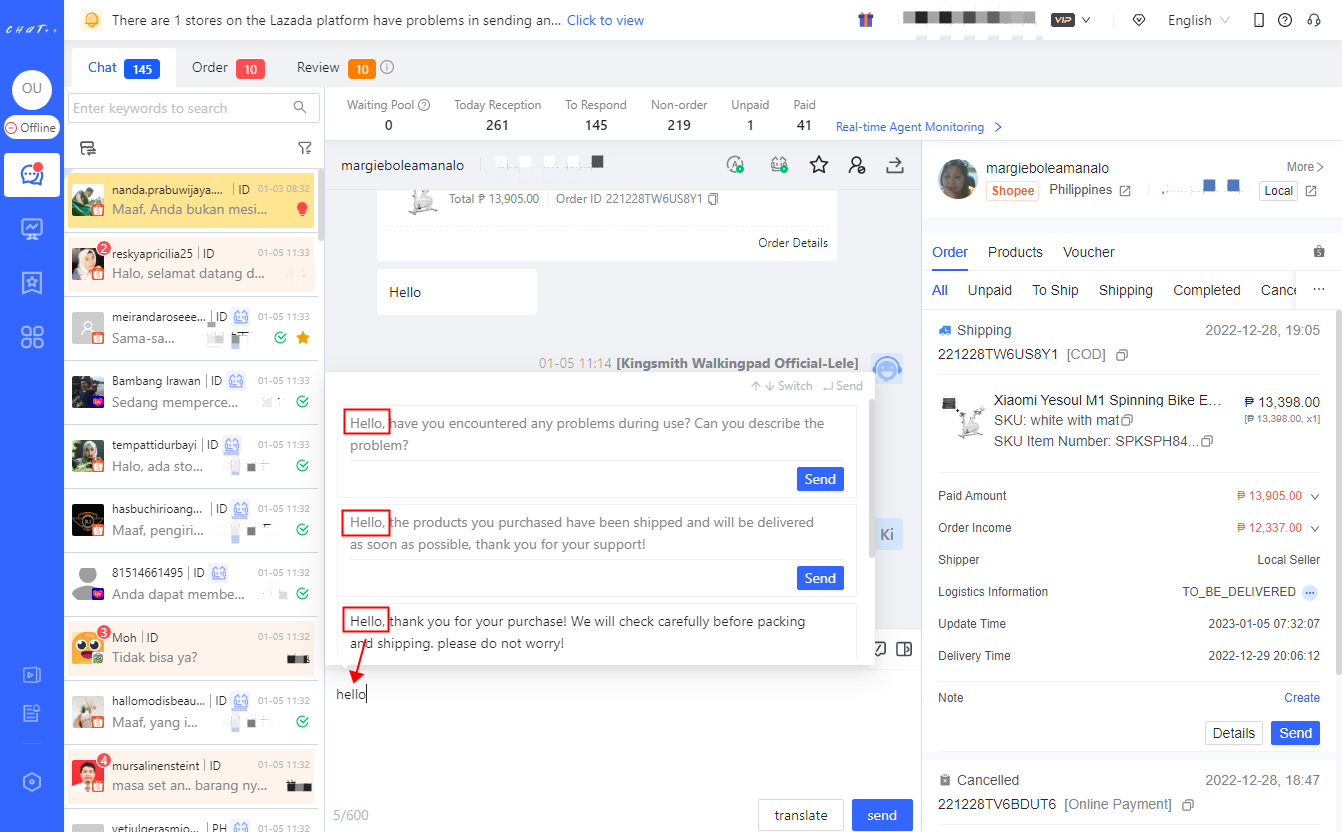
Figure 17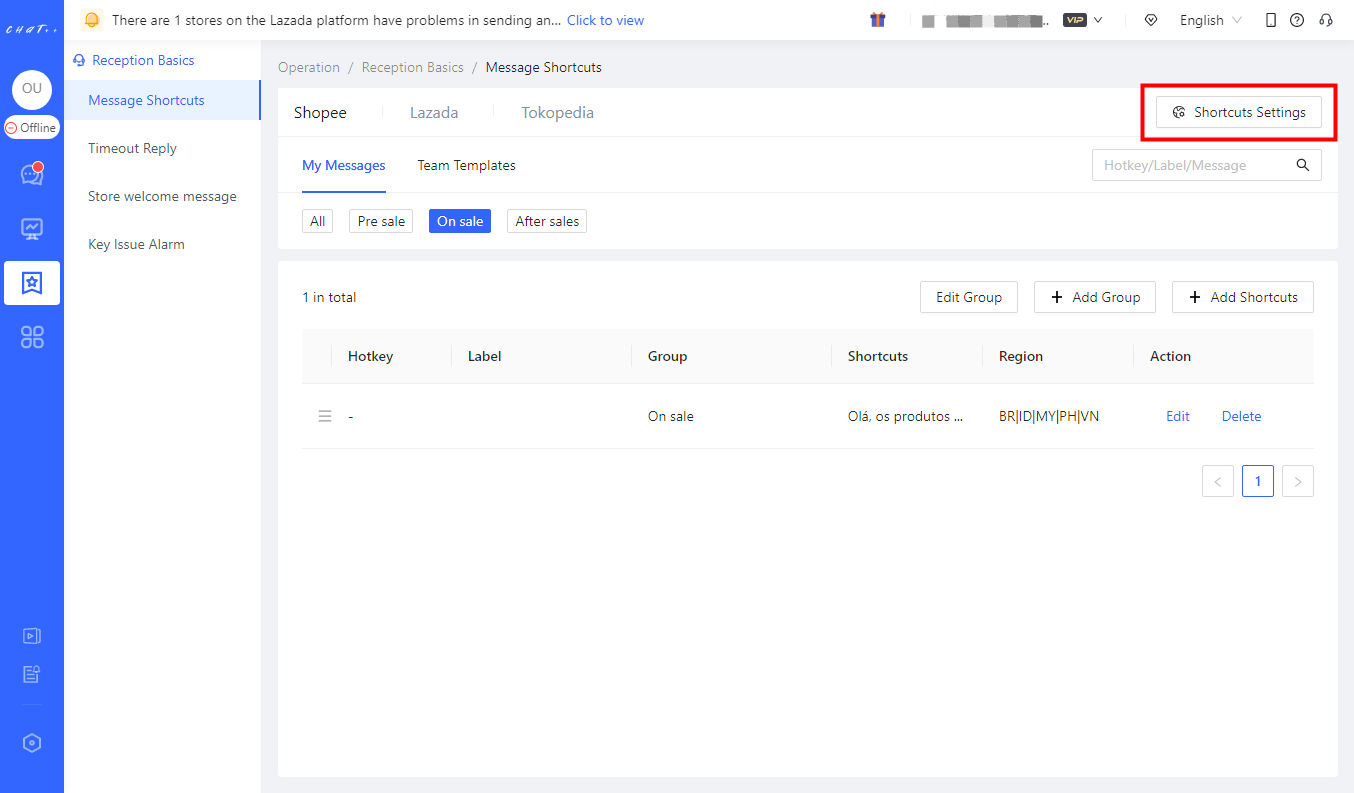
Figure 18
Attention
1、The message shortcuts can be customized differently for marketplaces, currently supporting Shopee, Lazada, Tokopedia, and TikTok, so shortcuts need to be added separately on each marketplaces.
Blacklist
💡 Buyers engaged in behaviors such as "sending spam advertisements/fraudulent information, or blacklisting stores" can be added to Blacklist. Once blacklisted, any messages from them will be no longer received, which reduces interference in agent work to enhance efficiency
🚫 Blacklisting Method
- "Automatic Blacklisting": If a buyer engages in behaviors such as "sending vouchers, blacklisting the store," the system can automatically blacklist them based on your specific requirements.
- "Manual Blacklisting": Agent can manually blacklist buyers who send spam advertisements, fraudulent information, and other inappropriate messages during the reception.
Permissions required for configuration
- The details of blacklist can be viewed and its settings can be modified for accounts with "Customer" permission .
- The details of blacklist cannot be viewed and its settings cannot be modified for accounts without "Customer" permission. However, buyers can be added or removed from the blacklist on the conversation page.
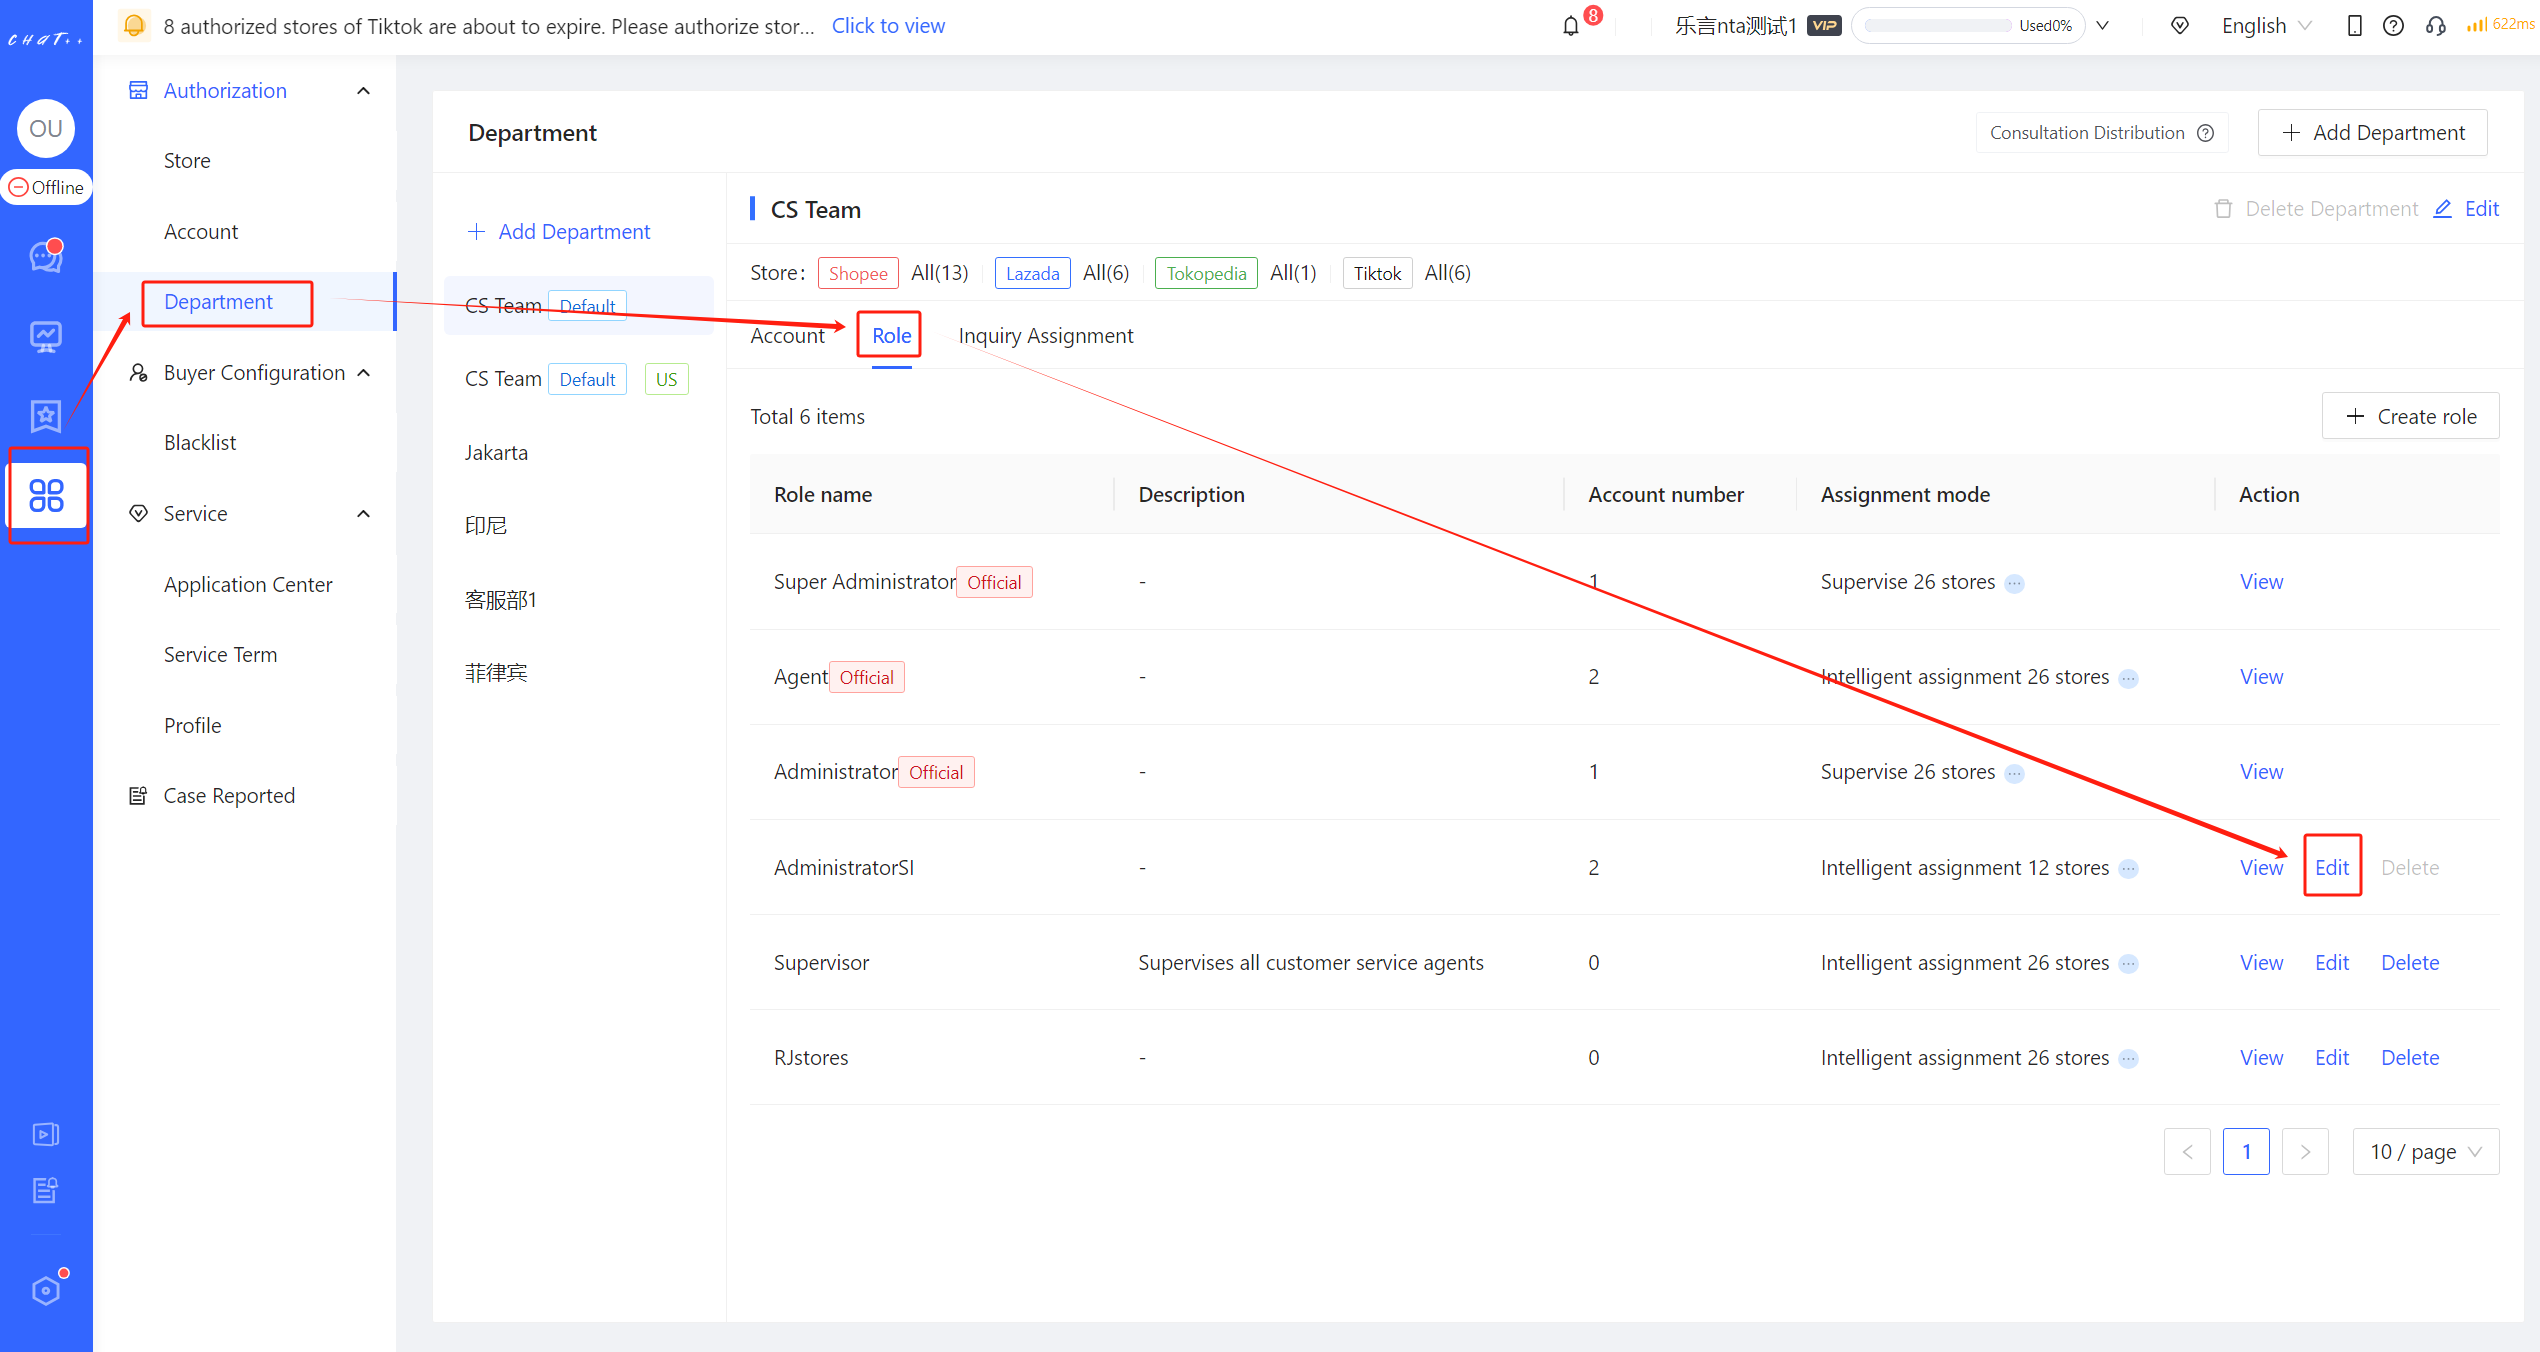
Figure 1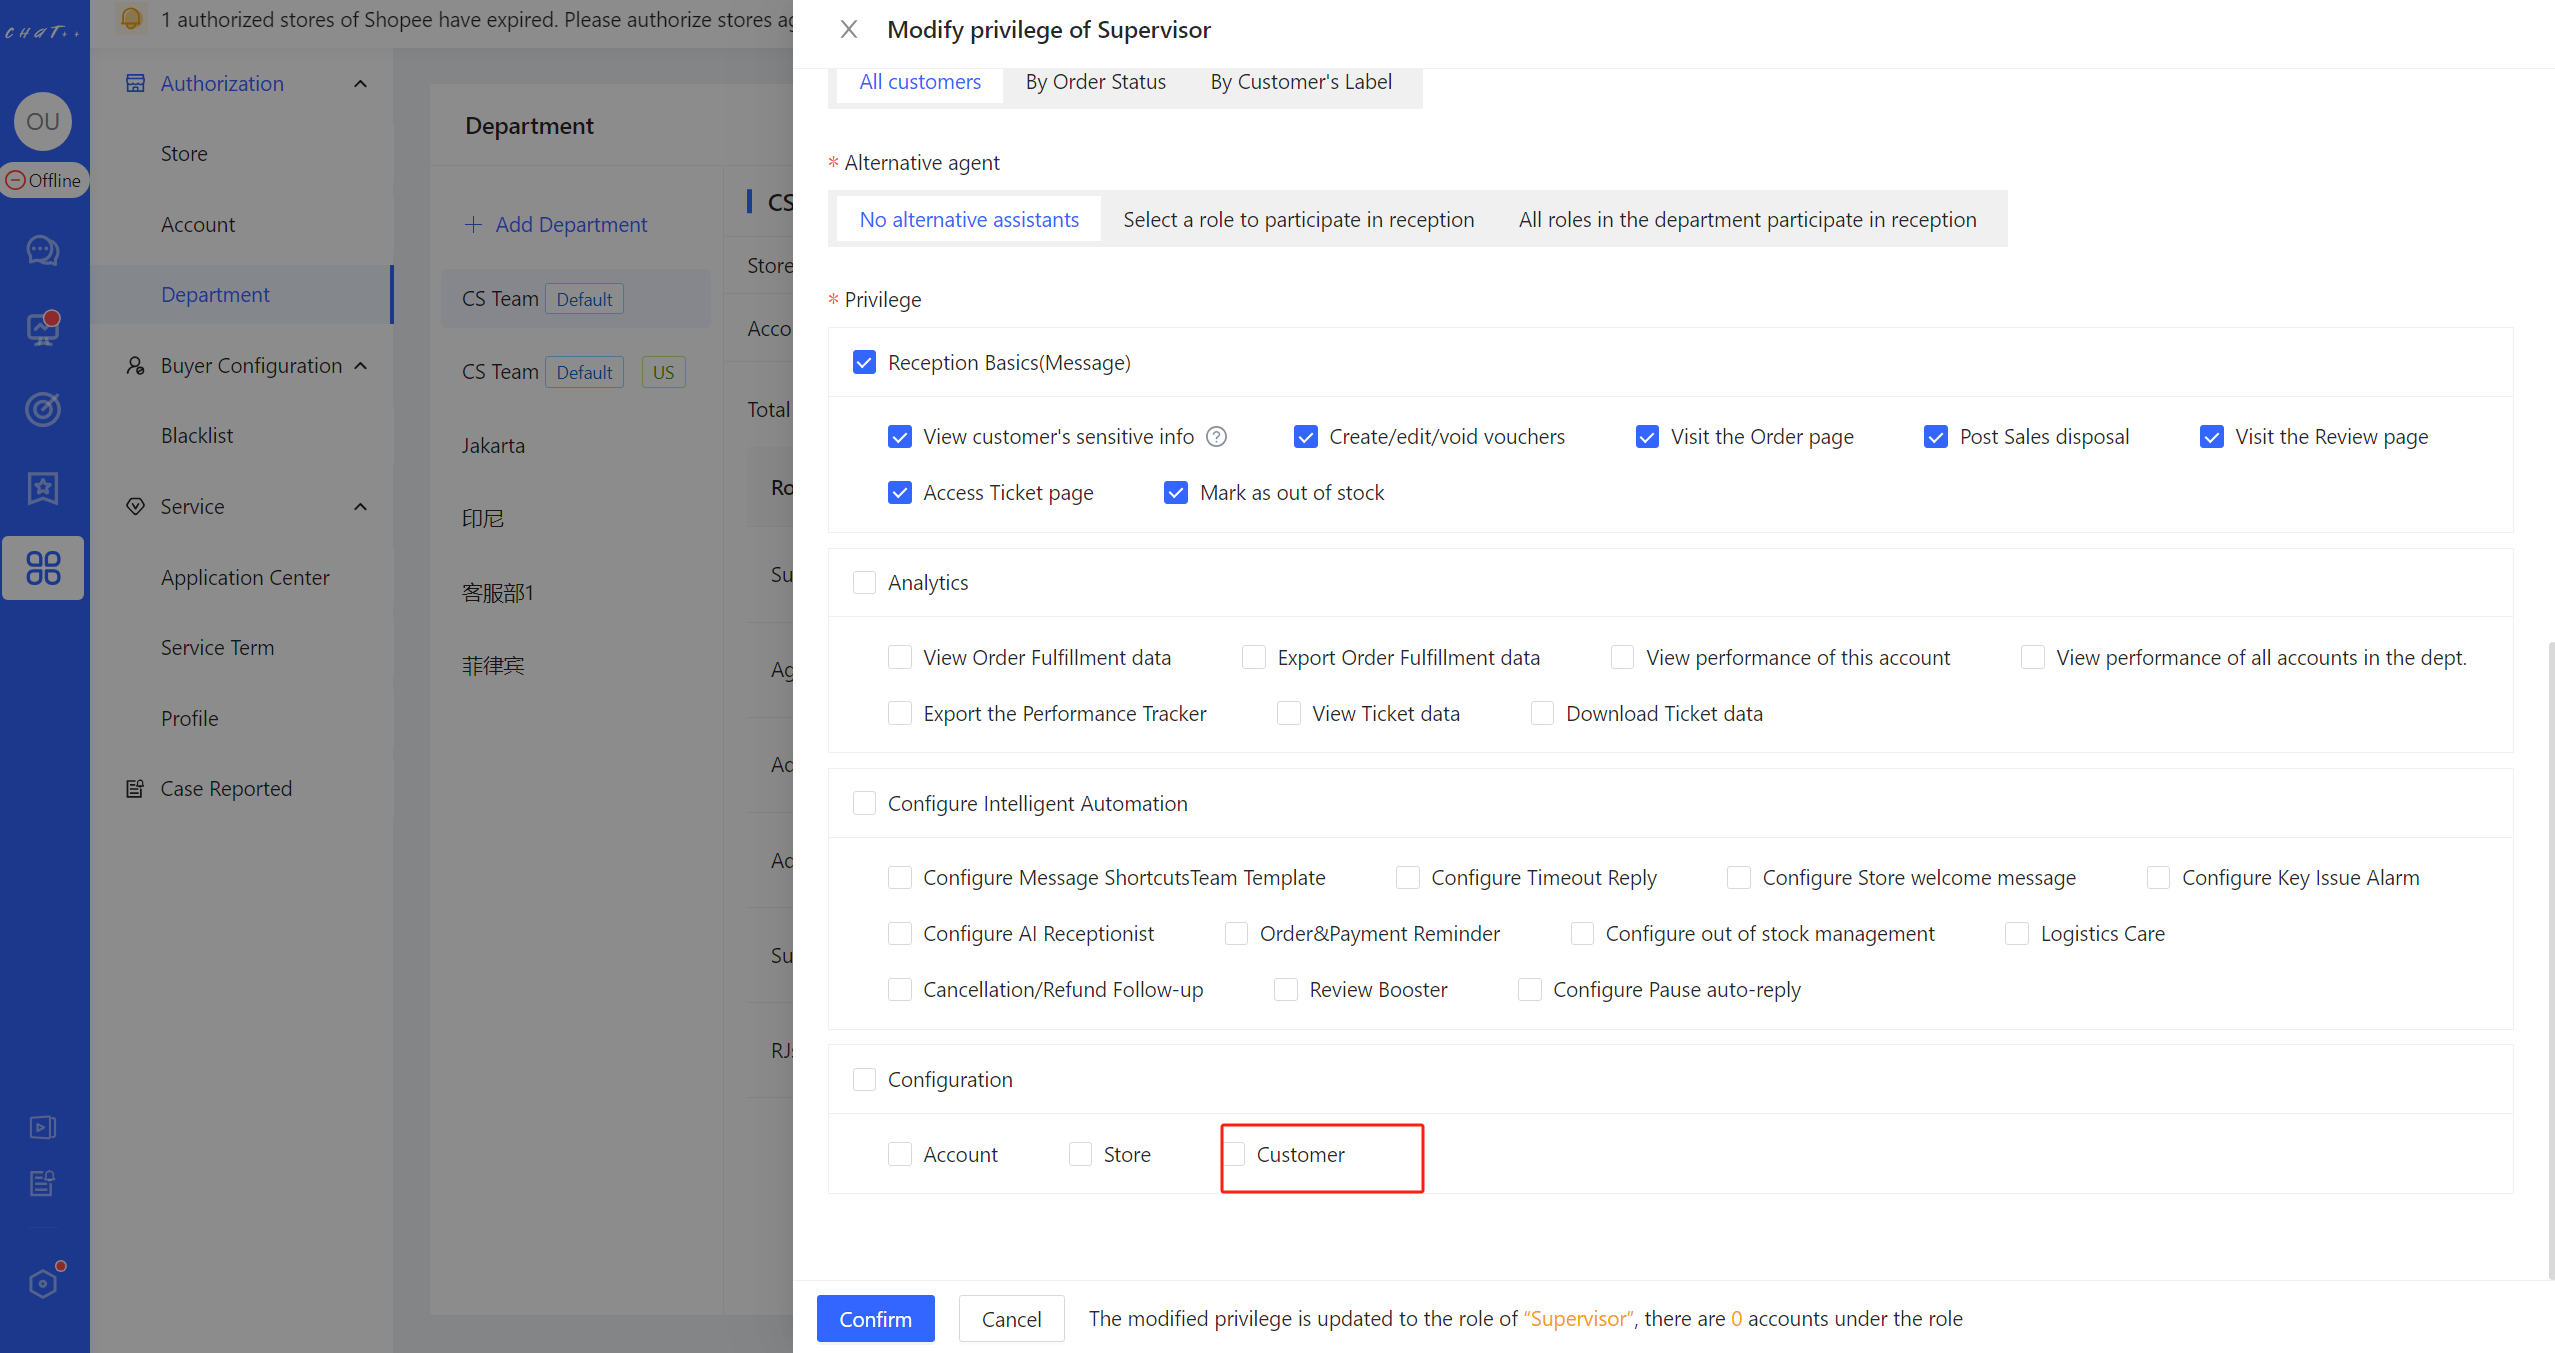
Figure 2
How to add a buyer to the blacklist?
Automatic Blacklisting
Click "Configuration -> Buyer Configuration -> Blacklist -> Settings" (as shown in the figure below) to enter the settings page and configure the rules of automatic blacklisting.
- Scope:All stores \ current store
- Reason:Advertising harrassment \ AdOther,or you can add reason
- The following buyers are automatically blacklisted:Buyers send ads or buyers block shops
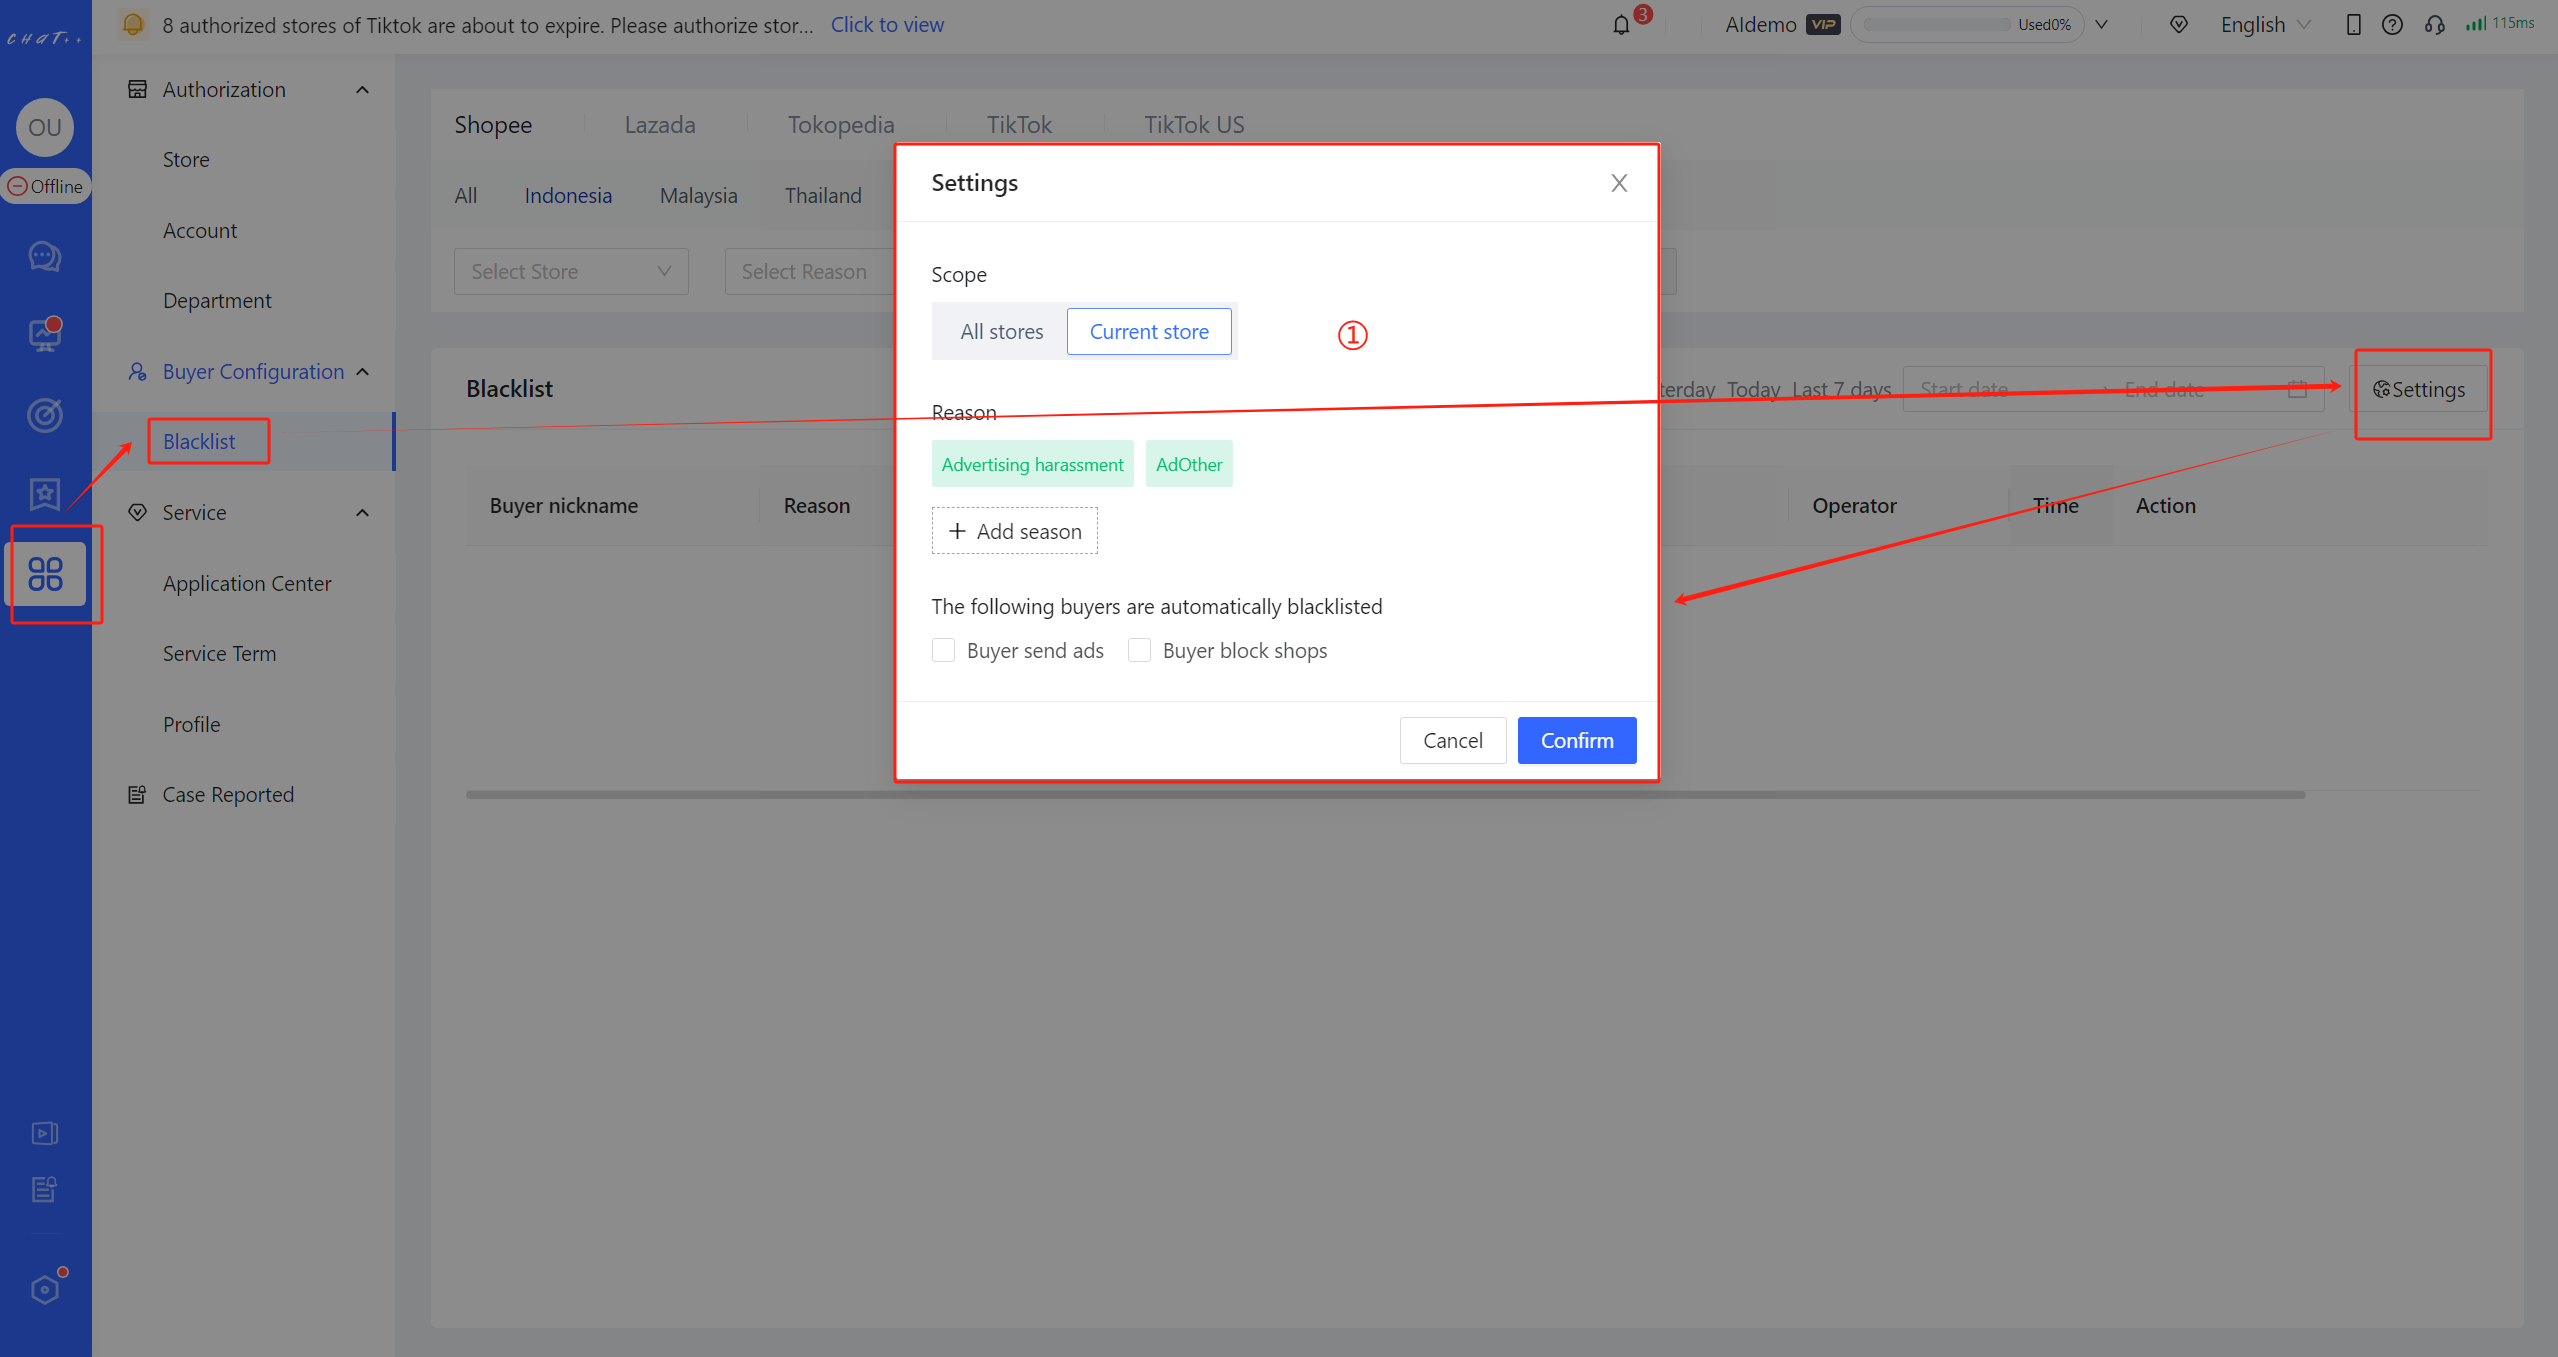
Figure 3
Manual Blacklisting
- Blacklisting method 1: In the conversation list, find (or search for) the buyer you want to block, right-clickand select "Block" (red box ① in the figure below)
- Blacklisting method 2: At the reception window, click on the blacklist icon in the top right corner "Block" (red box ② in the figure below)
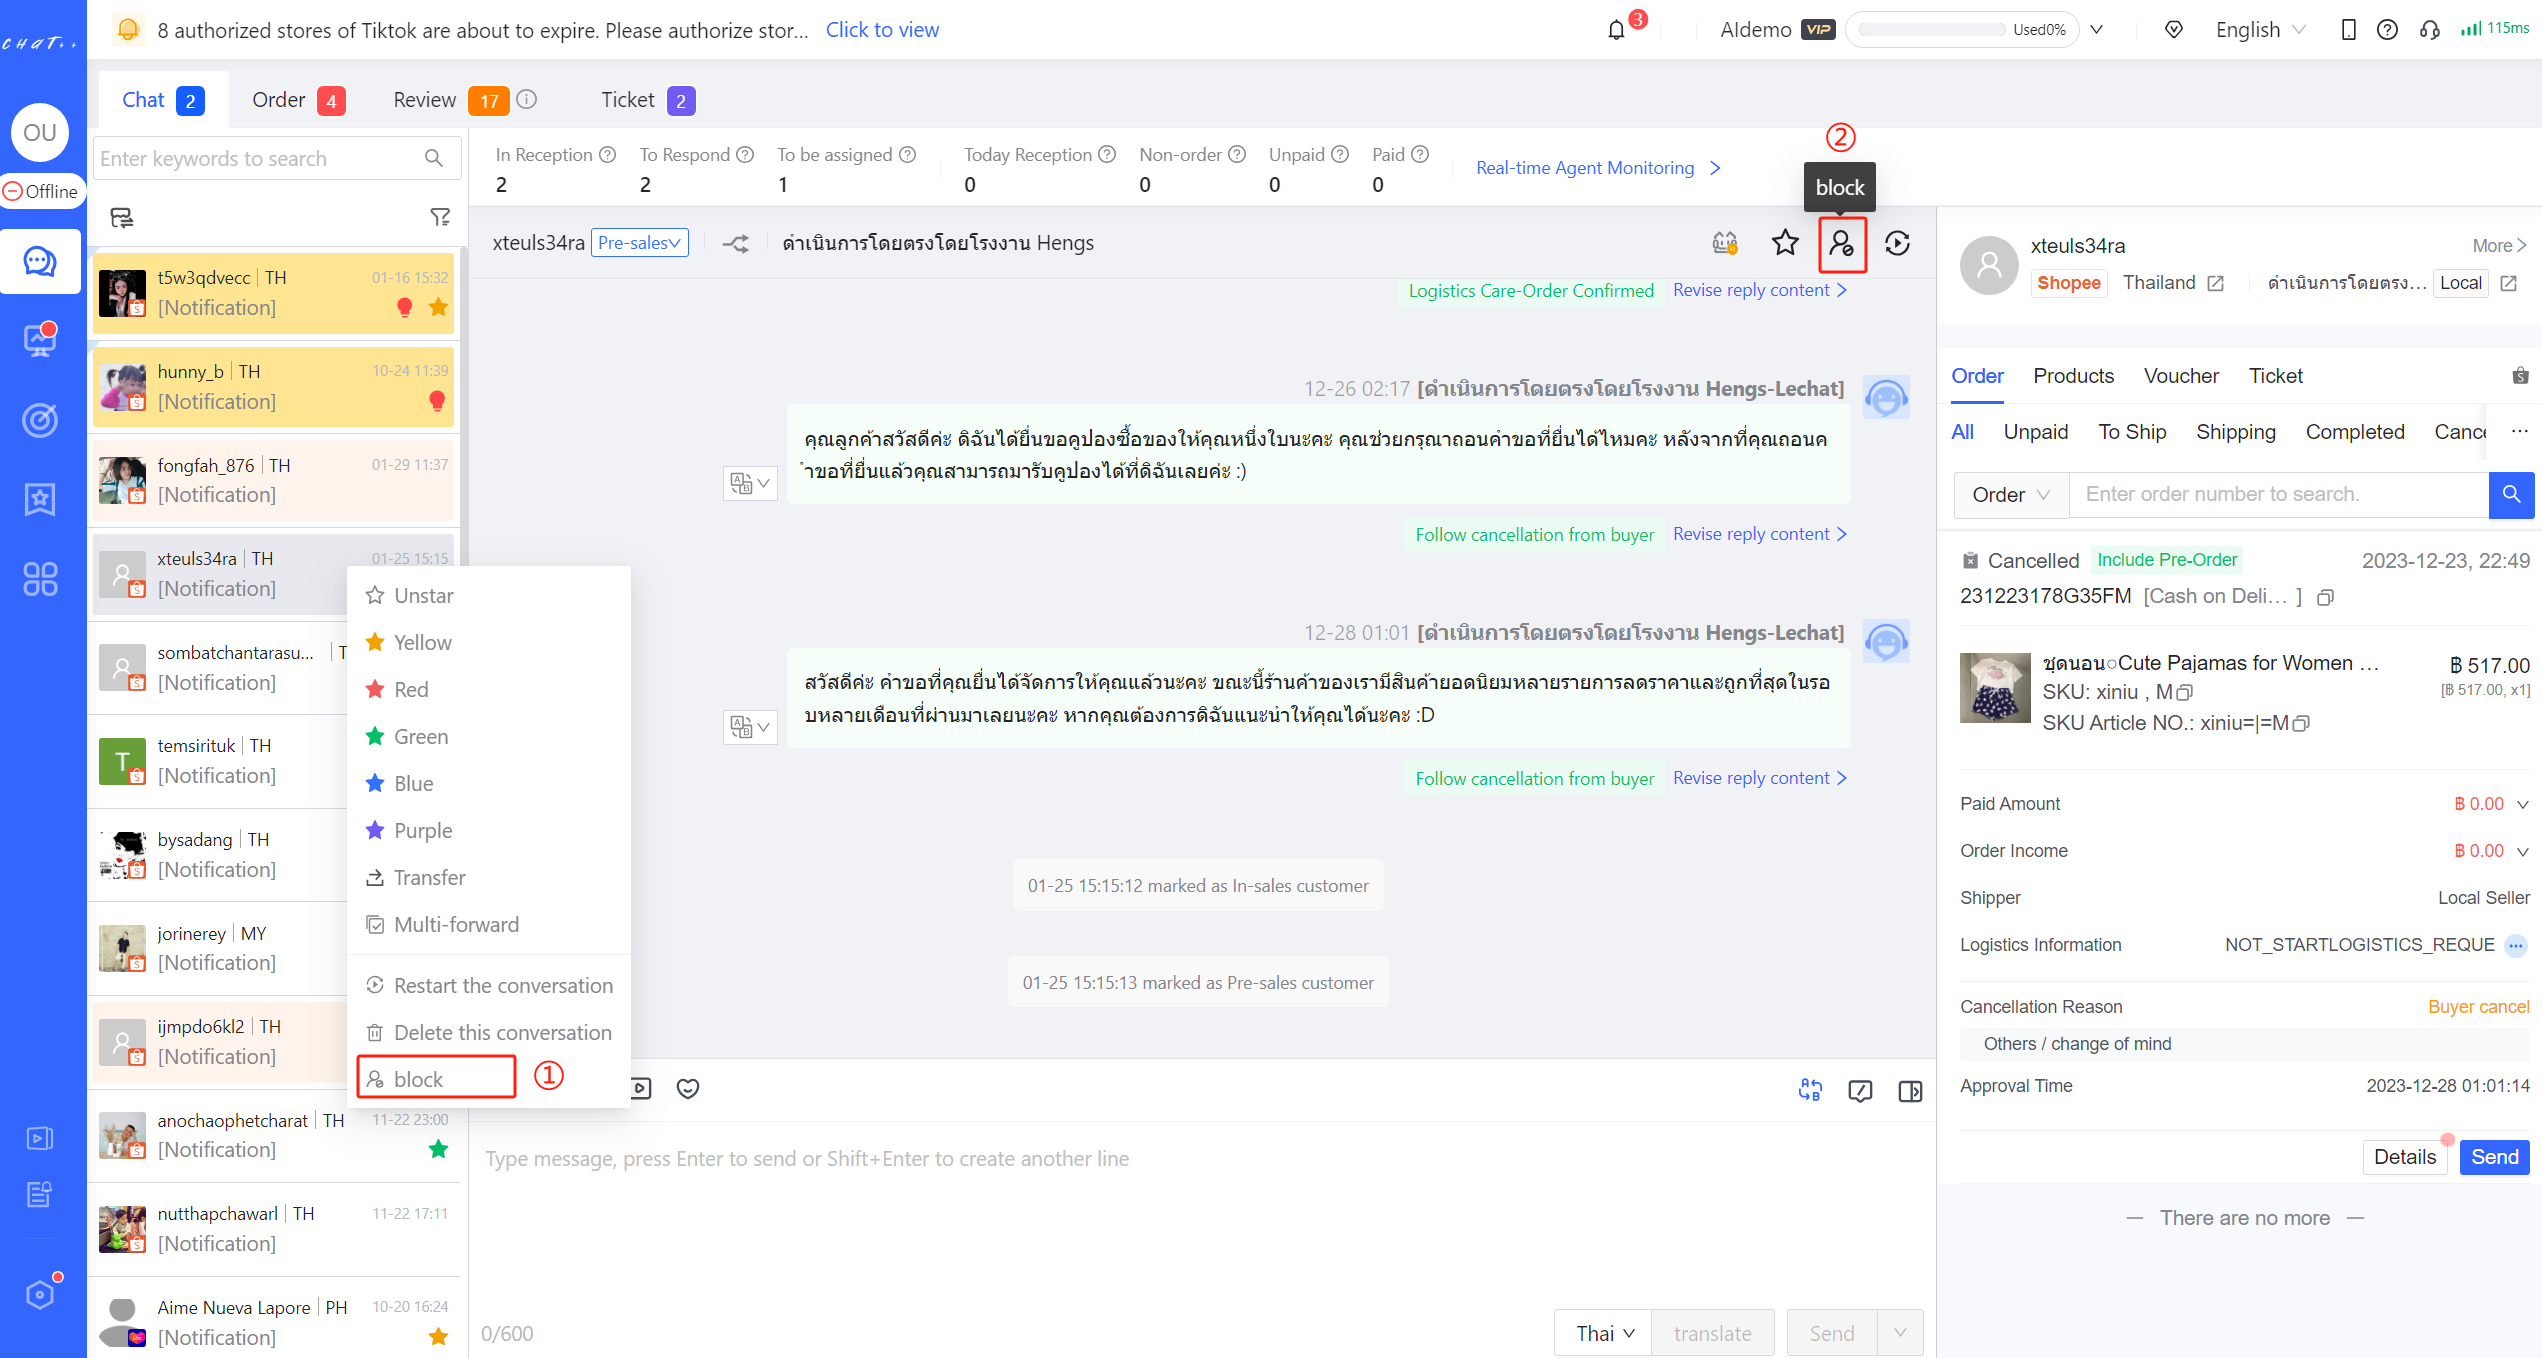
Figure 4
After clicking "Block," 👆 select "Scope" and "Reason" (shown the figure below)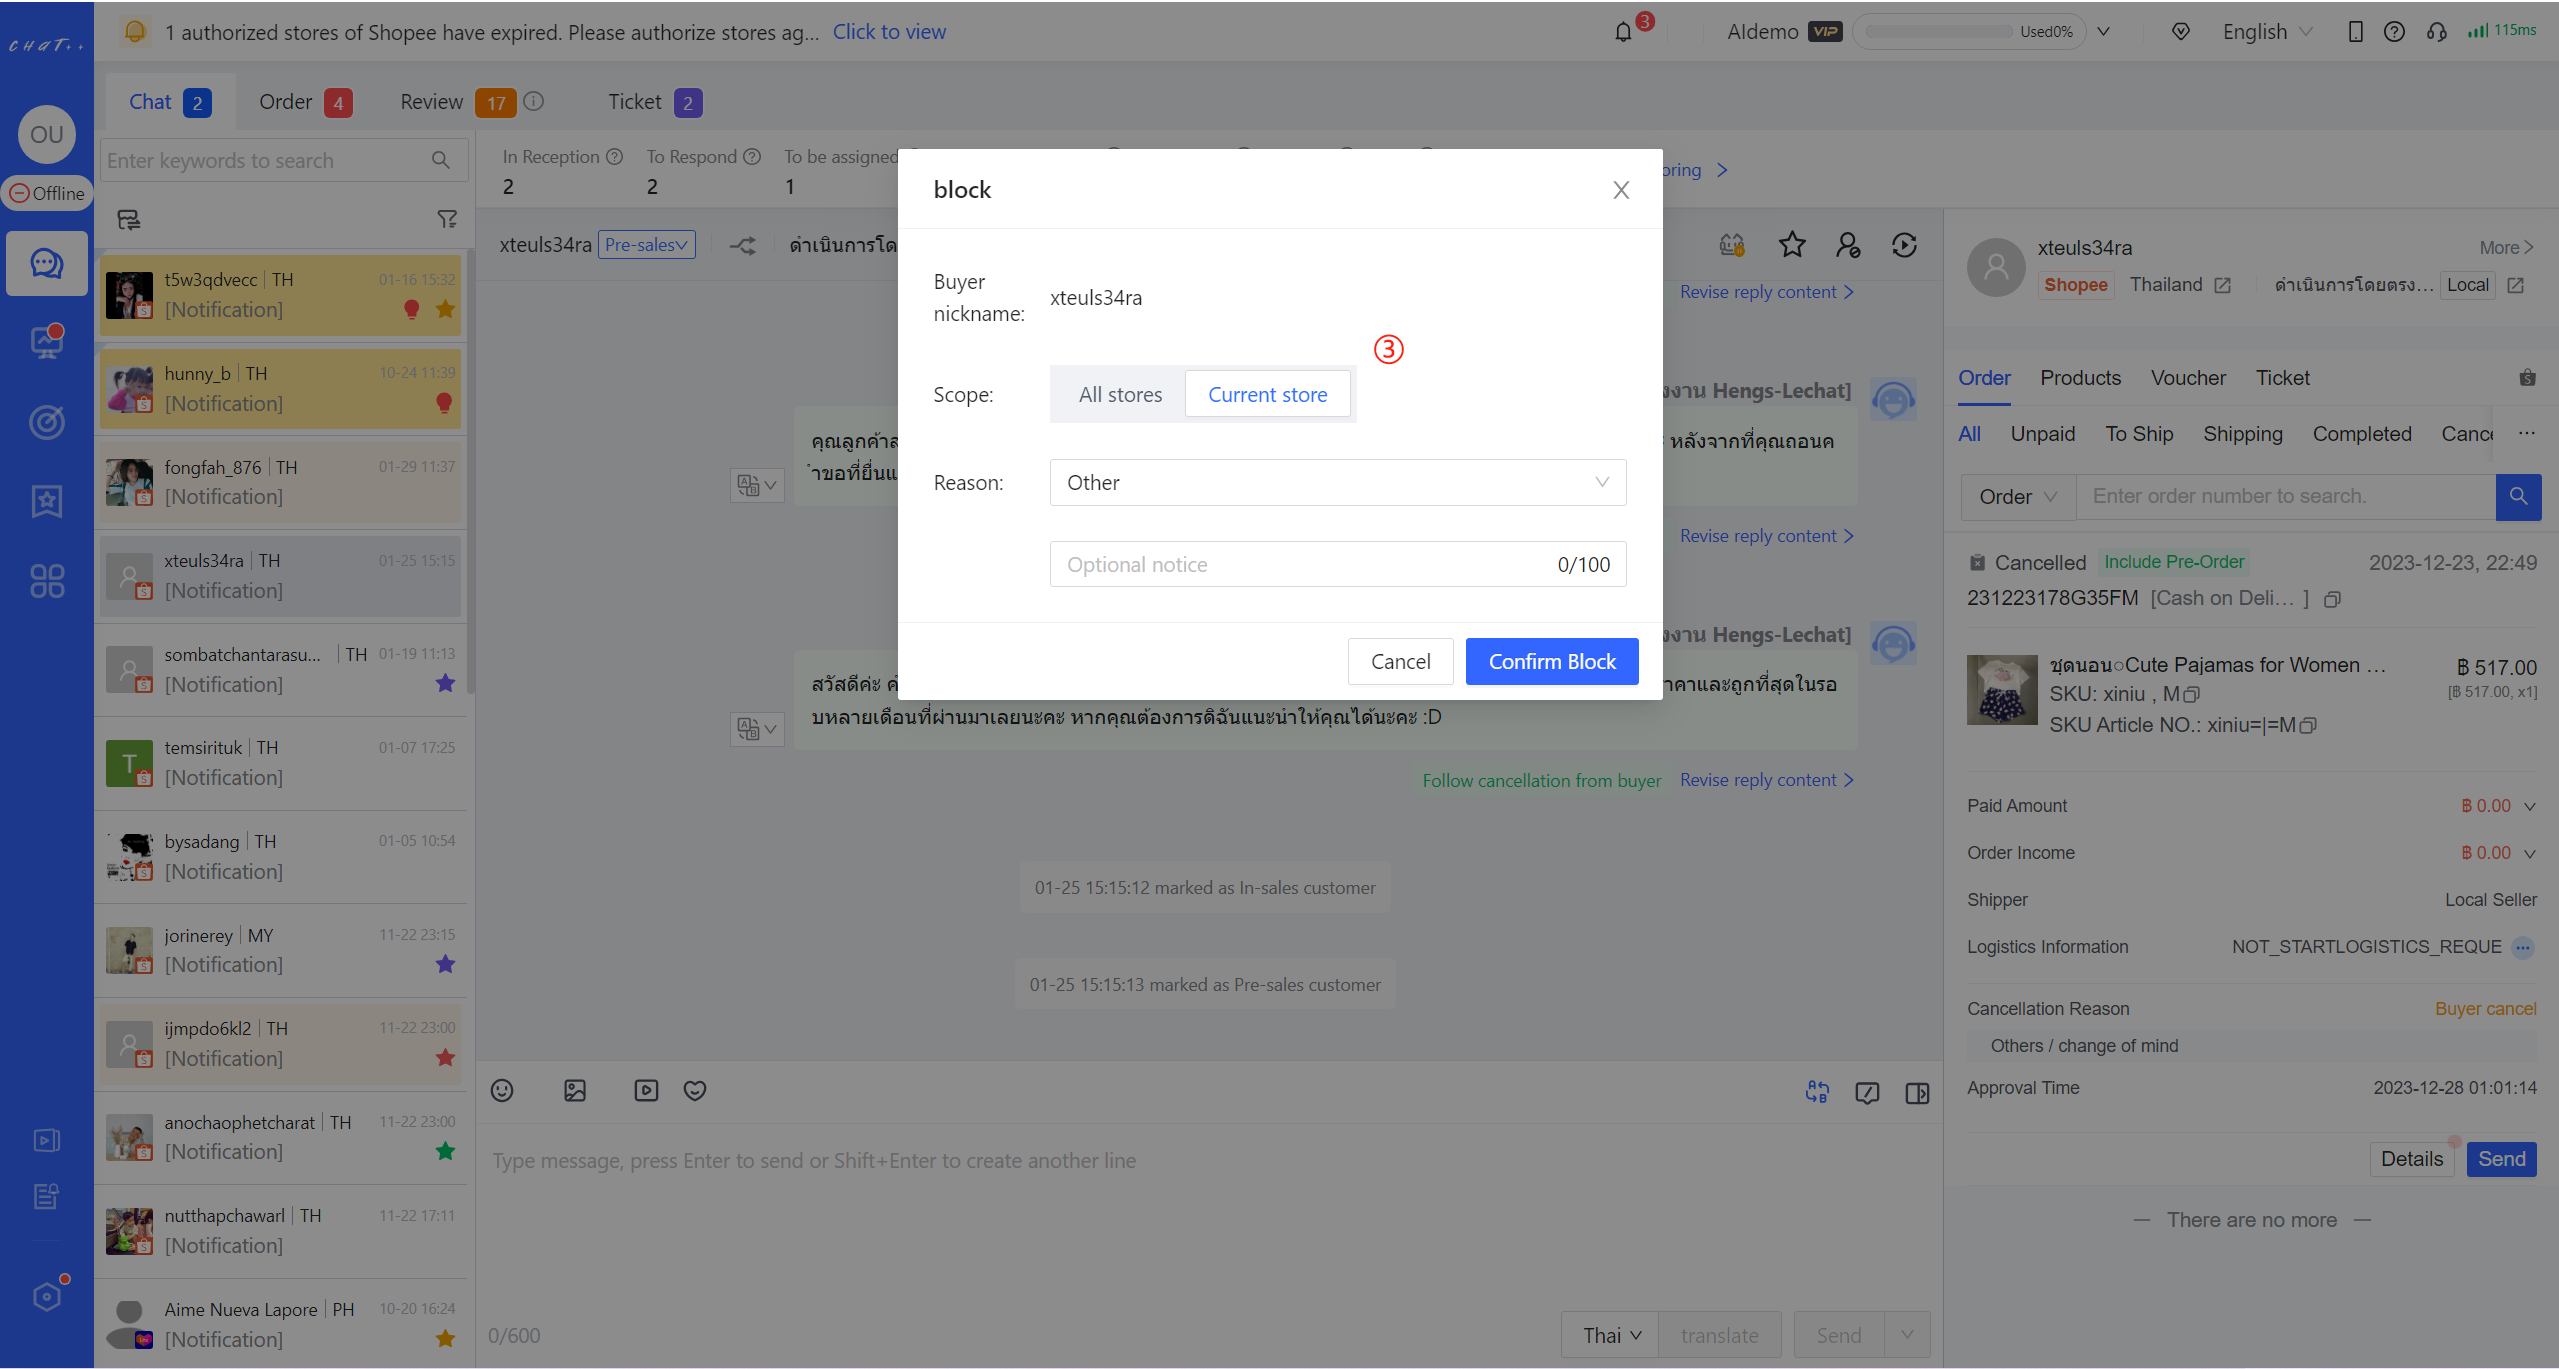
Figure 5
How to remove a buyer from the blacklist after mistakenly adding?
Operation in conversation page
- Removal method 1: In the conversationt list, find (or search for) the buyer you want to remove, right-click👆 and select "Cancel block" (red box ① in the figure below)
- Removal method 2: At the reception window, 👆 tap the blacklist icon in the upper right corner and select "Cancel block" (red box ② in the figure below)
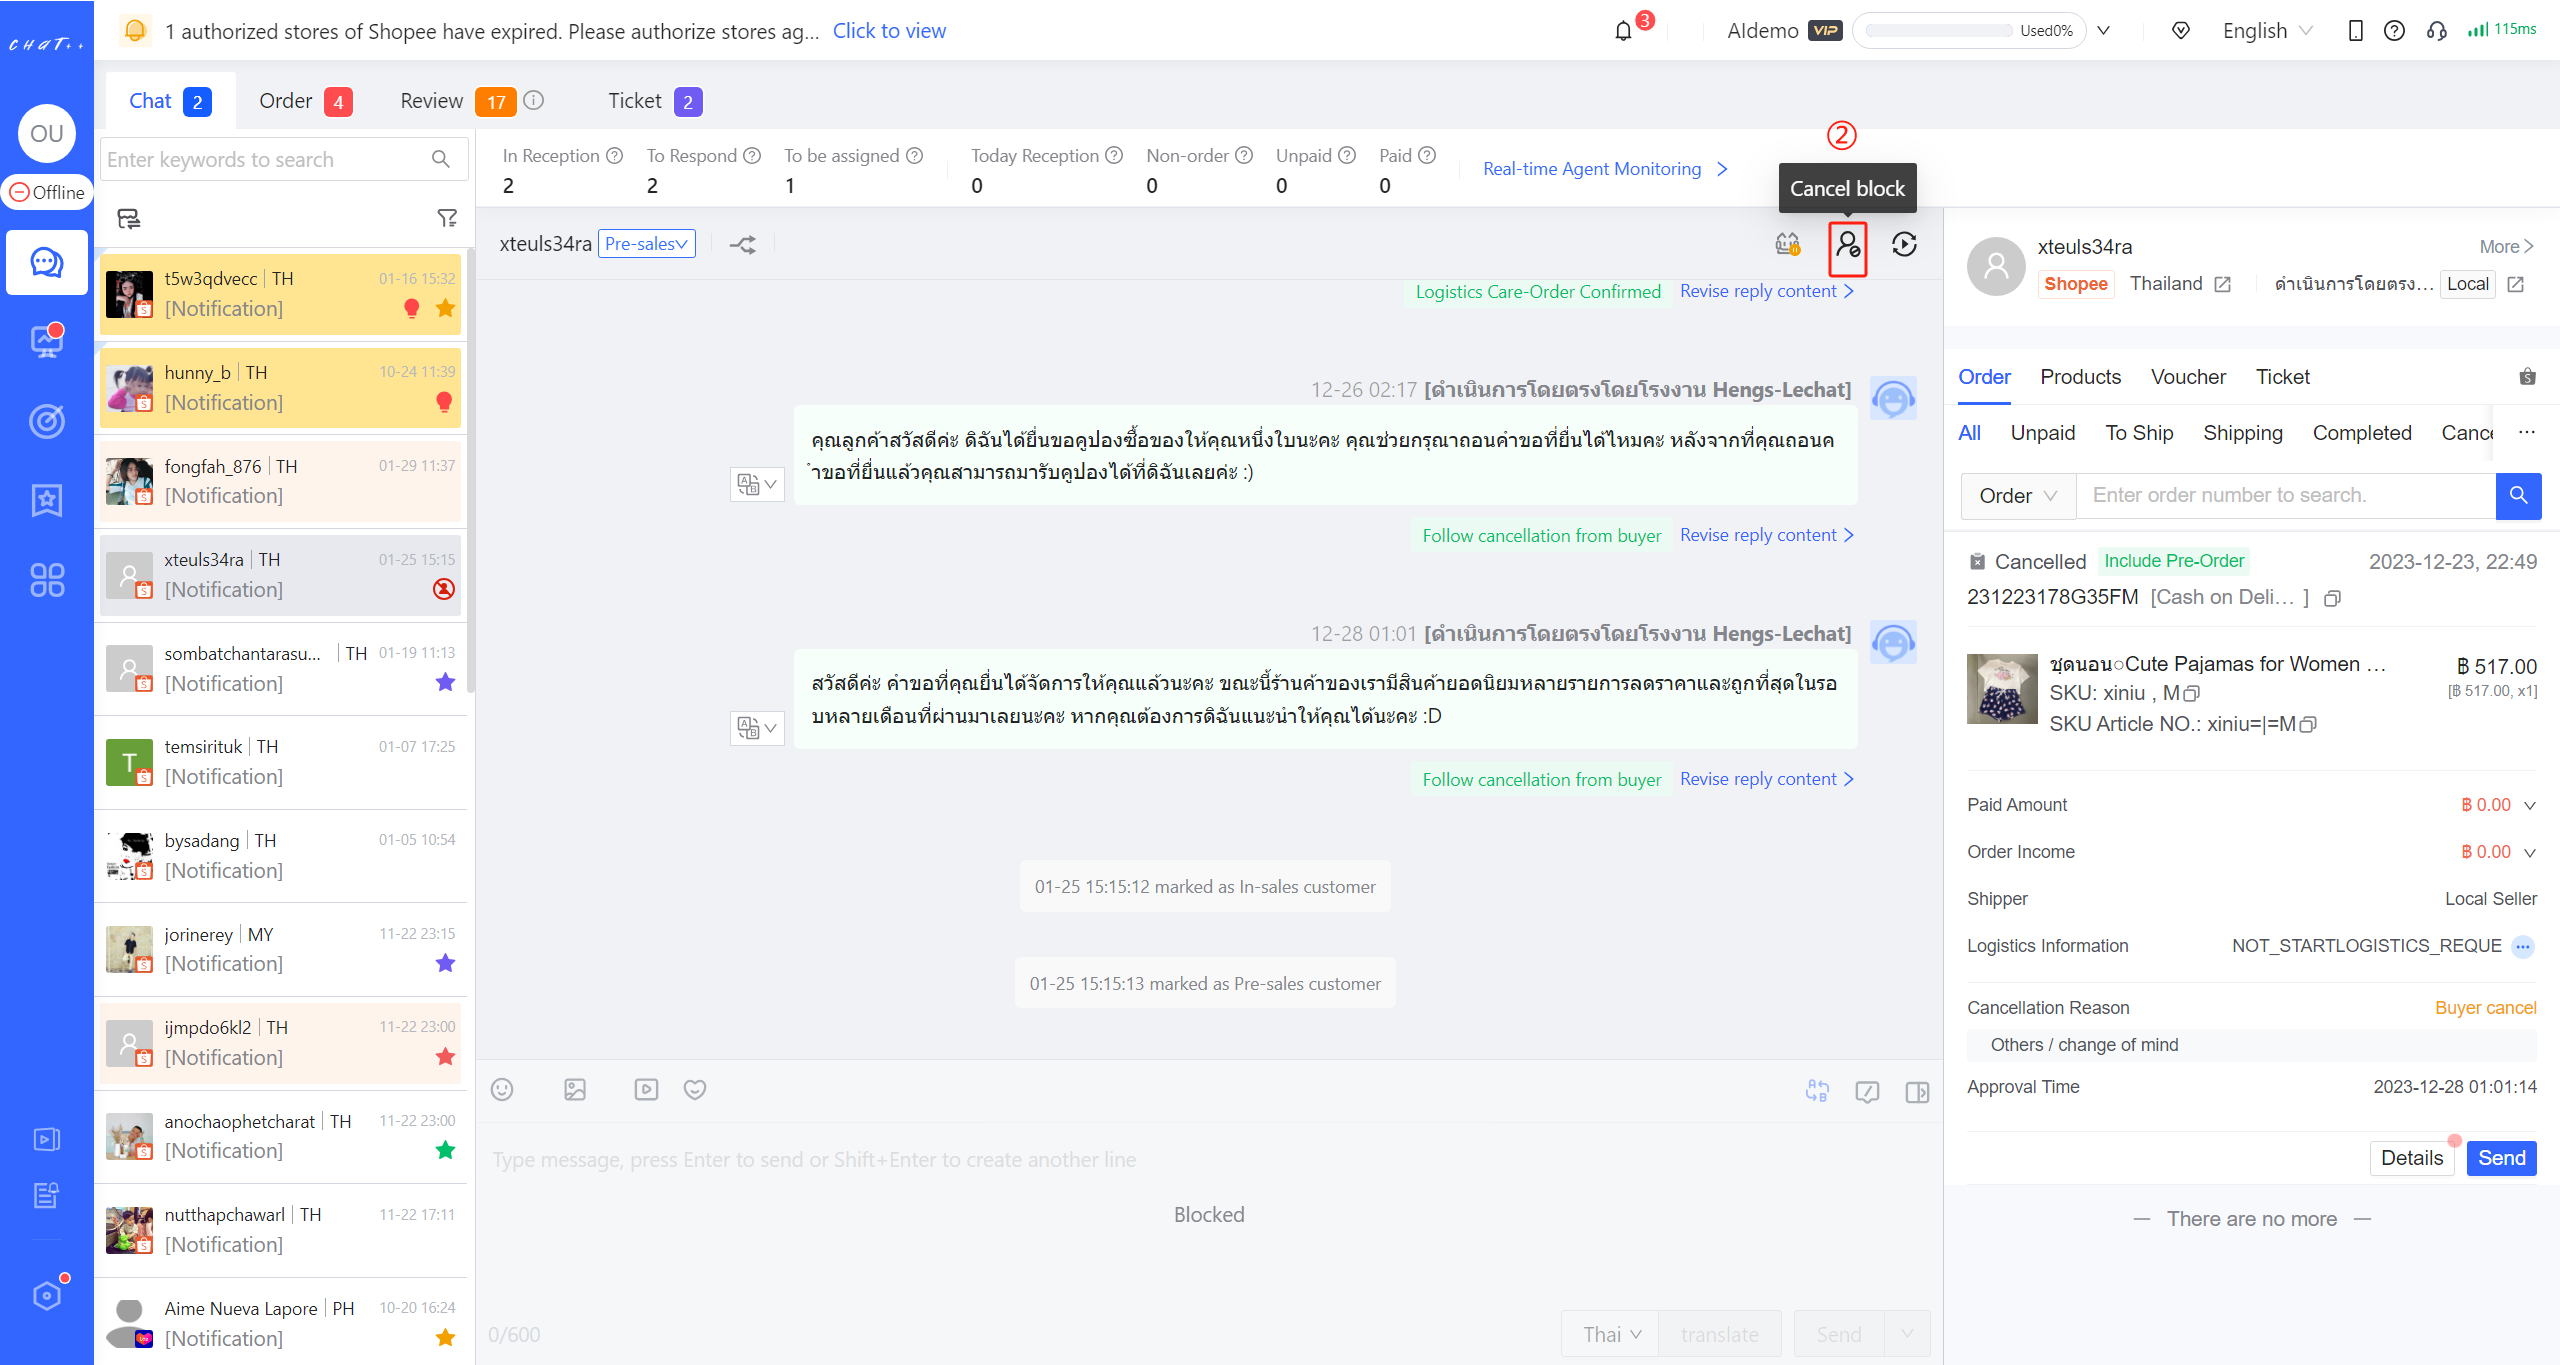
Figure 6
Operation in the Configuration
Click "Configuration → Buyer Configuration → Blacklist → Cancel block" (in the figure below) to remove the blacklisted buyers.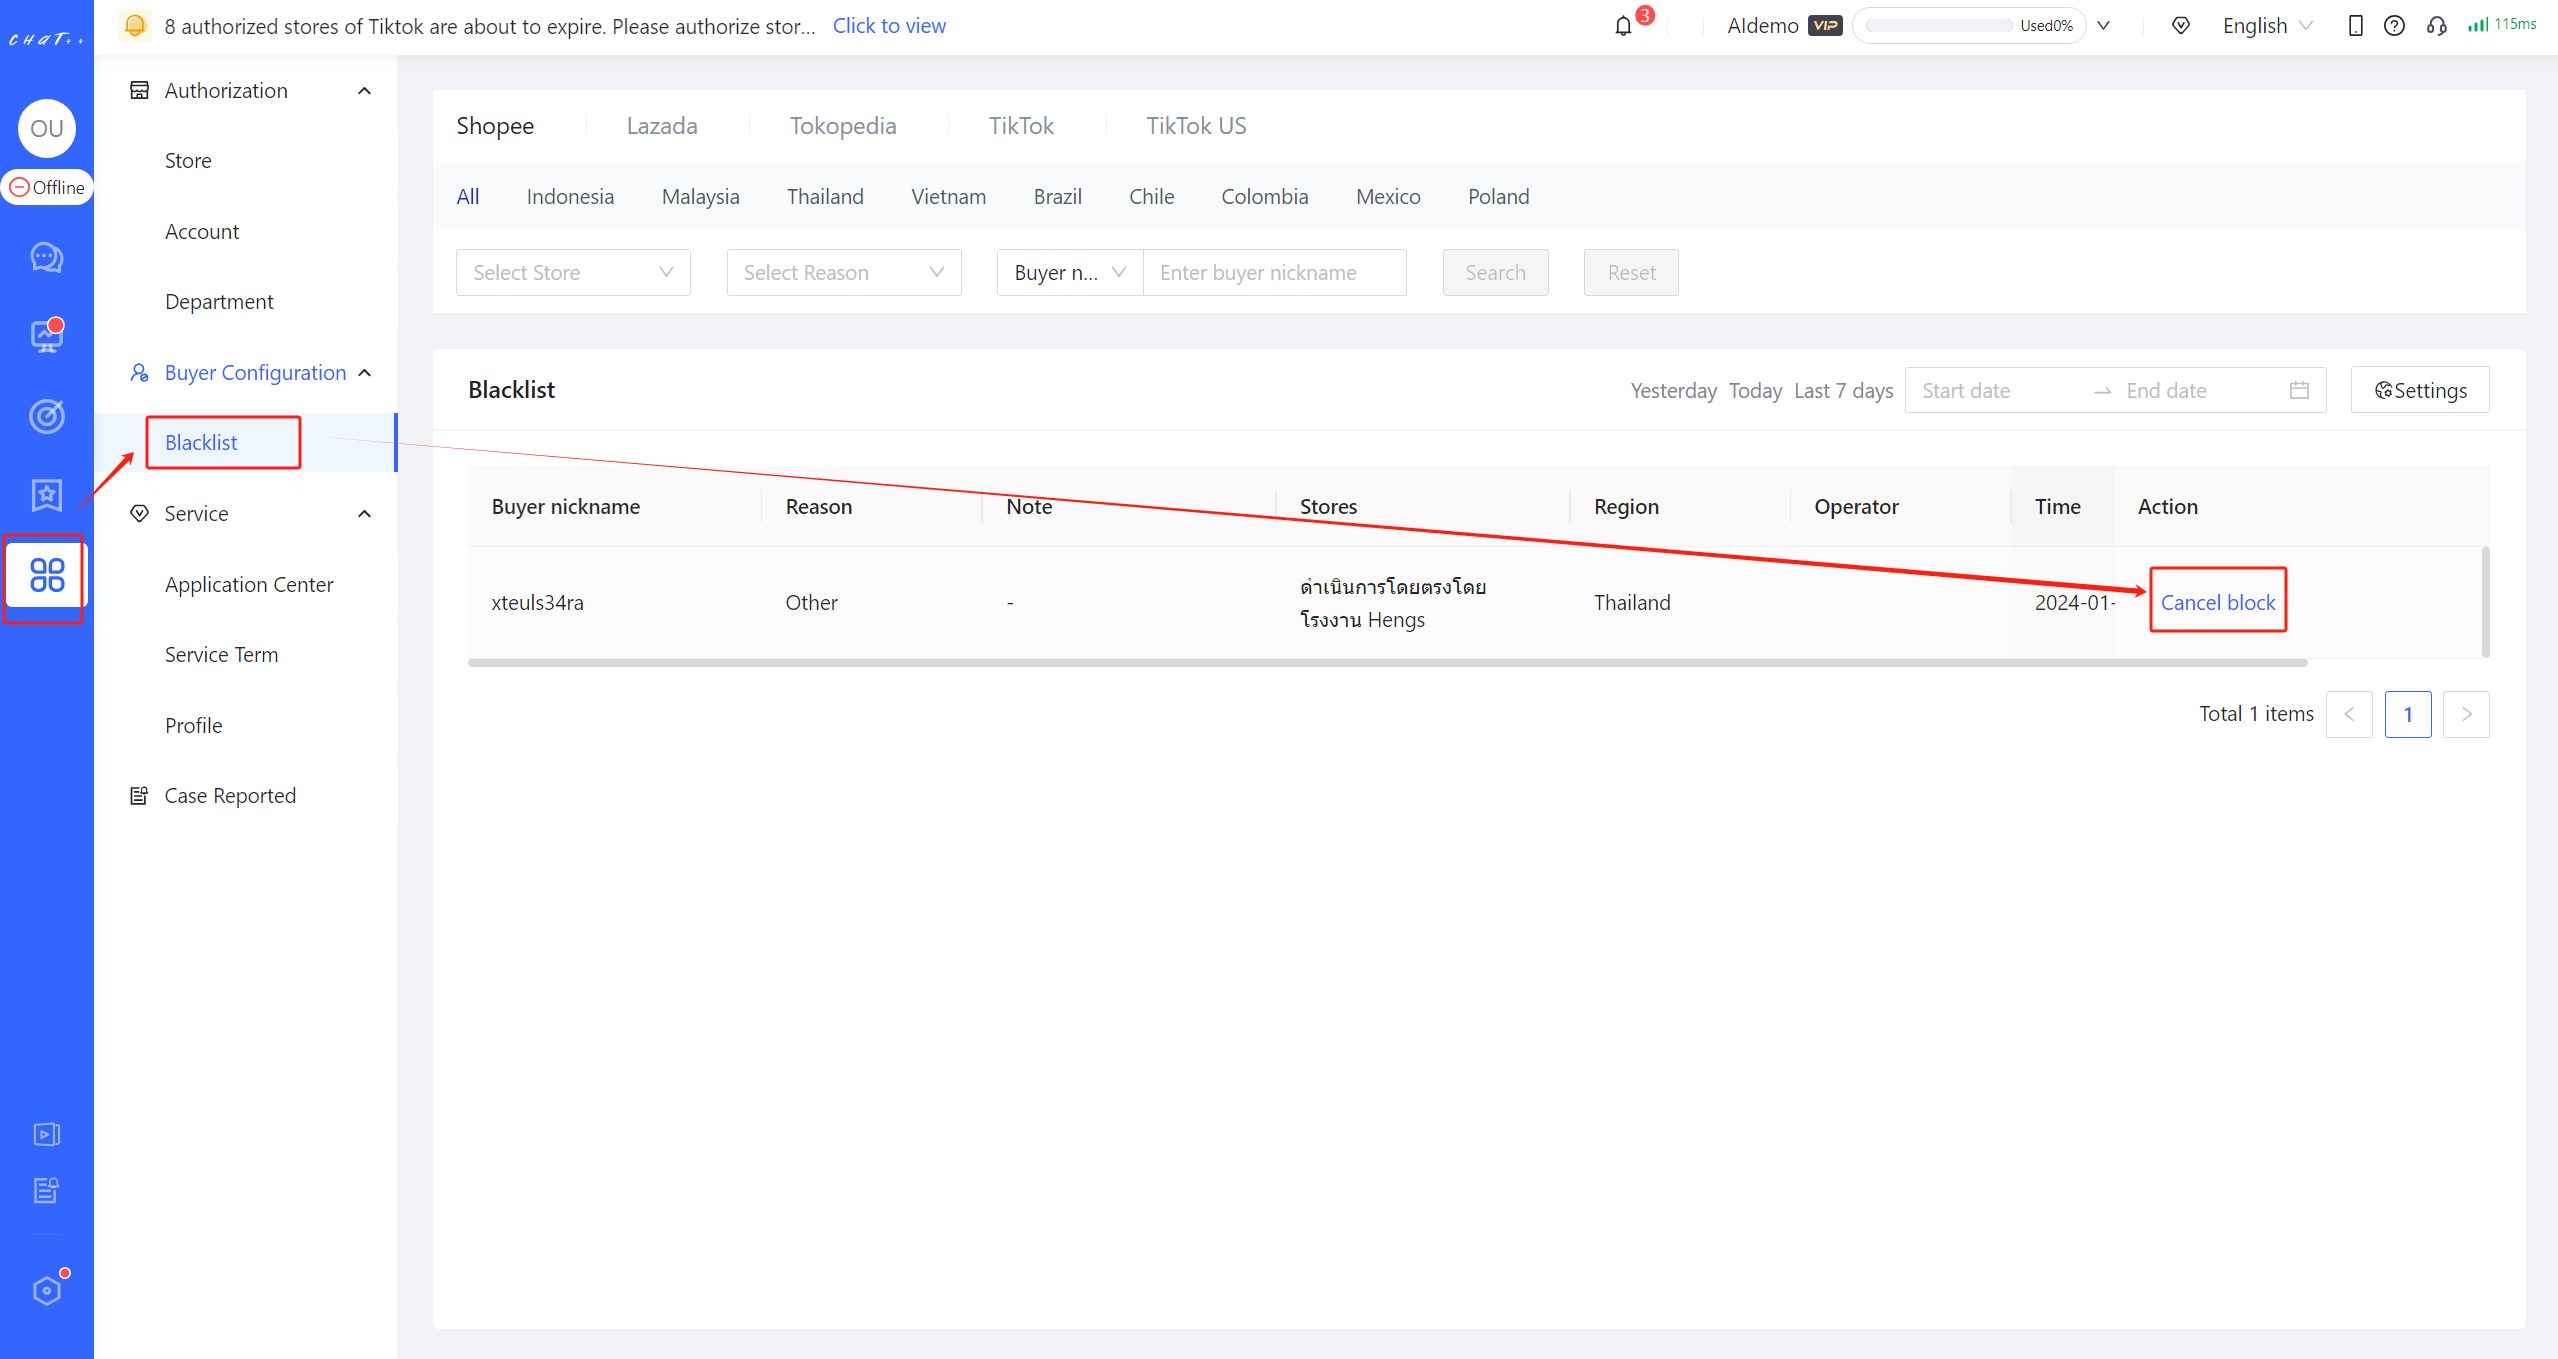
Figure 7
How to view and manage the blacklist?
Click on the "Configuration" in the left menu bar → "Buyer Configuration" → "Blacklist" (as shown in the figure below).
- The red mark ① in the figure below represents the filtering area. It allows the filtering of blacklisted buyers based on conditions such as marketplace, country site, store, reason, buyer nickname, operator, and note.
- The red mark ② in the figure below represents** the blacklist**. You can view the details of all the buyers who have been blacklisted, including the "reason, note, stores, region, time, and operator."
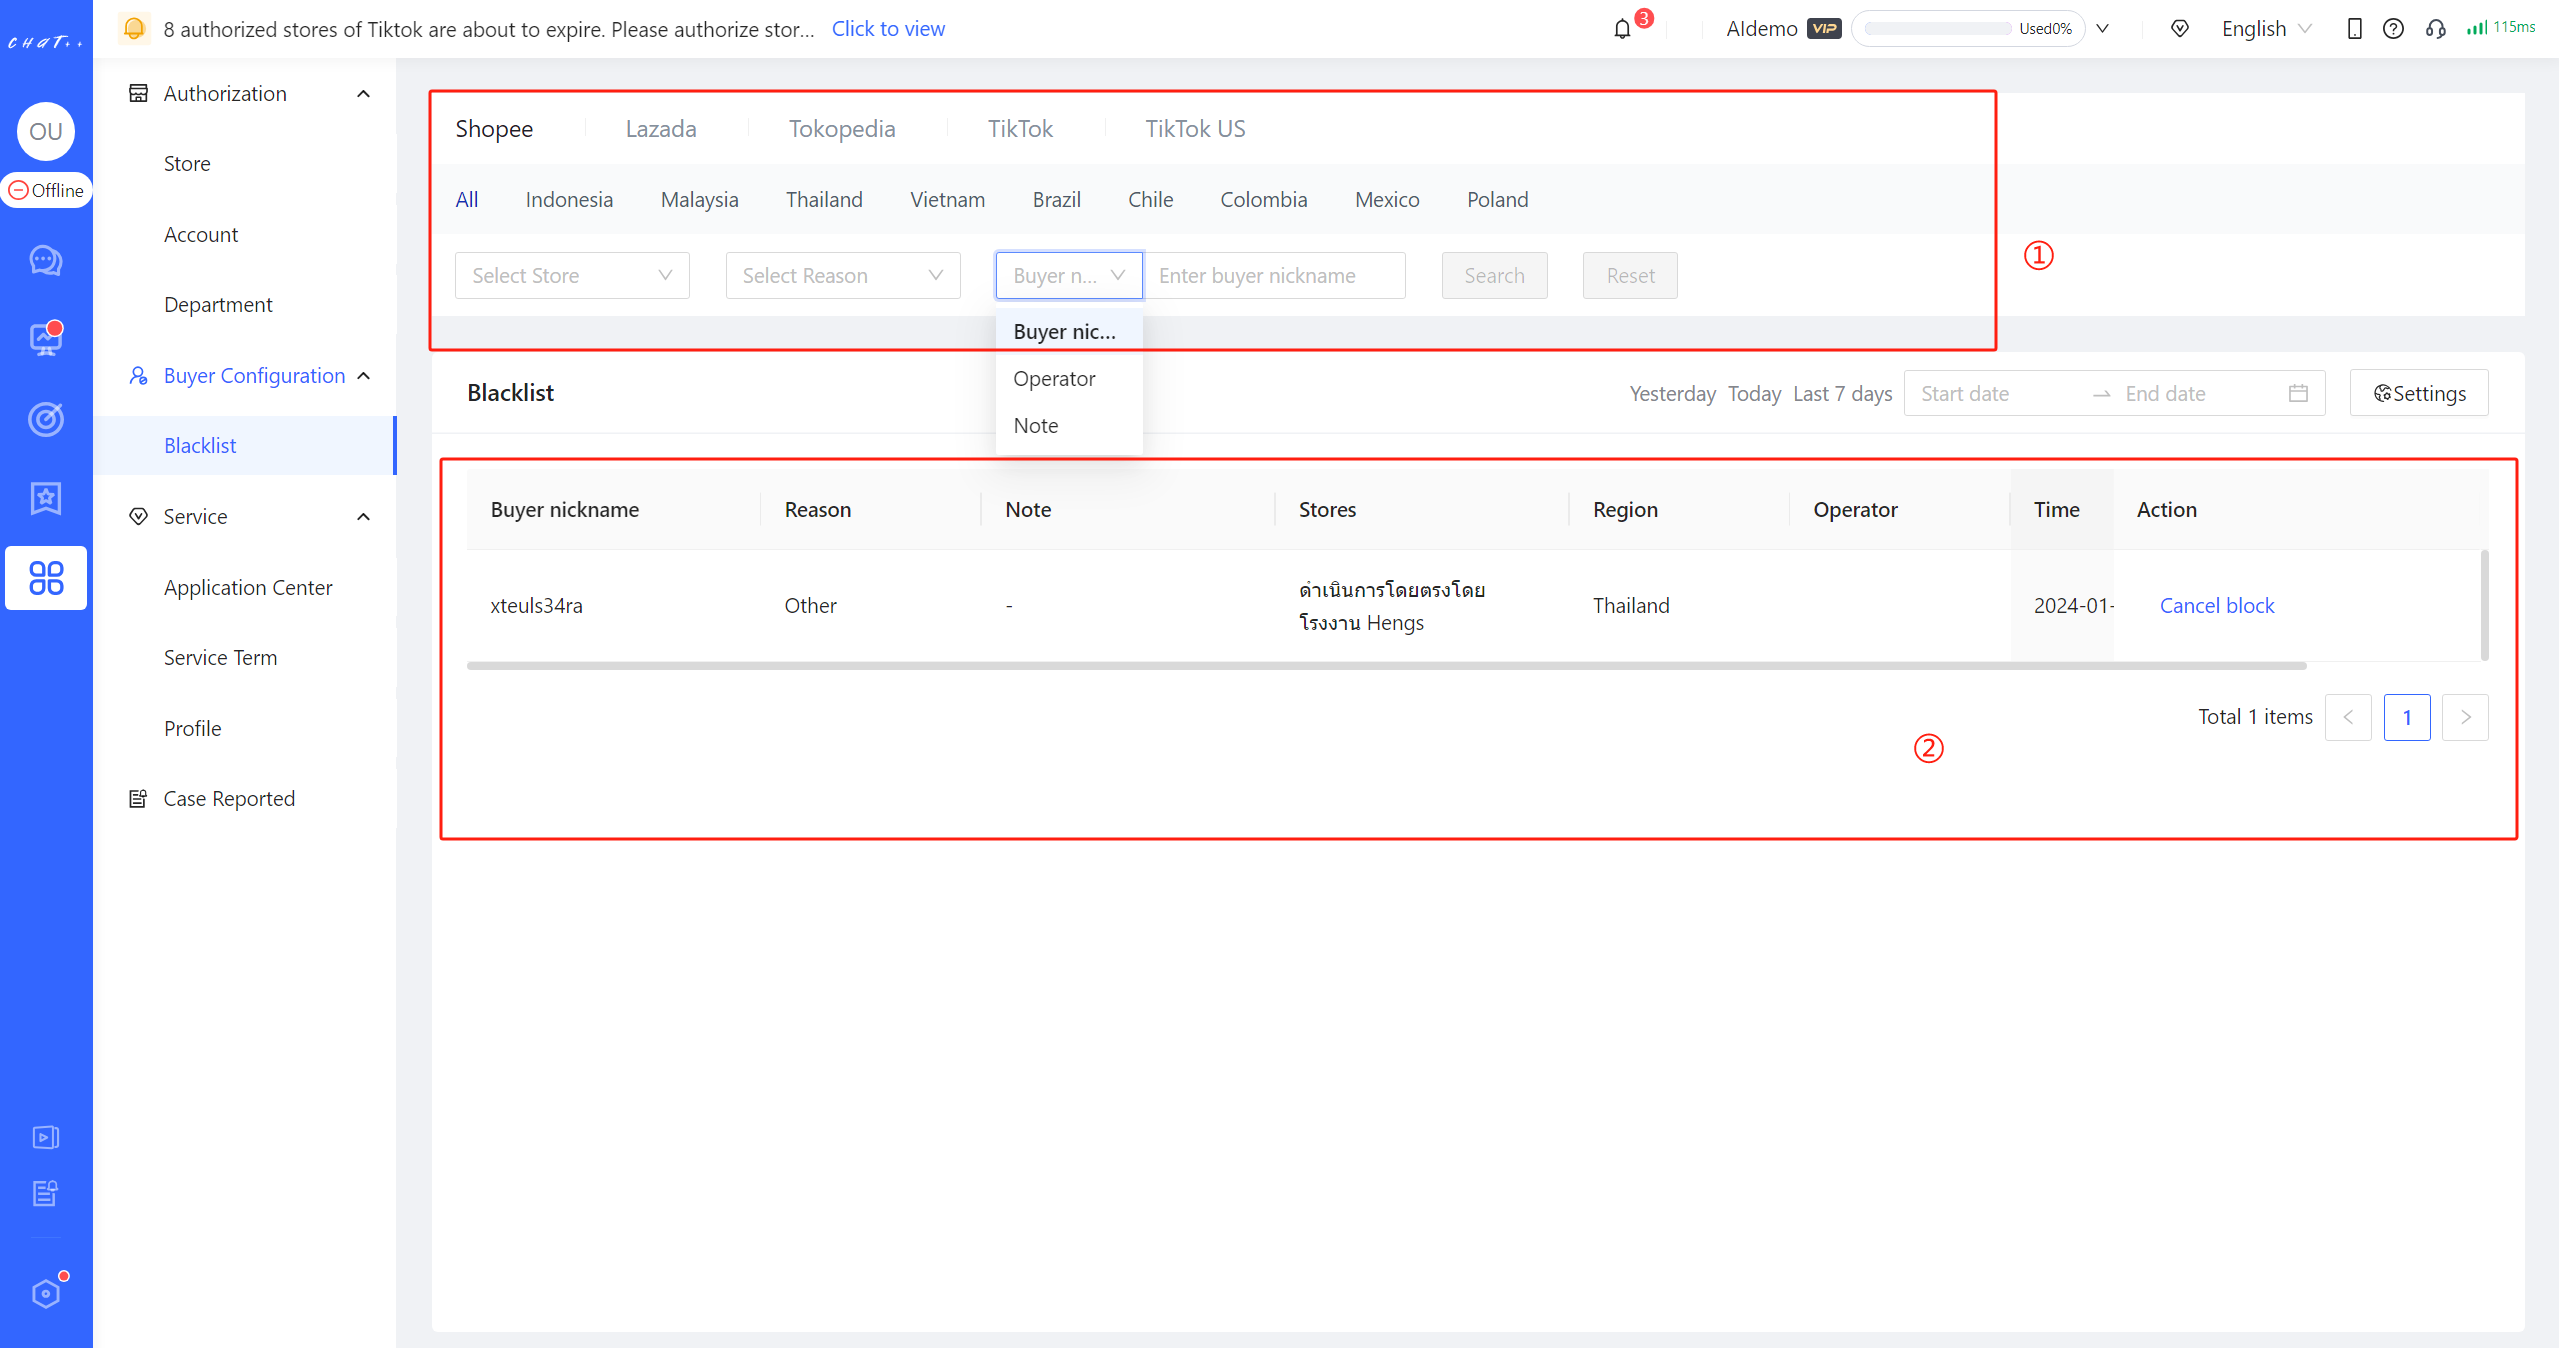
Figure 8
Contact US
1、WhatApps

2、Facebook
https://www.facebook.com/profile.php?id=100089554535162
